EXPLORING MANCHESTER
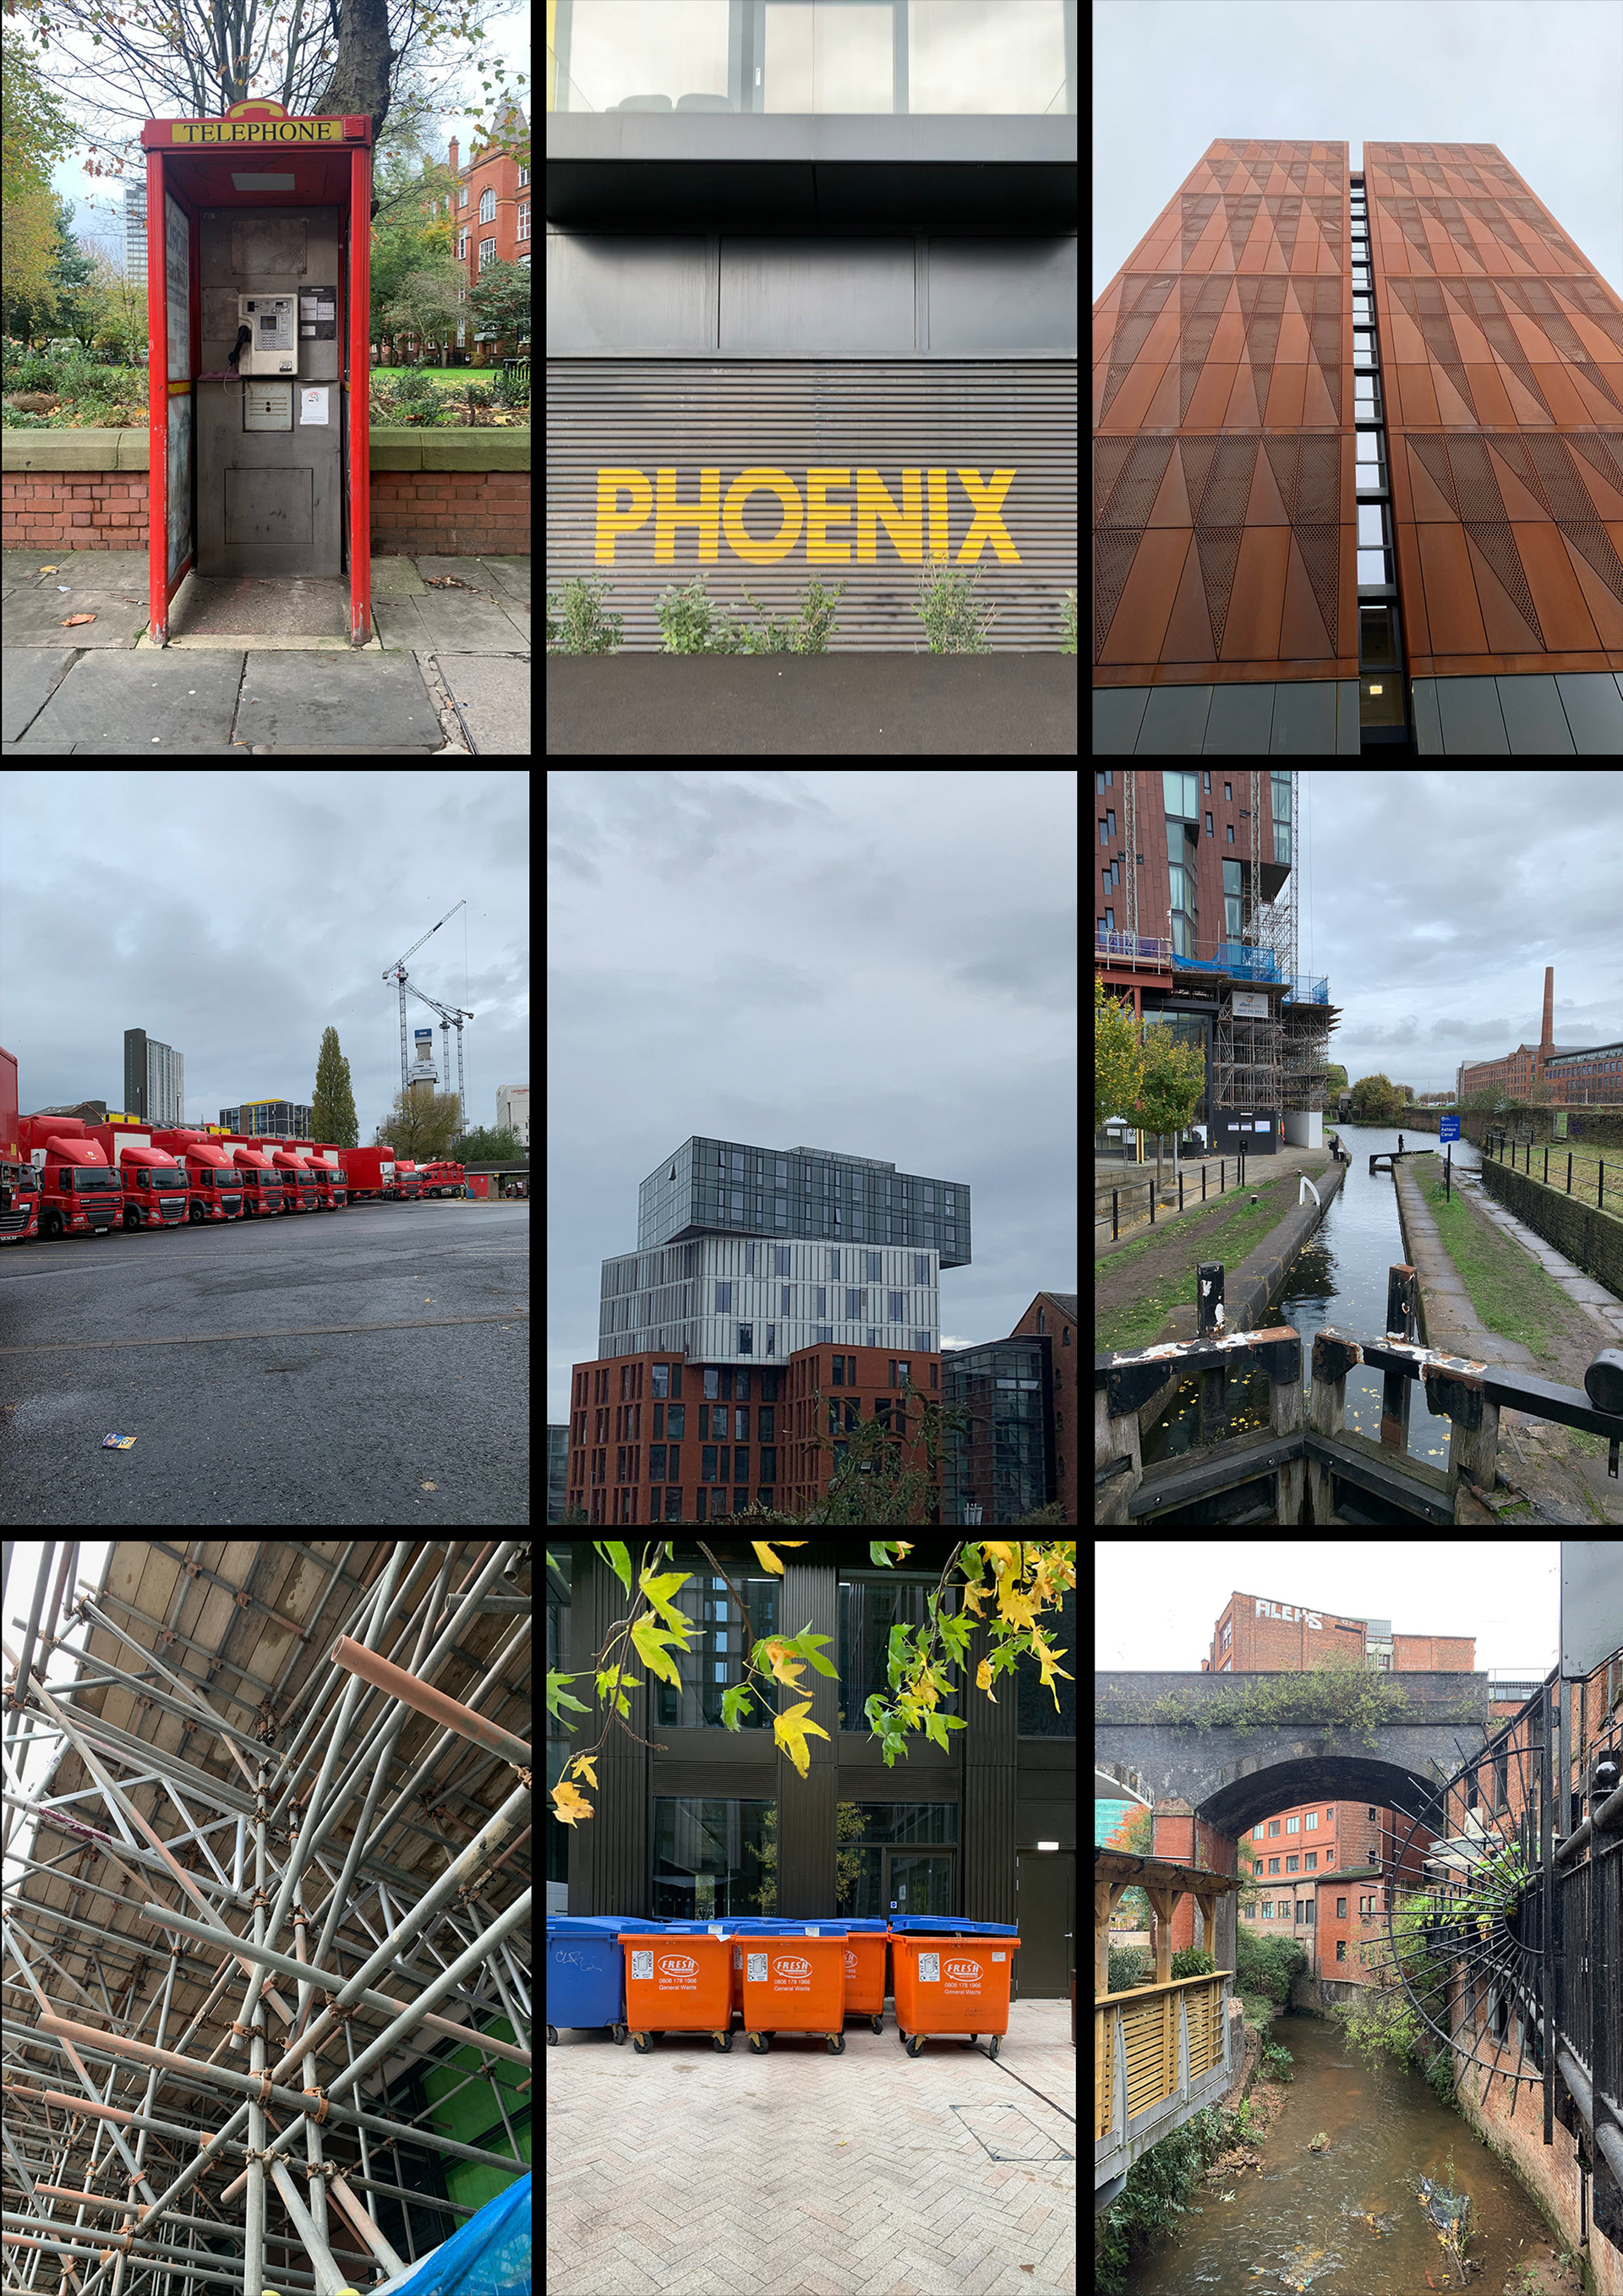
PHOTOS AROUND MANCHESTER
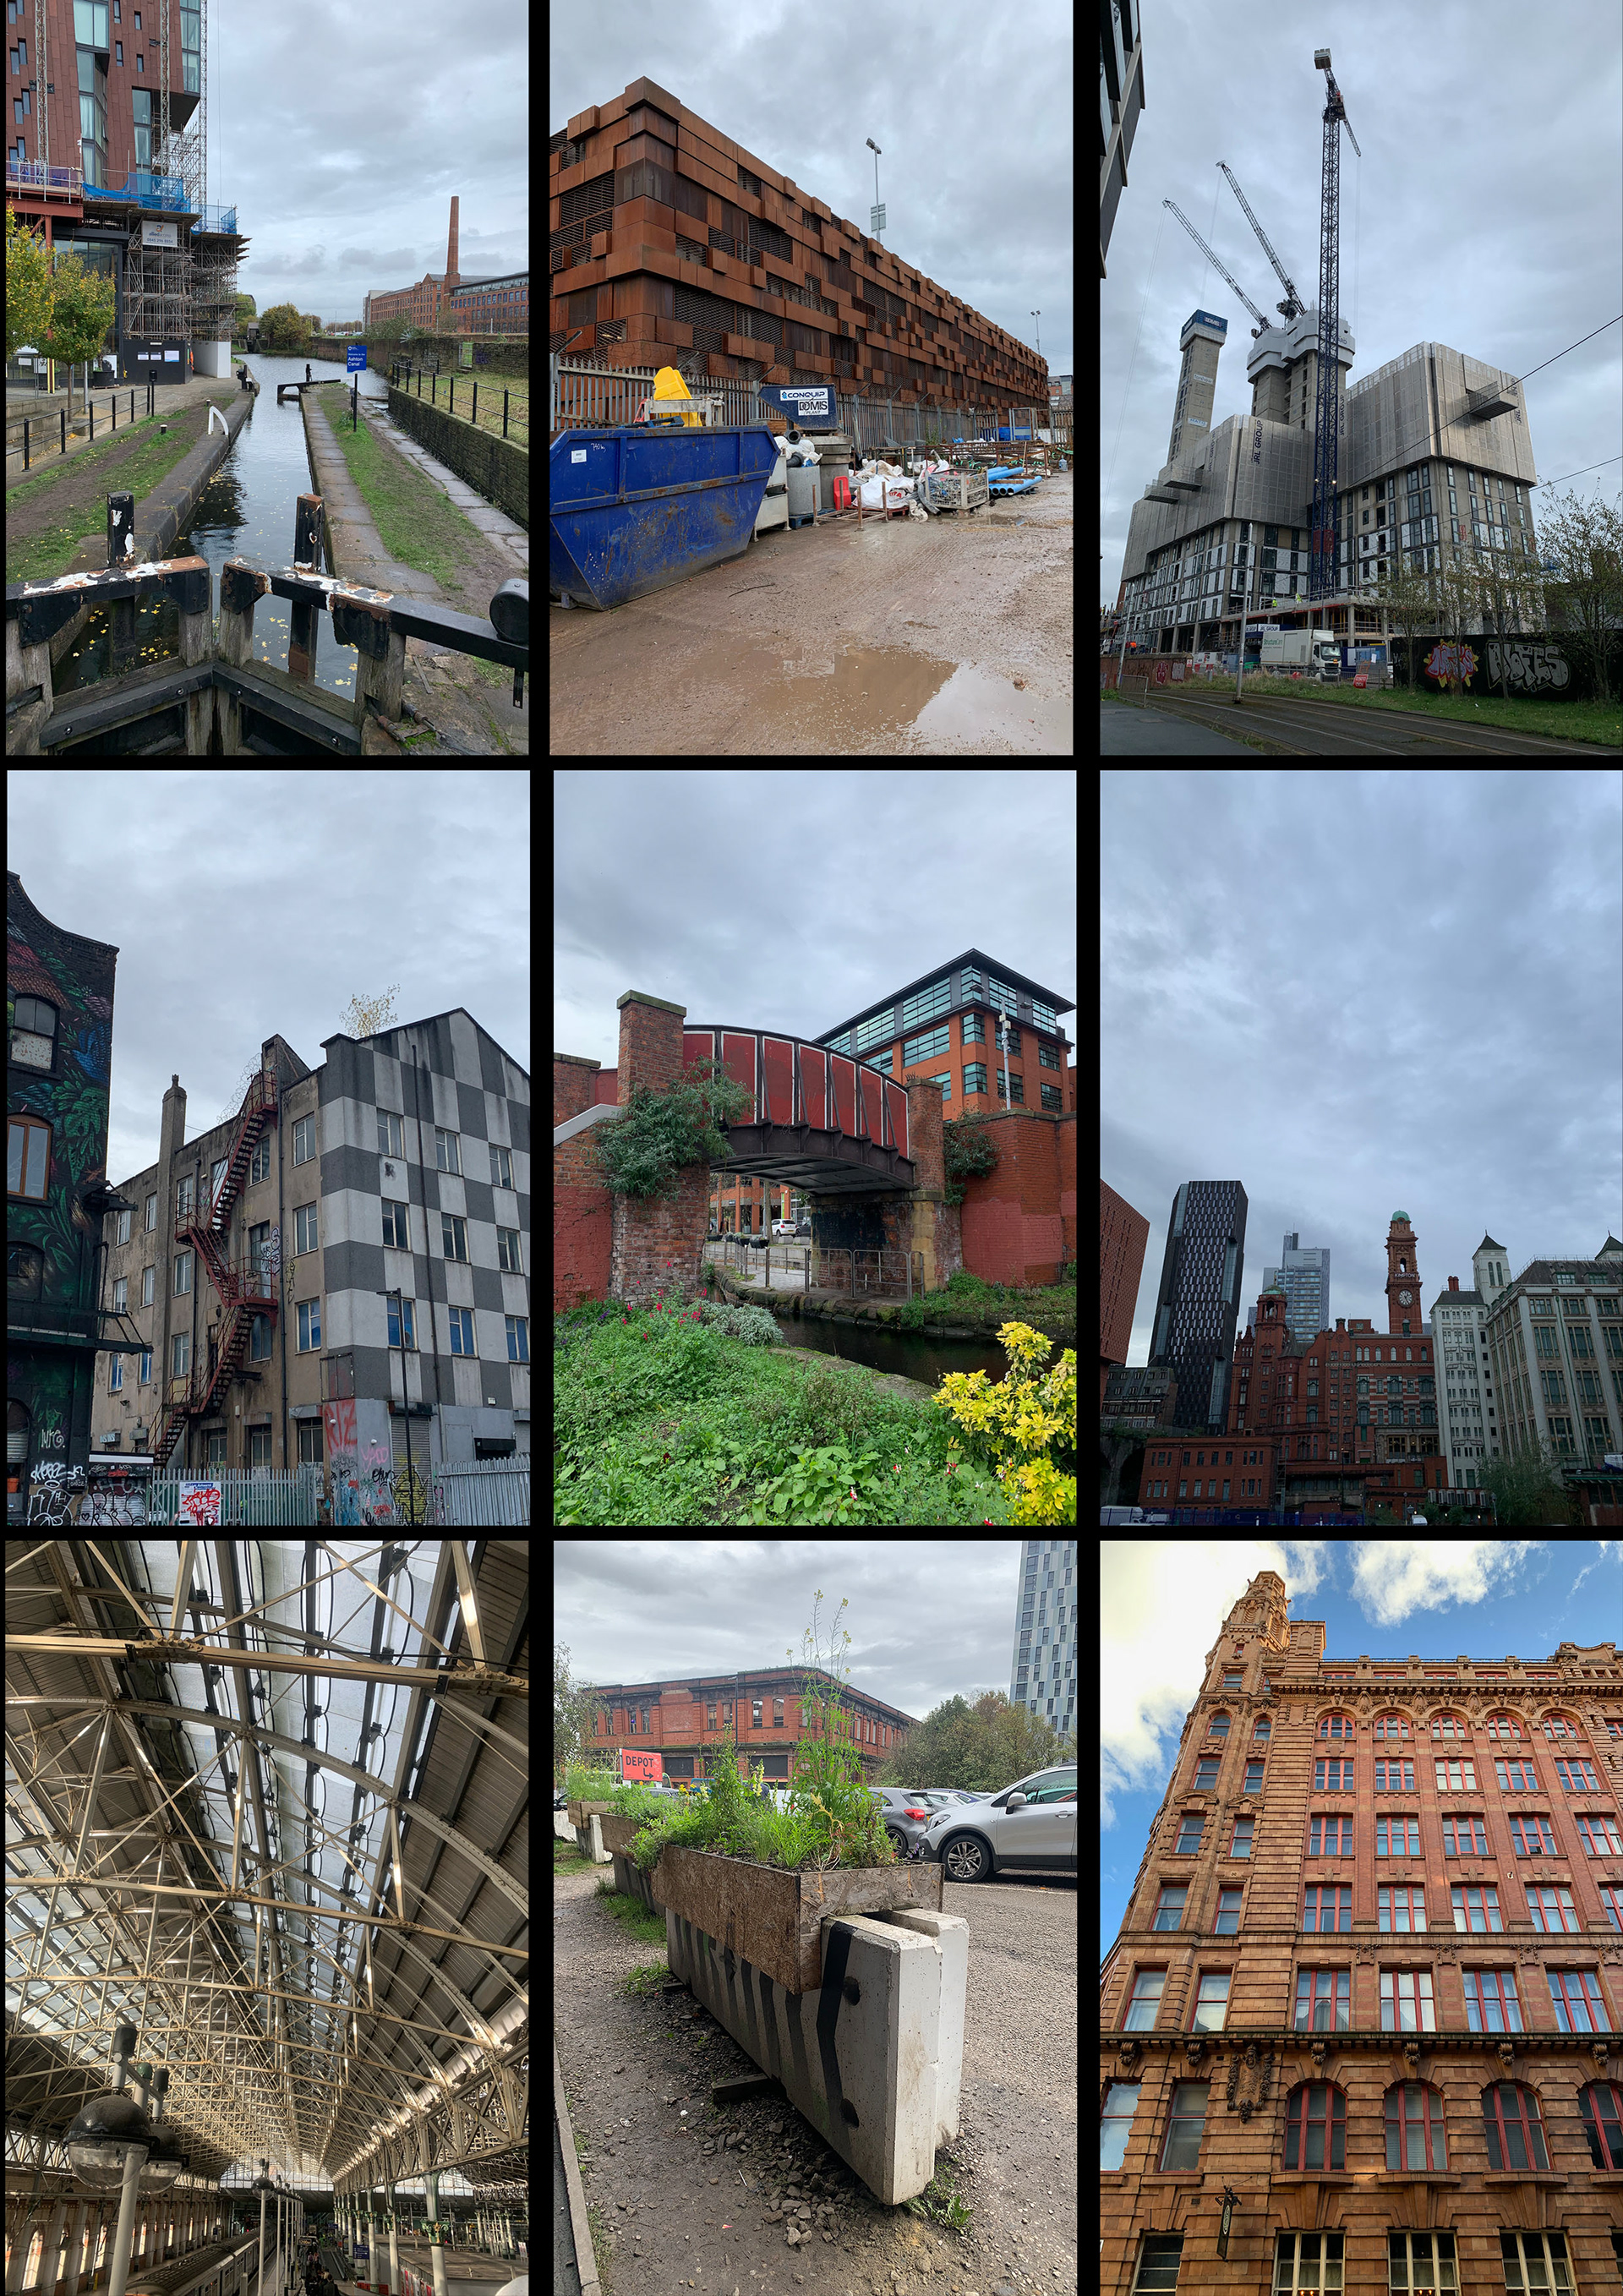
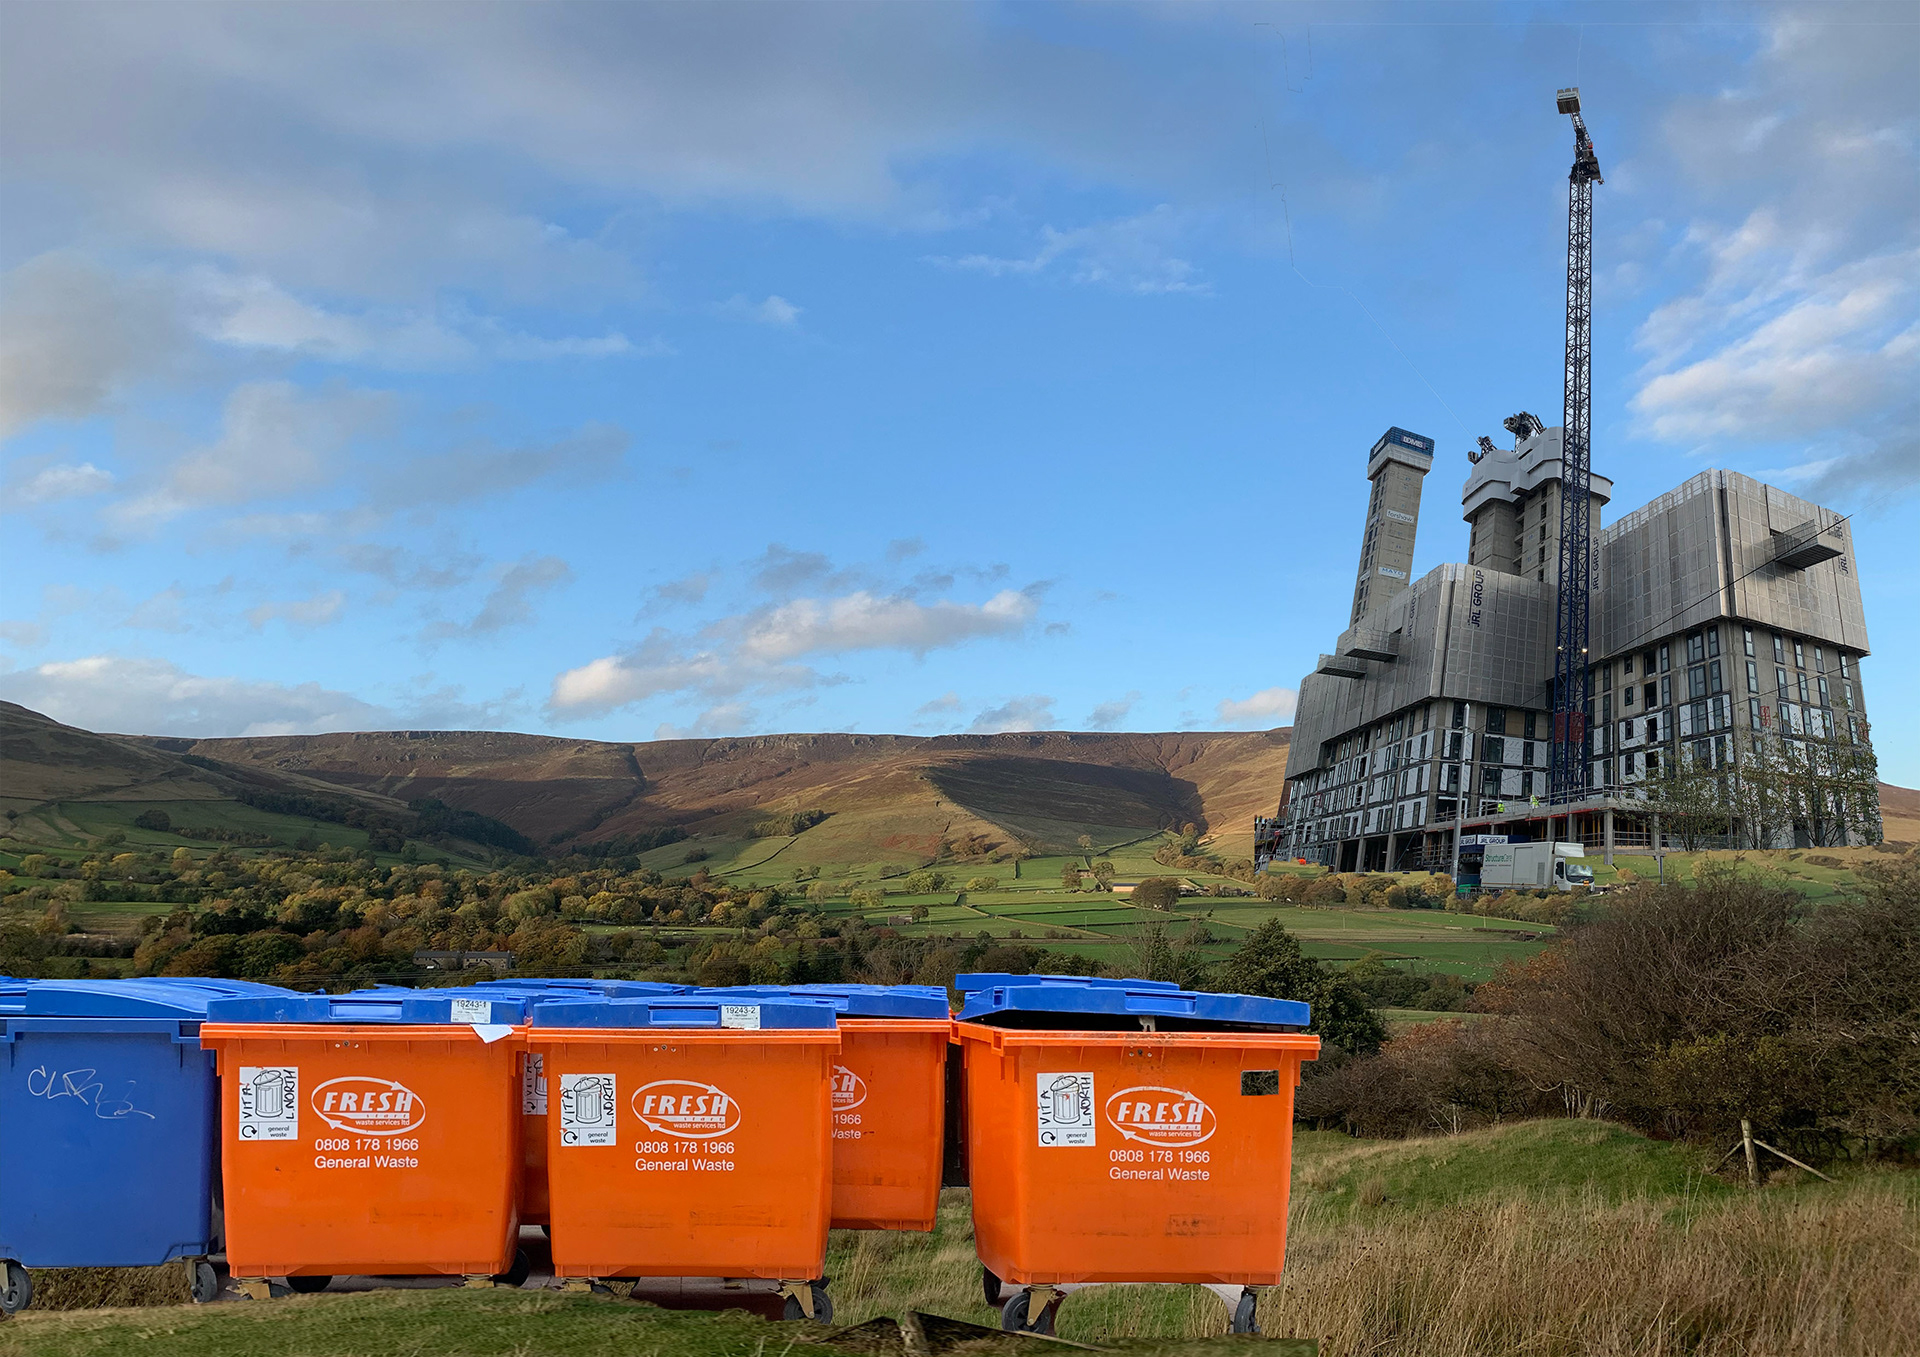
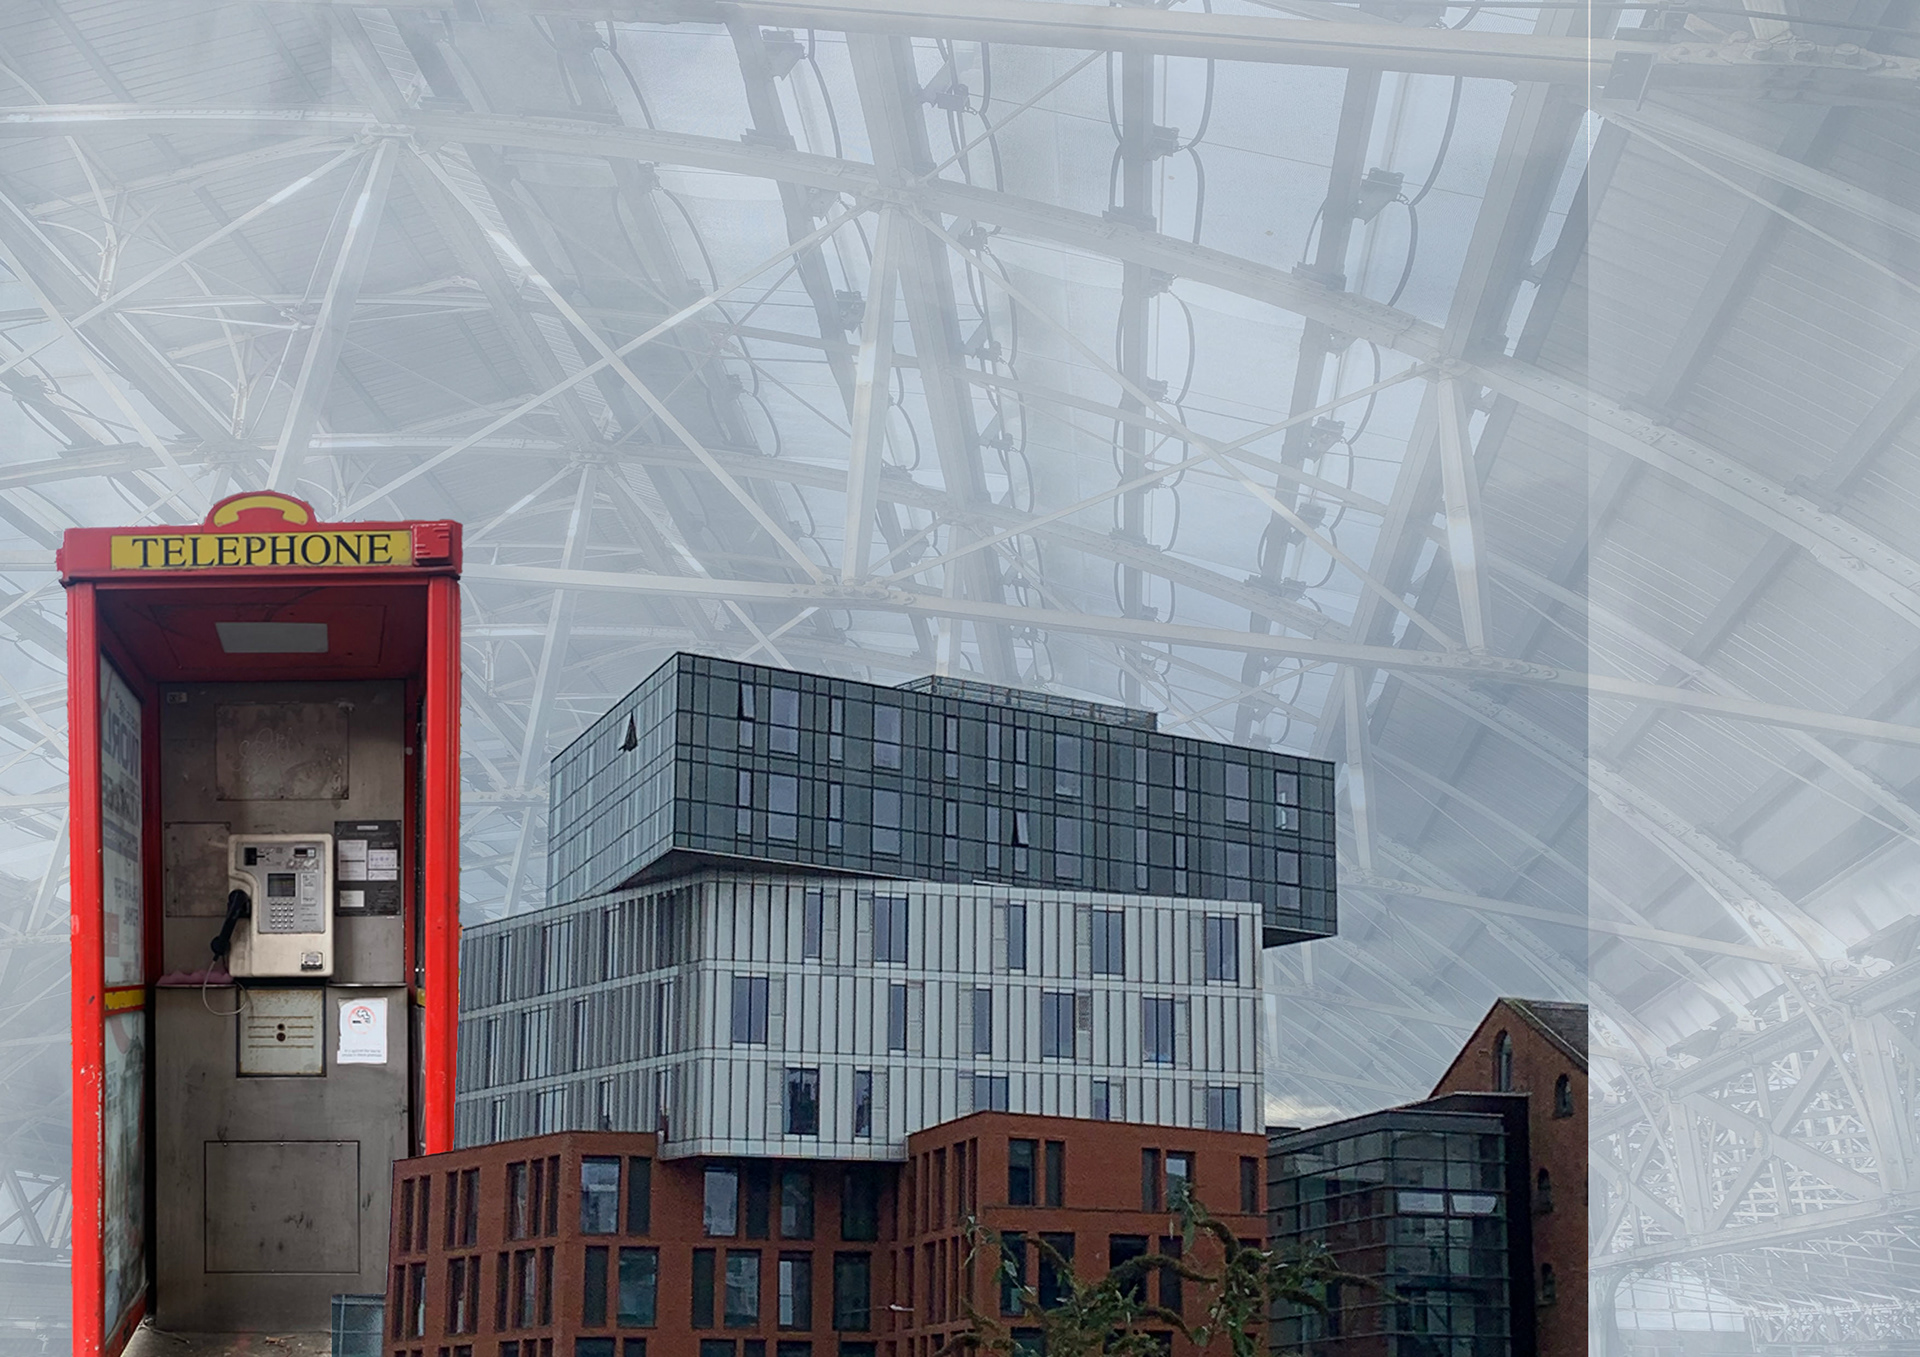
THROUGH OUT THE WEEK I WALKED AROUND MANCHESTER TAKING PHOTOS OF HOW I SEE AND PERCEIVE the city, I FOUND MYSELF TAKING A LOT OF PHOTO OF BUILDINGS AND LARGE STRUCTURES, BEING DRAWN TO THEM AND INTERESTED BY THE STRUCTURES AND MATERIALS THAT ARE IN A BIG CITY.
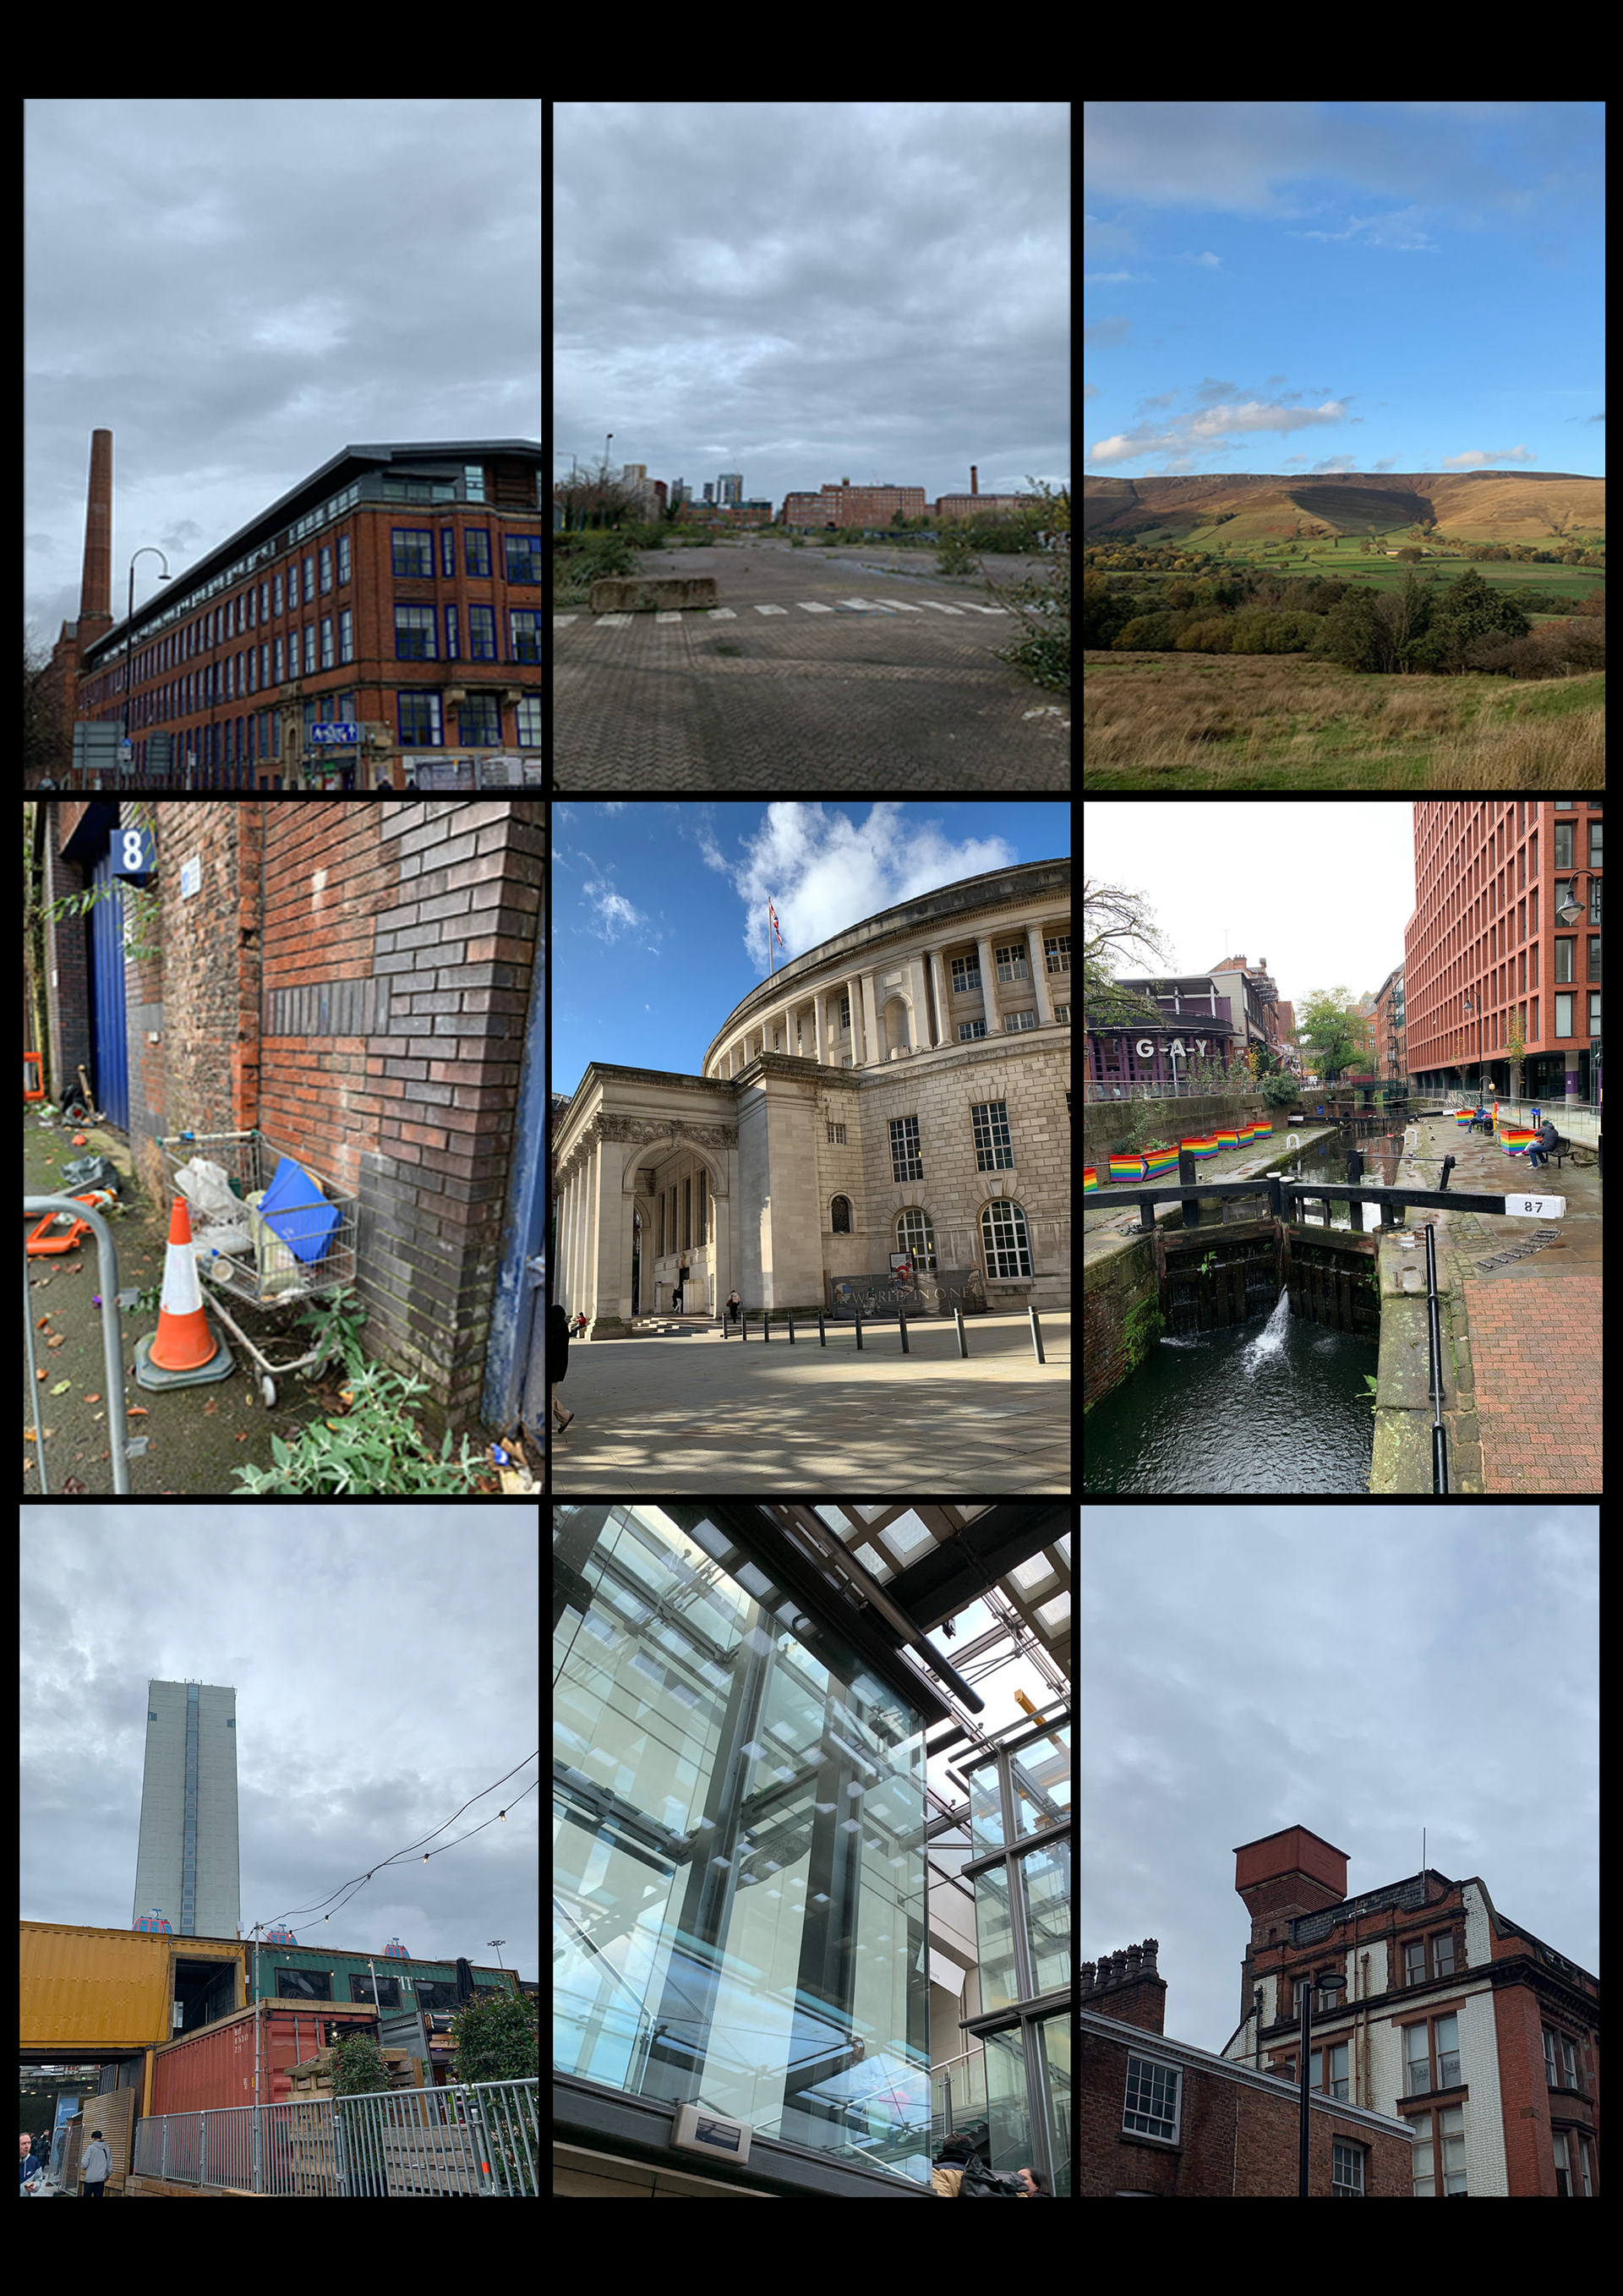
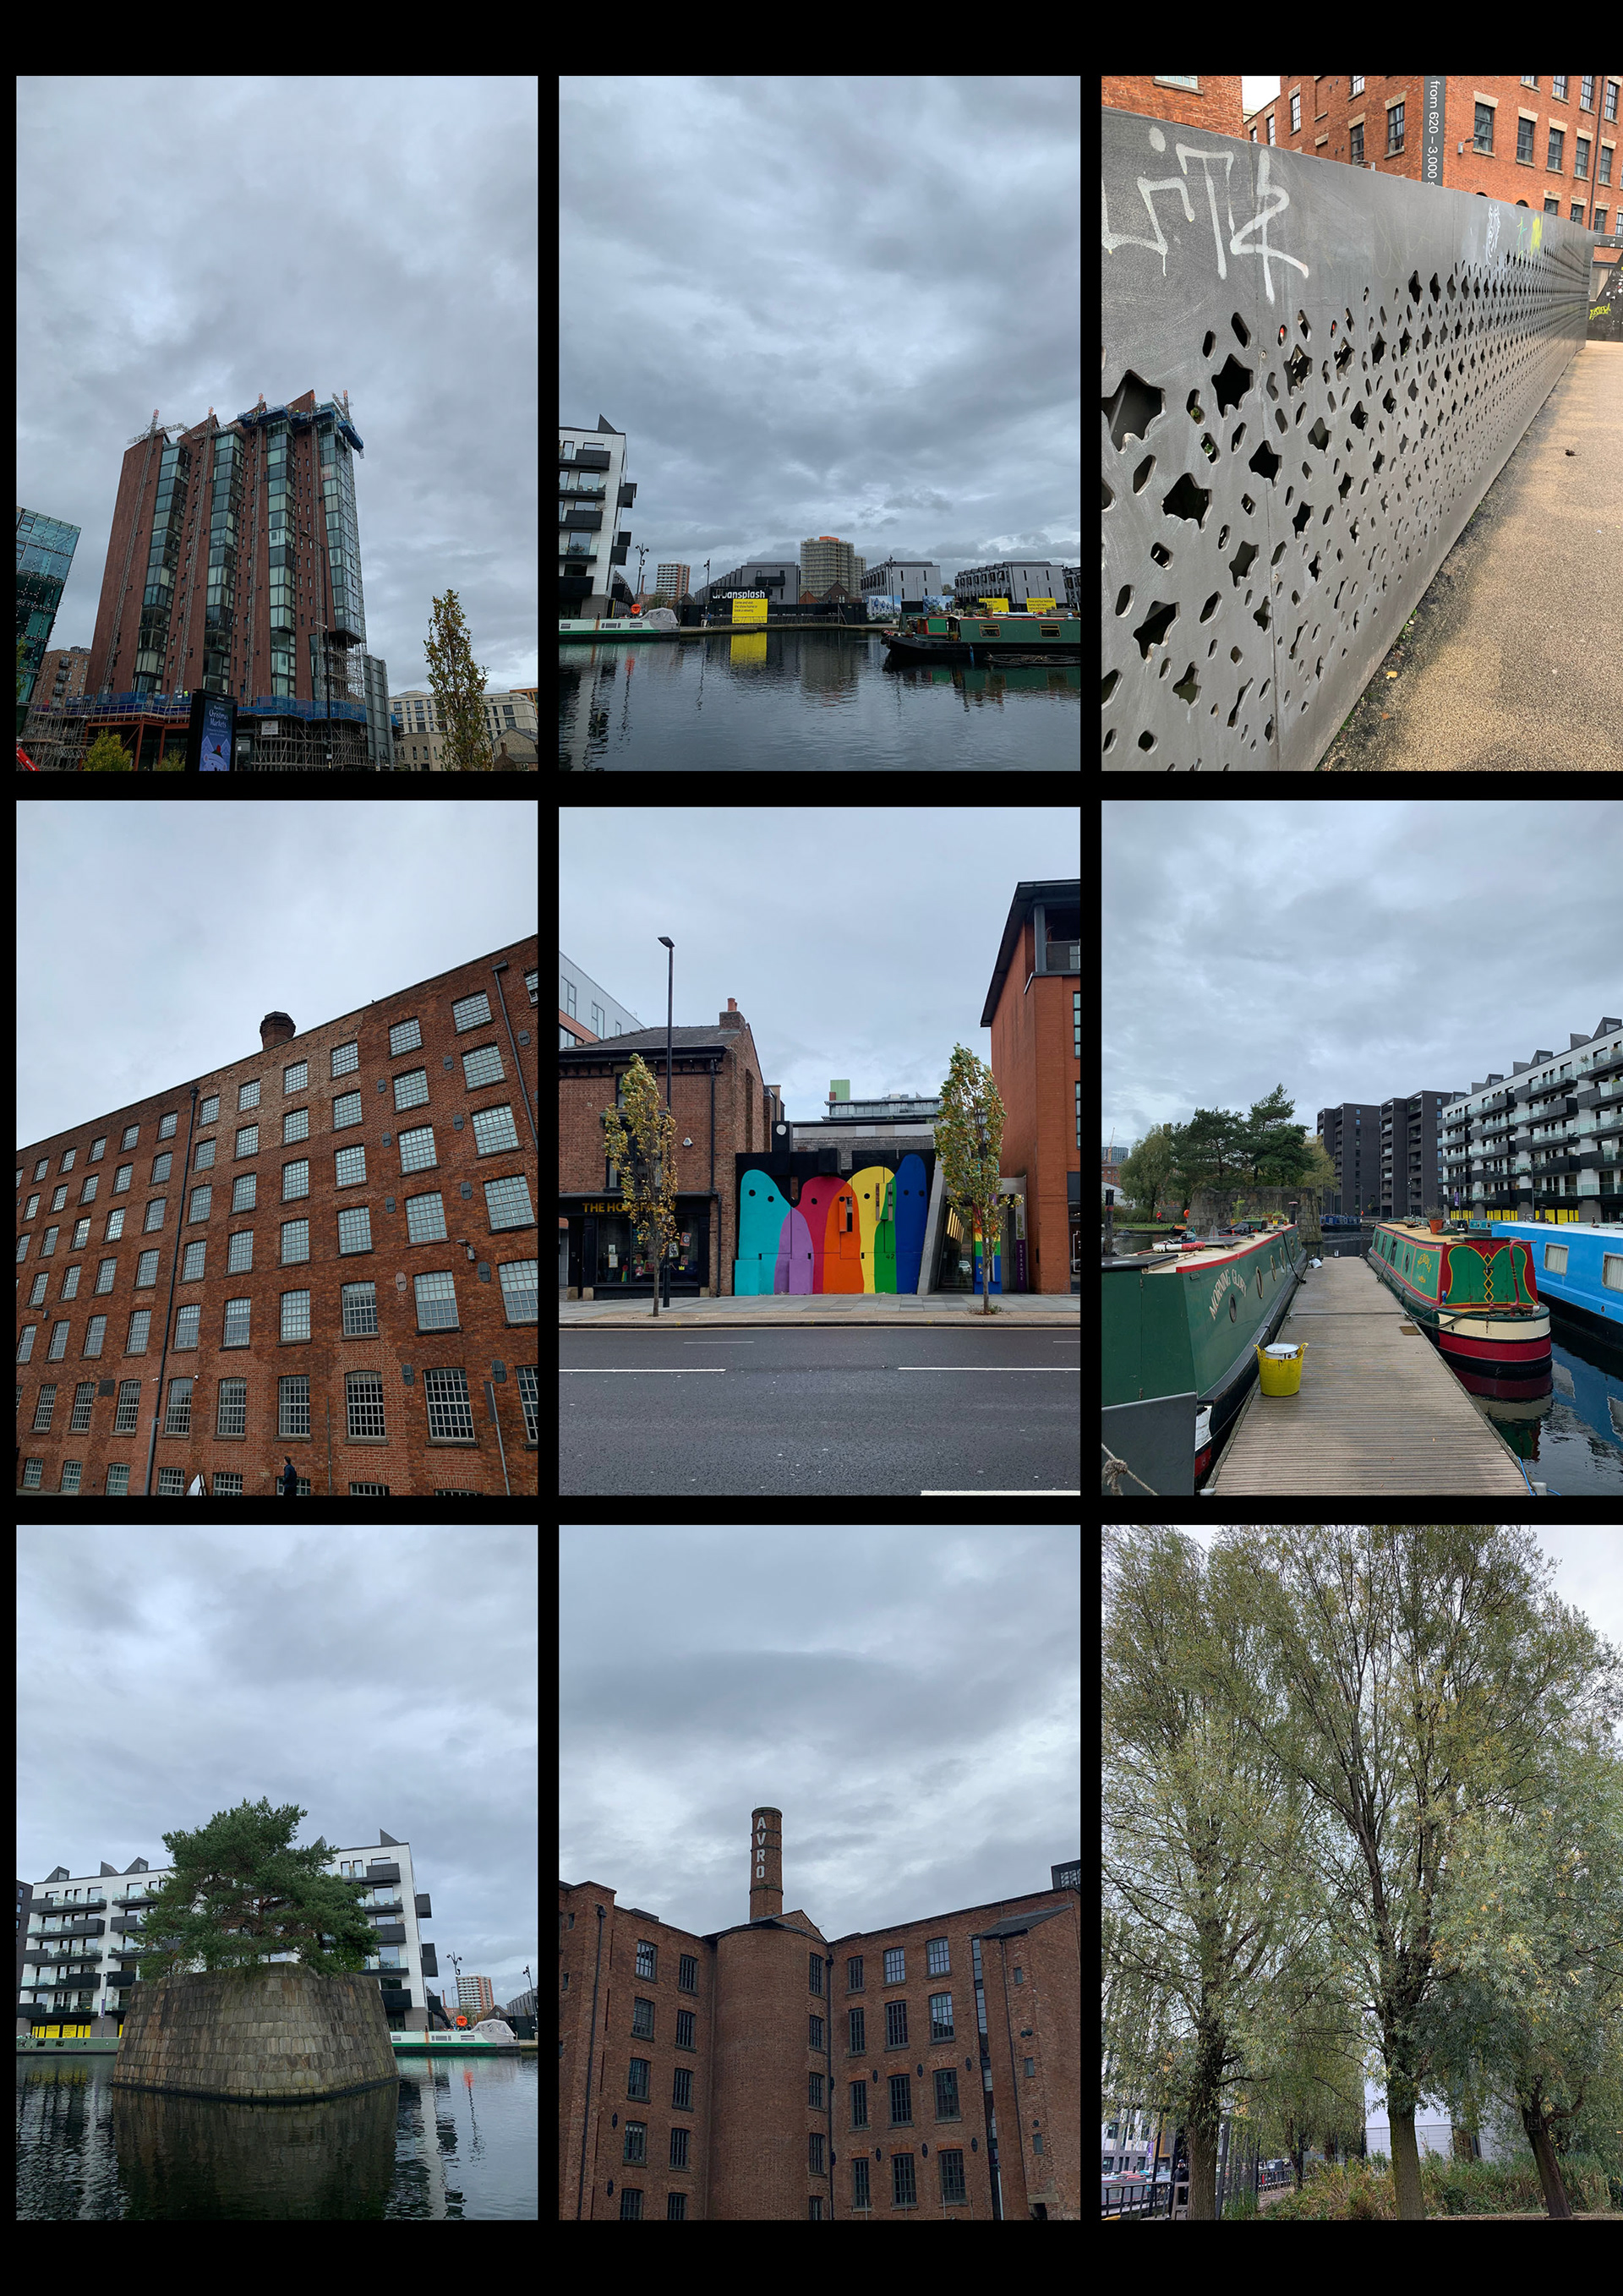
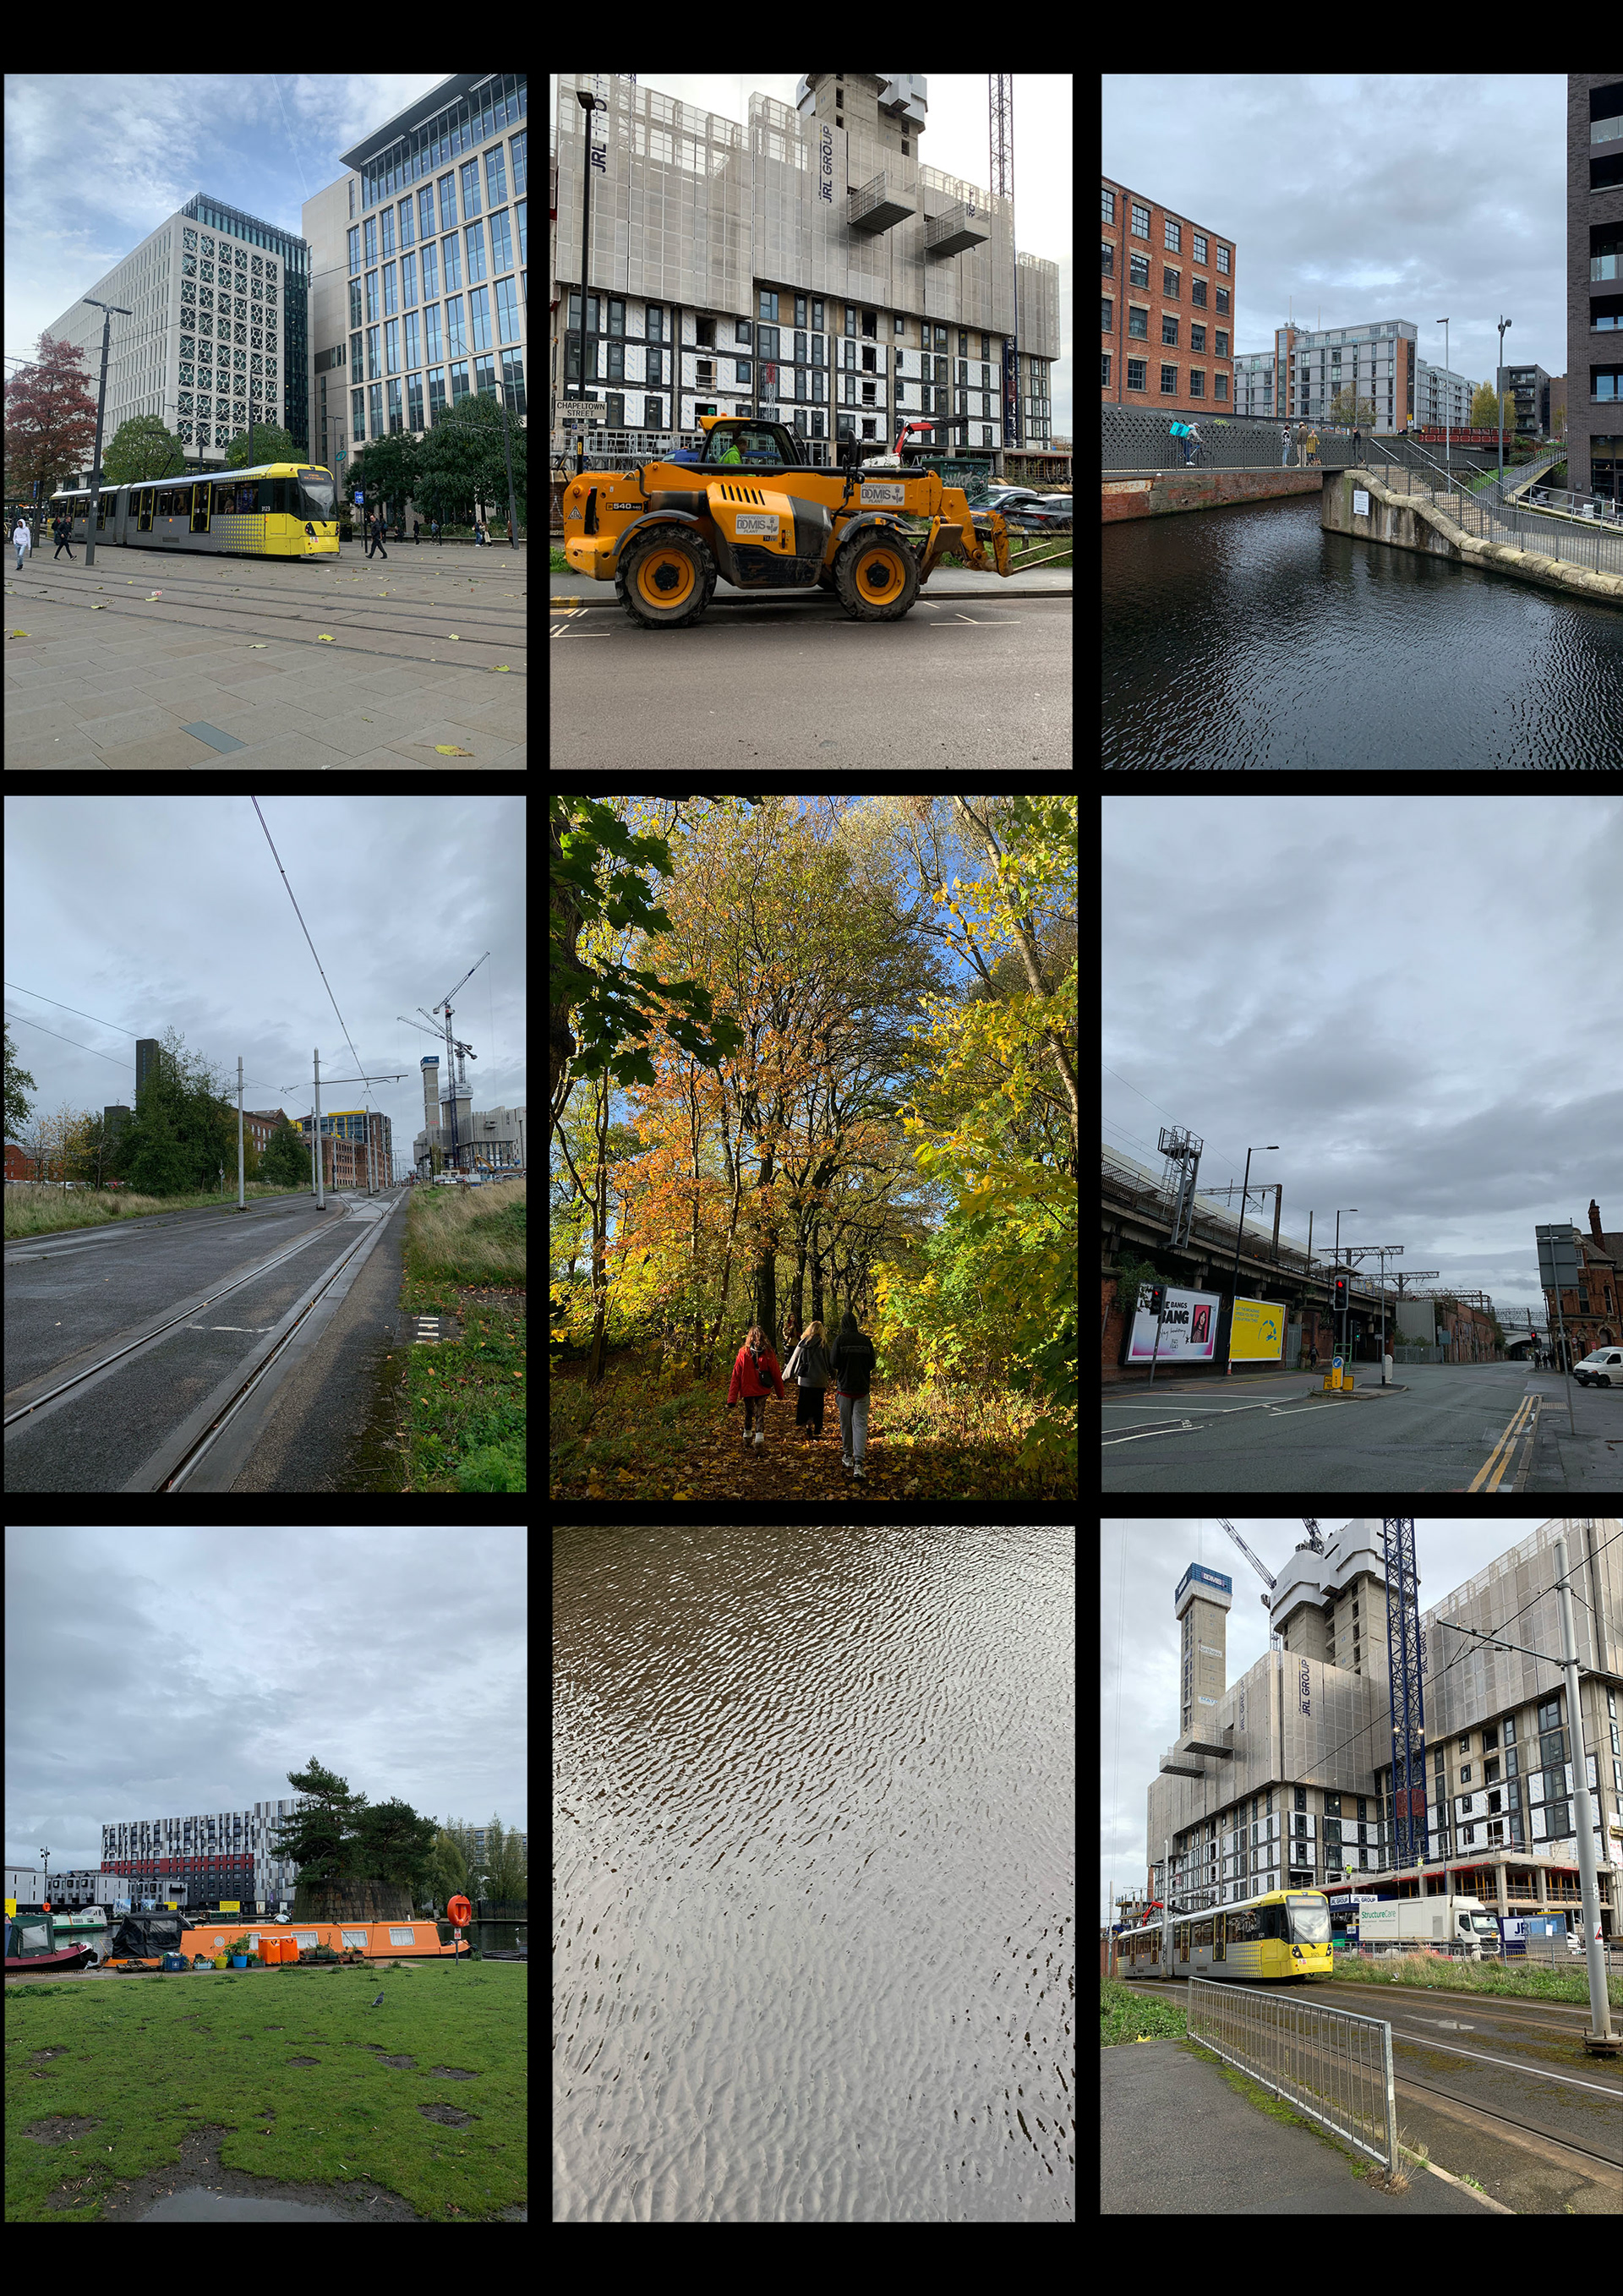
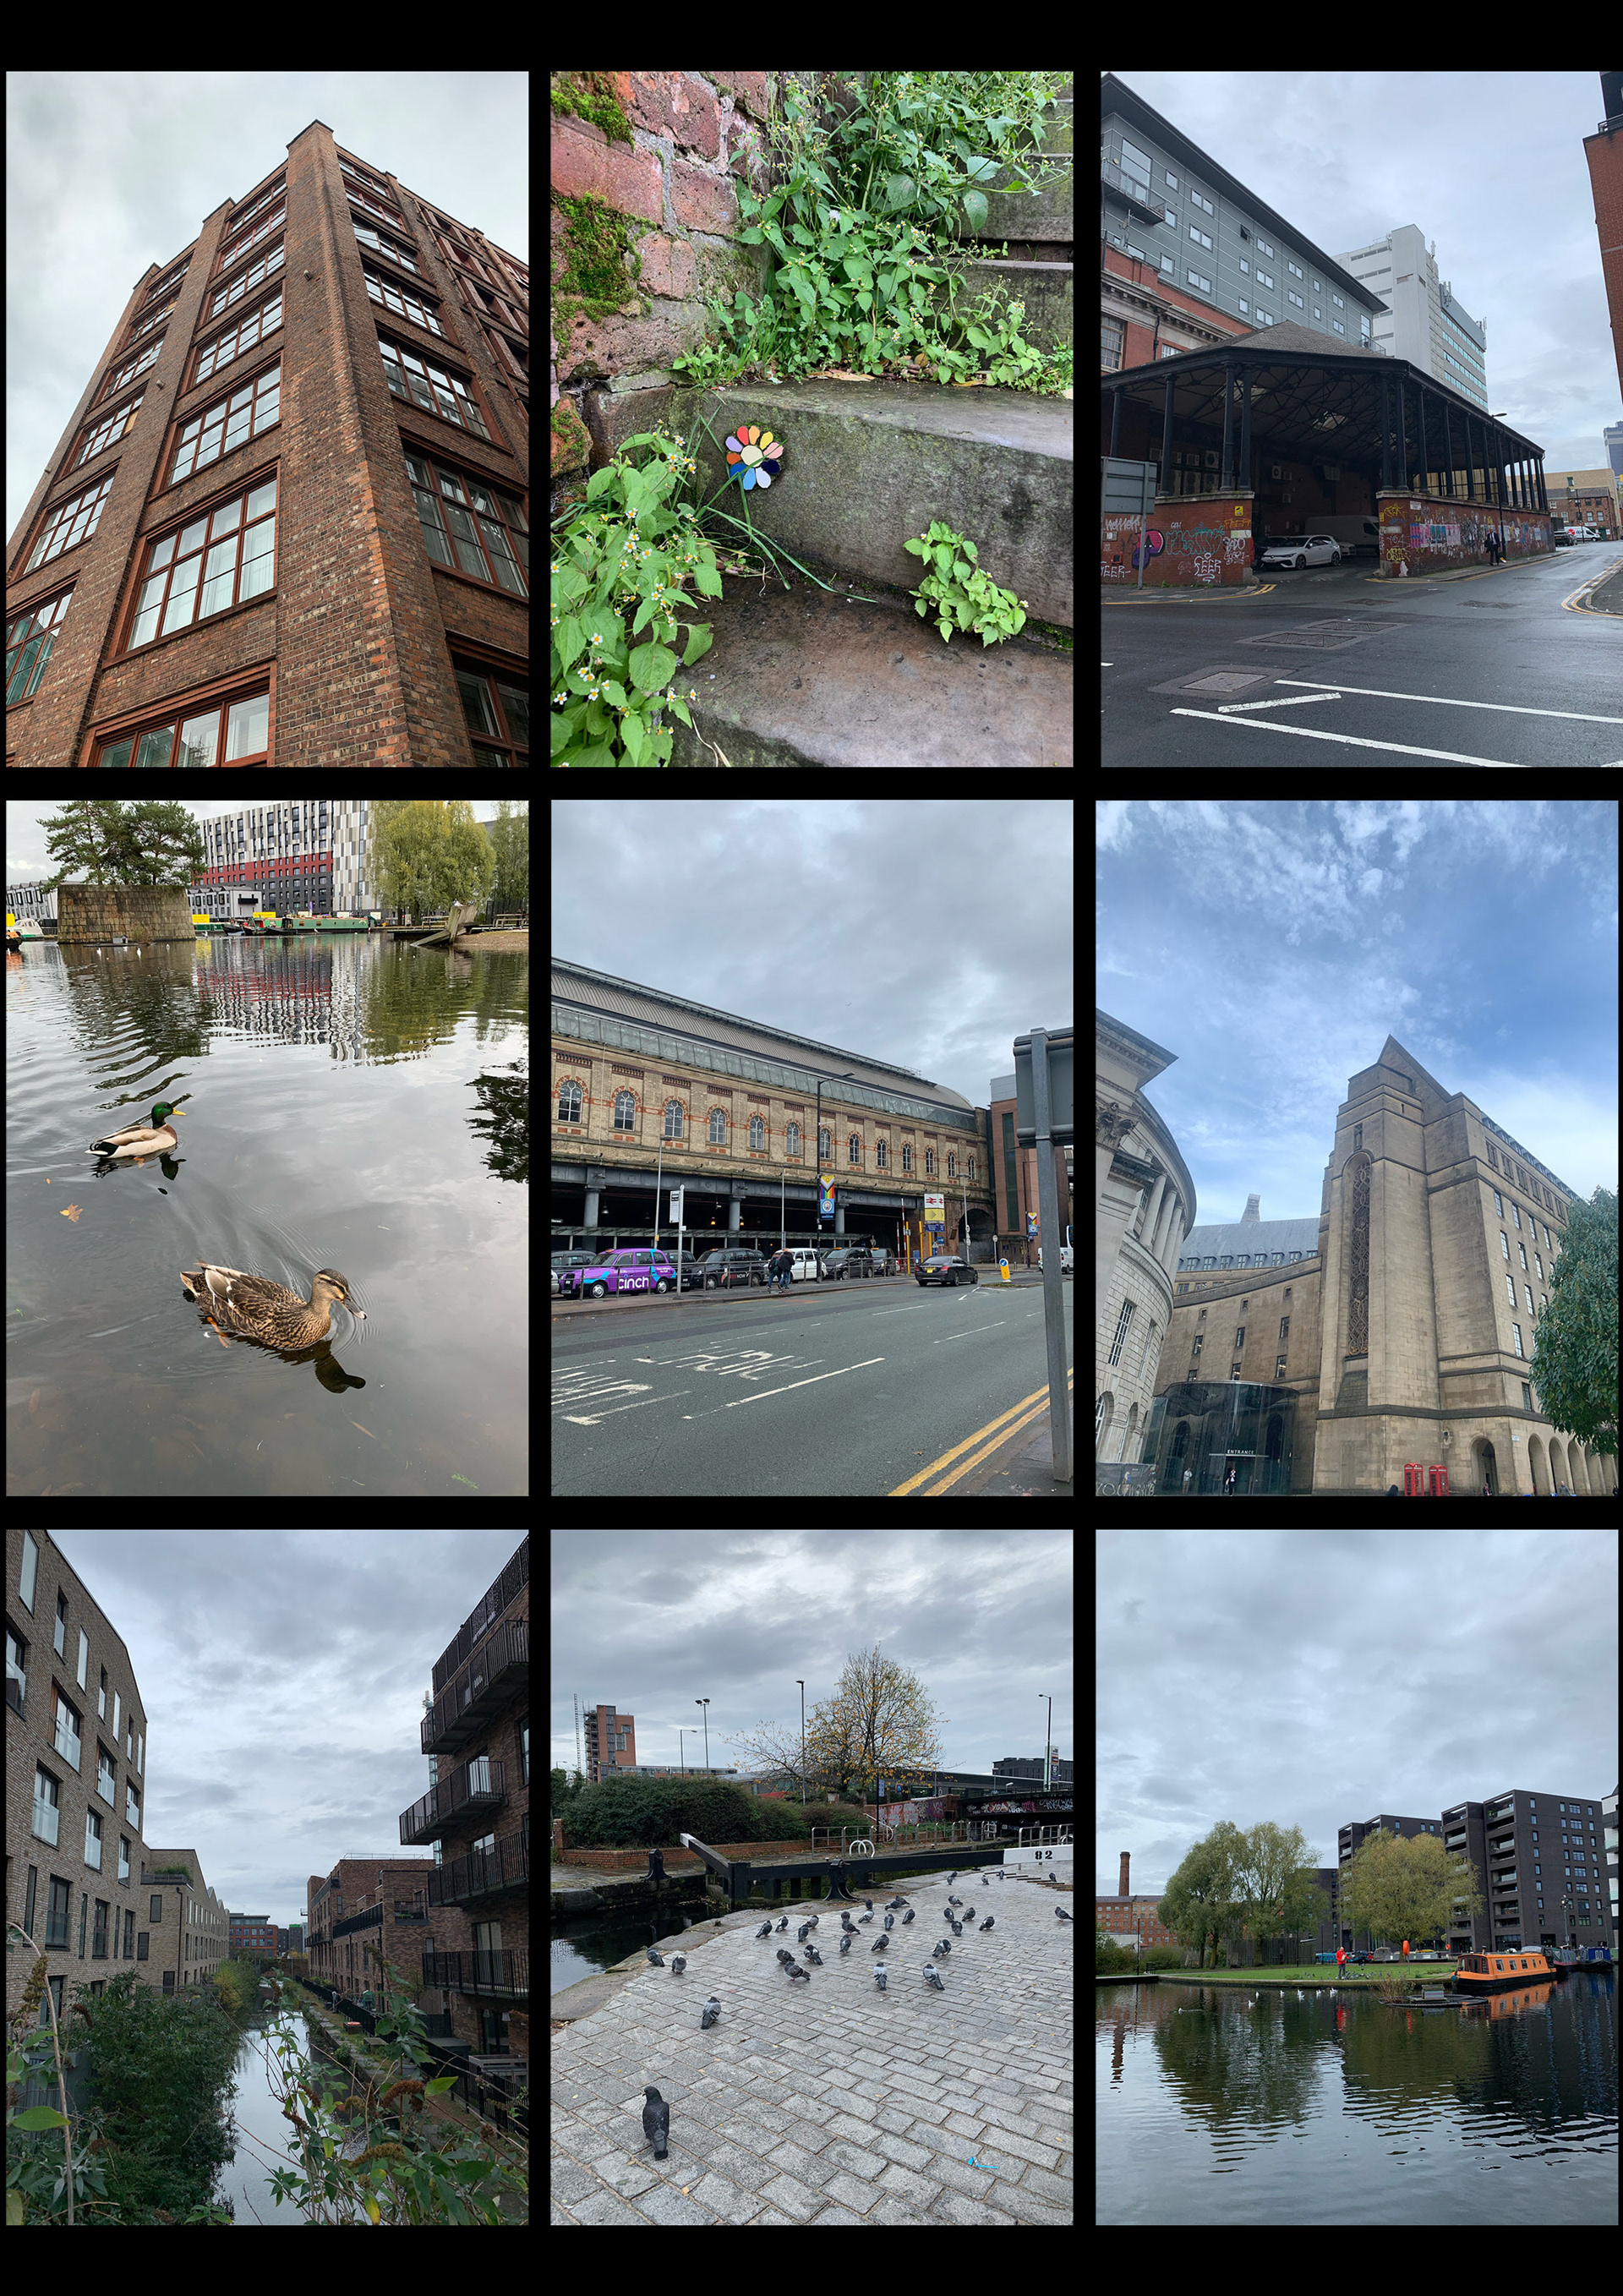
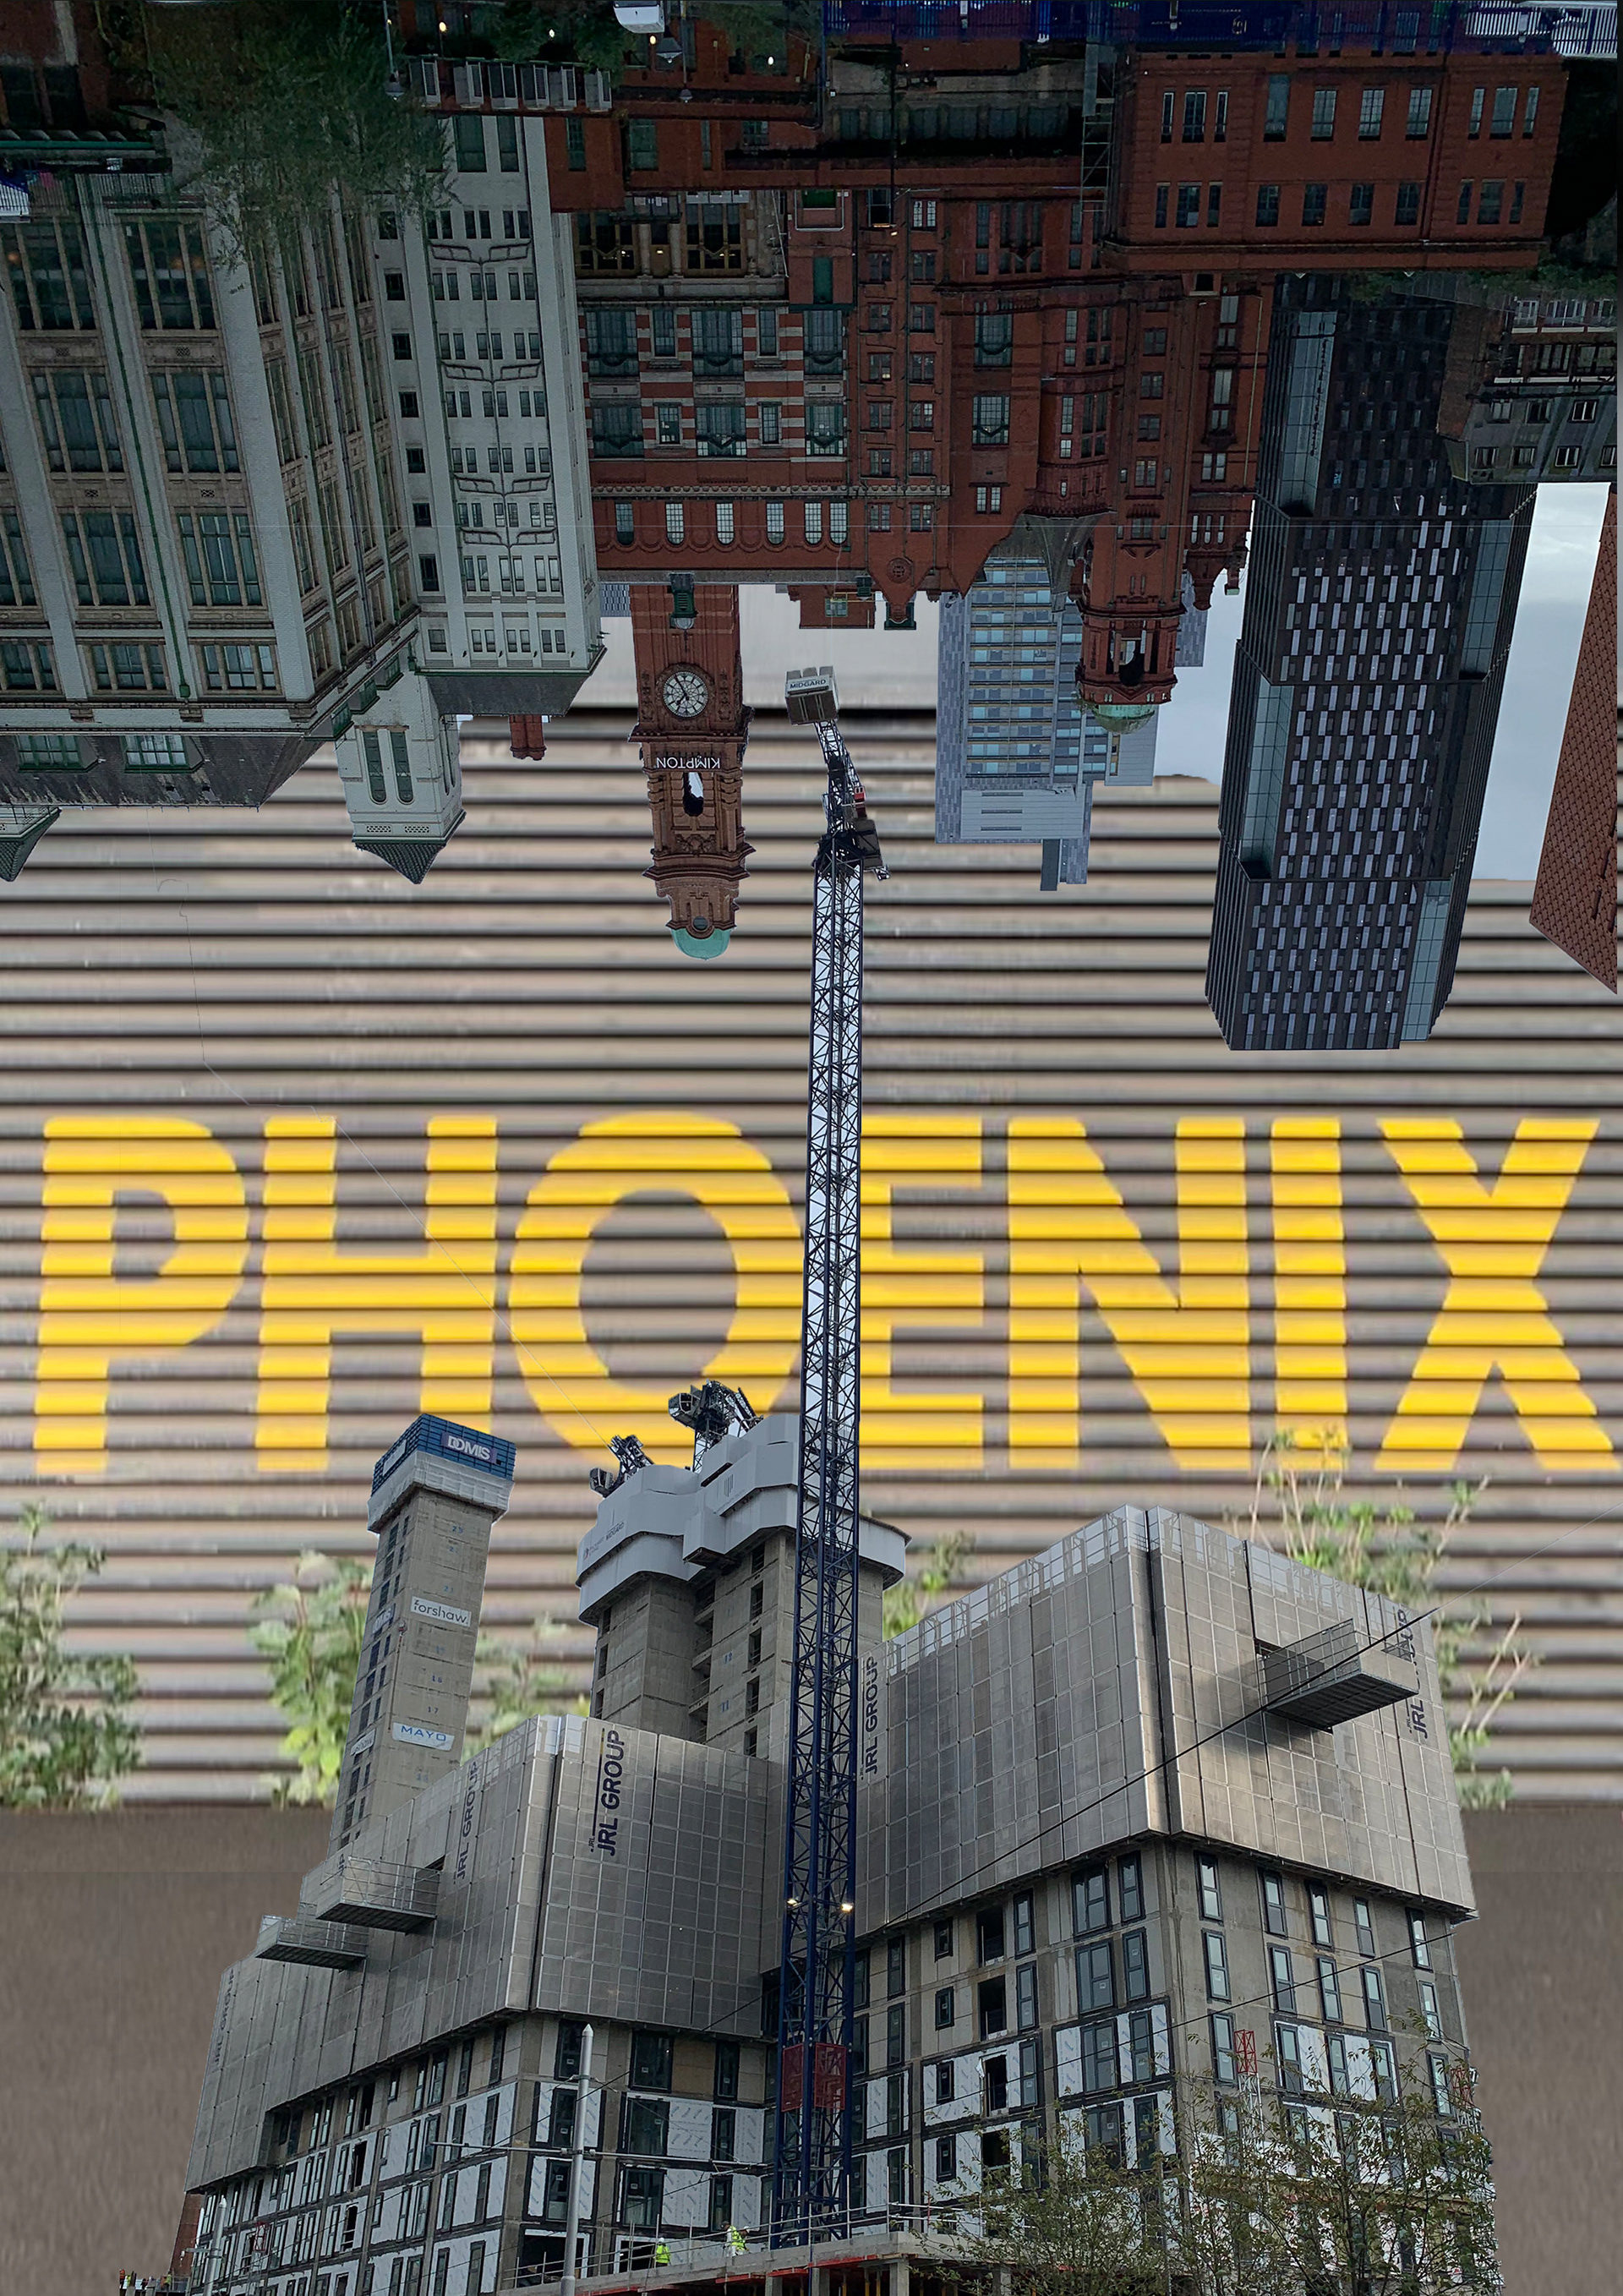
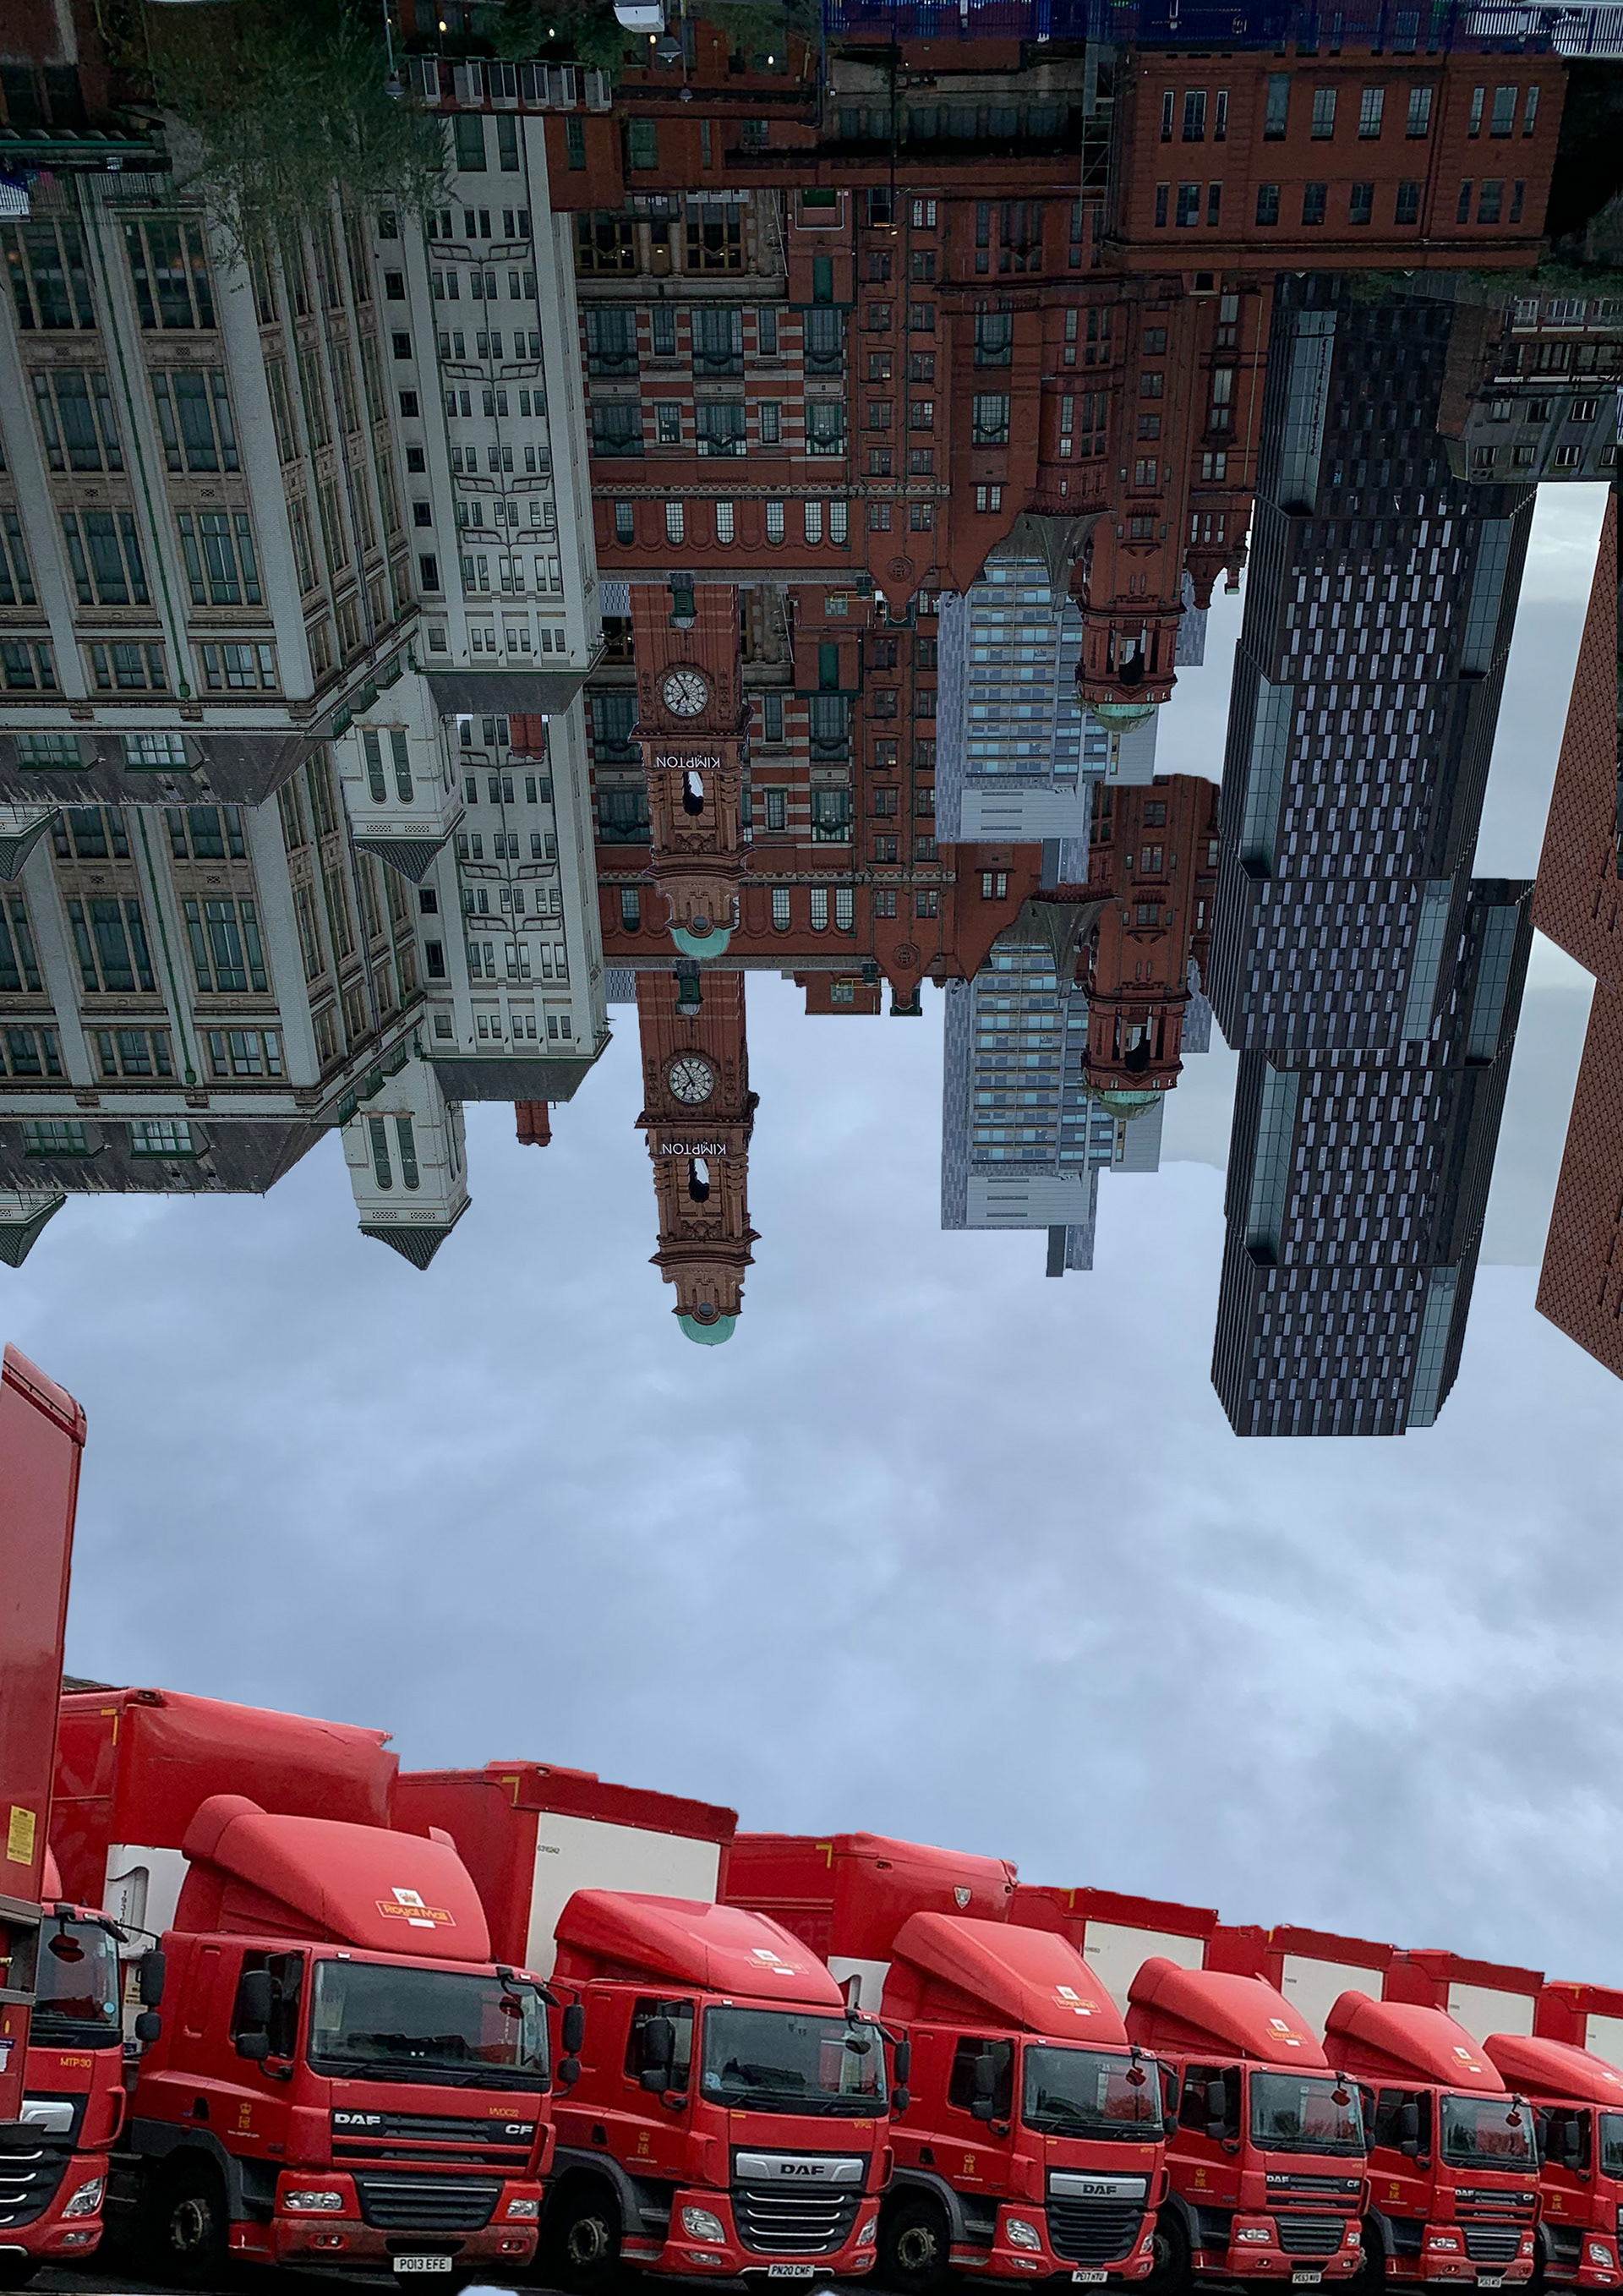
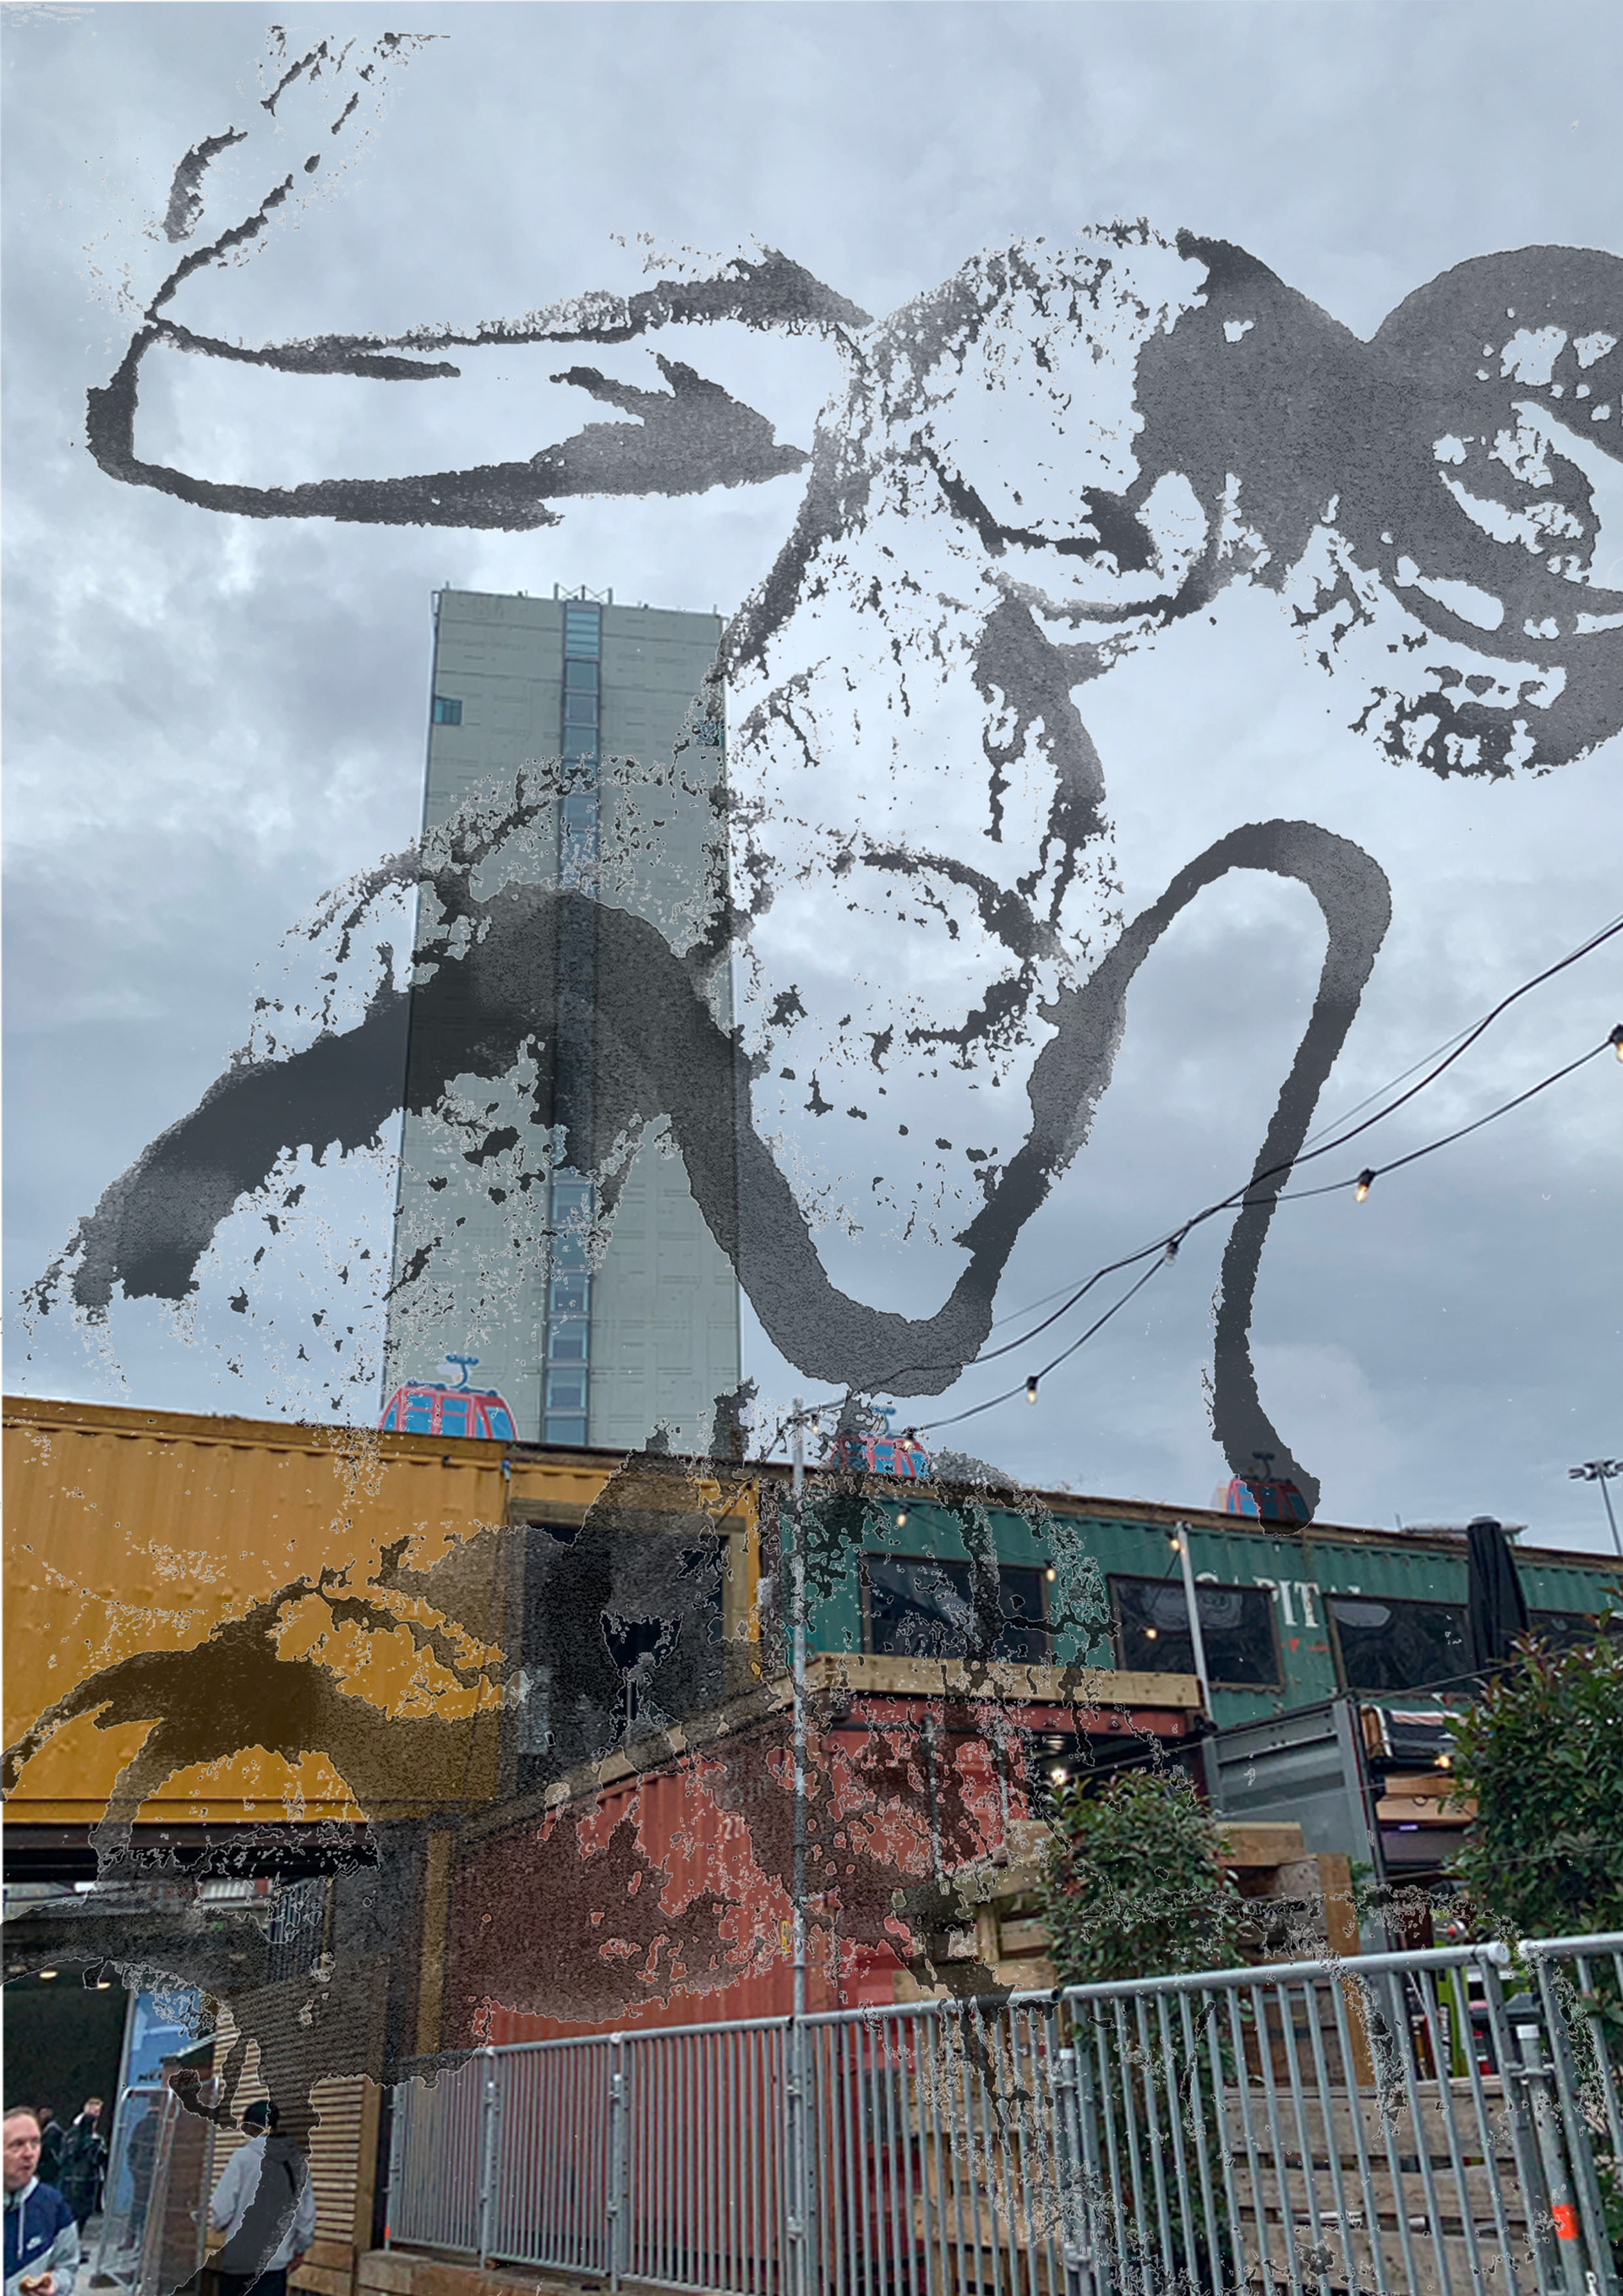
USING THE PHOTOS I TOOK OF MANCHESTER I EXPLORED MAKING COLLAGES THROUGH PHOTOSHOP CONTRASTING THE BIG CITY BUILDING WITH NATURAL FORMS, AND PLAYING WITH THE COLOUR PALLETS MANCHESTER GIVES.
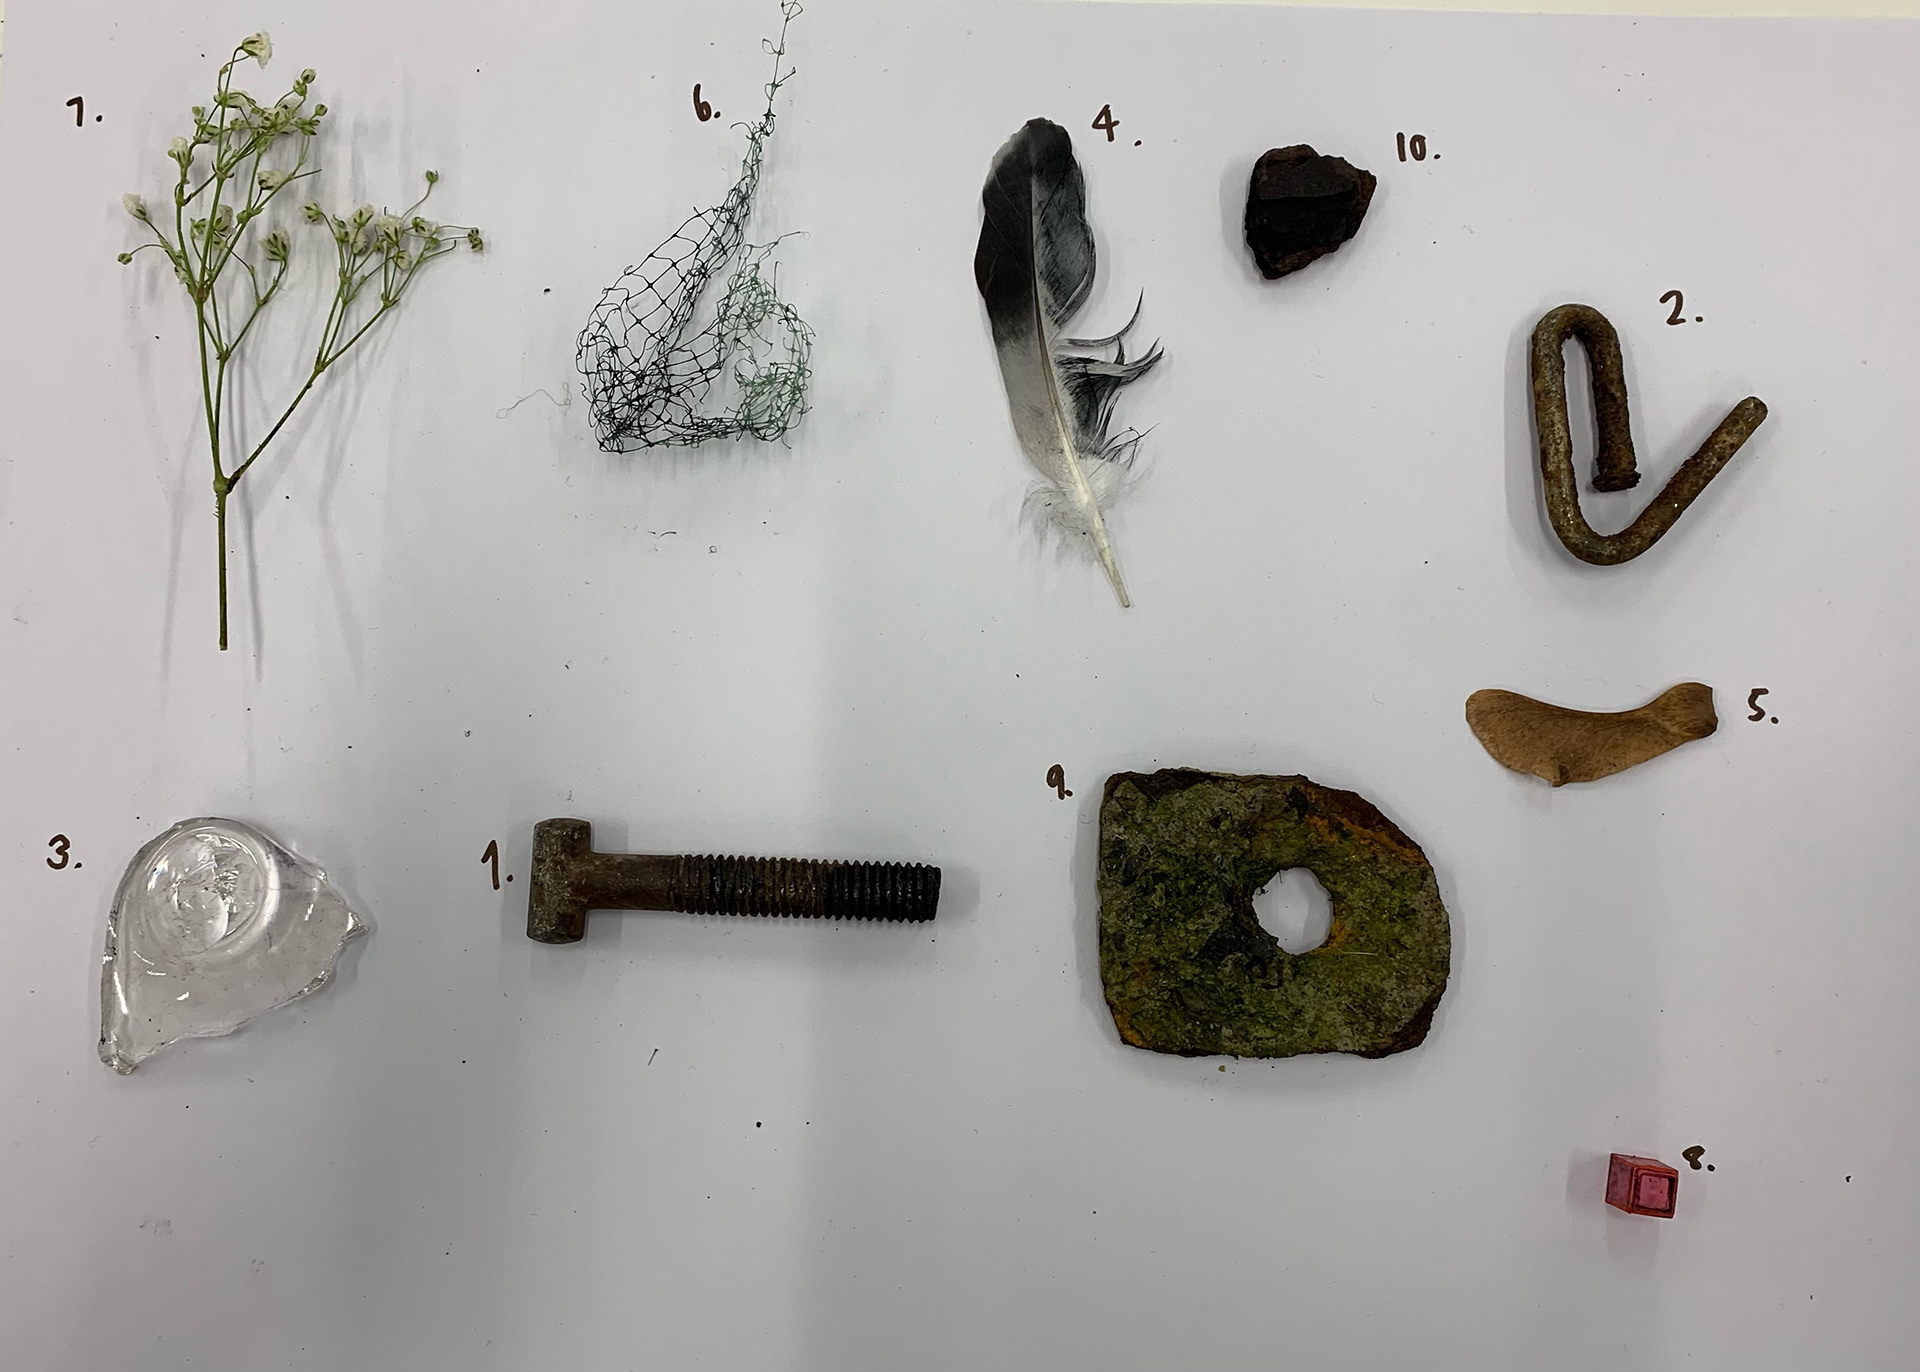
10 found objects
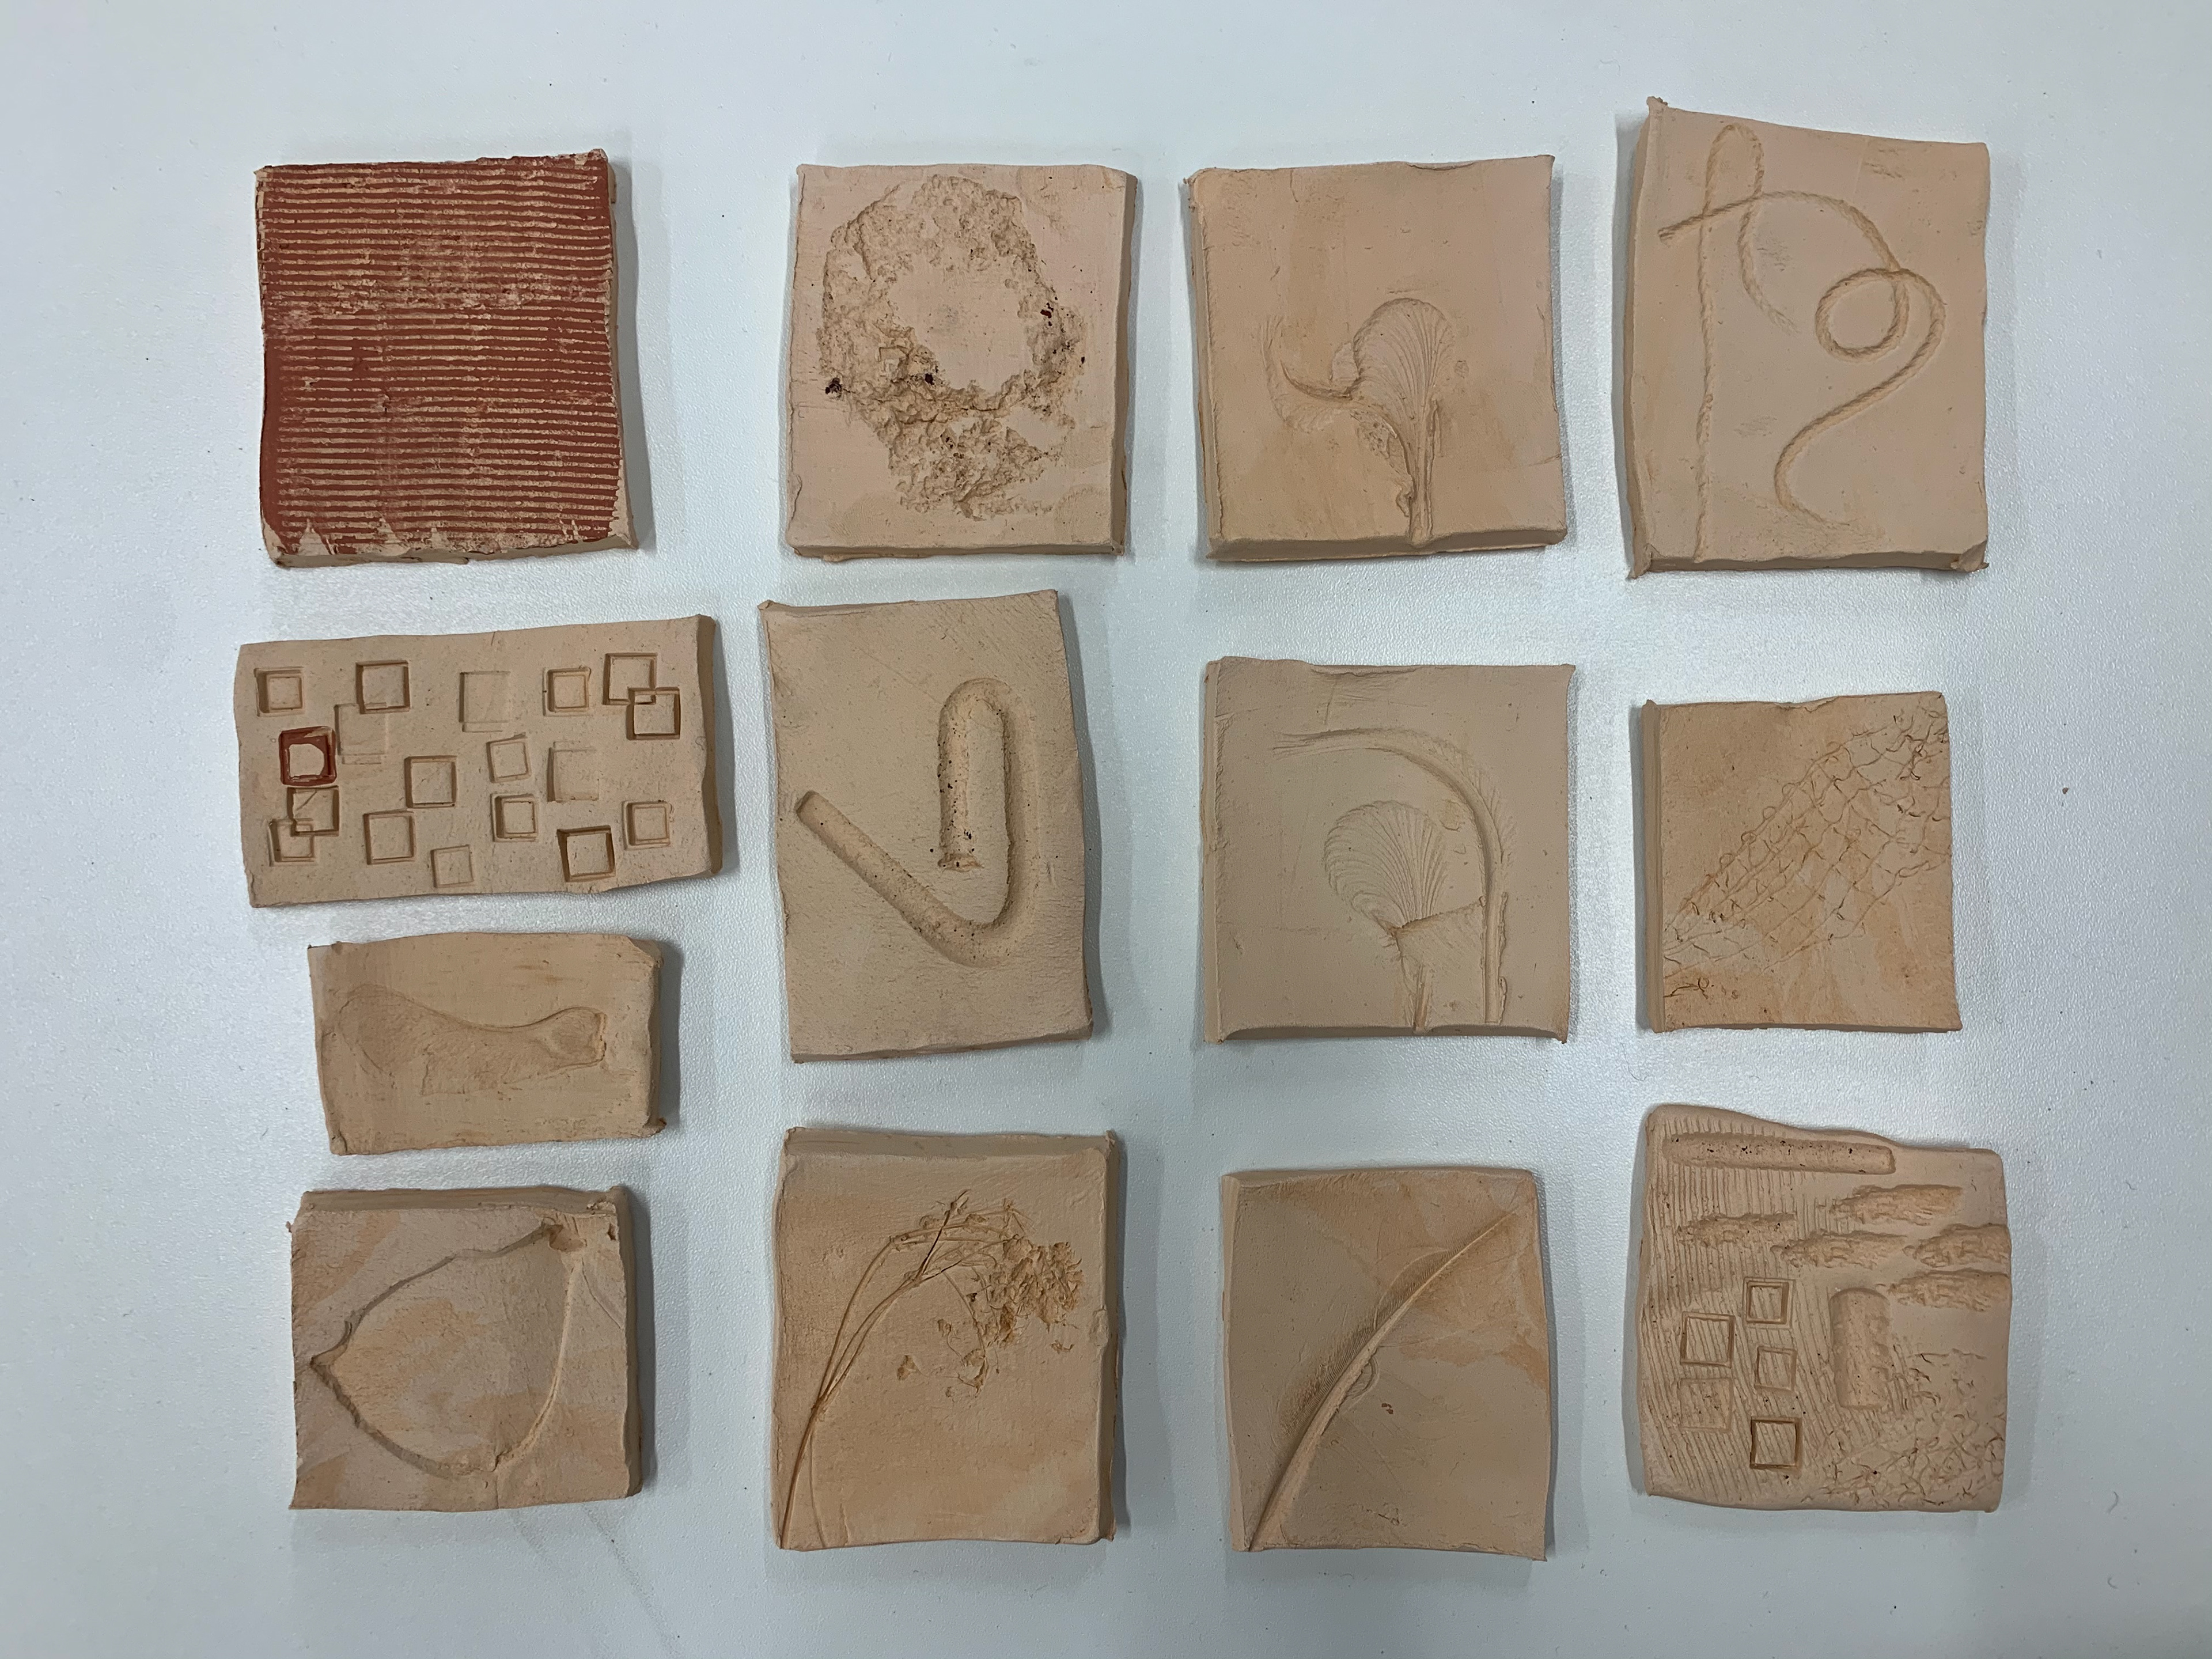
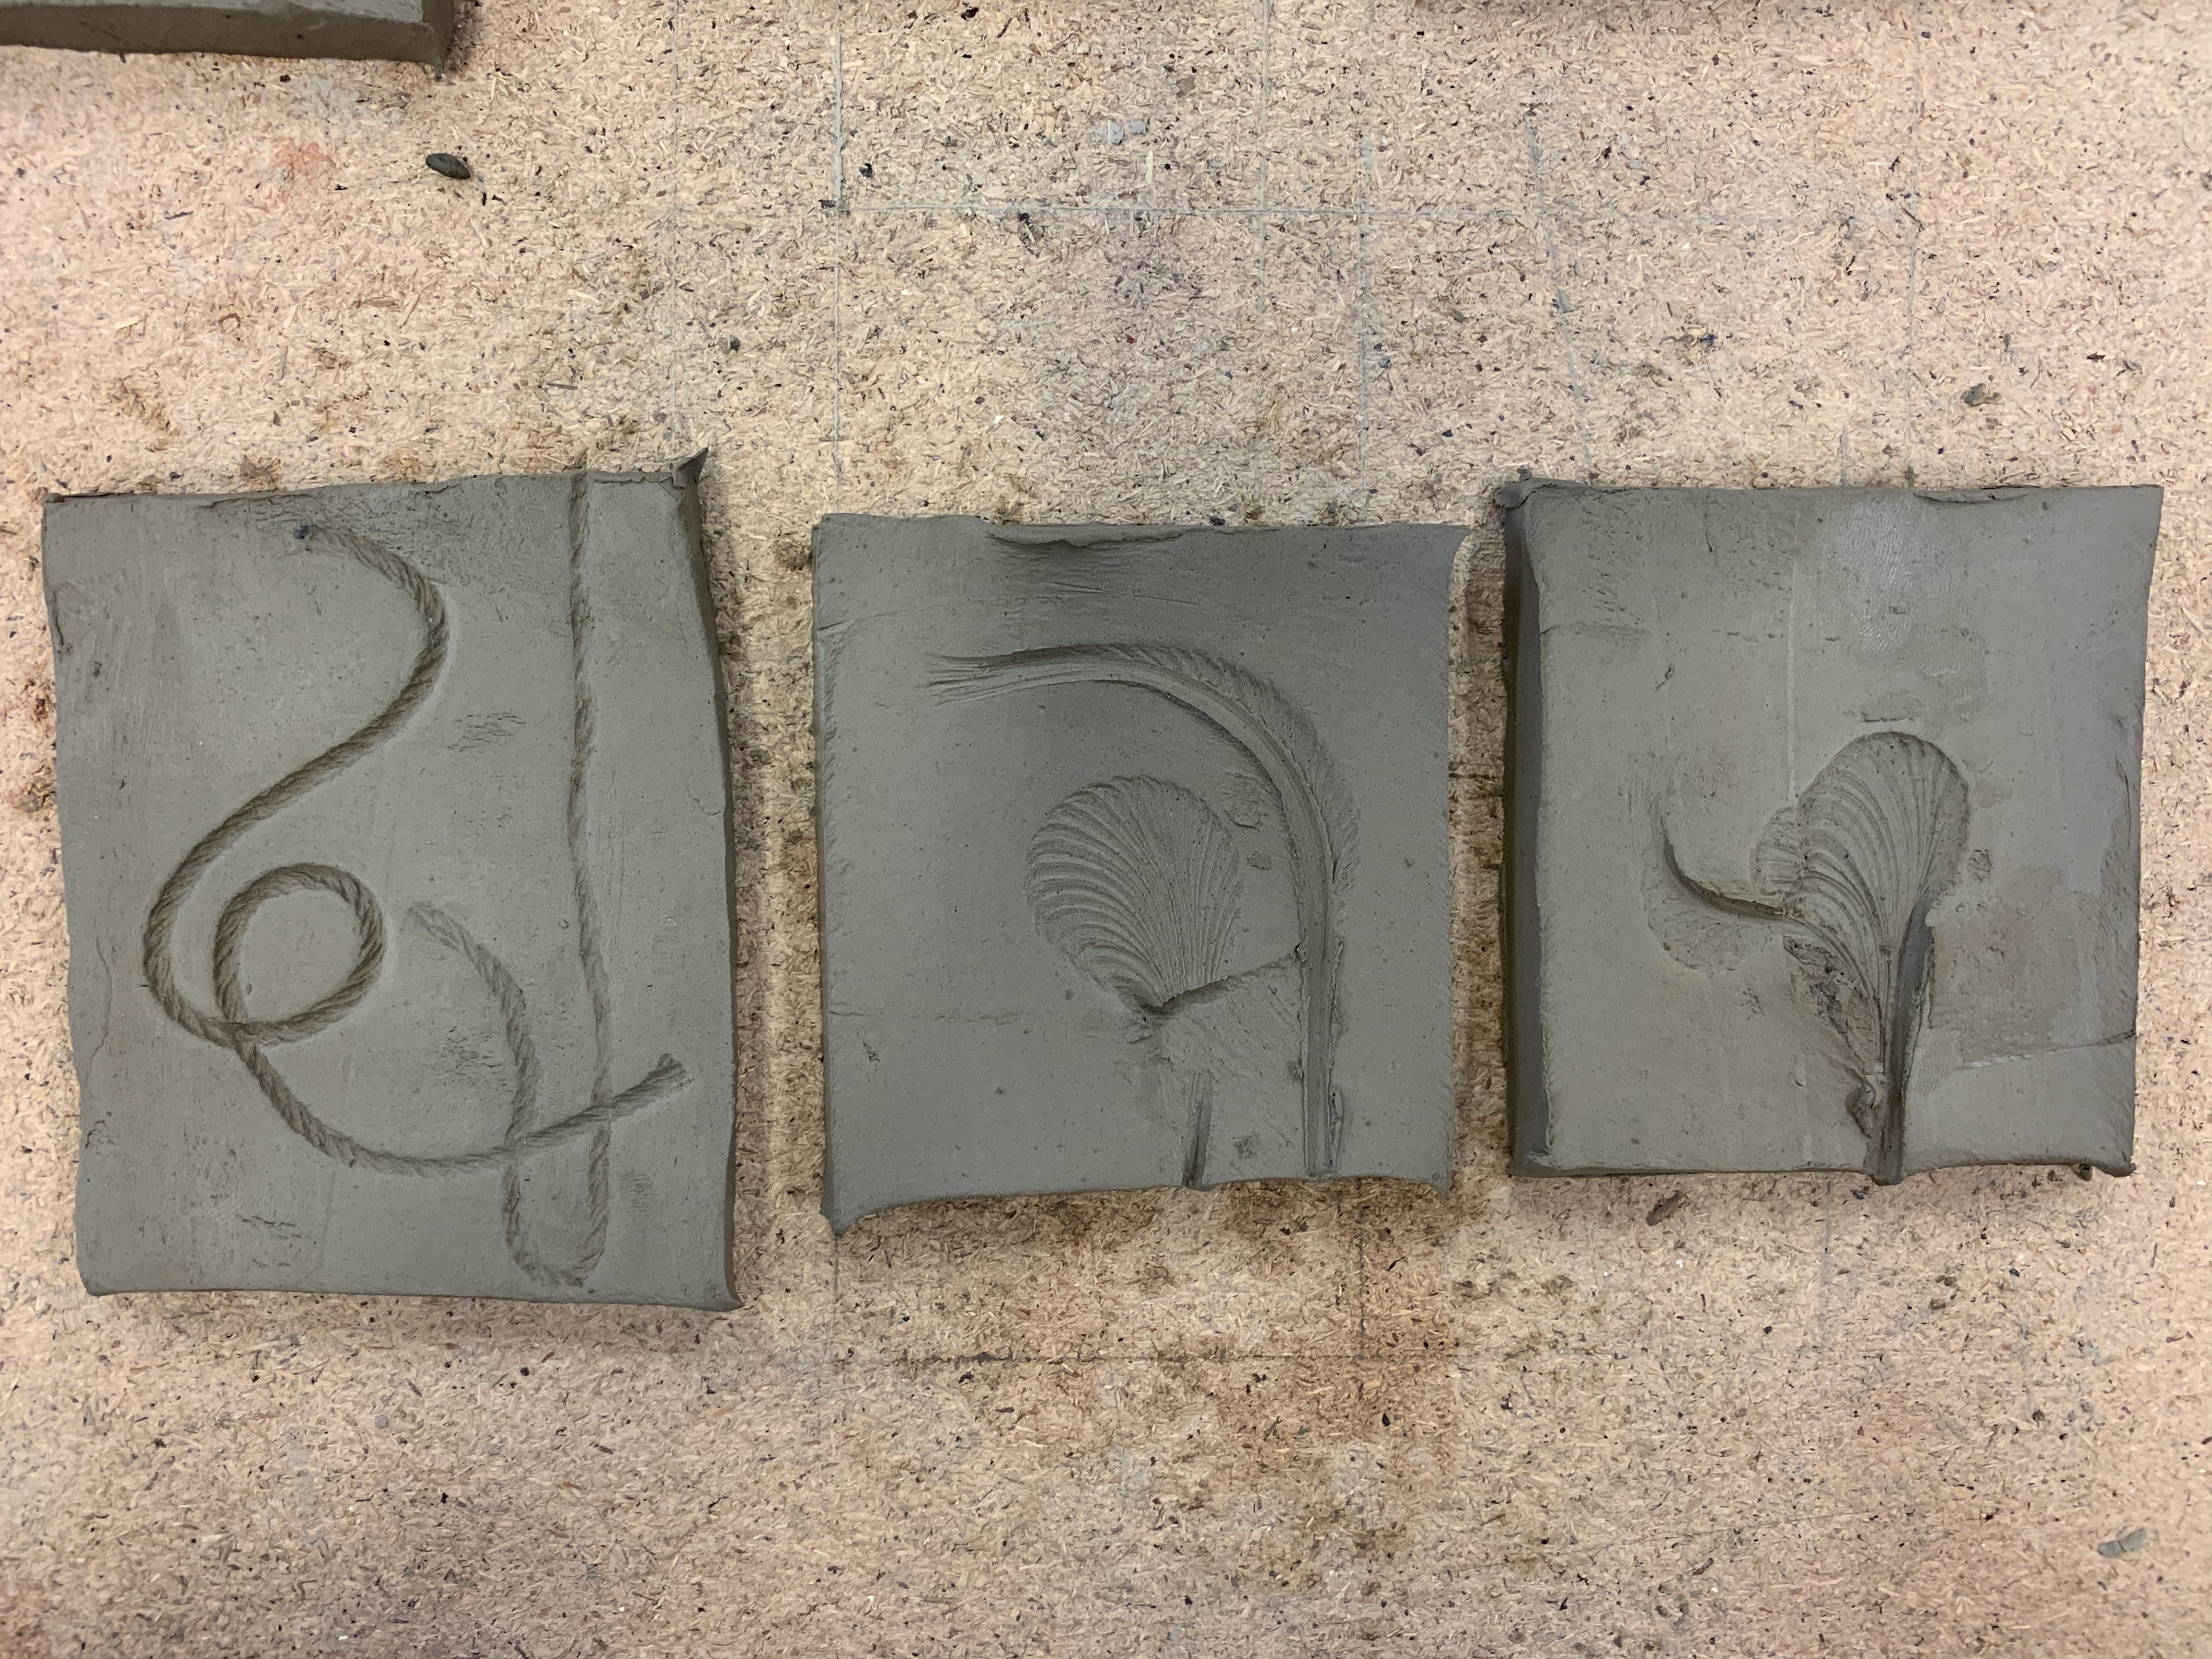
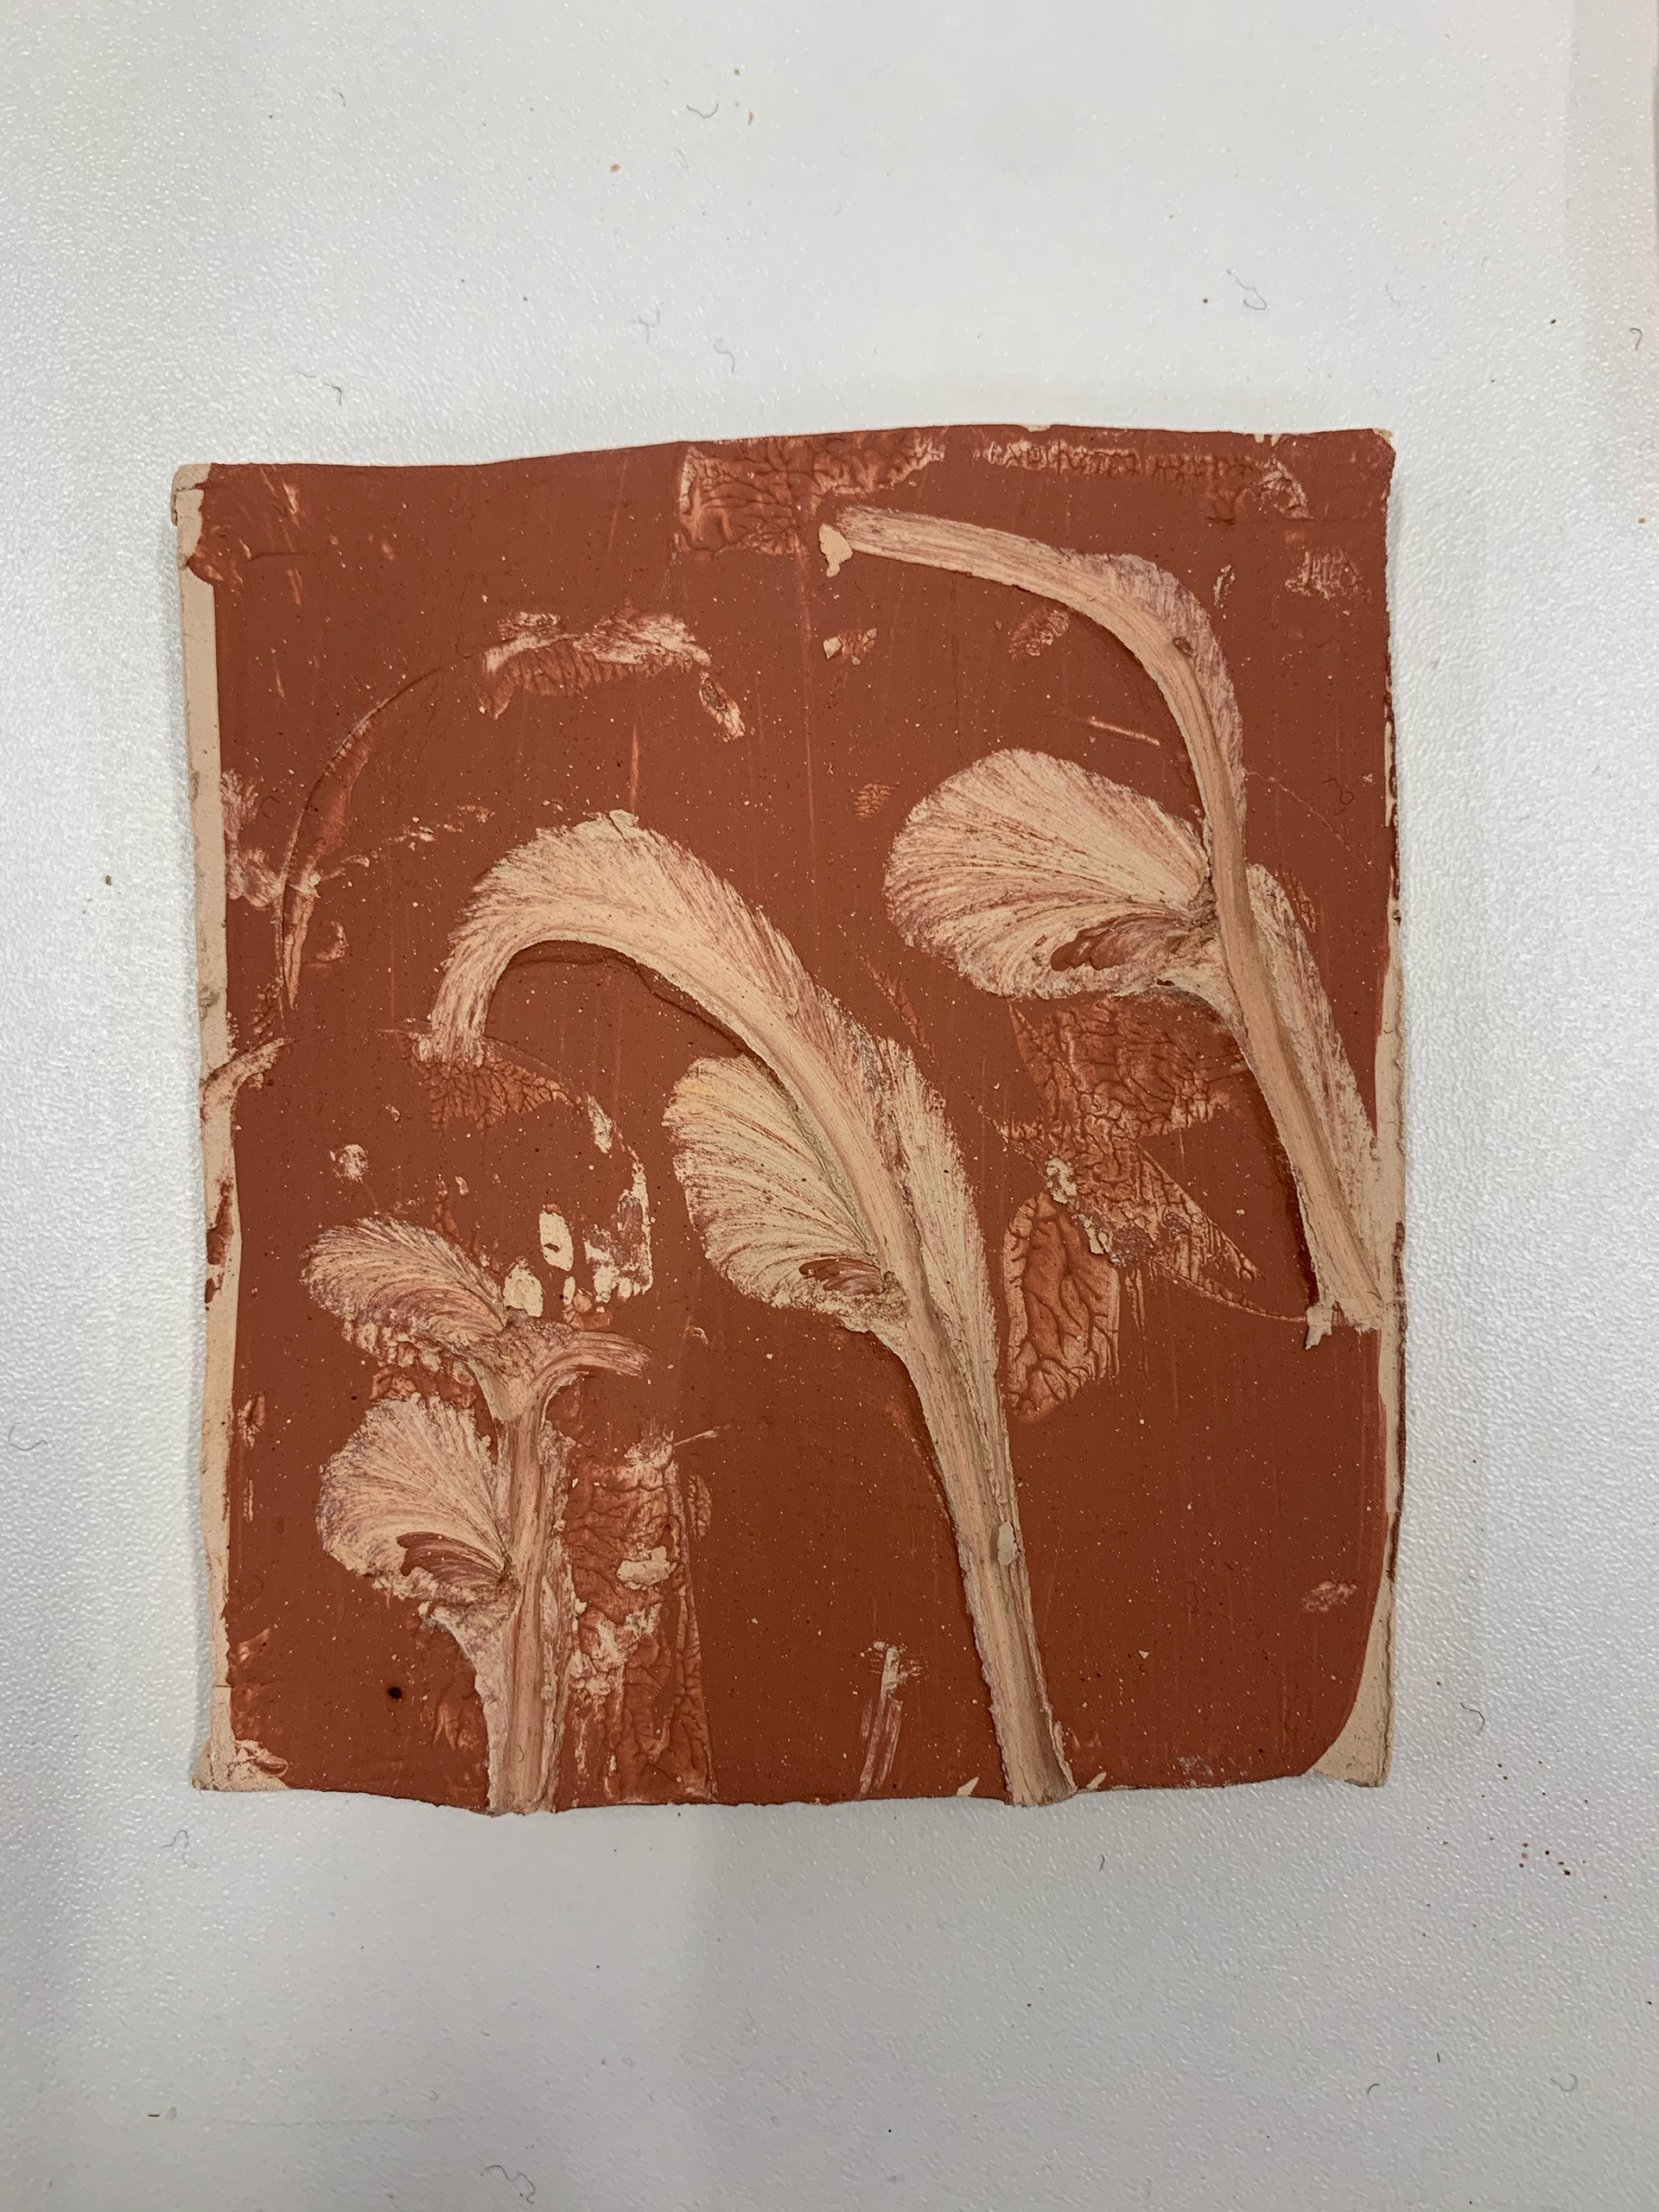
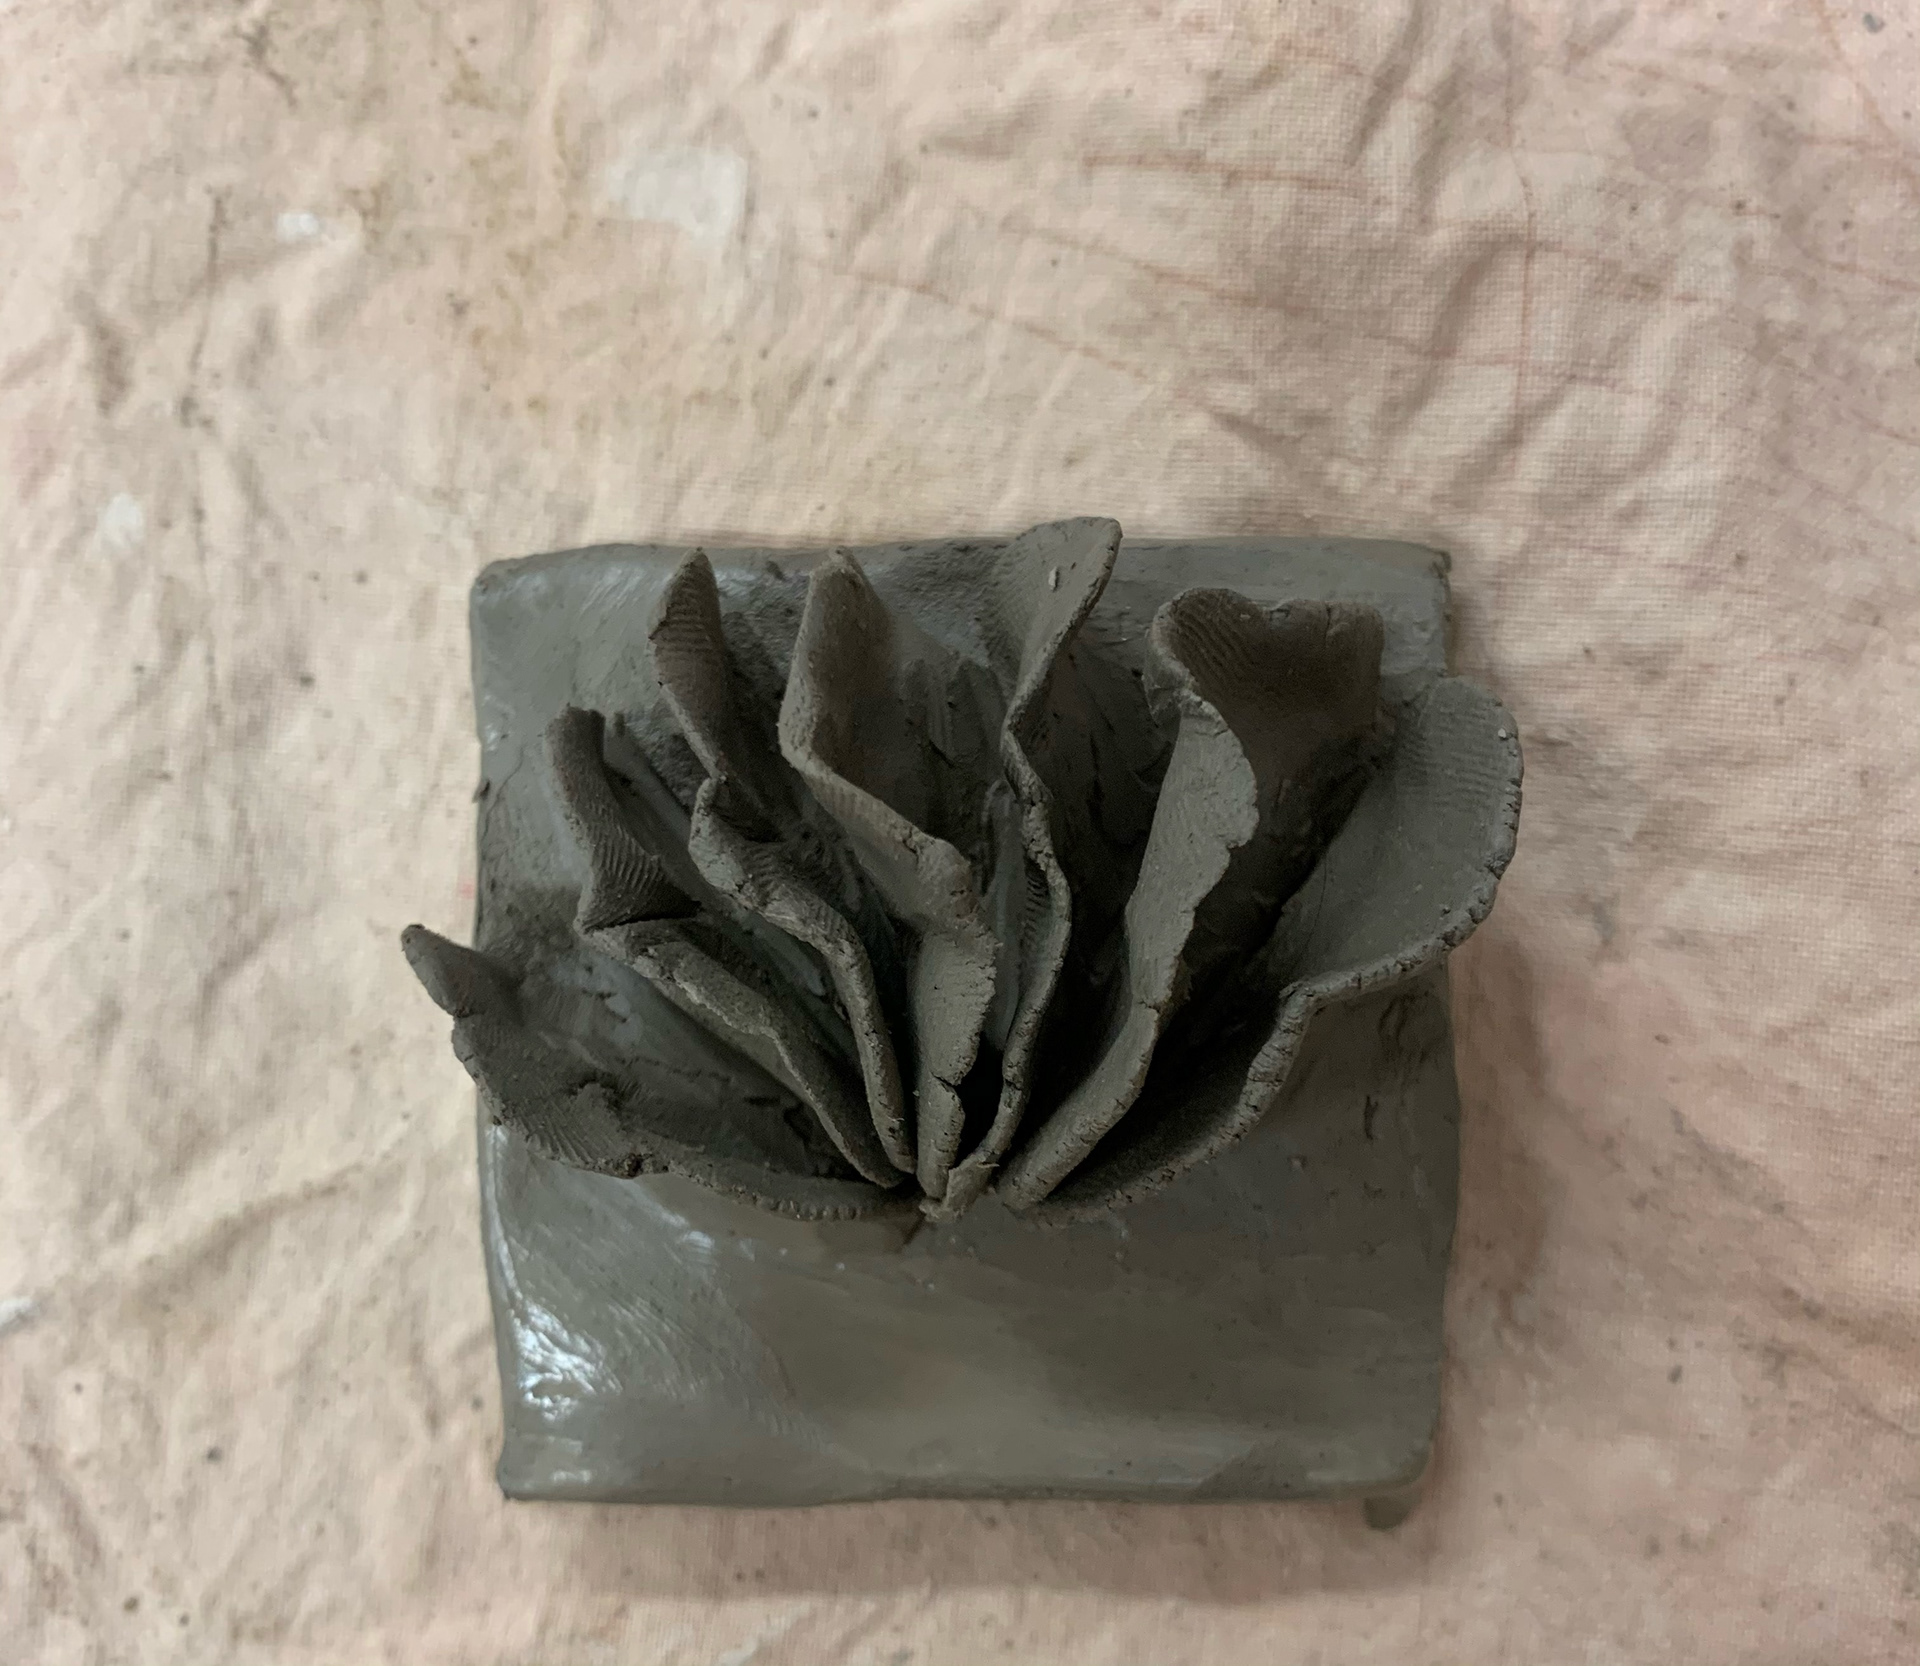
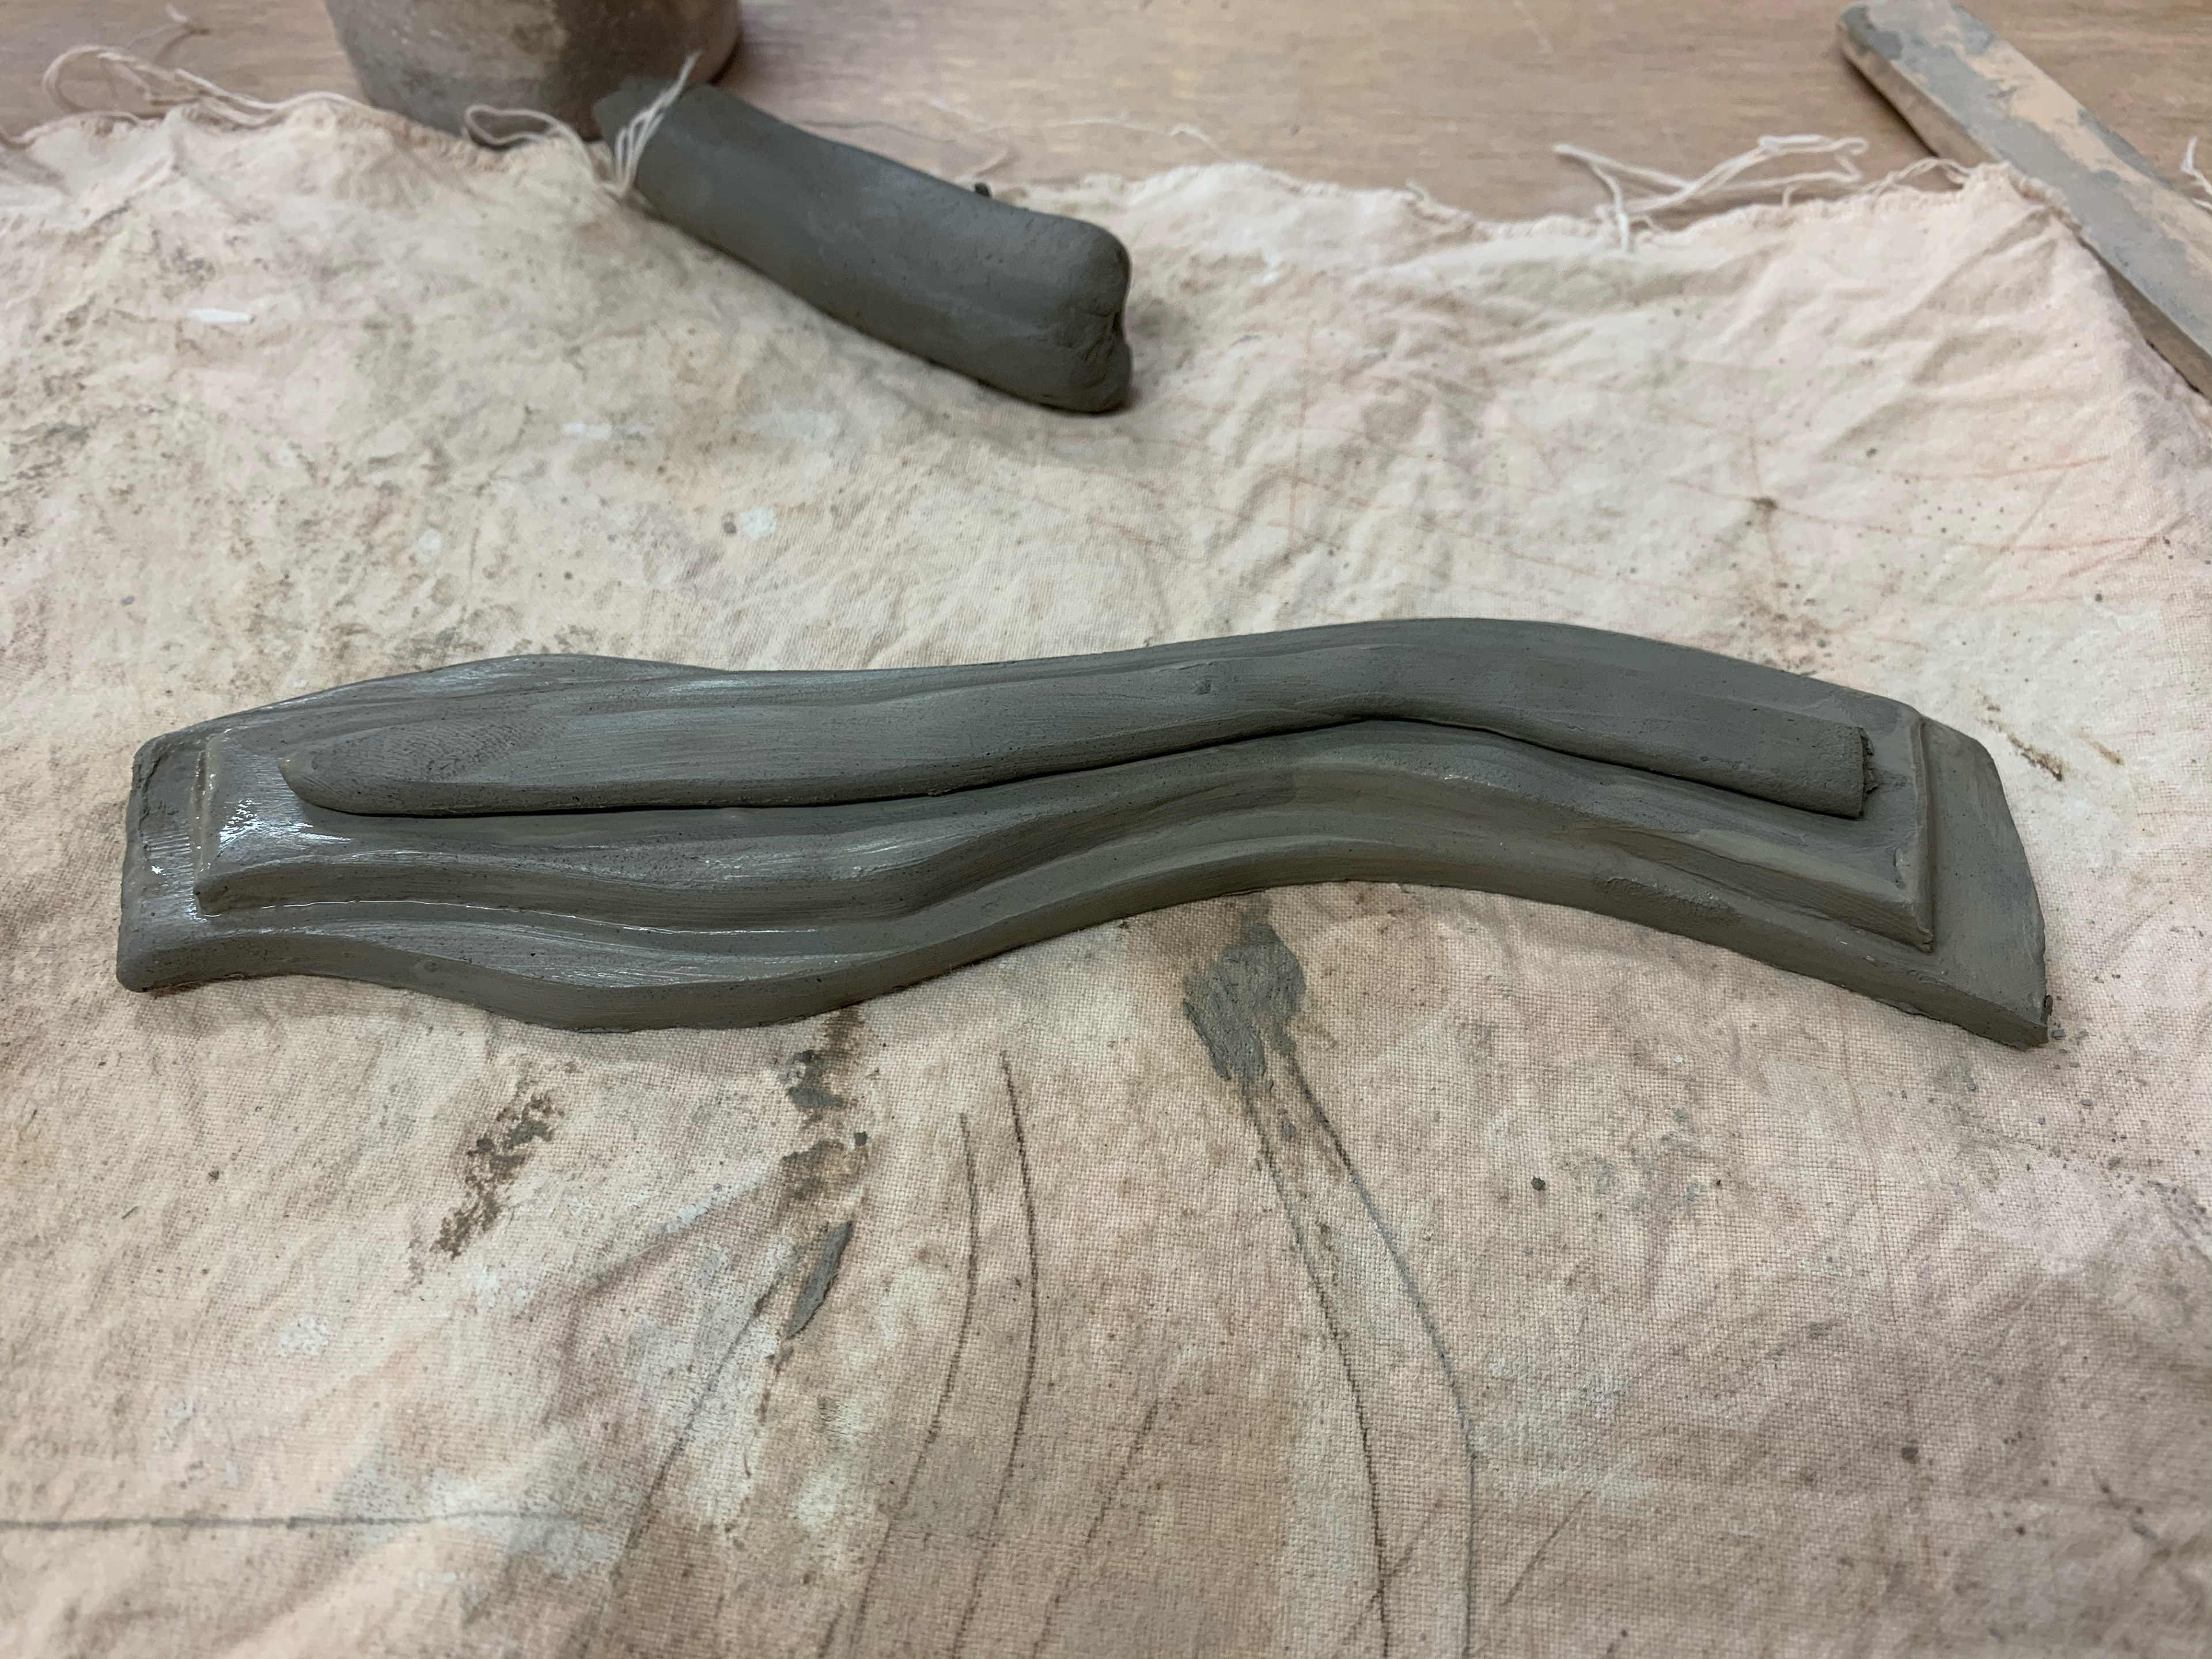
whilst walking around manchester i collected 10 found objects ranging from natural to manmade, industrial objects. to explore these i imprinted them into clay to look at the textures and patterns they create. some samples where very delicate and fine-feather flowers and others had much more bold patterns.
SAND CASTING
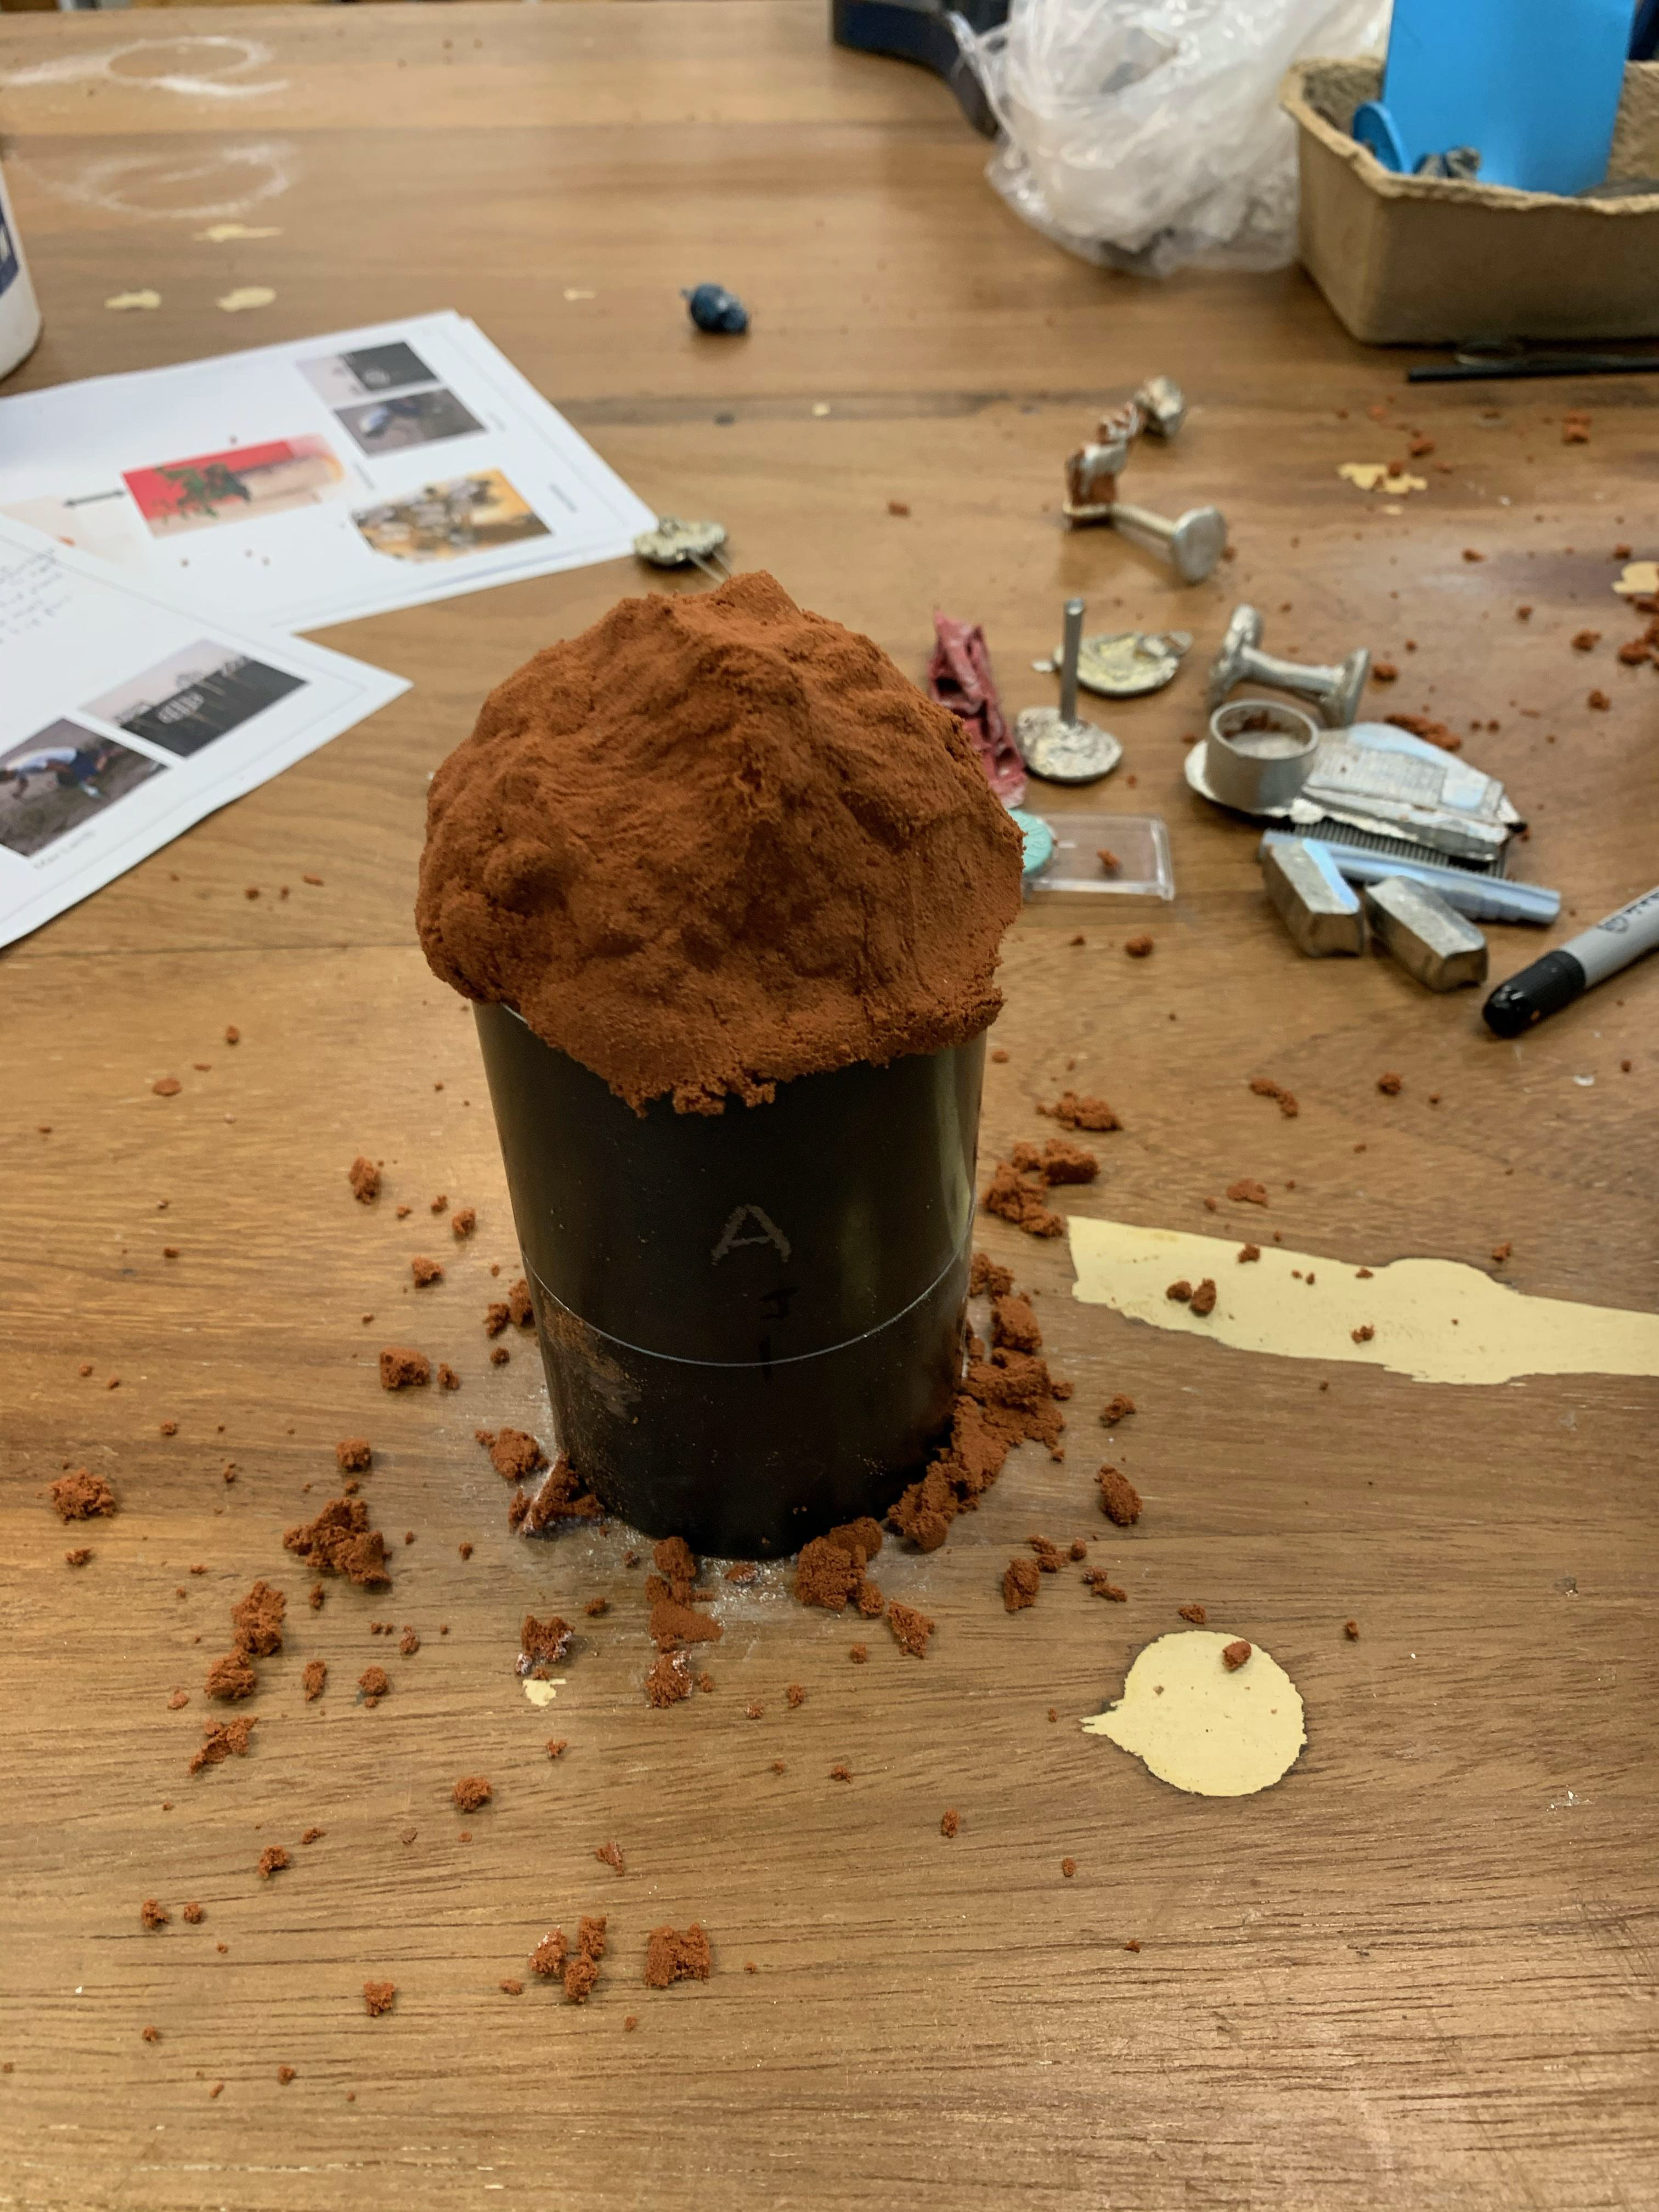
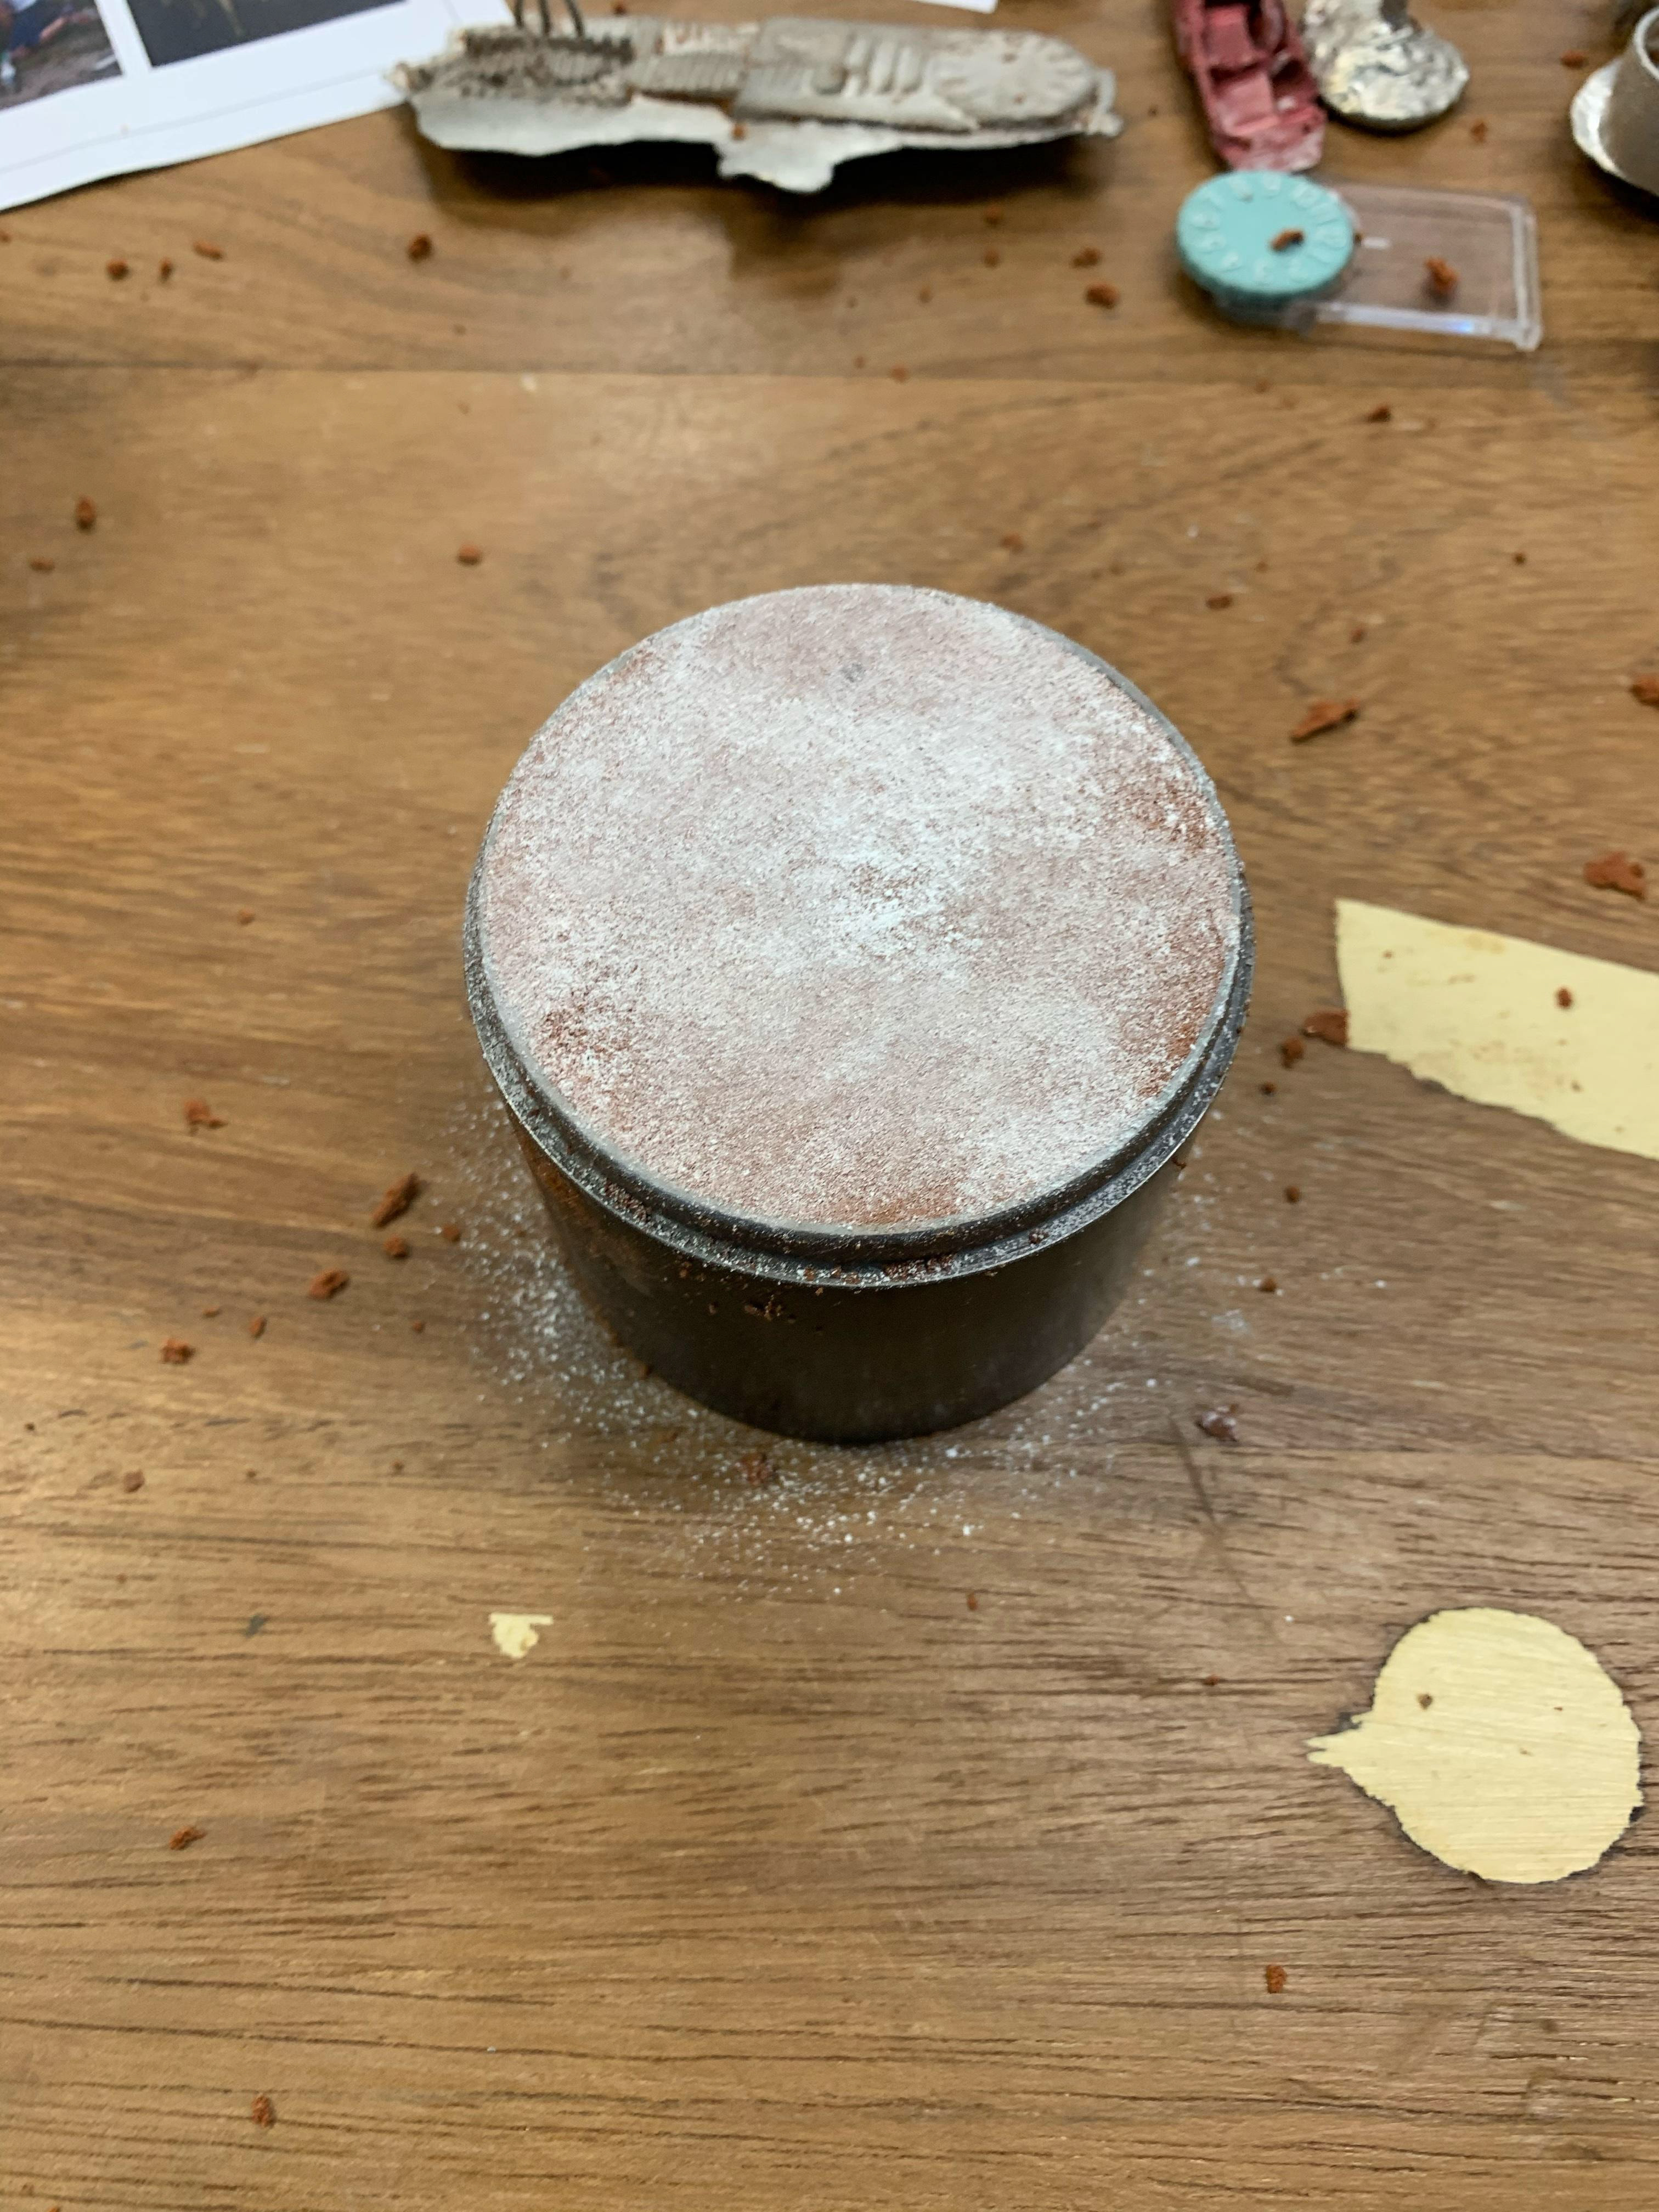
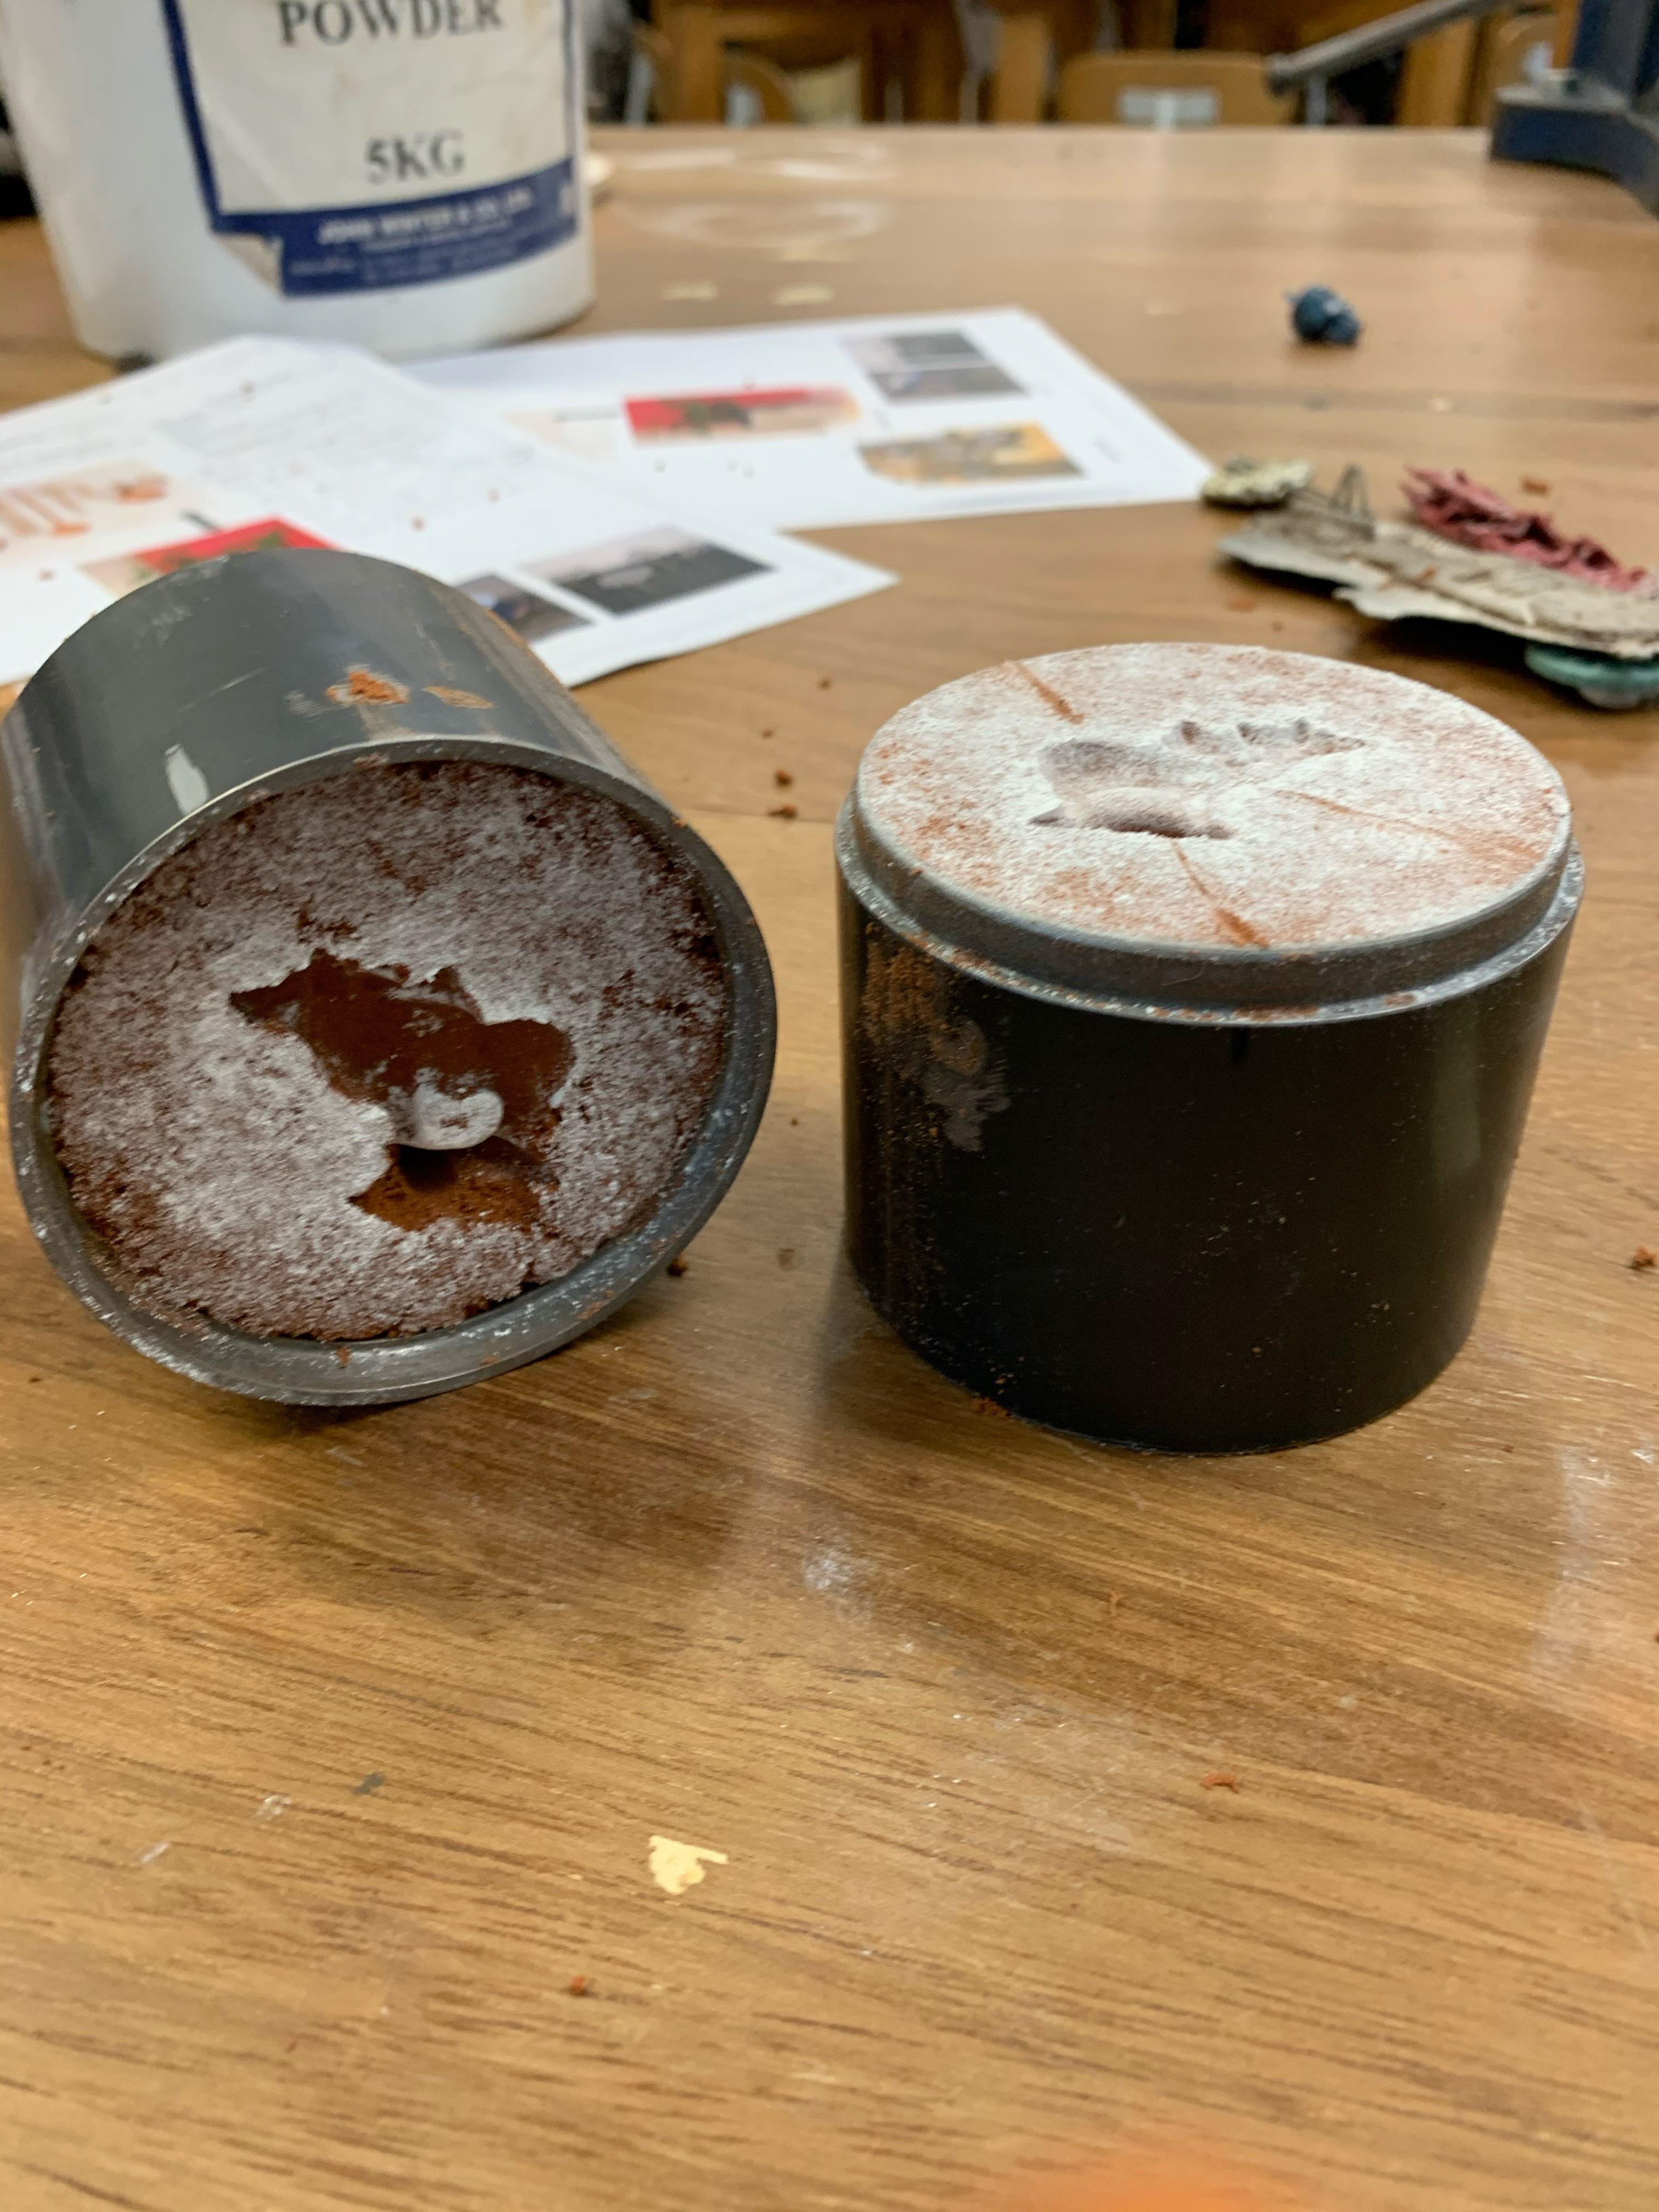
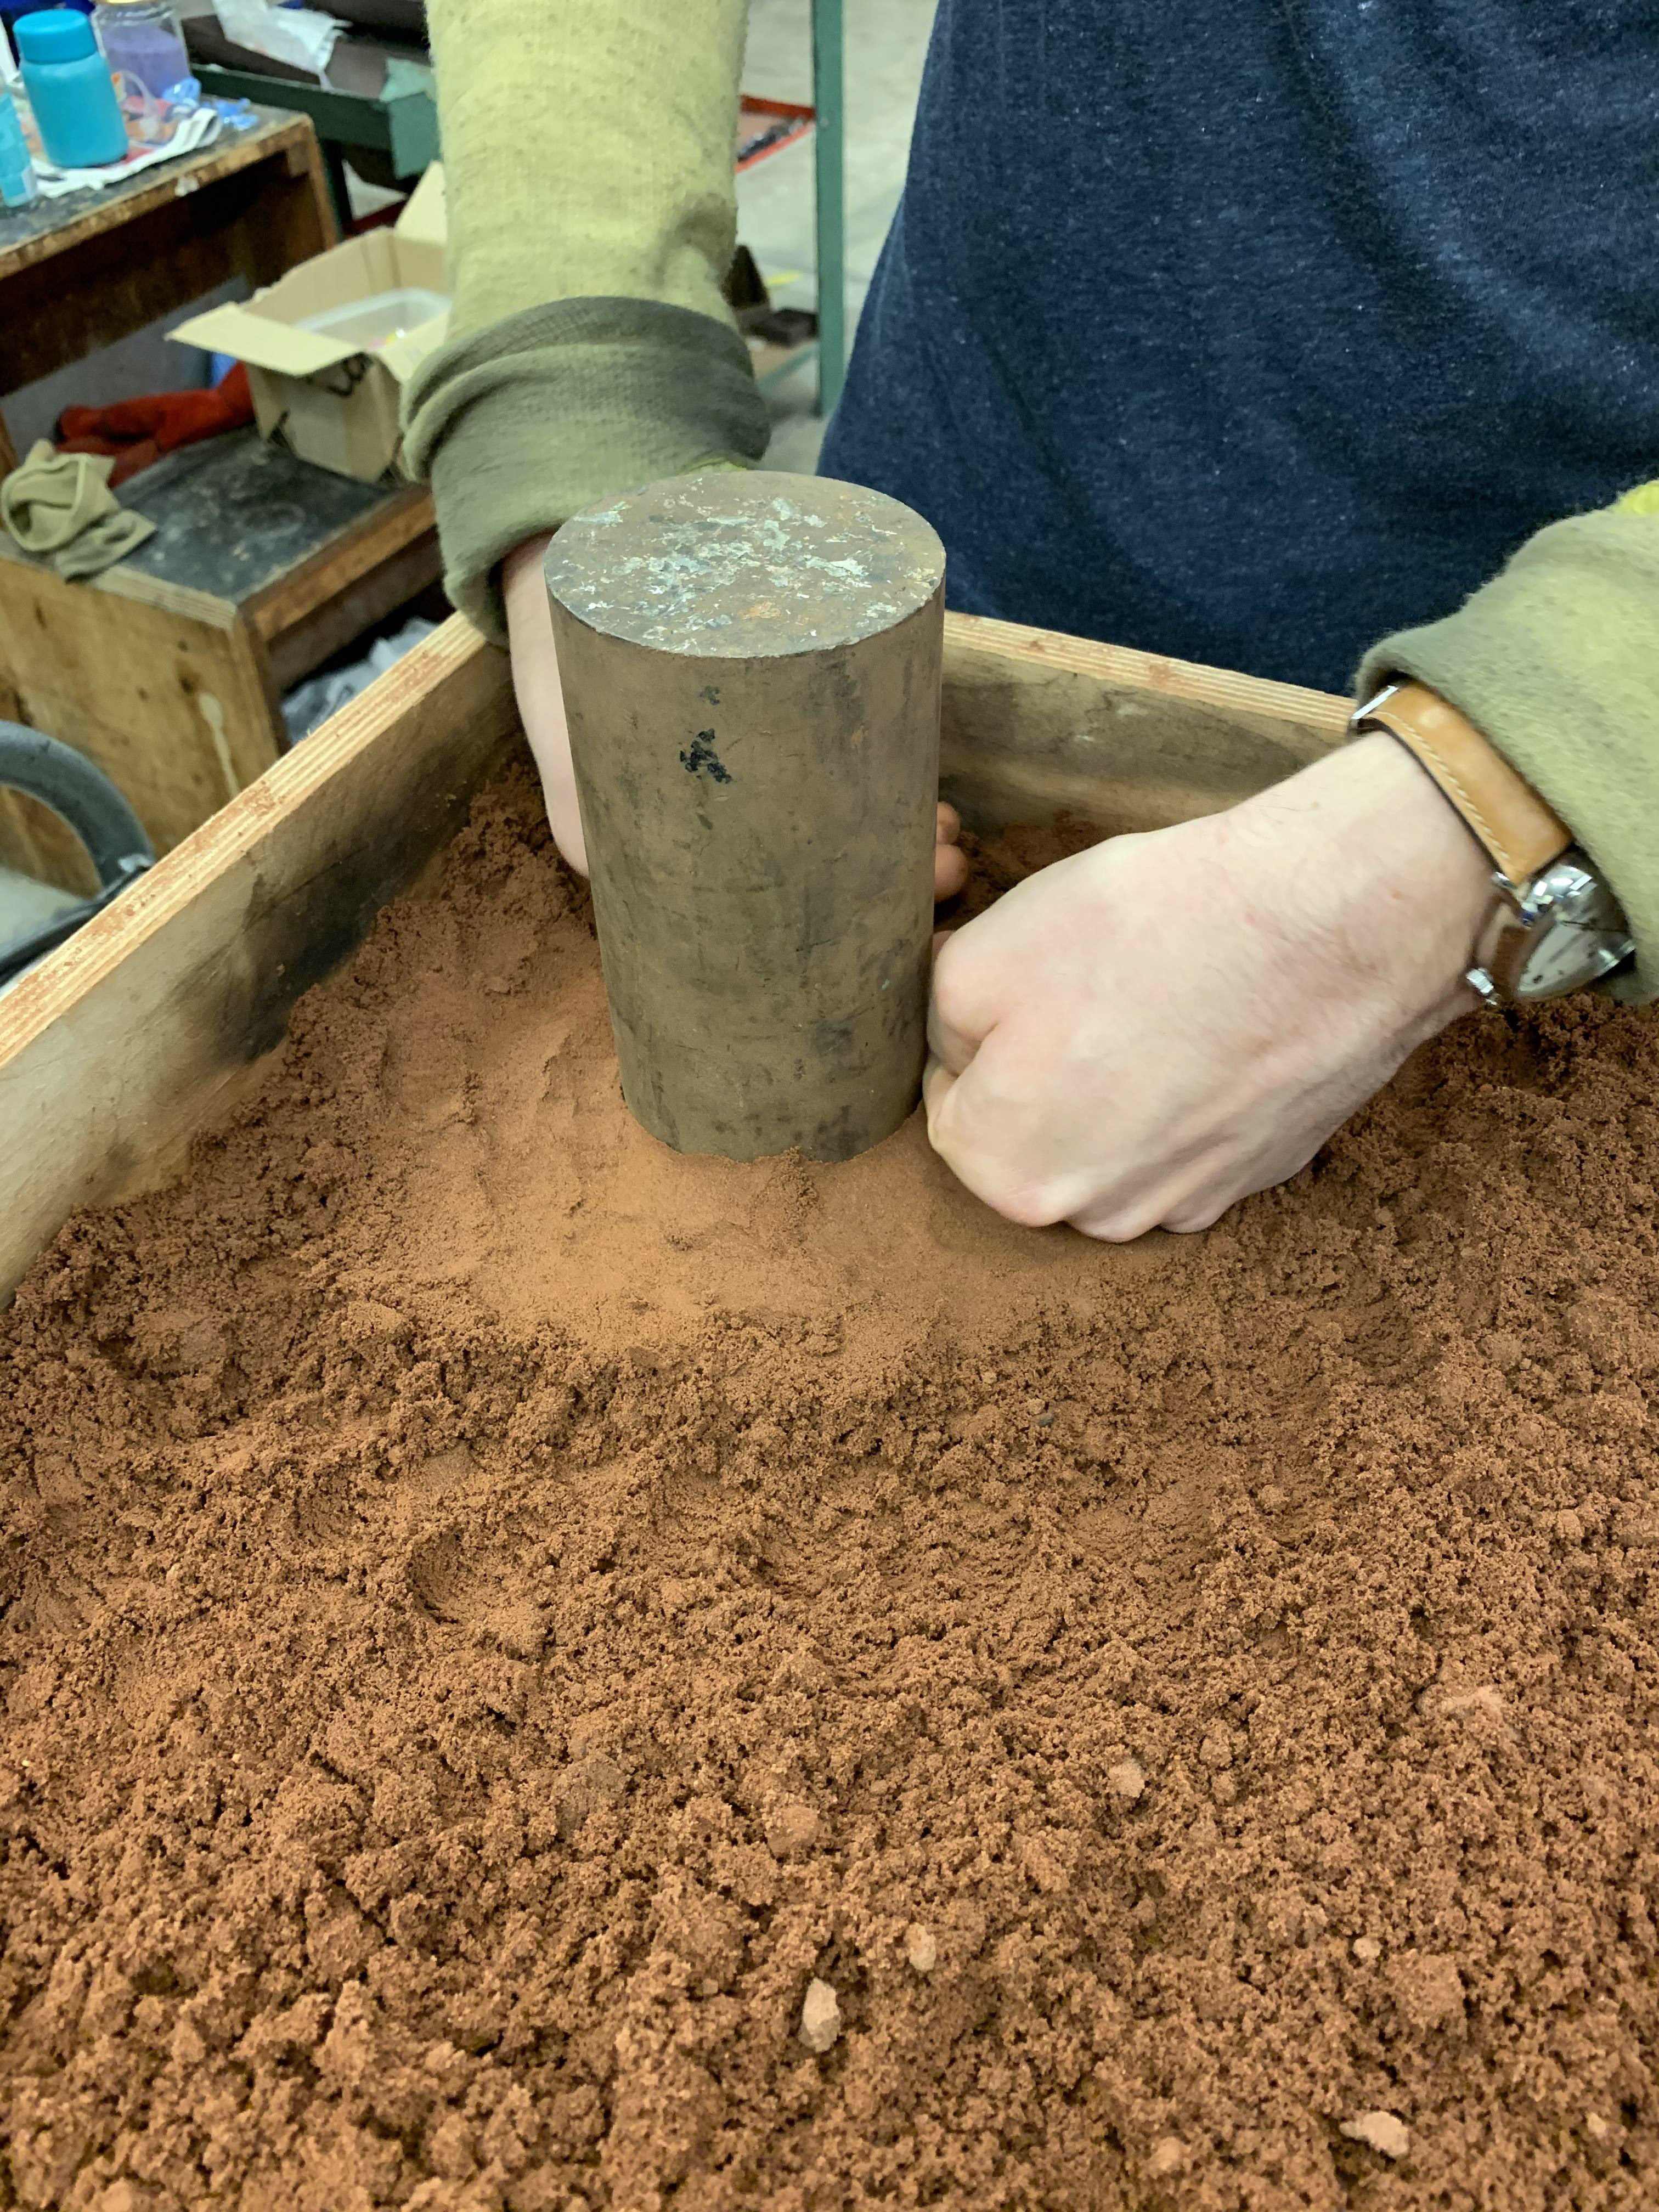
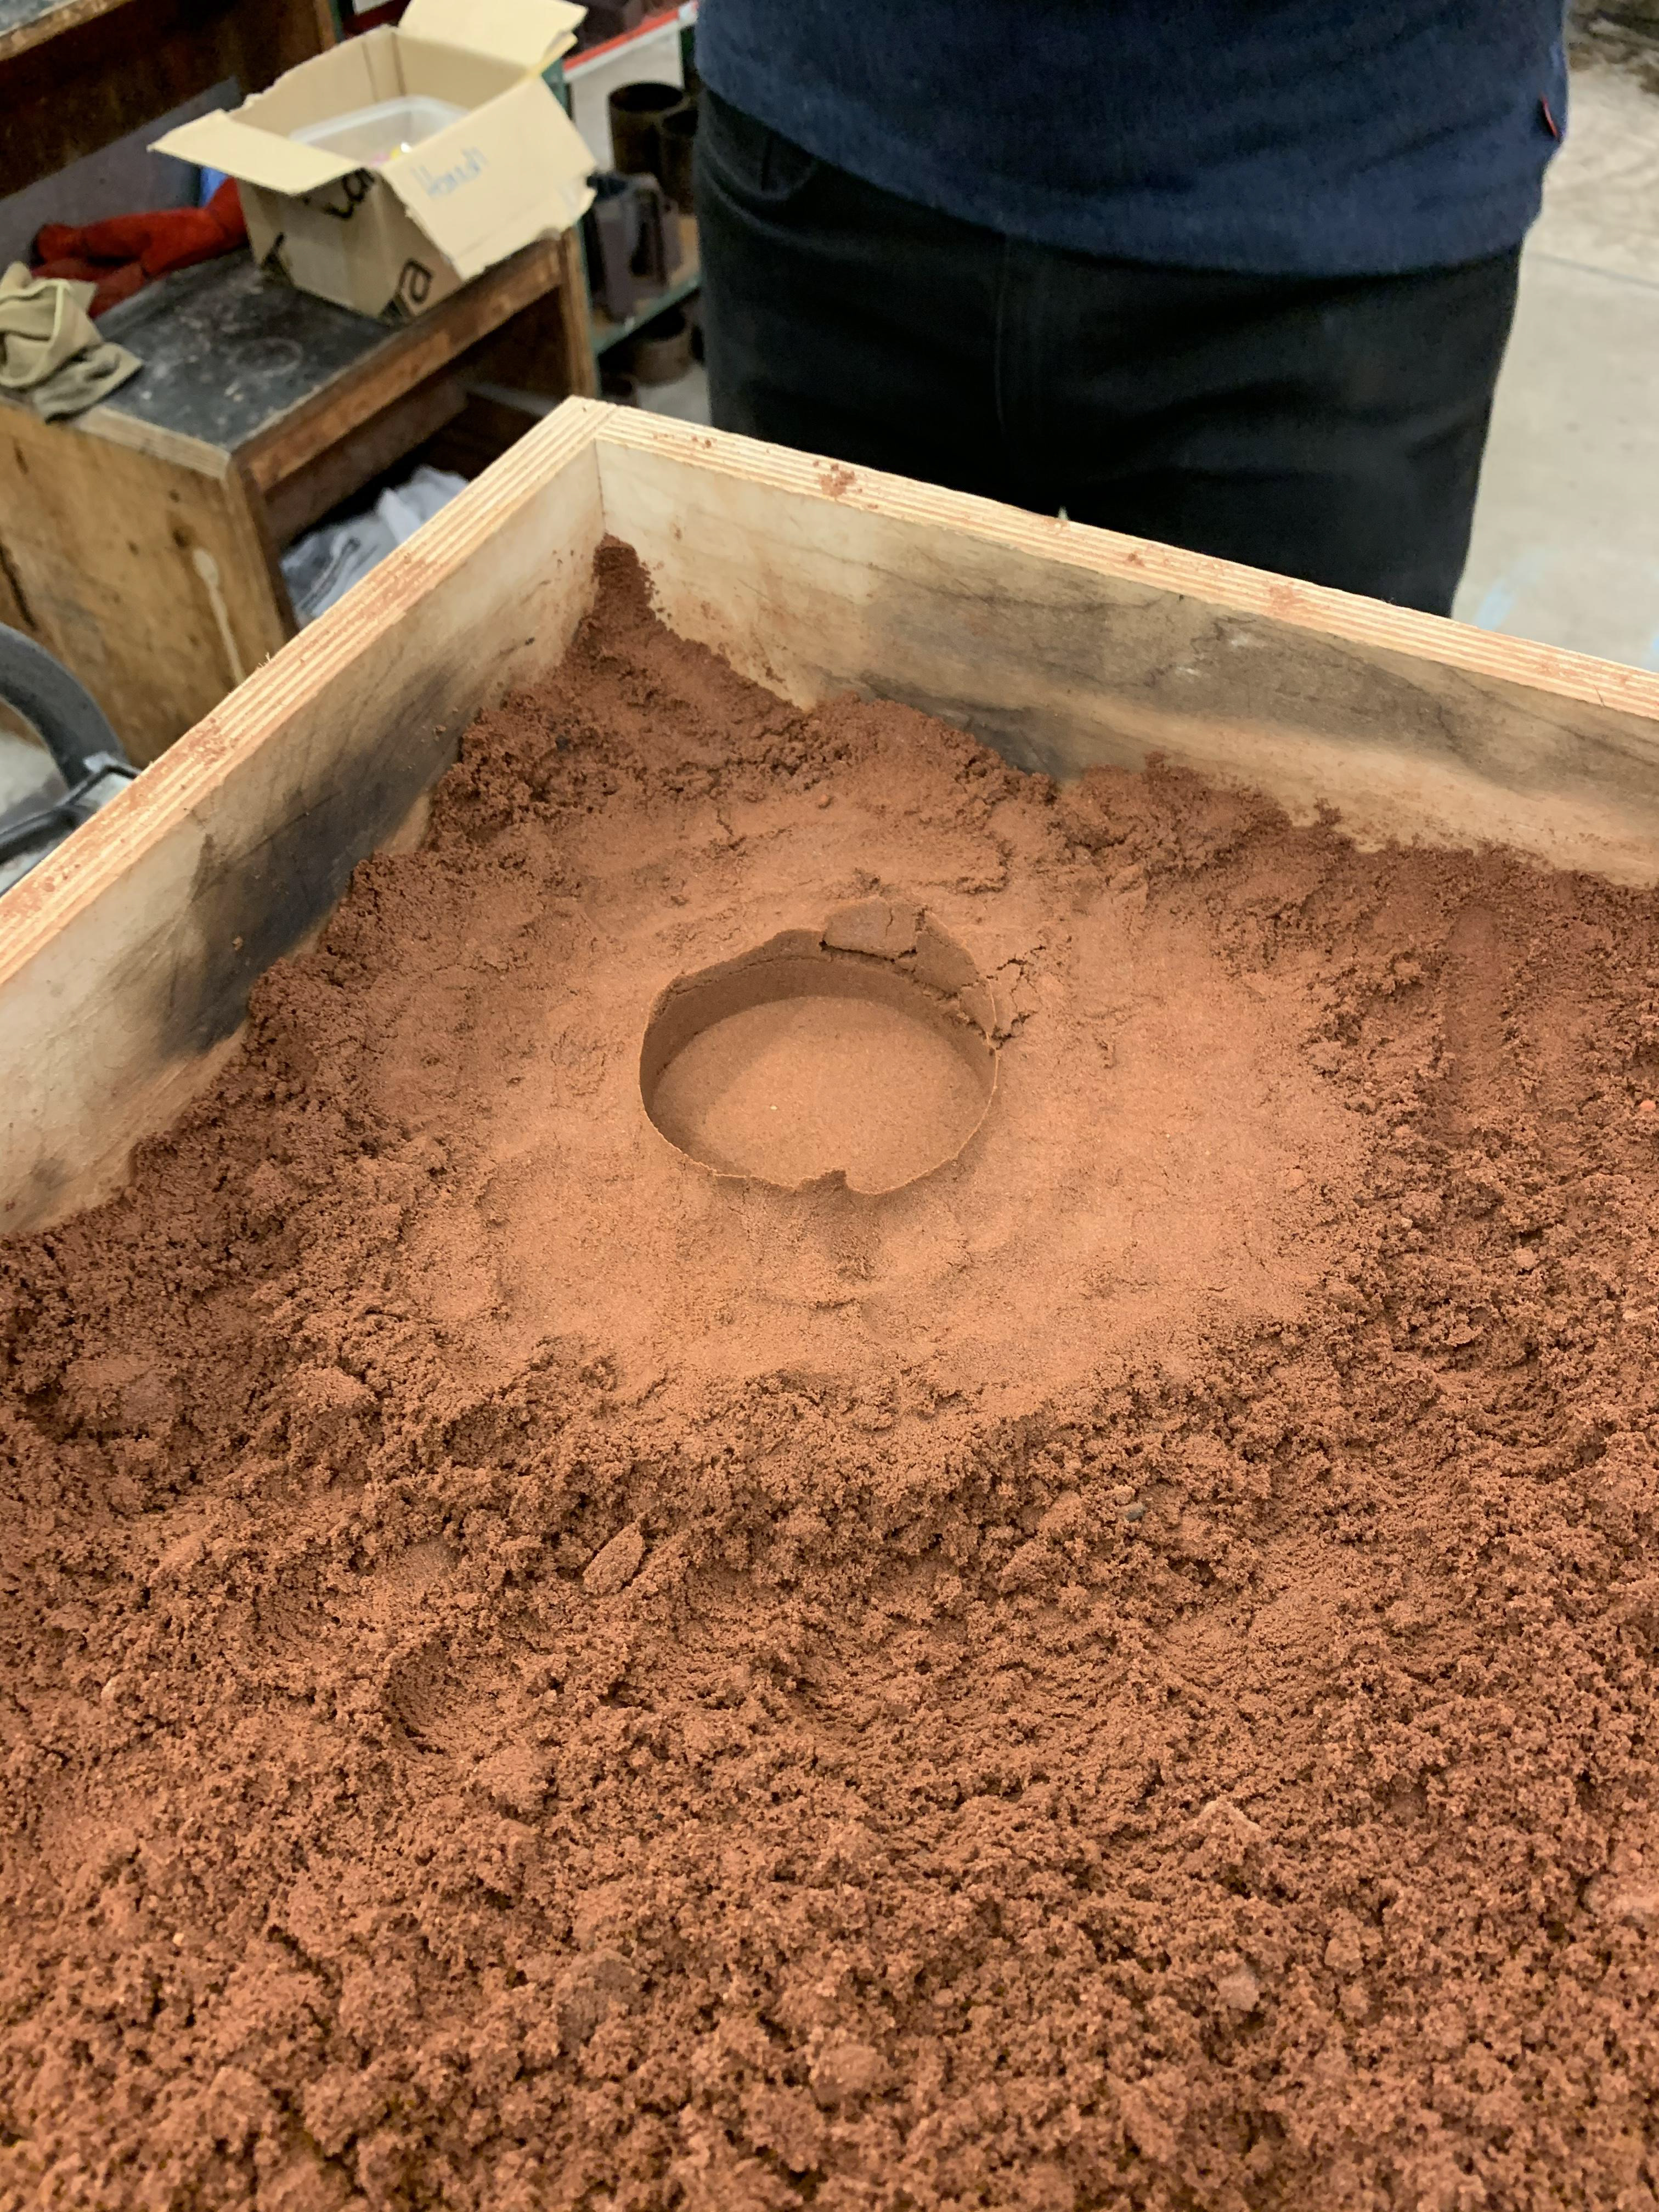
THE PROCESS OF SAND CASTING IS A forming technique in which molten glass is poured into a mould of compacted sand. FIRSTLY WE HAVE TO PREPare THE SAND, BY BREAKING LARGE CHUNKS UP AND MAKING THE SAND VERY FINE AND THE PERFECT consistency WITH WATER WHERE IT HOLDS ITS SHAPE. YOU THEN SELECT YOUR OBJECTS AND create an impression in the sand as negative space left behind. YOU CANT USE CERTAIN OBJECTS THAT will create ‘undercuts’ that disturb the mouLDed sand when being removed.
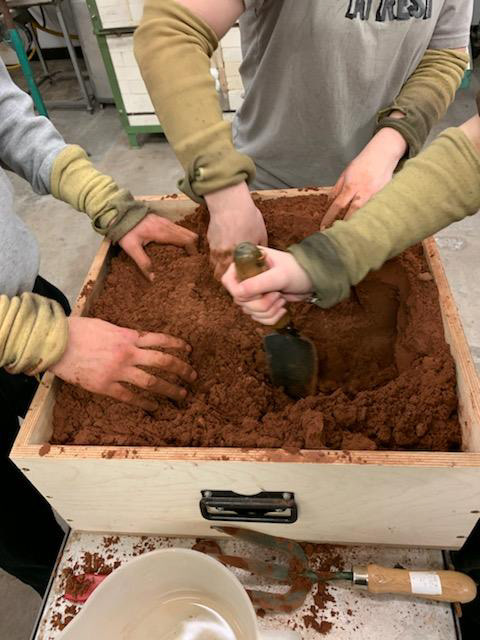
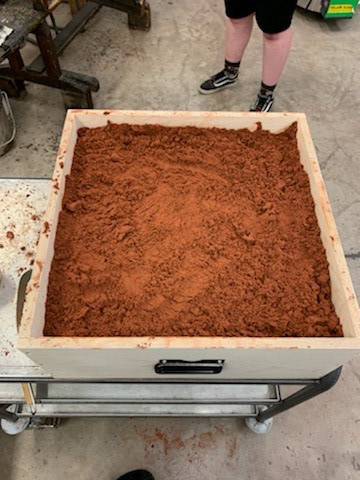
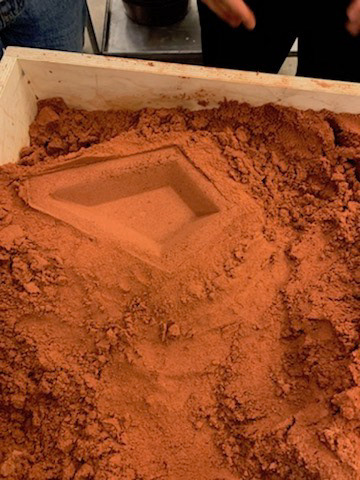
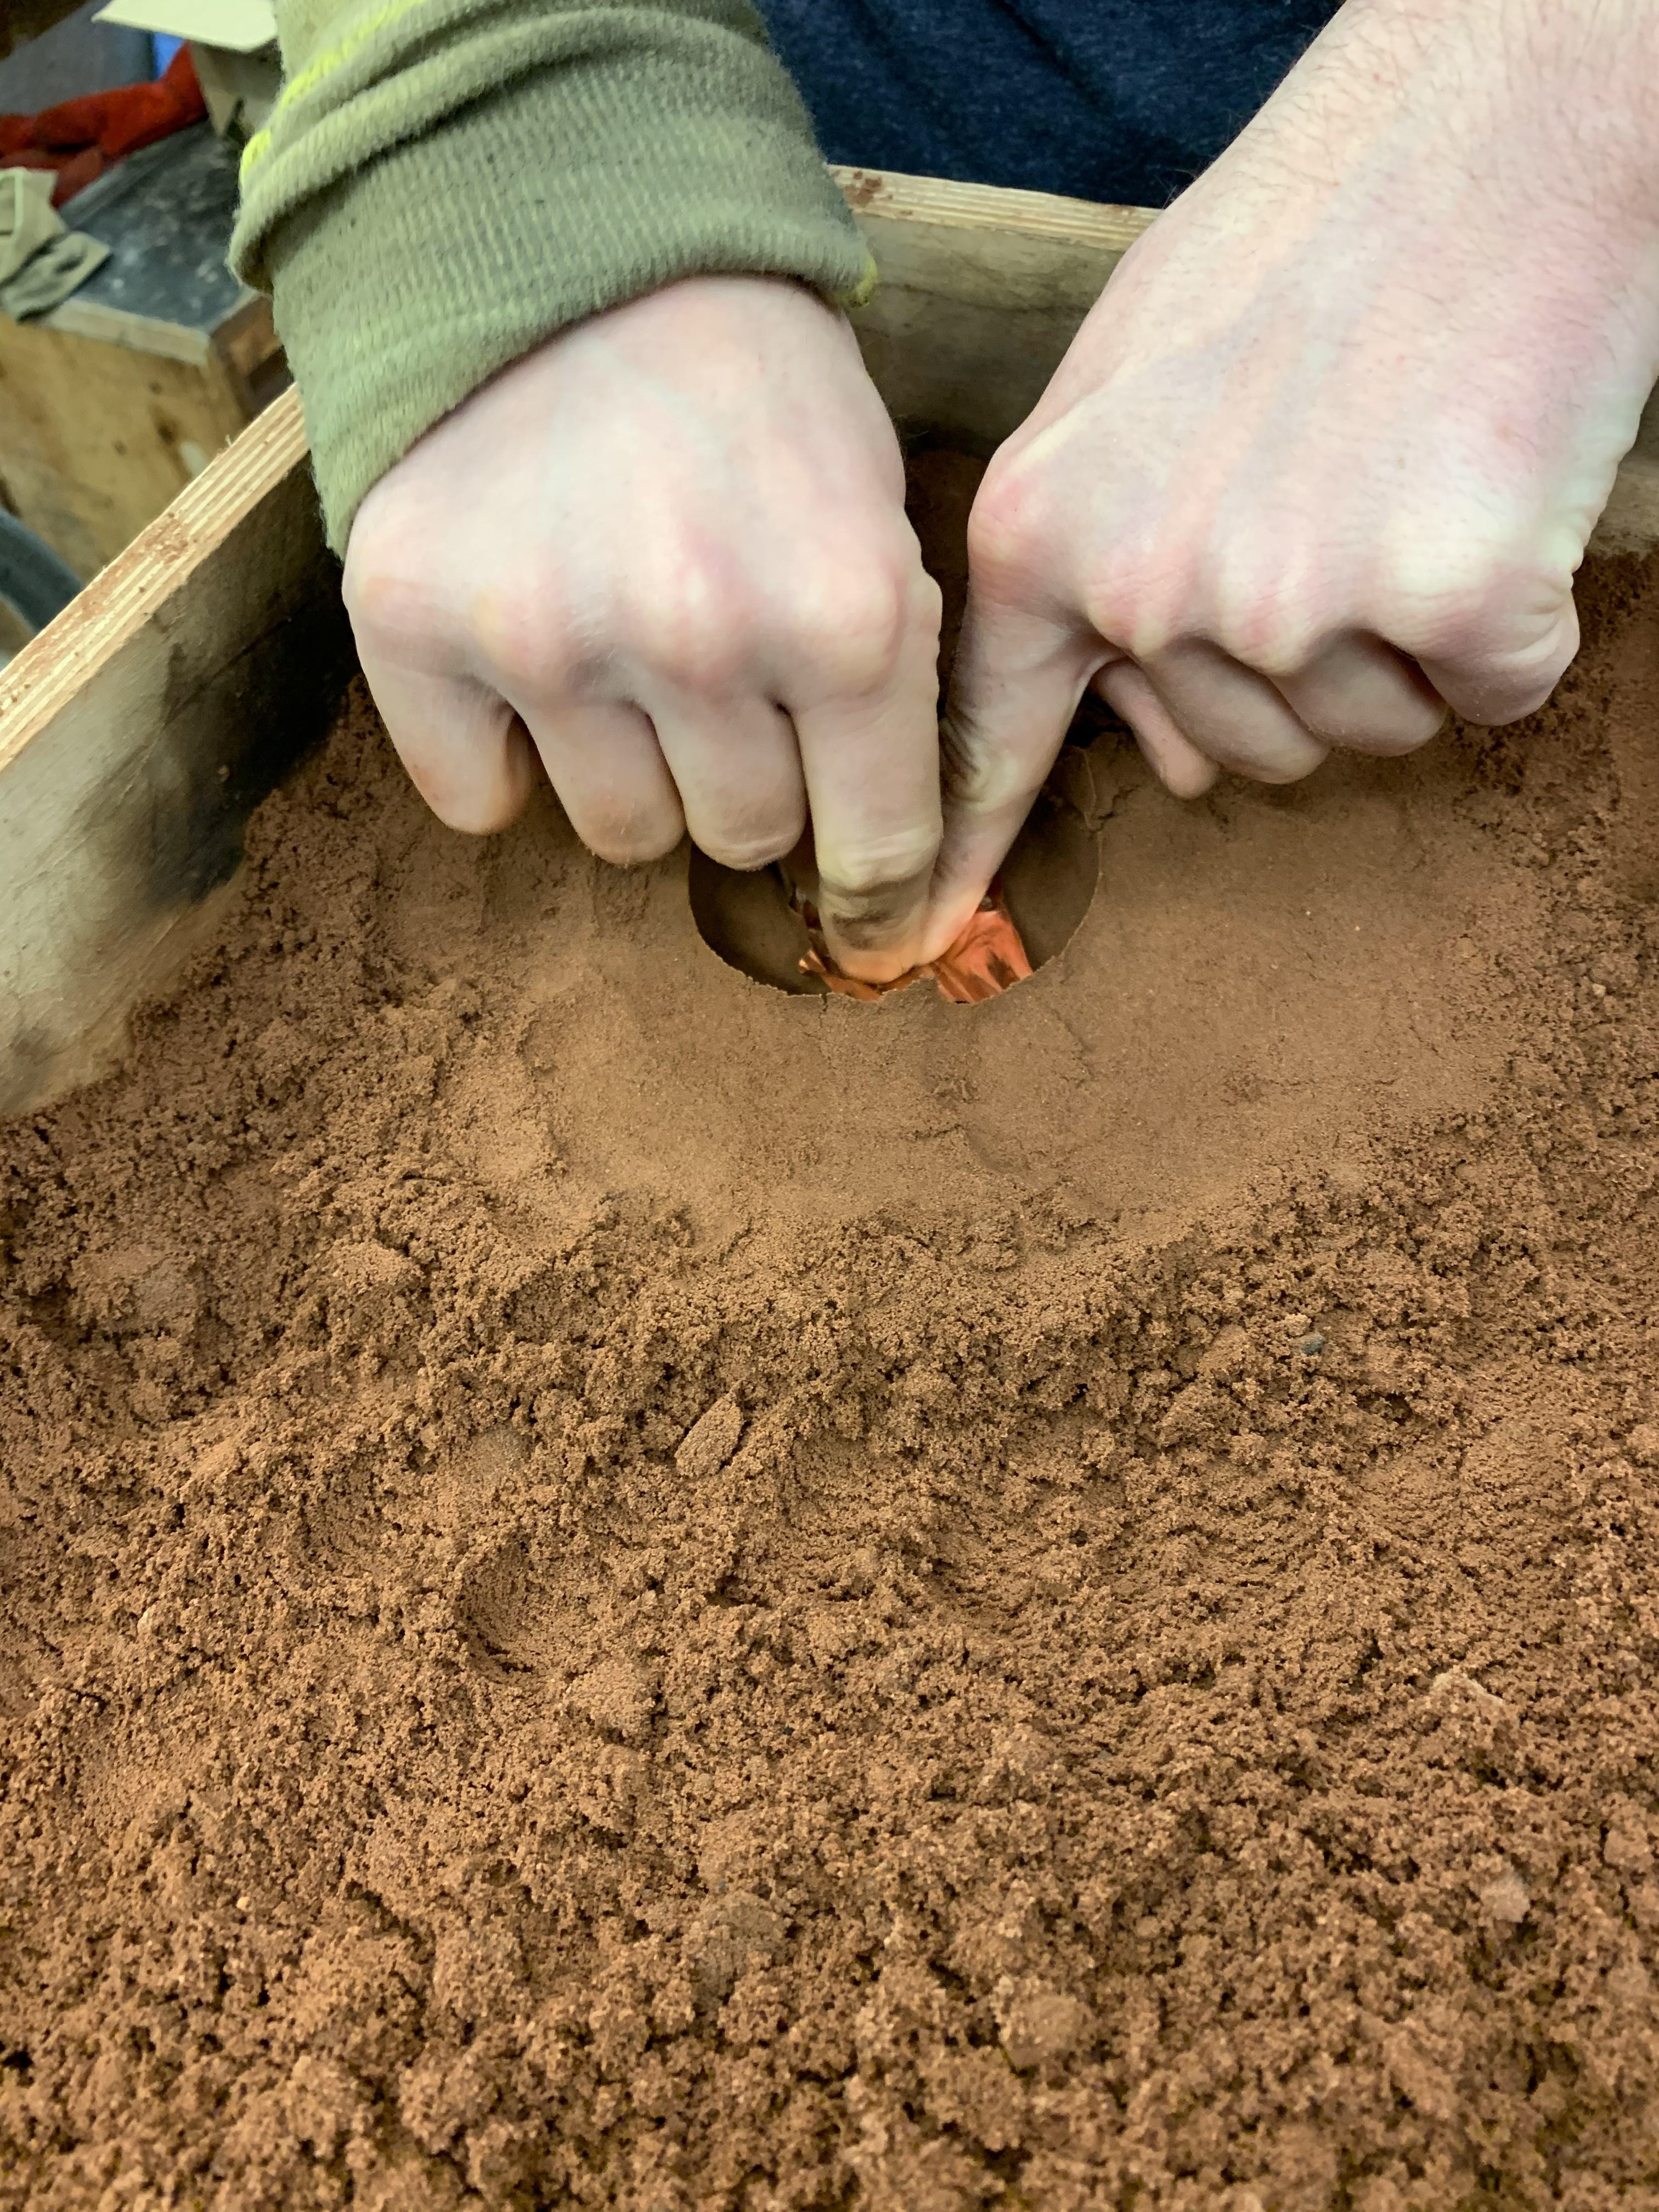
in these pictures our sand has been prepared and we 'fluffed' it up, therefor its easier to push a object into and takes its form better. any object can be used however if they have undercuts it will be hard to remove the object once you have taken its impression. pushing the object into the sand ands pushing it firmly and compacting the sand in the area will hold the best mould. once our mould is taken we remove the object leaving us with just the impression of the sand, we then spay the area with sugar water, we do this as the glucose acts as a protective layer therefore the sand doesn't make an impression on the glass. if you are looking for a fine bumpy texture then you don't have to spray your mould.
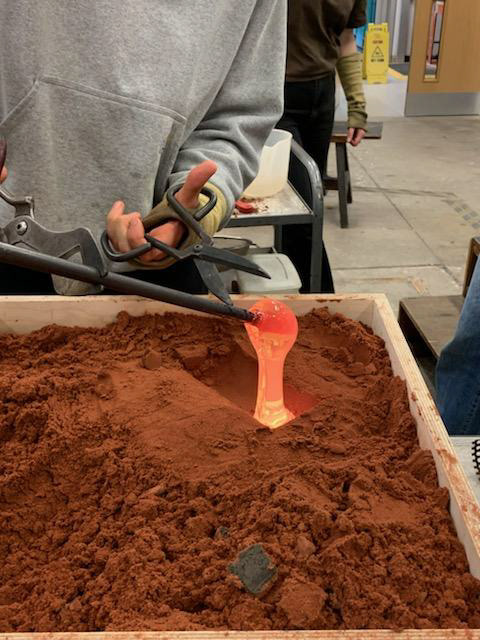
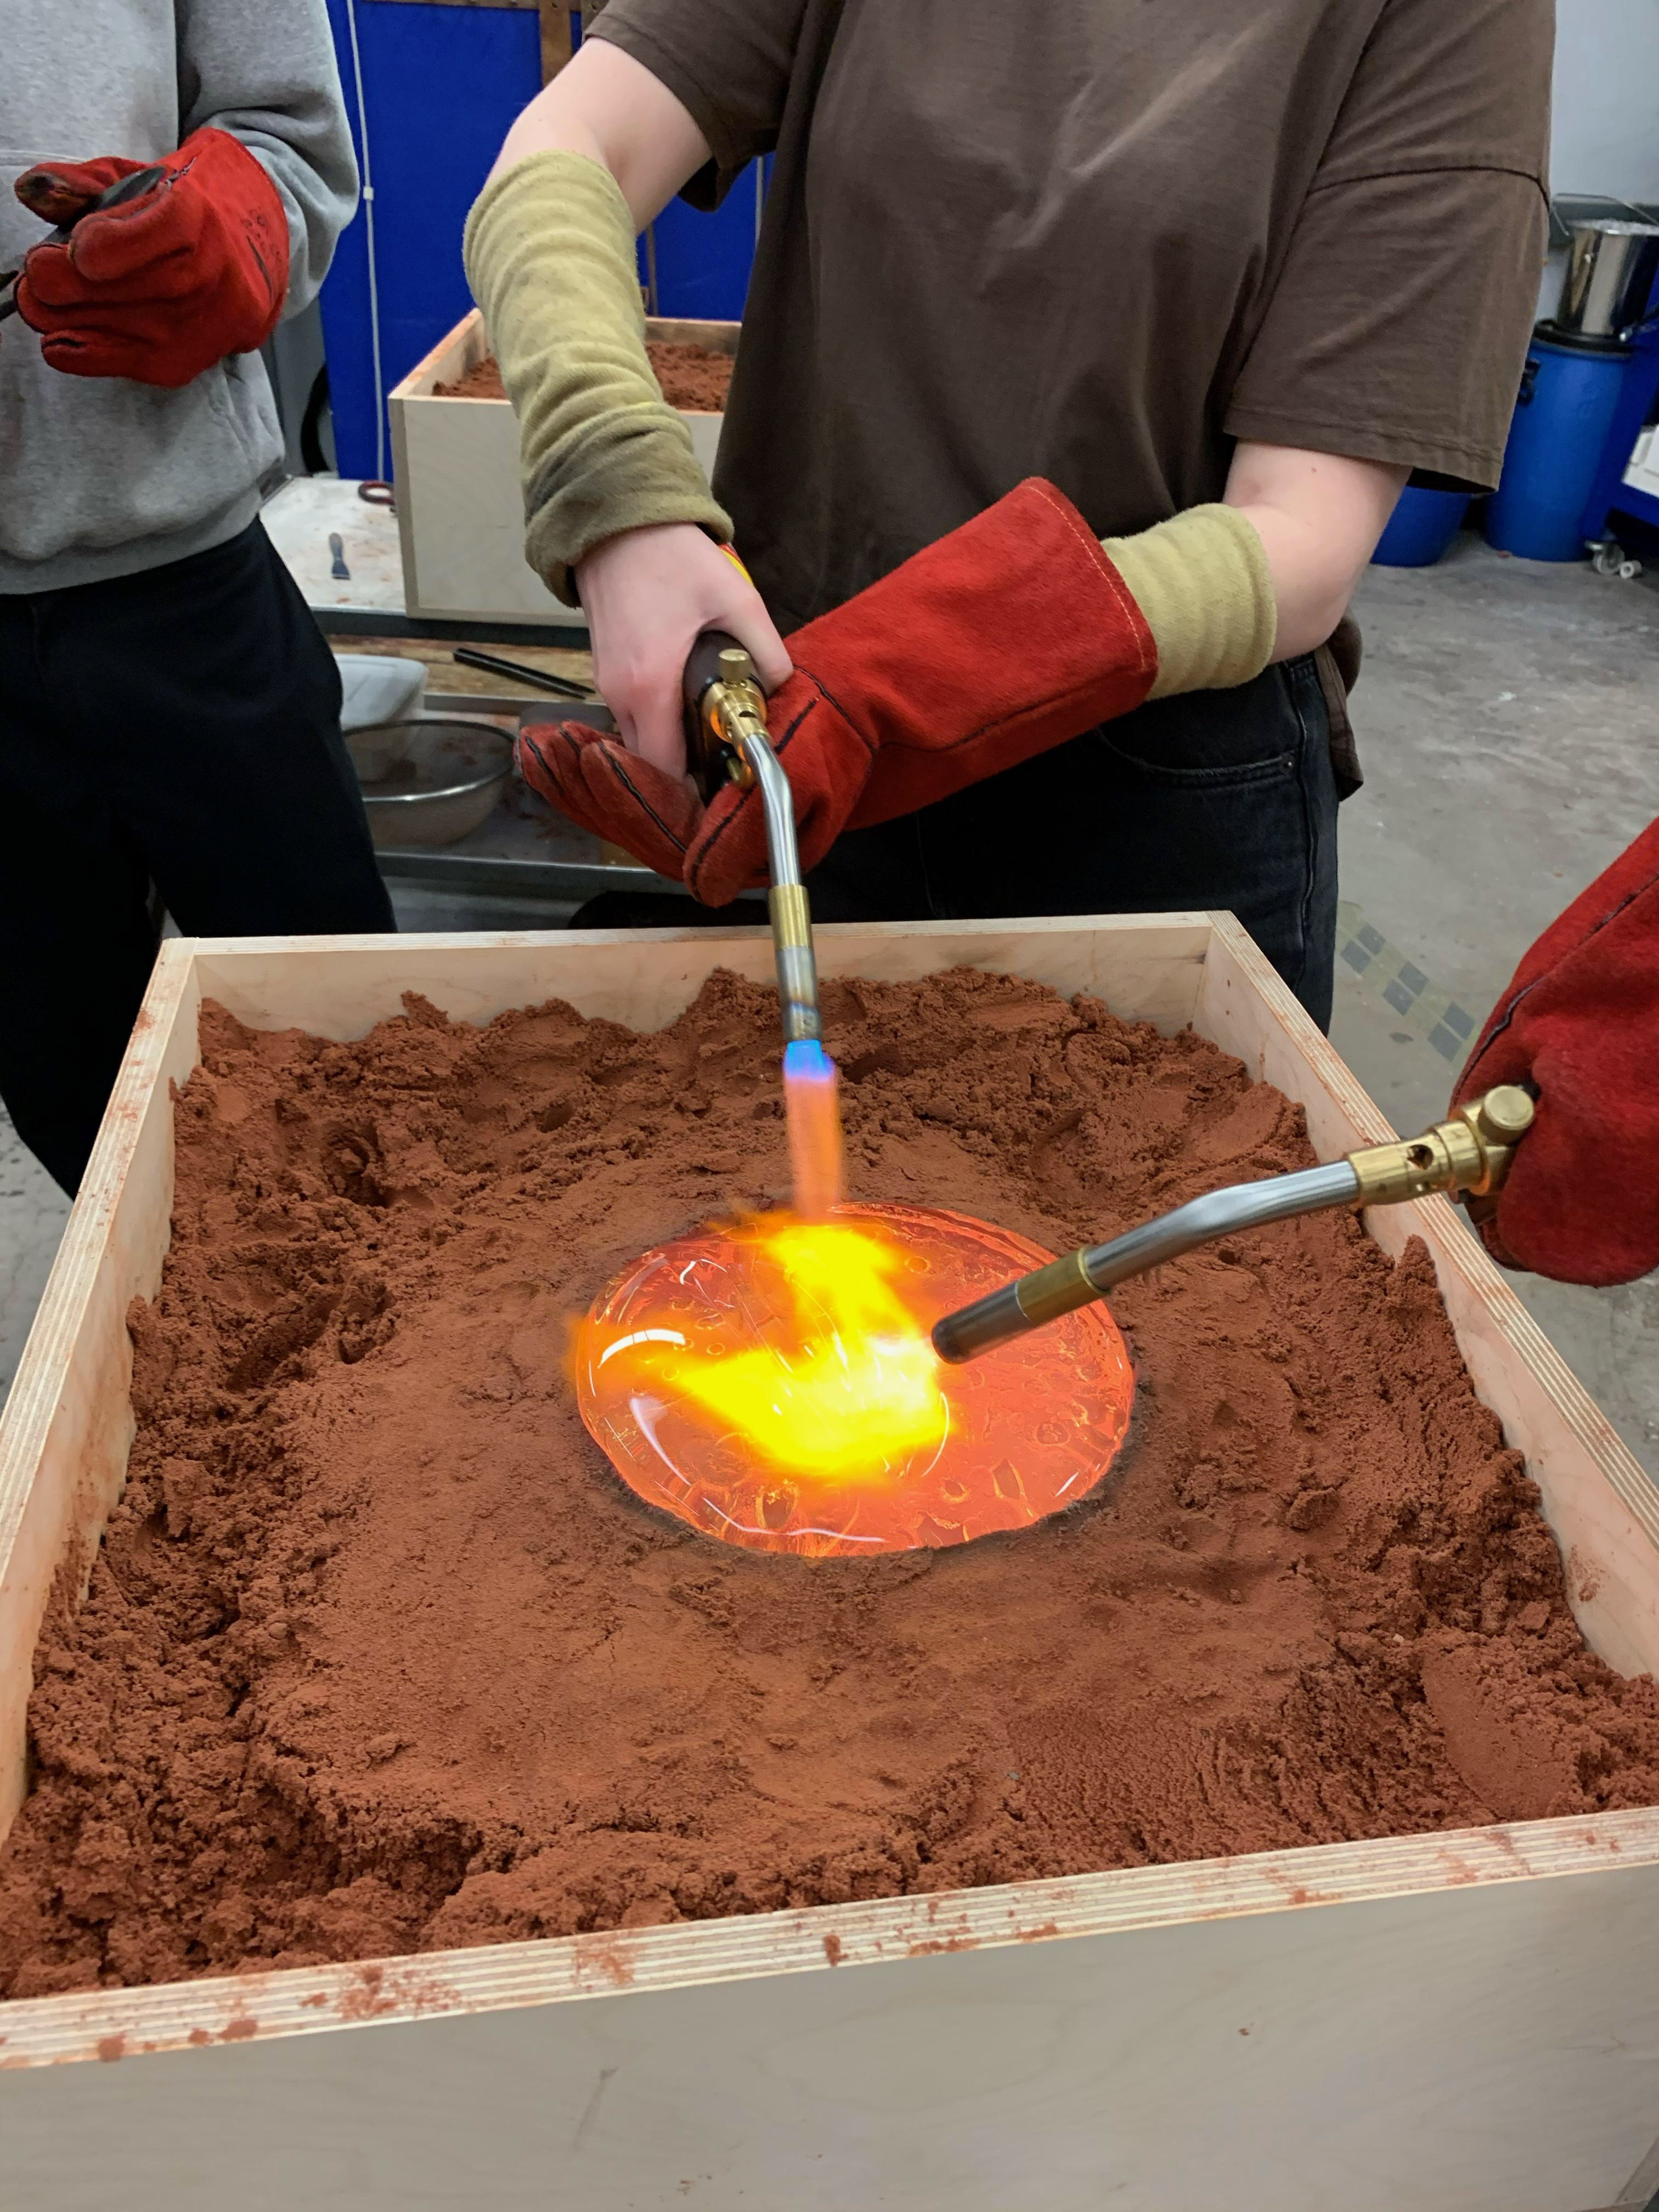
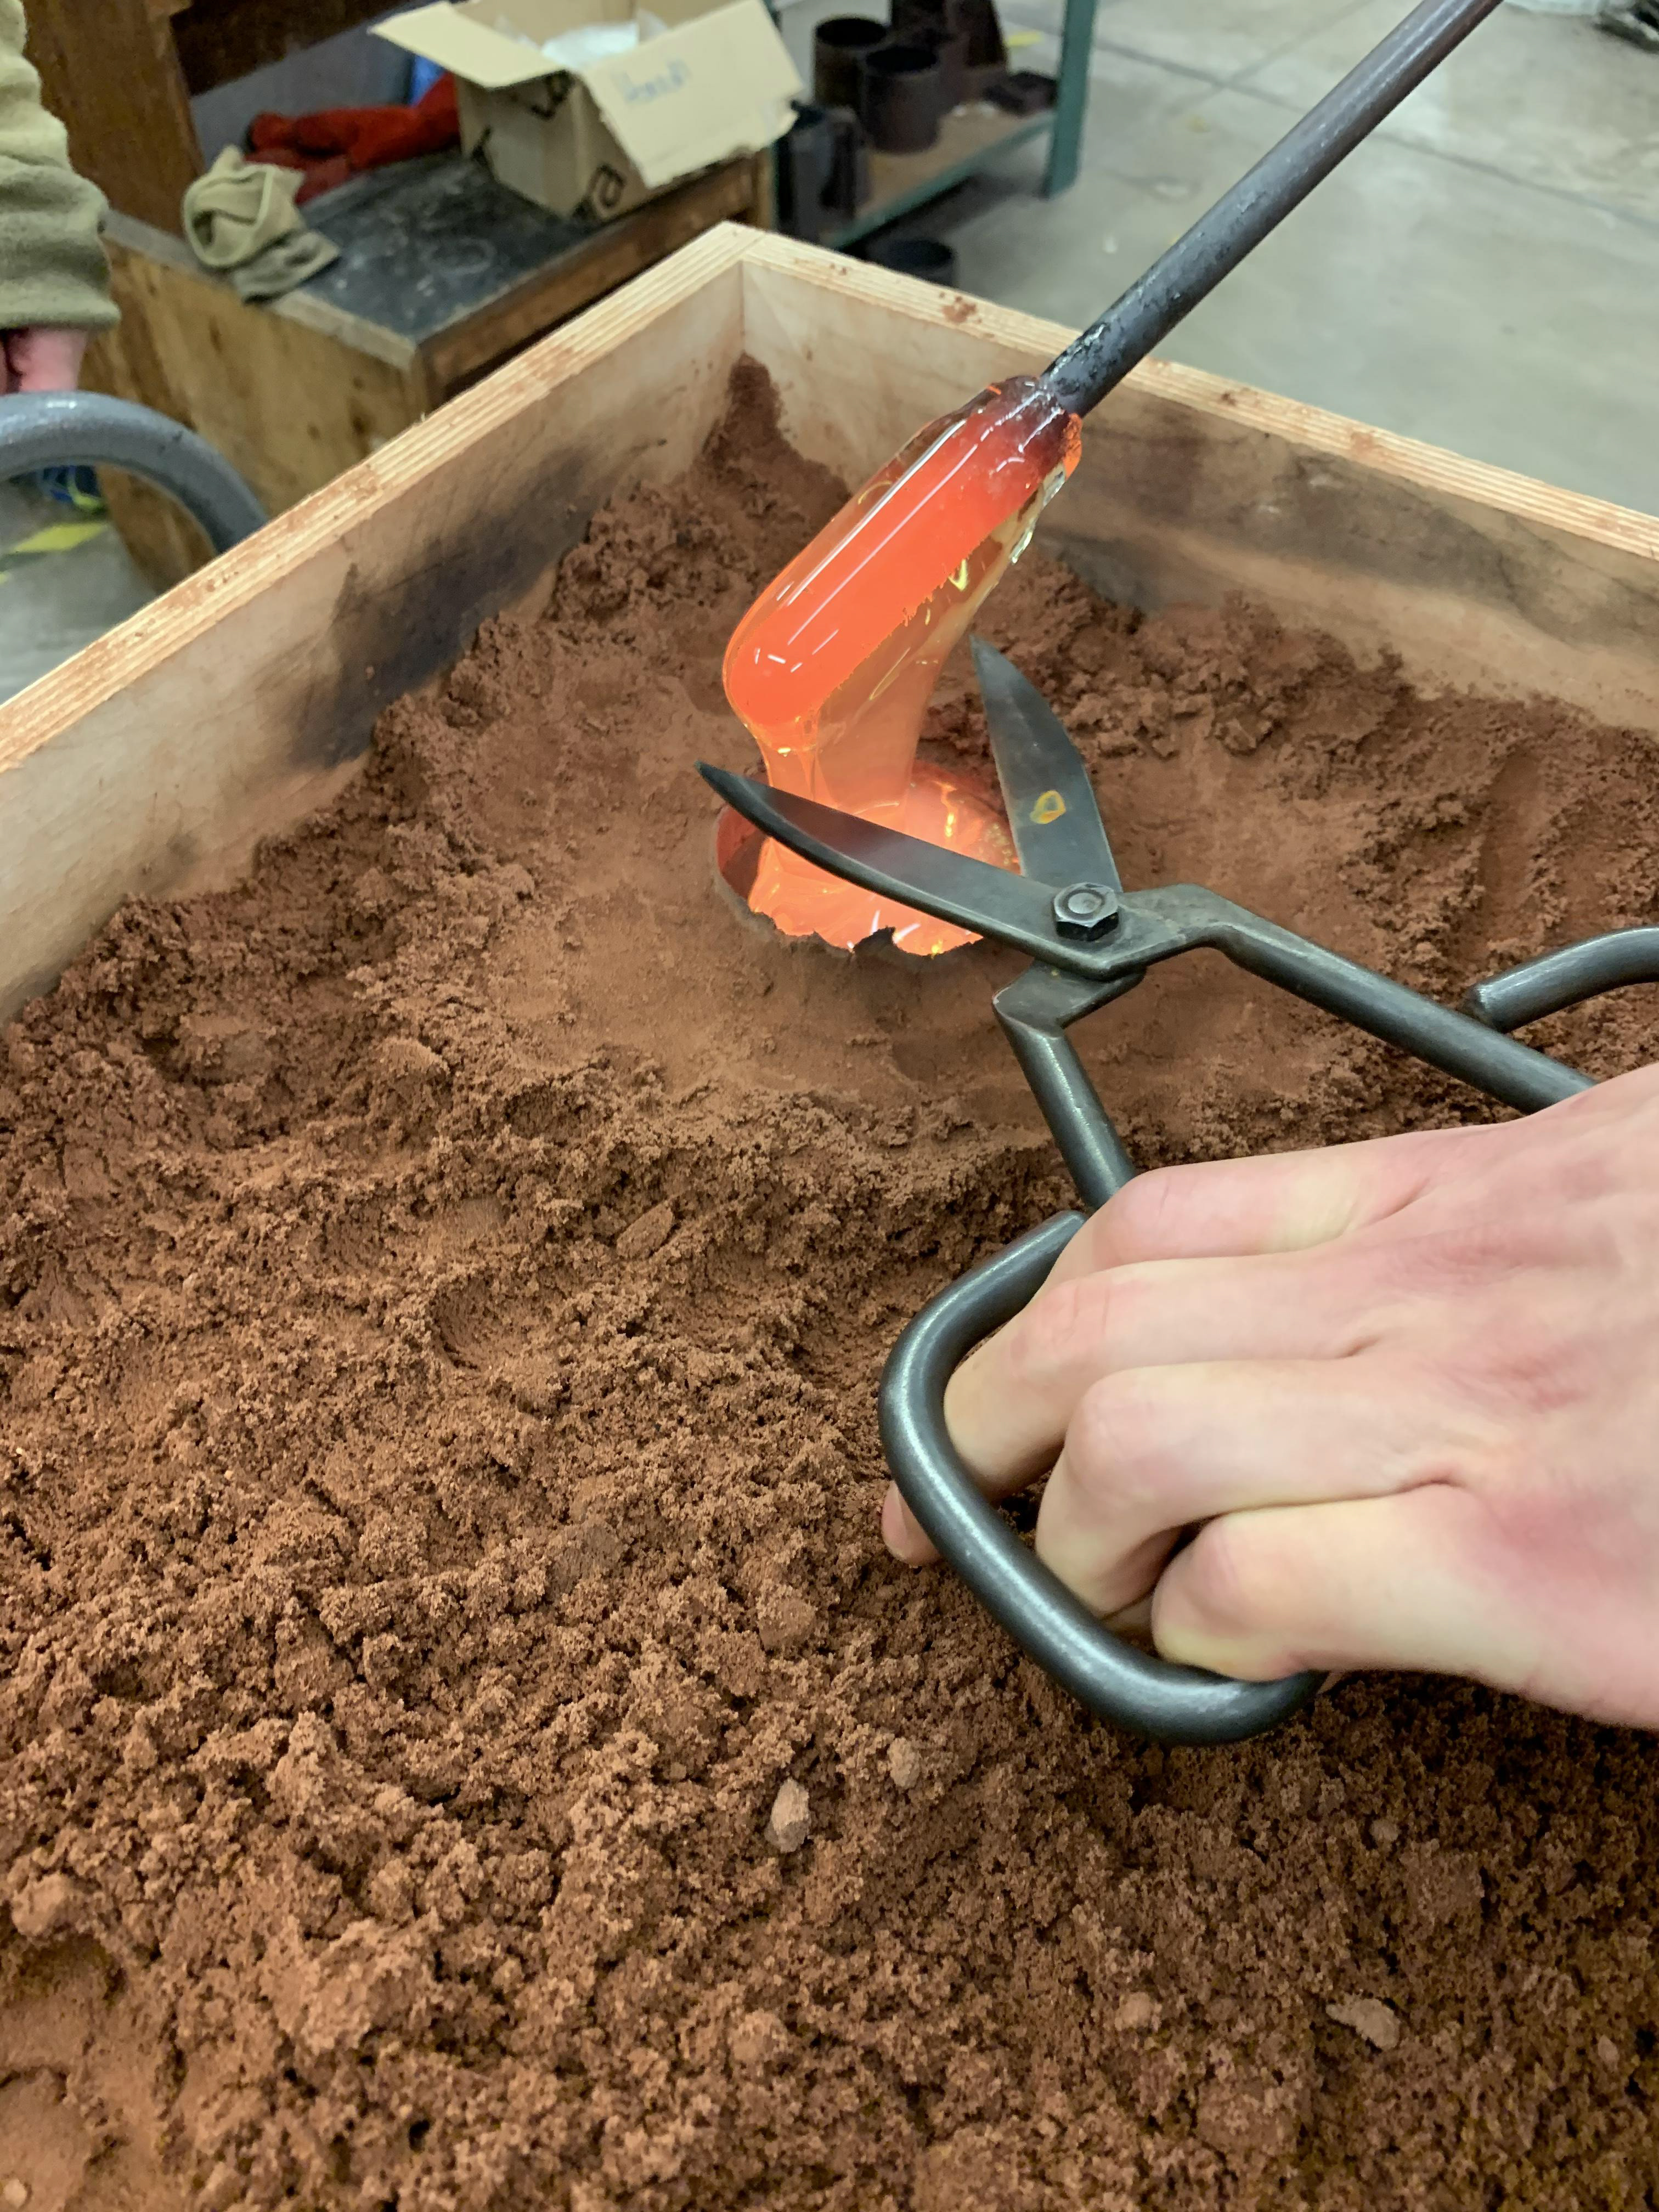
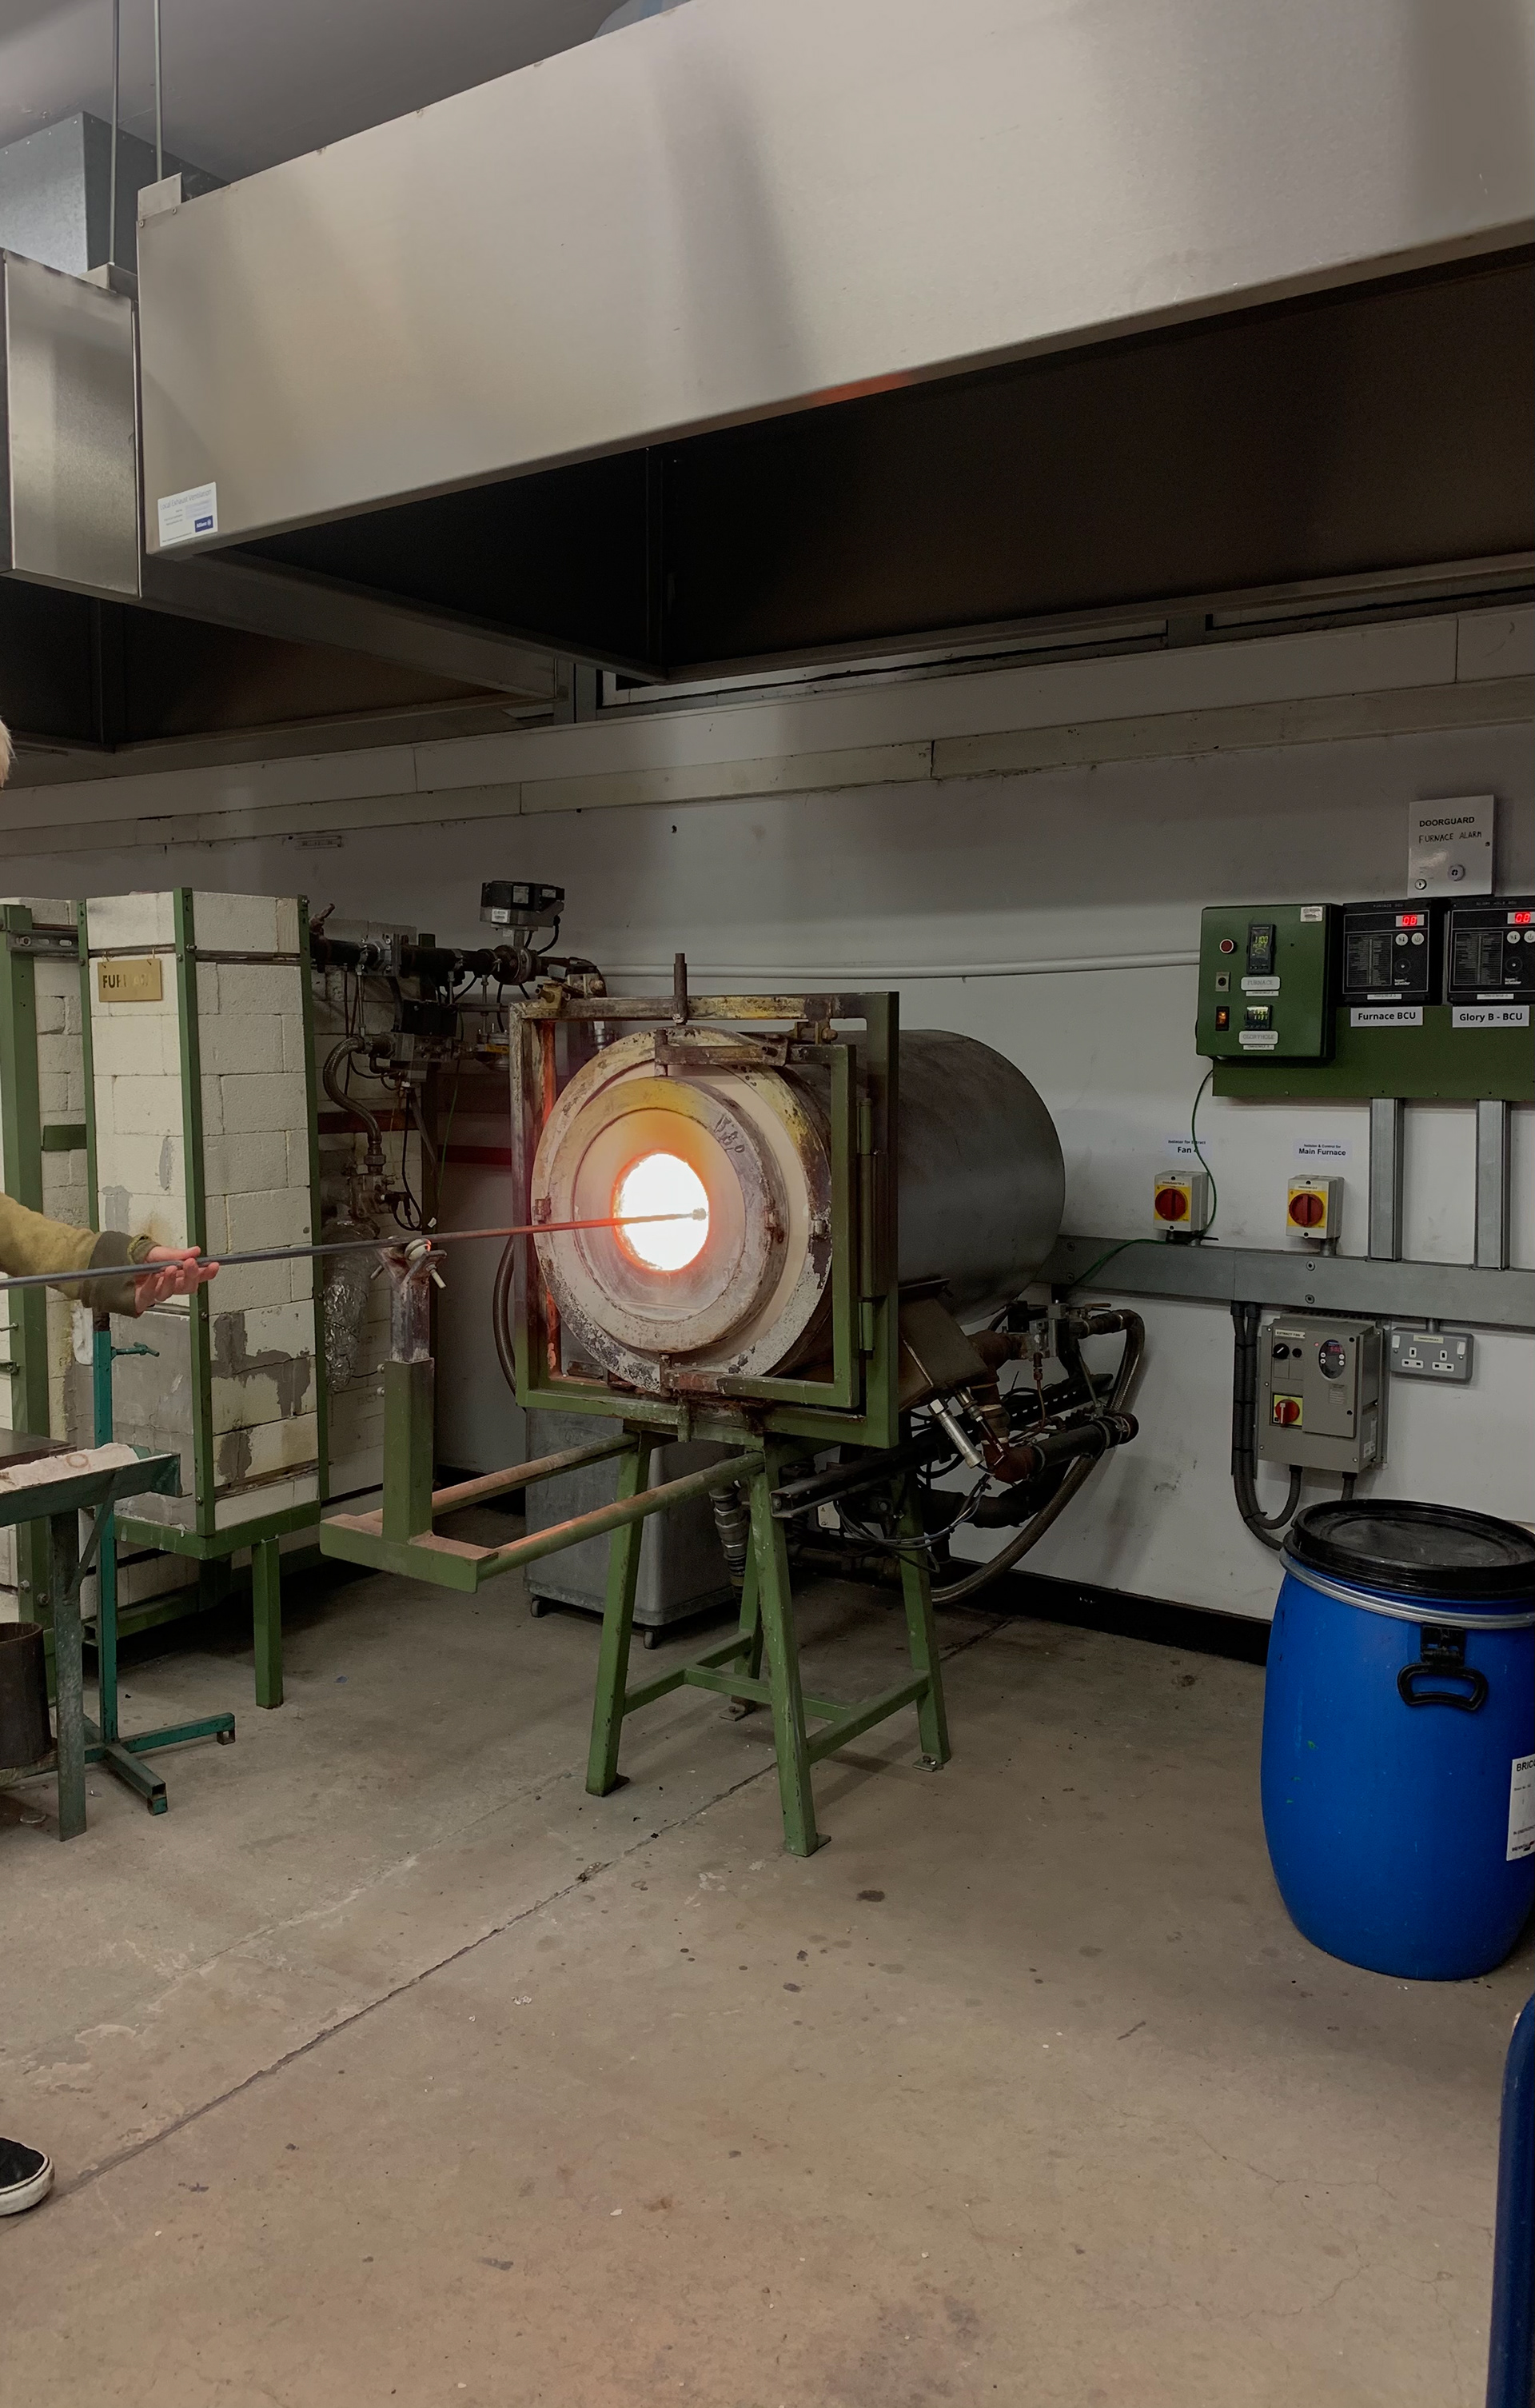
the next step is collecting your gather of molten glass, depending on the size many gathers may be needed. we then let the gather pour in the moulds we created as they are so hot they spread to the forms very easily. we cut the gather off and heat the glass with the blow torch consistently keeping it all the same temperature to avoid cracks. the blow torch allows you to do final manipulations to the glass like flattening the top and getting rid of the cut tail.
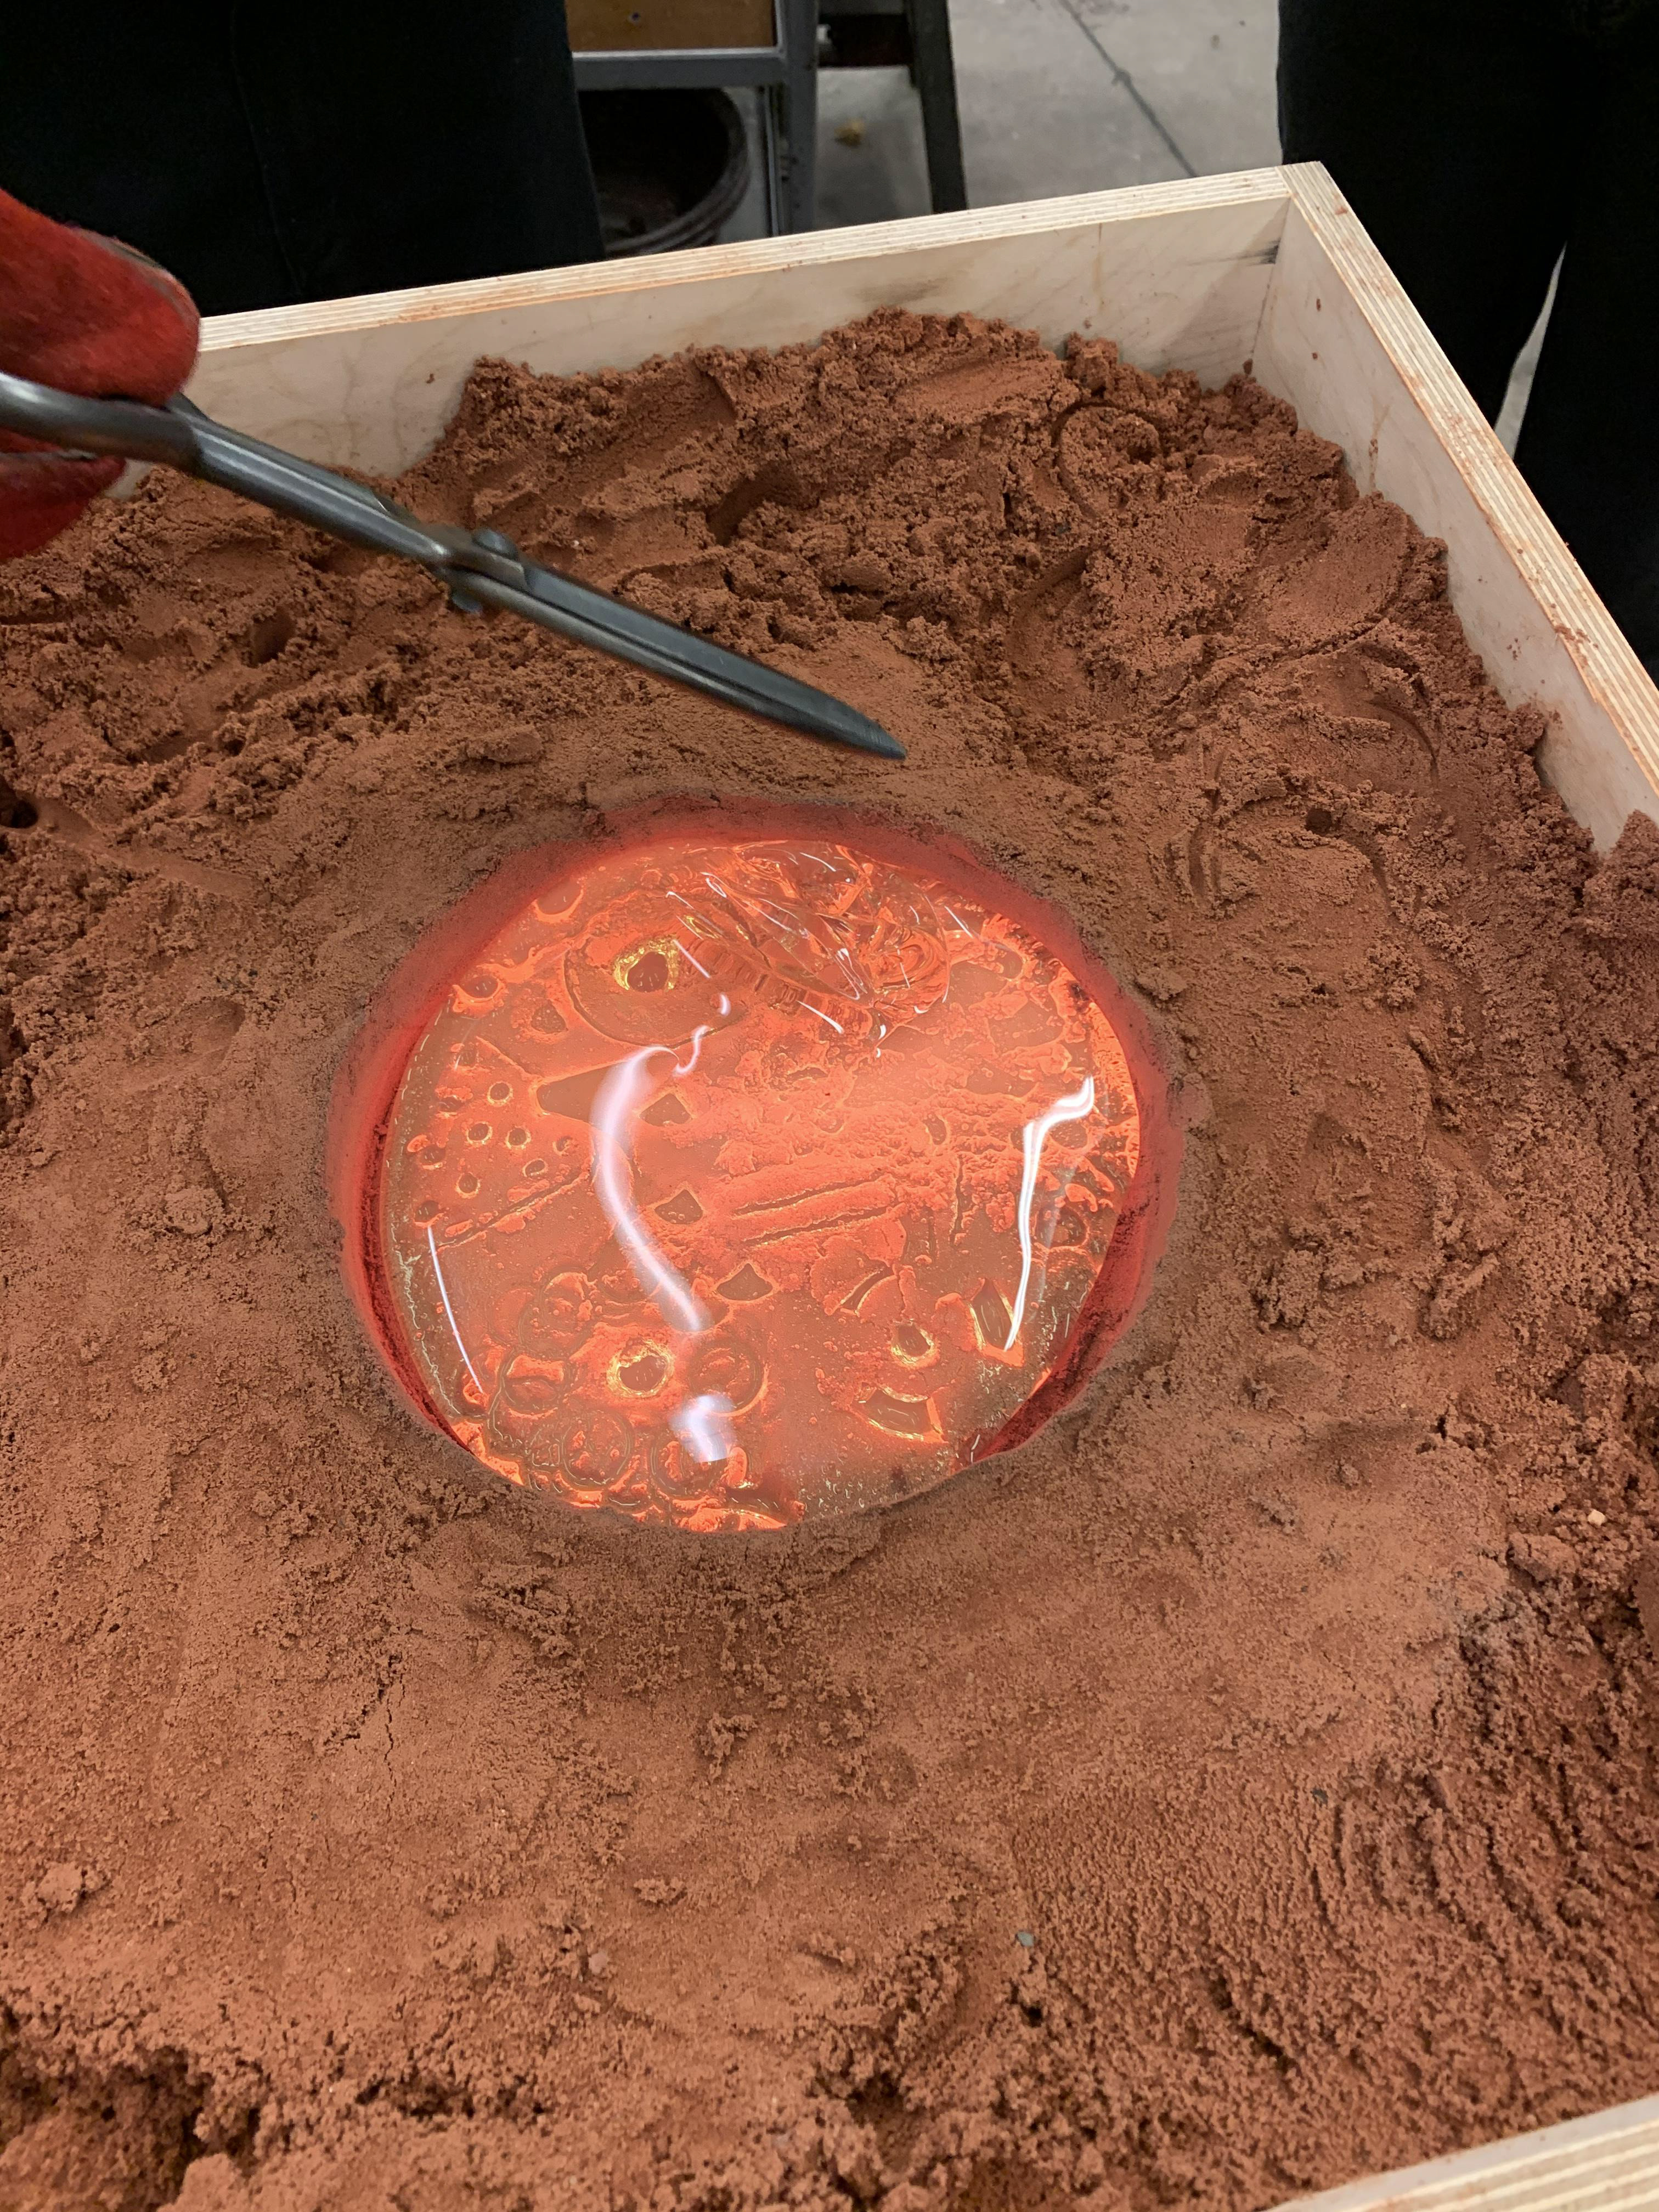
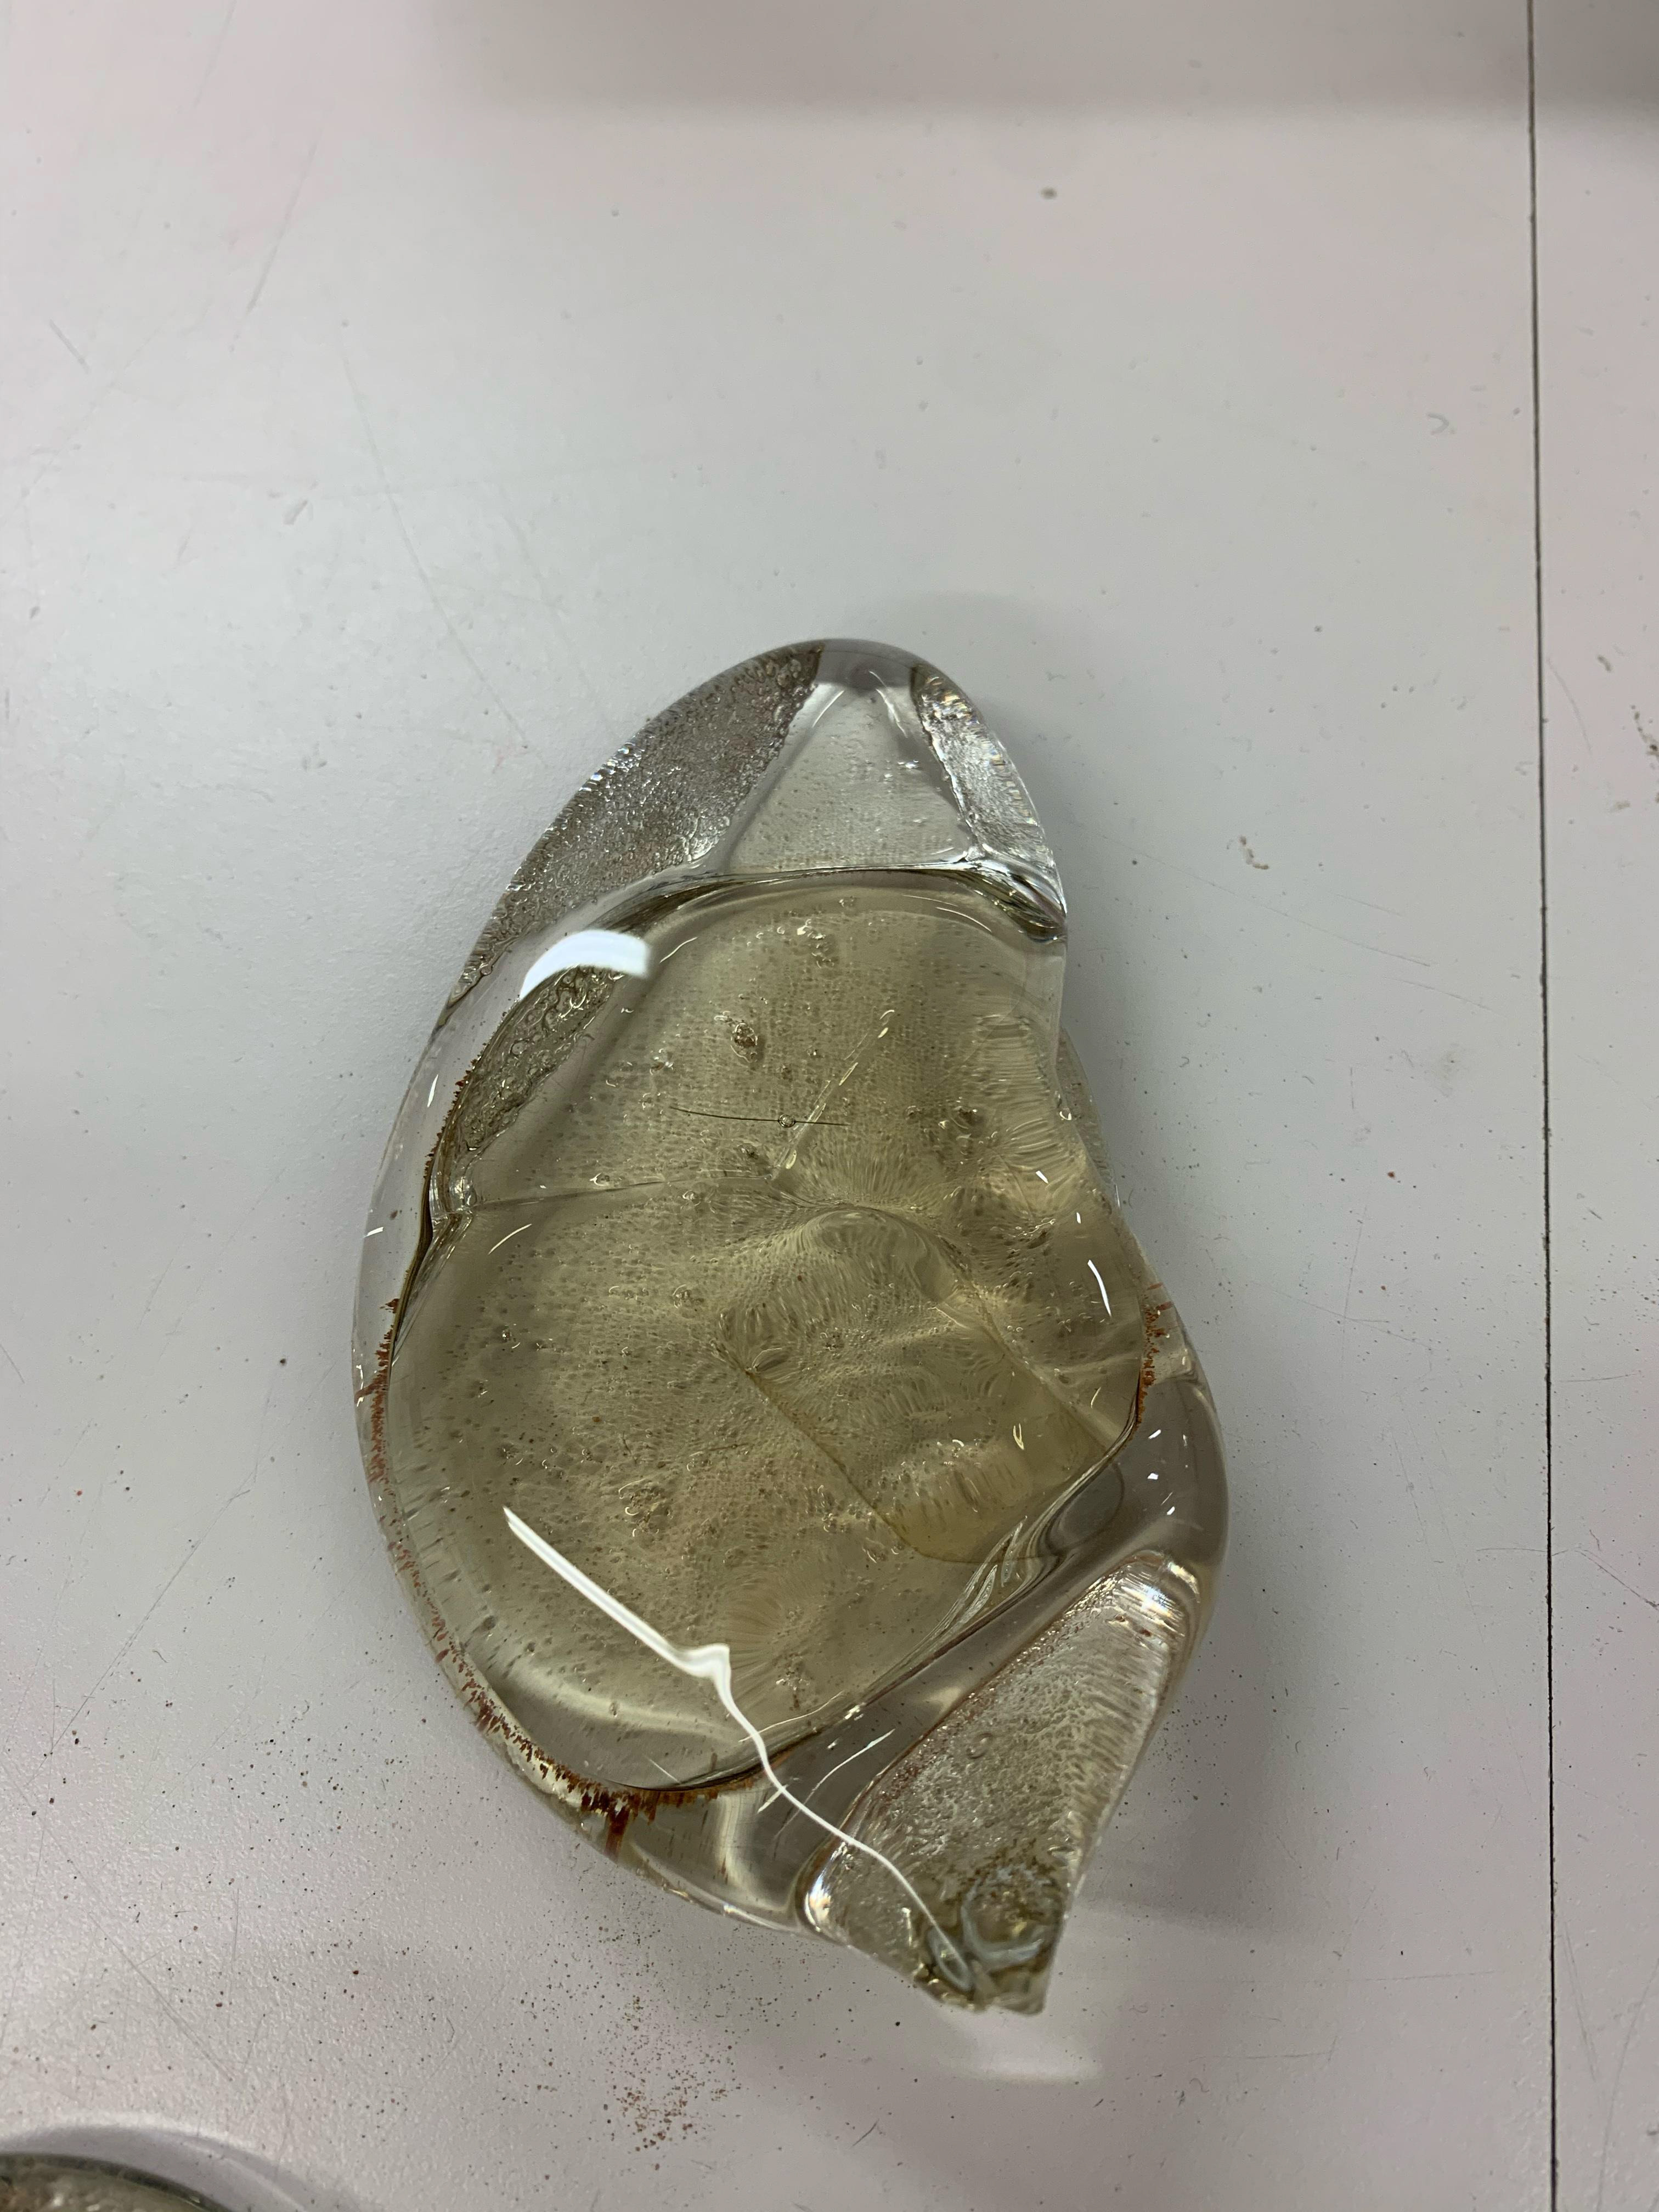
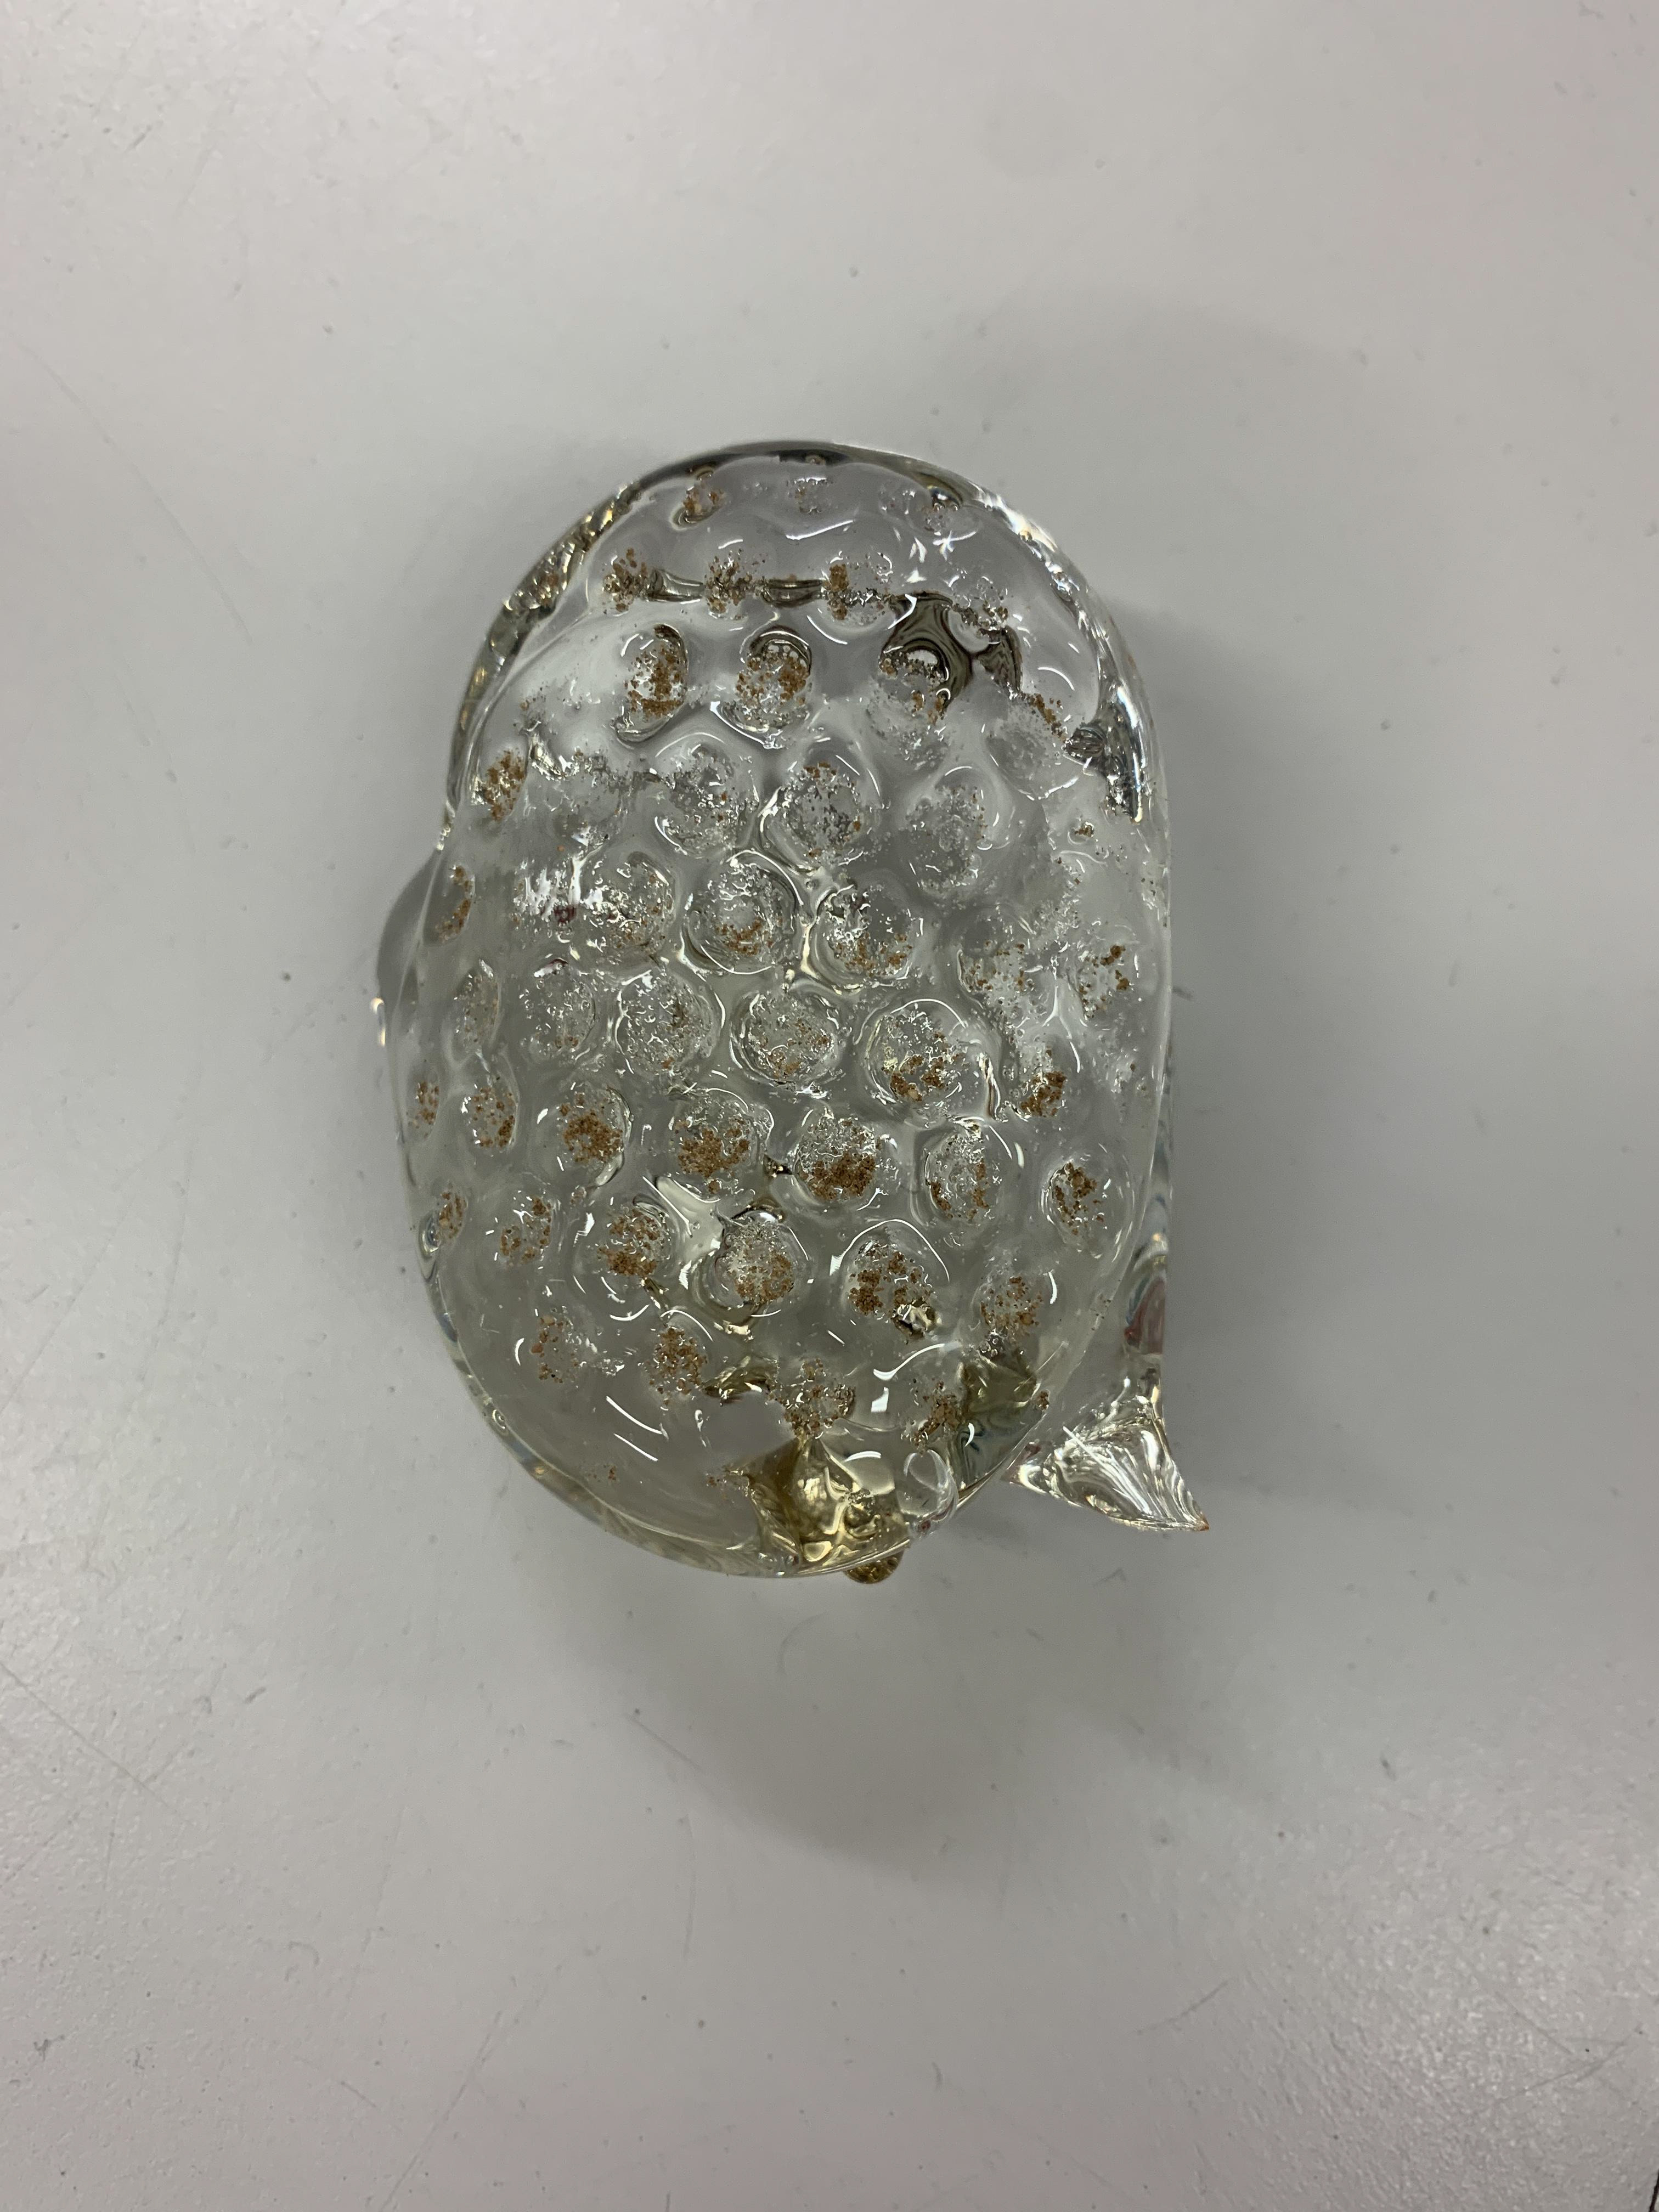
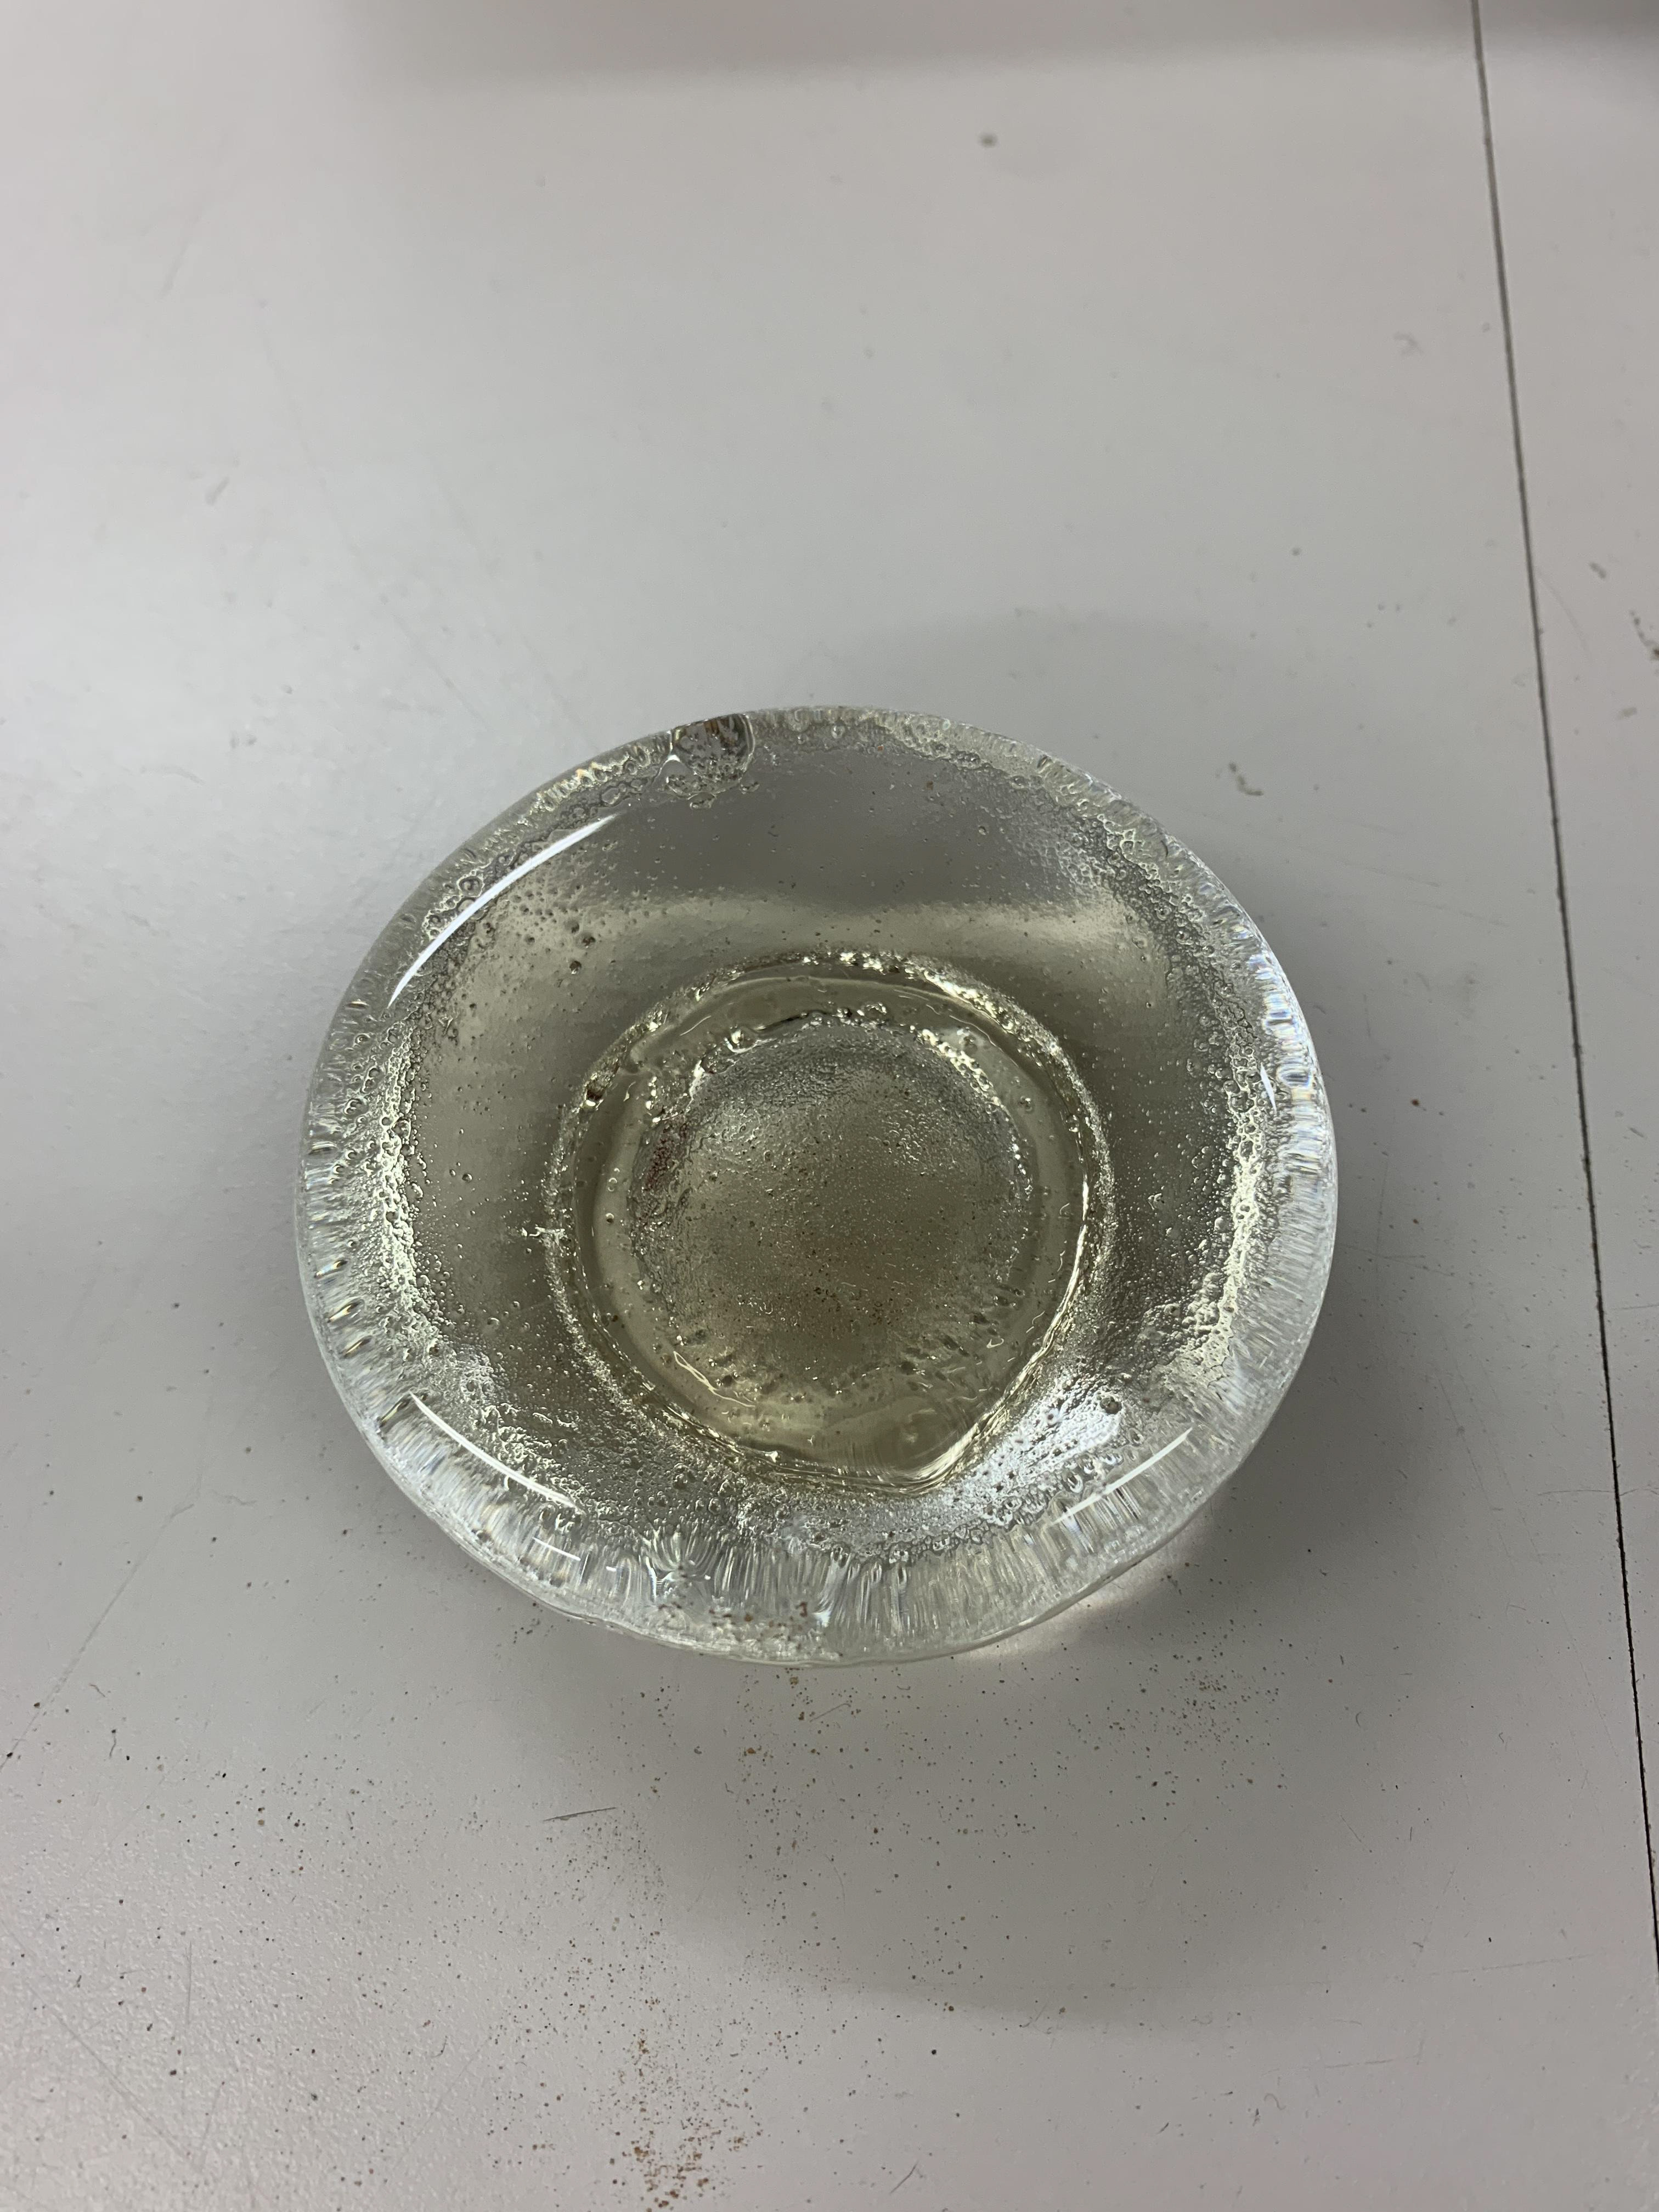
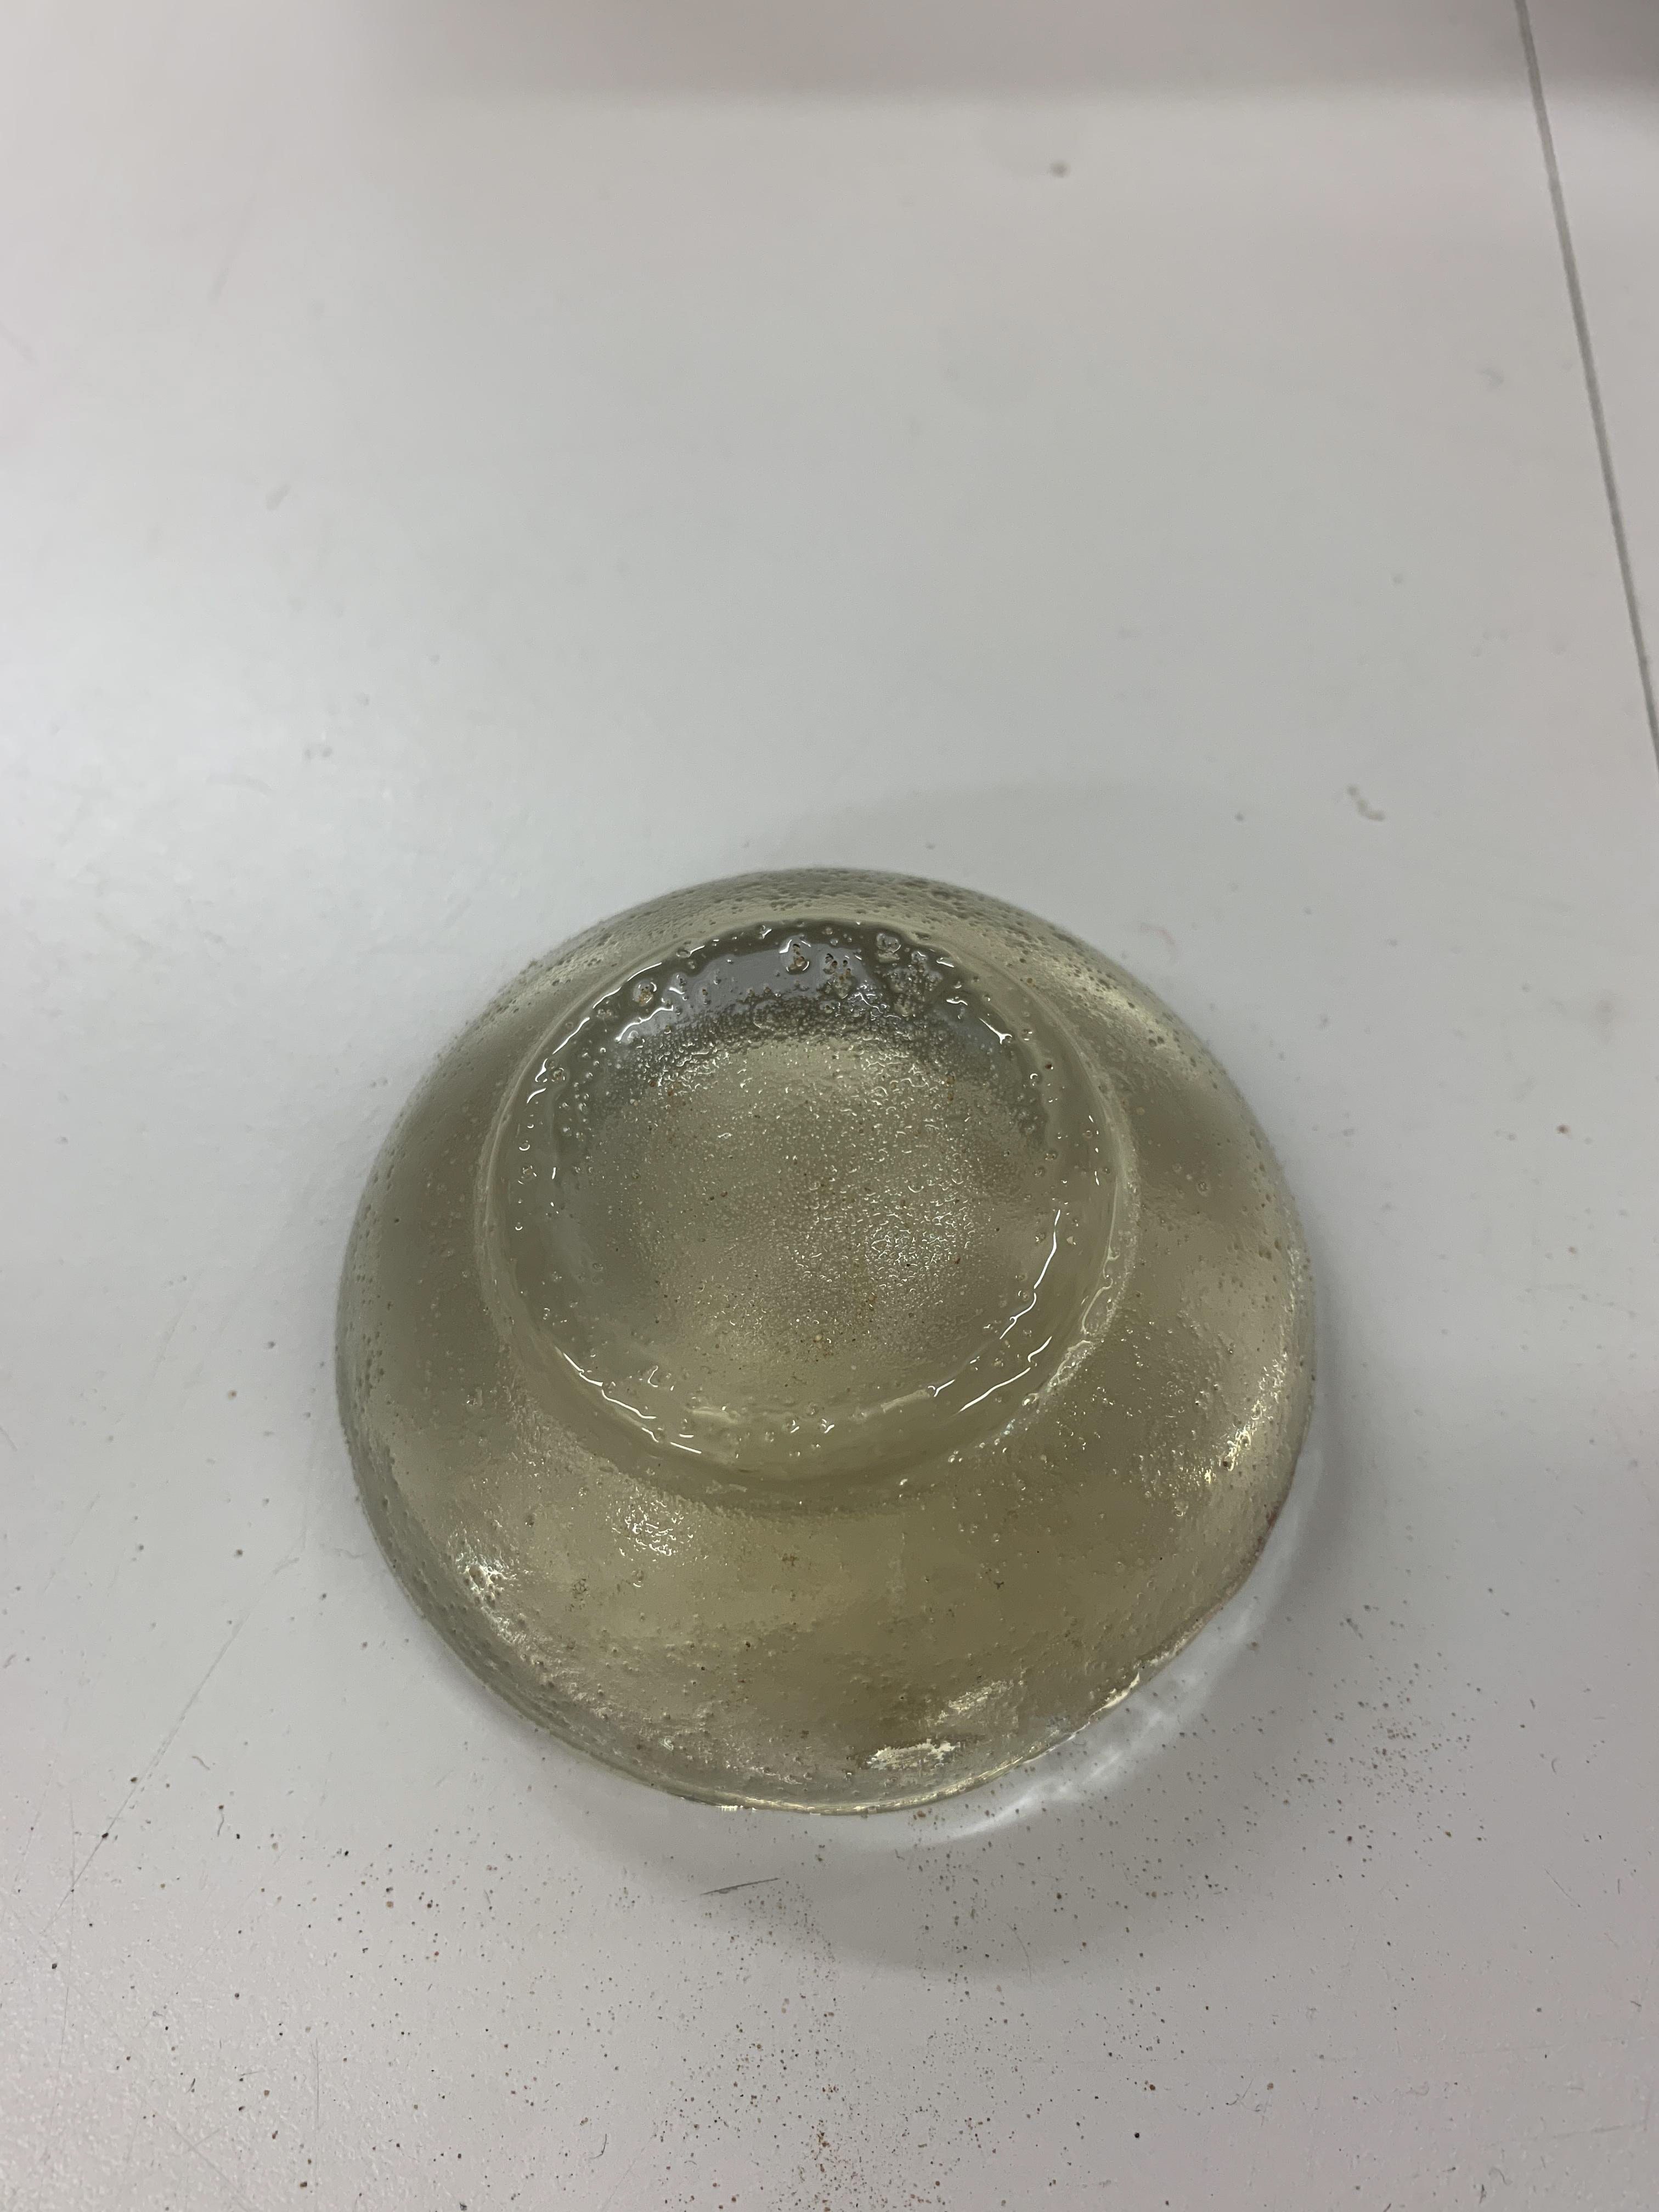
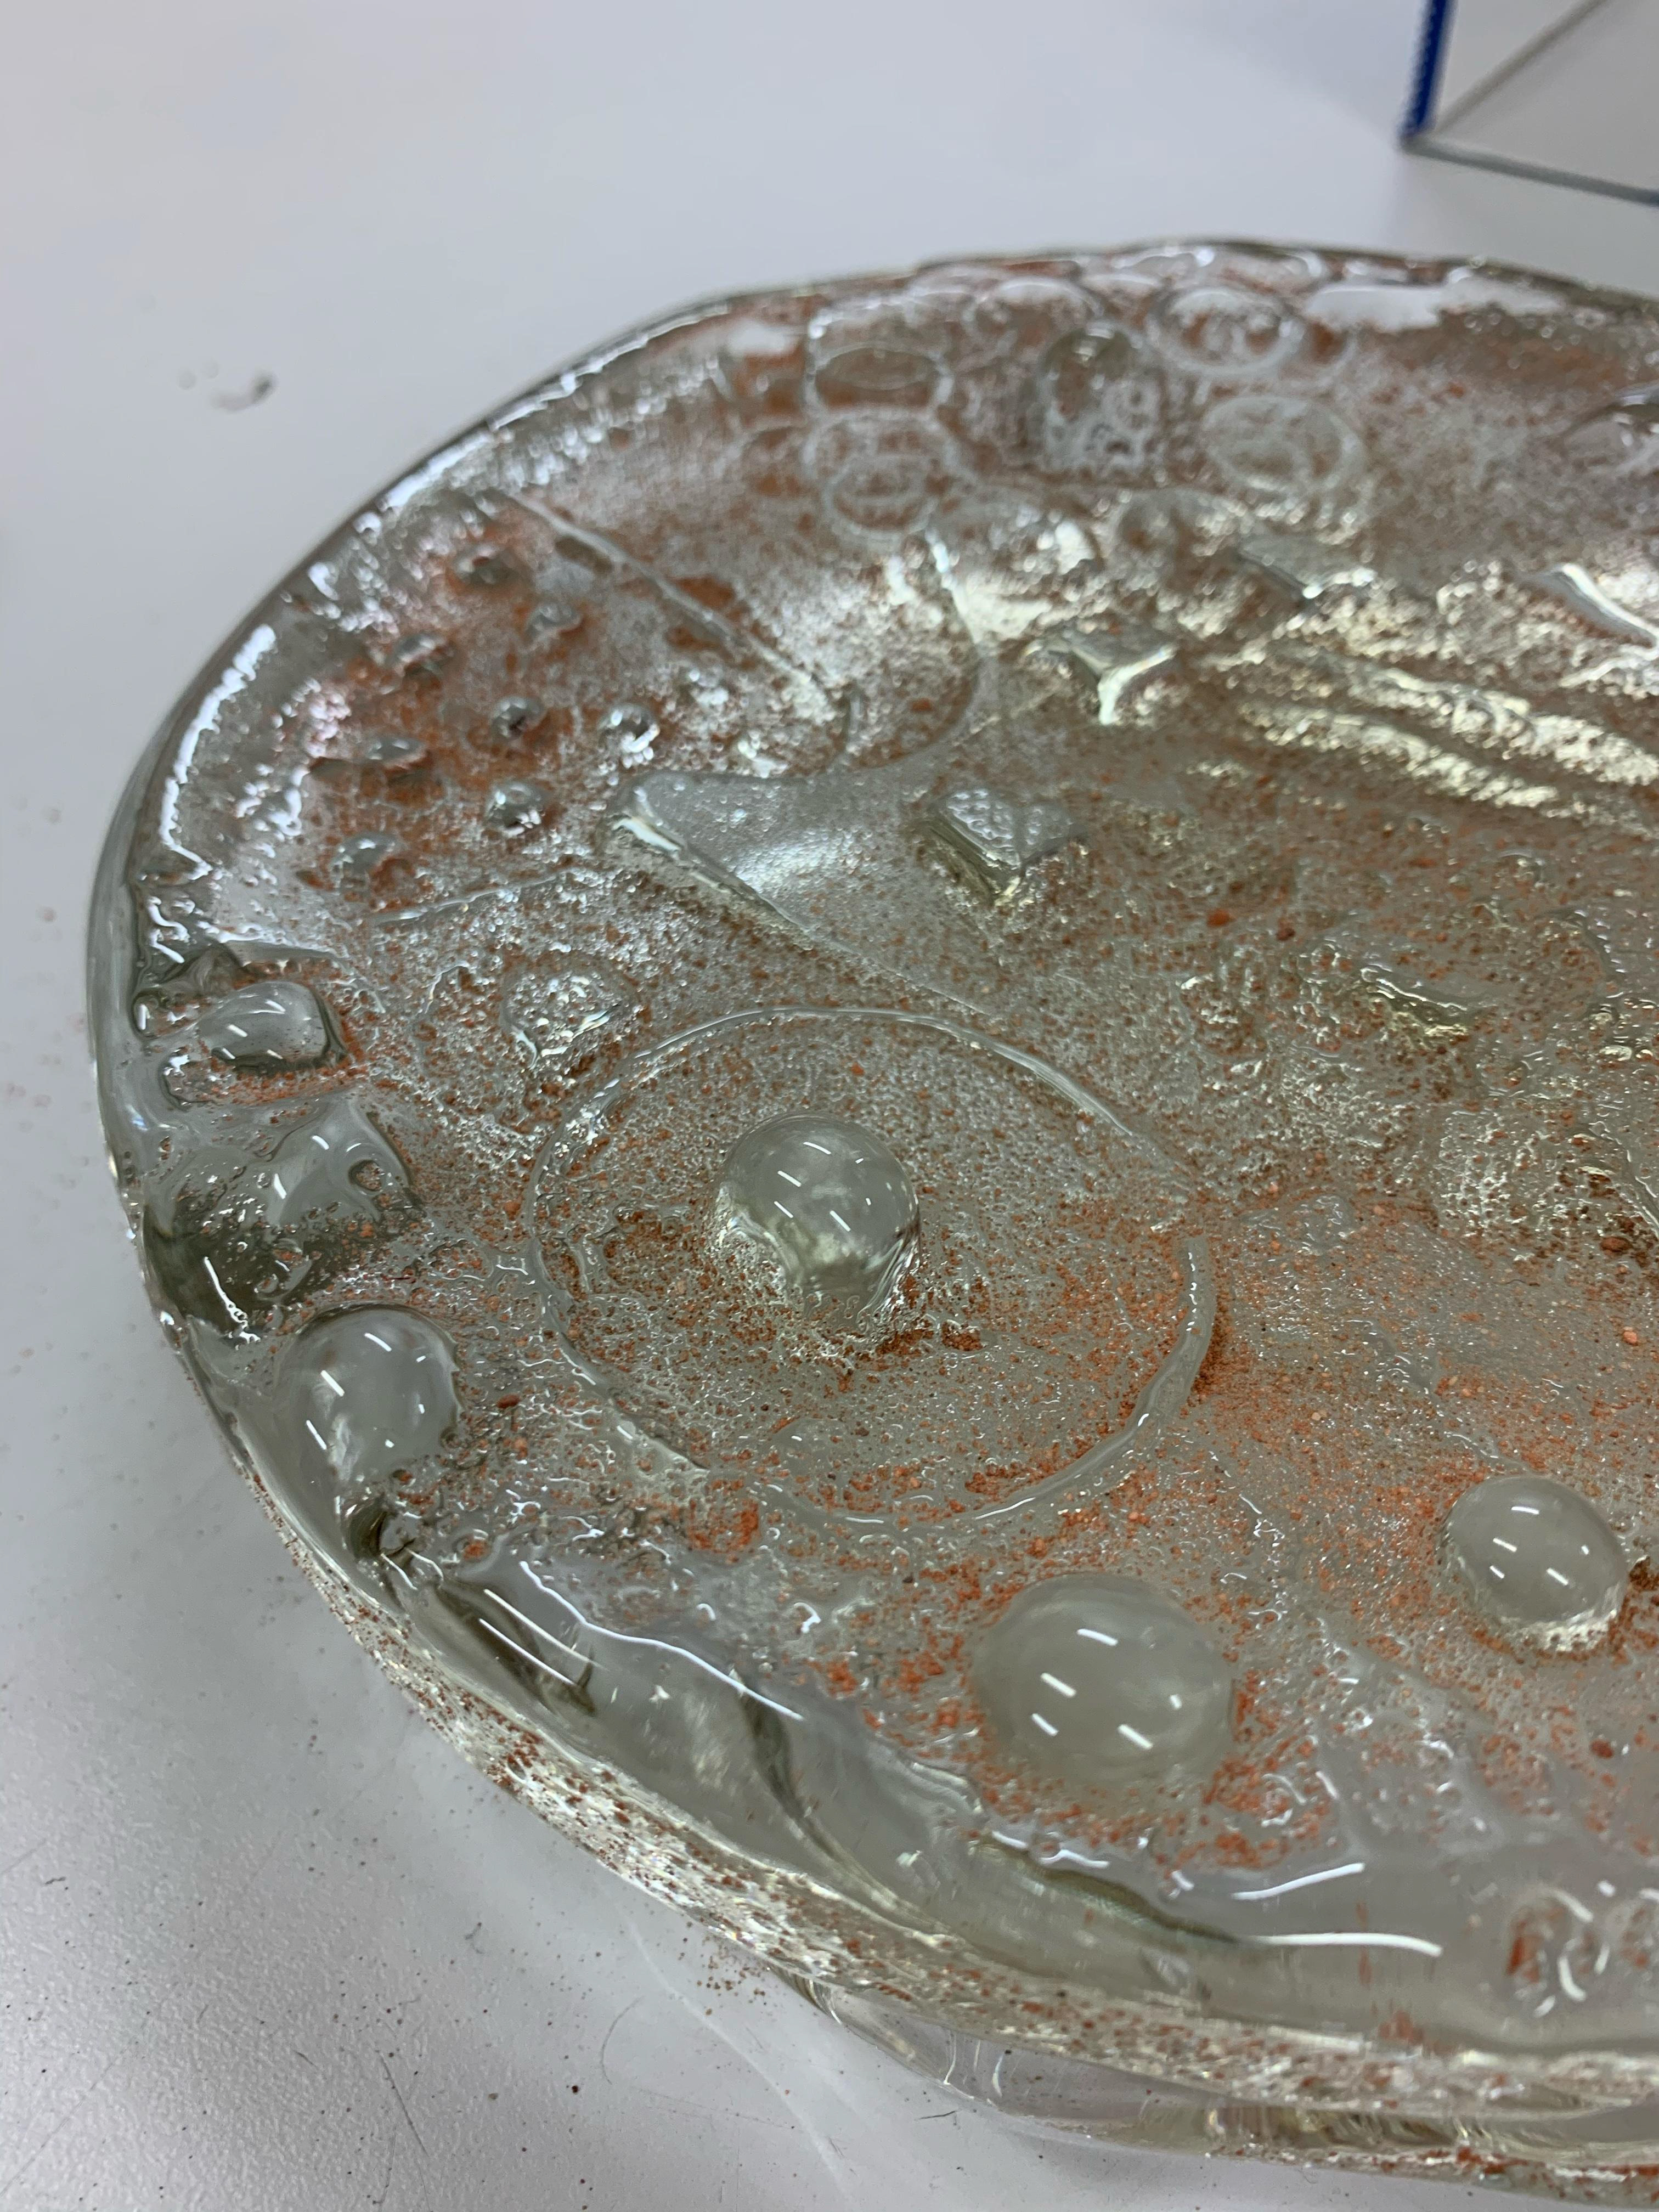
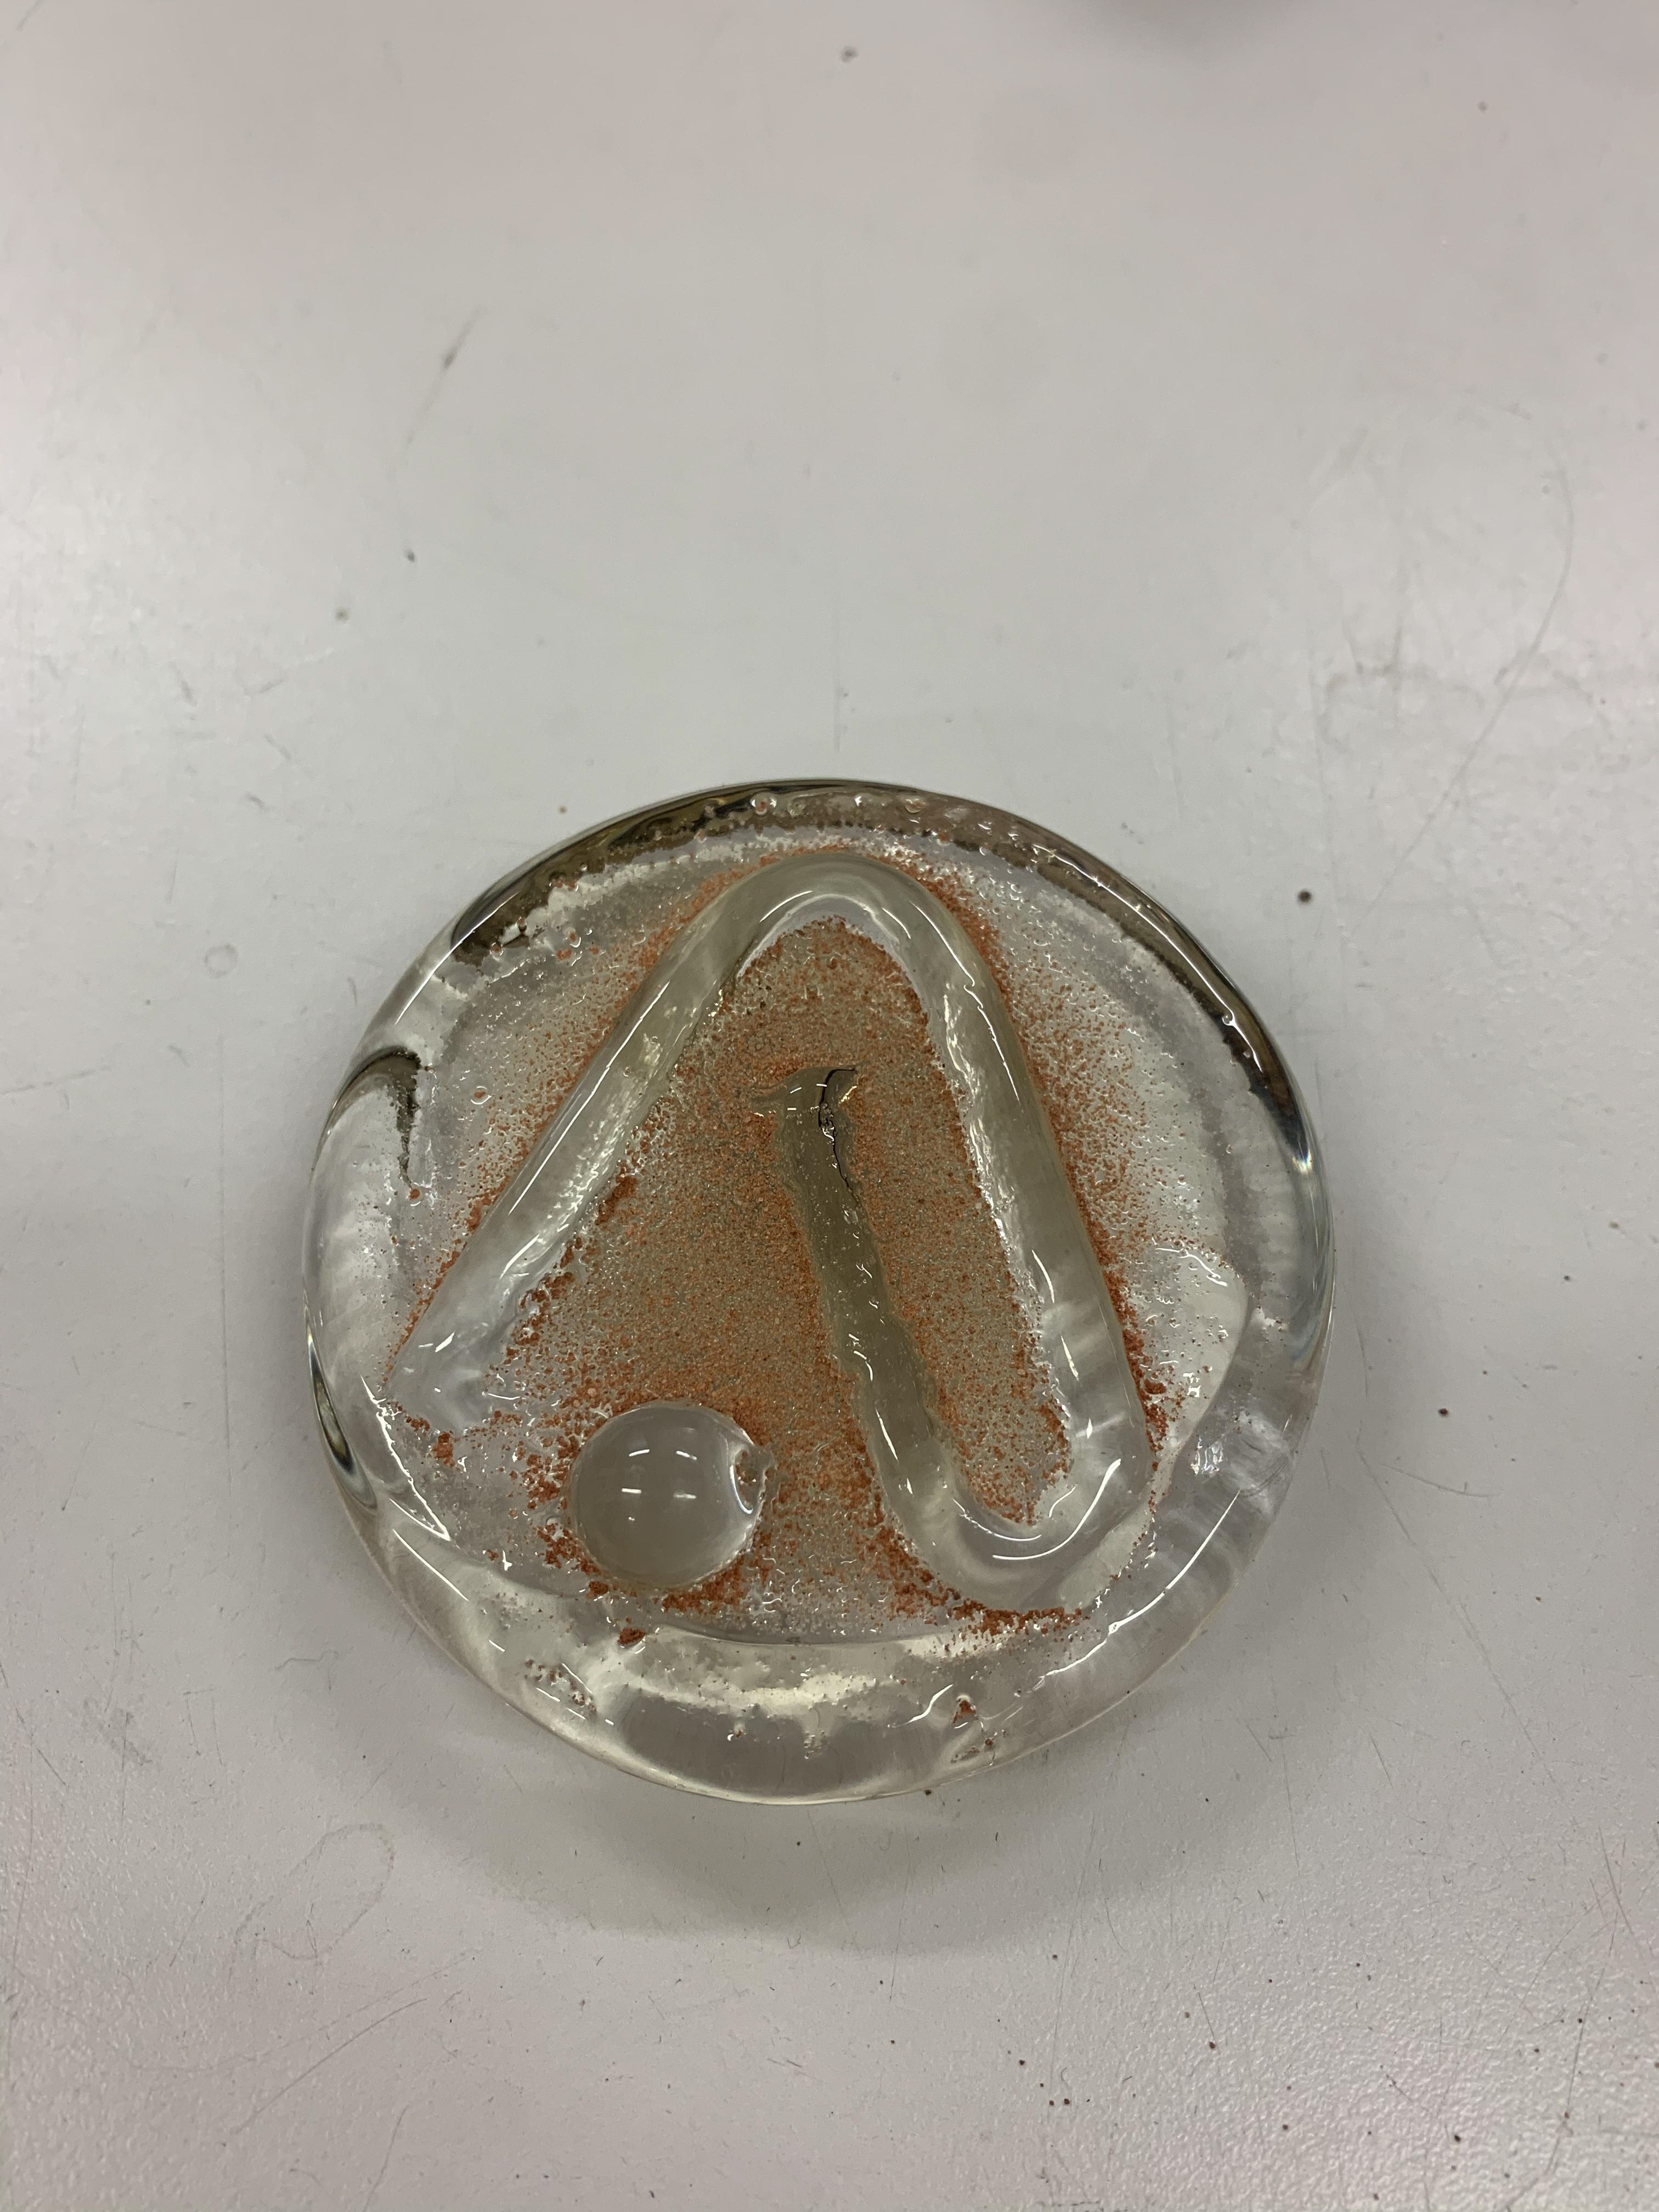
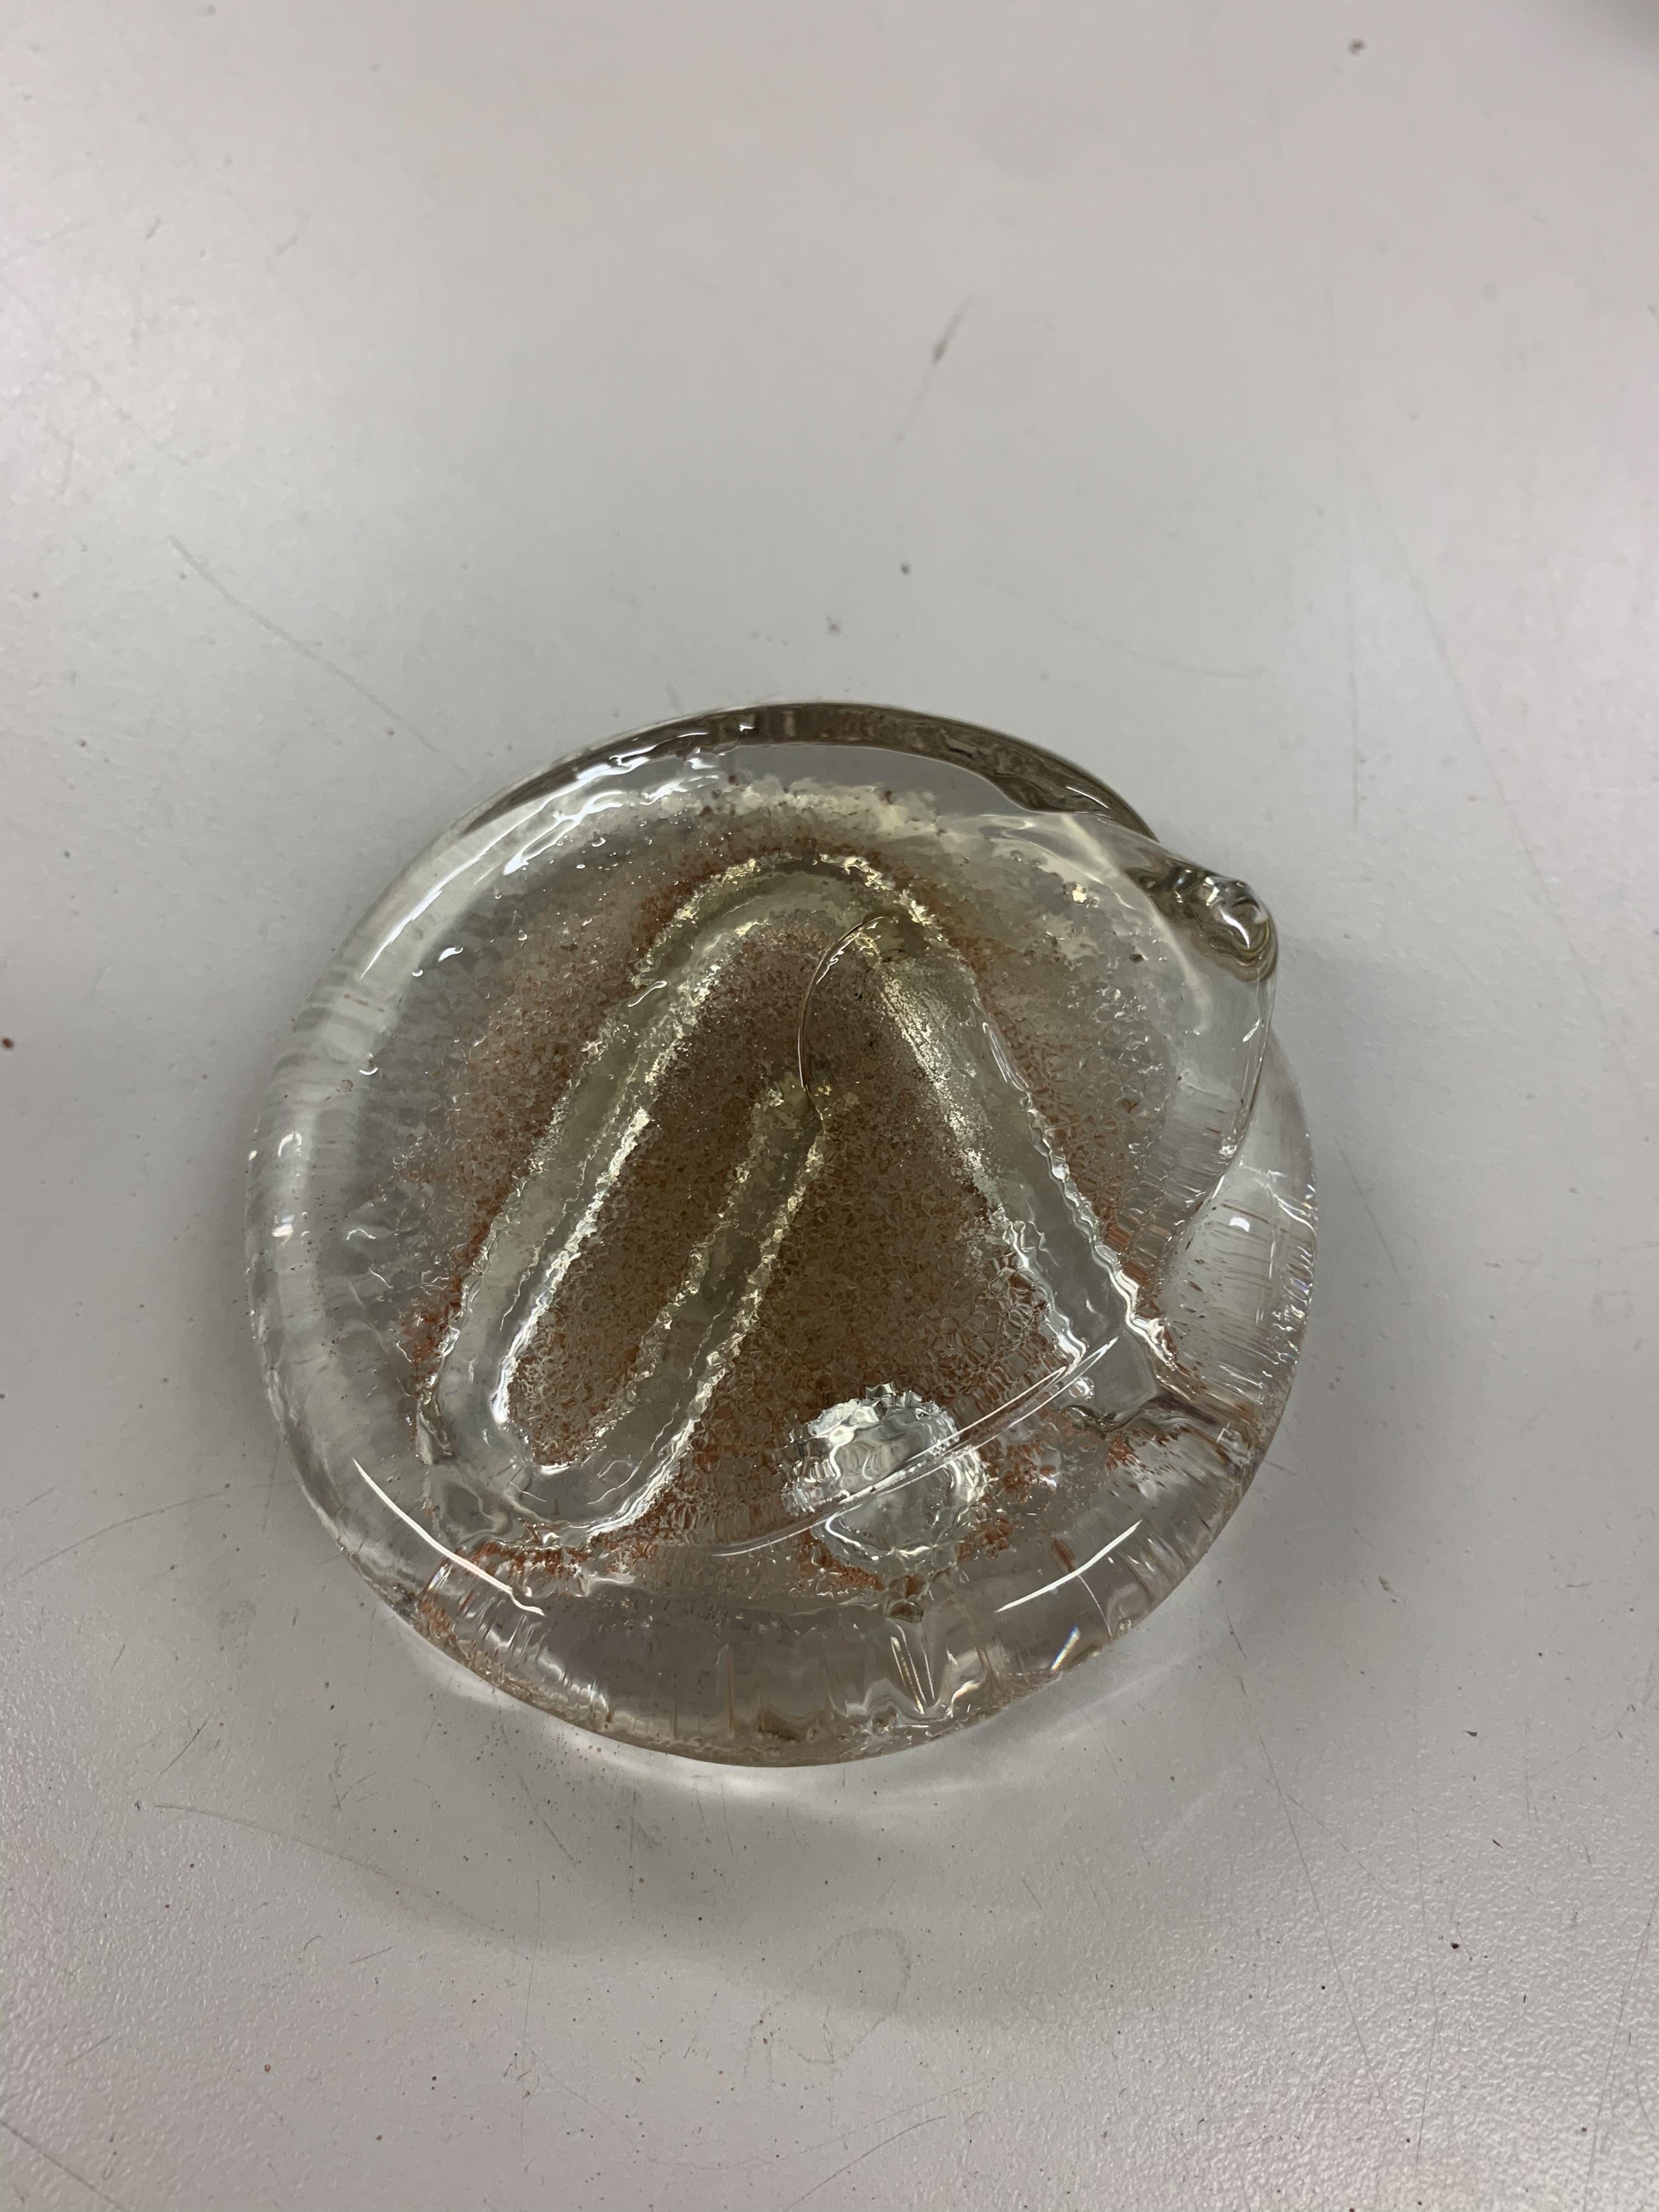
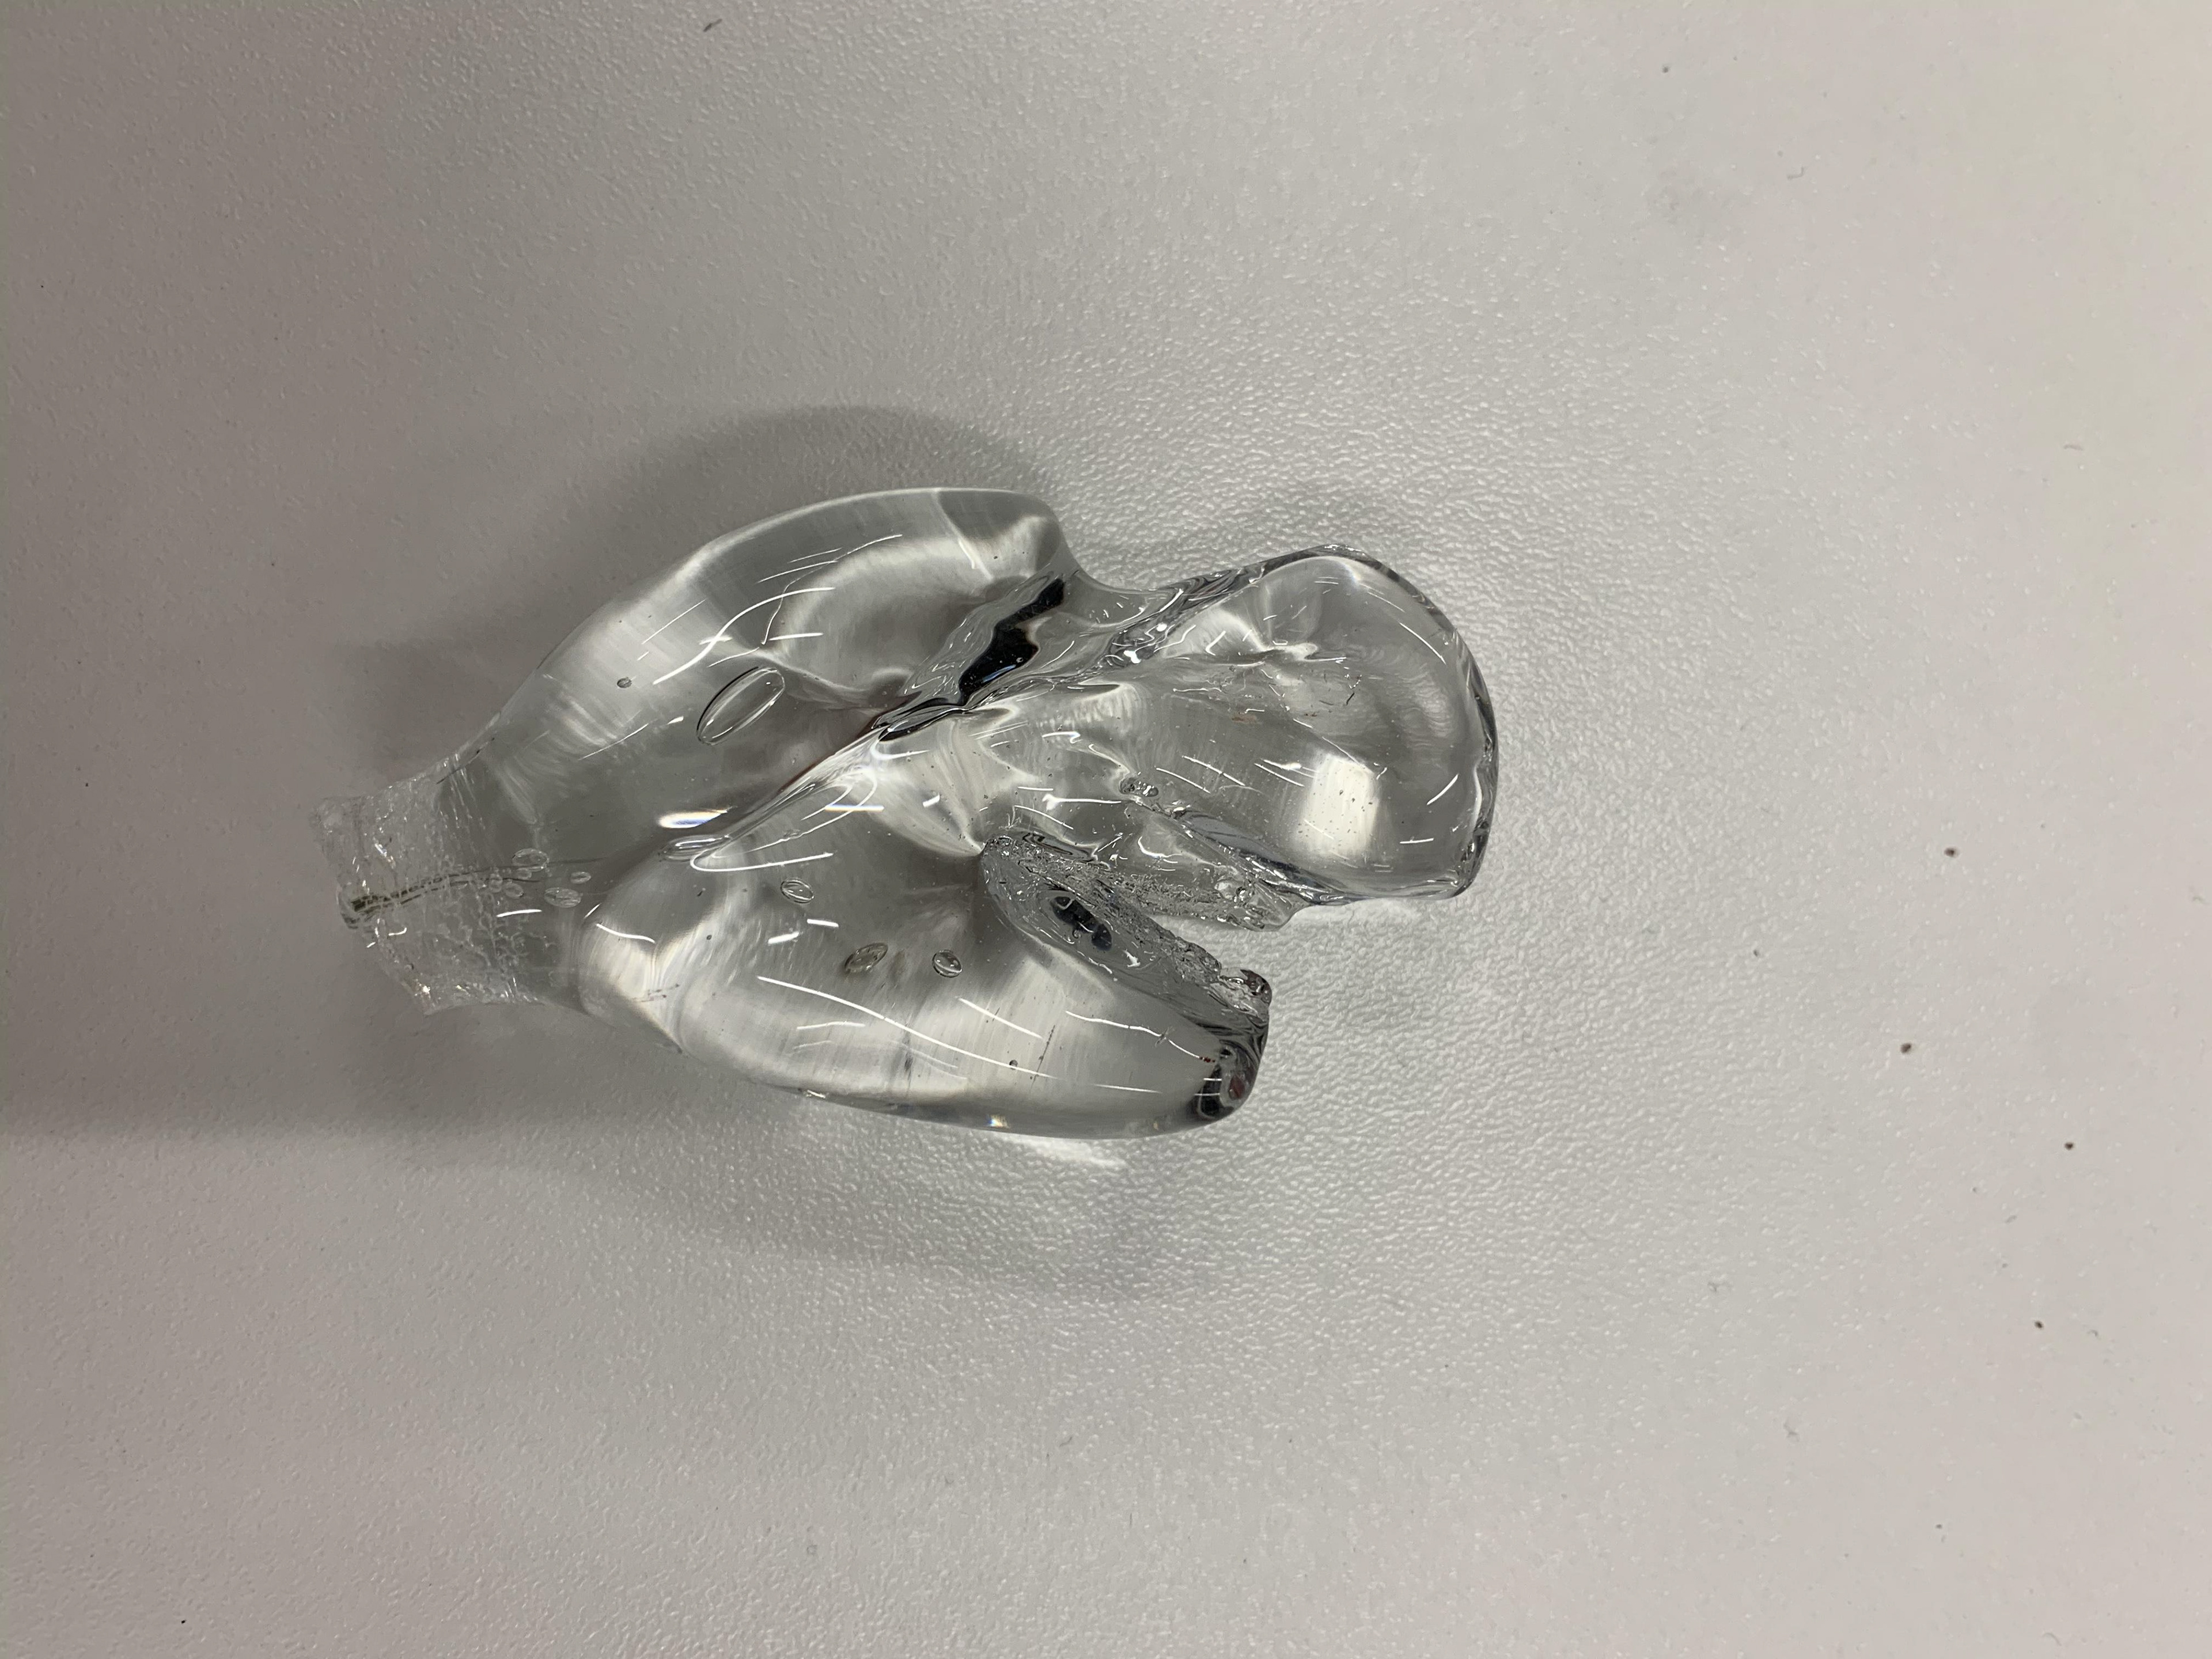
FOR THE PEICES ON TOP WE WANTED TO EXPERIMENT WITH TEXTURE GIVING US THESE WHOLES IN THE GLASS. WE FOUND THAT DUE TO THE SAND NOT BEING SUPER FIRM IN THE DENTS THE GLASS HOLES ARNT ALL UNIFORM AND ALIKE. THEY DIDN'T COPY the EXACT MOULD WE PUSHED IN. ON THE OTHER SIDE WE CAN SEE INSIDE THE GLASS THE YELLOW COLOURING IS FROM HAVING A LOT OF HEAT ON IT FROM THE BLOW TORCH, being to close or to far away providing the glass with too much heat or not enough. AS WE LAYERED THE MOLTEN GLASS AS THERE WASN'T ENOUGH GLASS TO FILL OUT THE FORM, so you can SEE WERE WE ADDED GLASS ON TOP OF IT AS THE GLASS LOOKS SEPARATED AND AND SPLIT INTO TWO SECTIONS. THIS GLASS PEICE WAS MADE WITH THE SAND CASTING TECHNIQUE THE TAKING THE FORM OF A SMALL BOWL, TWO GATHERS WERE NEEDED FOR THIS BOWL DUE TO ITS DEPTH, HOWEVER WE TORCHED IT FOR A LONG TIME WHICH GAVE IT A SMOOTH FINISH .
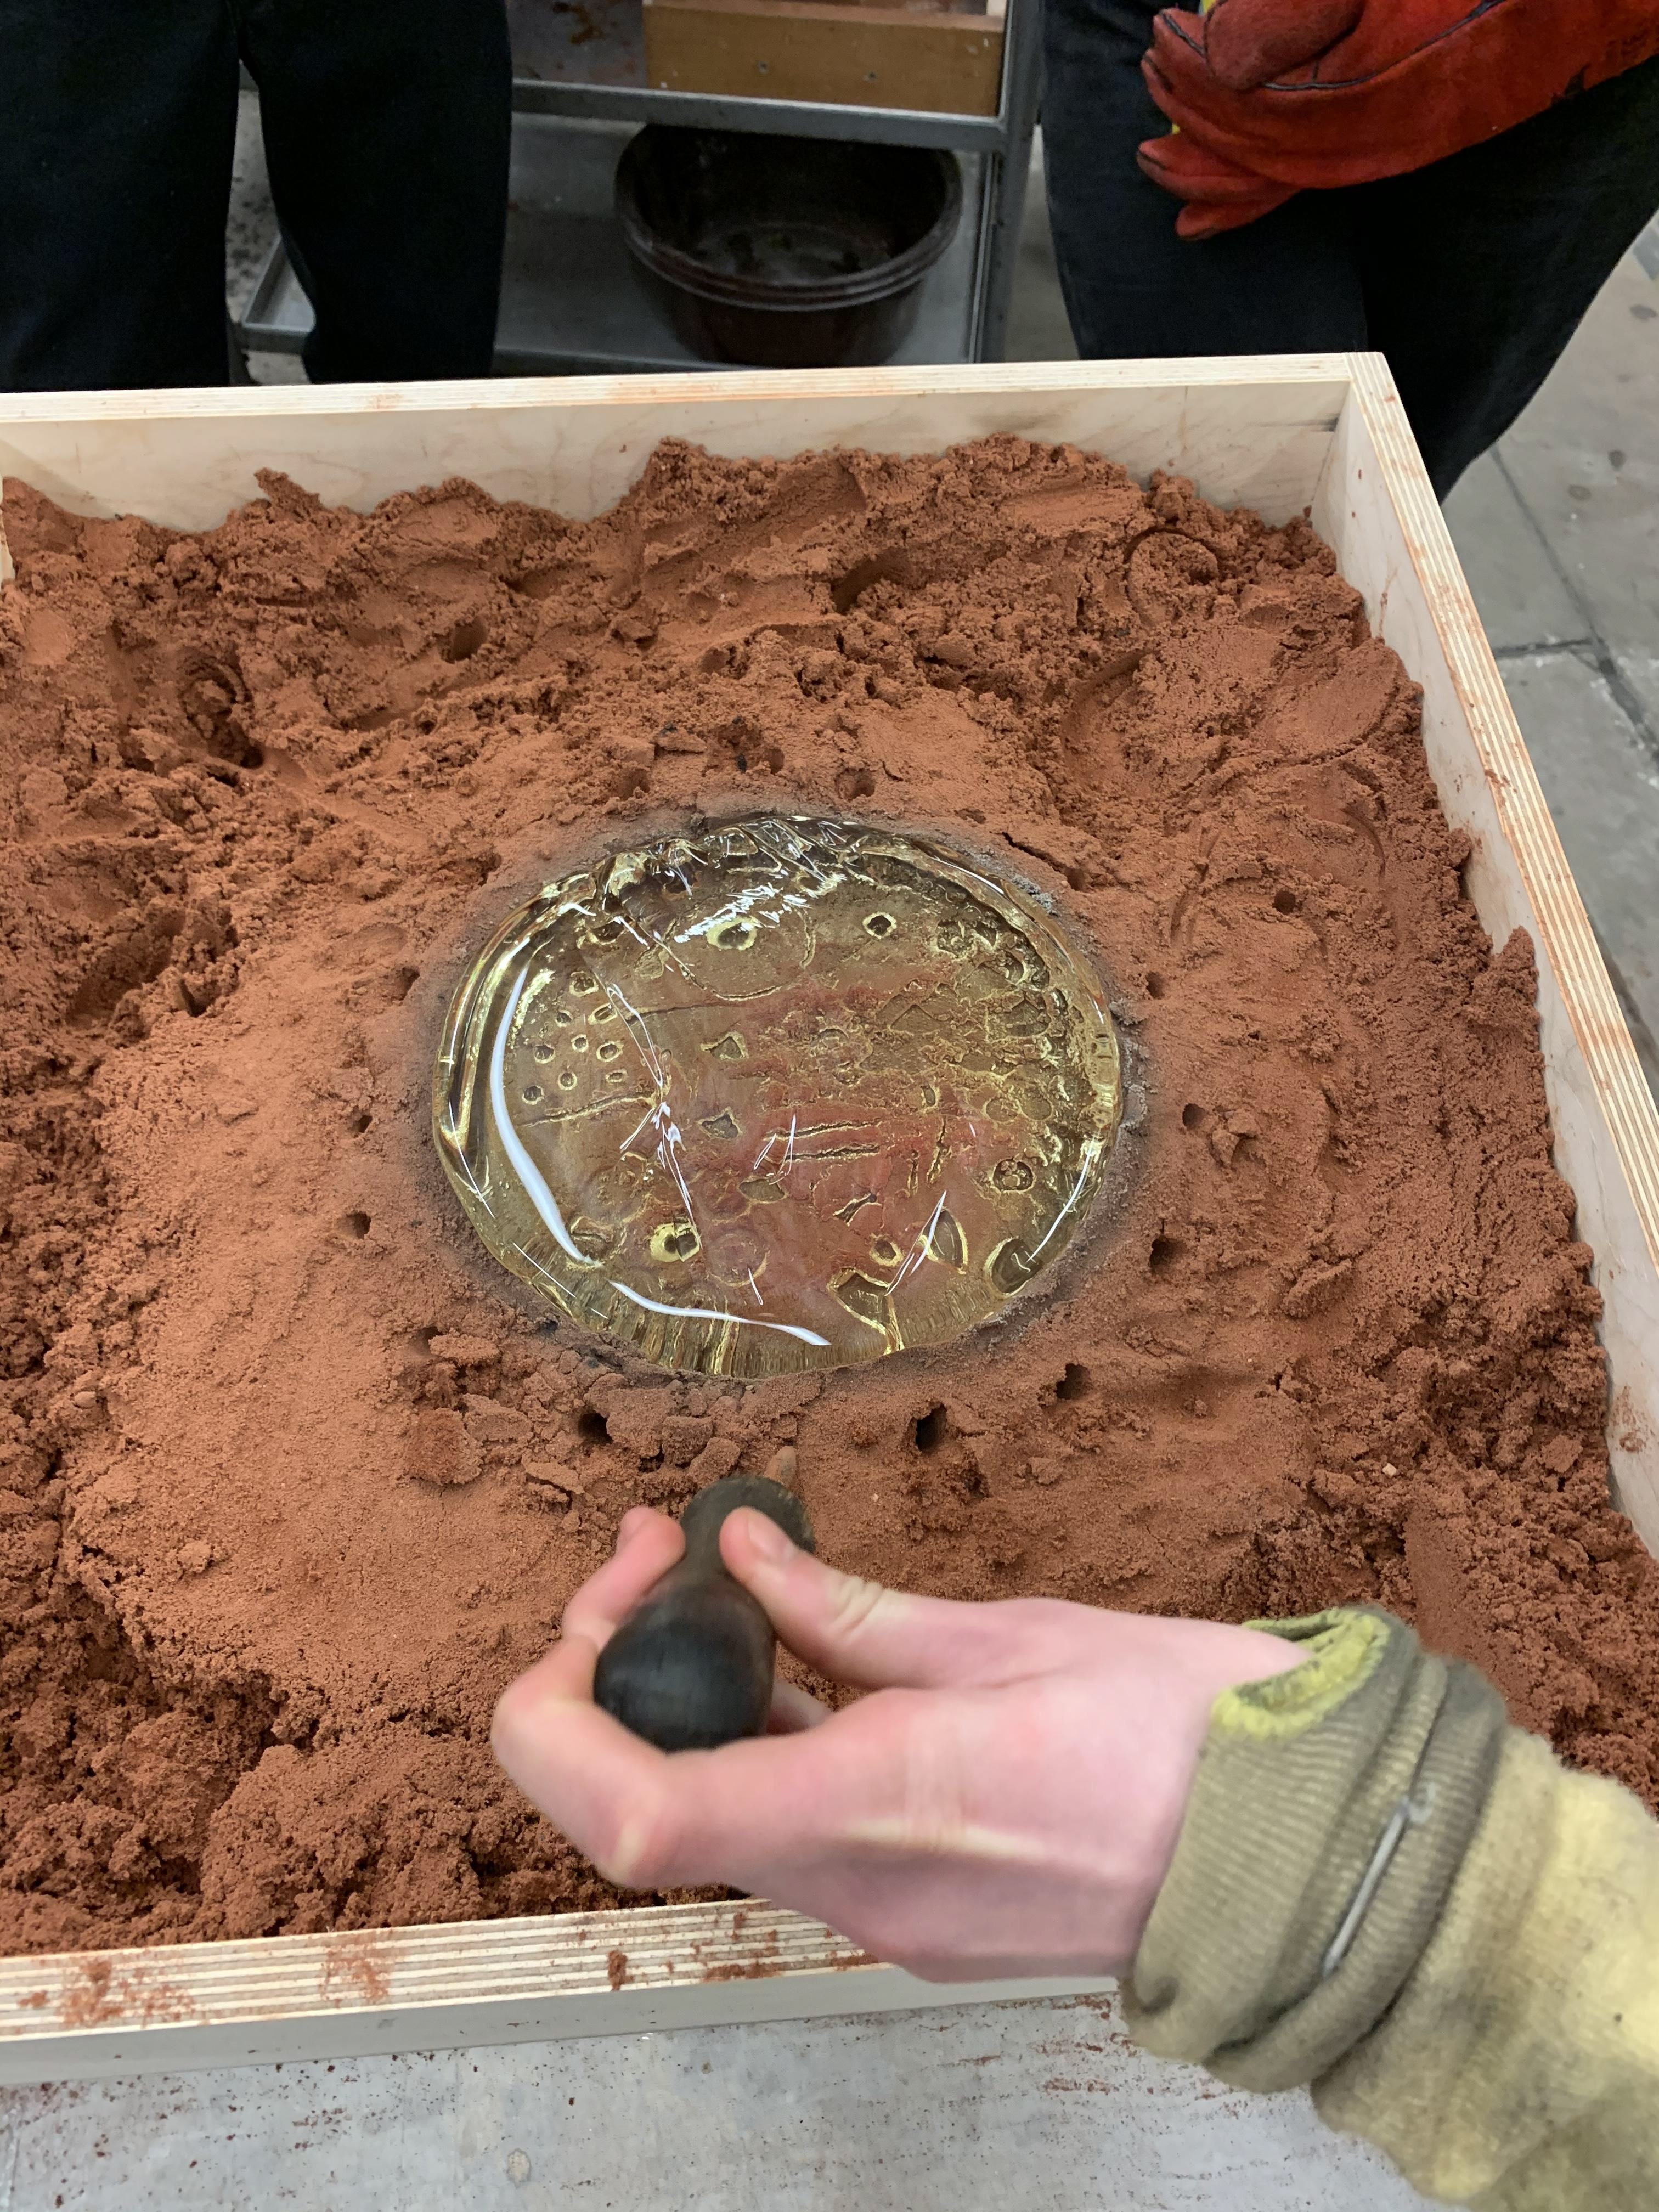
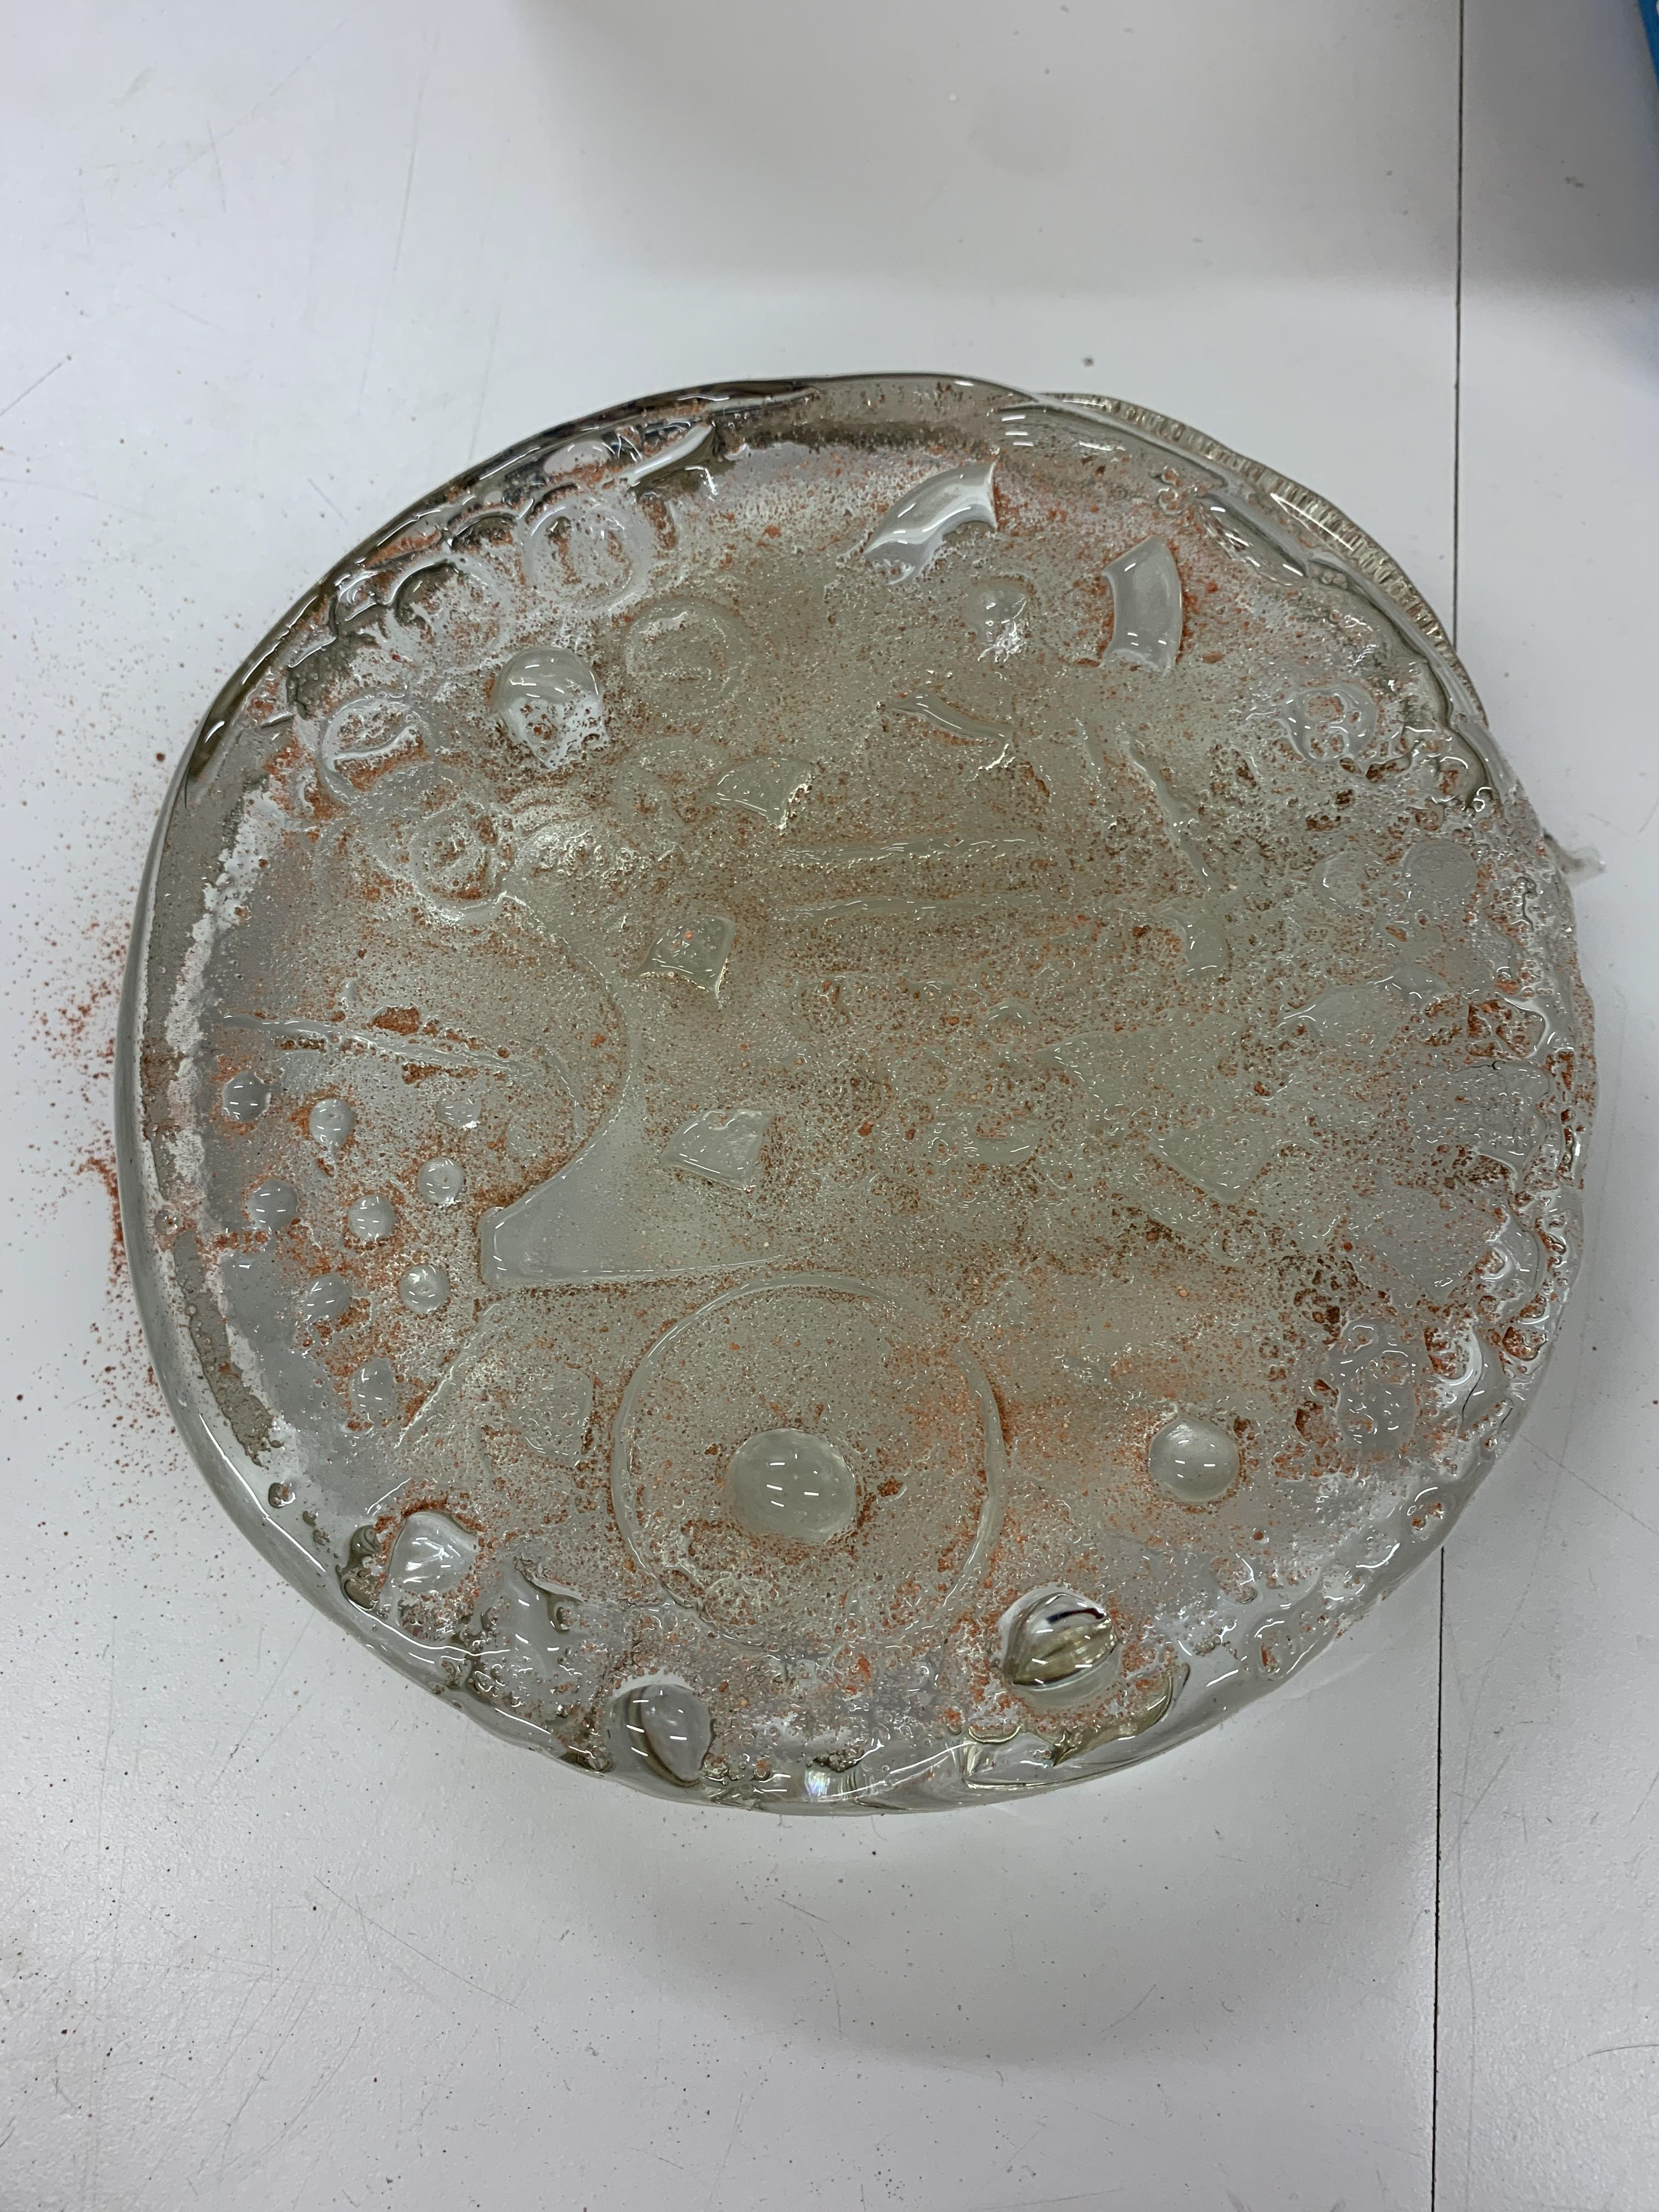
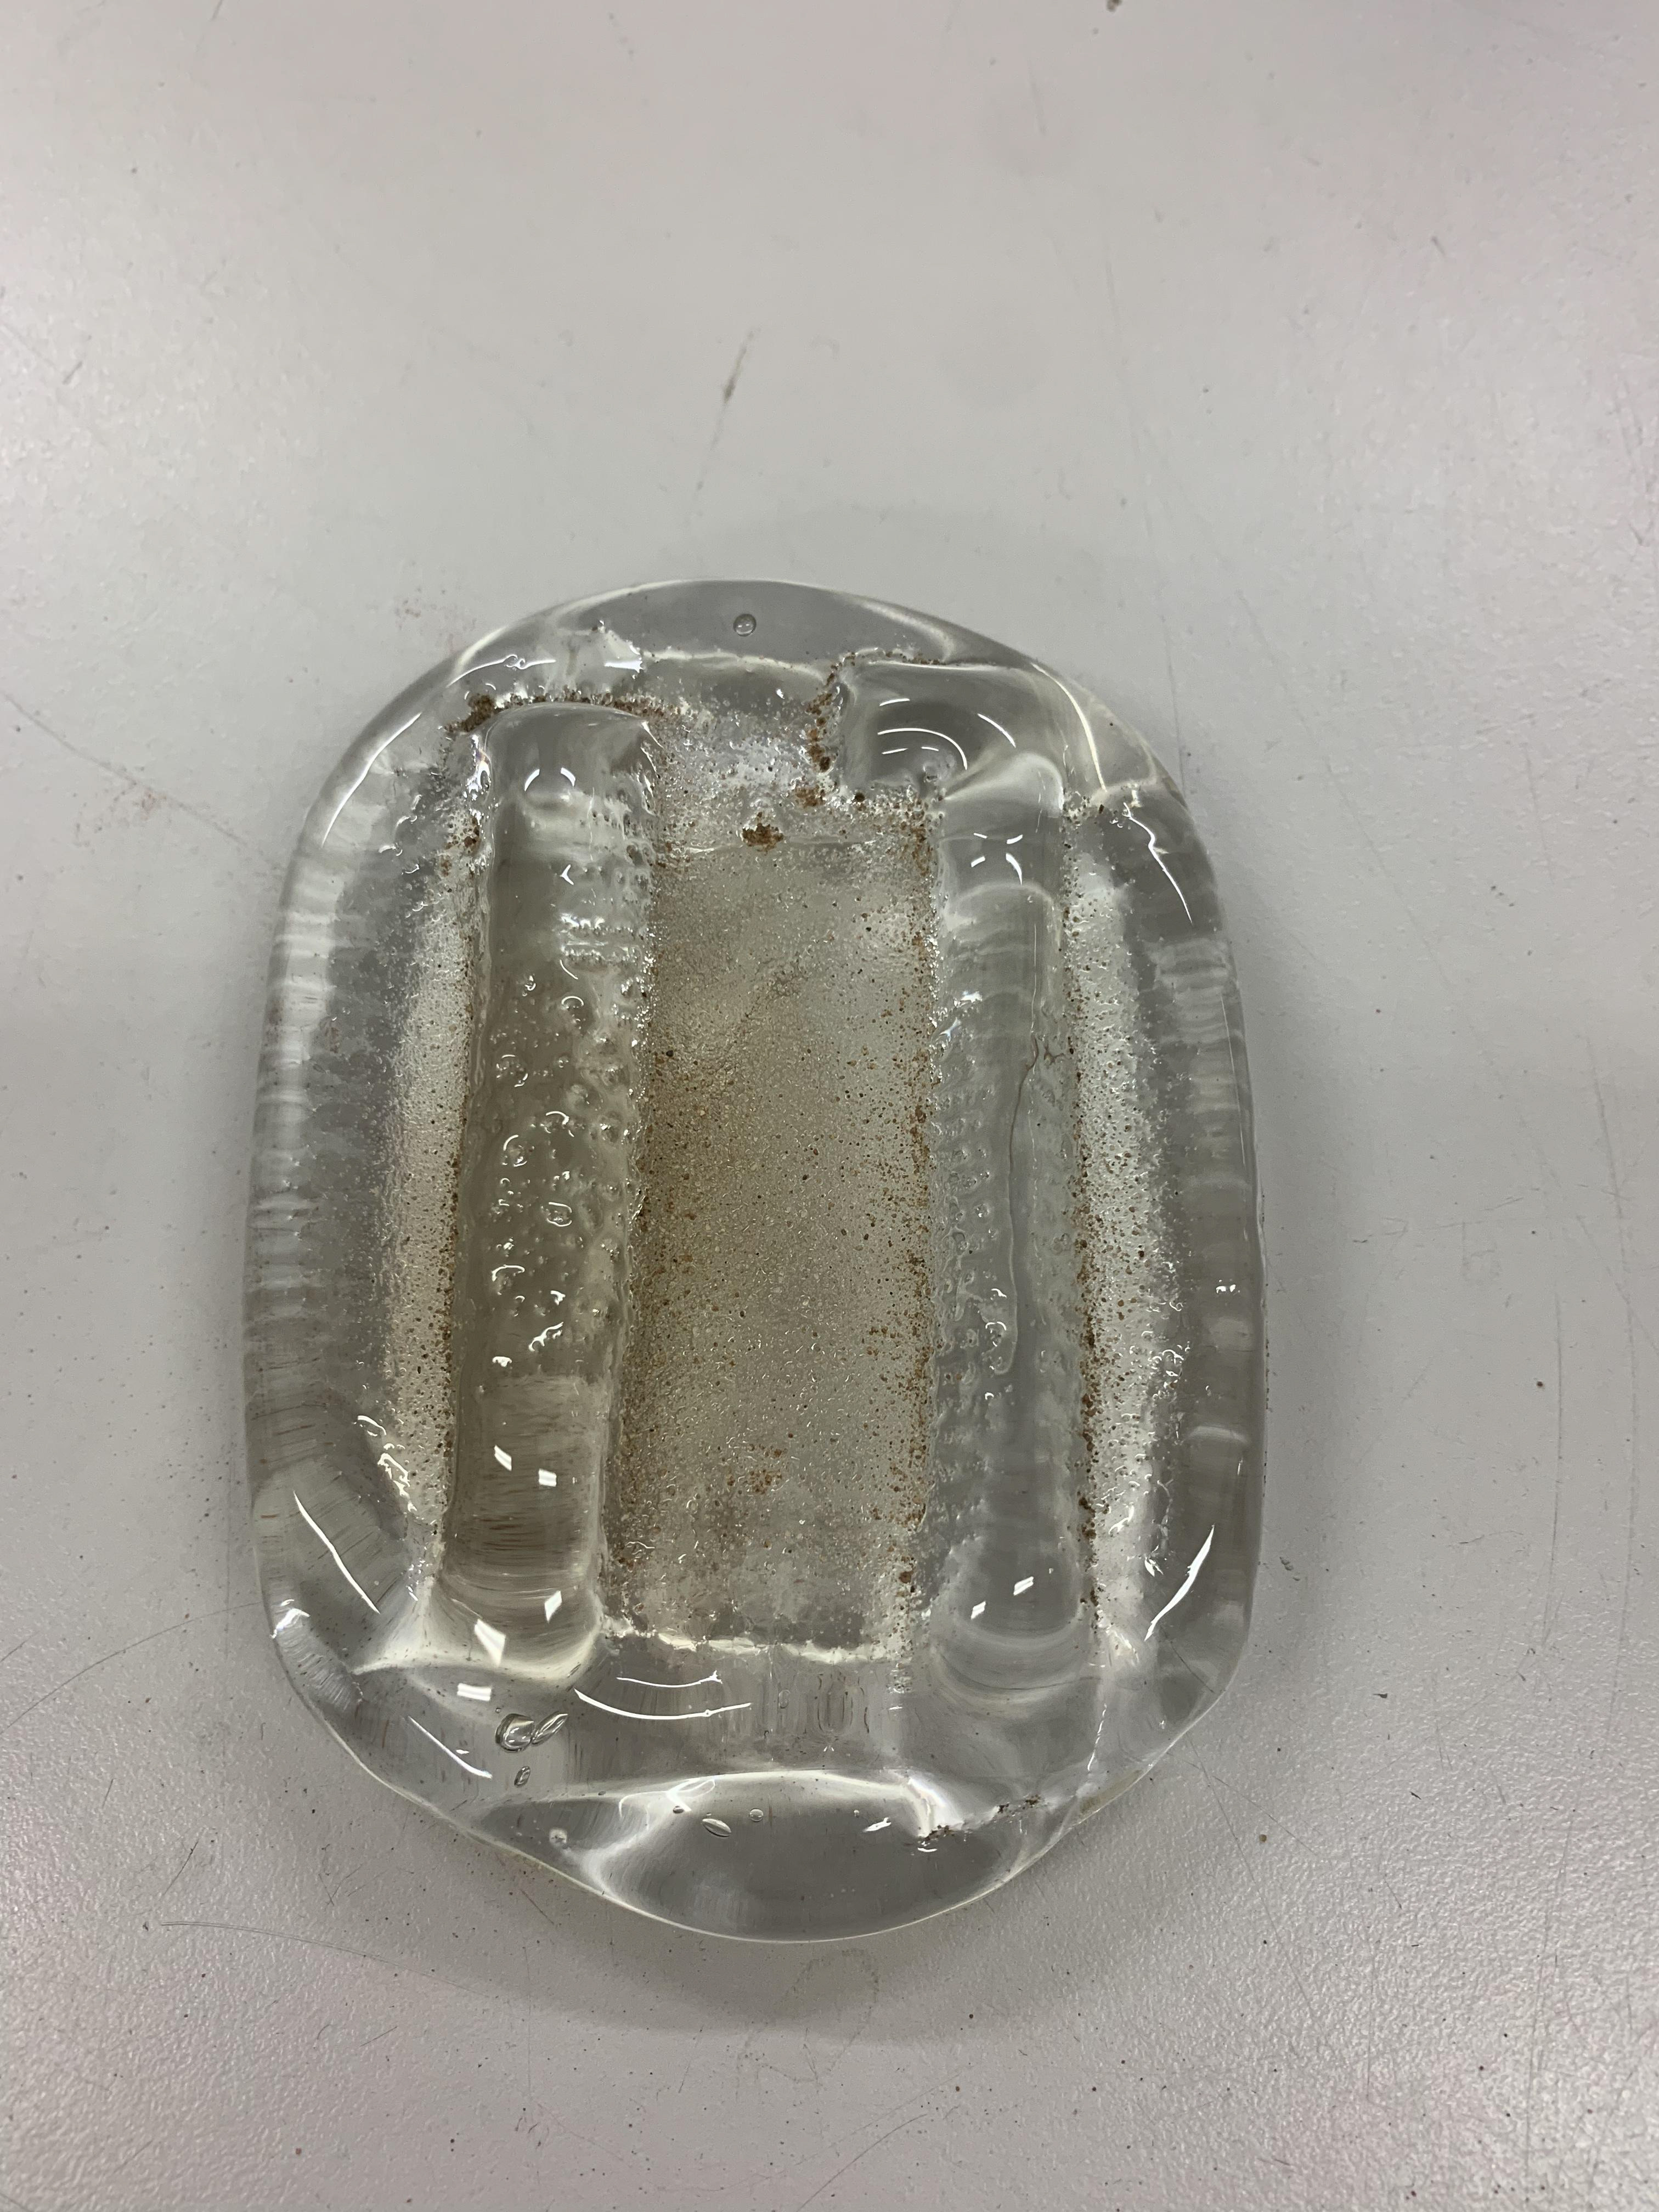
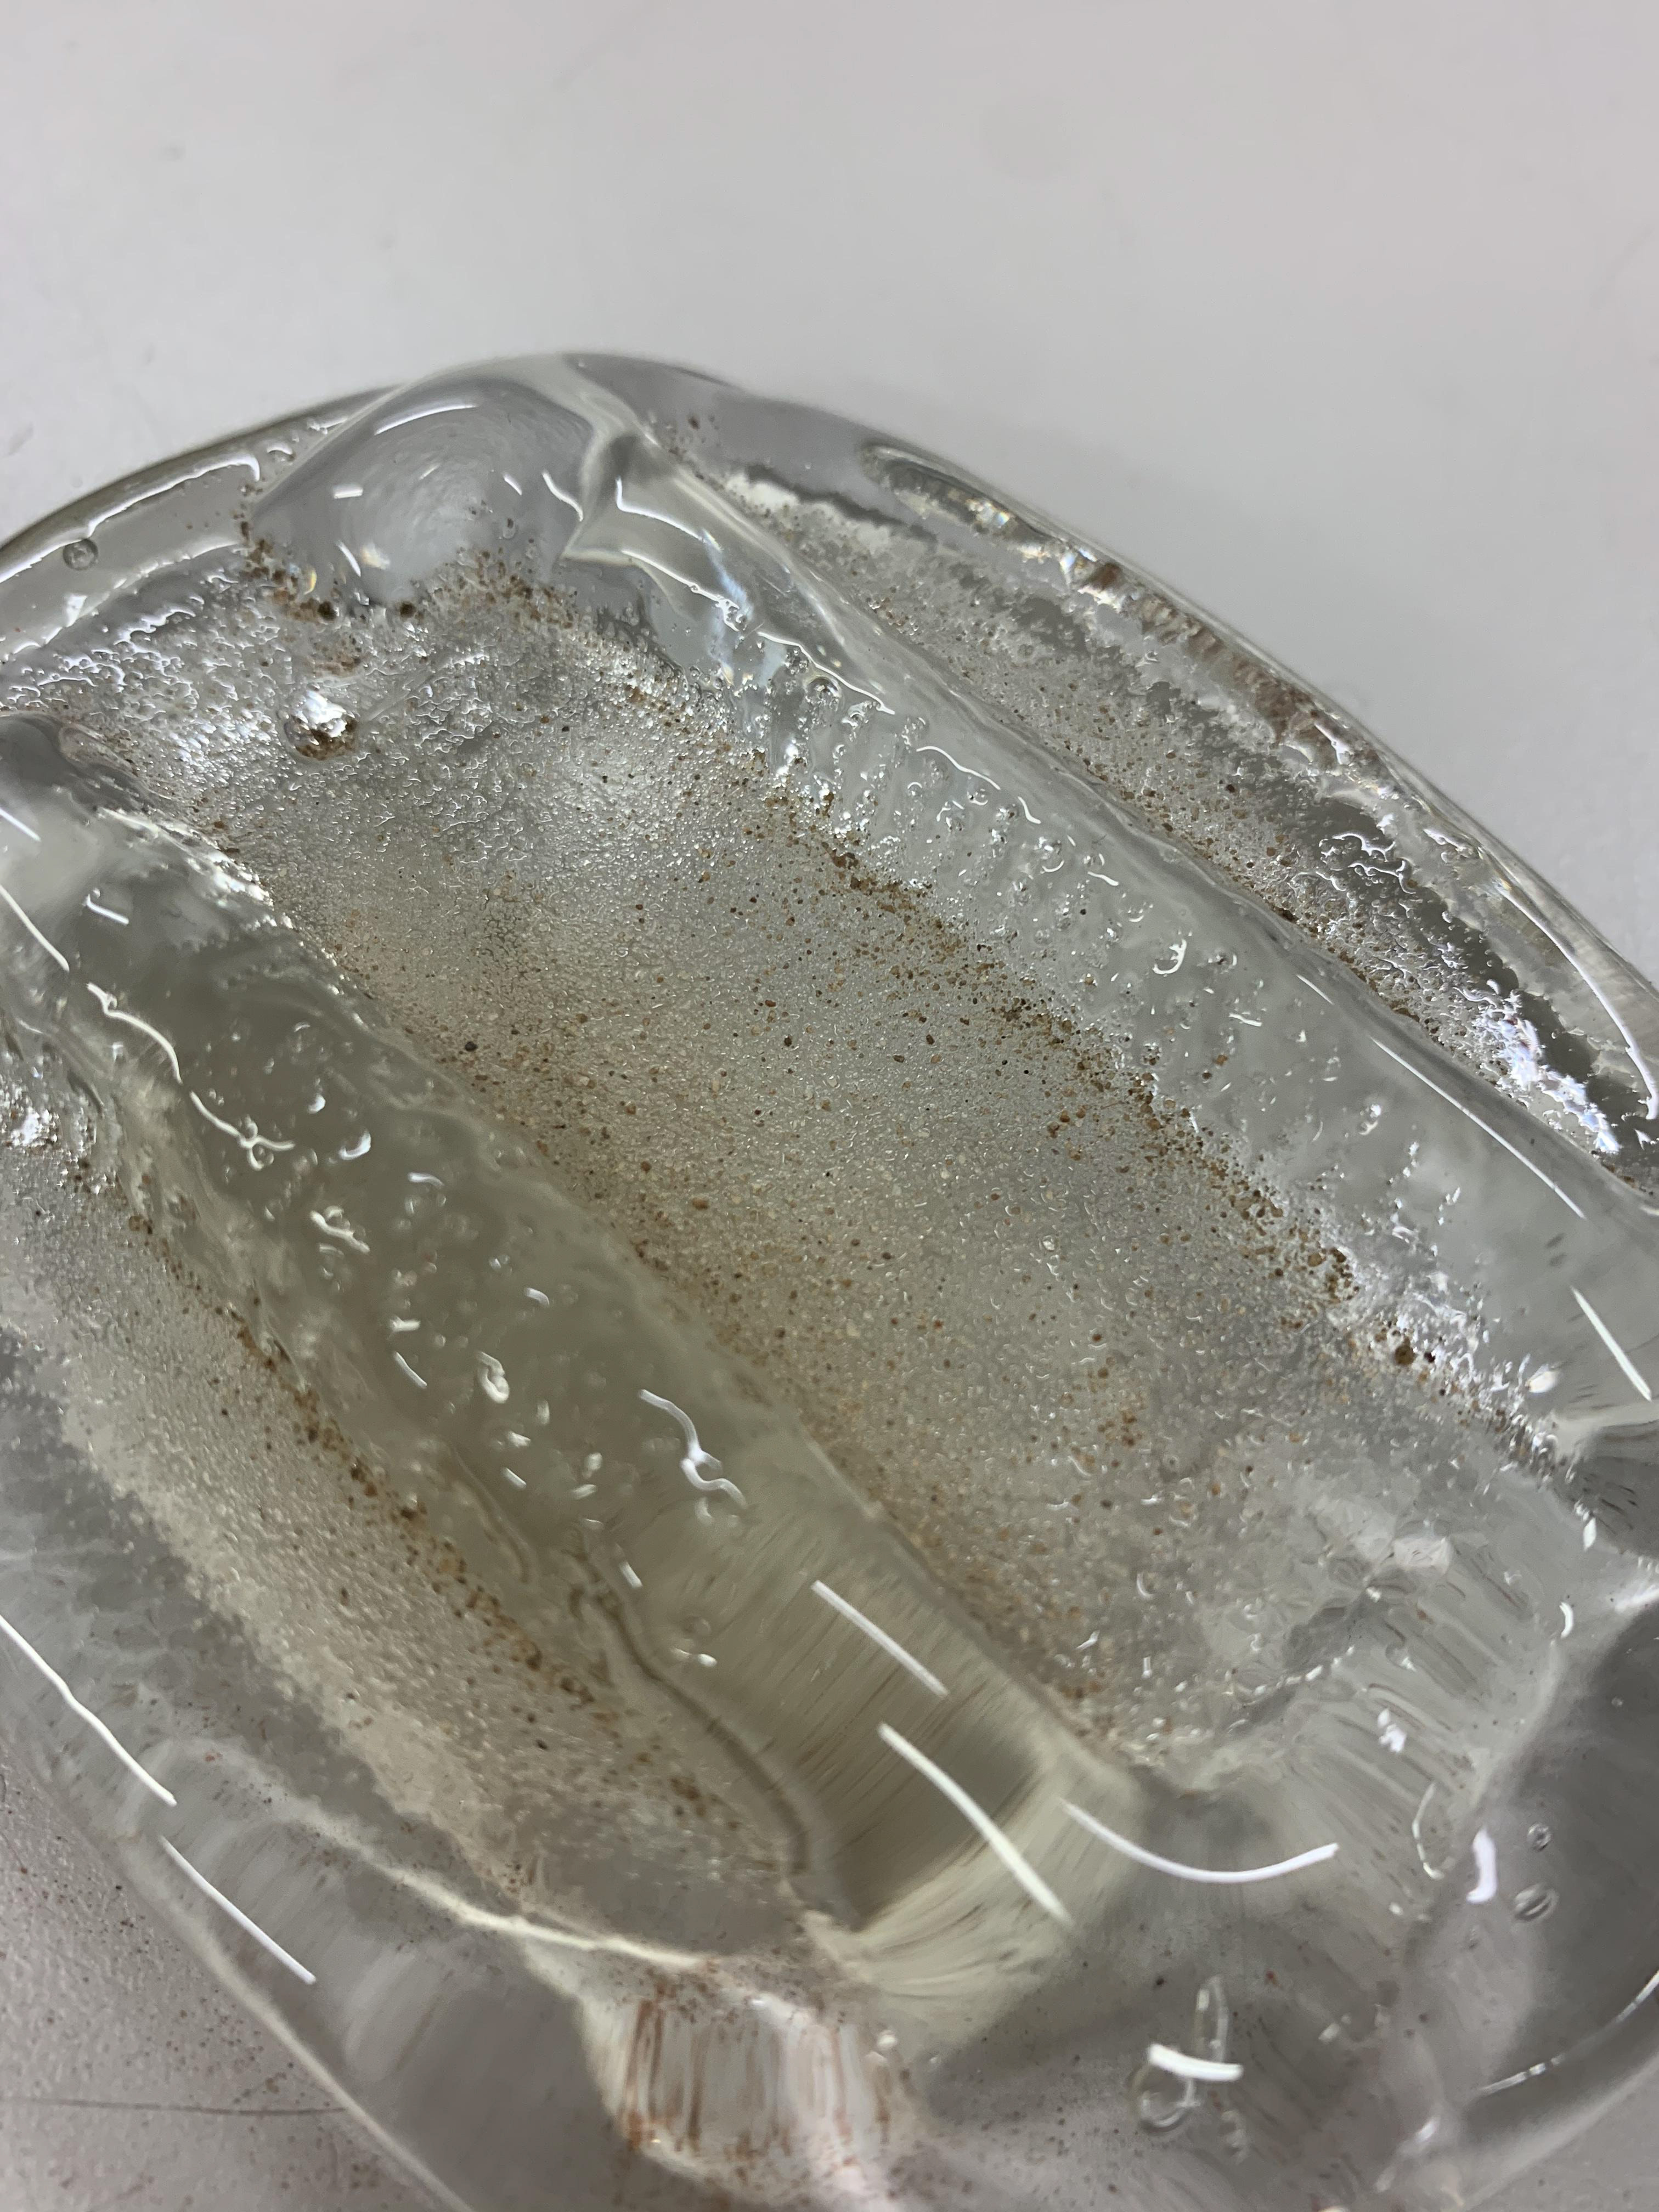
THIS LARGER PEICE WAS A GROUP PEICE, WE ALL USED FOUND OBJECT TO MOULD THE SAND TO CREATE DIFFERENT TEXTUREs AND TO SEE HOW DIFFERENT OBJECT REACT TO THE GLASS. WE ALSO DECIDED NOT TO SUGAR SPAY THE SAND THEREFORE THE GLASS IS TEXTURED AS IT PICKED Up THE TEXTURE OF THE SAND; A SMALL BUMPY GRAINY TEXTURE LINES THE GLASS. I REALLY LIKED THIS EXPERIMENT IT WAS INTERESTING TO SEE HOW LARGE YOU CAN MAKE YOUR SAND CASTING PEICES AND EXPLORING THE FORMS AND TEXTURES YOU CAN MAKE. I WOULD REALLY LIKE To EXPLORE USING THIS TECHNIQUE WITH FOUND OBJECT I FIND THROUGH OUT MANCHESTER LOOKING INTO TEXTURES AND ORGANIC FORMS.
bertil vallien

hot sculpture
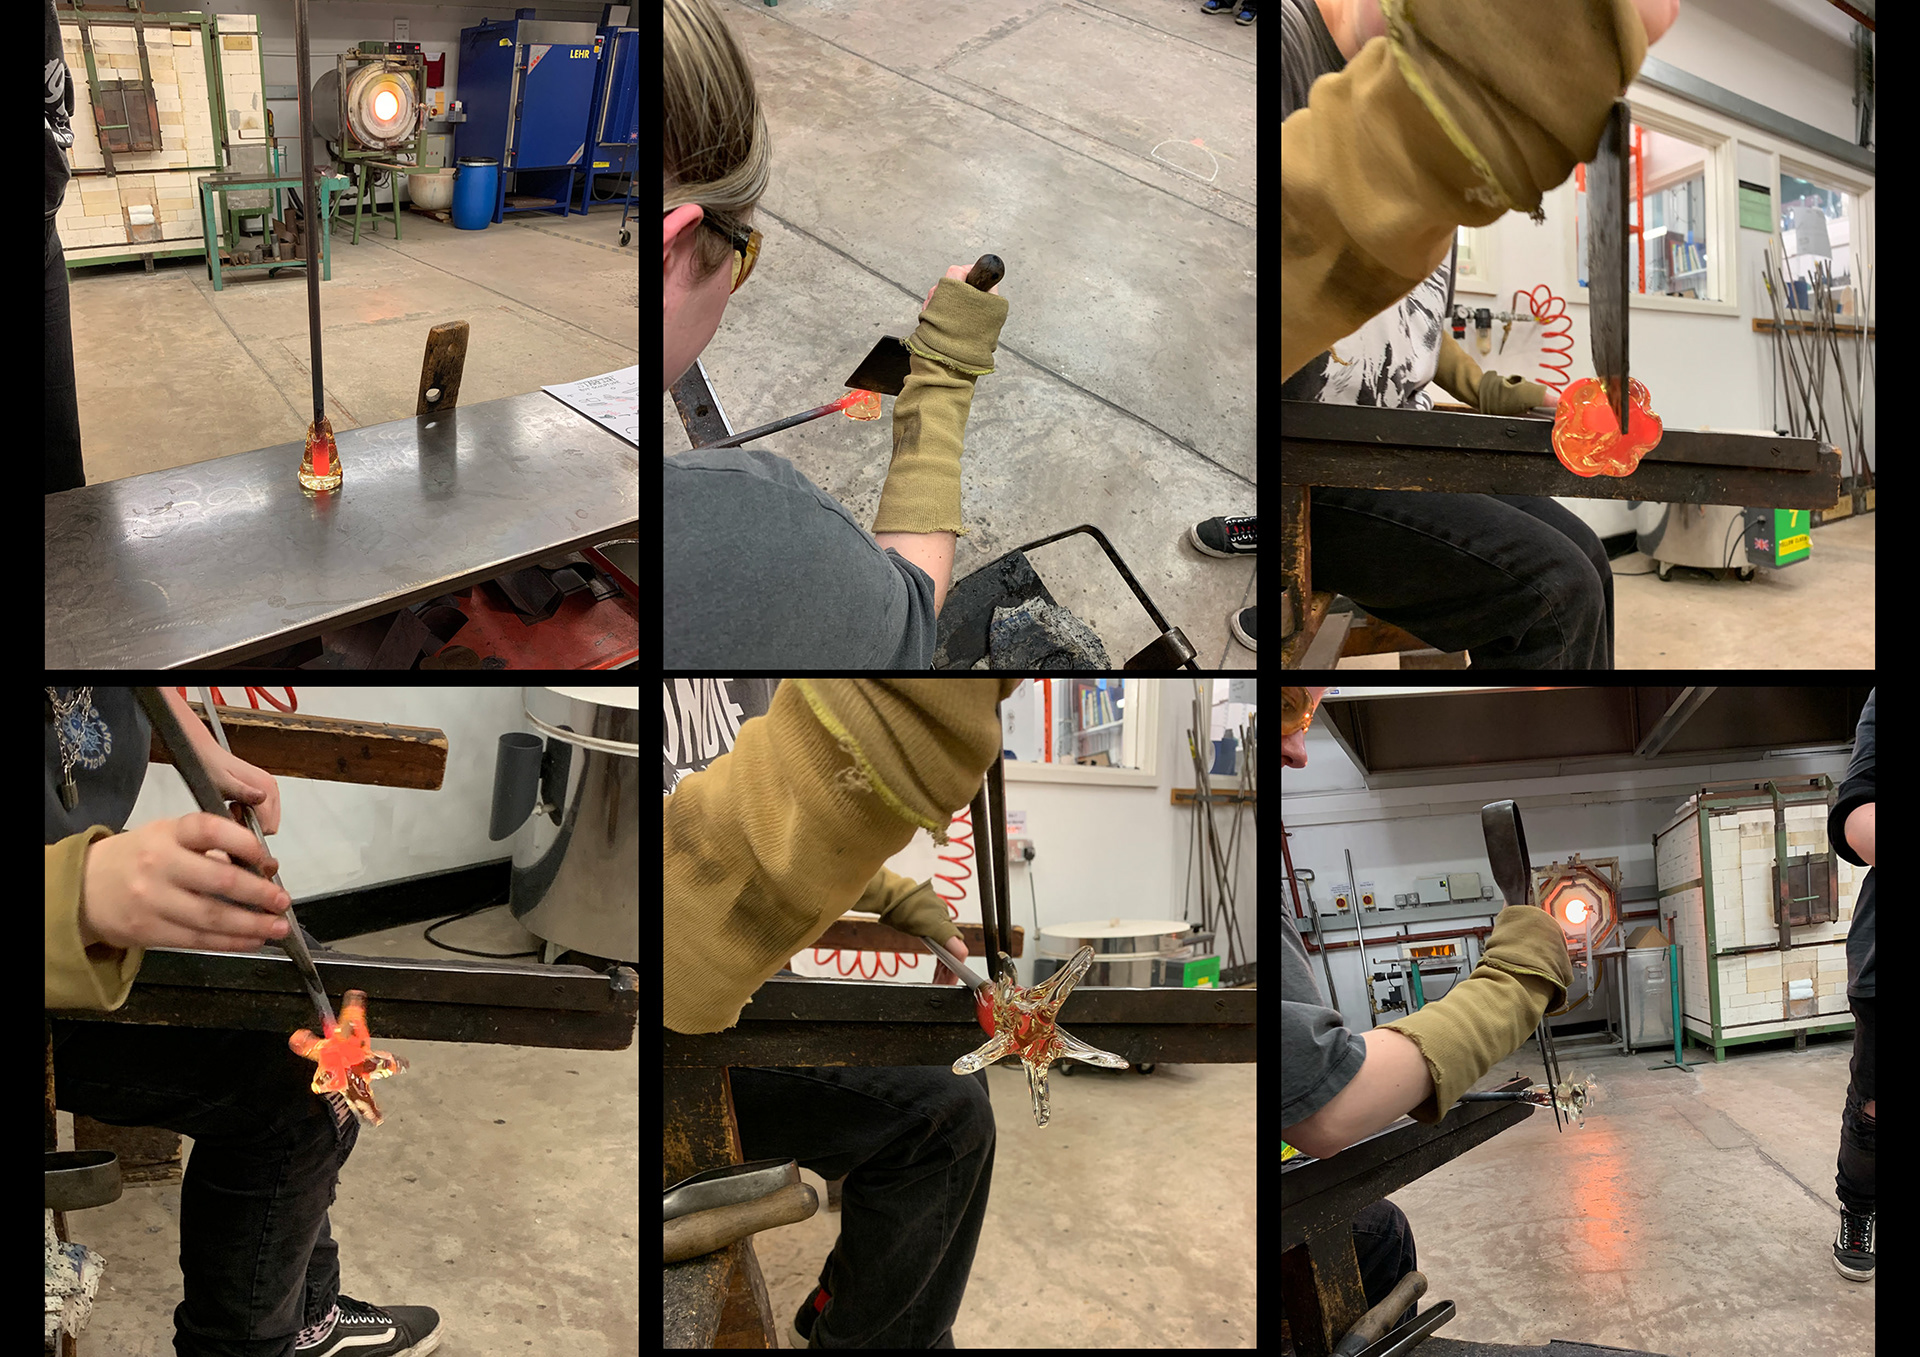
in glass we learned how to create a hot sculpture, we were challenged to make a star fish from molten glass. using a range of tools we gathered, shaped, cut and pulled the glass to create our desired shape. constantly feeding our sculpture back into the furnace to keep the glass at the perfect temperature therefore still workable.
here you can see we use a metal bench to help shape the molten glass rotating it evenly to get the right shape. this technique helps shape and pull the glass off the iron rod therefore we have more glass to play with. we wanted to create a tear shape with the glass so when we return to the bench using wet paper and water we could easily create a even ball shape which we would then cut into our star fish. this method helps as a base for the next steps, as the metal surface is even its a lot easier making a basic shape as long as even pressure is used.
these two videos show us forming the star fish shape. to begin with we mould the glass into a ball/ tear shape having this base shape allows us to use more of the glass and having a tear shape means we can easily create a neck for us to drop the glass off. using folded newspaper soaked in water you are able to shape the glass by adding pressure and doing full rotations of the iron rod. i found this technique difficult as if you don't have even pressure you will throw the glass off and it will be lopsided with means your work will continue you like this. however it is easily fixed, you have to return to the furnace many times as the water cools the glass and makes it to hard to mould. once you have the right pressure its a easy technique to use however i need to practise more. for the video on the left it shows the cutting of the starfish arms using a tag tool we created indents for the arms then using shears we cut along the lines we created. and with flat irons and tweezers you are able to pull the legs apart and create your starfish. i found this process very challenging as the glass was cooling very fast so i had to keep returning to the furnace and had to be consistently ROtATING it. i learnt that if the rotate your iron rod too slow the legs will droop due to gravity pulling them this meant lots of my legs were sticking together so i was having to repetitively cutting and pulling them apart. in contrast if you spin the iron rod to fast gravity pulls the molten glass out meaning the legs spun out which mean them harder to control what i was doing and i had less control of the glass. i think with more practise it will naturally come on the control needed with glass and with my second attempt you could see a bigger difference as i wanted to get the basic technique better than worrying about the over all shape i want to create.
frottage samples
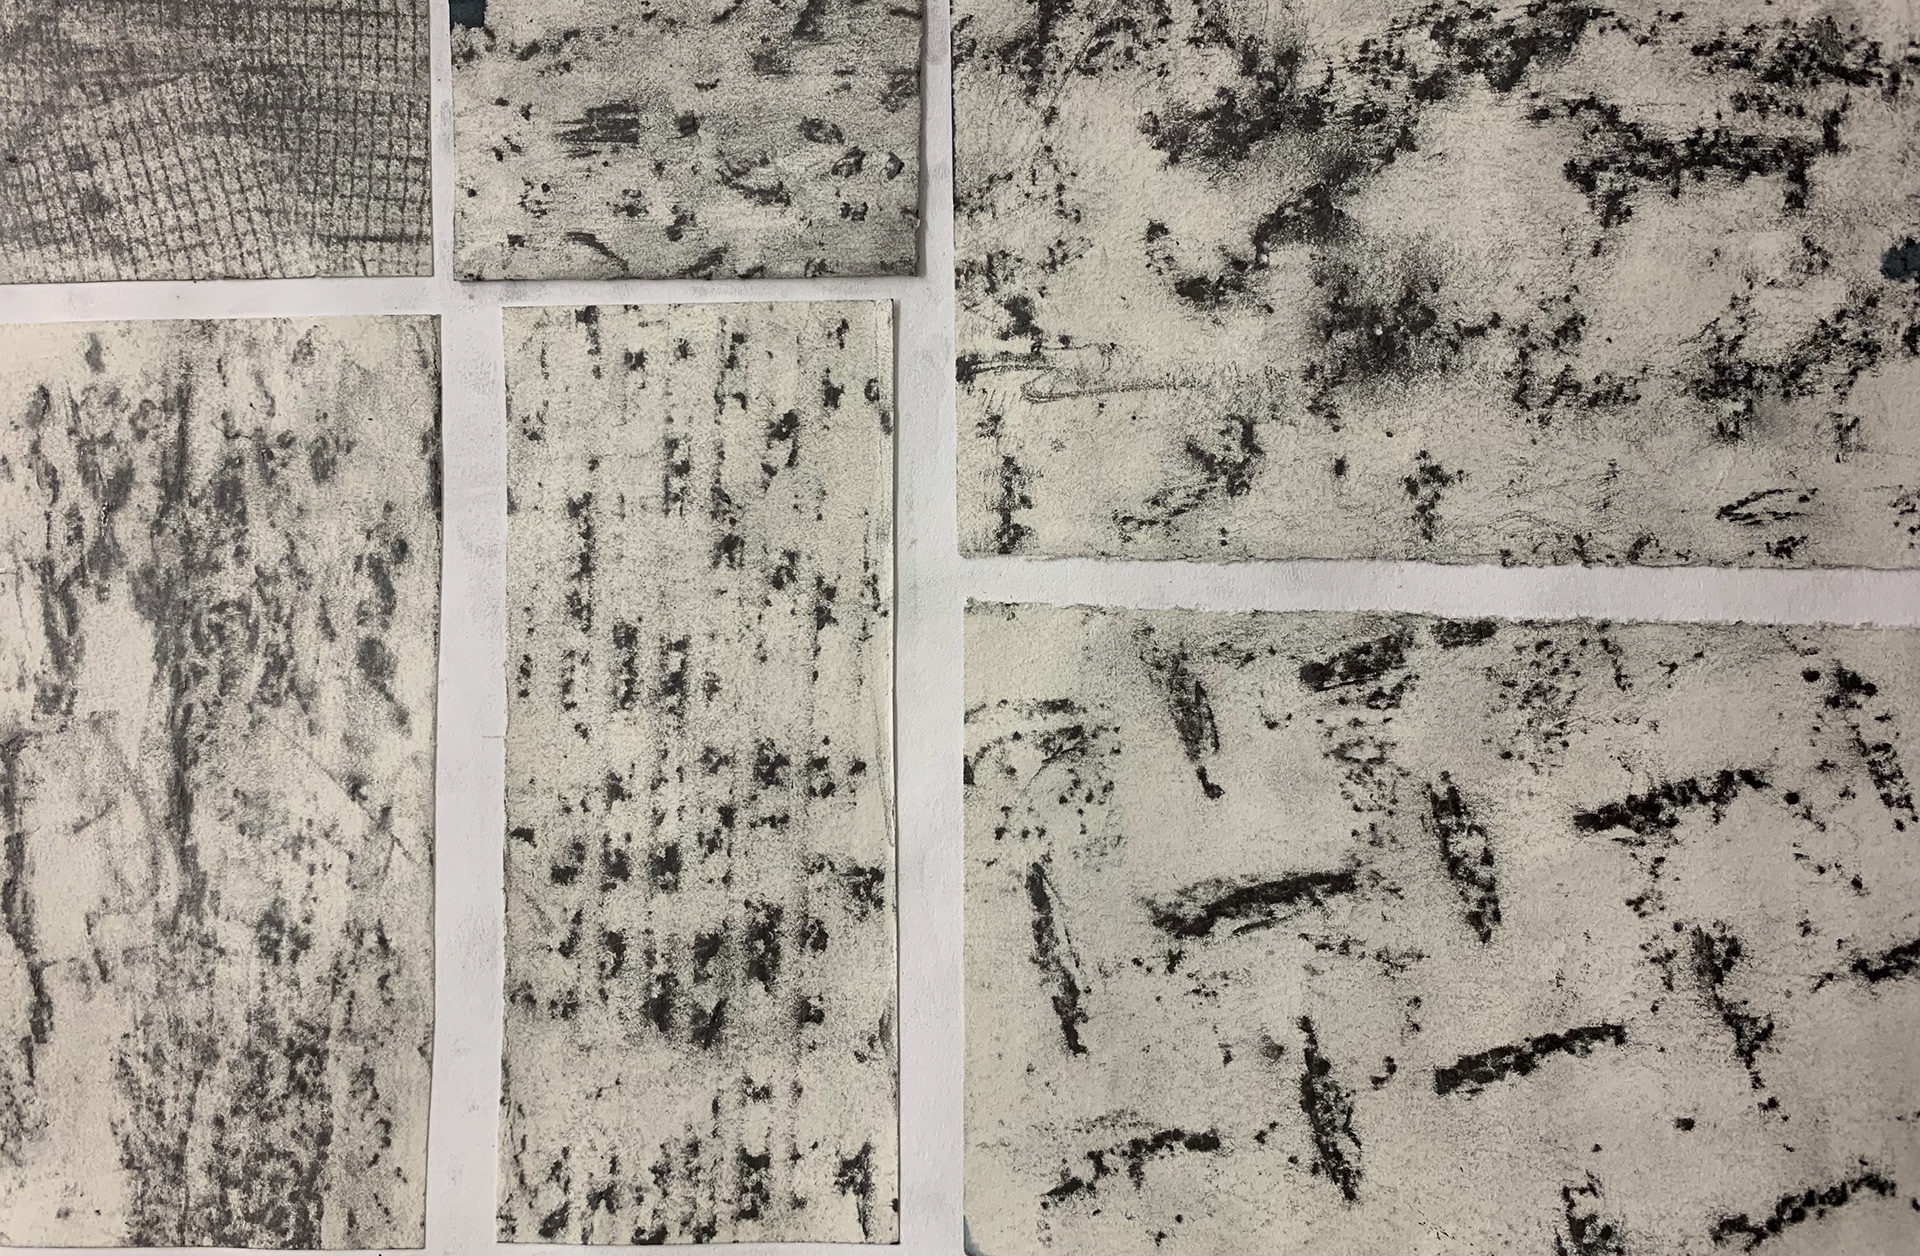
some of my frottage from around manchester
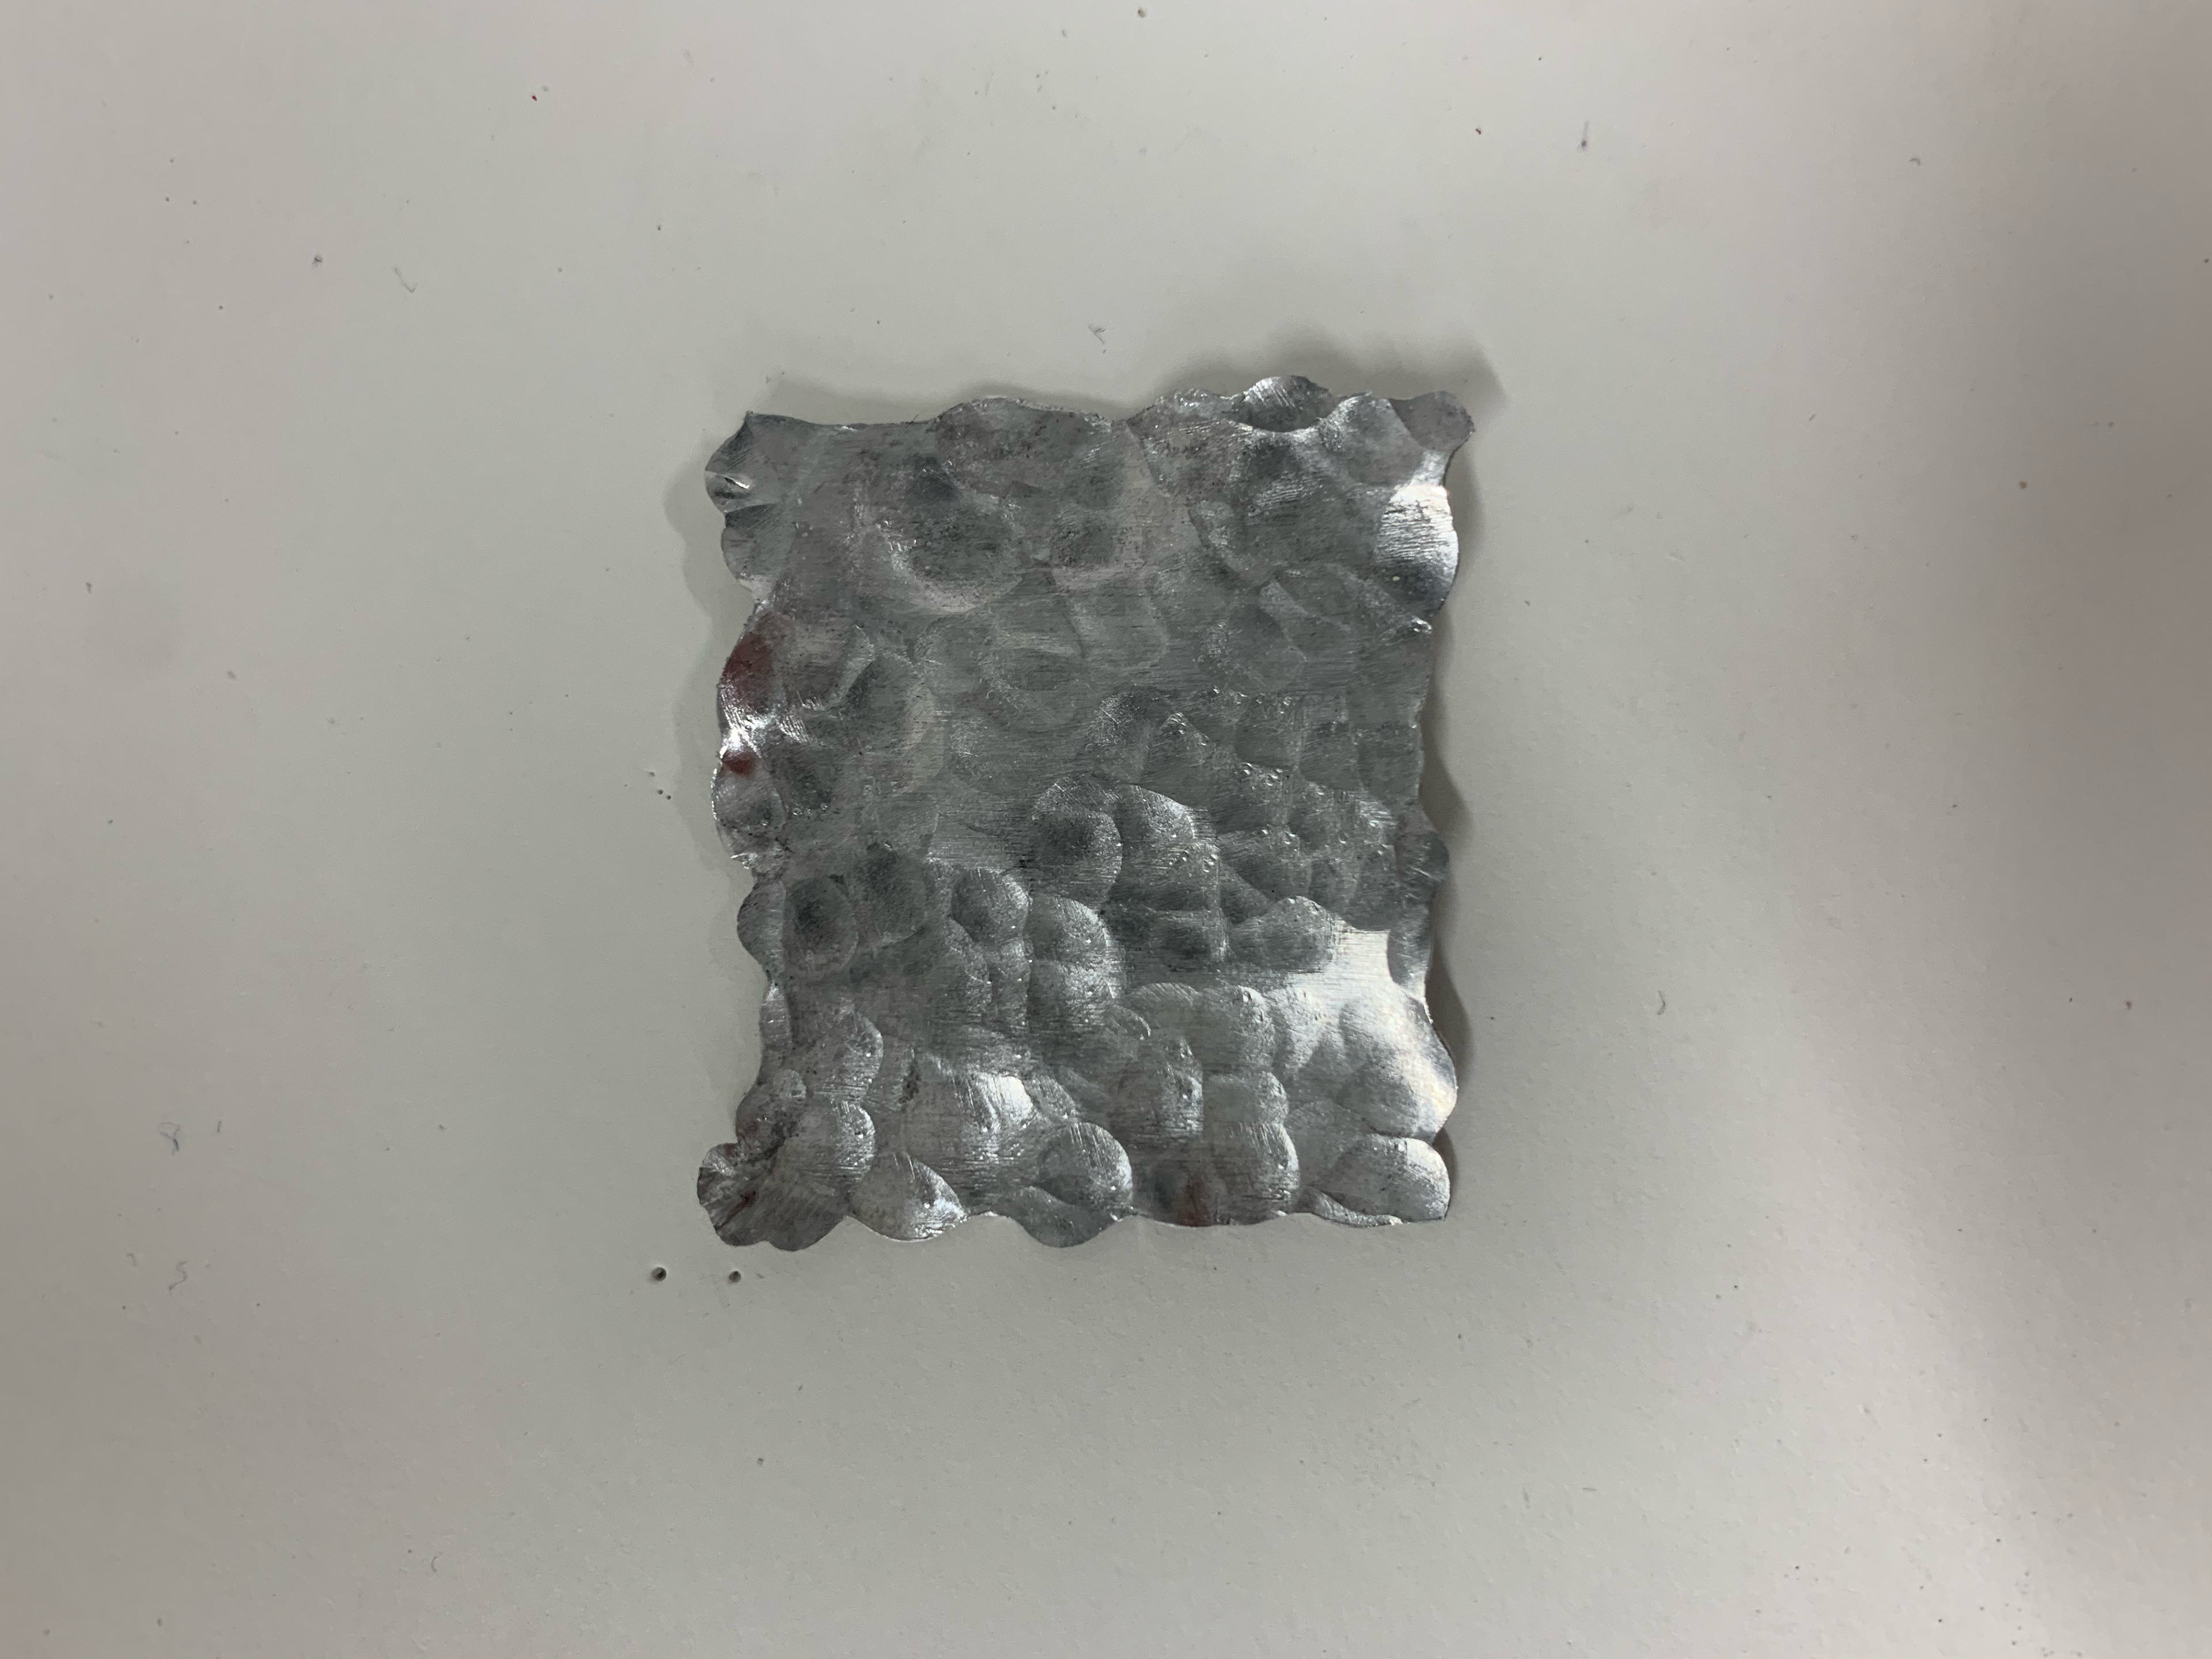
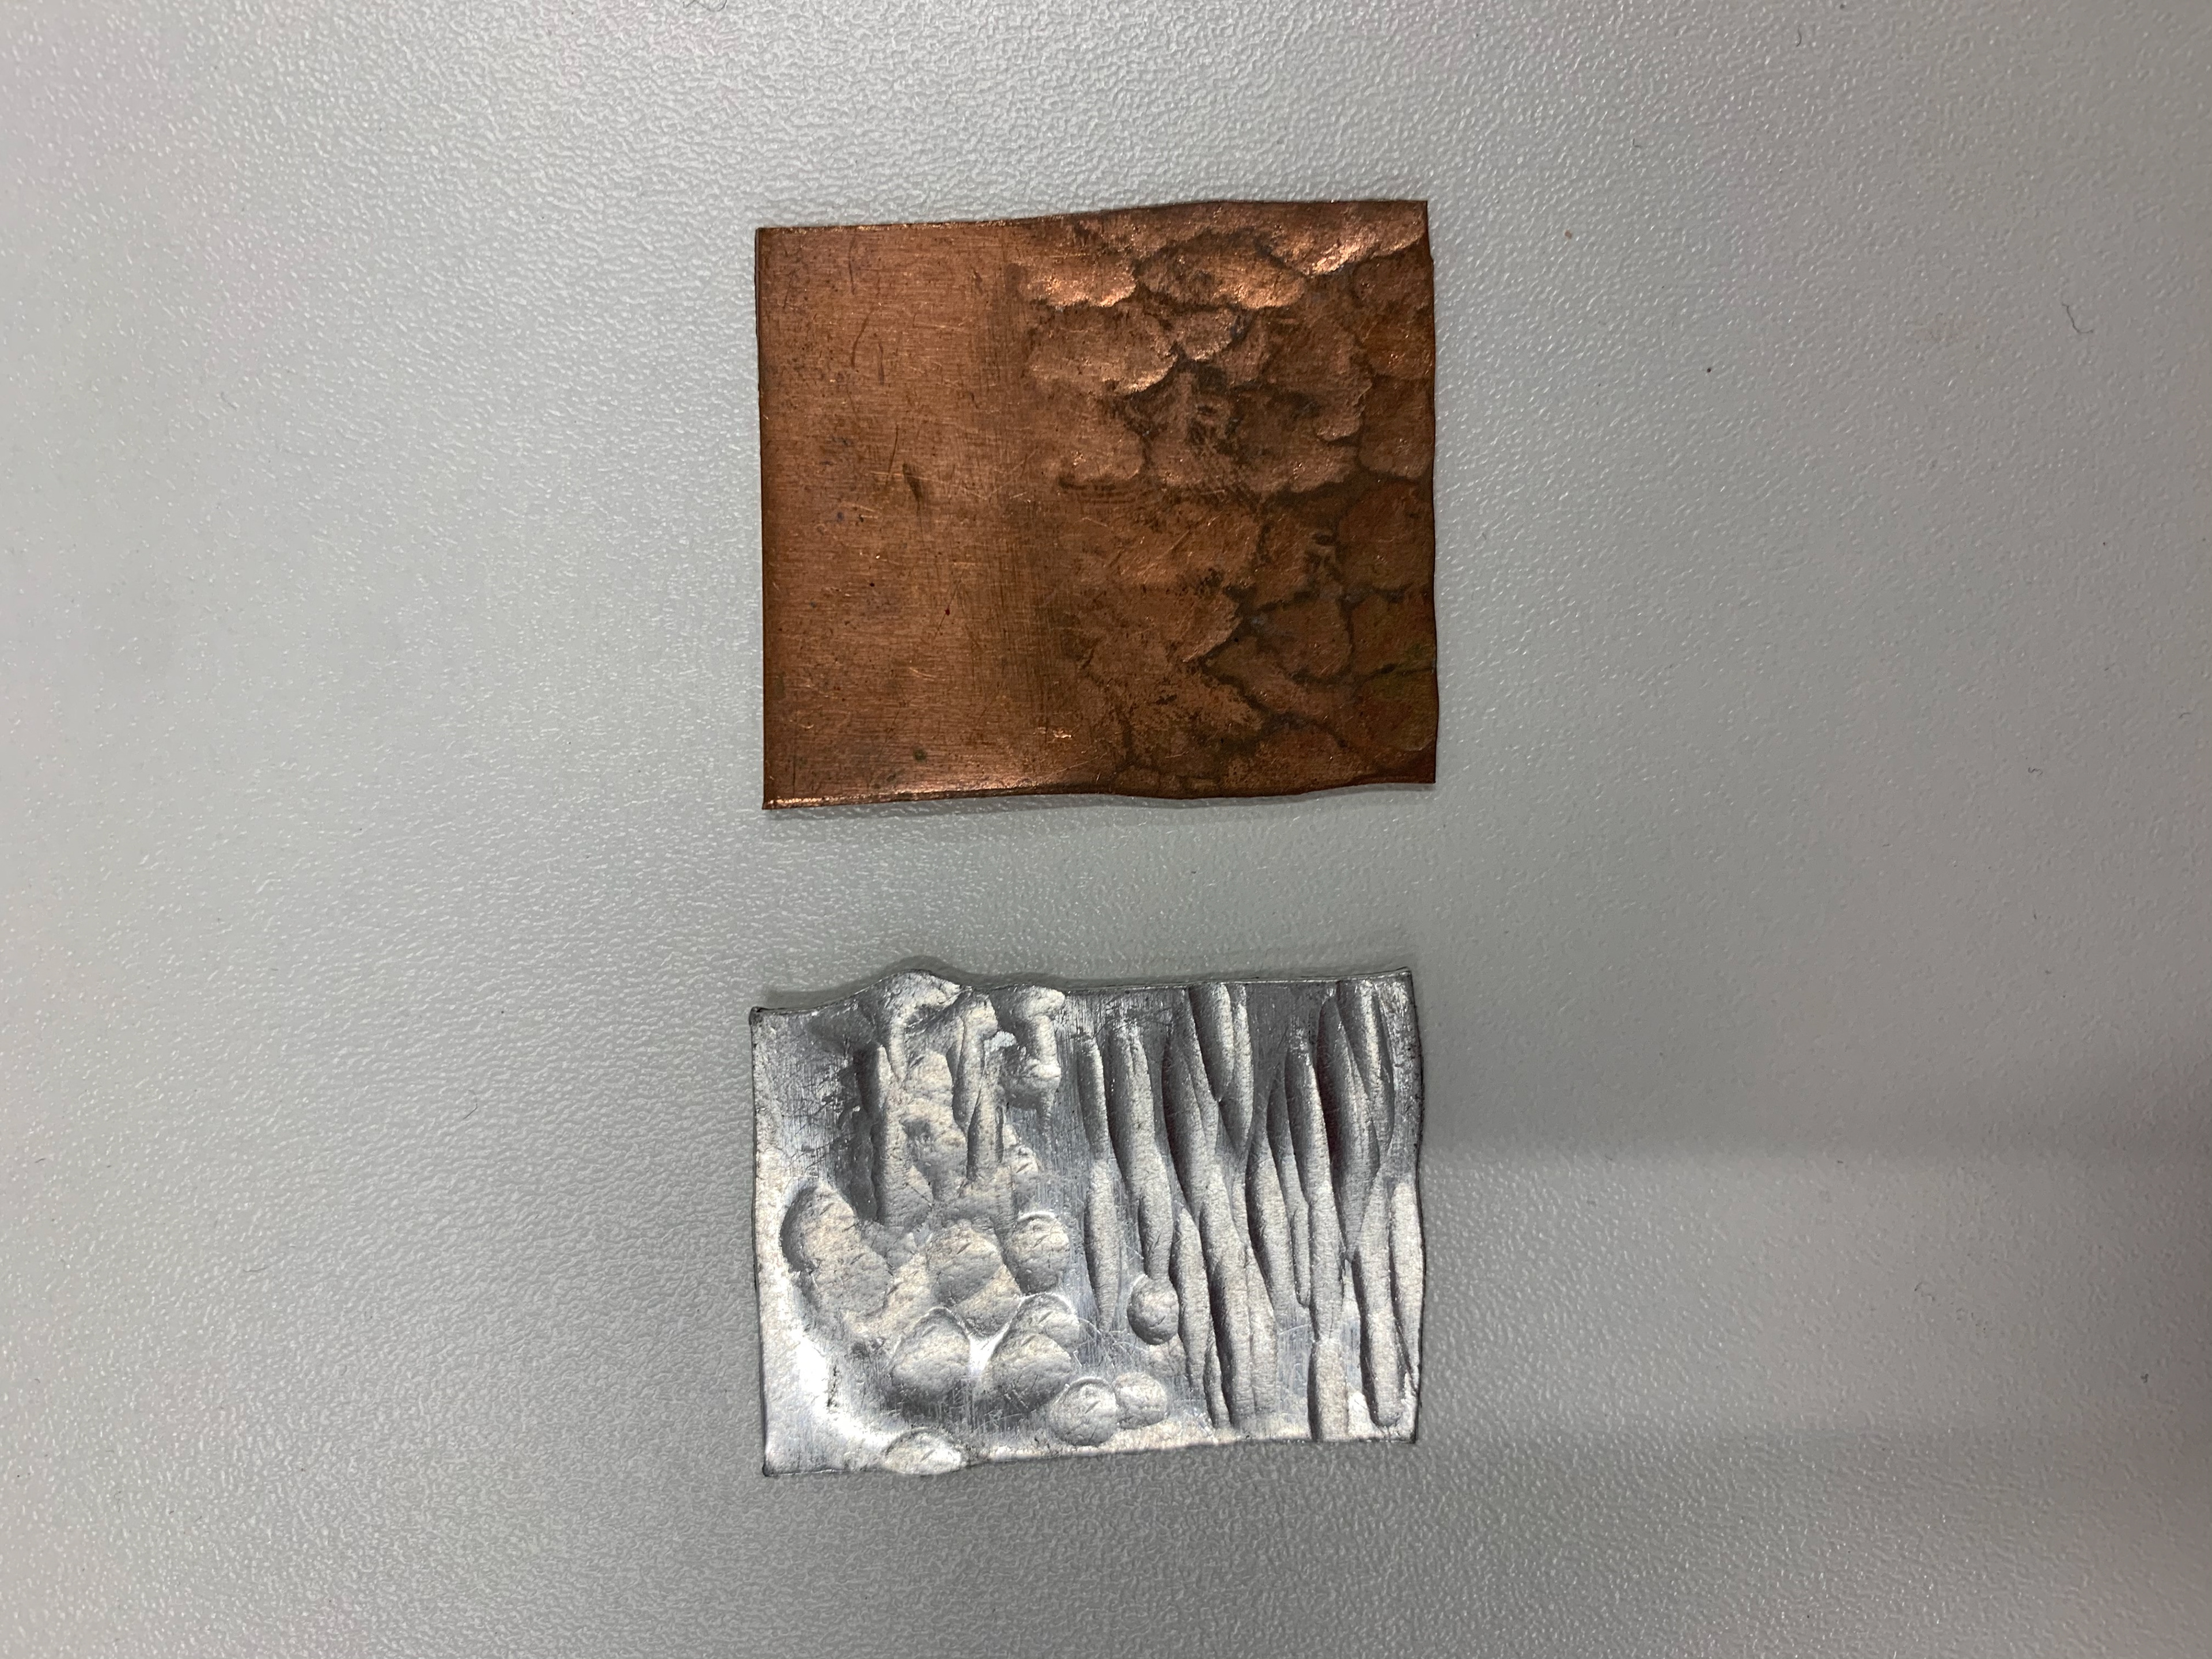
metal samples inspired by my frottage from different surfaces i found around manchester. these were made by manipulation of the metal using hammers and other tools to create textures.

group photos of manchester
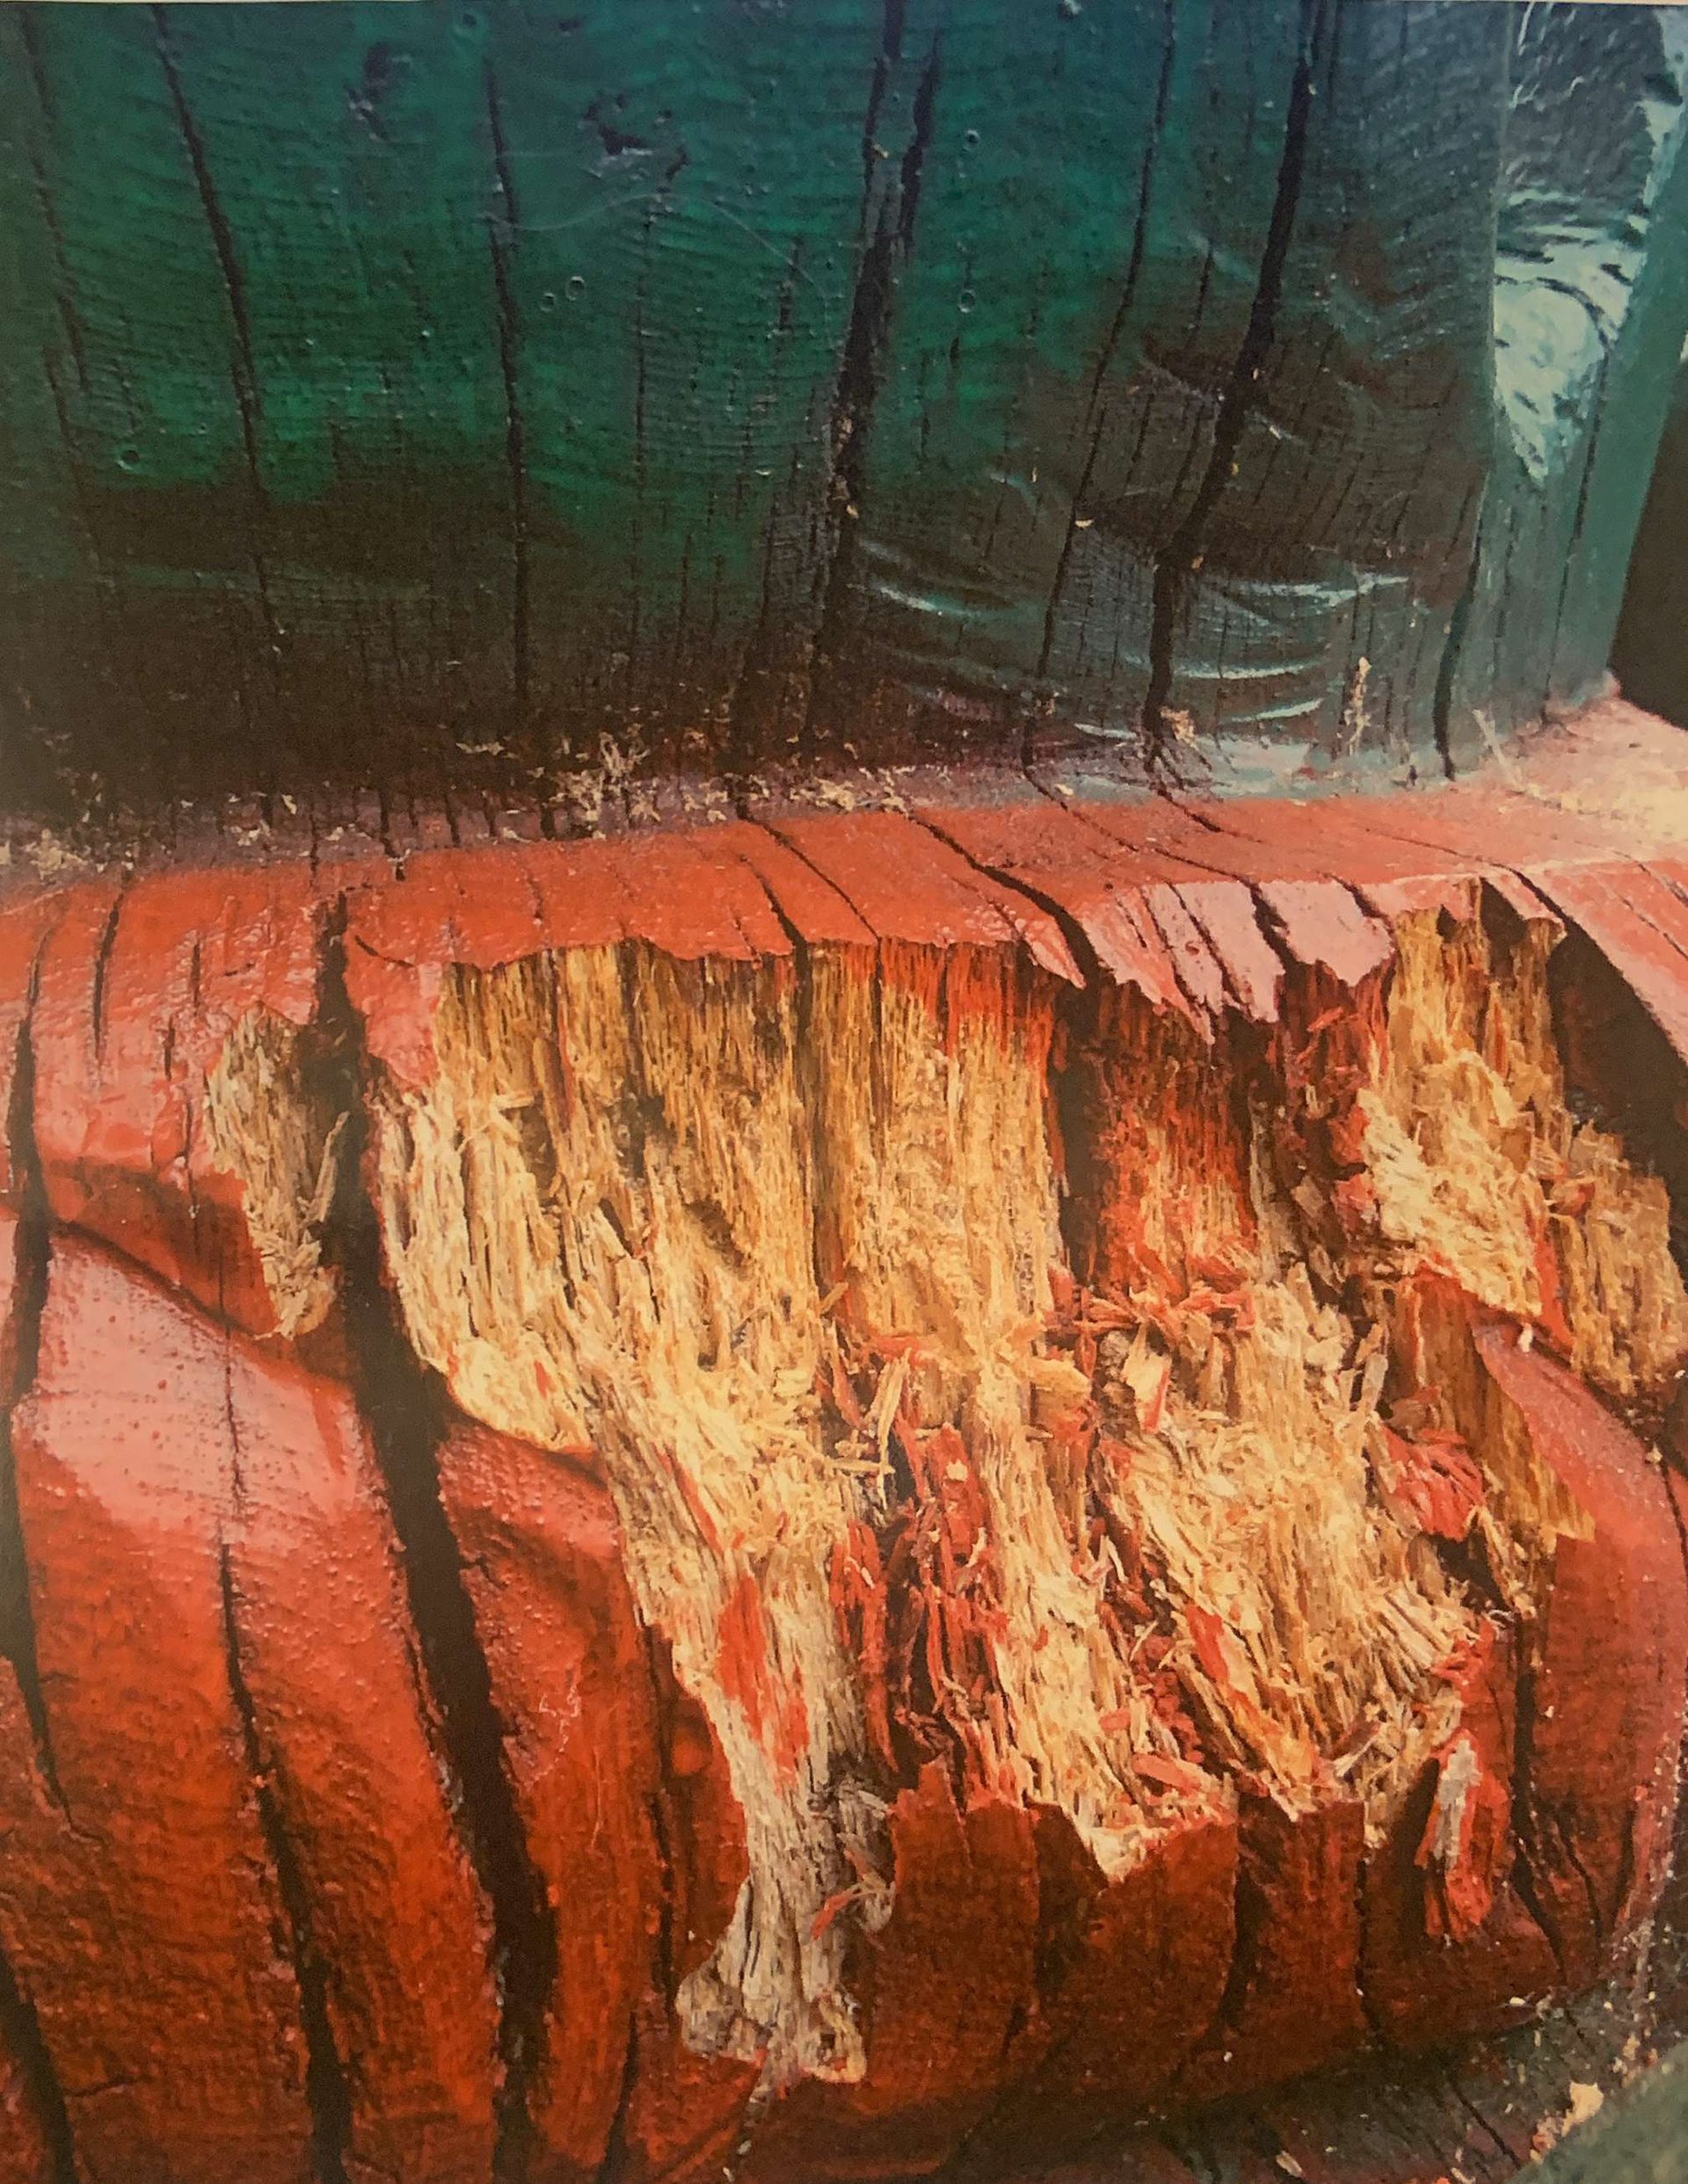
a picture i took from a group session of a wooden sculpture which has been weathered and worn to leave it decaying
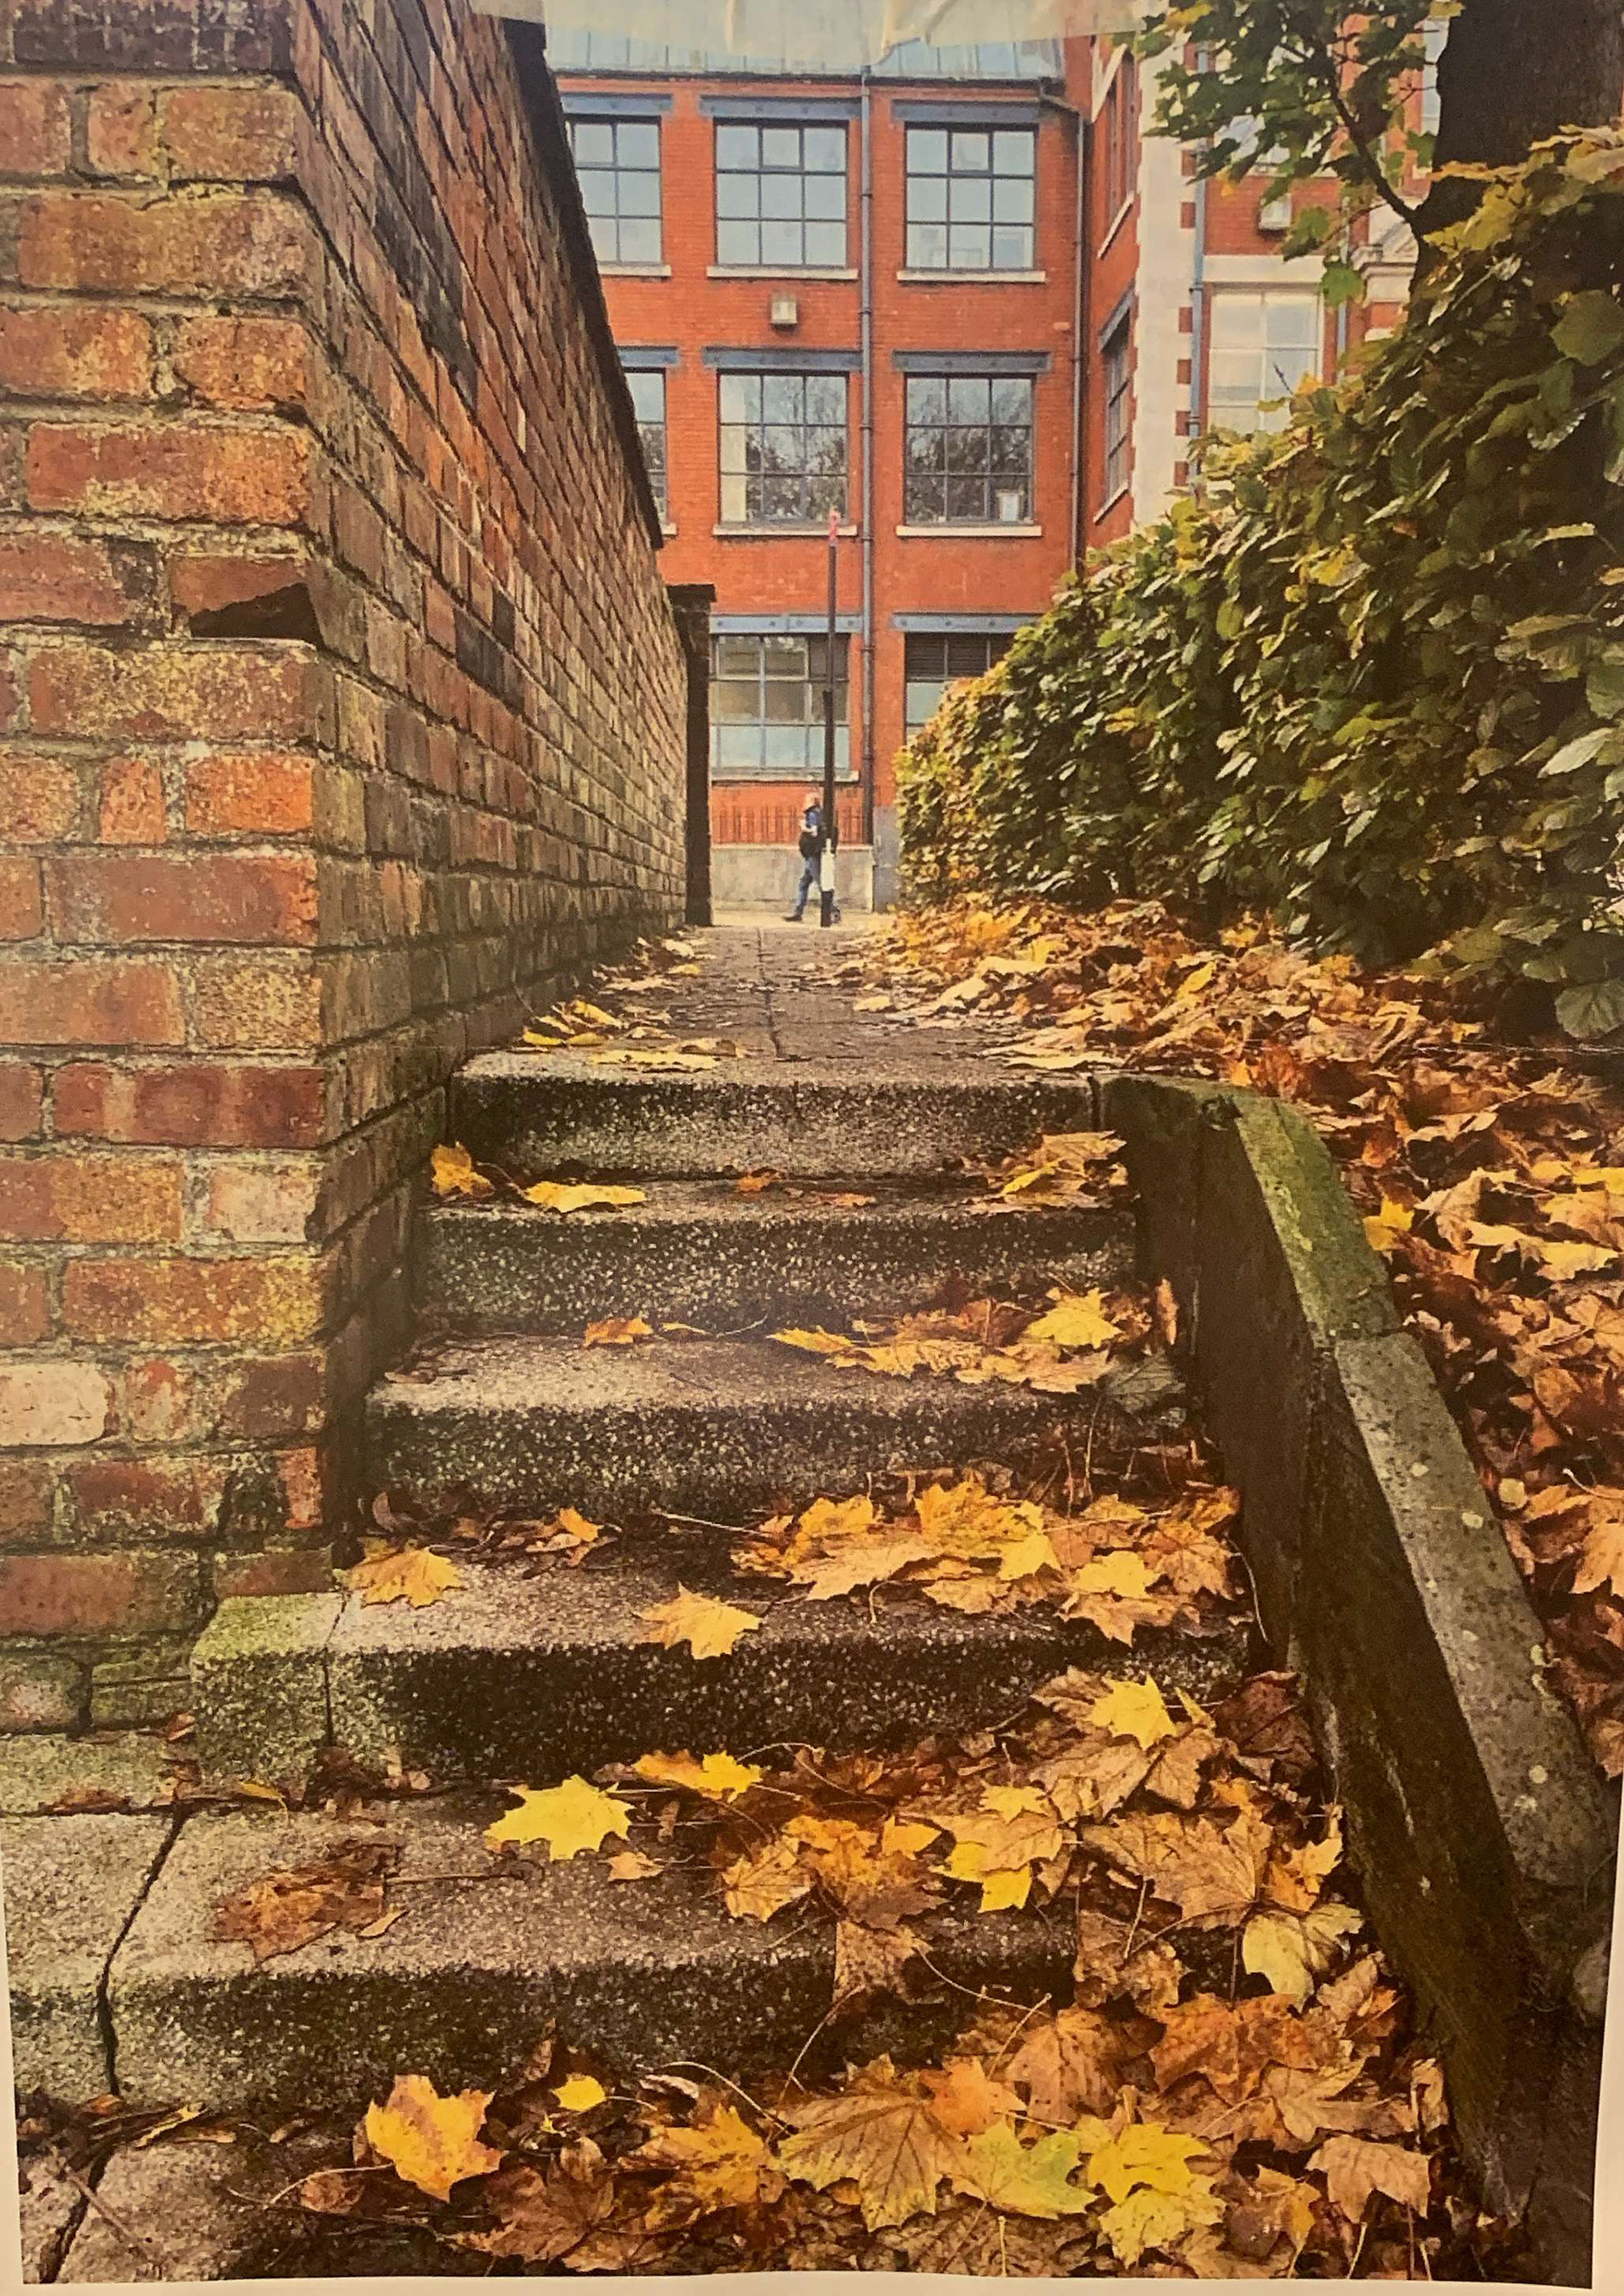
a picture from a group session of stairs
-decay-chunky-forgotten-shreded-chomp-broken-eaten-flesh-gnawed-hurt-
-asending-contrasting-overrun-peaceful-autumn-layered-scattered-lost-
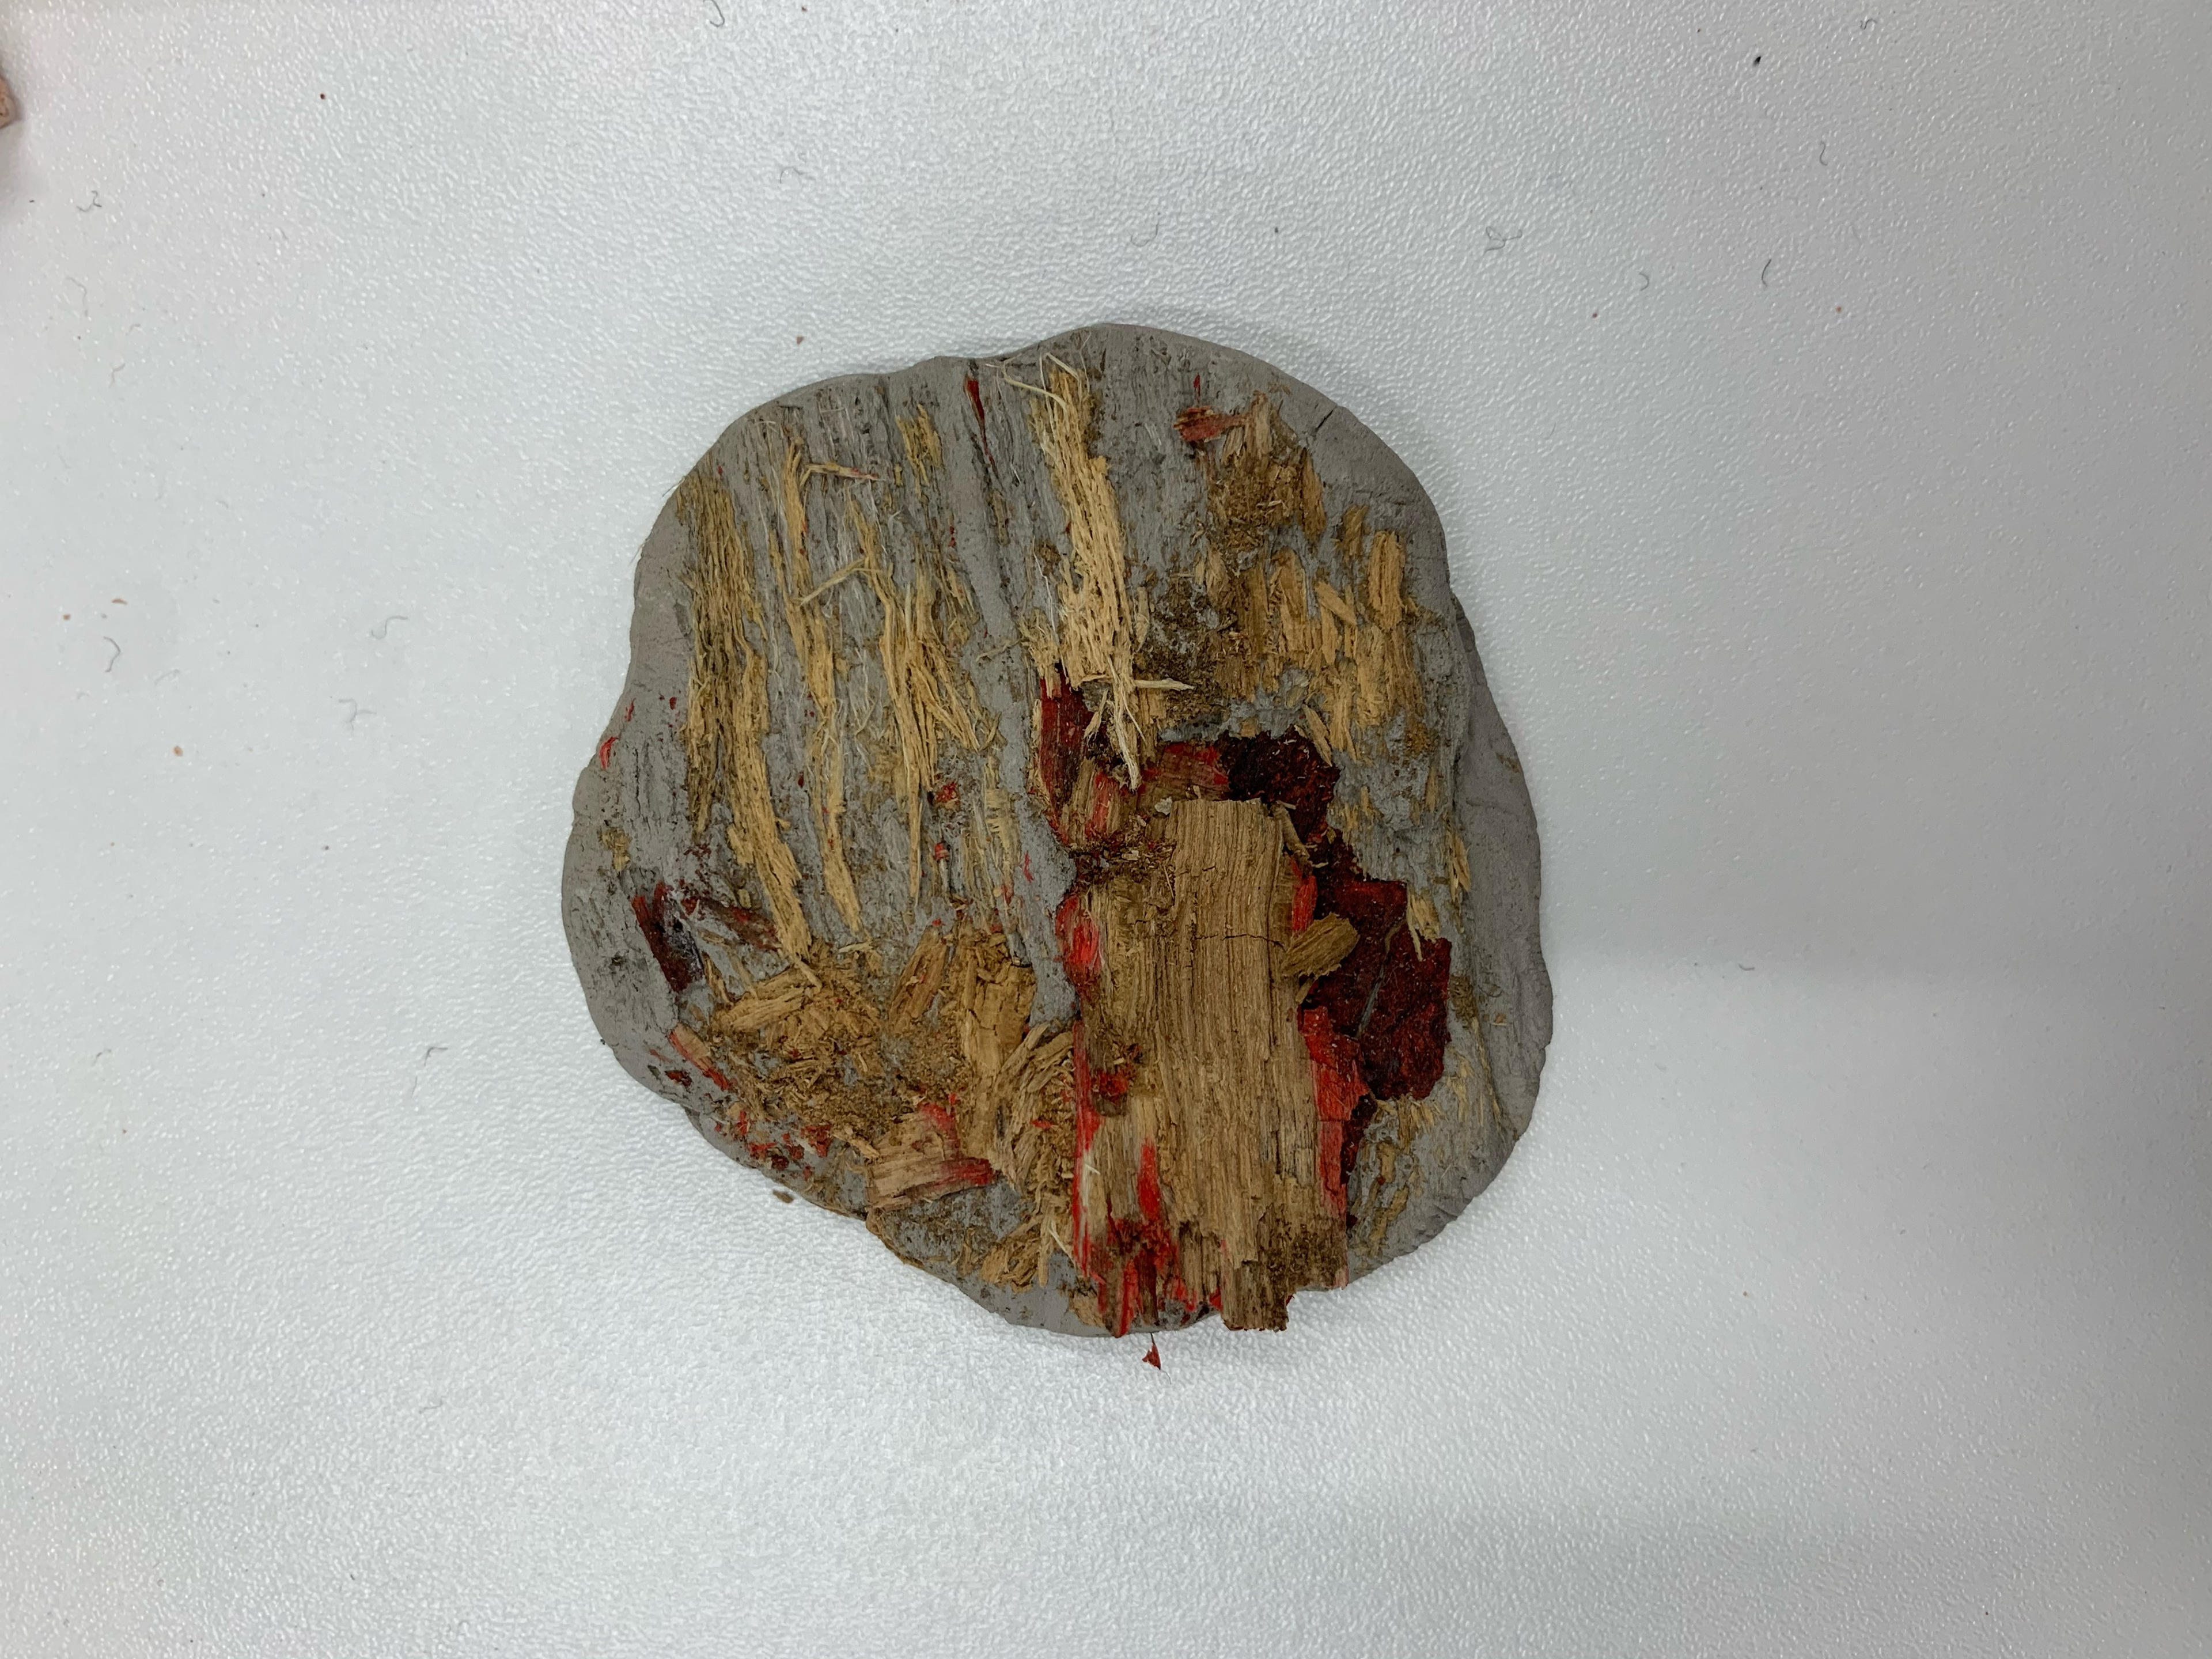

after looking into the chewed wood picture, i walked around manchester and identified the place it was taken. with clay i imprinted the area of clay to pick up on the texture and wood grain as like the photo. due to the wood being weathered and soft due to the rain my clay sample picked up the loose splinters of the wood sculpture.
sand casting
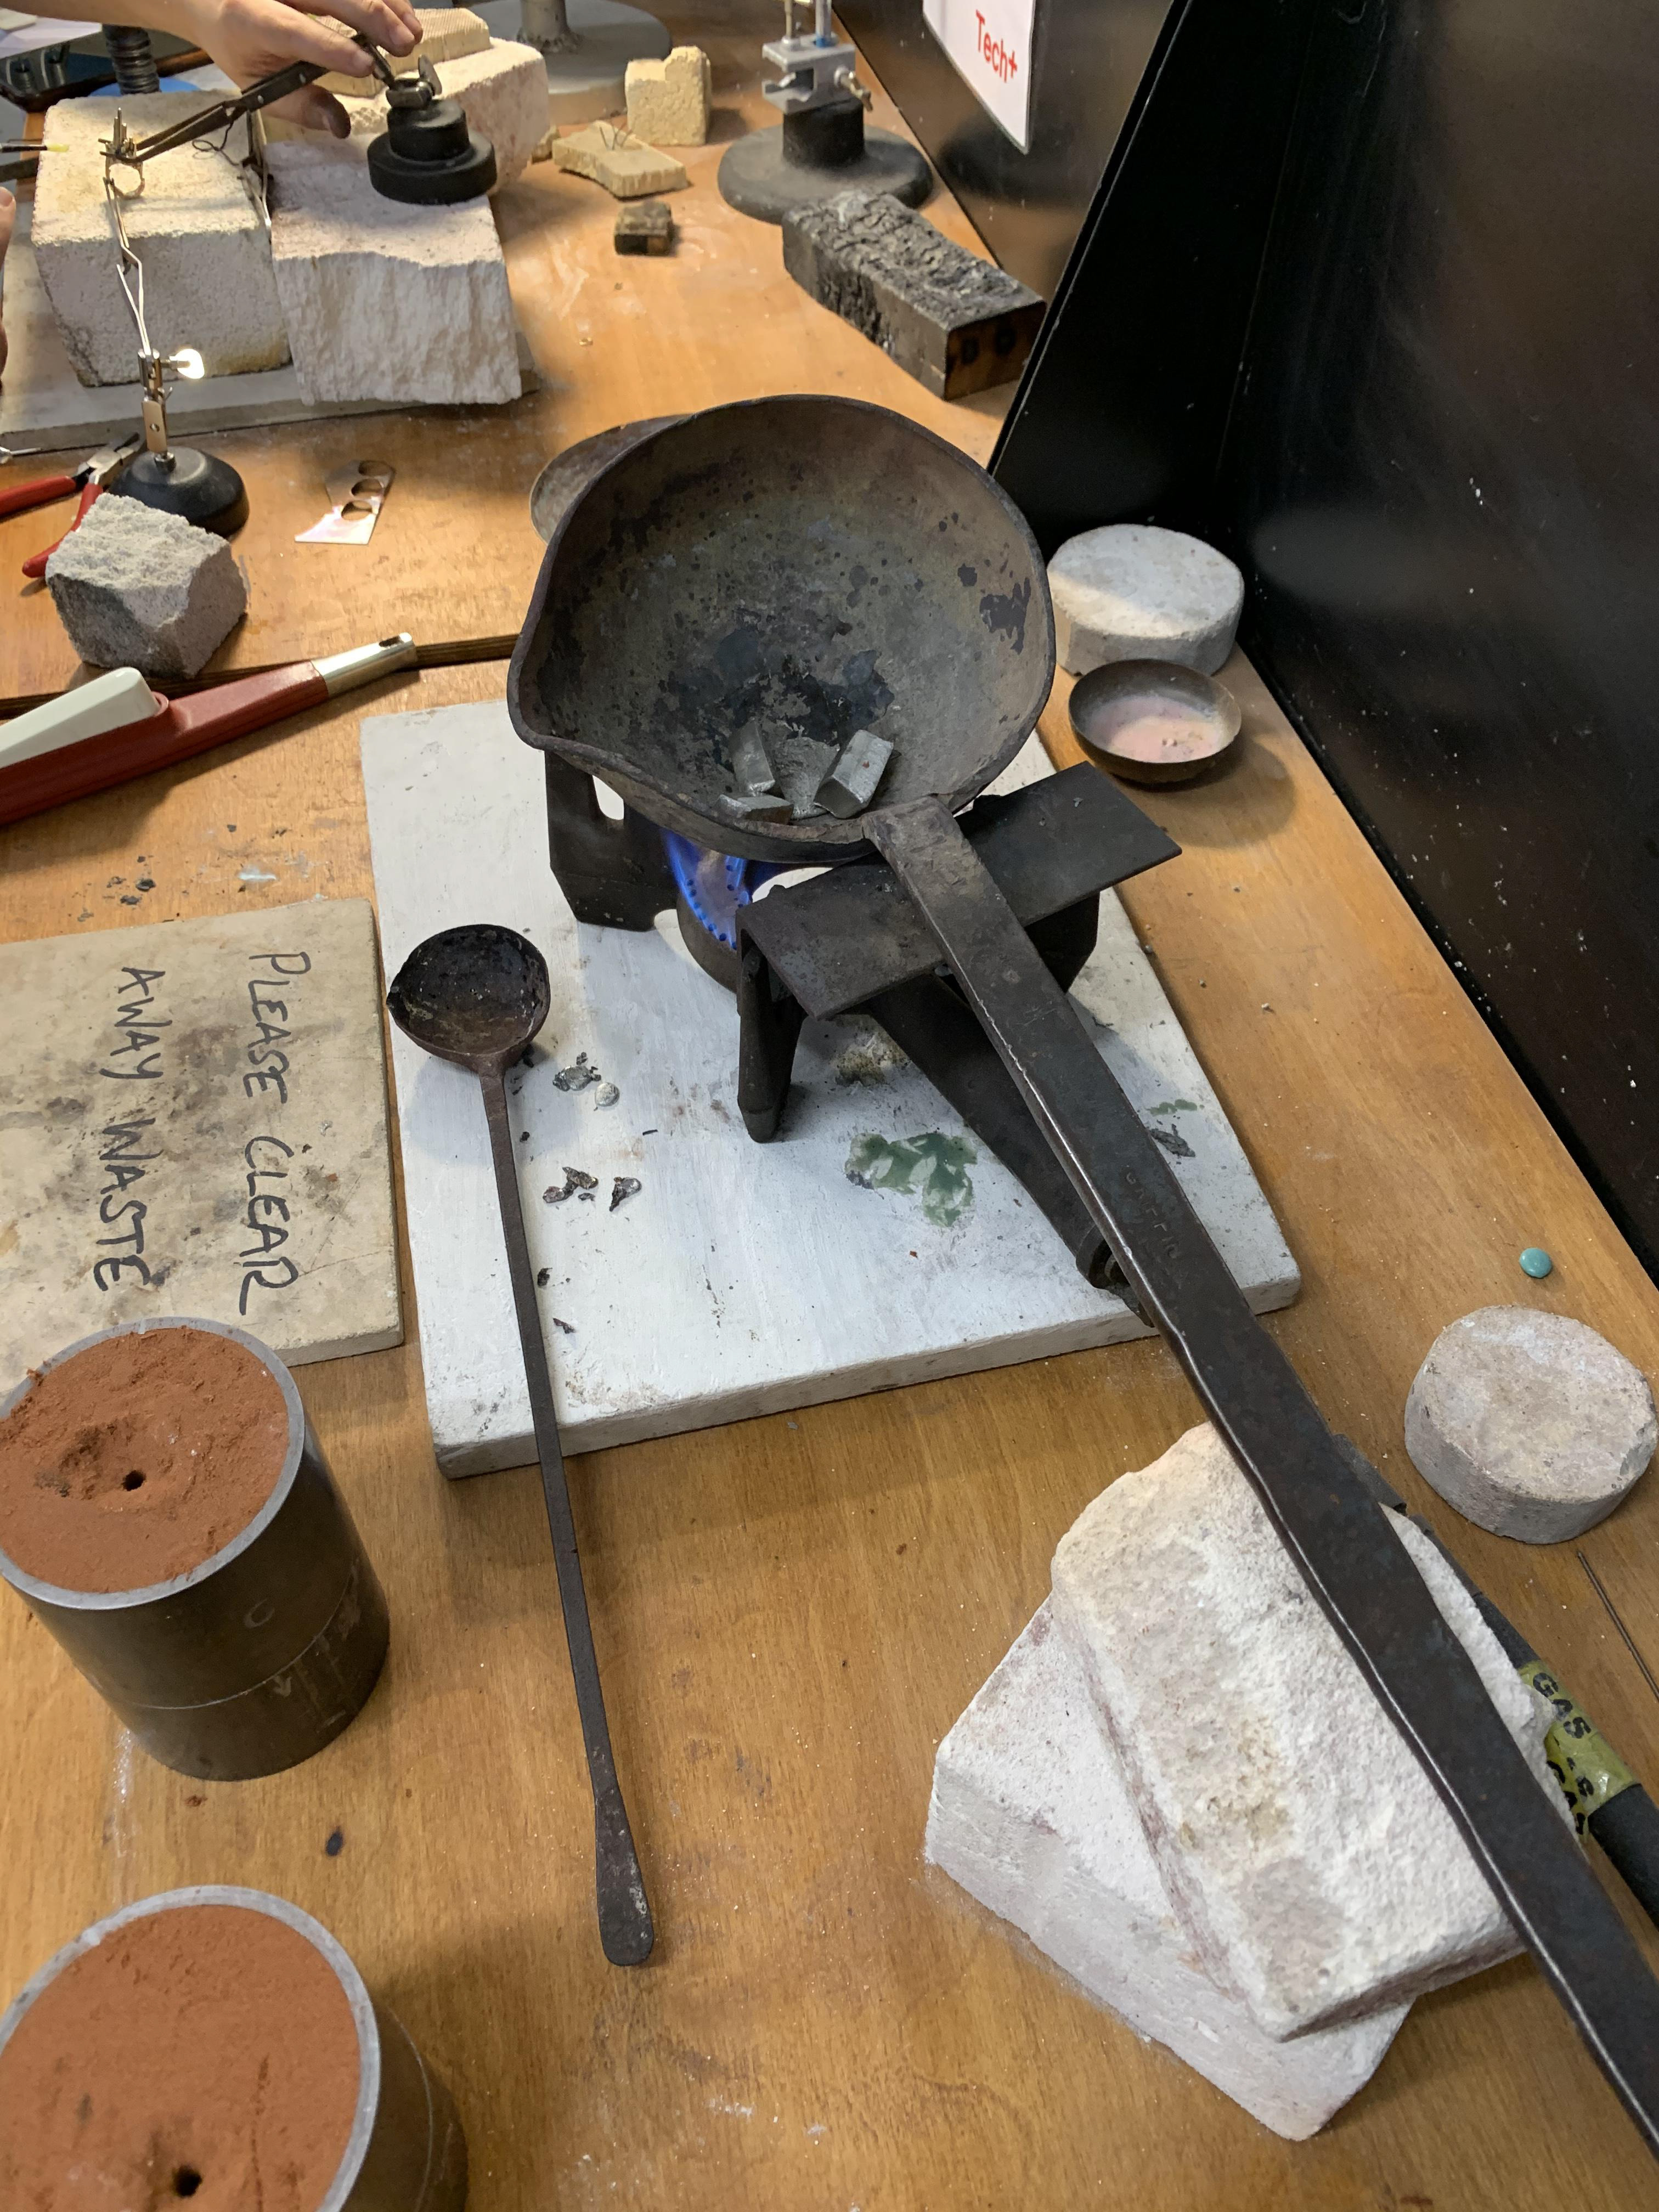
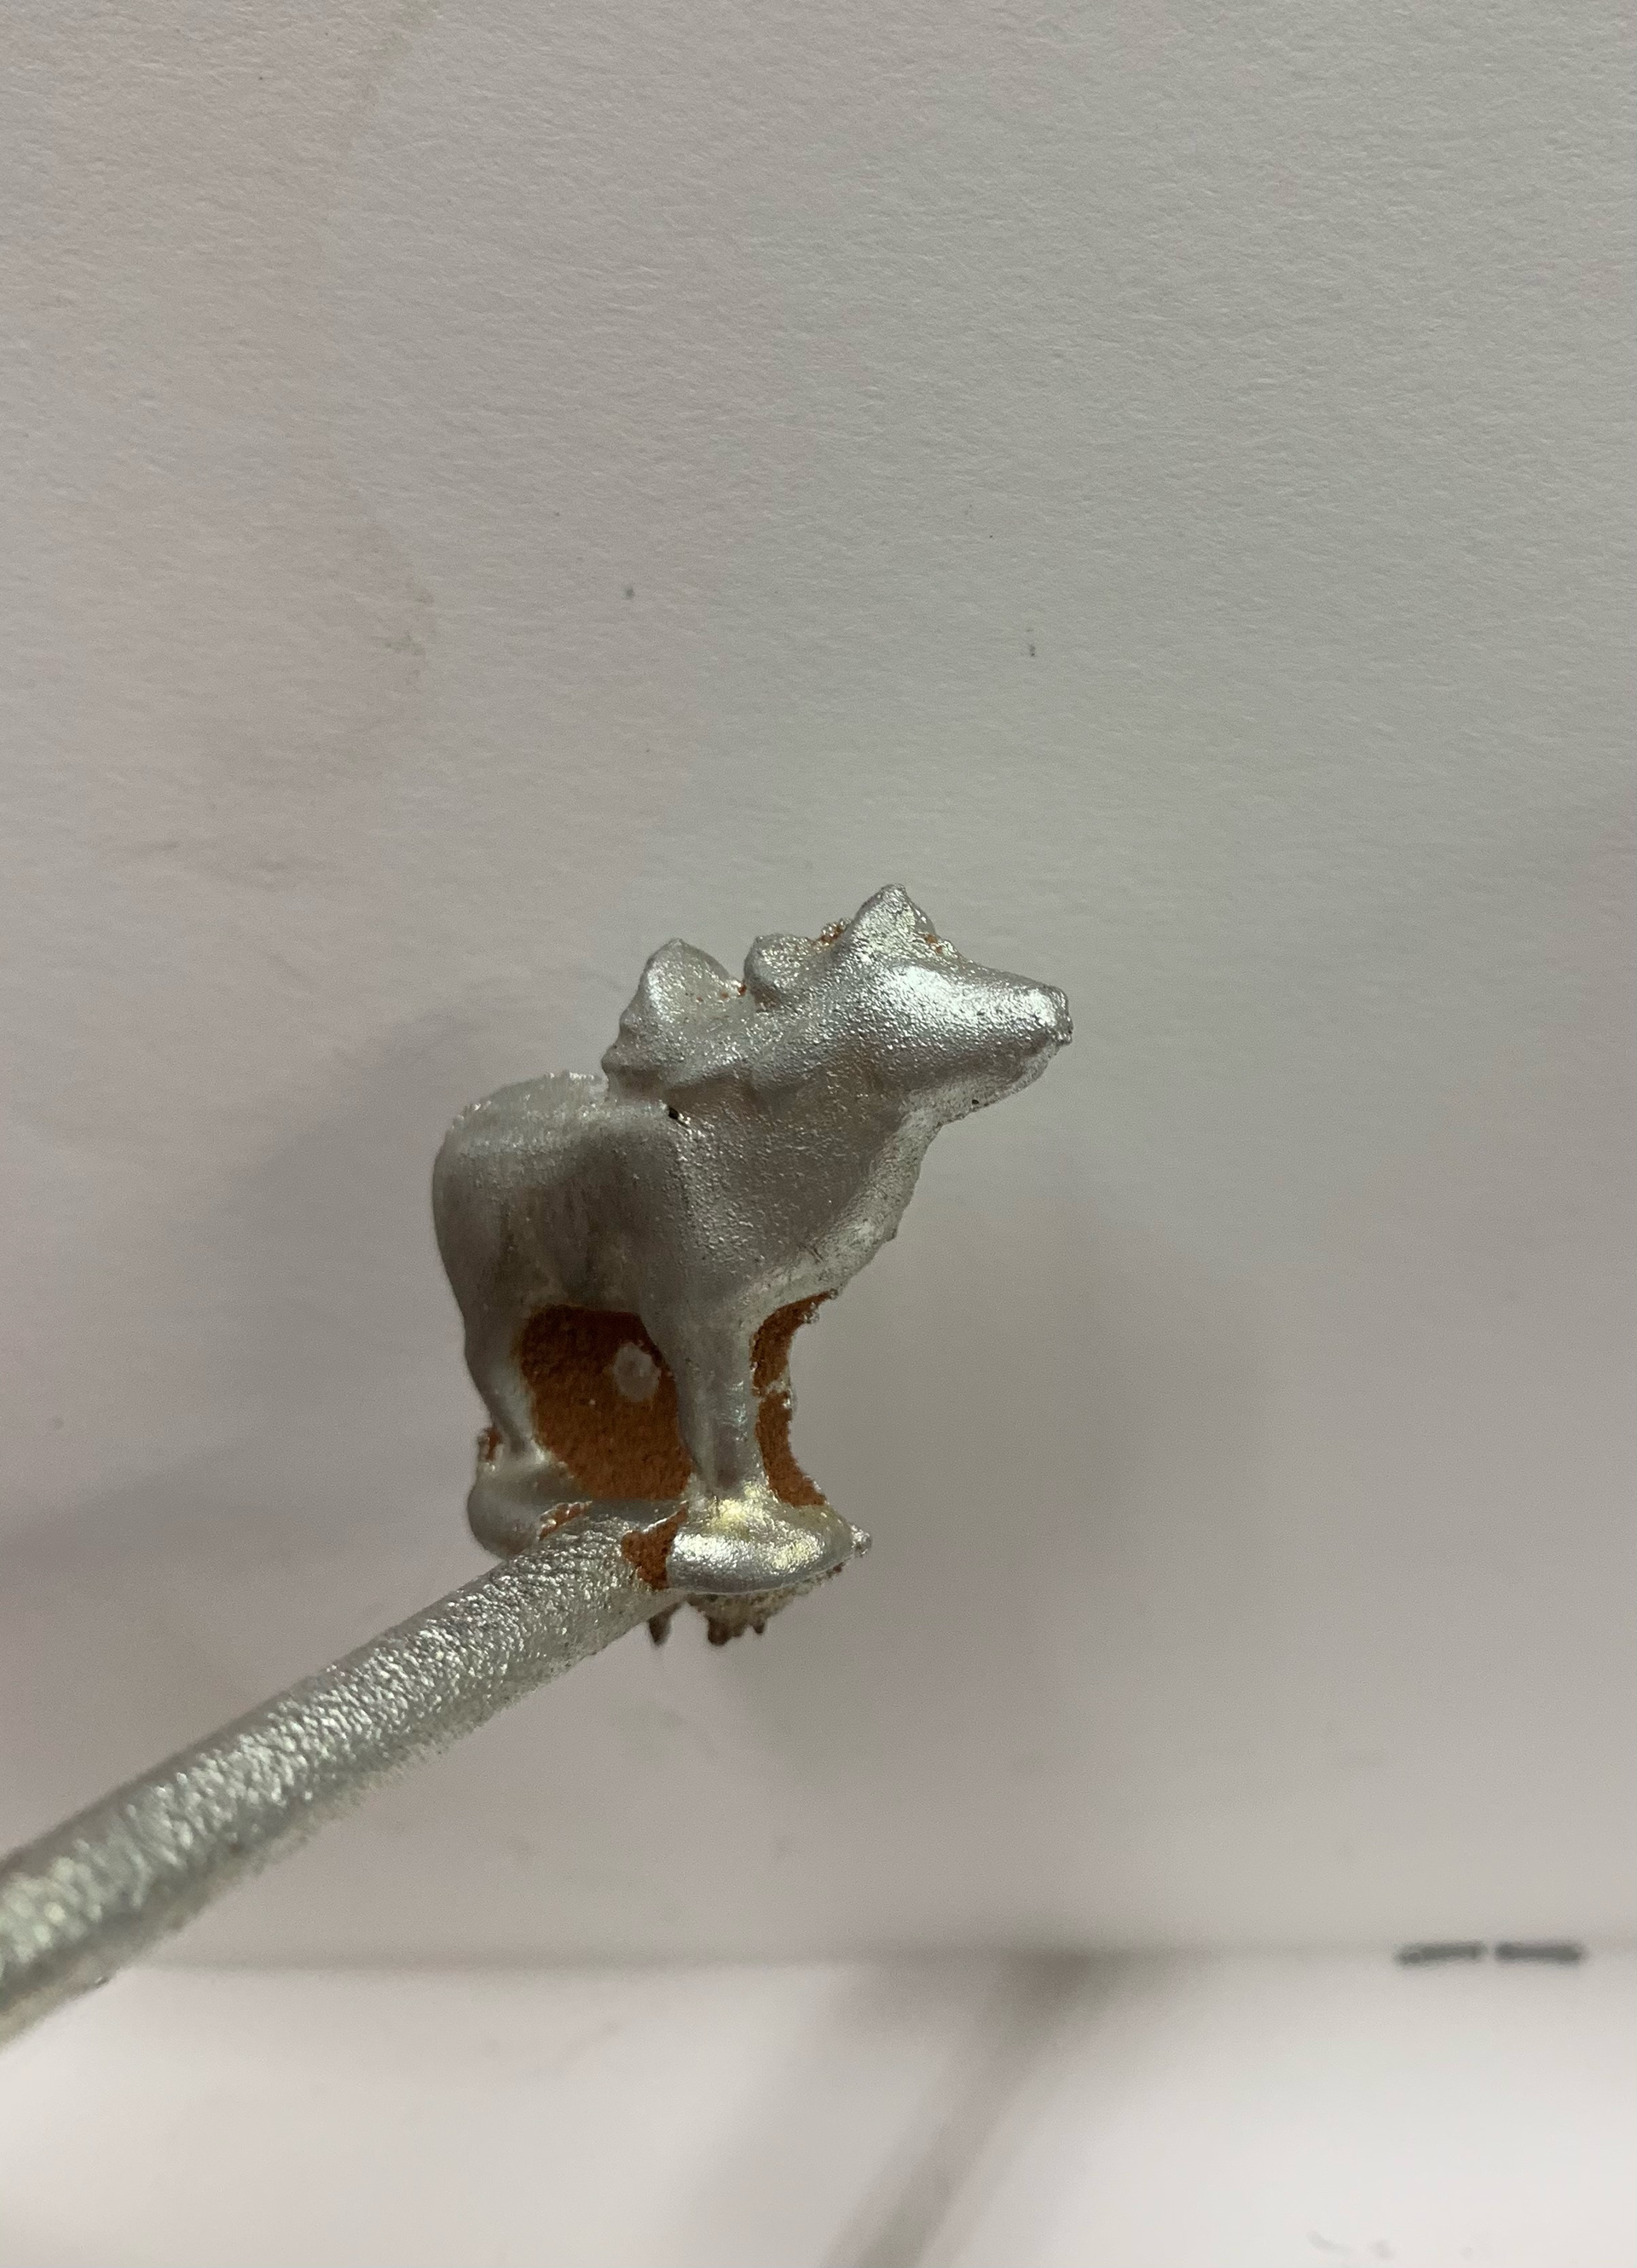
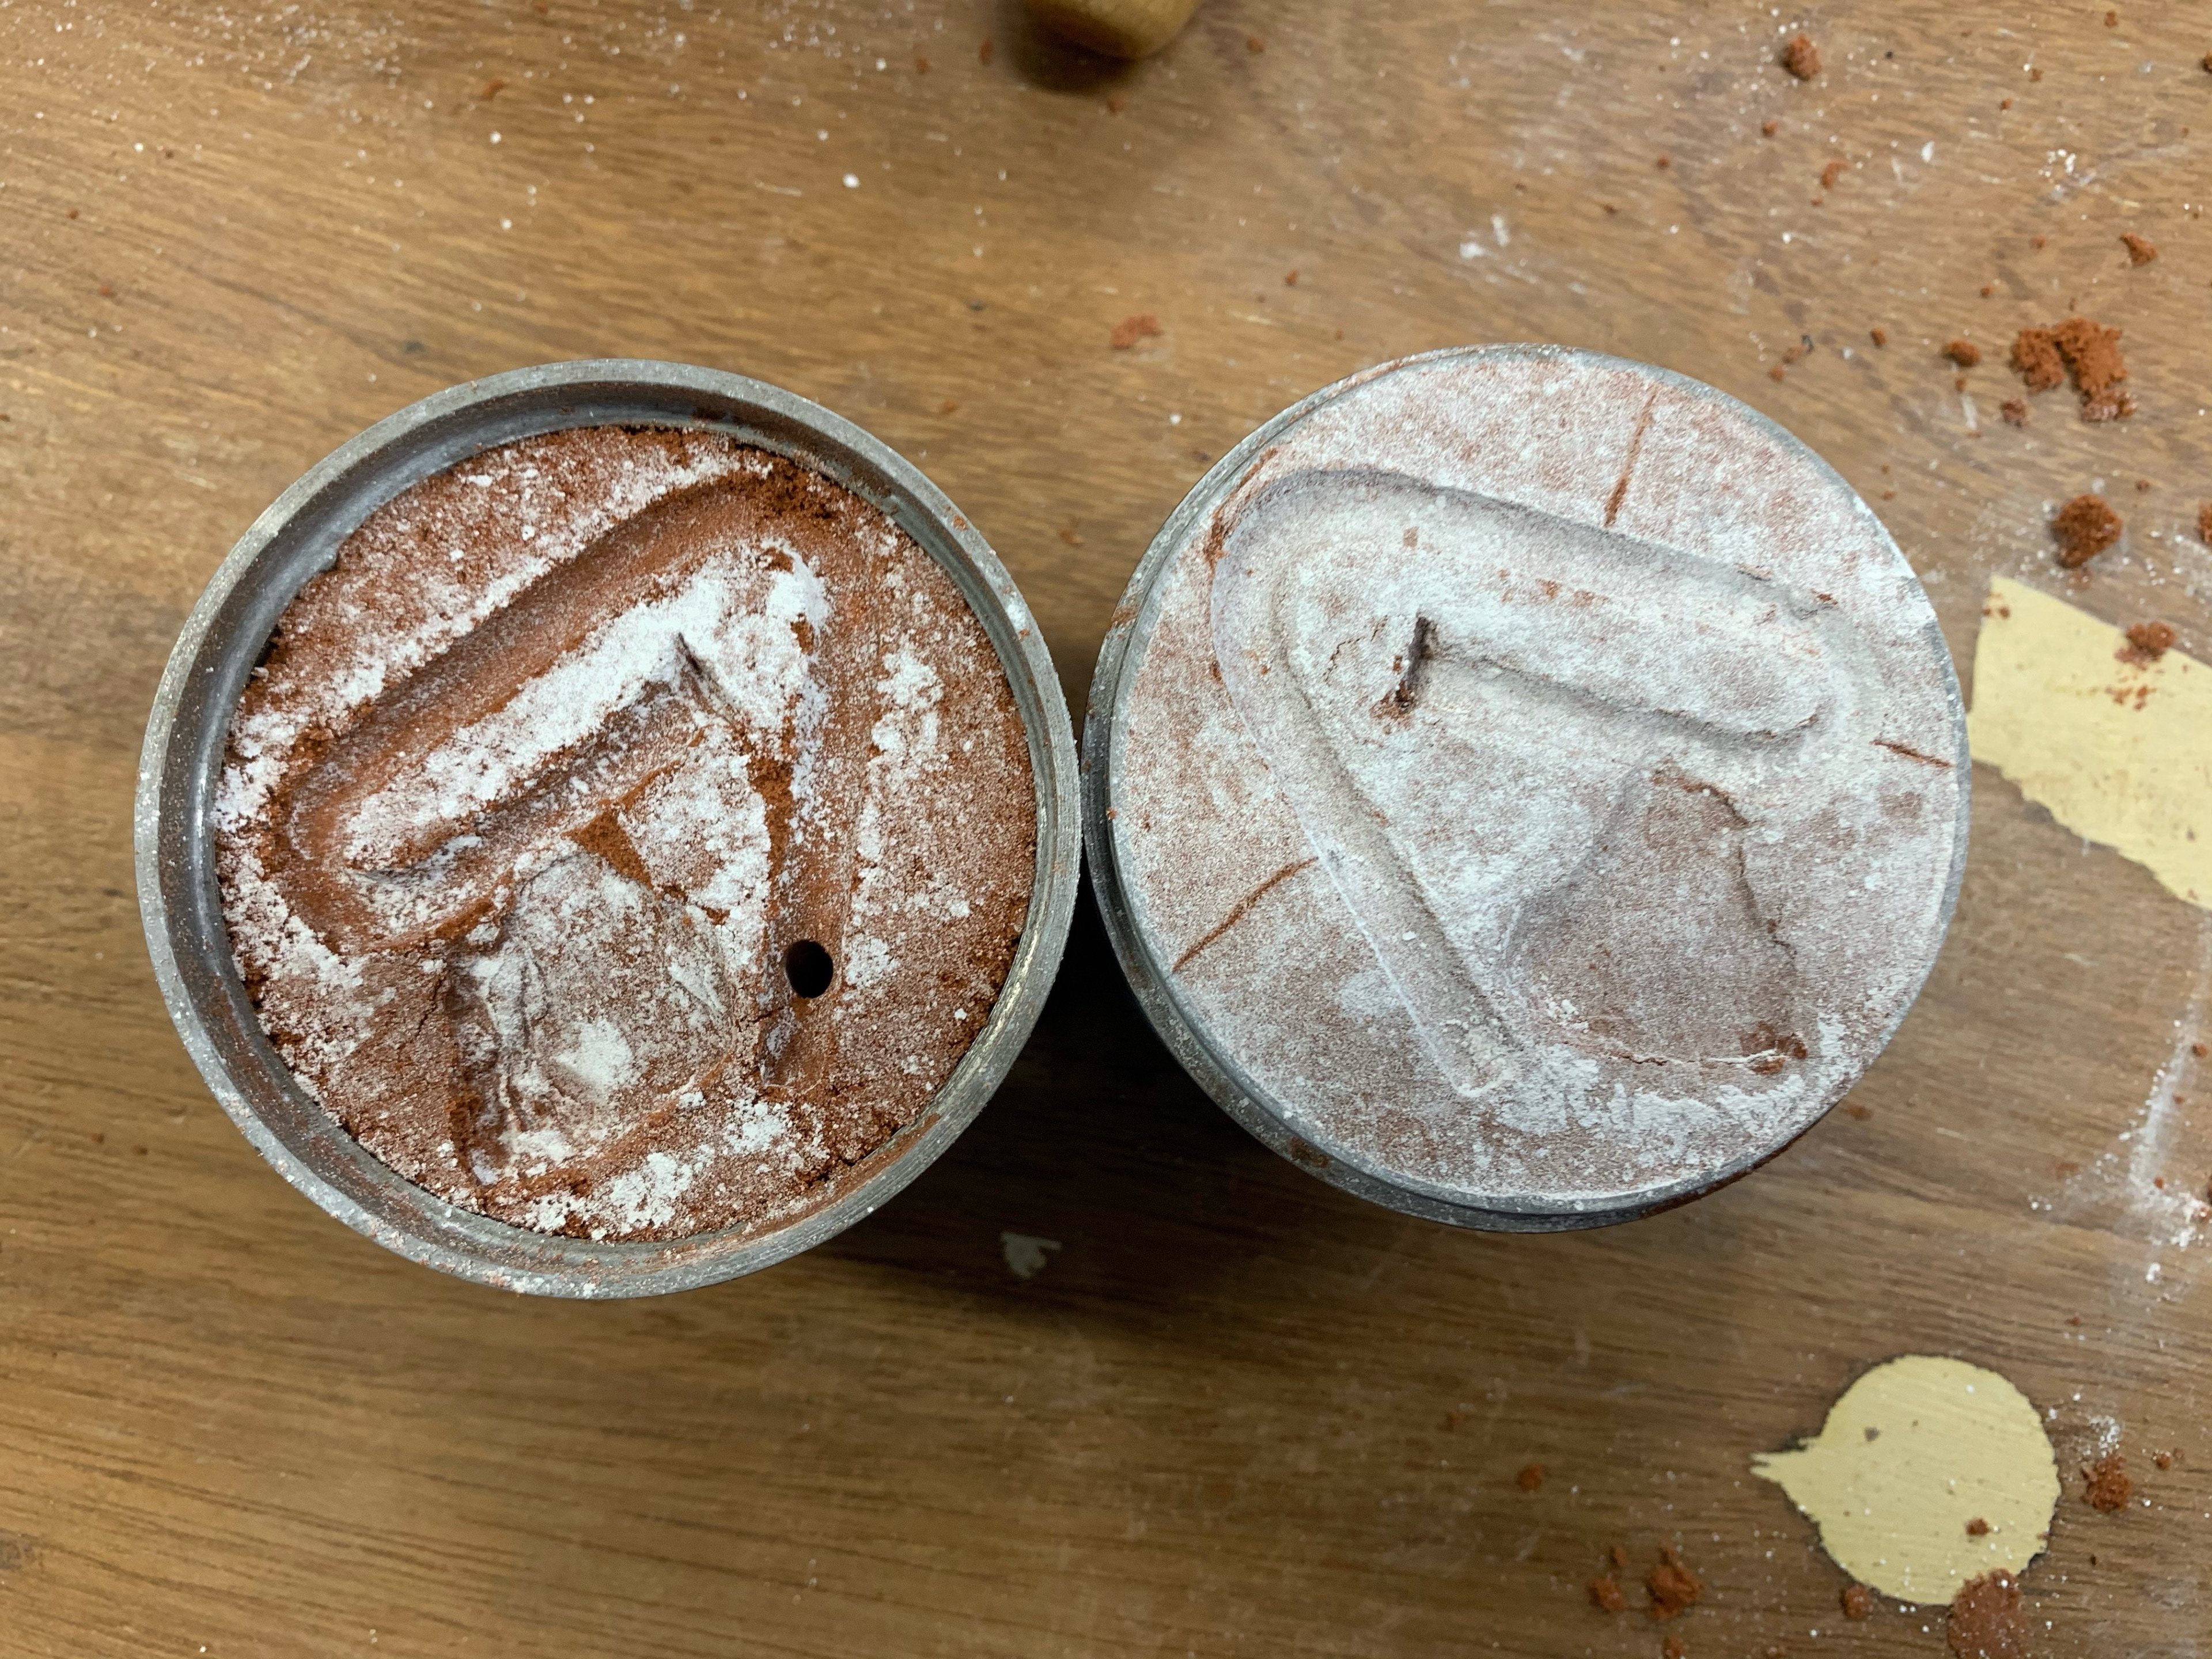
for this technical sample we did sand casting a technique used when molten metal pewter is poured into a flask filled with sand which has the cast of an object. for this sample i used a ceramic figurine of a moose to cast. i found this technique very fun to do and is a quick was to get an effective piece of work, some parts were challenging when having to be delicate not to disturbe your cast when moving it around and correctly lining up your two part flask so forms properly. sand casting can be used many ways you can do singular object or create a collage of objects and they pick up on the objects detail so well.
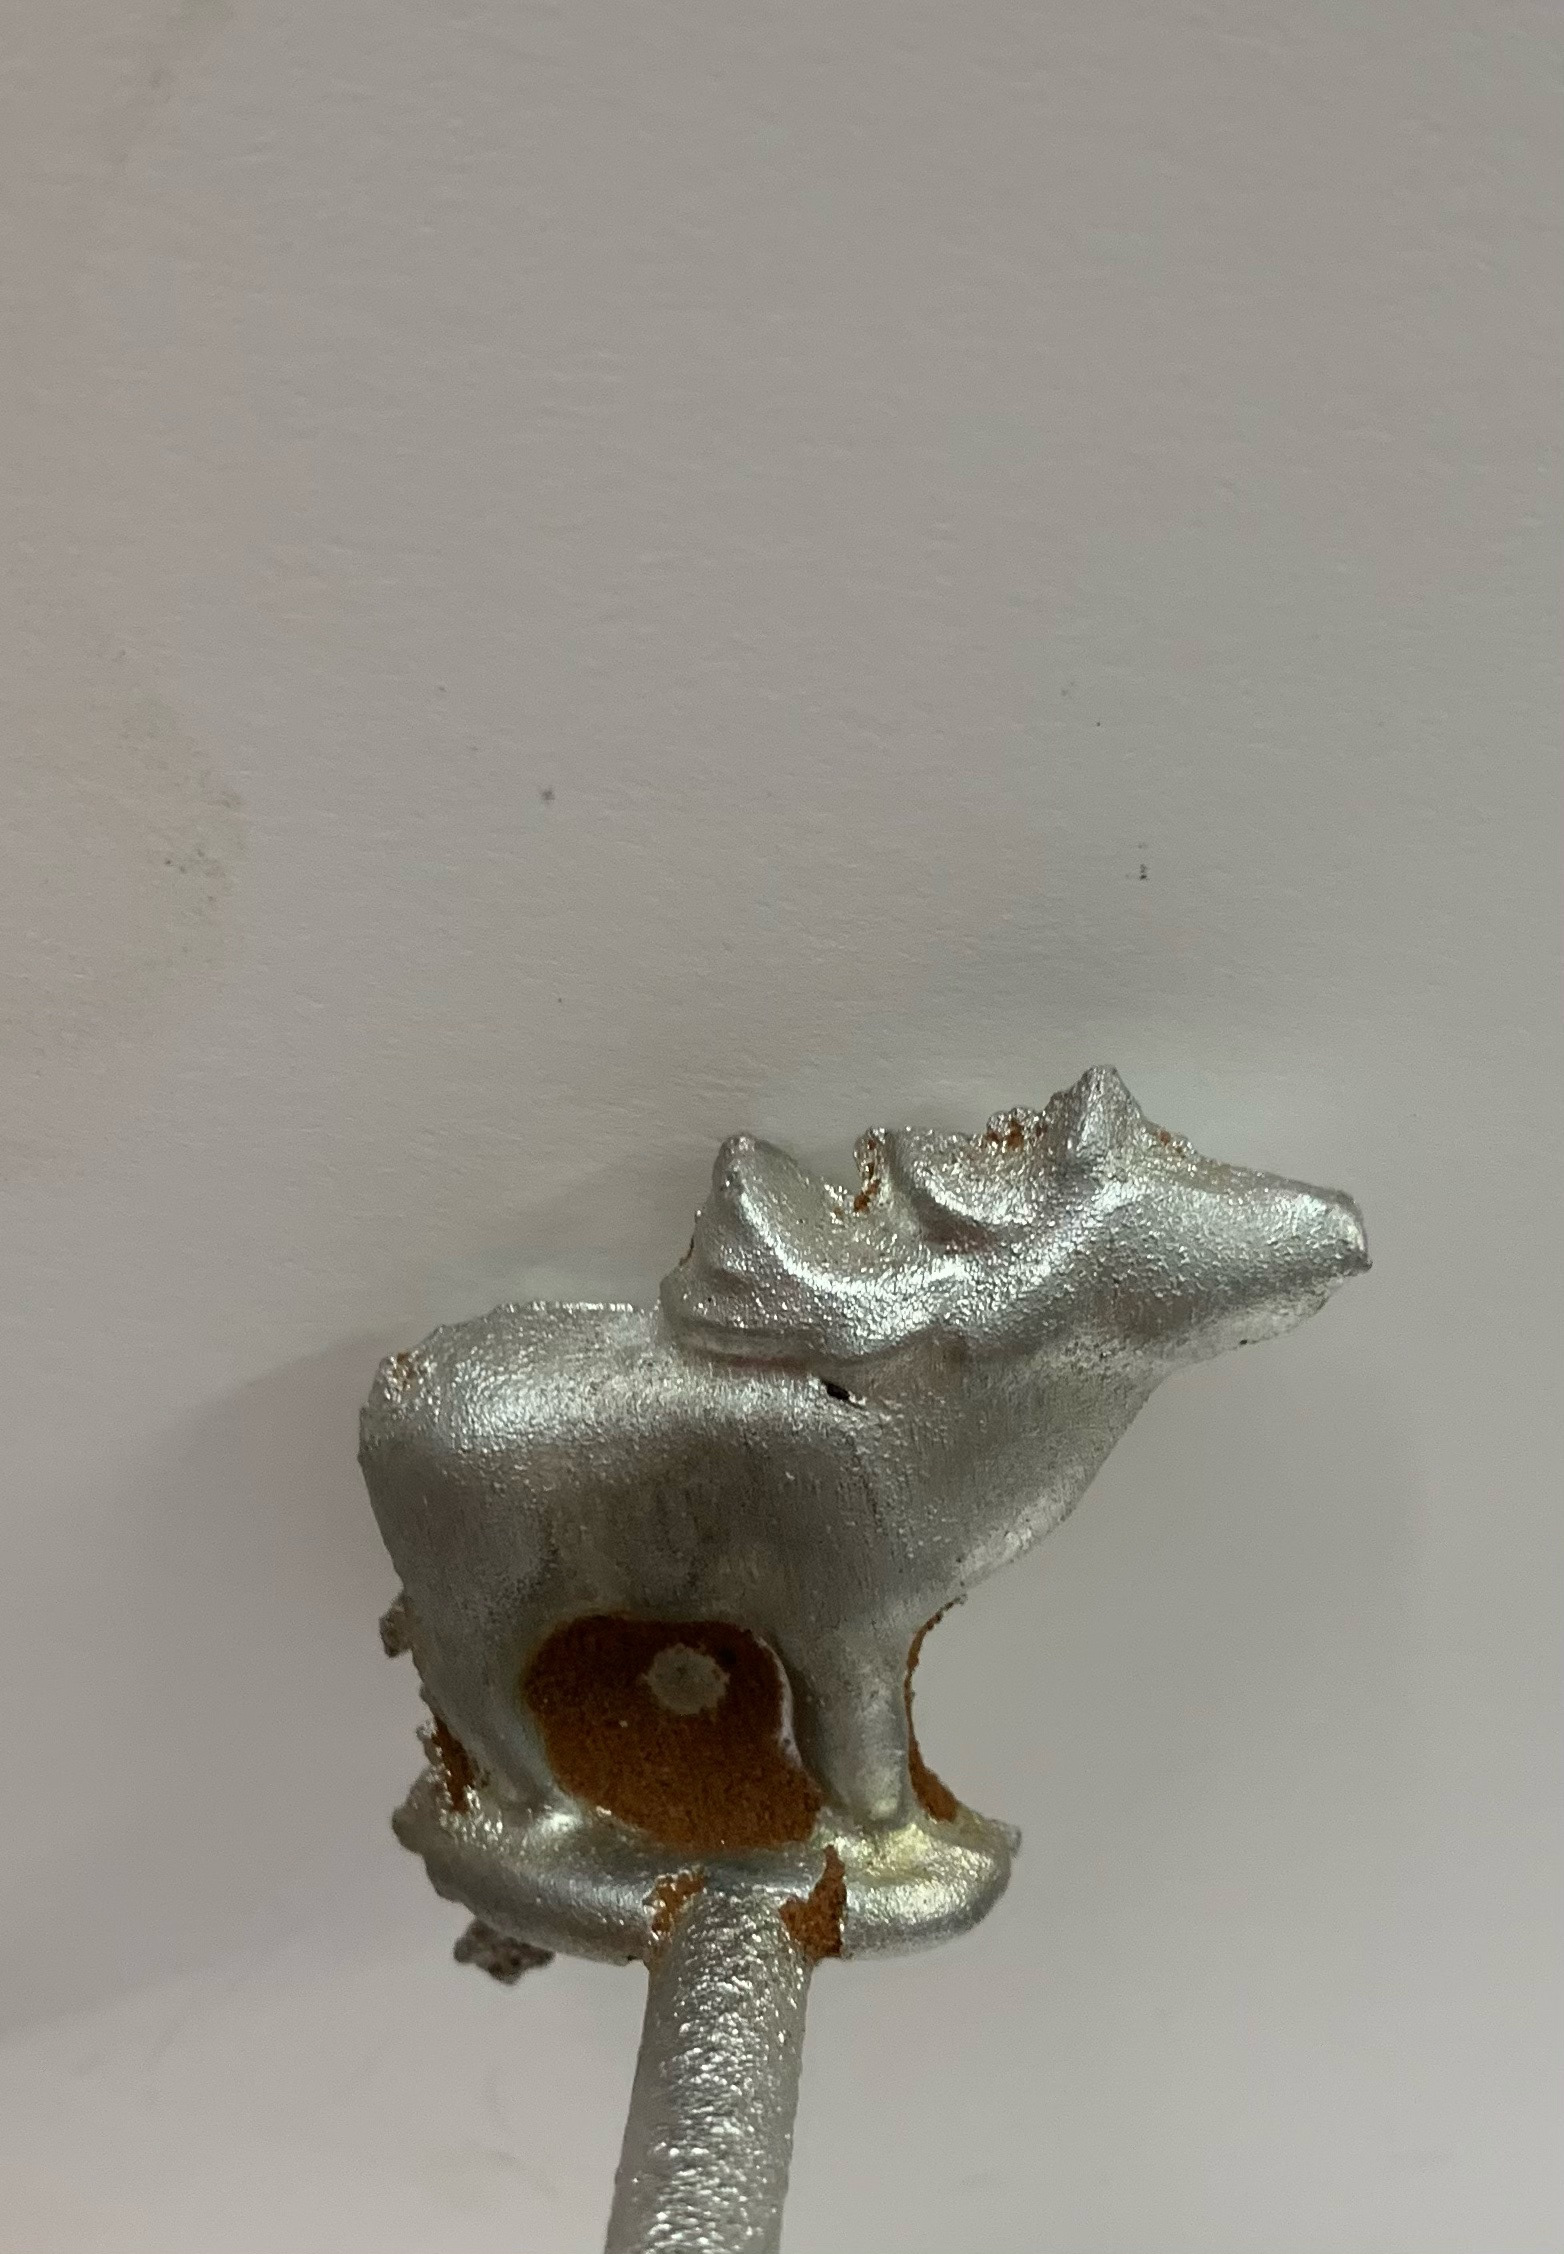
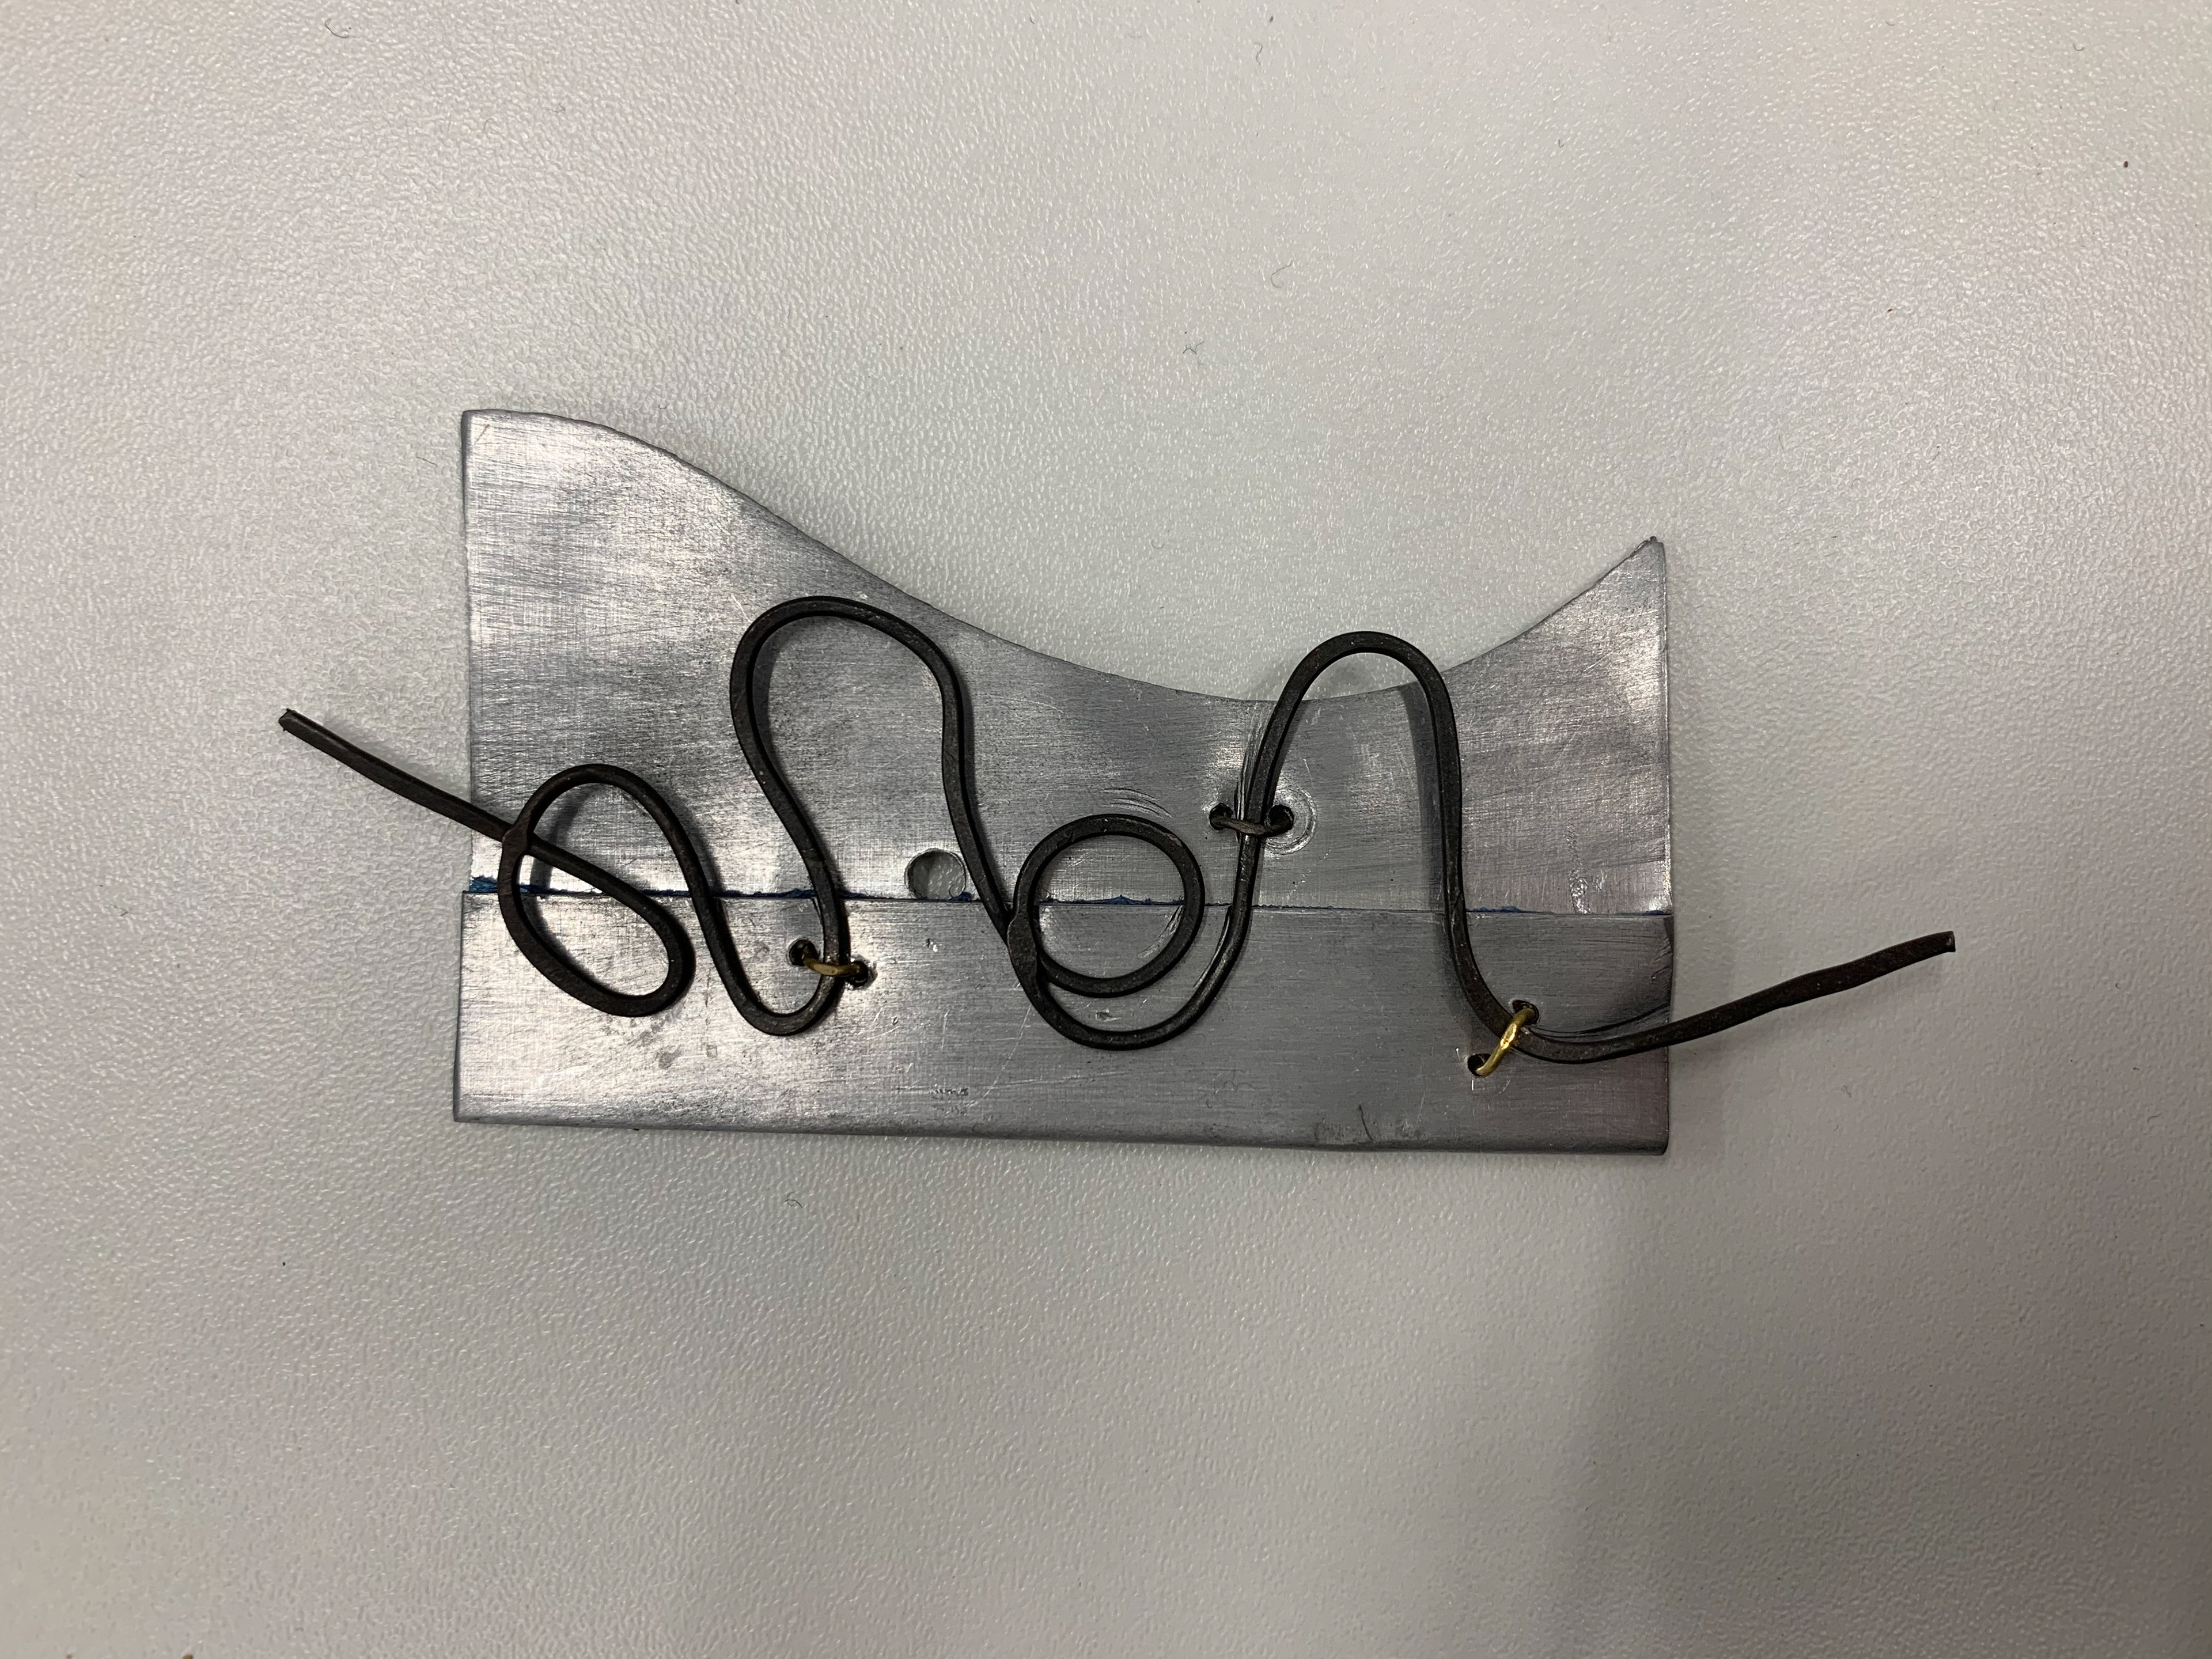
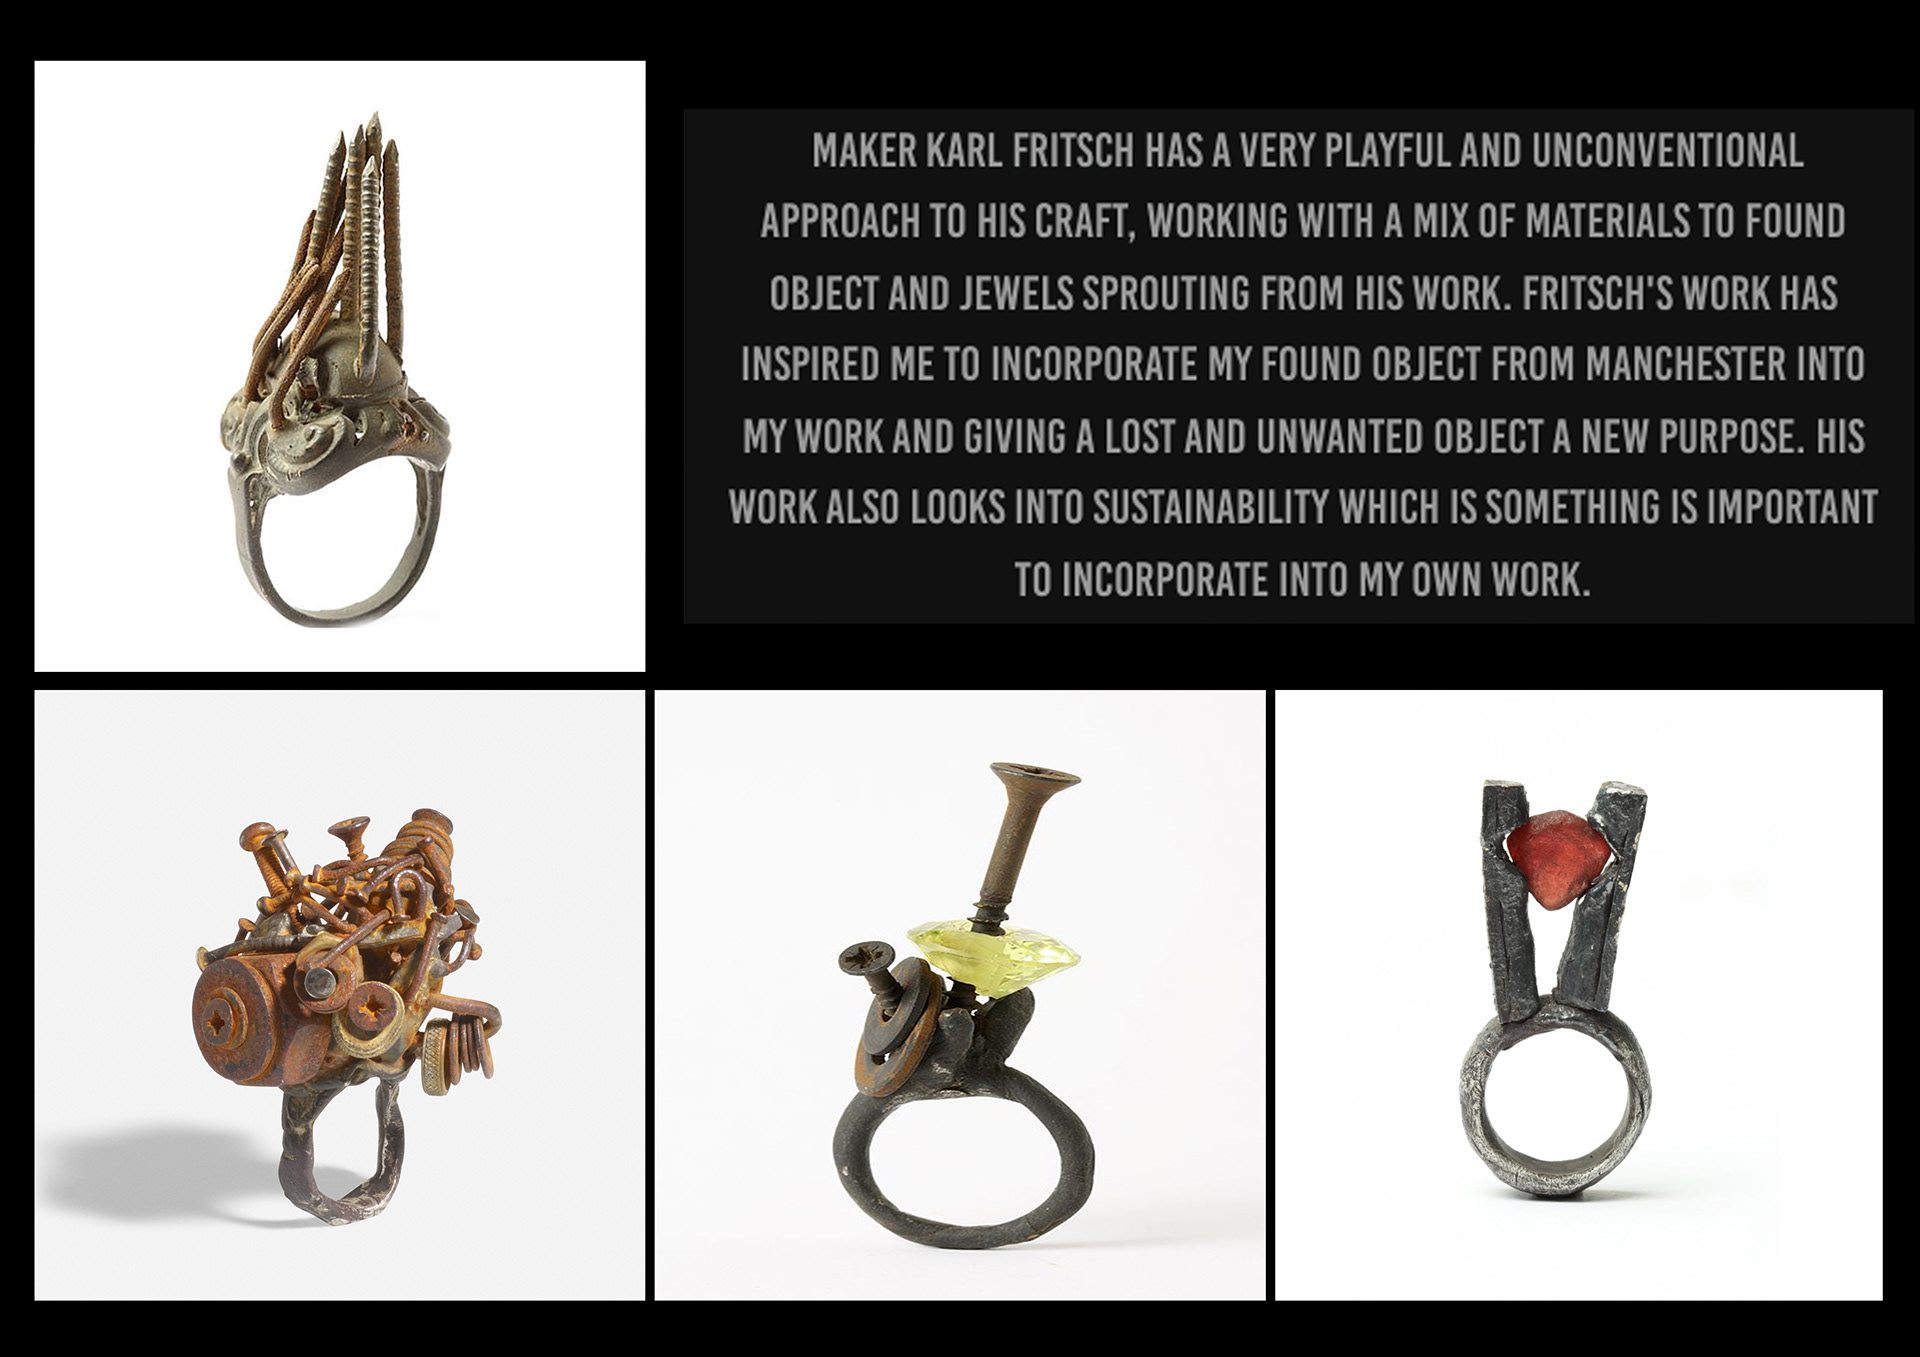
KARL FRITSCH
piercing saw
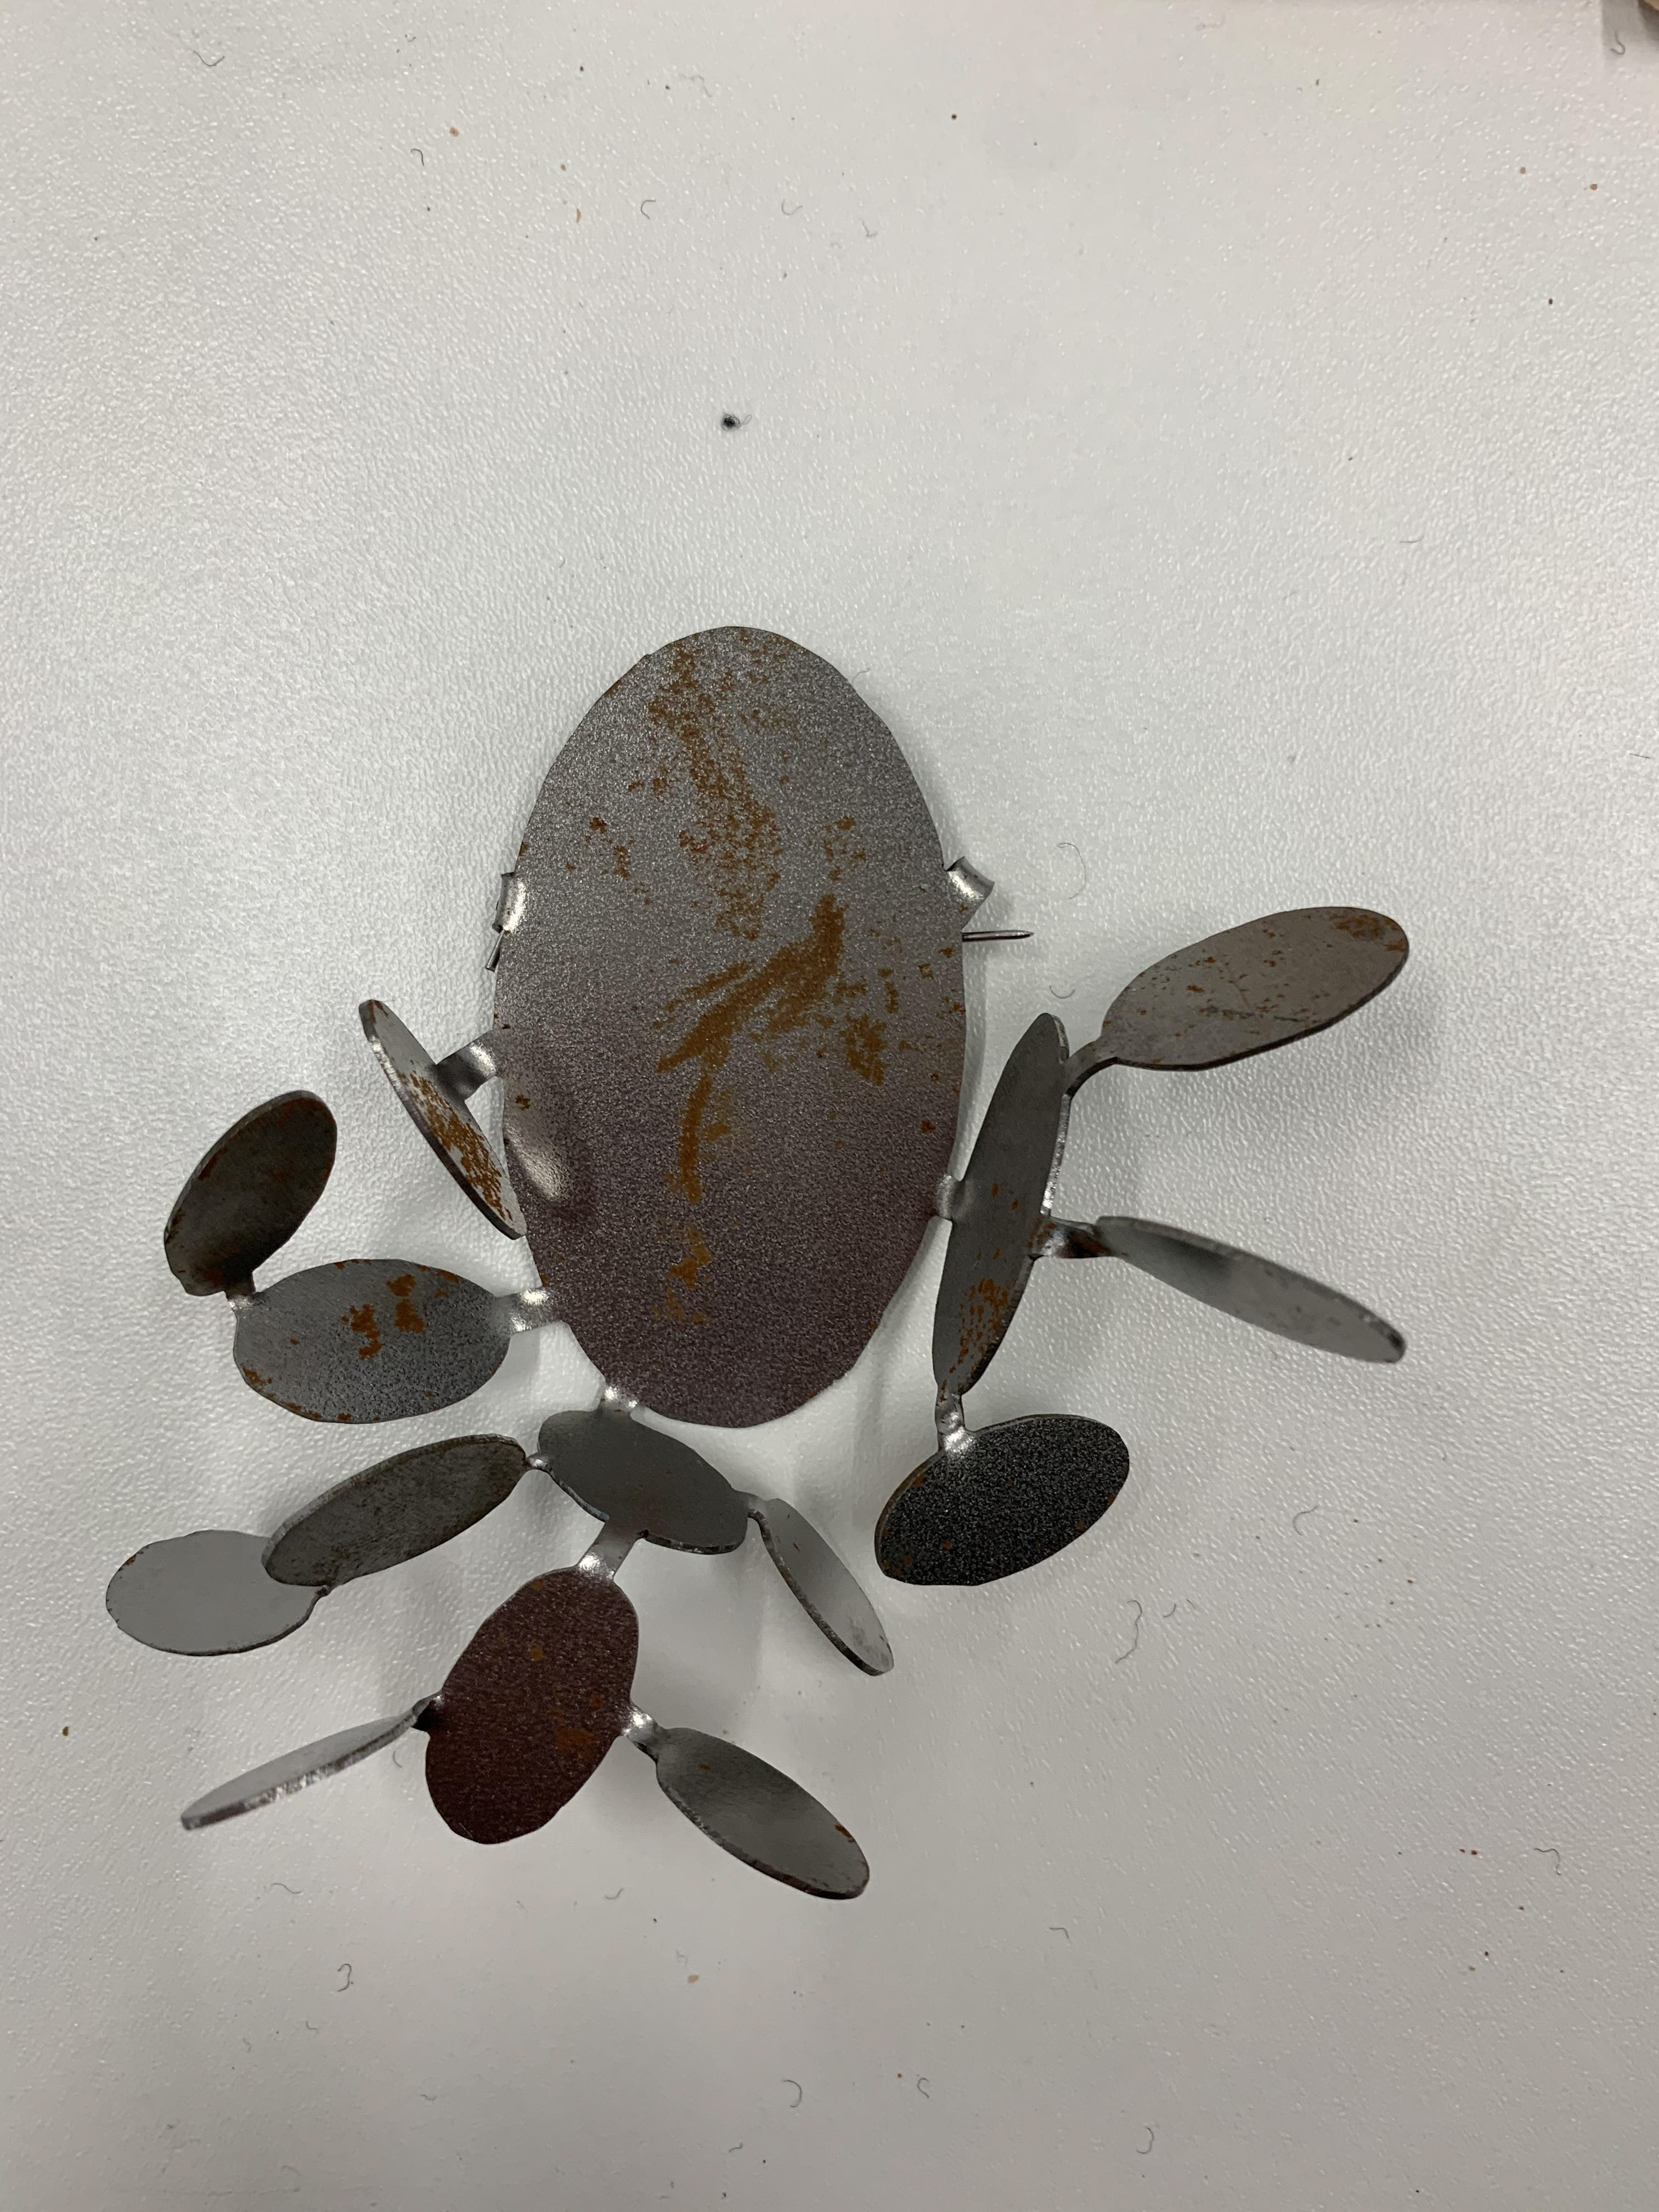
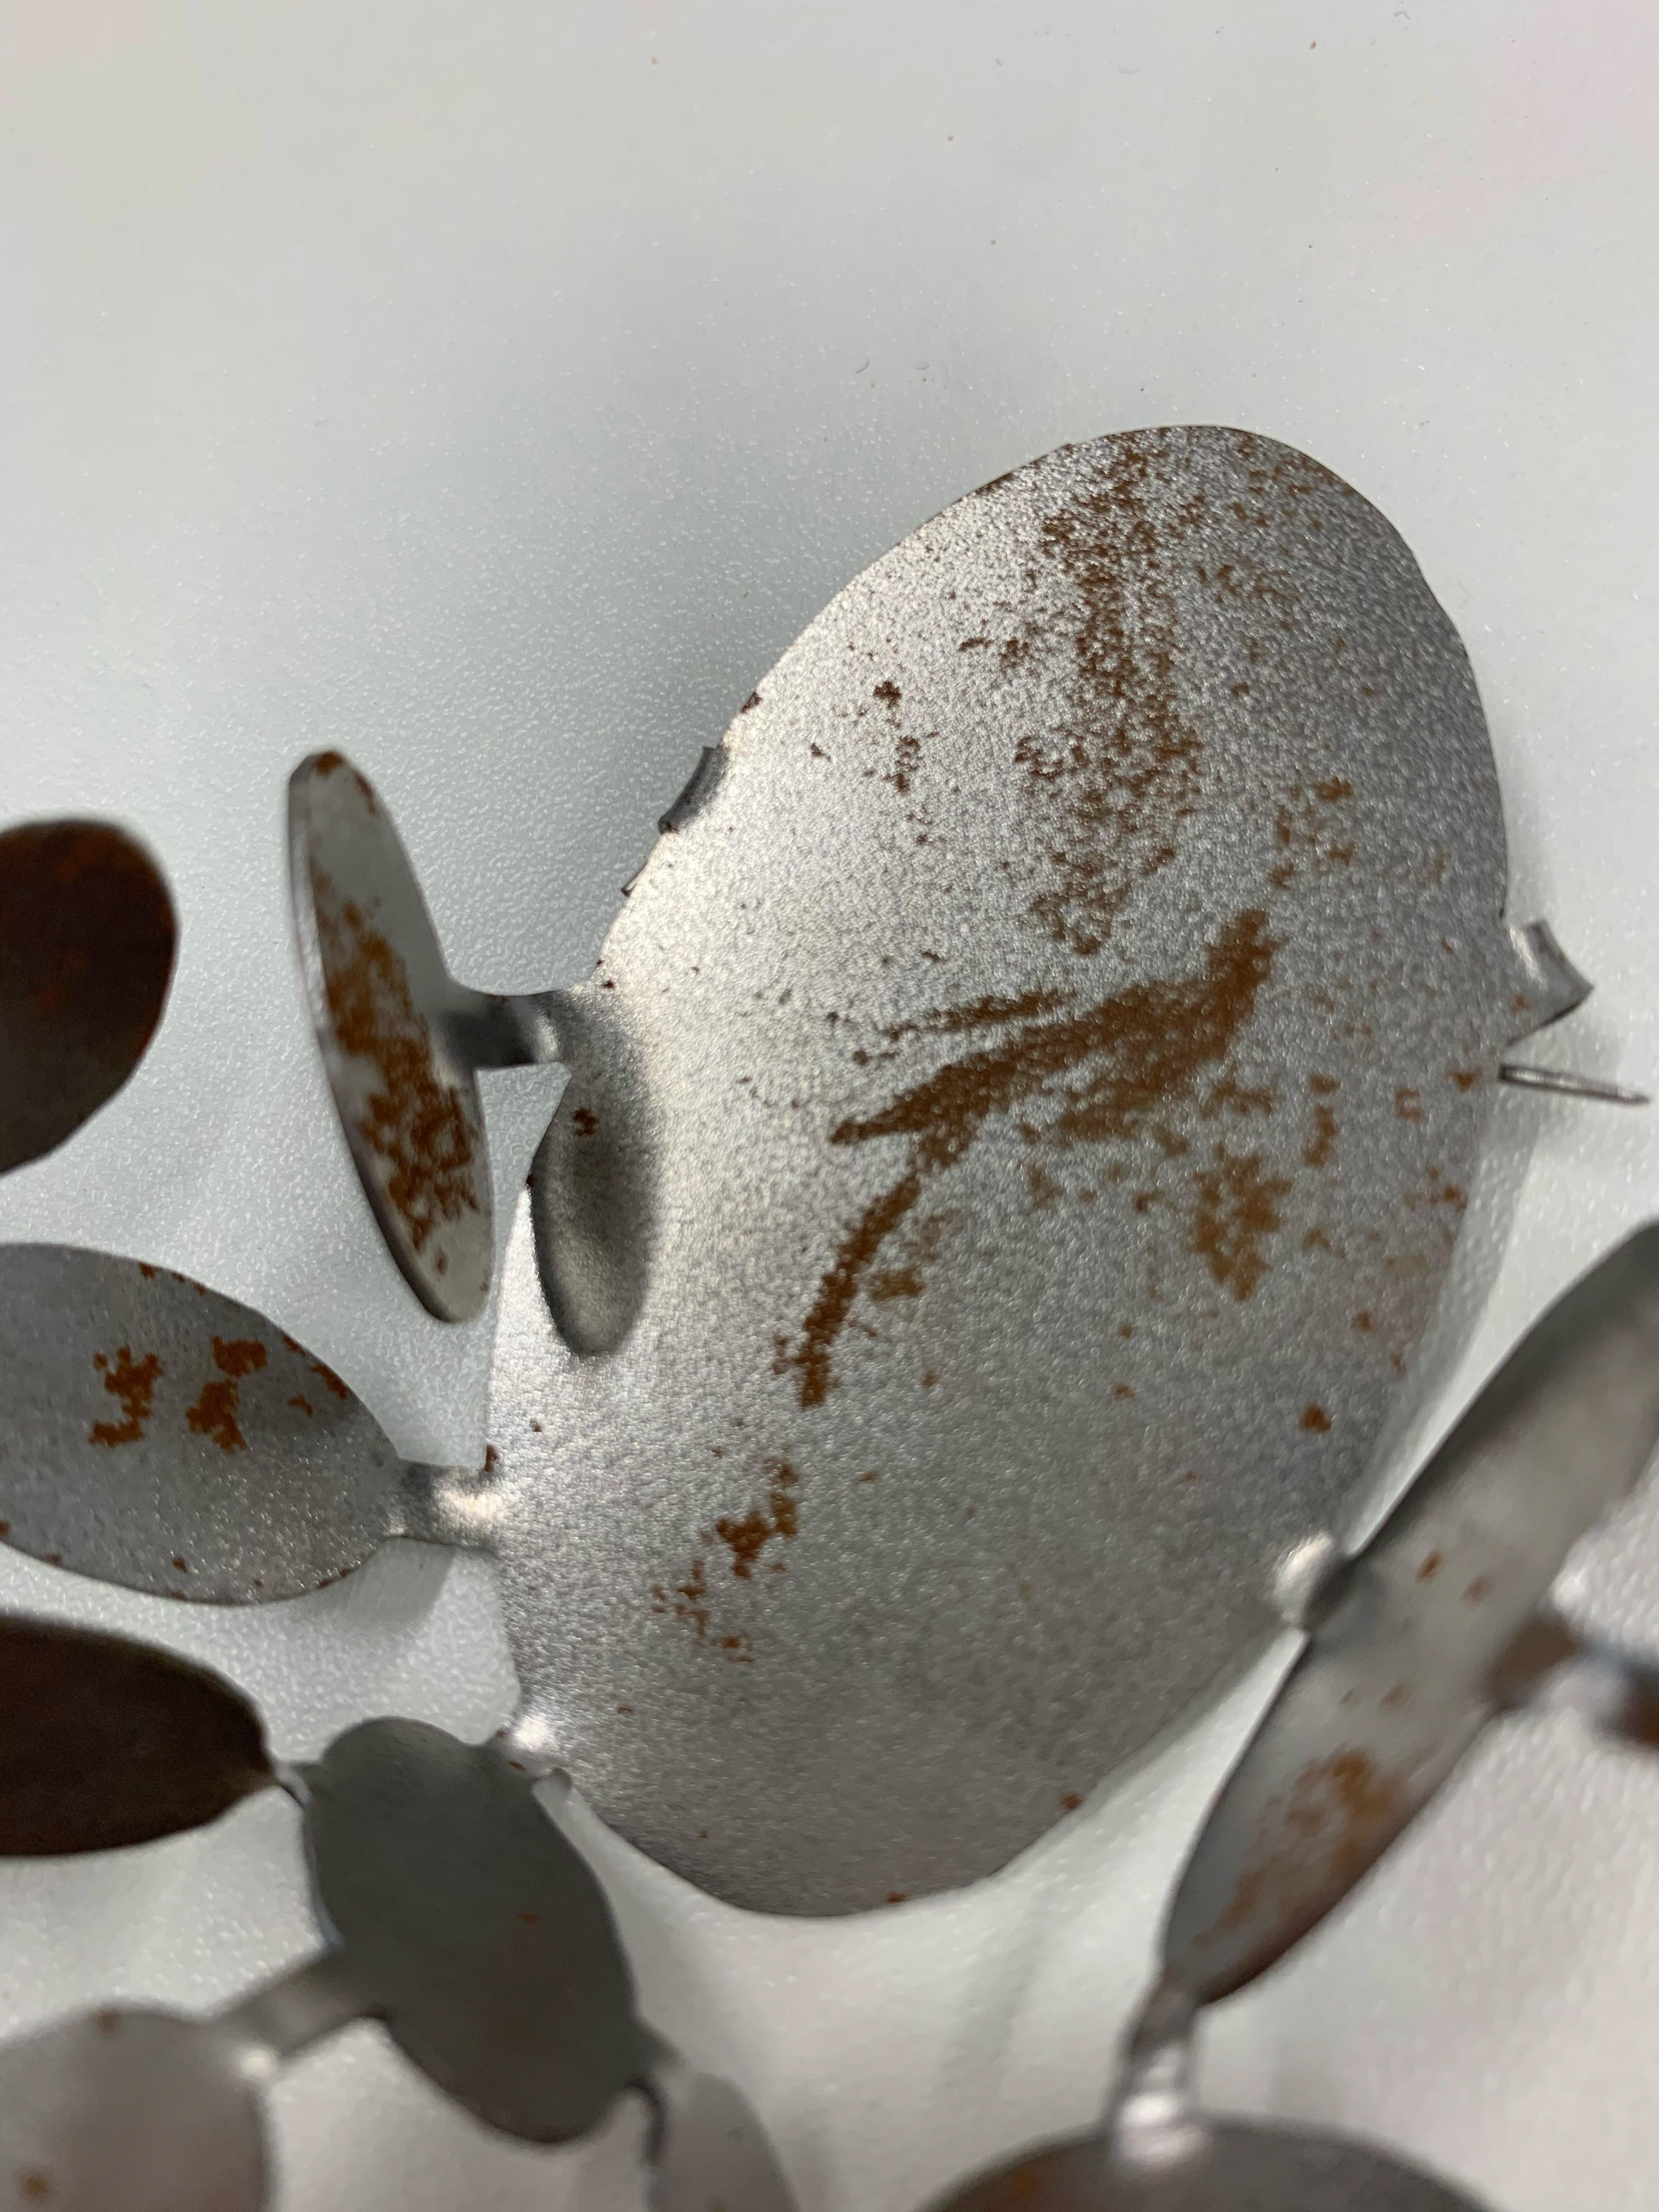
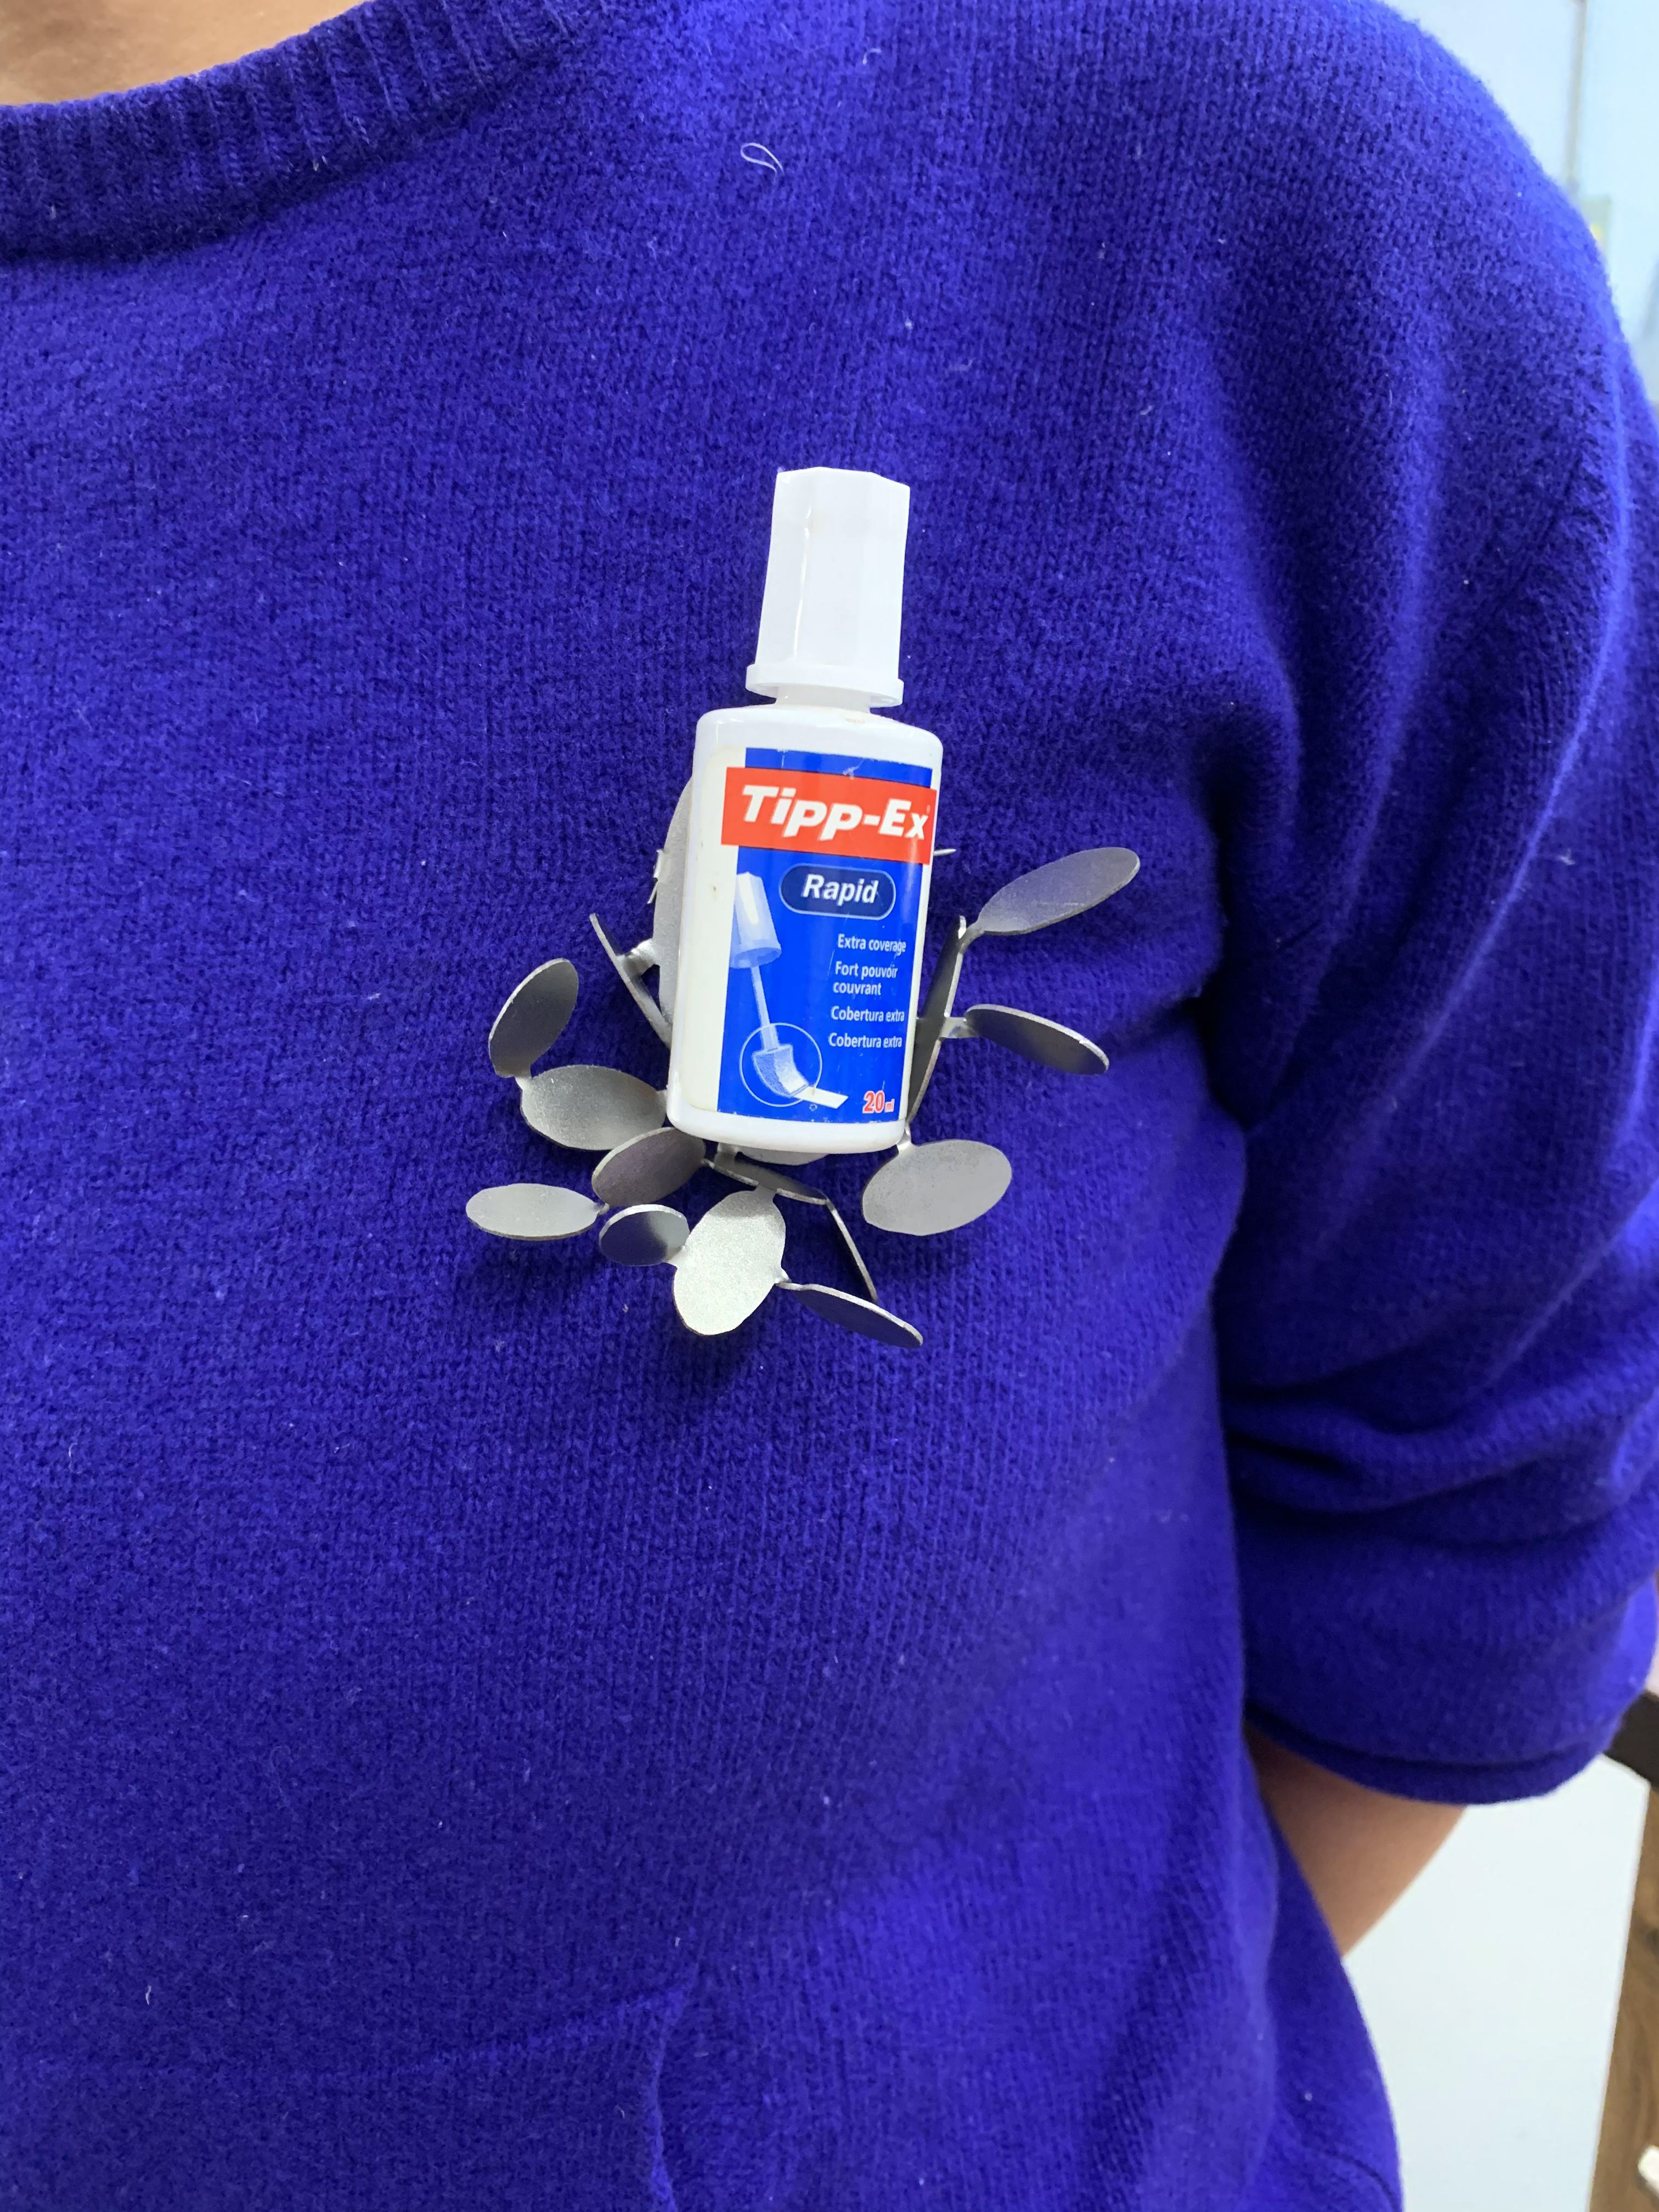
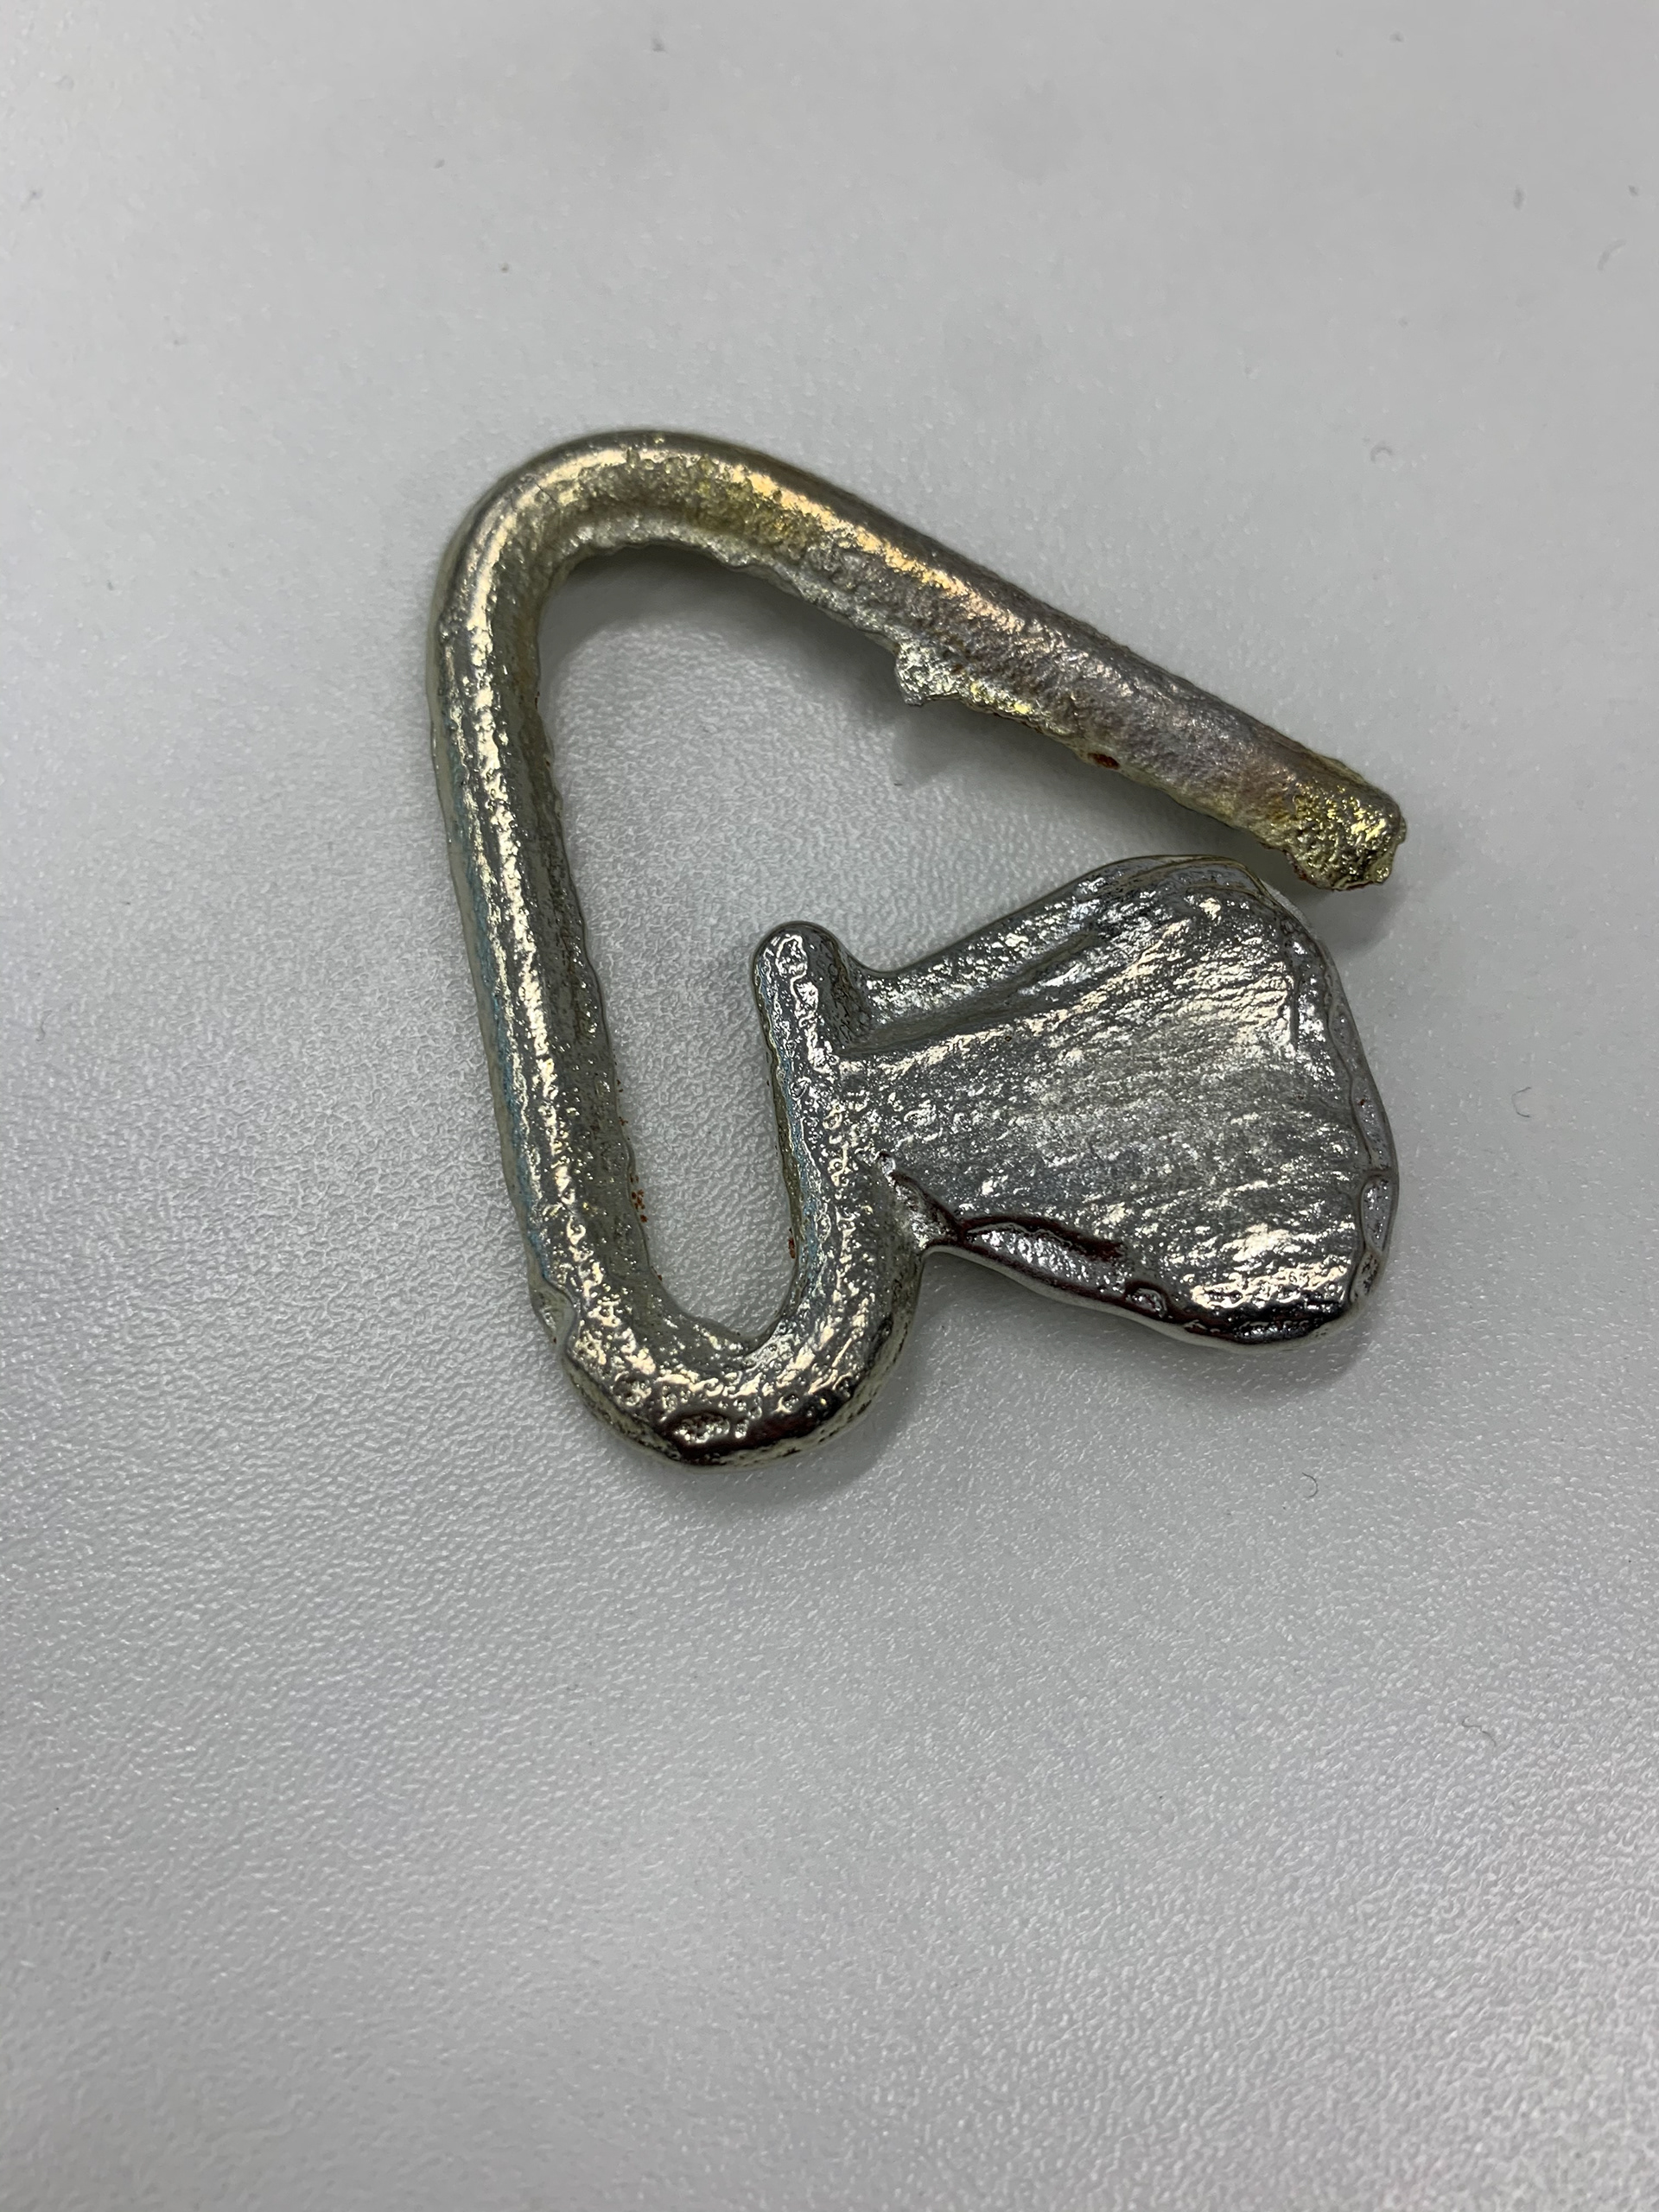
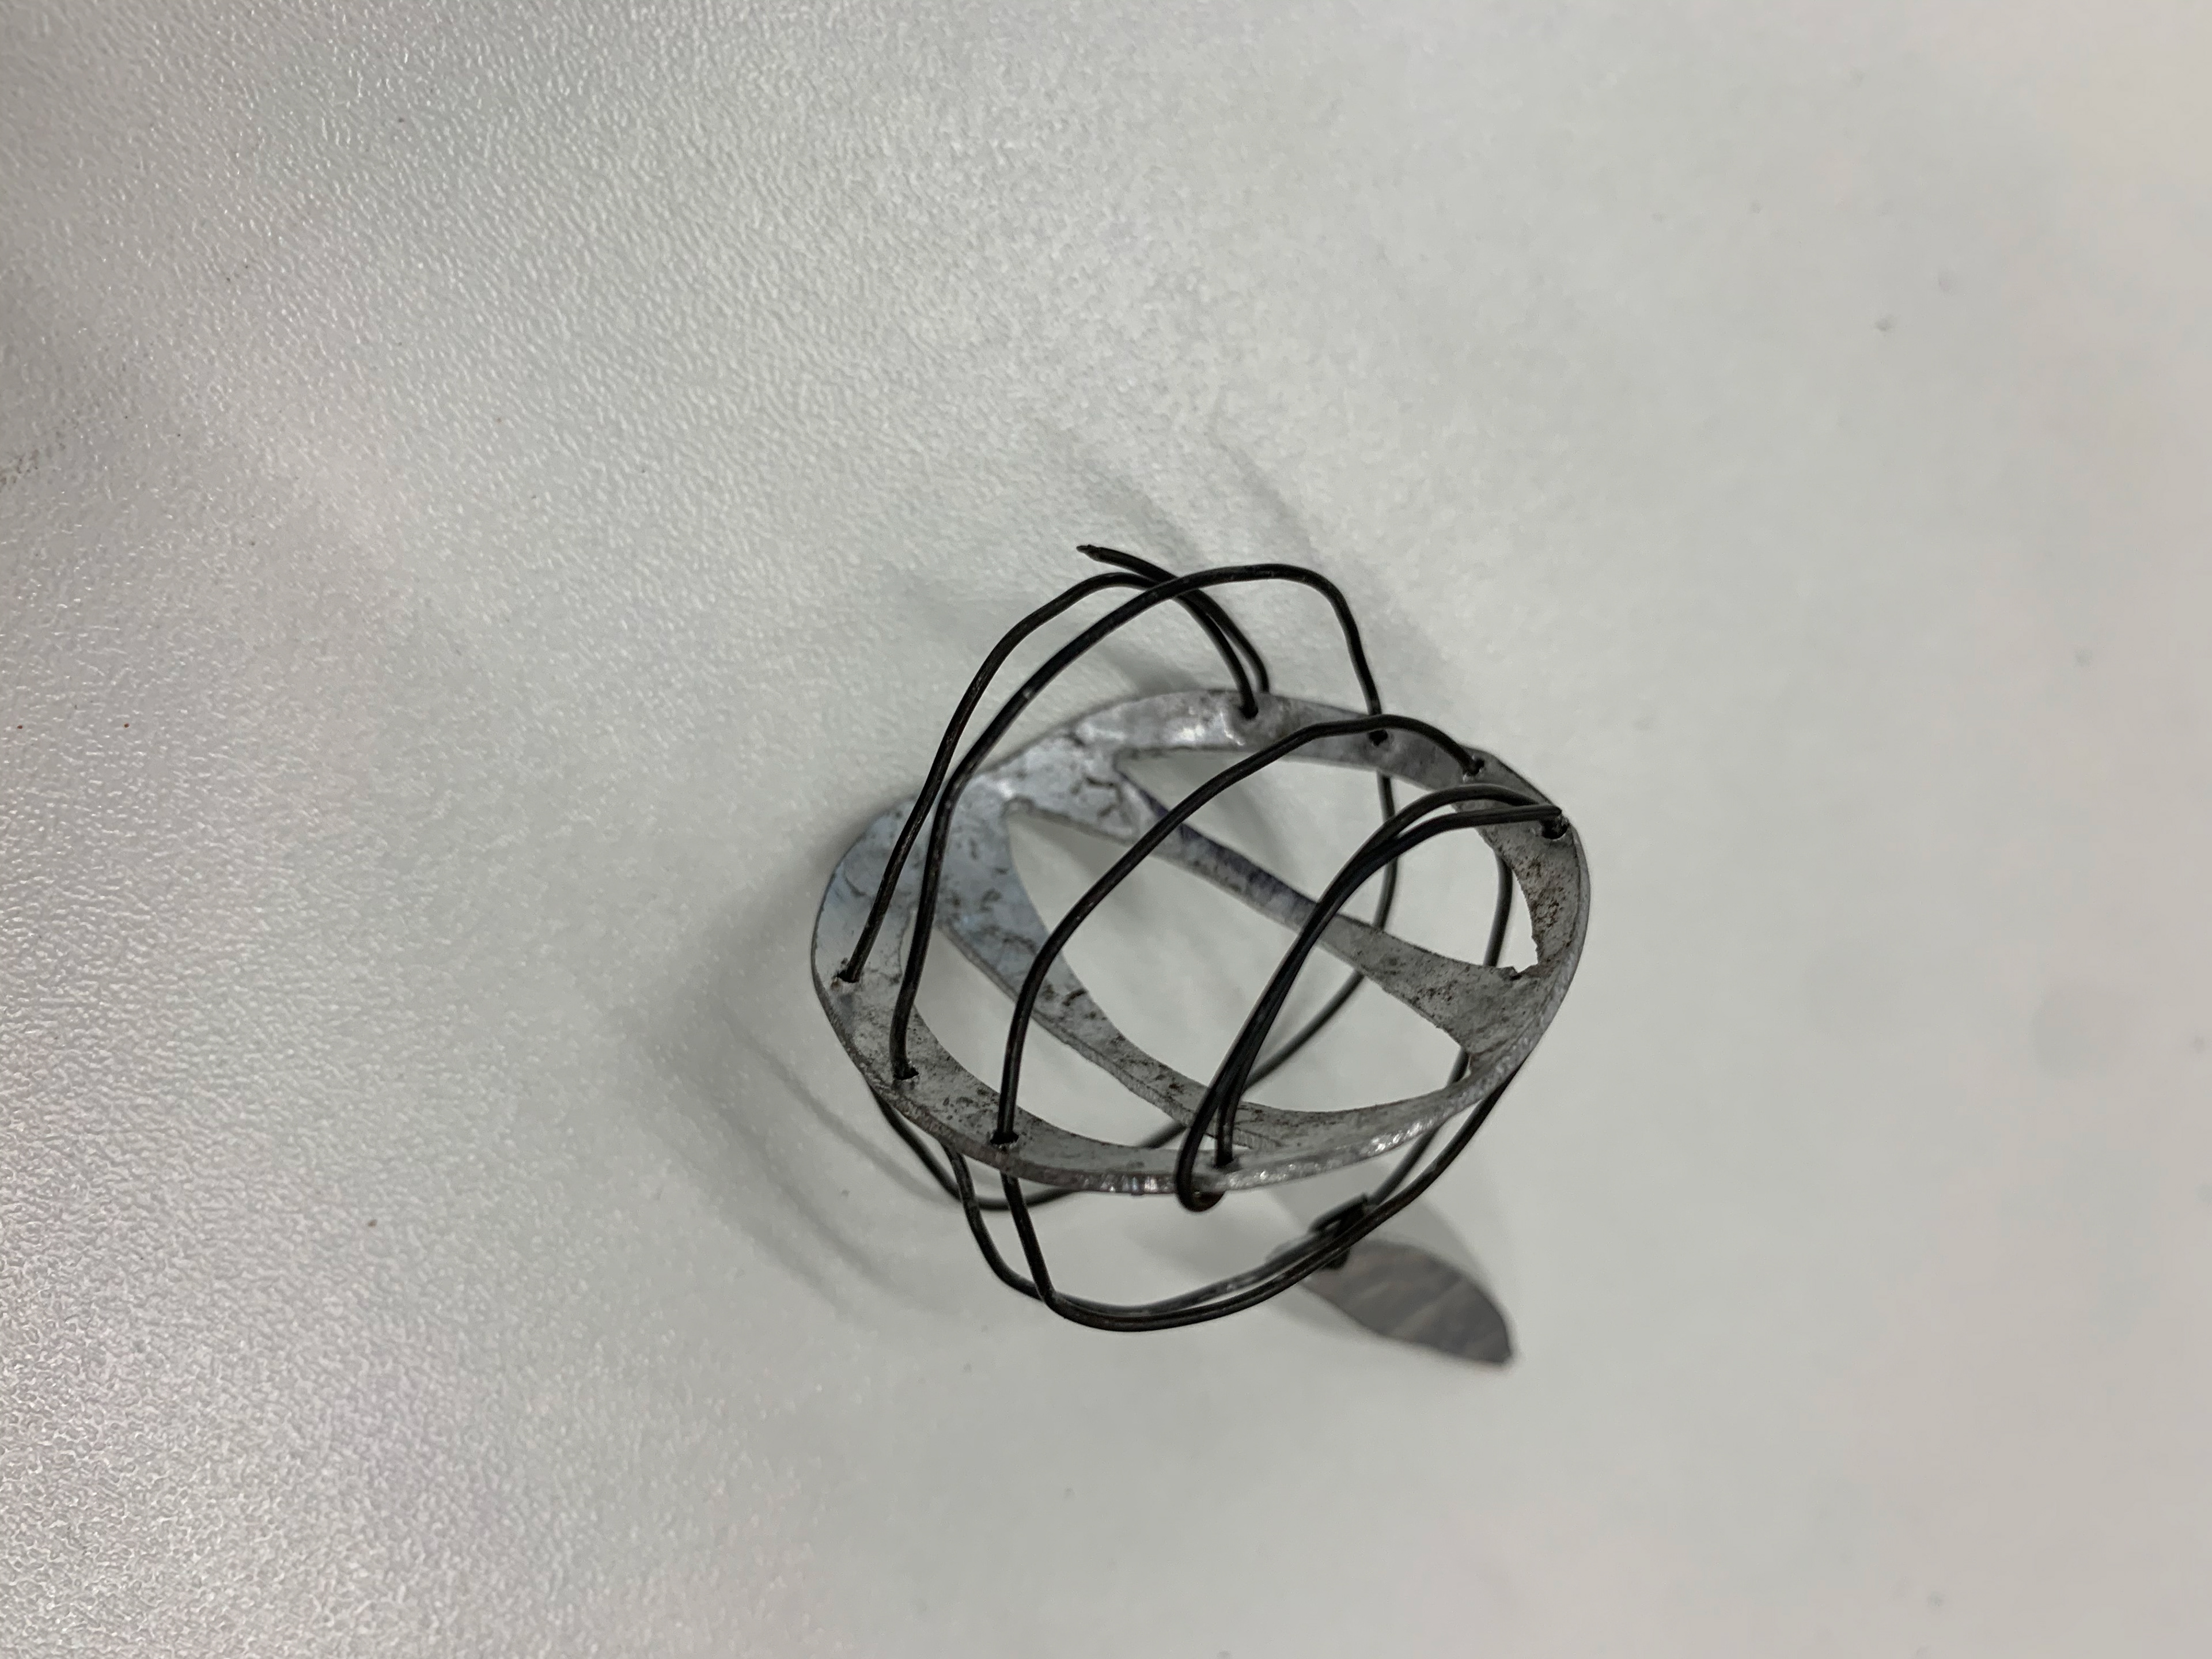
using the piercing saw we created a broach that mark designed. piercing such a small and delicate piece did prove very frustrating and difficult, using steal as the sheet metal which is very tough and strong made sawing challenging however once in the right movement and flow it was much easier. i learned about the right pressure thats needed and the movement of the blades that allows you to get a good circular cut with out breaking the blades.i finished my broach with sanding it down with wet and dry and folding and twisting the different parts to my own style, i purposely twisted it so it had a base under the main circle there fore creating a shelf like broach so different objects can be held in it. and adding a pin at the back. as steal is the metal i used once i washed it off and let it dry rust started to develop on the piece which i really like the added texture and the hints of burnt orange it gives.
sand casting sample
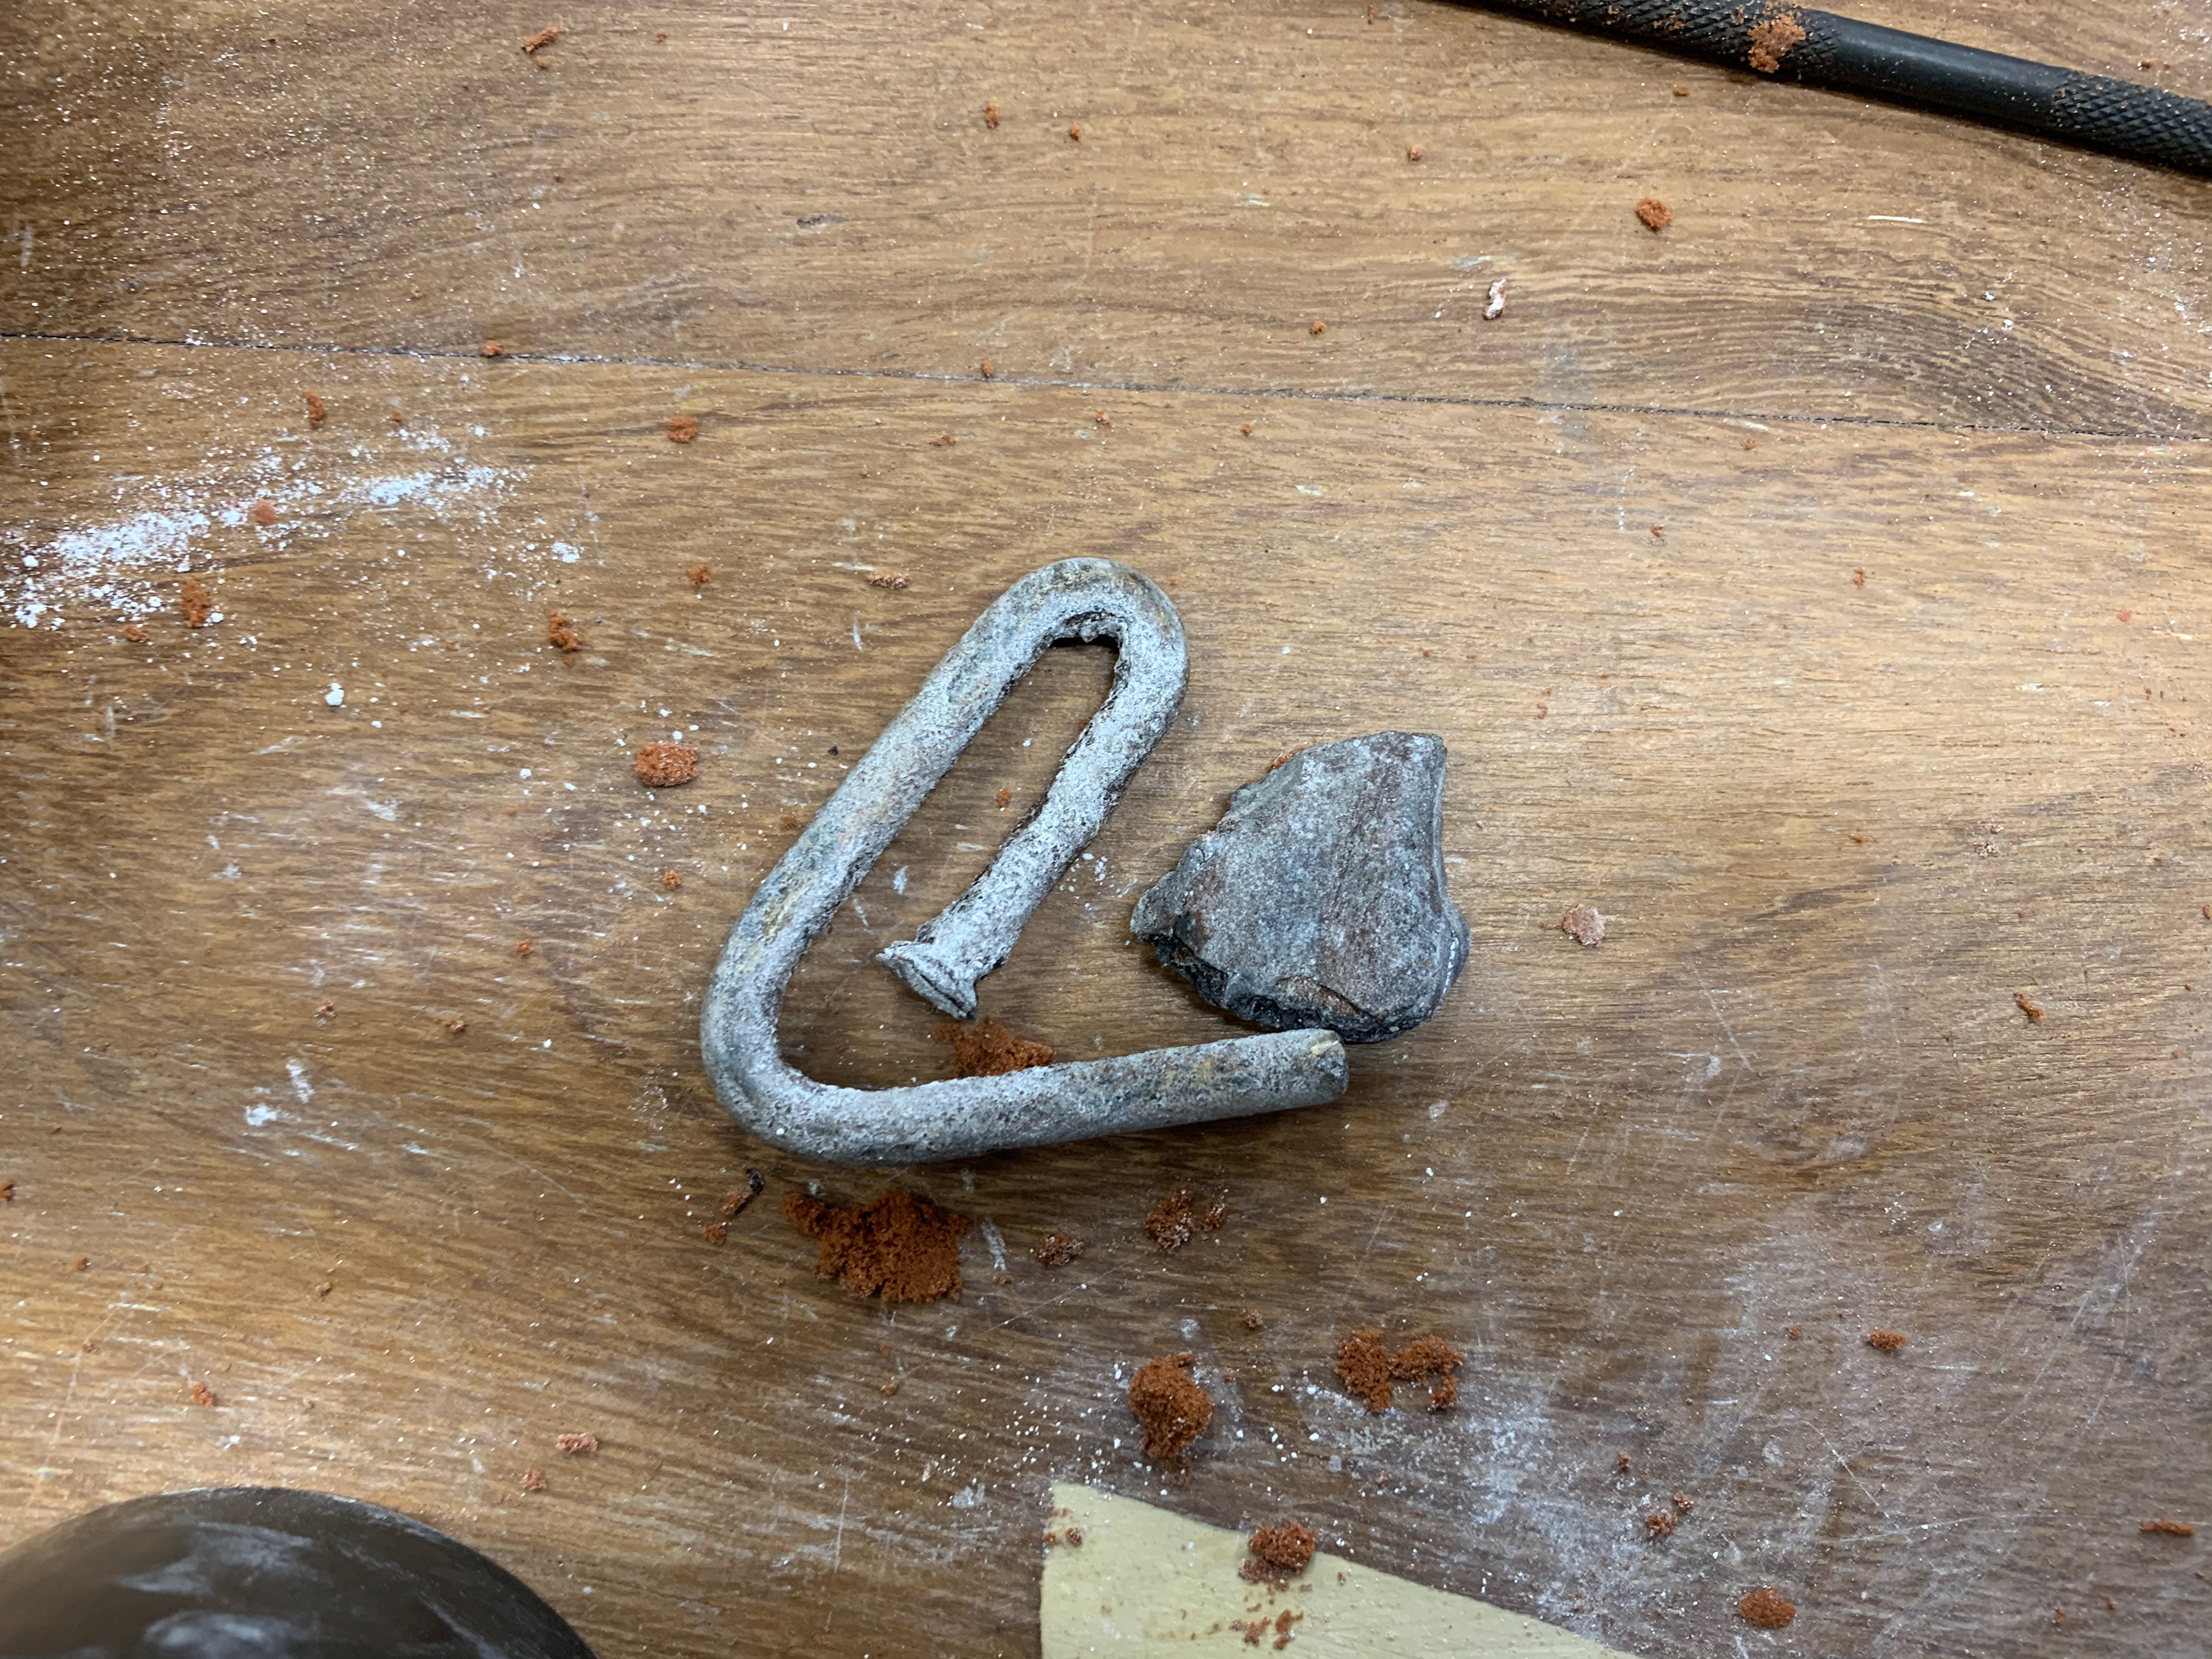
exploring my found object, i wanted to create a sample with my found bent nail and piece of bark to show the difference with the industrial and nature within manchester. i like working with pewter sand casting as it picks up on details really well especially with my bark showing the layers it has and where its been chipped away. casting with two objects is a little different as you cast one object then have to place your second object overlapping so the molten pewter has a channel to pass through. you do the sand casting process twice with each object having to be careful especially with the second object that you don't push sand in to the previous objects cast.
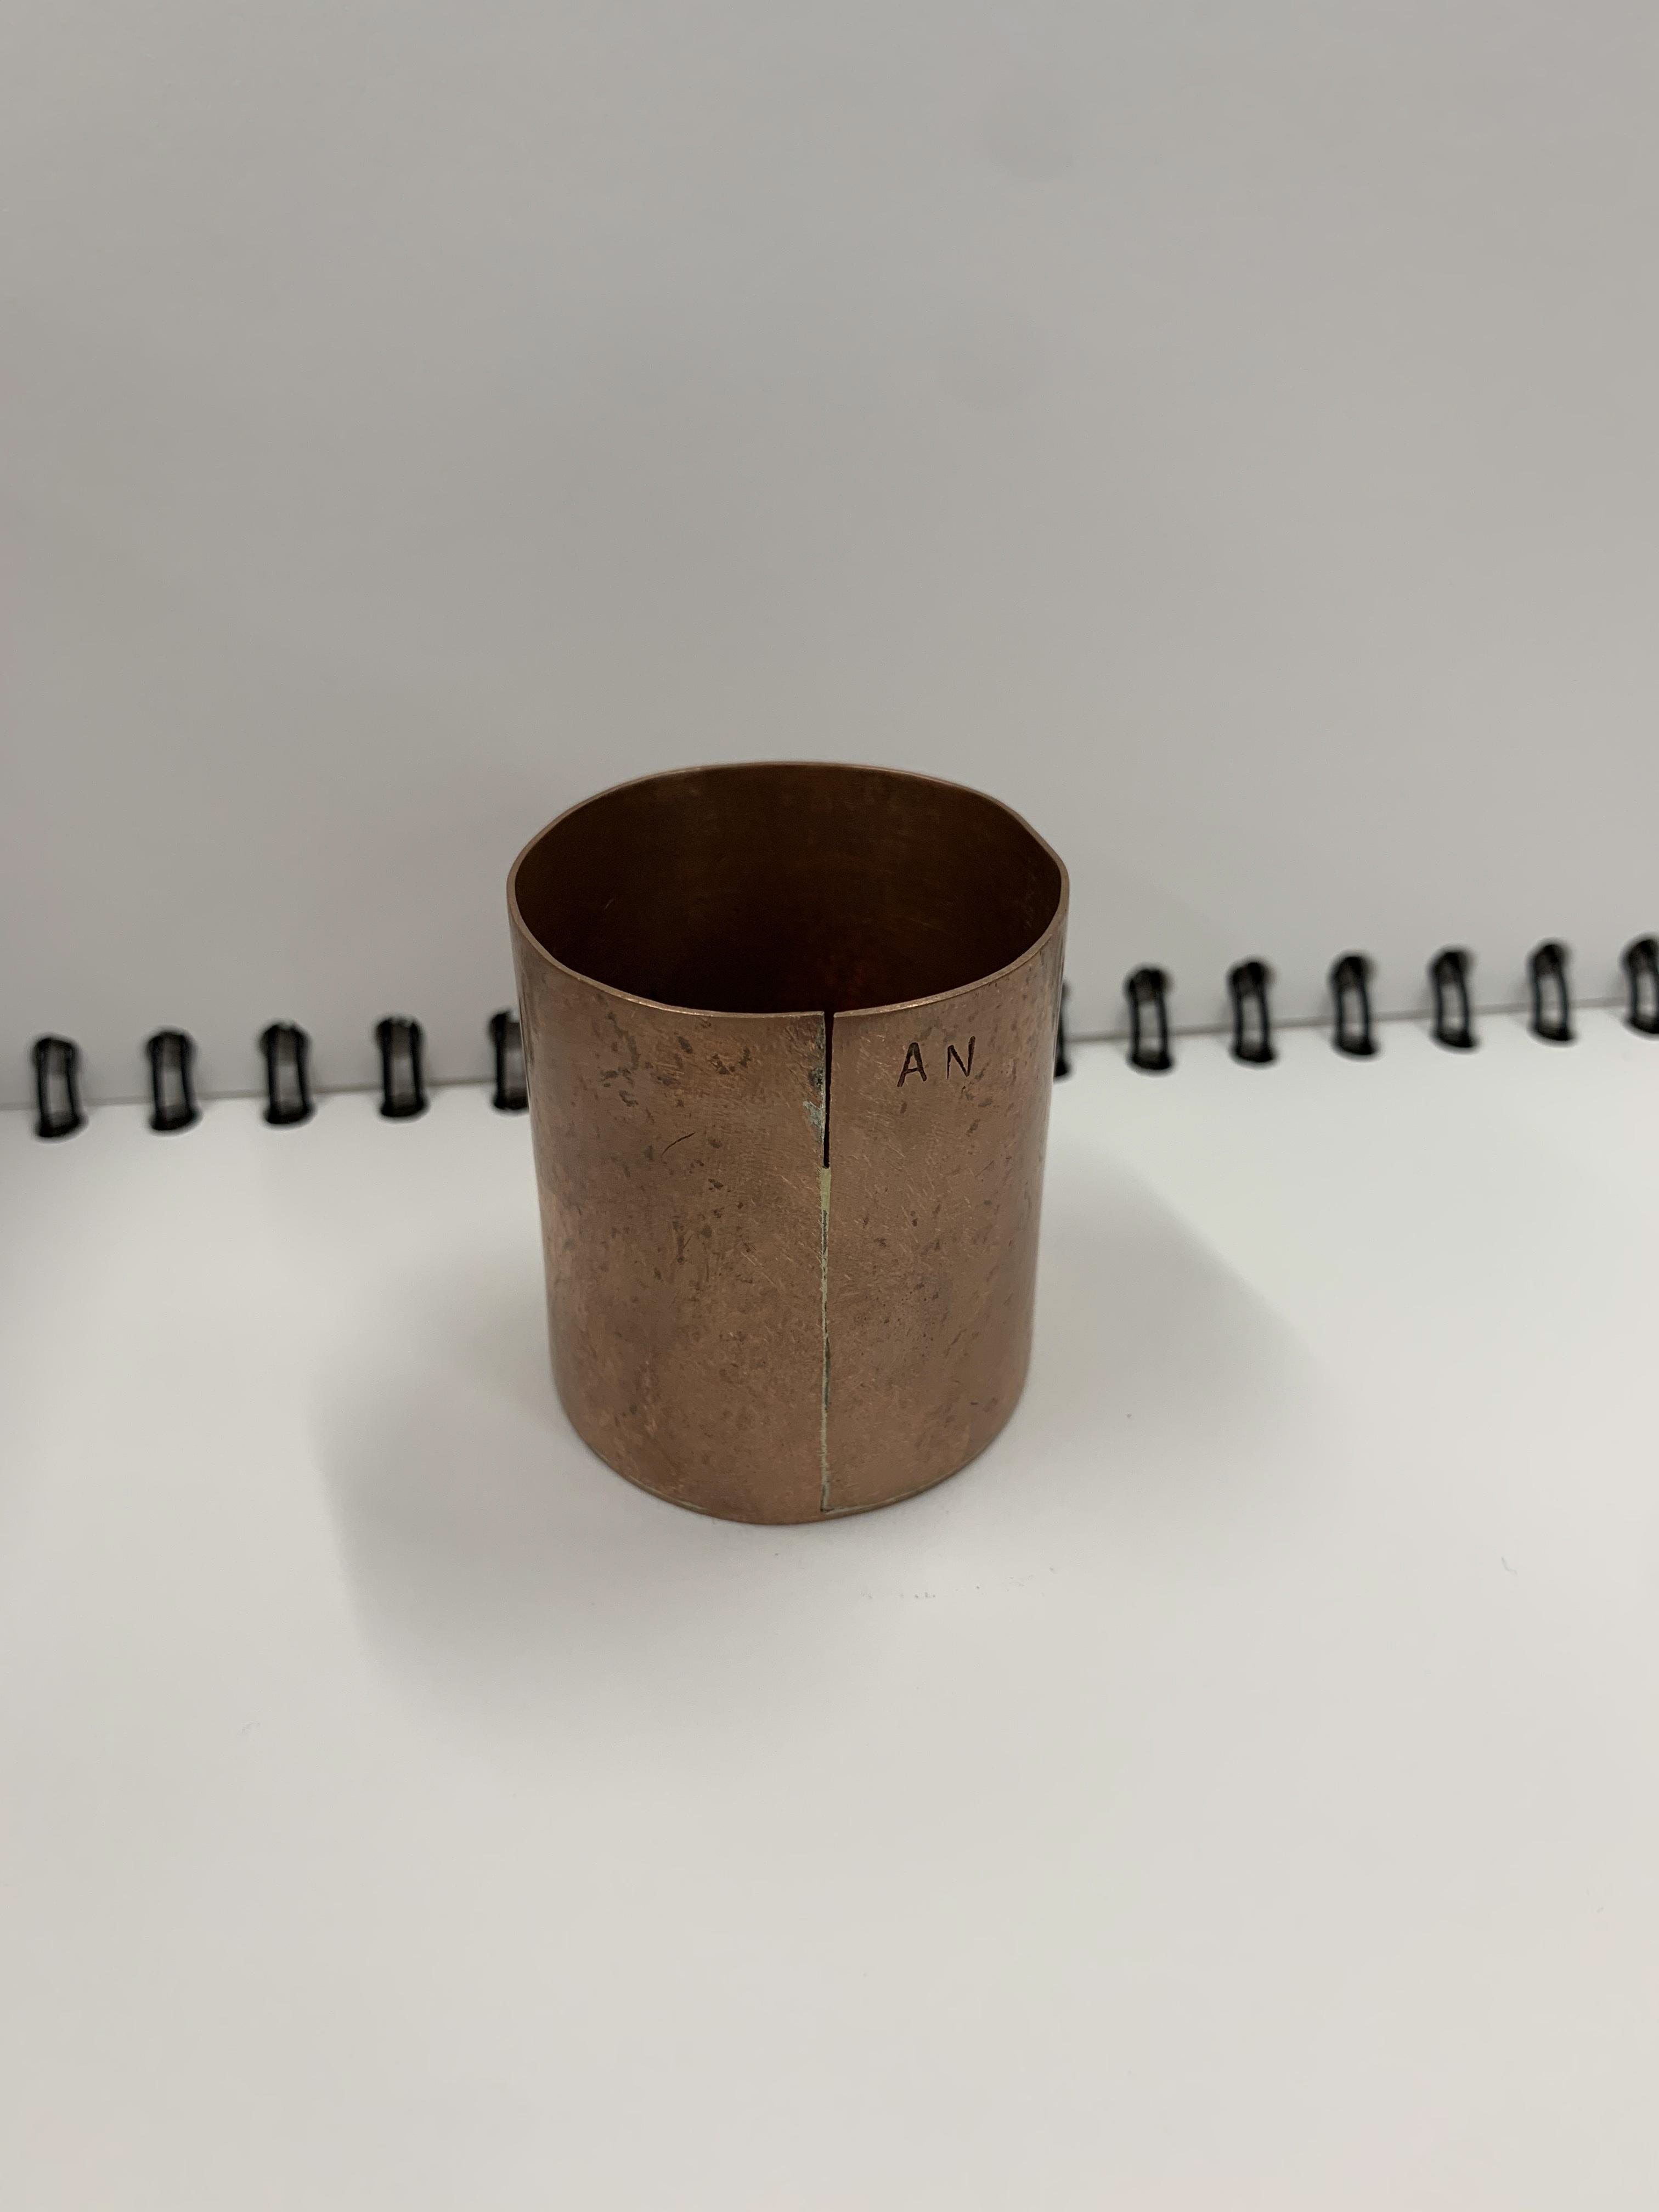
metal copper vessel that i soldered together, i had to repeat this process twice as i couldn't get a tight seal on it. i found soldering very challenging as i couldn't keep the copper at a consistent heat which meant the solder melted at different points and spread out instead of on the line. however i managed to sand most of the spread solider of to give it a clean finish. i also found it challenging when applying the hard solider pieces as the force of the blow torch kept making them fly away and it was hard to keep them in place.
metal vessle
investigating an object
for my object i chose a red stripe and did a series of experiments and investigations into the bottle. one experiment i did was mark making the bottle made when dipped in ink i found the results very fascinating as different parts of the bottle gave very organic and flowing marks.

these marks were created using the mouth piece and the neck of the bottle
this was created by the bottom ridges and the body of the glass bottle
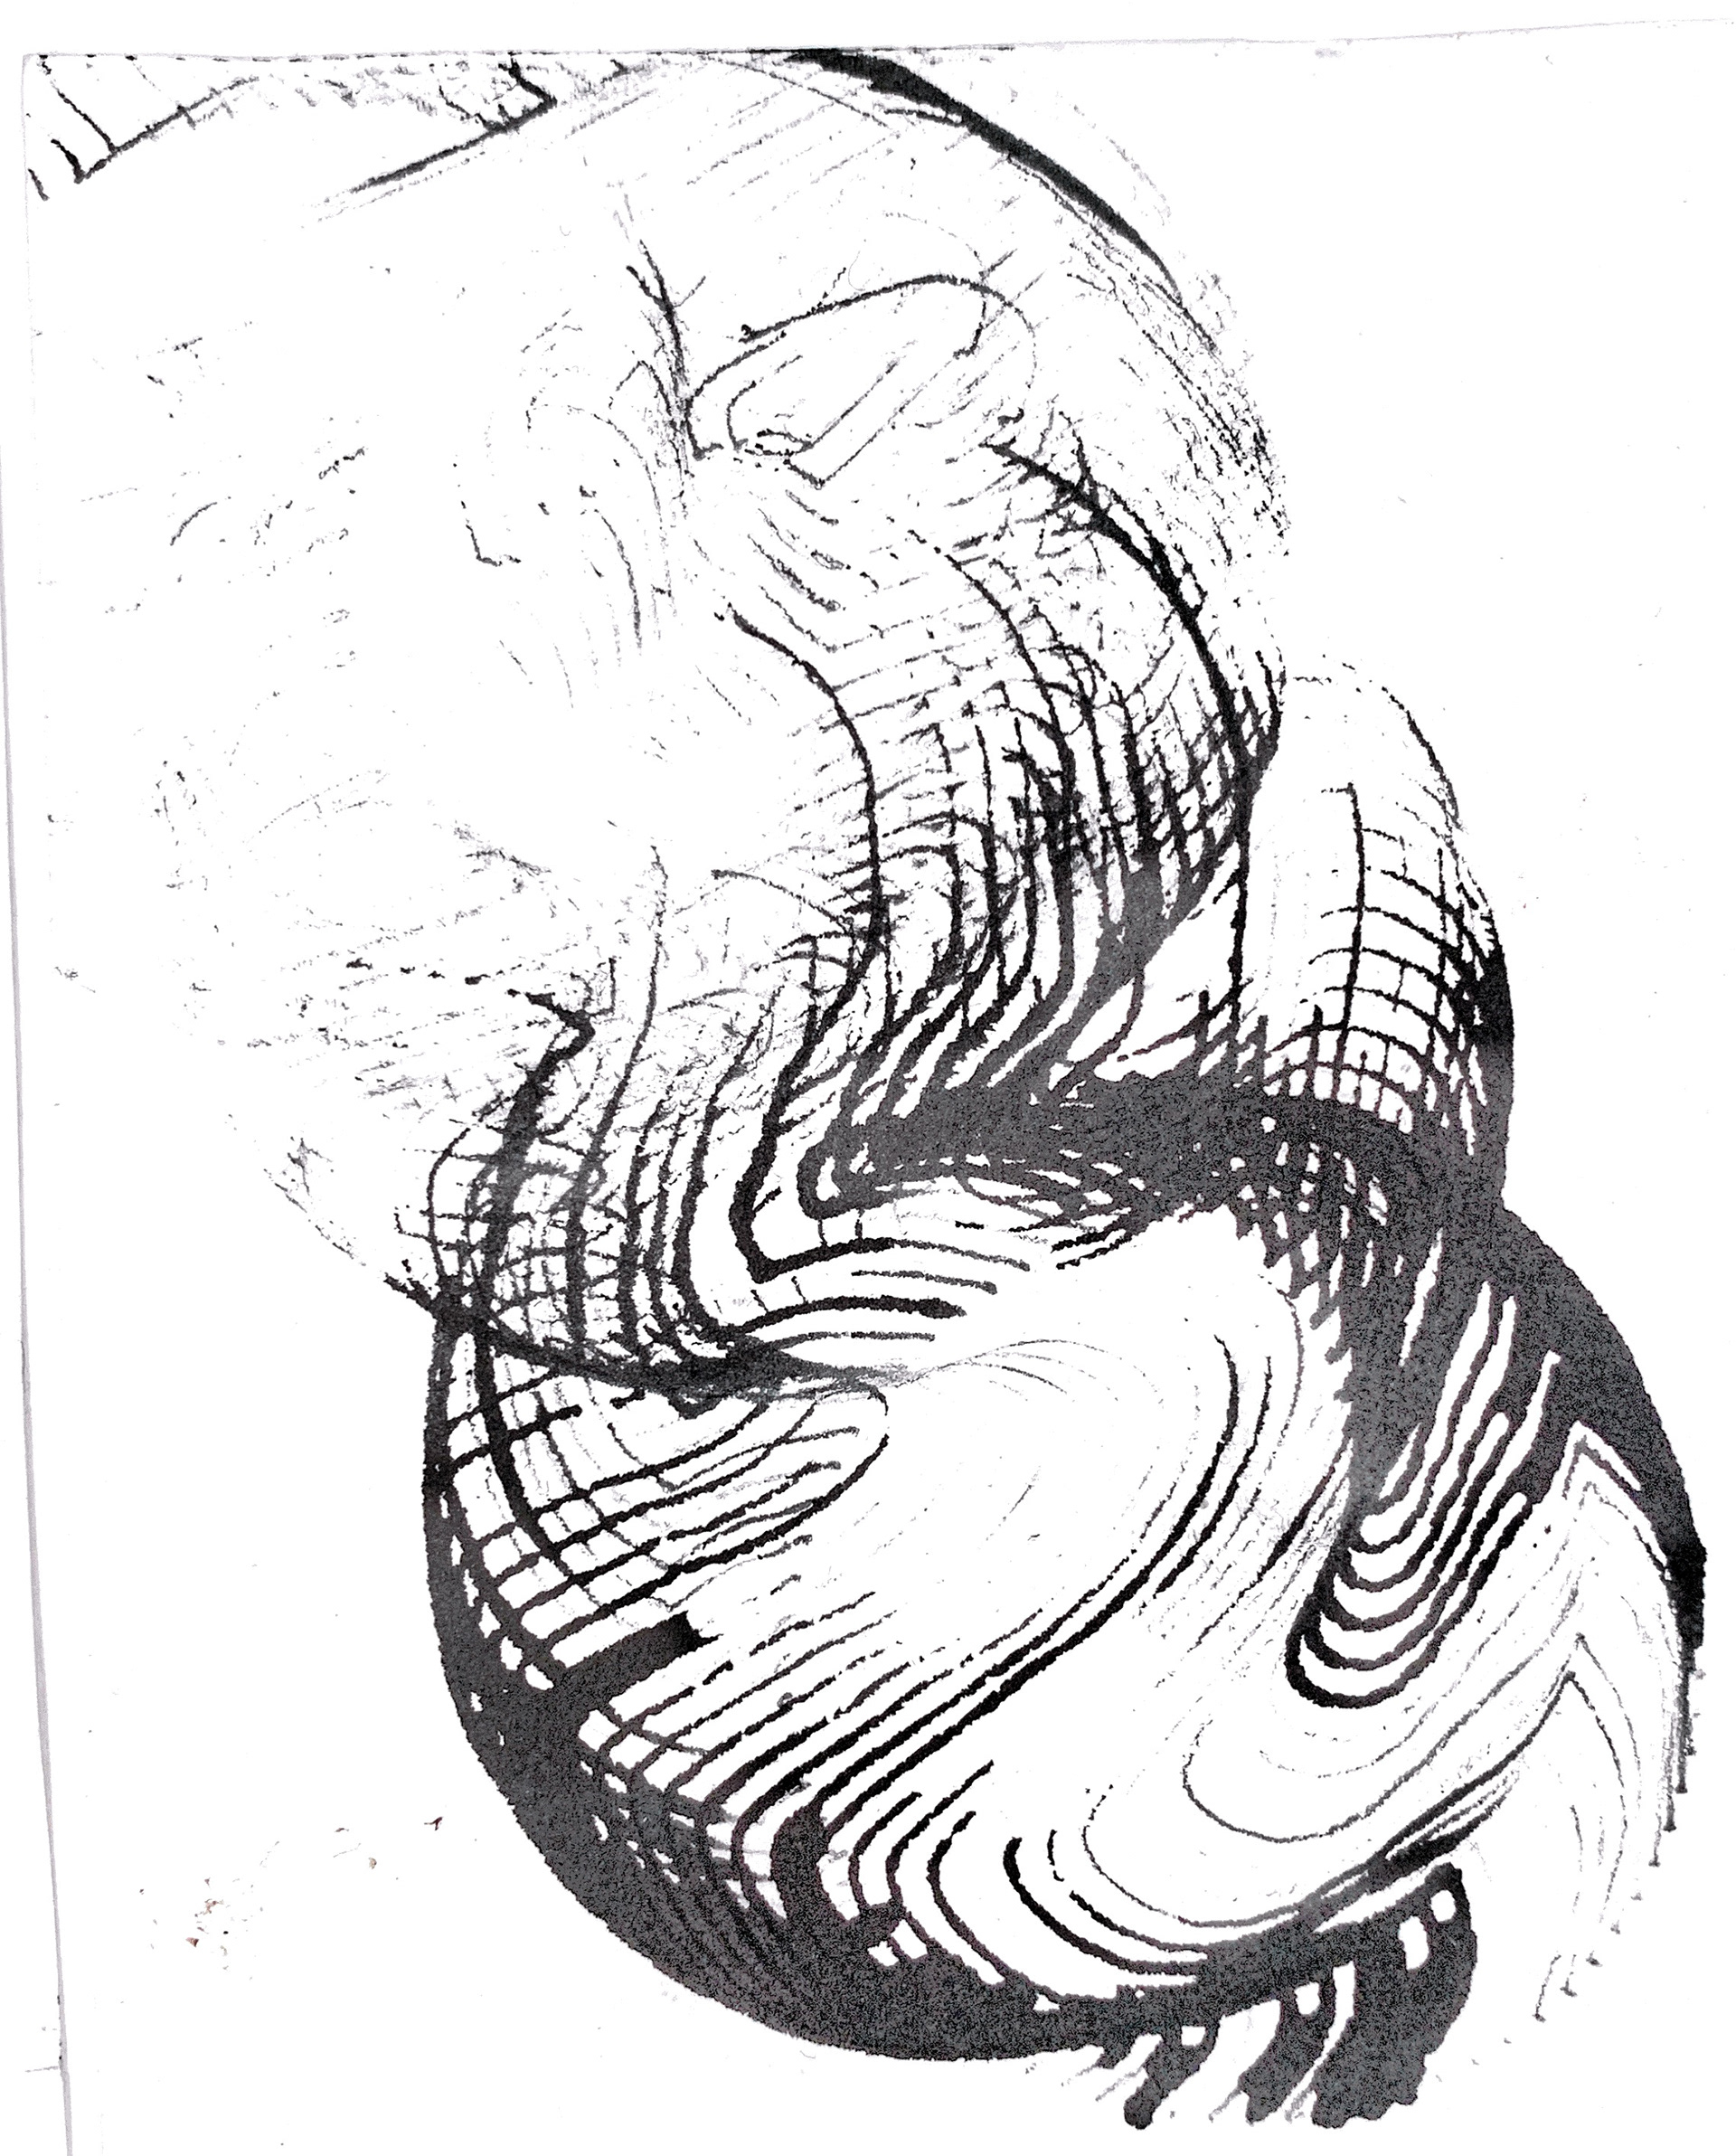
using the ridges at the bottom of the bottle
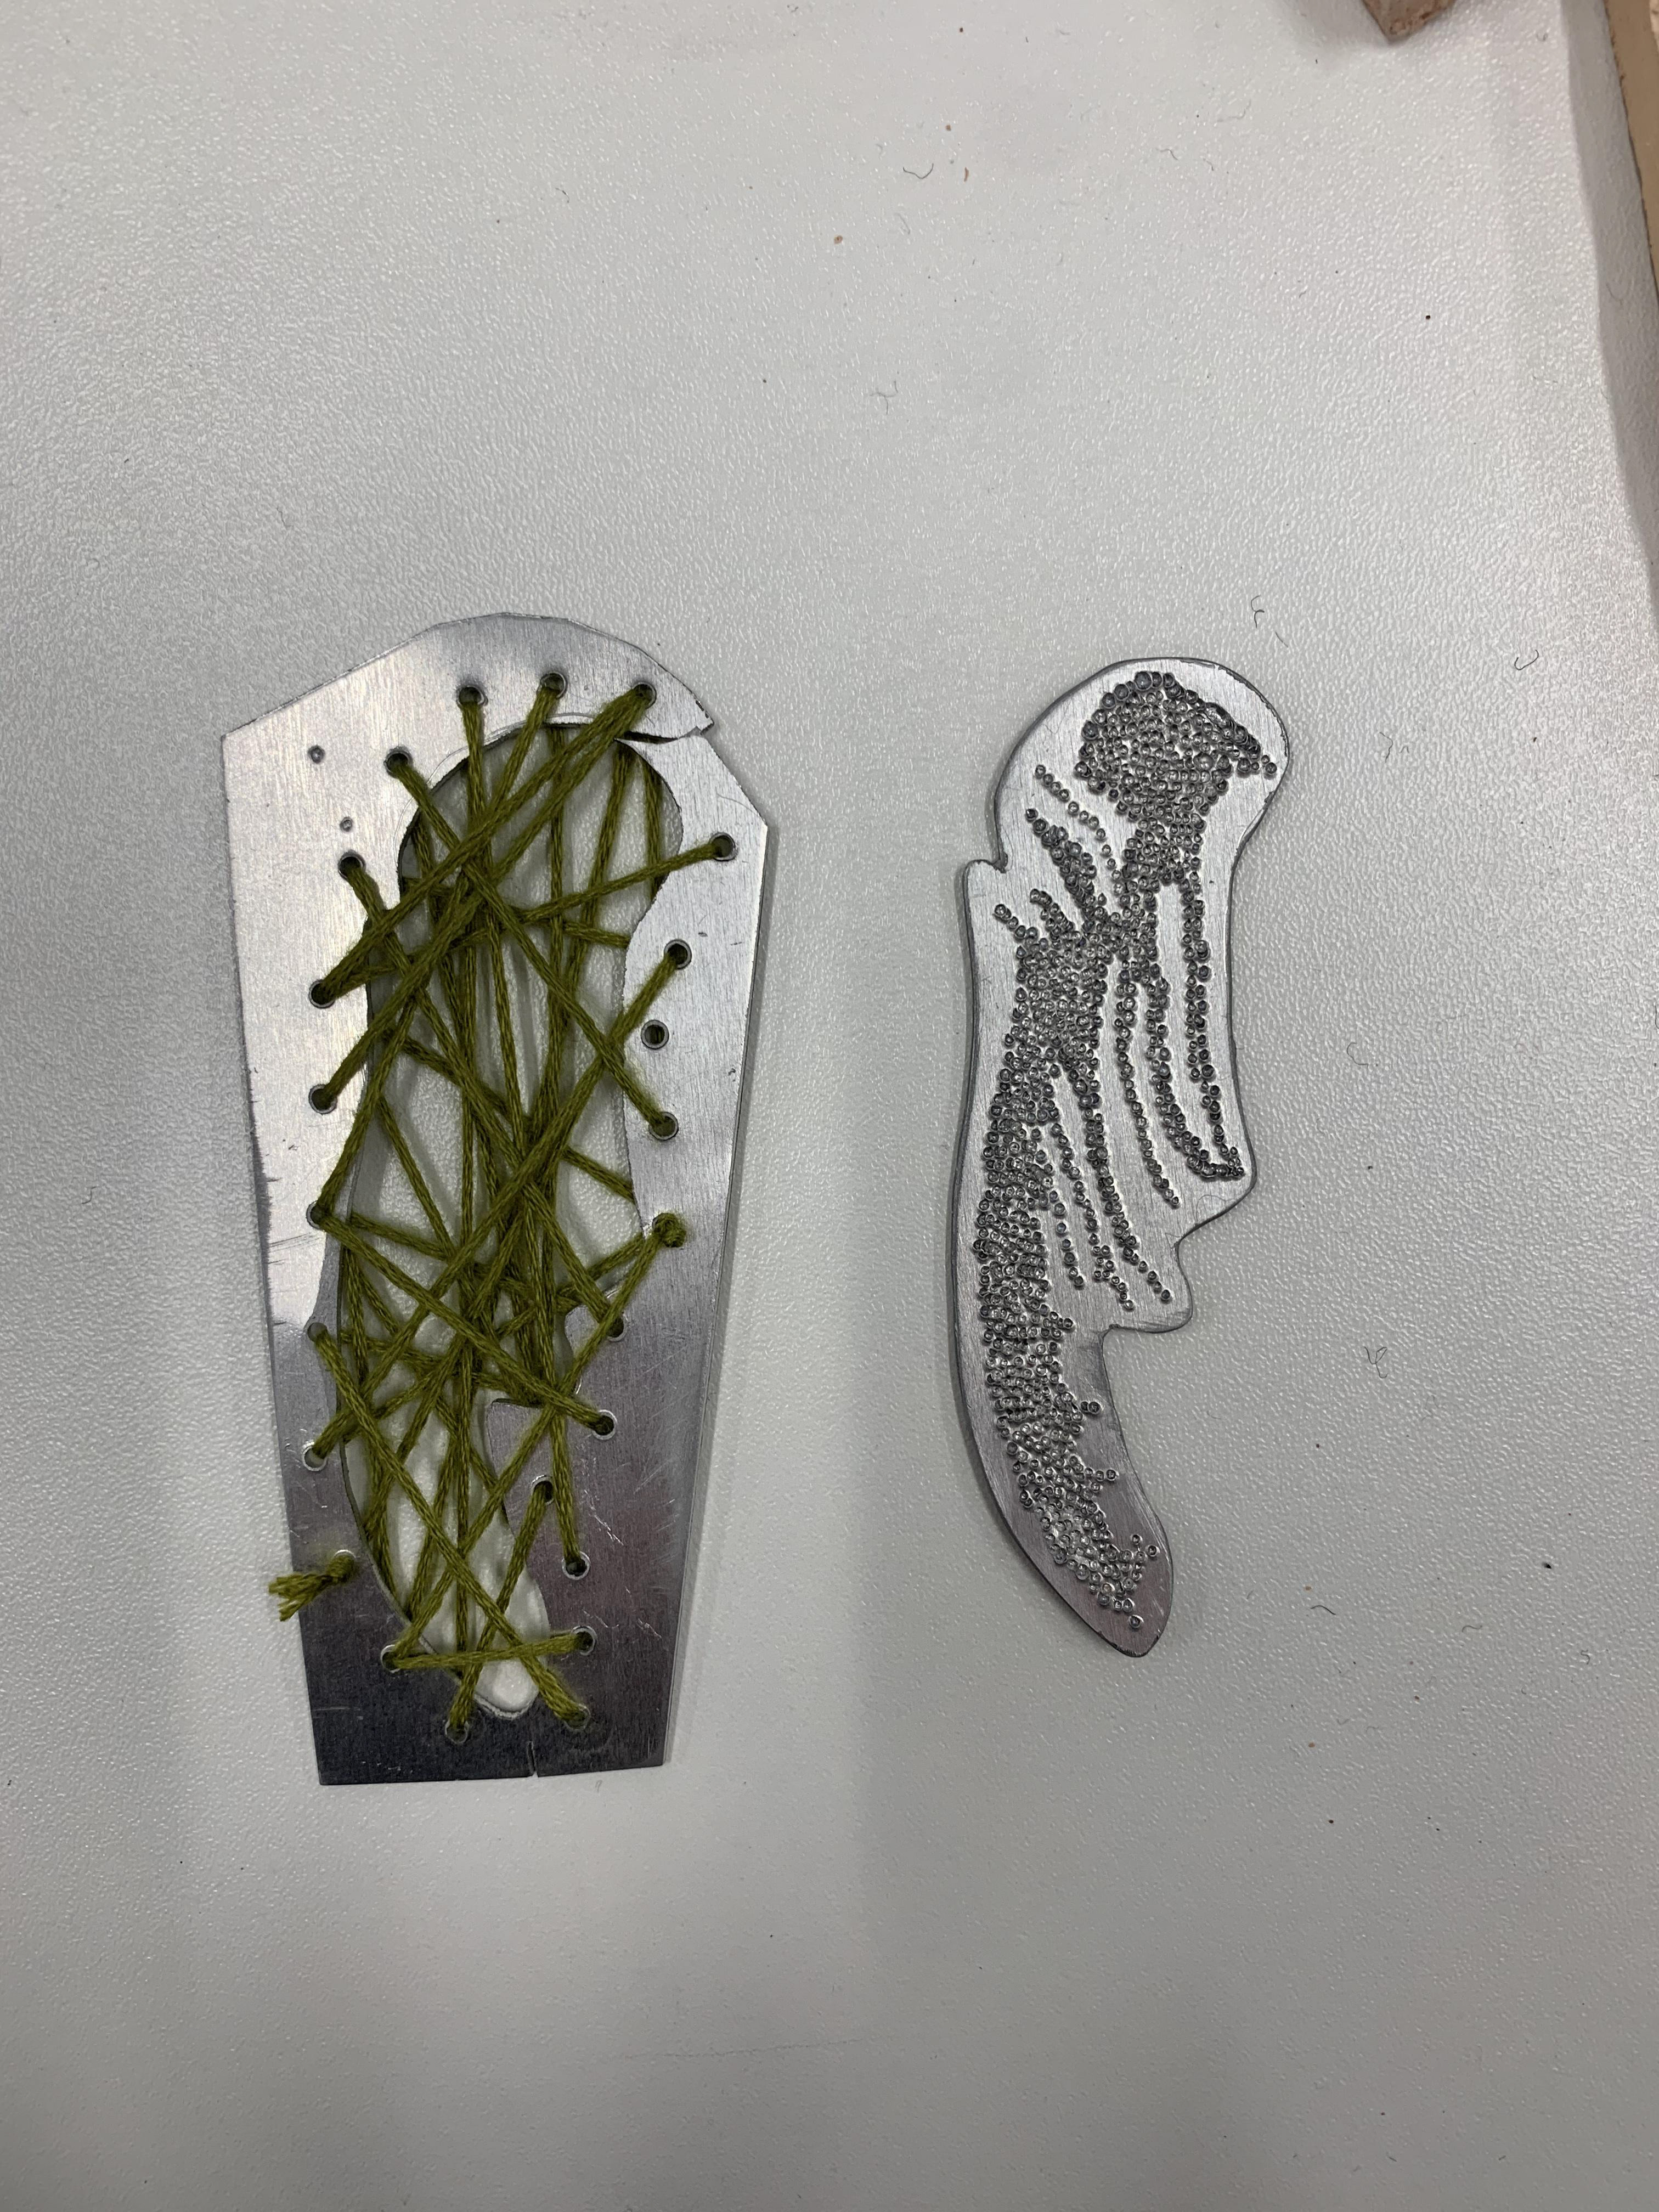
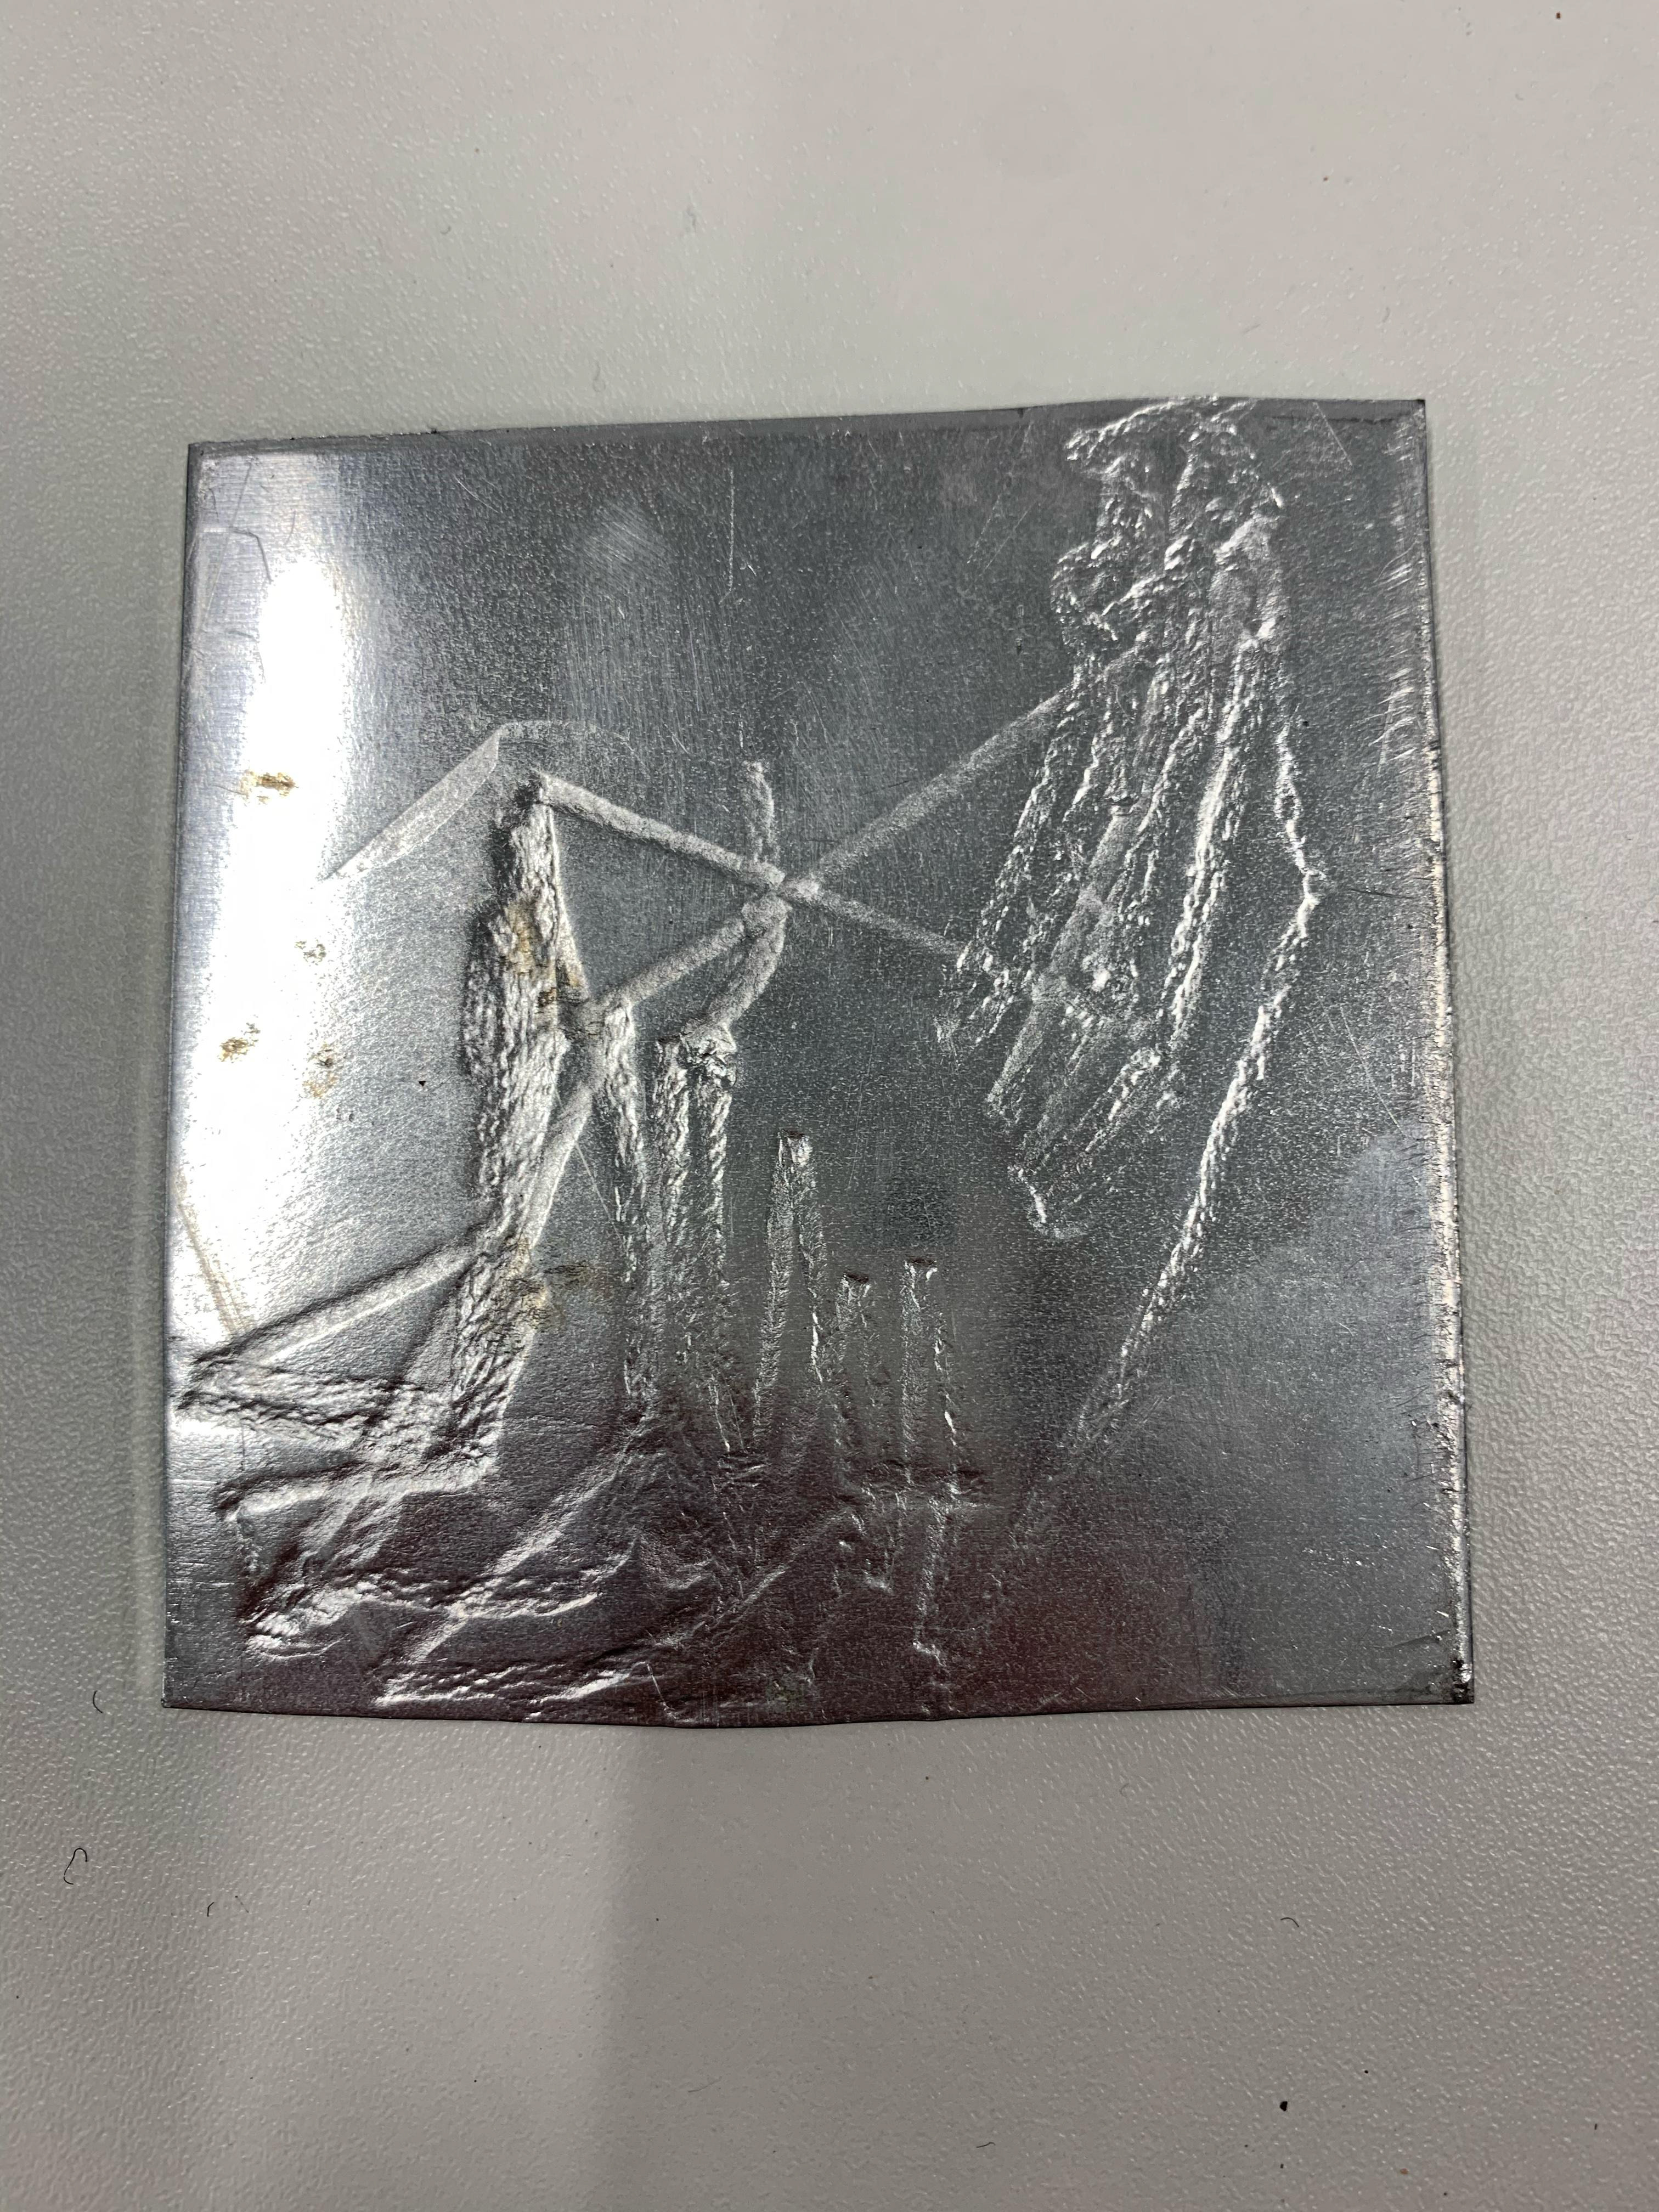
these pieces were inspired by my bottle mark makings, for the sample on the right i attached a printed photo of the marks made by the bottom ridges and body of the bottle, sticking this to my sheet metal i outlined the inked parts. once i had this initial outline i decided to hamper in tiny dots using a centre punch to created the black out texture part. this piece did take a while as i wanted to be precise with my marks however doing a part which is manly filled out with ink meant that i had to do a lot of centre punches repetitively. i then cut this piece out leaving its silhouette, i used this piece to sample one of my light drawings which looks into the negative space of shadows i drew i felt this piece worked well and i added embroidery to represent the light that shines through.
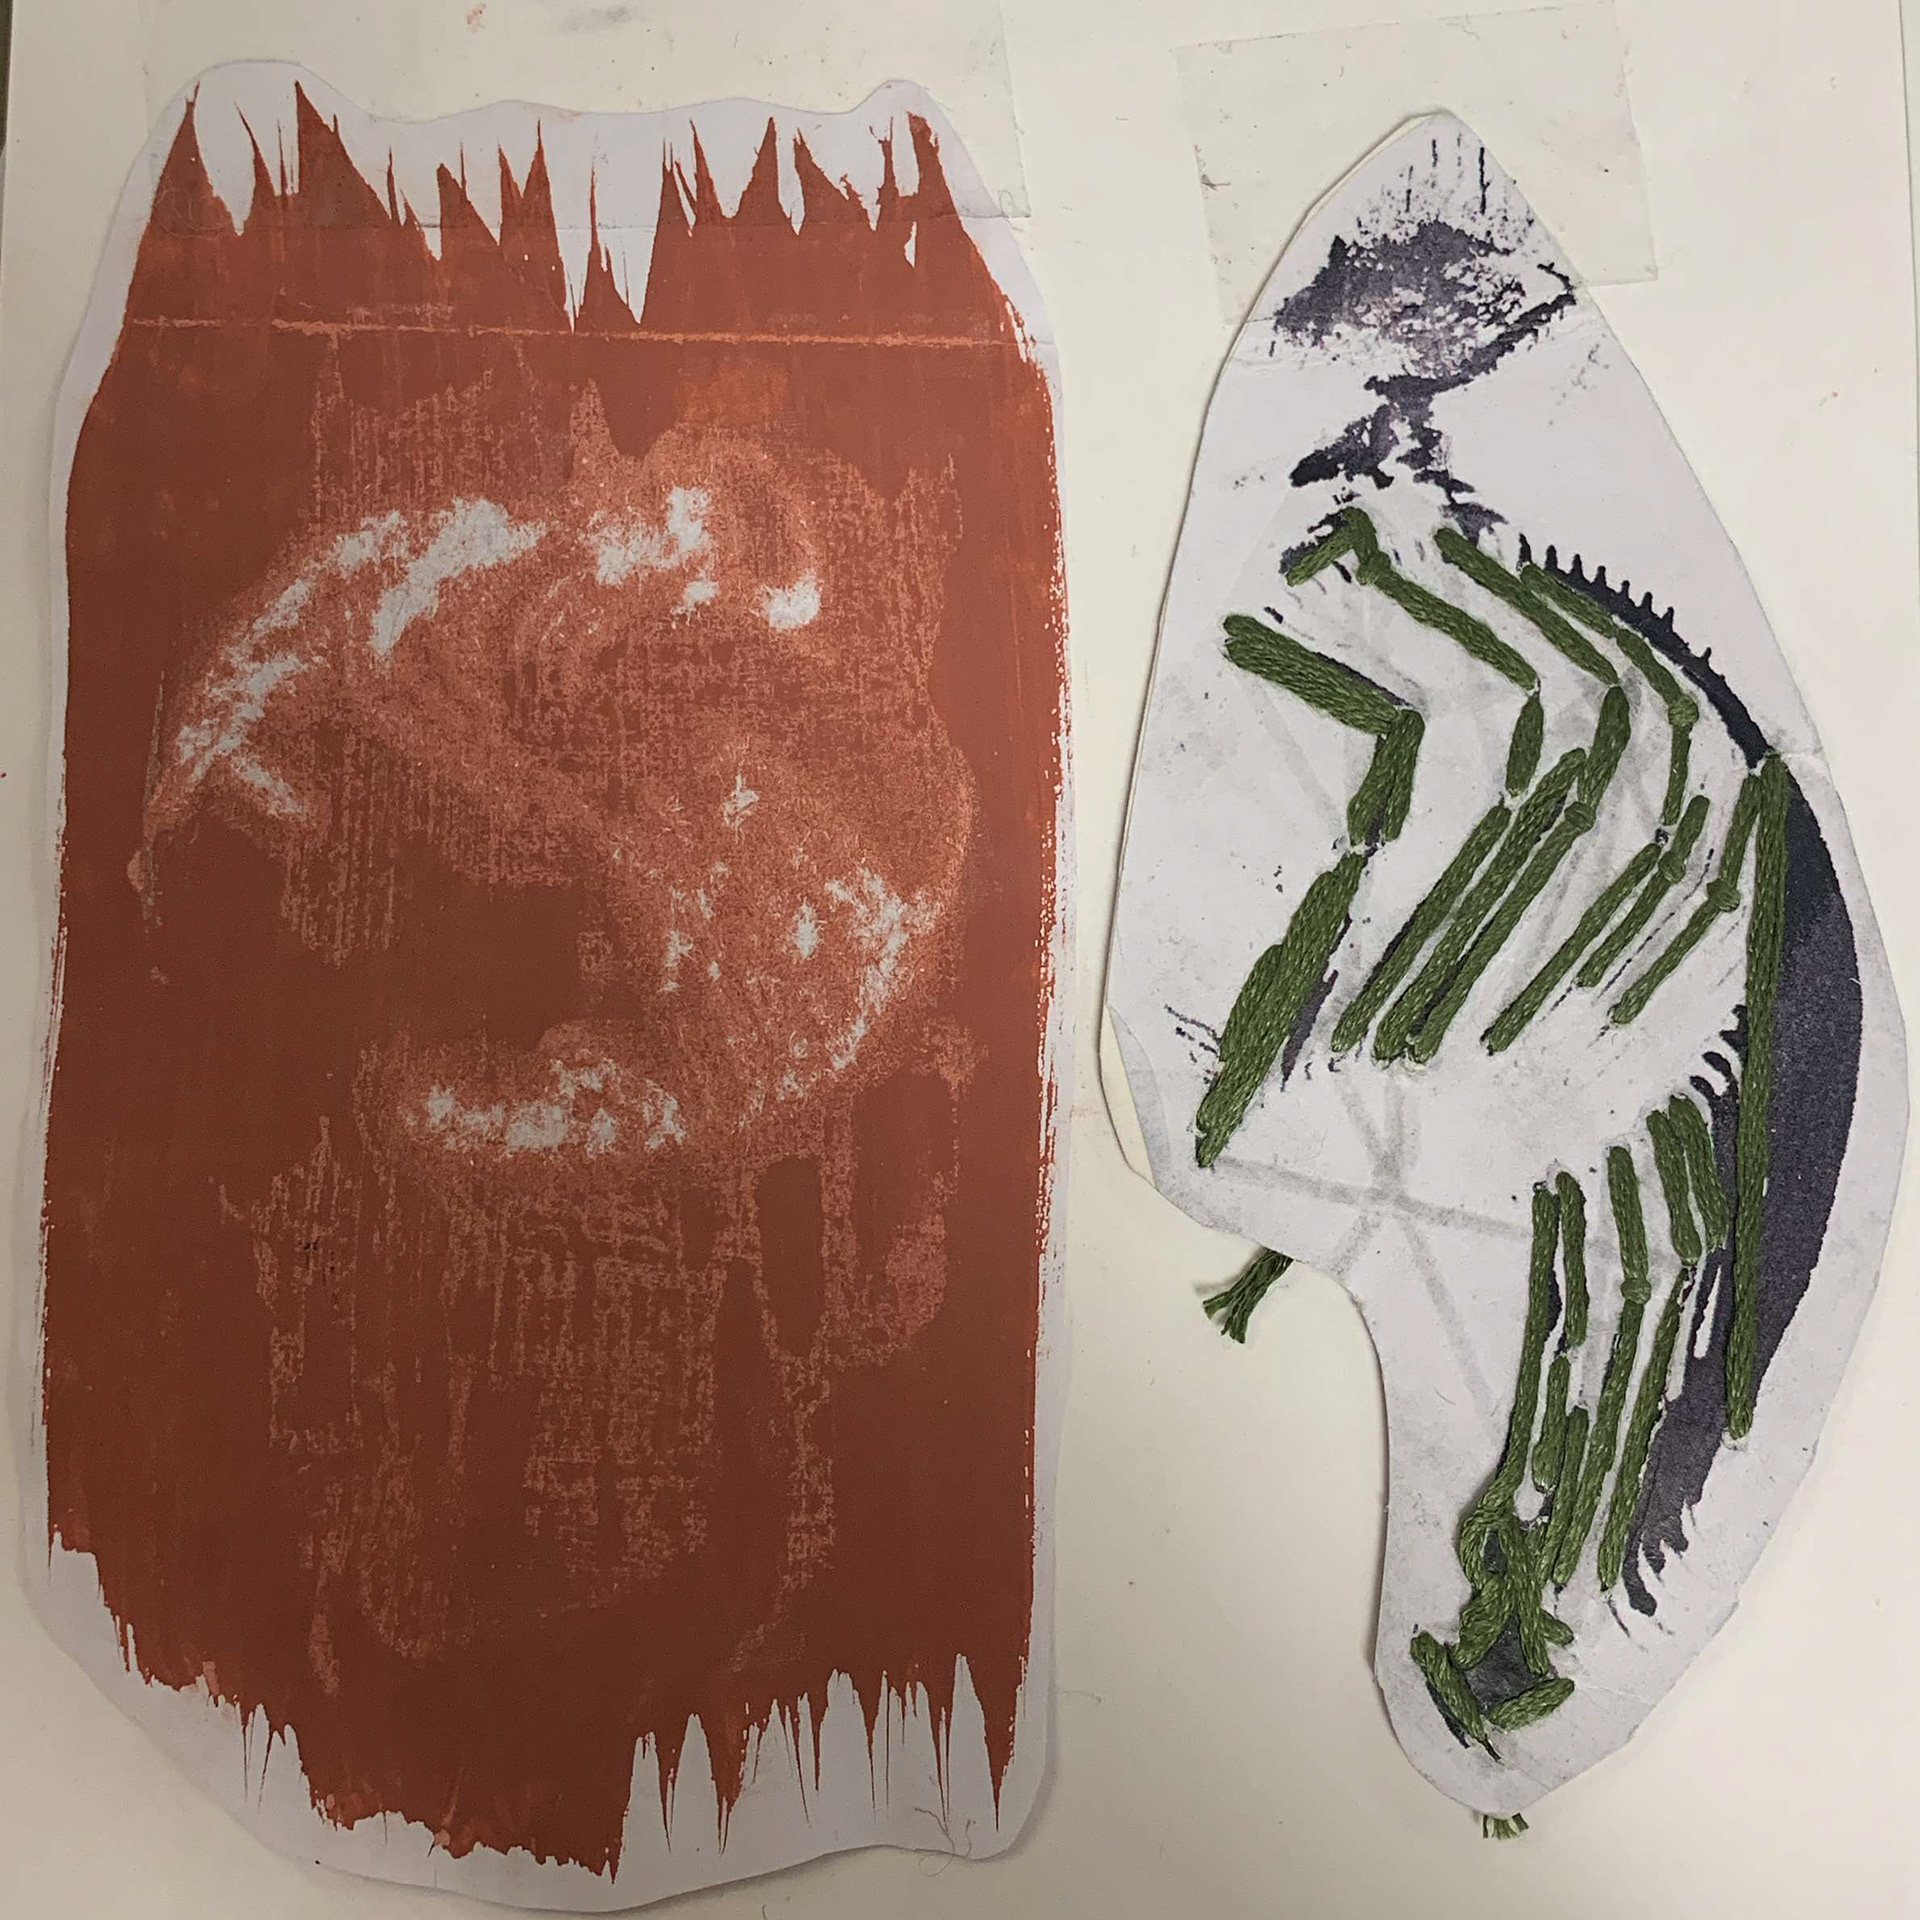
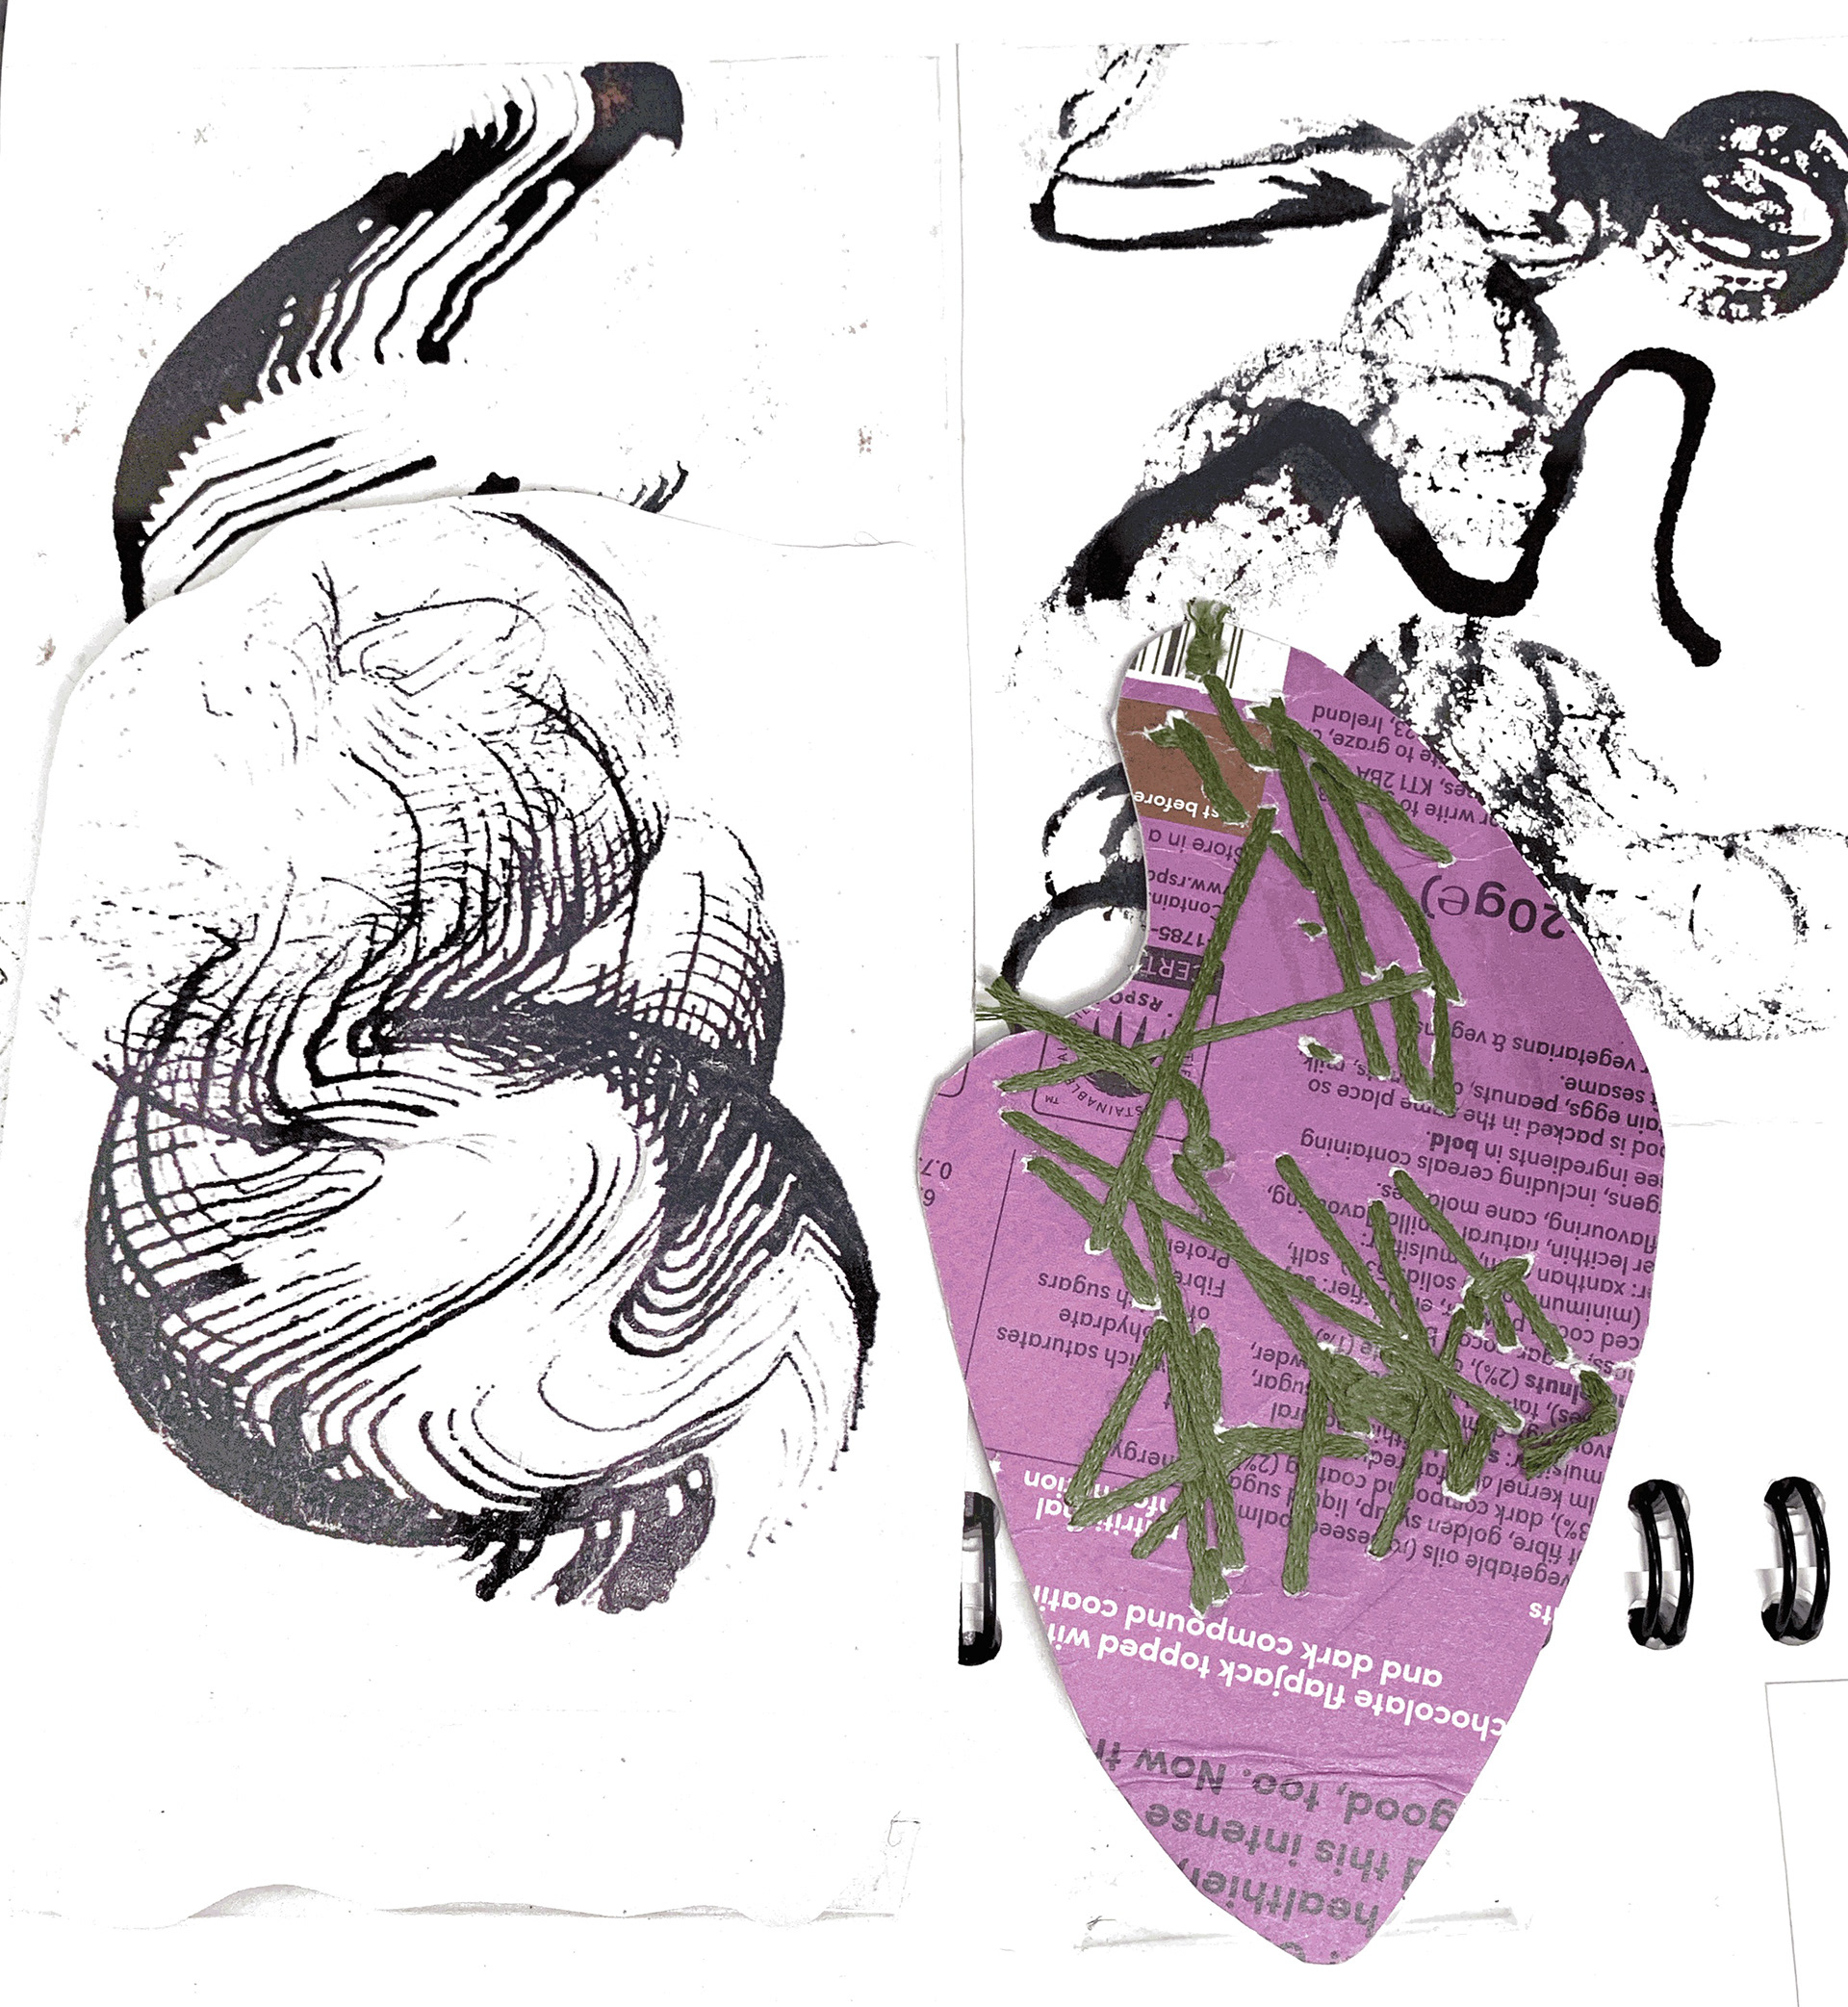
for these two mark makings i developed them into my clay and metal work.for my embroidery piece i did a rough sew of all the lines that the bottle created on cardboard. i then rolled the cardboard on a thick aluminium, being a soft metal when rolled though a machine with lots of pressure it picks up the rise and layered pieces of your work. i really like this outcome as it picks up the embroidery from both sides and the texture of it. for my second piece i wanted to use clay and coloured slip printing my mark makings out and painting red slip onto it, once dried i was able to apply it to my clay and i traced out the mark makings on the other side so it printed on the clay. when i lifted the paper the results wasn't as expected i think as i used plain printing paper the slip didn't realise as well, compared to being on newspaper, however i still really like the texture that was realised onto the clay.
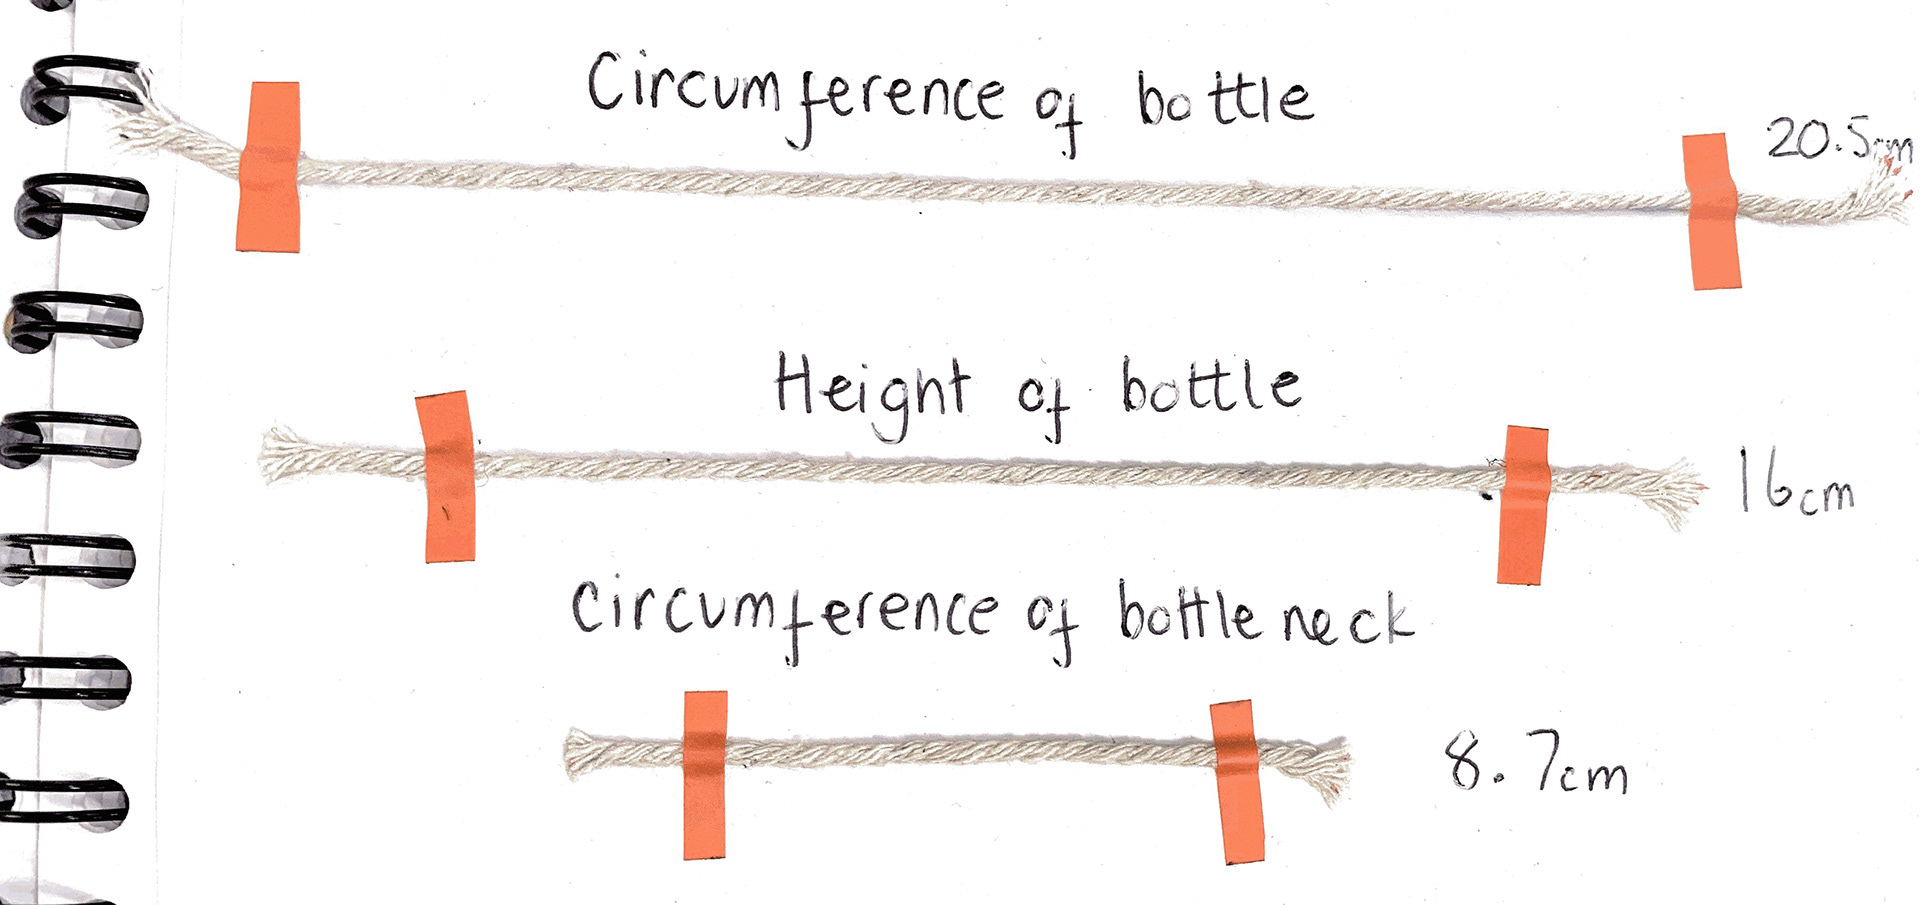
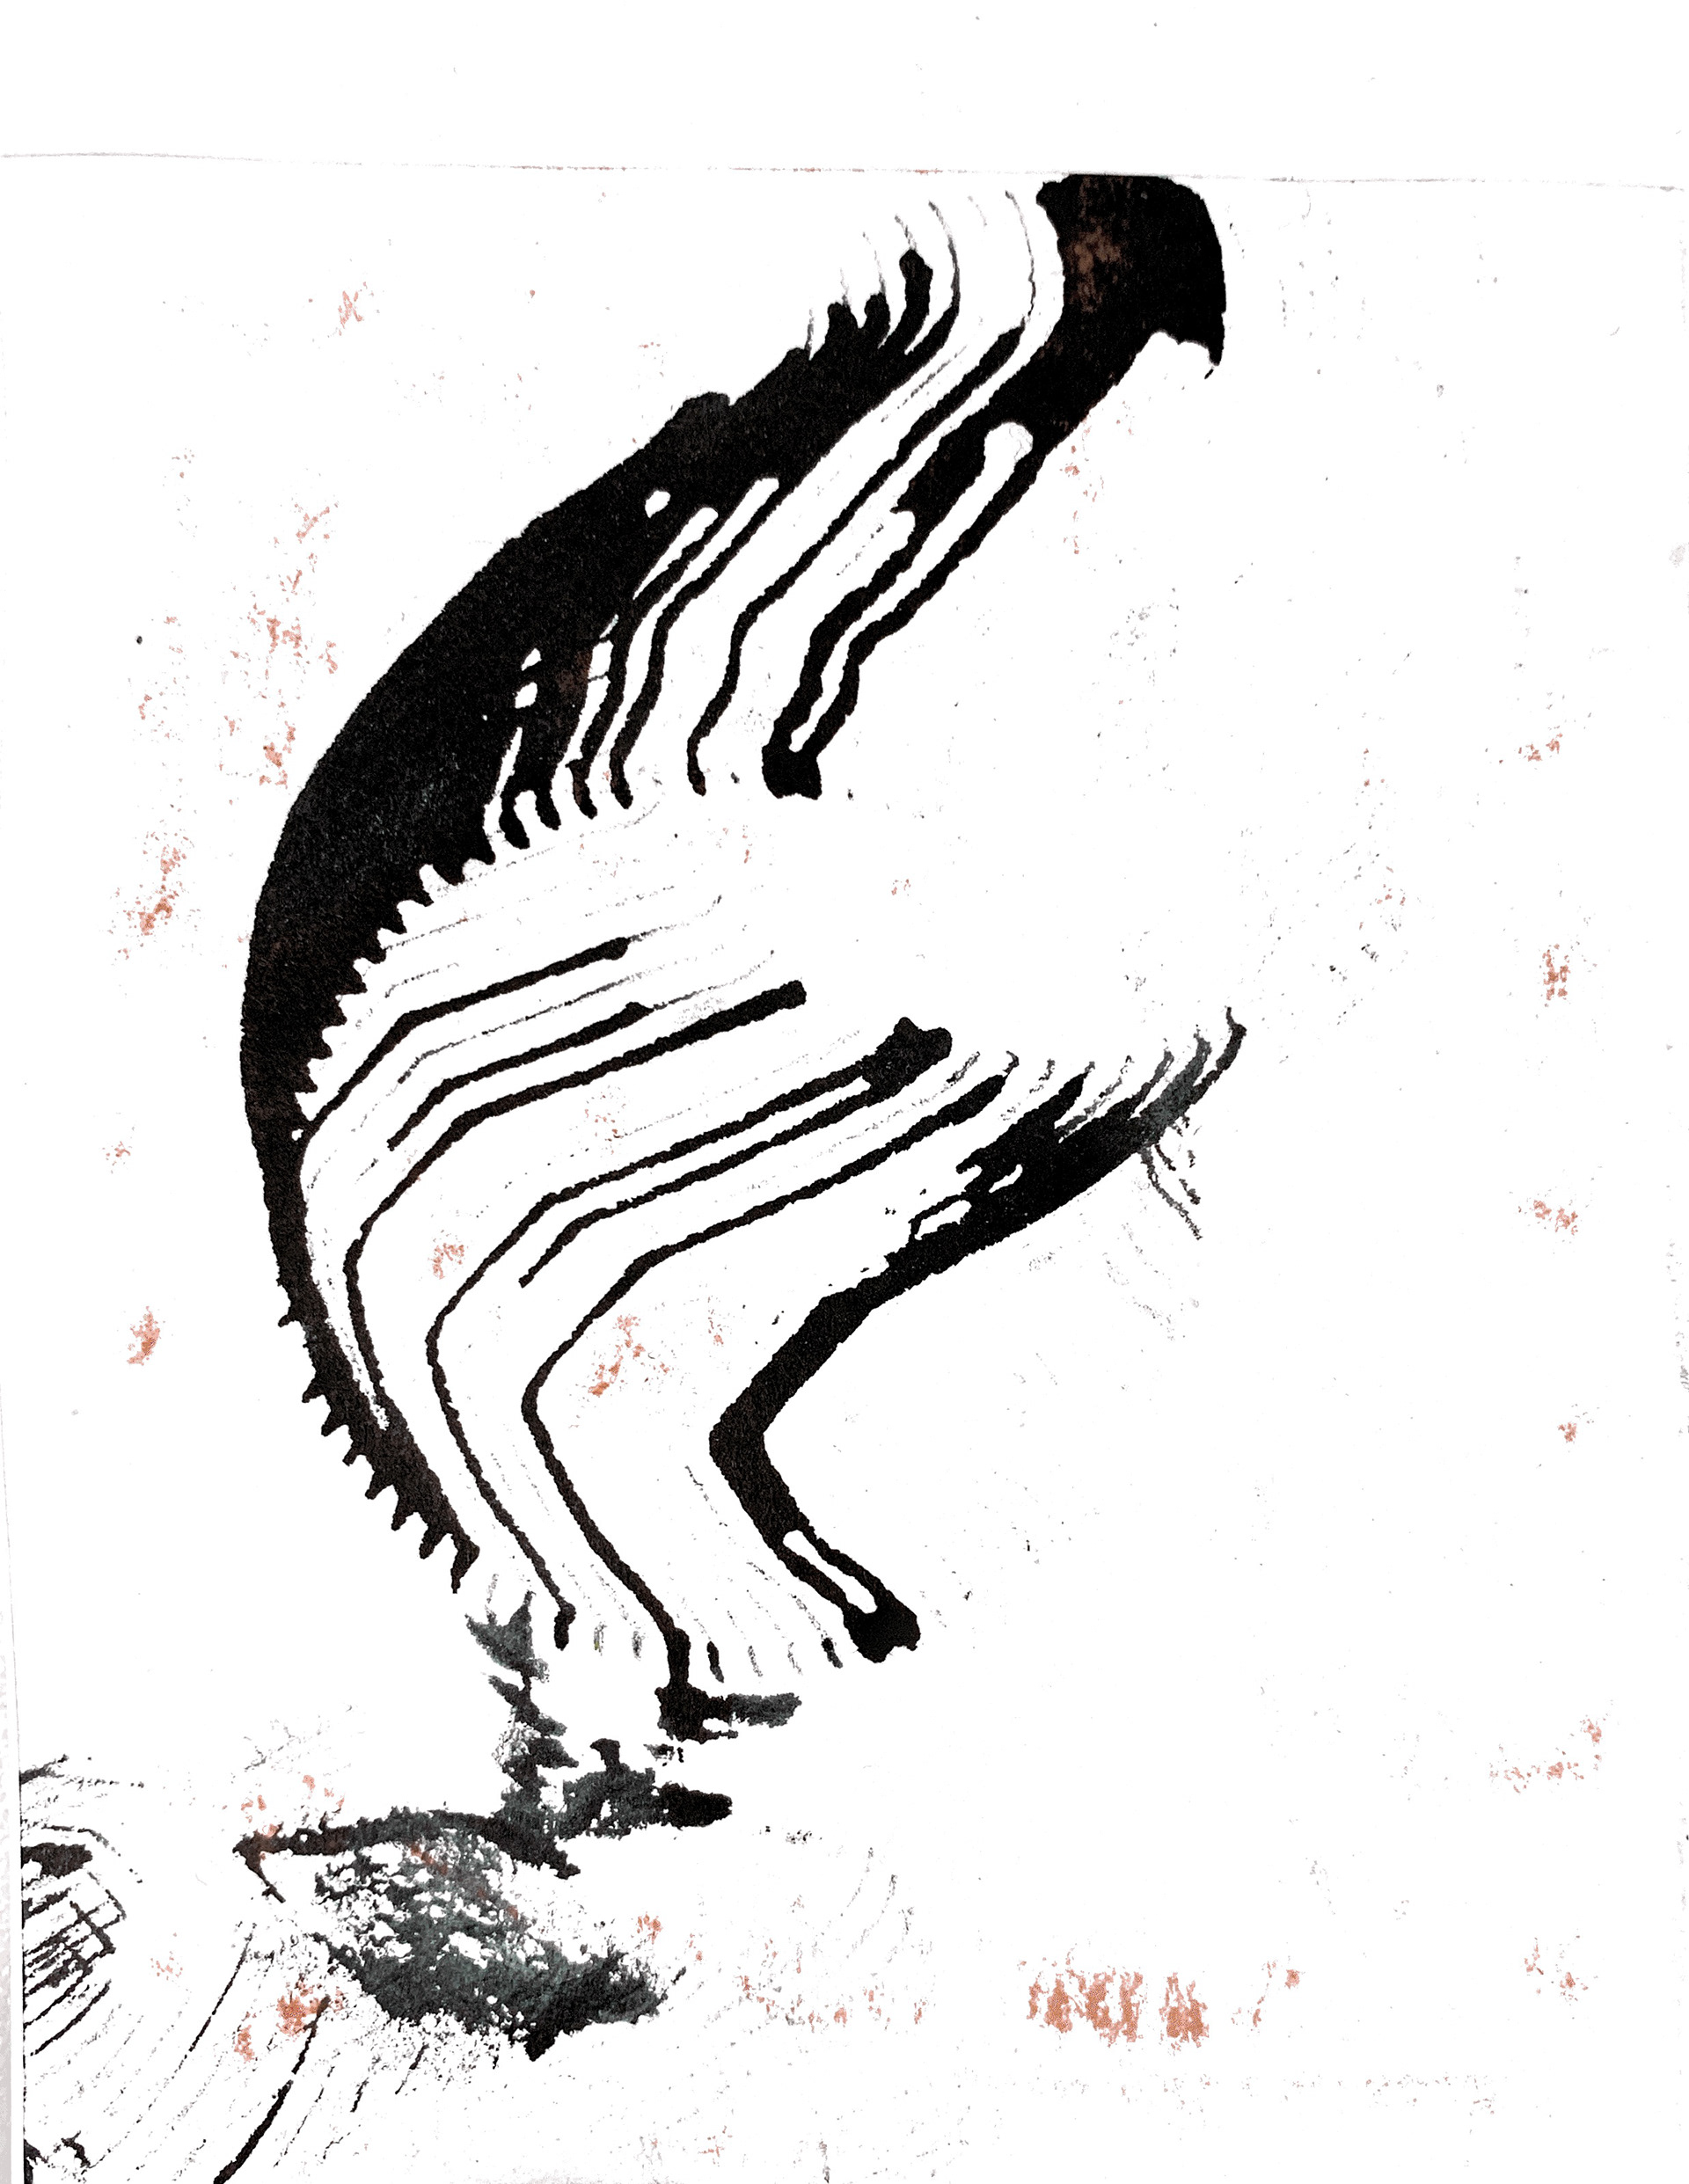
another investigation i took with my red stripe bottle was measuring features of it with string finding the circumference of the bottle, height of the bottle and the circumference of the neck. i then developed this by using these specific lengths of string to created a textured mark. i covered the string in charcoal and placed it on paper with a curling form, i them sandwiched them in between the paper and applied even pressure and pulled the string out. the charcoal left a very delicate trail reminding me of flowers, the flow of the string is very organic and flowing. i wanted to develop this into sample pieces this being my inspiration i wanted to create samples in ceramics and metal.
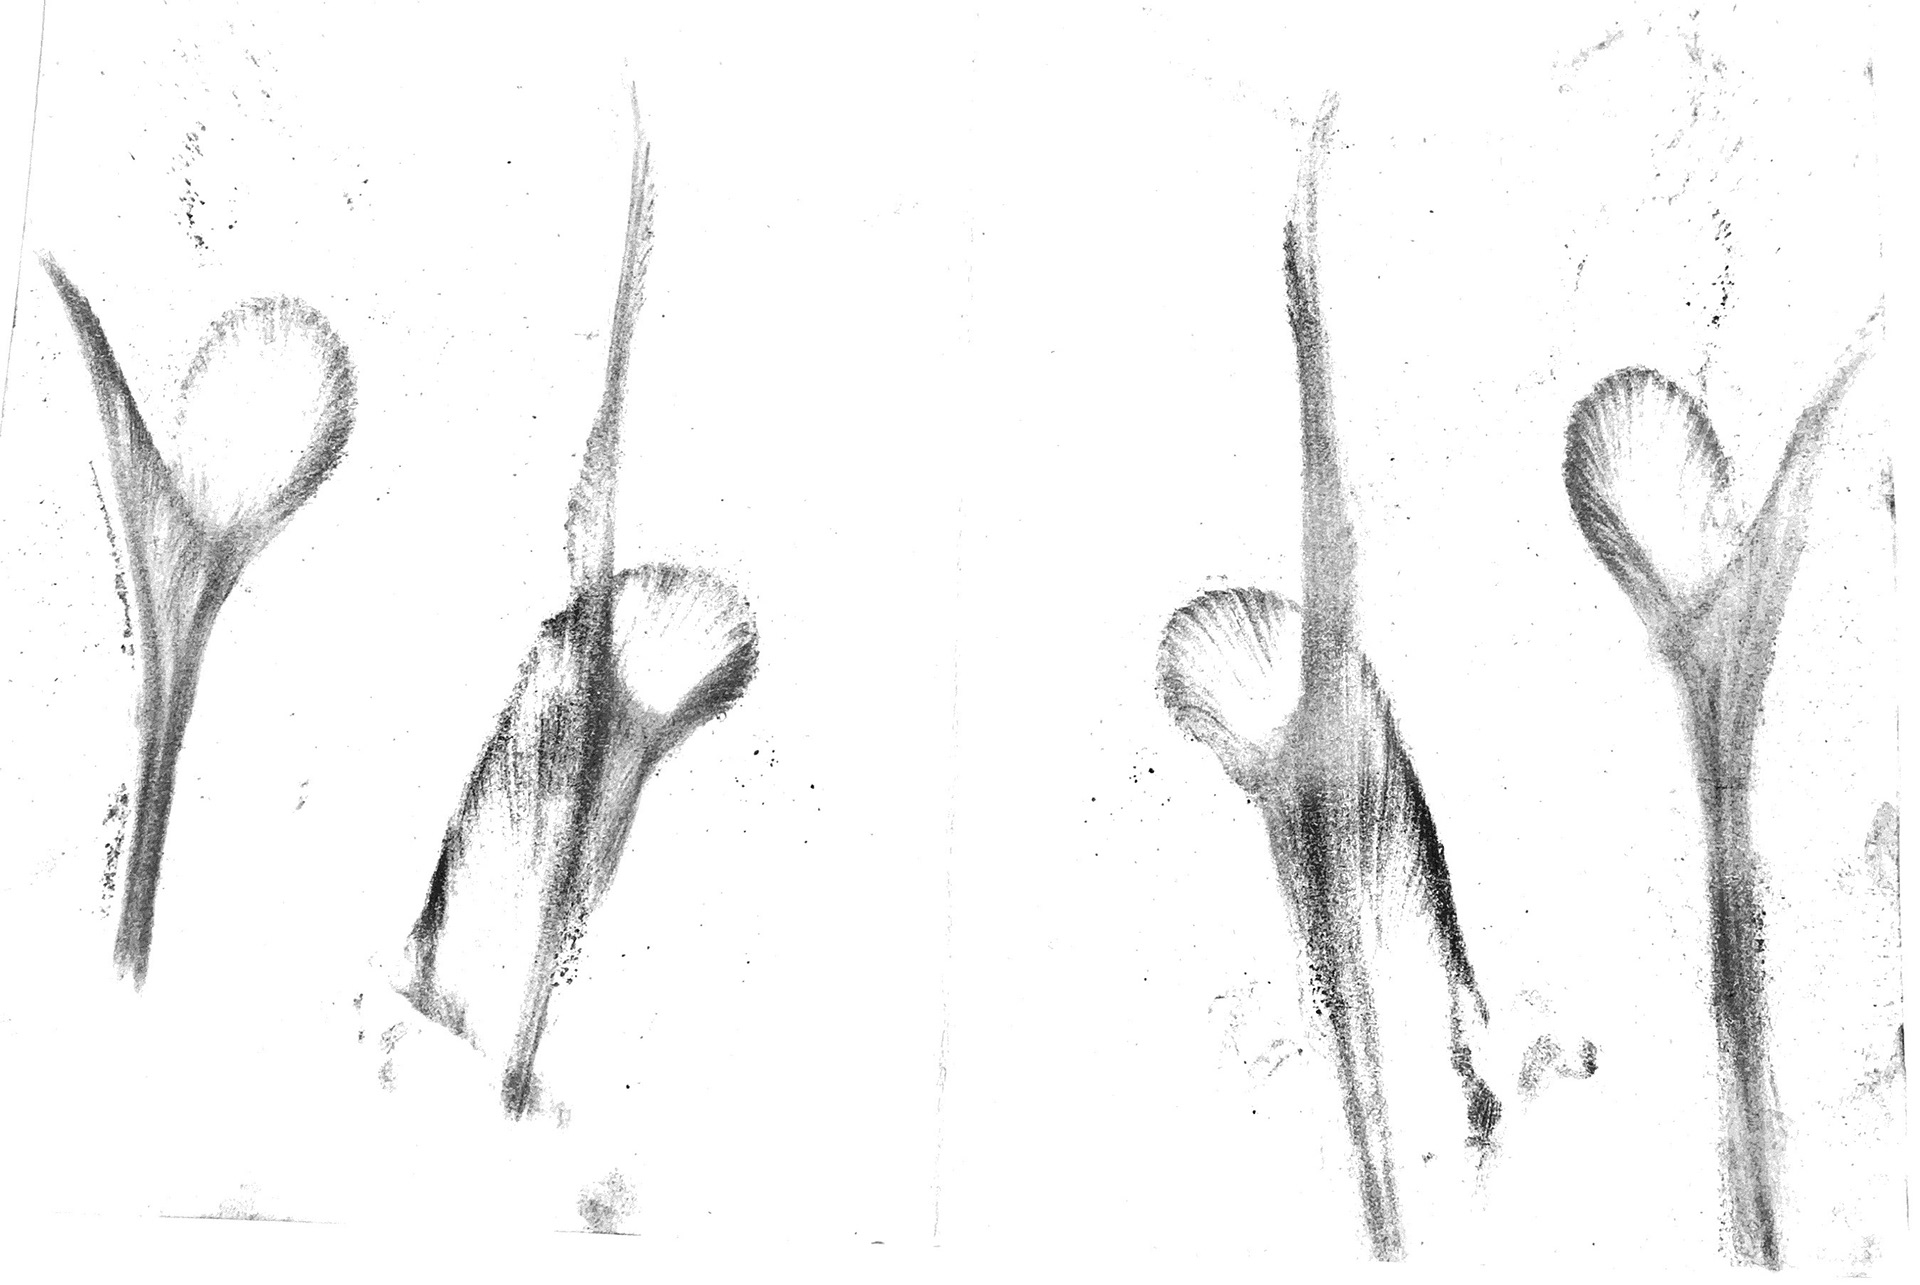
samples exploring with clay and my string form my investing object.
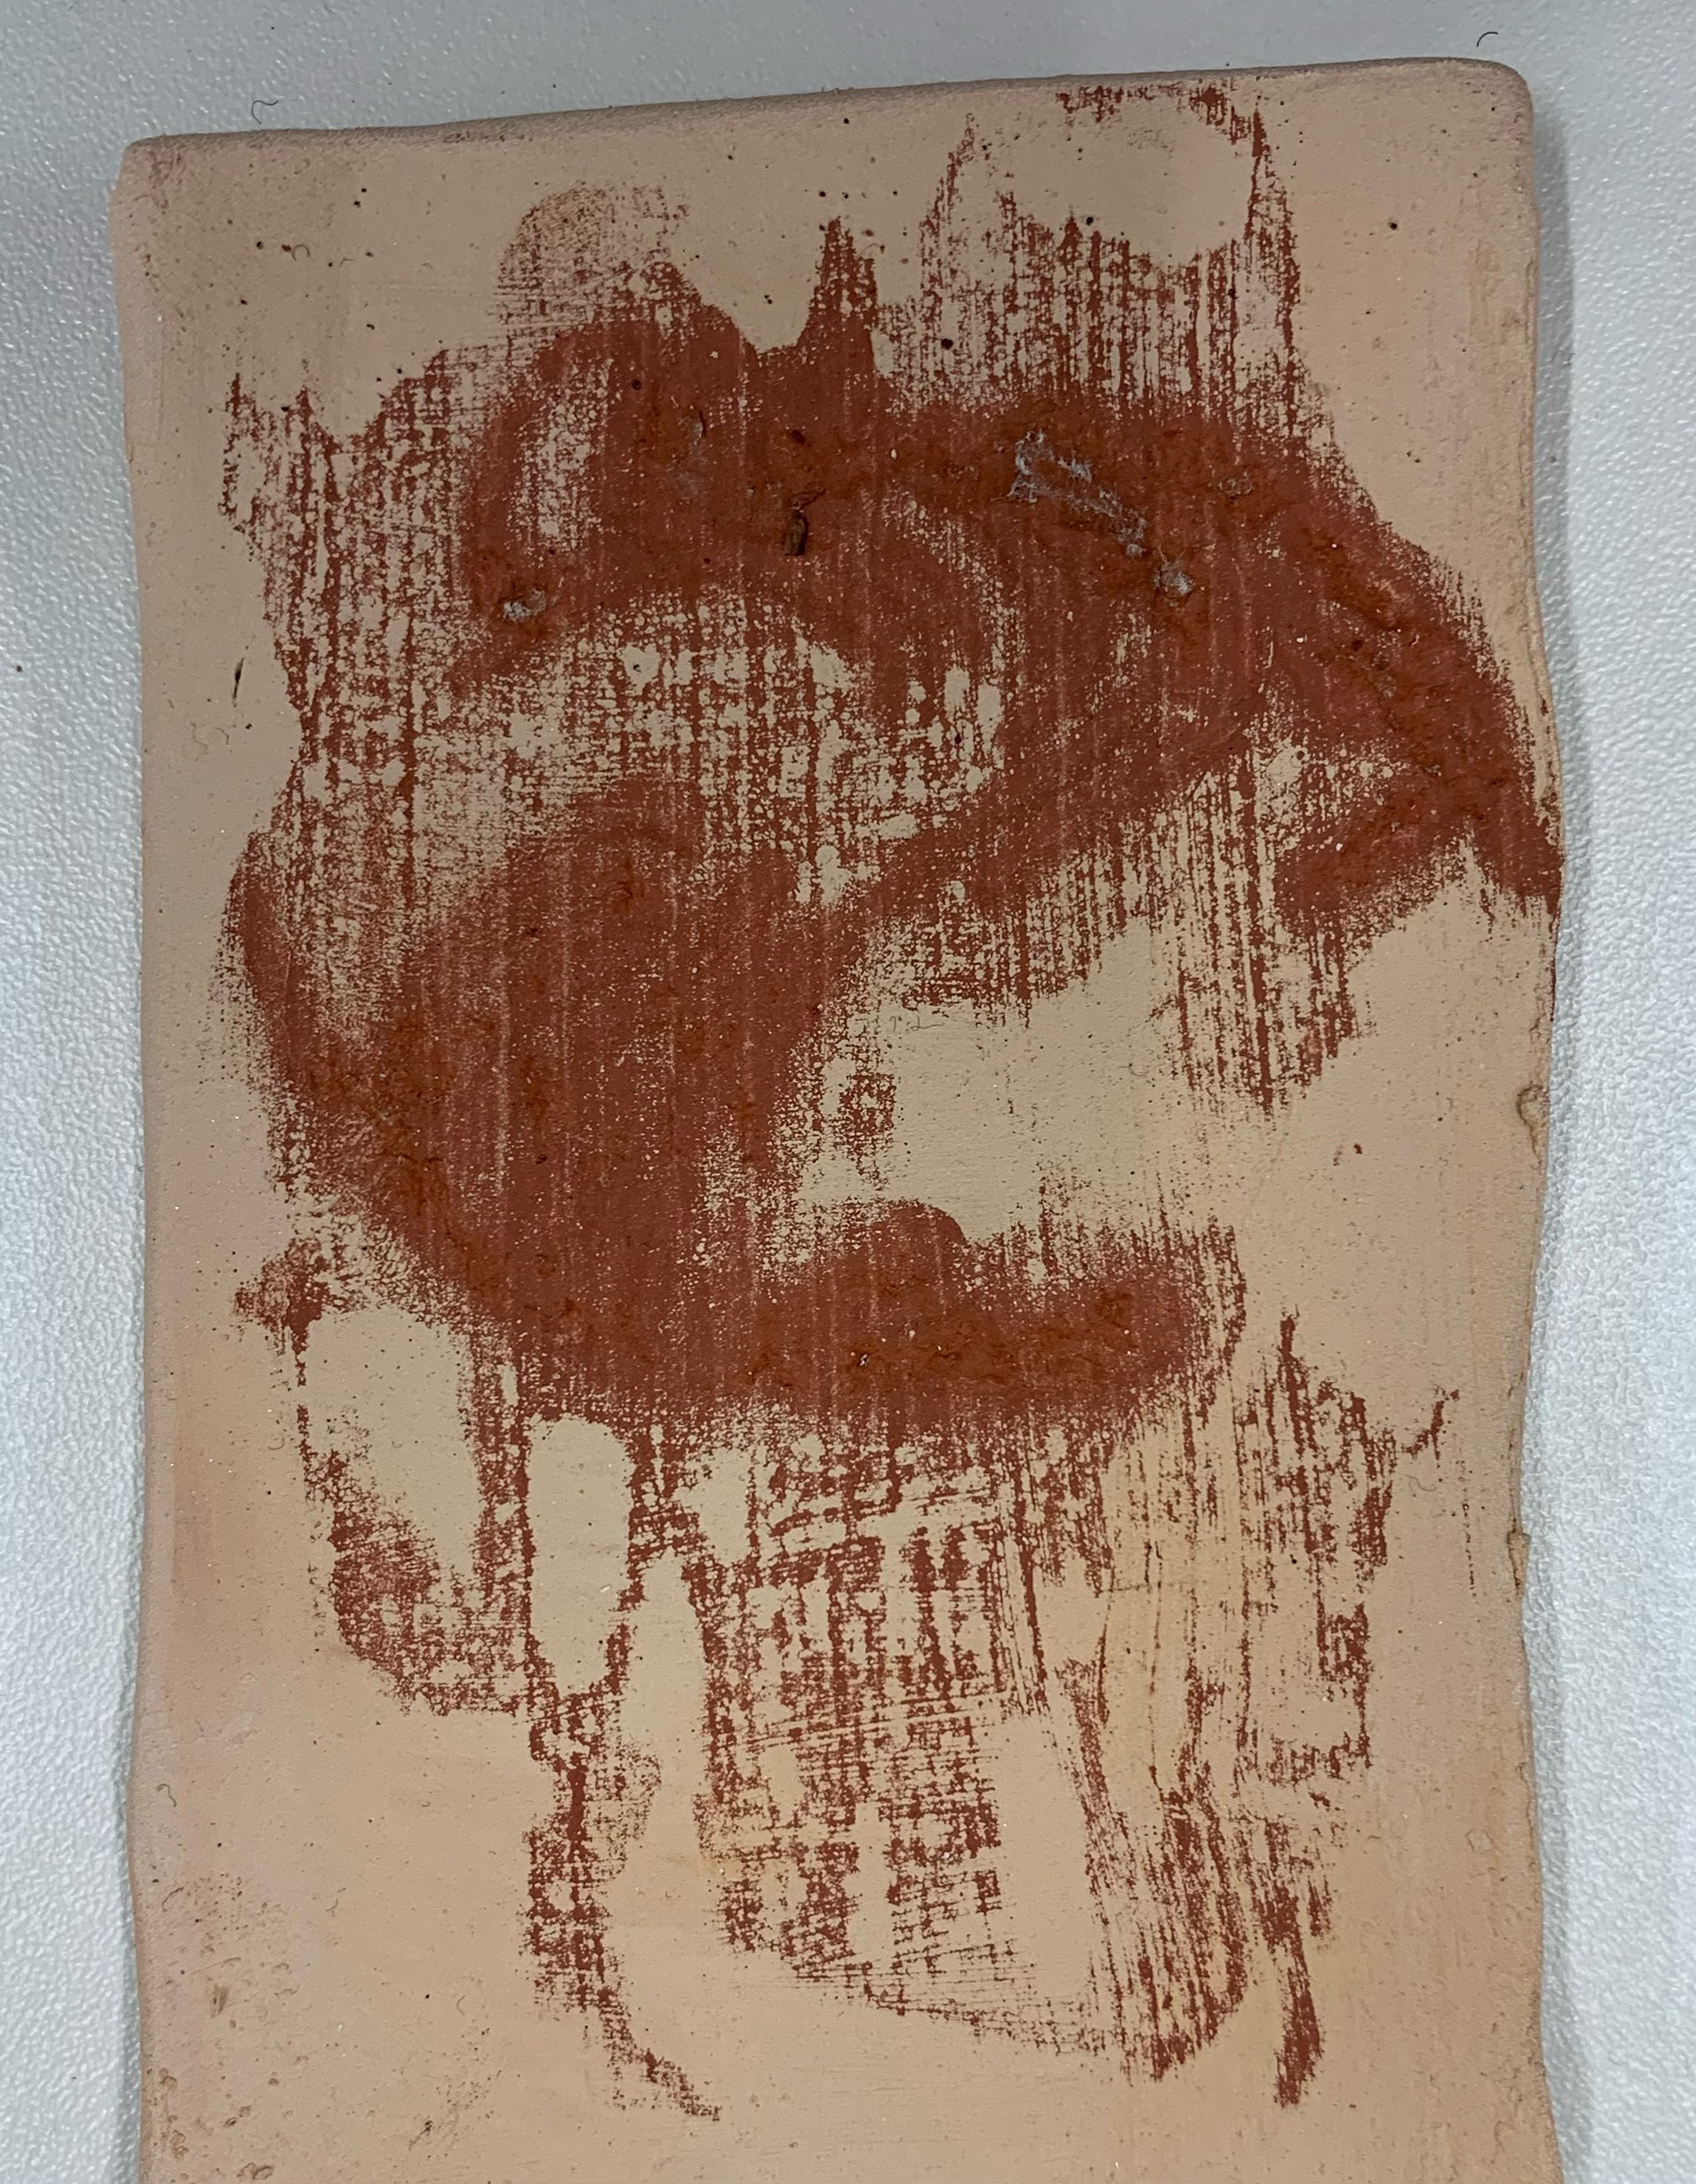
doing a similar technique with clay and red slip. i applied slip to my slab of clay and did all three lengths and had a block to apply the pressure and pulled each one out individually. this left me with these sting markings, however the thing i like most with applying this to clay instead of paper is the texture of the string is imprinted and you can see the direction and flow of how its been pulled. i really like these organic textures and shapes and how they were developed and formed from a mass produced object which is very industrialized.
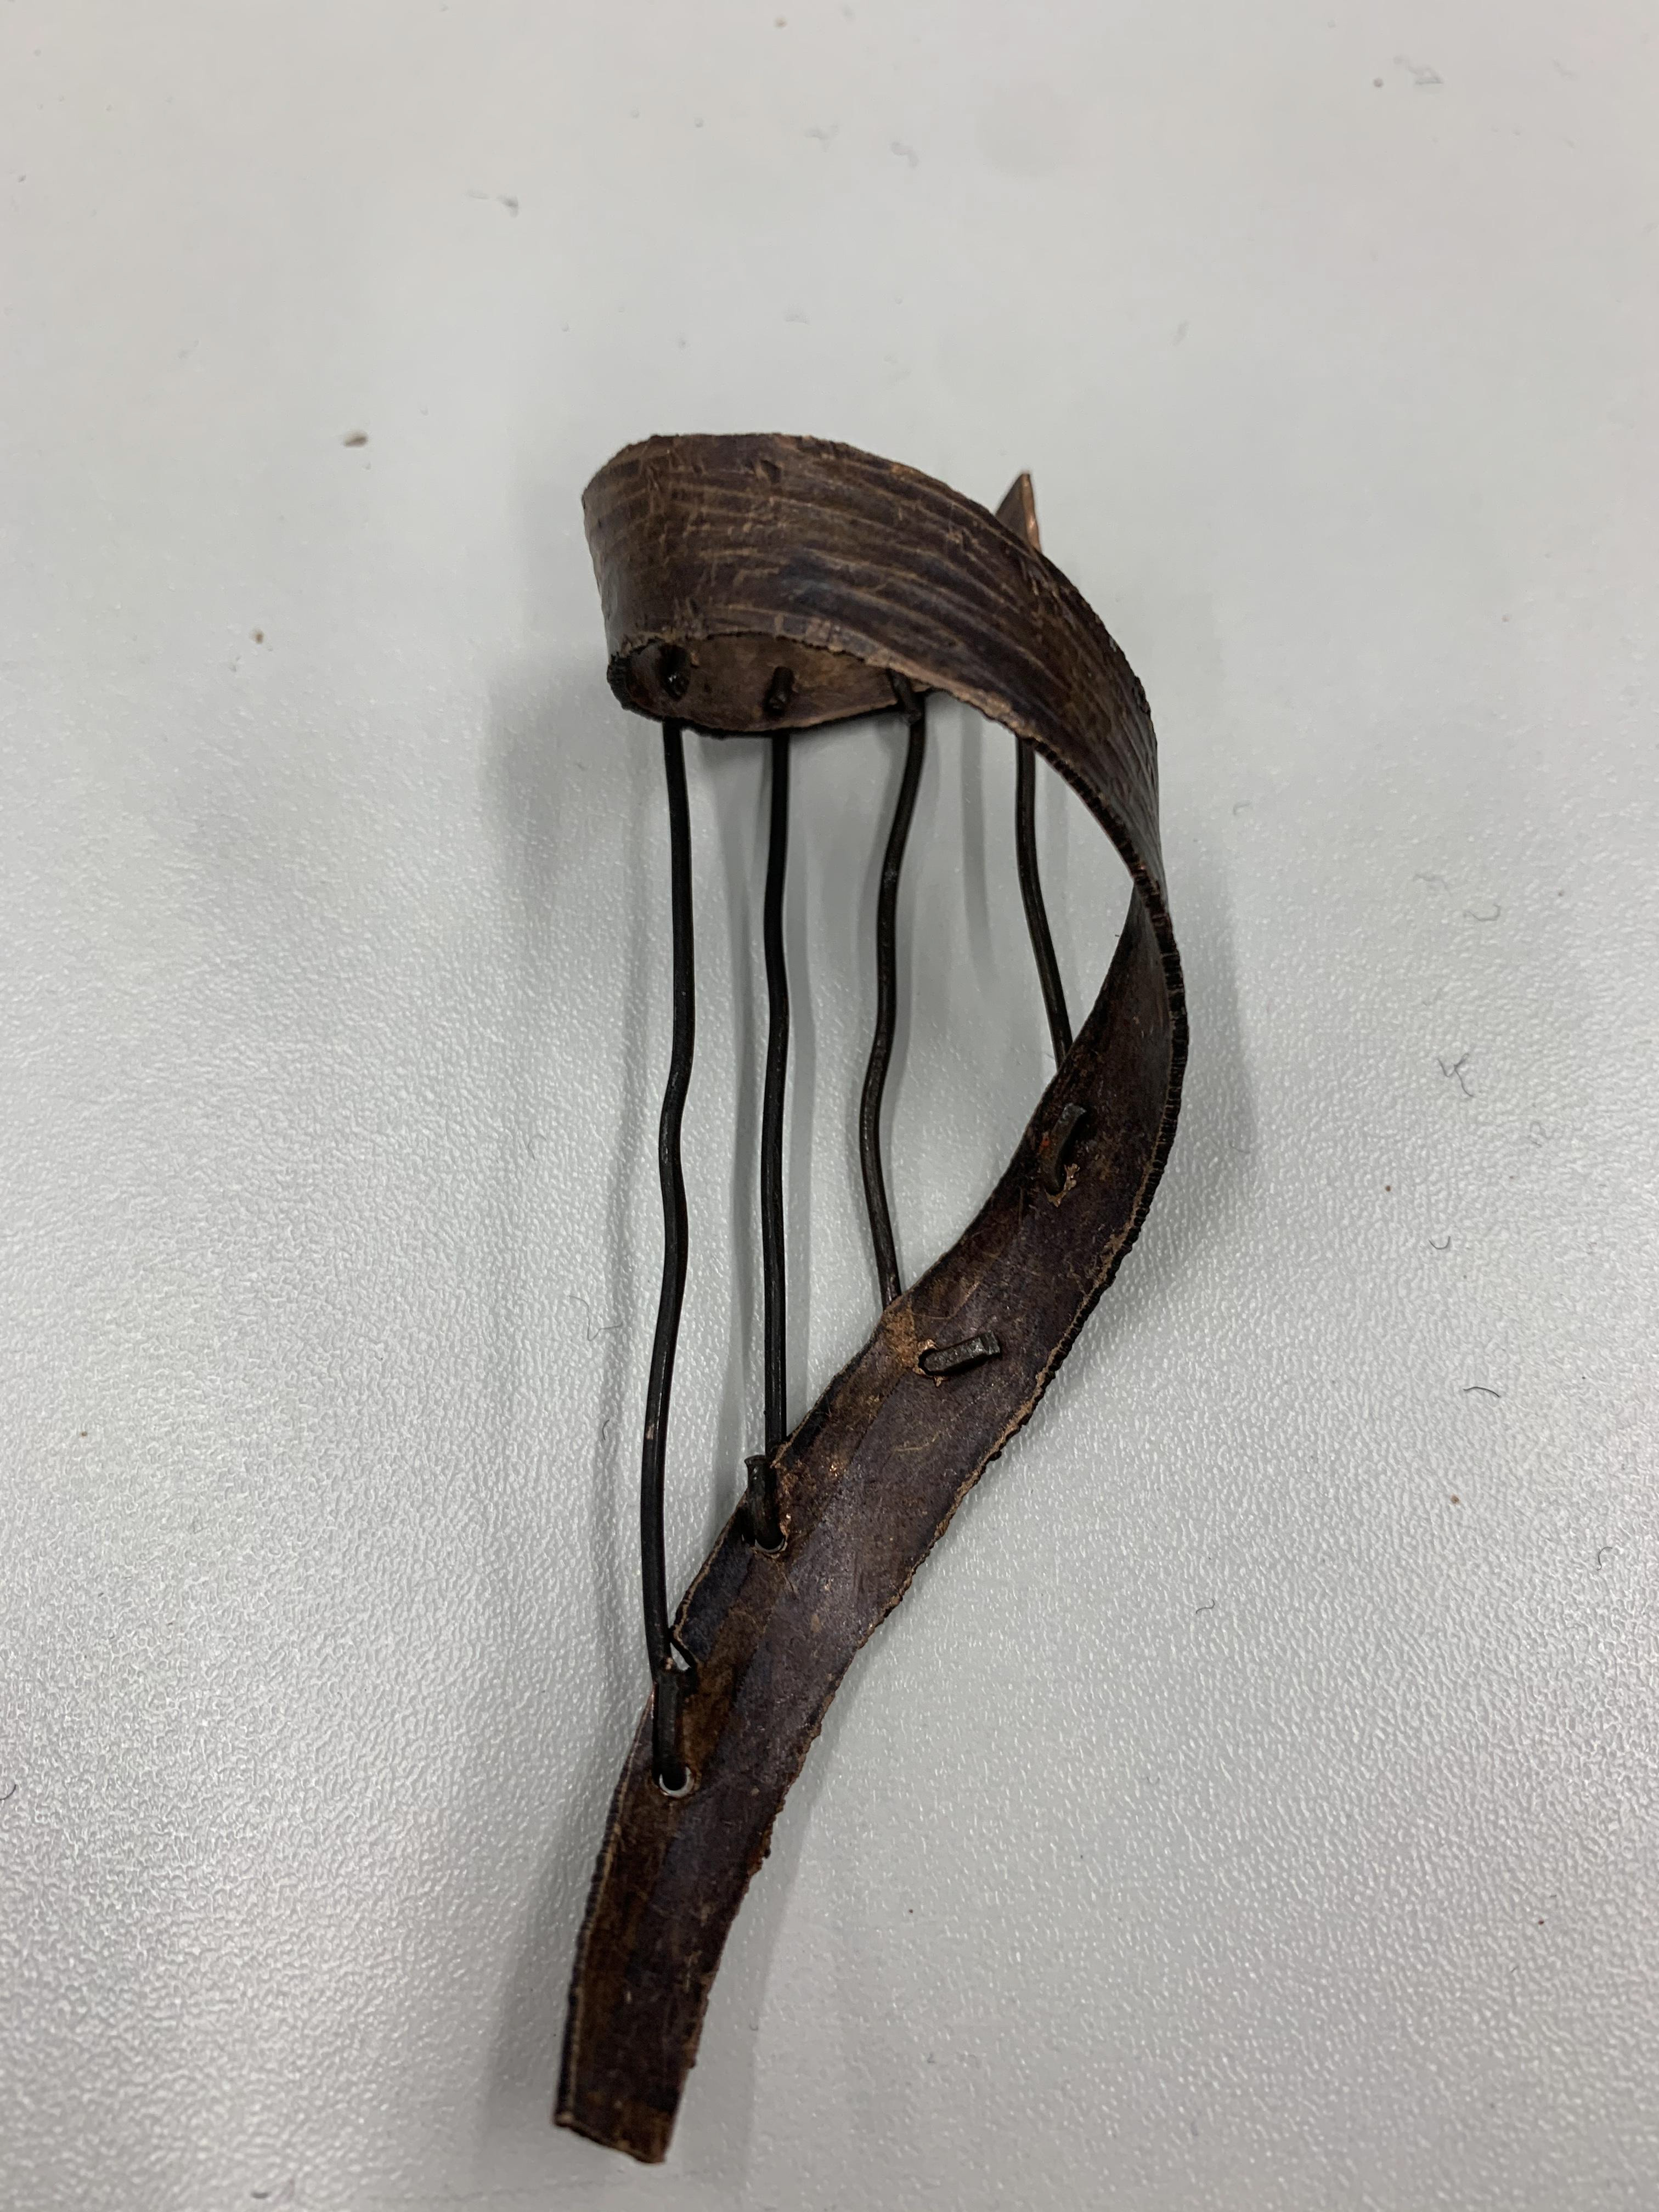
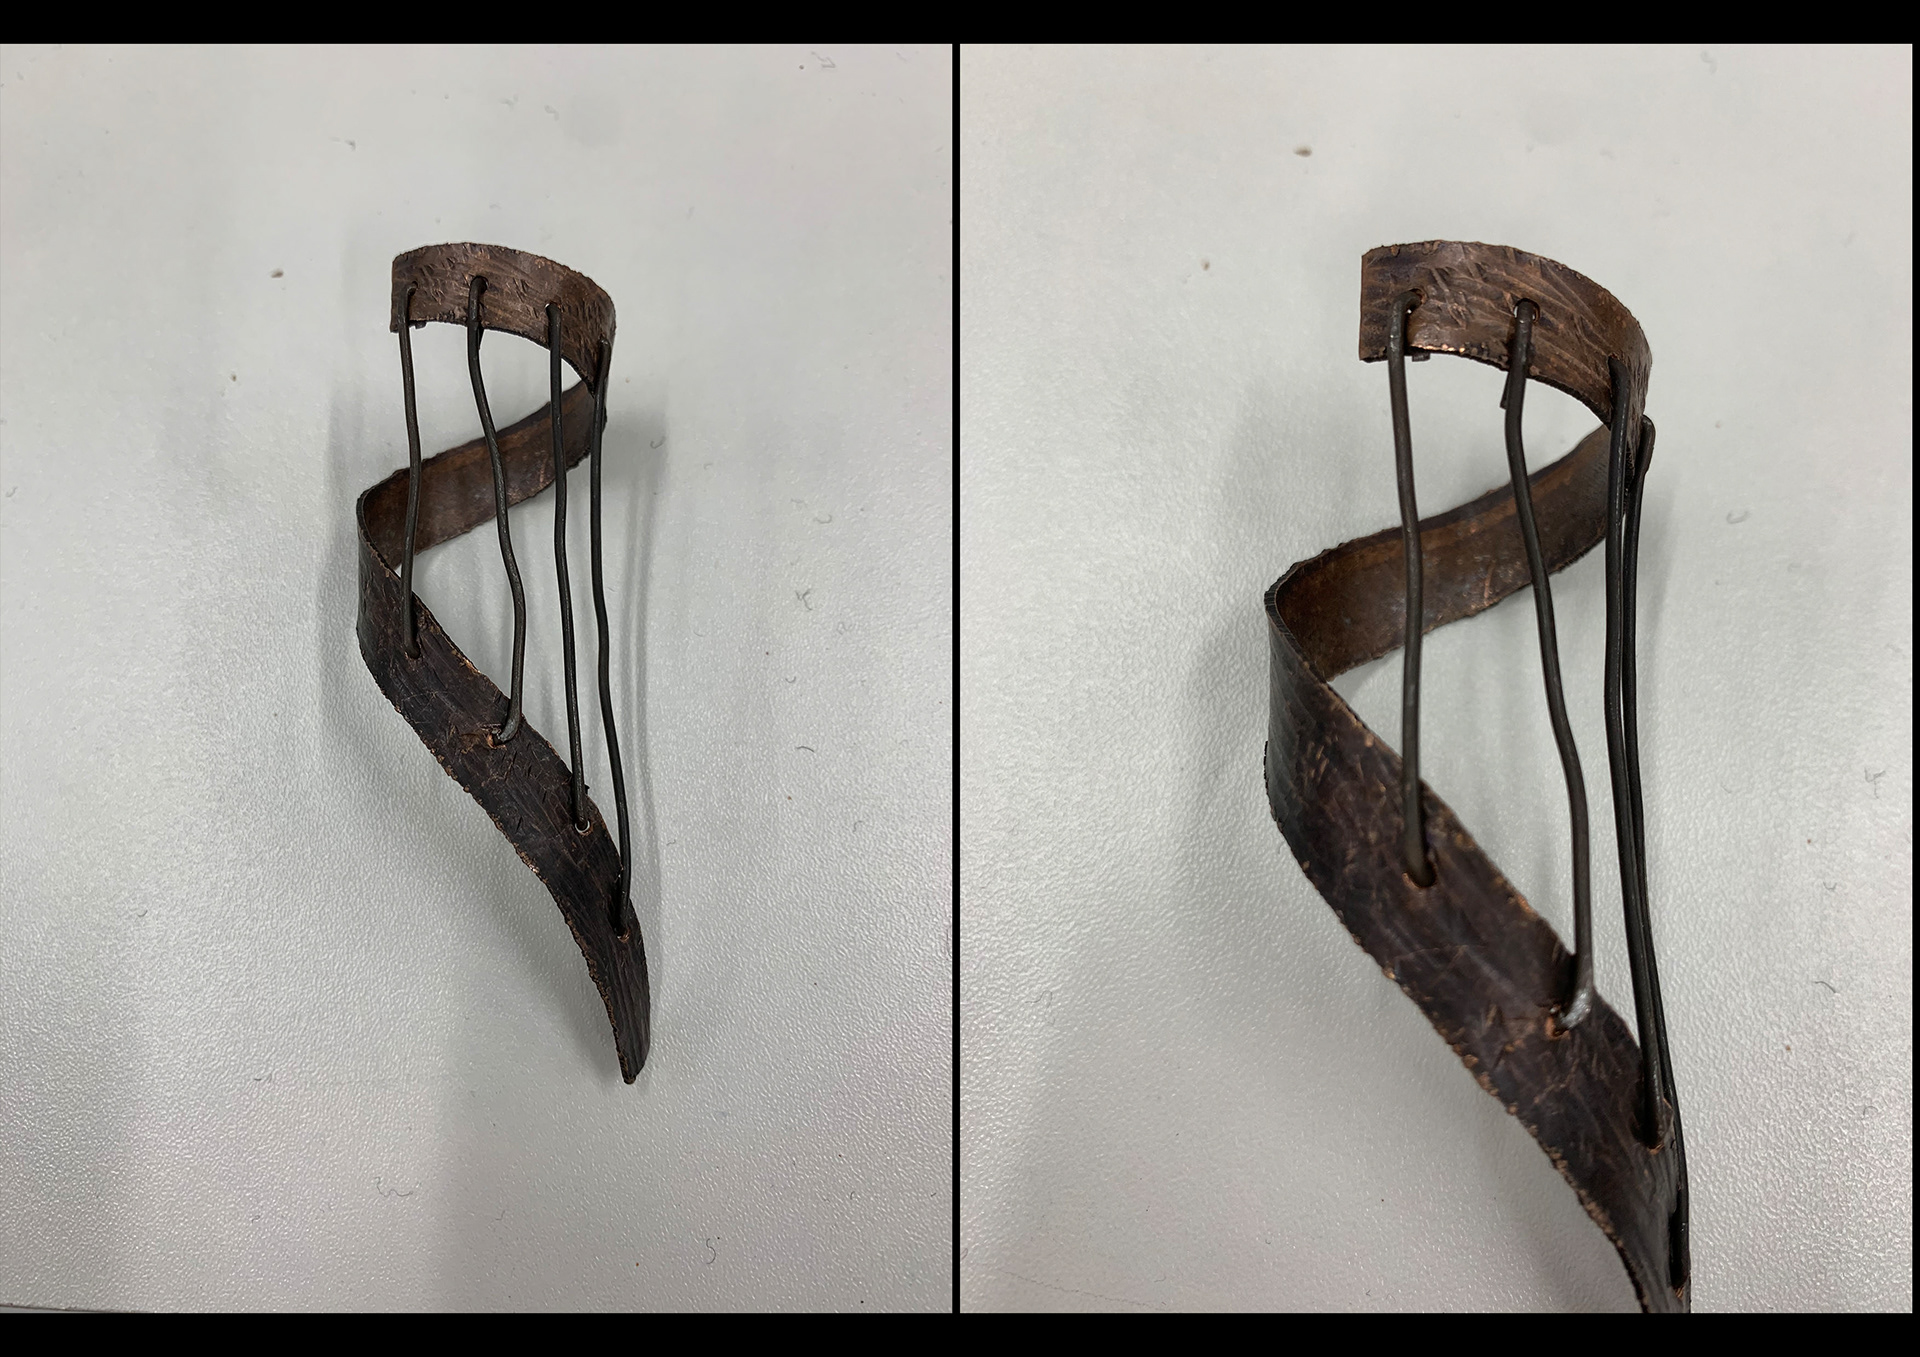
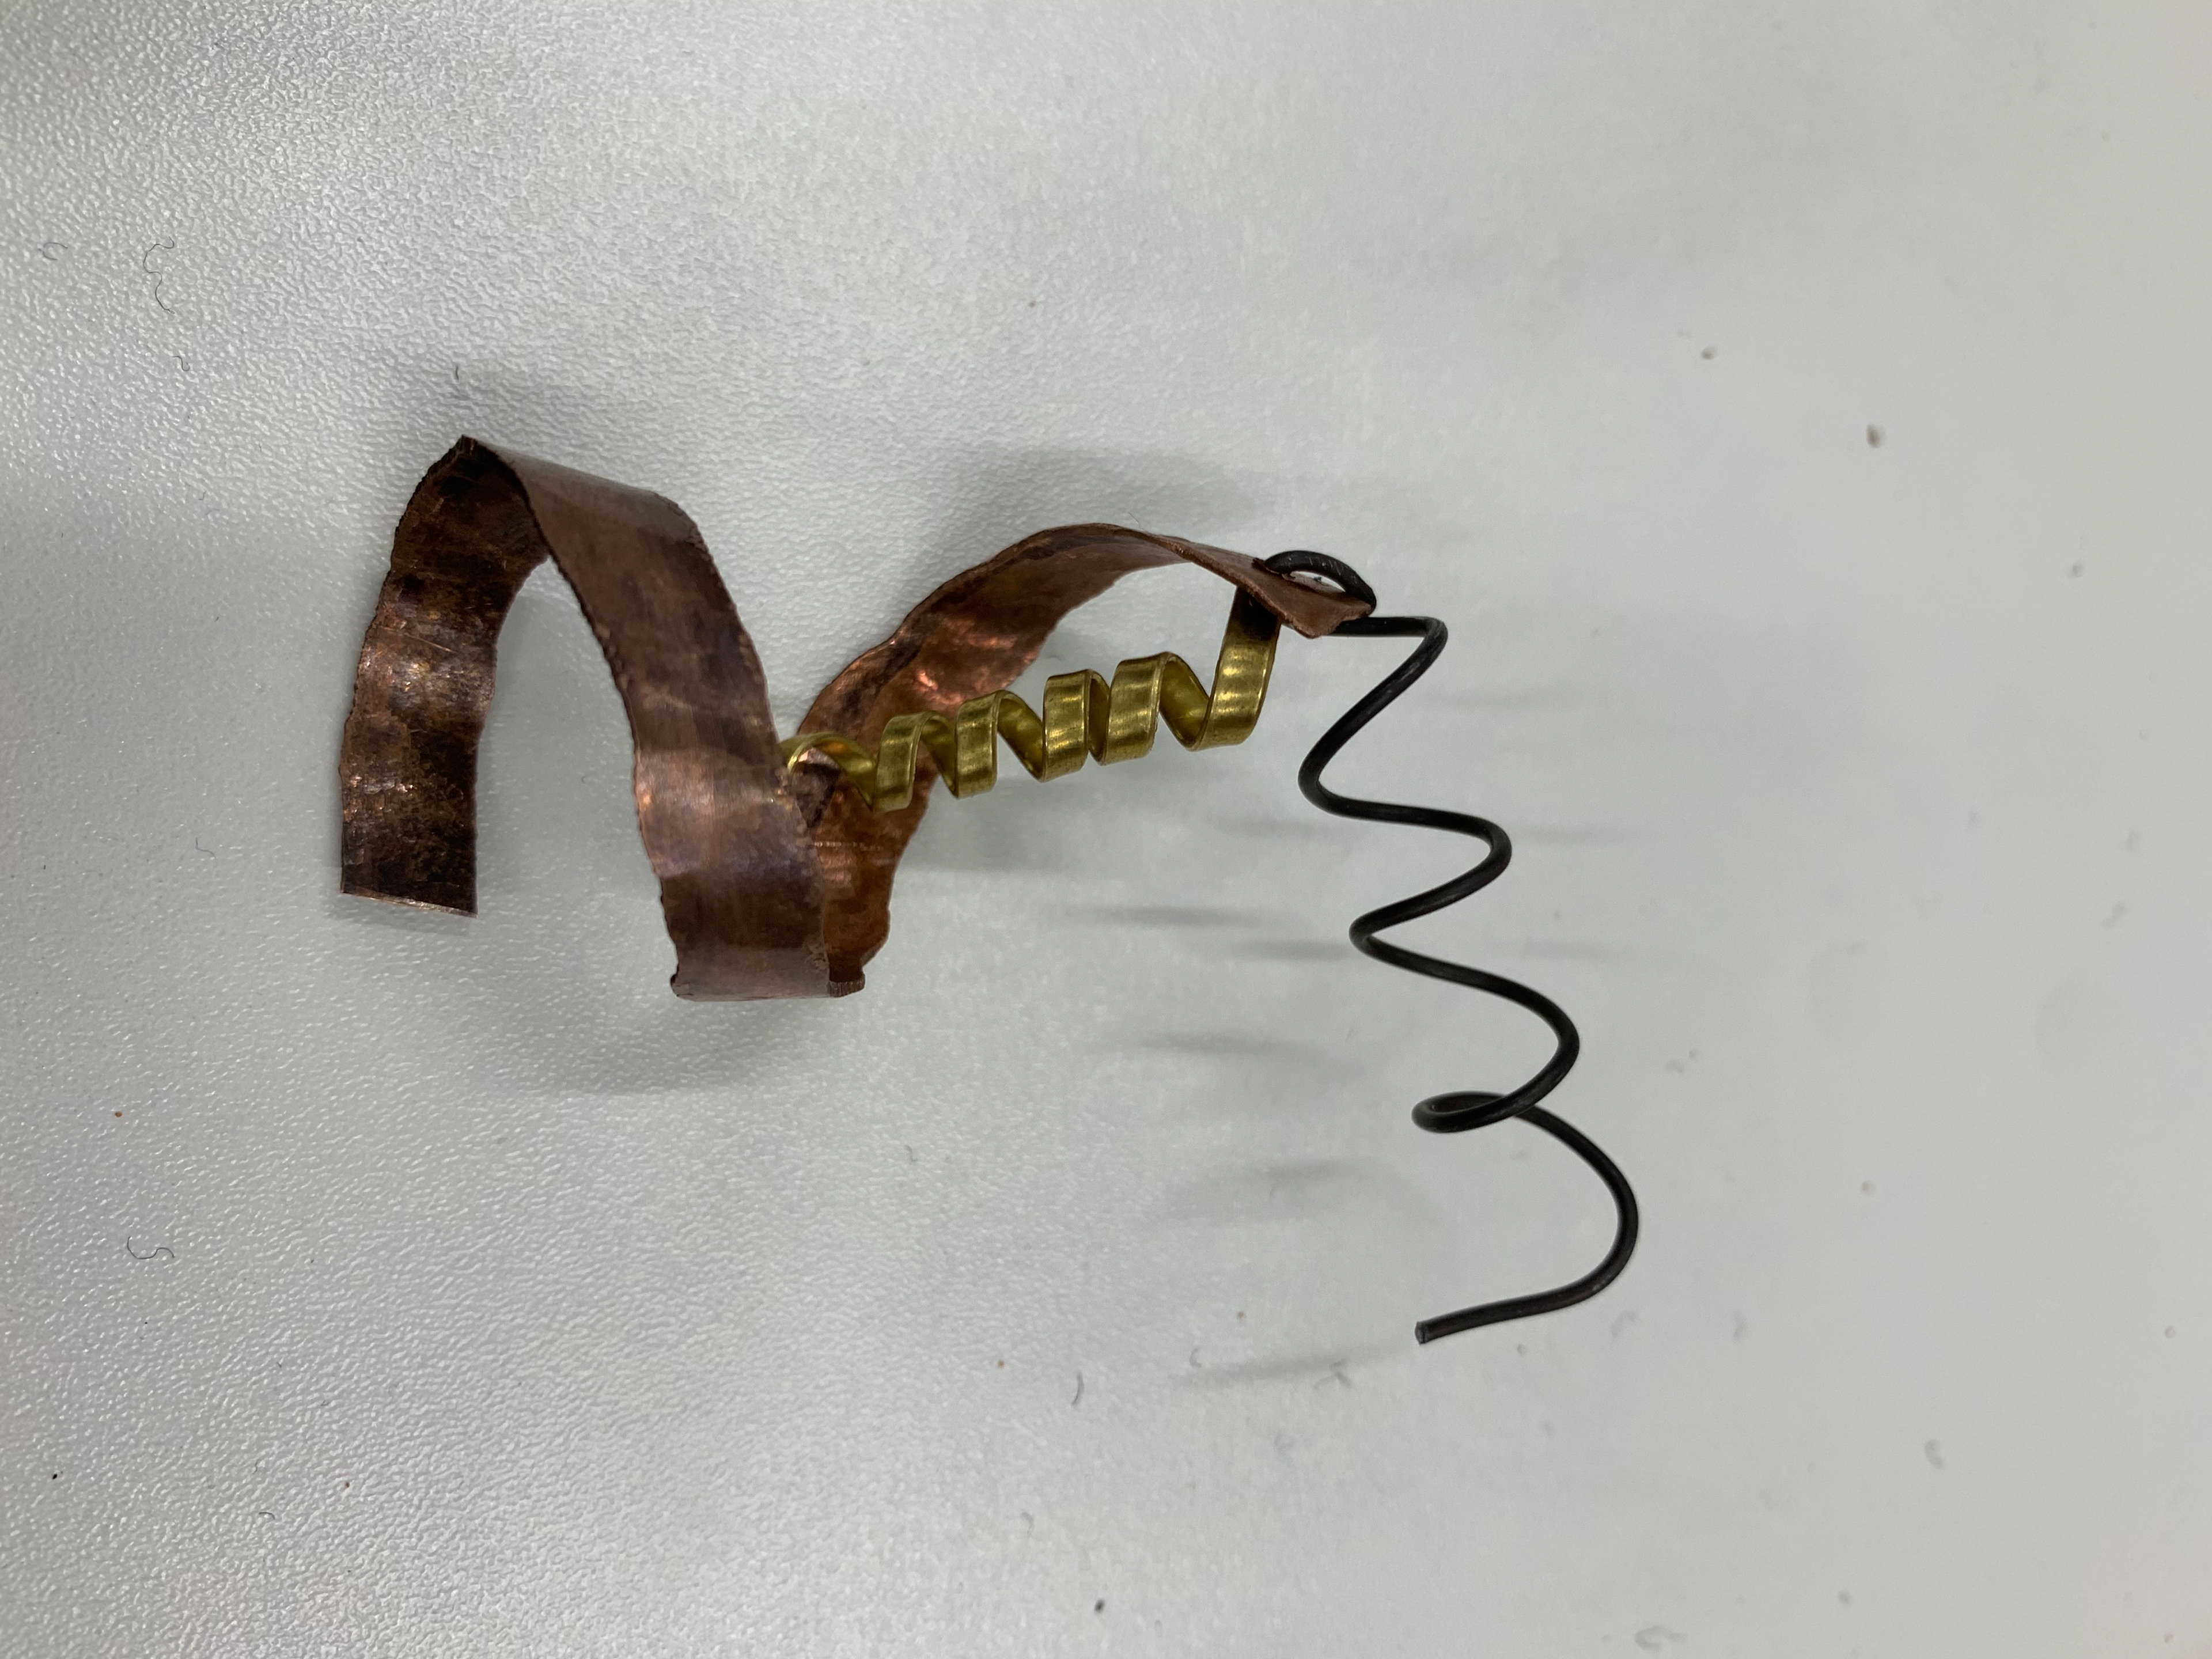
this metal pice was inspired by my coal markings from my investigated object for this i started with a strip of scrap copper which i then enameled the piece by applying heat to the piece to oxide it which gives it its dark burnt colour. then using a flat hammer i hammer the copper to give it a texture. using a circular former i twisted the piece and hammer it to give it its spiral shape similar to the coal markings, and then drilled holes at the top and bottom allowing my iron wire to be treaded through creating parallel lines attaching the top and bottom of the form these for wire pieces are all individually pieced into the the form by putting them through the hole and creating a l bend to make sure they are secure. i really like this piece and the texture that i created in the copper which wraps around. i also like how the wire naturally bent whilst i was applying it to the sample, i wasn't expecting it to warp but add a more organic flow like the coal pieces.
a collage i created in photoshop by layering the original mark makings, making them transparent and layering them on top of one of my researched photos to give texture to the photo, this also looks into my layering in the industrial side of manchester with the big shipping containers layered with delicate mark makings from a found object, looks into the large scale of manchester compared to the smaller scale.
sand casting samples
exploring with sand casting i wanted to create samples using my found objects as sand casting picks up on so much detail. i decided to sand cast my metal bolts and metal nail as two samples. working organised and with a group who all having set jobs is essential for sand casting as it stops people from getting hurt and makes a smooth process leading for your product to be as clean as possible, i used a heavy weight for my casting to apply pressure to the glass making sure it picked up my forms and also it smoothed off the tail at the bottom.

my samples of sandcasting bolts cooling of in the sand box
with my sample using a bent nail and the end of the bold i forgot to sugar water the sand before hand, this means there was no layer of carbon which meant the sand will stick to the glass creating a bumpy texture. to my surprise this effect only the flat layer making it have a texted surface however didn't effect the rise objects i pushed in to the sand.
light samples
from my light drawings i developed samples in metal and clay. in metal the samples on the left was developed from a drawing that has lots of rays shinning though a tree, the different metals, textures and thickness is my interpretation of the rays. i wanted to make them spiral as this is how i think the light travelled through space weaving though the leaves. for my second metal piece i was inspired by the light coming from a lamp with the wire becoming larger distributing its light.
my light samples with clay looking at the rays and the layers of a neon light. although i didn't do clay as a rotation i still wanted to work and experiment with it as its a pretty malleable material which can be easily moulded in to my samples. unfortunately i wasn't able to glaze my clay sample pieces.


i wanted to practise with my hot sculpting some more. i find hot sculpting very challenging as i find it hard to control the hot metal however i wanted to challenge myself and tried to create a sample of my light.
collage samples
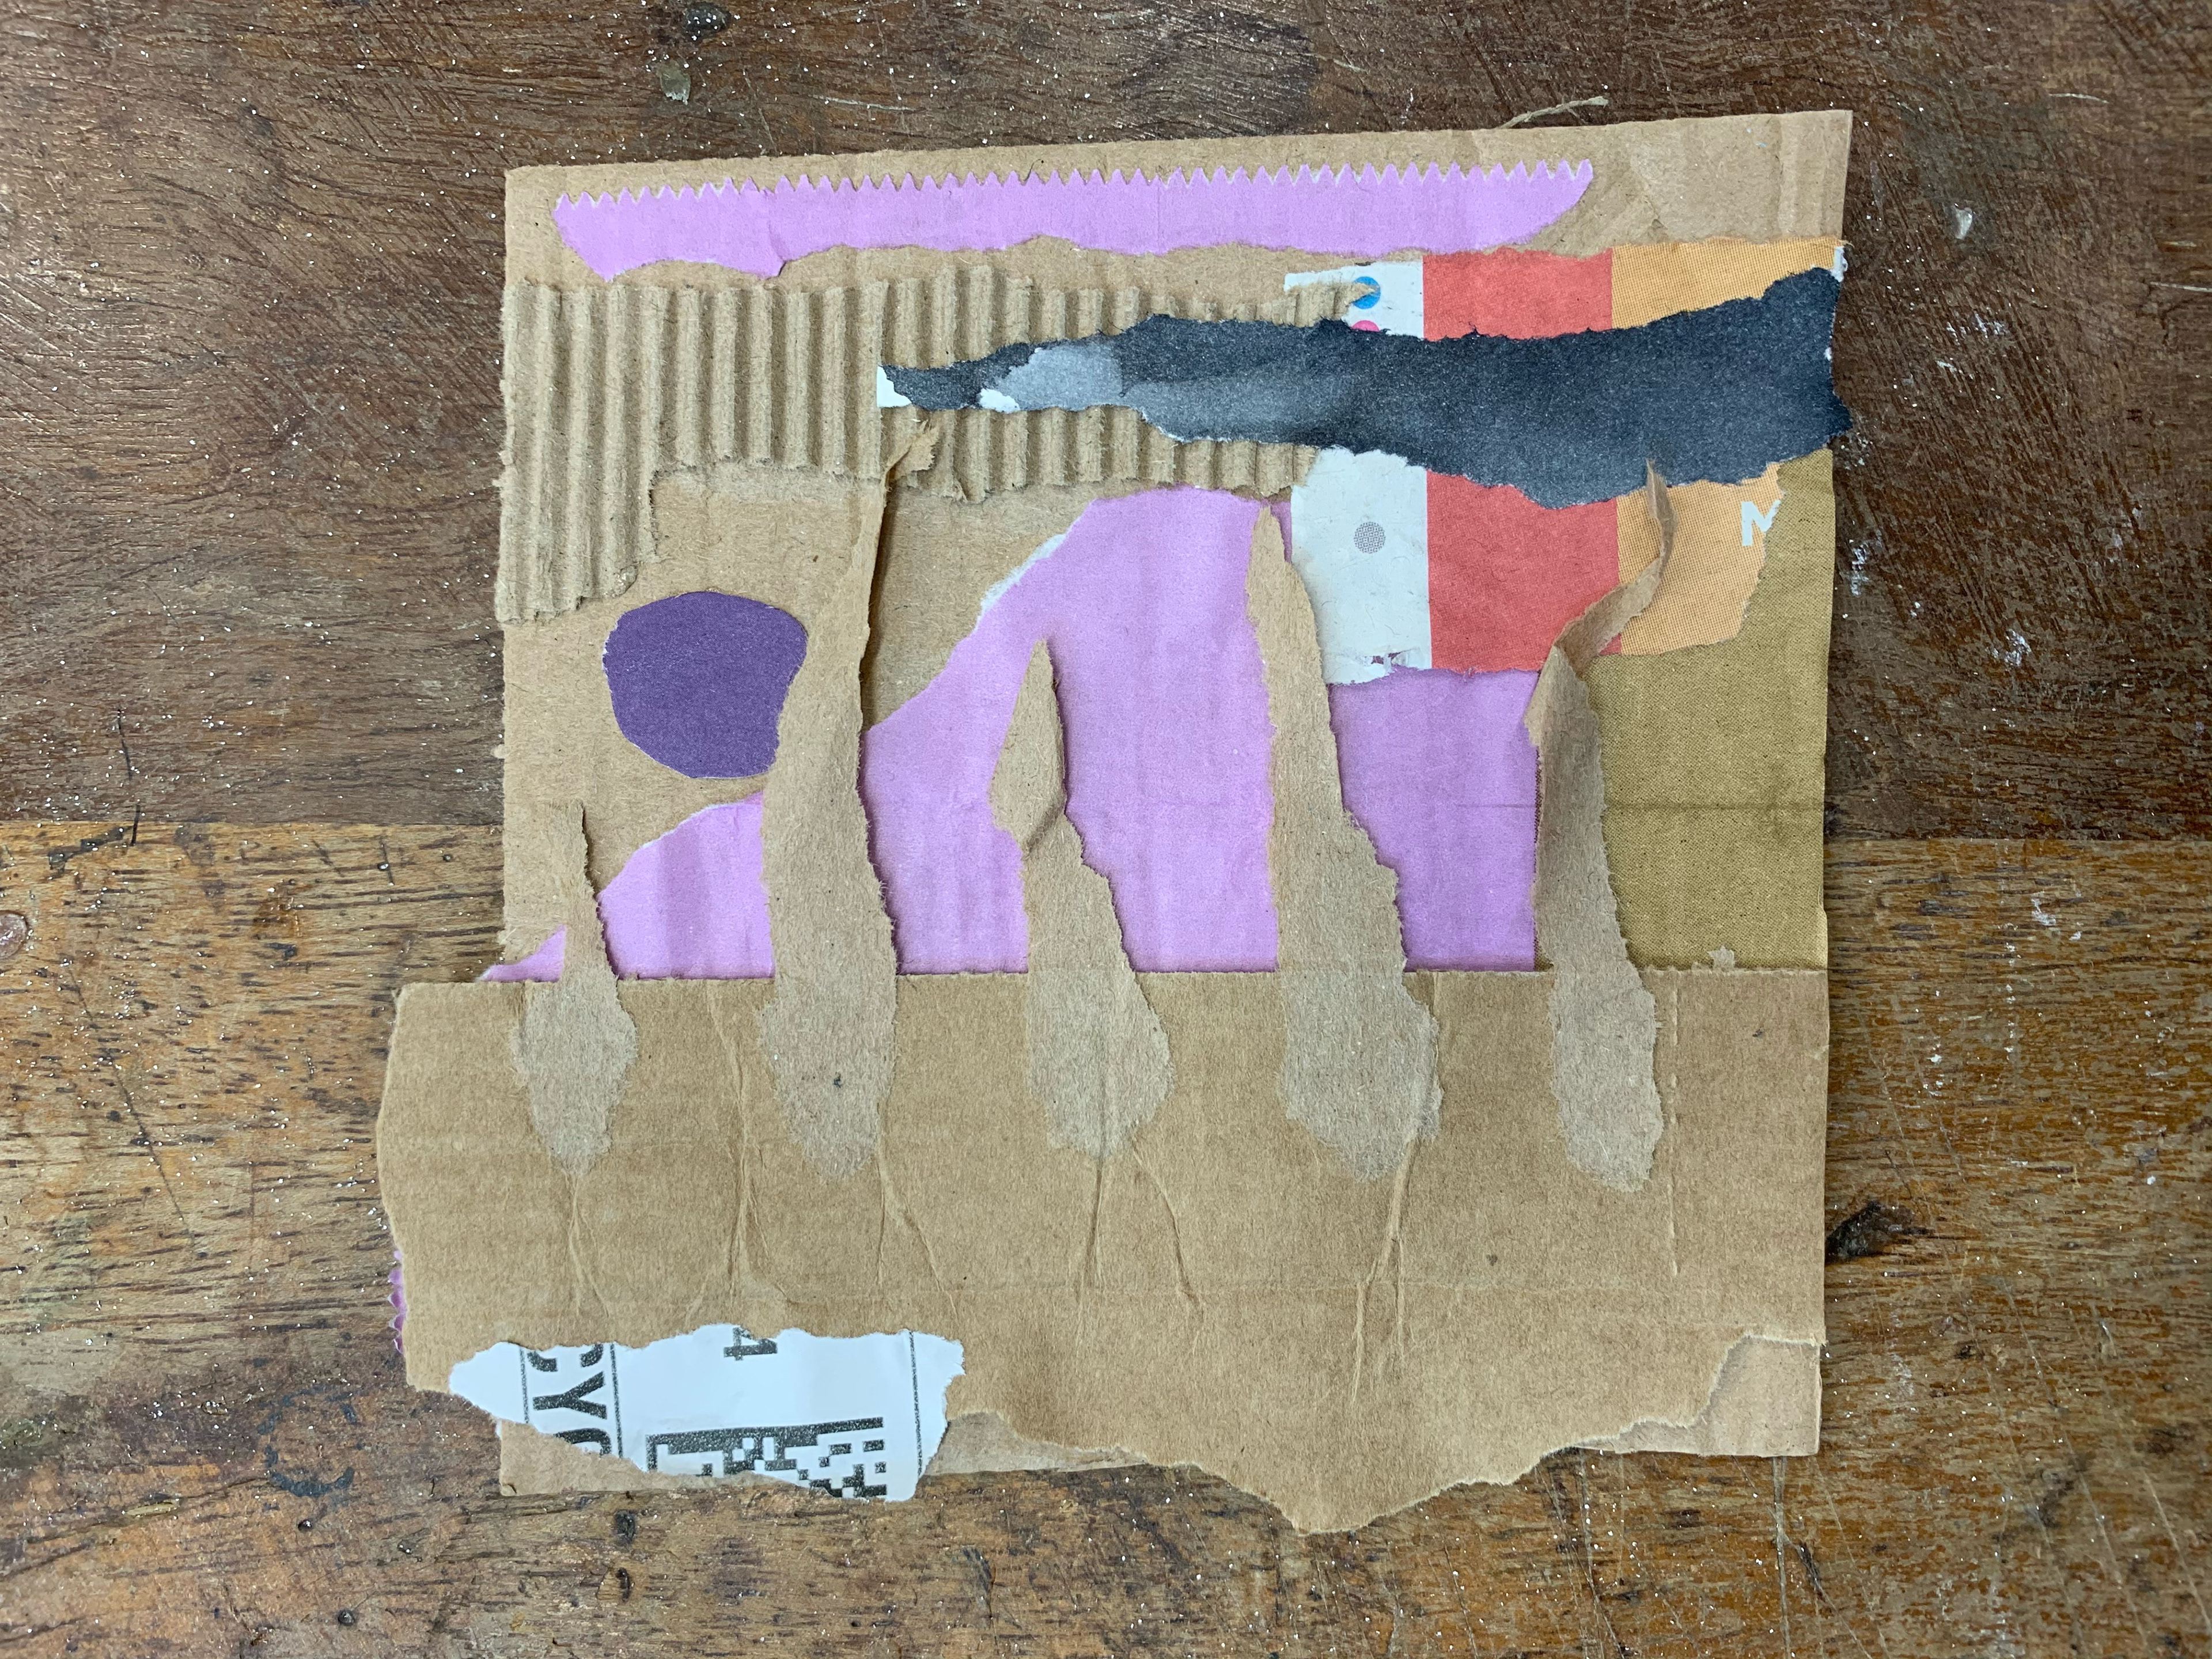
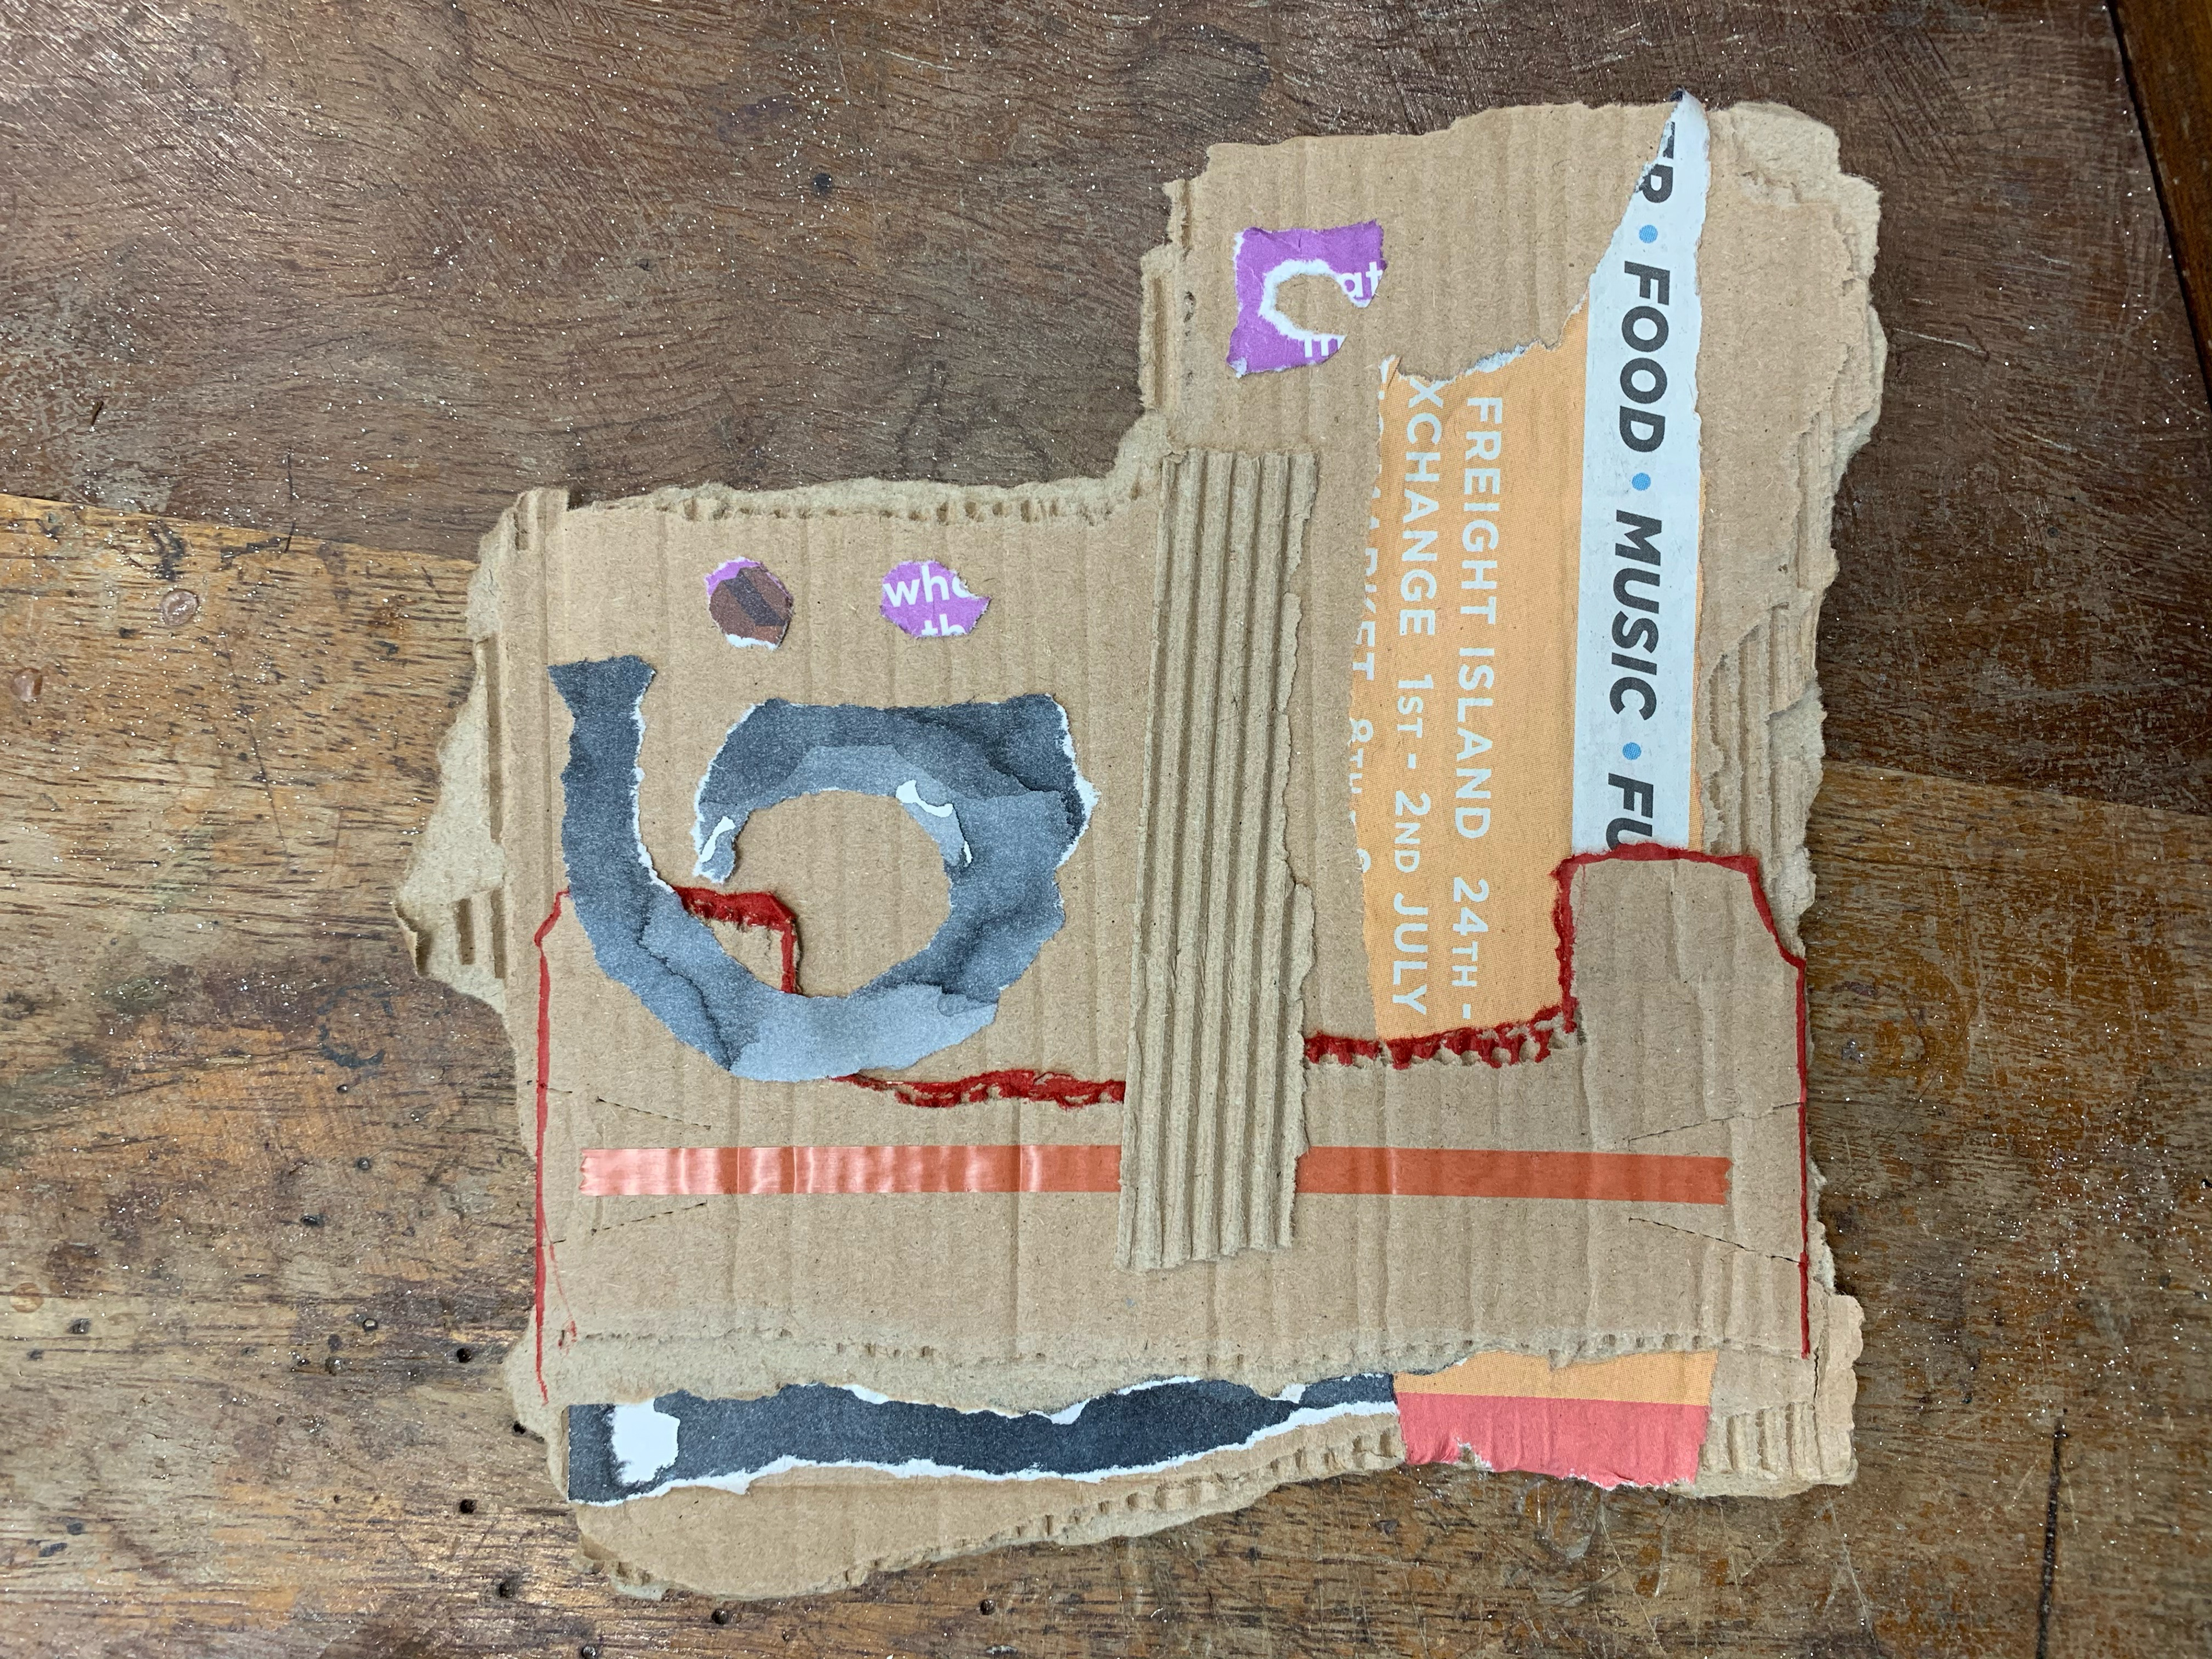
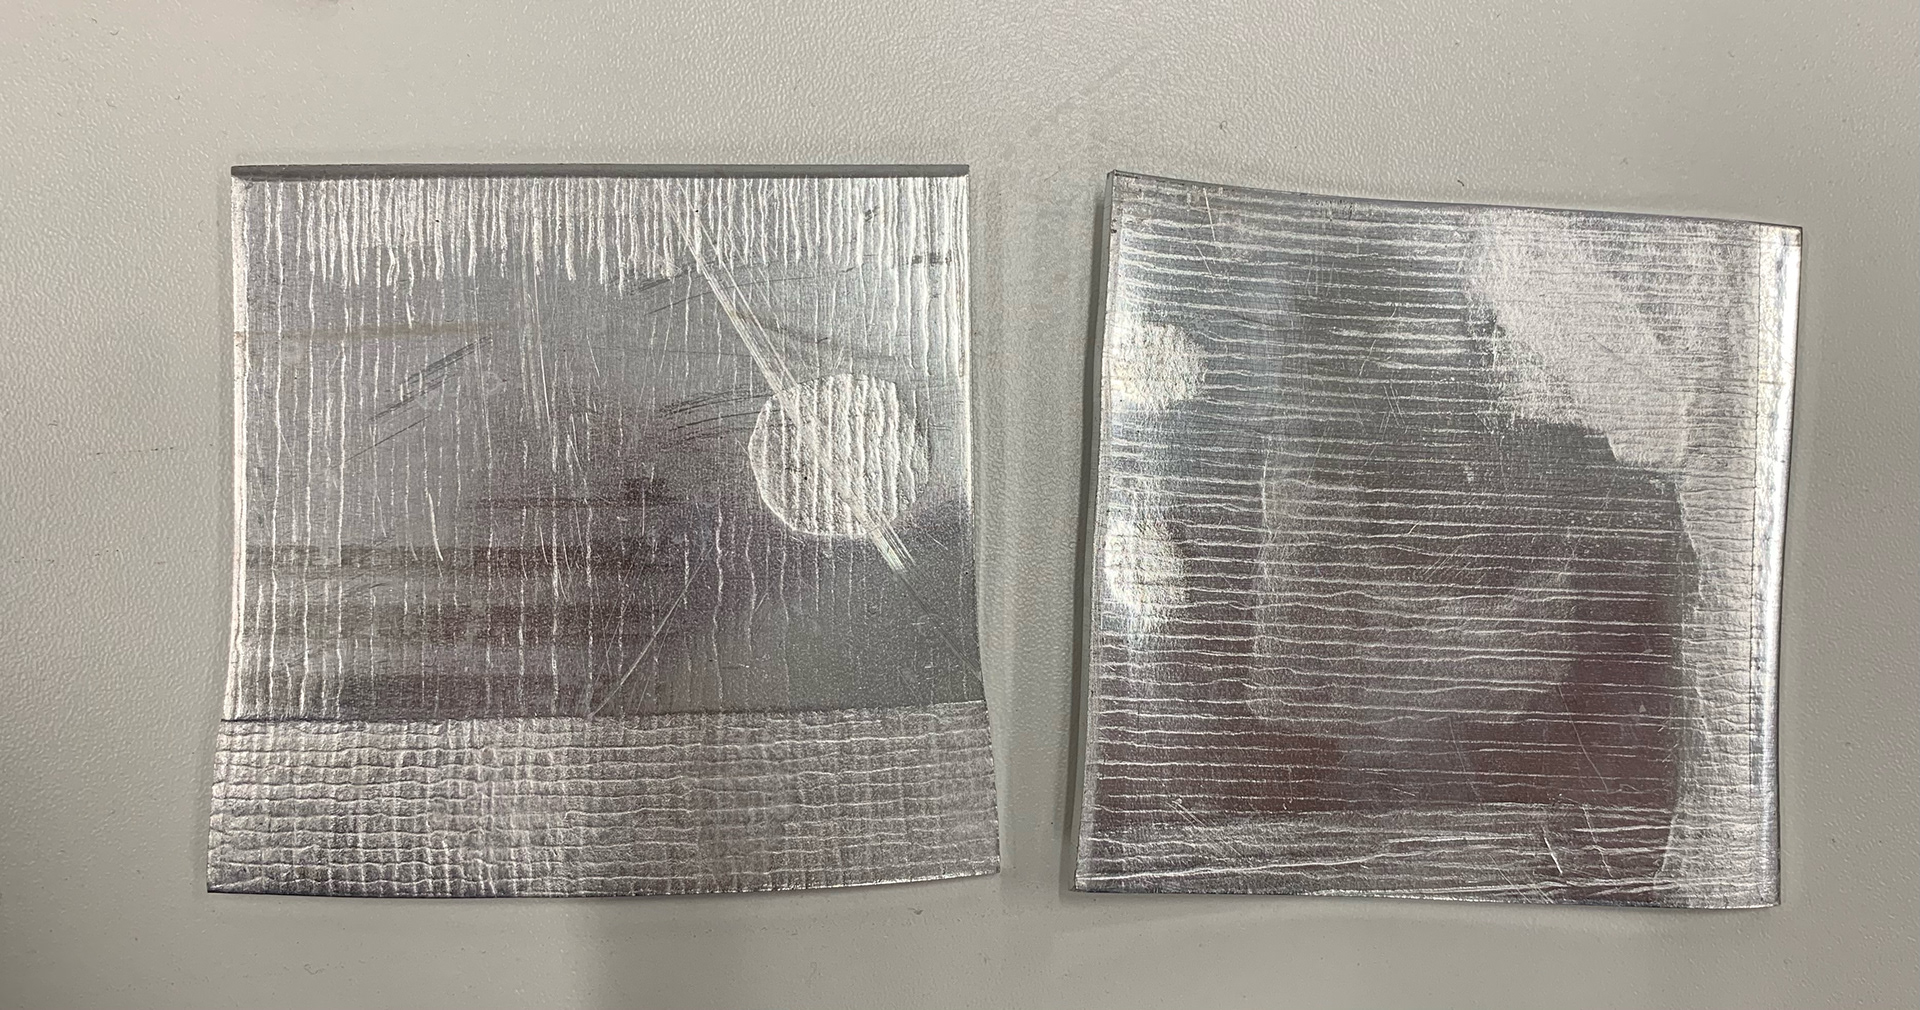
i collected newspaper, boxes and cardboard from around manchester and created a collage that had different textures and layers to it. i wanted to collect a range of textures and thickness of paper as we were rolling this a rolling machine on thick aluminum sheets. the pressure from the rollers allows the collage pieces to imprint on the metal sheets showing the texture and different thickness from the collages.
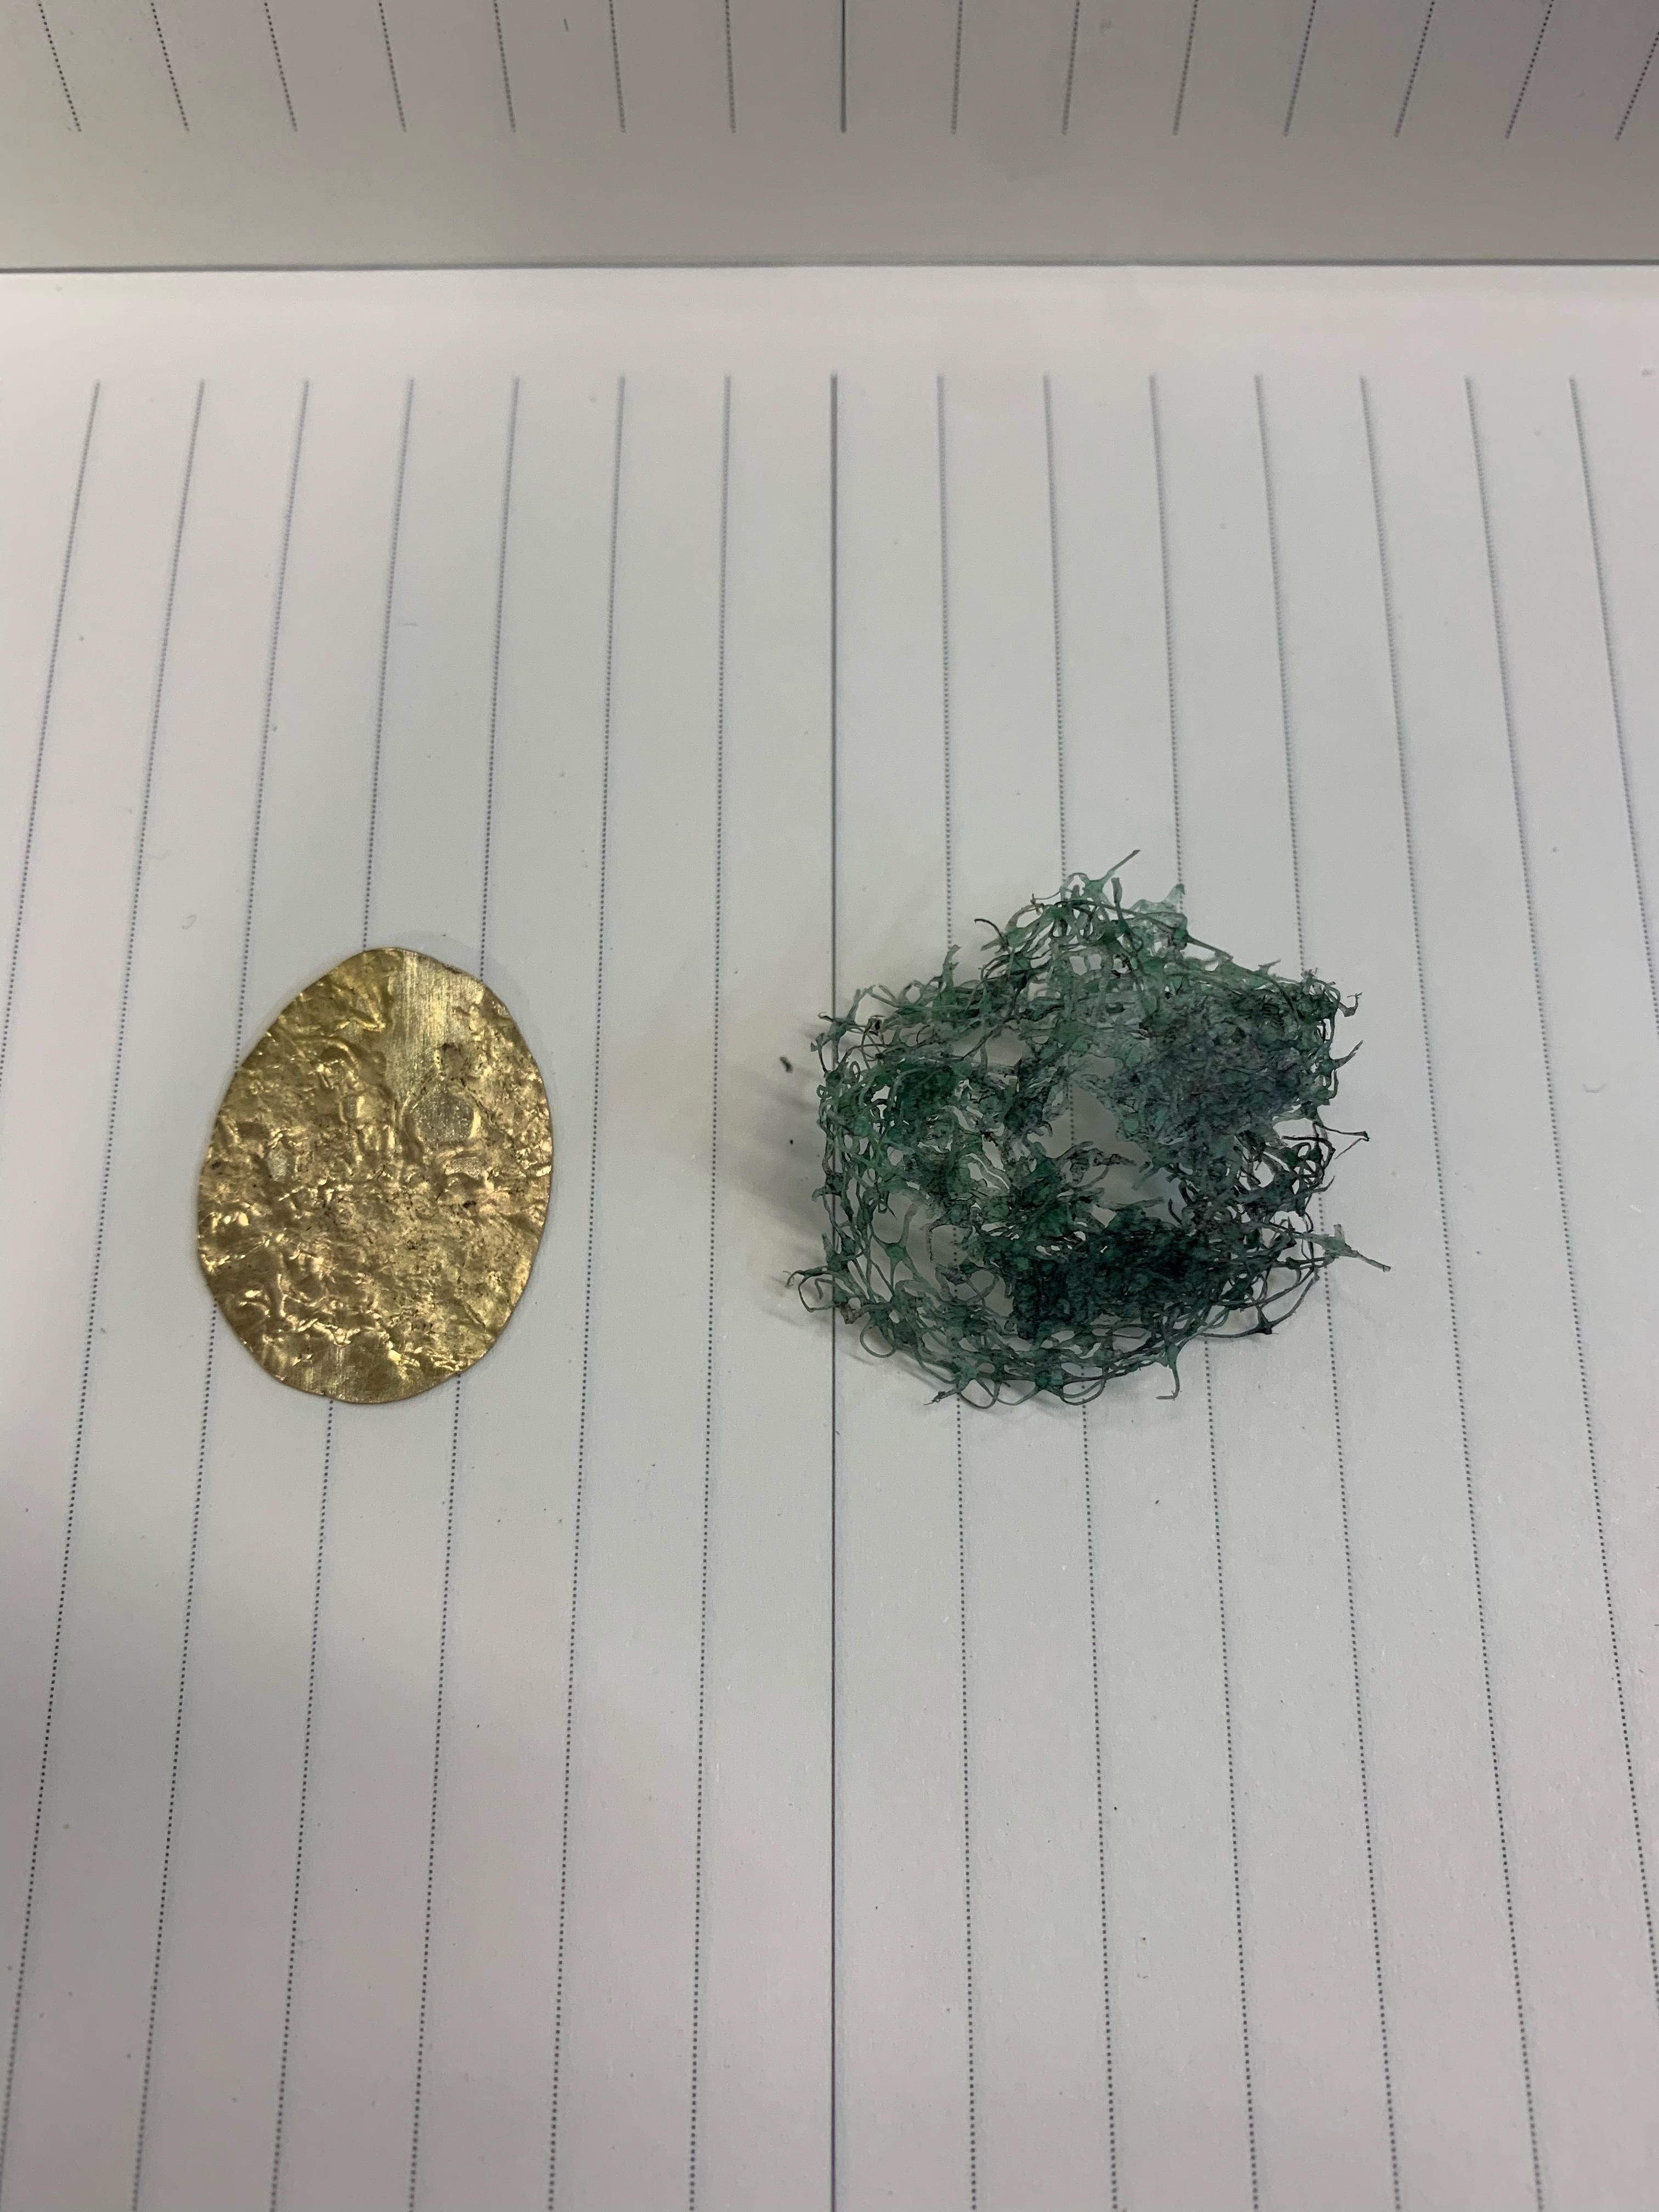
i also used this technique to create a quick sample using my found object of plastic netting i found. using this process is very simple and fast but has a big effect creating lots of texture in your work.
weather samples
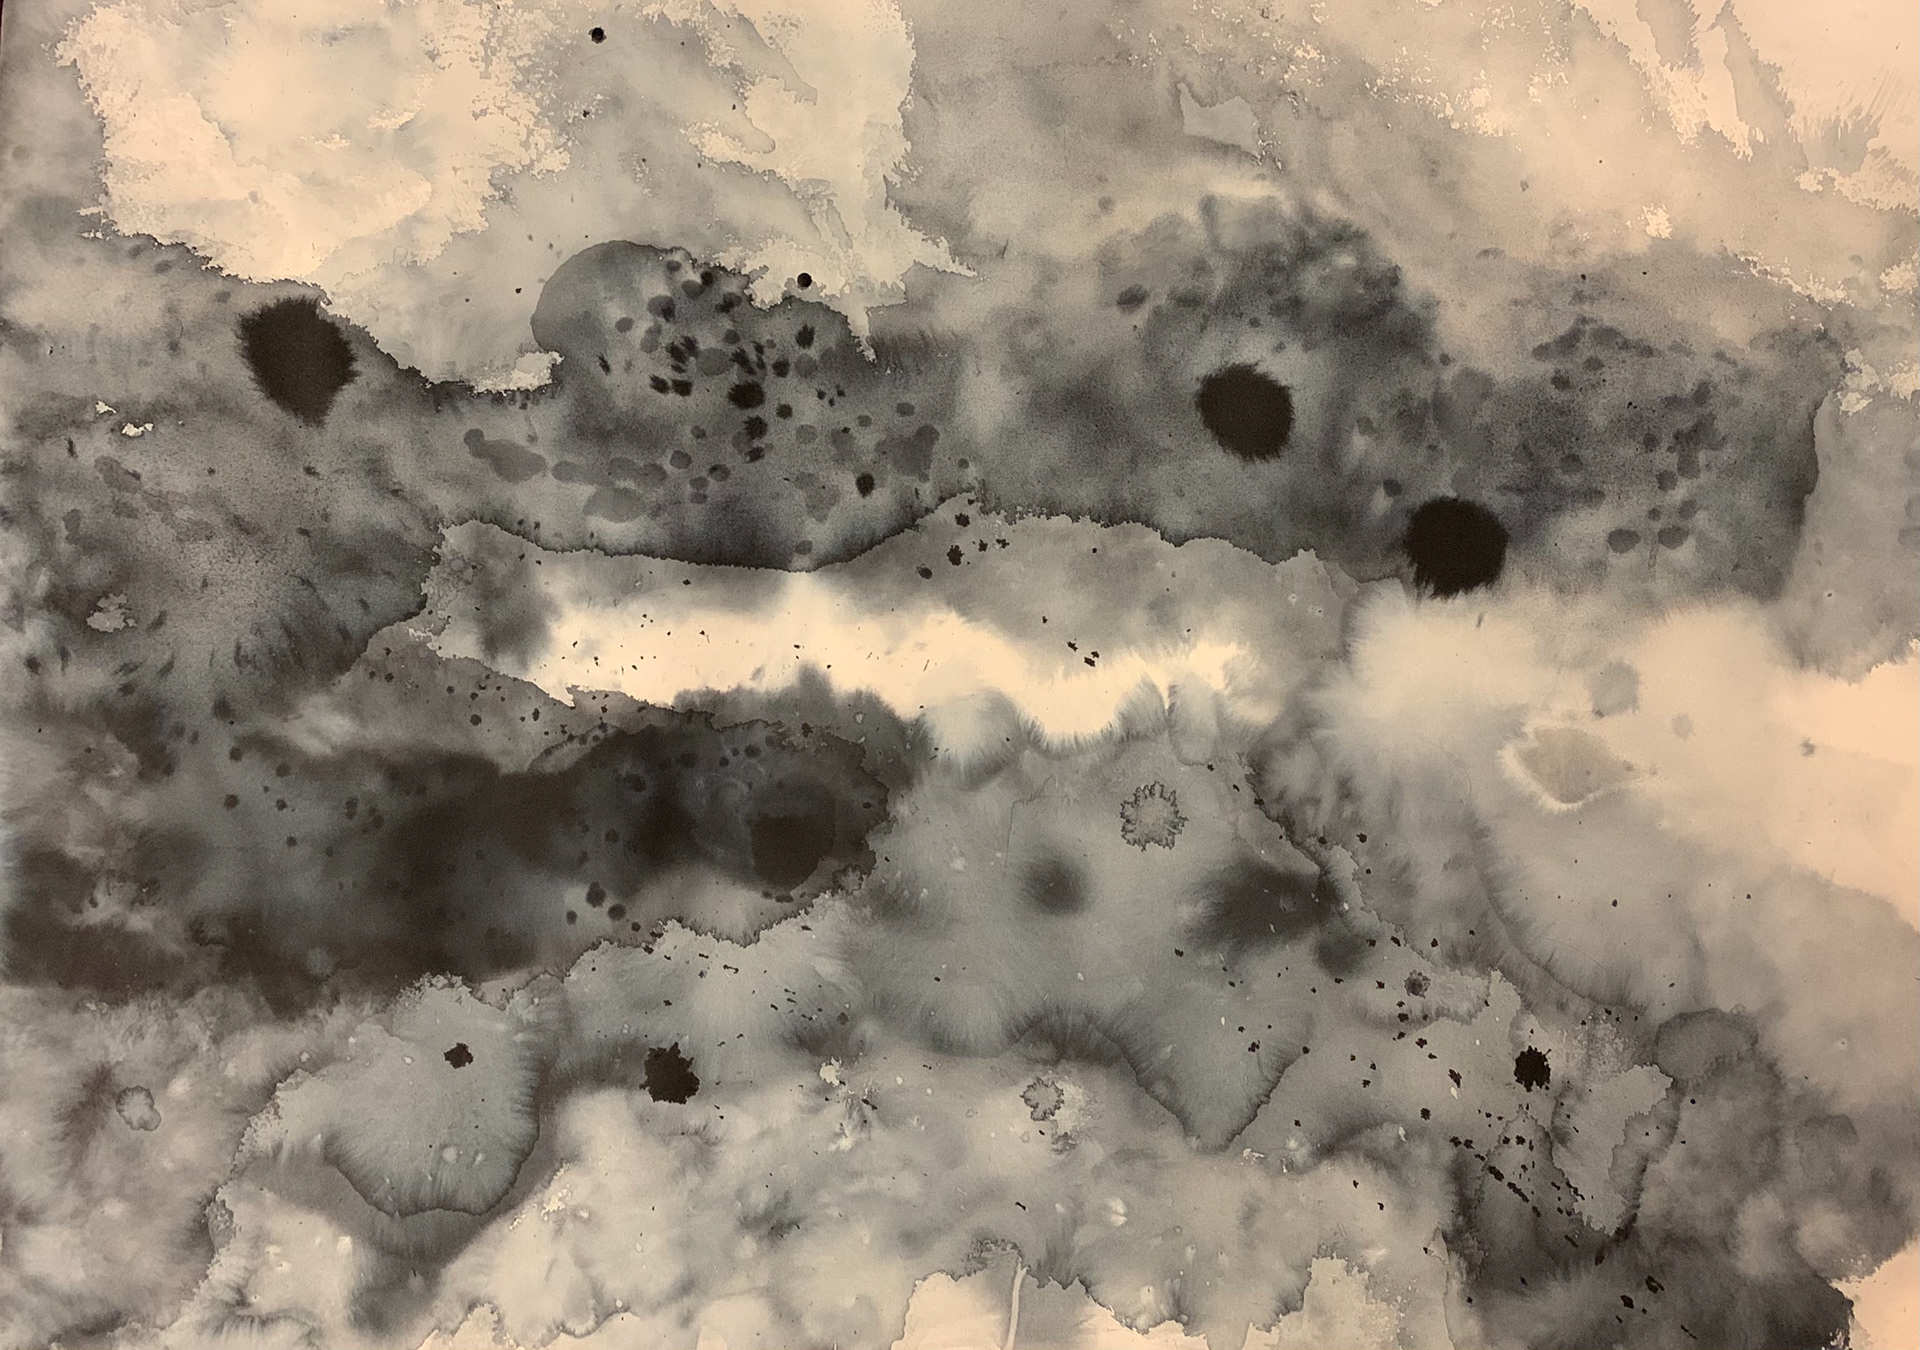
a1 drawing that captures the weather in manchester
sample piece inspired by my a1 painting of the weather in manchester created by a folded aluminum sheet and spiraled wire running along it which has been hammered down and secured by drilling two holes either side and tying metal wire around it.