Summer Sampling
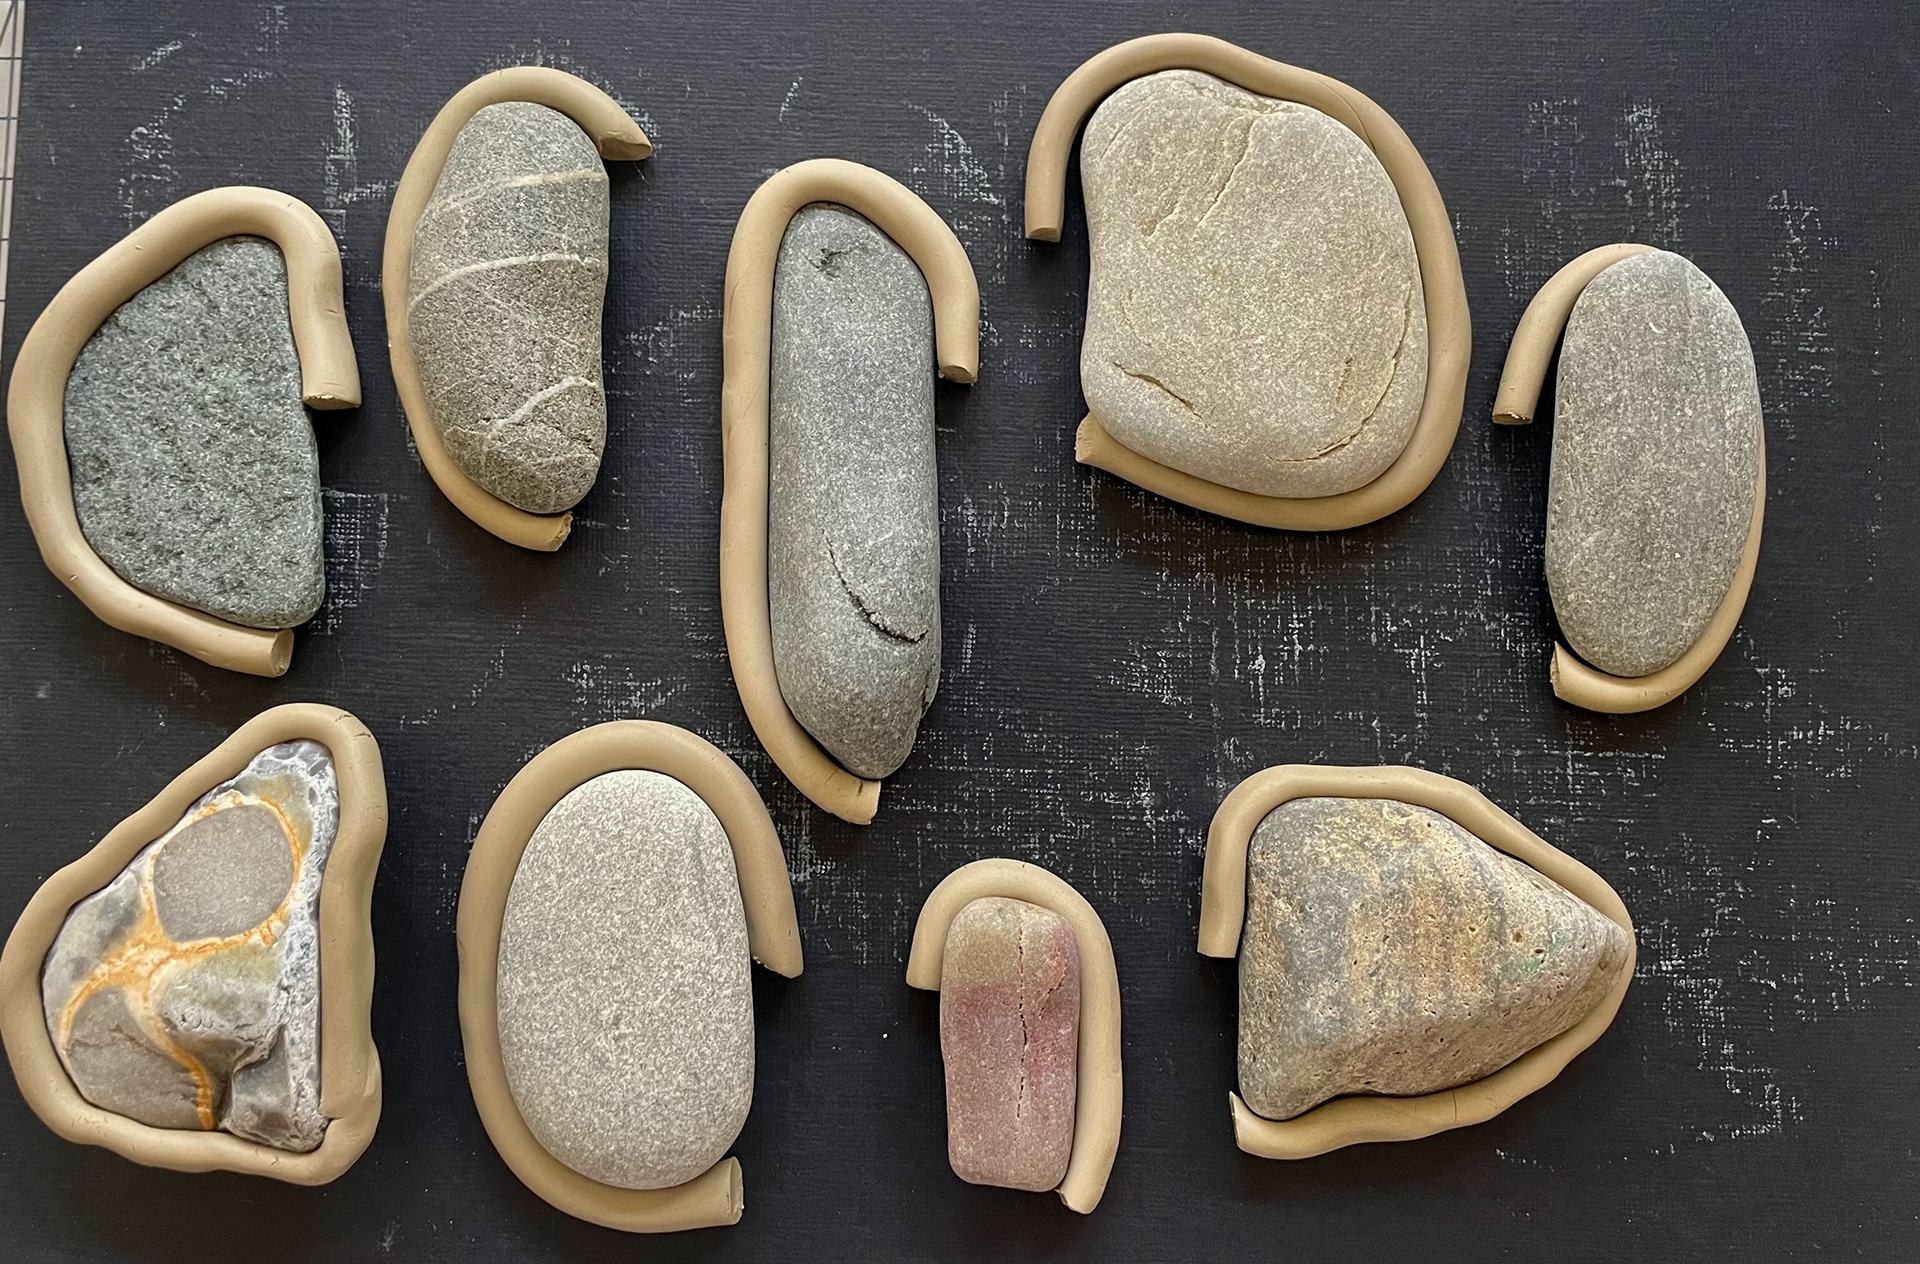
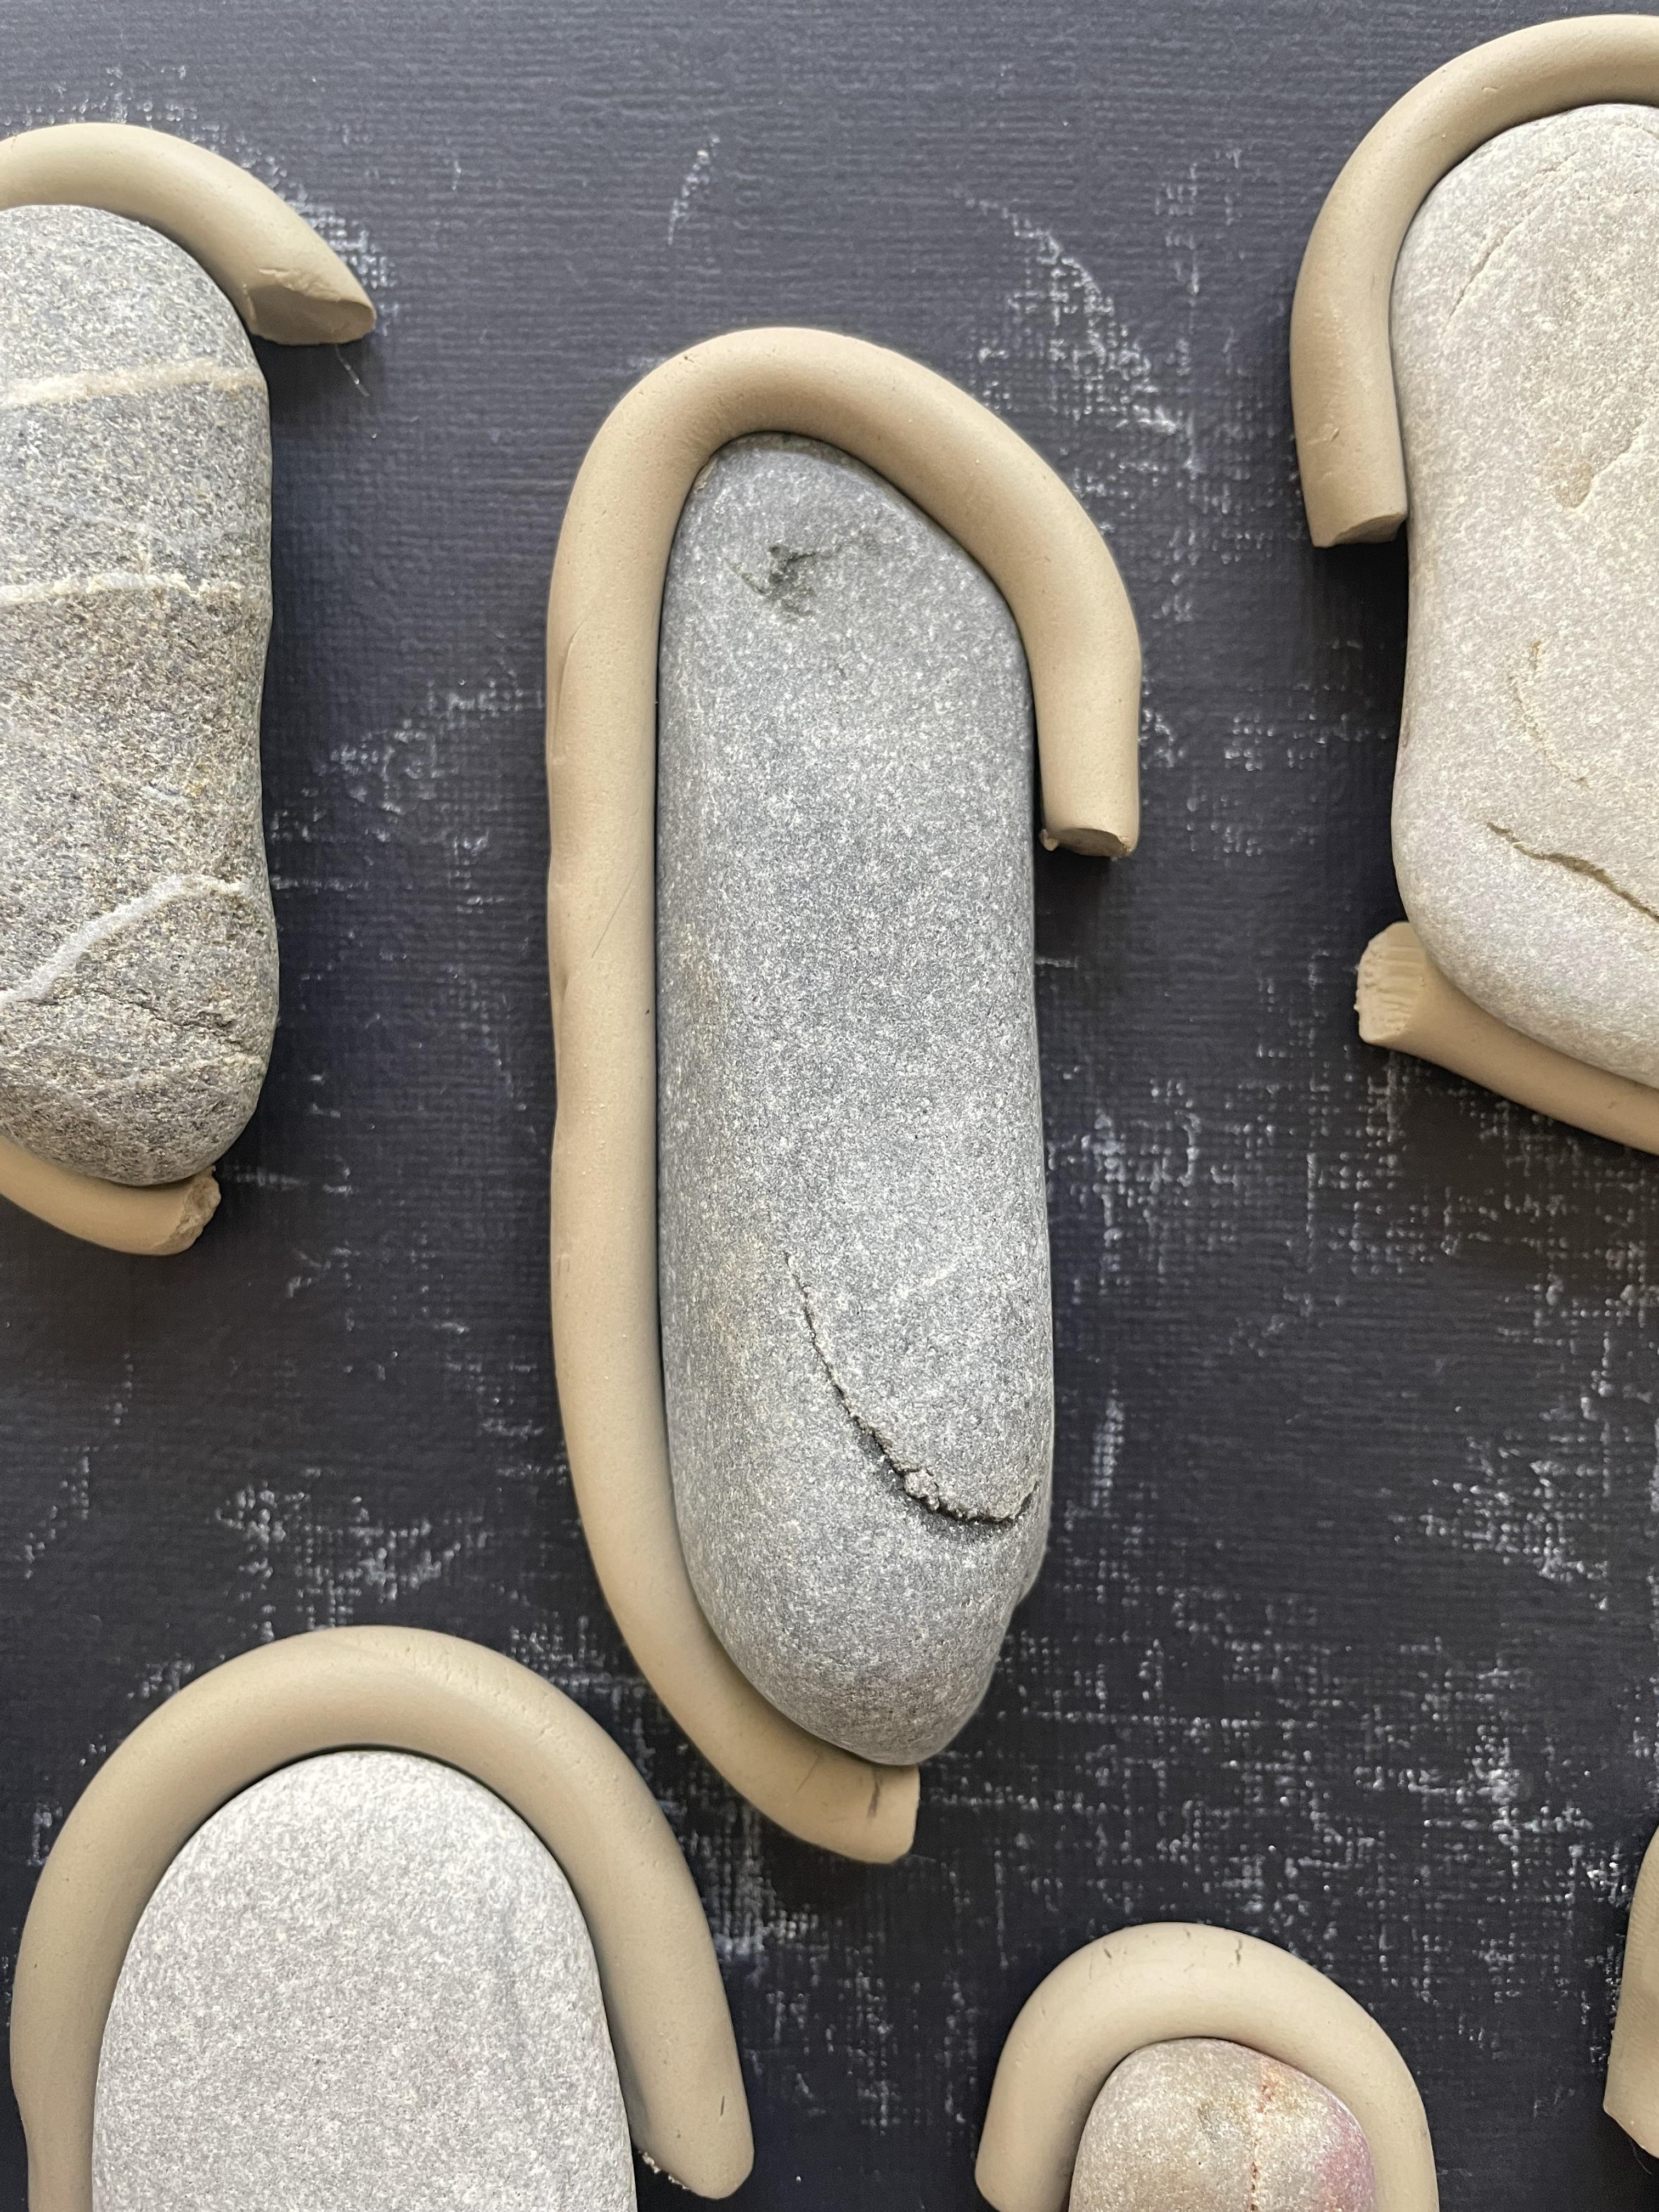
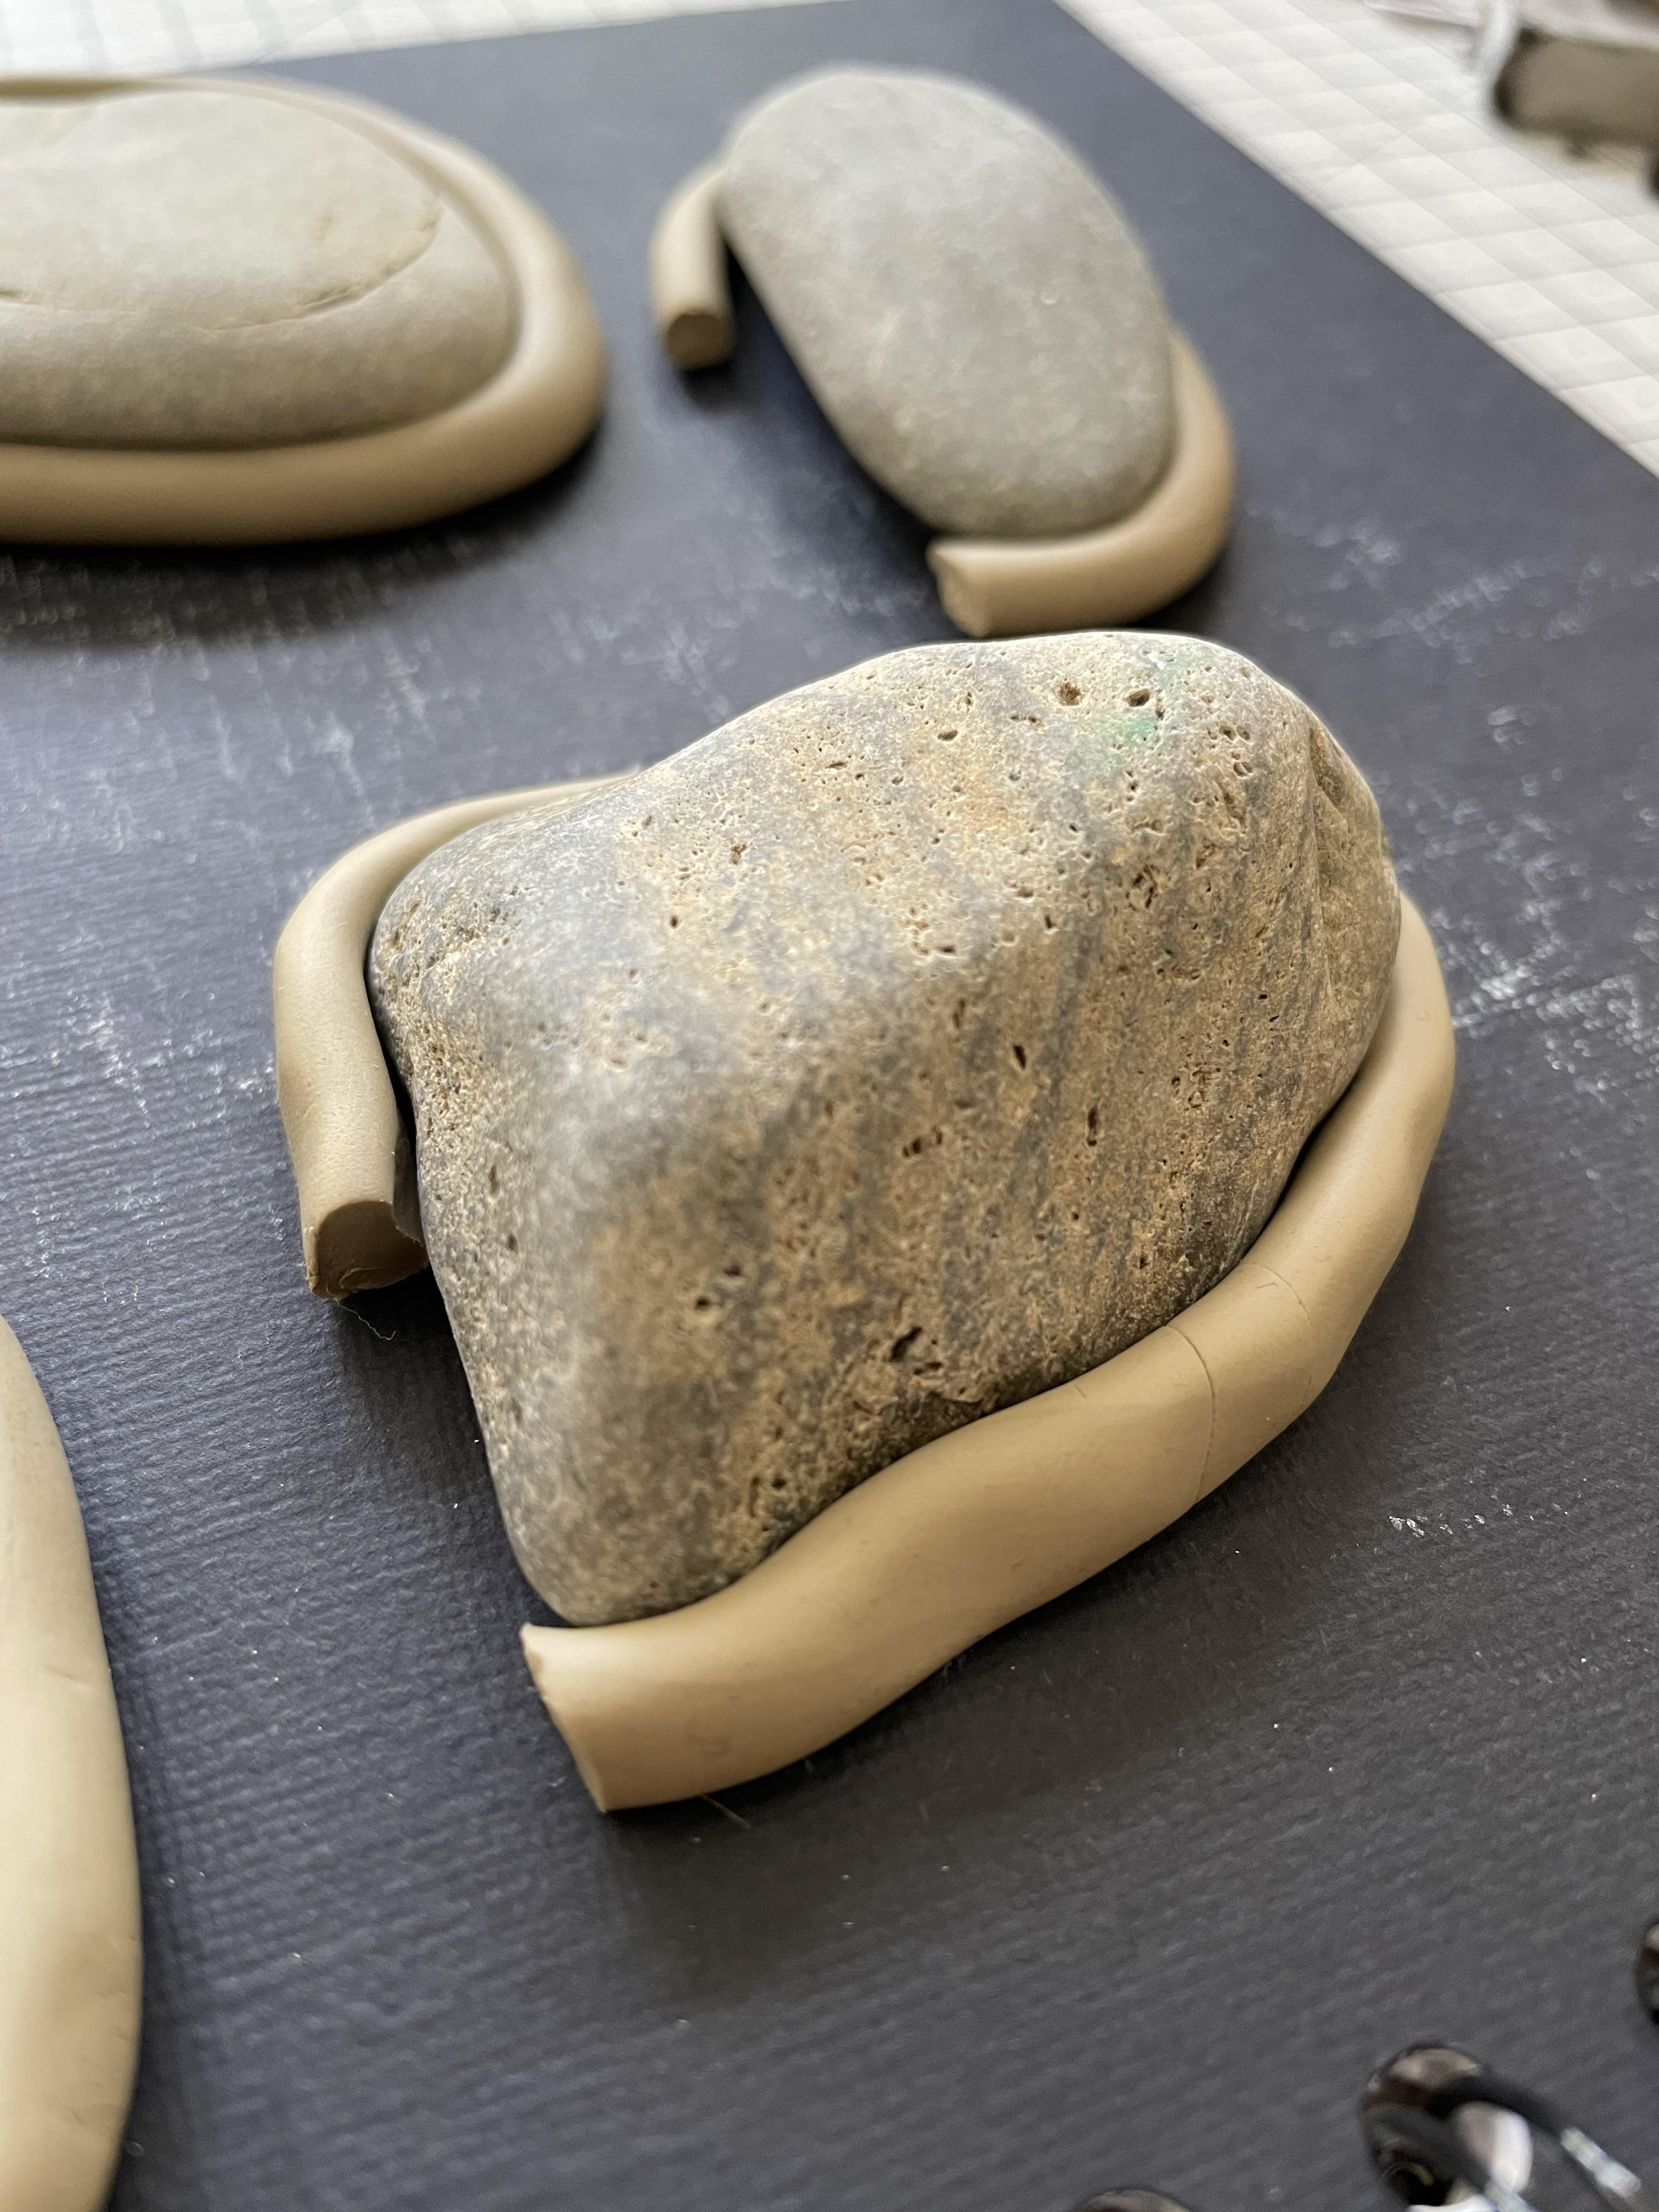
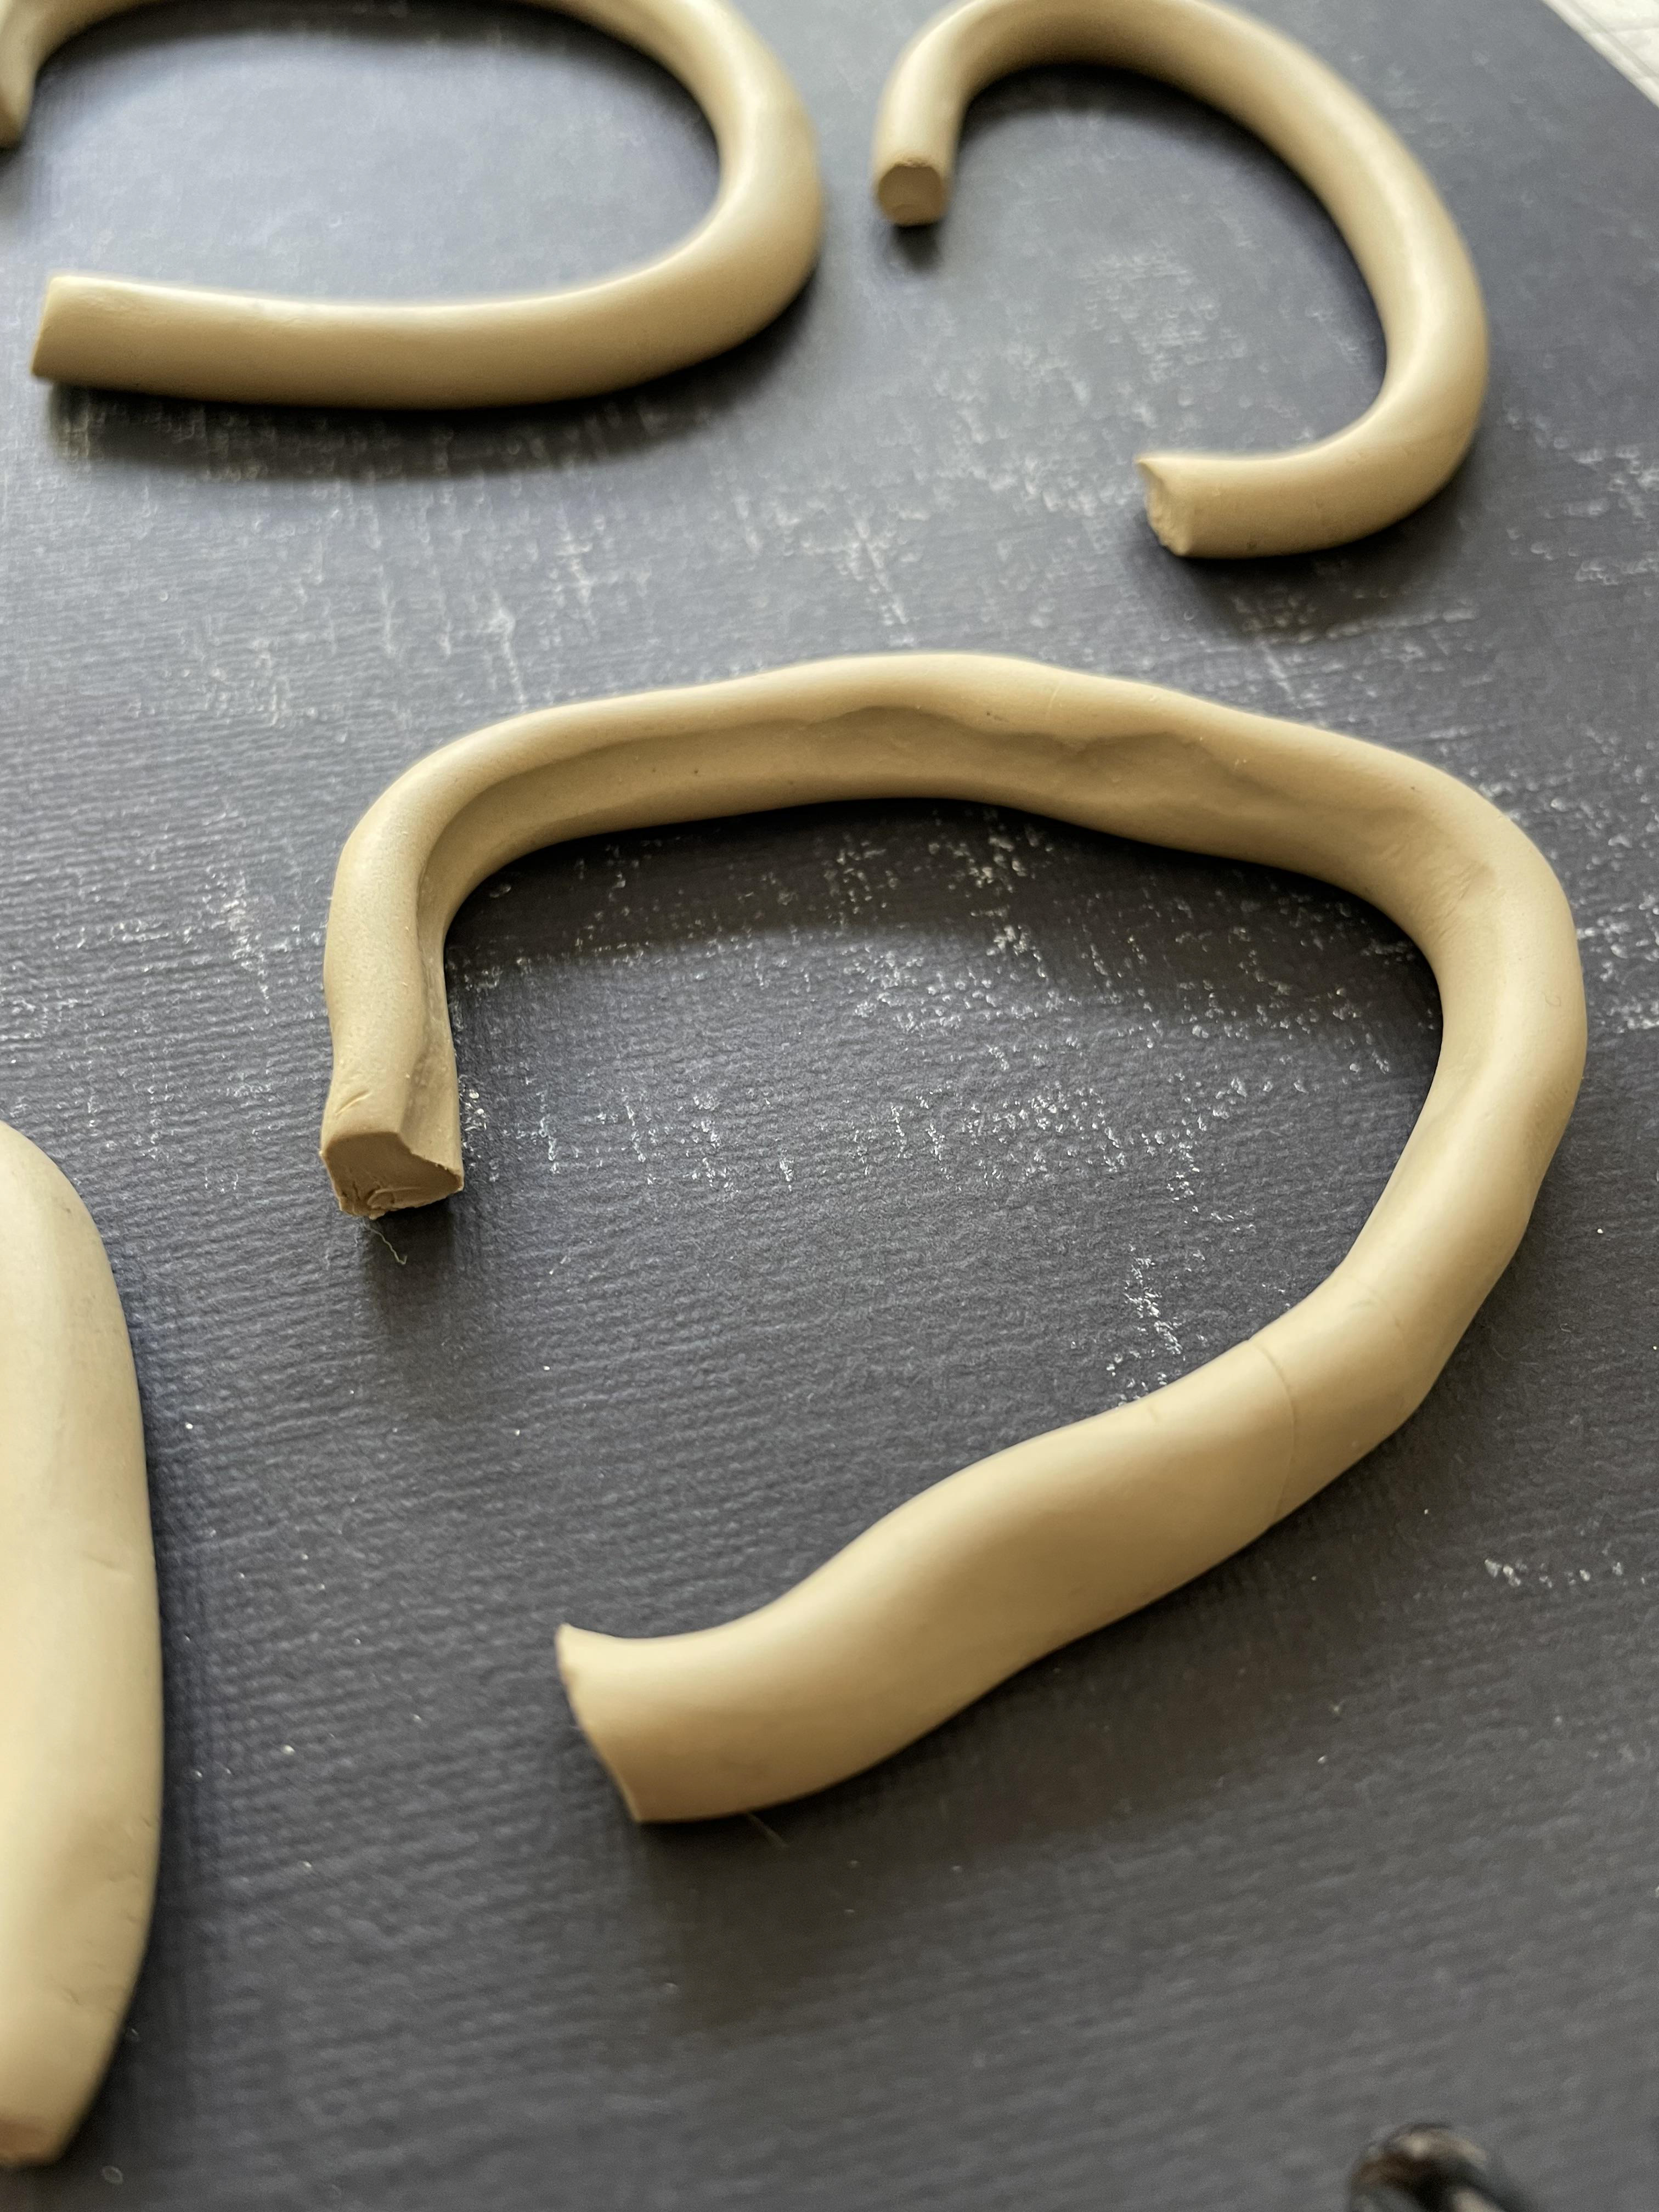

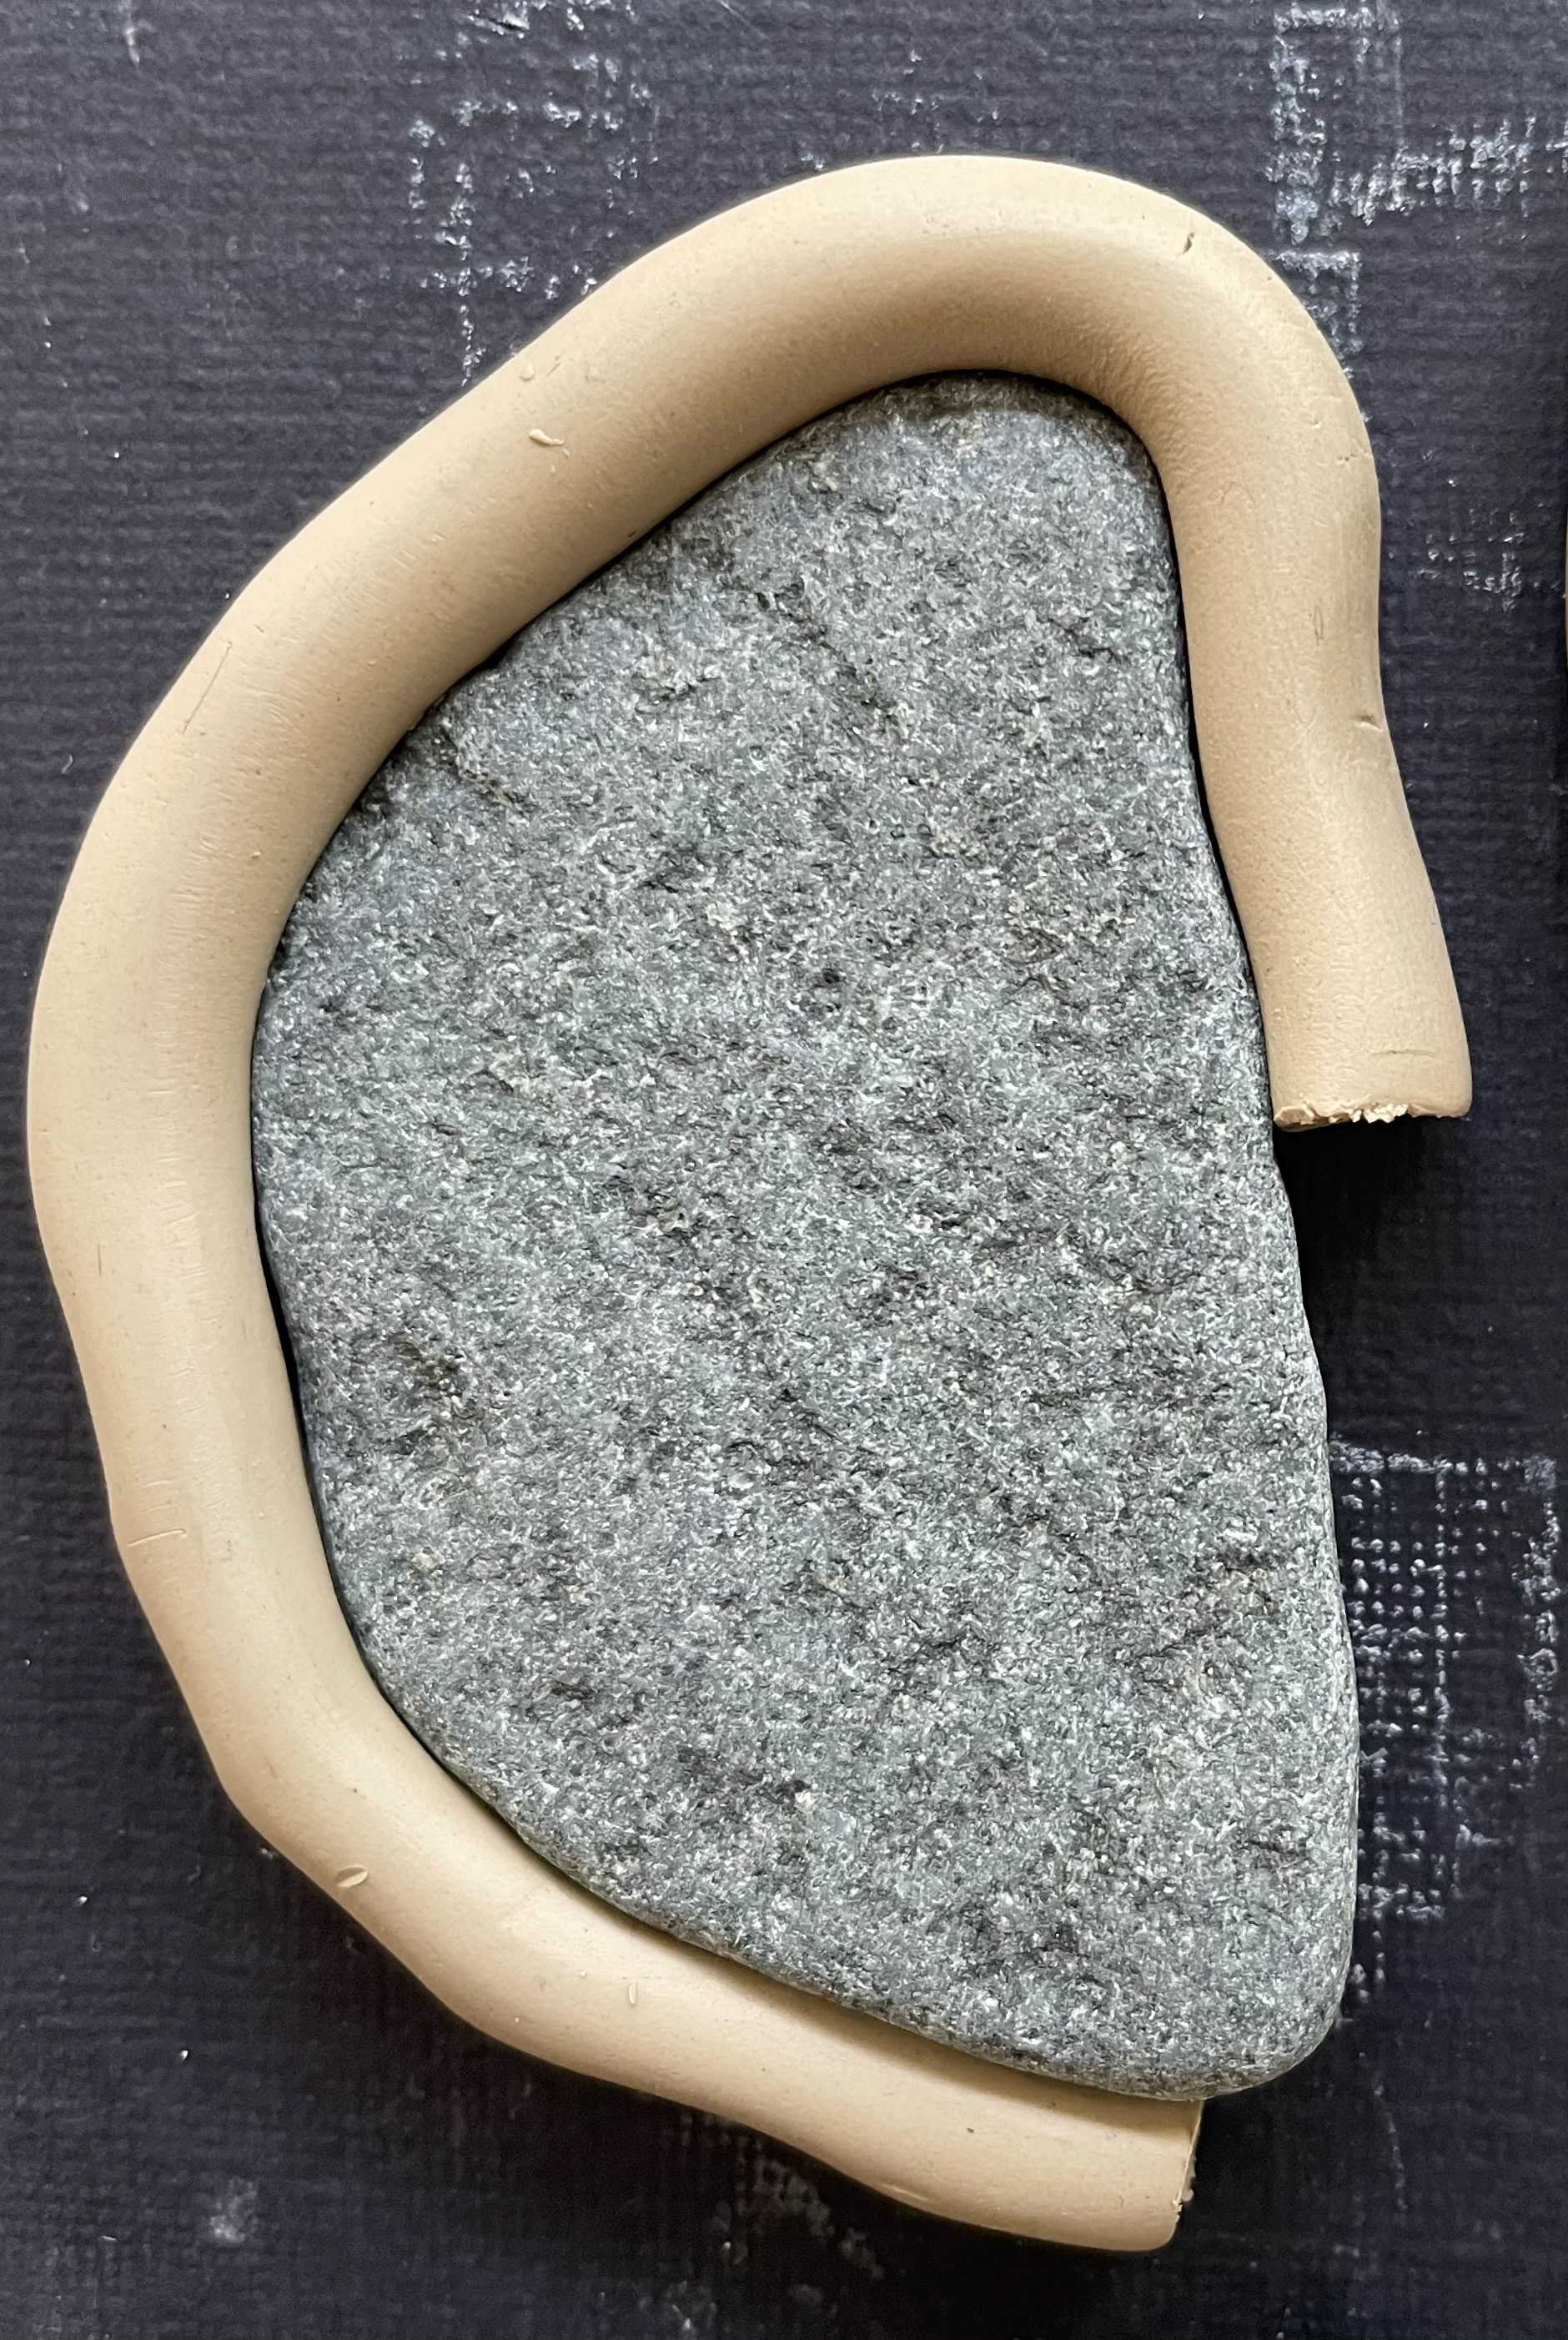

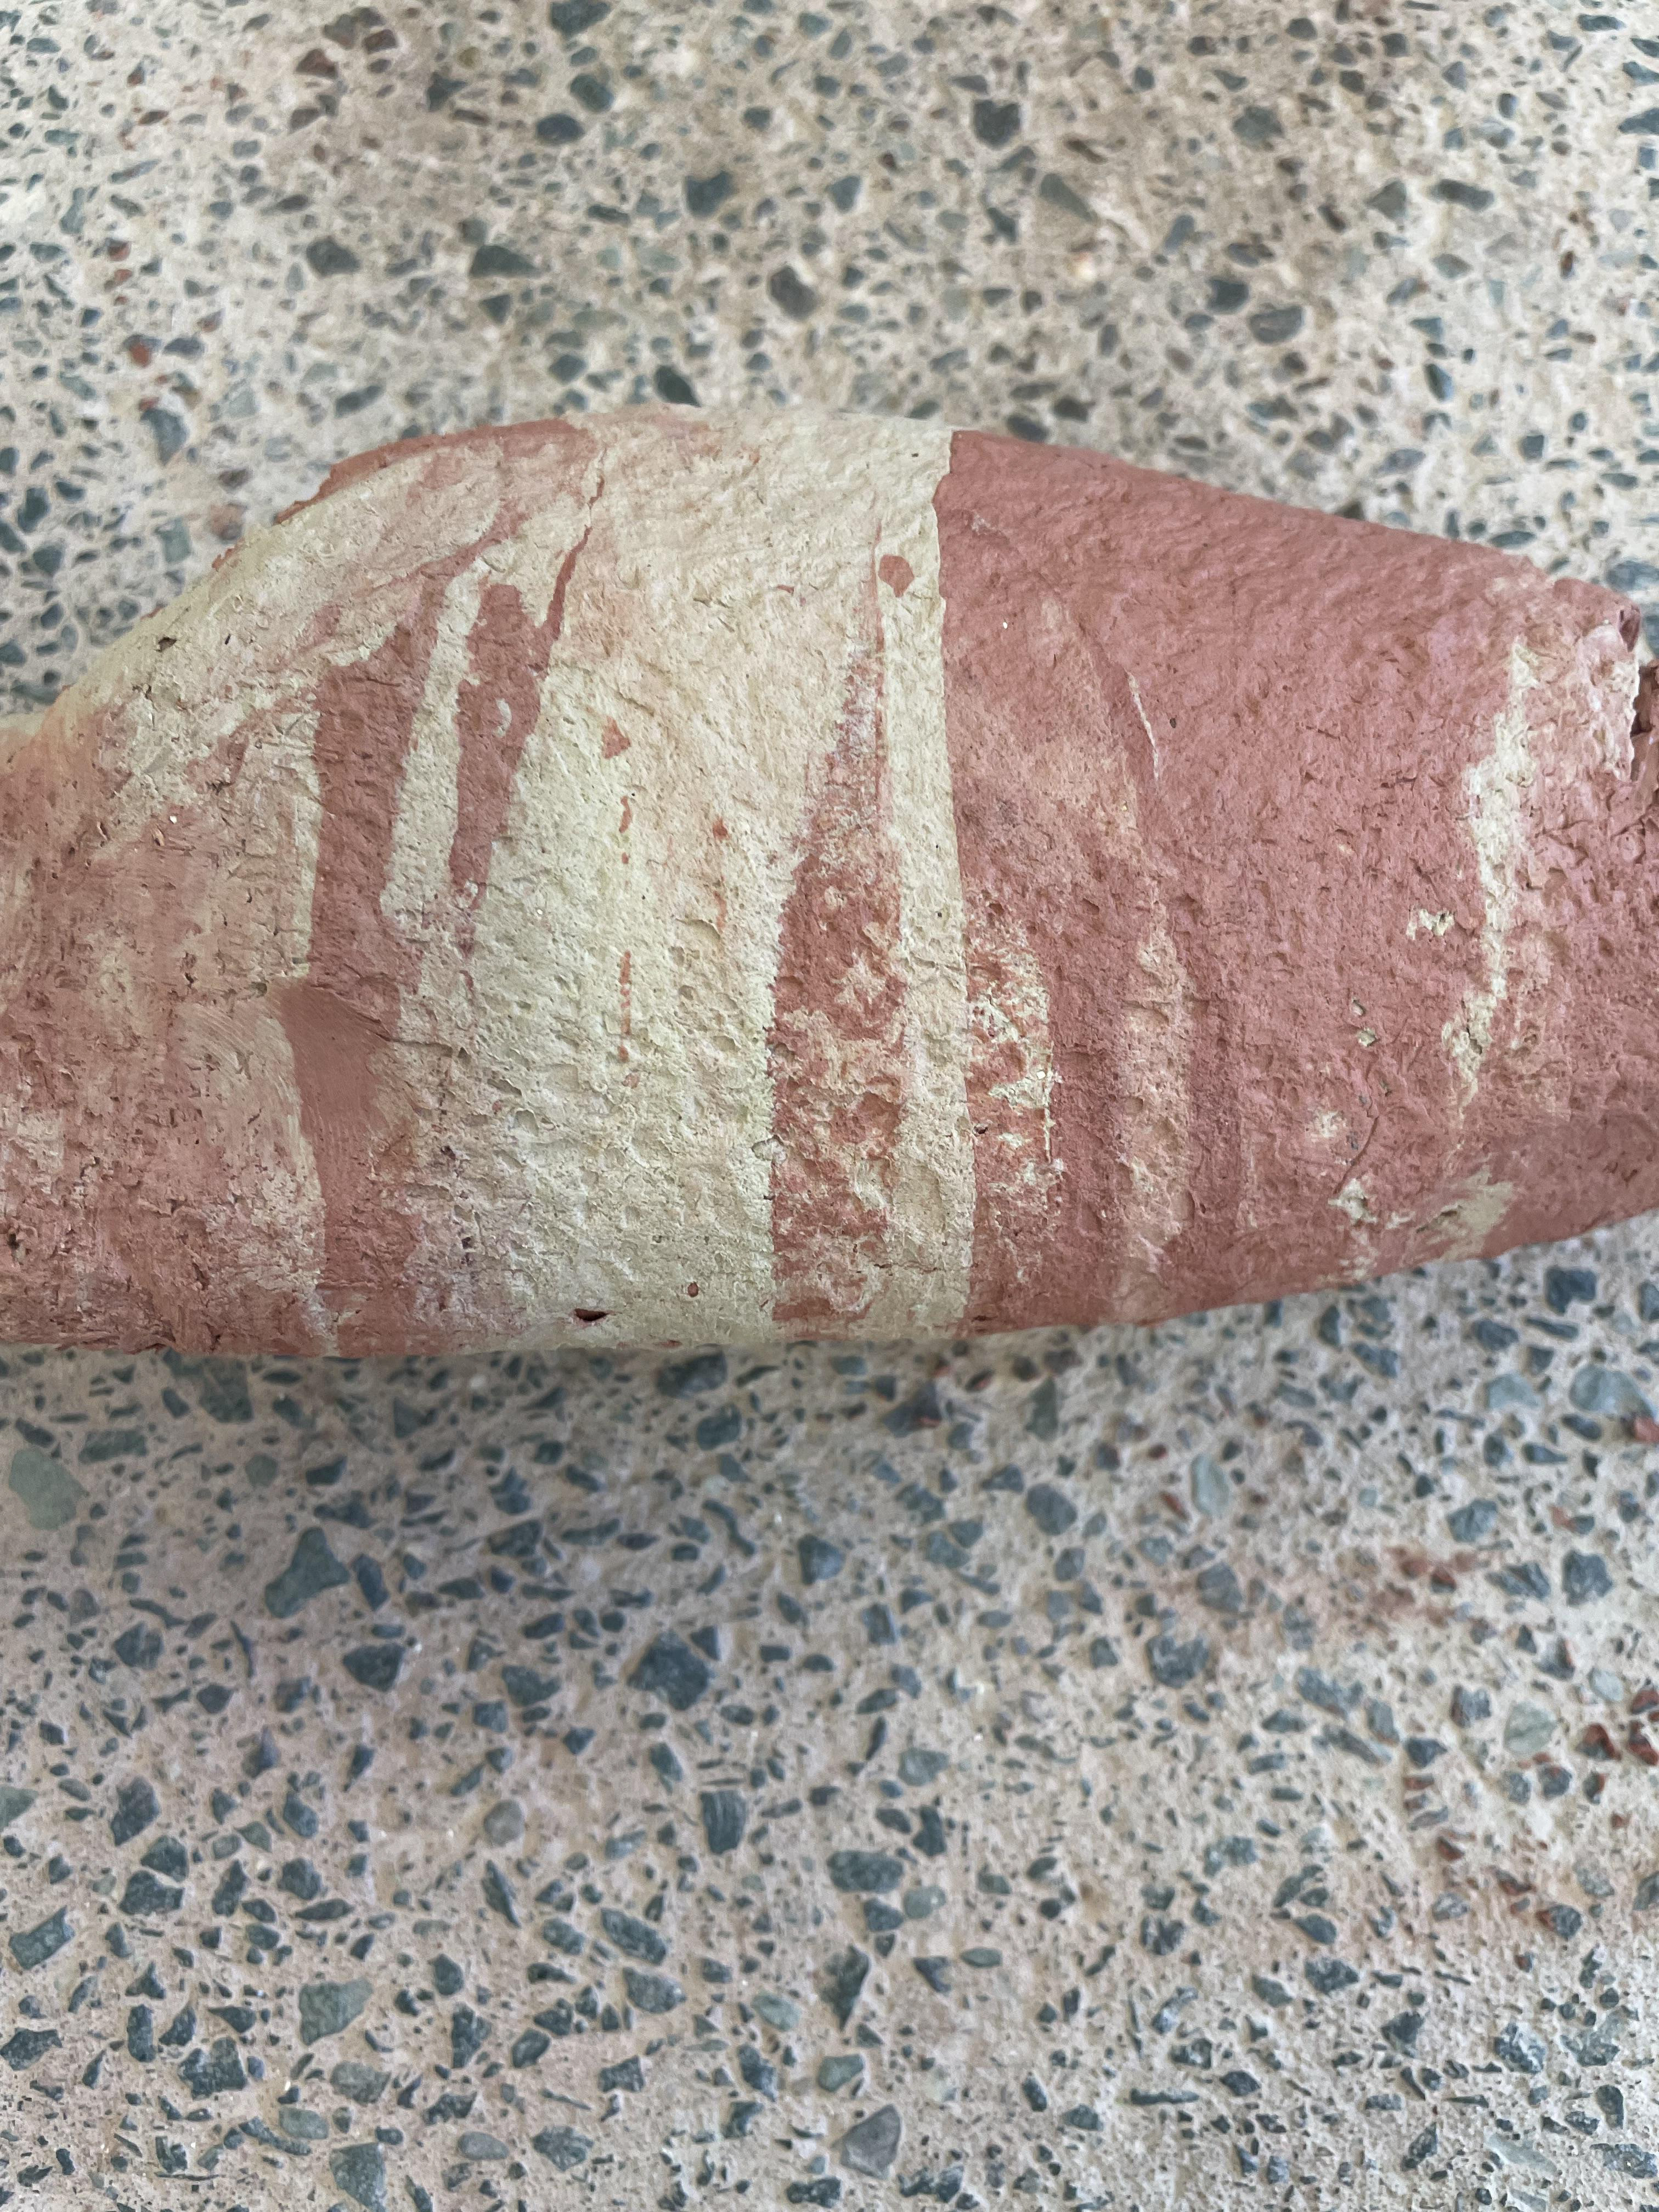
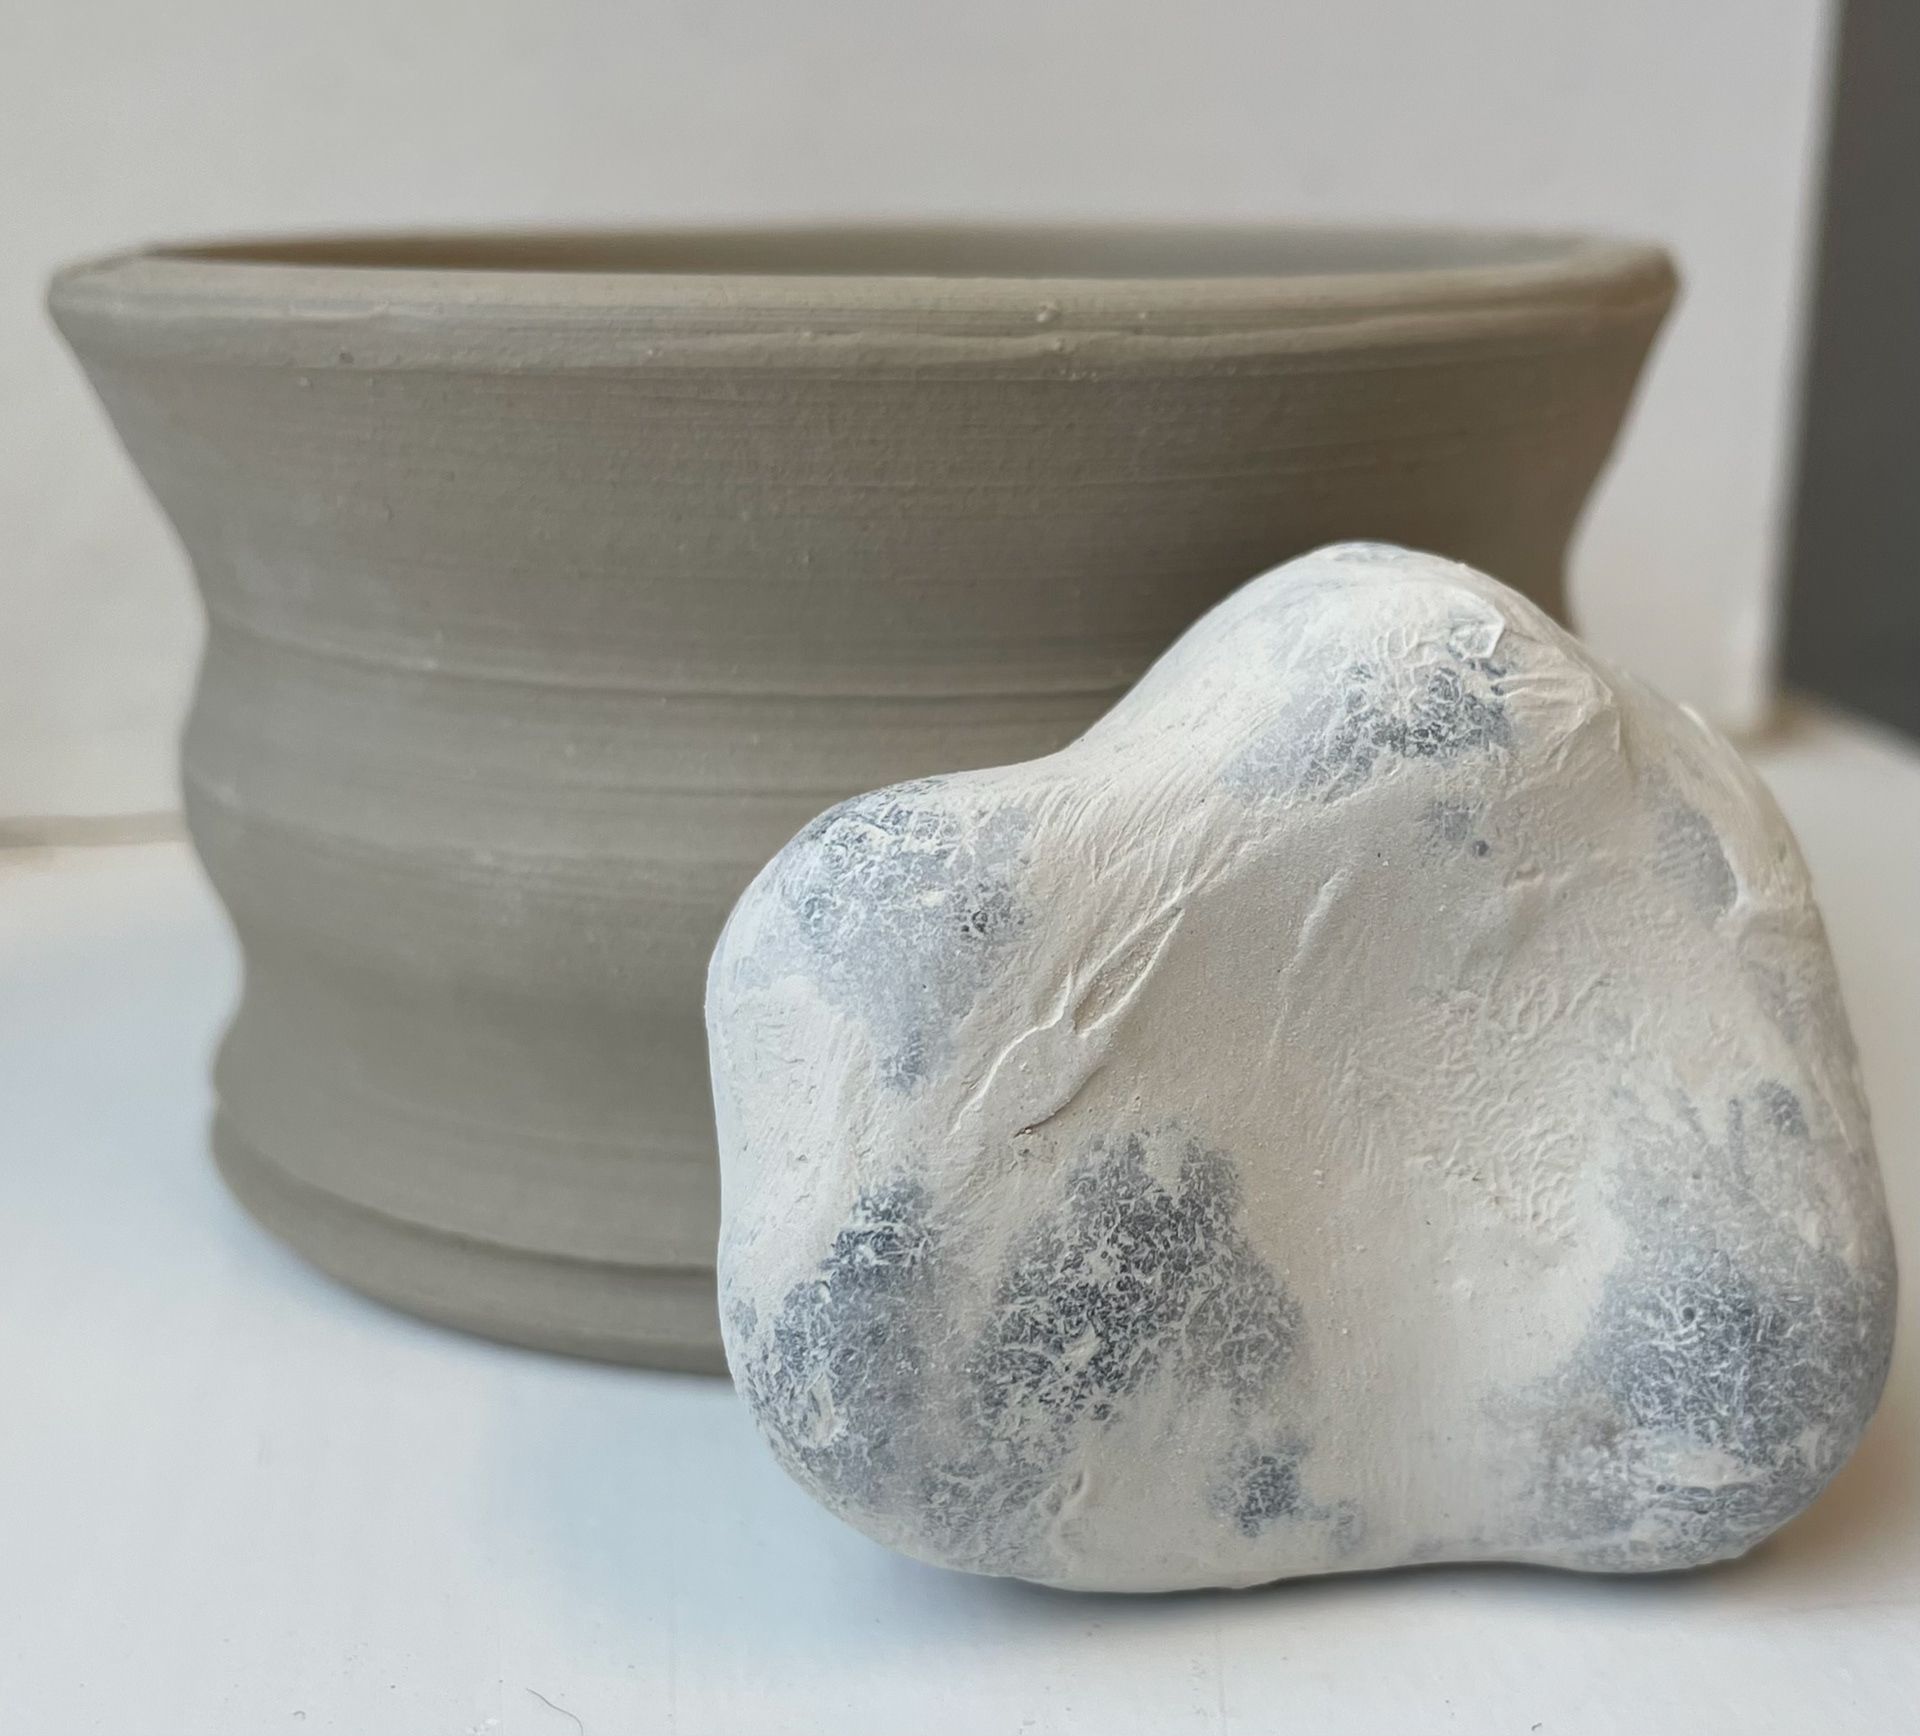
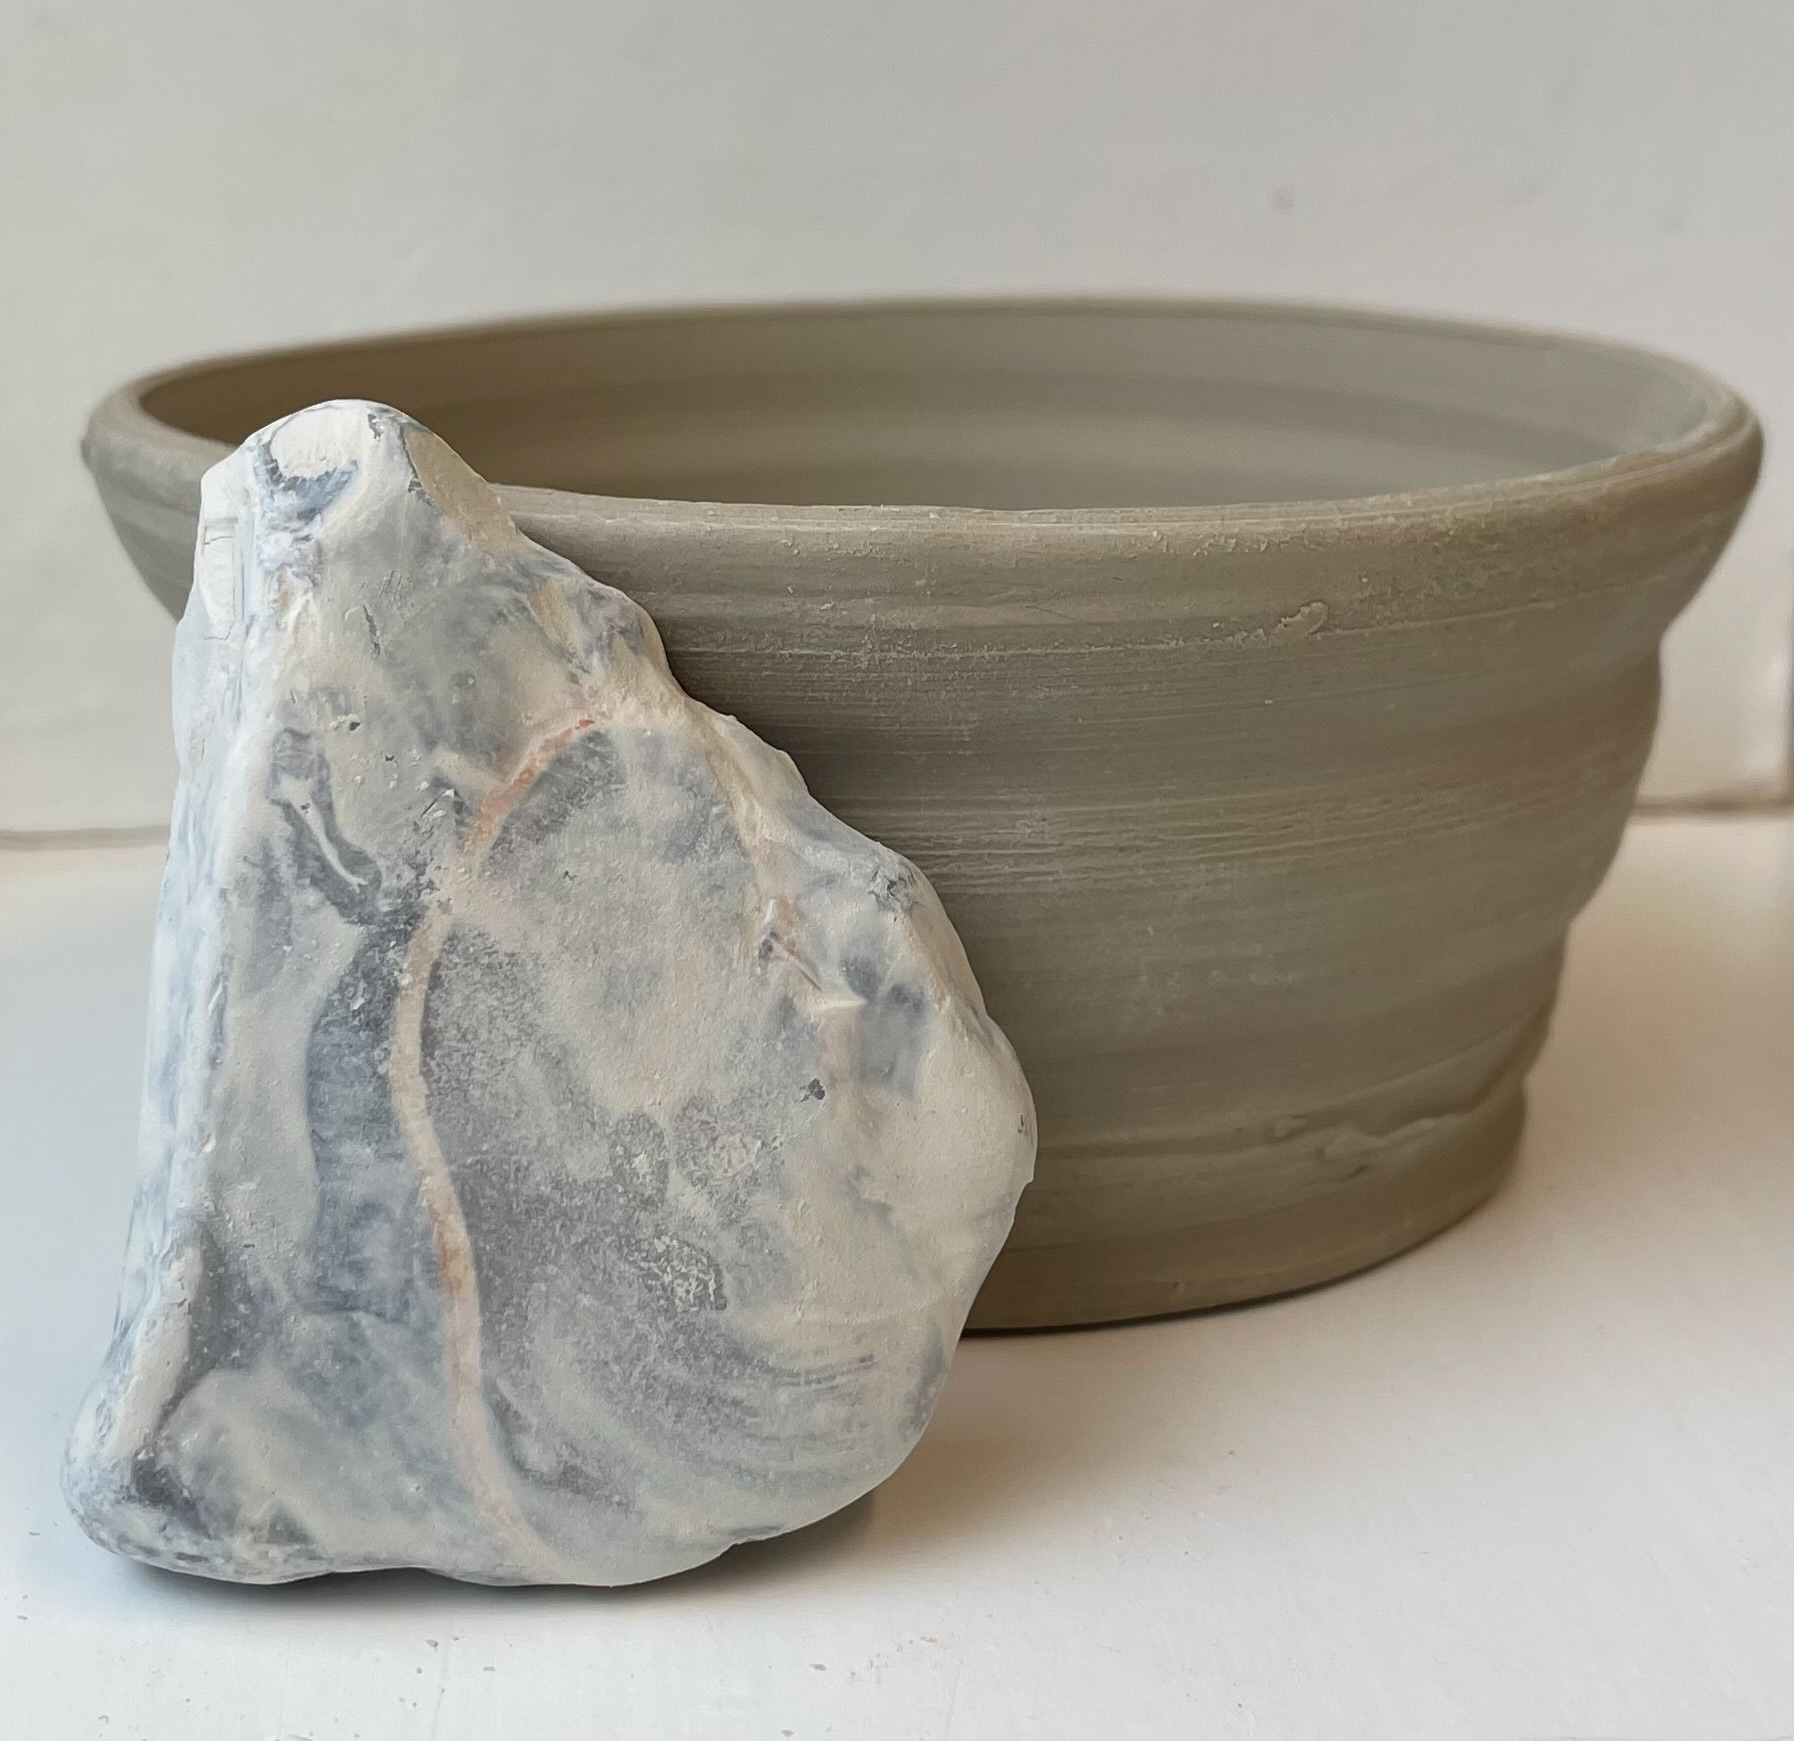
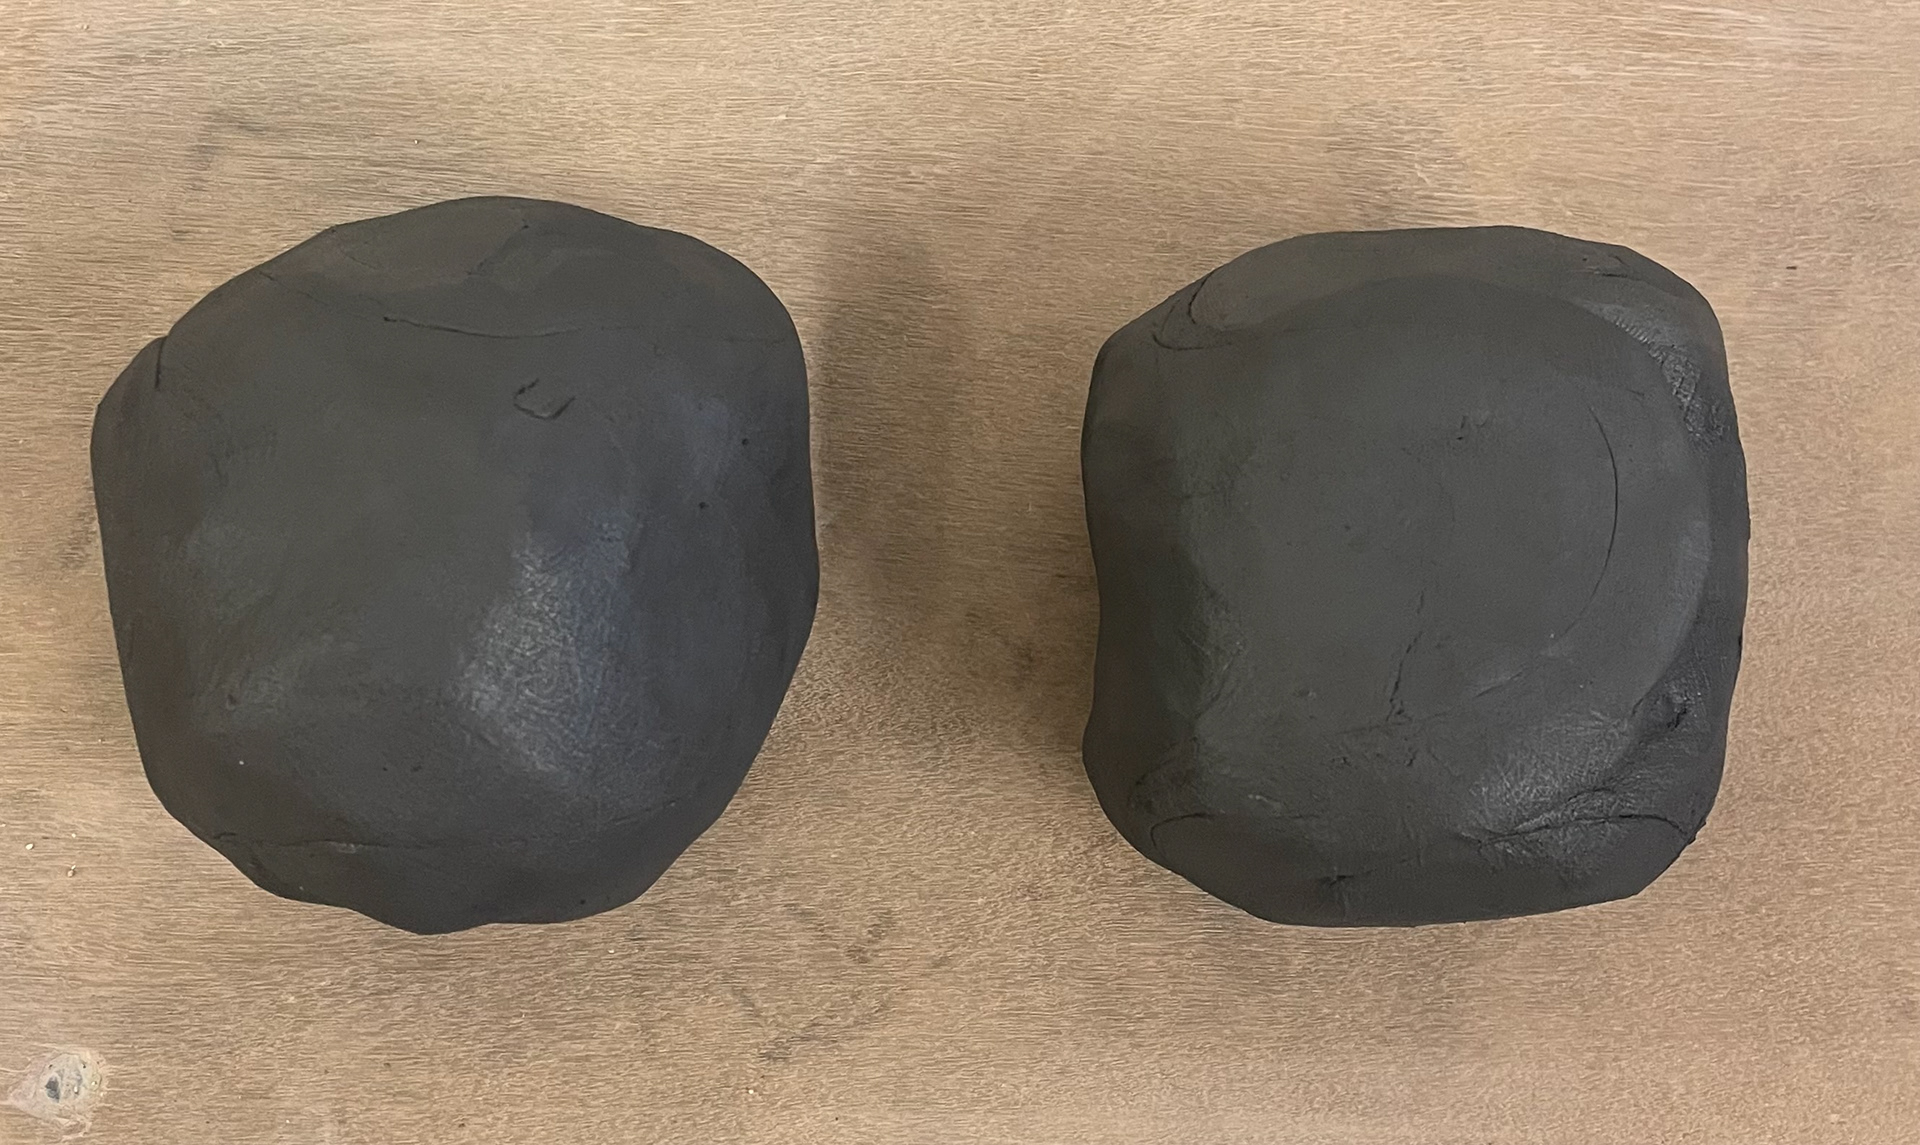
Over the summer, I collected pebbles from Brighton Beach. I've always been drawn to the millions of pebbles that cover the beach. Each pebble has an individual shape, colour, and size, not one the same. With these, I wanted to explore the pebbles' form and trace their outlines with clay. I thought these could be an exploration of different handle shapes, especially as each one is different. I was also really interested in the imprint of the inside of the clay form picked up from the pebble and the texture that they gave. although I don't think I'll be using handles in my work, this was still a fun sample, allowing me to explore pebbles further. This also gave me the idea of using these pebbles as ribs when throwing, to advance on this experiment, I want to use the pebbles in my making, using them as a tool and see what forms I can create.
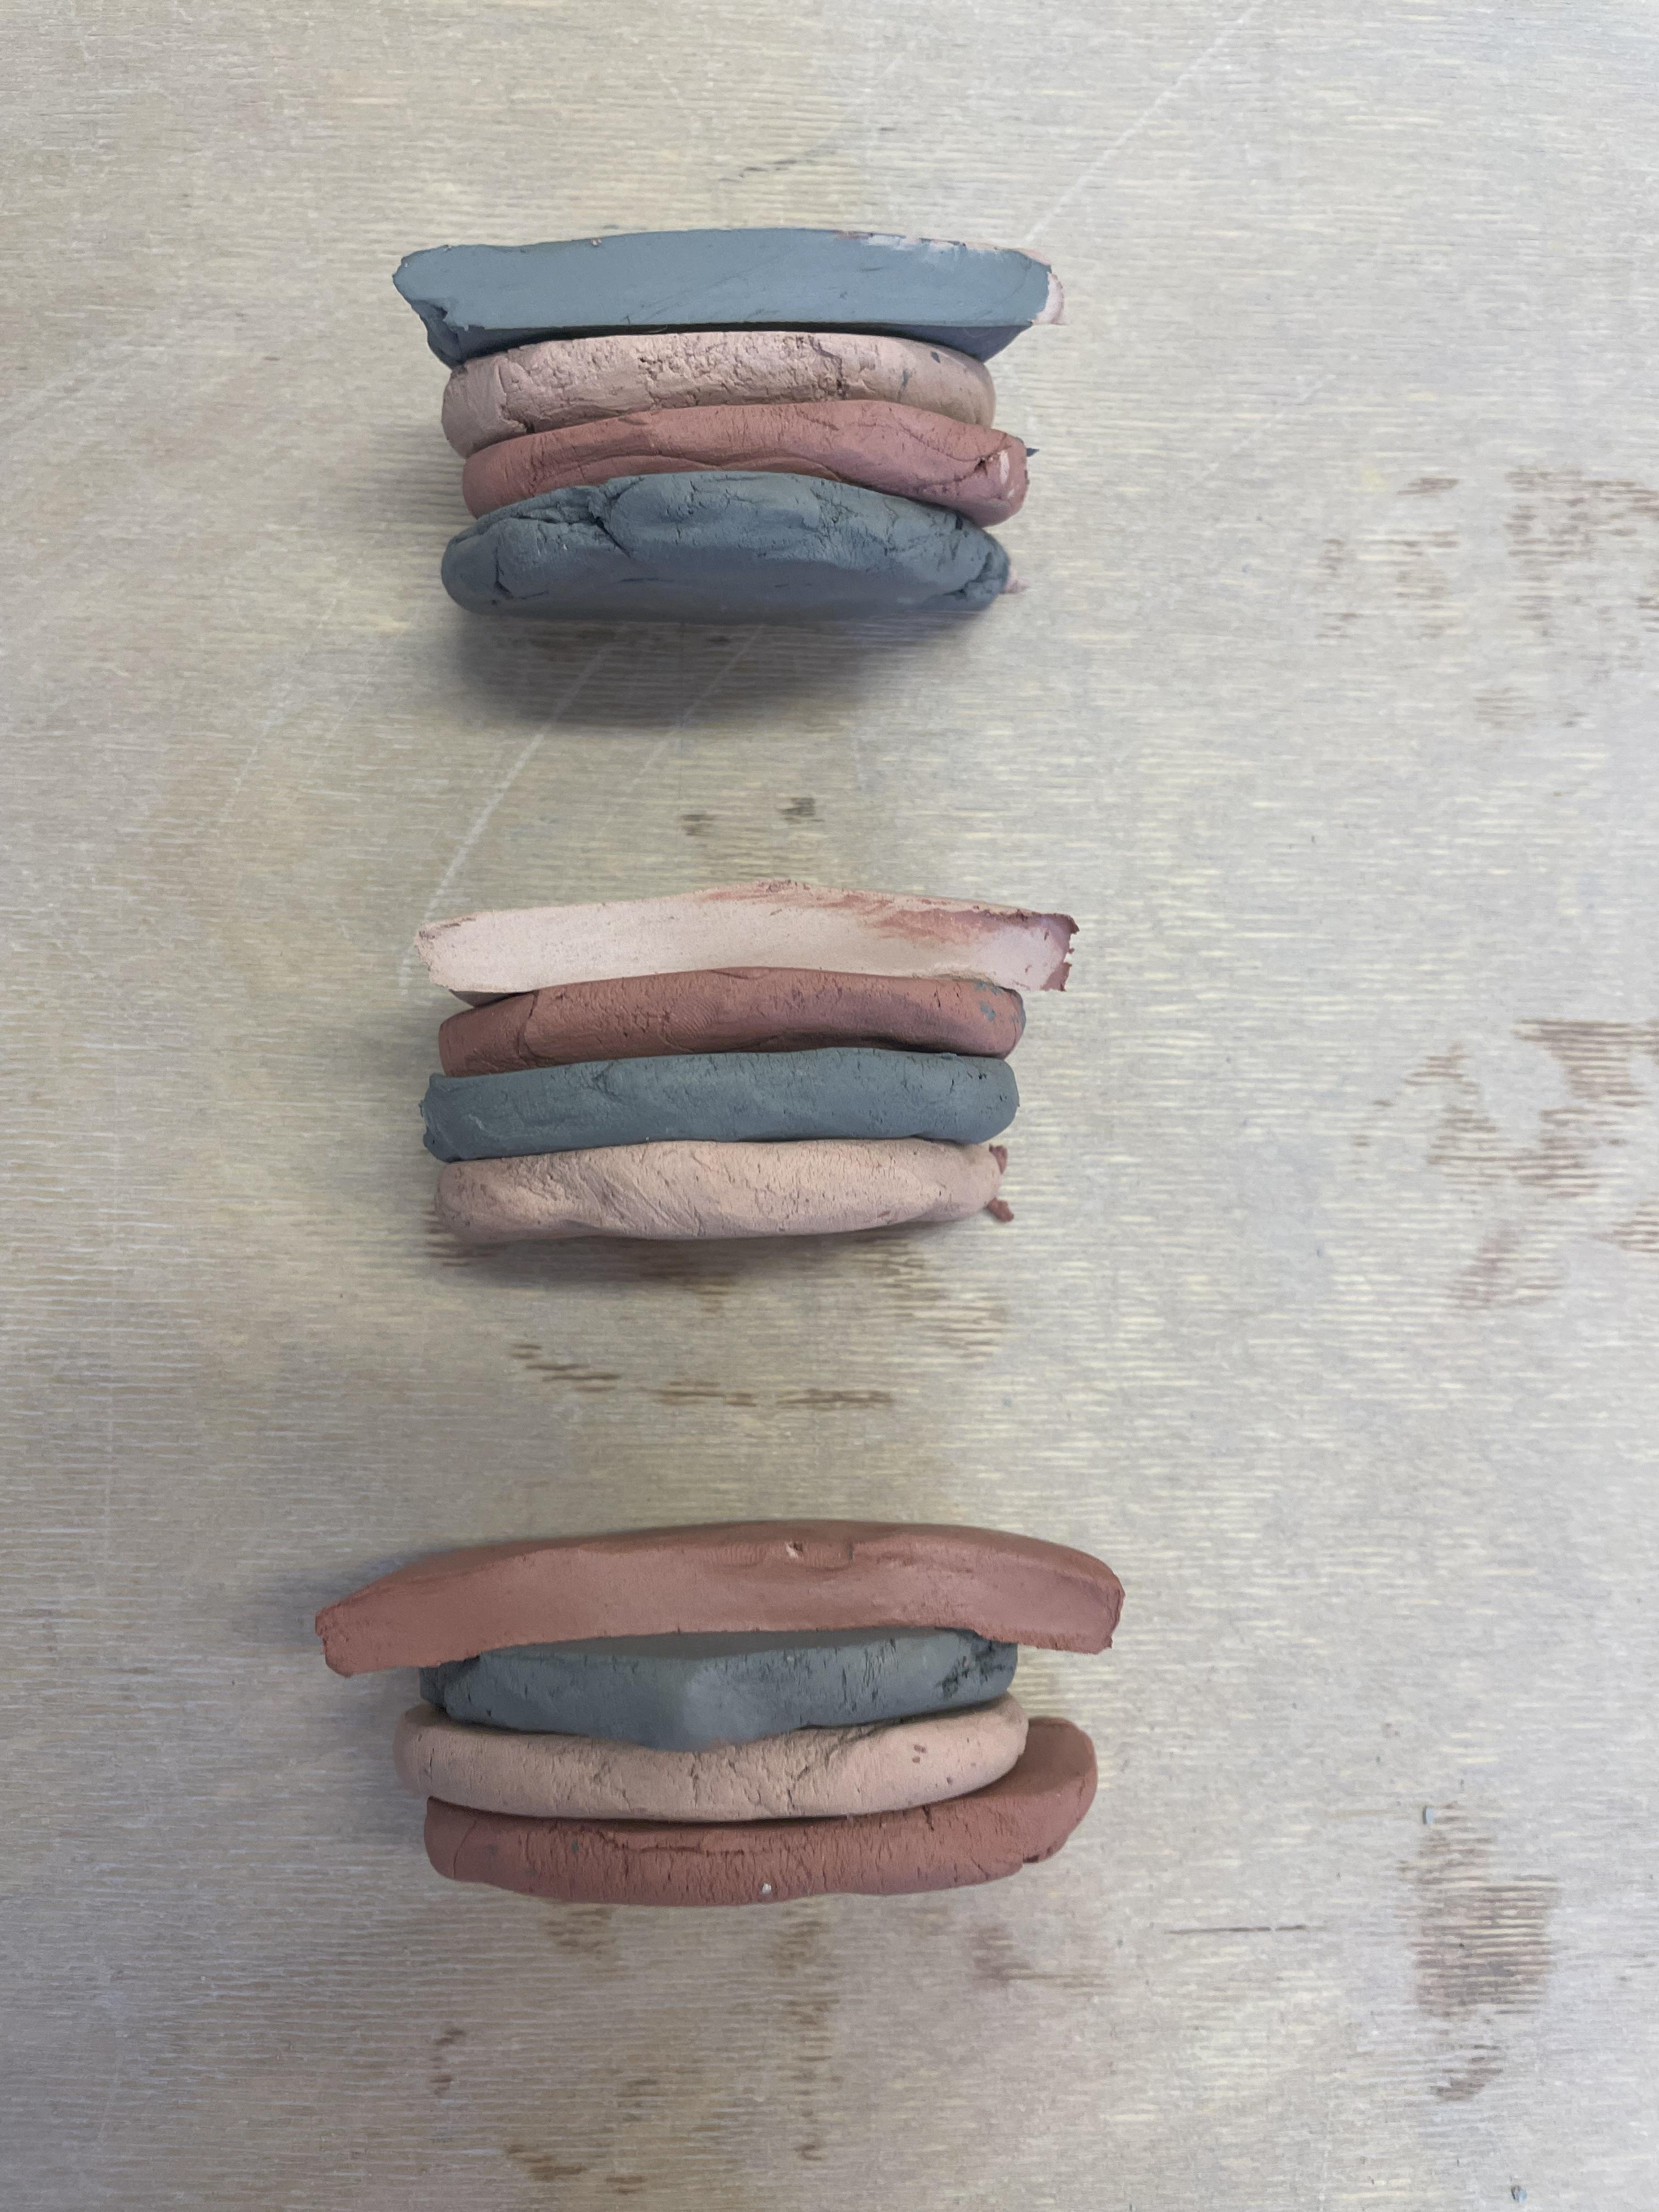
Colour Samples 1
These are colours that I'm aiming to recreate with oxides and stains; these colours are all taken from my found pebbles. They might only be recreated by mixing oxides or stains. However, a lot of samples will be needed, and I need to record my findings so I can experiment further and achieve the array of colours I want.

My first test was coloured clay sampling, allowing me to find the right colour pallet inspired by my pebbles. All my clay testing is using ivory stoneware clay as it holds the pigment of the oxides best.
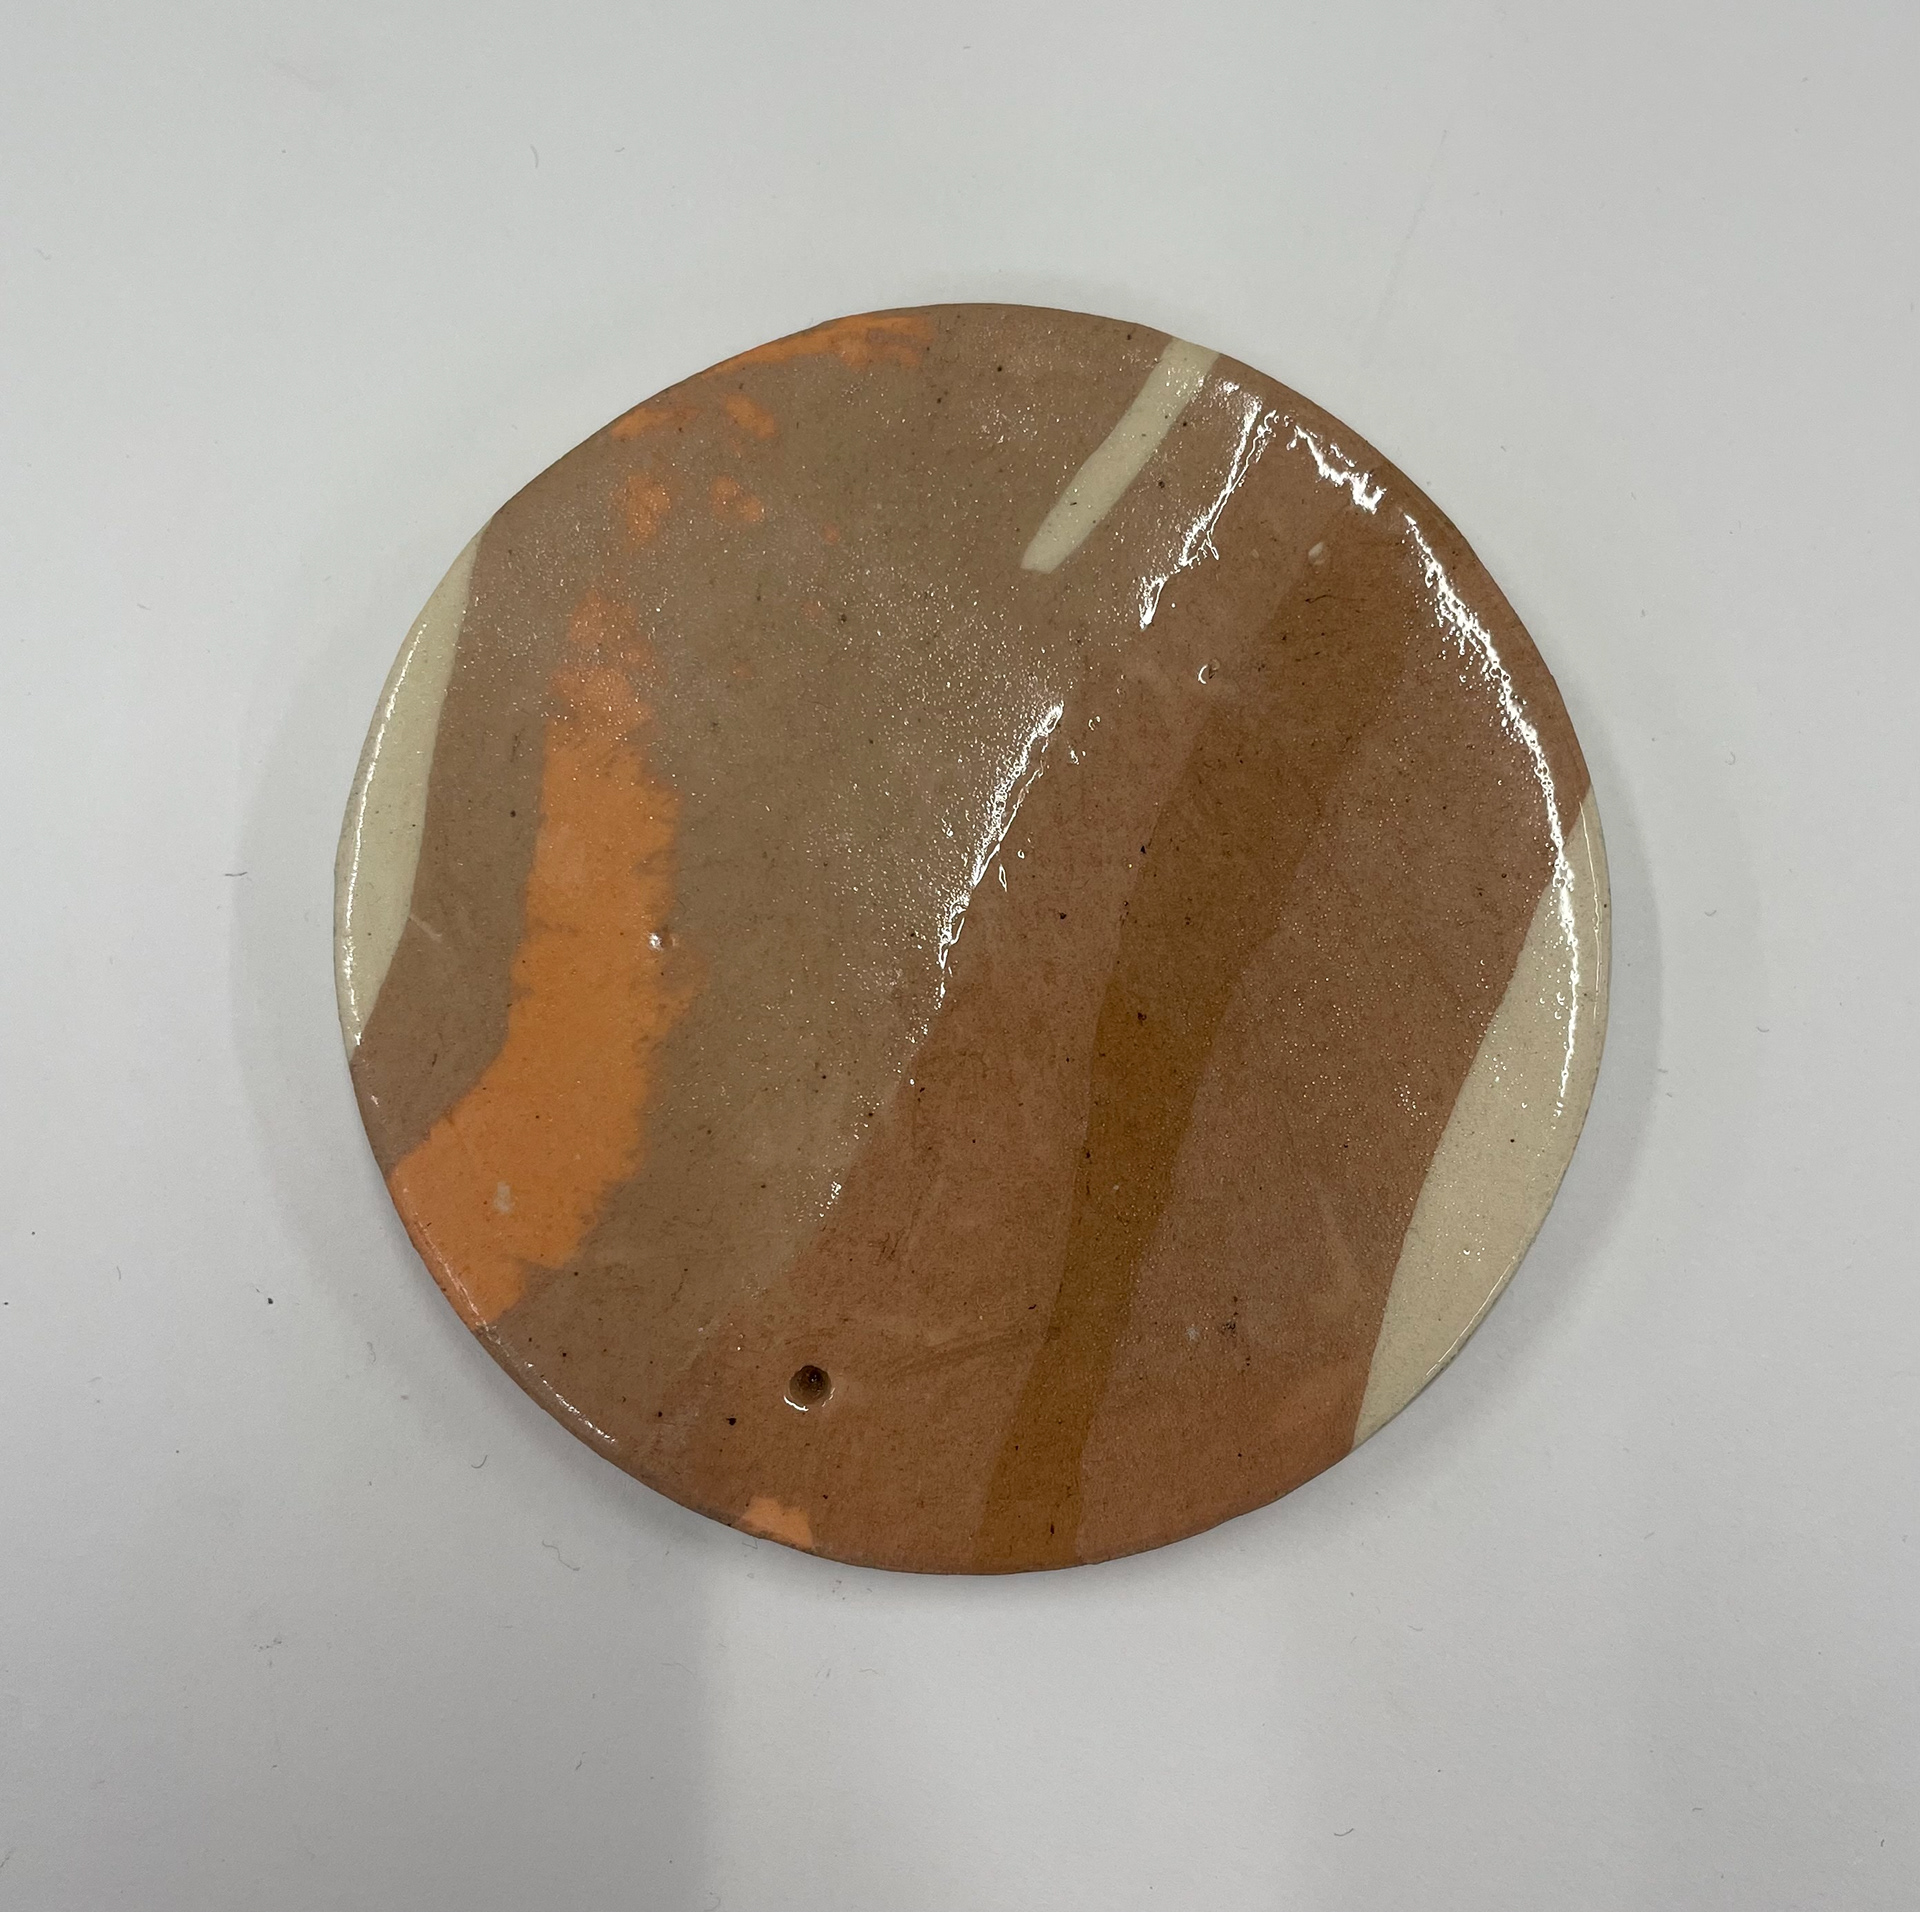
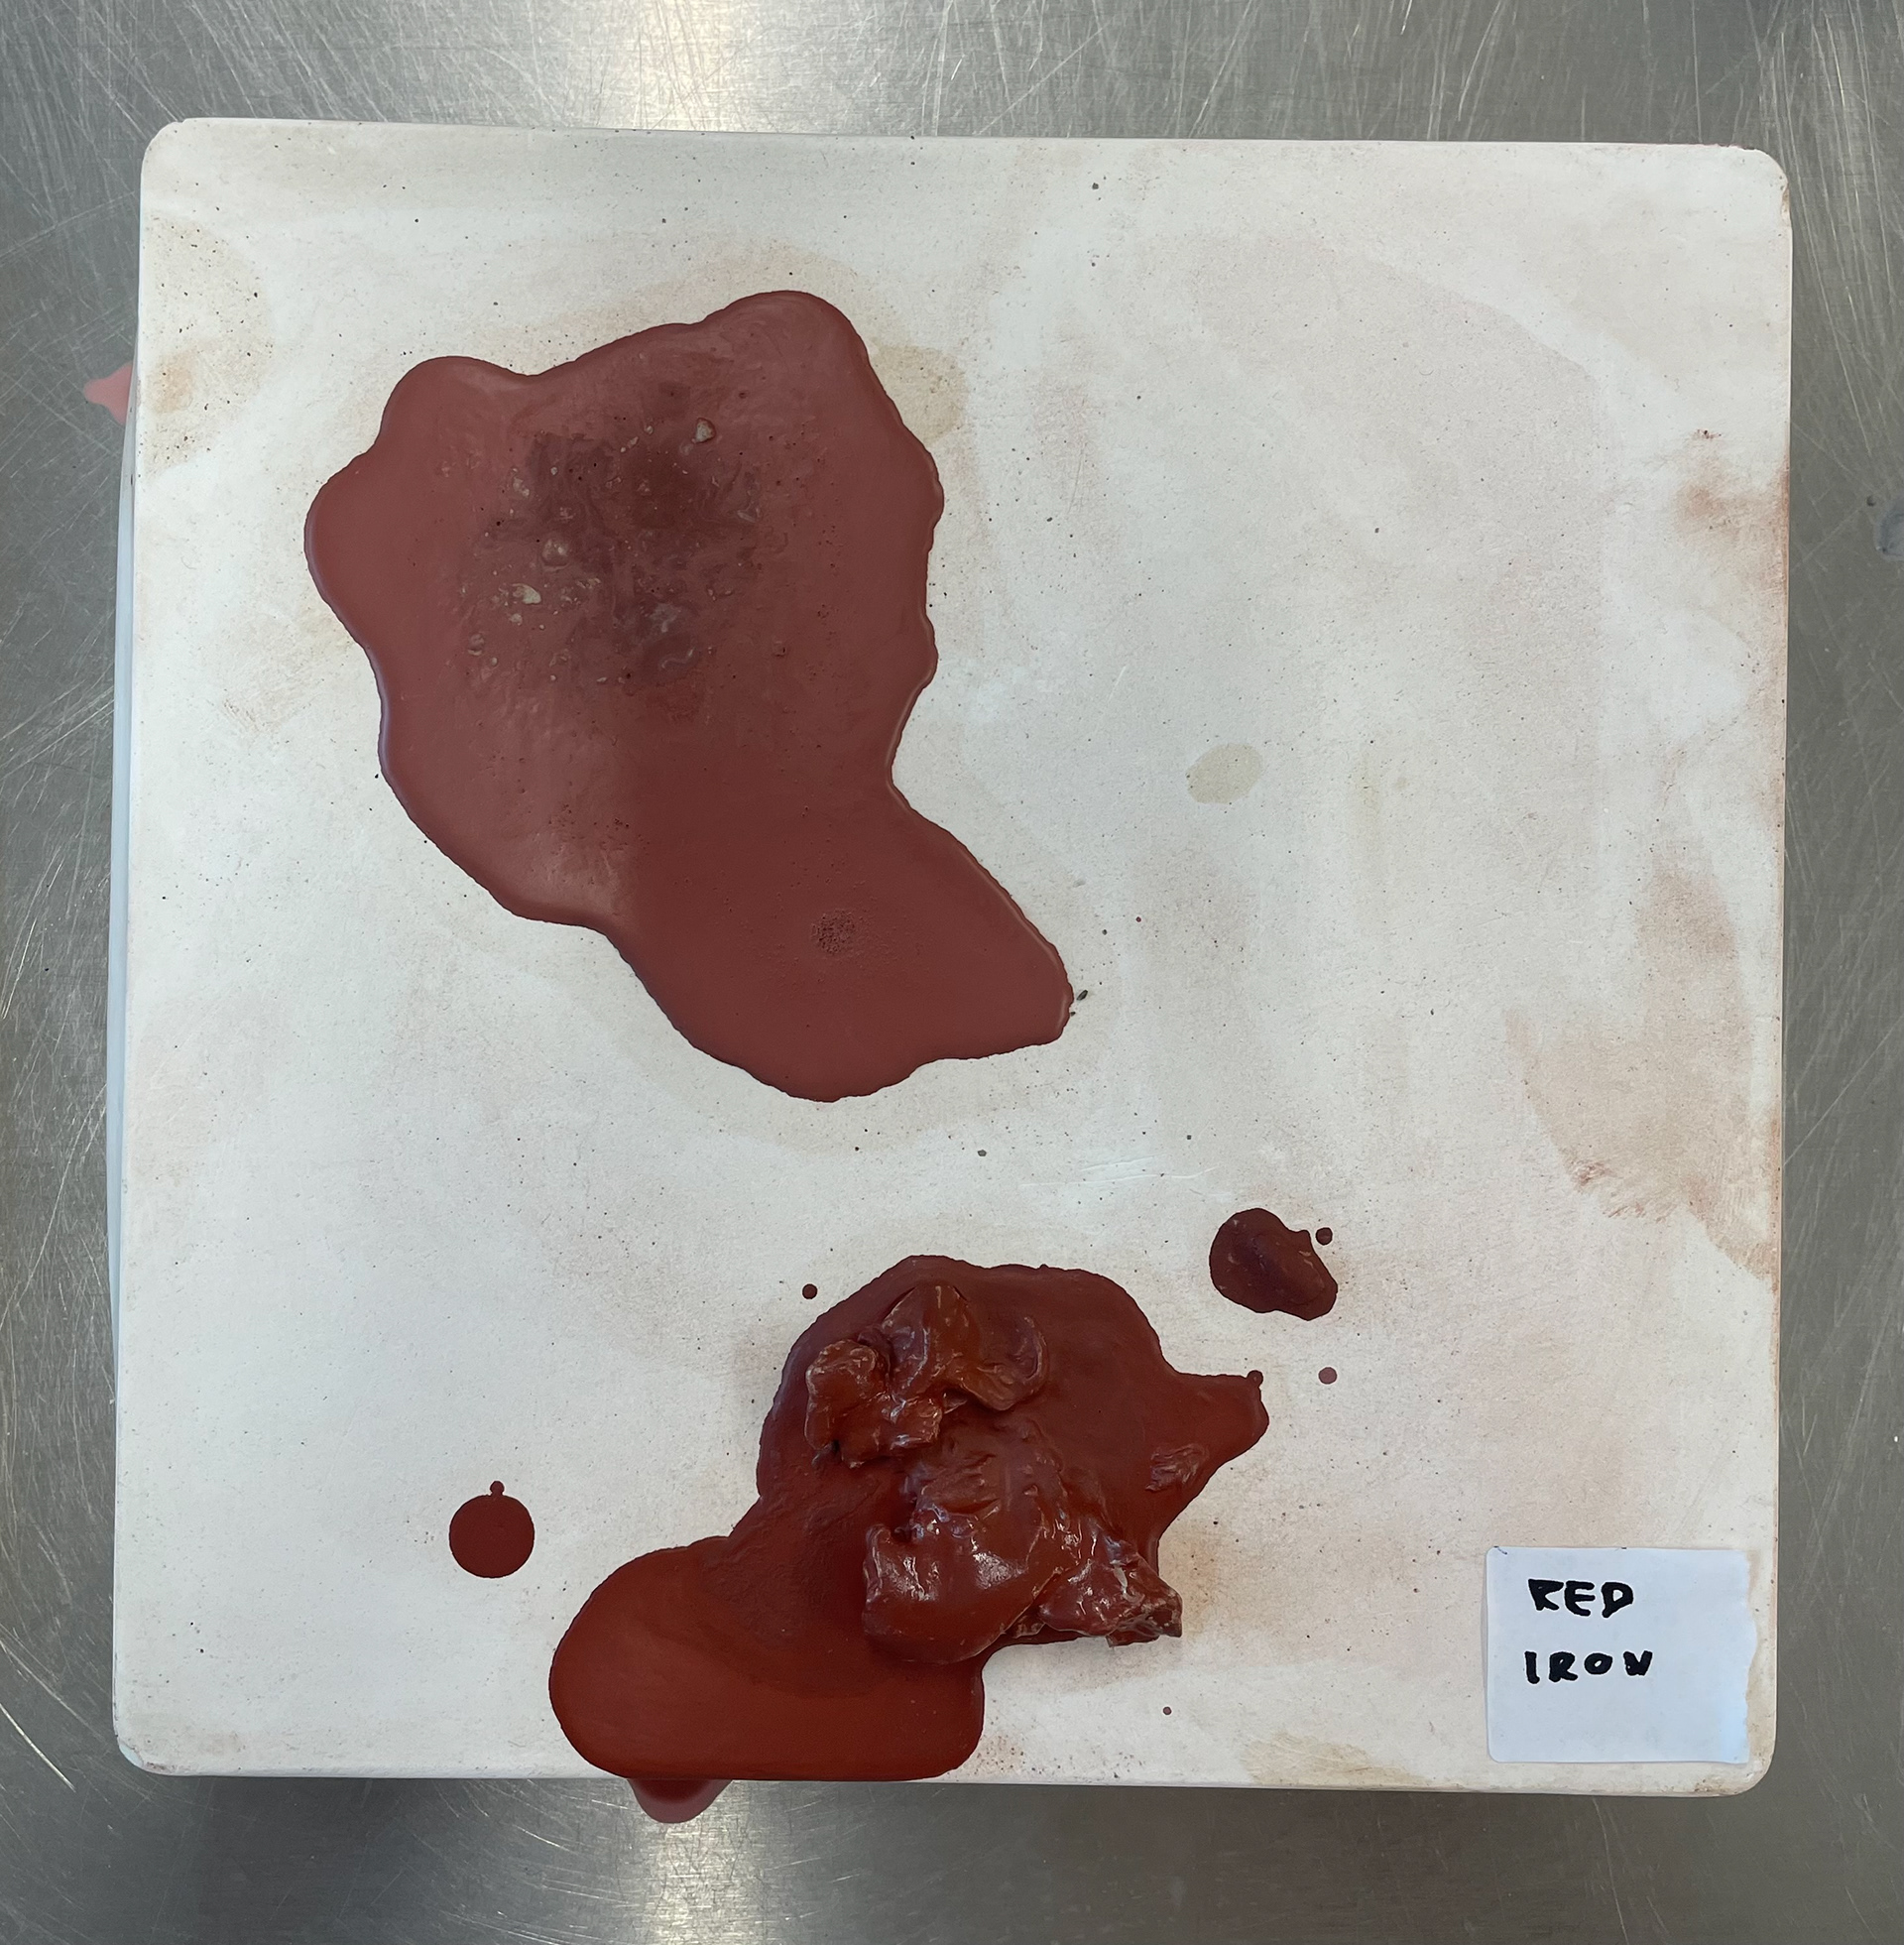
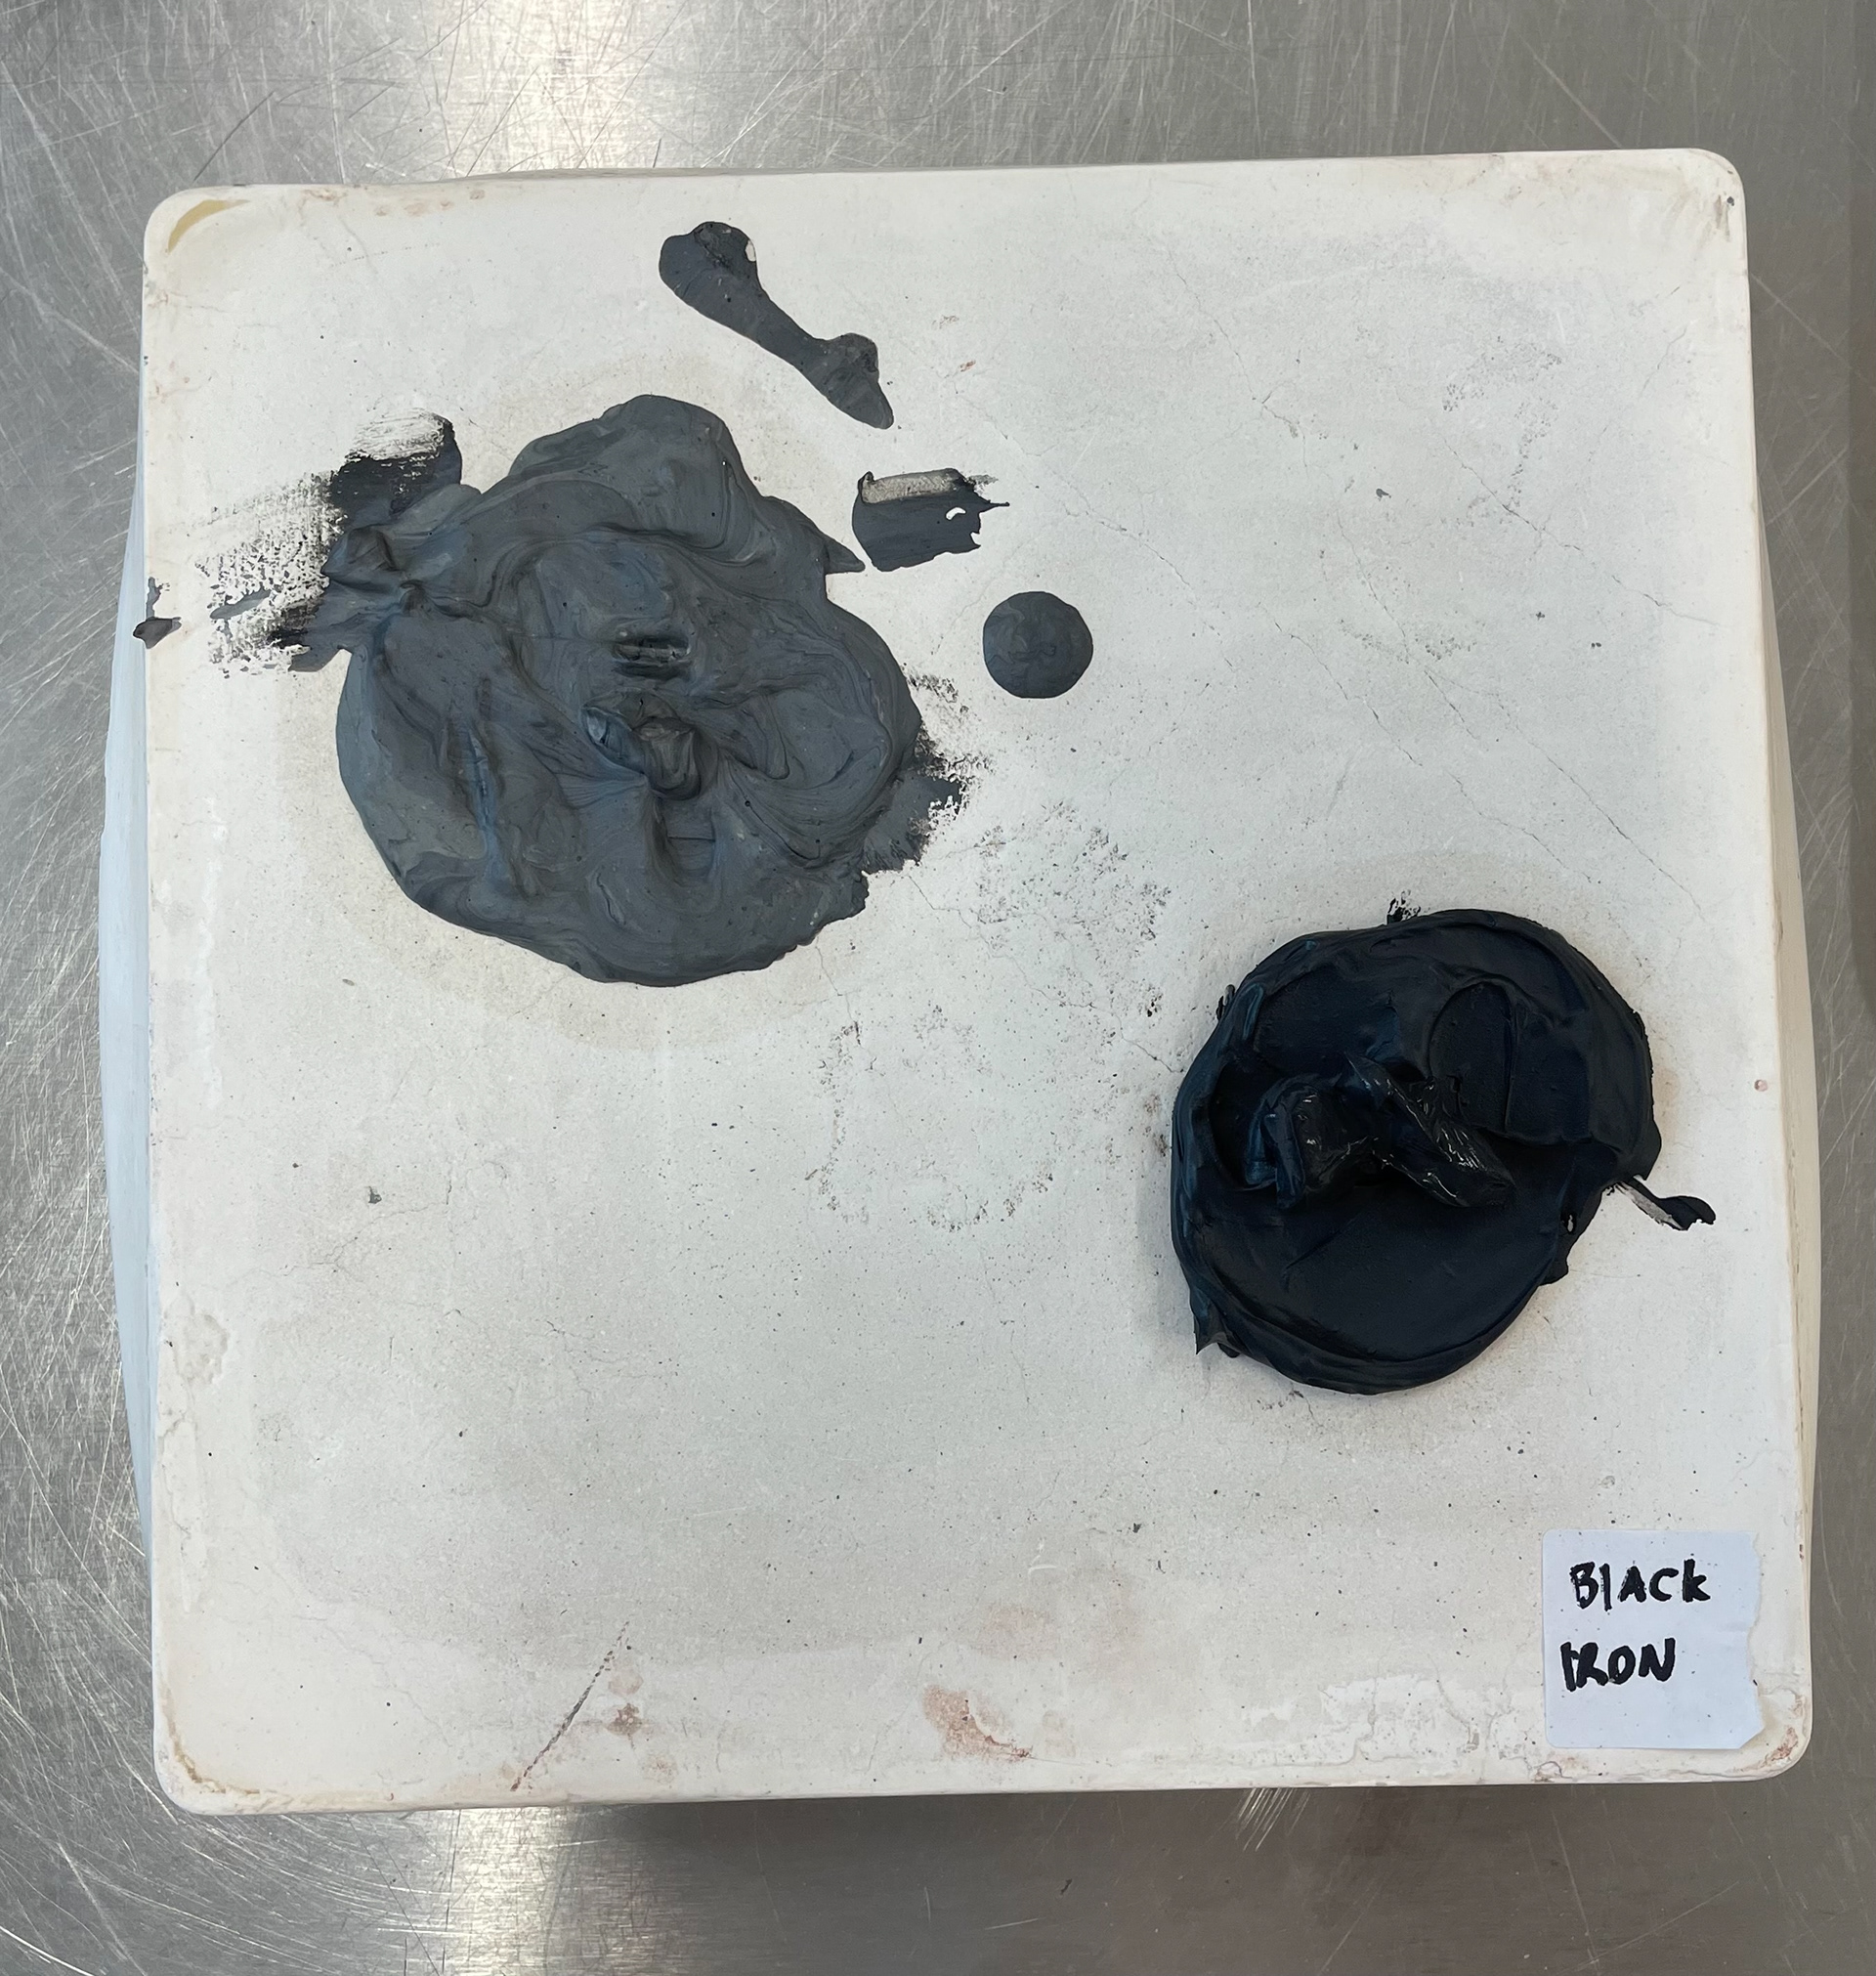
My first samples were with black iron oxide(1%), red iron oxide (1%) and orange stain (5%)
400 grams of dried clay each with 4g red and black iron oxide and 20g orange stain

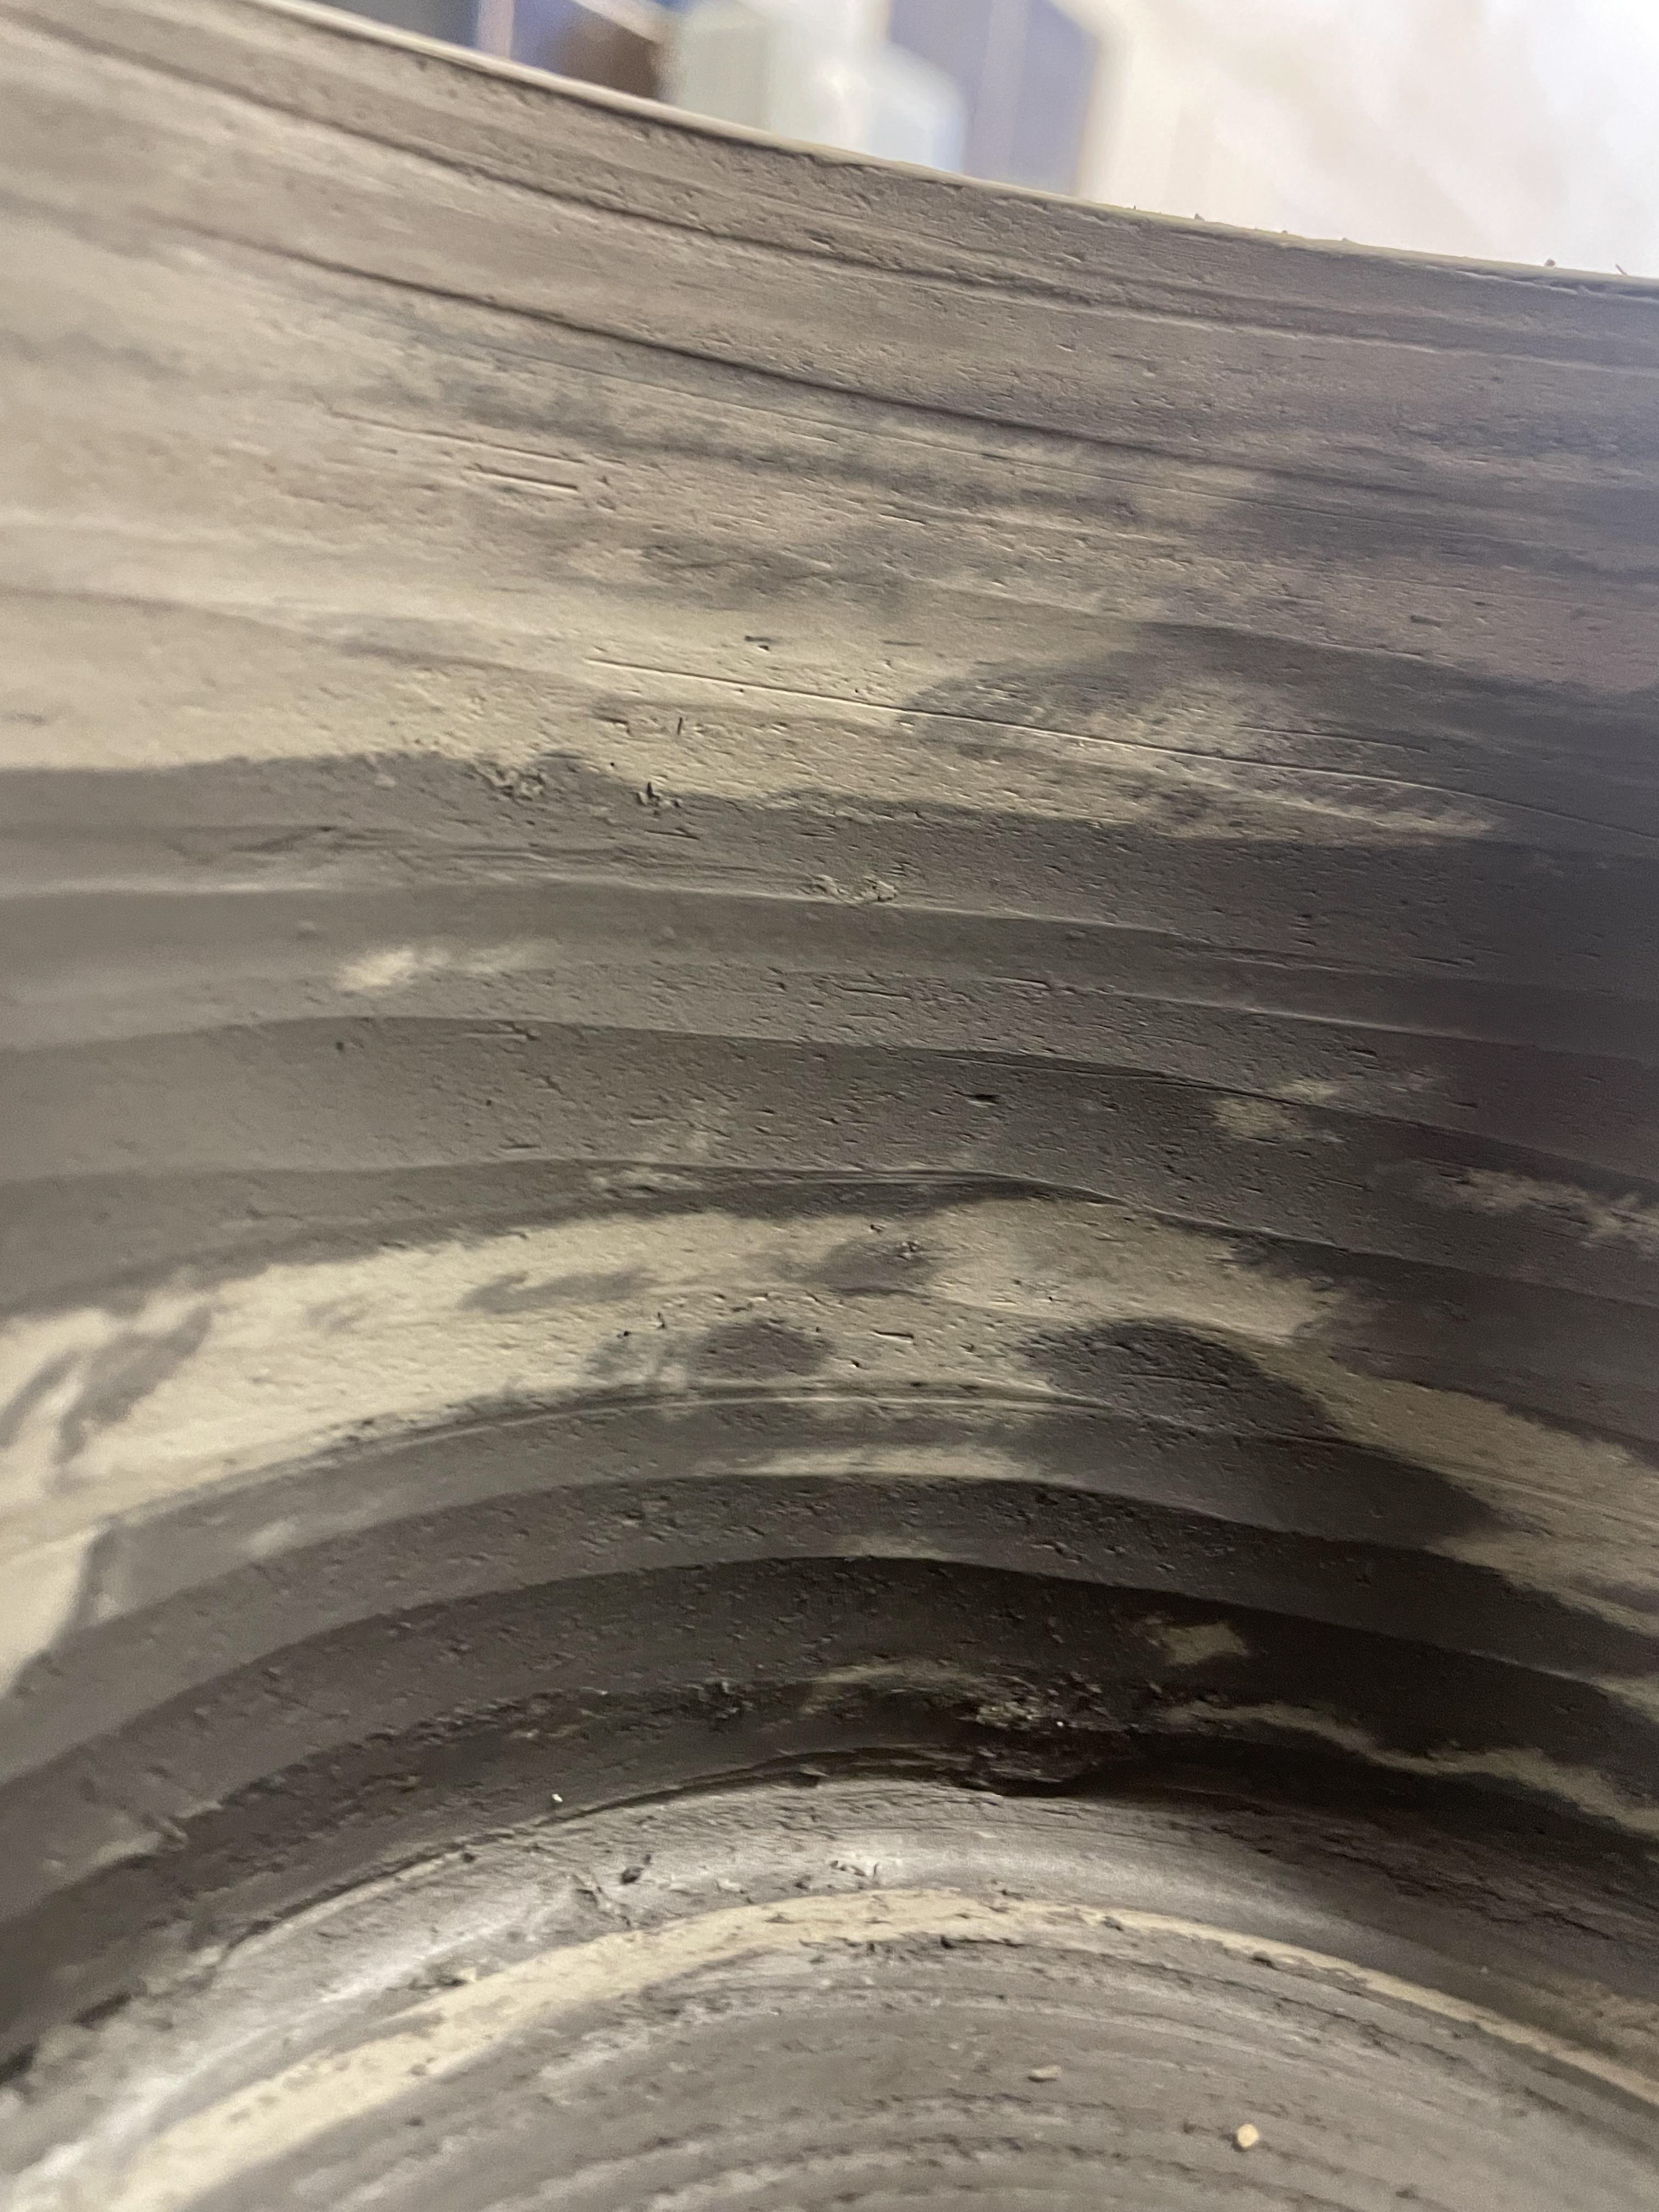
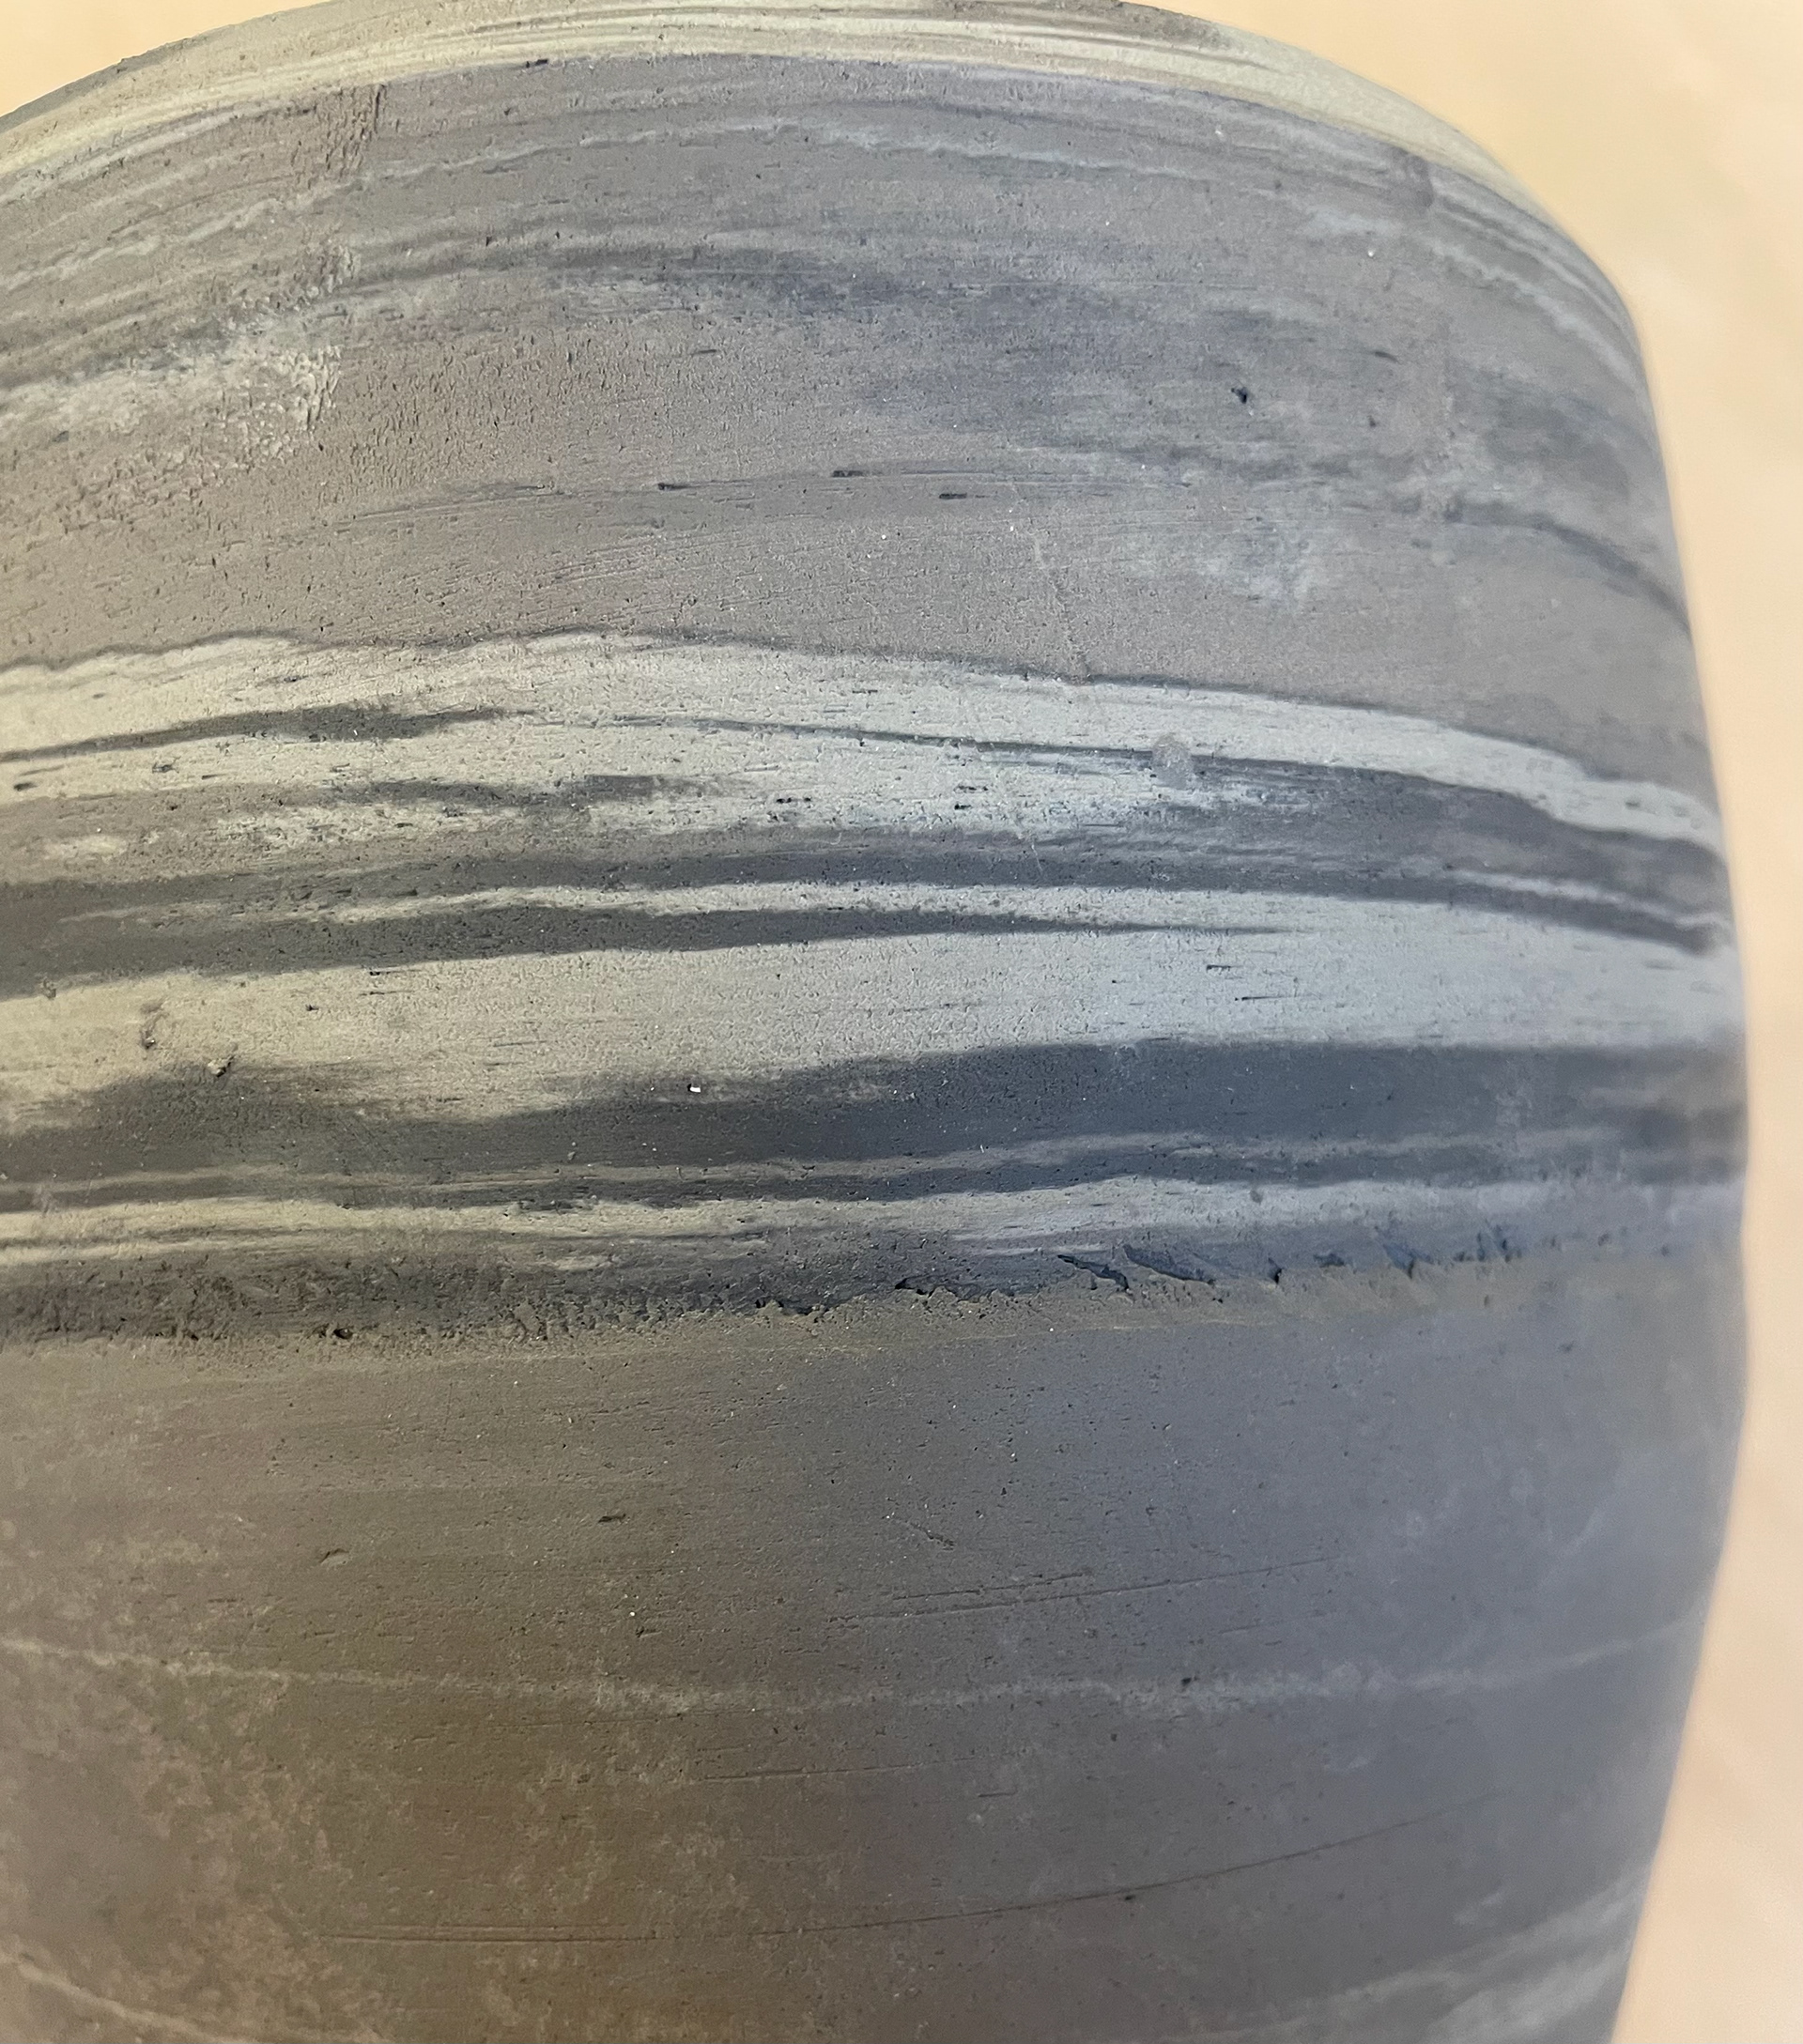
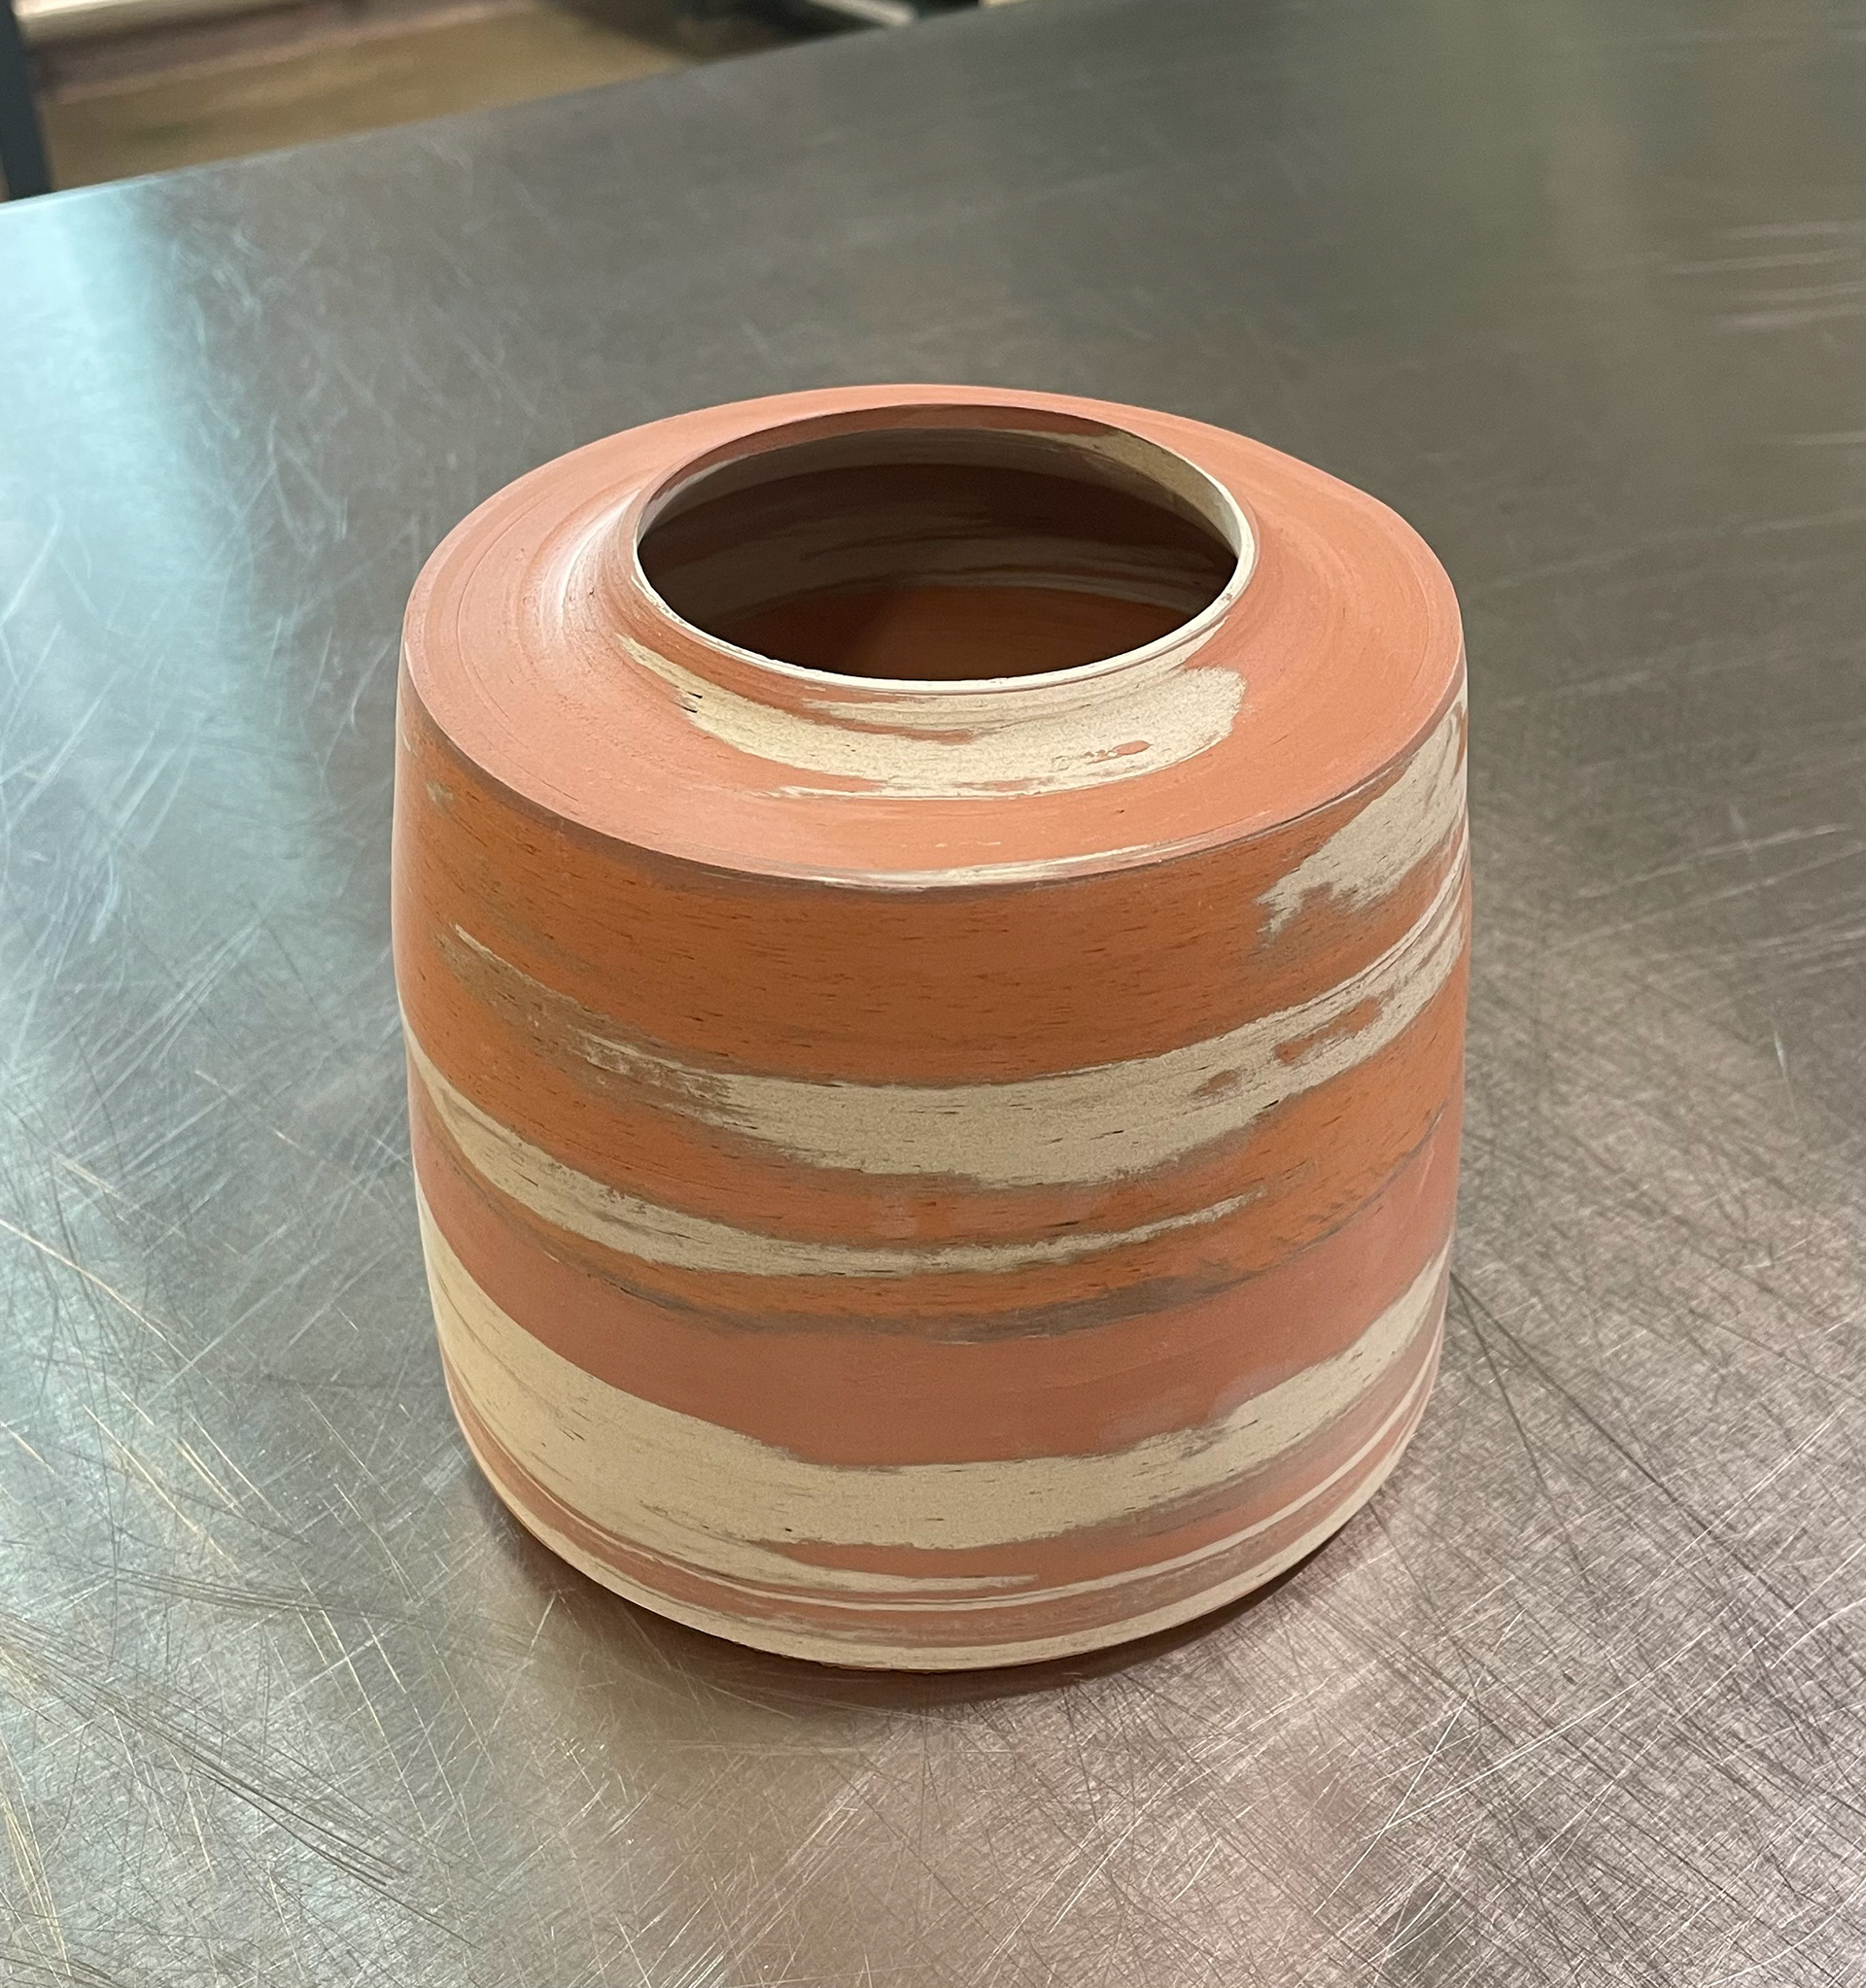
I was drawn to the patterns created when mixing the coloured clay. The marbling and ripples of colours looked like my pebble scans, and I would like to replicate this in my coloured clay vessels. Different shades of the same colour will add depth, and having thicker lines marbling through my work will give a similar effect.
black iron 1%
red iron 1%
5% orange stain
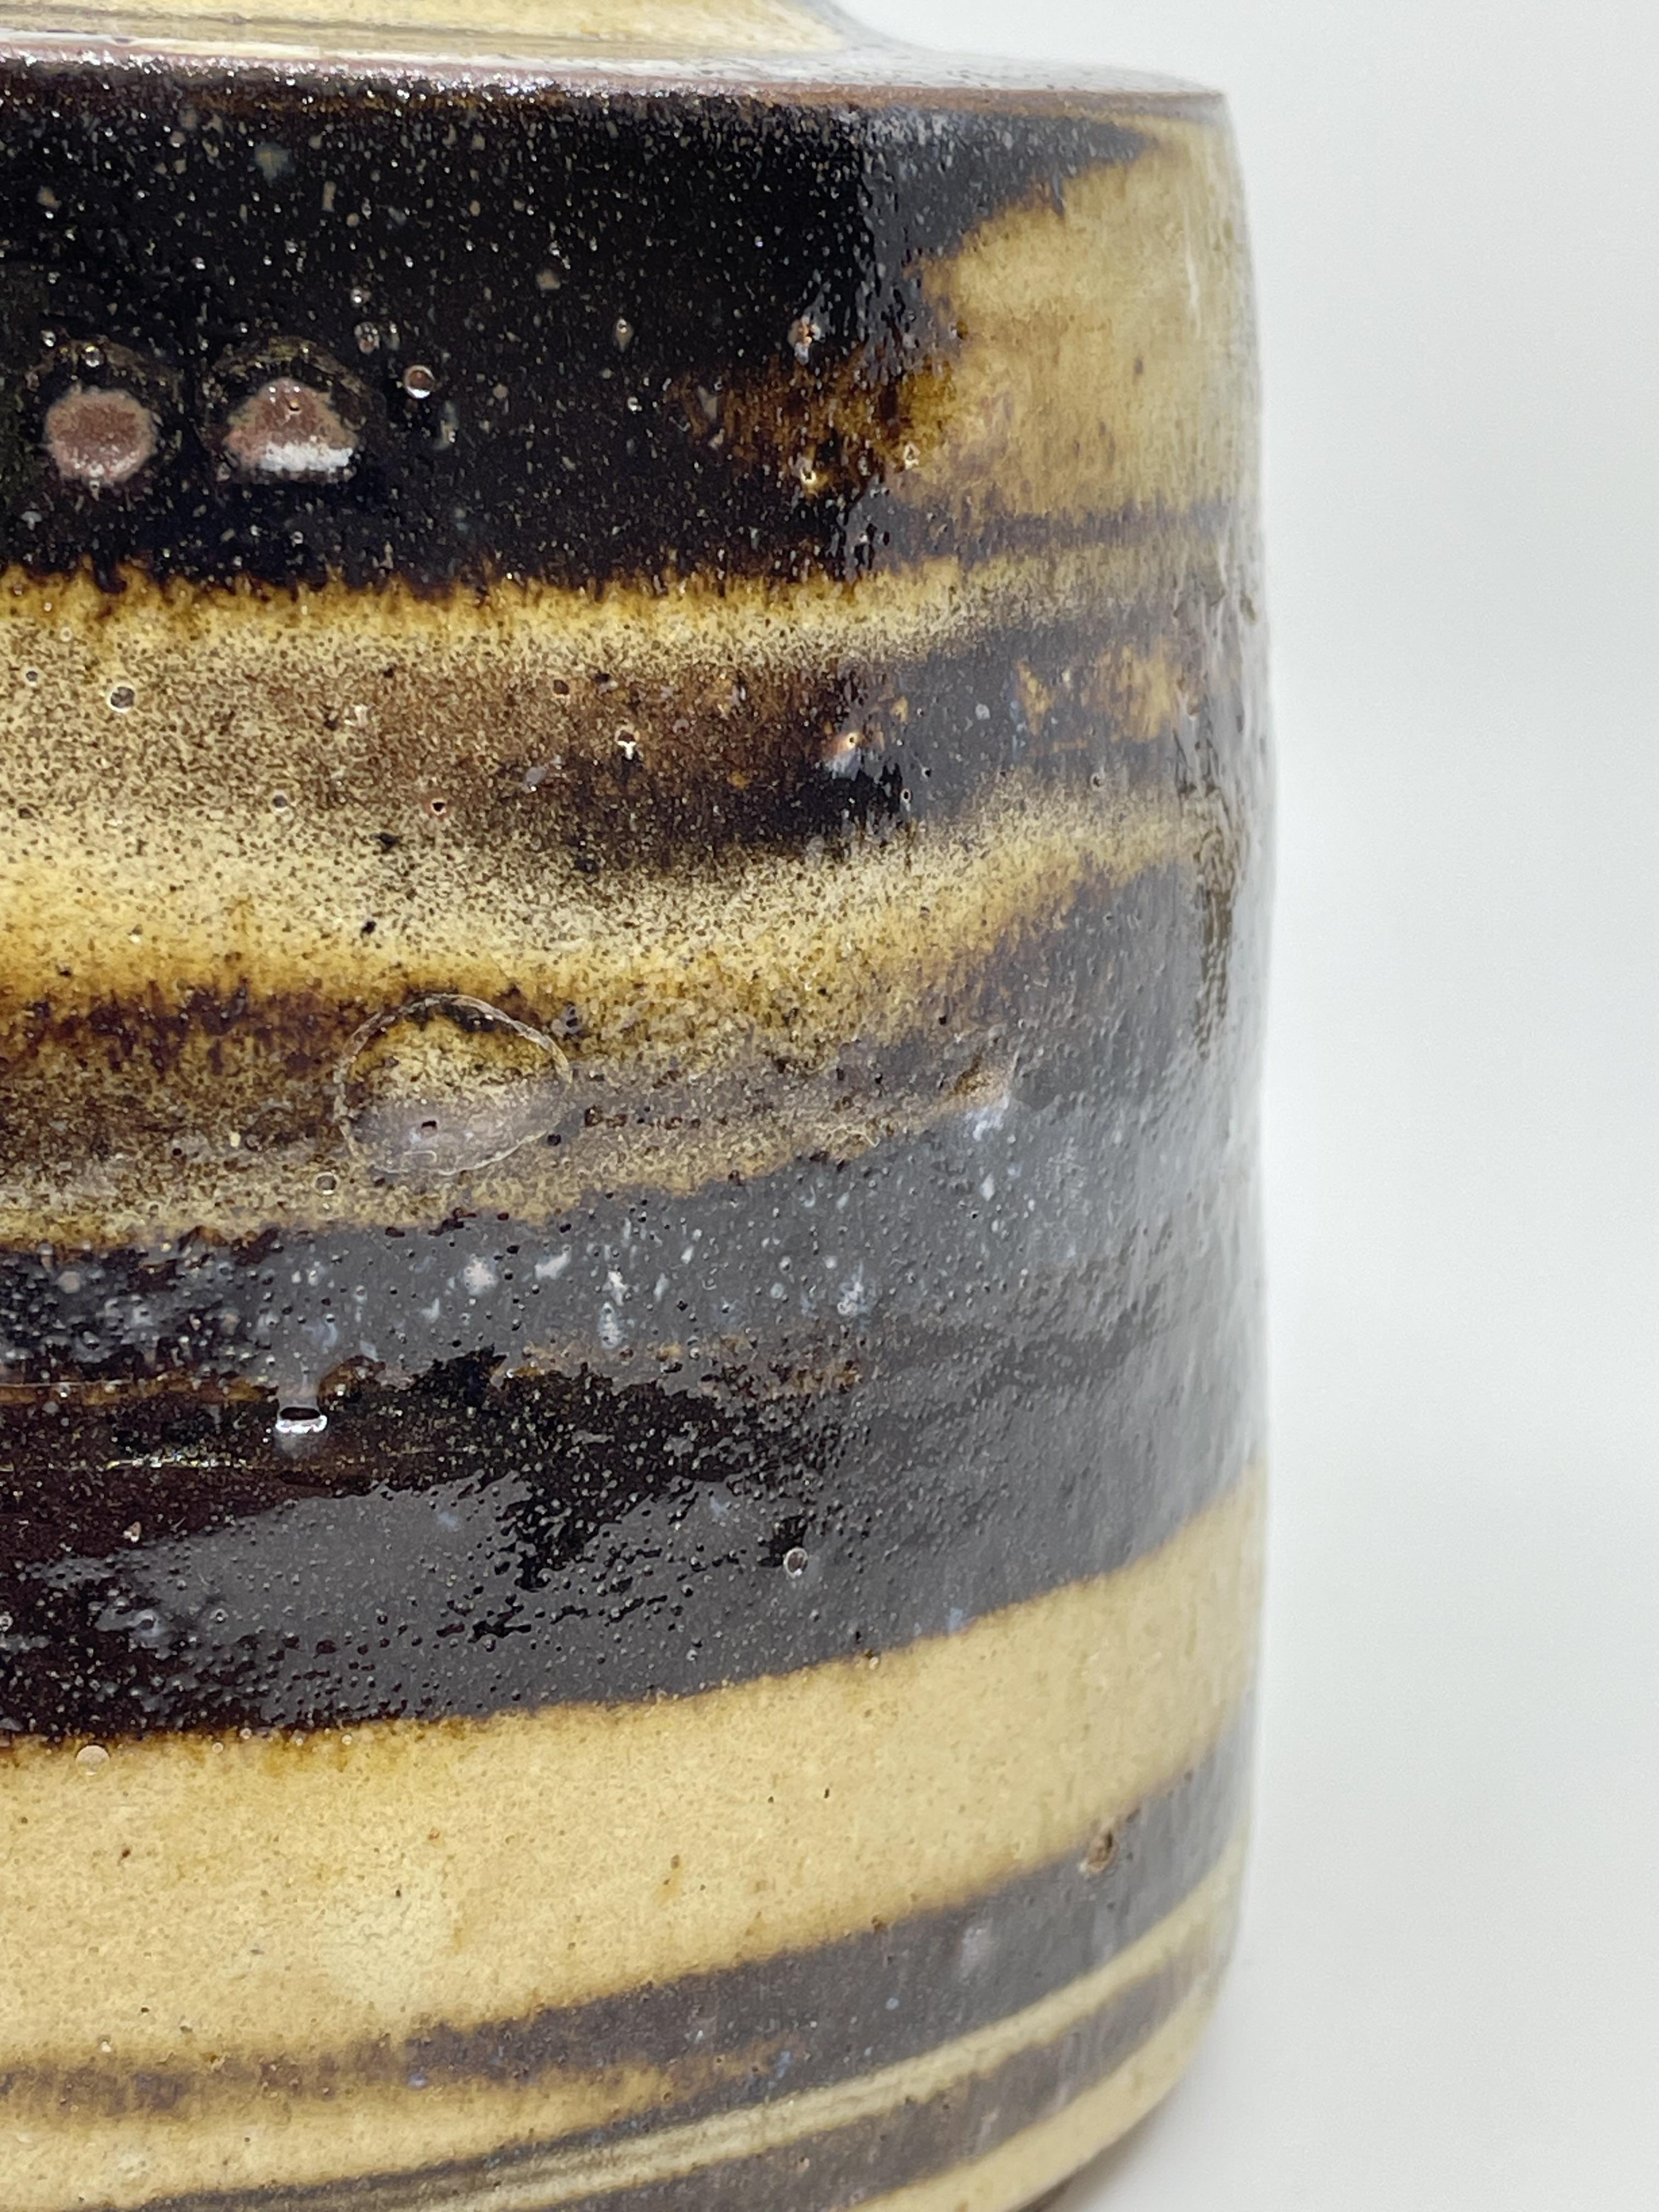
Fired colour samples of 1% red iron oxide (left above), 1% black iron (right above)and 5% orange stain (right). Although once wet clay, their colours were so contrasting, with black iron oxide being a charcoal grey, I was surprised that once they came out of the kiln, the heat had a completely different effect than I suspected. They were all fired in an earthenware kiln where I also half-glazed them with clear shiny and clear matt; the different glazes didn't affect the colour, just a different finish. These colours were not what I was expecting and not what I have in my colour palette therefore, I won't be using them further or making more. However, I would like to try using larger quantities of oxides this will allow me to test the spectrum of colours and also experiment with a stoneware kiln, seeing if a higher heat will bring more pigment to the finished ceramics.
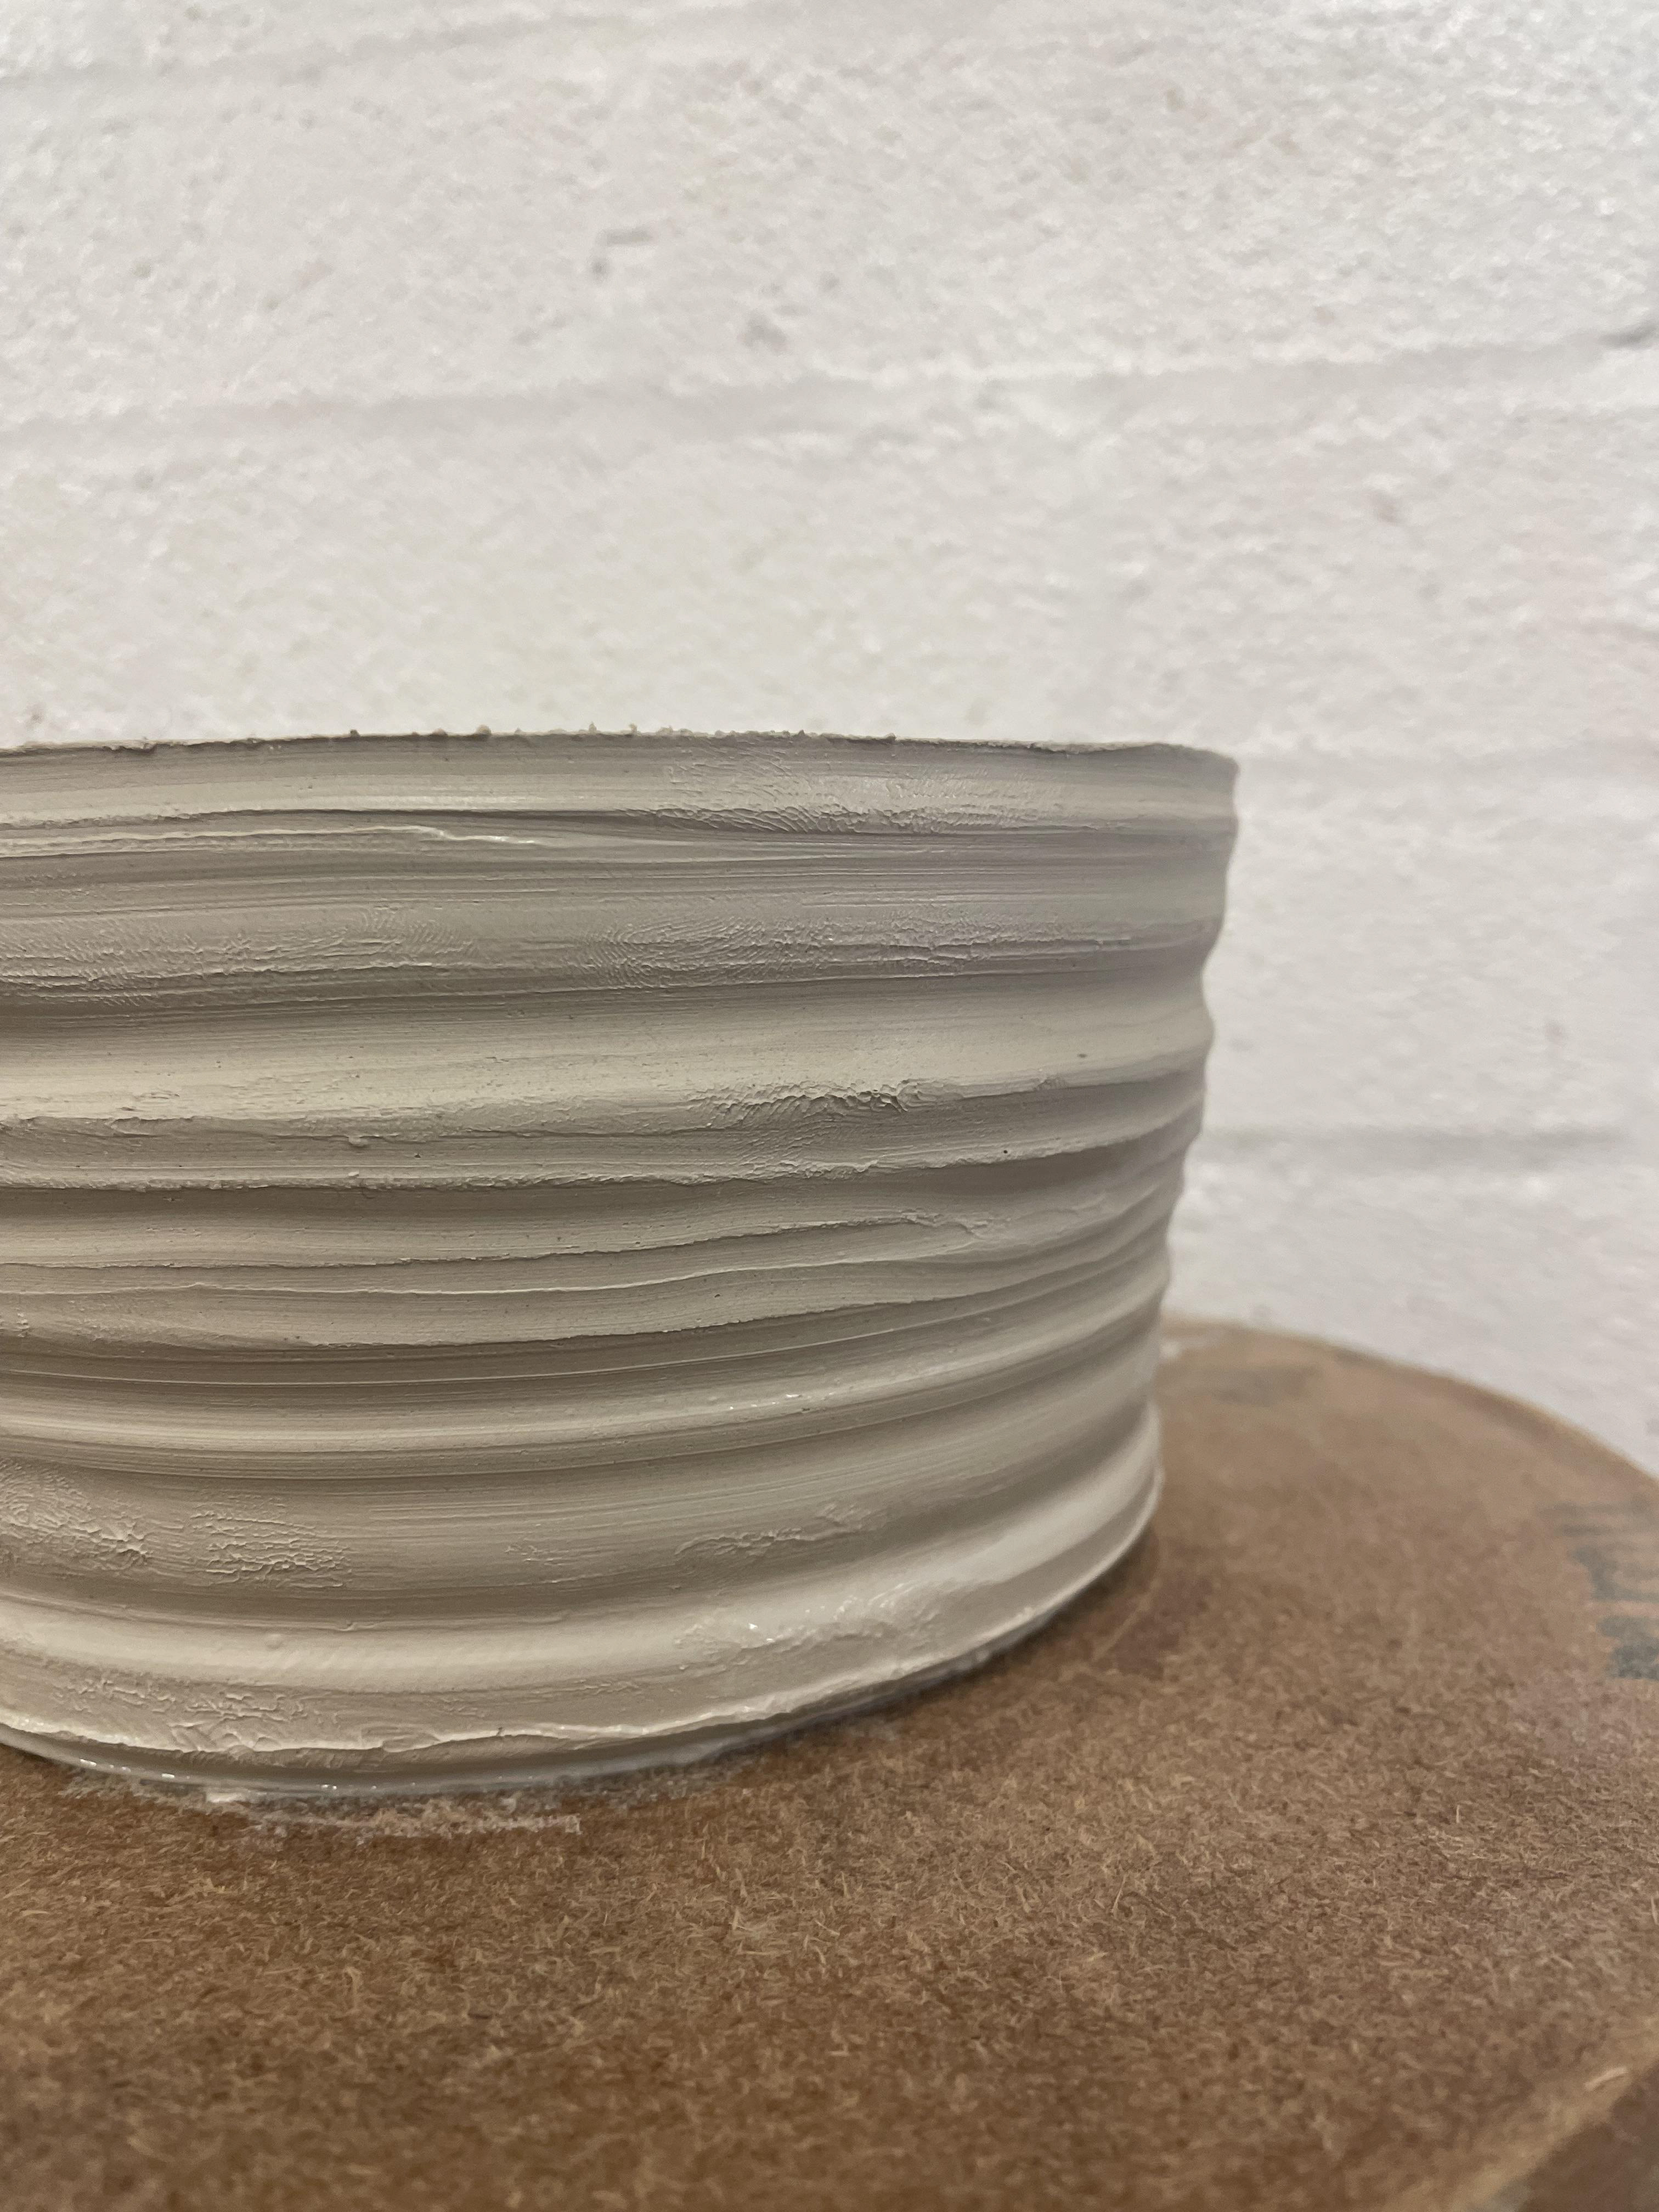
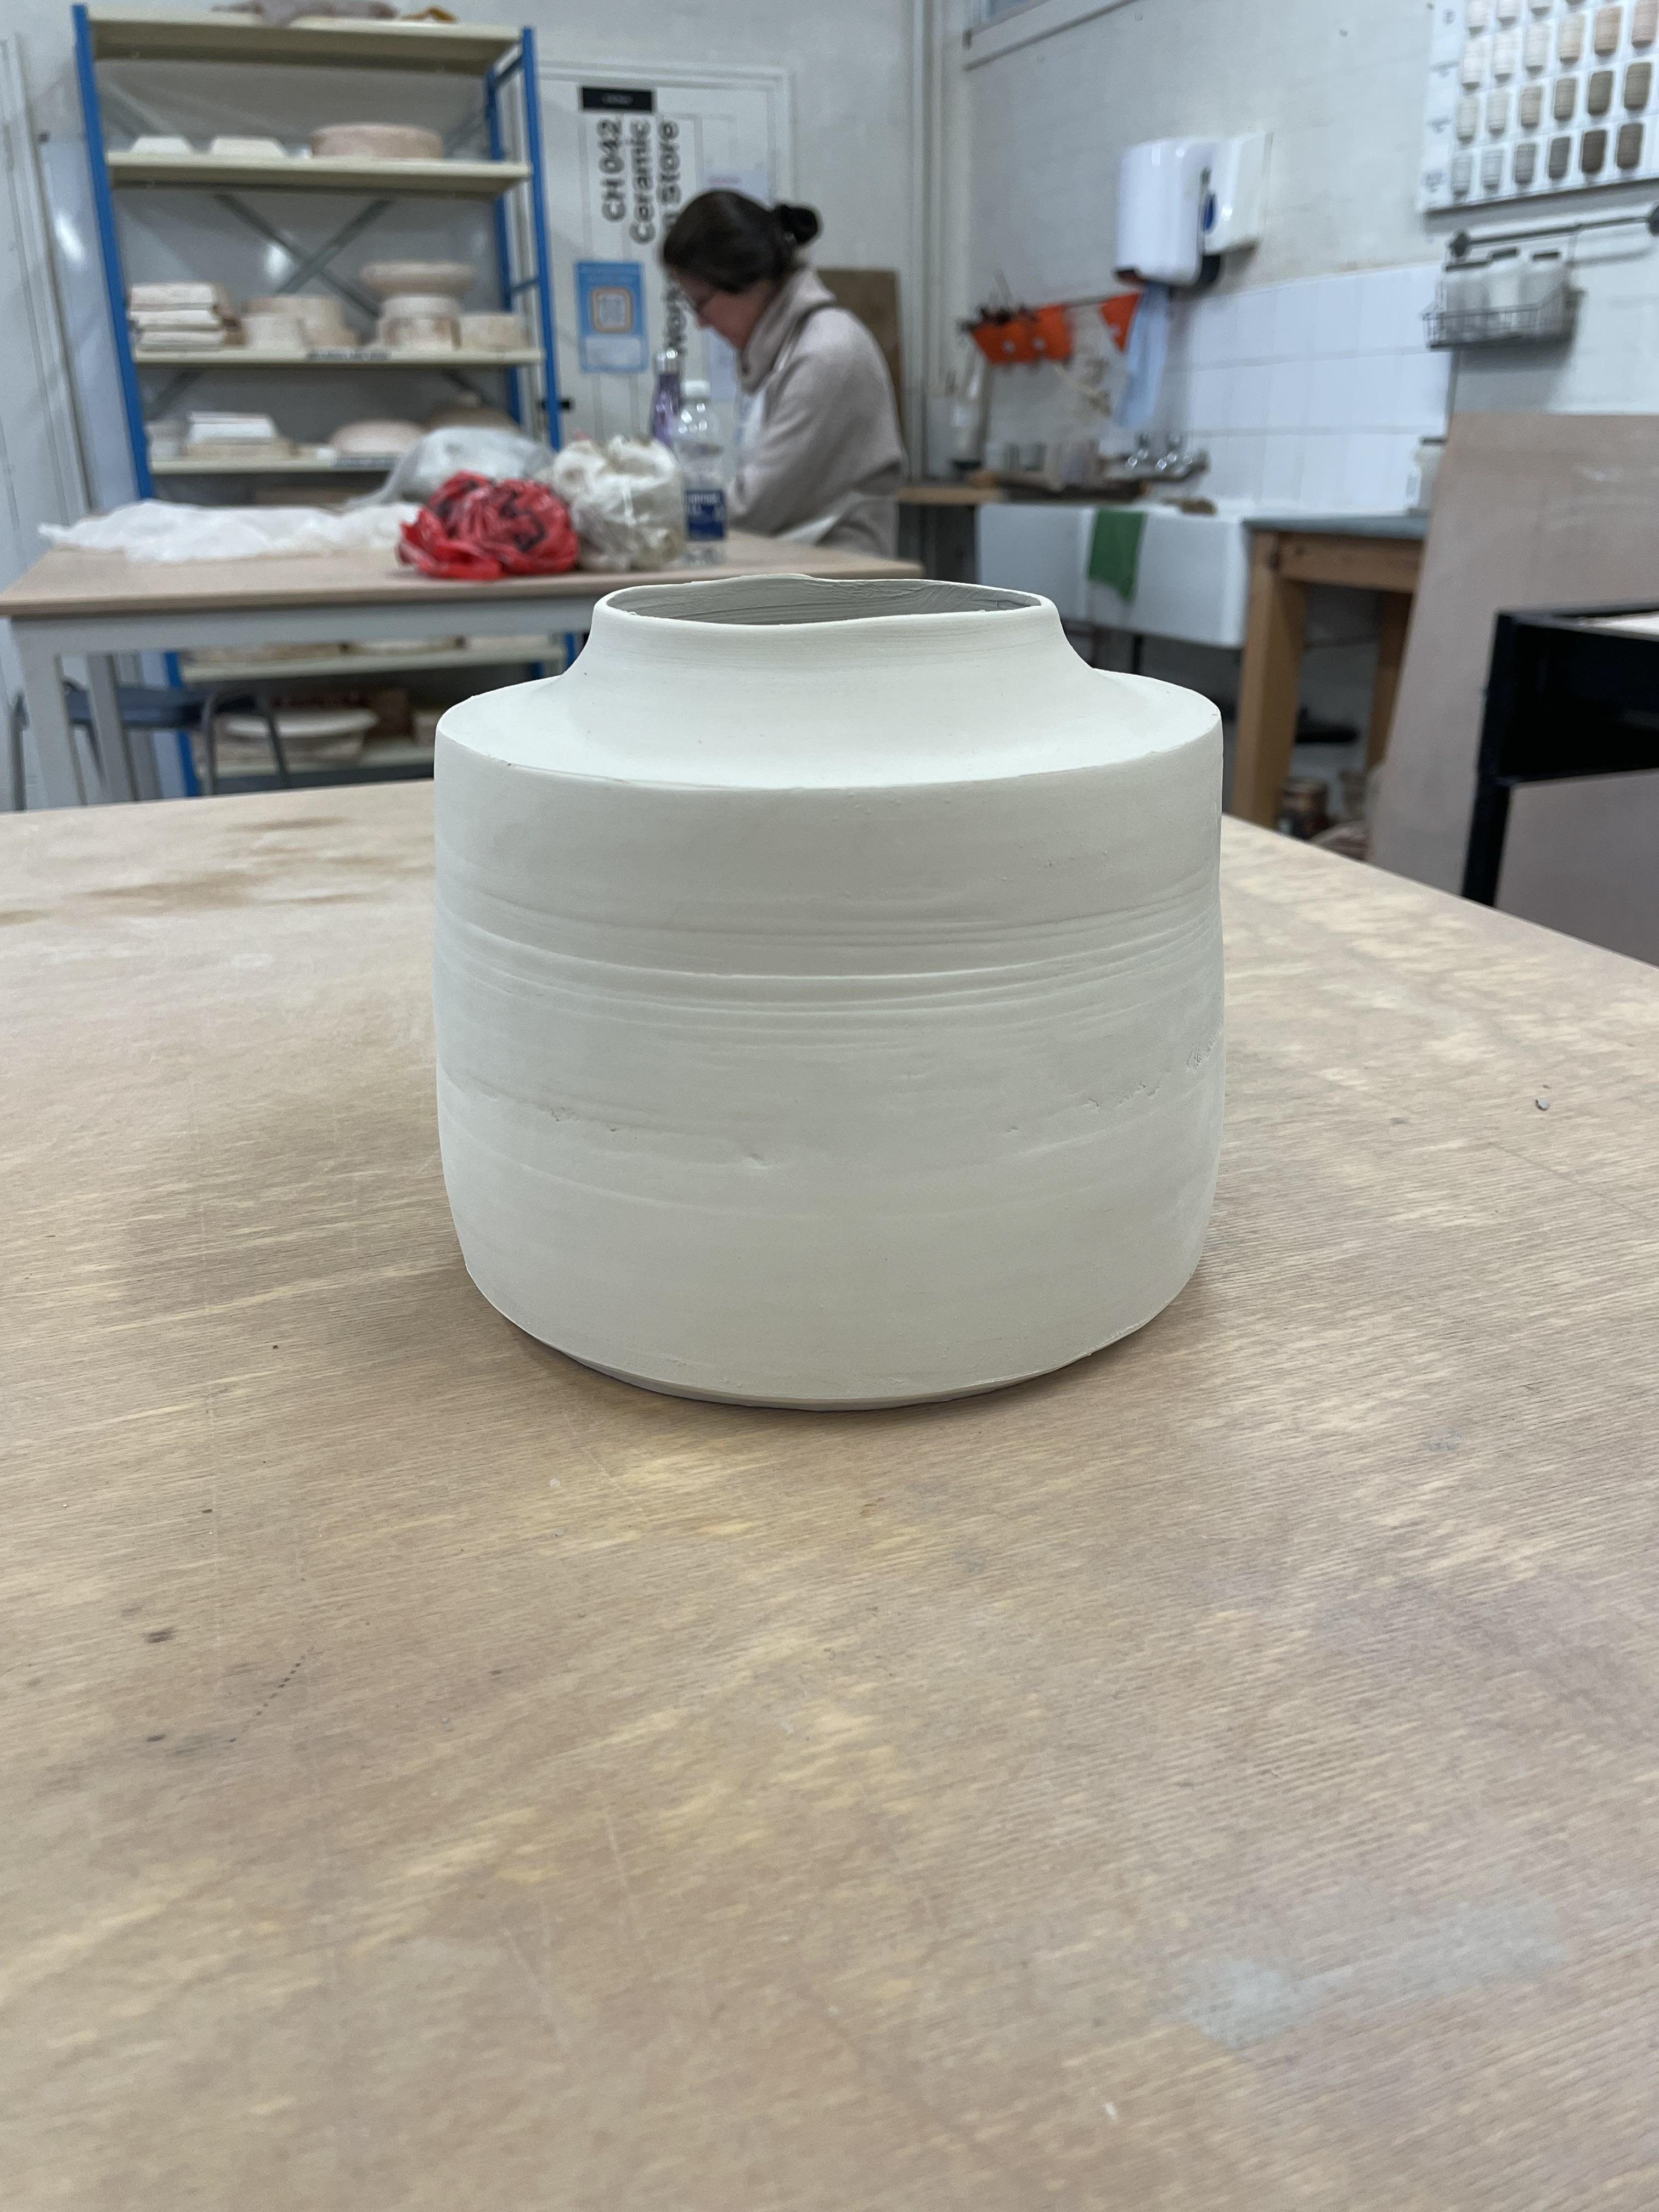
Throwing Into Vessels
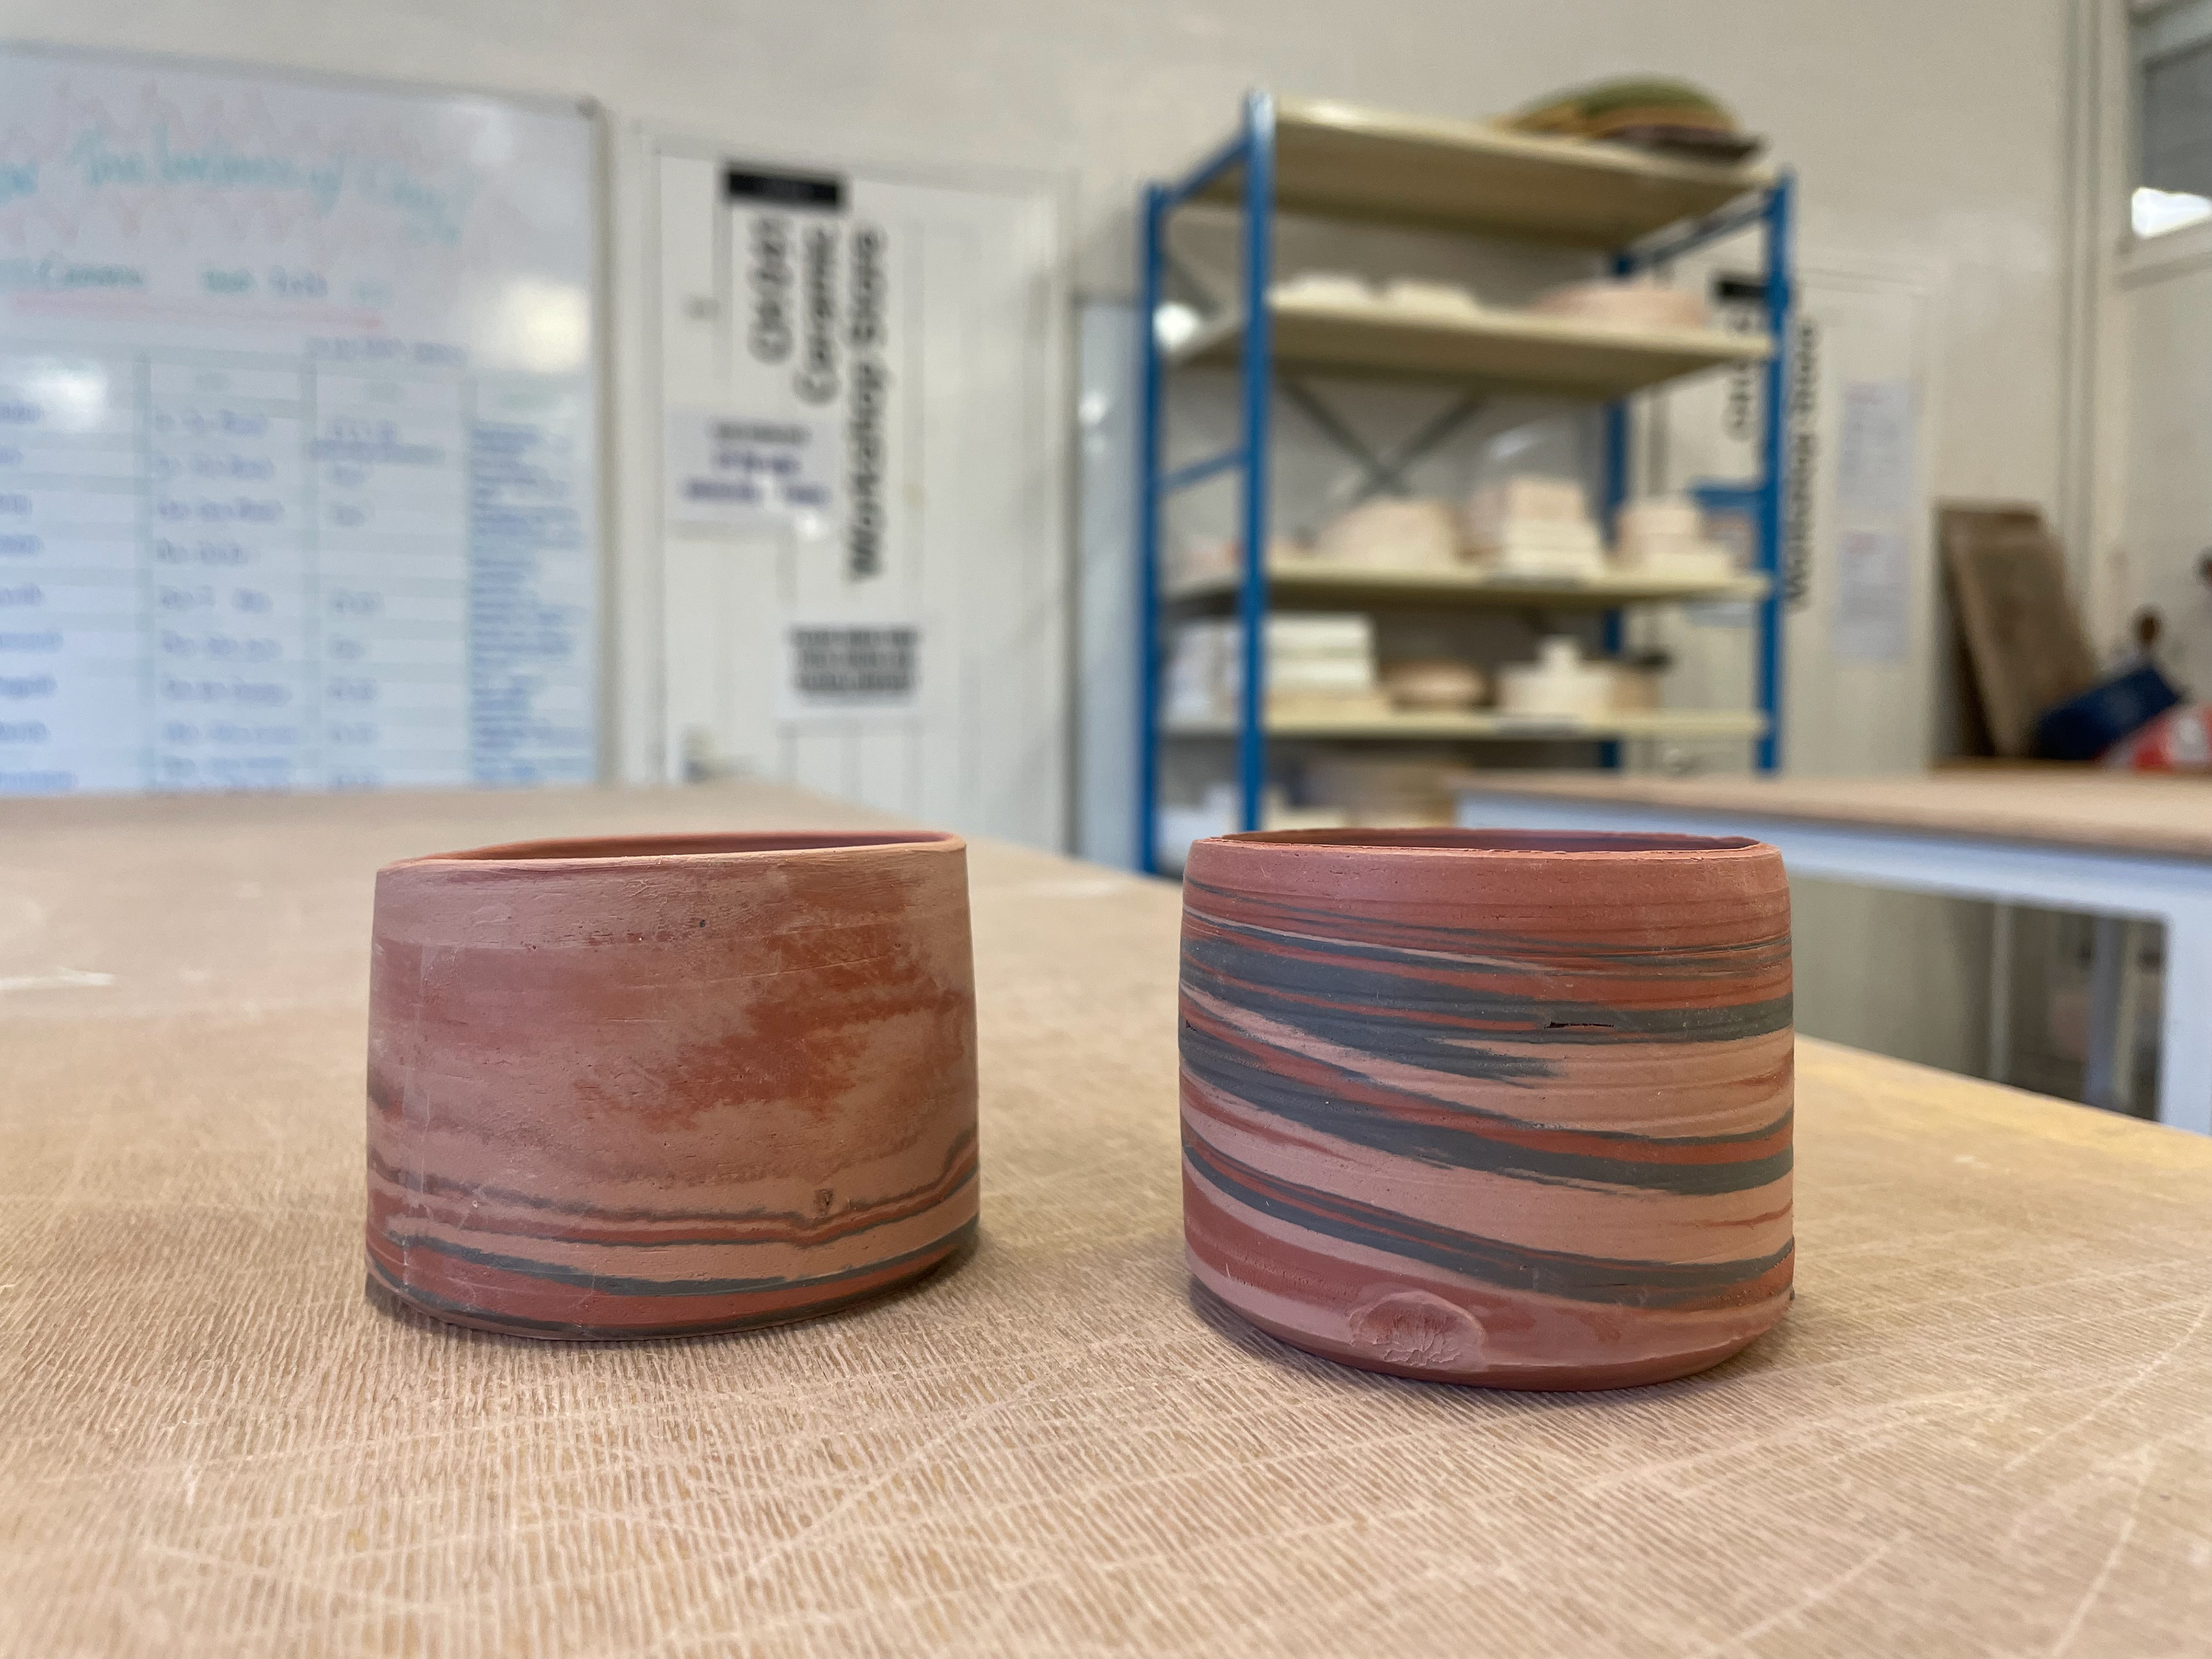
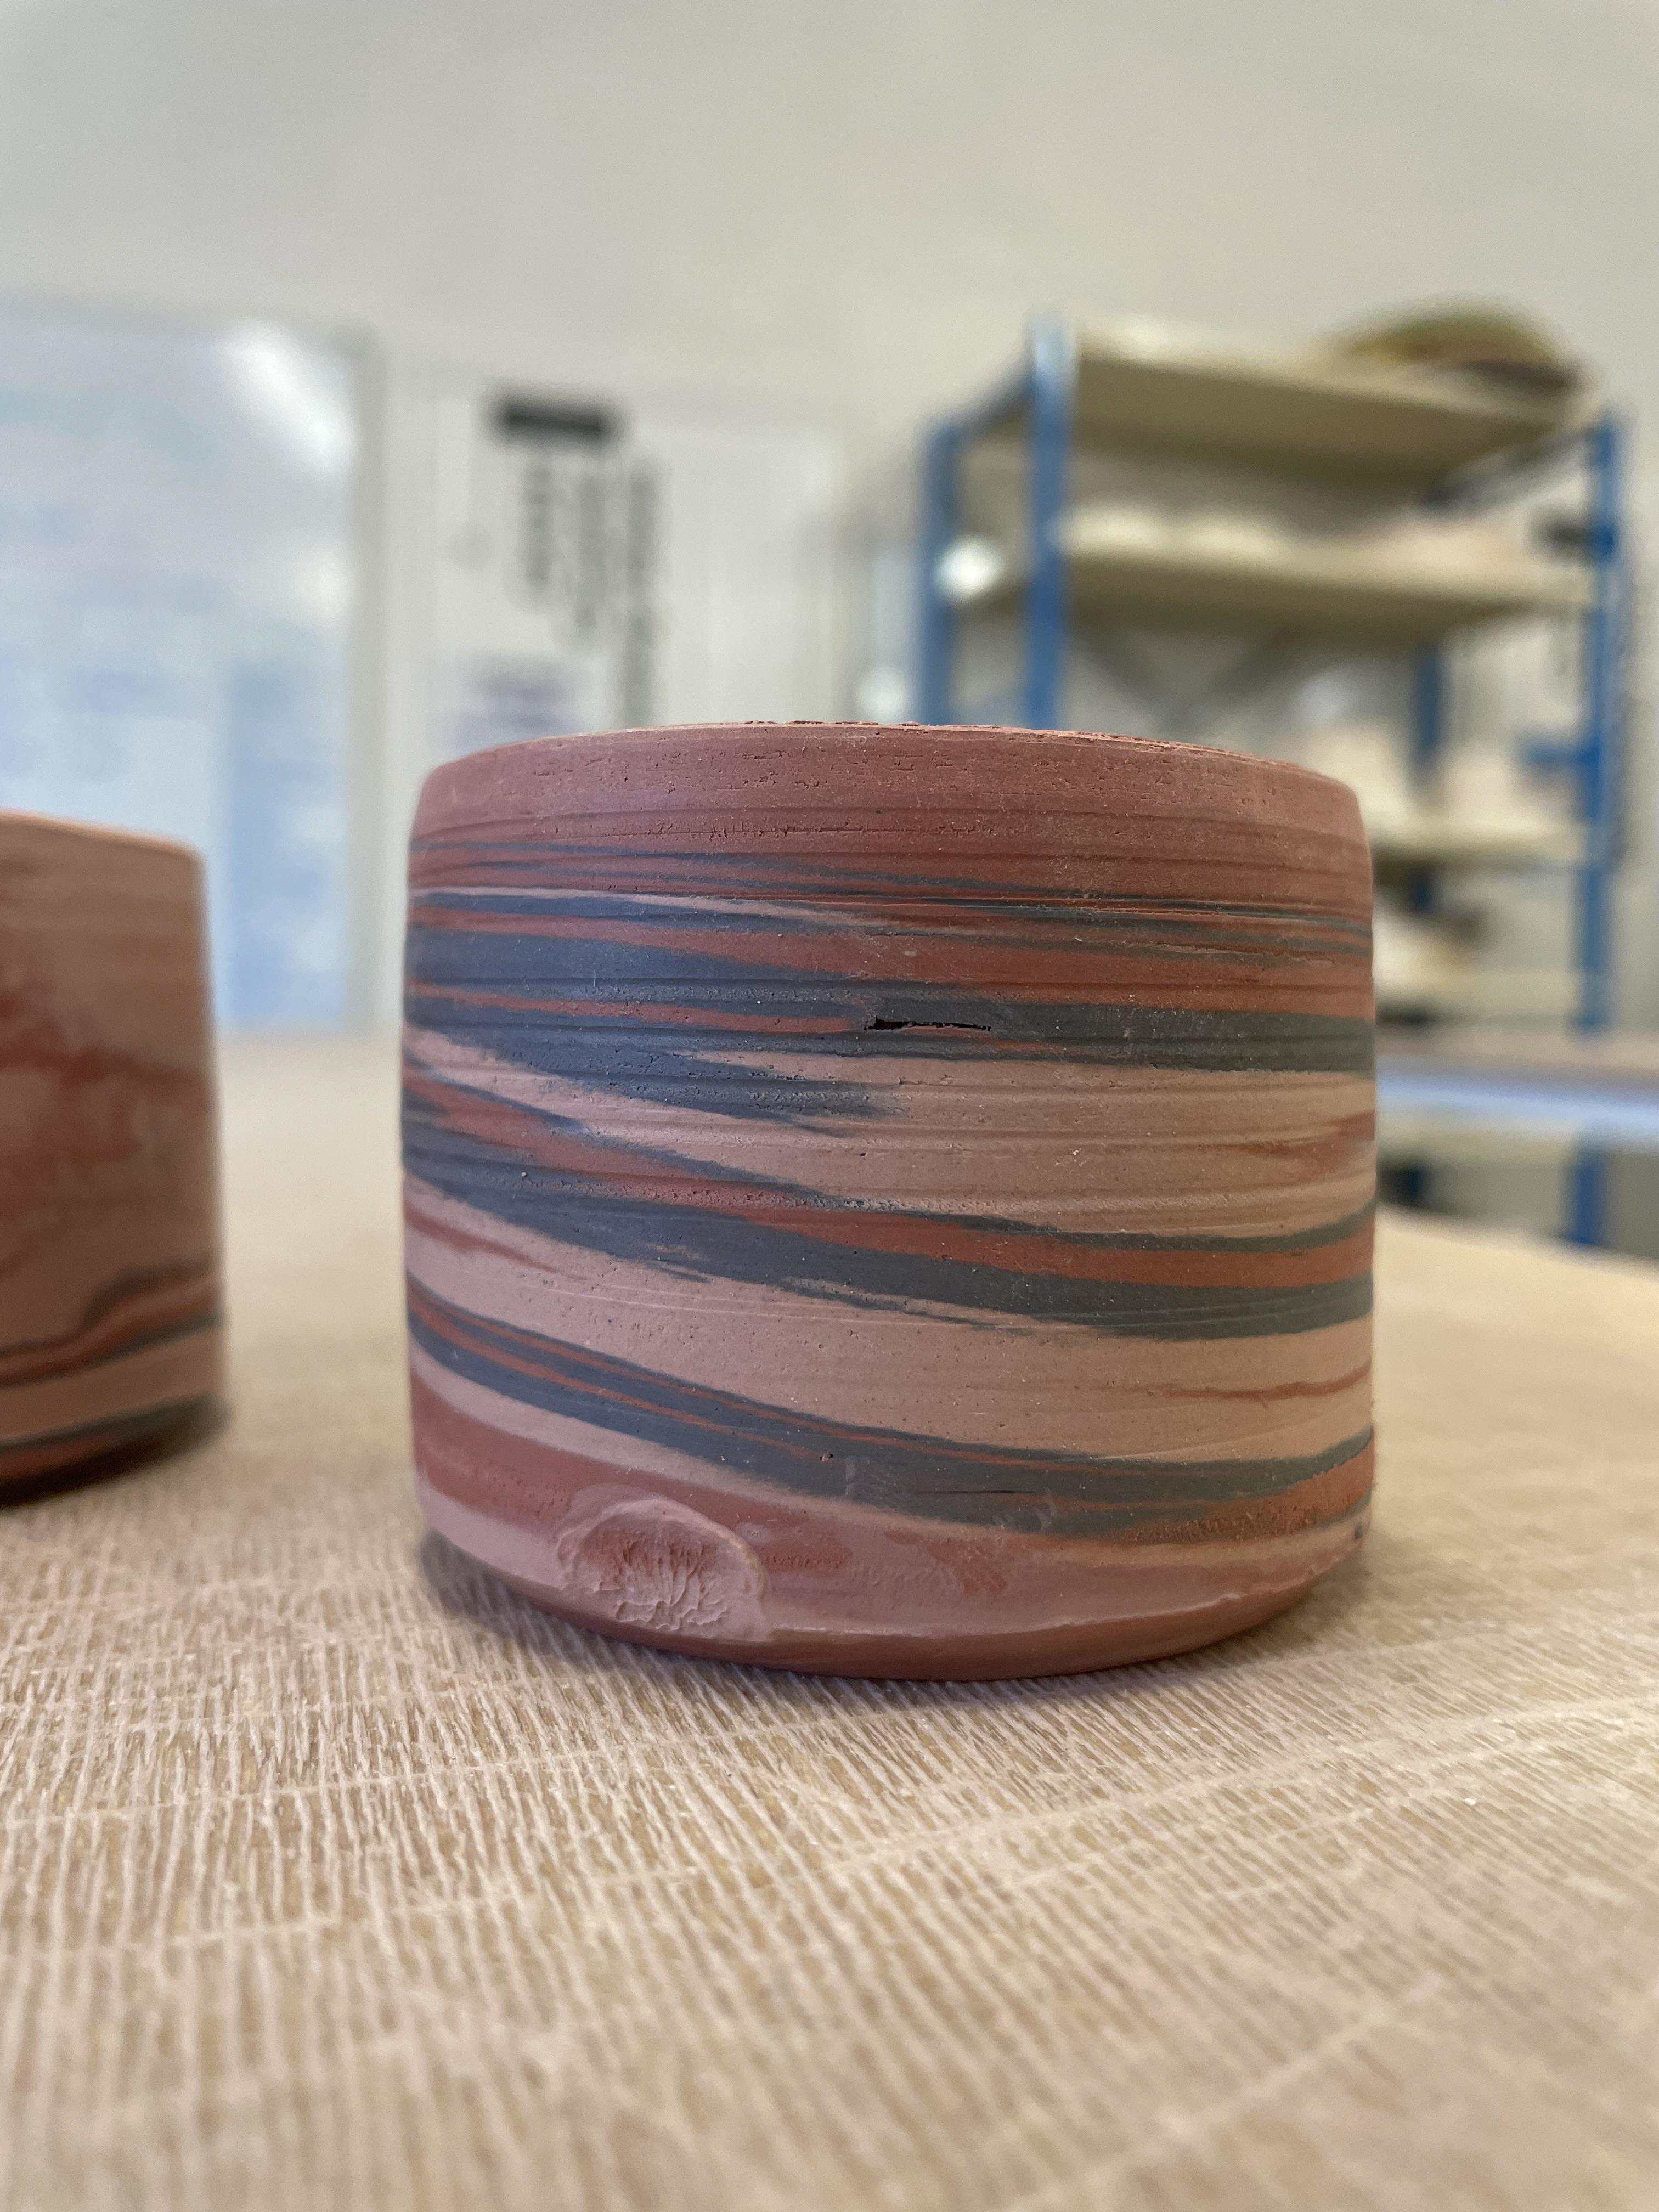
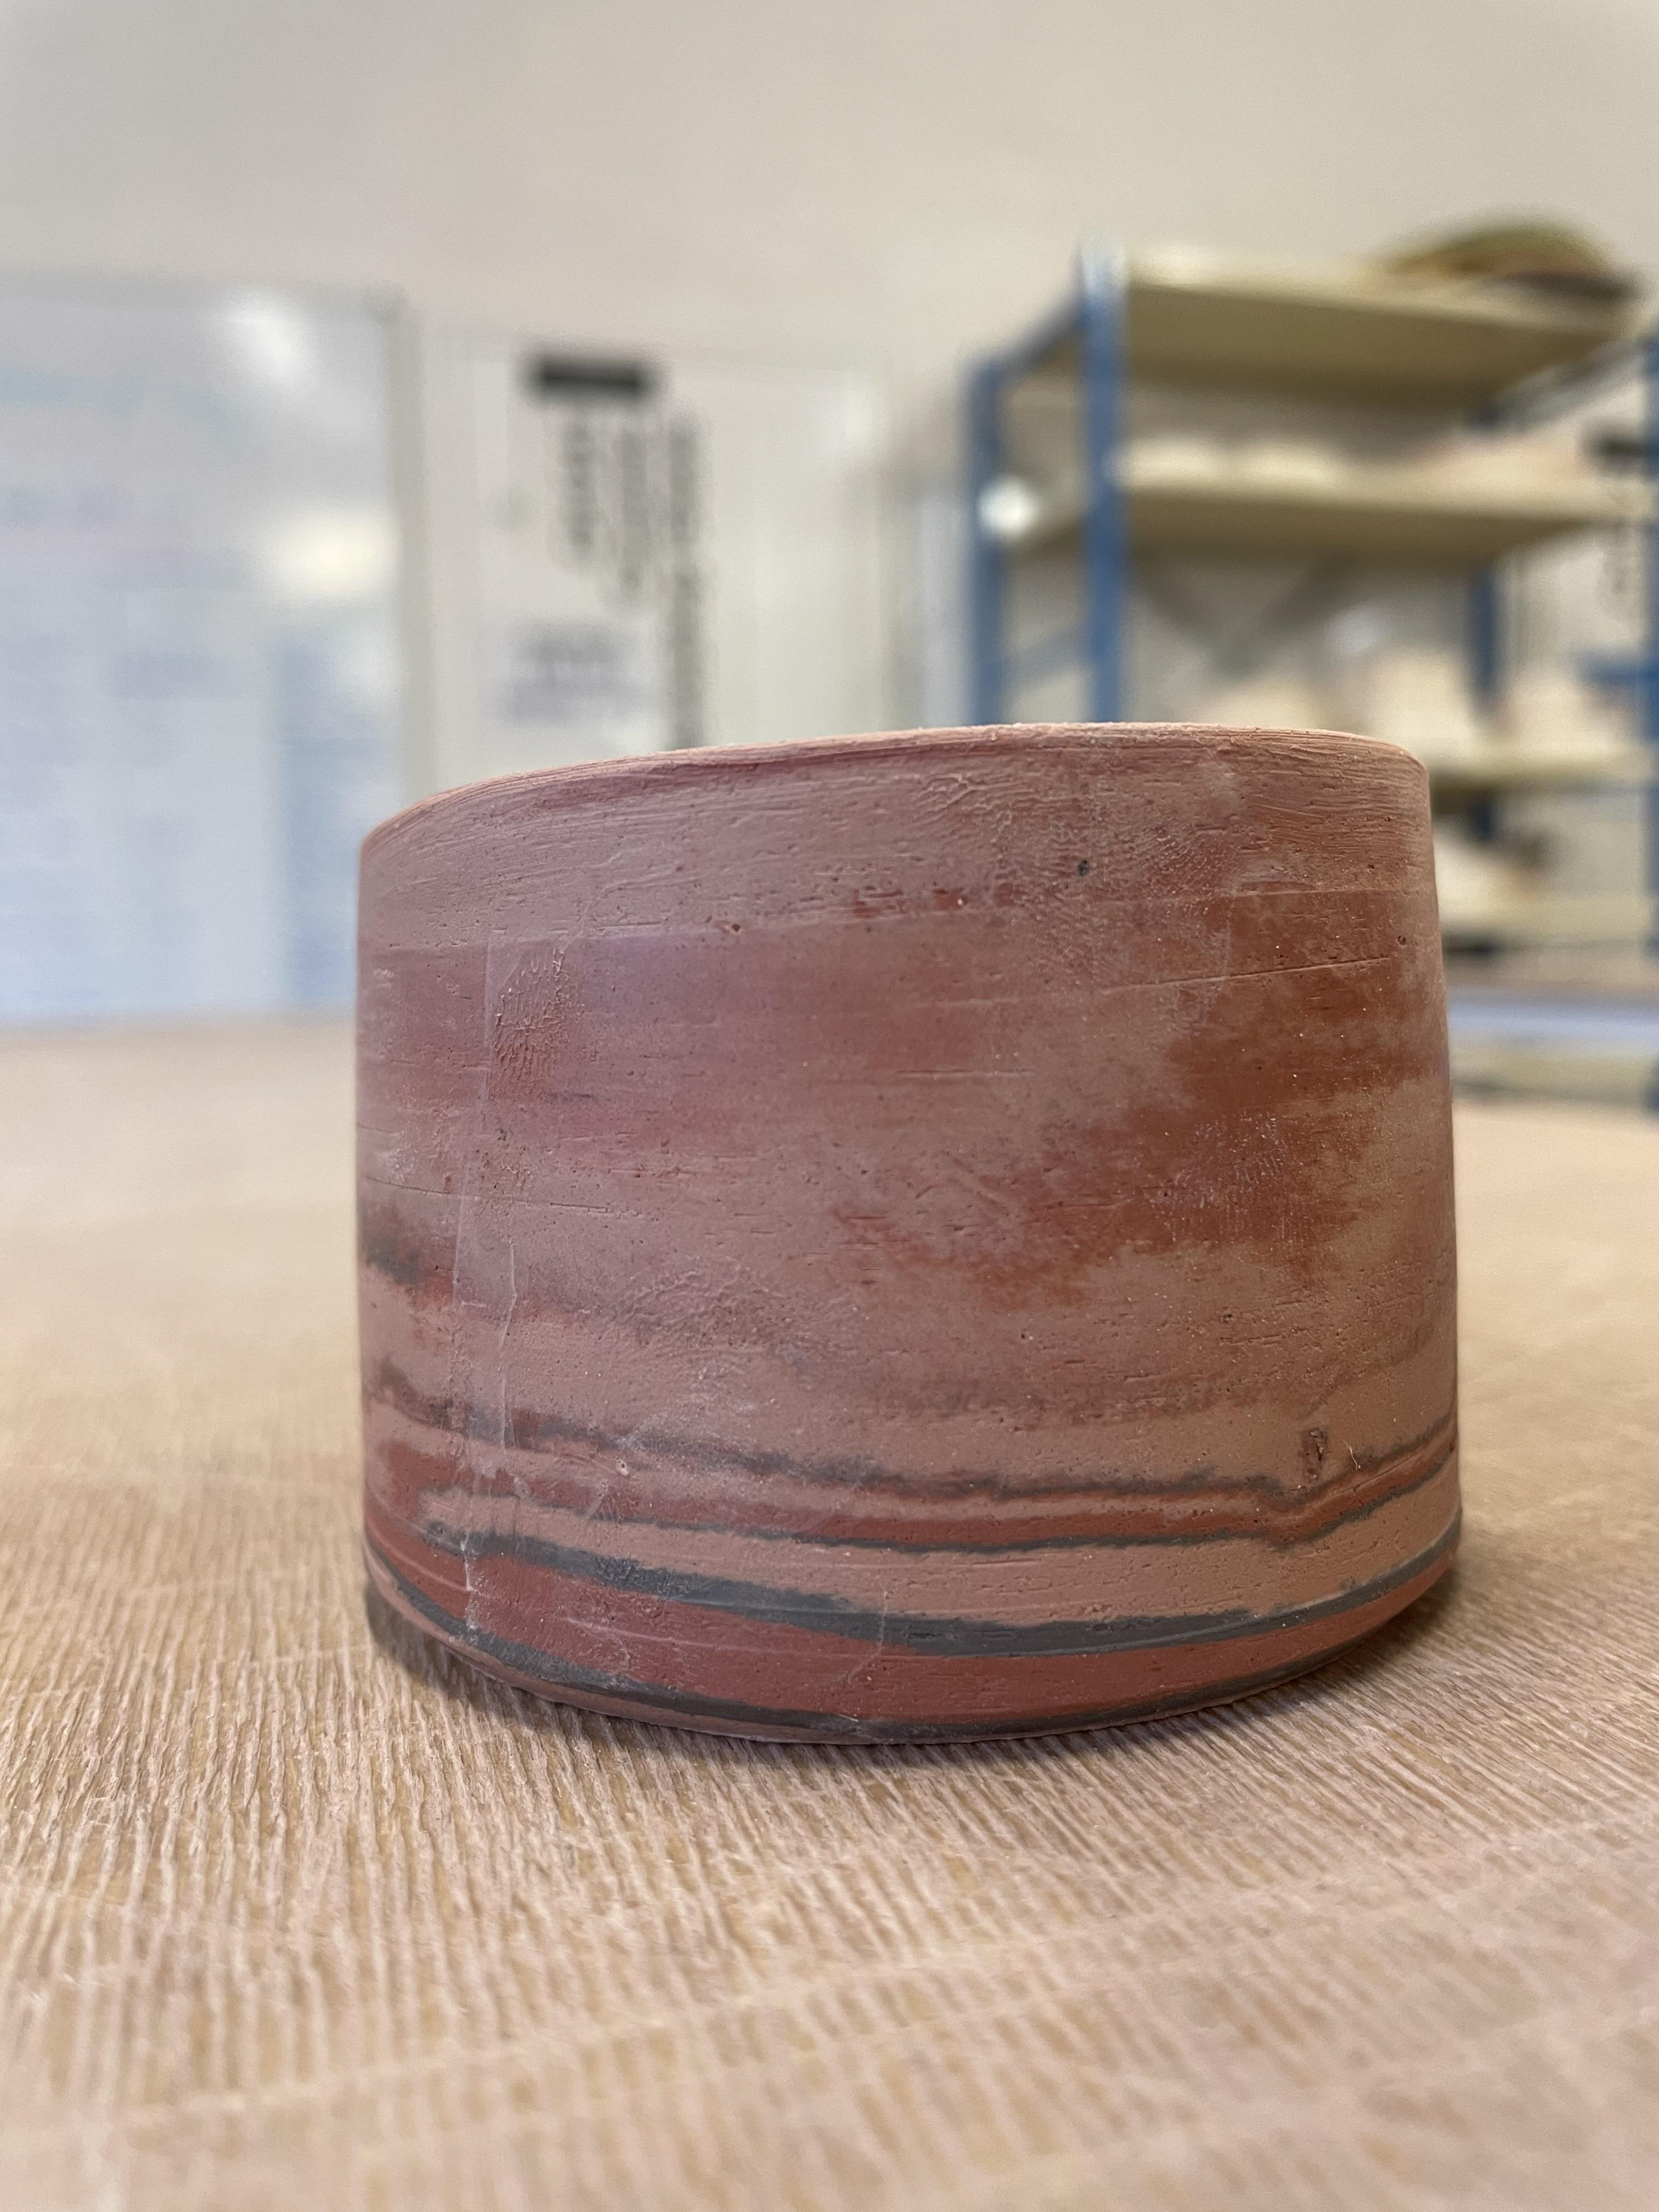
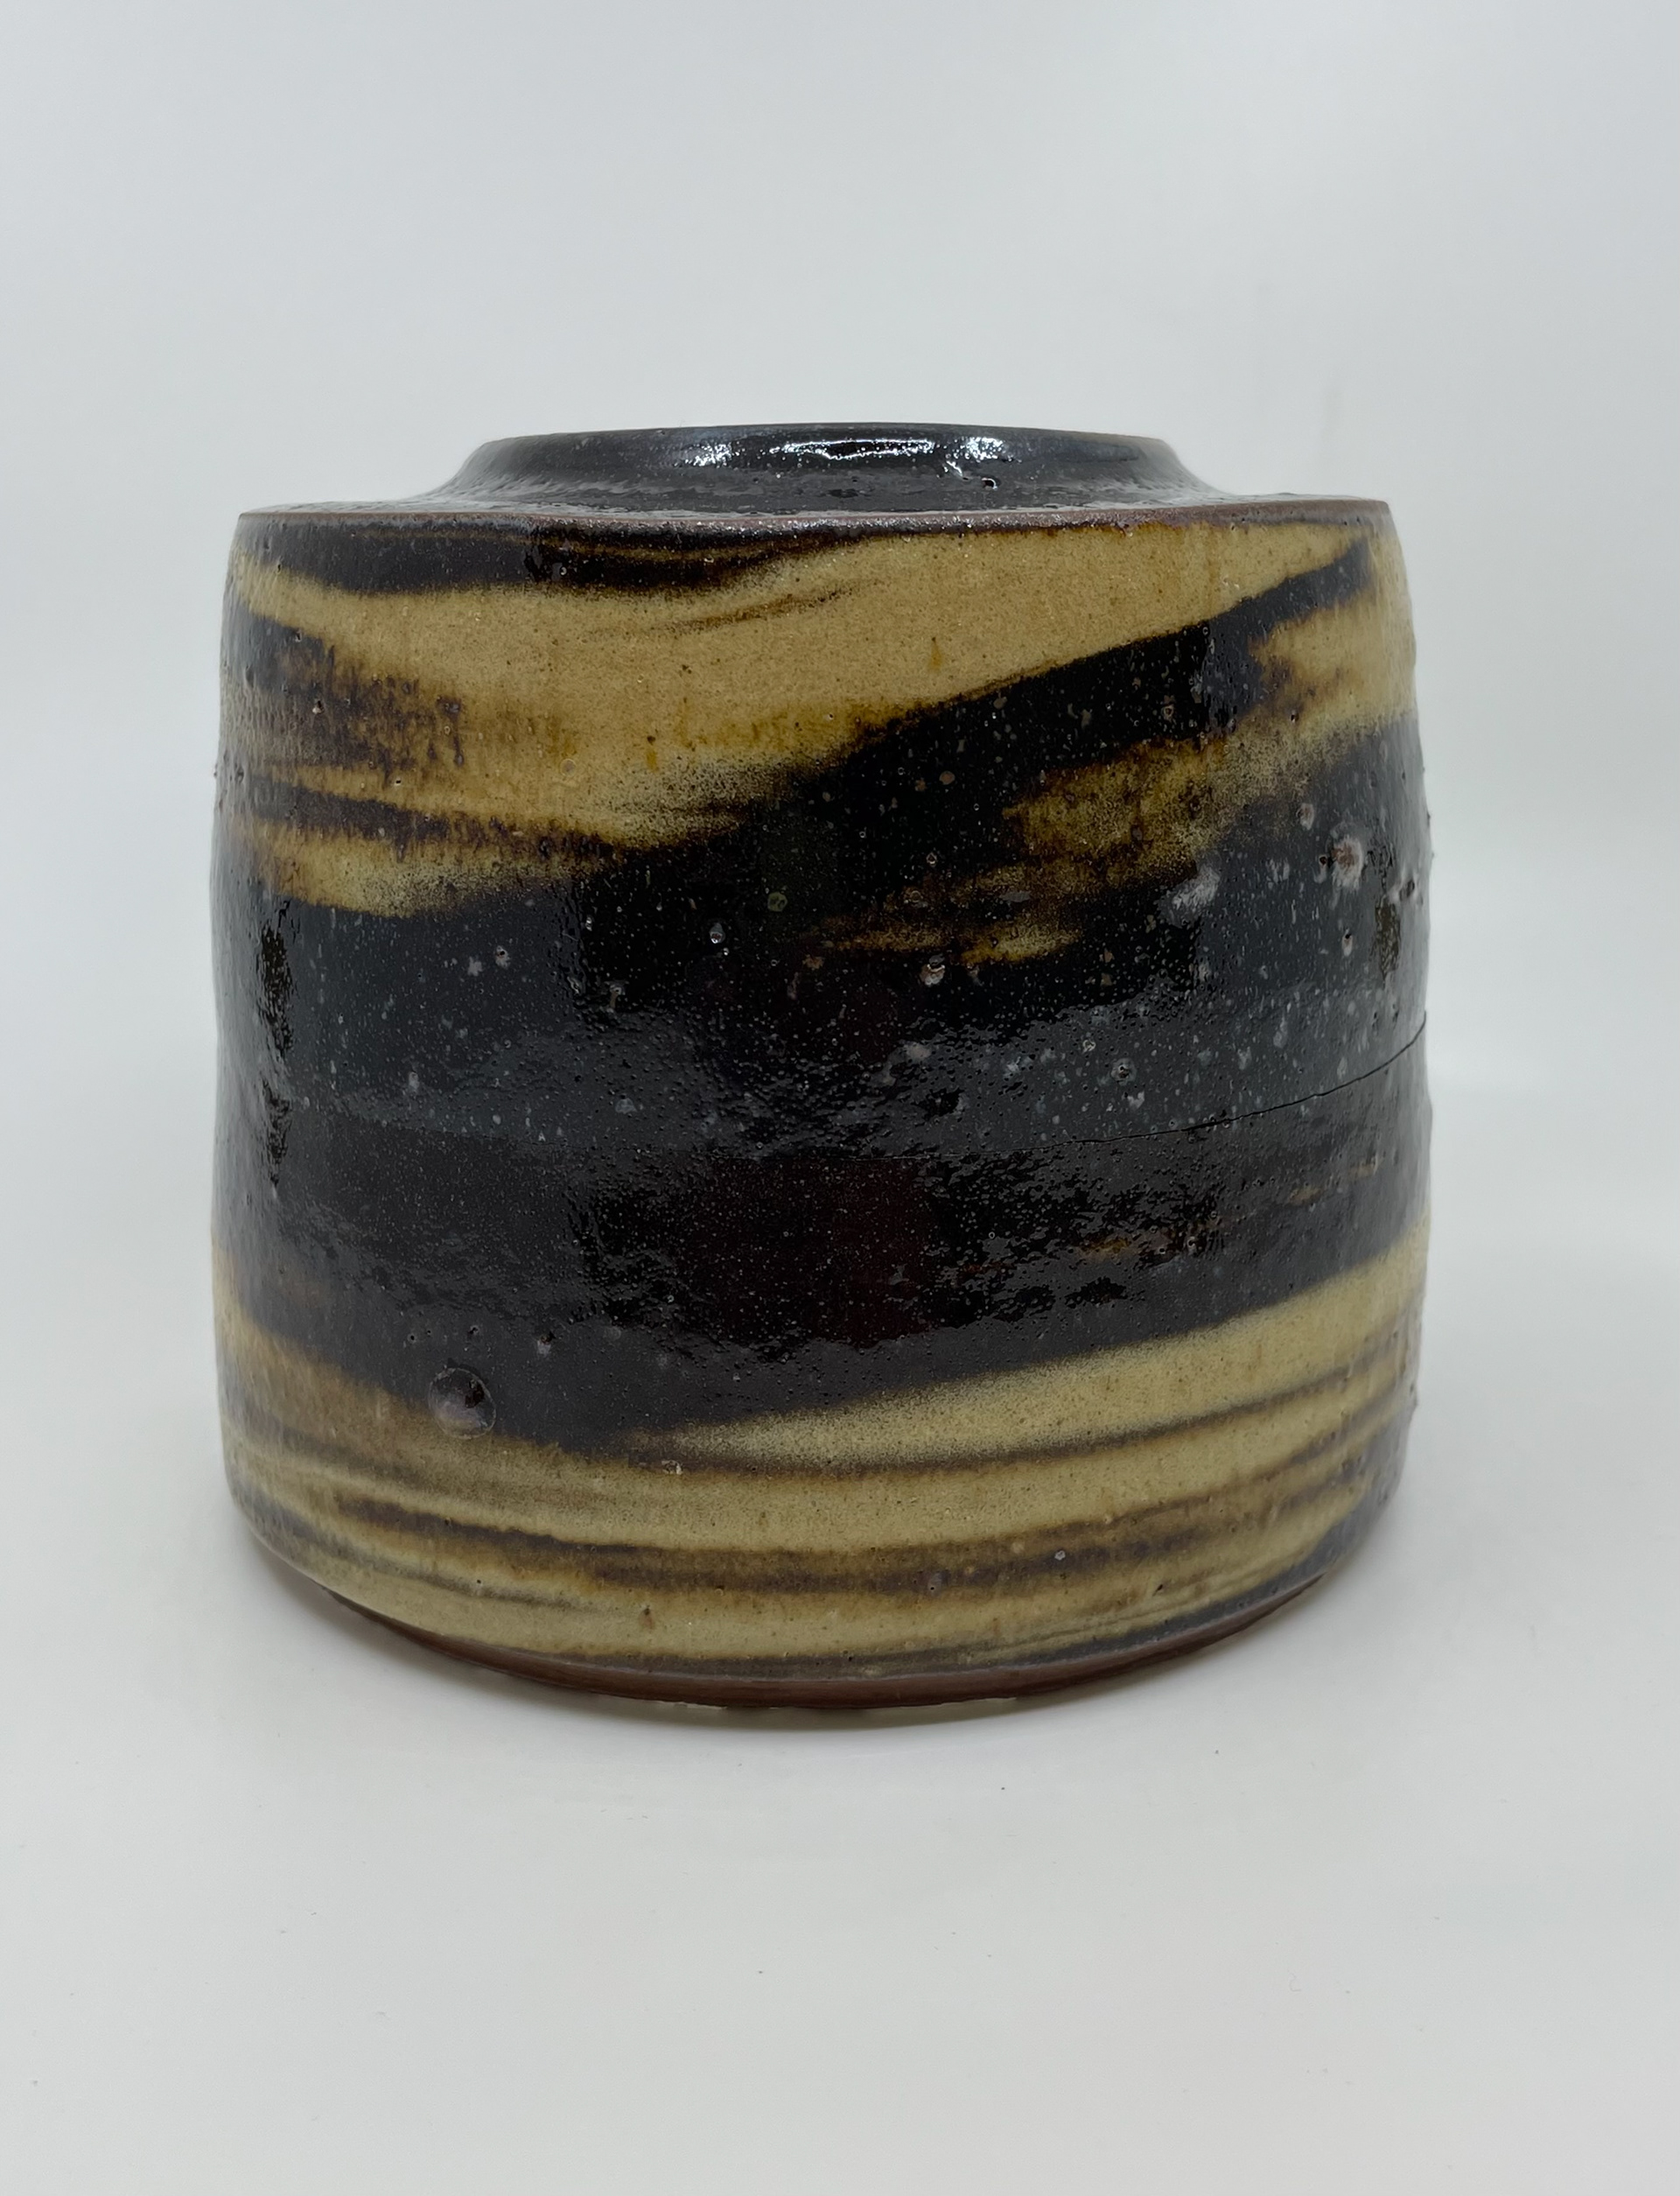
Using the leftover coloured clay, I threw small vessels just to see how the marbling effect works with the colours. Each vessel has different amounts of clay.
These were the finished test vessels, although I like the marbling here as the black oxide and red oxide are very similar colours, which means they create a gradient in the marbled pattern I think this adds an interesting depth and is something that is noticed in my pebble scans, different scales of colours built up. For this reason, I like the effect it has. However, I'm not too fond of the colours they weren't what I was expecting in my sample testing I was expecting a lot darker colours, and the orange stain clay is more peach and isn't consistent with any of my colour pallets. To take this further, I need to do more experiments with a higher % of oxides in my clay. These were also fired with earthenware clear shiny glaze, so It would be interesting to see what they are like in stoneware if this helps create a deeper colour pallet. I also need to consider when throwing the larger amount of each coloured clay I will need and experiment with the ratios based on my pebble scans. Although this was a successful sample, I think it needs a lot more detail to be satisfactory with what I intend my work to be.
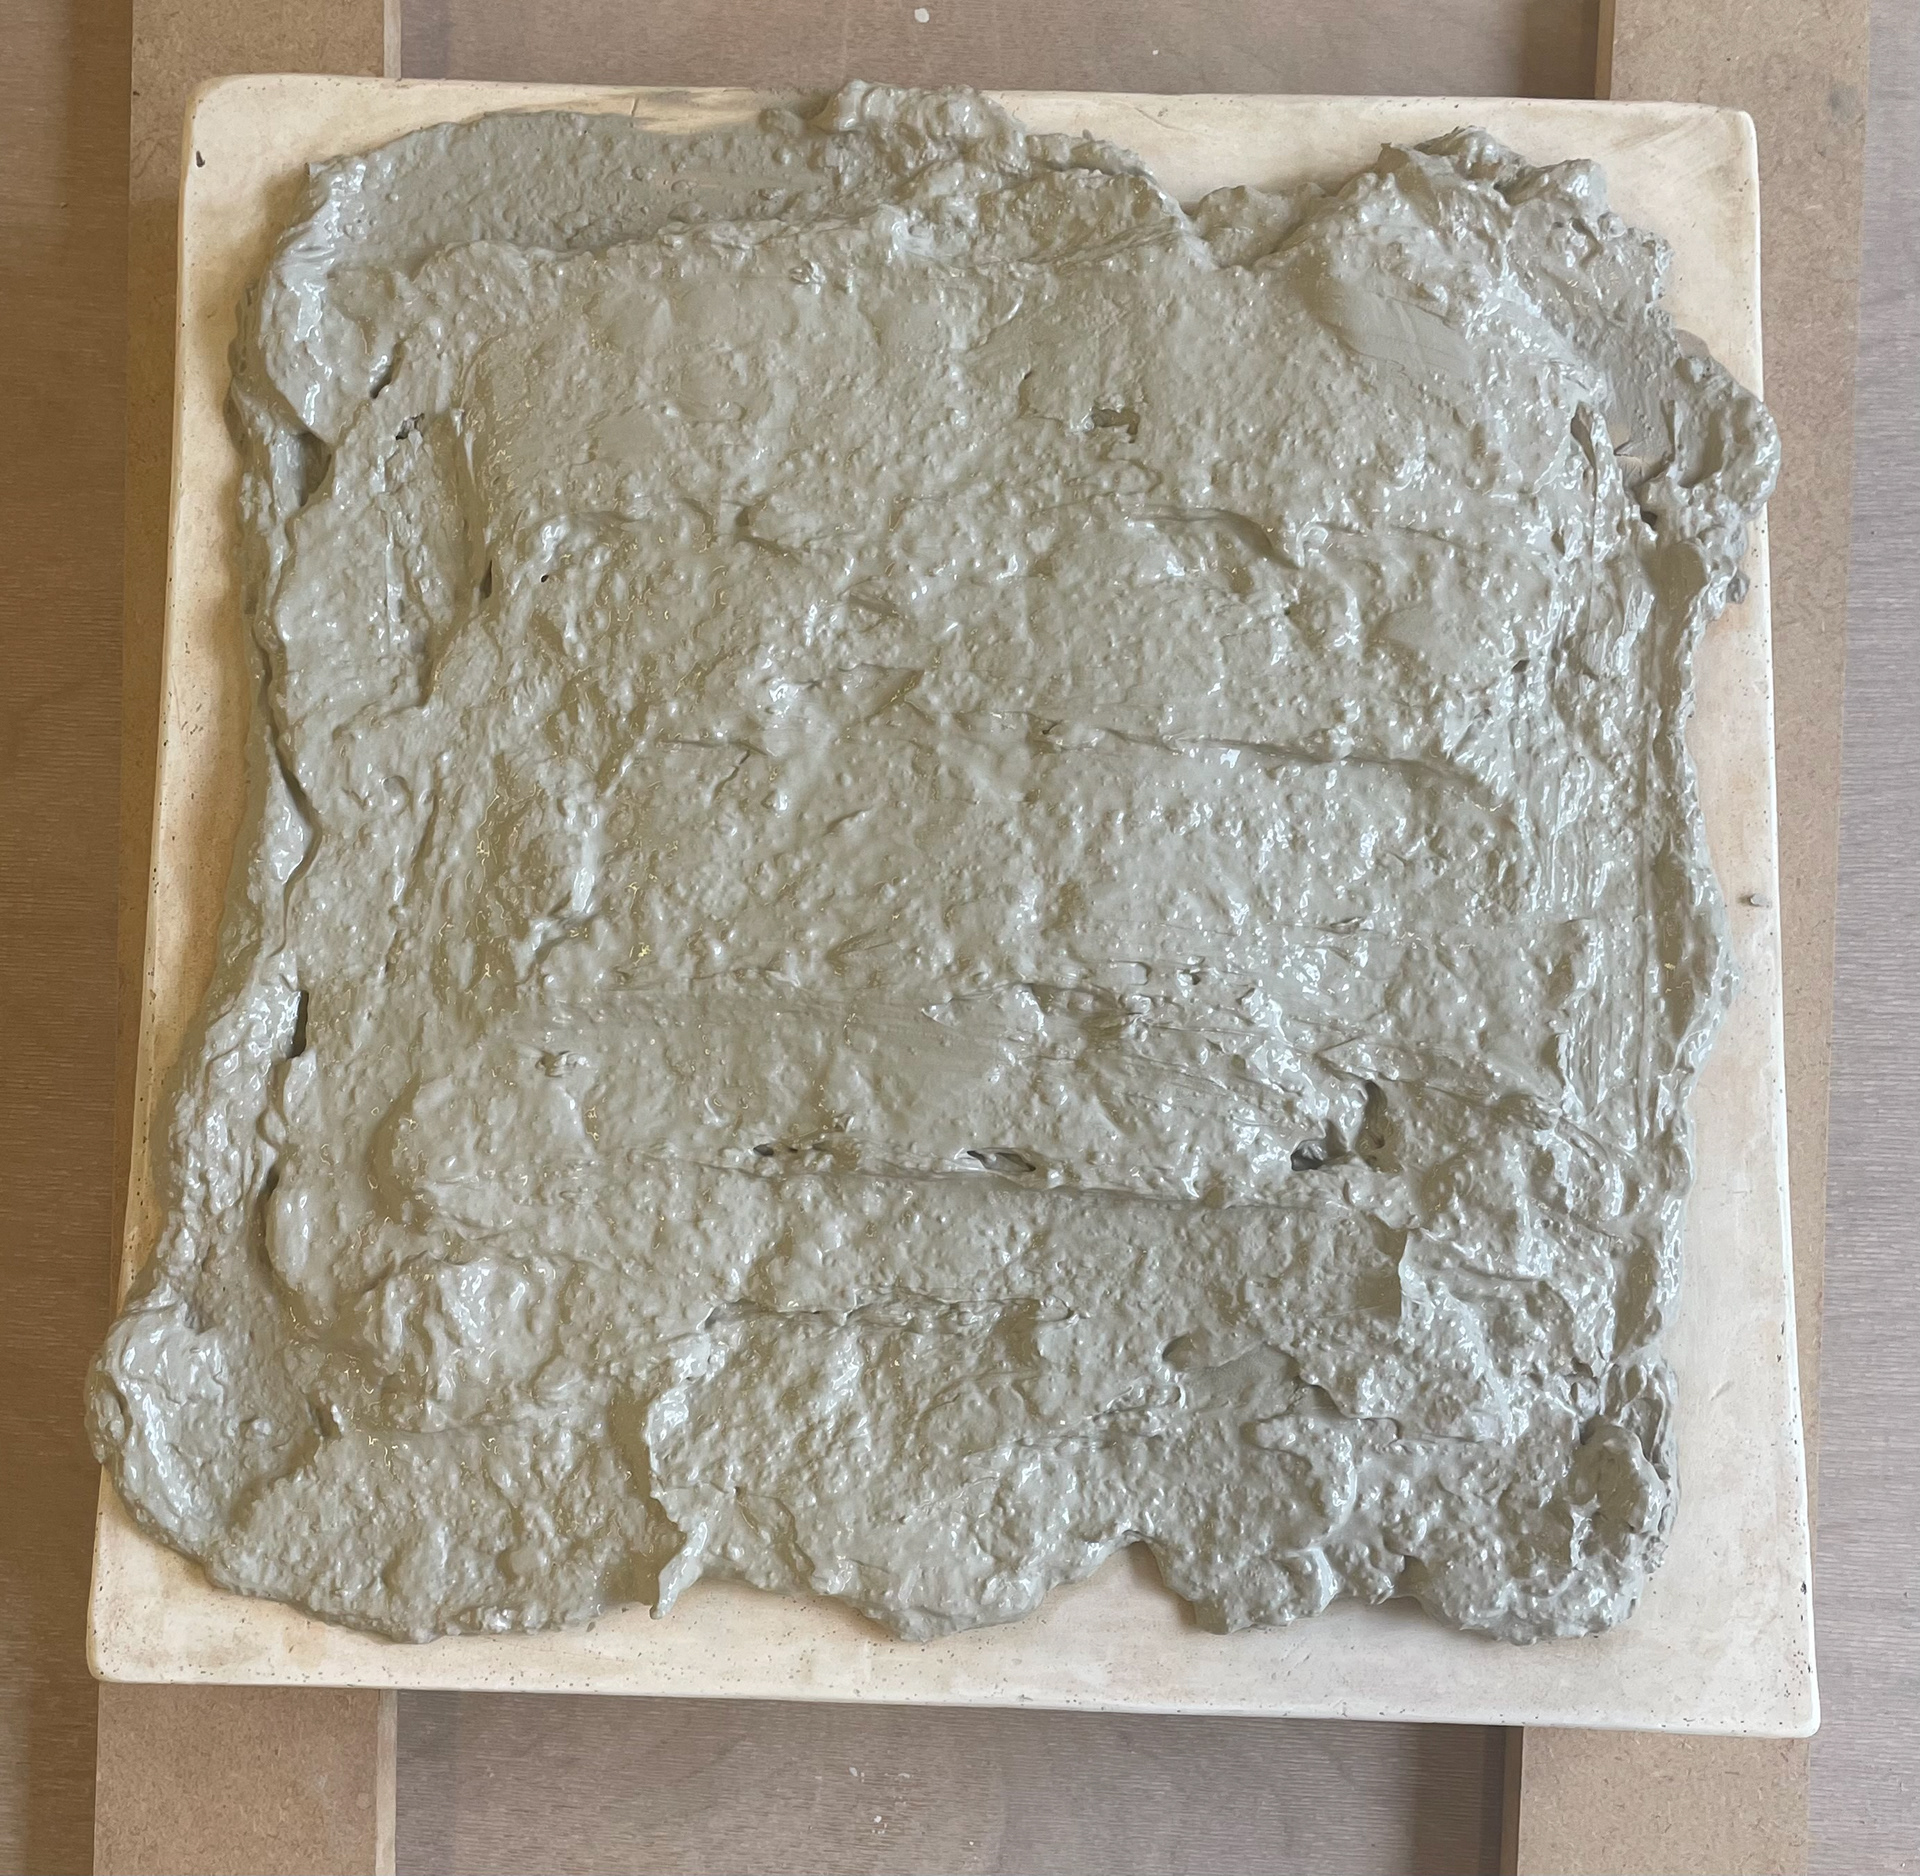
Using leftover coloured clay to experiment with different applications, I rolled ivory stoneware and then applied three different colour clays on top: black iron, red iron and orange stain. I rolled these out so they were all the same thickness on top of the ivory stoneware. This stretched out the coloured clay and also mixed the colours however, they did still hold their form well, so they didn't blend like I thought, leaving me with a very playful piece. This is a process I won't take any further as it's used best with slab-building pieces however, as I intend to throw my clay, it's not a process that benefits my practice, although it was fun to play and experiment with different applications of coloured clay. If the outcomes were more striking in how intended, I would want to take this process further and translate it into throwing.
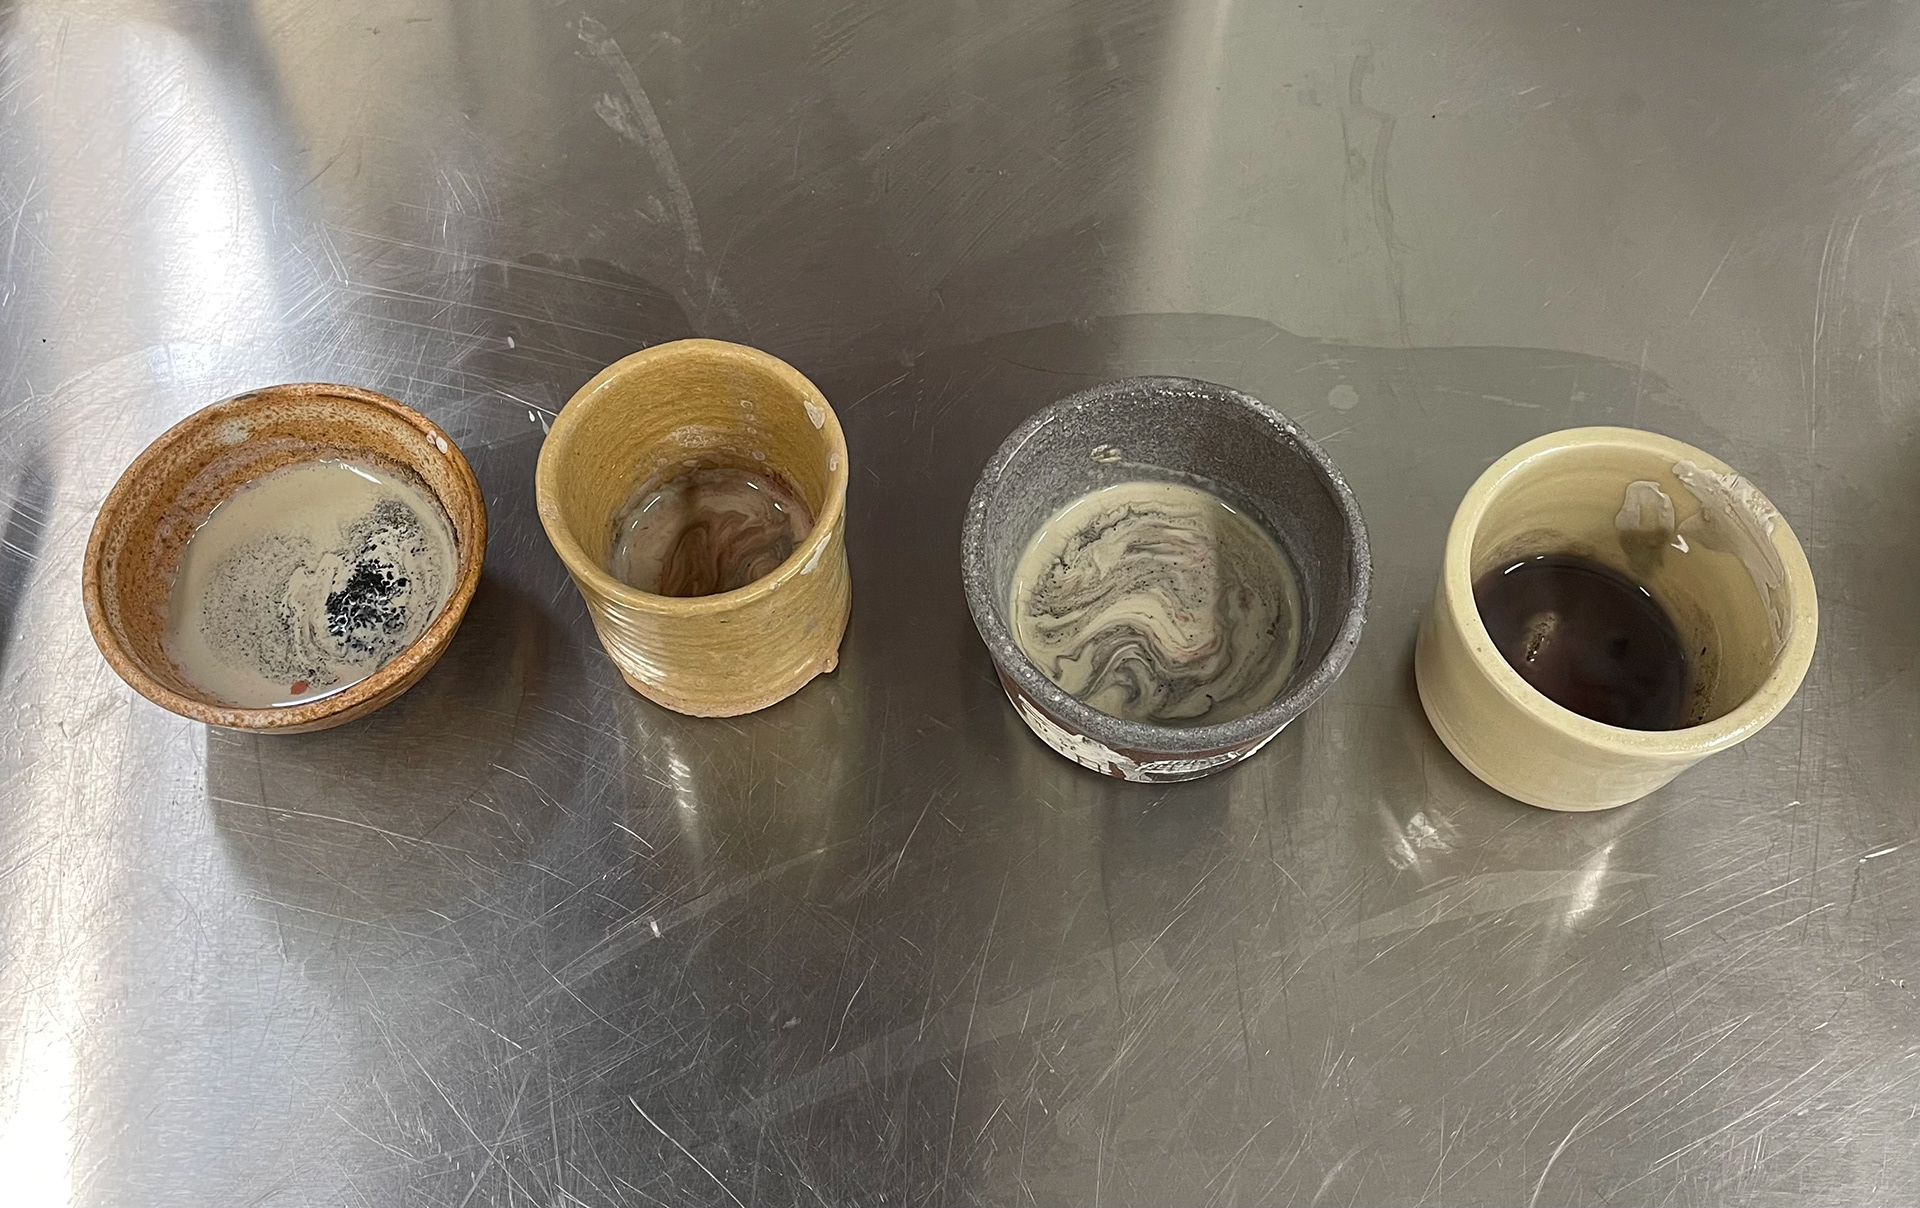
With the fired piece, I decided to glaze half with a shiny clear glaze and the other half with an earthenware matt glaze. I didn't think this would have a big impact on the colours, just the overall finish however, to my surprise, the glazes did affect the overall colouring and finish. The matt side dulled the colours, creating more pastel colours. However, the clear, shiny glaze made the colour clay more vibrant and bright. I'm not sure if this was a coincidence, as I know I applied the glaze a bit too thick. However, that hasn't affected the oxide colours before. I think, perhaps, it is due to the matt glaze being a bit too thick mixed with clear glazes, which are transparent and allow light to pass through, while matte glazes are opaque and scatter light:
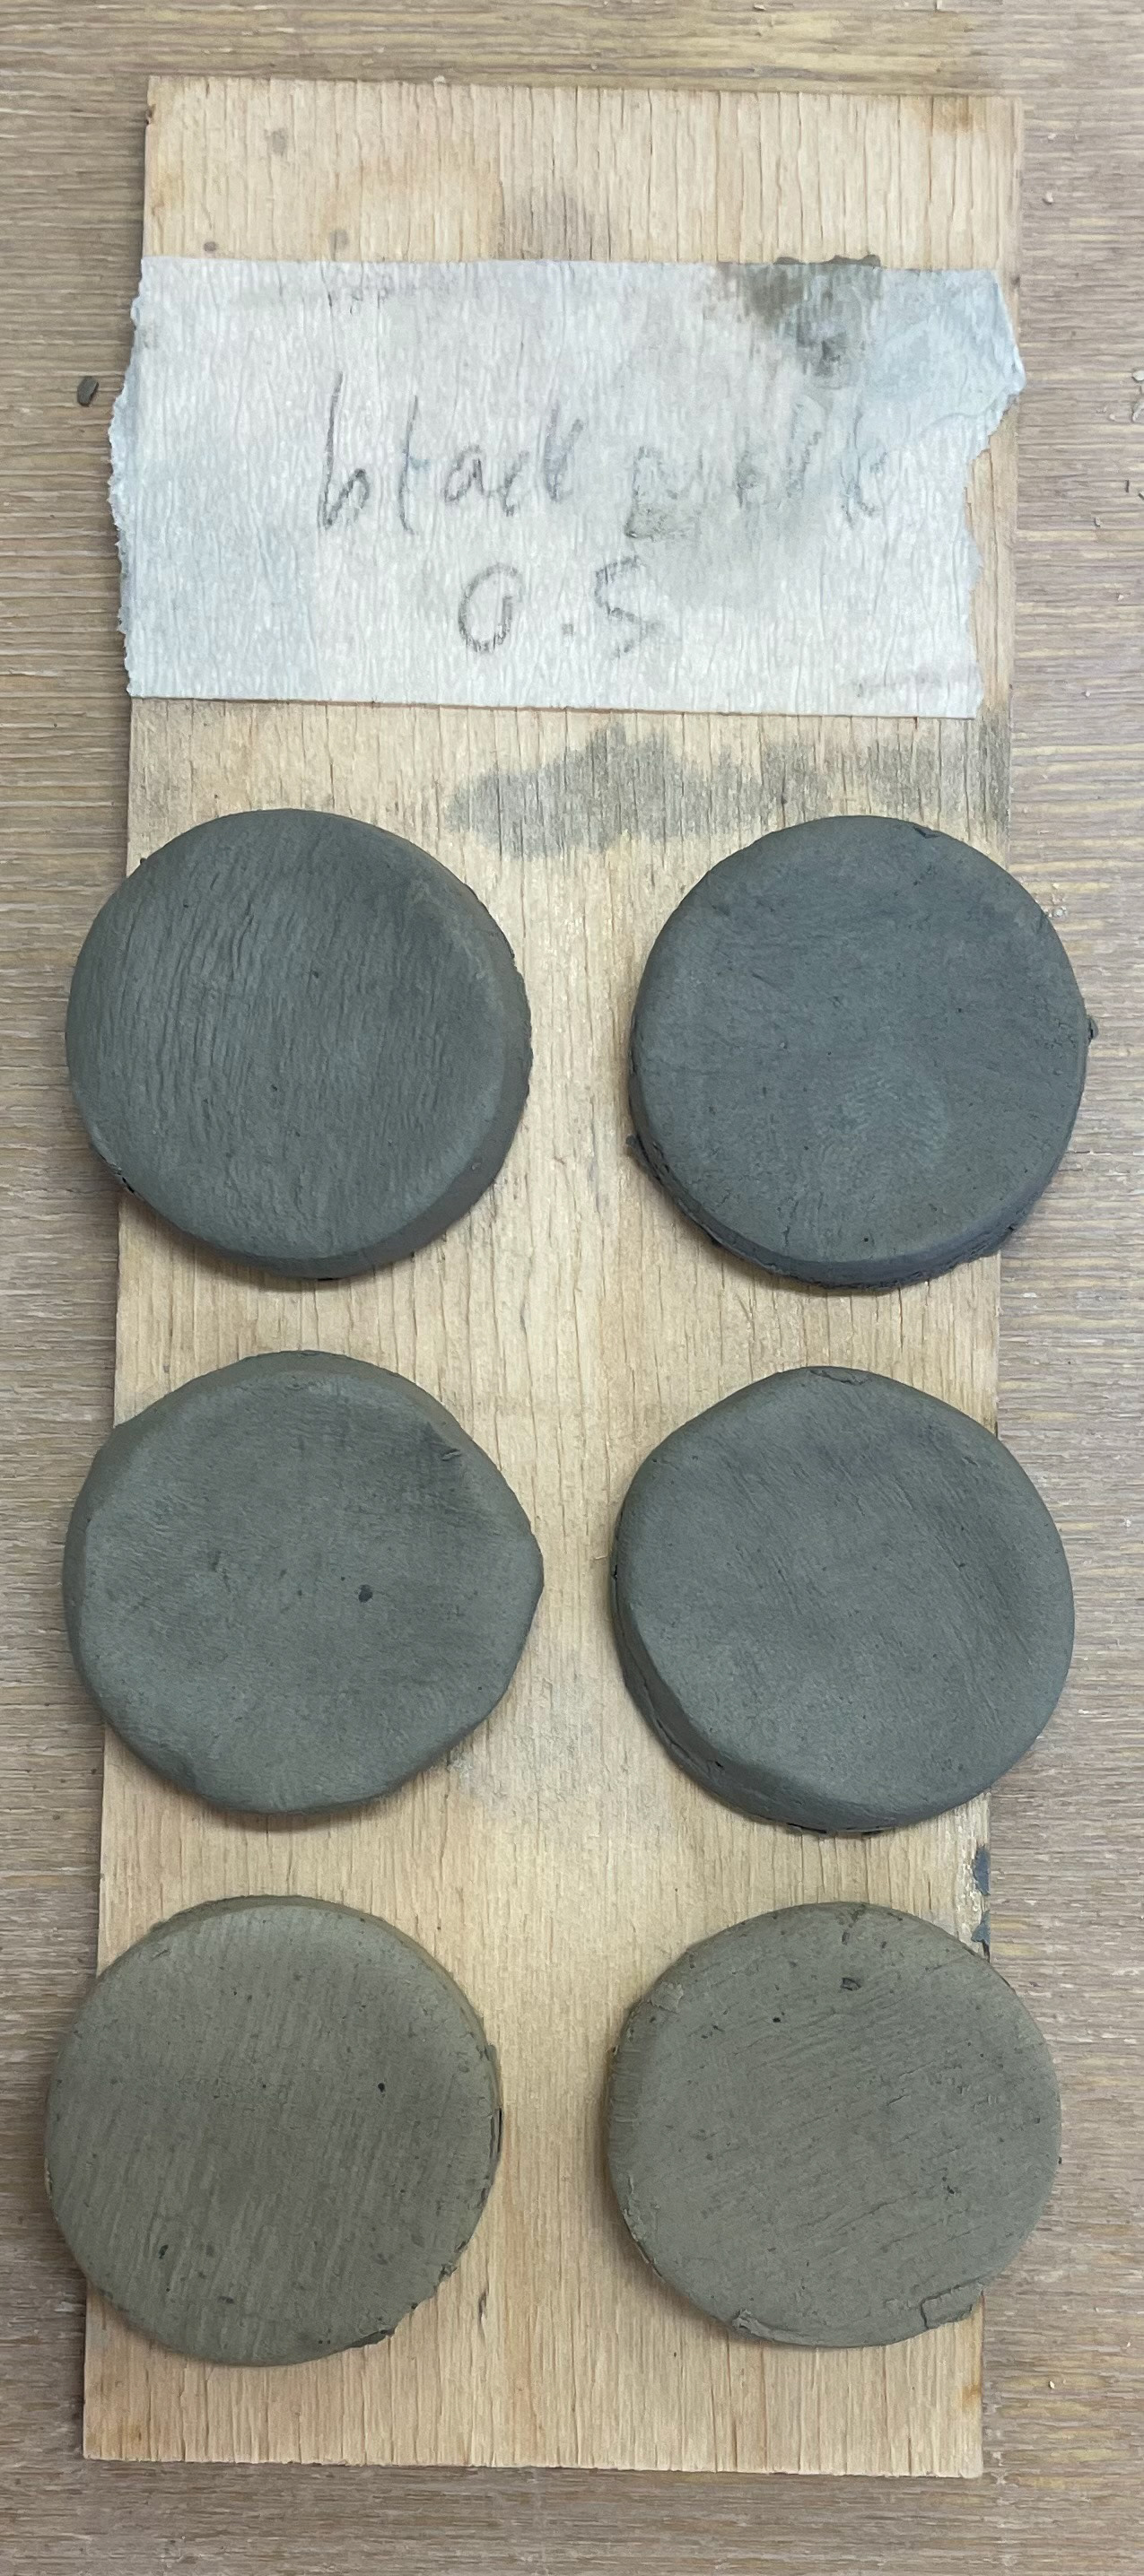
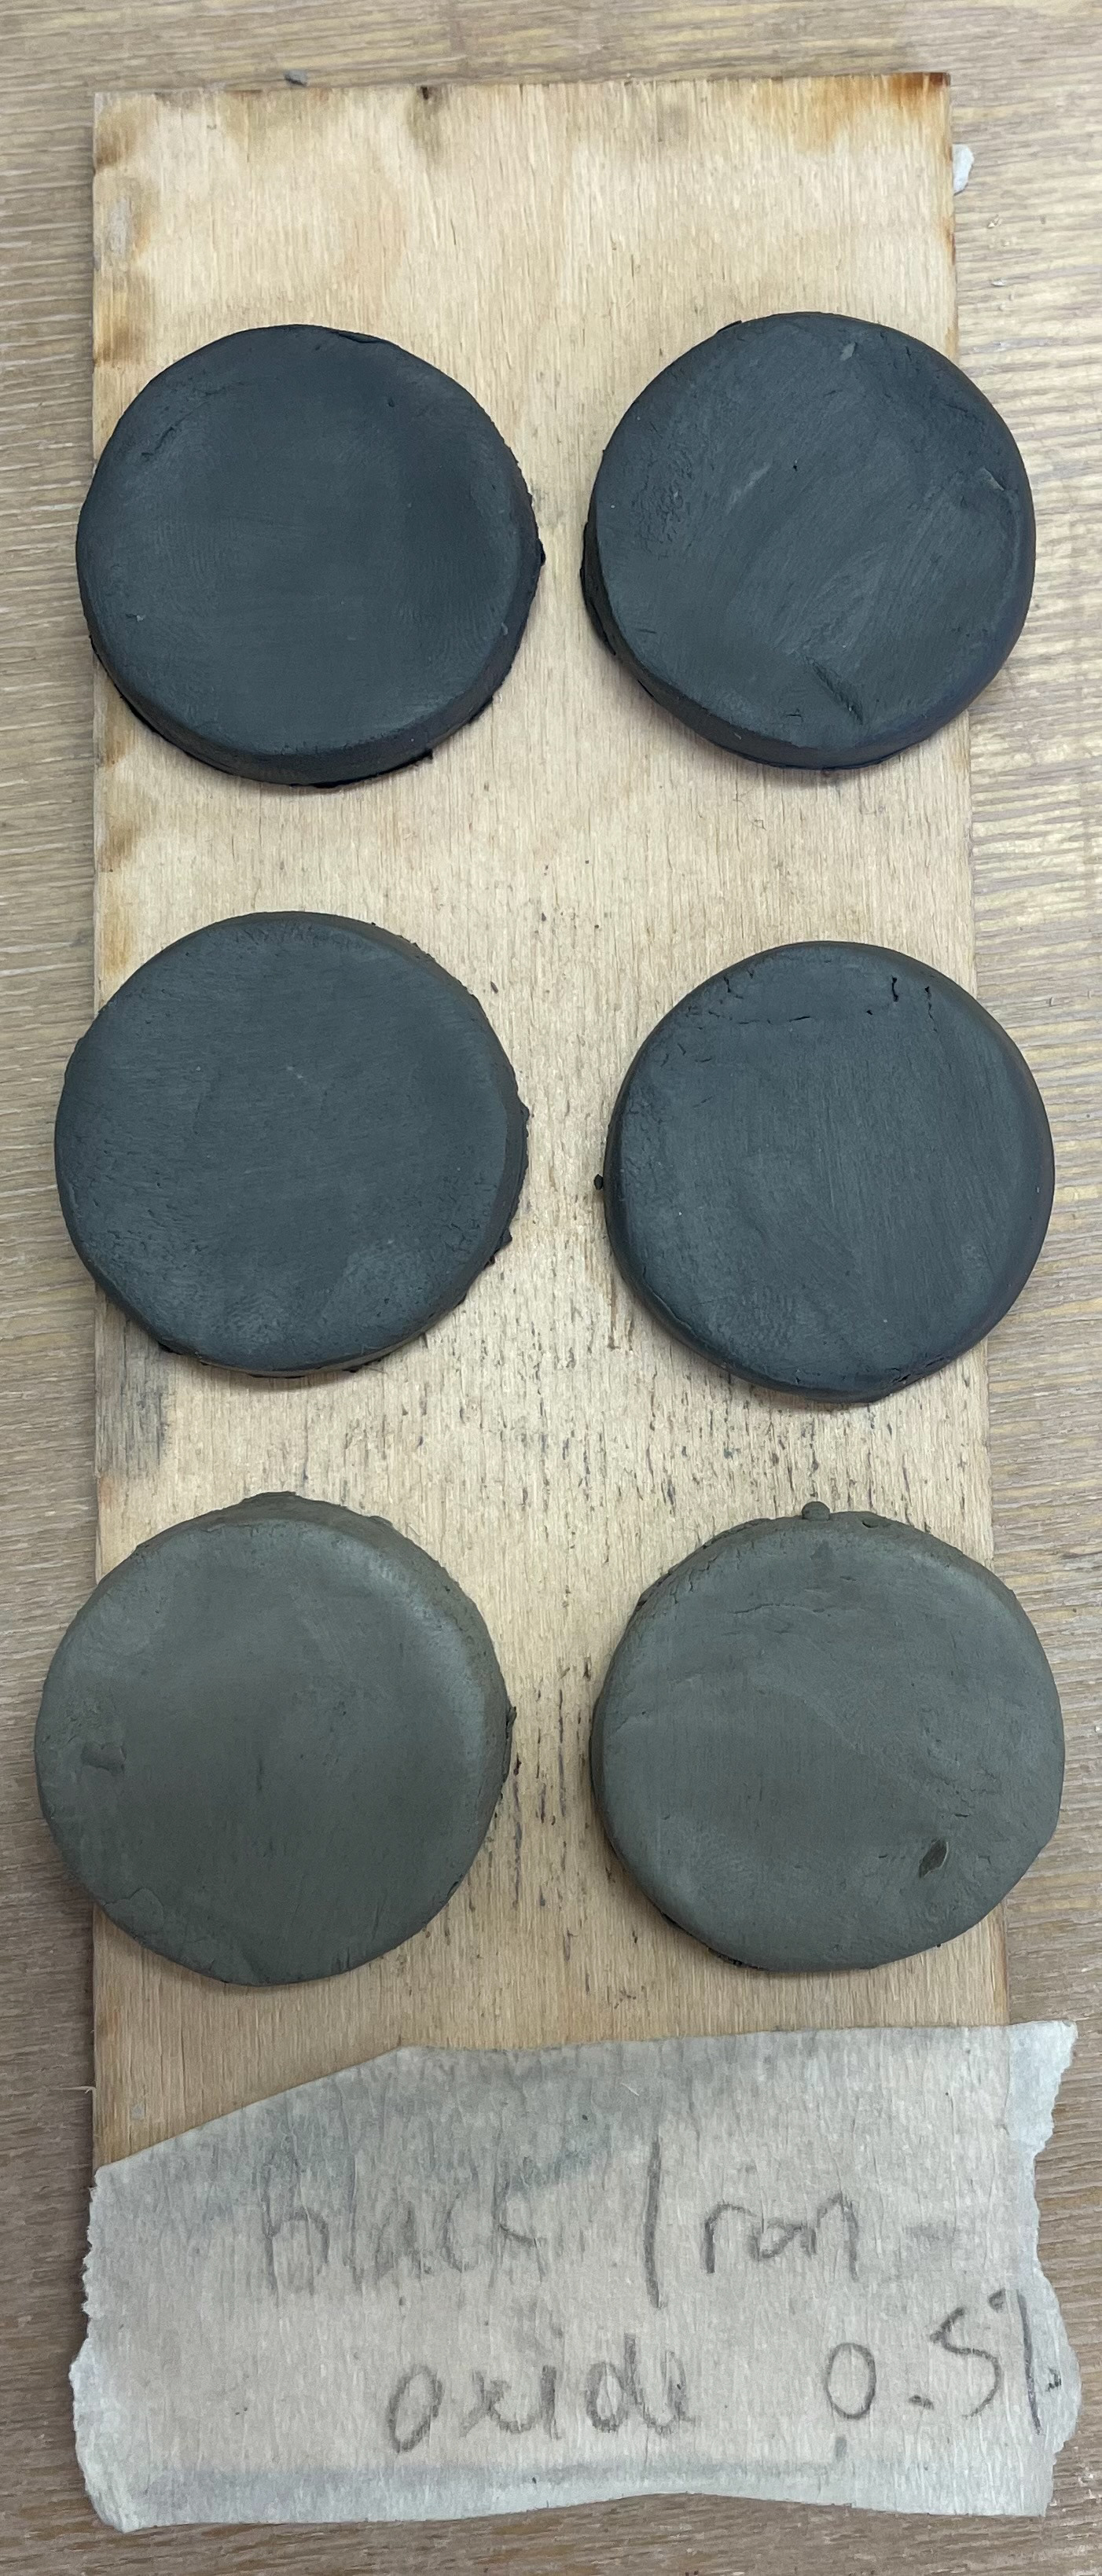
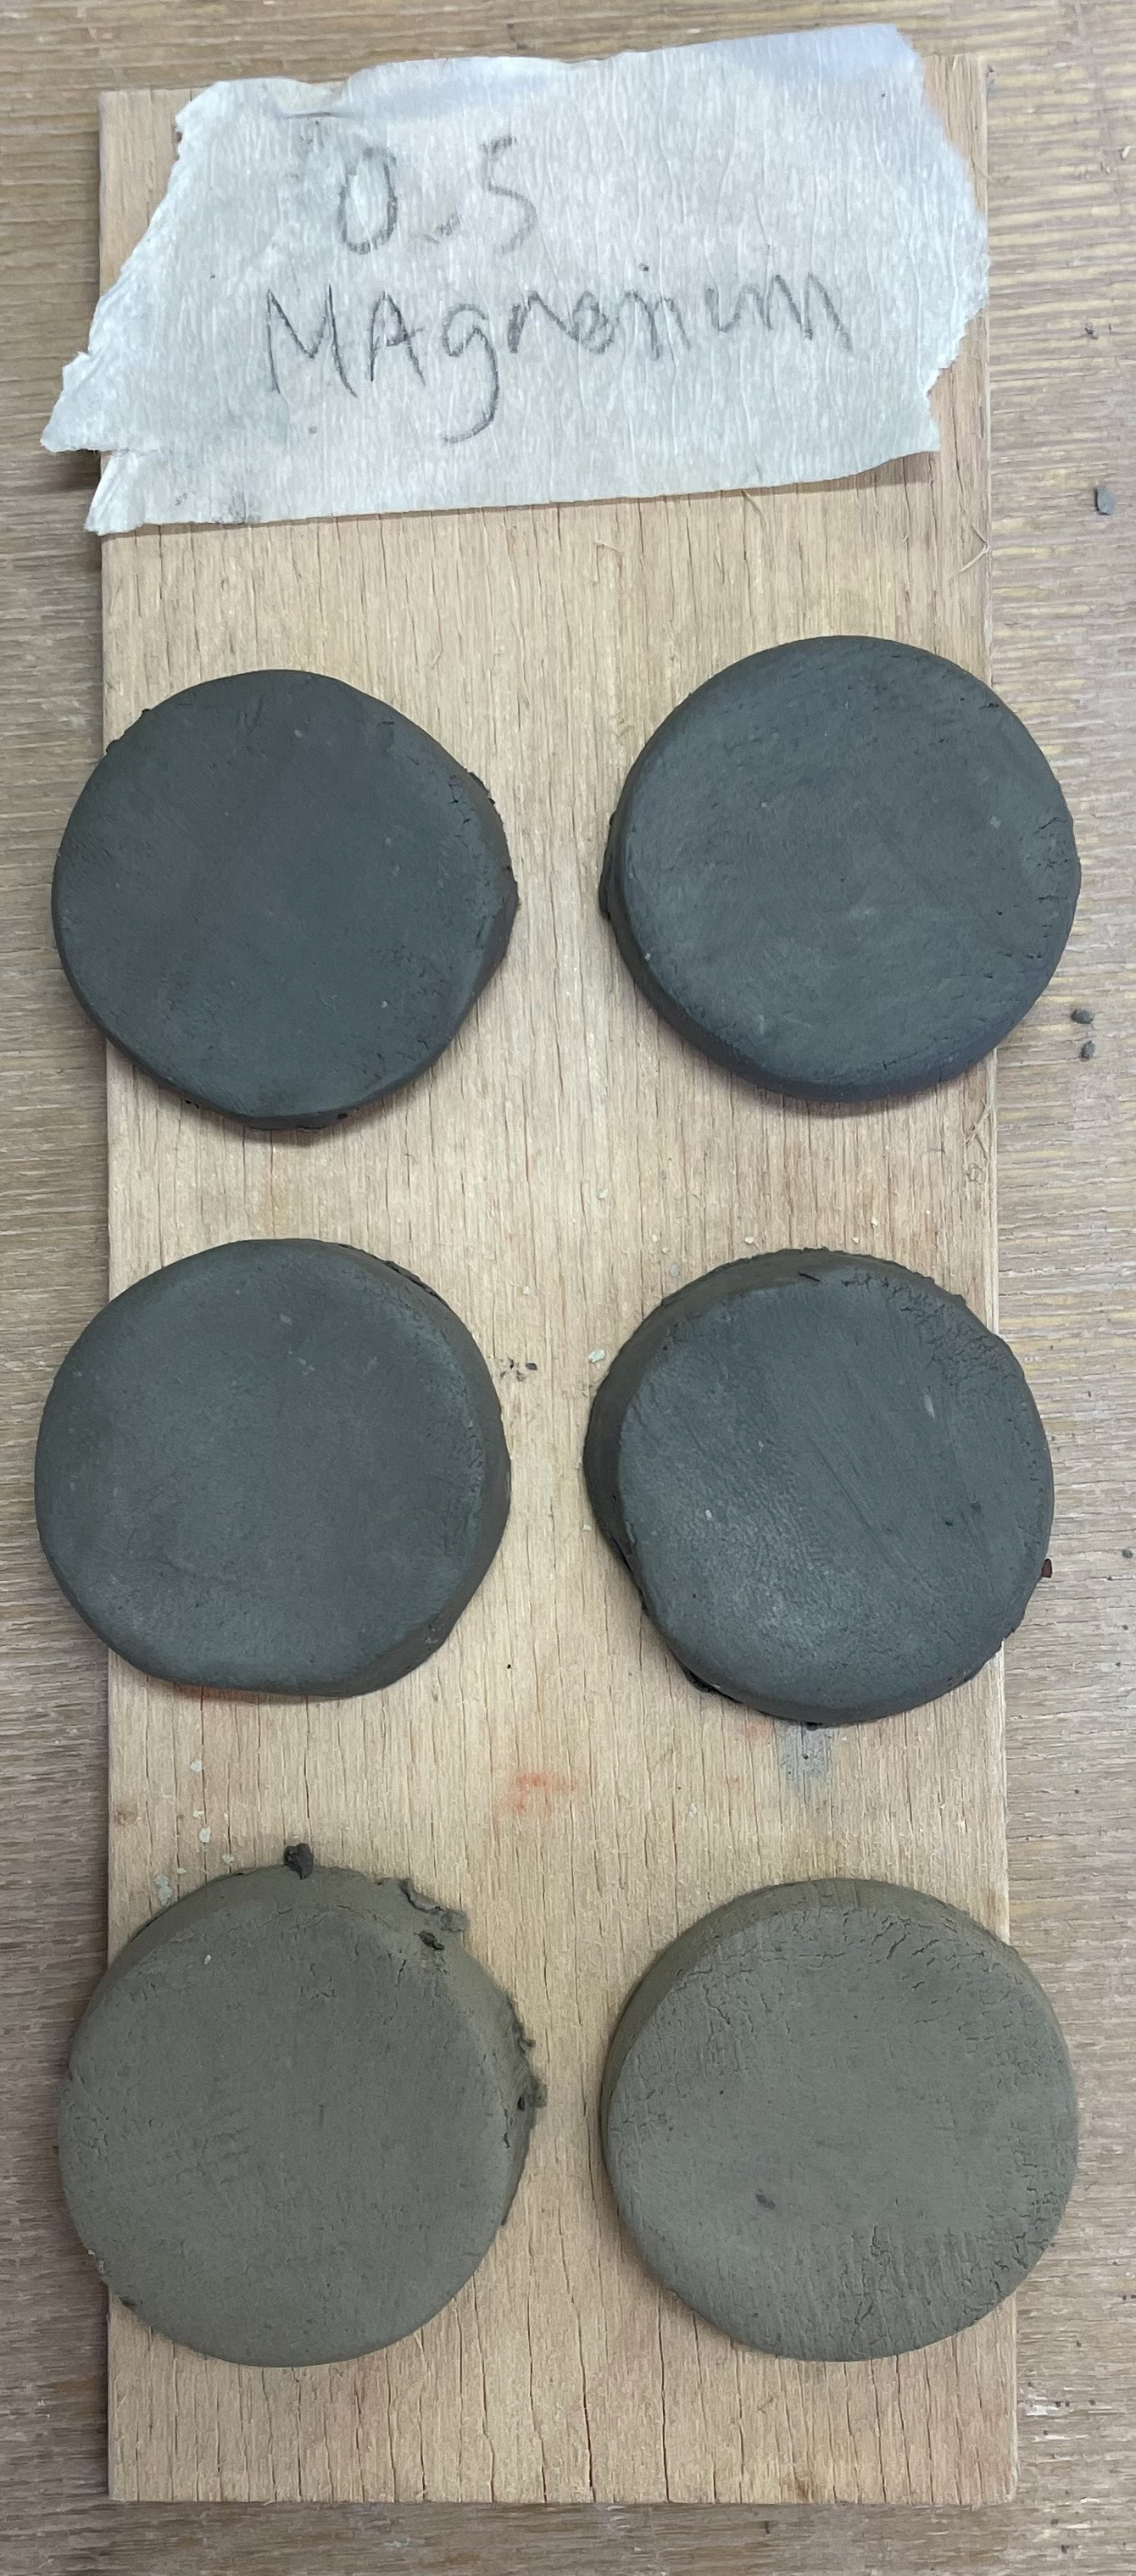
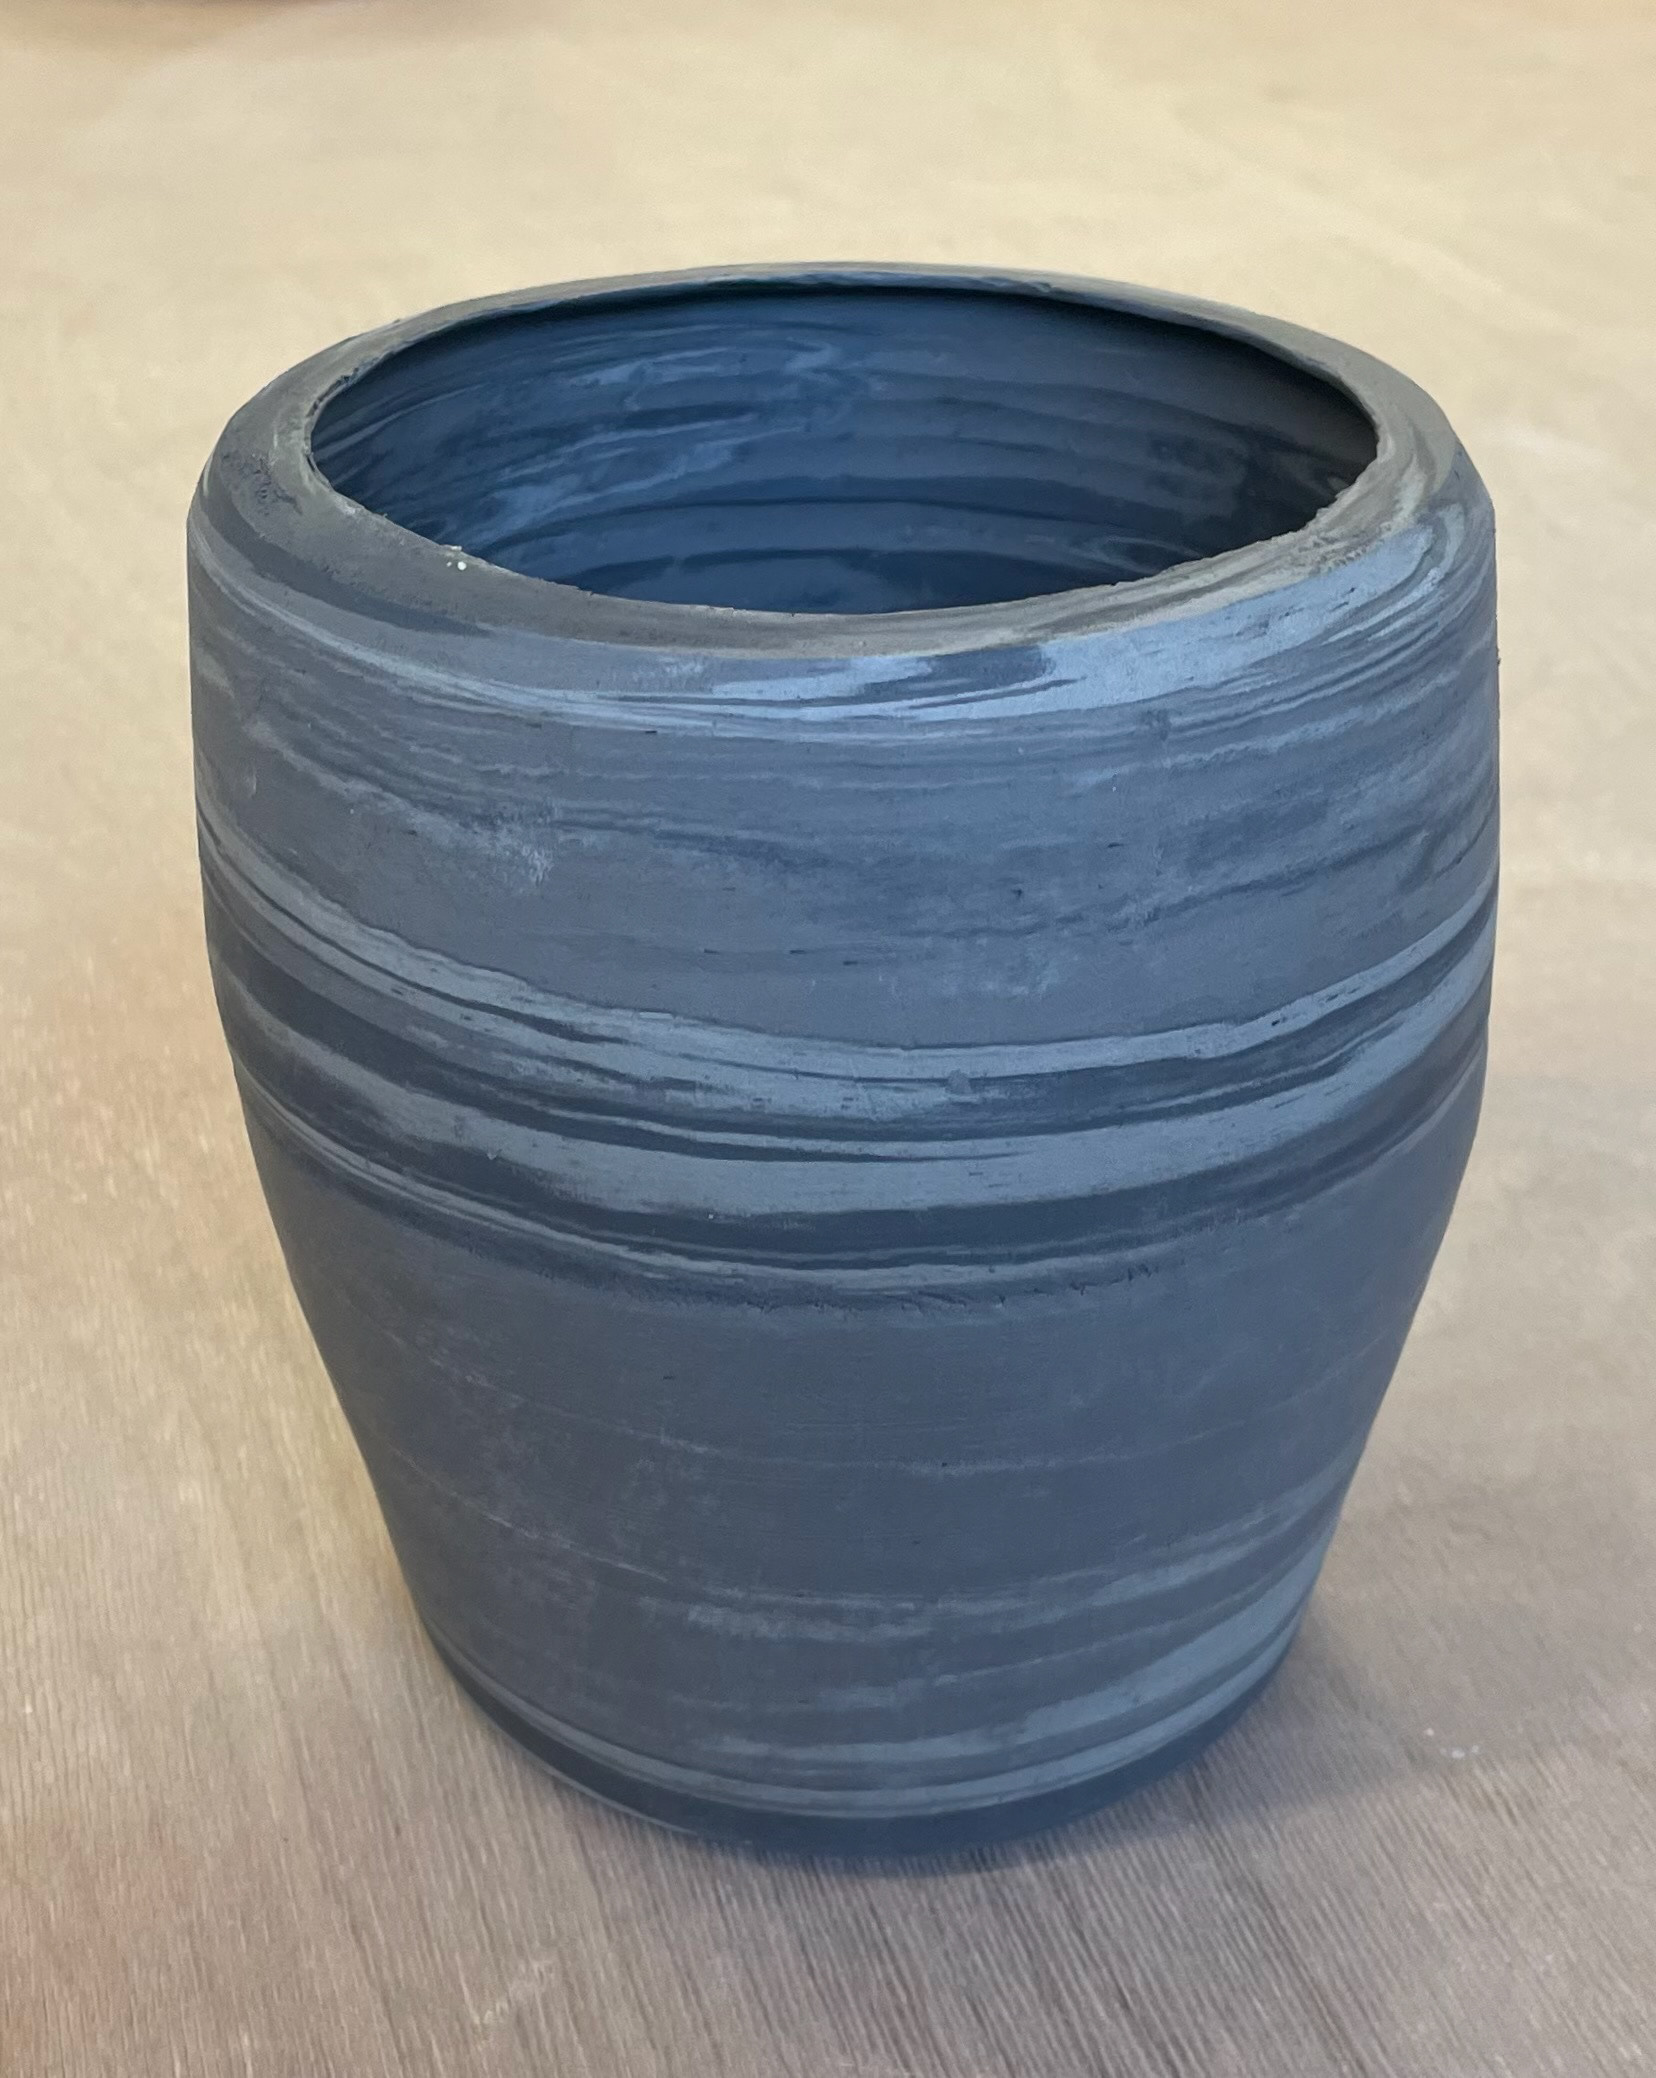
Colour Clay Sampling 2
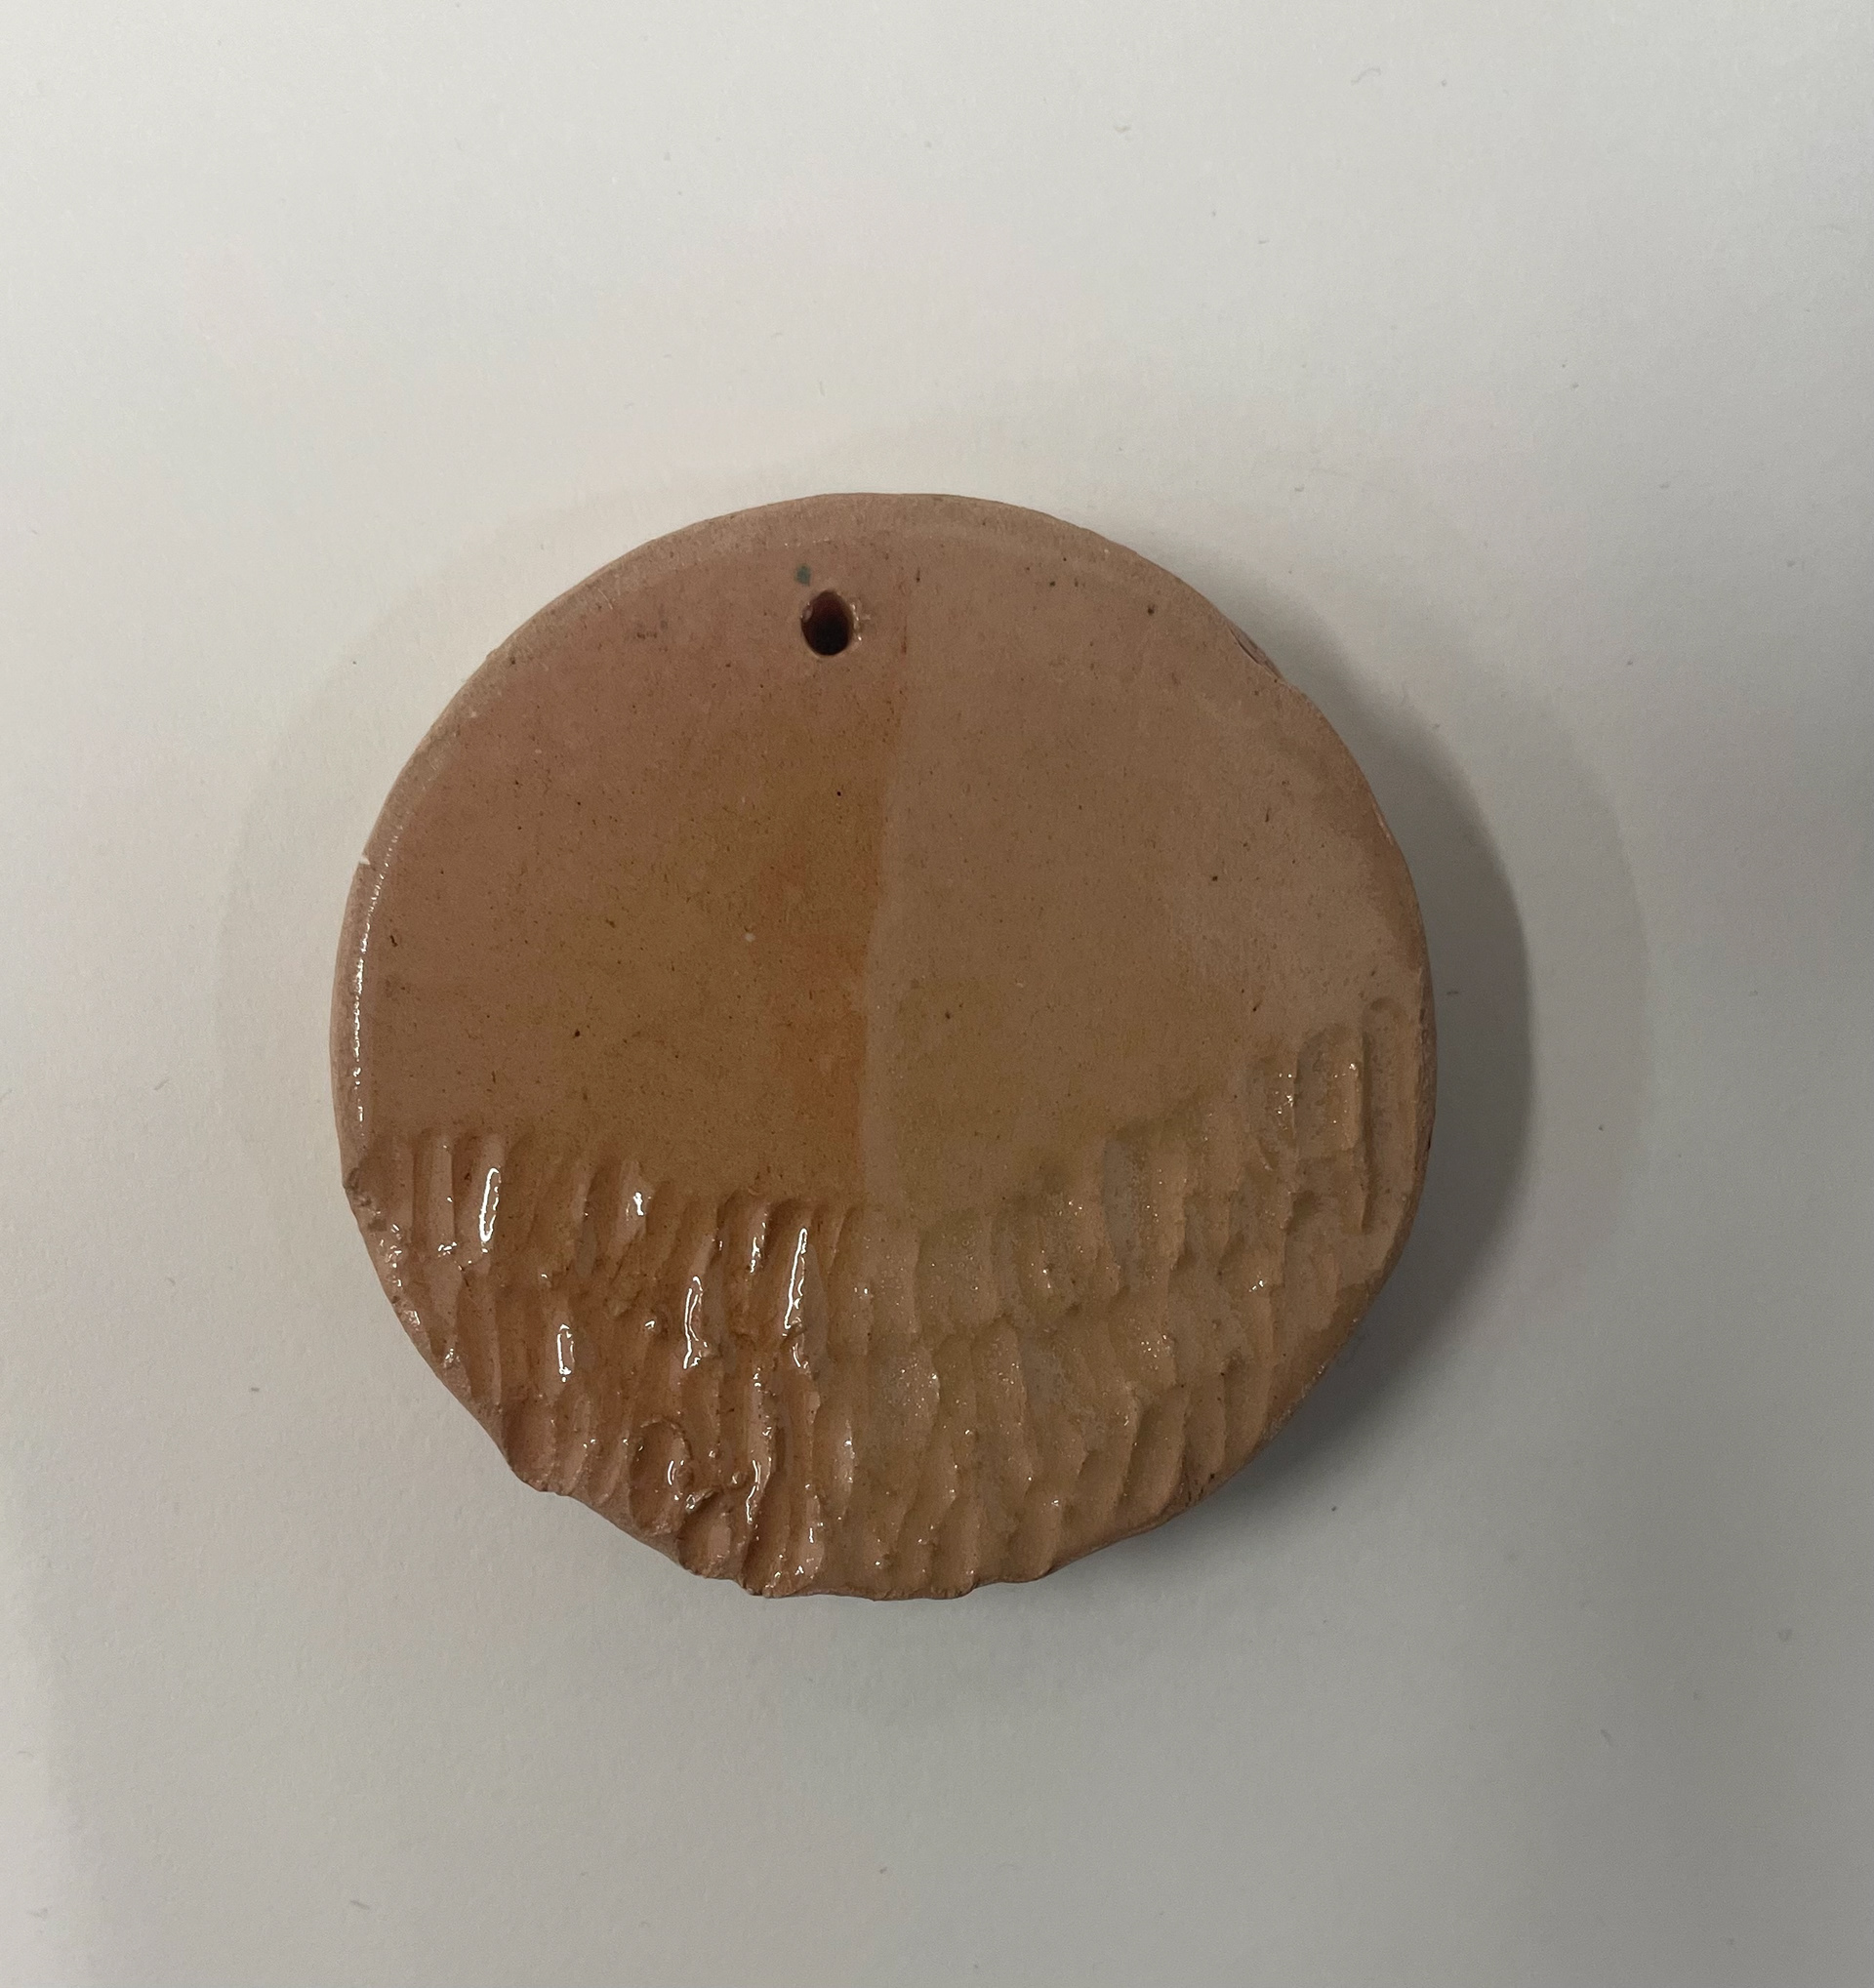
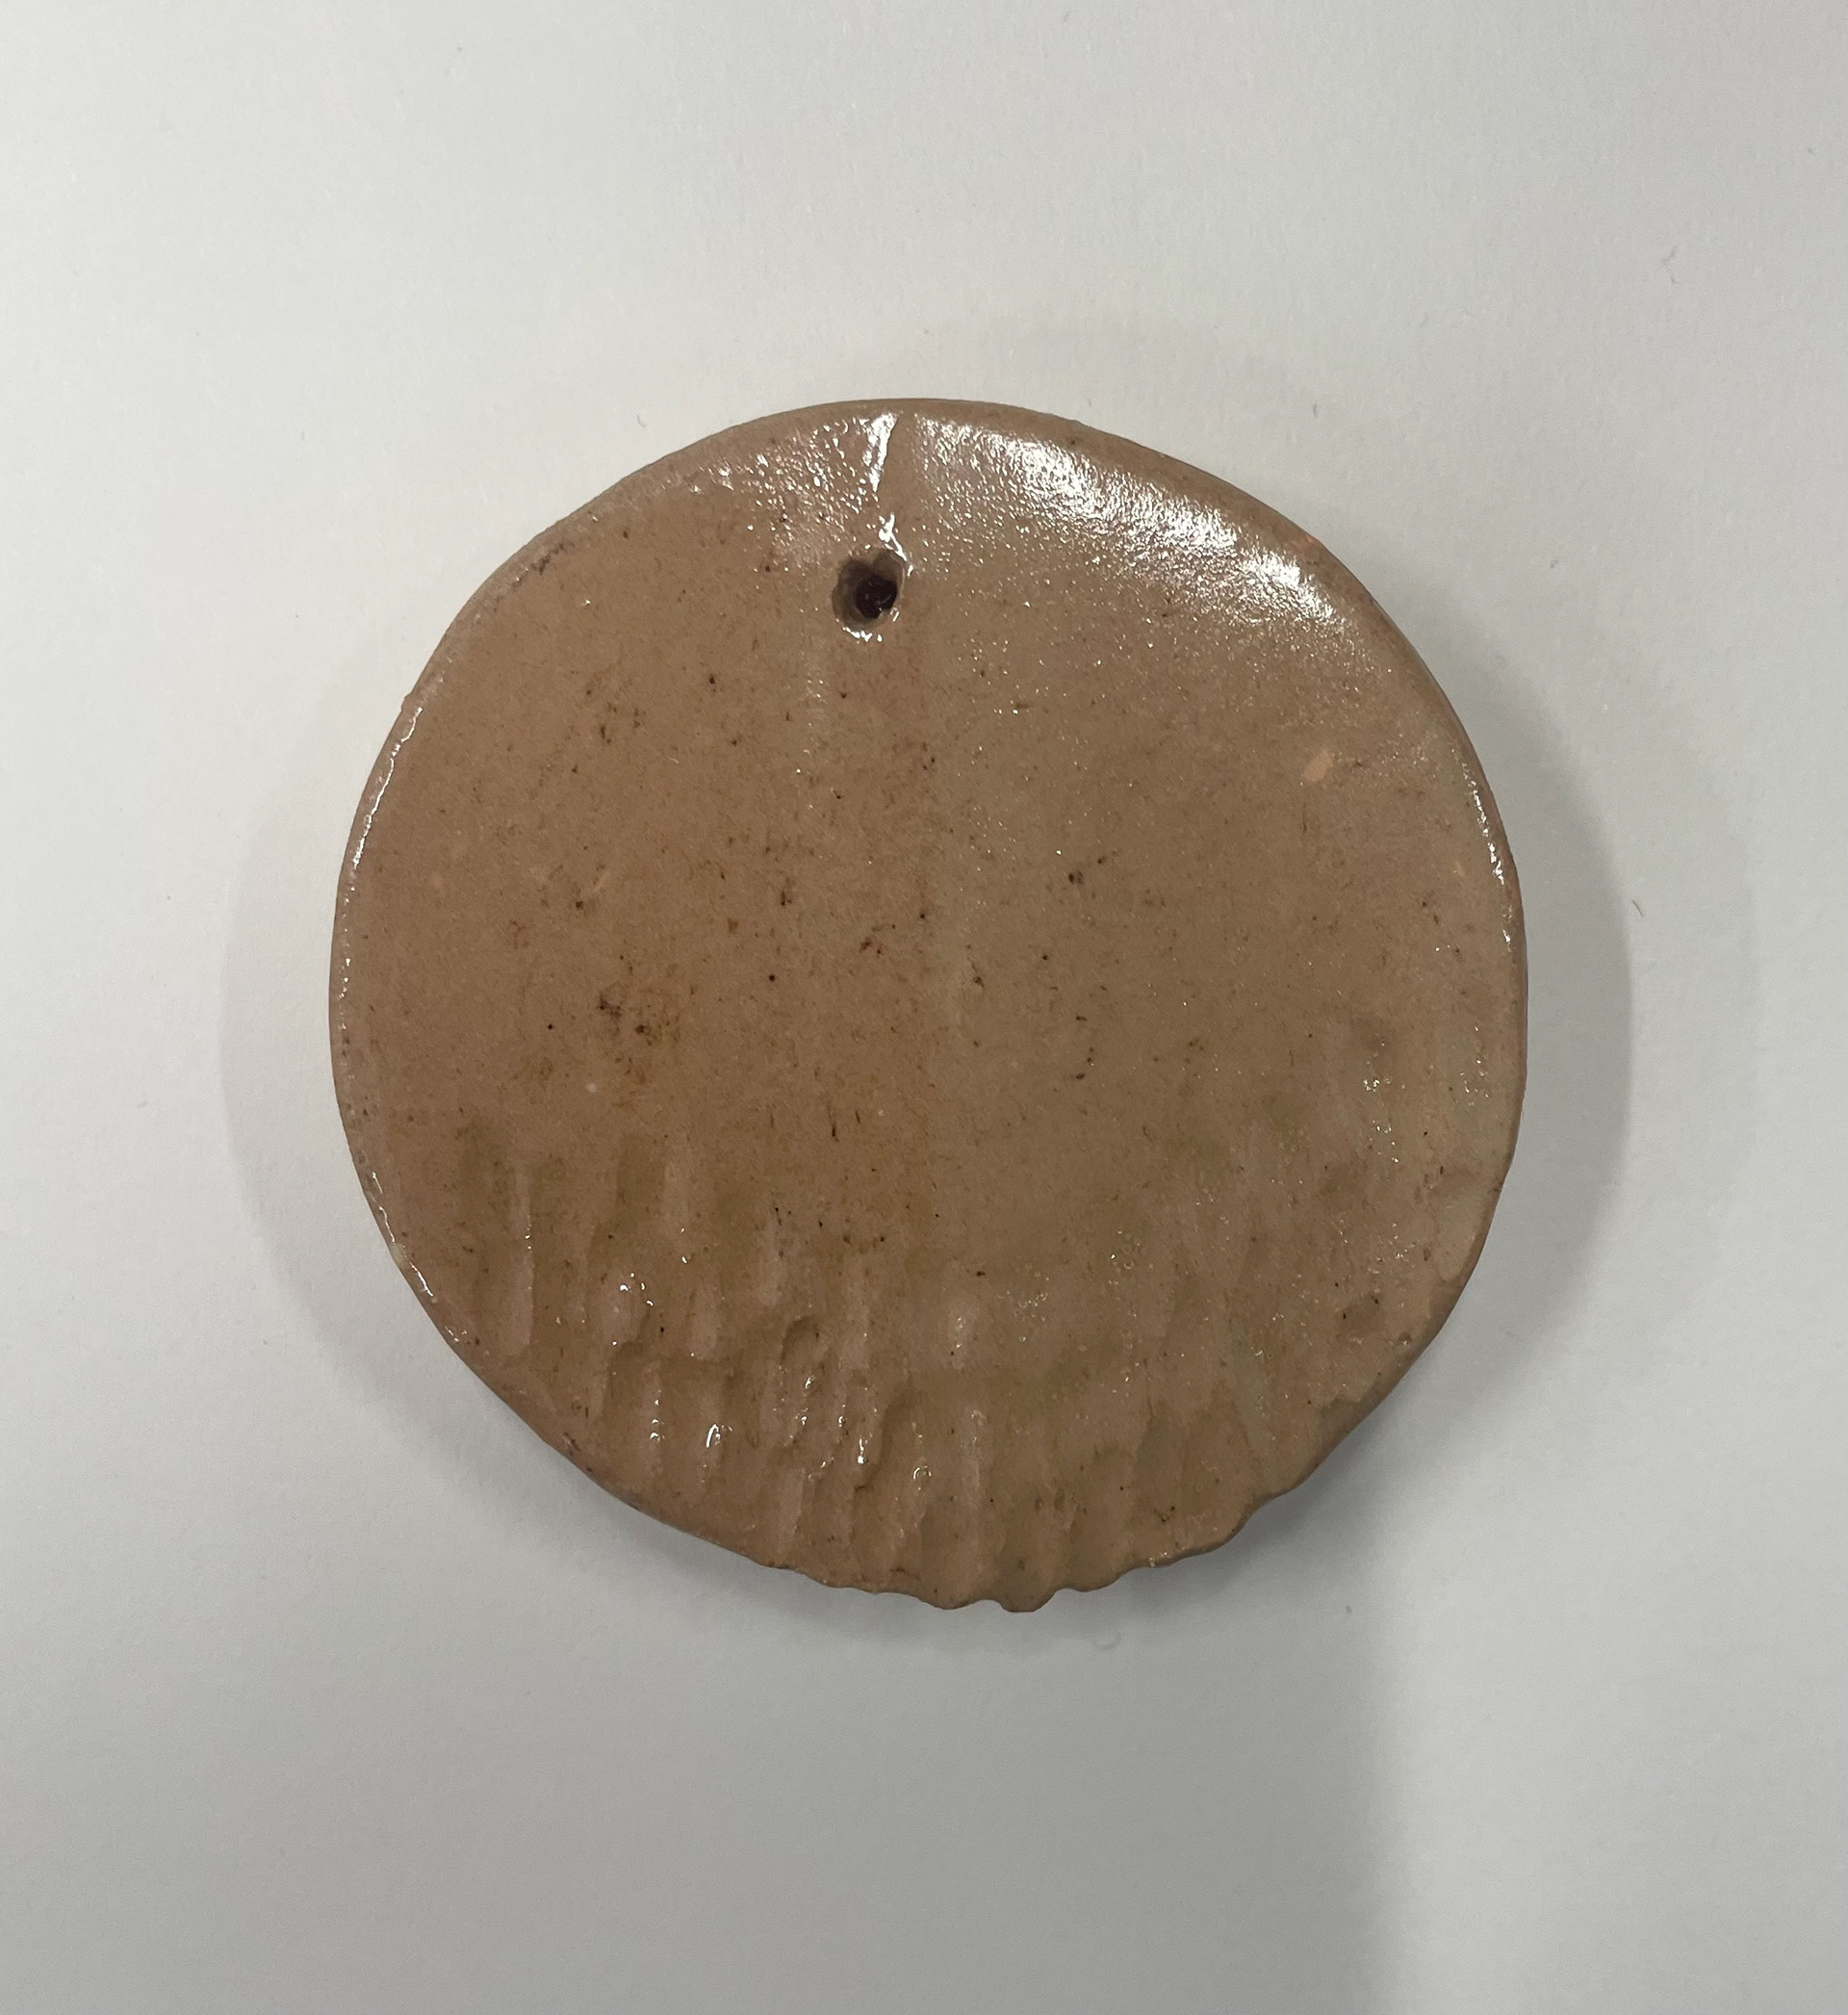
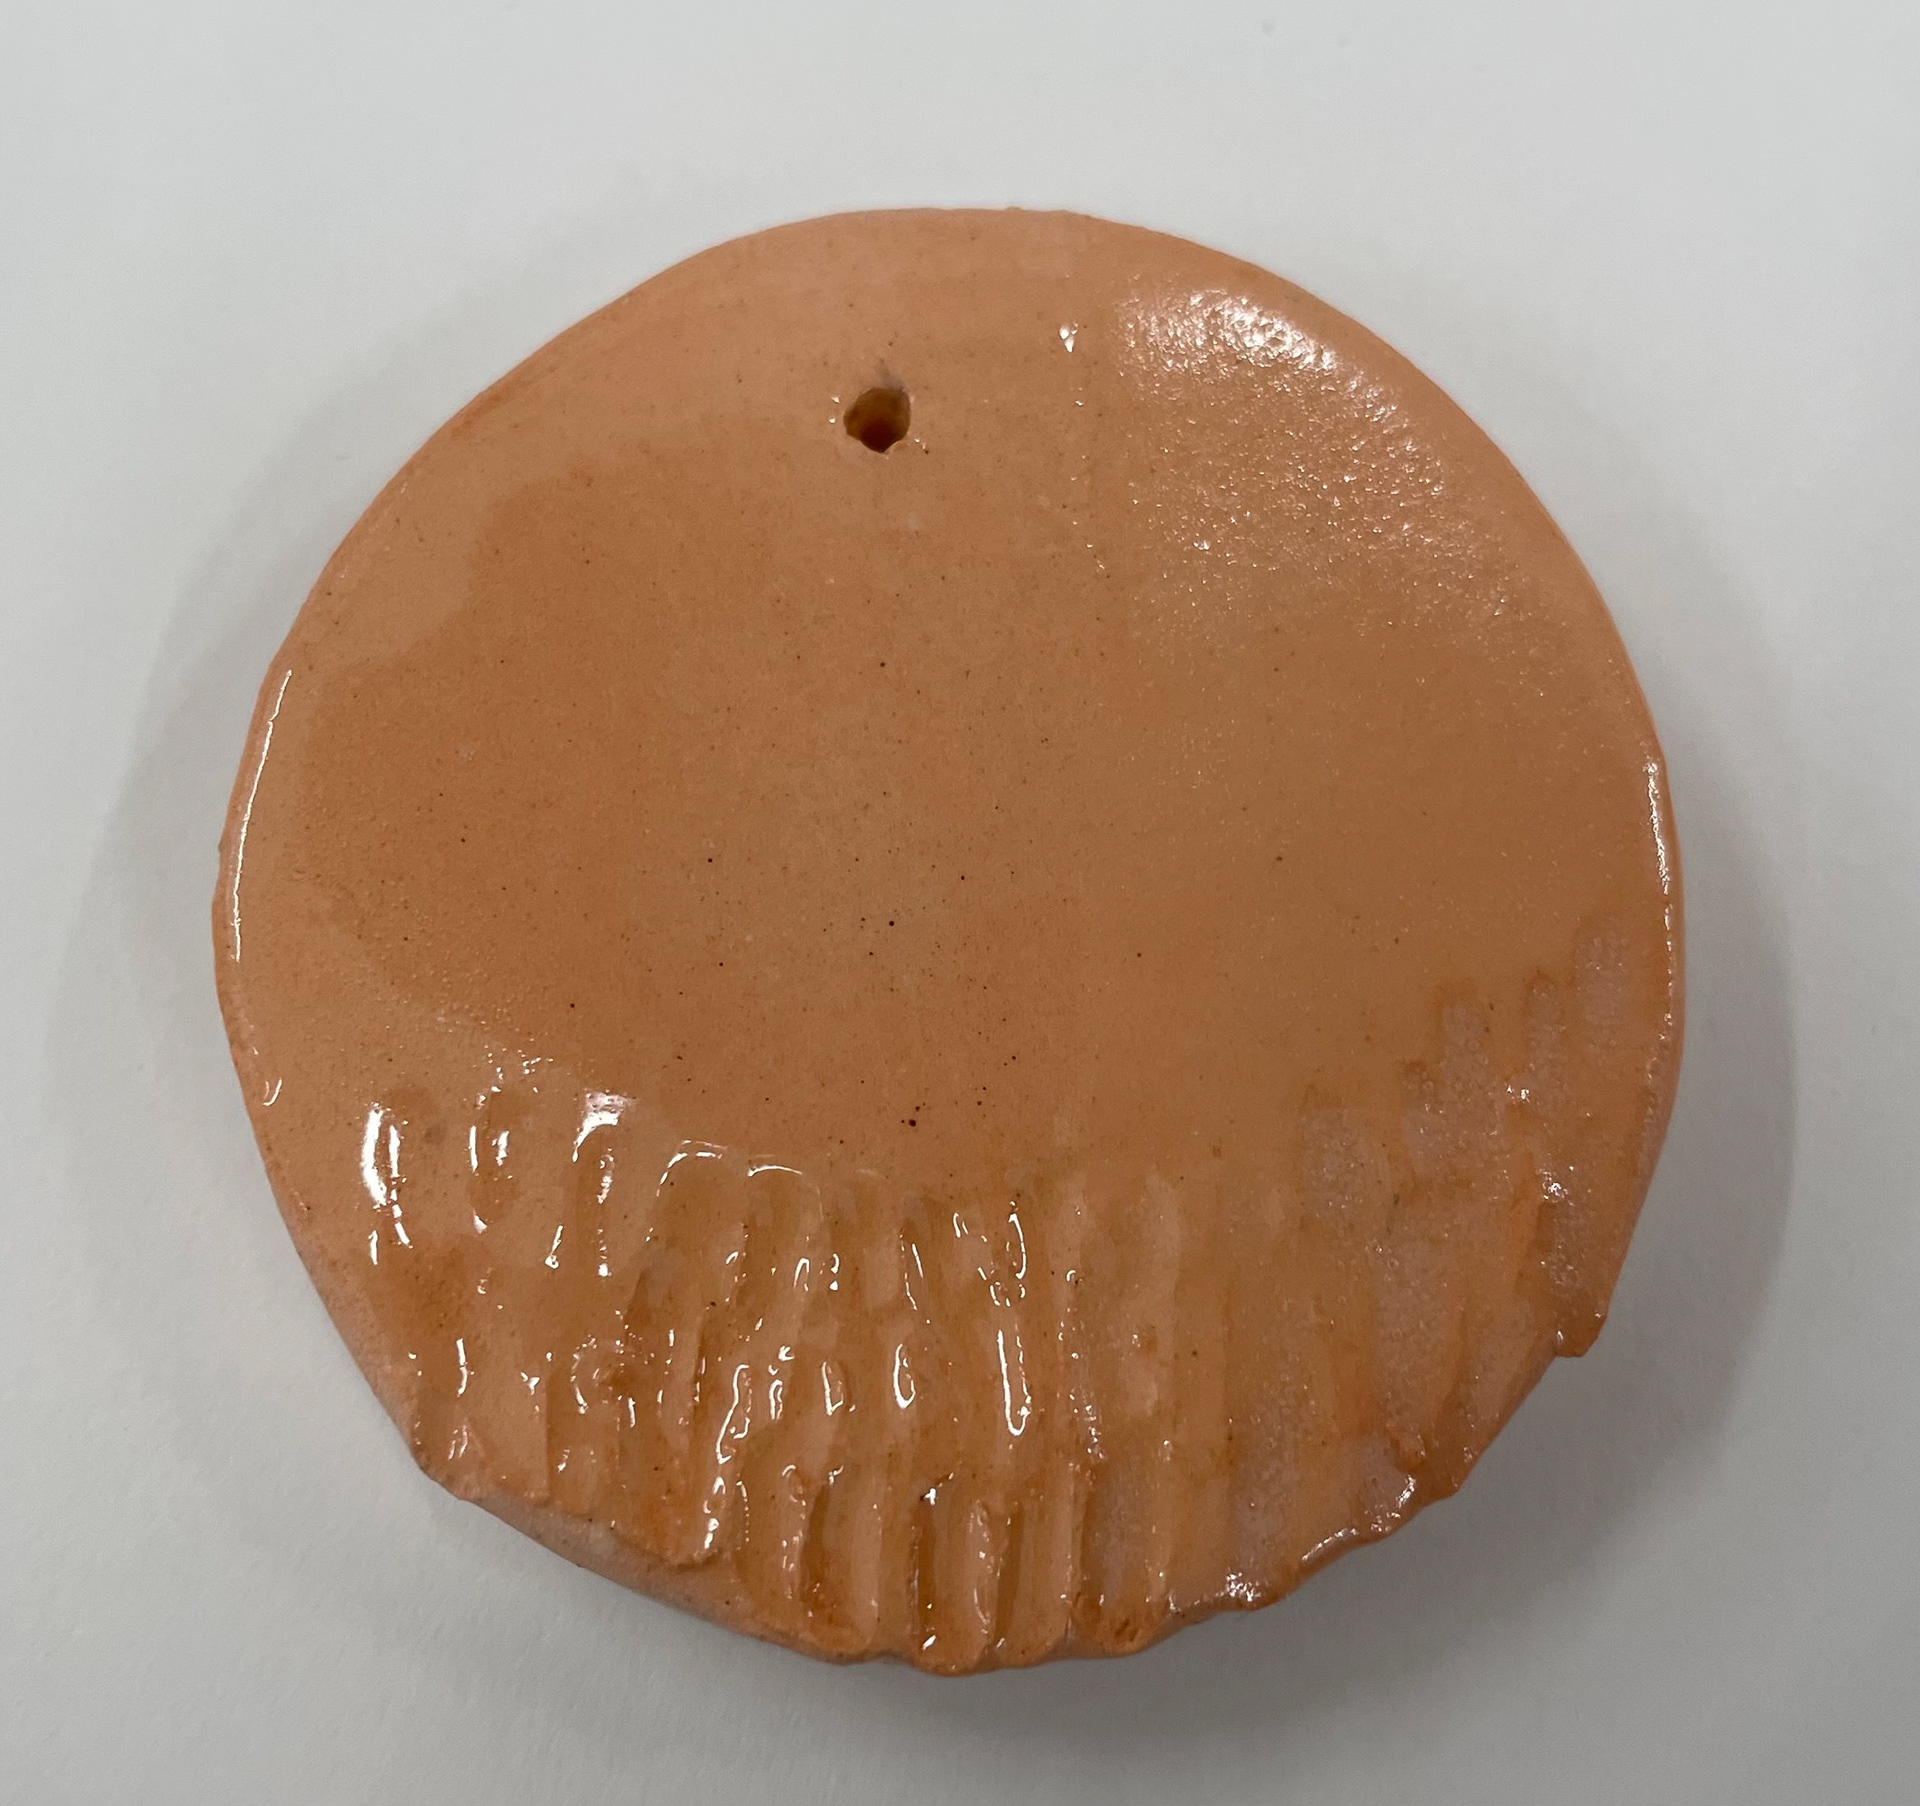
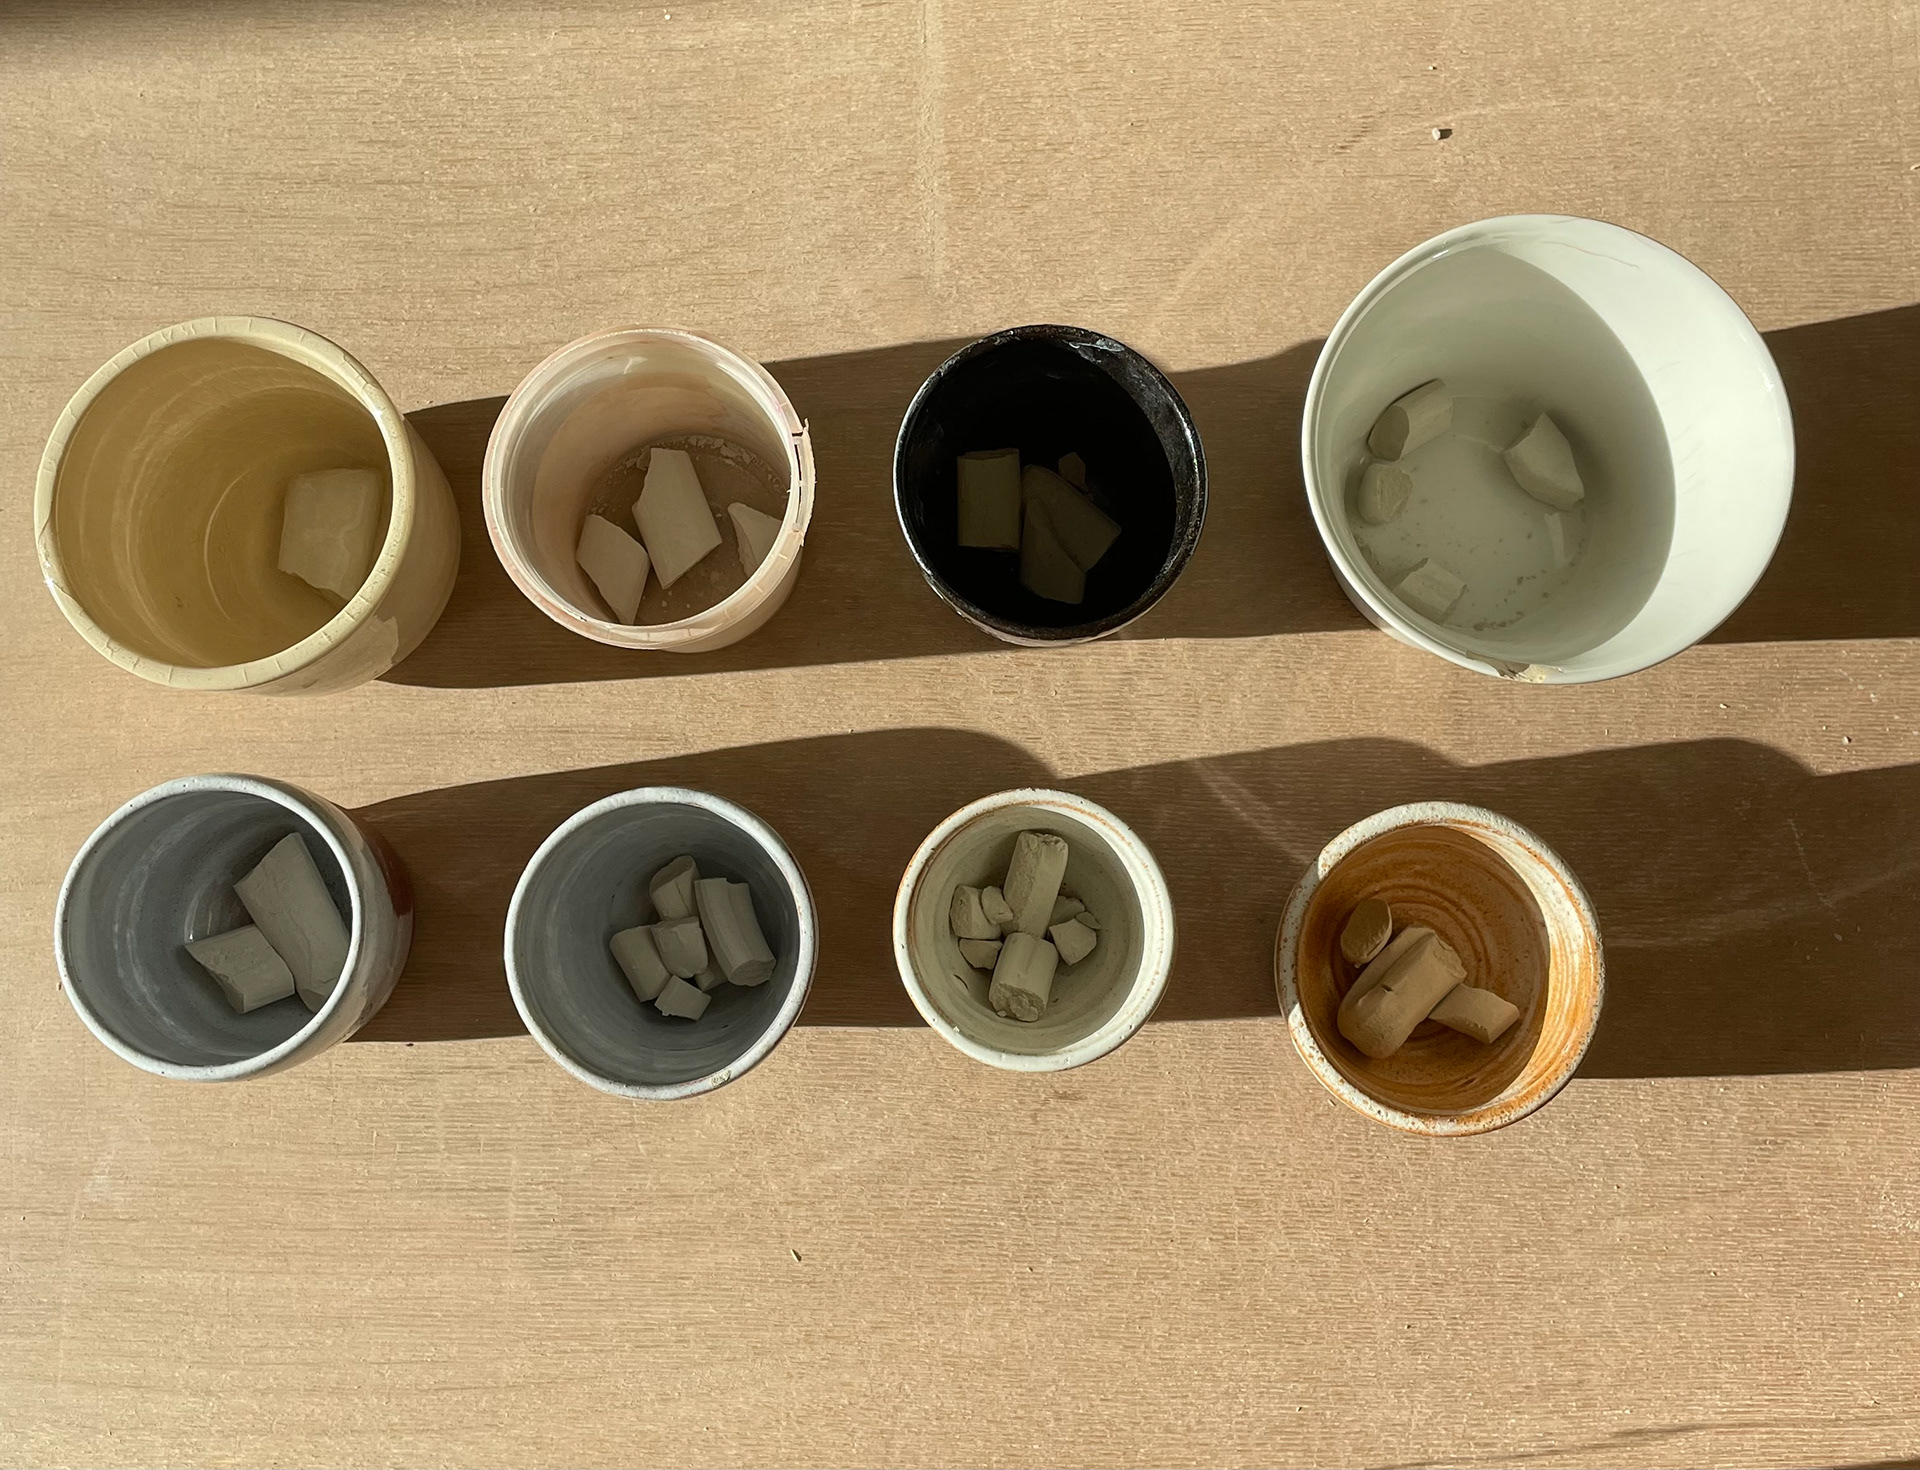
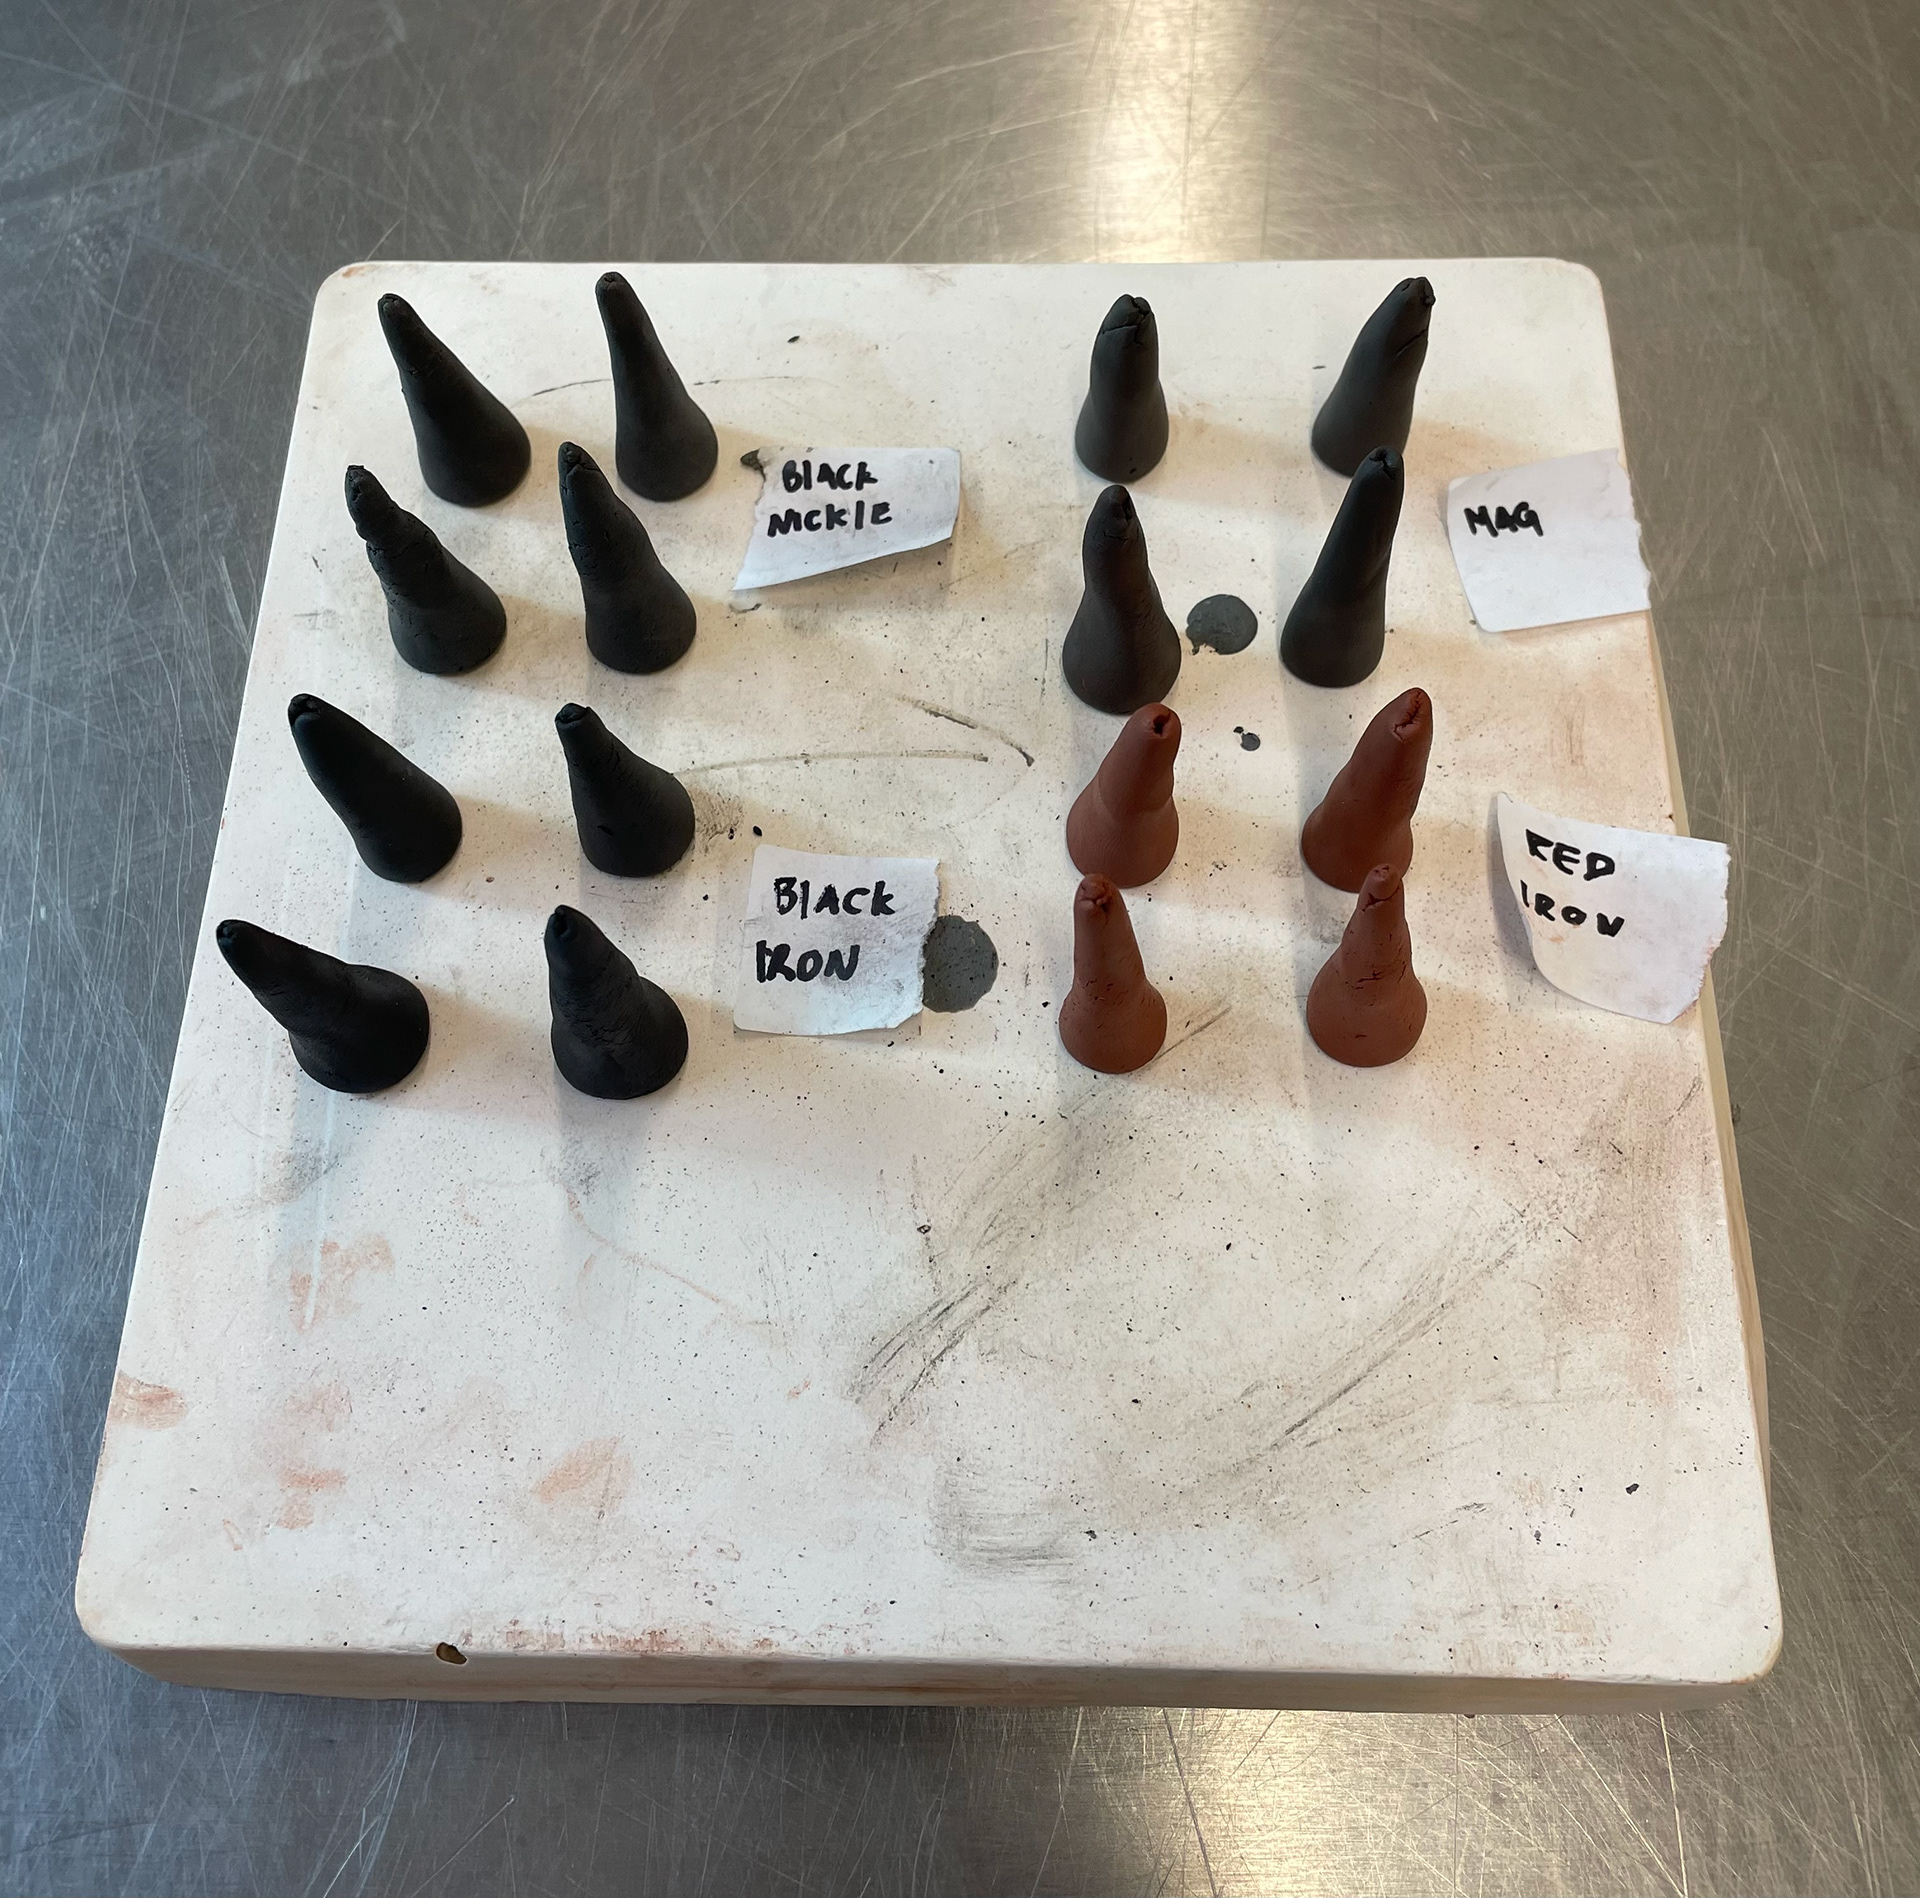
Doing quick experiments with different quantities of oxides in coloured clay, by doing this it allows me to see which colours I prefer in my work without wasting lots of clay and oxides. Measuring out 10g of dried ivory stoneware, I chose this clay as it's the lightest clay, therefore allowing pigment to be more saturated. I went up in quantities of 0.5. therefore, had three coloured clays with magnesium oxide, black ion oxide, and black nickel. In quantities of 0.5%, 1%, and 2% of each oxide. I decided to have two sets of each coloured clay, which meant I could fire them in both earthenware and stoneware to see if the different temperatures affected the colours.
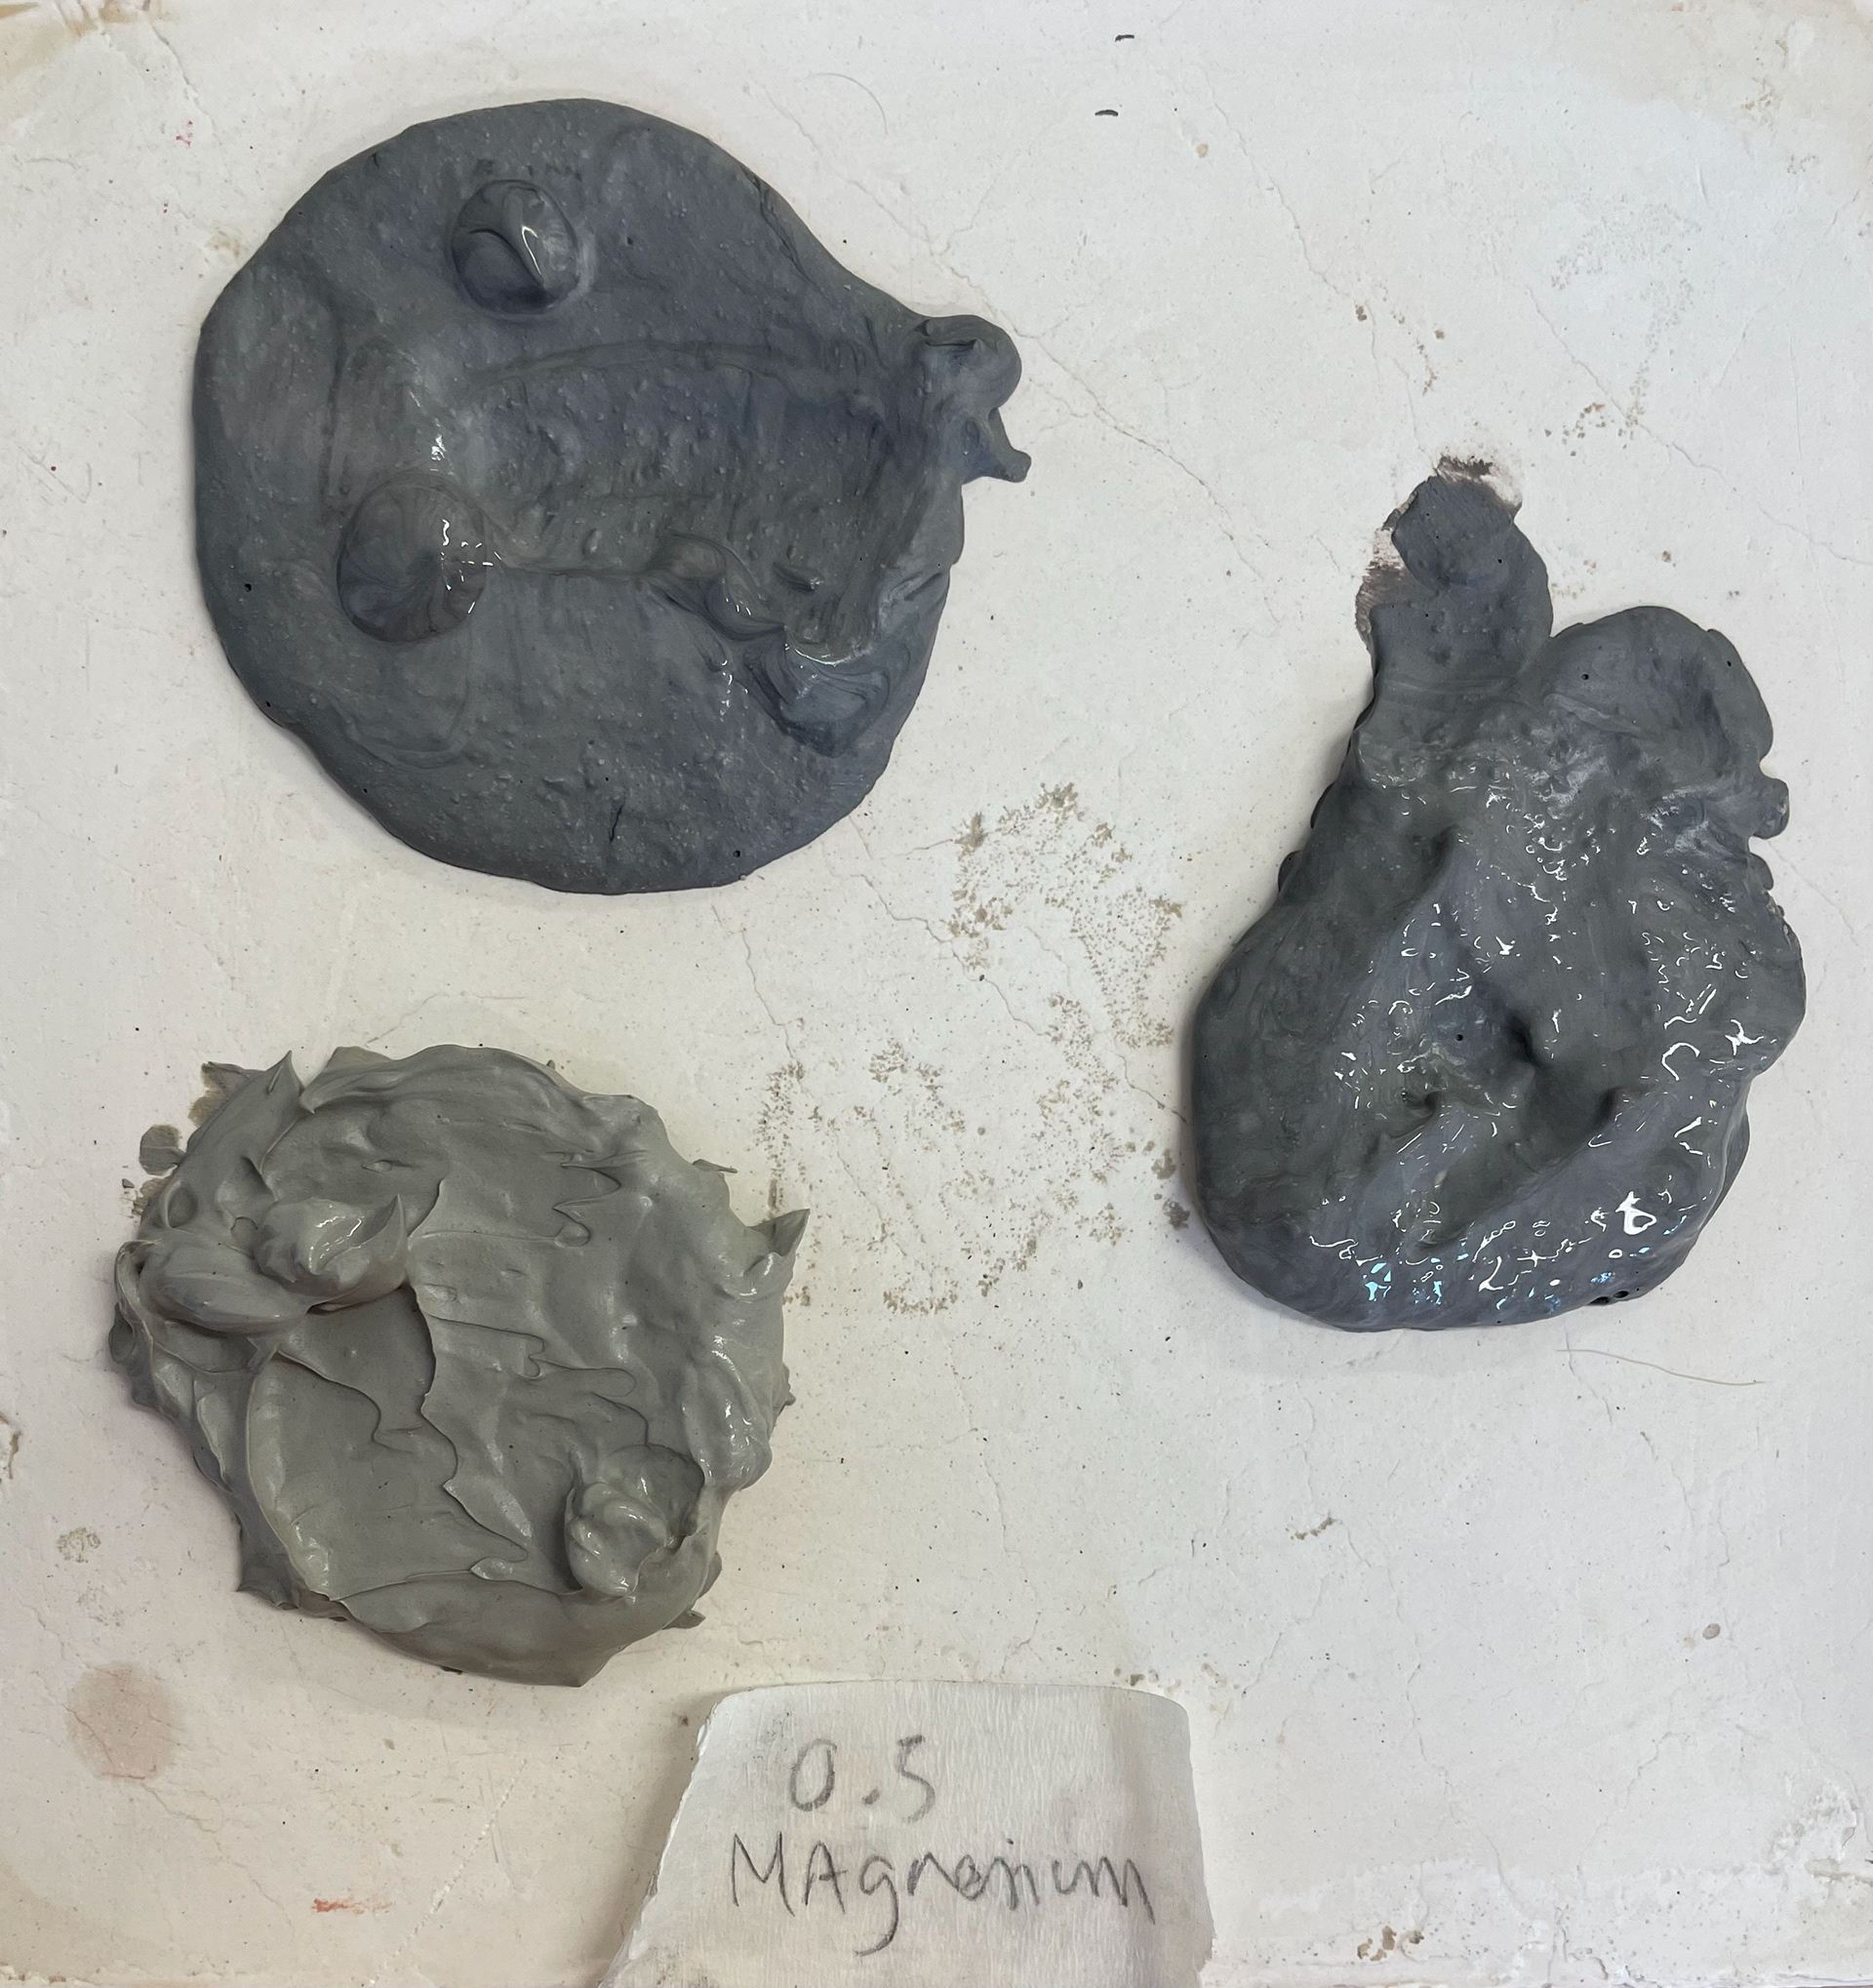
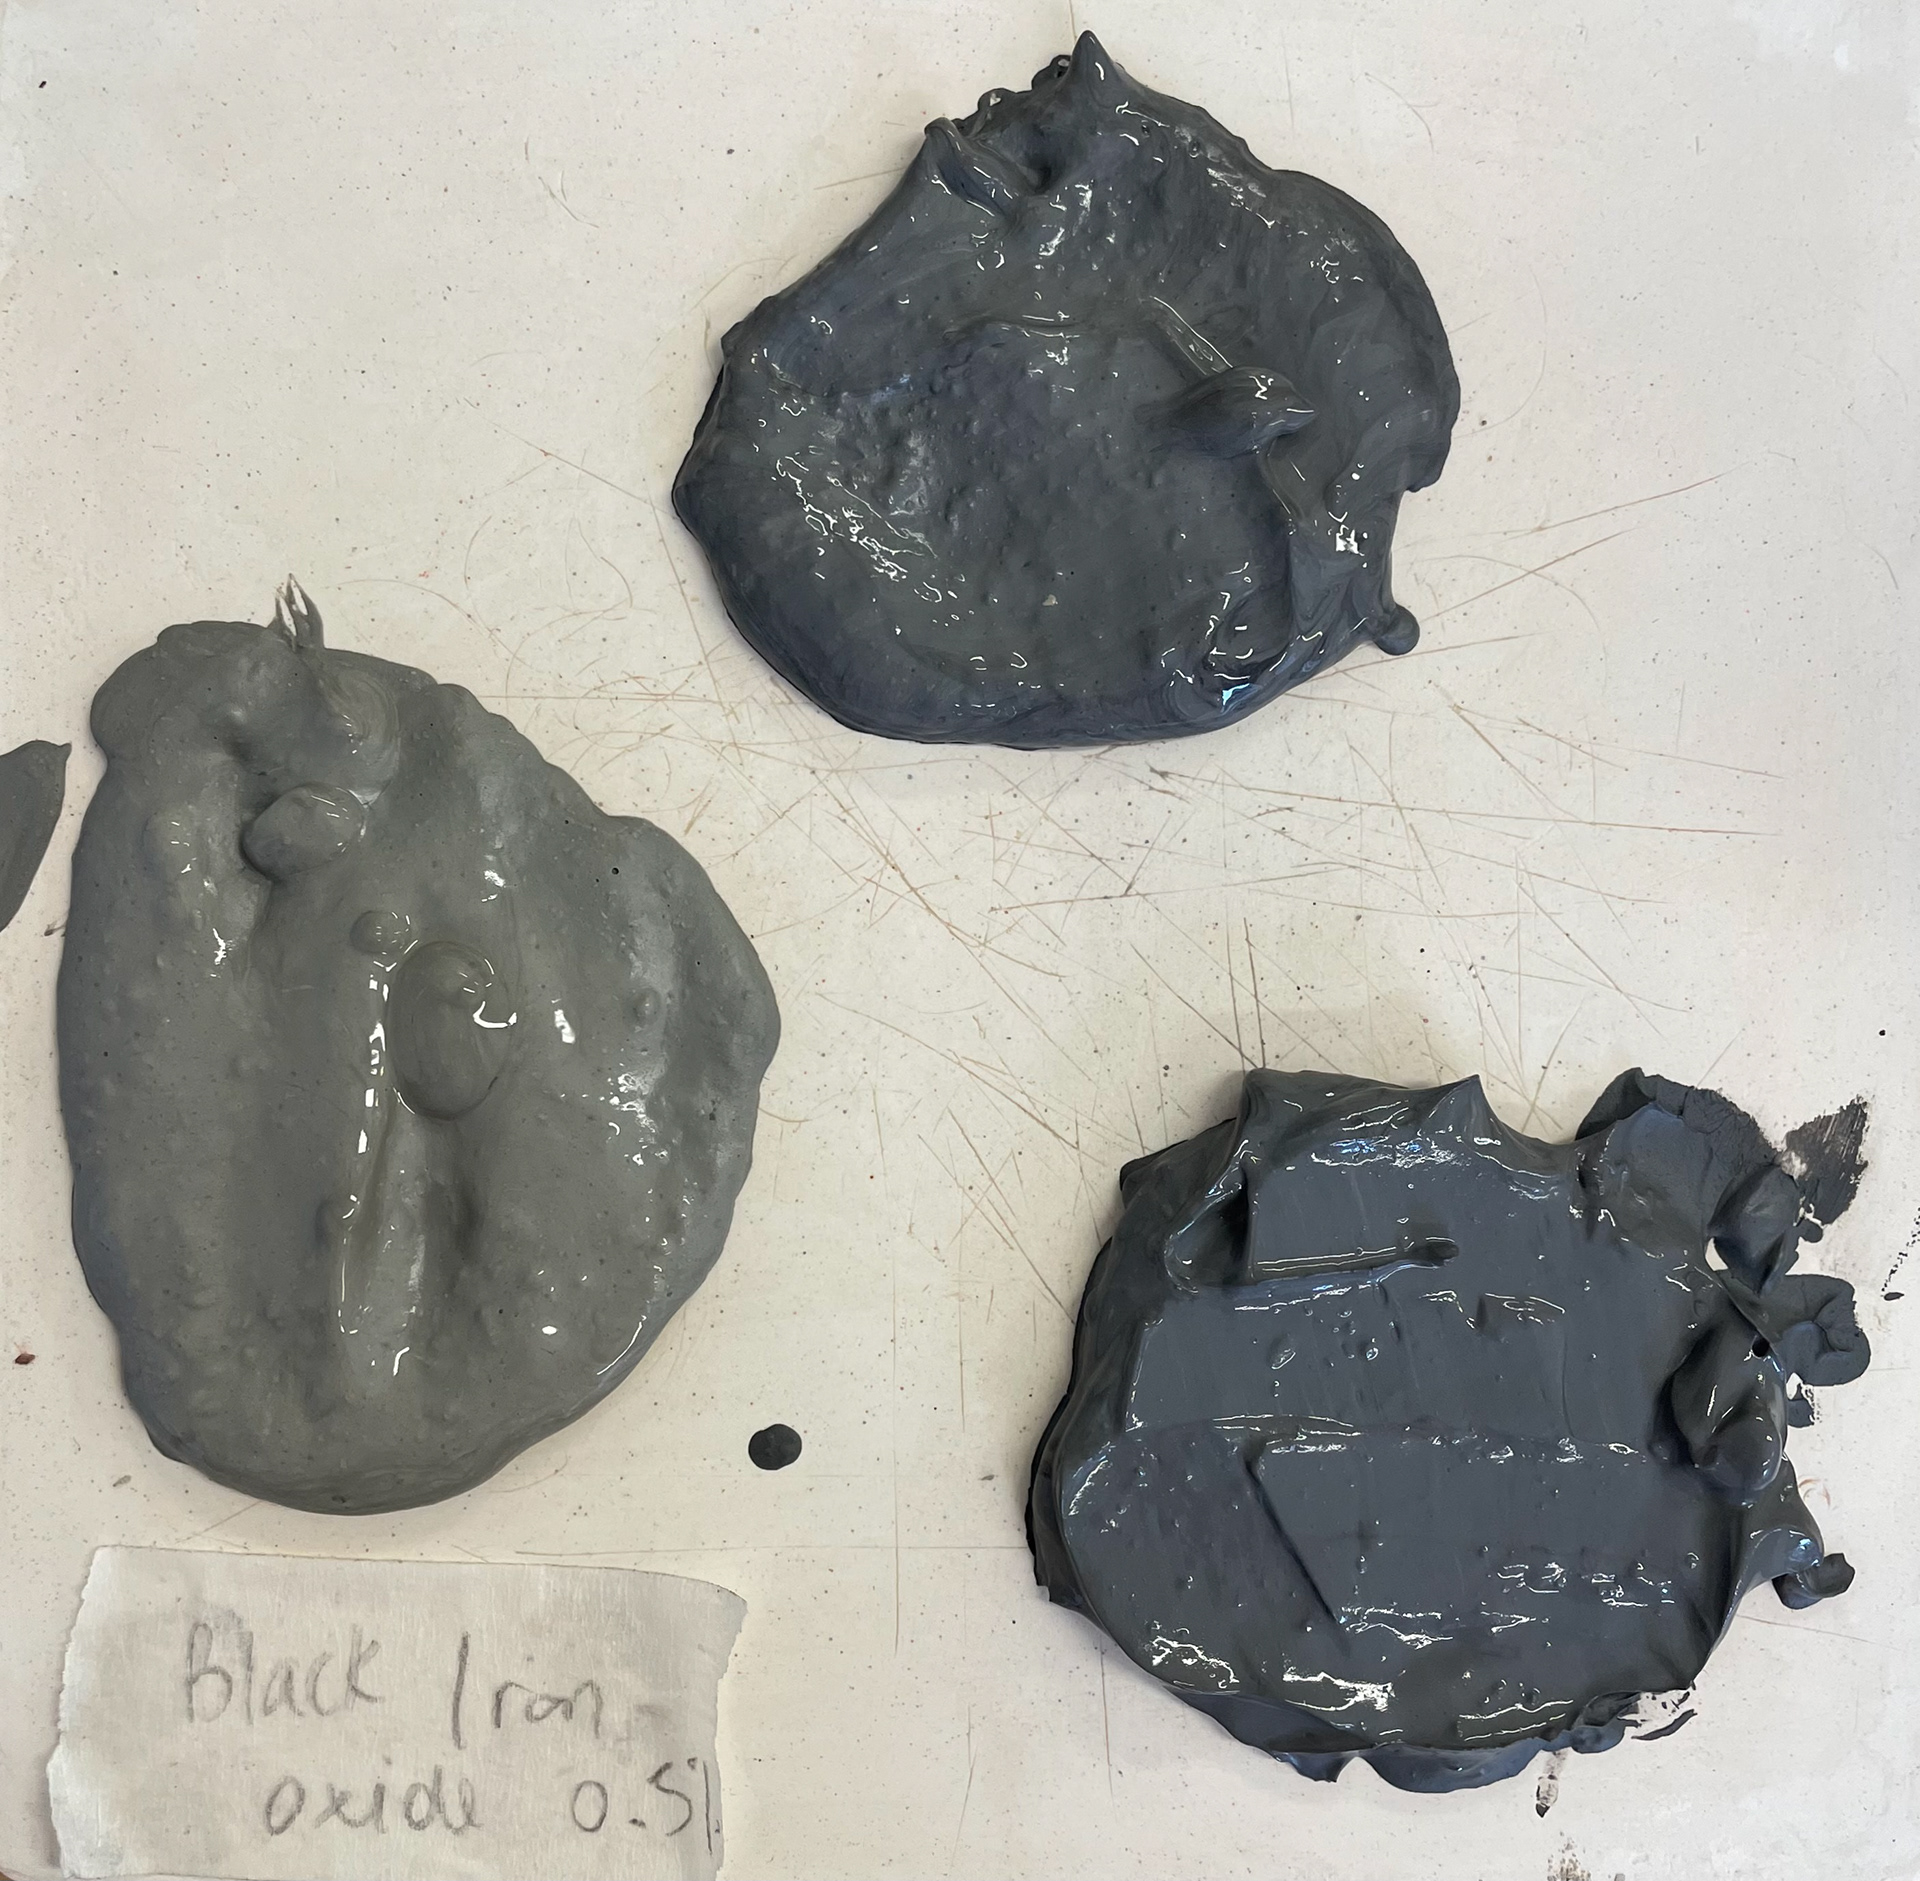
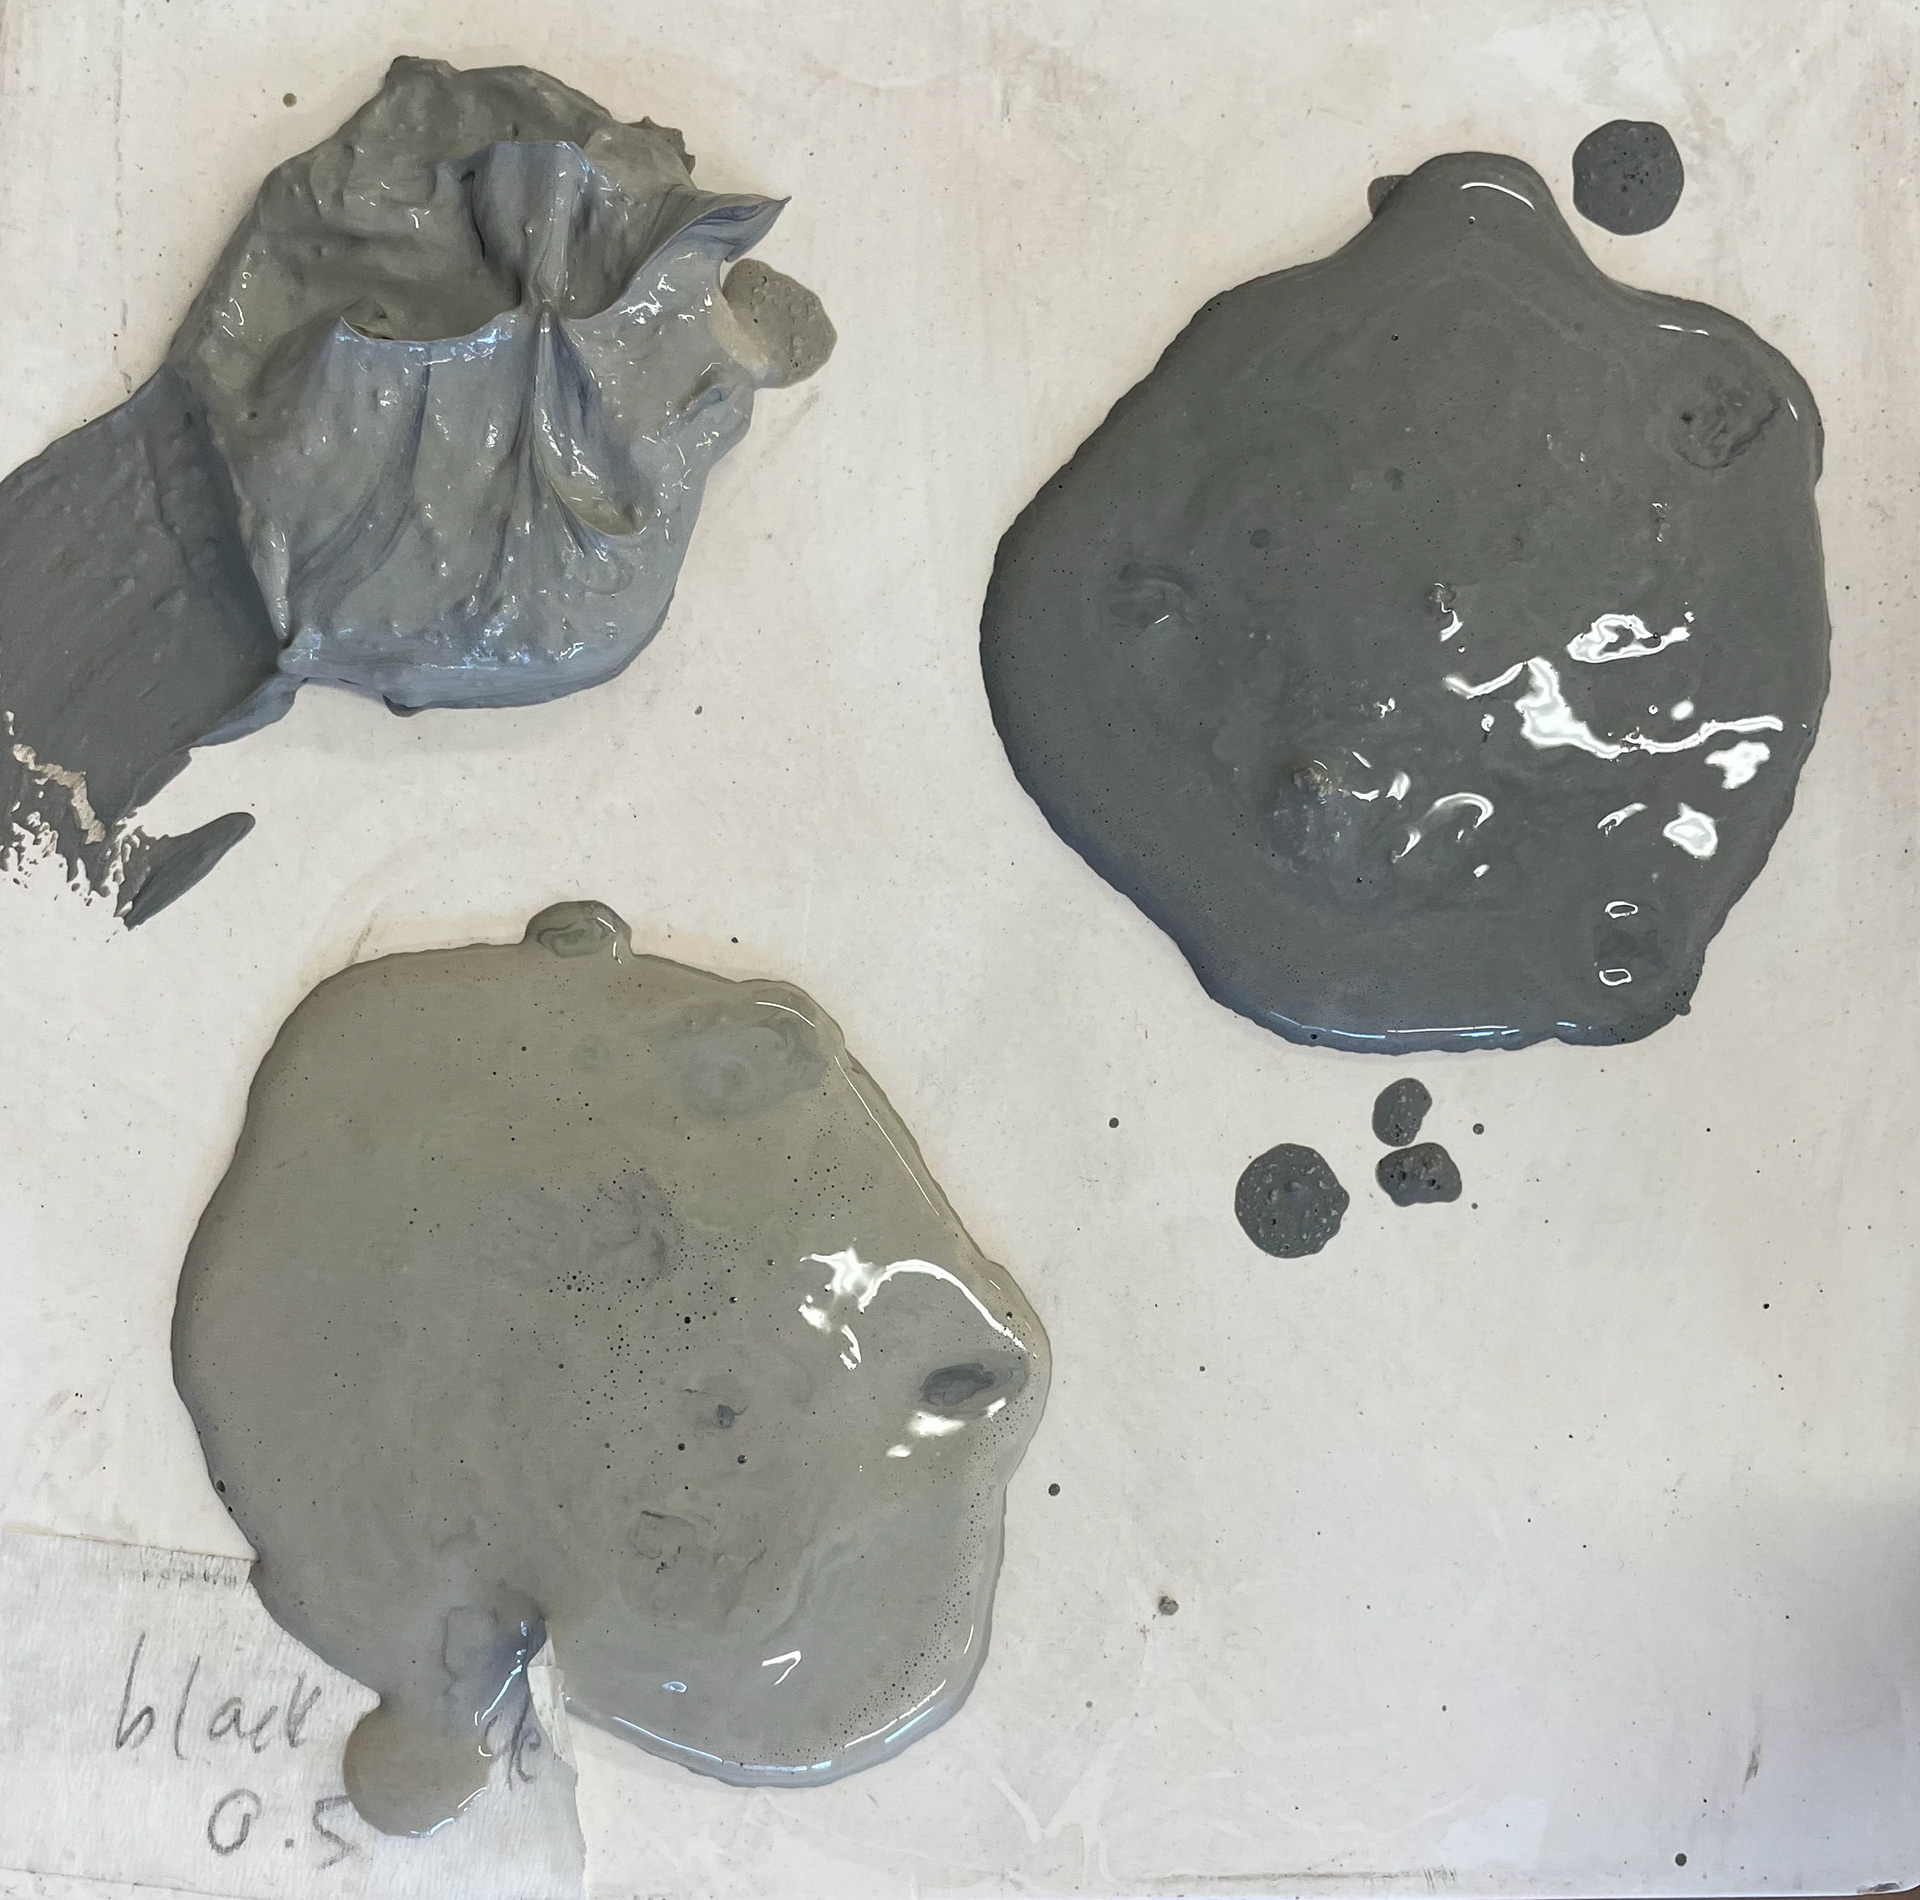
When mixing the colours, they all looked very similar, all very dark and shades of grey, this made me hopeful that they would produce dark-coloured clay. However, I know that the colours can change drastically in the kiln. The 0.5% increments meant the colours only changed slightly. Perhaps if I do this again, I would go up in more drastic increments as it would give me a broader range of colours and would be easier to imagine the 0.5% colours rather than 1% coloured clays.
Black Nickel Oxide
Black iron Oxide
Magnesium Oxide
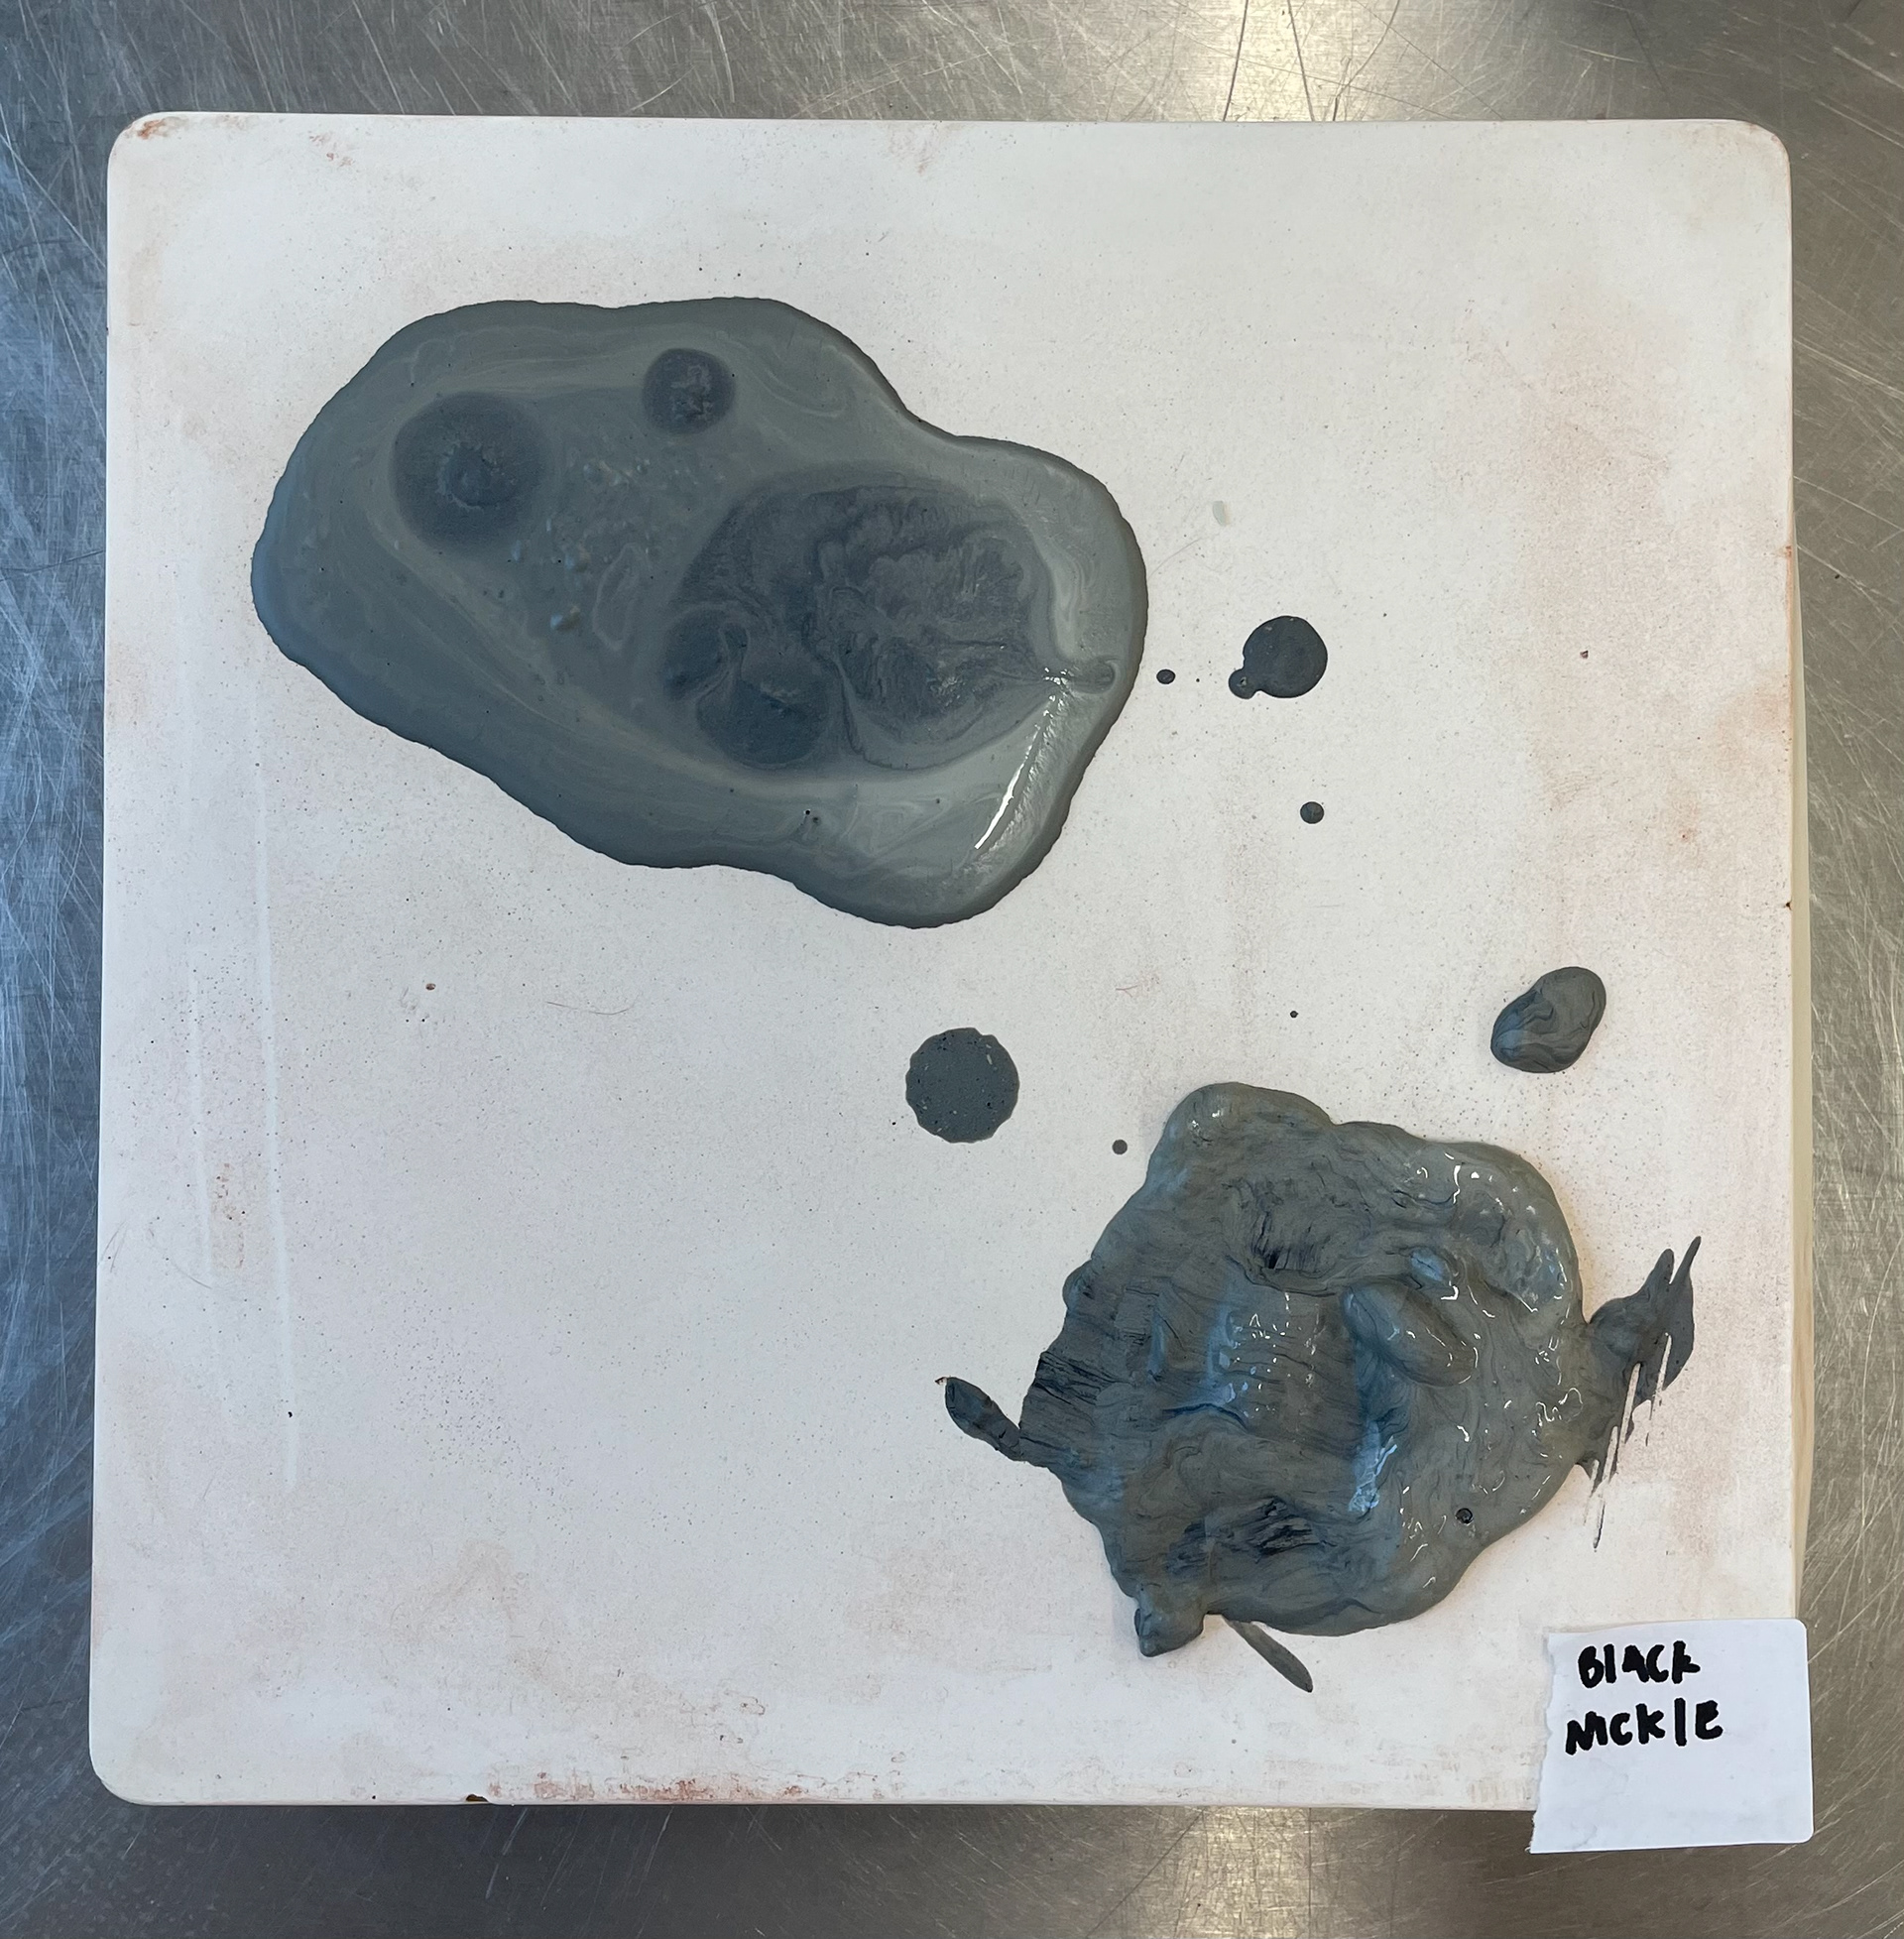
I was very surprised by the finish of my clay samples. I decided to use a clear shiny glaze on one half and then a clear matt glaze on the other, this allowed me to see if different glazes affect the colours and overall finish. With the earthenware samples, I was very shocked by their colours, as they were so dark going into the kiln I was expecting to see more shades of grey however, they are a lot warmer tones. The matt glaze didn't have much effect, only dulling the colour out a little on some samples. However, this might be because I applied it on too thick, therefore taking away from the pigment. I think I need to redo this testing, but with higher percentages of oxidised and larger increments, looking at 5%, or 10% perhaps, to see if this makes a more drastic change in the colours. Most samples look very similar I think this is surely since I did small increments of 0.5%. Out of the three tests, magnesium was my favourite coloured clay that I was able to create I think how it has small black speckles in it, adding depth. Also, it best matches the colours of the stones, which is my colour palette. The samples in 0.5% were just too light, and I didn't like the non-pigment they created. The difference between earthenware and stoneware firing was big in the pigment, although I like different colours from both firings; the stoneware firing gave cooler colours, and the earthenware gave warmer colours. As I will be taking different colours to marble in my throwing, I need to consider that one vessel has to be fired in stoneware or earthenware so I cannot mix the different outcomes.
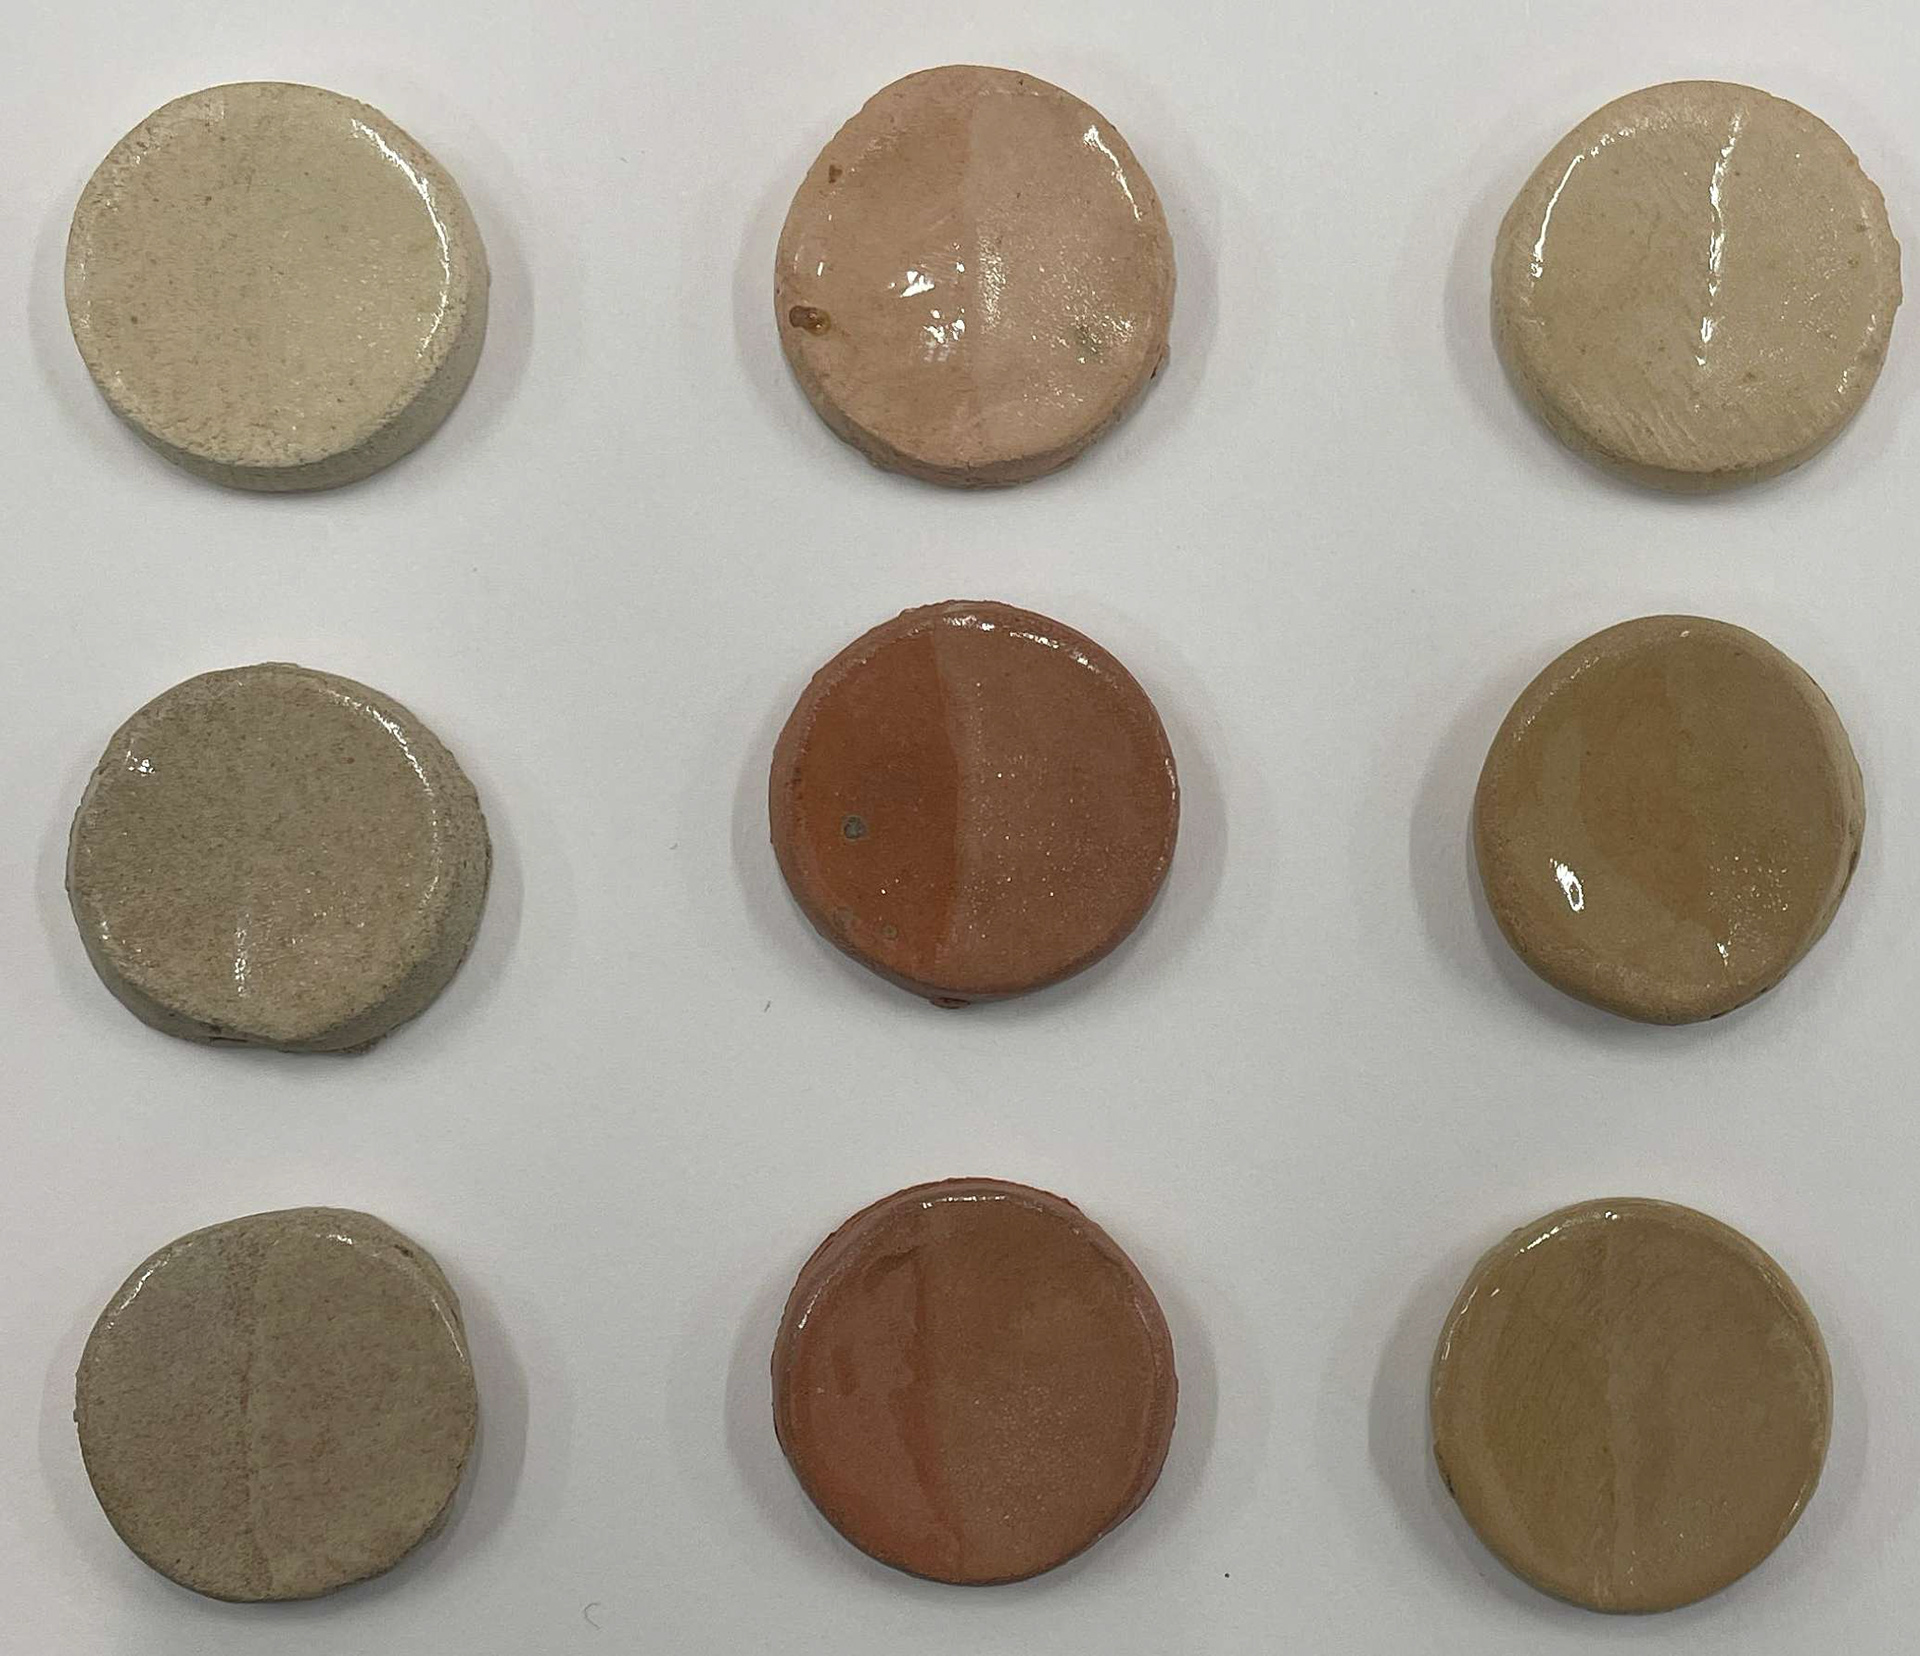
Fired Earthenware
Fired Stoneware
This was just a quick sample using leftover coloured clay using magnesium and black nickel, due to the small increase in oxides, there isn't much marbling as the colours blend into one. However, it was useful to get back throwing.
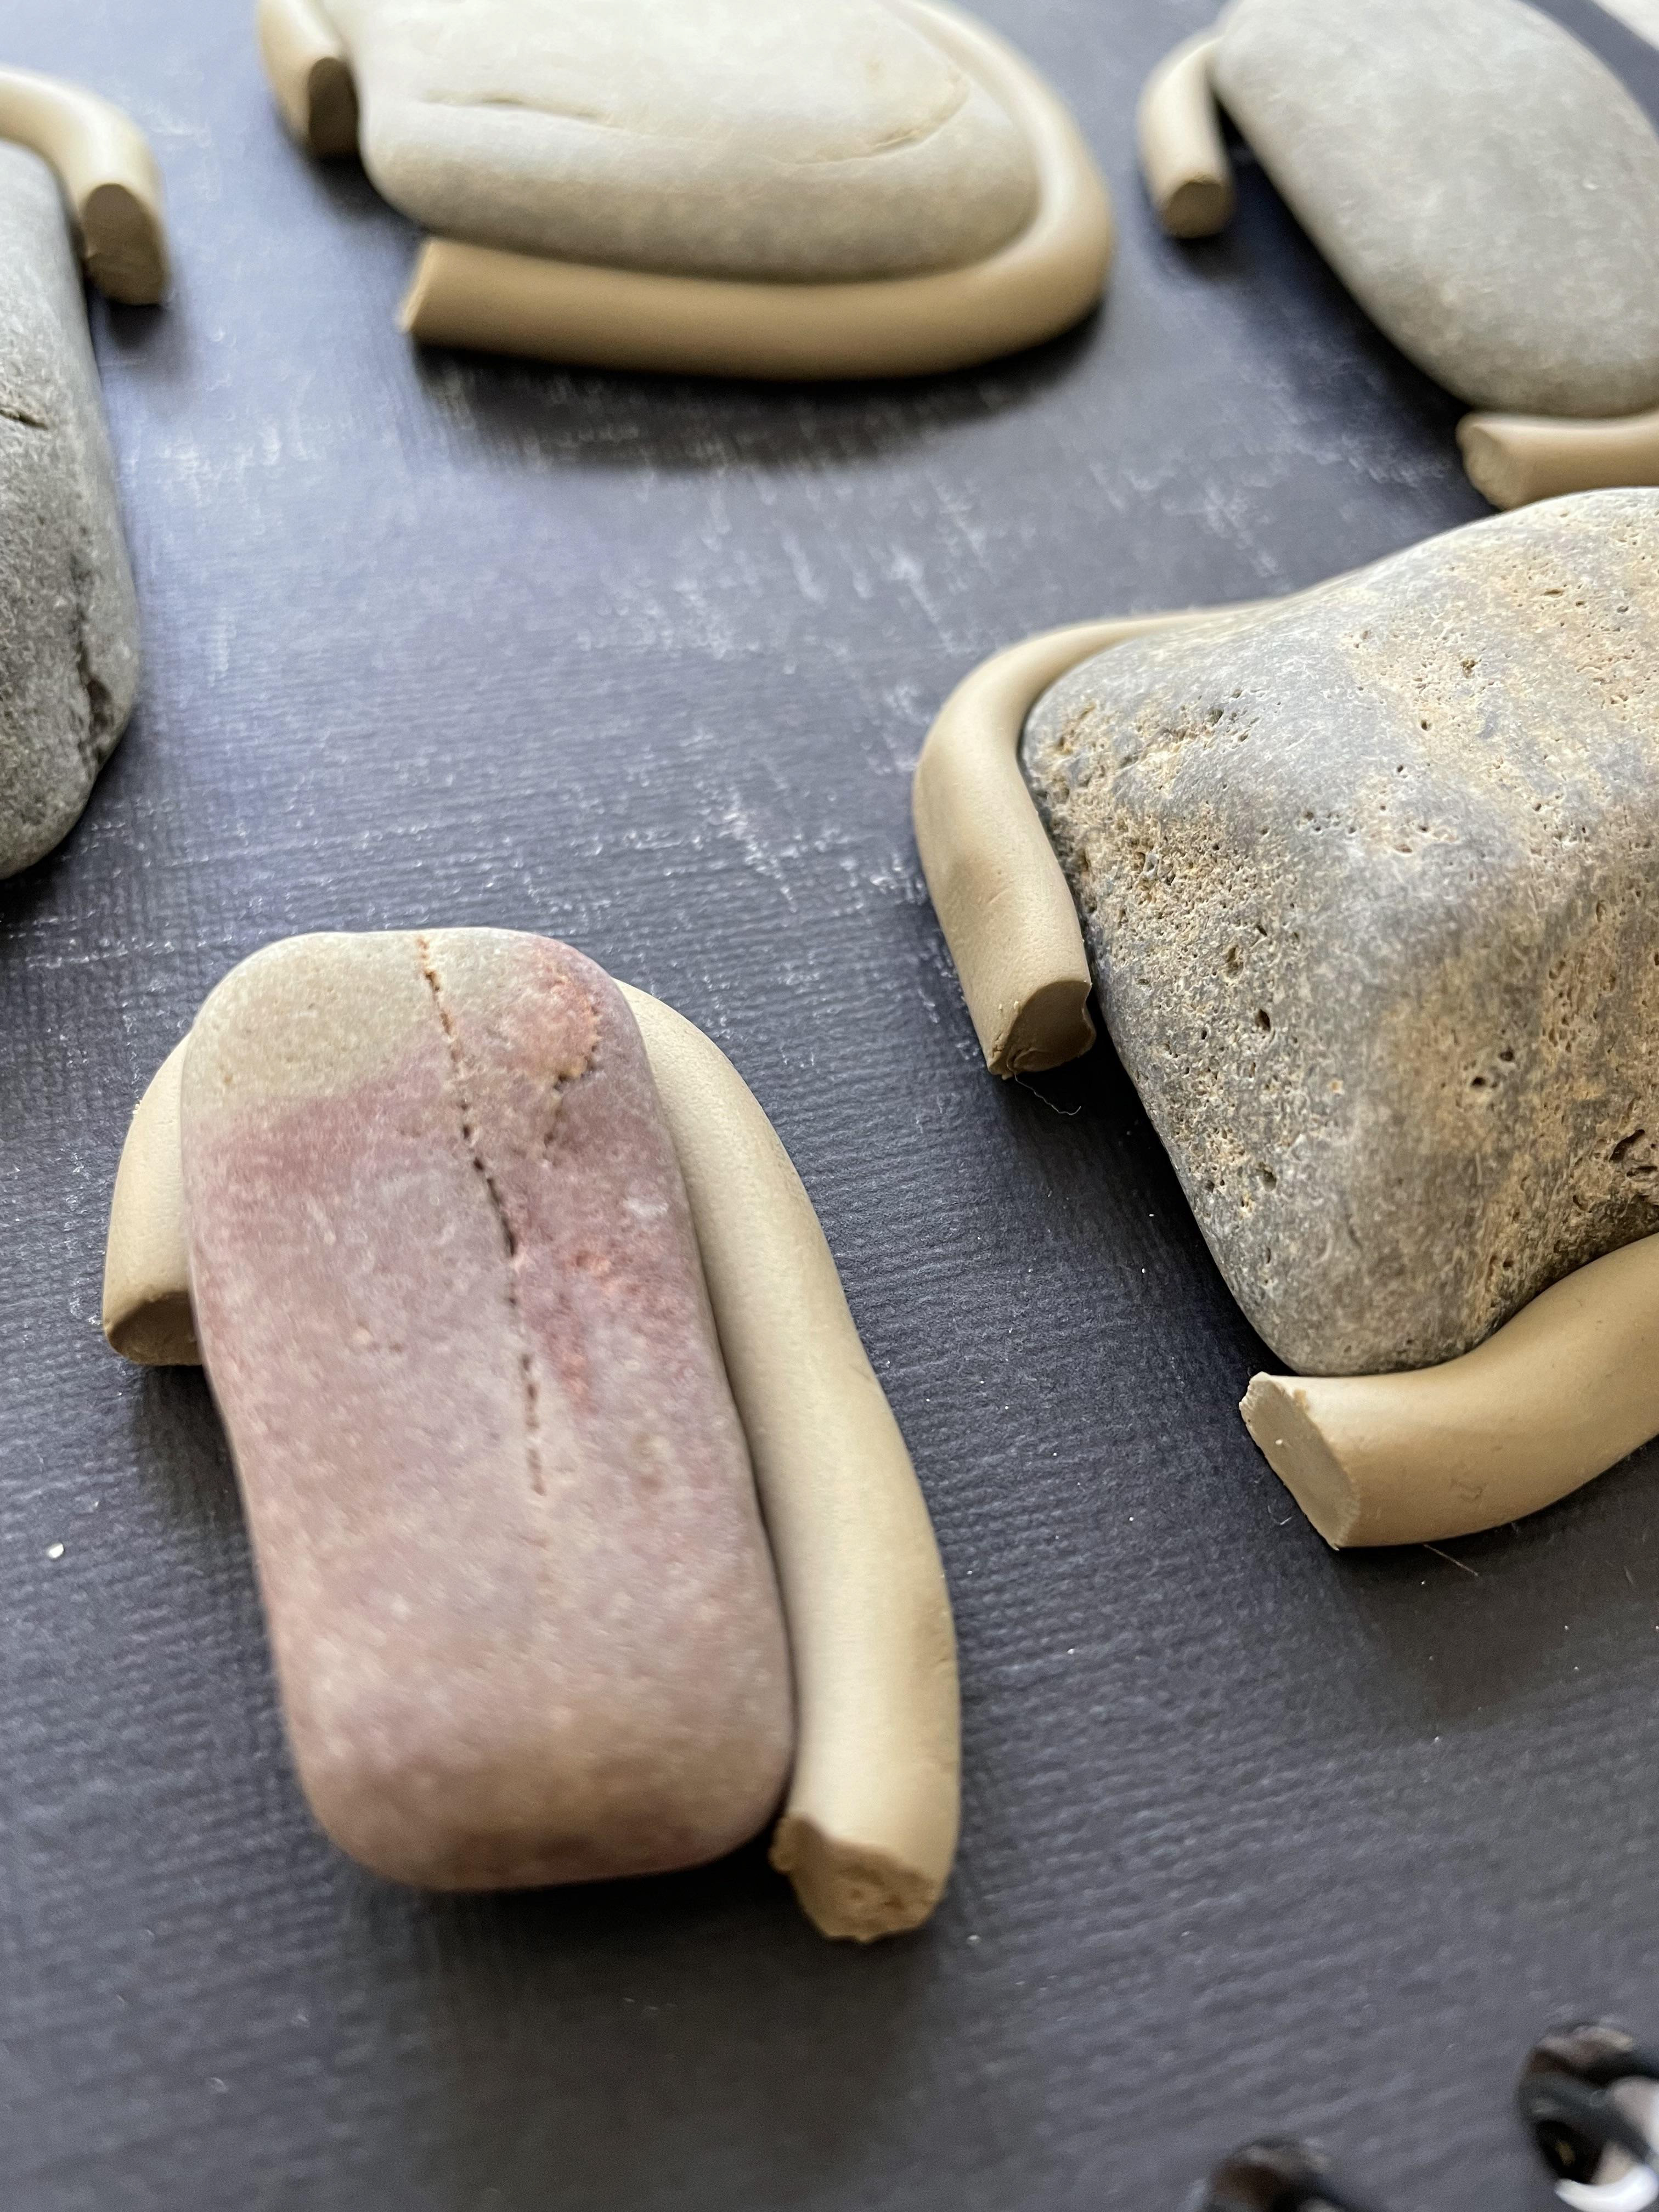
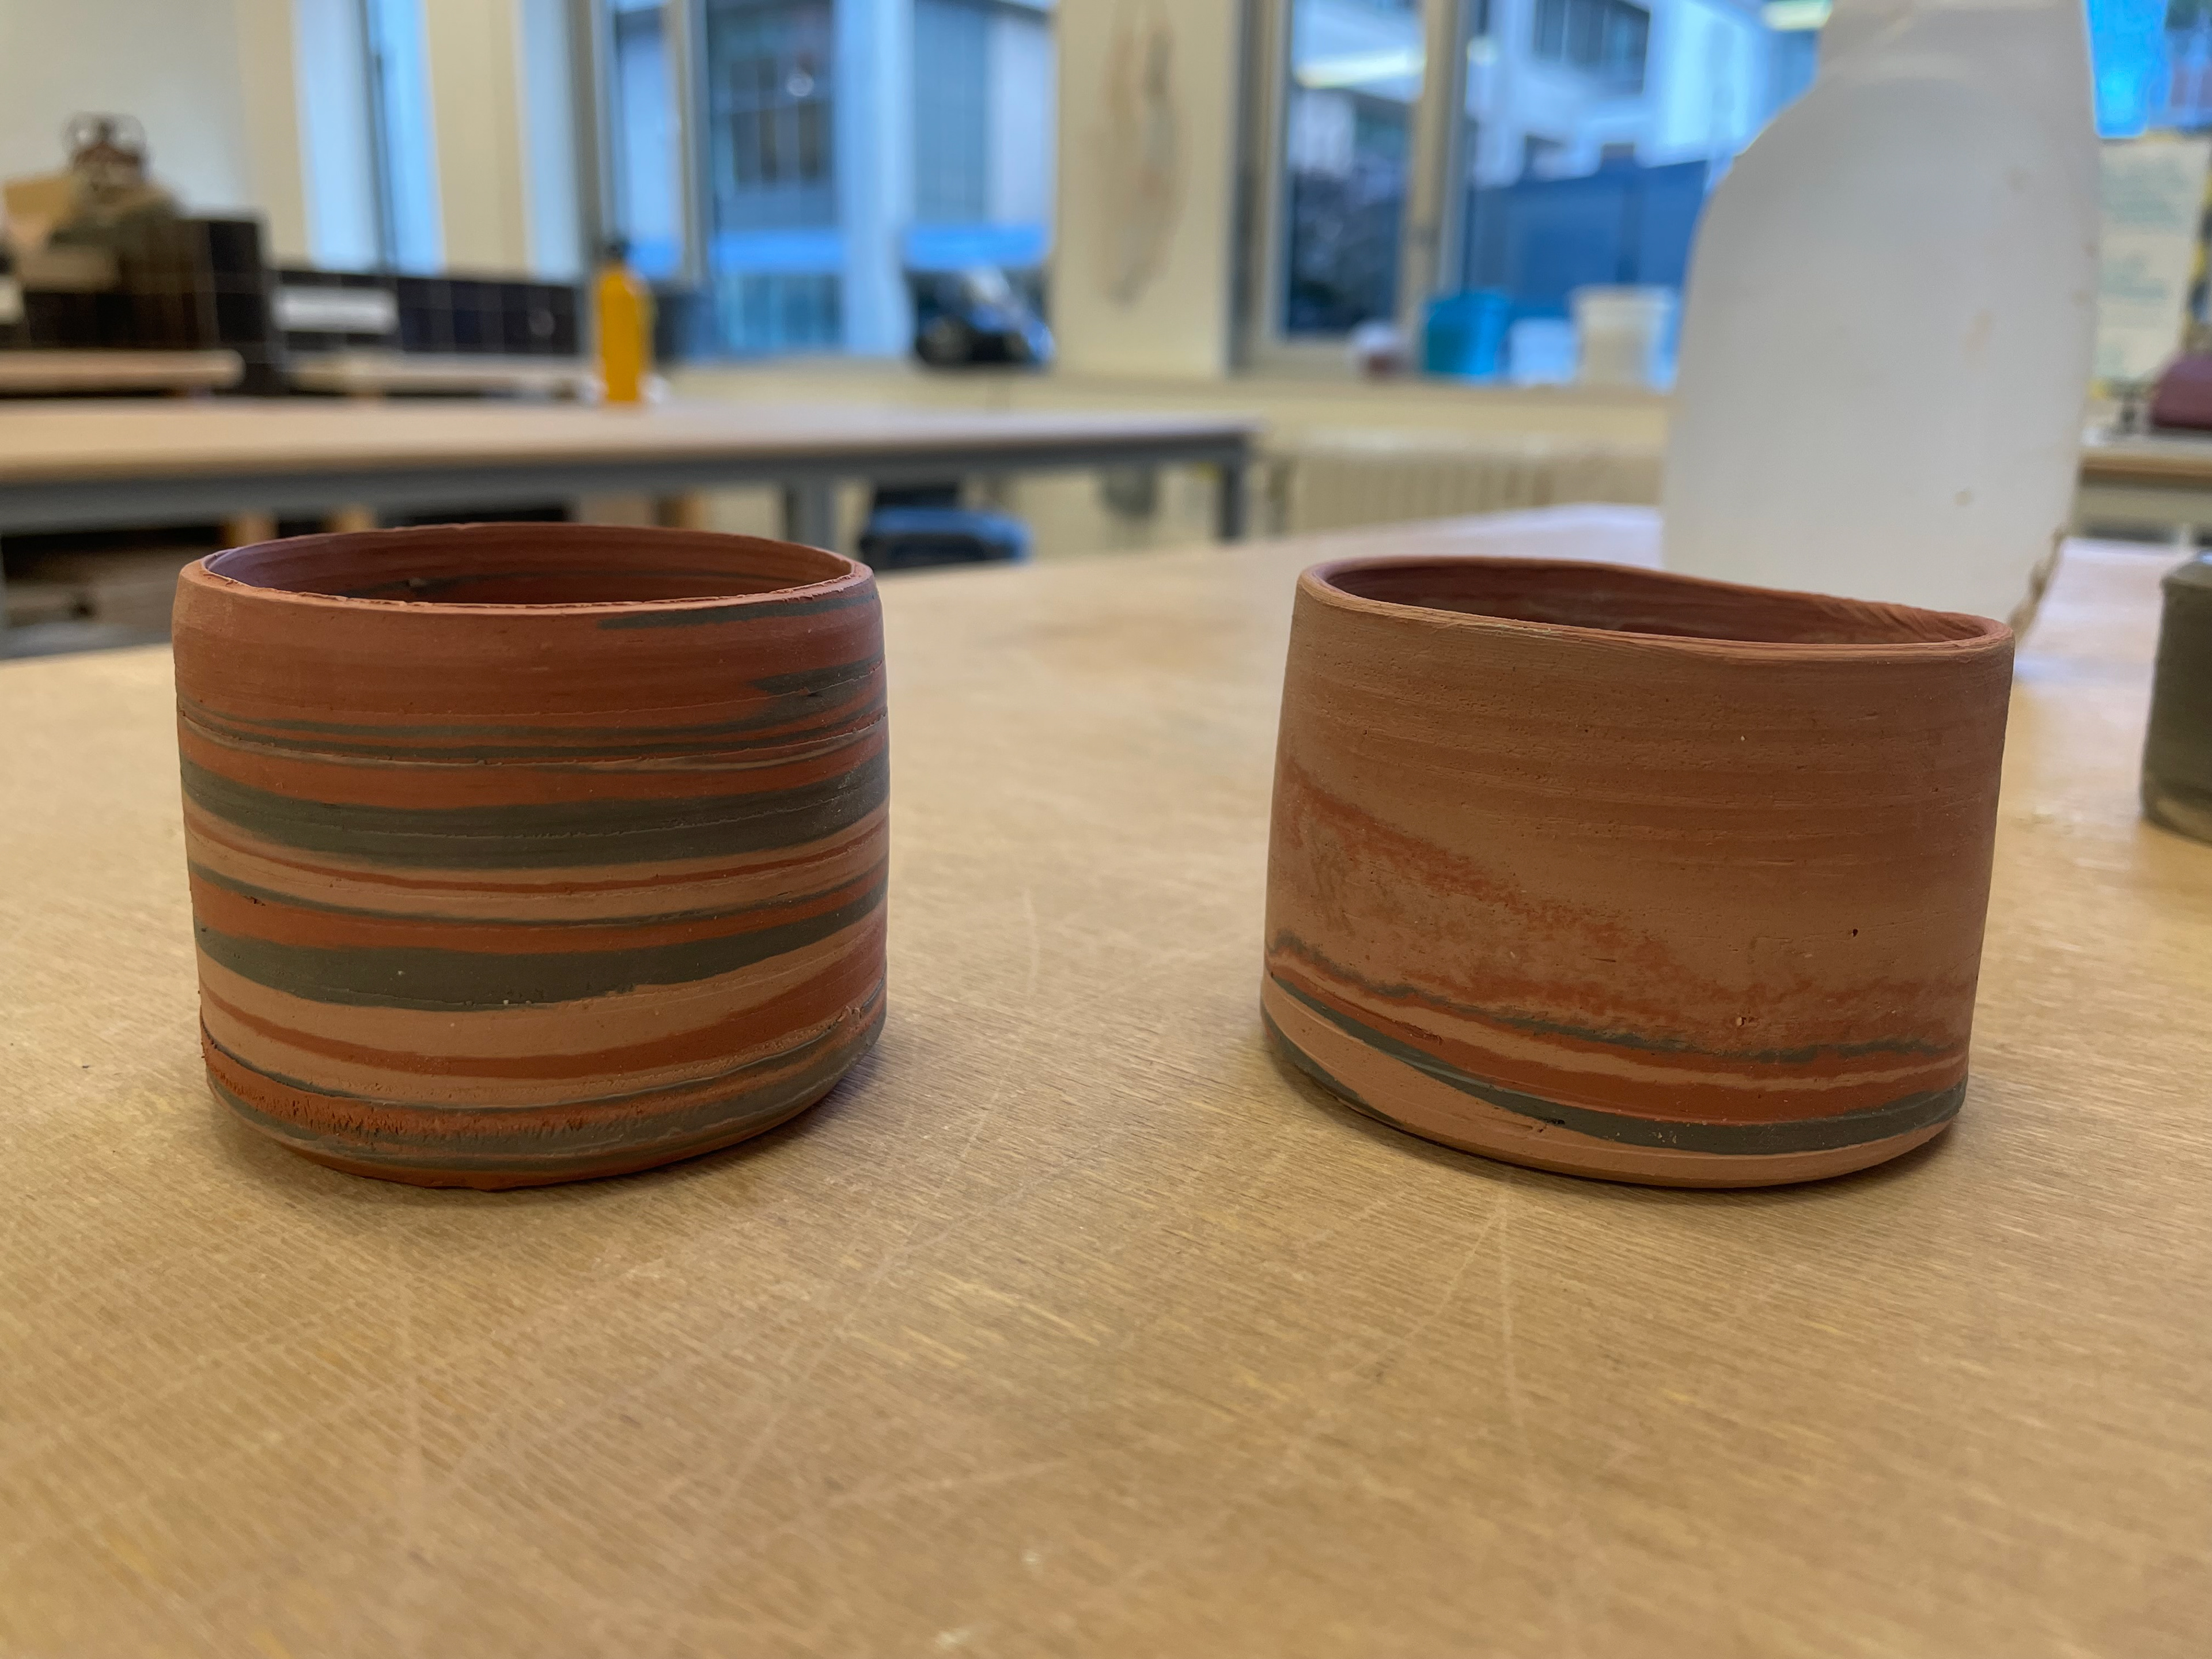
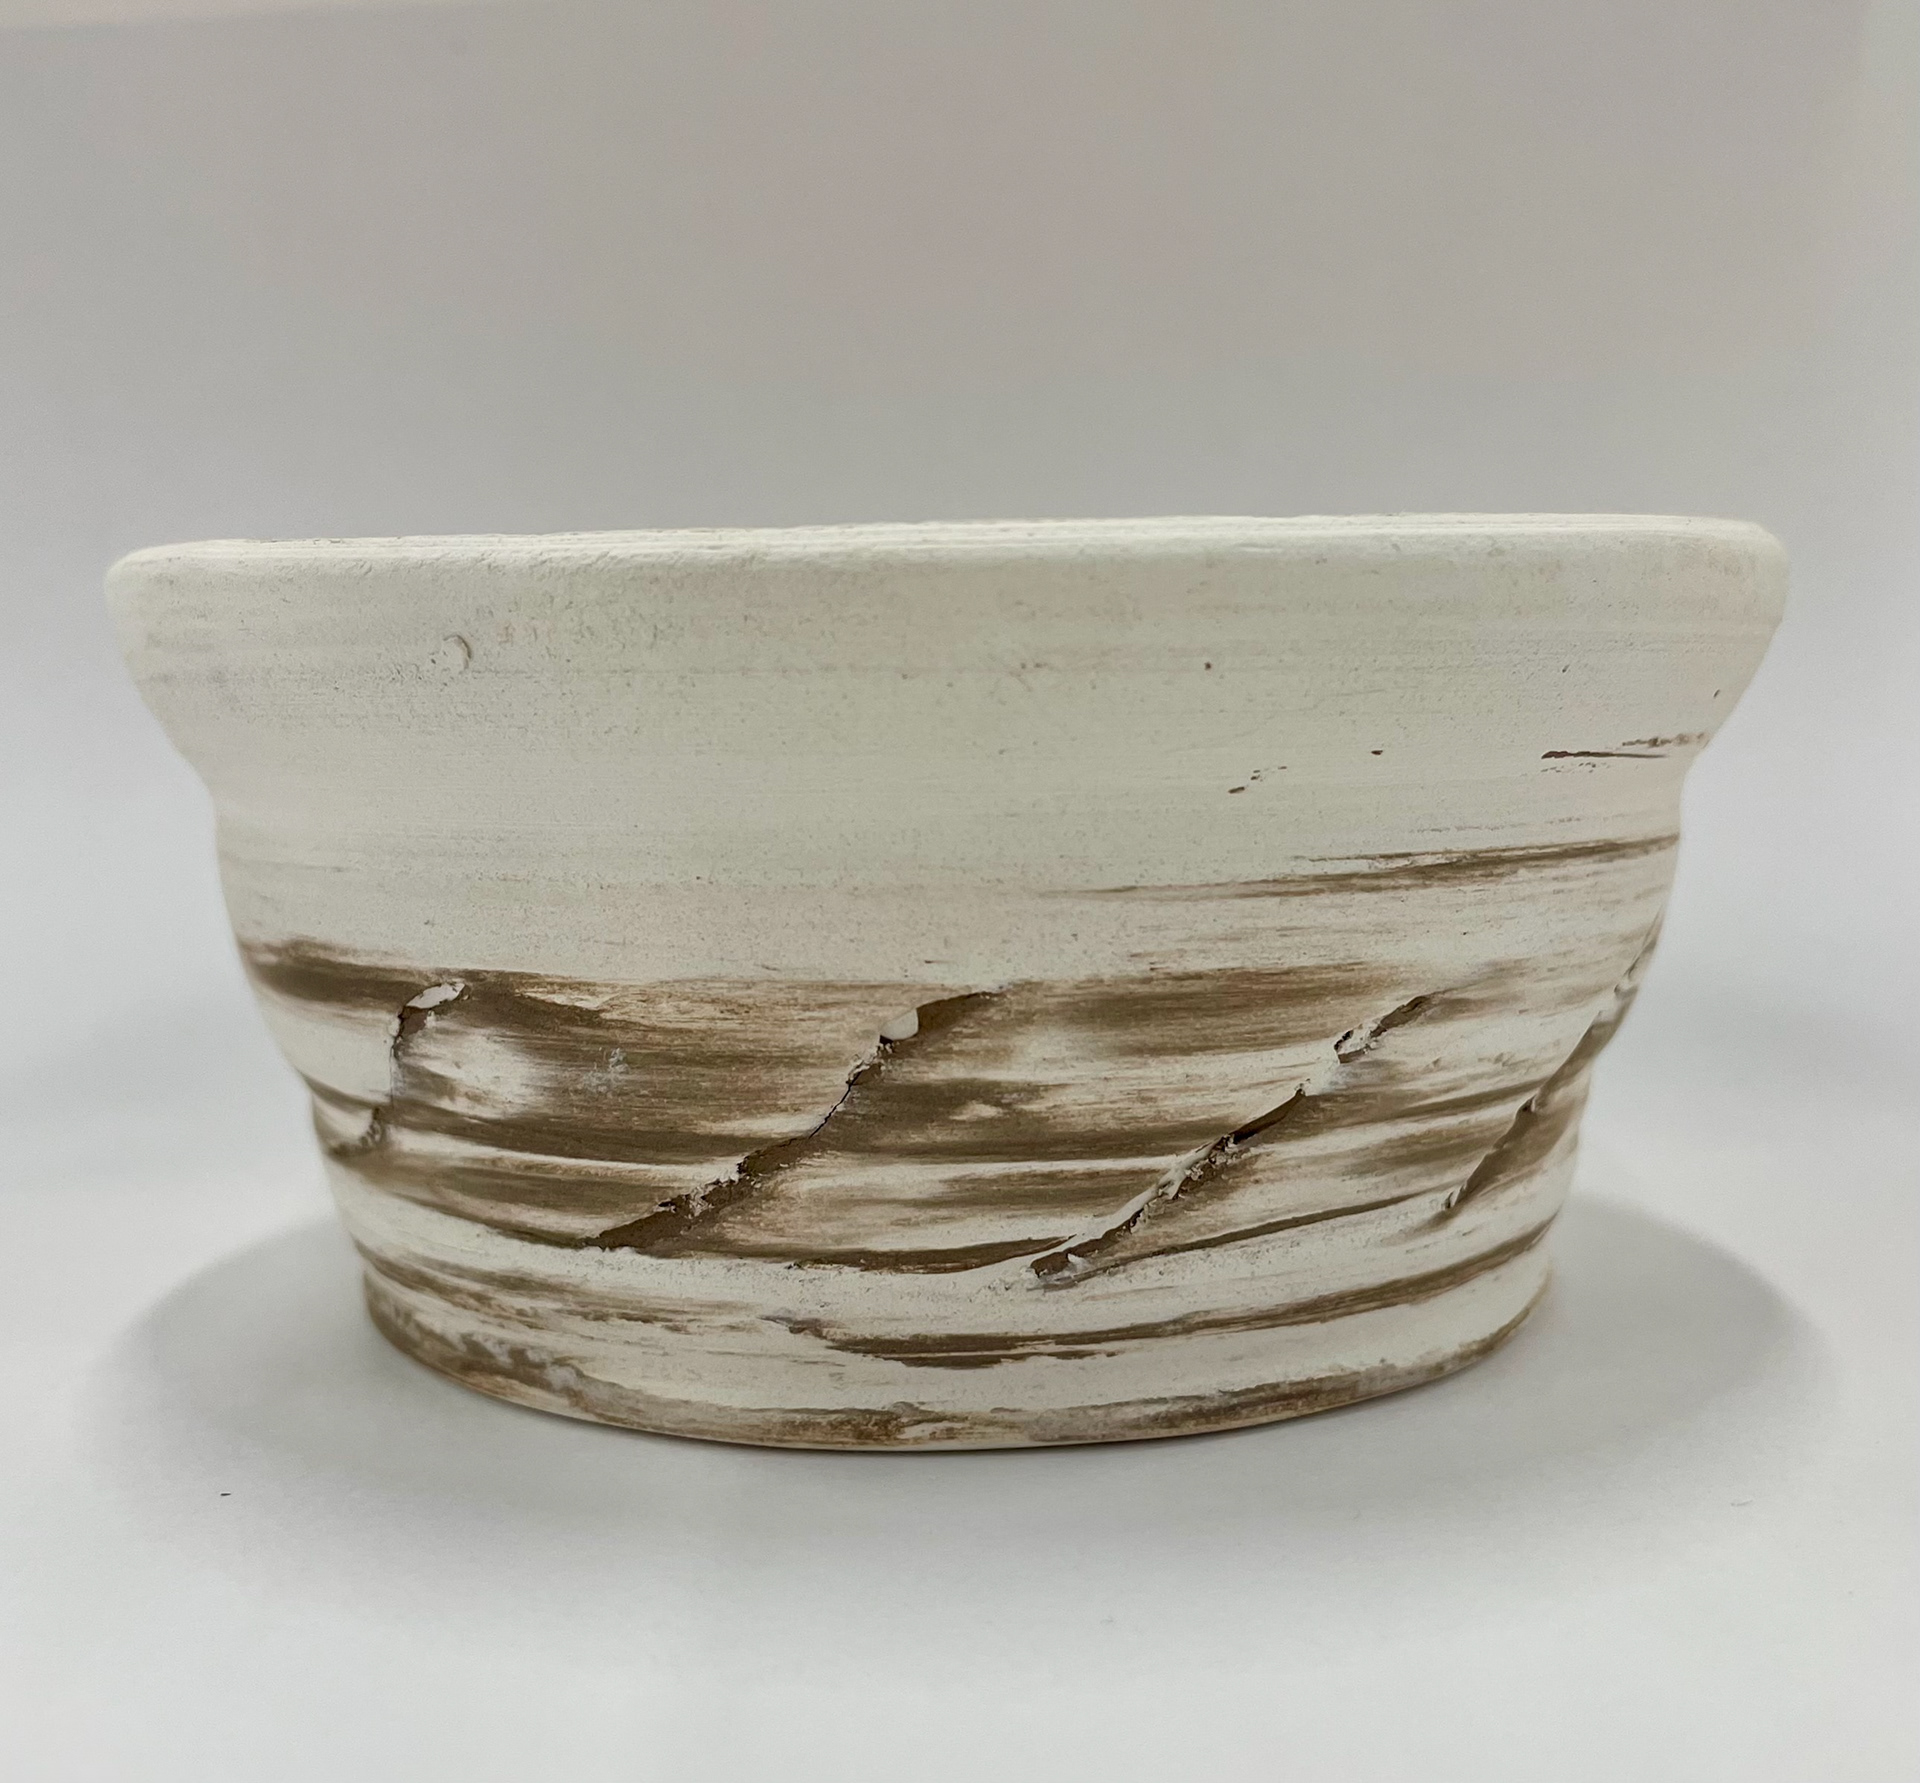
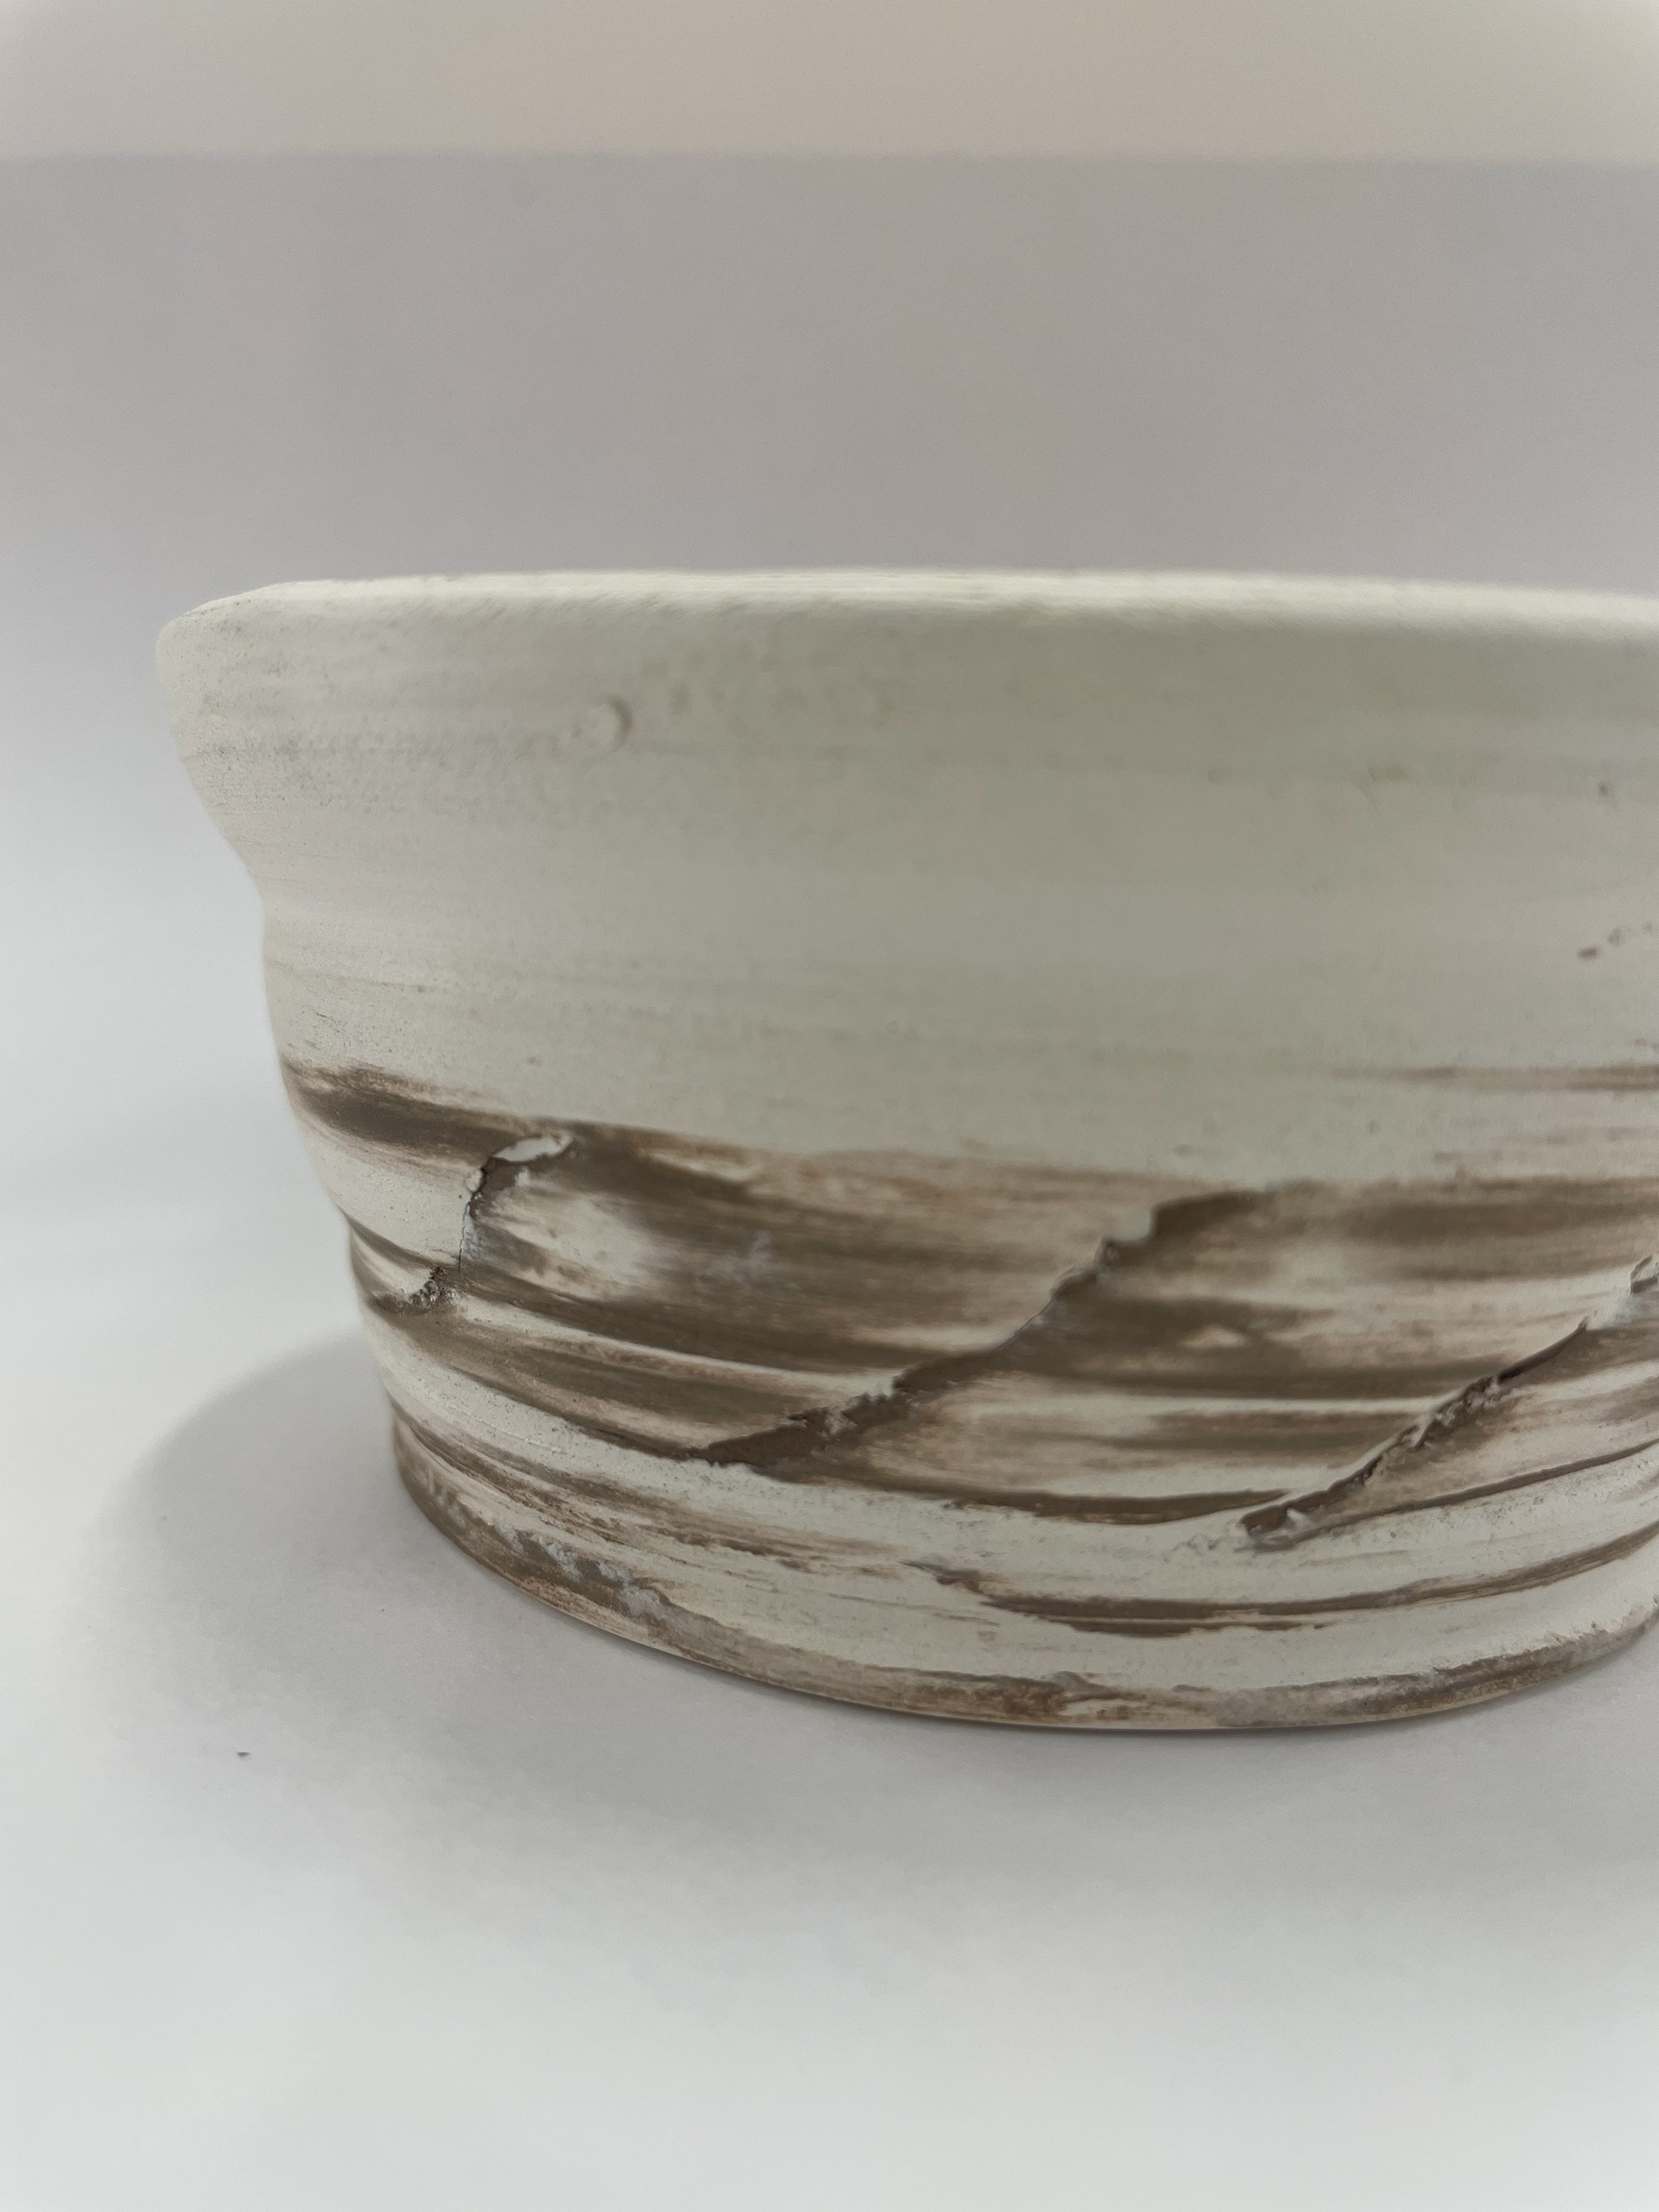
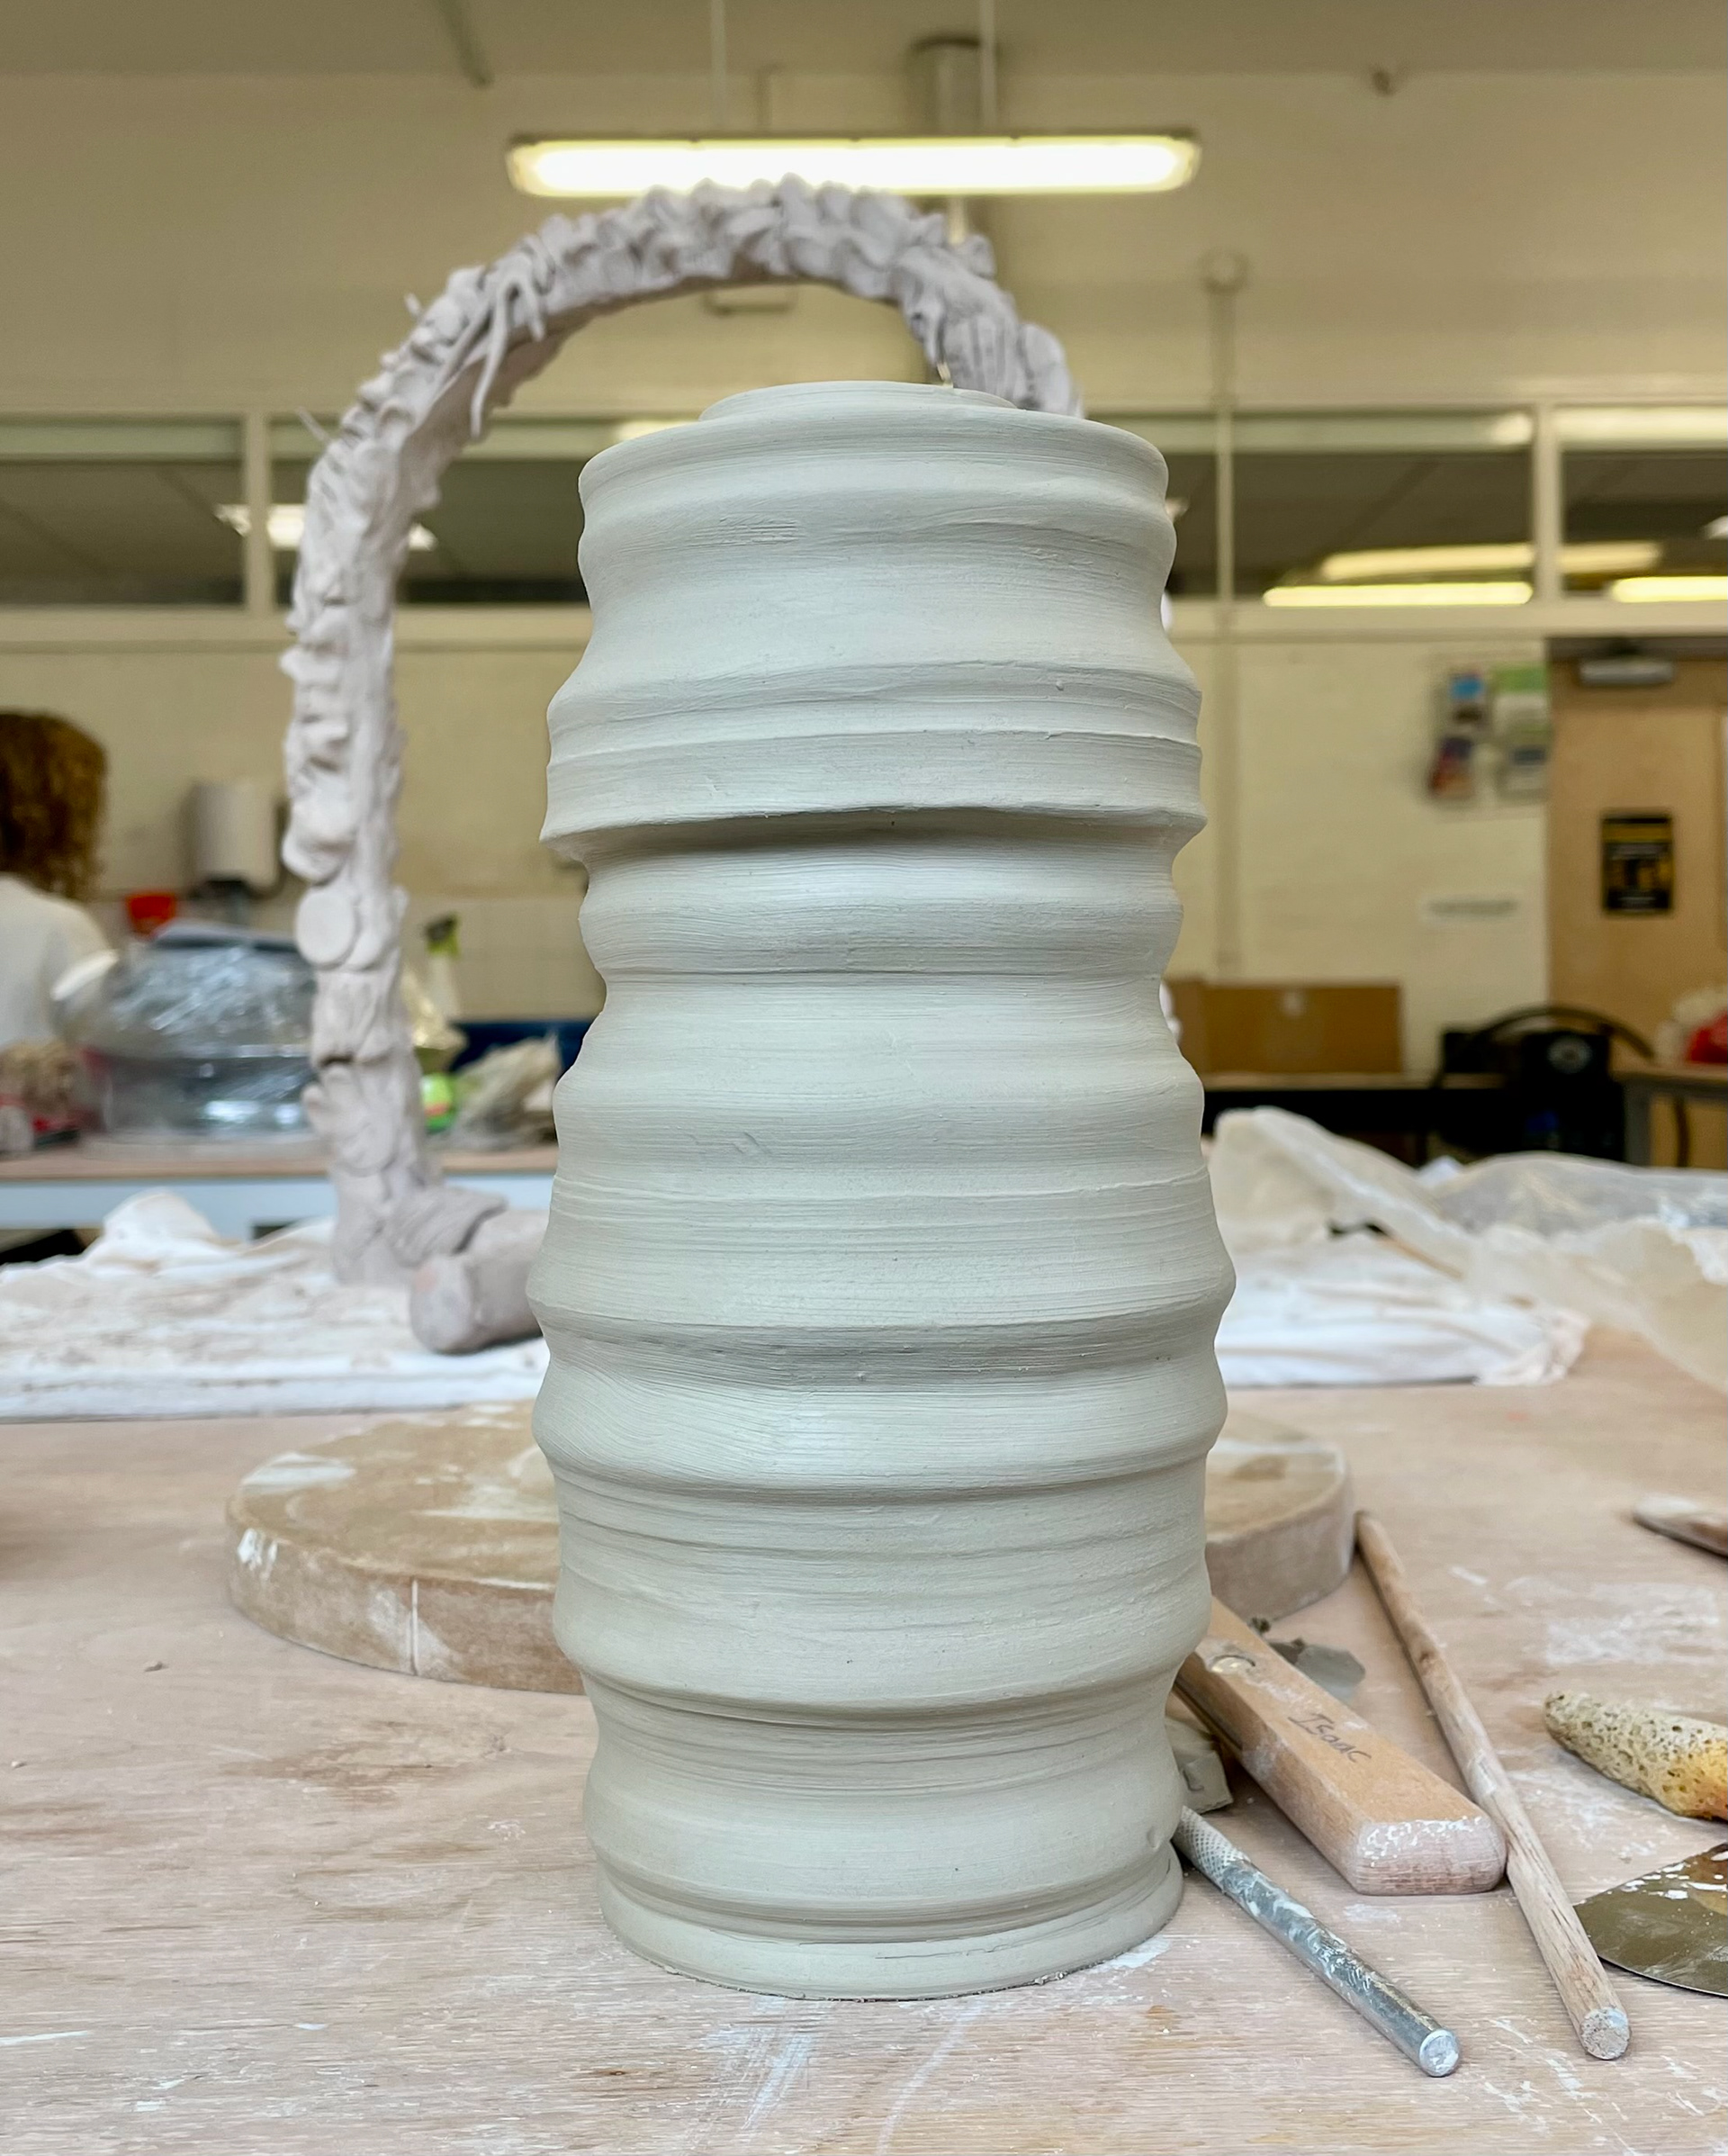
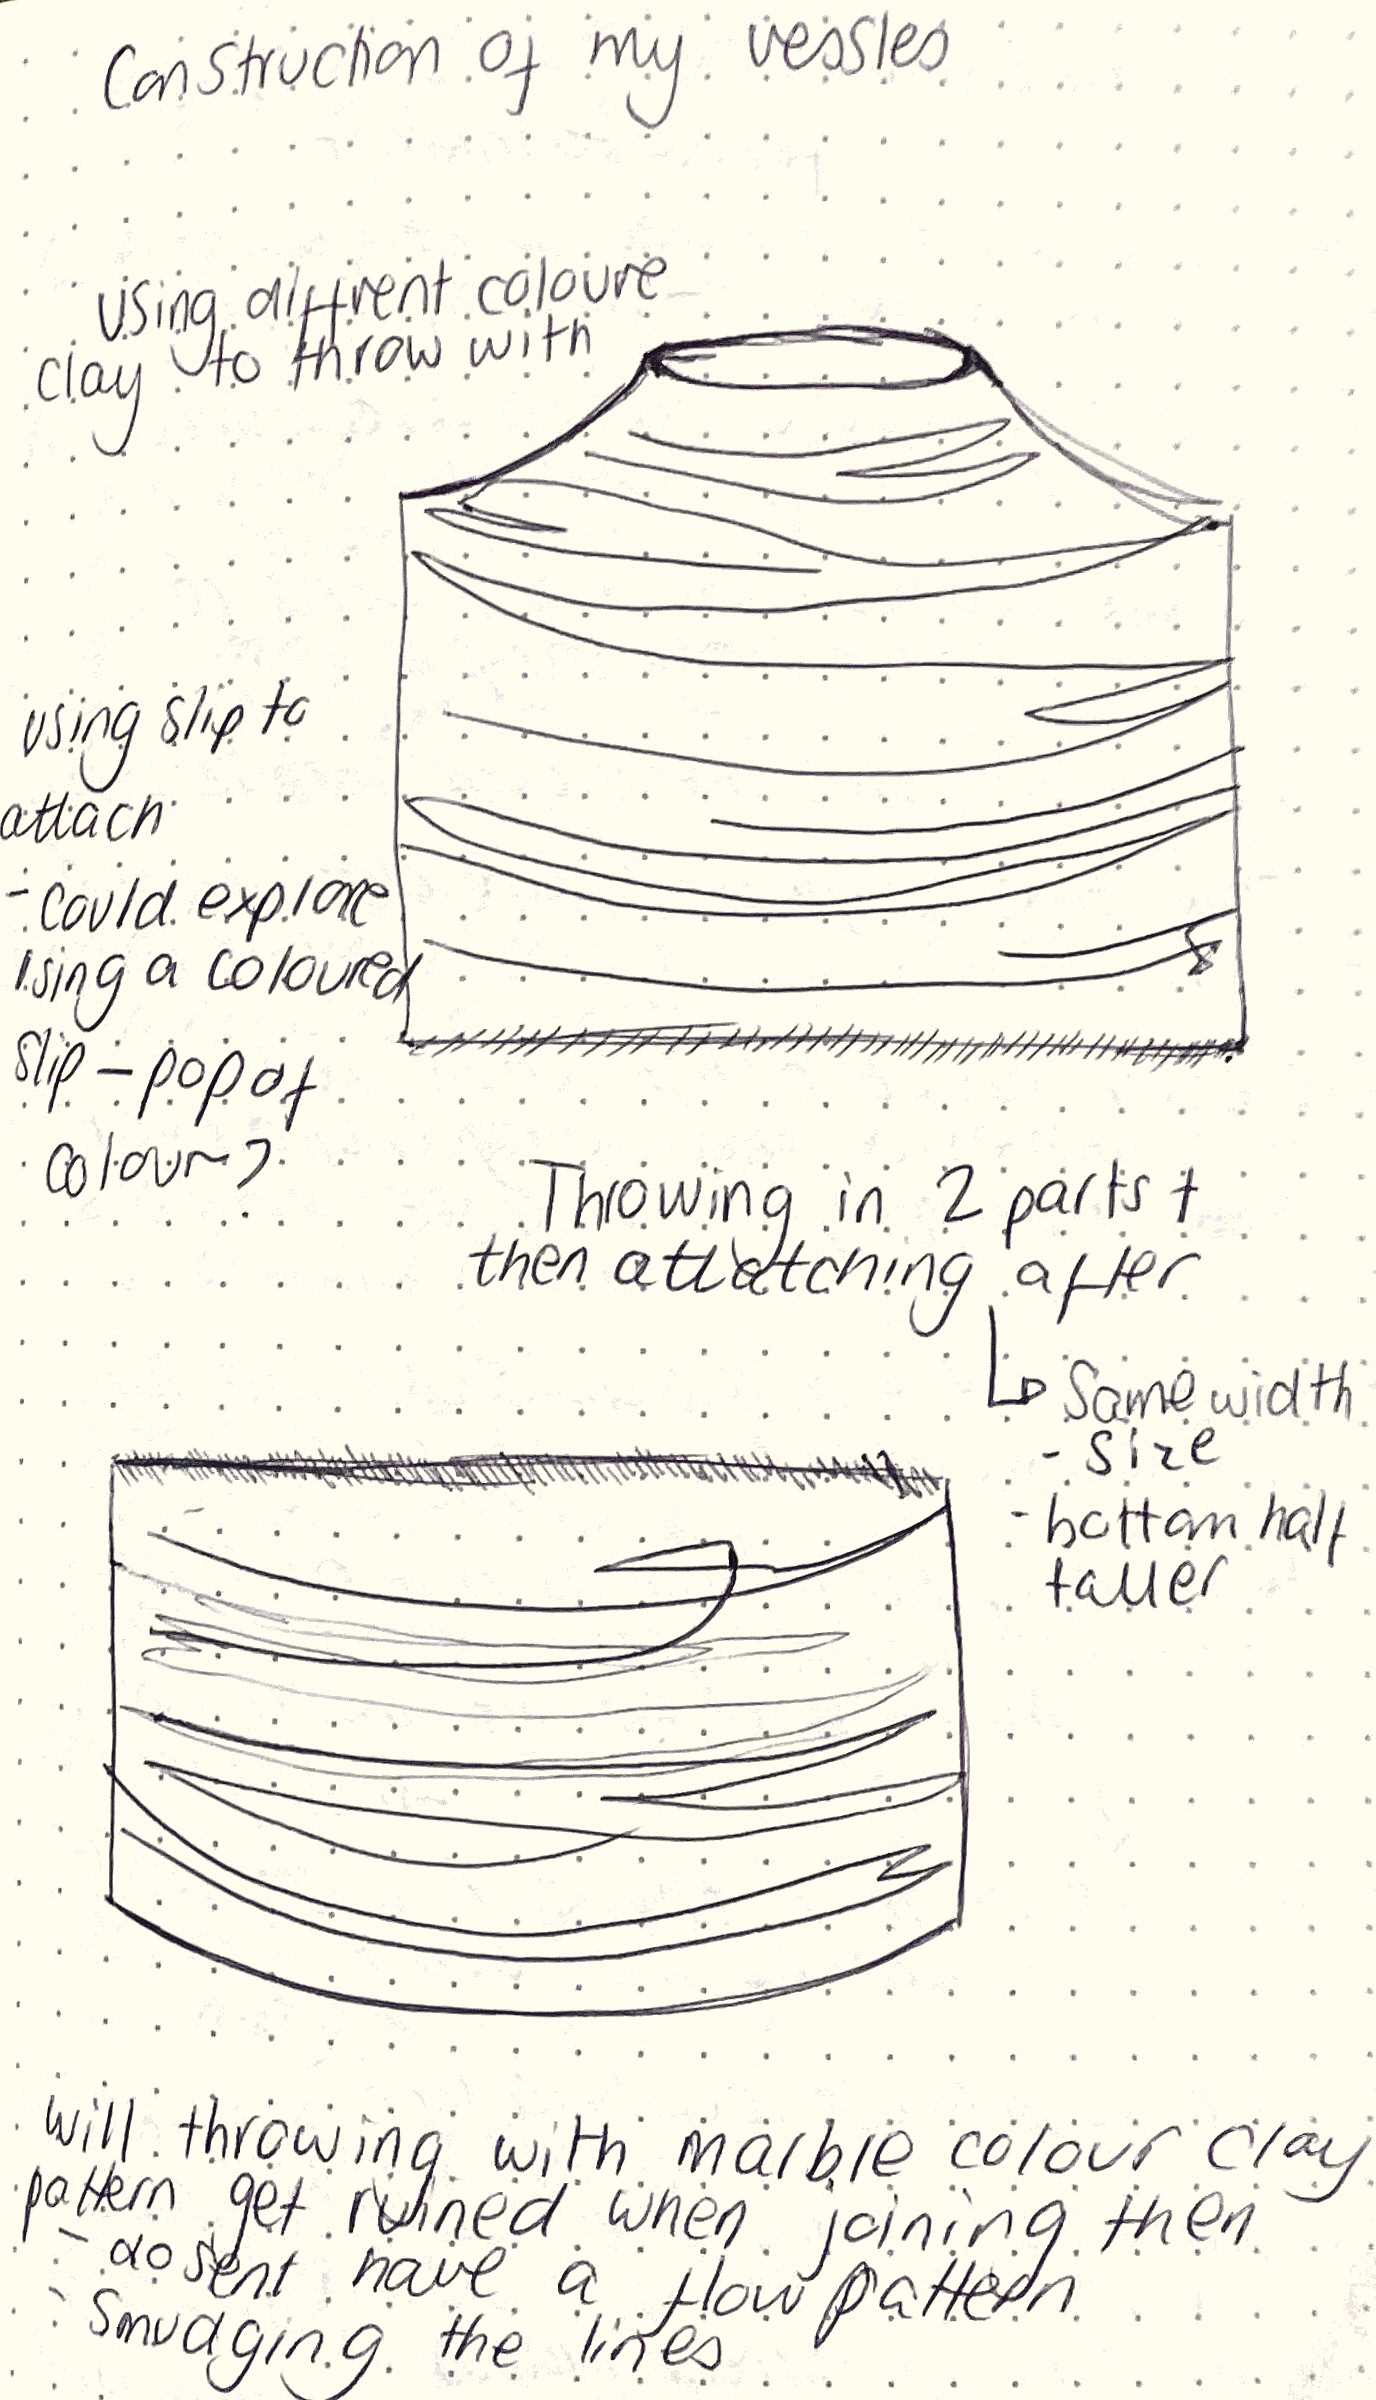
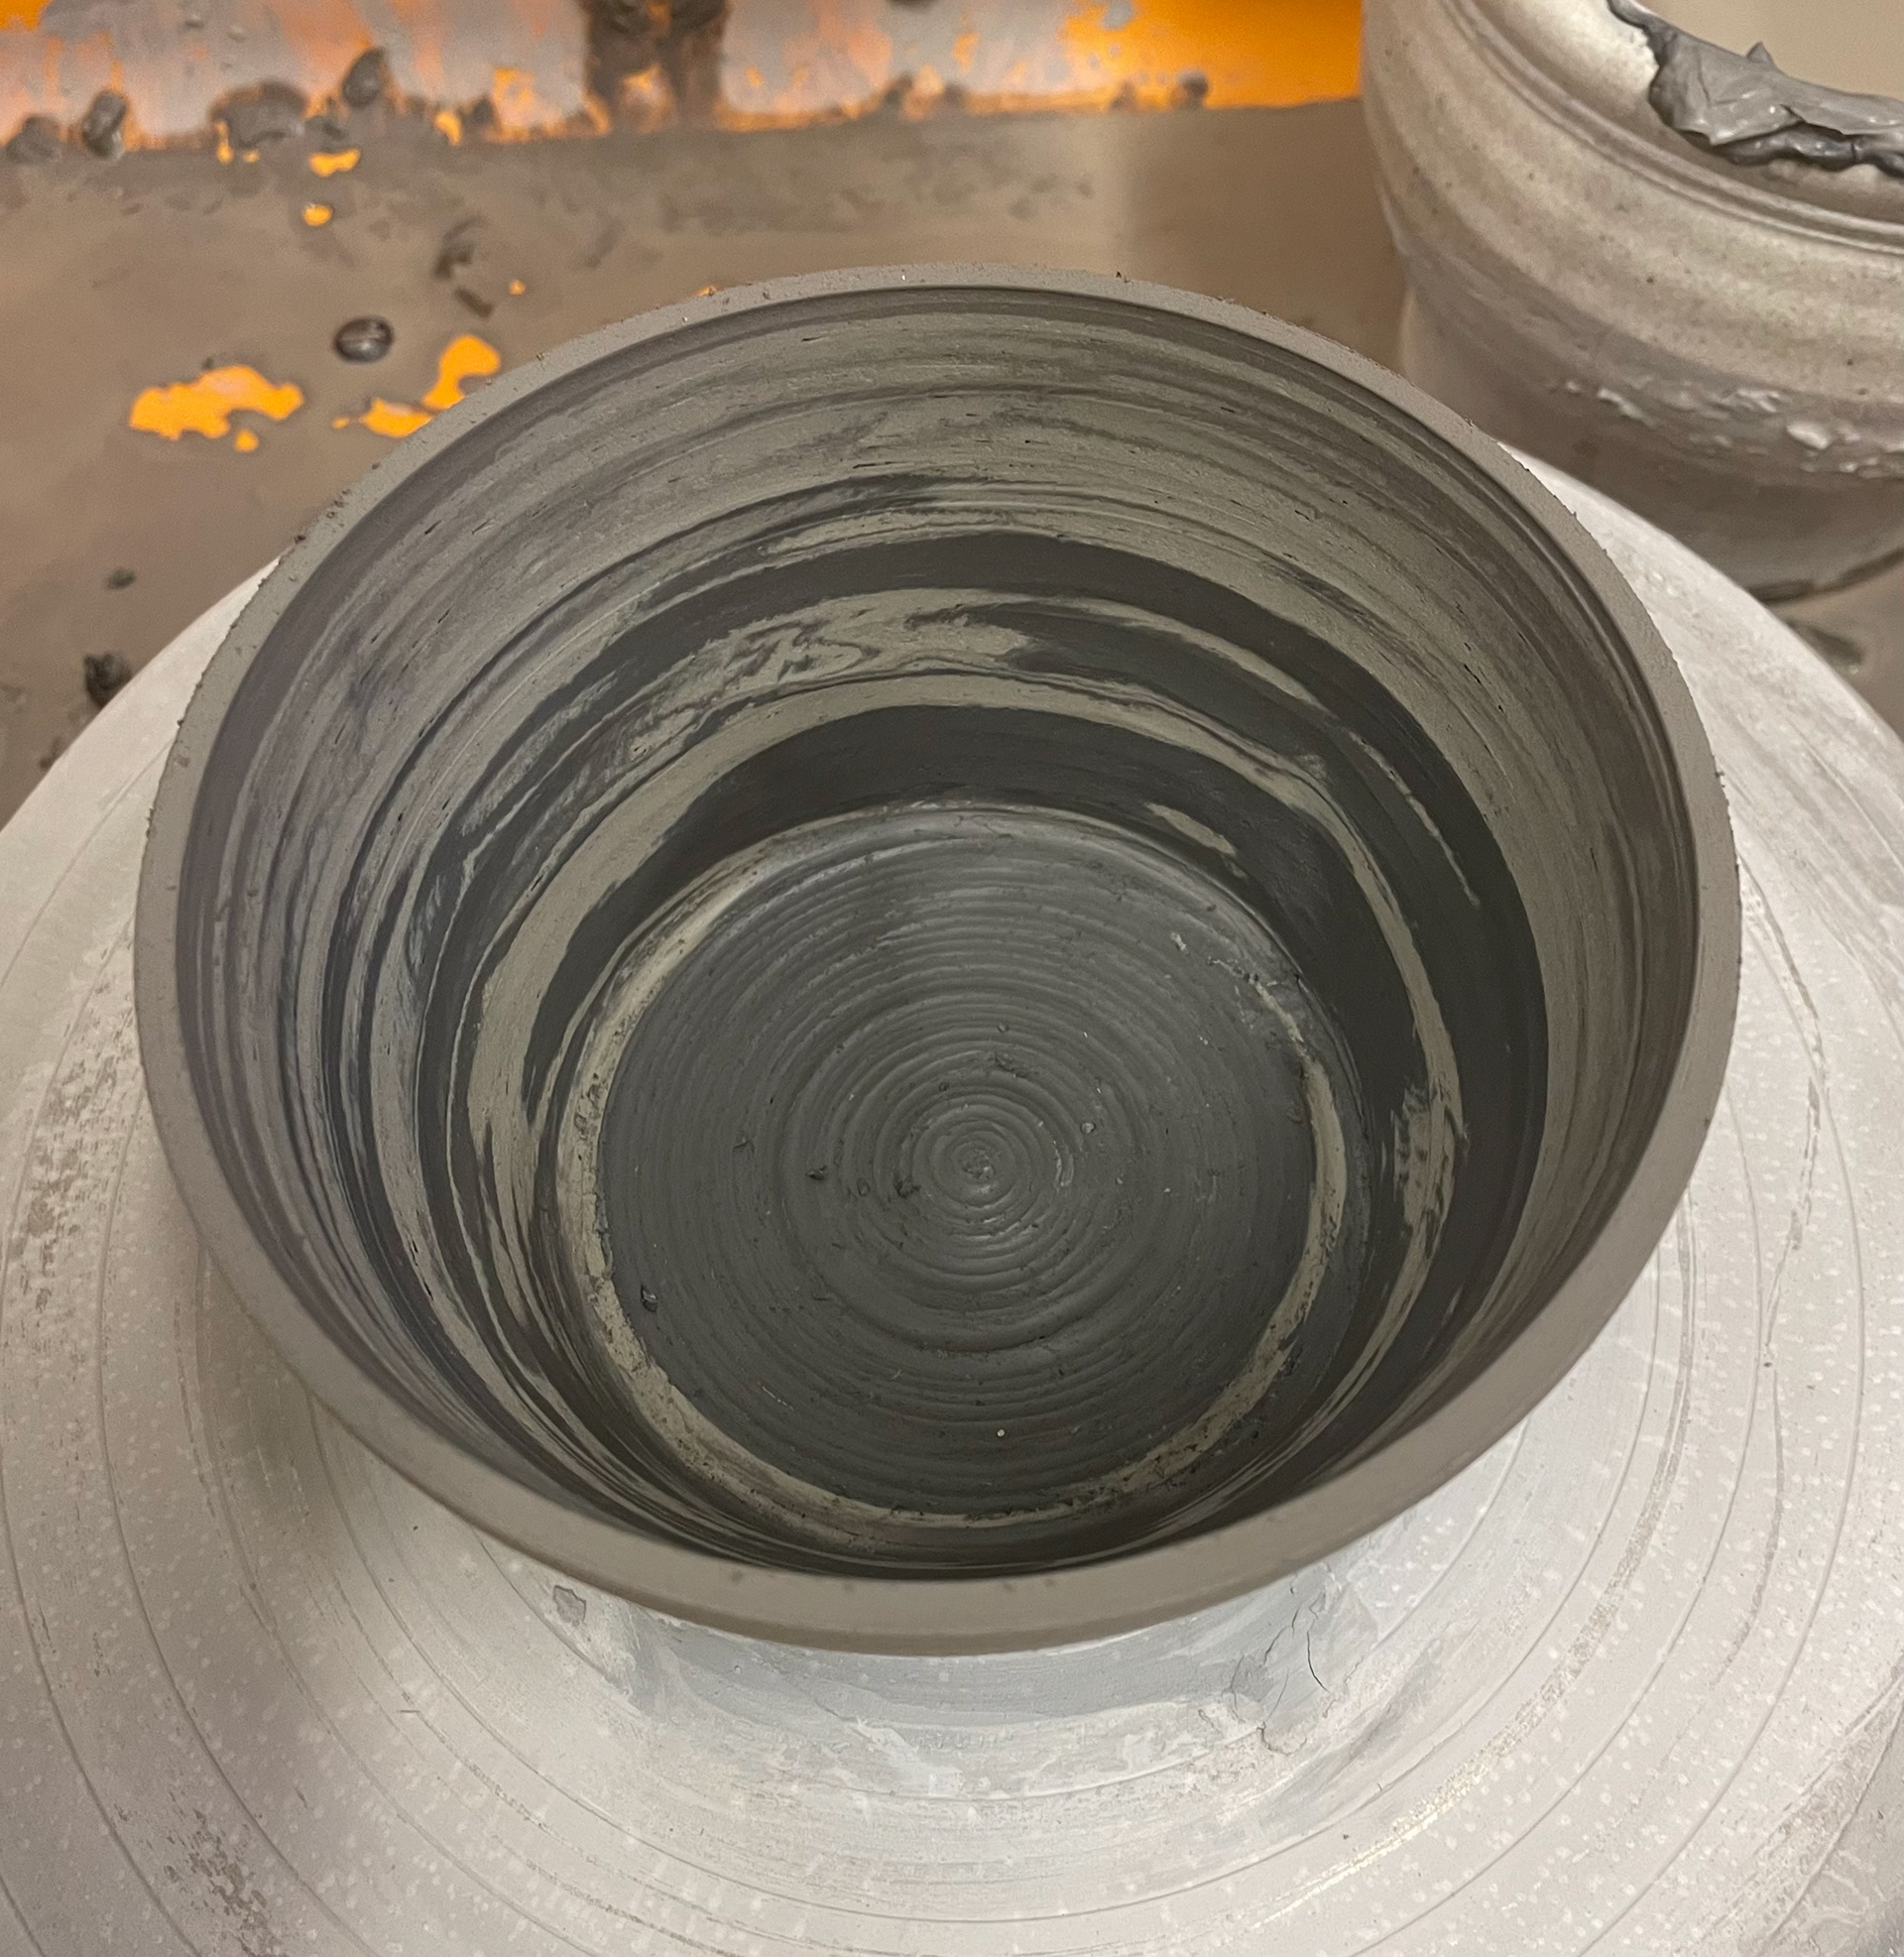
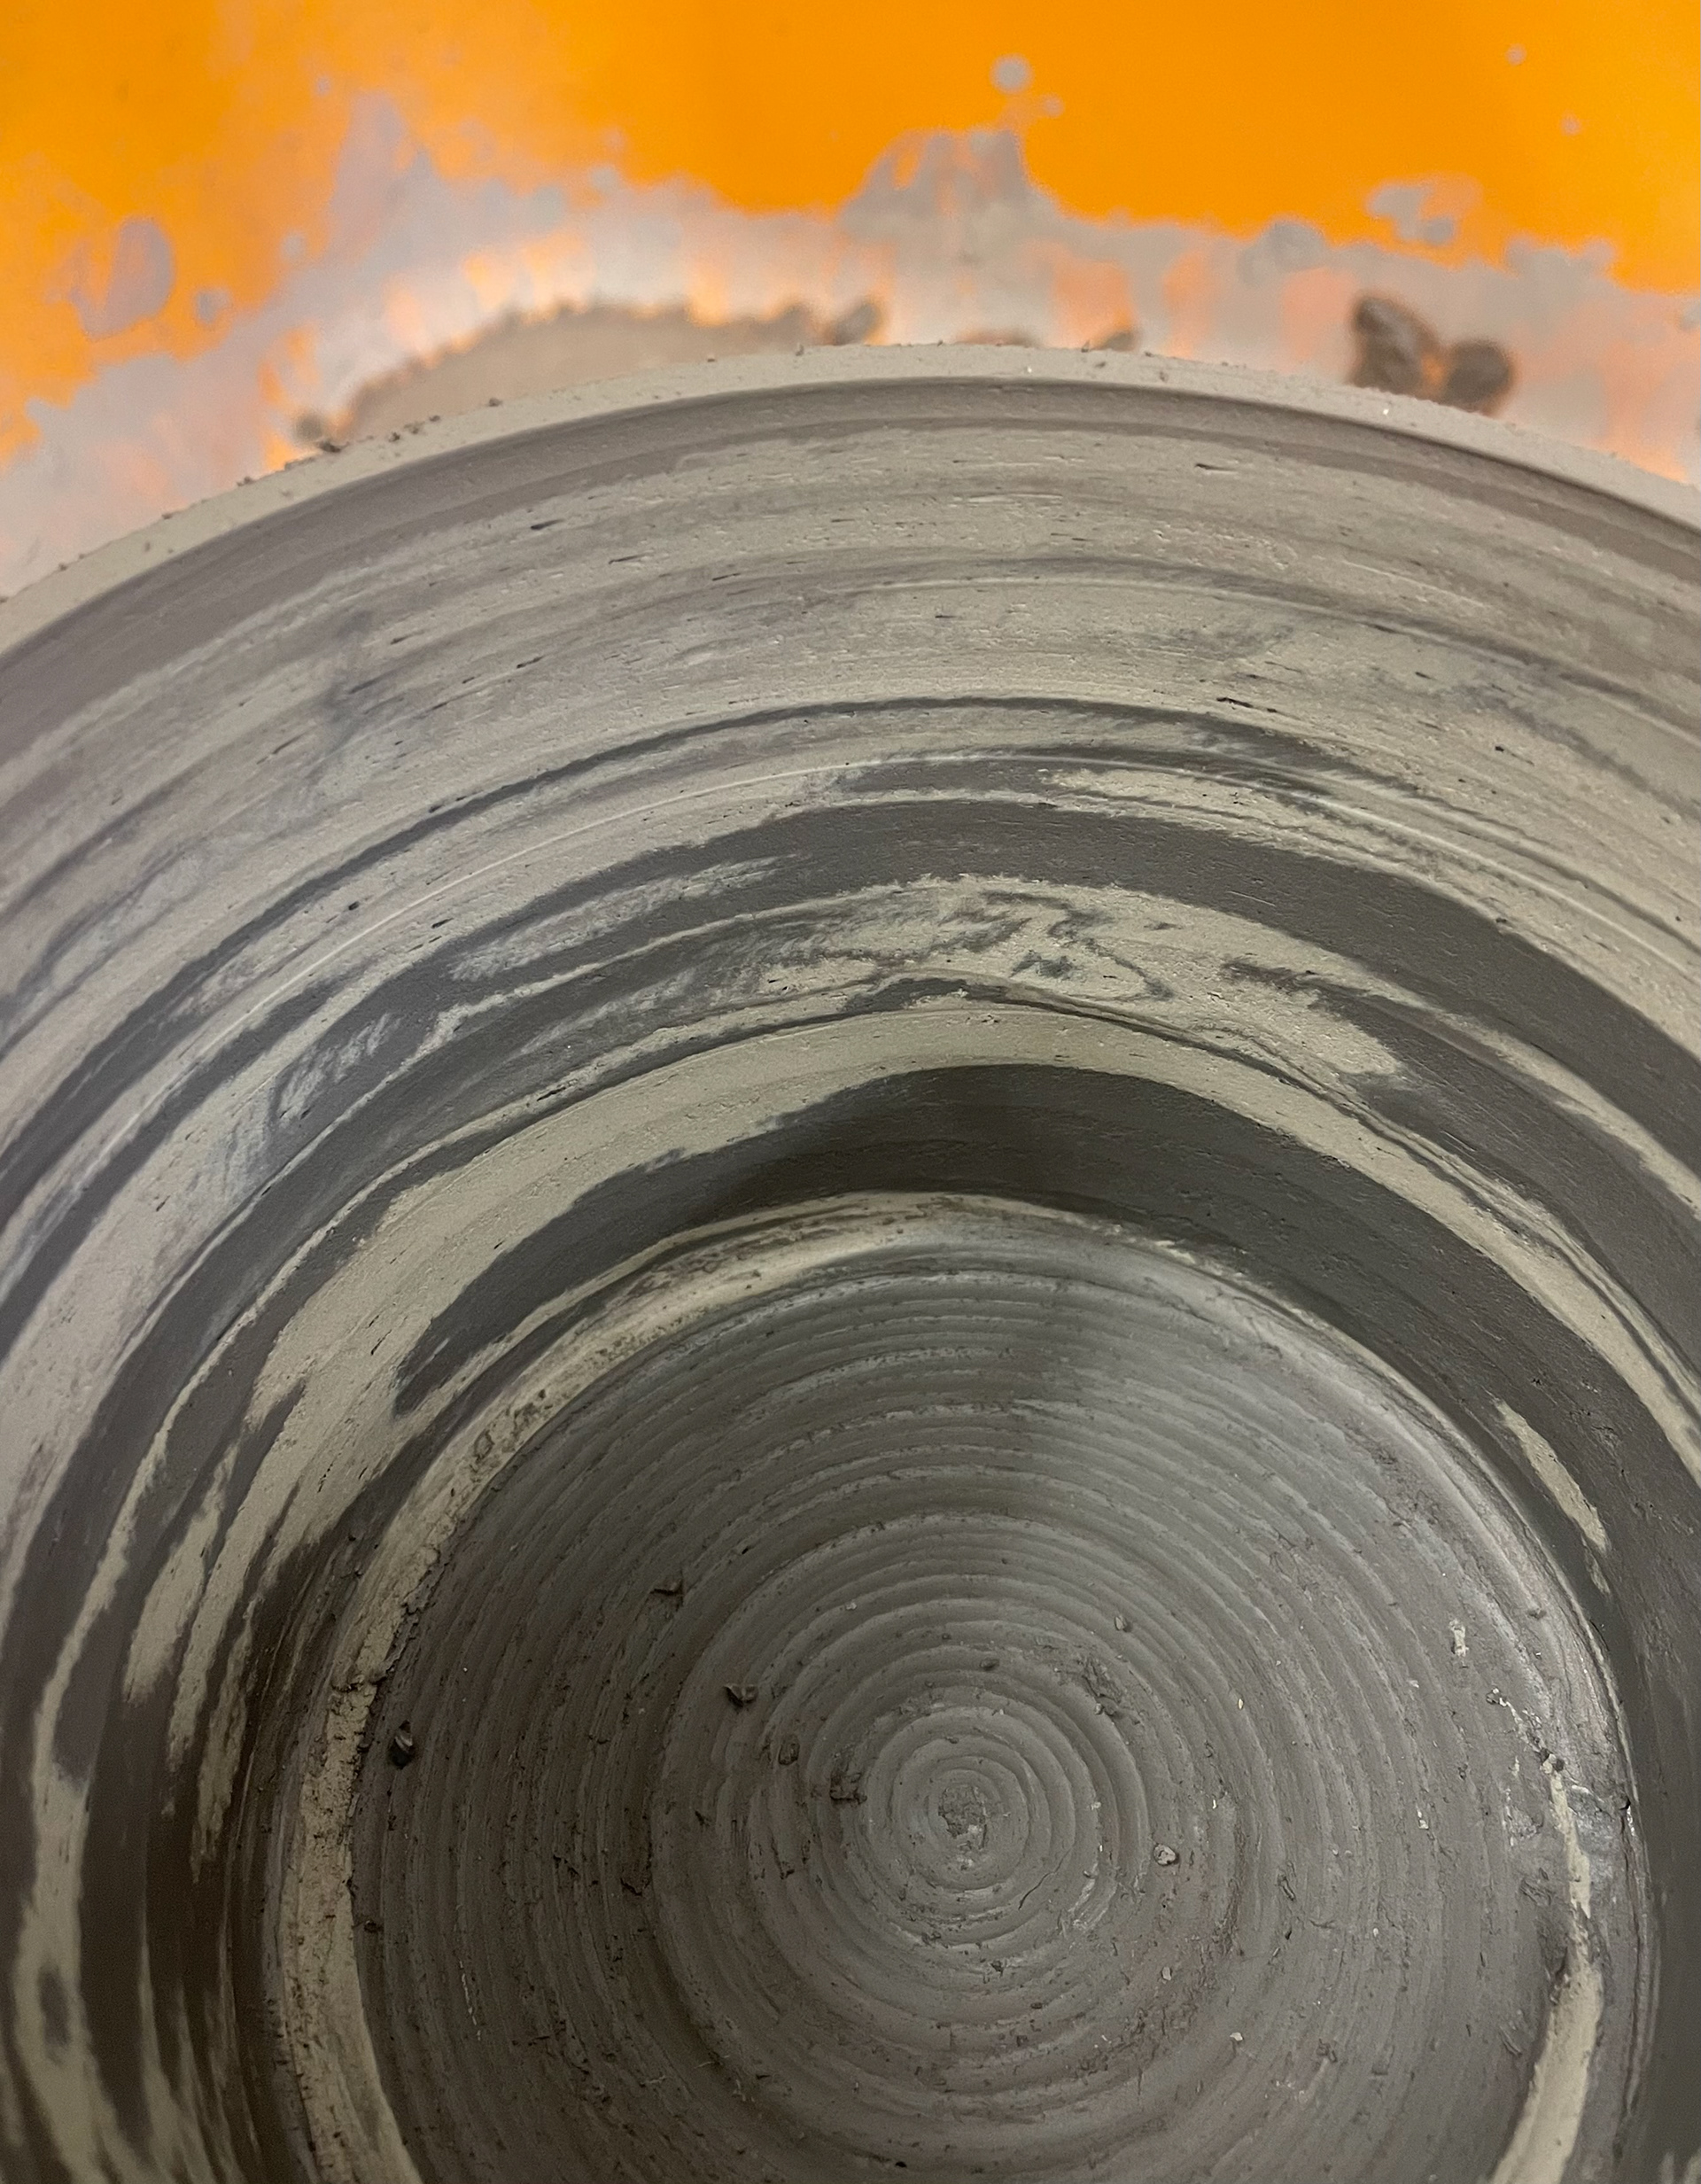
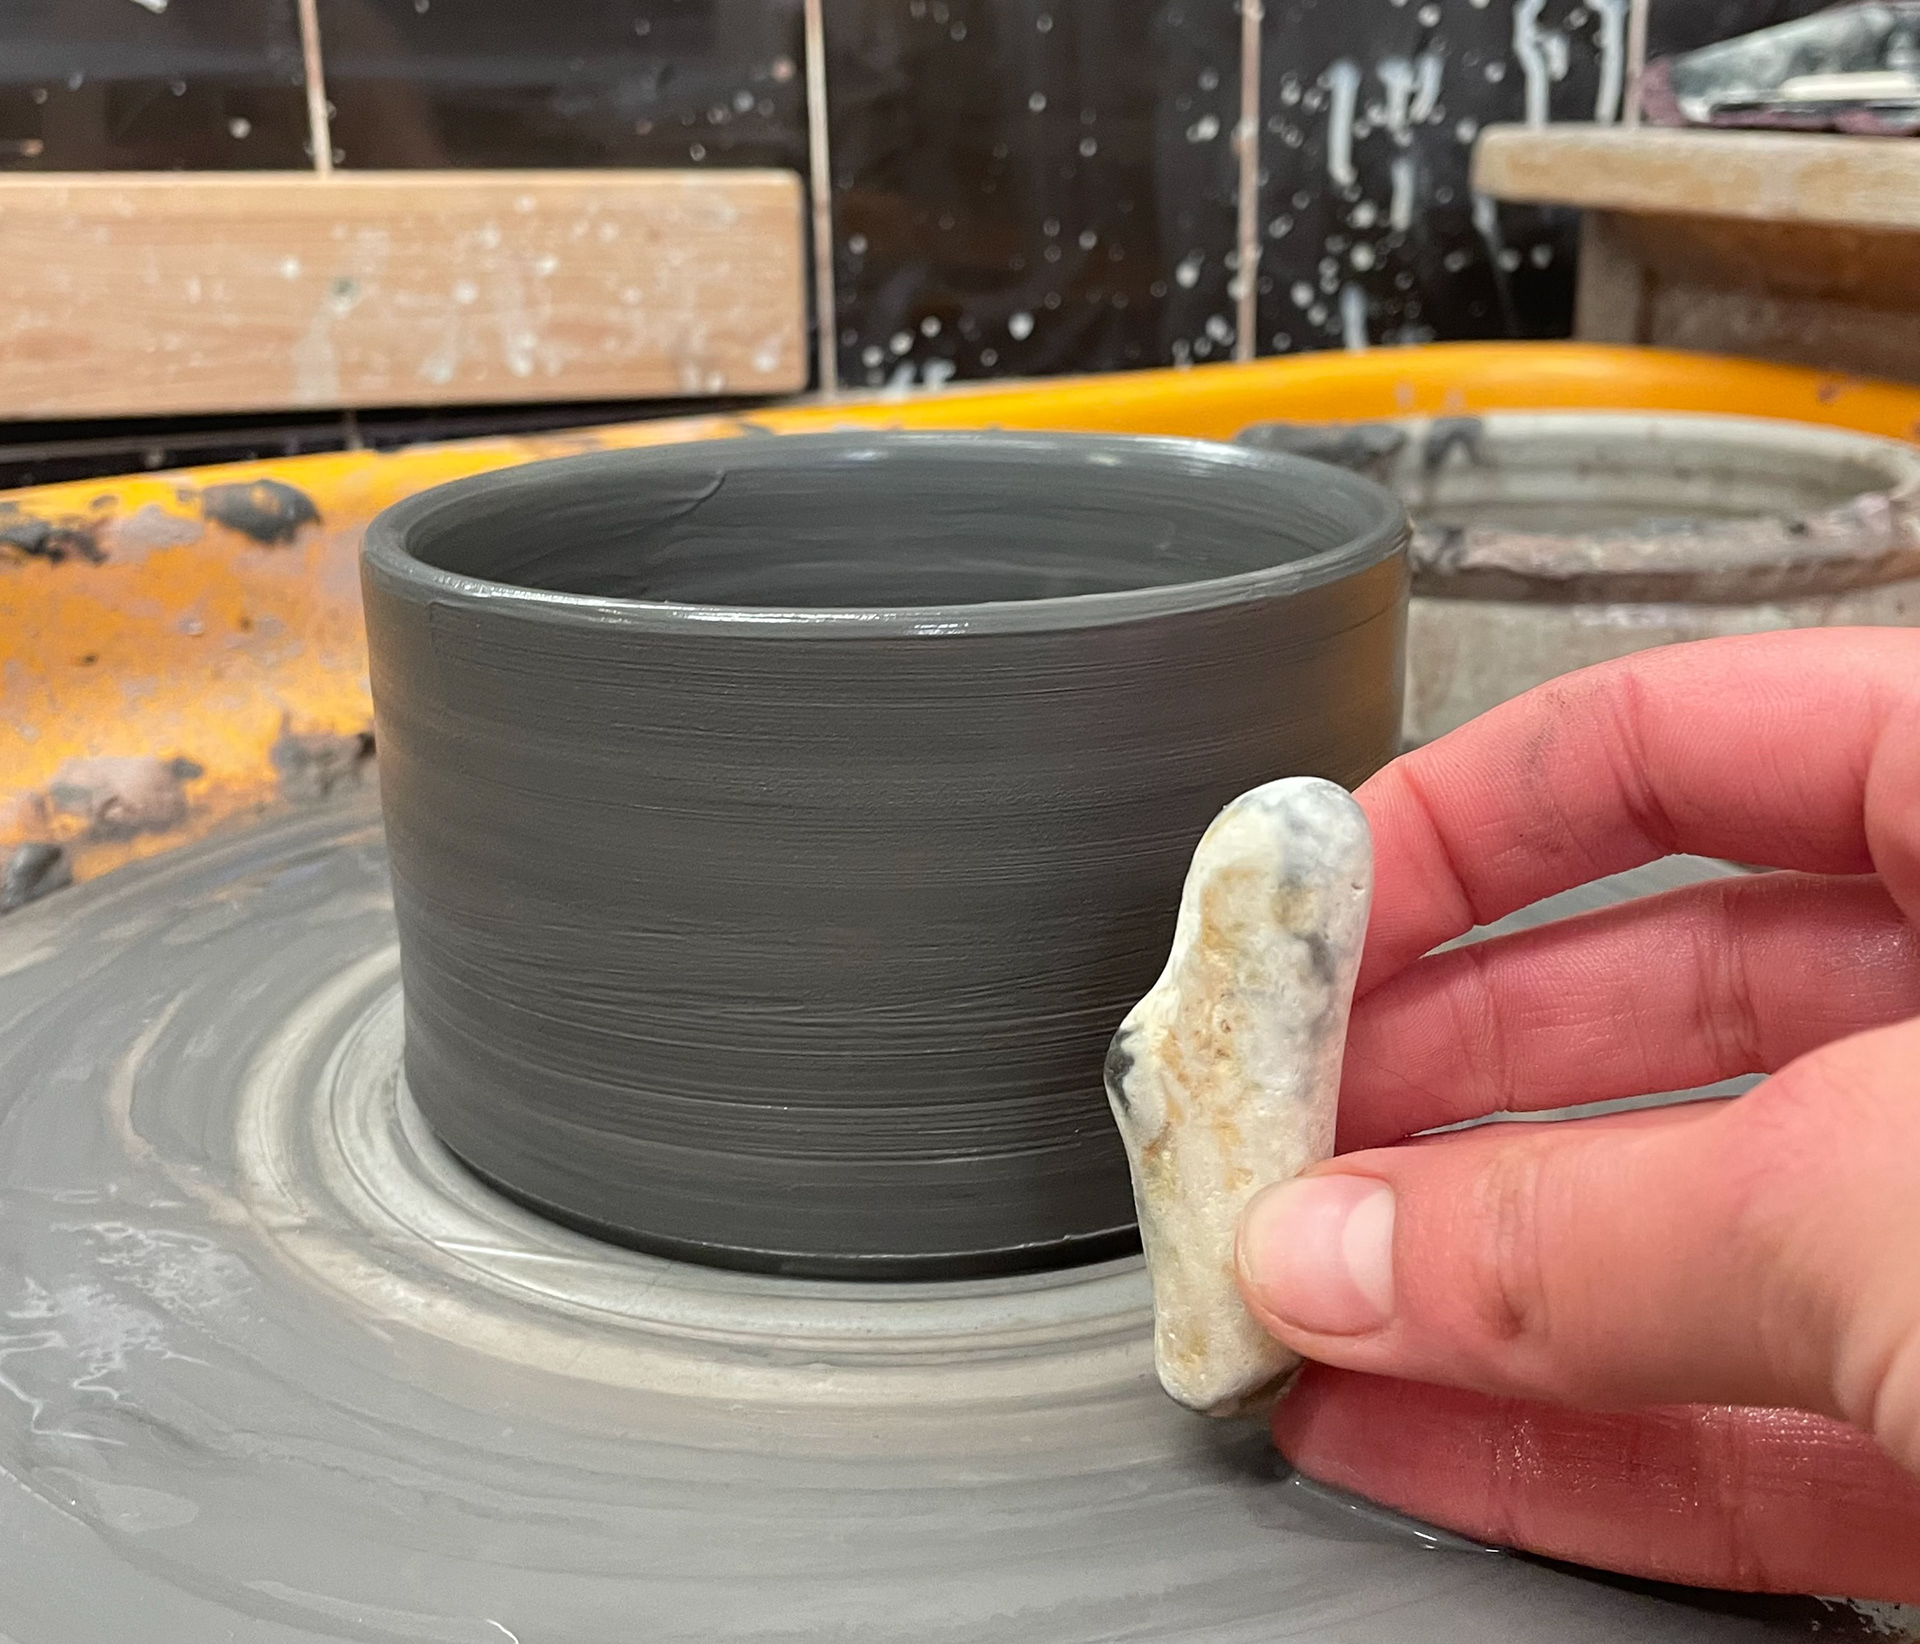
Throwing With Pebbles
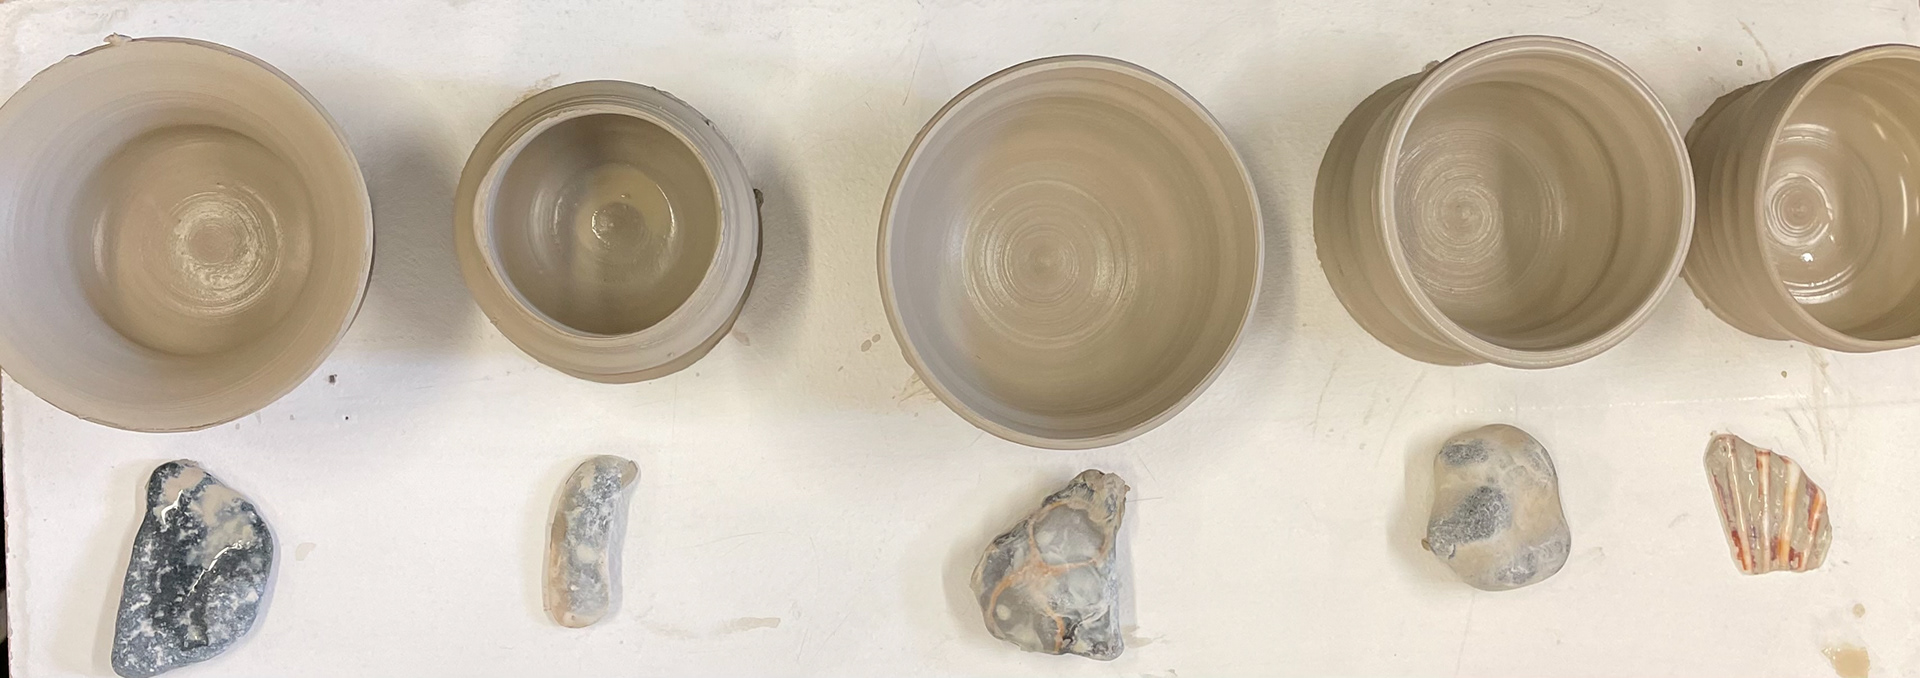
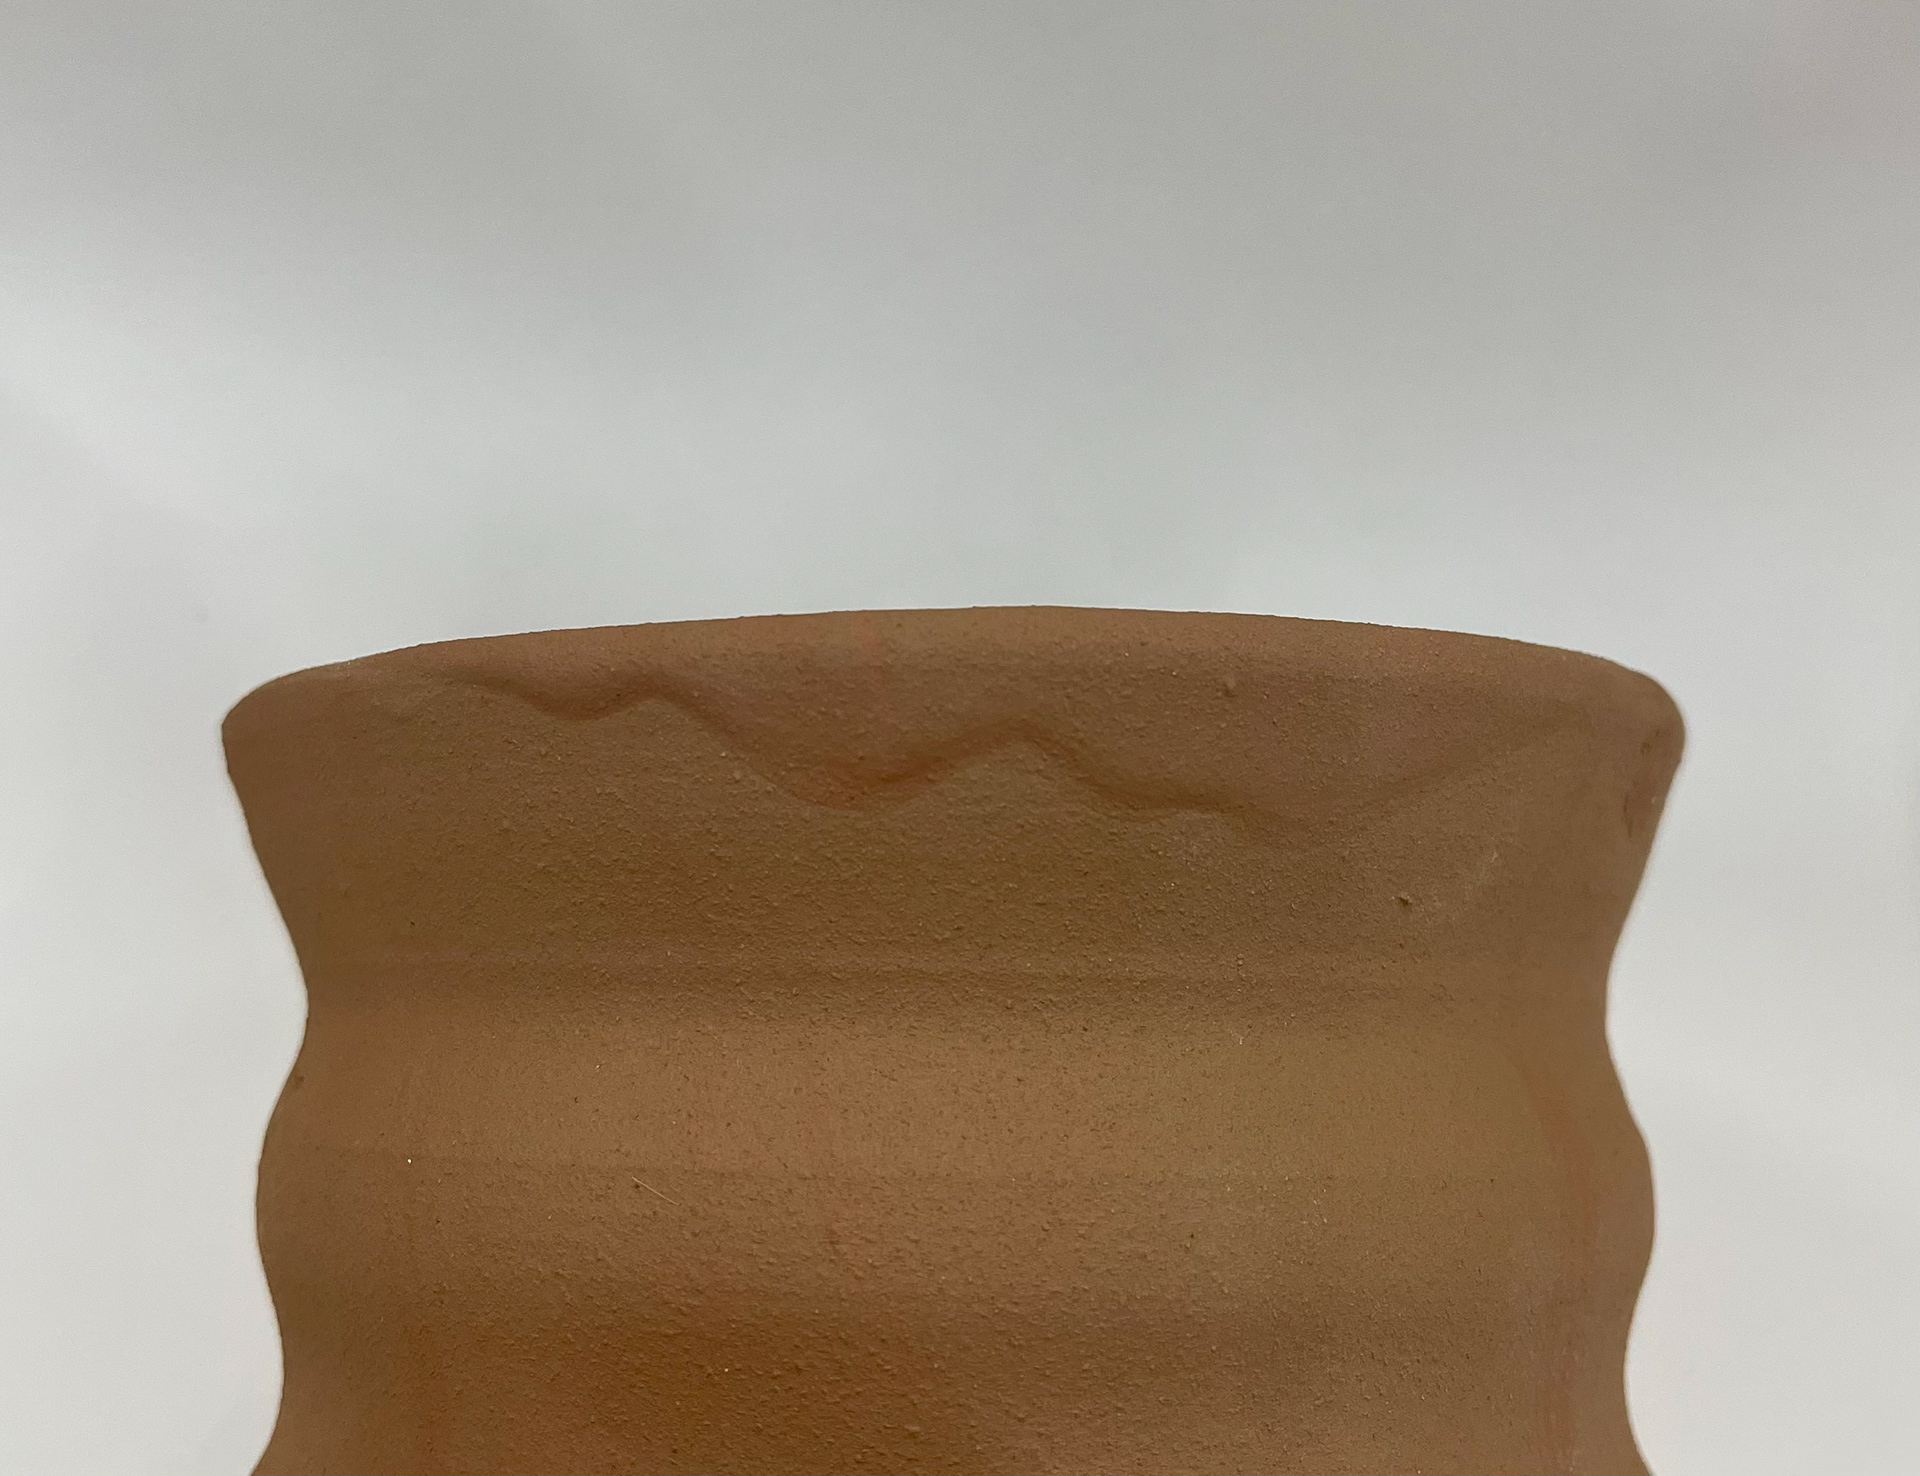
Using different amounts of clay, I found pebbles from Brighton Beach to use as a rib to create different patterns within my clay-thrown pieces. I started by throwing small vessels, all in a basic cylindrical shape, once I had the basic shape, I then used the dents and portraits of the stones to cut into my vessels, imprinting their shape onto the vessels. This was a really interesting experiment and fun, and it was hard to imagine what effect the stones would have on the clay, depending on the stone shape, they would cause rises in the clay or carve the negative away. I'm fascinated that every pebble will leave a different impression on the clay, leading to not one vessel being the same. The pebbles also were the deciders of the profile of the vessels- making the tops flare out, carving the bottom away, making a round or a v-shaped body. It can be frustrating as depending on the stone, it can cause the clay to be uneven, leading to the tops not being straight. I like how you can place the pebble next to the vessels and follow its imprint, seeing each bit it touches. To further this, I would like to experiment with larger vessels and stones with a more drastic profile. People would look at these vessels and see nice shapes carved into them, not making the connection there are the cause pebbles, which I like, but once shown, you can see the connection.
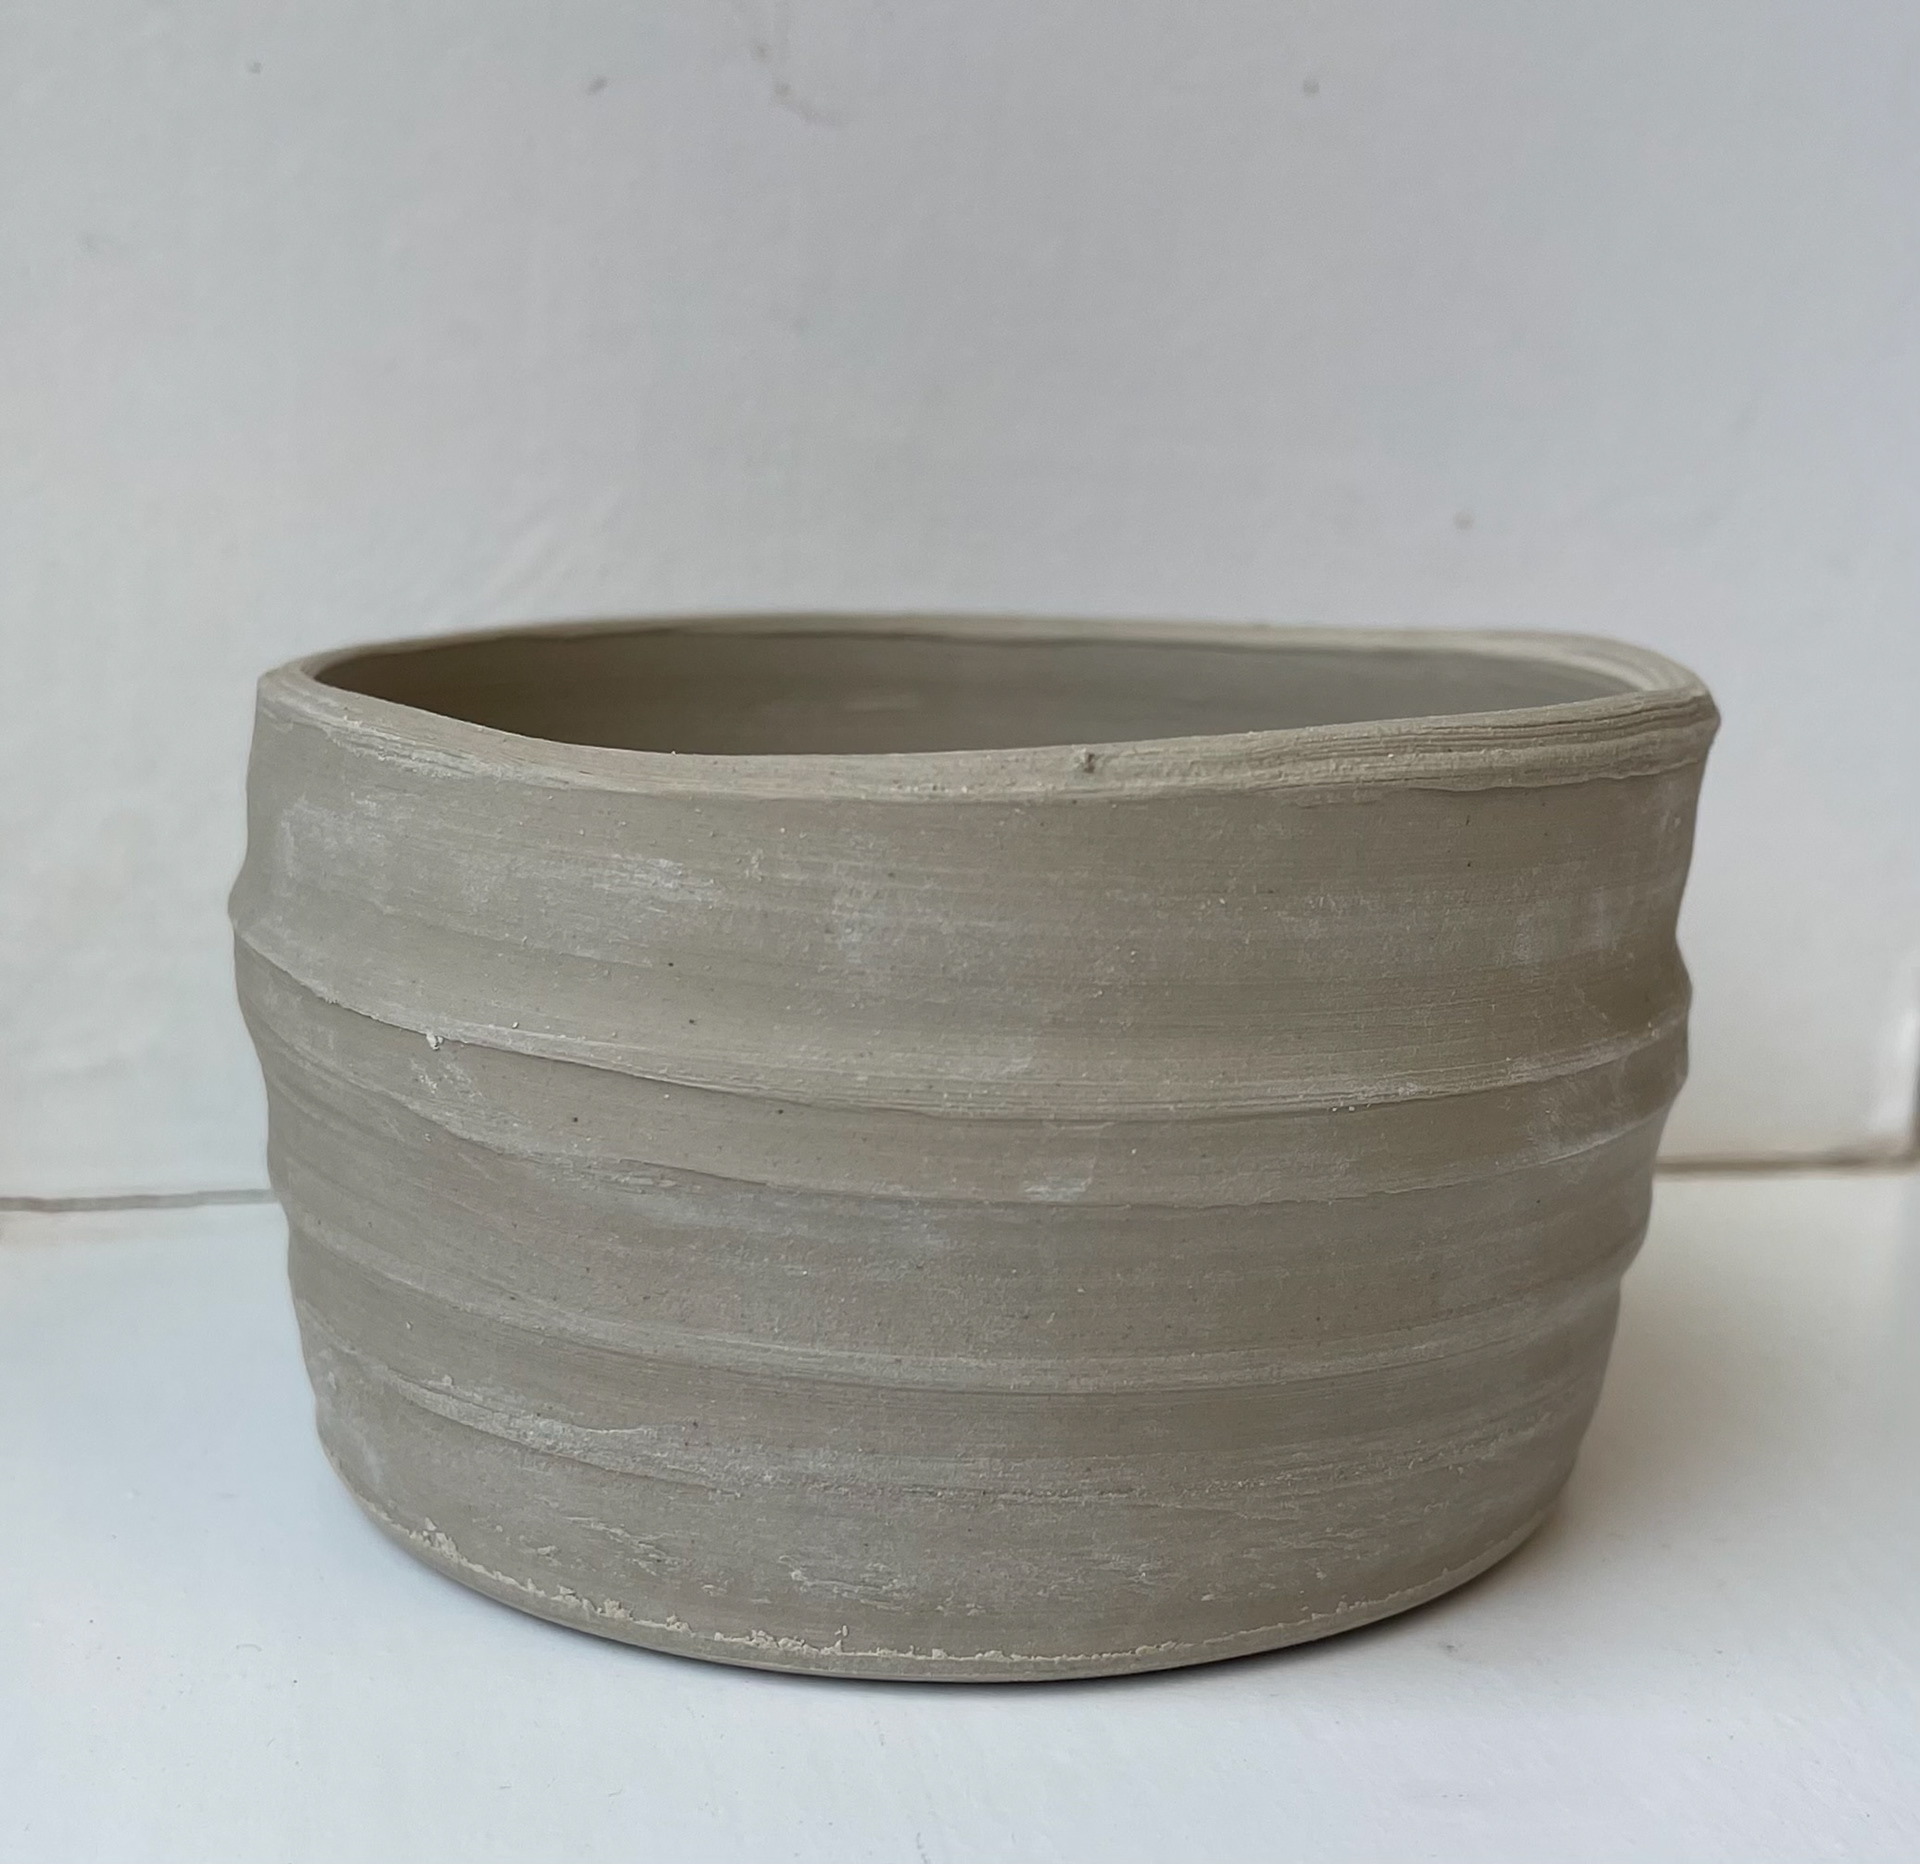
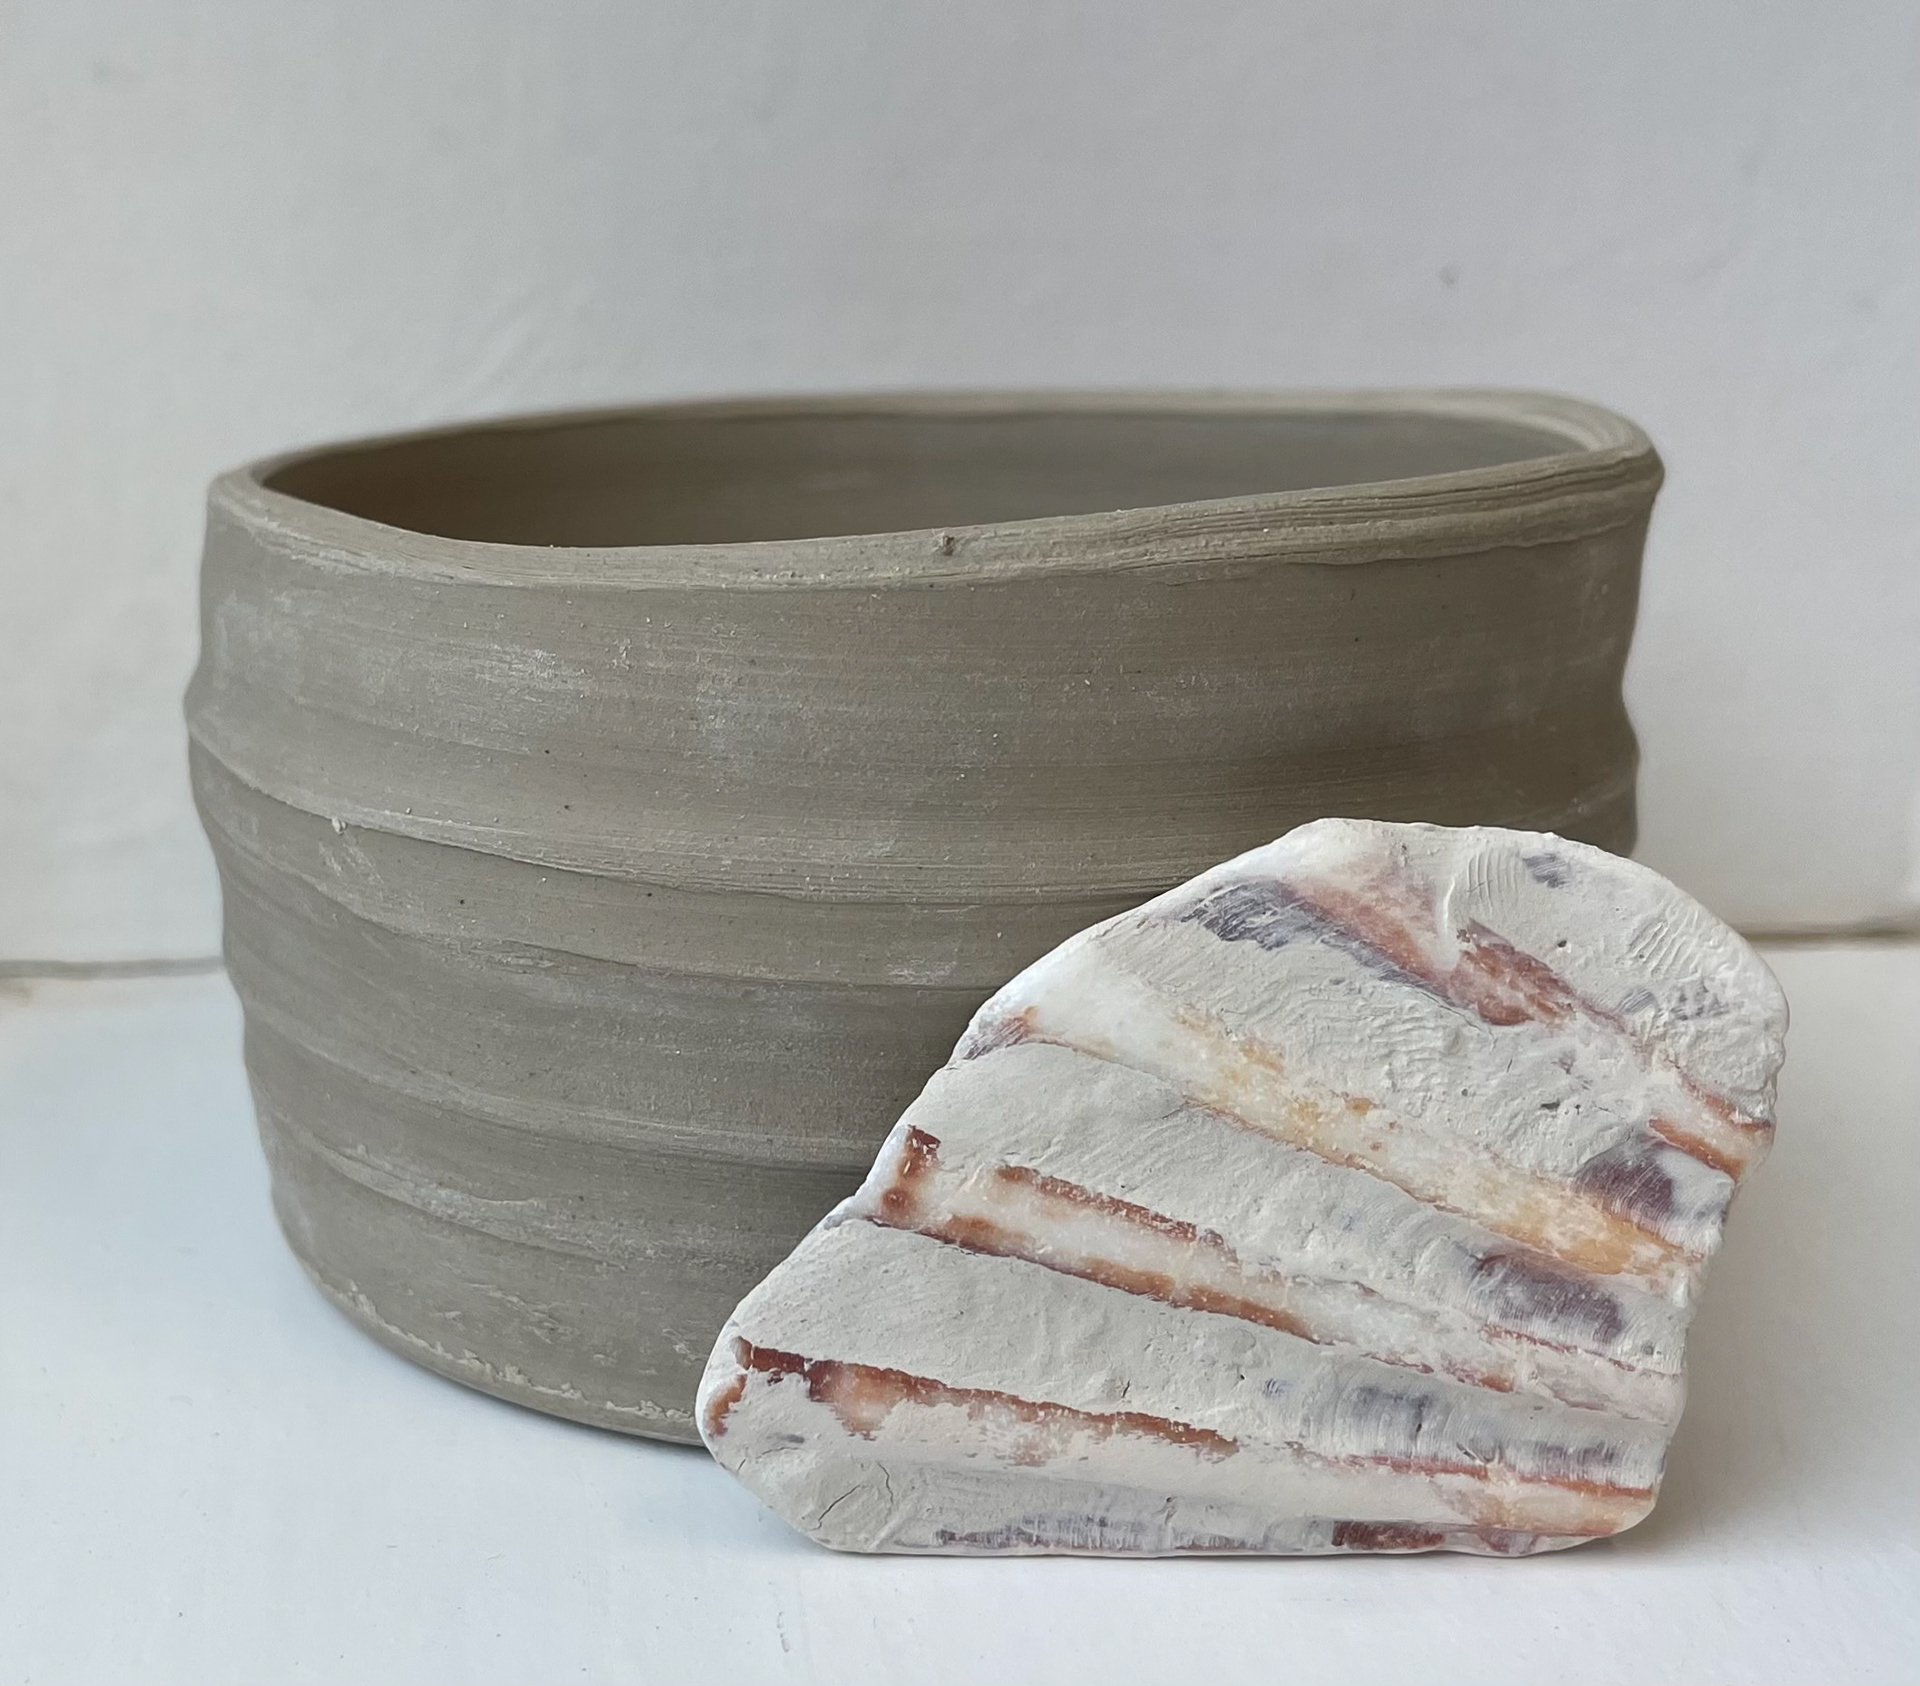
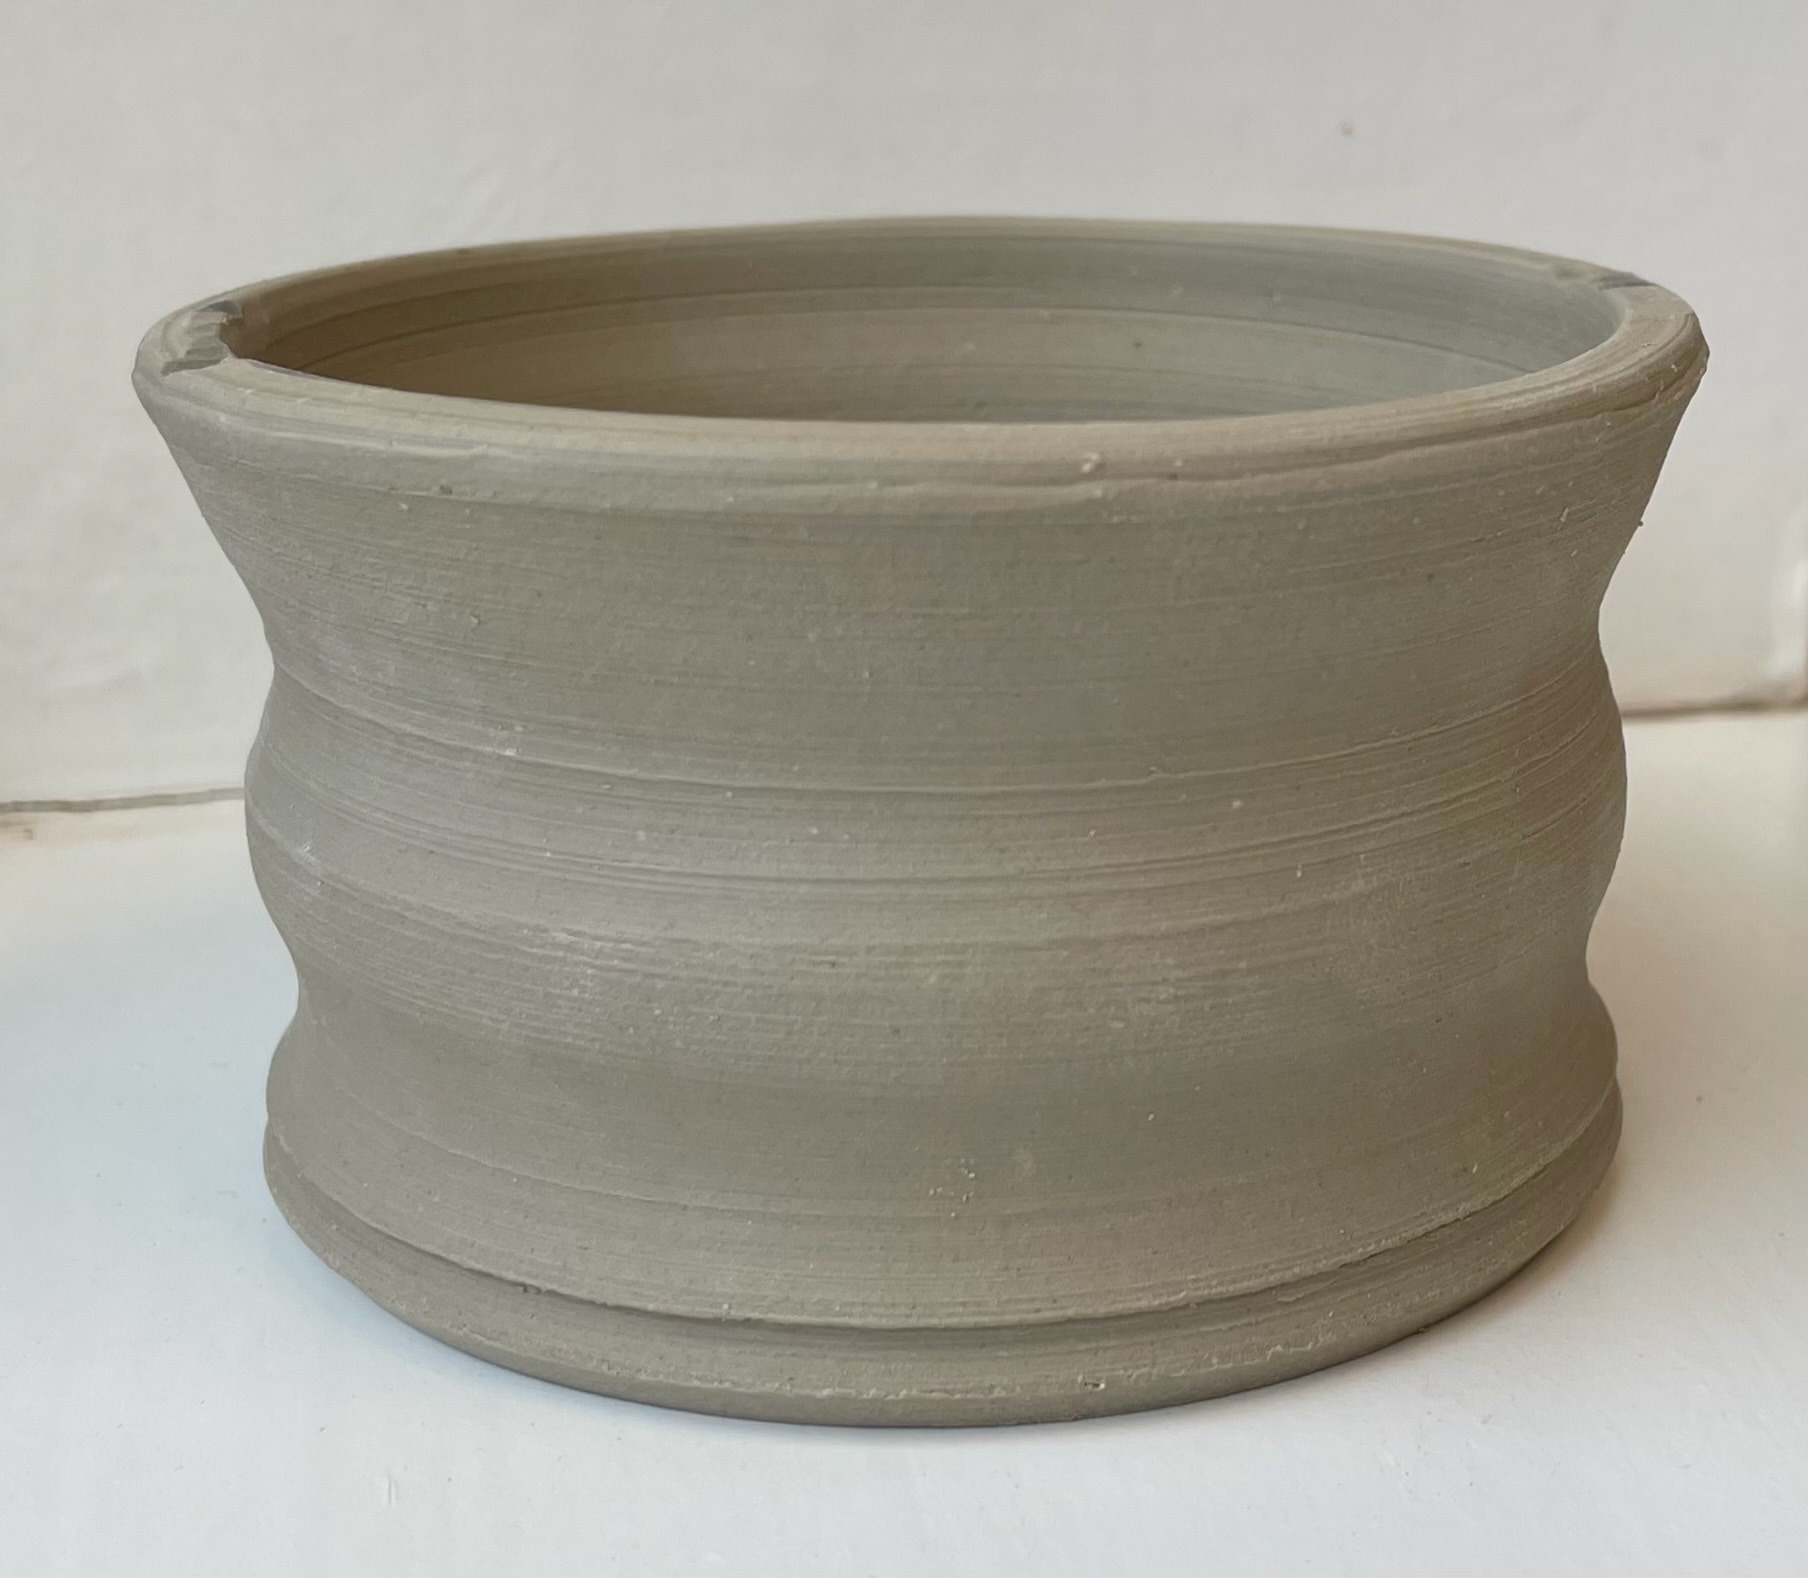
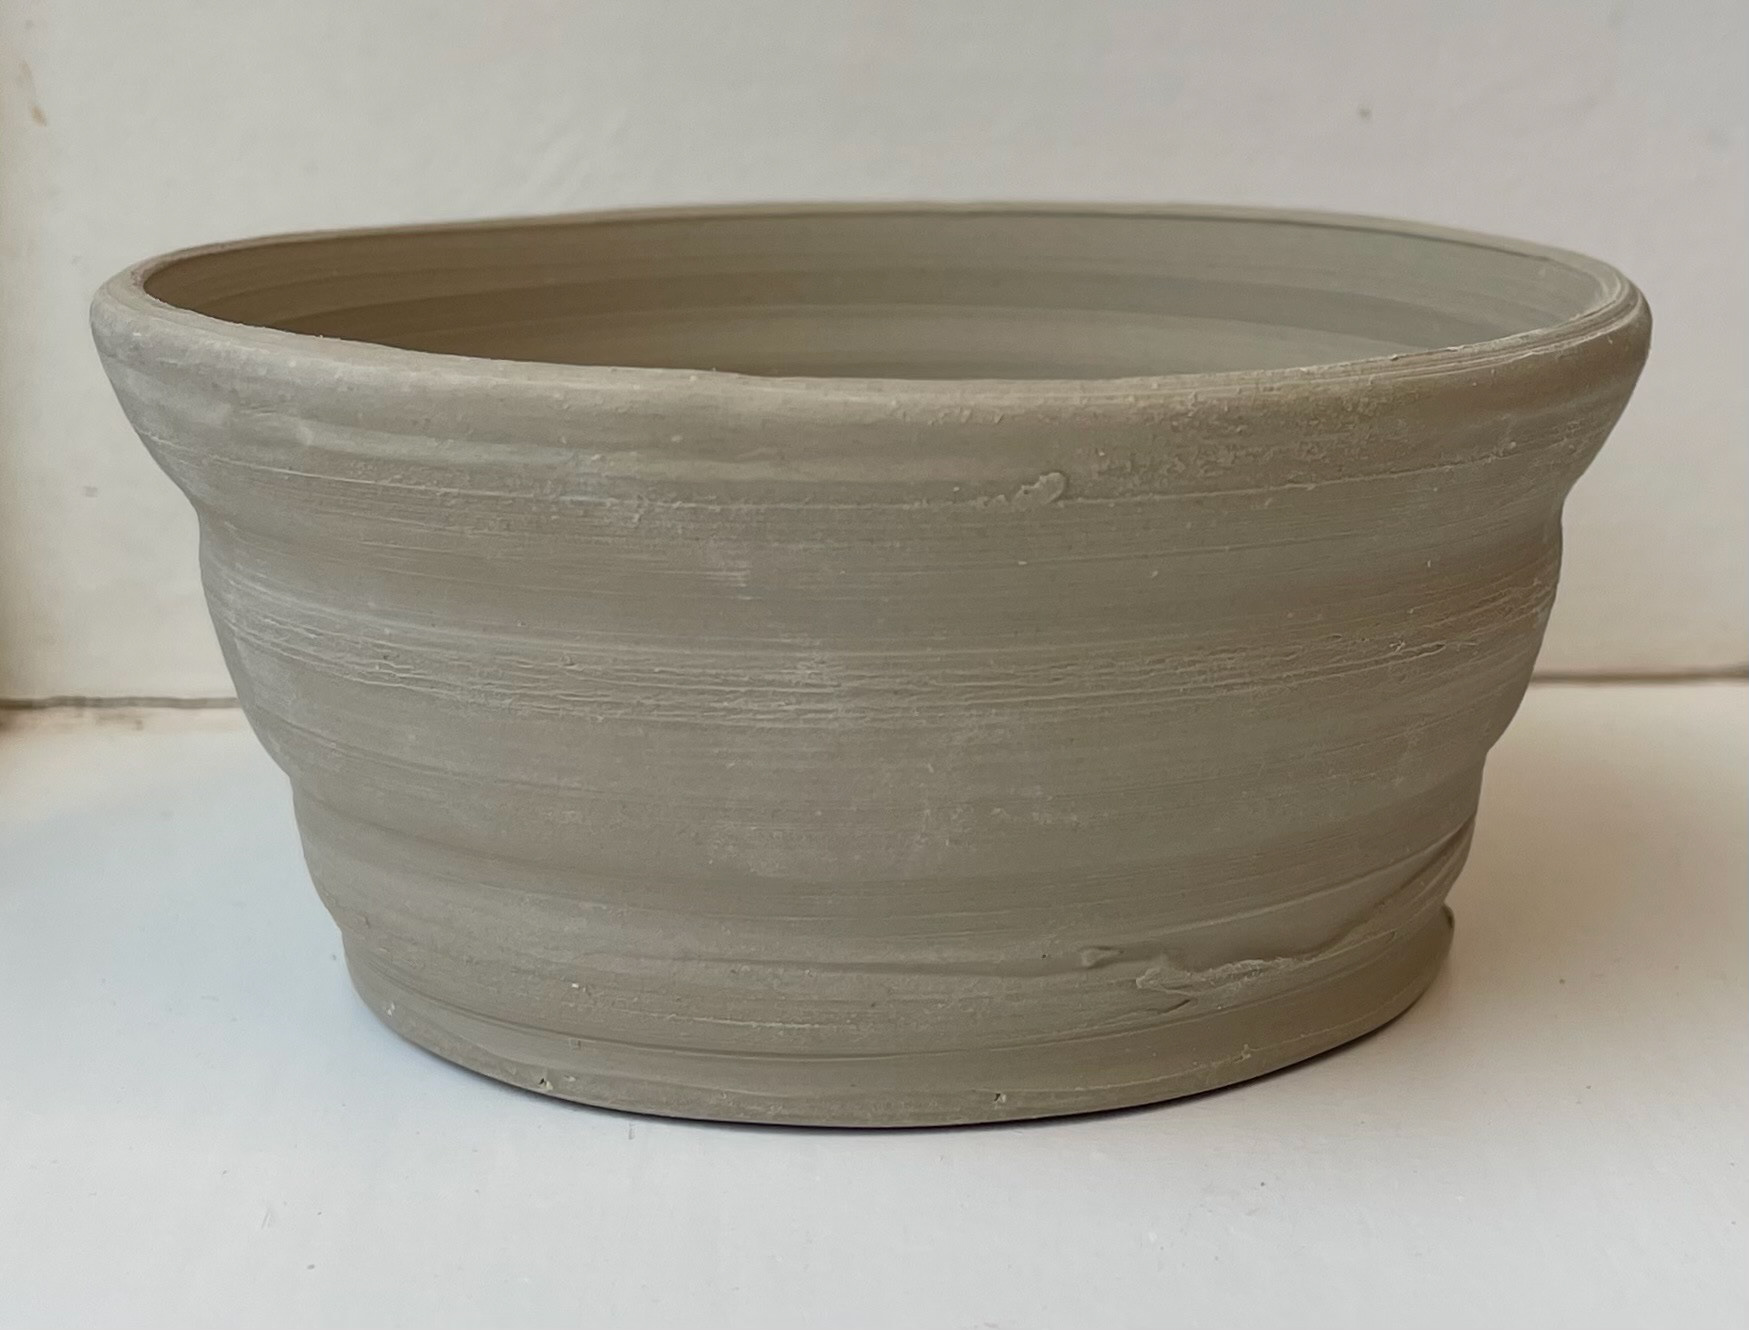
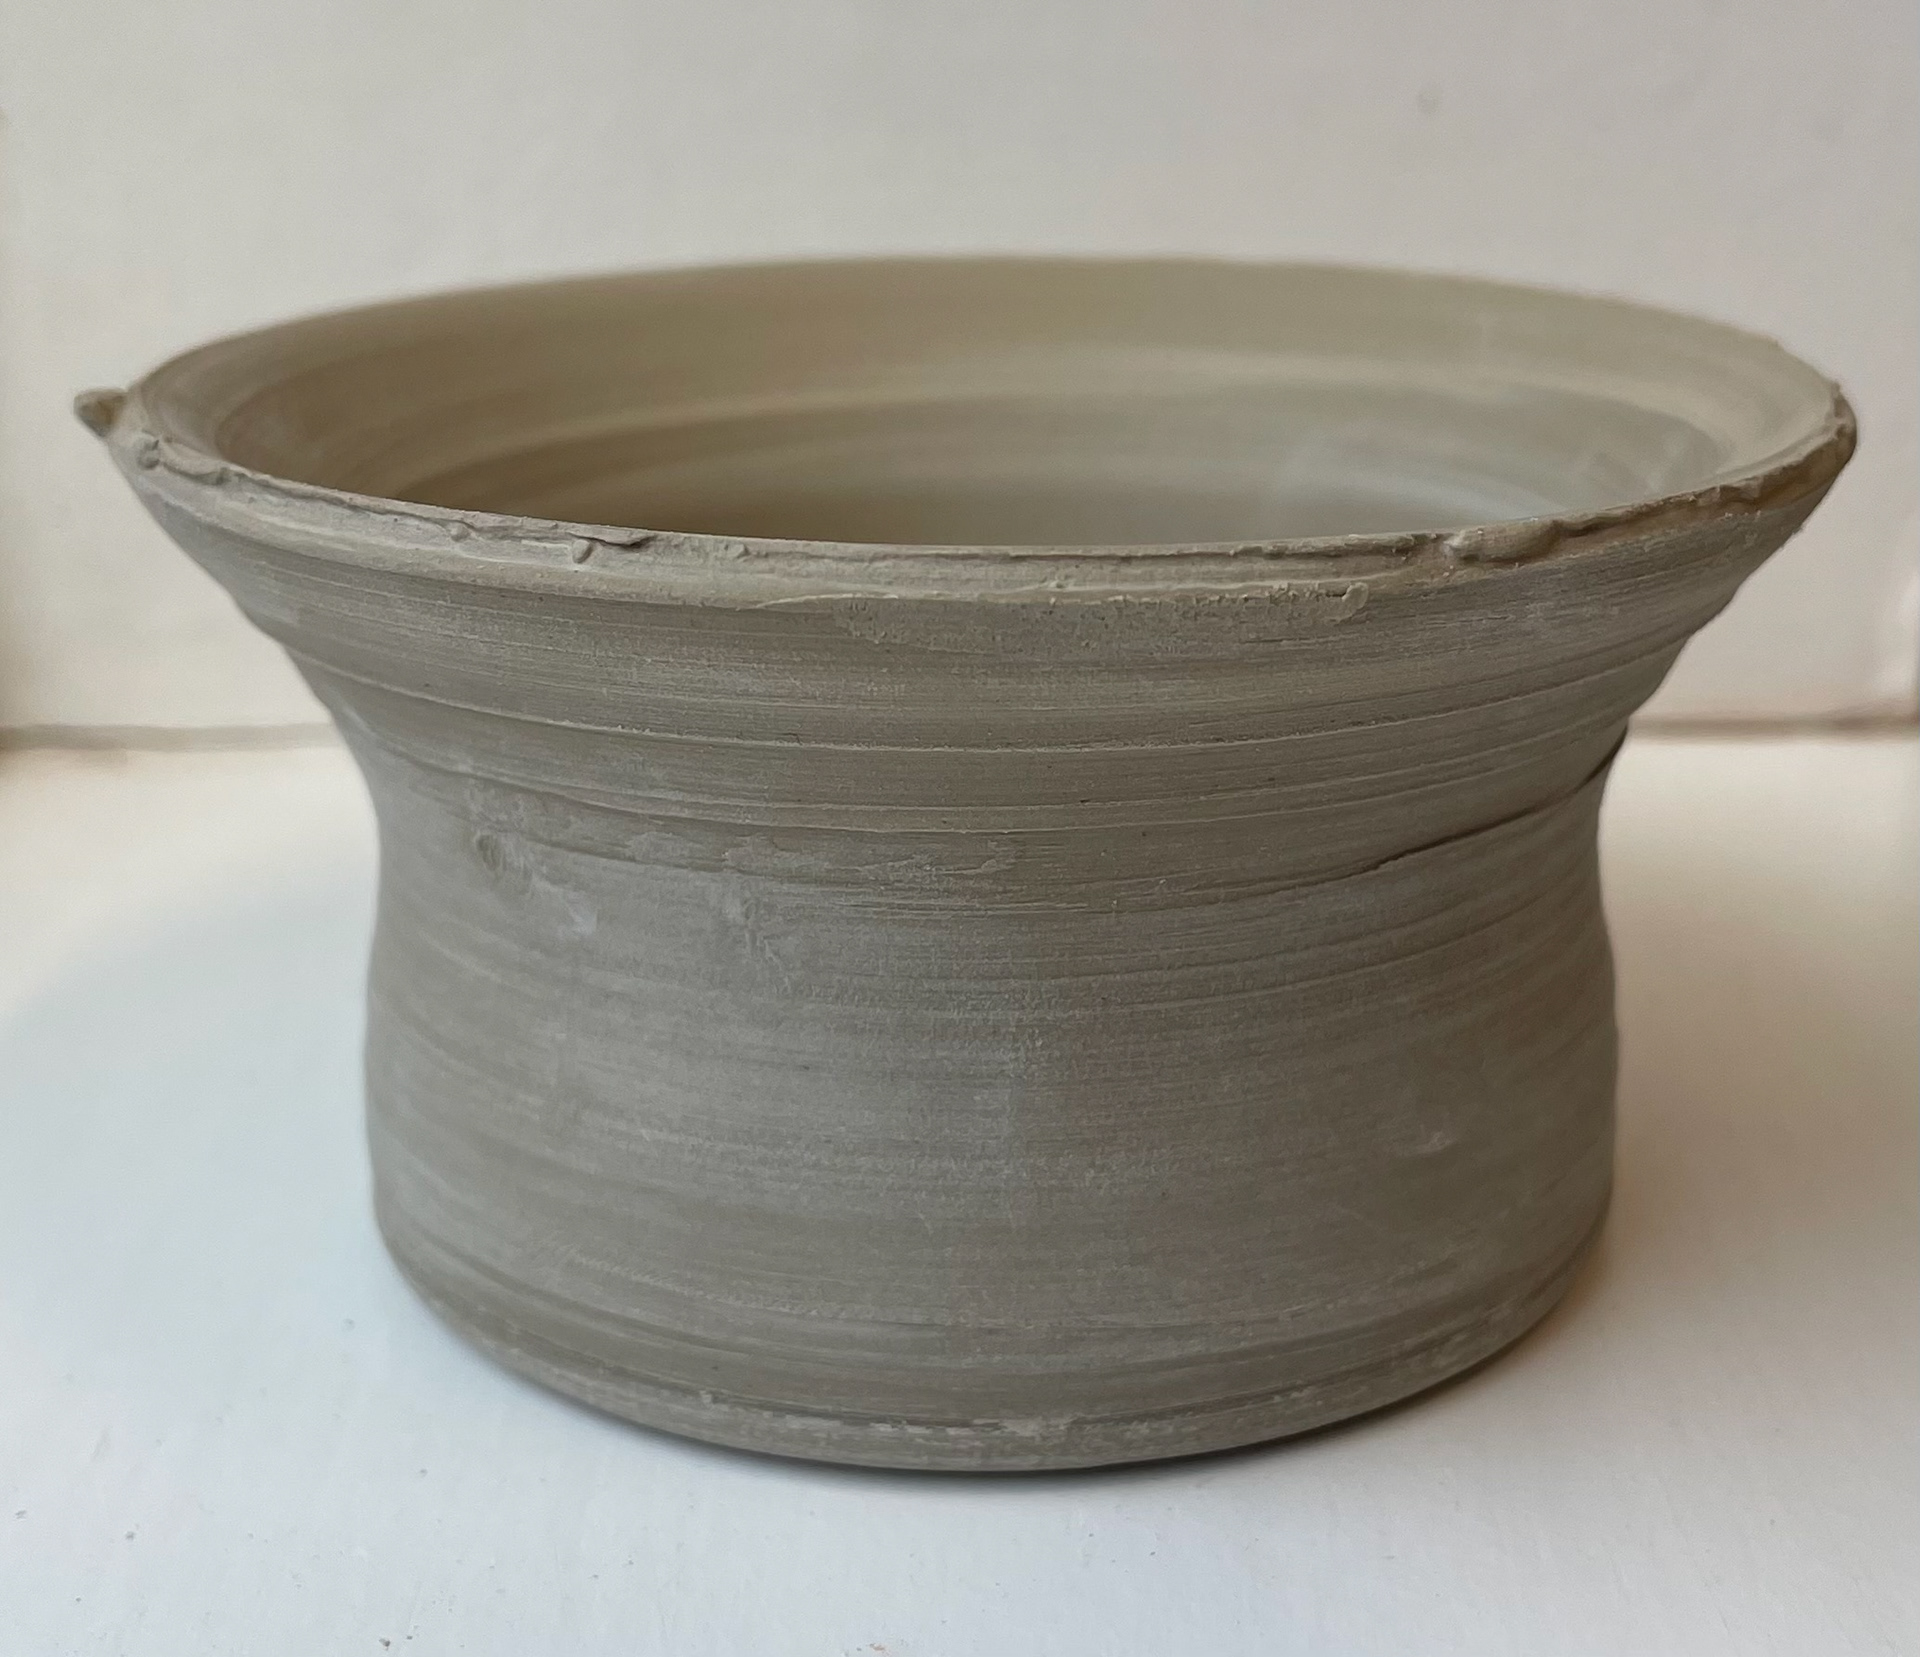
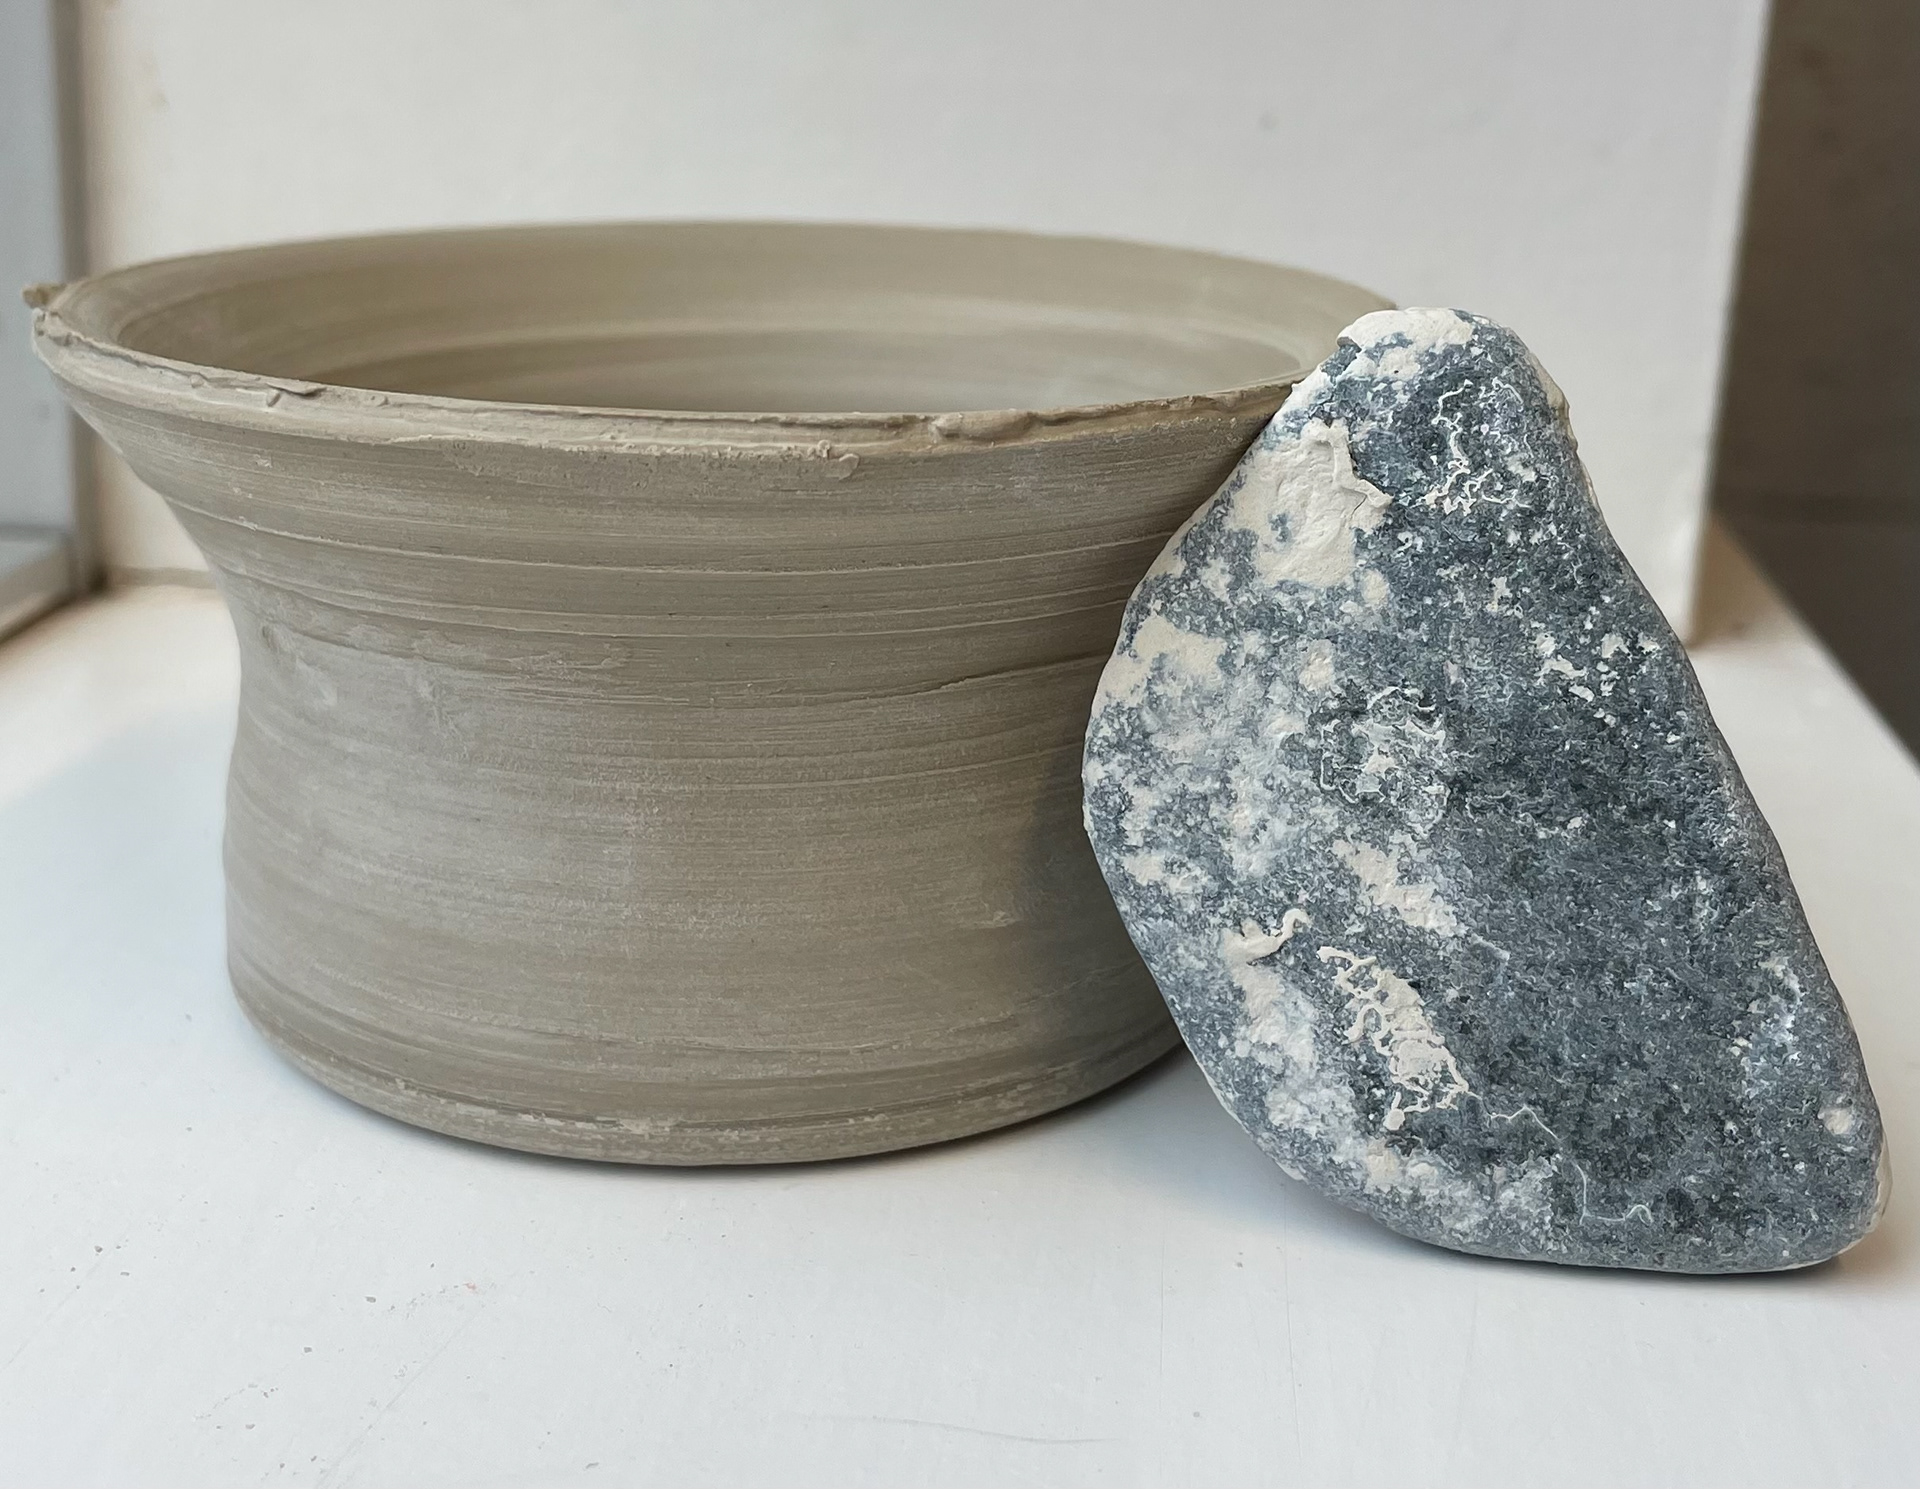
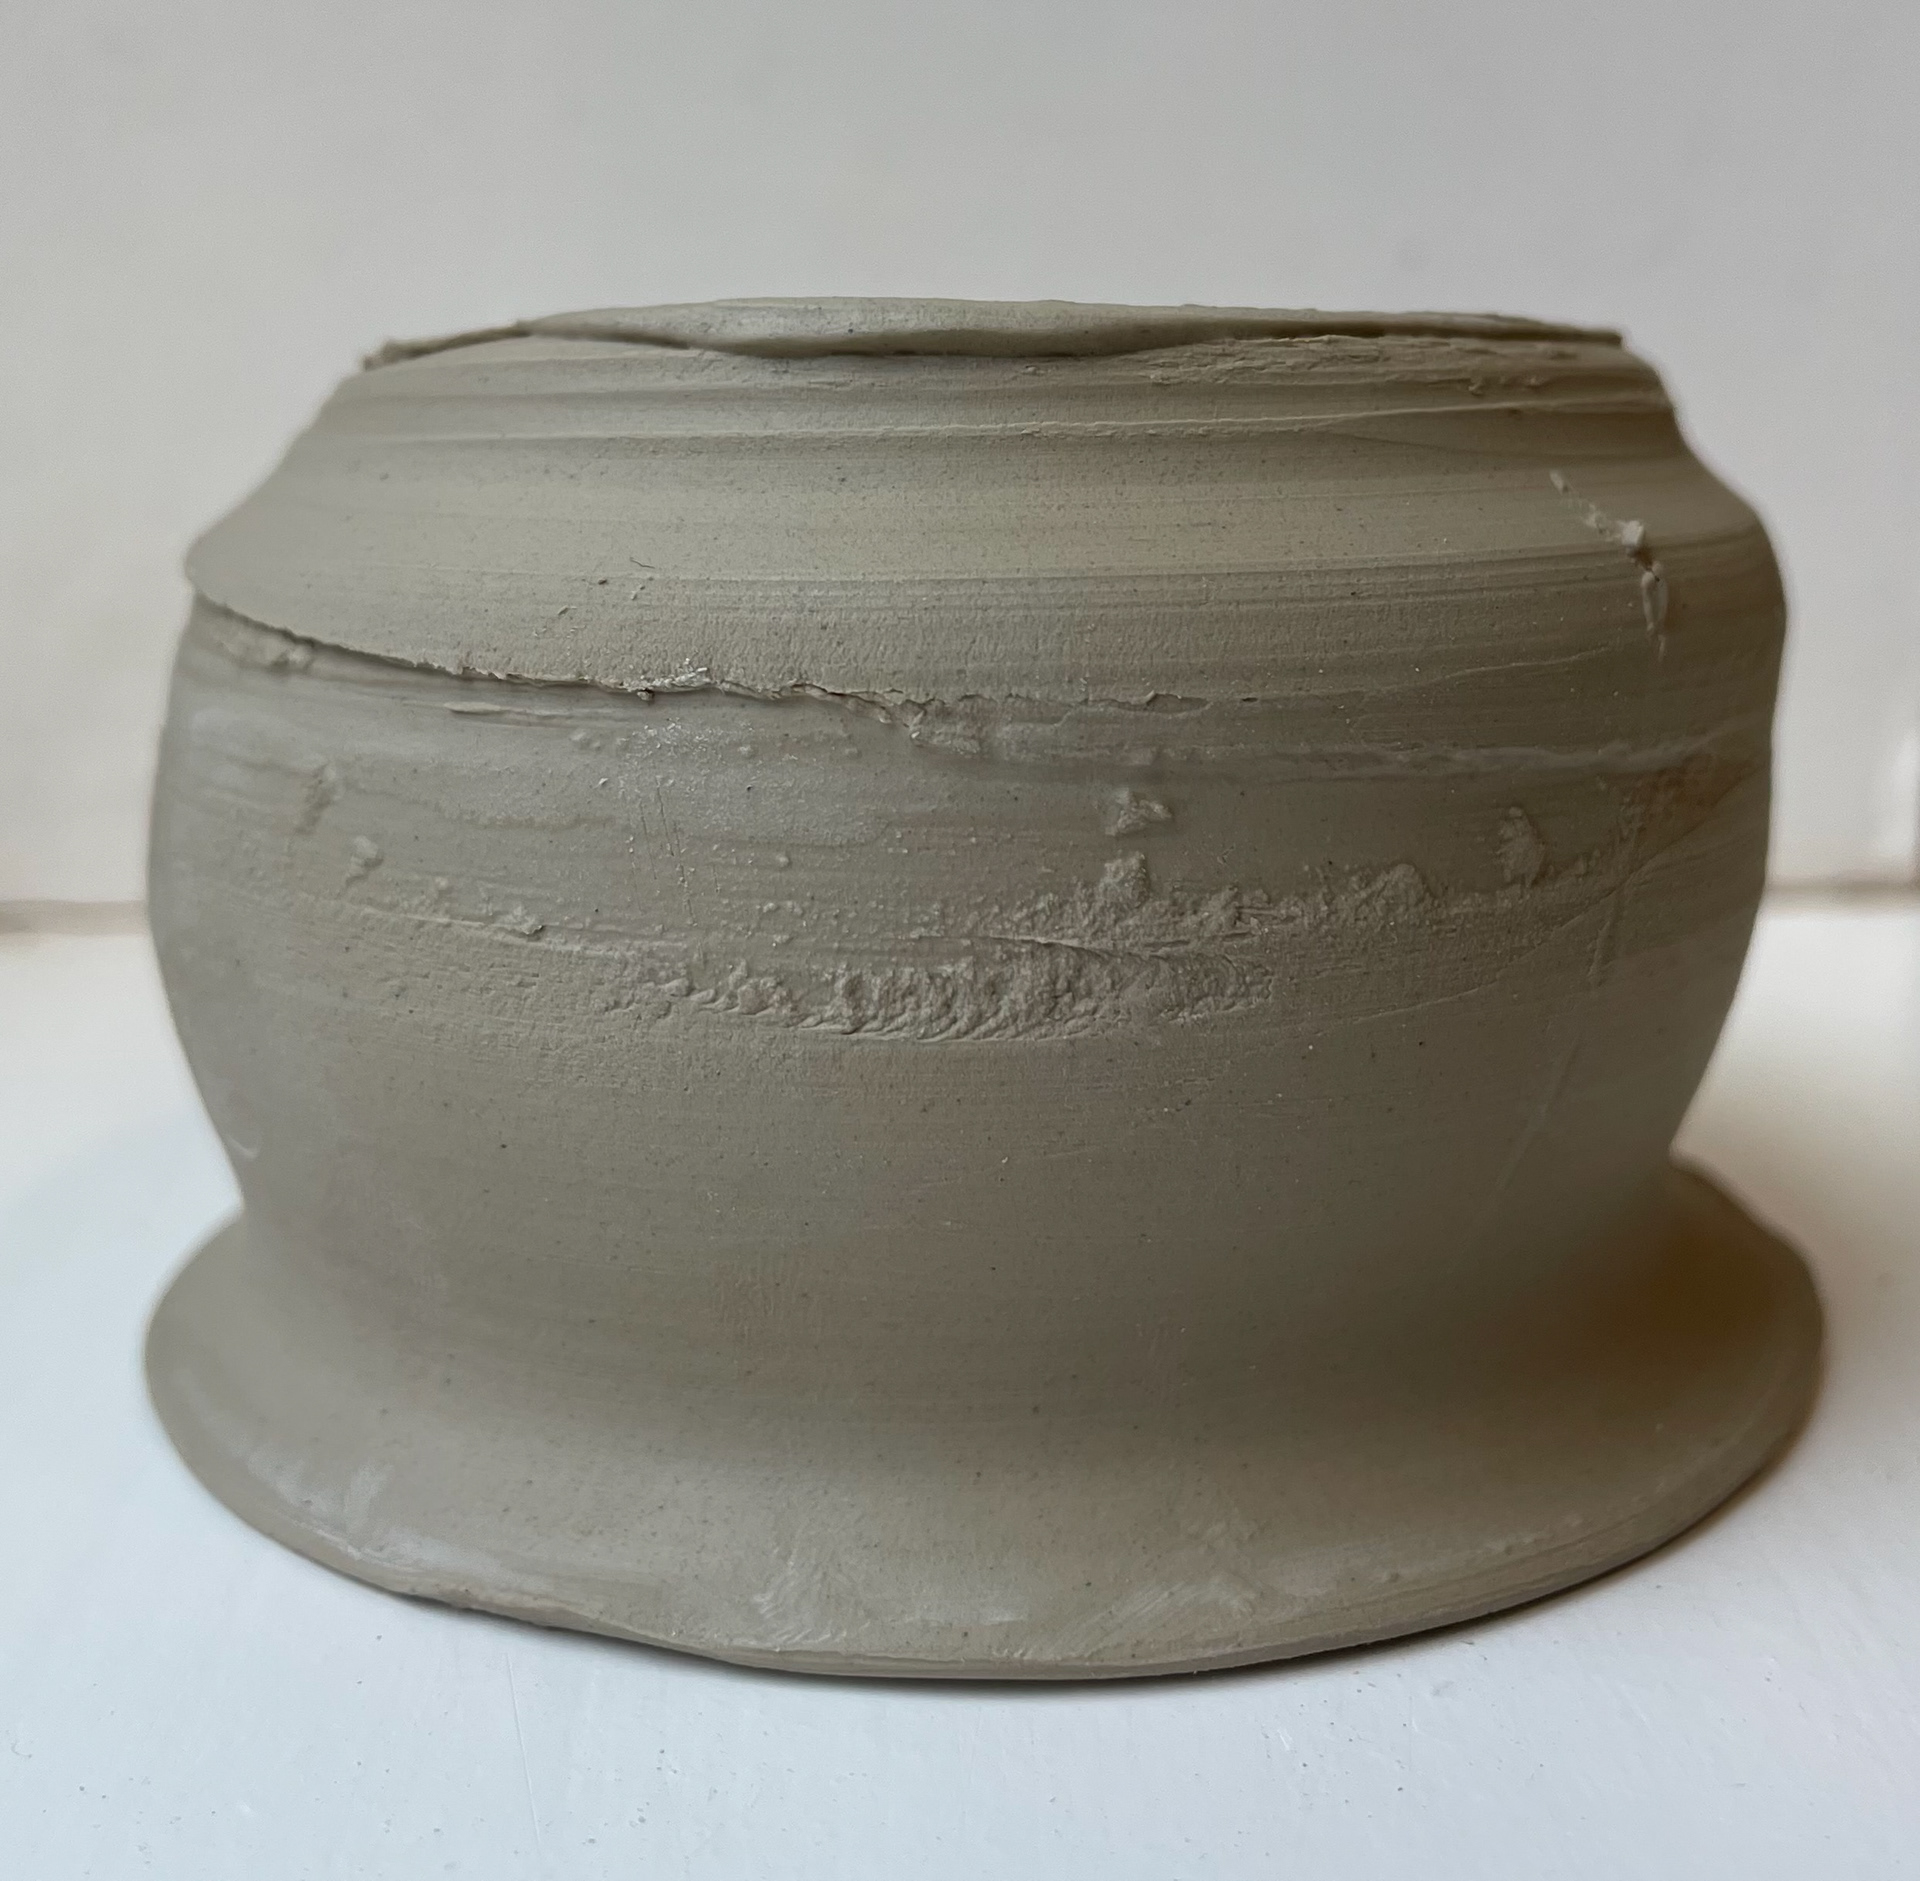

I decided to leave these vessels very raw; the difficulty is that if you want to clean them up, trimming them would get rid of all the detail of the pebbles, due to this, I would have to consider if I would want very raw and unrefined but rich in form and texture. I think if I took this further, I would have to think more in detail about the refinement of the forms and the effects this would have. Also, if I want to throw bigger, I would need to consider the sizes of the pebbles or if I just do repetitions of the same stone.
Exploring Ways To Incorporate Colour Clay
My project is based on the idea of incorporating coloured clay into vessels, although I've only ever thrown with coloured clay. Here, I wanted to take a deeper exploration into ways that I might incorporate oxides into clay and see if these effects will be more impressive than marbled clay.
Looking at the final results of these pieces after being bisque fired, they were not what I was expecting. I thought the coloured slip would fill in the cutout dents, leaving a more consistent pattern. However, instead, it filled out the gaps and then covered the rest of the vessel, I tried to scrap off the smugged coloured slip however, it just mixed more with the clay. I think this might be due to the vessel clay being too dry, so the slip was just being absorbed into the shell of the vessel, or the cuts I attempted to do were not deep enough, not giving enough space for the slip to go. The outcomes of these are not as impactful as my modelling clay therefore, I will not be going further with these, especially as I want a few colours on my vessels they will all just smudge and mix instead of having clear separation in coloured slip.
The outcome didn't go how I expected. I thought it would pick up more on the two different coloured slips, leading to a more detailed marbling on the vessel. I wanted to explore with coloured slip as I can add different oxides to the slip, exploring the colours more, and it seems simpler to use slips than creating multiple different clays, which would allow me more time to create more vessels. Dipping it into a bowl of slip also meant that the drips remained in the vessel. Although I could clean these away if I developed a method to create clear marbling, wiping these drips would ruin that pattern, smudging the slips together. Although I think it was important for my practice to explore different ways to add coloured clay, I did learn some new techniques. However, these ideas are not as impactful as colouring clay and throwing with marbled clay, a technique I'm very confident in and would like to explore further.
For this test piece, I used a pebble to paint on my coloured slip. Using a curved pebble, I thought I would incorporate colour and texture into a vessel. This was a fun experiment as I had little control over the application of slip, only able to choose where I wanted it, the pebble was in control of the painting. It was interesting to see the marks that were created, the larger surface areas of the pebbles applied slipped more tick and covered. I think it would be interesting to look at different colours being applied over the top. However, this technique isn't as controlled as the quality of marbled clay is. I think it just doesn't have a finalised and a high standard for a final piece.
Recycling Clay
I'm aiming to recycle all the clay that I use. The main reason for this is I want to be as sustainable as possible. Recycling my clay is a perfect way to be more resourceful in my work and materials. It also helps my practice as I colour clay with bone-dry clay, which is easier to break down from old clay dried out. Another main reason is I aim for my work to be free to the public, so I need to consider the pricing of my equipment and materials and how I can make my project as budget-friendly as possible without affecting my overall project. Recycling clay is a perfect way of doing this it allows me to get free clay. The only downfall is that it takes two days for me to recycle clay, which means I need to plan when I recycle my clay, allowing me to not put my making on pause, as this will lead me to be behind and then have to buy clay which is going back on my intentions.
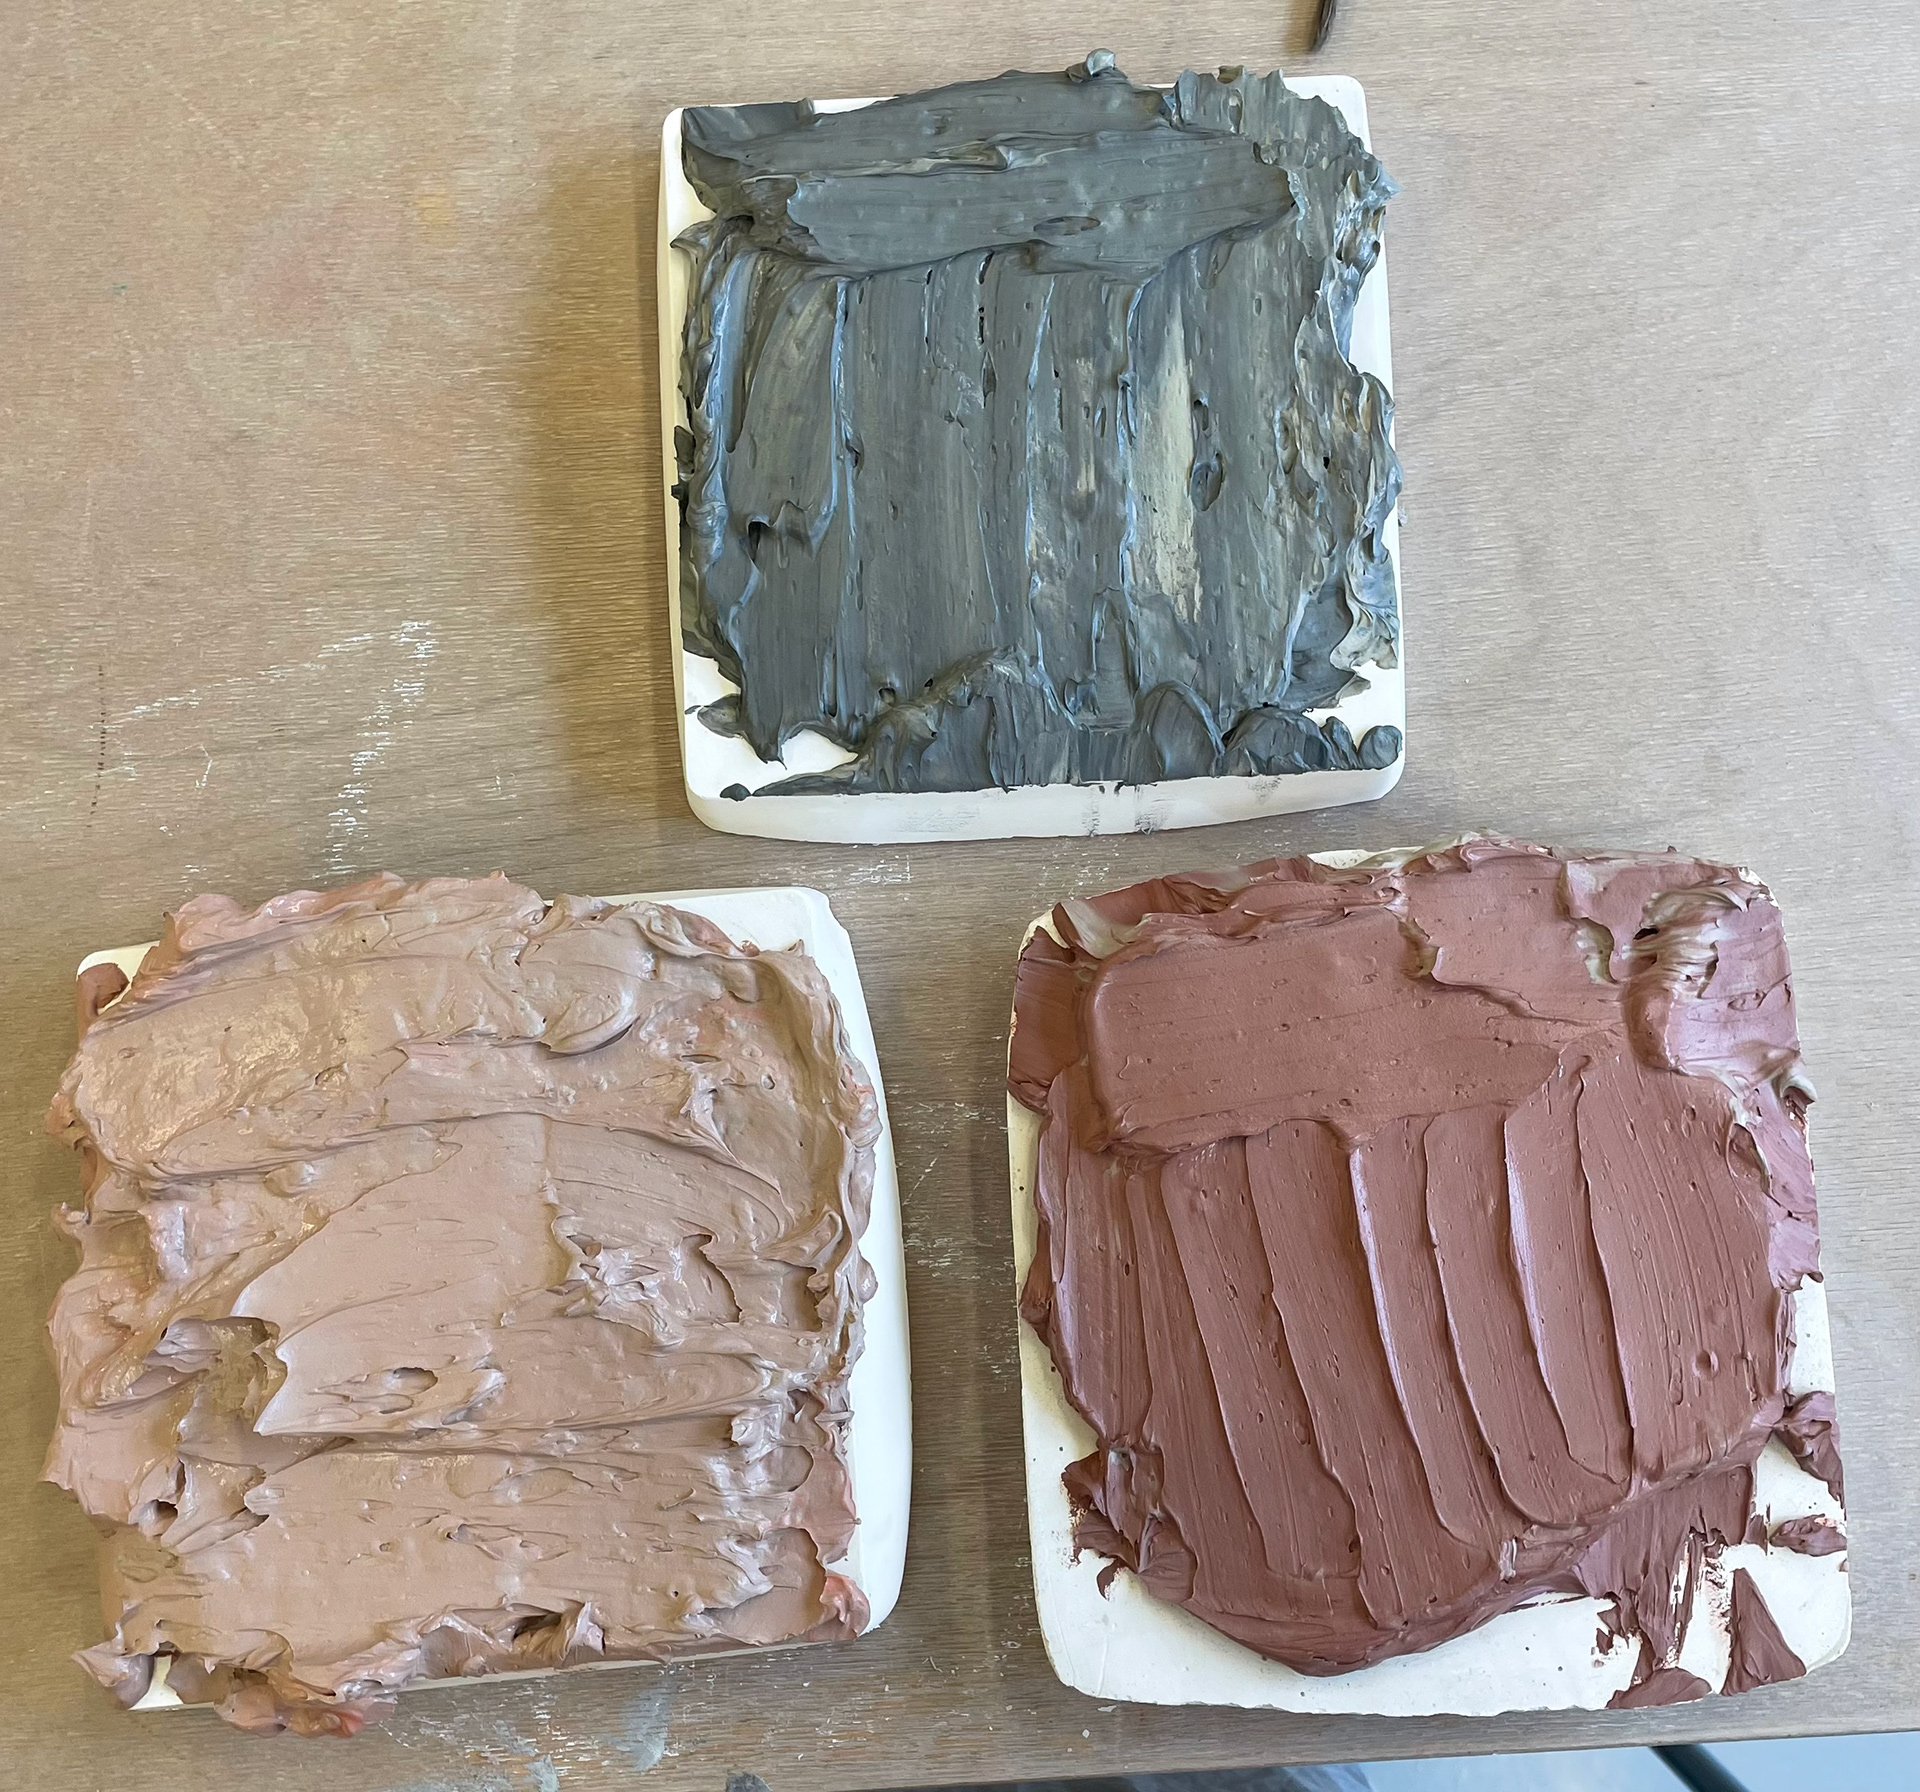
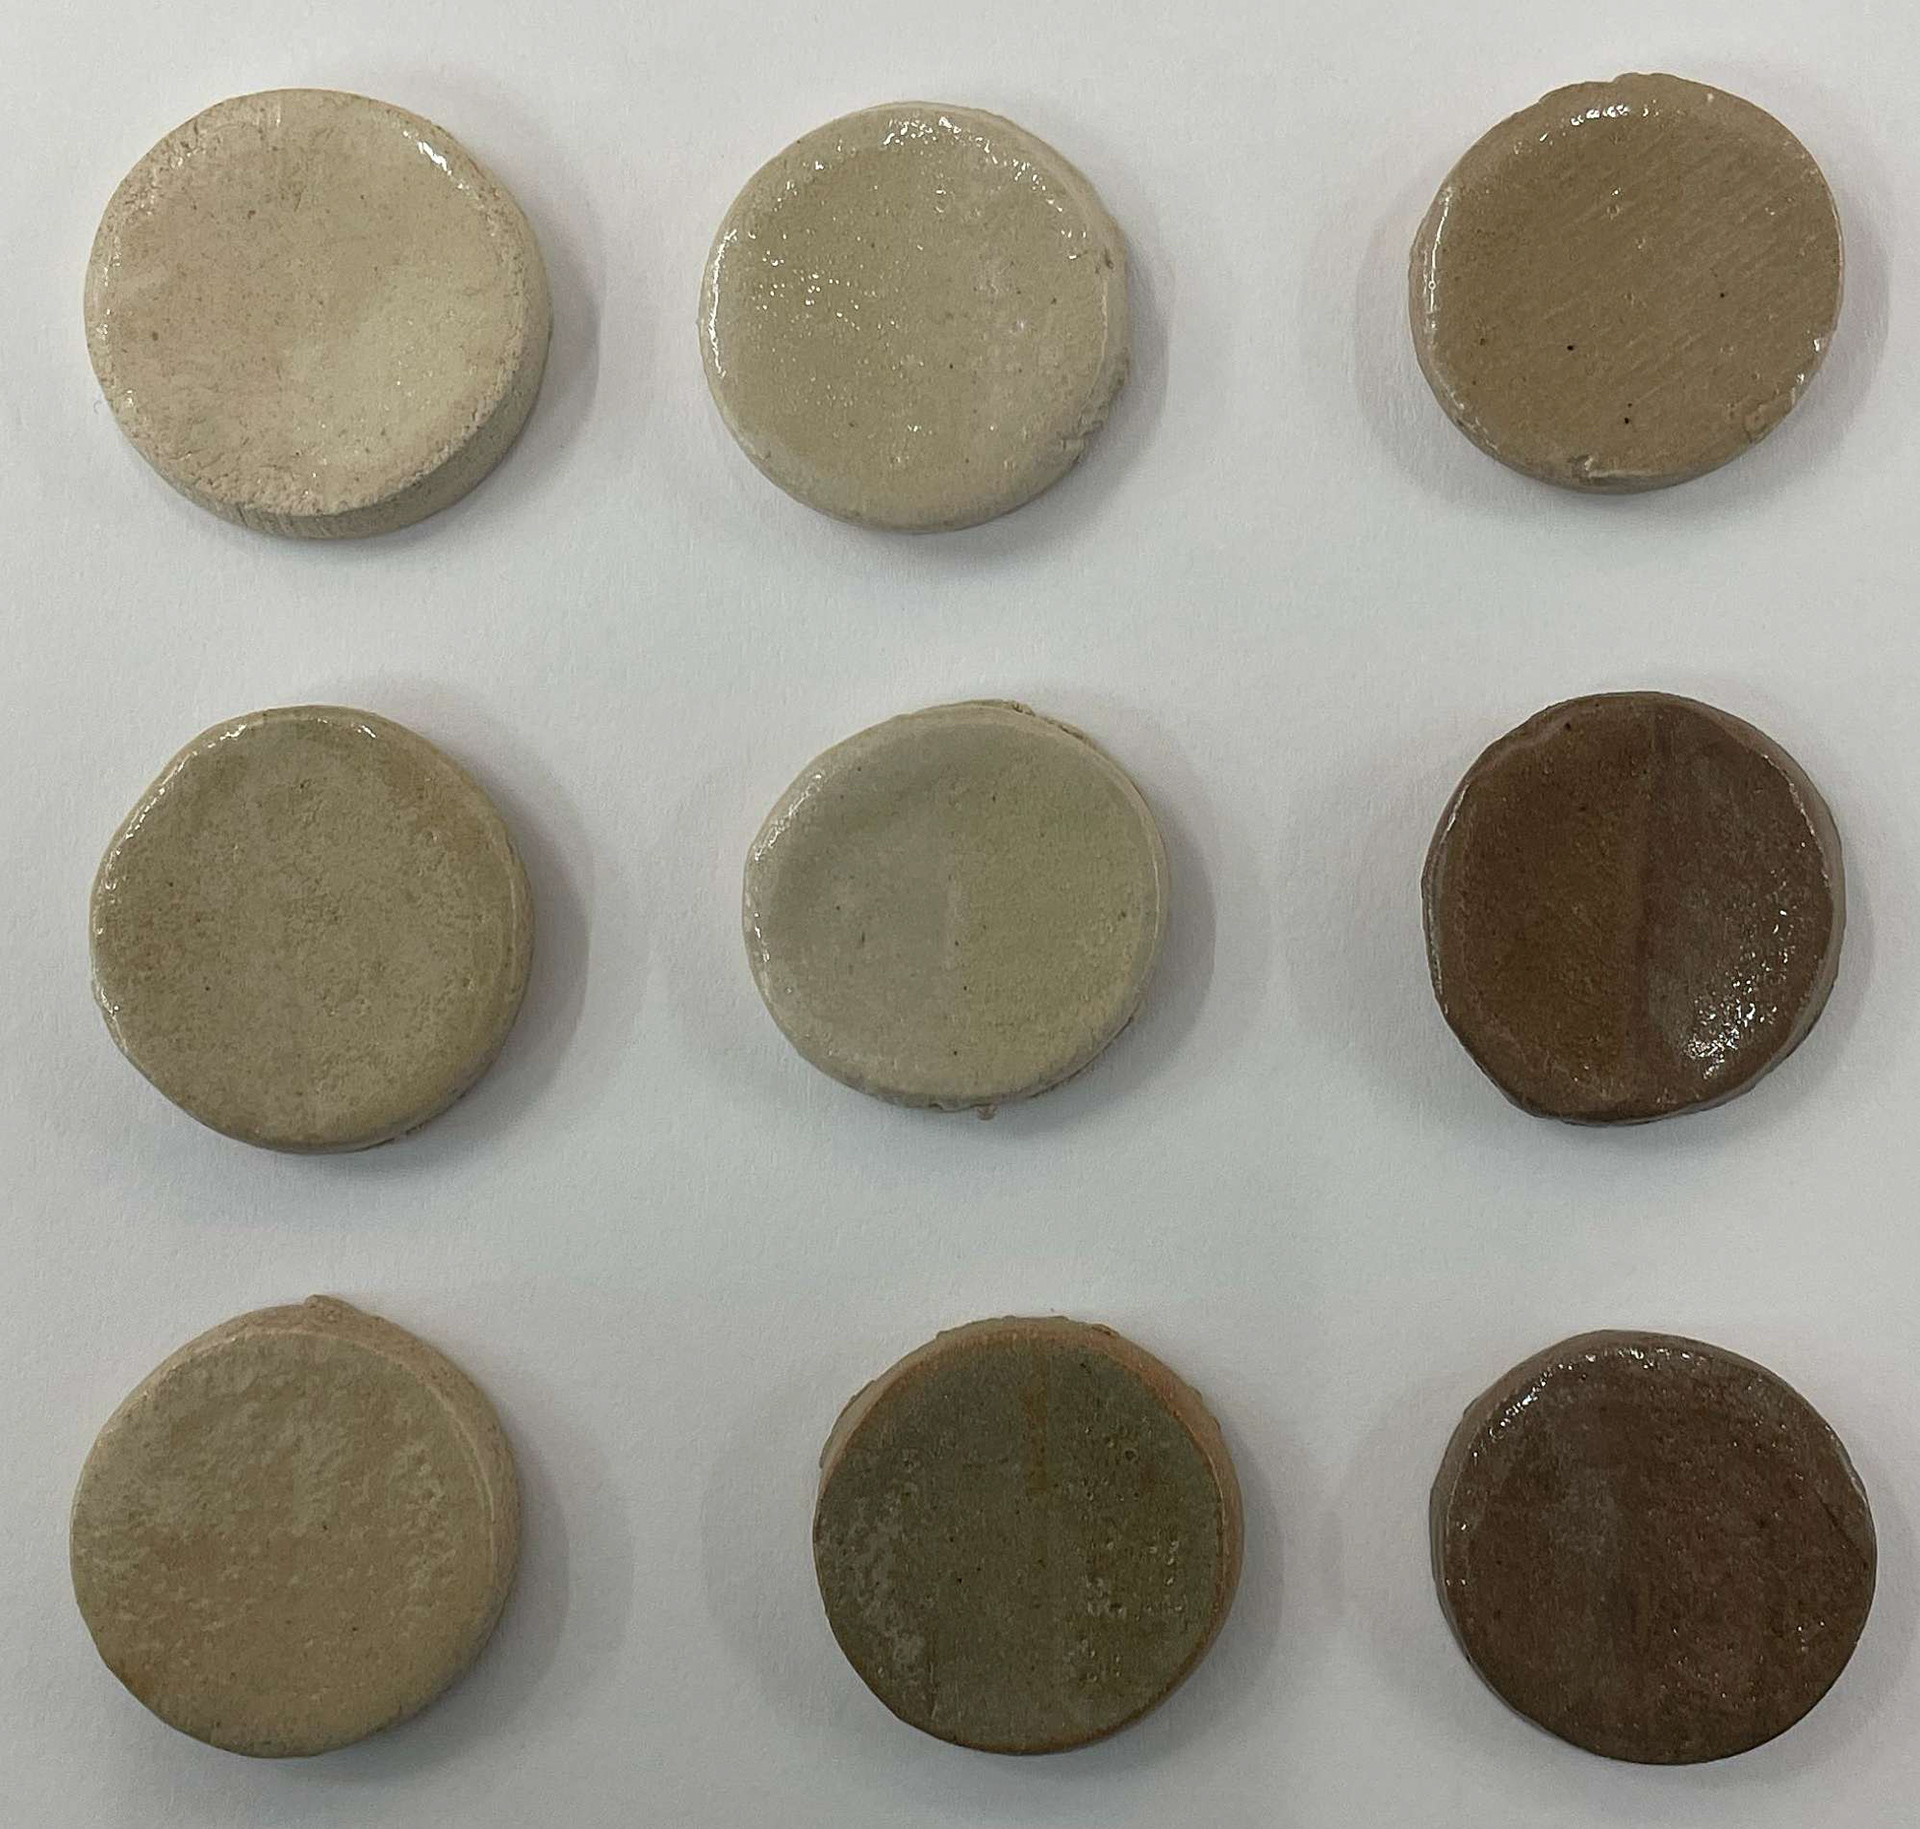
Colour Sampling 3
For these colour samples, I started with using 10g of dried clay; I rehydrated these and then added in my oxides. from my previous colour sampling experiment, I established that I needed to look at a bigger array of %in my clay that had bigger increments, for these colour samples, I decided to use Black Nickel, Magnesium, Red Iron, and Black iron. I decided on these oxides as I know that their colouring, once fired, is similar to the colour pallet I want to achieve. I then added the oxides in 5% and 10% quantities. I also created two of each. Therefore, I could fire one at earthenware and one at stoneware, allowing me to see which firing temperature affected which oxidised.
Black Nickel
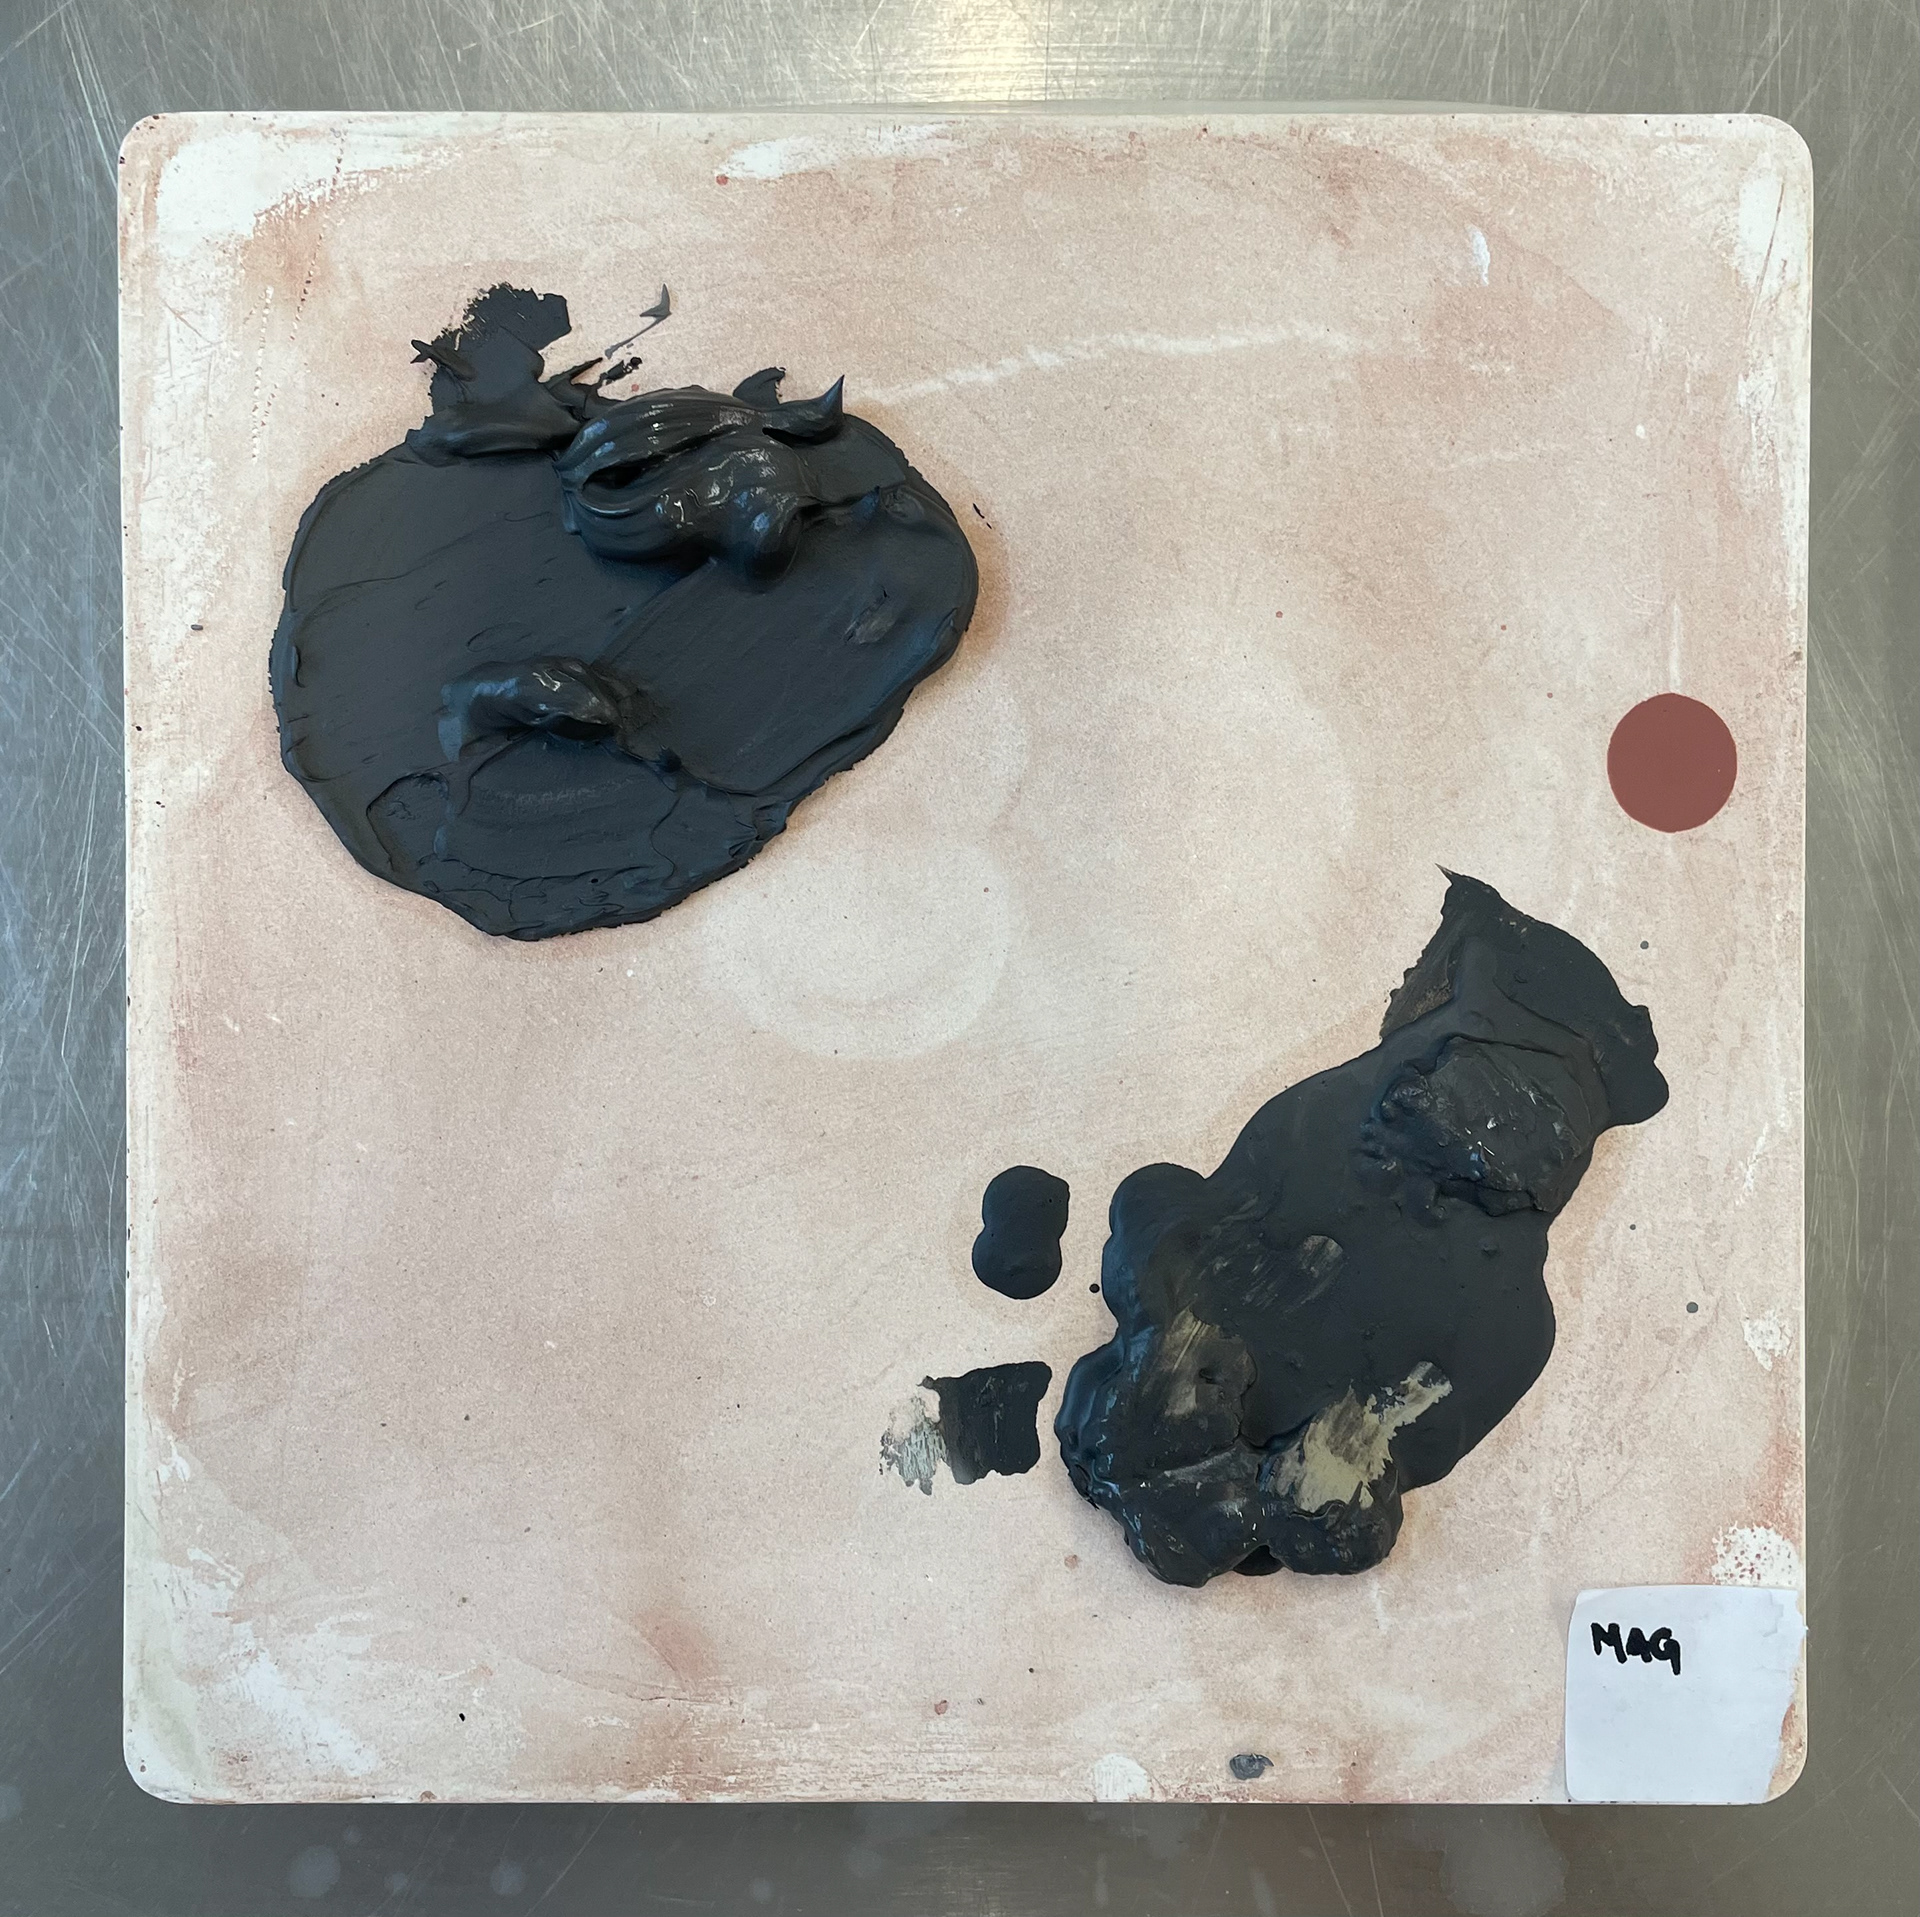
Magnesium
Red Iron
Black Iron
Due to working with oxides and clay so much, I knew that the initial colour of the clay was not what it looked like. Once fired, I knew that the colours could change drastically; even with double 10%, there was not that much colour difference between the wet clay, which made it challenging to remember which one. During all these colour samples, I have also learnt how to organise within my practice and tidy. As I have developed so many colour samples, it was hard to keep track of which cone matched the %of oxides due to this, I decided to make myself labels throughout so I could tell which clay was which and also number each cone at the bottom. These numbers collimated to the coloured clay oxidised recipe, allowing me to have more organised marked work.
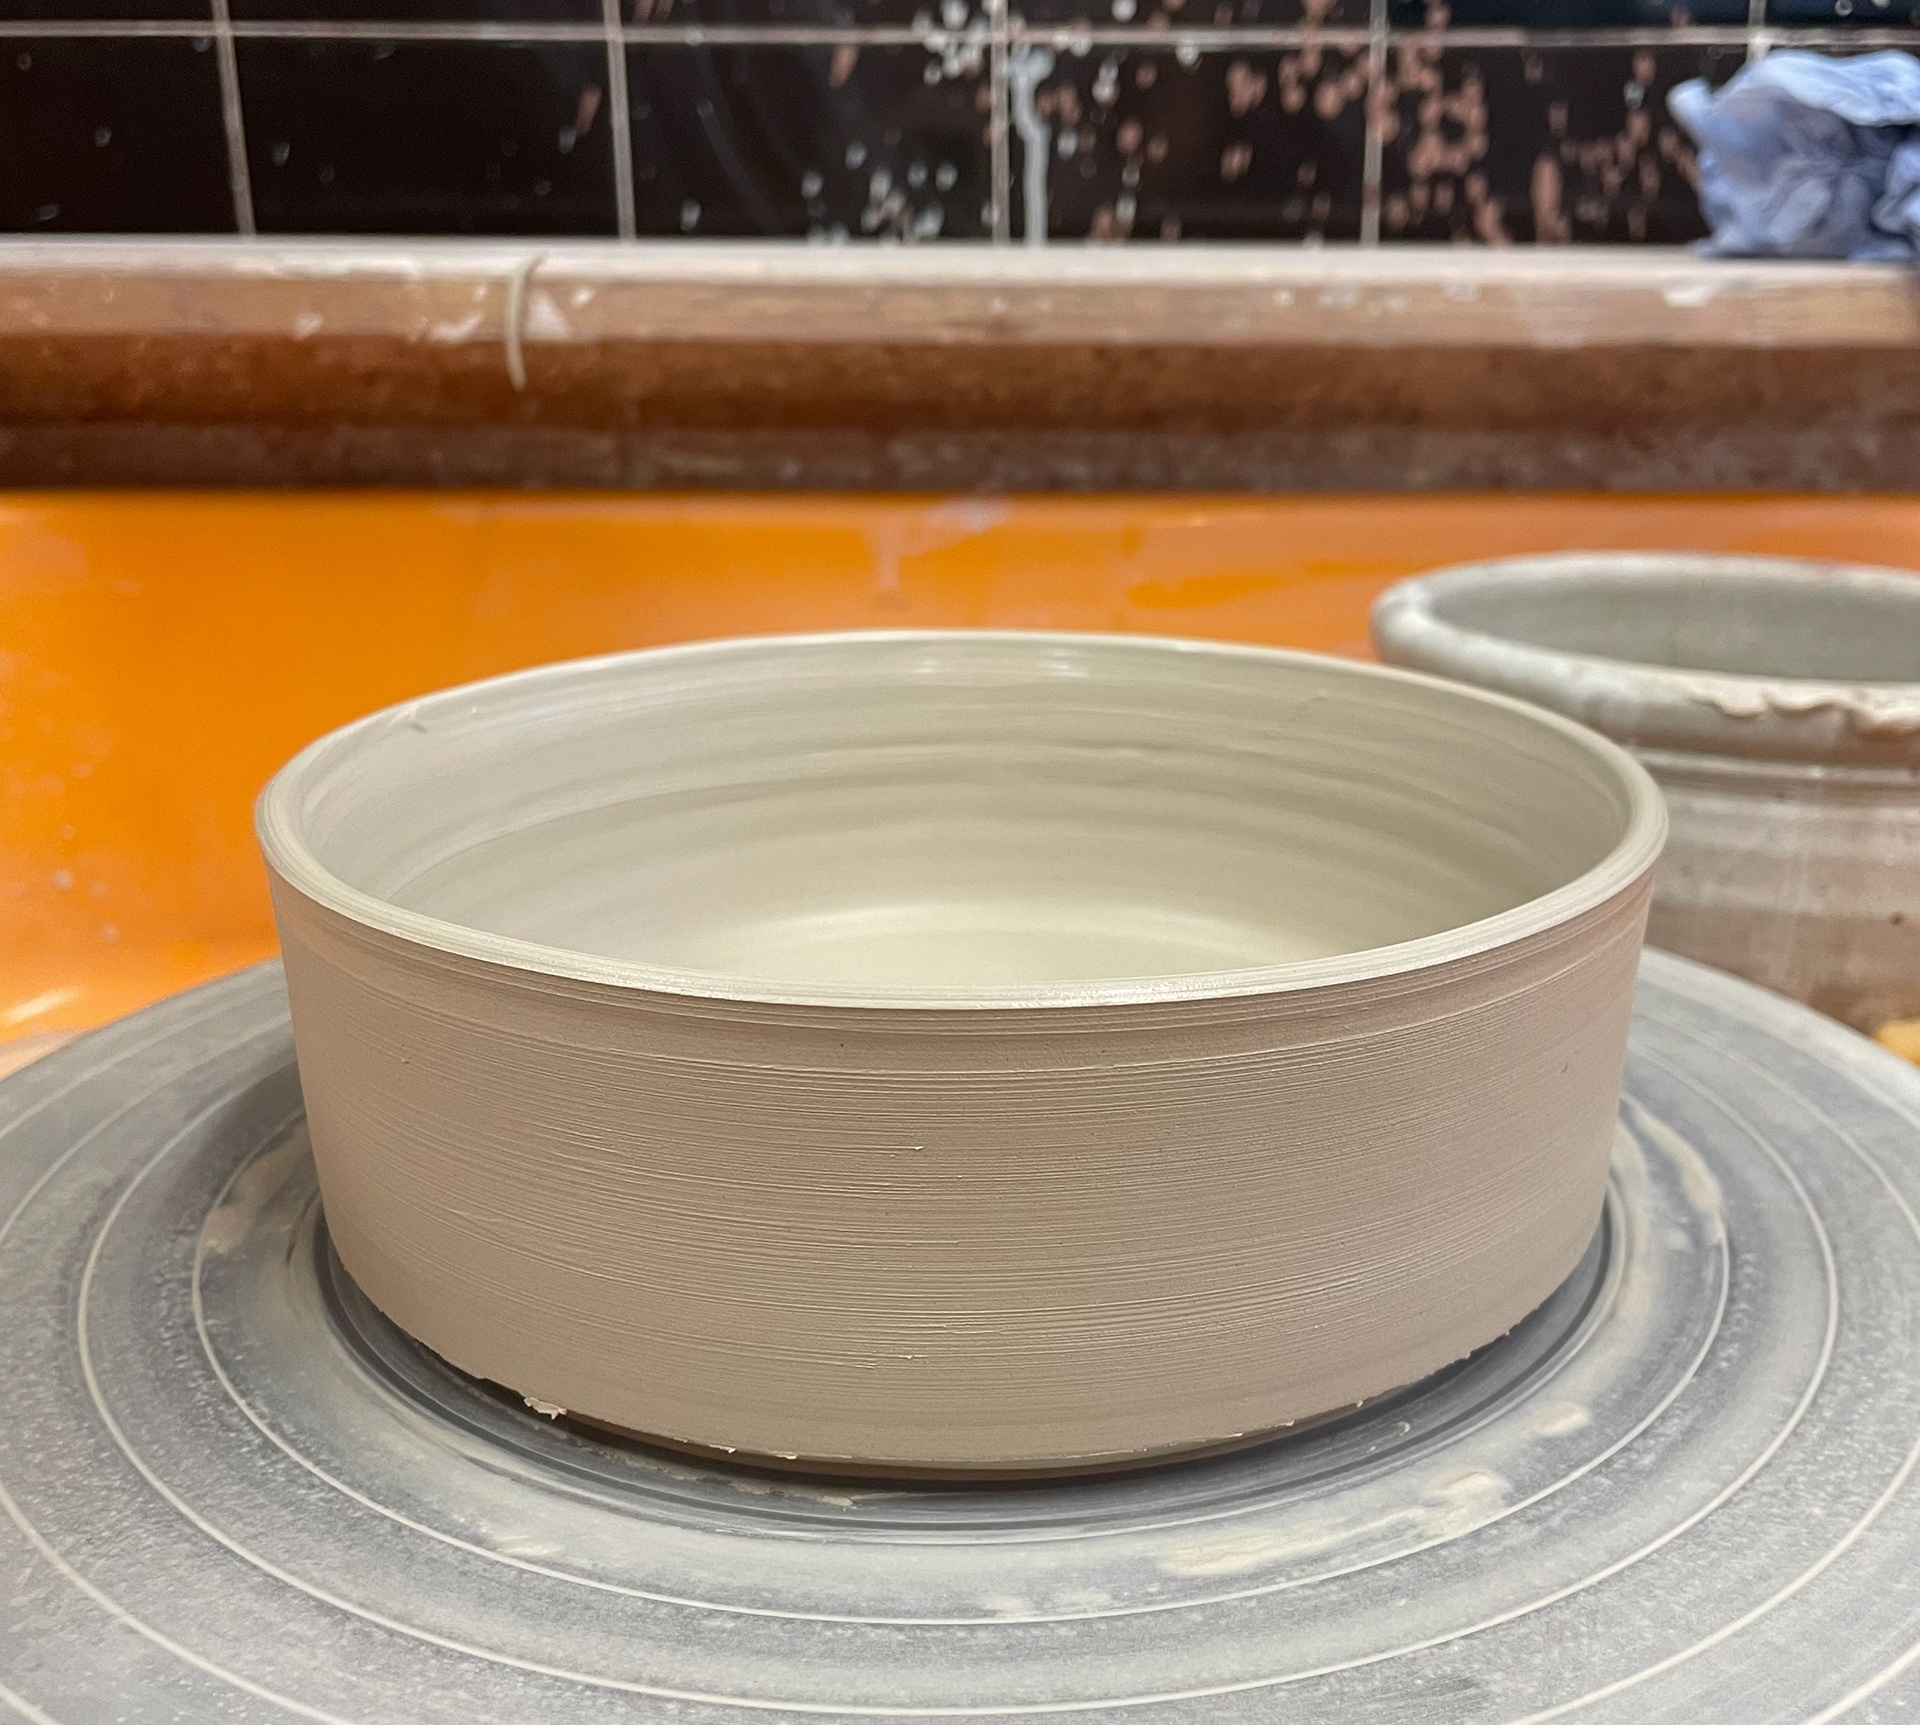
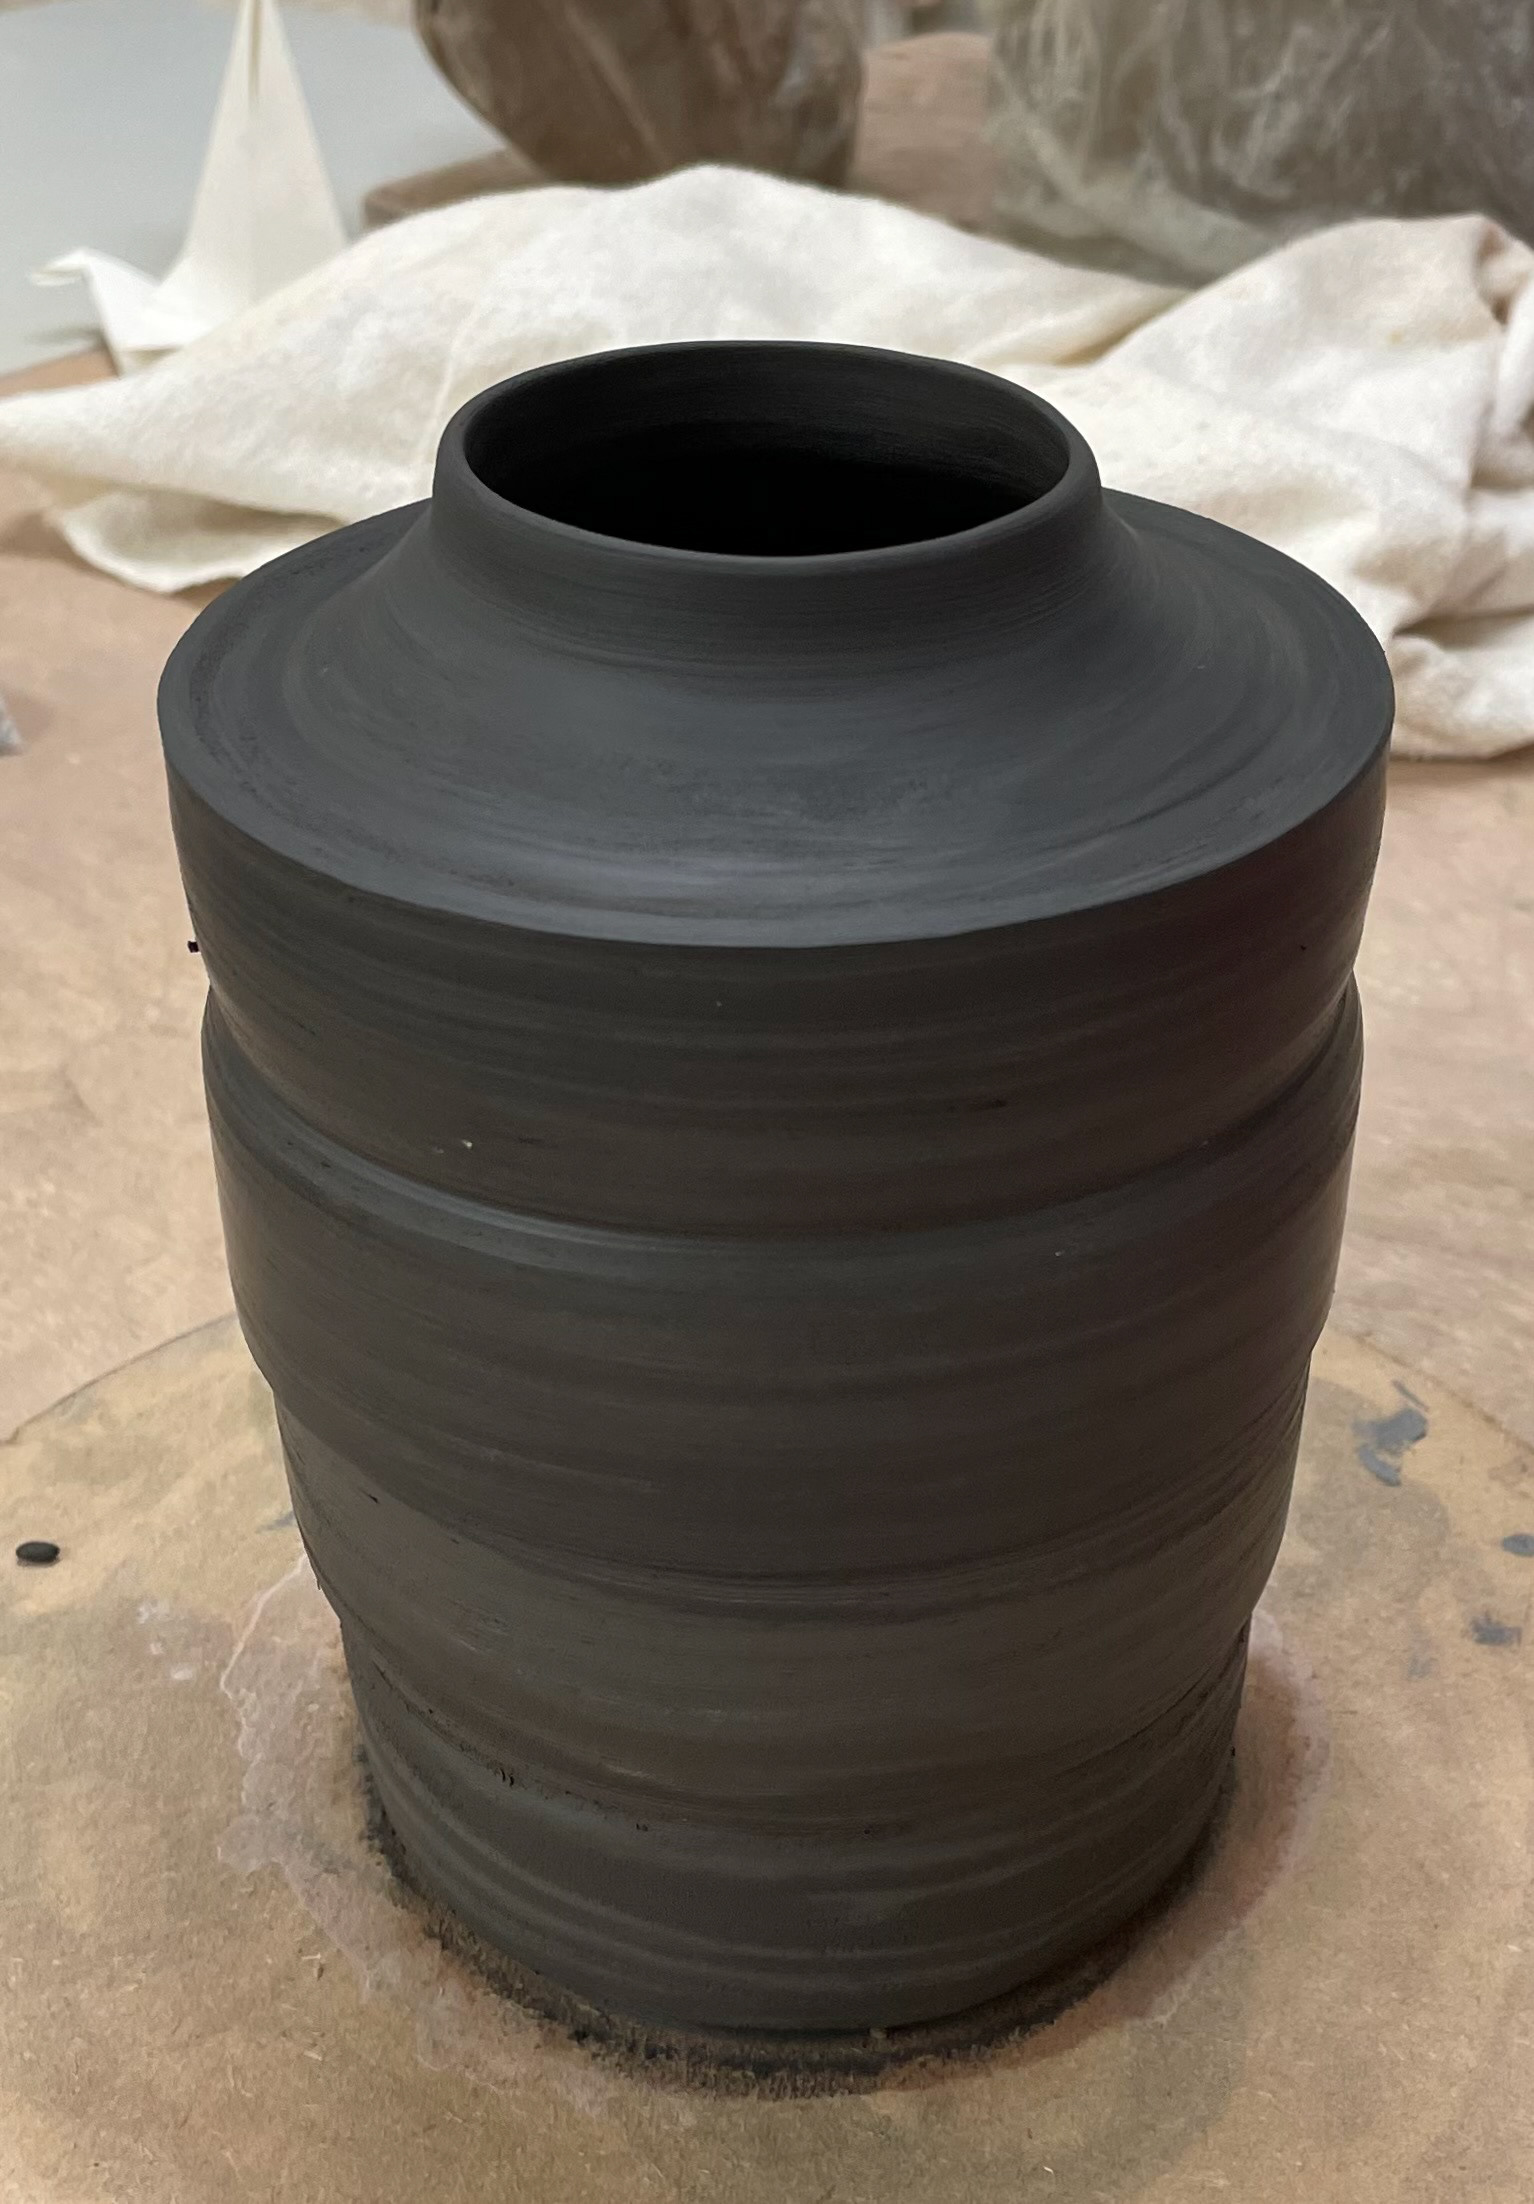
Throwing Large
For practising my technique to throwing large, I decided to practise with some terracotta as I had a lot to have and needed to just practise getting more similar to throwing large. I decided to throw starting at 600 grams and then going up to 900 grams this slow increase, I hoped, would help me grow more confident rather than just starting extremely big. Whilst throwing these, I found my biggest challenge was controlling my hands. I found I had to find the right amount of pressure for me to centre it but not too much to push it off its place. With larger humps, more controlled force is needed to guide it through your hands. Whilst throwing as well, I kept getting cramps in my hands from keeping the same pressure on the clay for a while.

Throwing large with clay was challenging. I'm a lot more confident throwing smaller and have good control of the clay however, I felt like I had to use my hands differently to gain control of the clay. The most challenging part was pulling the walls, and I didn't have the right positioning of my hands, leading to the walls flaring. I also realised that I consistently didn't make the vessels have compacted bases, which is the foundation for all large objects, which meant that the walls had different thicknesses whilst pulling and wasn't a good structure to pull a larger vessel. I also kept on pulling the walls out rather than up, flaring them and making them bowled walls instead. This was consistent with every vessel I tried to throw, although they were not bad bowls and were pulled well, they were not the shape I intended to pull. Due to this, I asked Rudy to watch me pull a wall and advise me where I was going wrong. When pulling, the clay follows your arm movement; if you are pulling with your hand going up but your arms (elbows) are facing the ground, then the clay has nothing to guide it. What I need to do is pull with my hands and extend the pull through my arms, guiding the clay where to go, I want my vessels to be big and long. Therefore, I must put my elbows in the air, allowing the clay to follow the motion. When trying this new technique, it was difficult to find the right position on smaller pieces; it doesn't make such an impact due to their size, and the control you then have over it is small. But with larger pieces, this is needed to accentuate your movements. This is something I need to practise more on, starting small and then building up the size; I need to grow confident in throwing large and also teach myself the right technique this is why I find filming helpful as I can look back and see what I did and didn't do improving my myself every pot.
I spent two weeks throwing multiple vessels a day to practise and perfect my technique. Although my technique is not perfect, I can see my vessels developing. My hand naturally take more control, knowing the positions they are meant to be in instead of me reminding myself. Filming me throwing has been helpful, and when I throw, I'm usually too concentrated to see the bigger vessel and stop to see where I'm messing up however, with a video, I watch them at the end of the day and get feedback on myself, slowing growing more confident with throwing larger. To build my confidence, I started with 700g of clay, Once I felt with this amount, I increased the clay by 100g this was a very helpful process instead of just starting with loads of clay, working up and up the amounts. This was beneficial as it gave me small rewards of completing confident thoughts with one amount. These little rewards would then push me to increase my clay size. It also allowed me to become confident in myself and bypass the mental demotivation that can occur within my work when I see no progress.
A Collection Of Me Practising Throwing Large
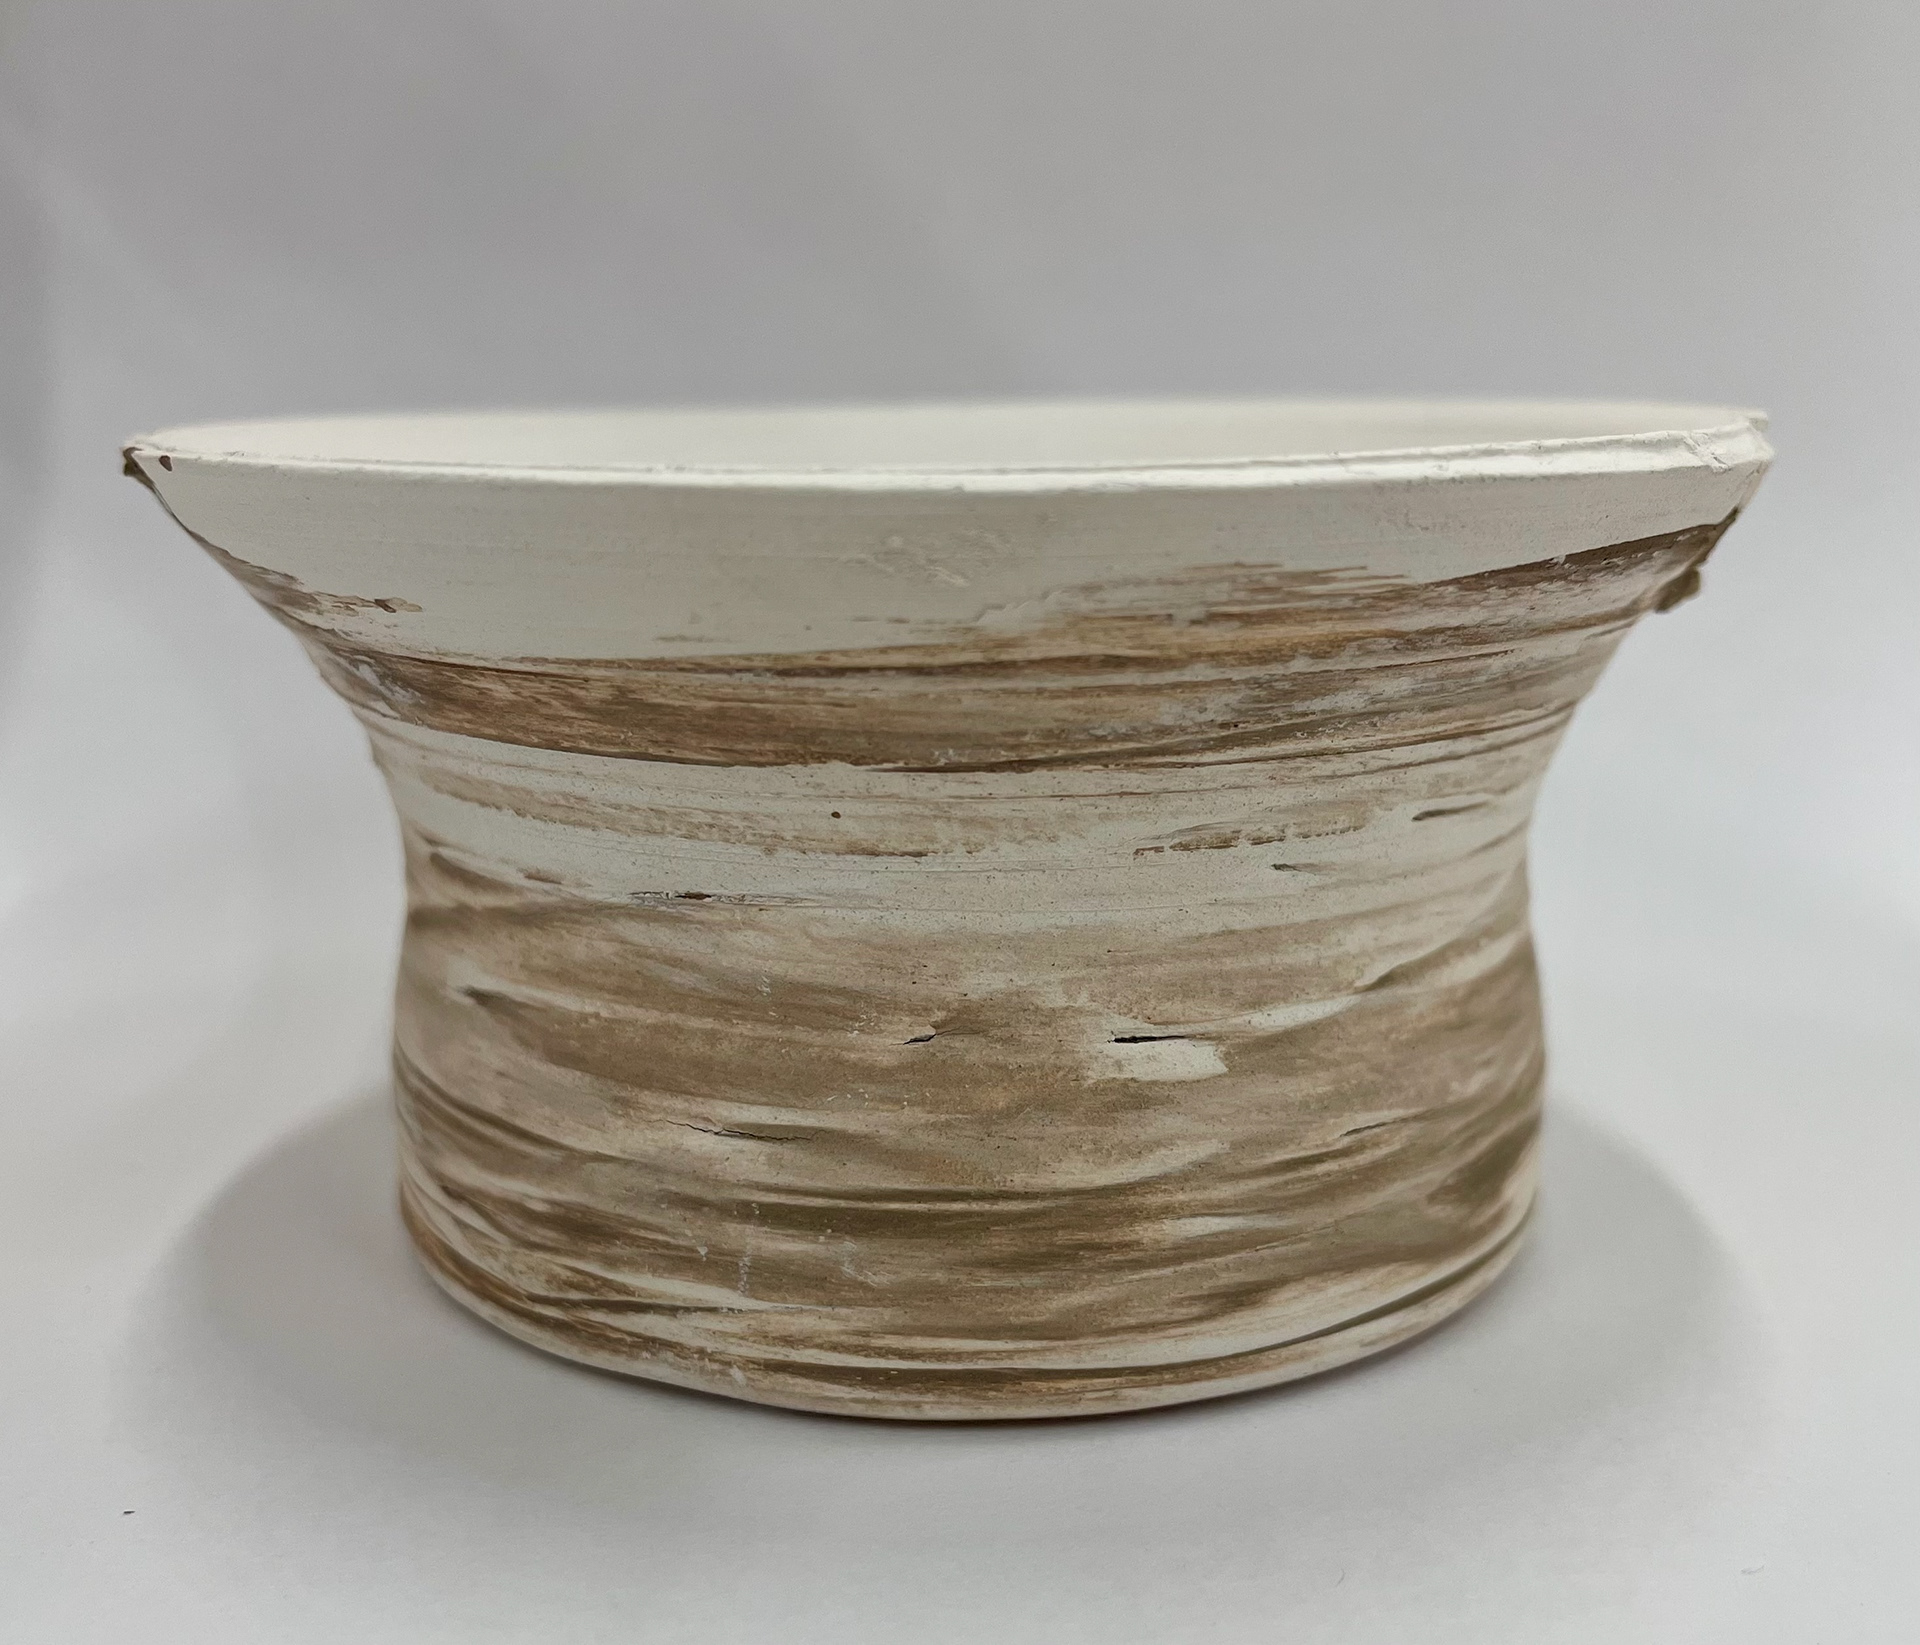
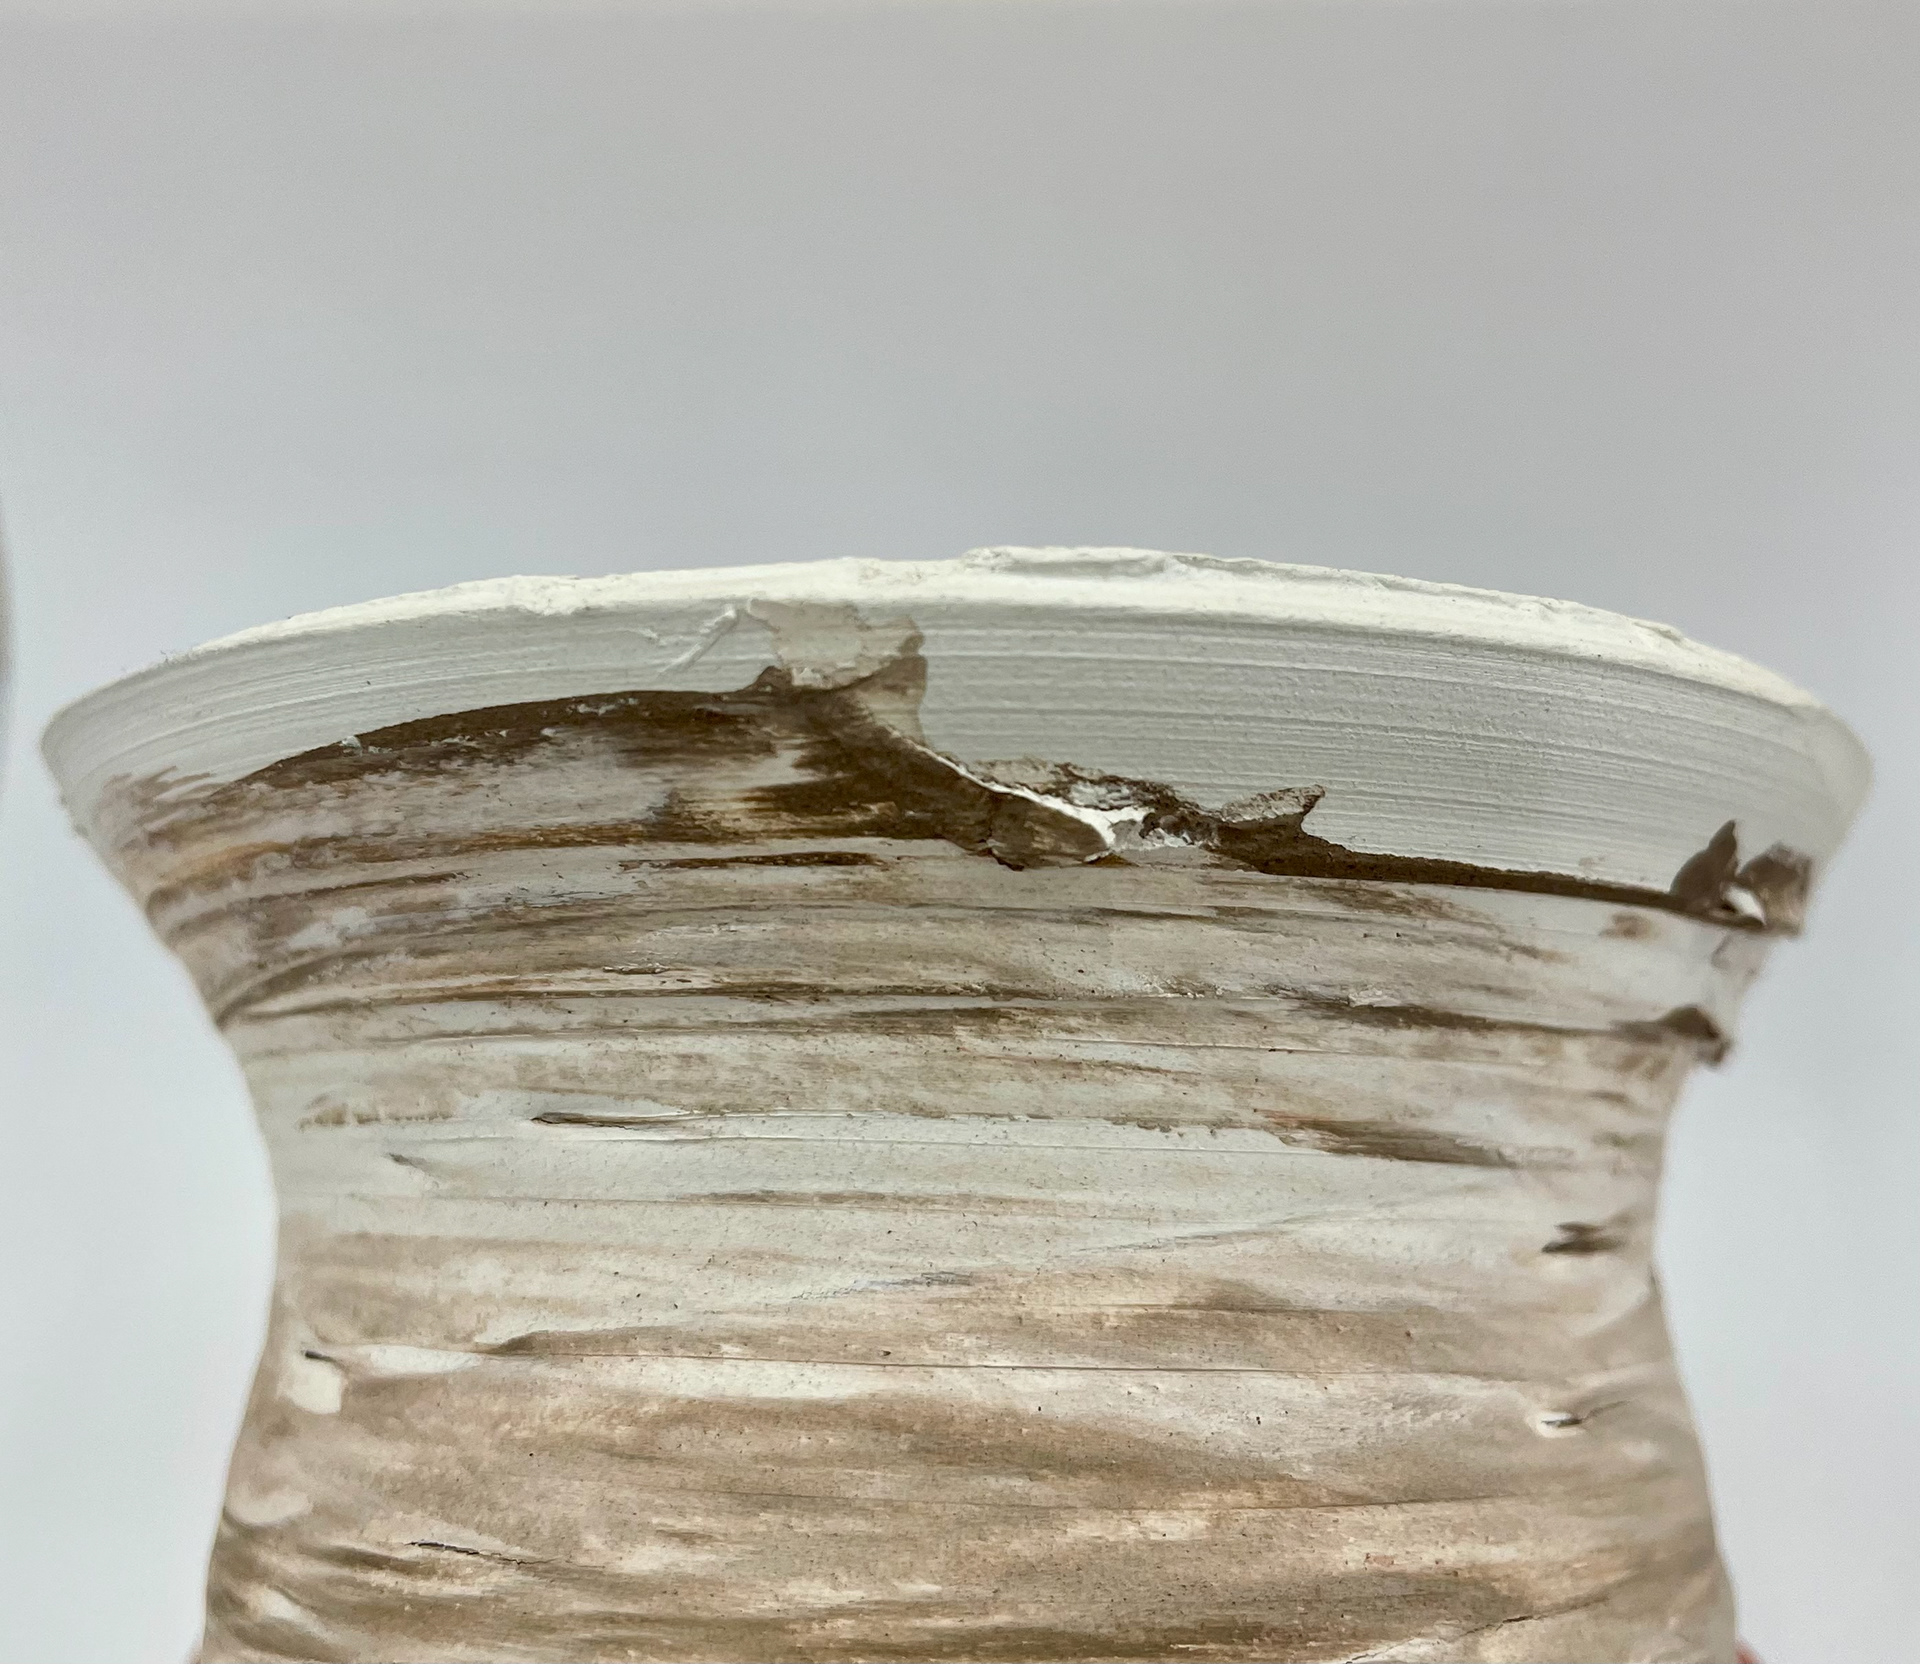
Throwing Larger With Pebbles
Continuing with my thrown pebble vessels, I wanted to expand on this and try with larger vessels. Once I had a basic large thrown piece, I used a pebble as a rib to create marks and a surface texture on the profile of the vessel. Although this was difficult as the pebble stretched the clay out too much, making the walls warp, I did like the effect it gave, giving different groves in the vessel. I think depending on the pebble used will give an easier application of the textures as I used a very curved stone, it stretched out the clay too much, especially at the top of the vessel. Although I like the texture it gives to my vessel, and it directly incorporates the beach into my vessels, I feel like the texture will conflict too much with the marbled colouring being too over-powerful on the vessel profile. I think a simpler form of the vessel's body would be better as it wouldn't be too overwhelming, taking away from the coloured clay. Furthermore, using this technique whilst creating marbled colour clay would be difficult as I have to trim away quite a bit of clay to reveal the marbling however, if I did this technique, I would have to remove all the texture created as the marbling wouldn't show though, and the colours would just be blended. Not showing clear distinction.
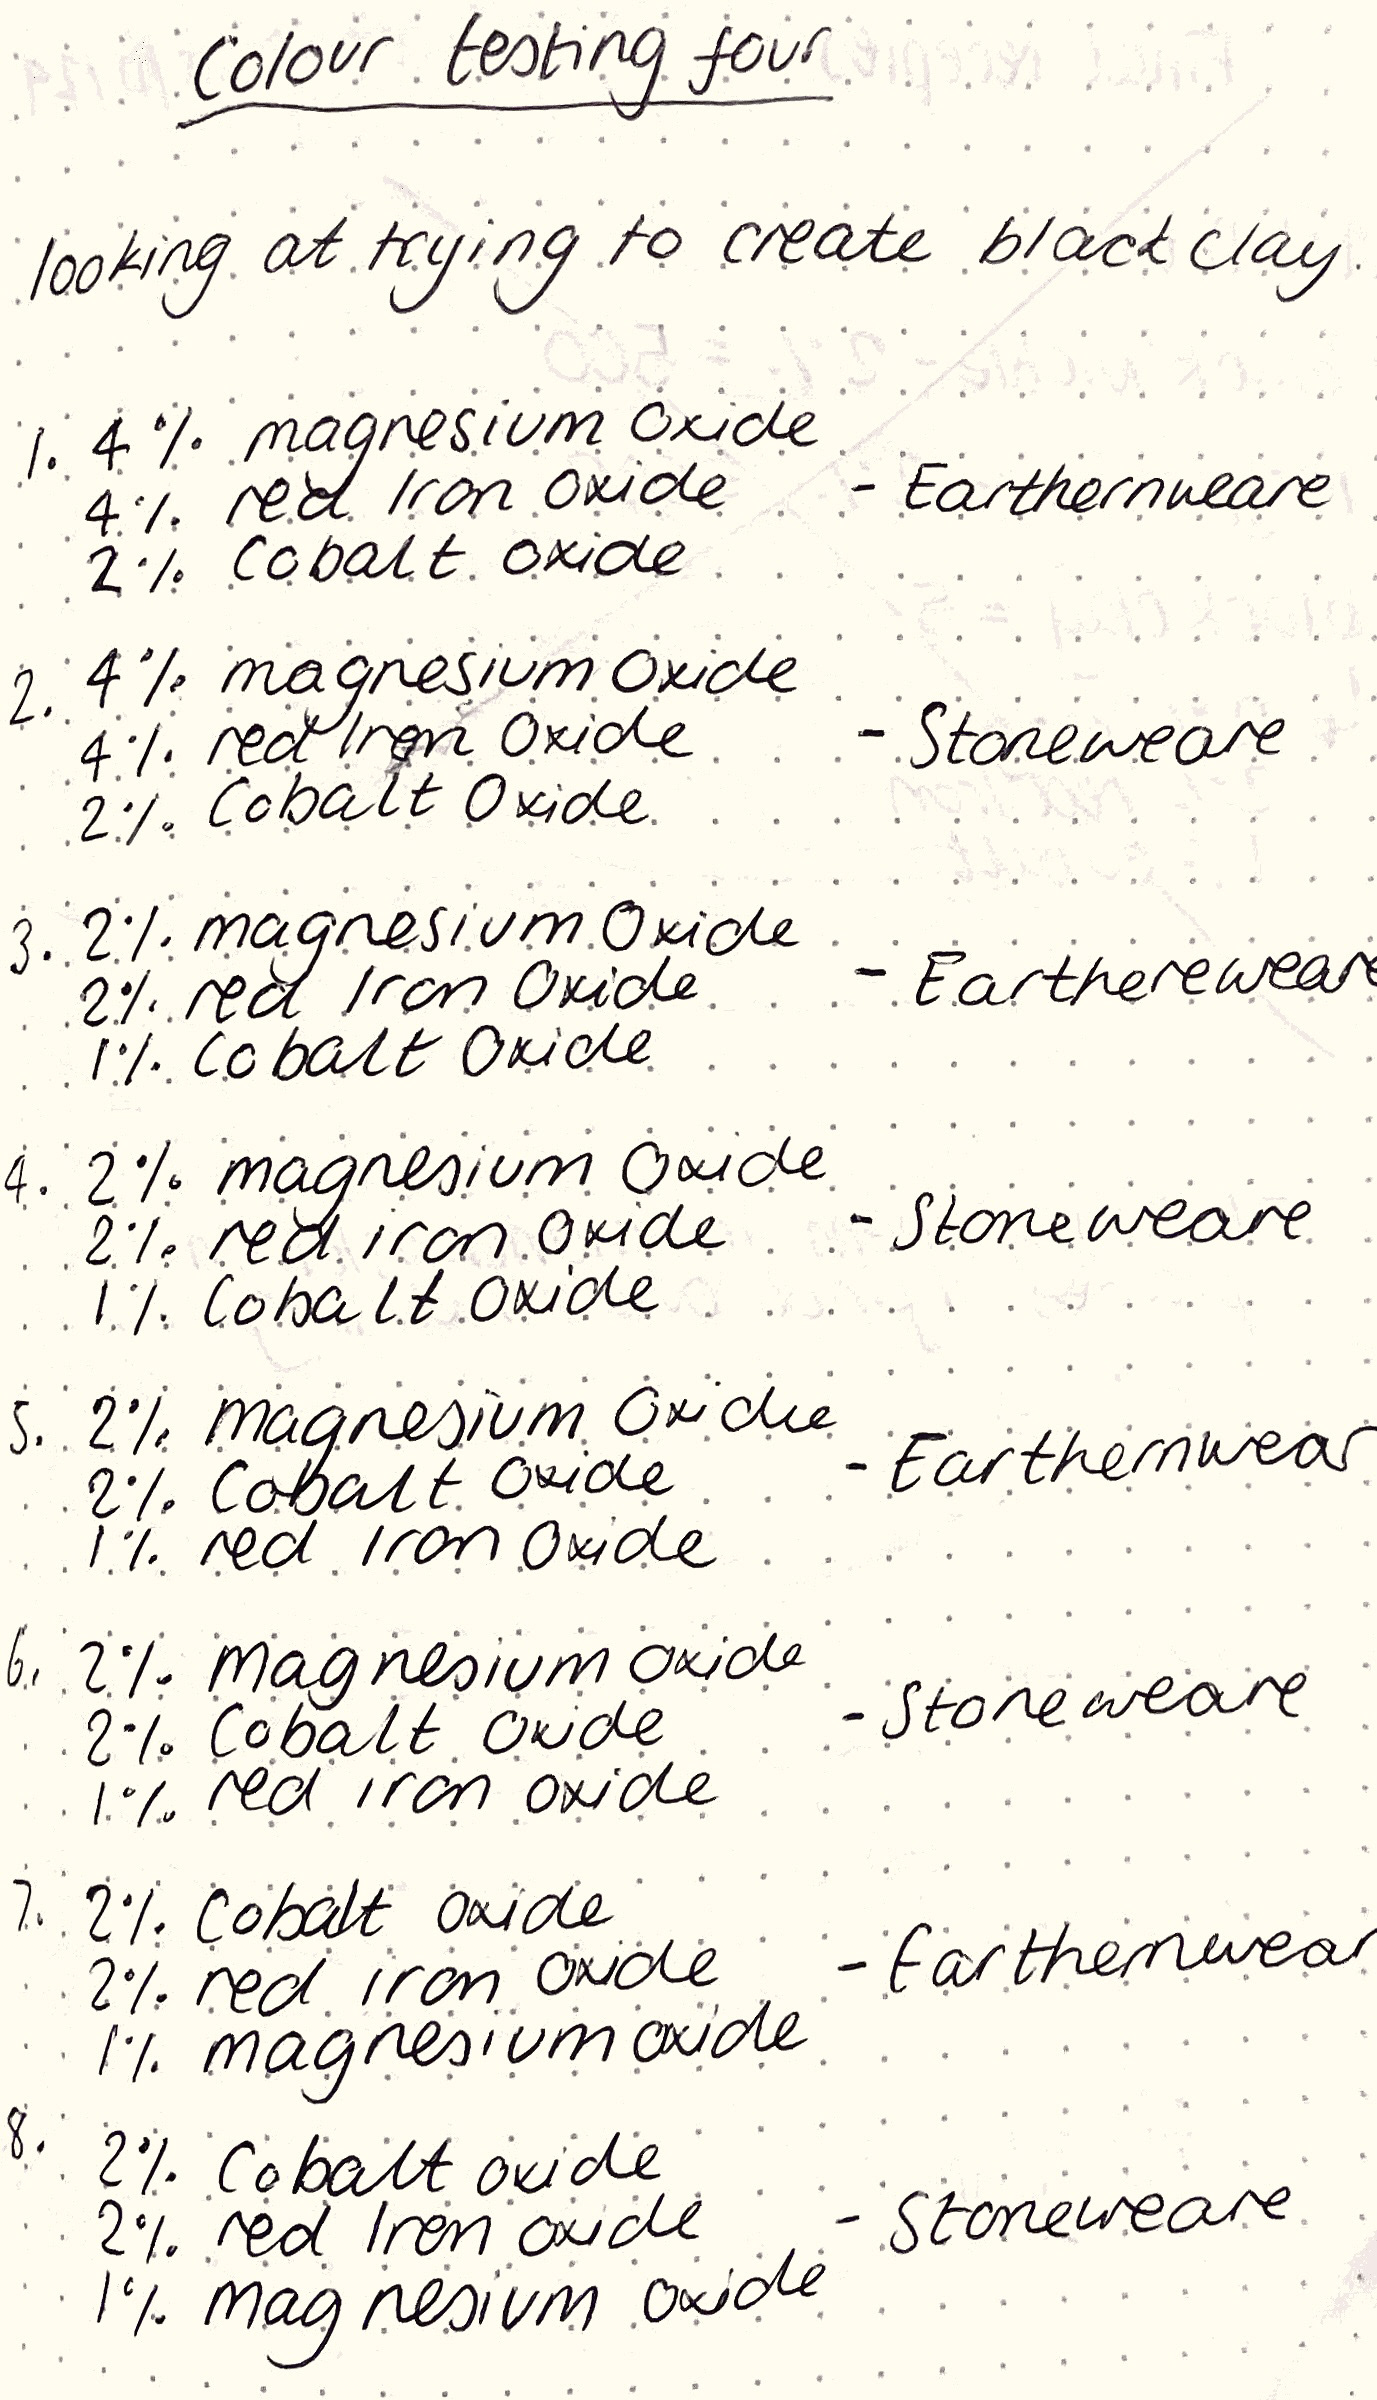
Colour Sampling 4
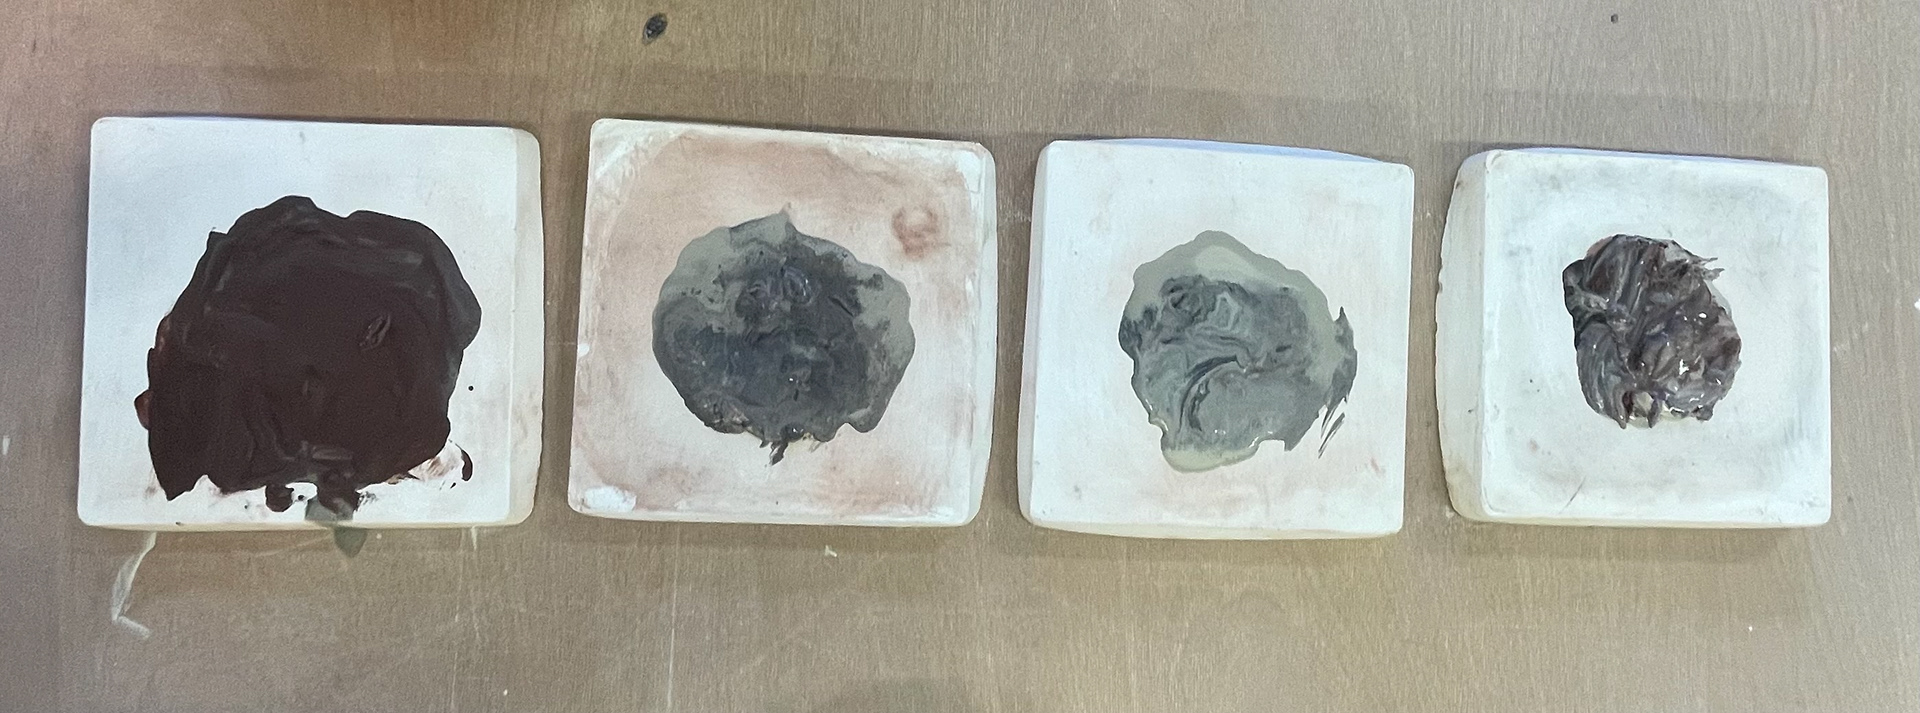
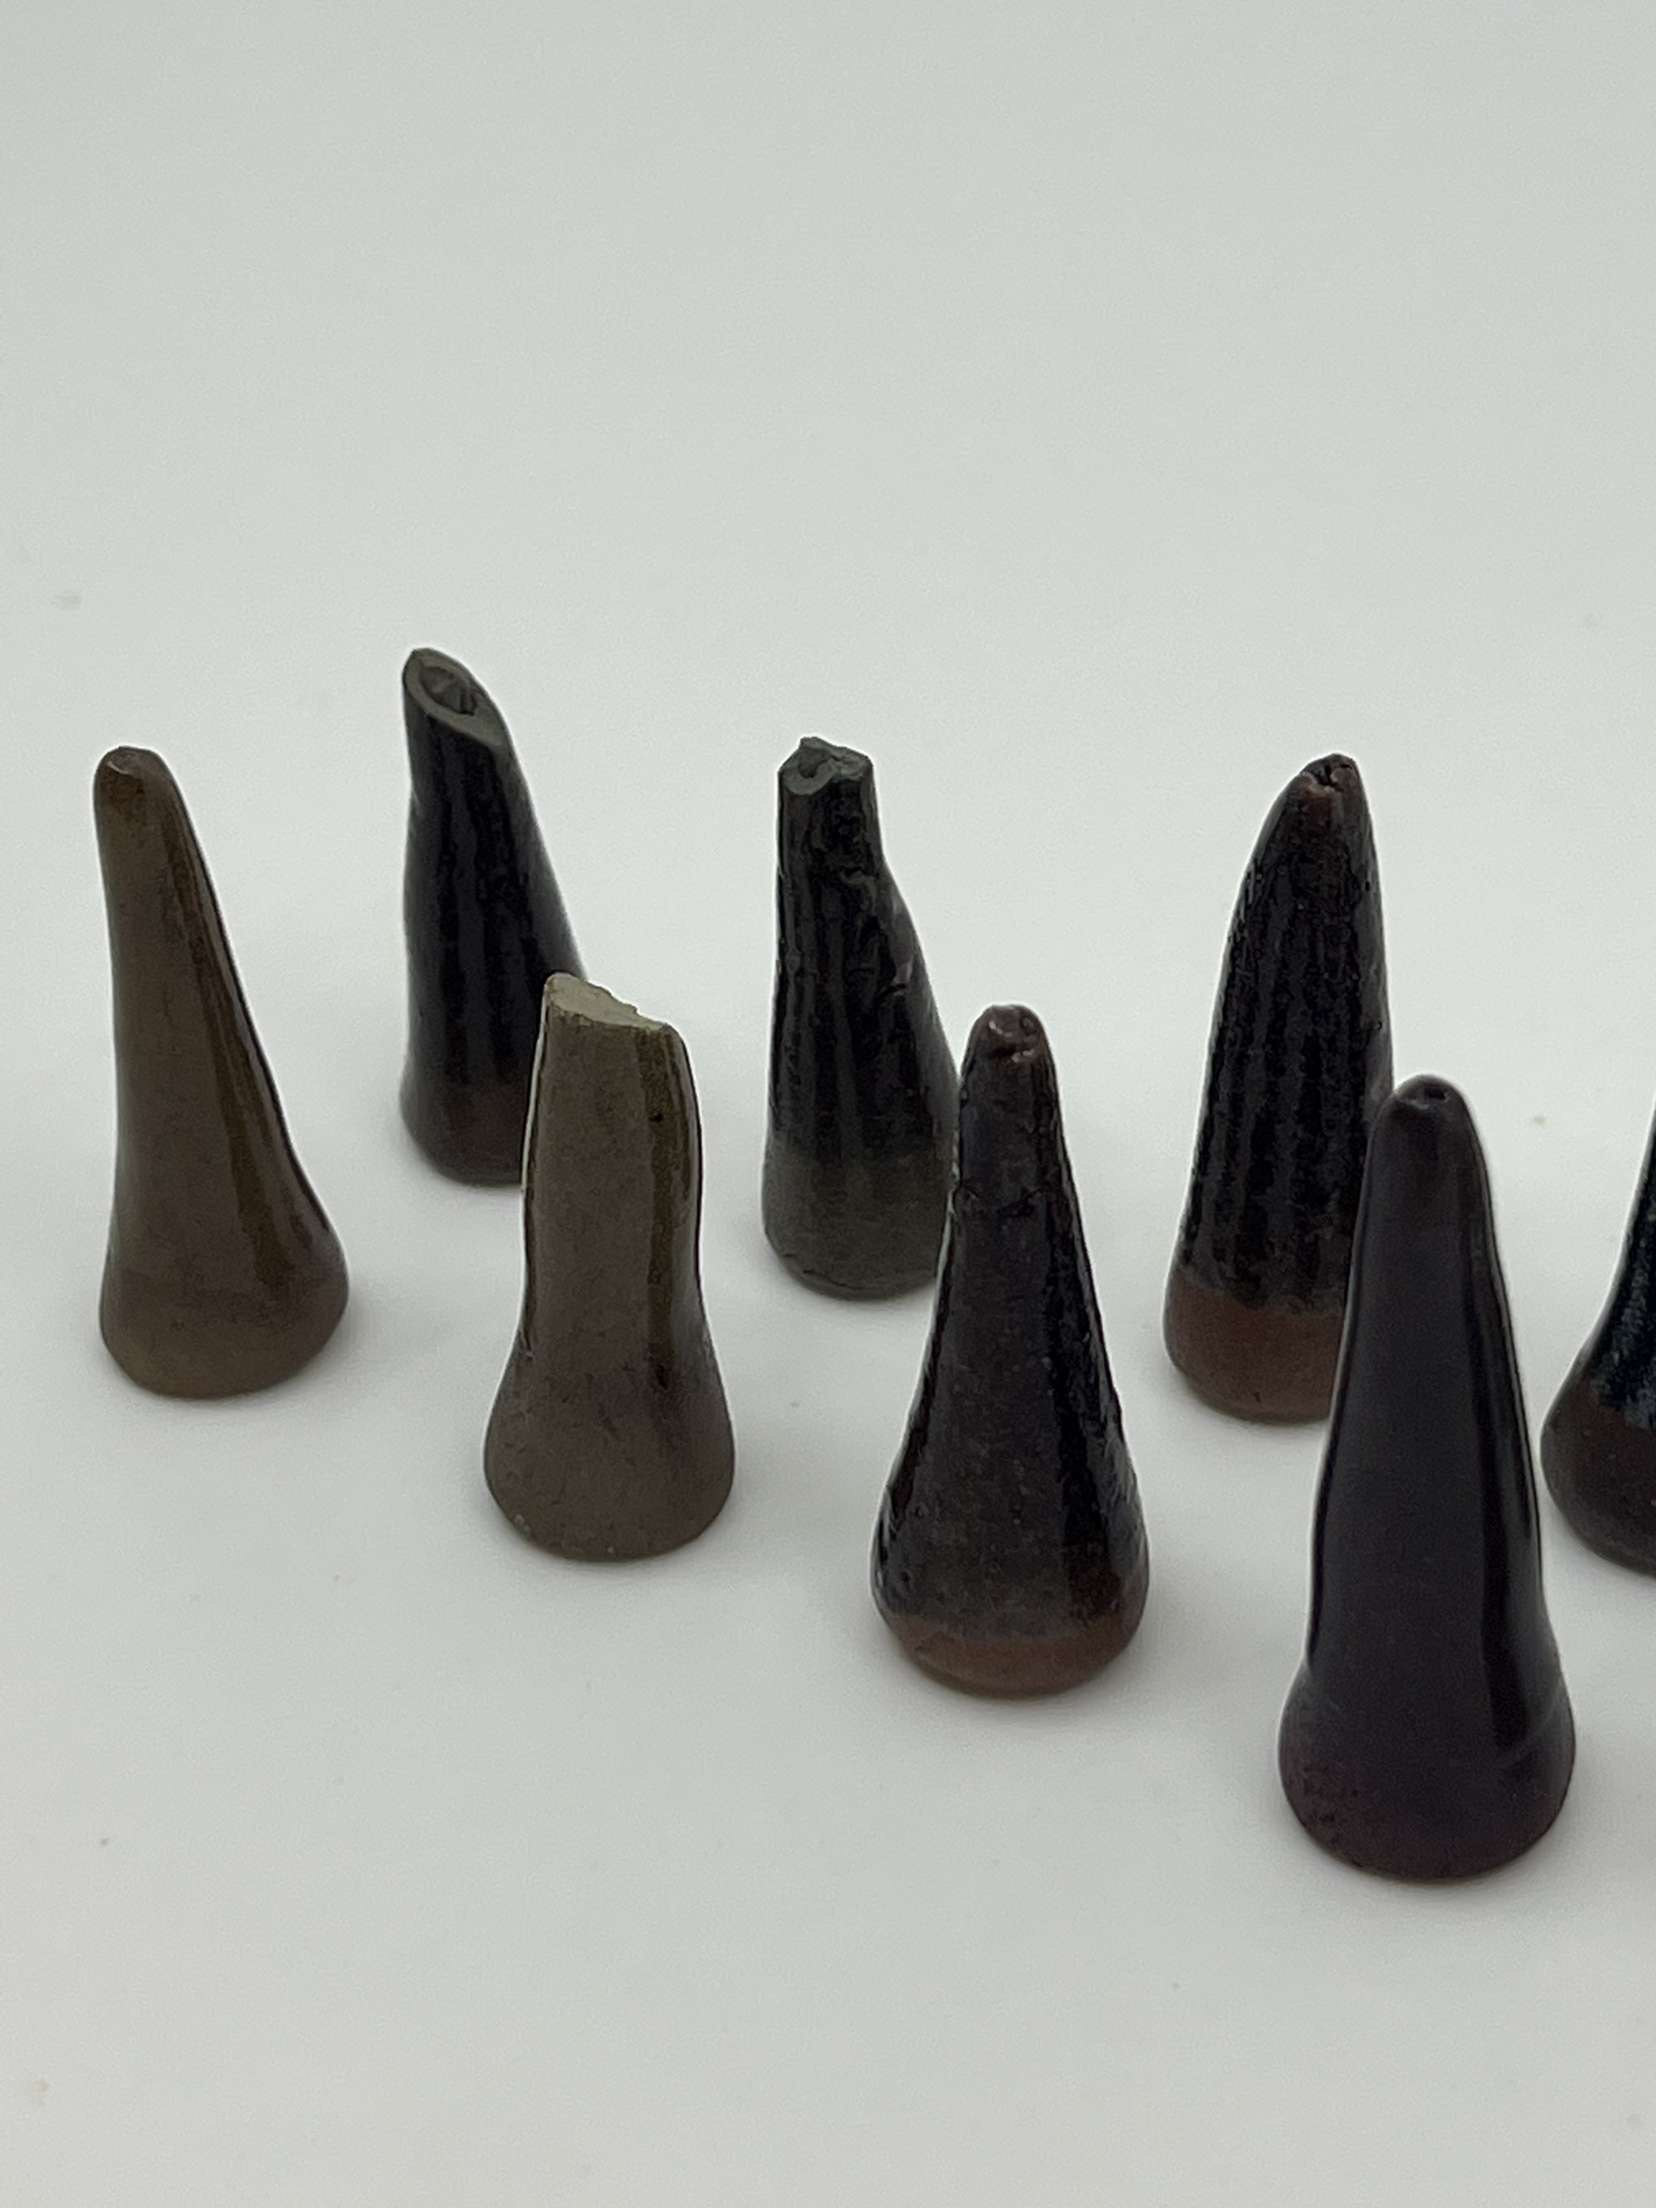
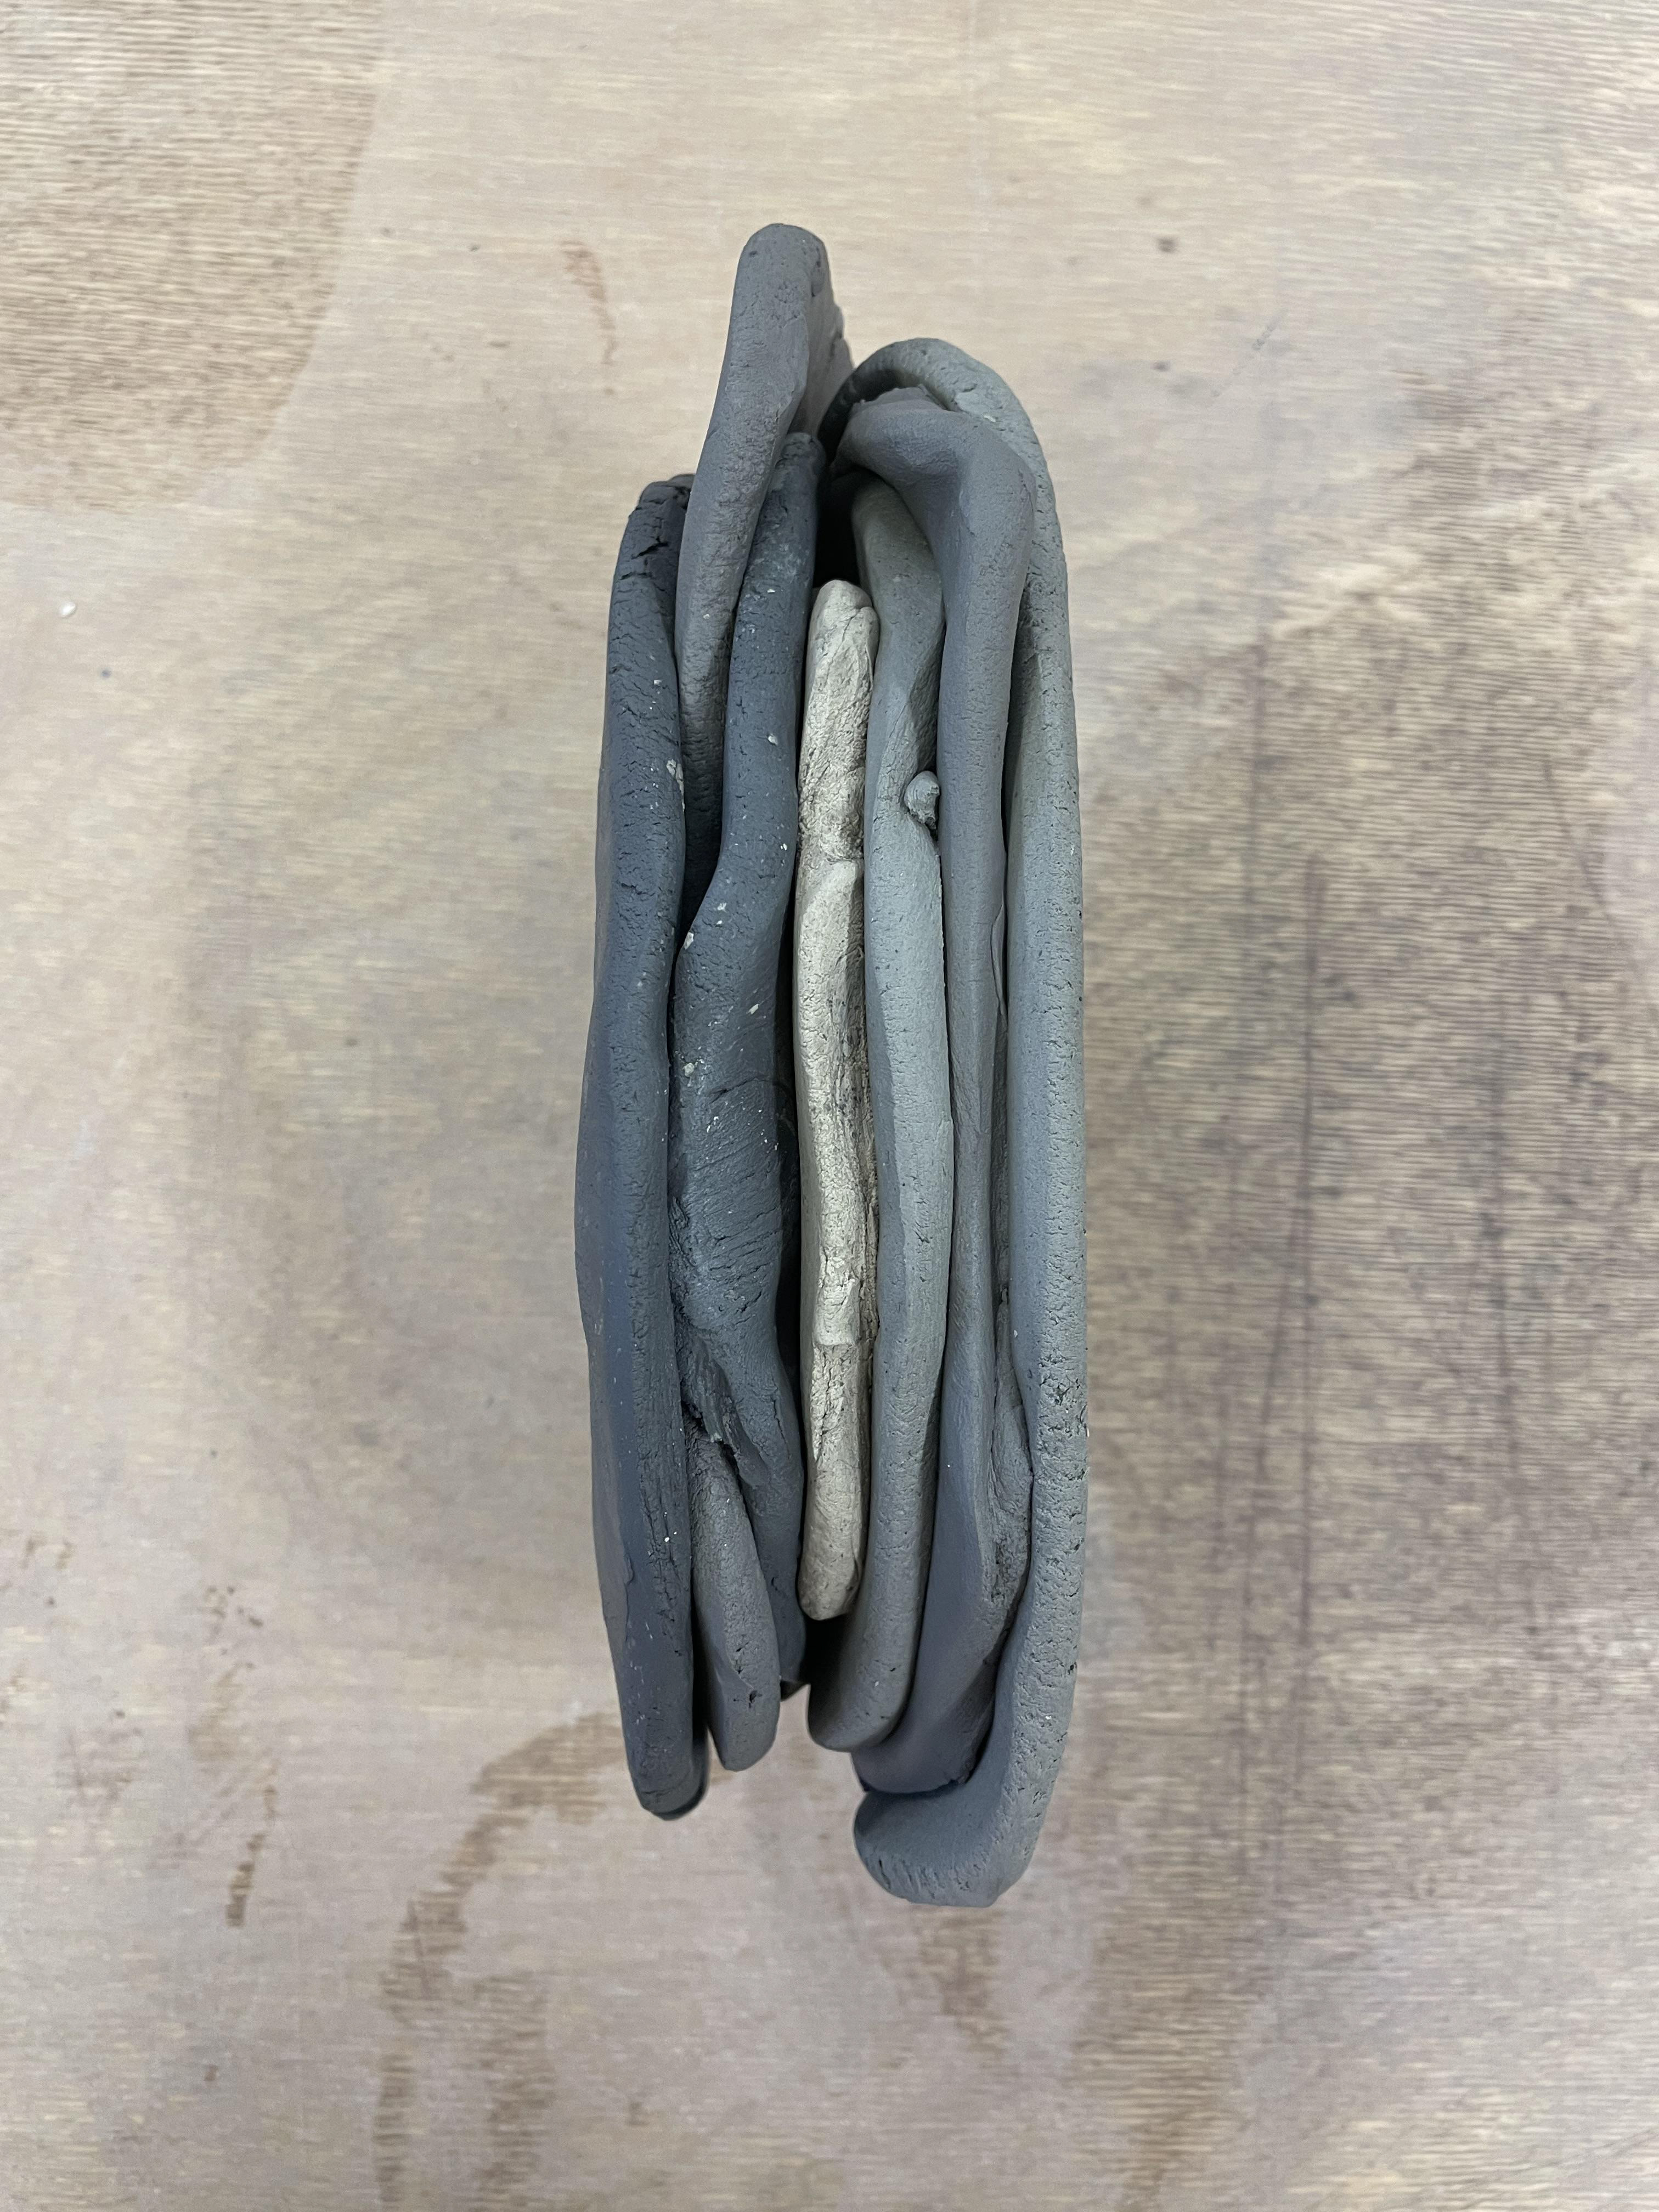
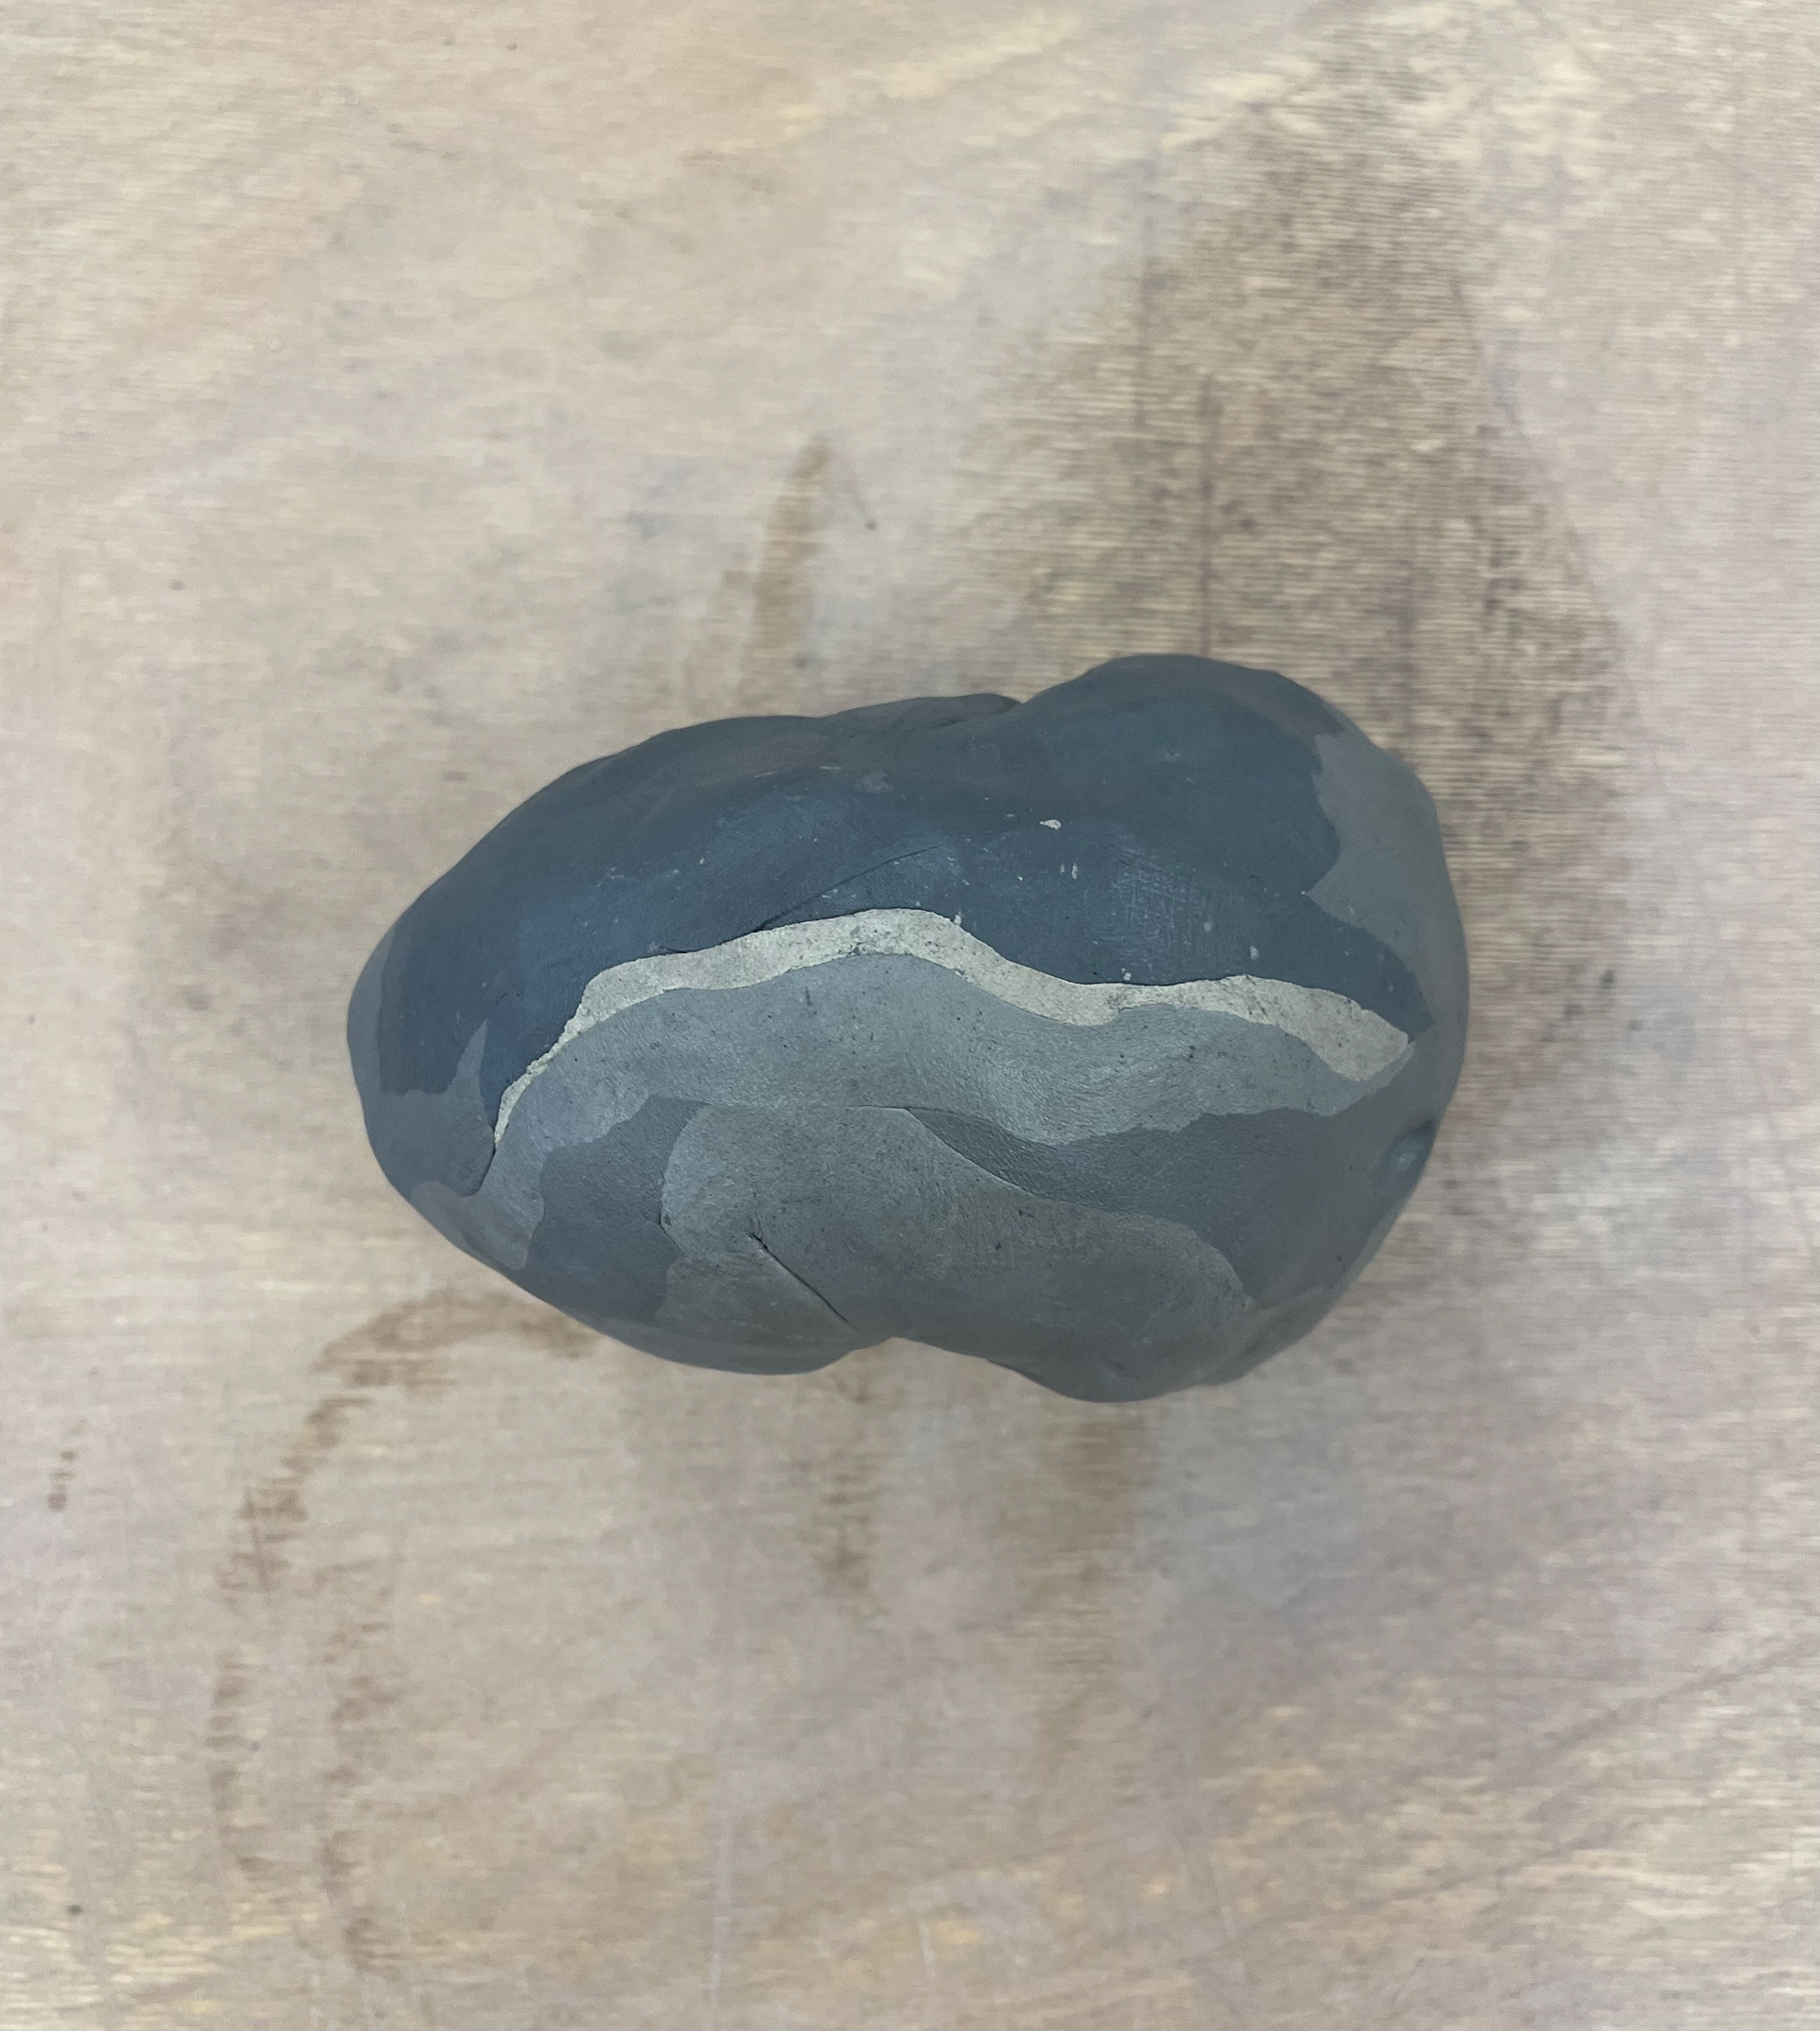
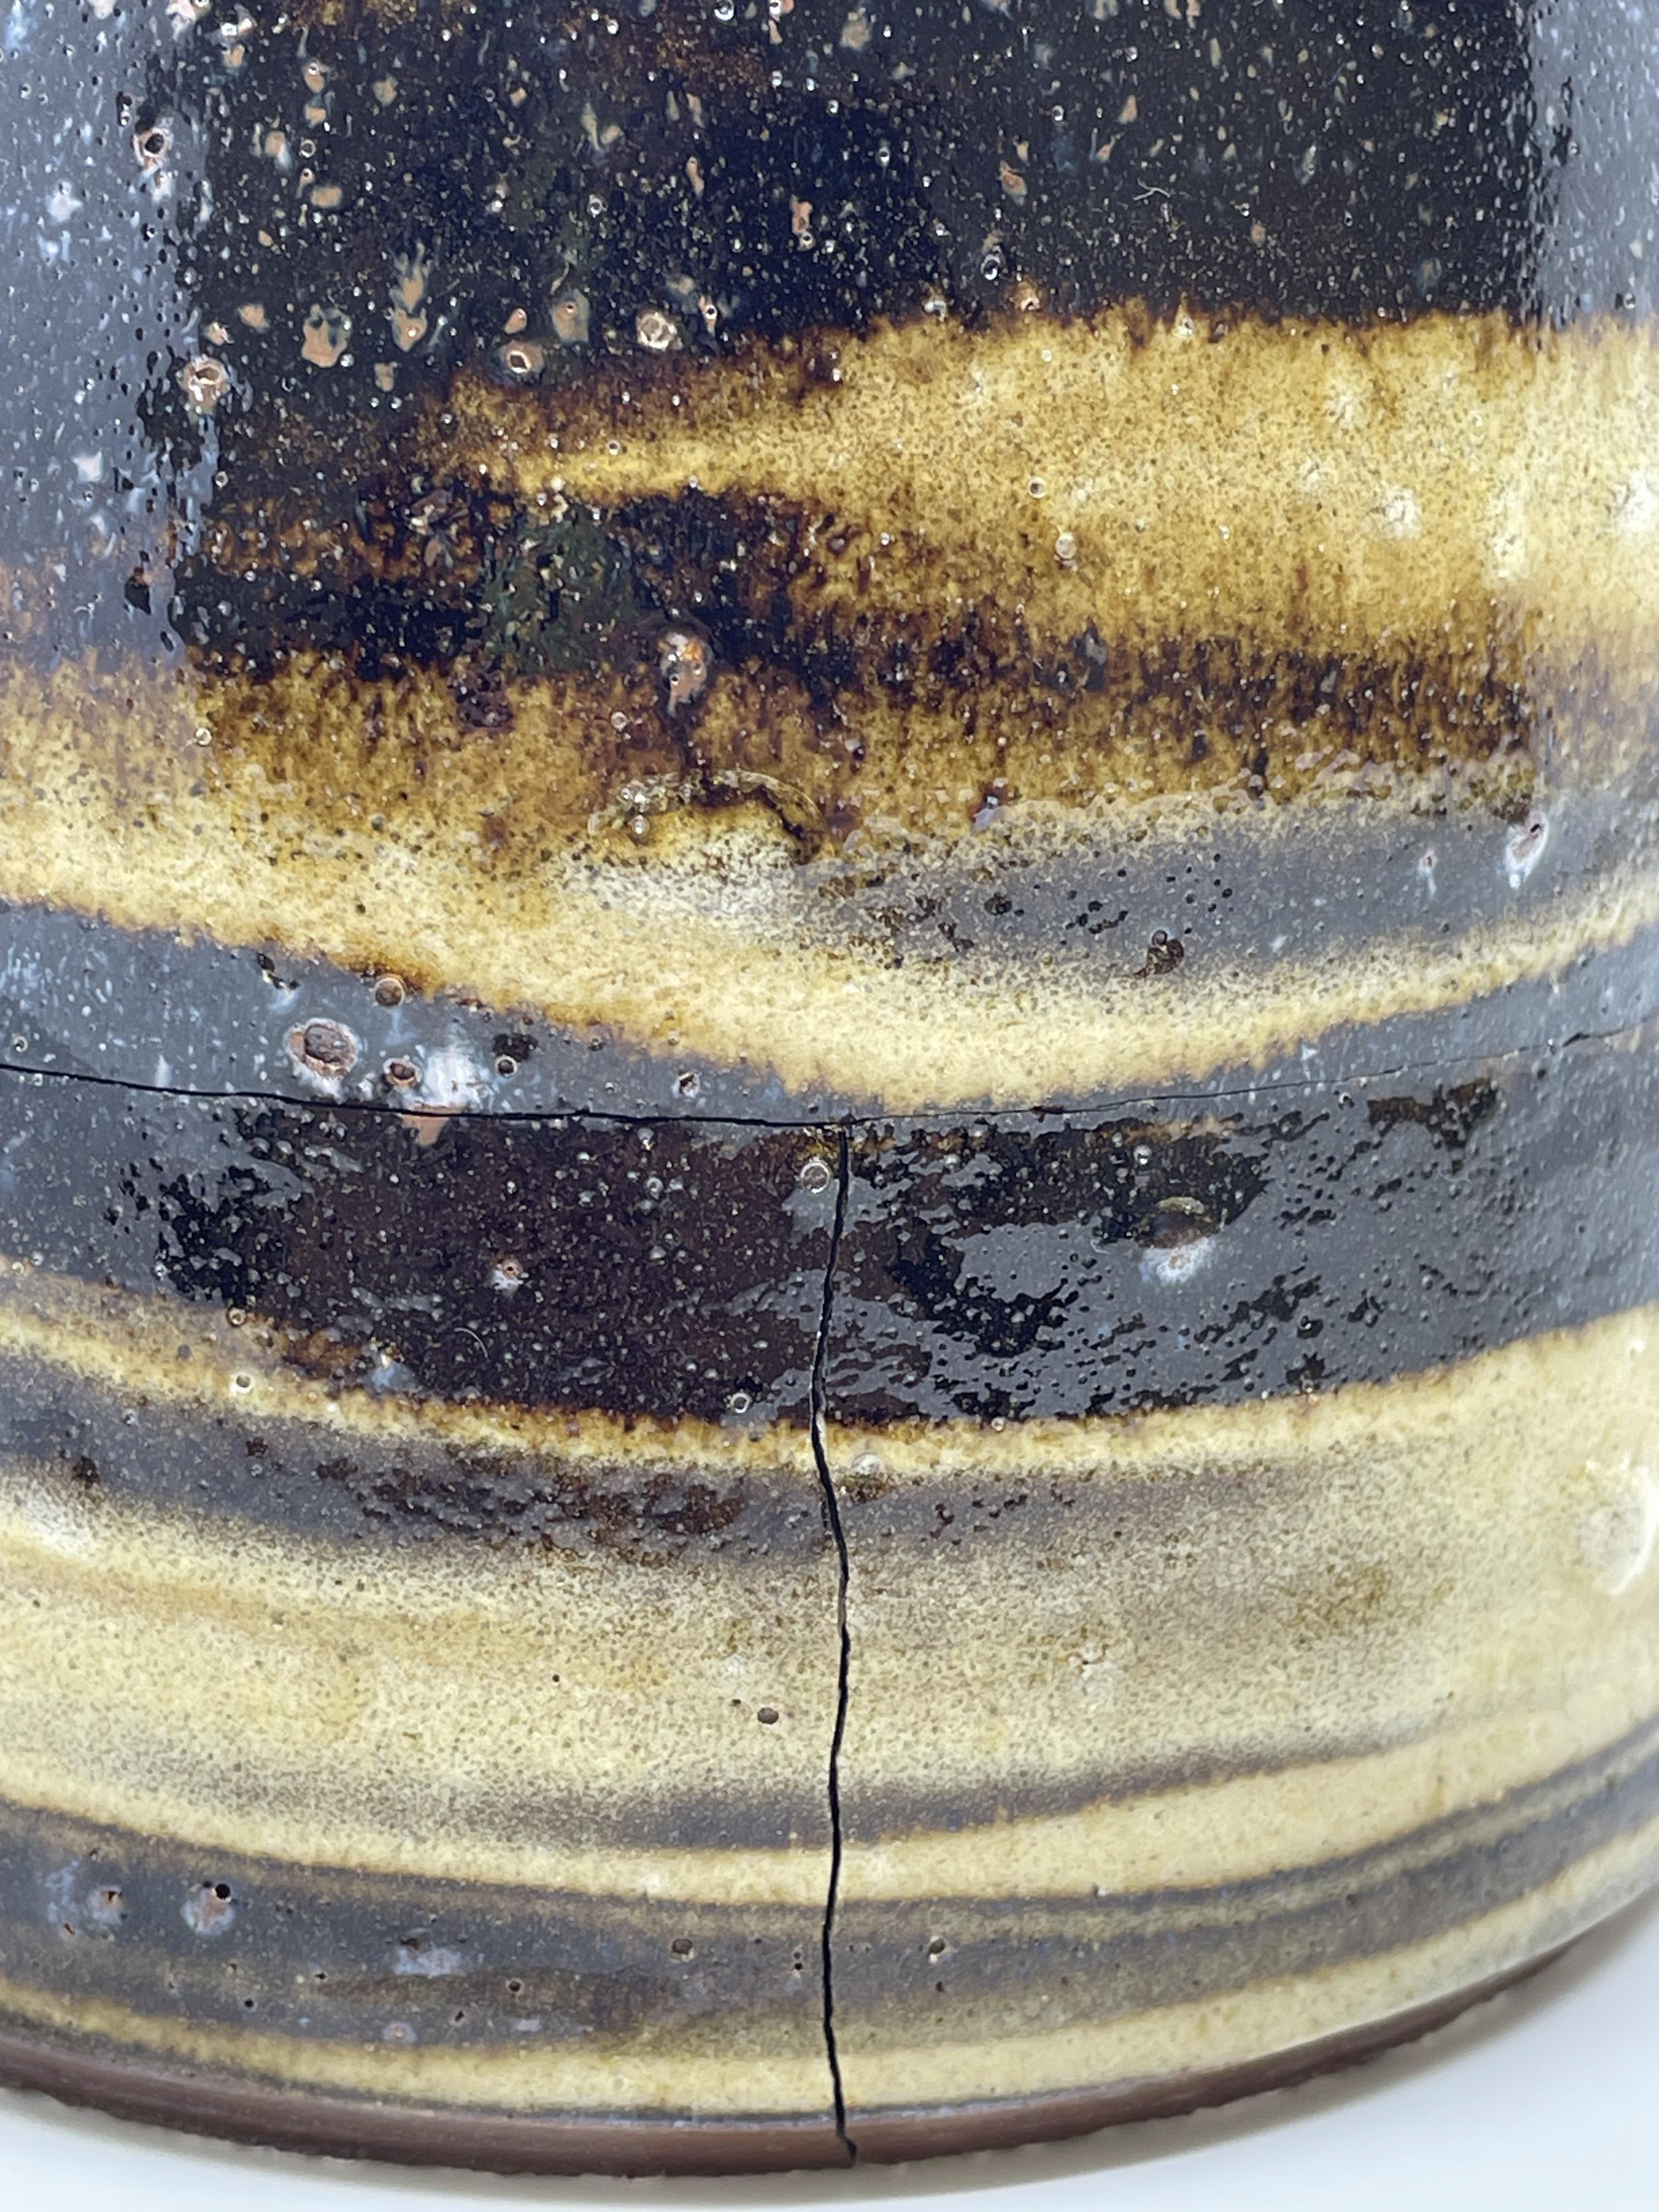
In many of my pebbles, there are darker greys and blacks; I wanted to experiment with making black clay with oxides. I found this challenging as I couldn't find documents or books about black oxide recipes for clay bodies, only for glazes. therefore, I decided to make up my experiment, taking from various glaze recipes. Using red iron, magnesium, and cobalt oxide, I used various quantities to explore which recipe had the best effect. using 10g of dried ivory stoneware, I then mixed the oxides in and fired all four recipes in earthenware and stoneware to see if the different firing temperatures gave different effects.
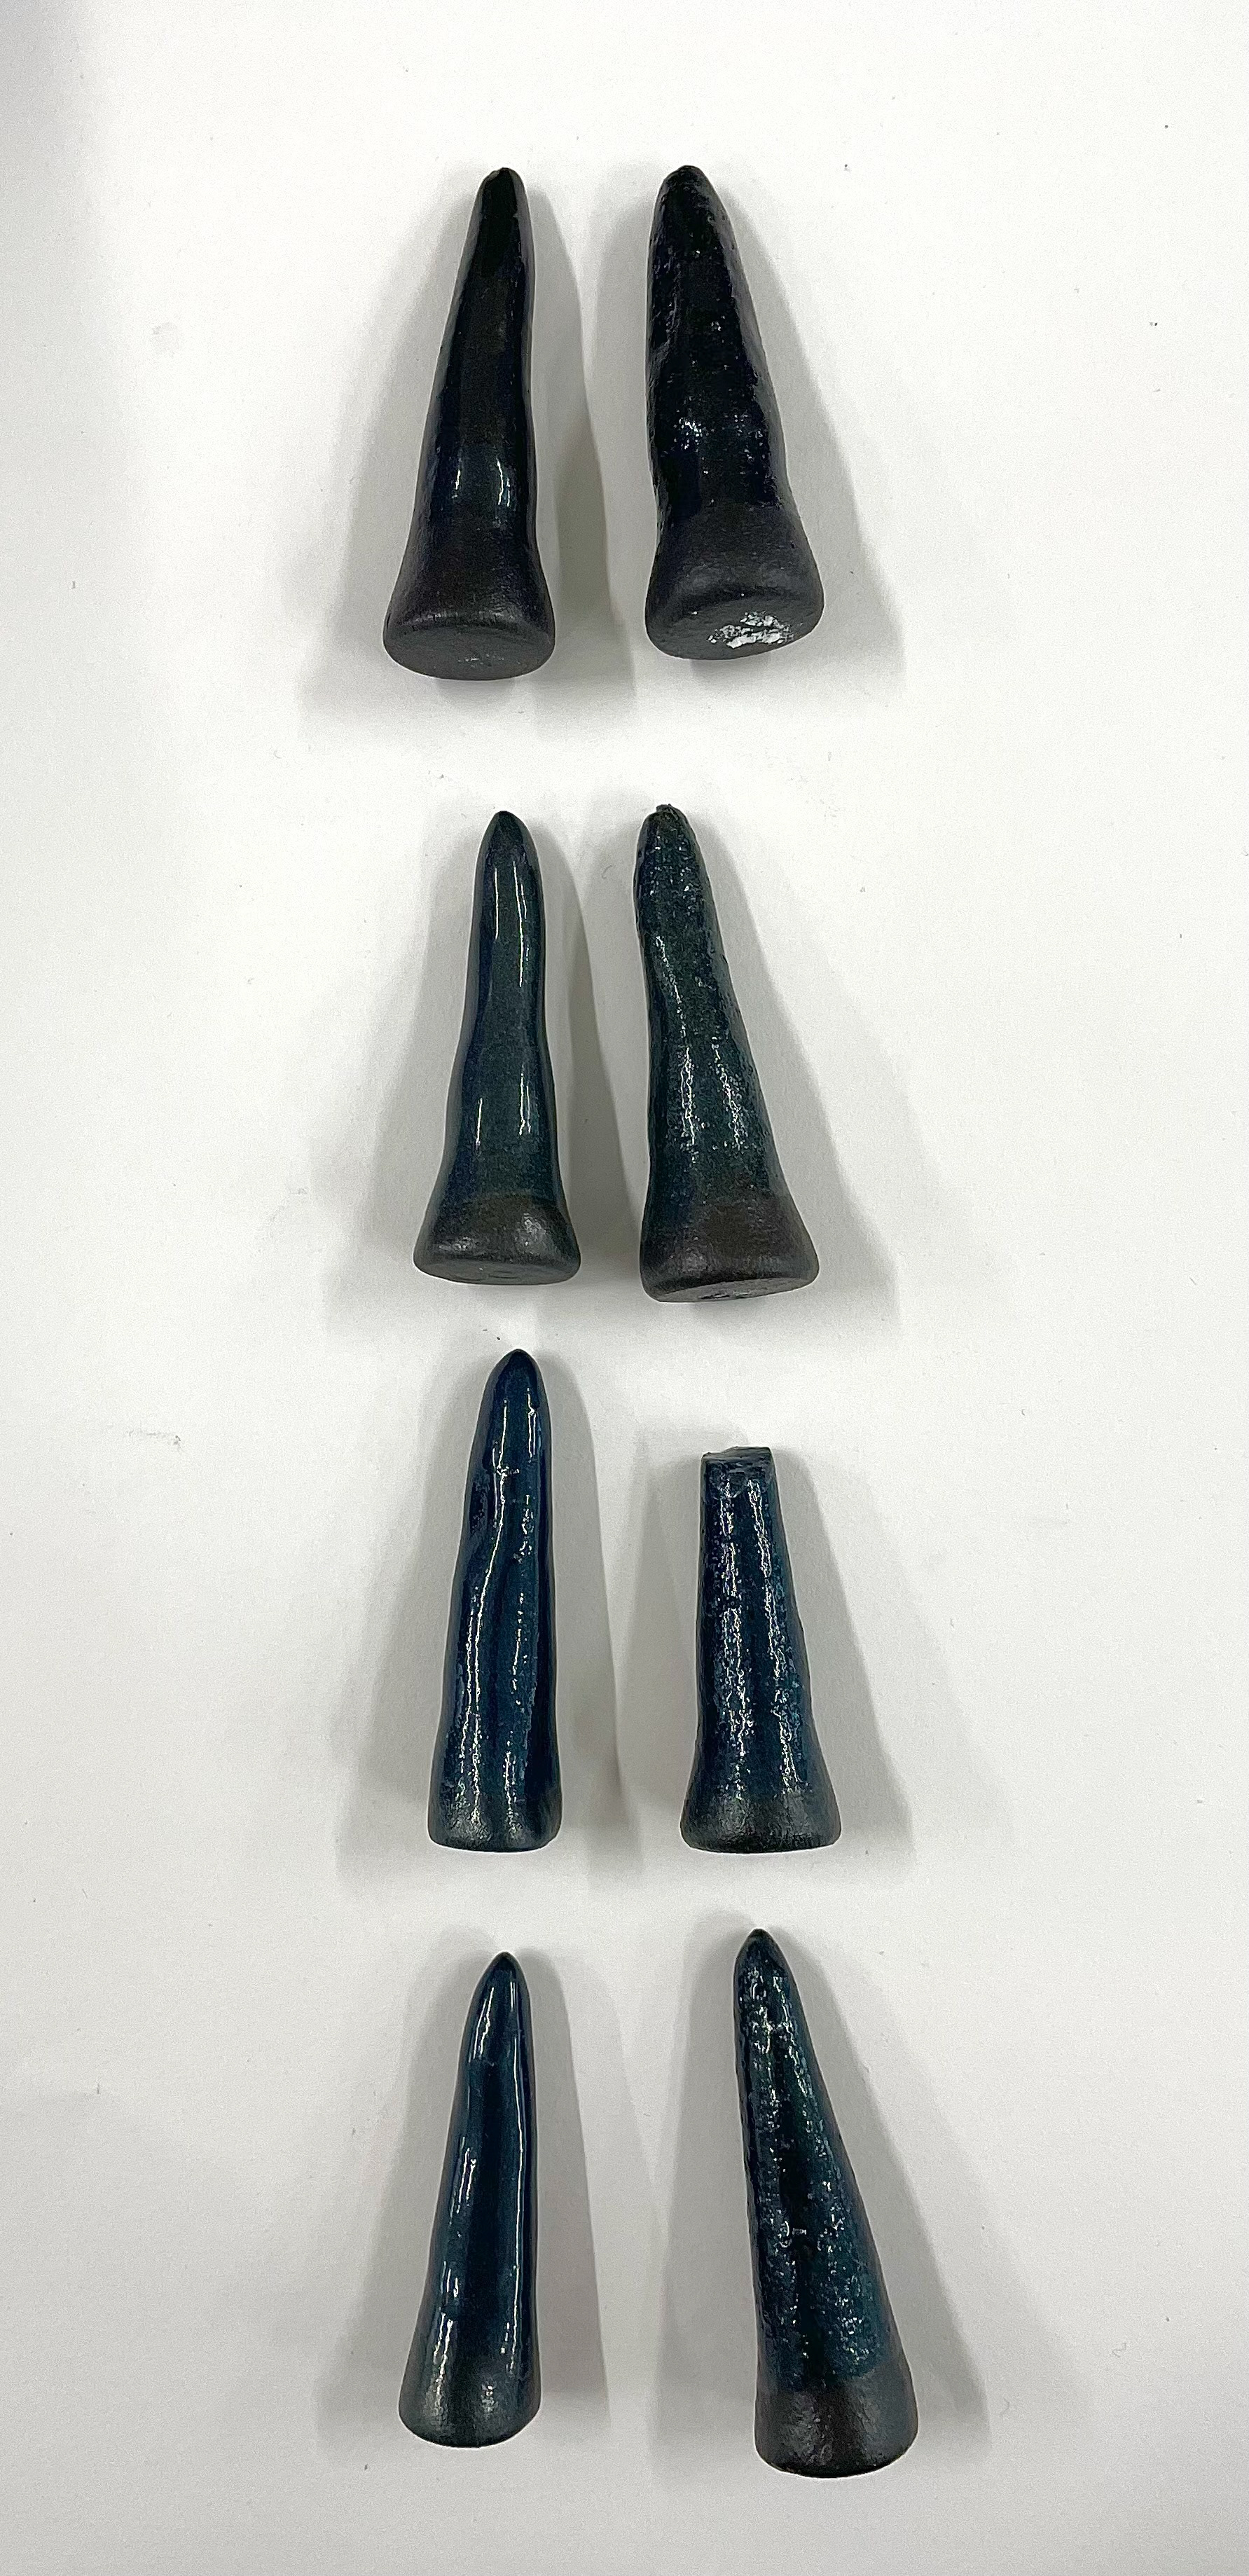
To my surprise, my black oxide experiments worked, as I took these oxide recipes from glaze recipes, I was hesitant that they would give me the result I wanted. After this experiment, I found that my first and second samples had better results than my third and fourth ones, I think I used too much cobalt, giving it a more blue hue, which, although a nice colour, is not the colour I wanted to achieve. Firing in earthenware and stoneware led to very similar results; however, firing at a higher temperature with the glazing resulted in a rougher glaze, giving the cone a bit of a bumpier texture. However, this is something that I didn't mind, so depending on what my other clays need to be fired at, it is good to know that I can create black clay in earthenware or stoneware. As a further experiment, I think I would like to explore lowering the quantities of the black oxide recipes to see if it results in more grey tones, halving the quantity of oxides I put in might be a result of this.
I aim to look into creating greys with oxides To achieve this, I'm going to test halving the amount of oxides I used for my first test, instead of using 2% red iron, 2% magnesium and 1% cobalt, I will half these to test if that gives a lighter grey.
Practising Different Methods of Vessels
With this process, I threw three smaller vessels, and I then used a pebble to inform the shape of the body, using different parts of the same pebble led to a variety of forms curving in and out, making a very rigid form. Once these were thrown, I then stacked them and made them one using a slip. This created a tall, slim vessel, which had curves following throughout. Putting this then back on the wheel allowed me to create the opening of the vessel, which is a lot more structured.
Although this method was more in my comfort, throwing a variety of smaller vessels to create one large vessel. Its final form was not something that I had in mind. I think the pebbles created too much form on the surface, making it too rigid. When I would then take this into throwing with marbled clay, I think the form and the mix of colours would be too conflicting and would not take away from the focus of the colour and fine marbling. I think exploring using a simpler form for the body of the vessels would benefit the aesthetic and look, not being too overwhelming with colour and form. I do, however, really like the size I think looking into different sizes and forms of my vessel would be good, and having a thin and tall vessel would complement the collection of vessels I want.
Method Two
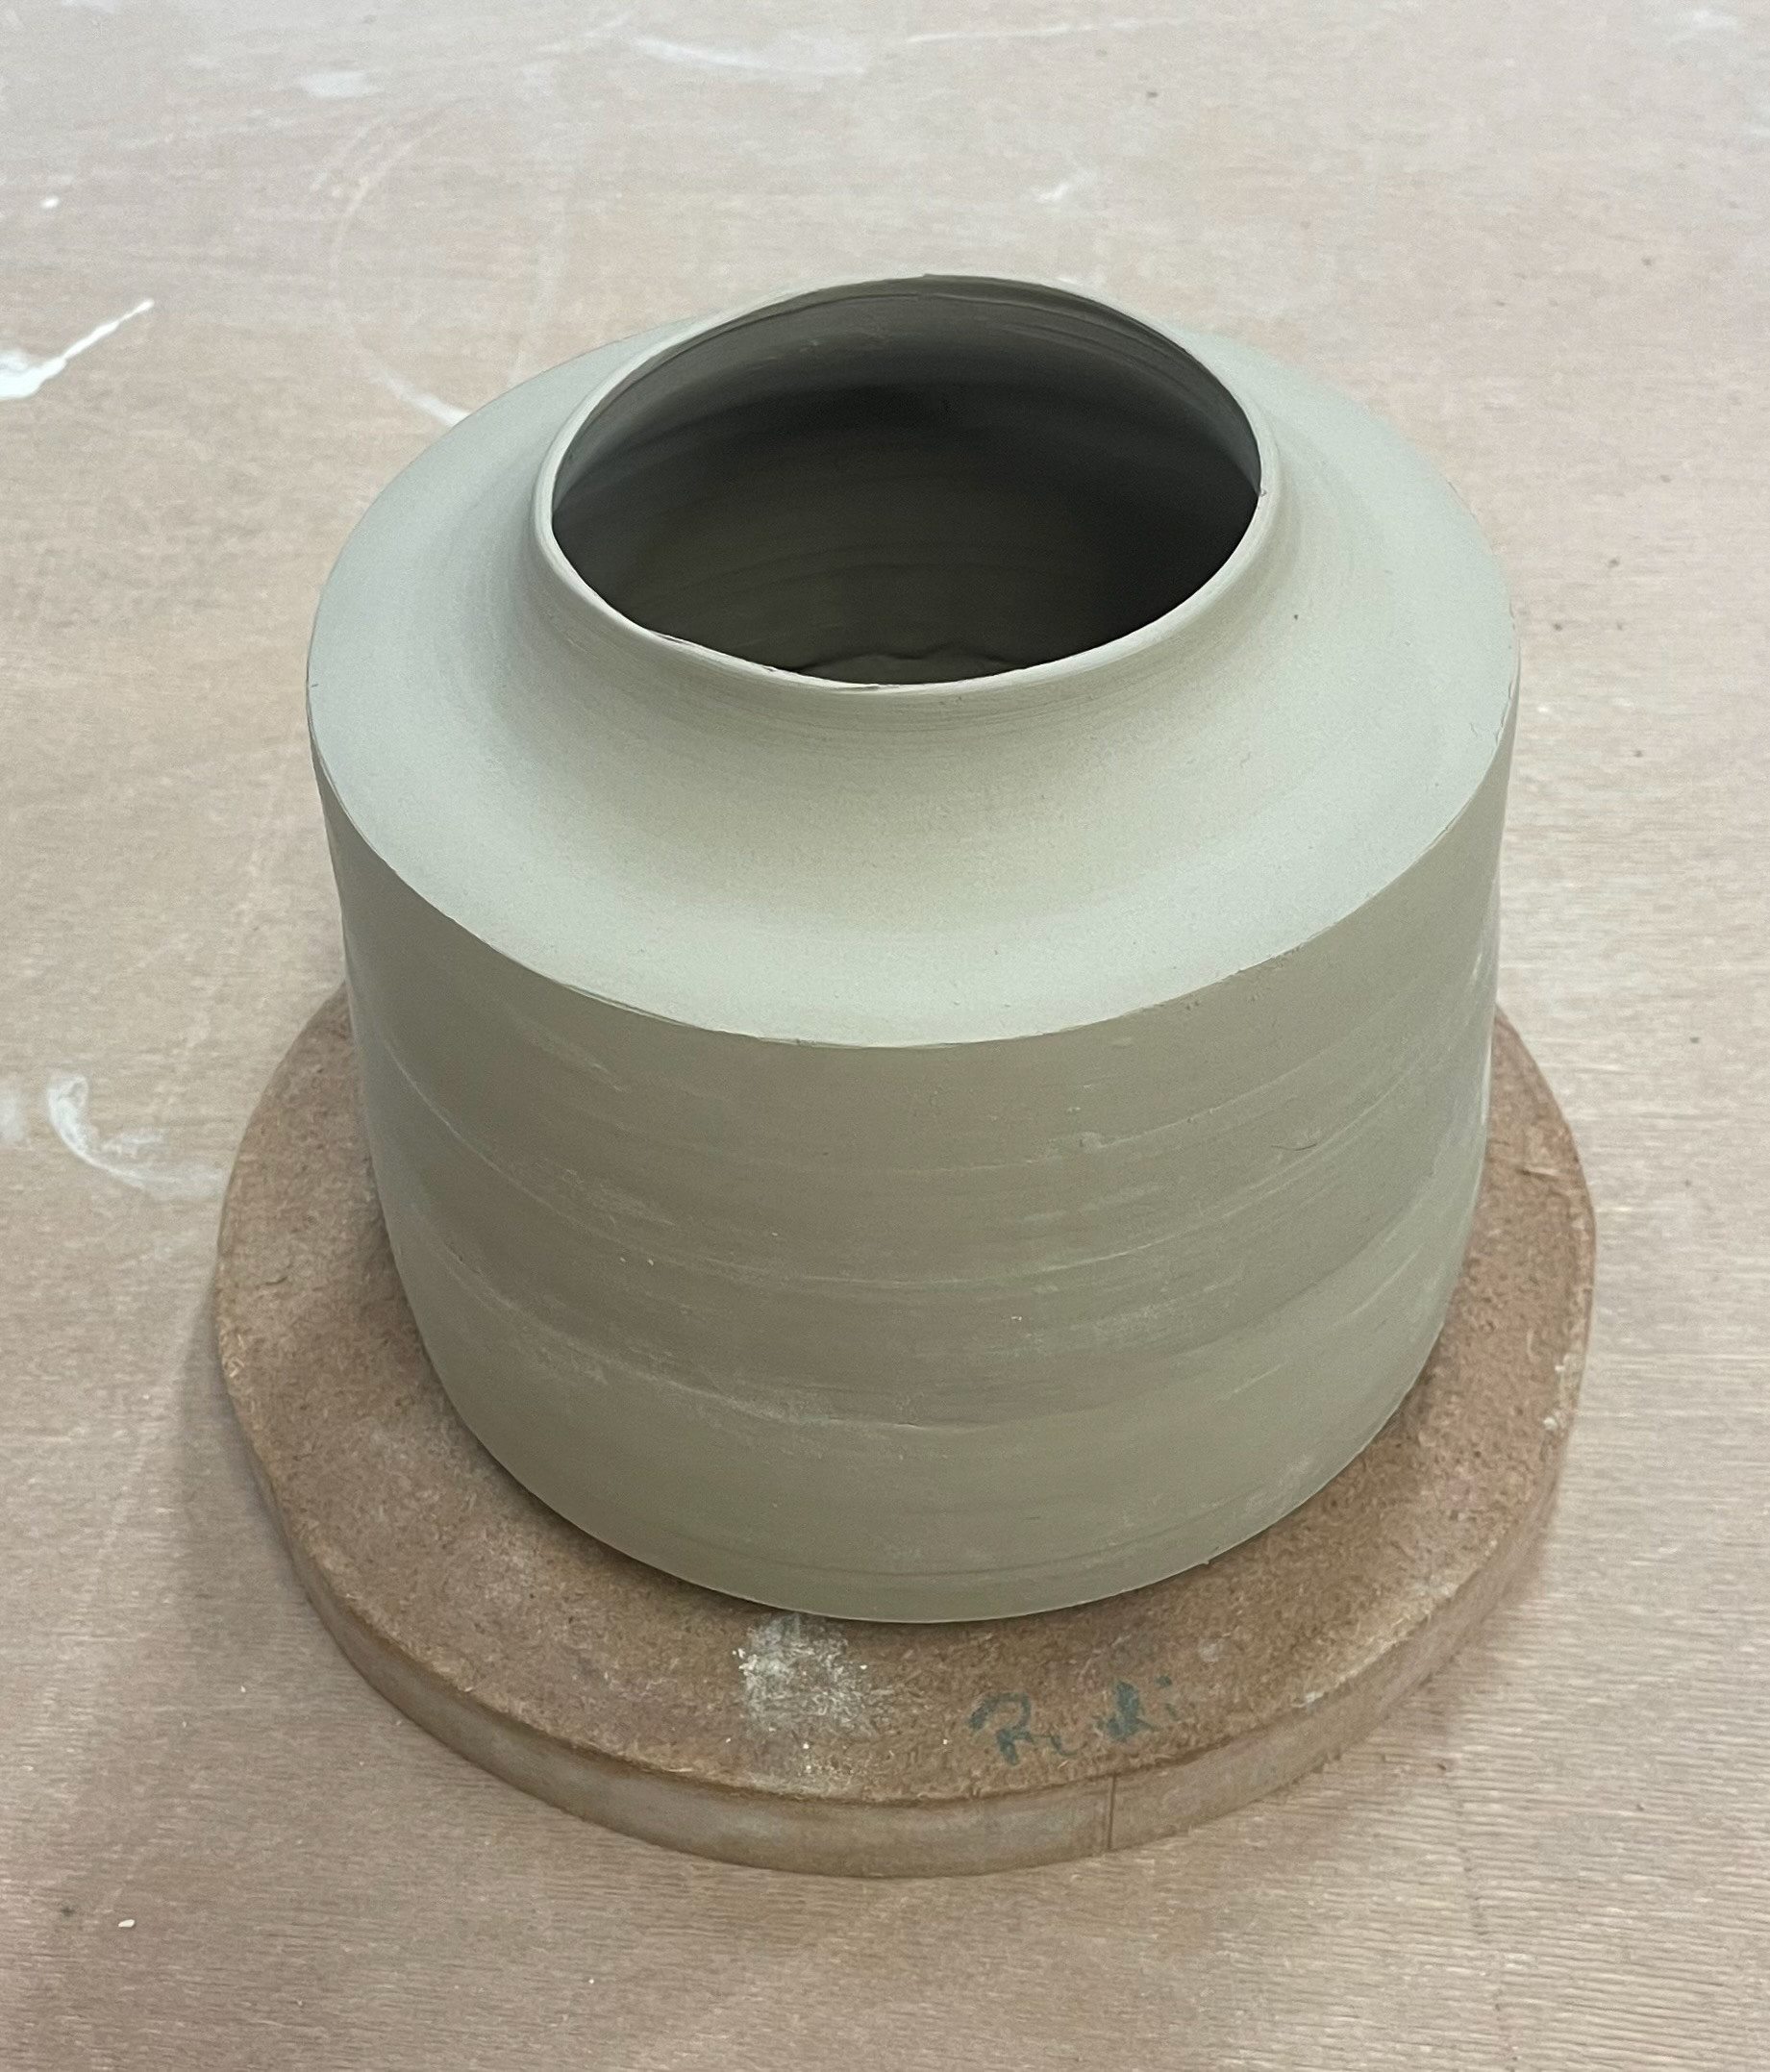
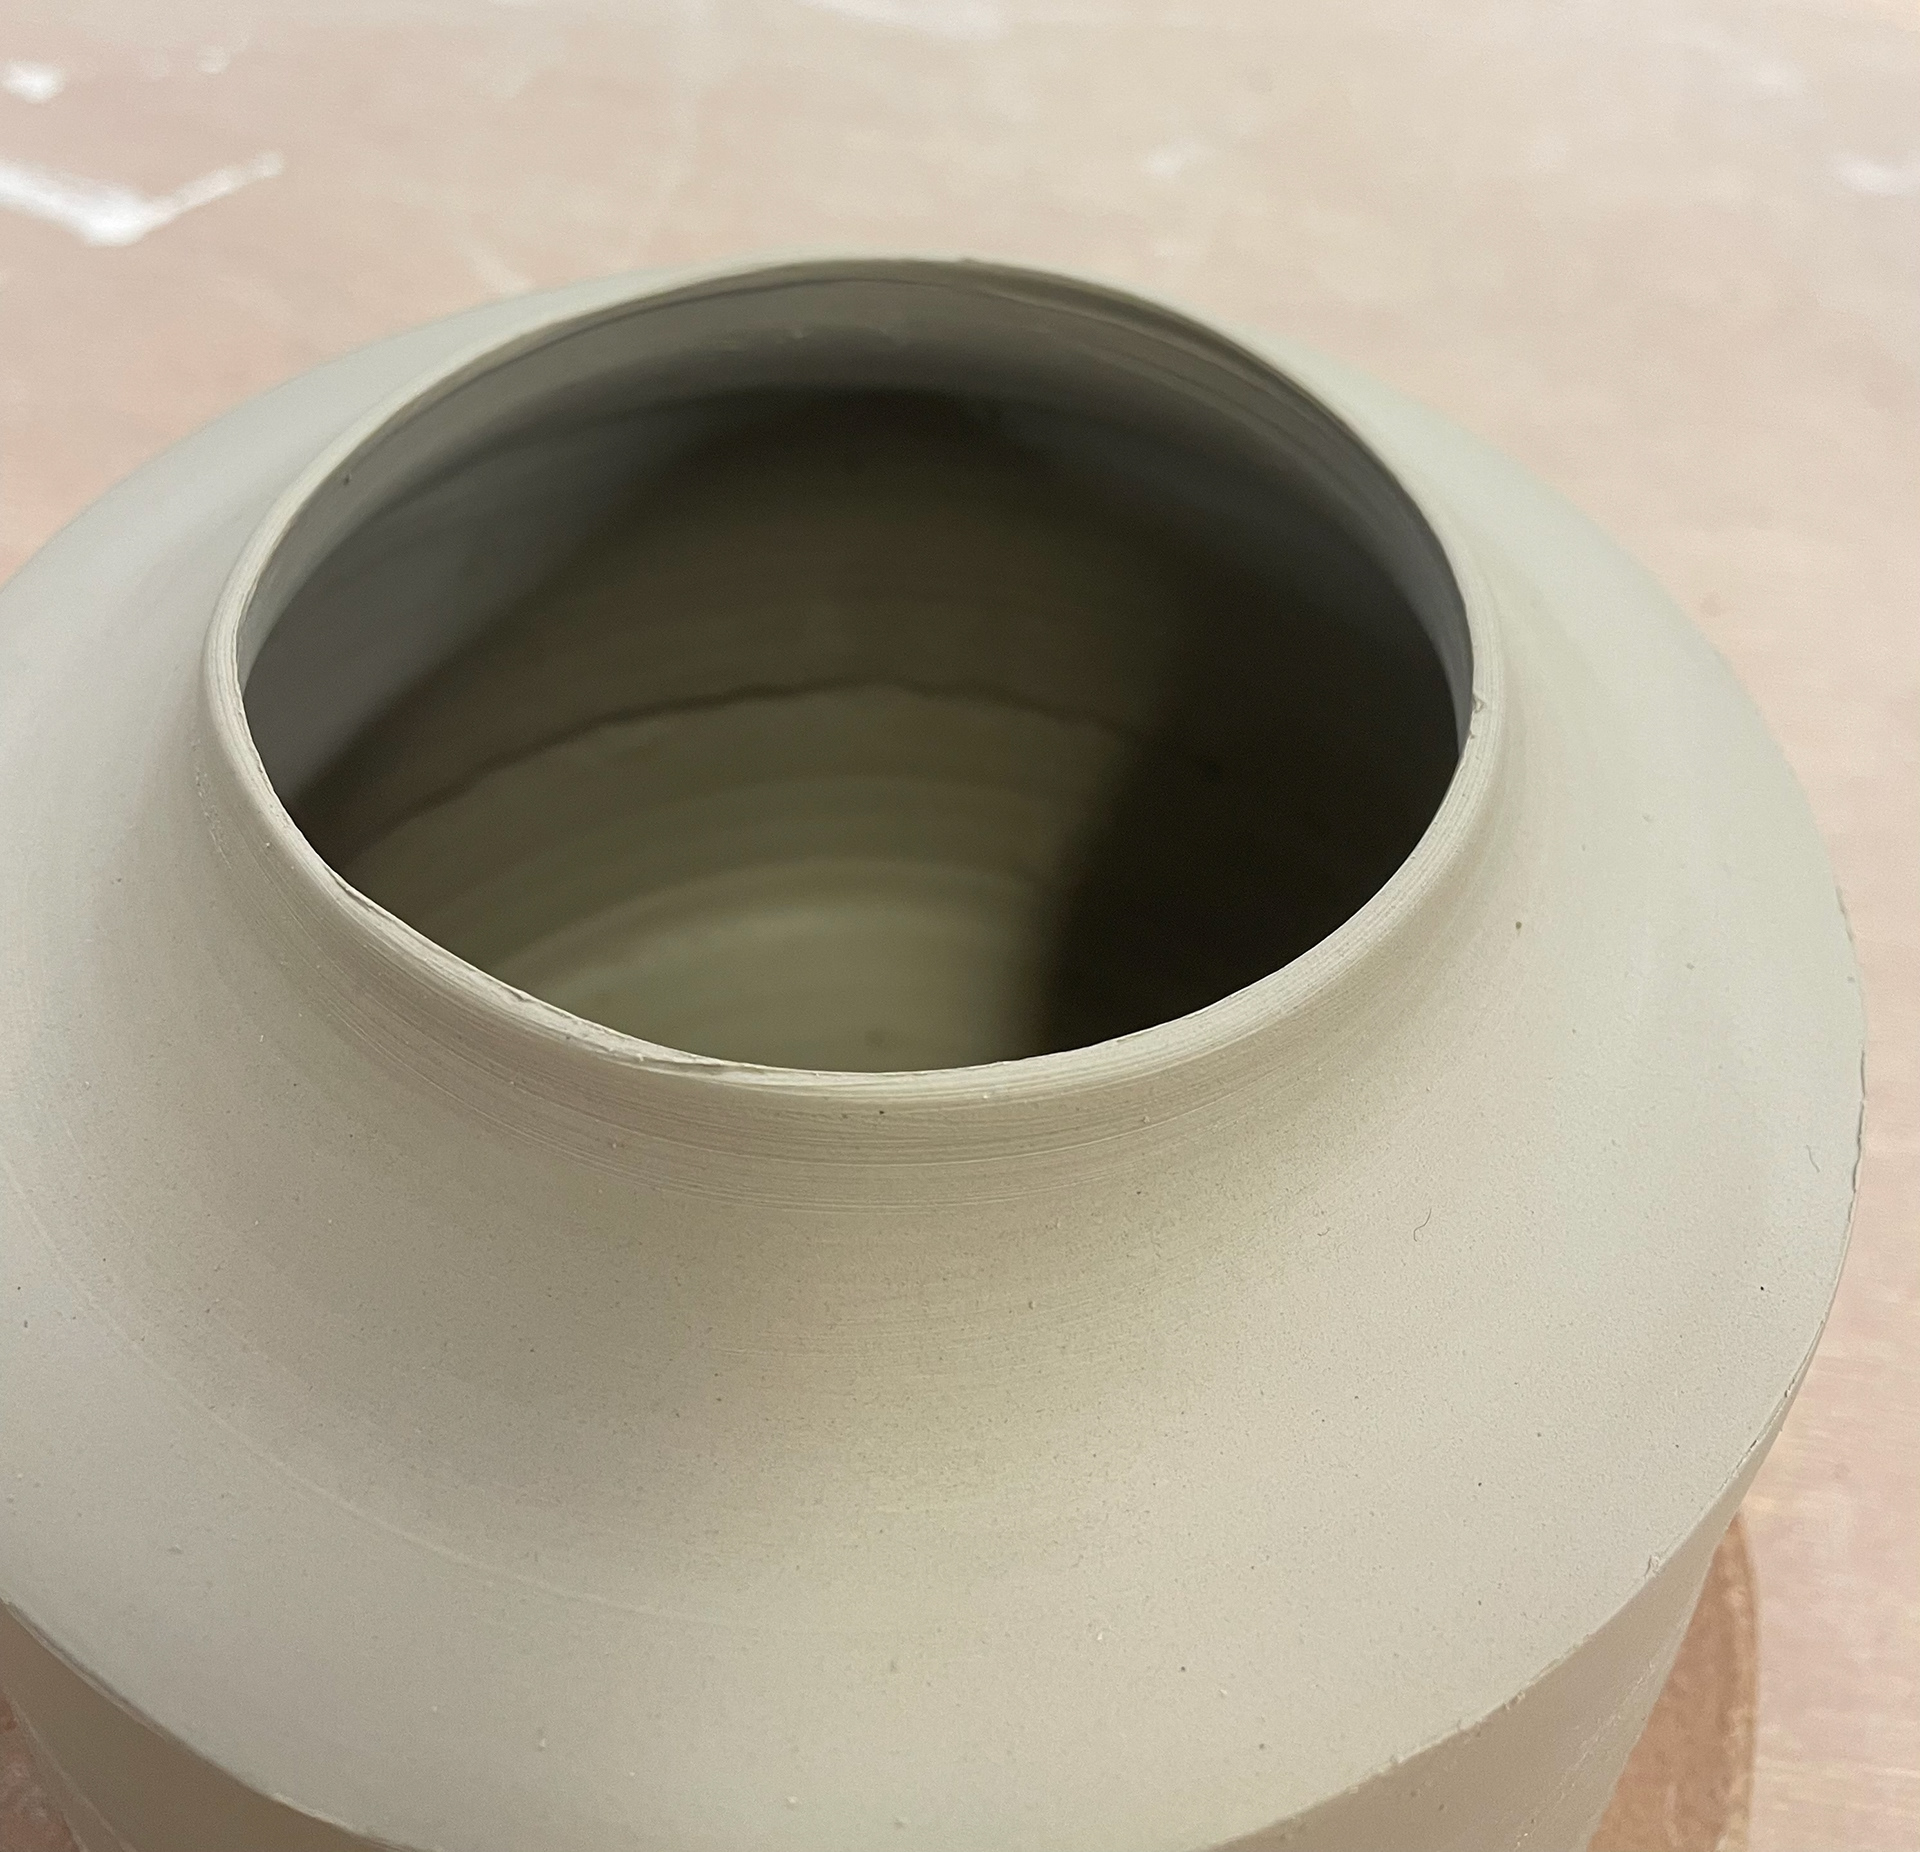
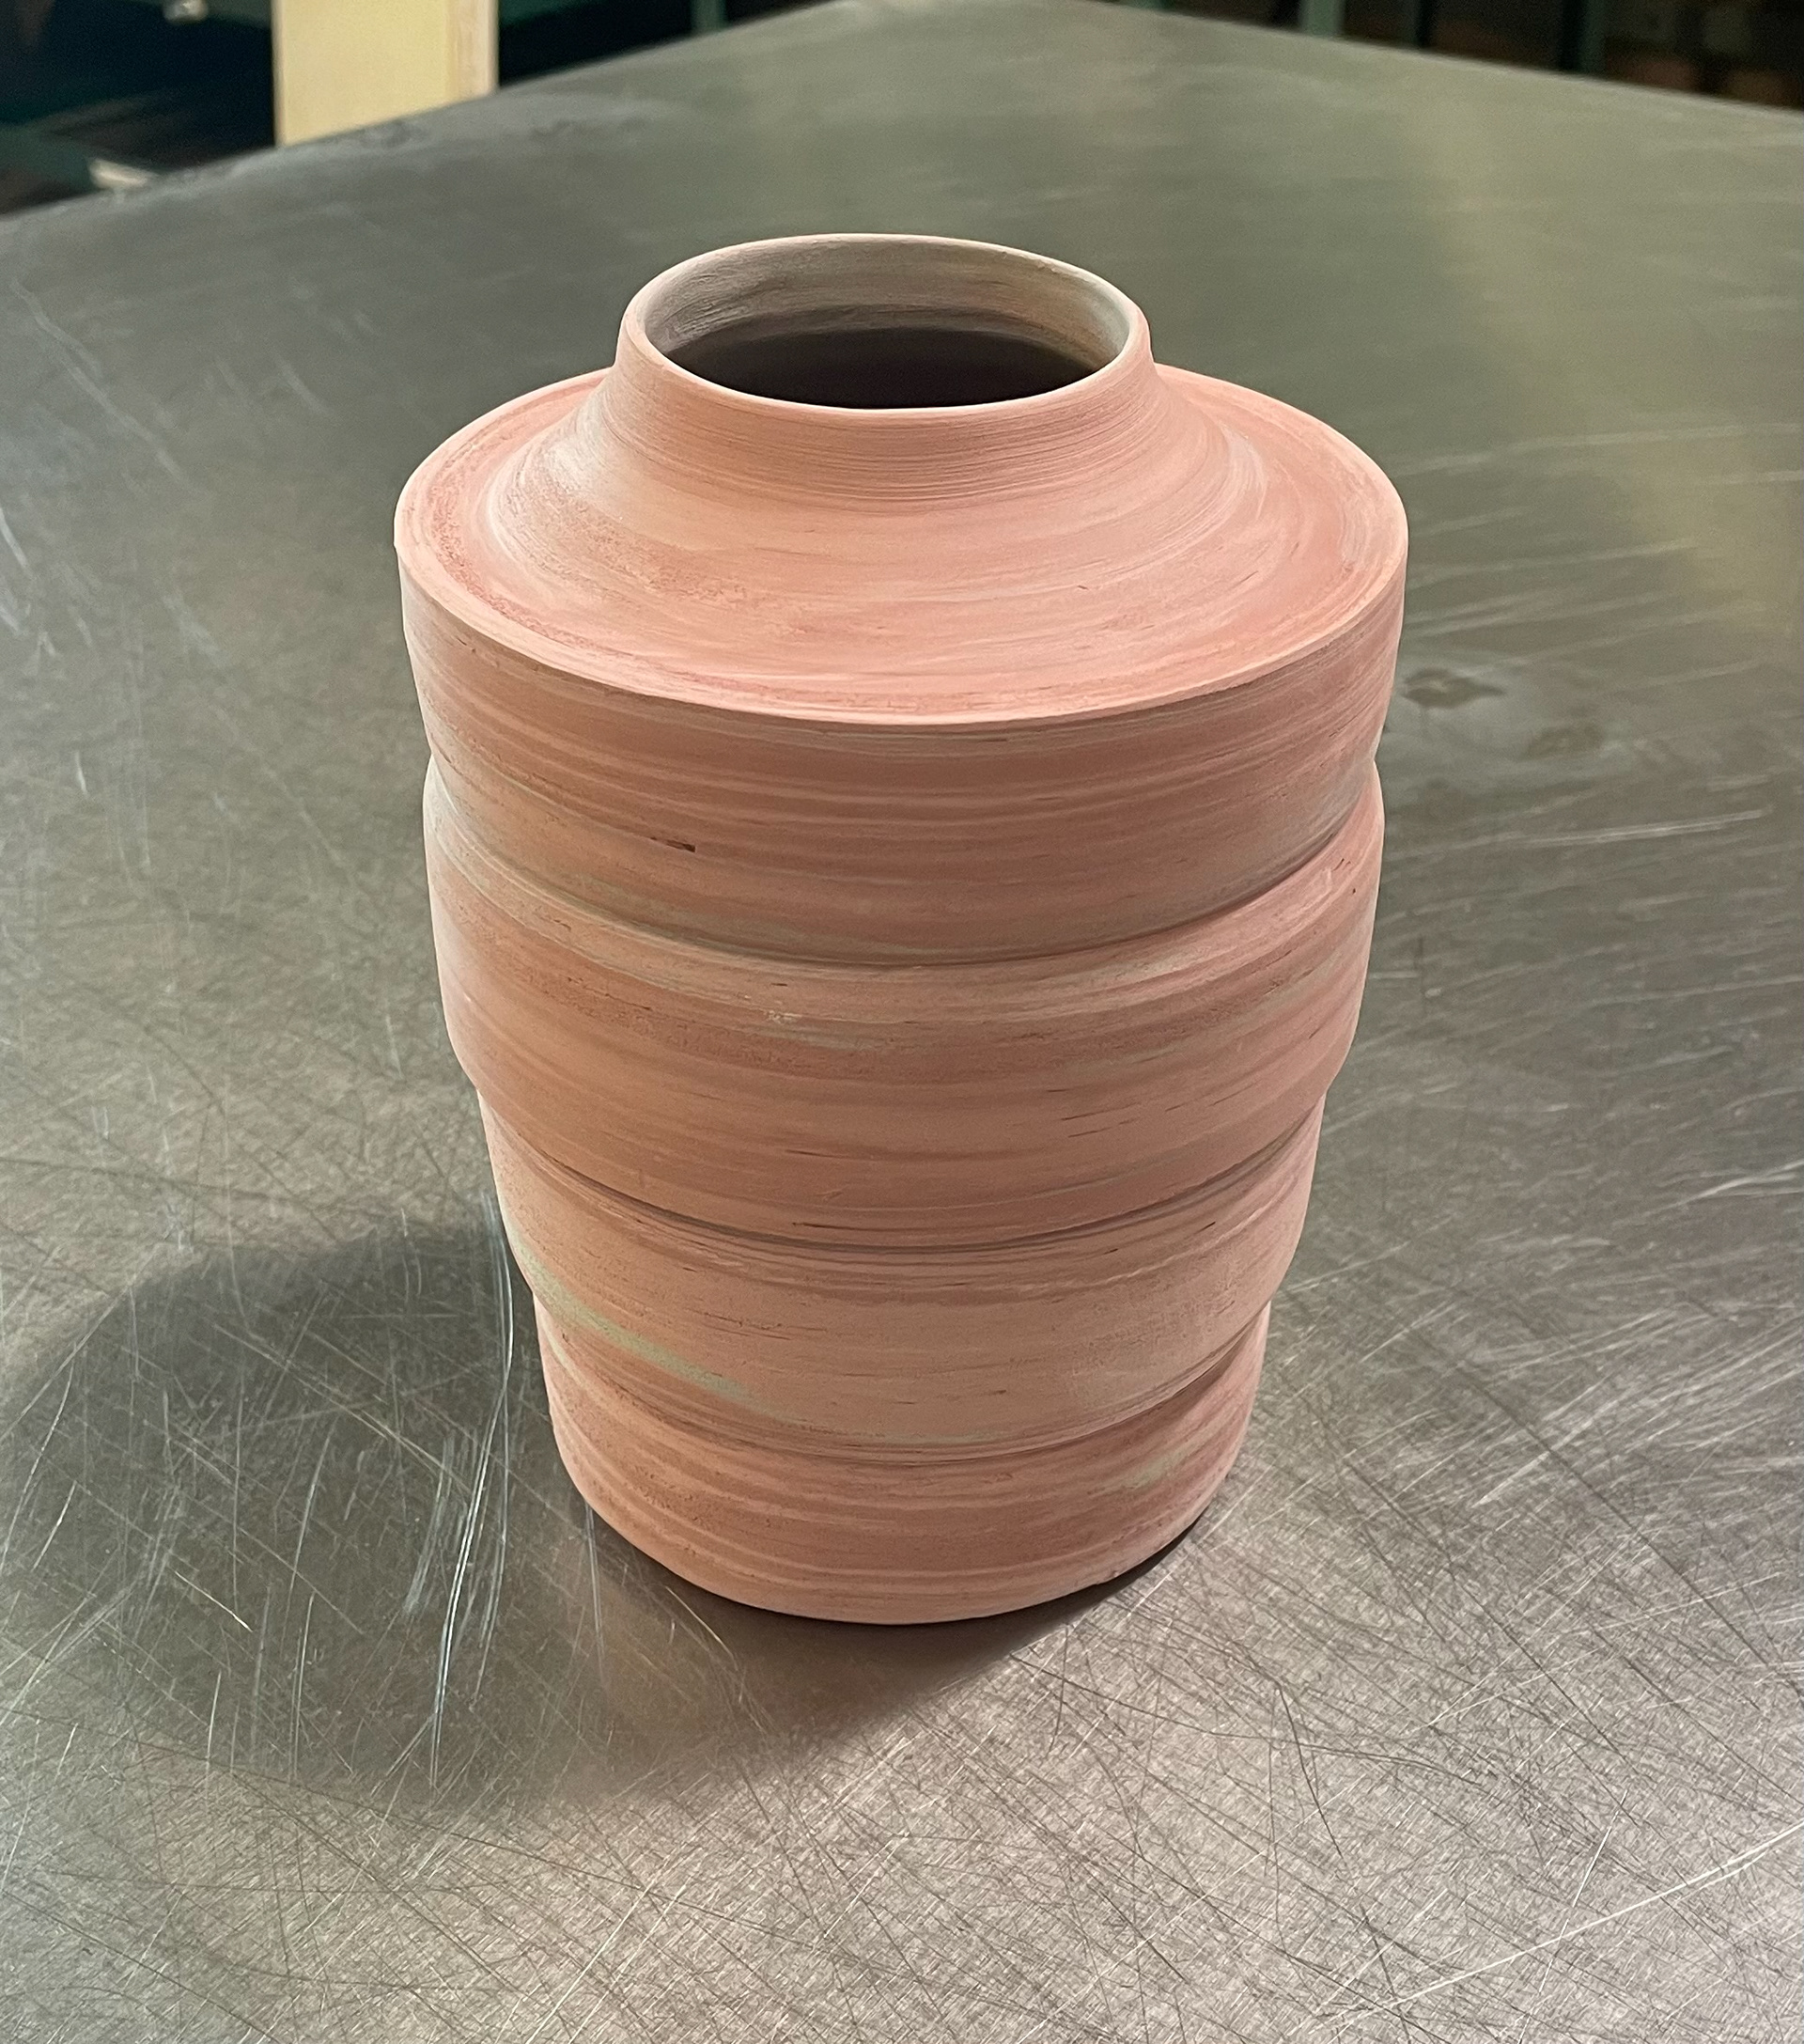
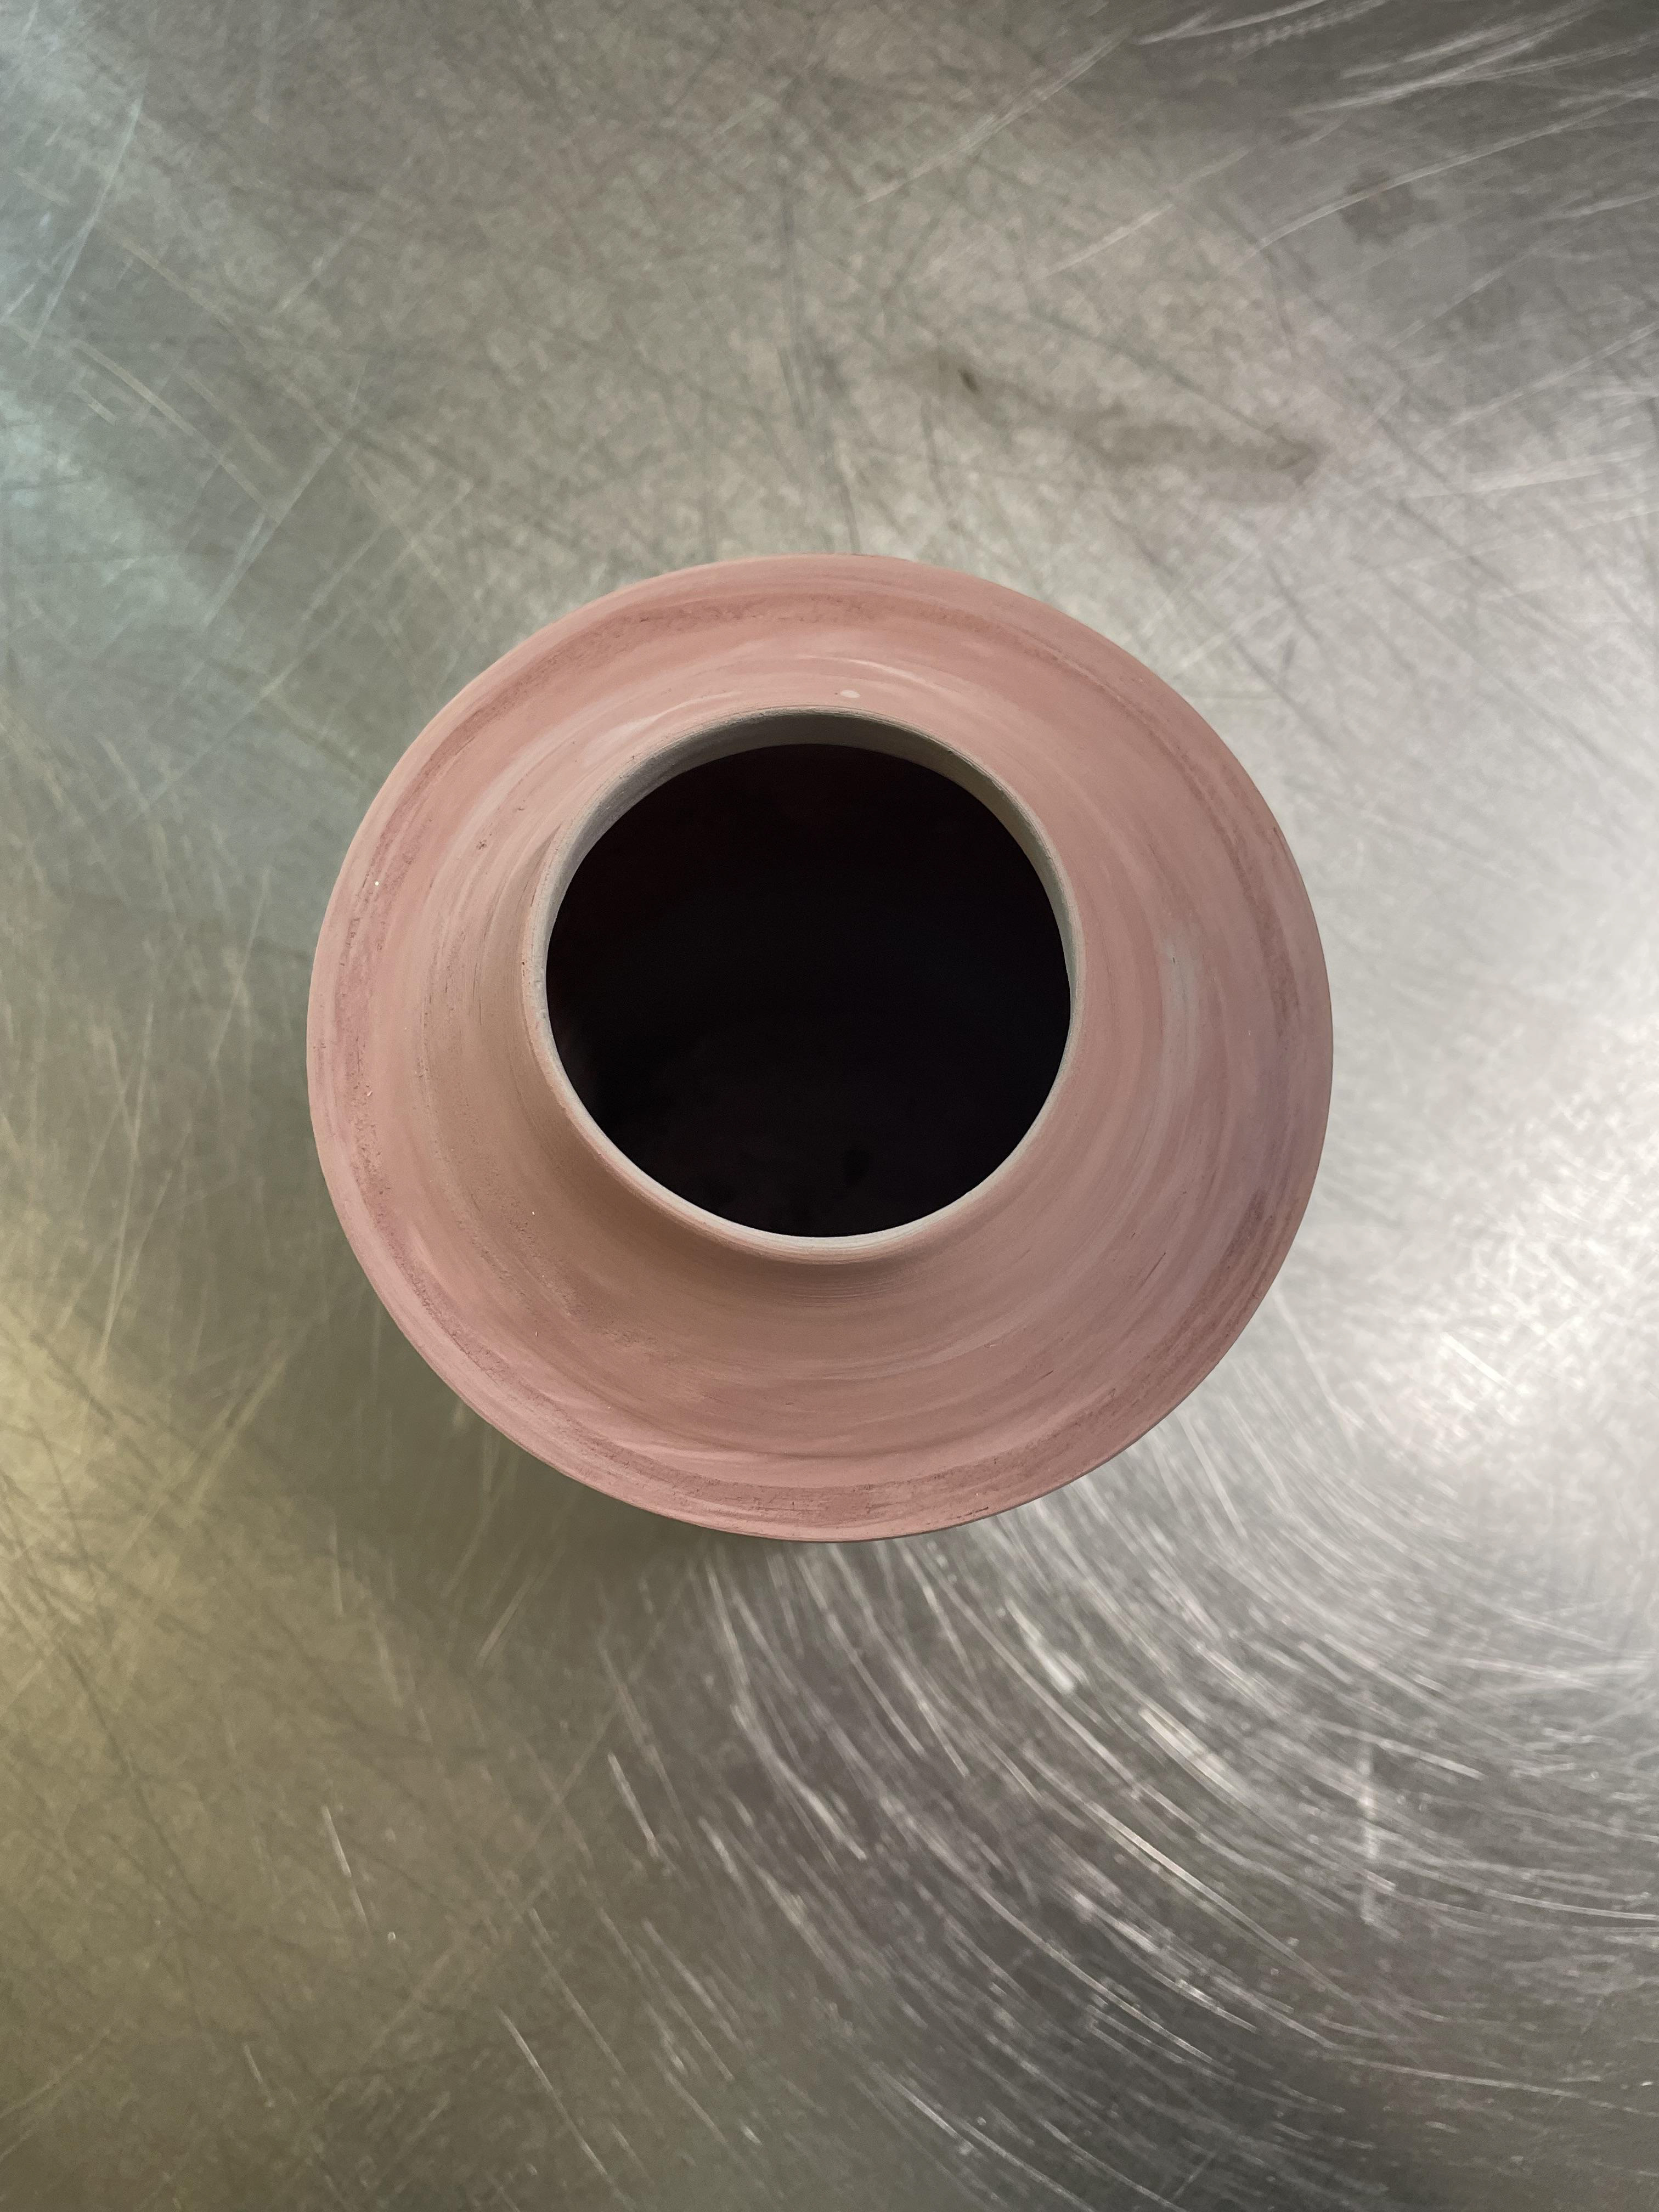
For this technique, I was following Taya Gomez's large throwing technique. I had a call with Tanya where she shared with me all her tips on though one large. For this, she throws her pots in two and then attaches them. This is challenging as you need to get the perfect one on both parts so they fit seamlessly together. To create the opening, I cut a hole from the base of the second thrown part, I then flipped this and attached it to the first half of the vessel these two parts were attached, and one vessel I could place back on the wall and pull open the top on the vessel. I learned that the most important thing is to have a consistent base if this is consistent, then the rest of the vessel will follow, especially when pulling the walls for the top rim, mine became a little warped as my base wasn't the same thickness all the way. I like the shape I was able to achieve with technique nine, like how the body of the vessel is more rounded, and the base is carved out to have a sharp trim. This contrast between the body of the vessel and the top and bottom is really like the top and bottom have very sharp lines and are very clean. However, the body was completed with a pebble rib, but it had a flat surface, giving a more organic body. I wanted to establish a good form before adding in any oxides, as with coloured clay, before getting my form would lead to a waste of oxides that would be harder to recycle.
I think this is the method I will be taking forward I like how I'm able to create a very sharp, clean top, and hopefully, with practice, the rims of the vessels will be cleaner. Having a very structured top compared to a more natural body is what. I pictured my vessels to take form. The size of this vessel as well is good, having a large width and height. I would be able to throw this as one full piece; however, with the timing of the project, I don't think I'll be able to confidently throw this large without spending dedicated time practising throwing. as this piece isn't perfectly done it gives a sense of comfort, the size and the form of the body gives comfort which then has precision and refinement in the rim and the bottom gives it a nice holder within the comfort within.
I want my vessels to allow the coloured marble clay to be there, and stand out with the first method the form was the centre of the work and I feel like this would take away from the colour and the I'm part of the pieces as a collection.
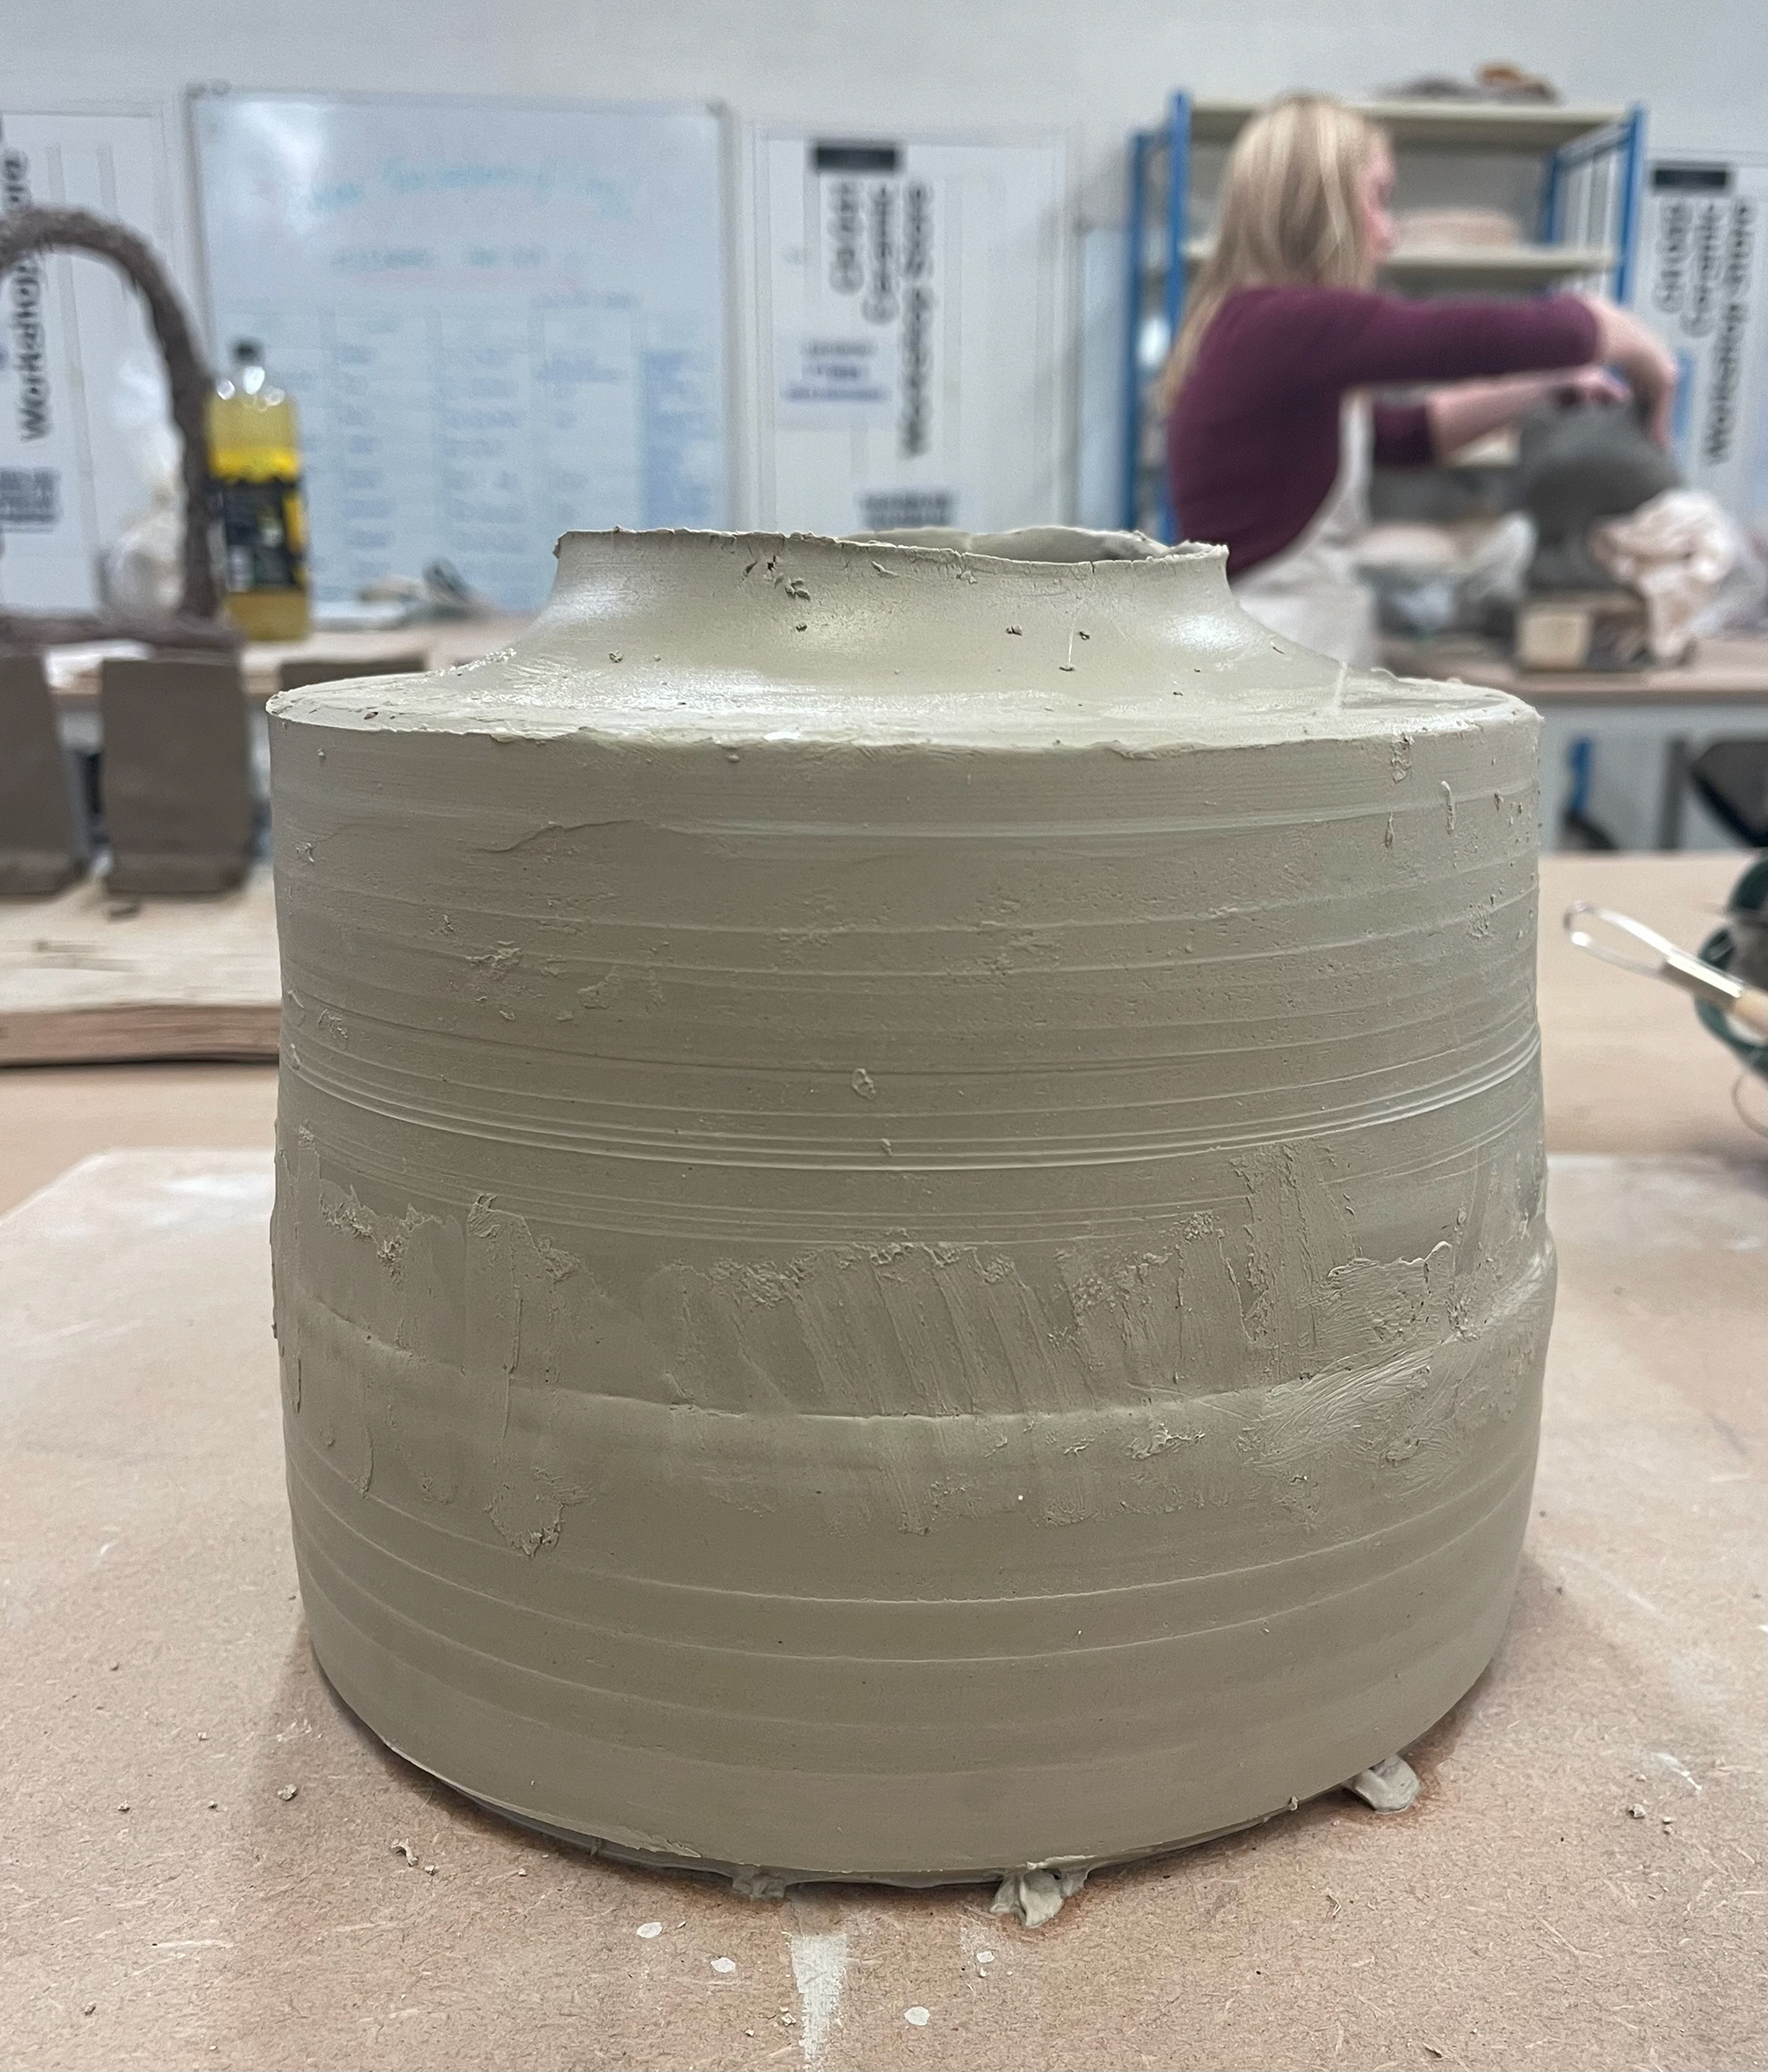
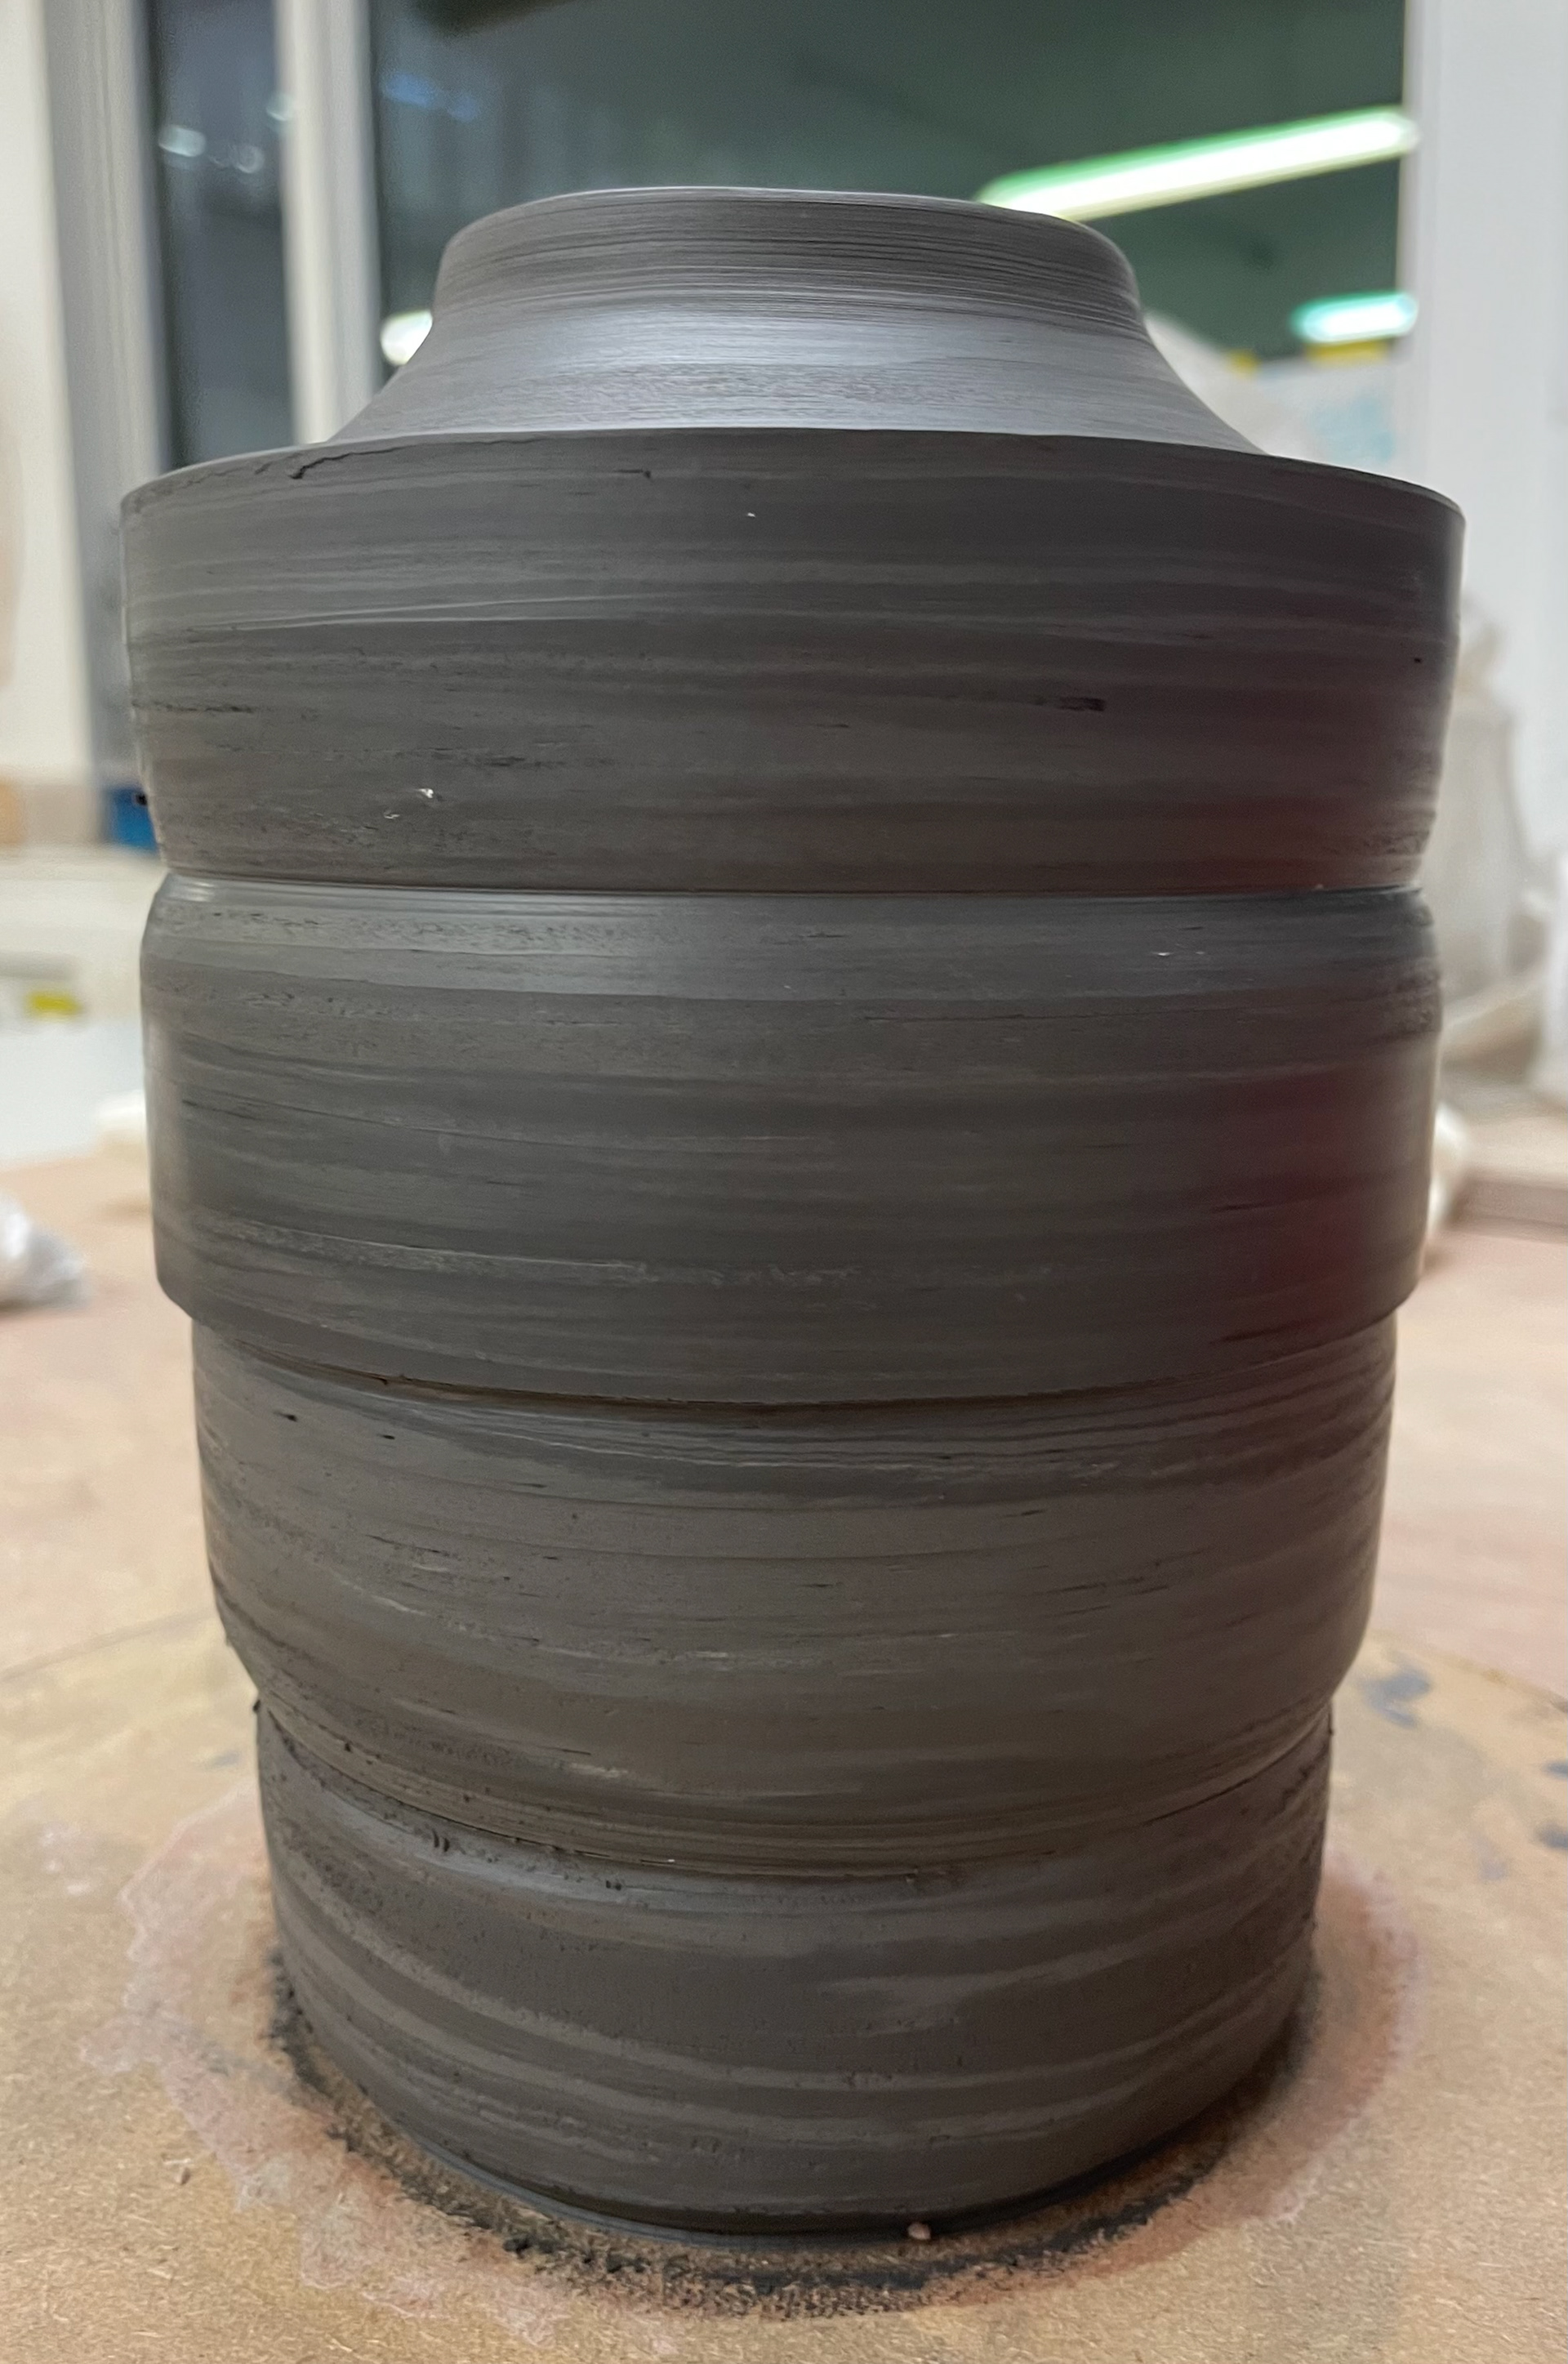
Incorporating Pebbles Into Thrown Pieces
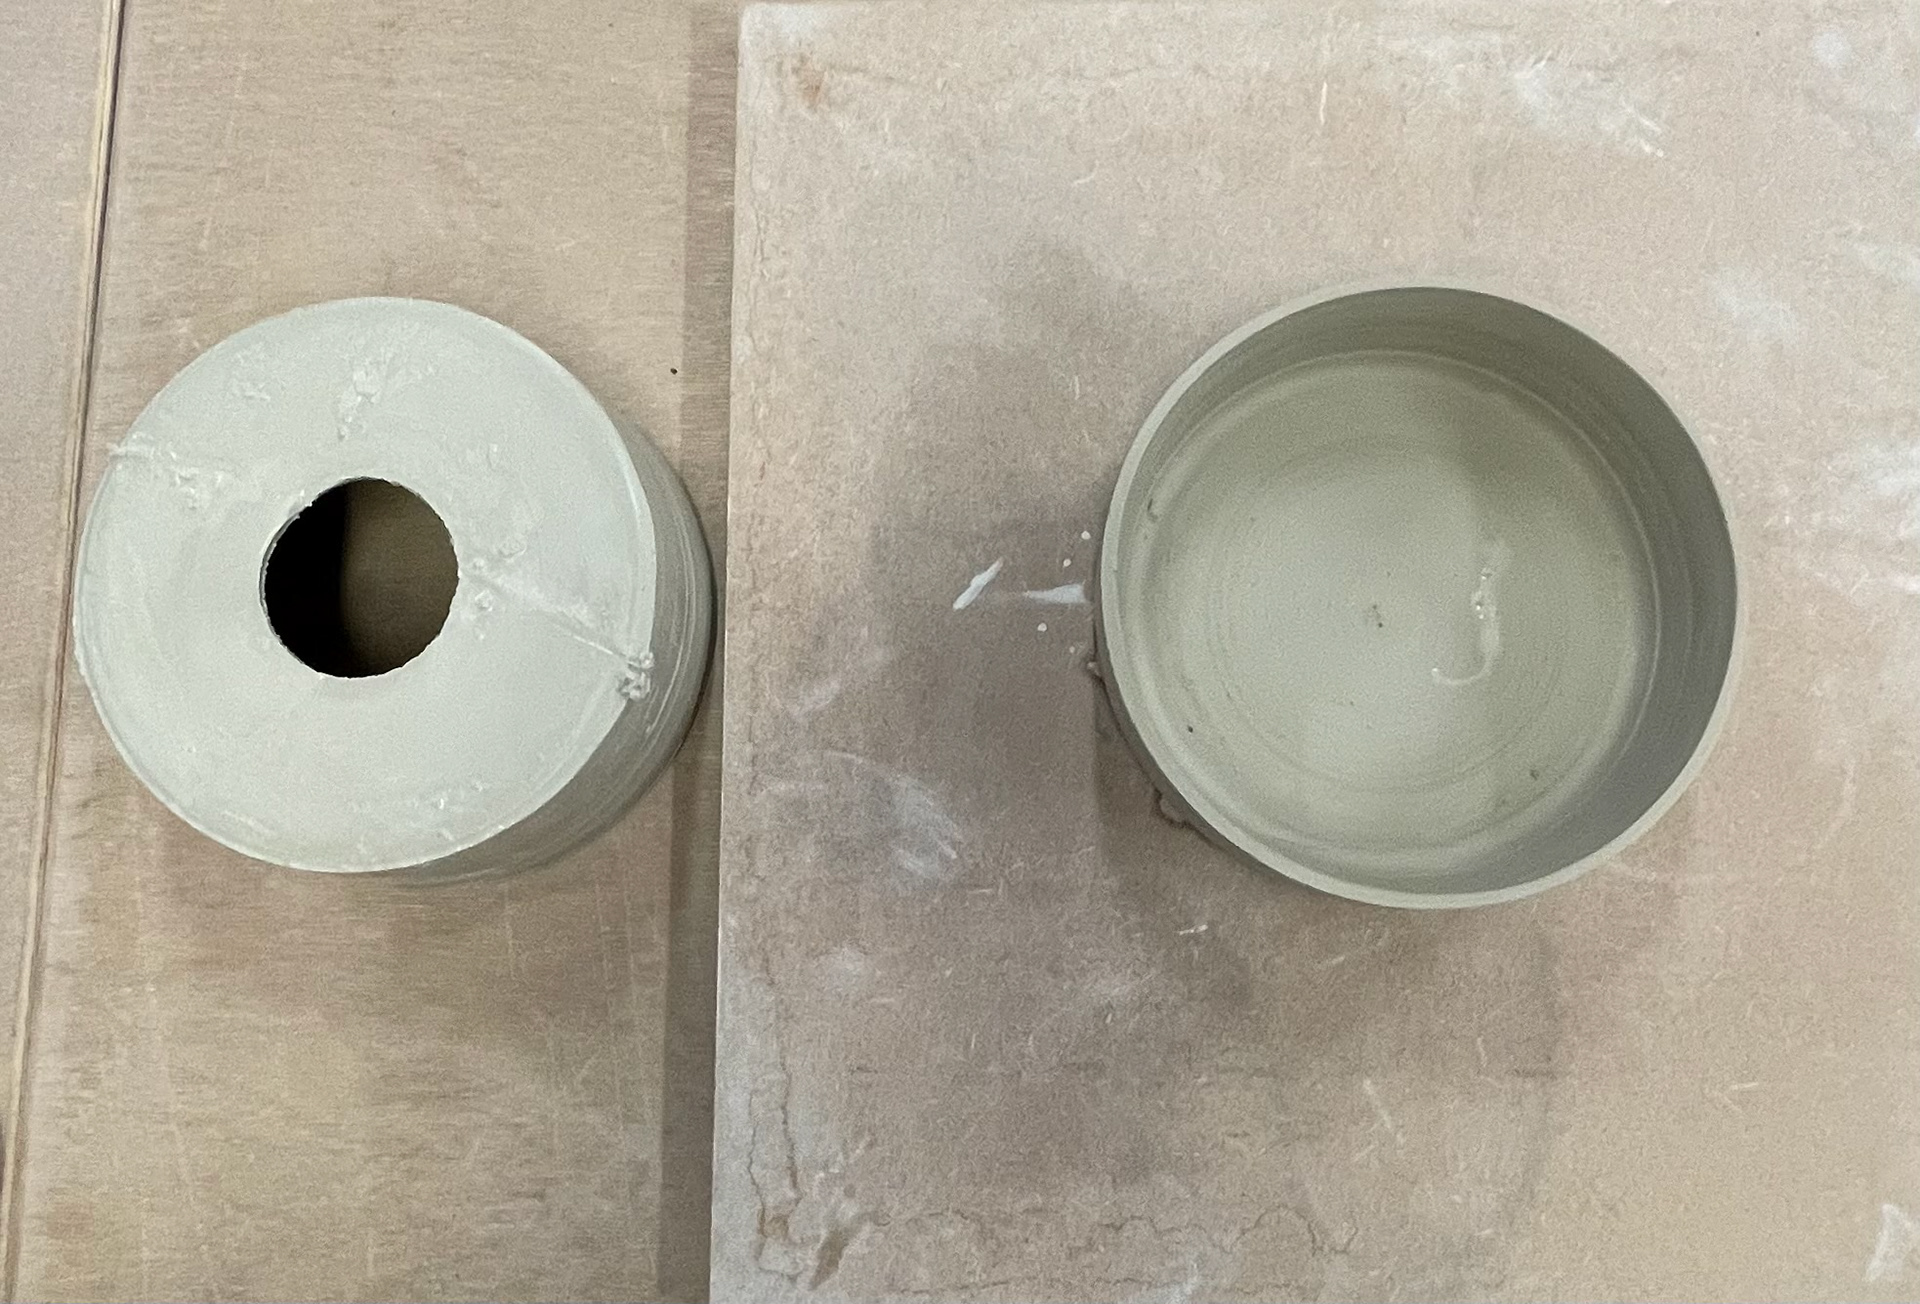
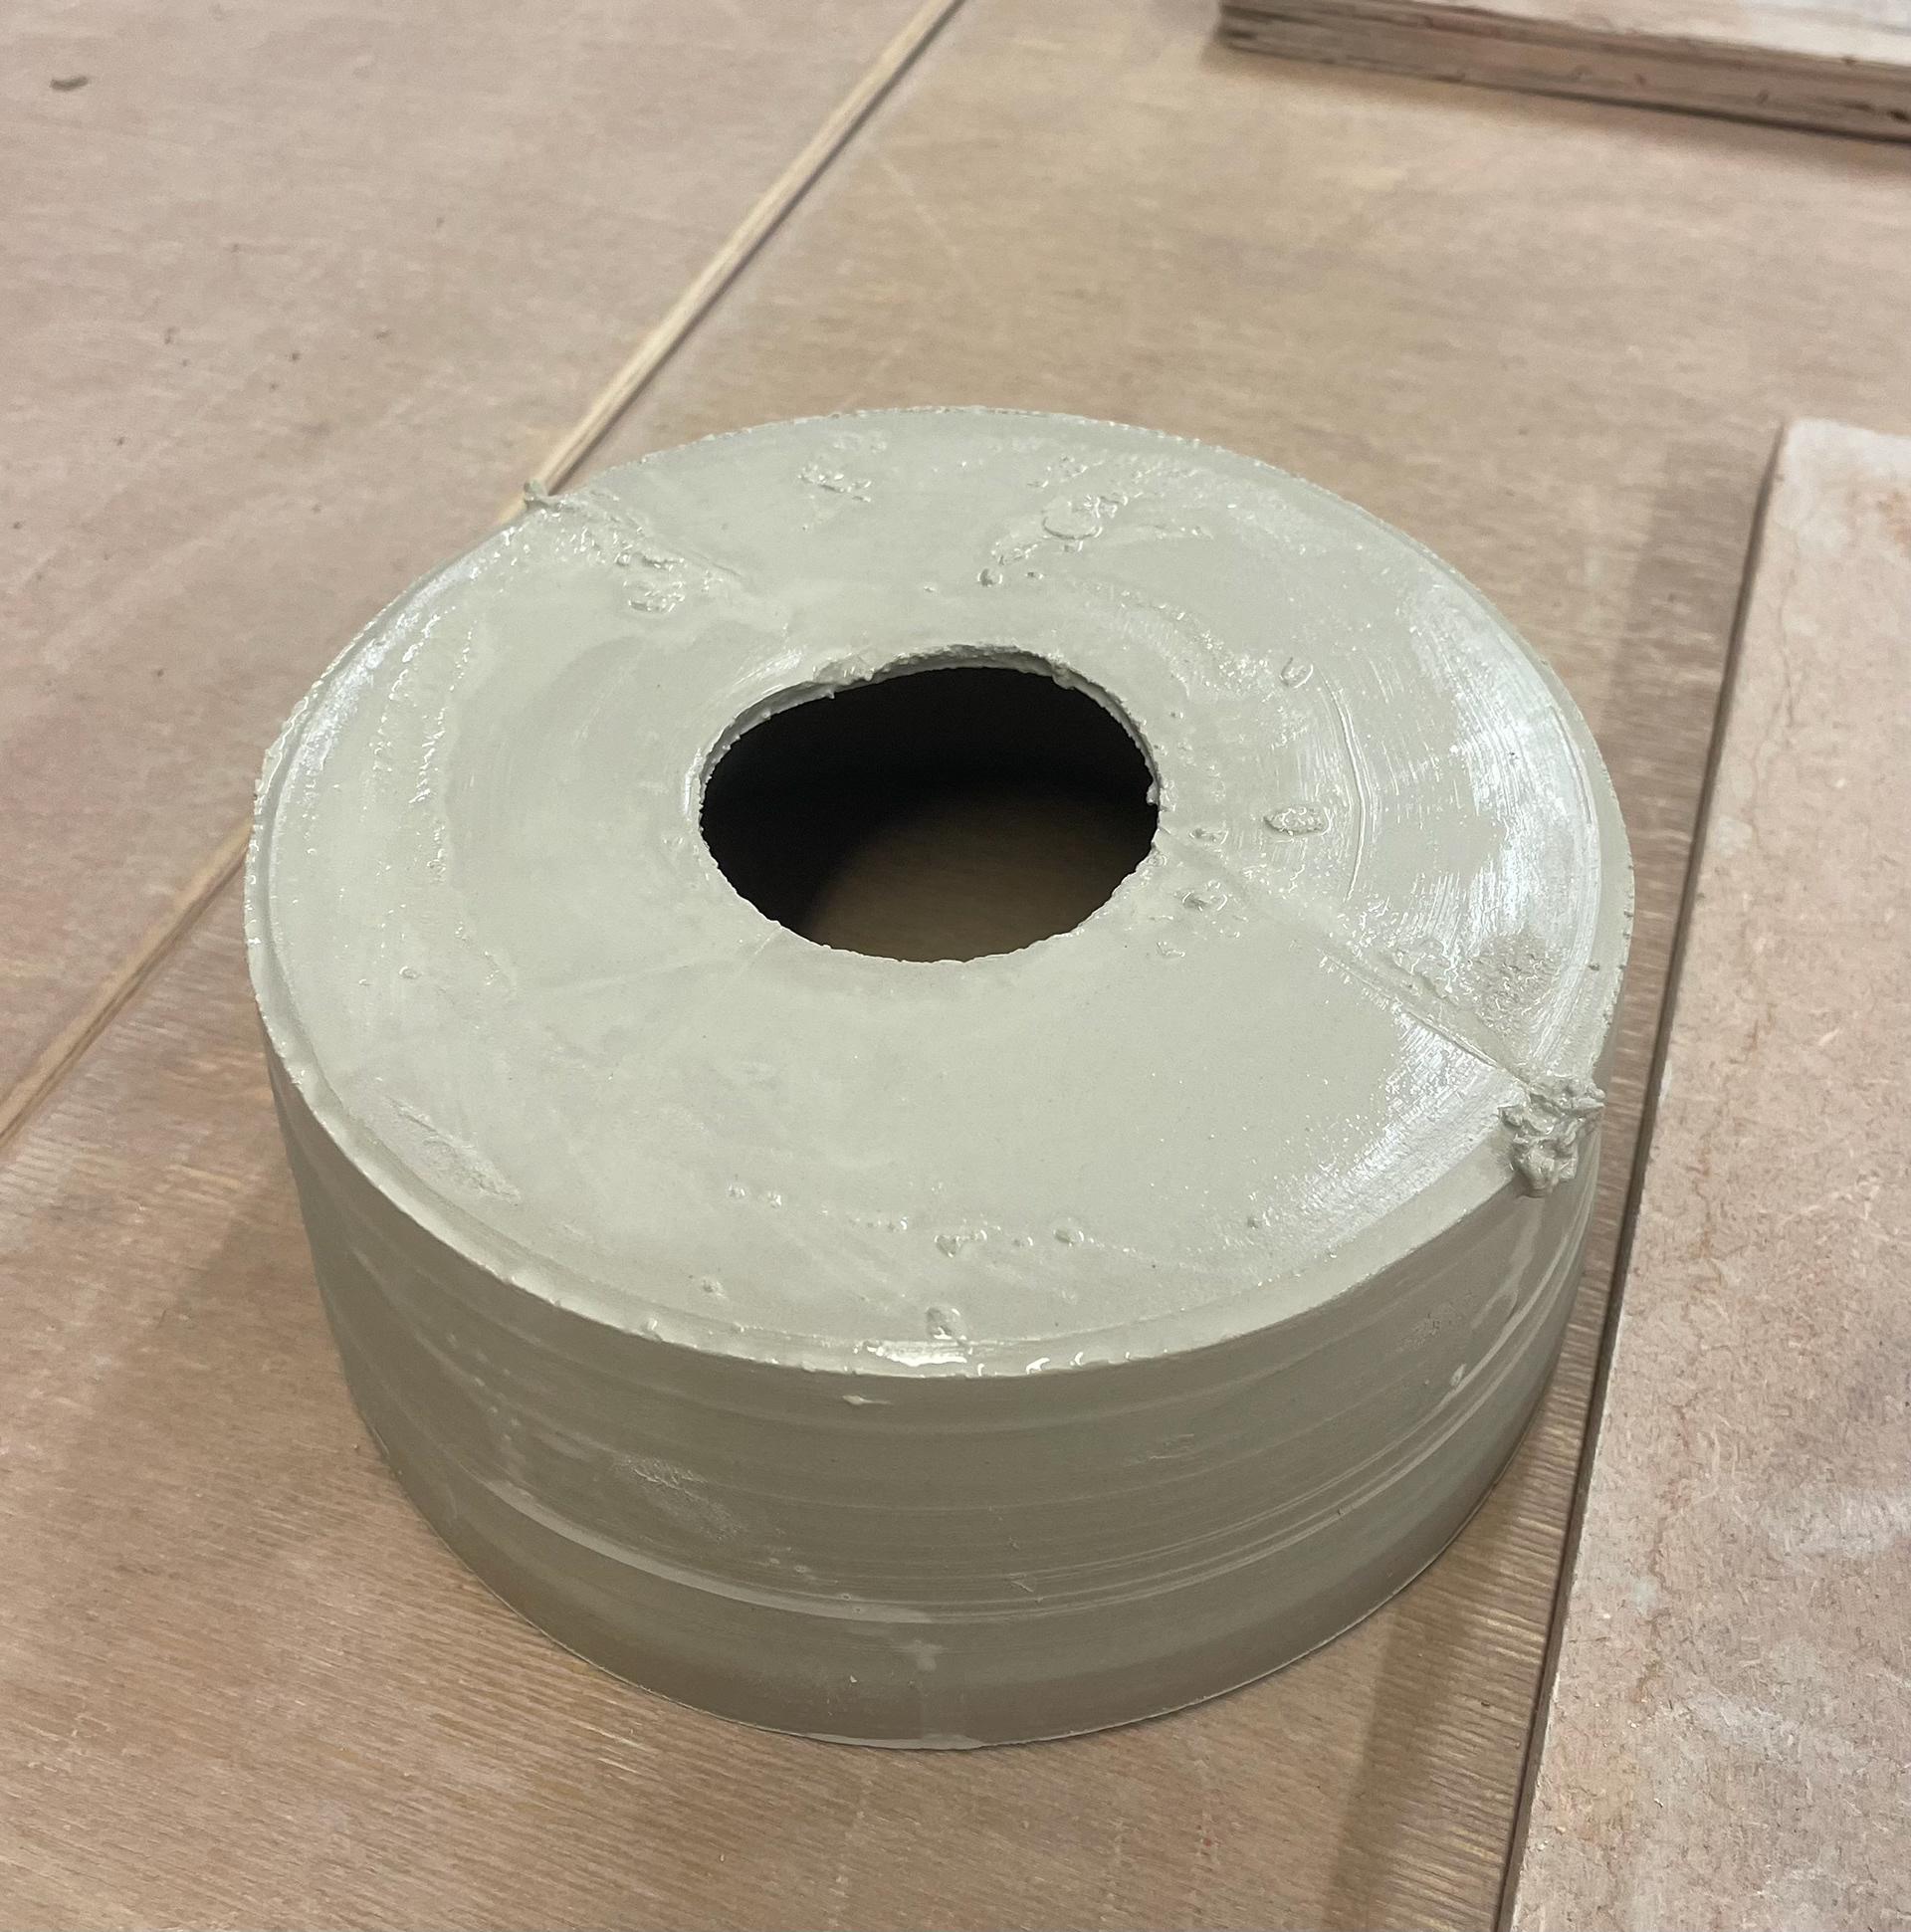
This was my first large throwing vessel with three coloured clays. I wanted to practise throwing with coloured clay and become comfortable with throwing, getting as much practice as possible. I used a total of 1000g using black iron 2%, black nickel 2% and magnesium 2%. At this point of making, I hadn't established the style that I wanted to throw in just wanted to gain practice. As I was throwing in two parts, I split the clay into equal amounts. I was trying to improve by getting the right technique. I learned a lot from throwing this piece, mainly that I needed to throw with a larger amount of clay this is because the walls were too thin, especially after trimming them. This meant that it would have led to cracks during firing and could lead to the vessel warping more. I also found that as I threw it thin, it also meant that the base was really thin this meant that once I cut it away from the wheel, the base disconnected from the vessel, leaving an open top. This is not what I intended to do, and with it being so thin, it dried at different speeds and started to crumble at the rim of the vessel. This has taught me that I need to work on throwing with thicker walls and that I need to throw with a thicker base that gives me a fully shut lid, which I then can open with a knife and pull the walls up, giving me a nice consistent rim of the opening of my vessel.
Think About Texture and How That's Incorporated
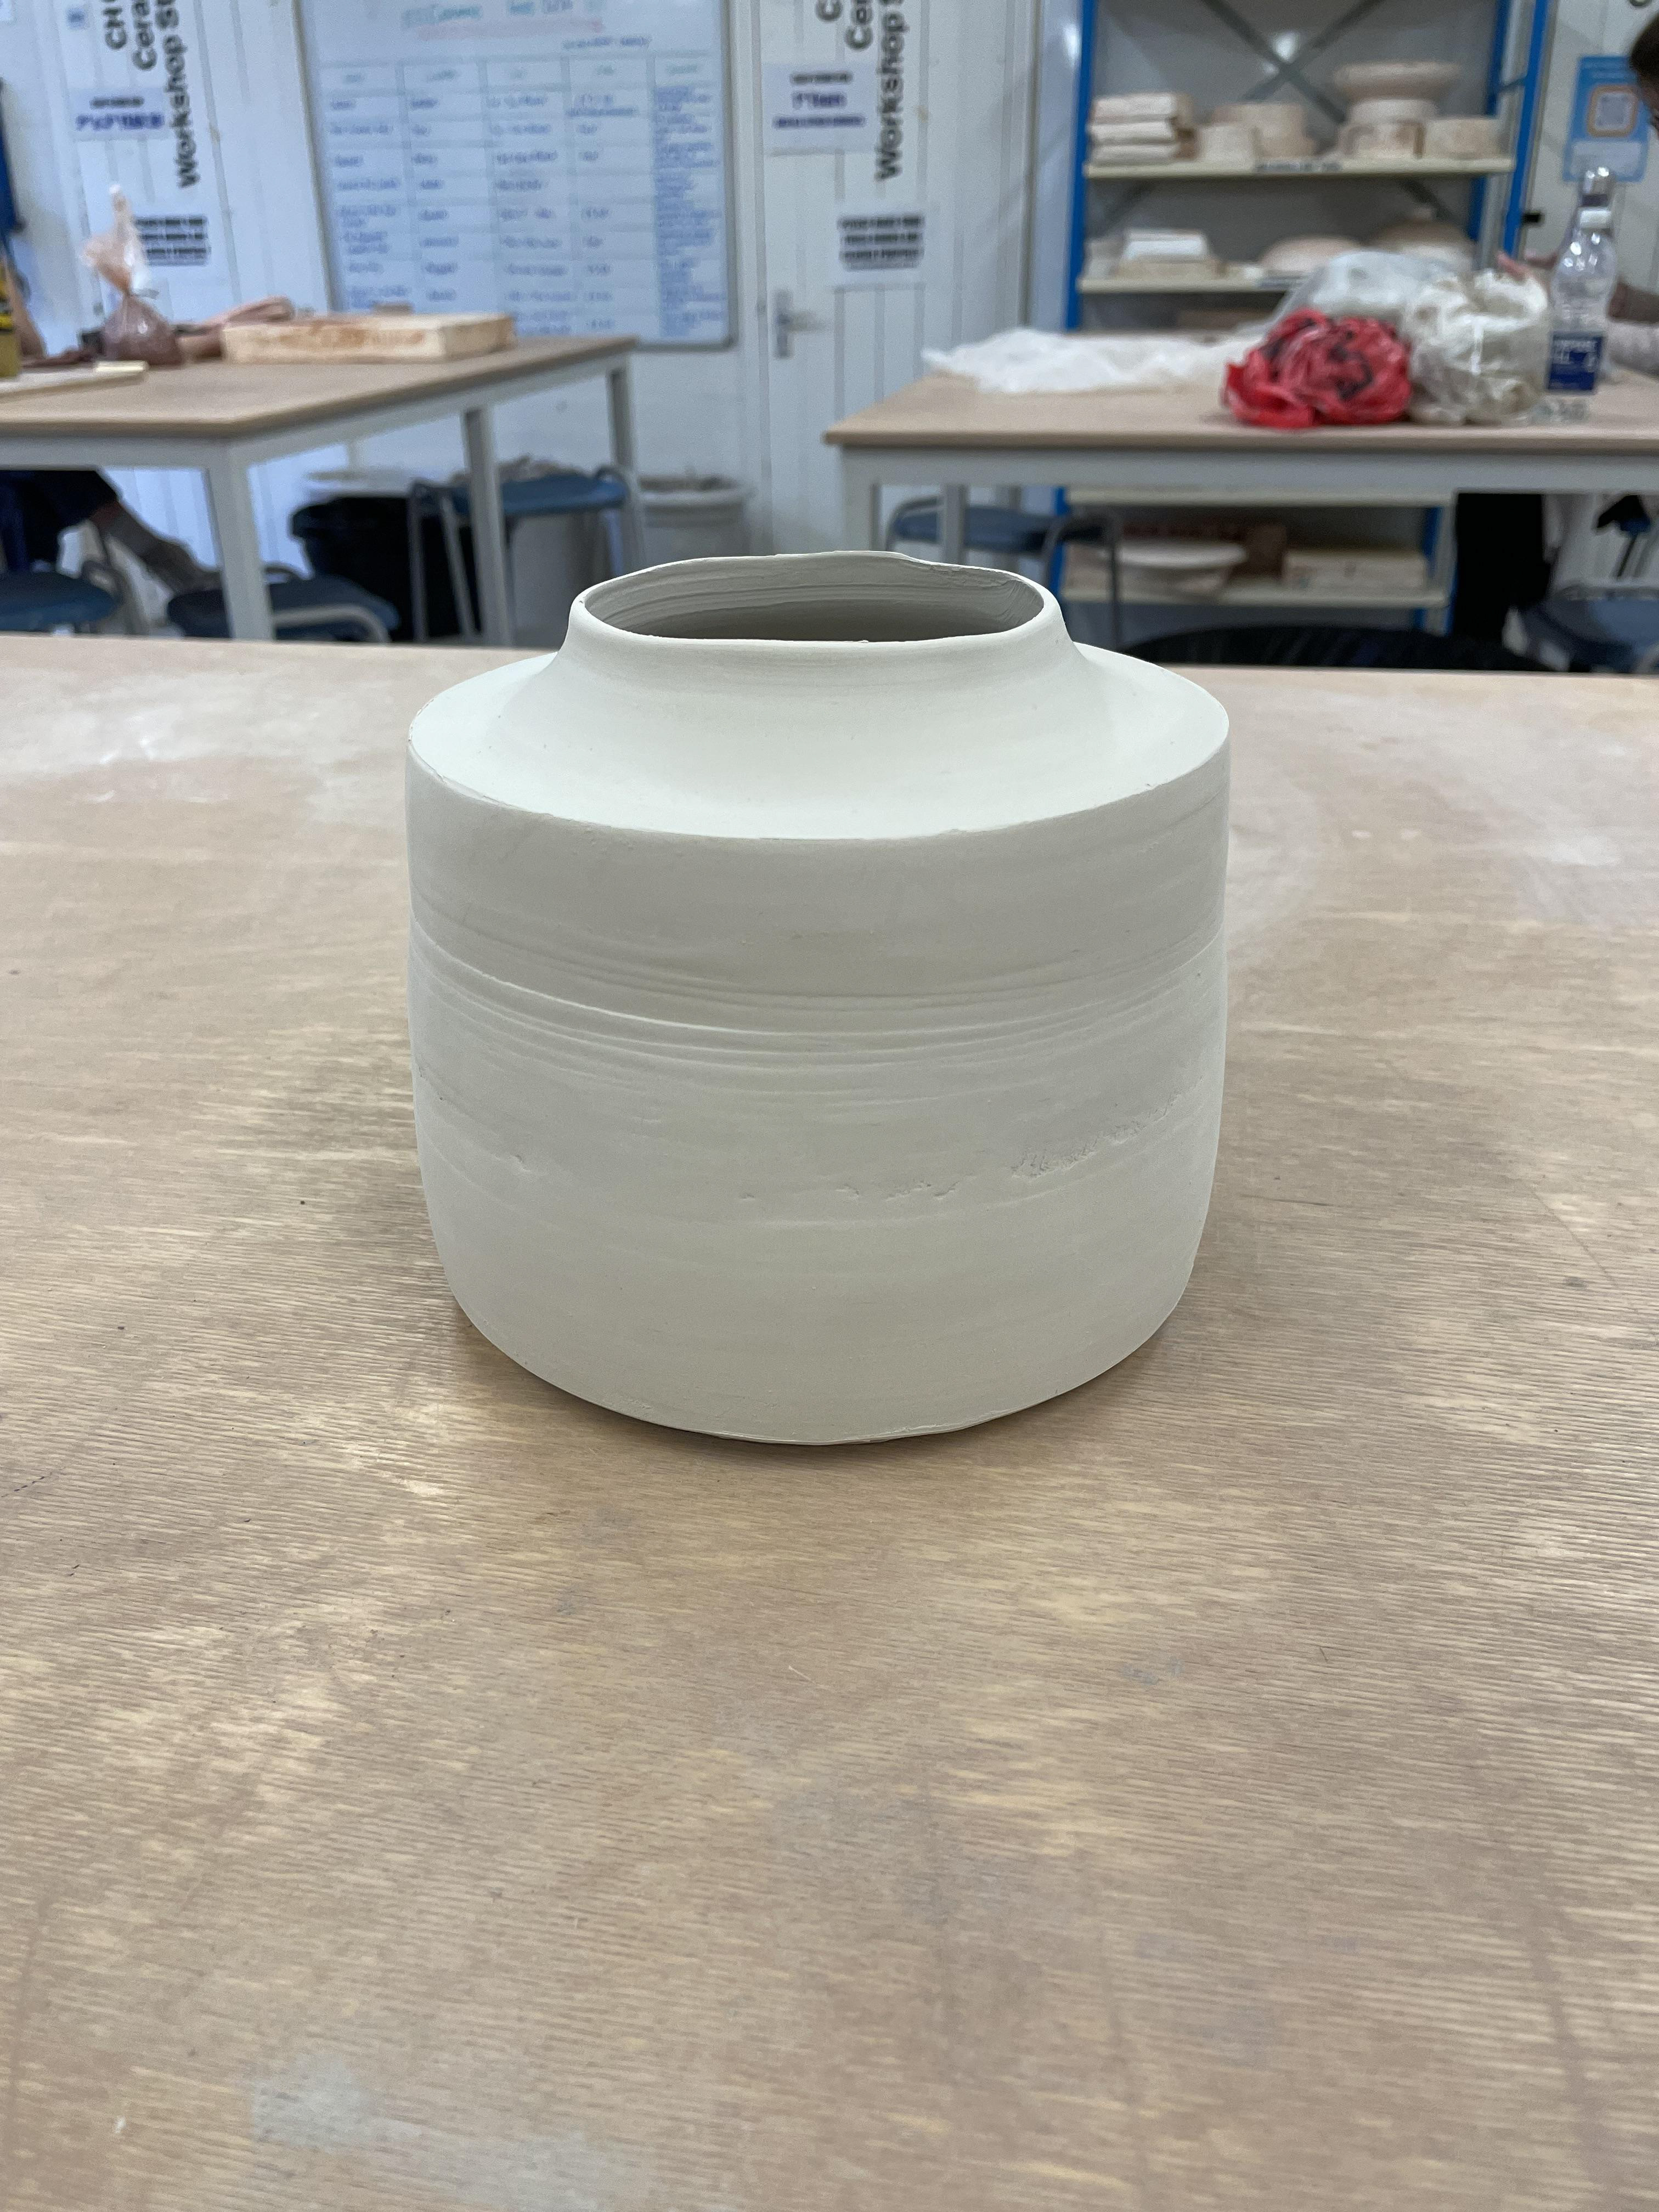
In this practice piece, I aimed to explore a texture profile in my vessel using a pebble as a rib to create ridges throughout. I was surprised by the outcome; while the natural rib did provide a clean and structured profile, it wasn't the organic form I was looking for. To achieve the desired texture, I threw the vessel in two parts, using the pebble as a rib on each. Once the parts were attached, I ribbed the surface to create a defined profile. Although the clean look didn't align with my initial vision, I was pleased with the top rim and the overall sizing of the vessel. This experiment has inspired me to create similar pieces for my final collection, adding diversity in sizes and forms. The process highlighted the importance of balance between structured and organic elements in my work, enhancing the connection to nature while maintaining a unique aesthetic appeal i think this could be accomplished by using a pebble as a rib to help form the walls instead of taking the form of the pebbles.

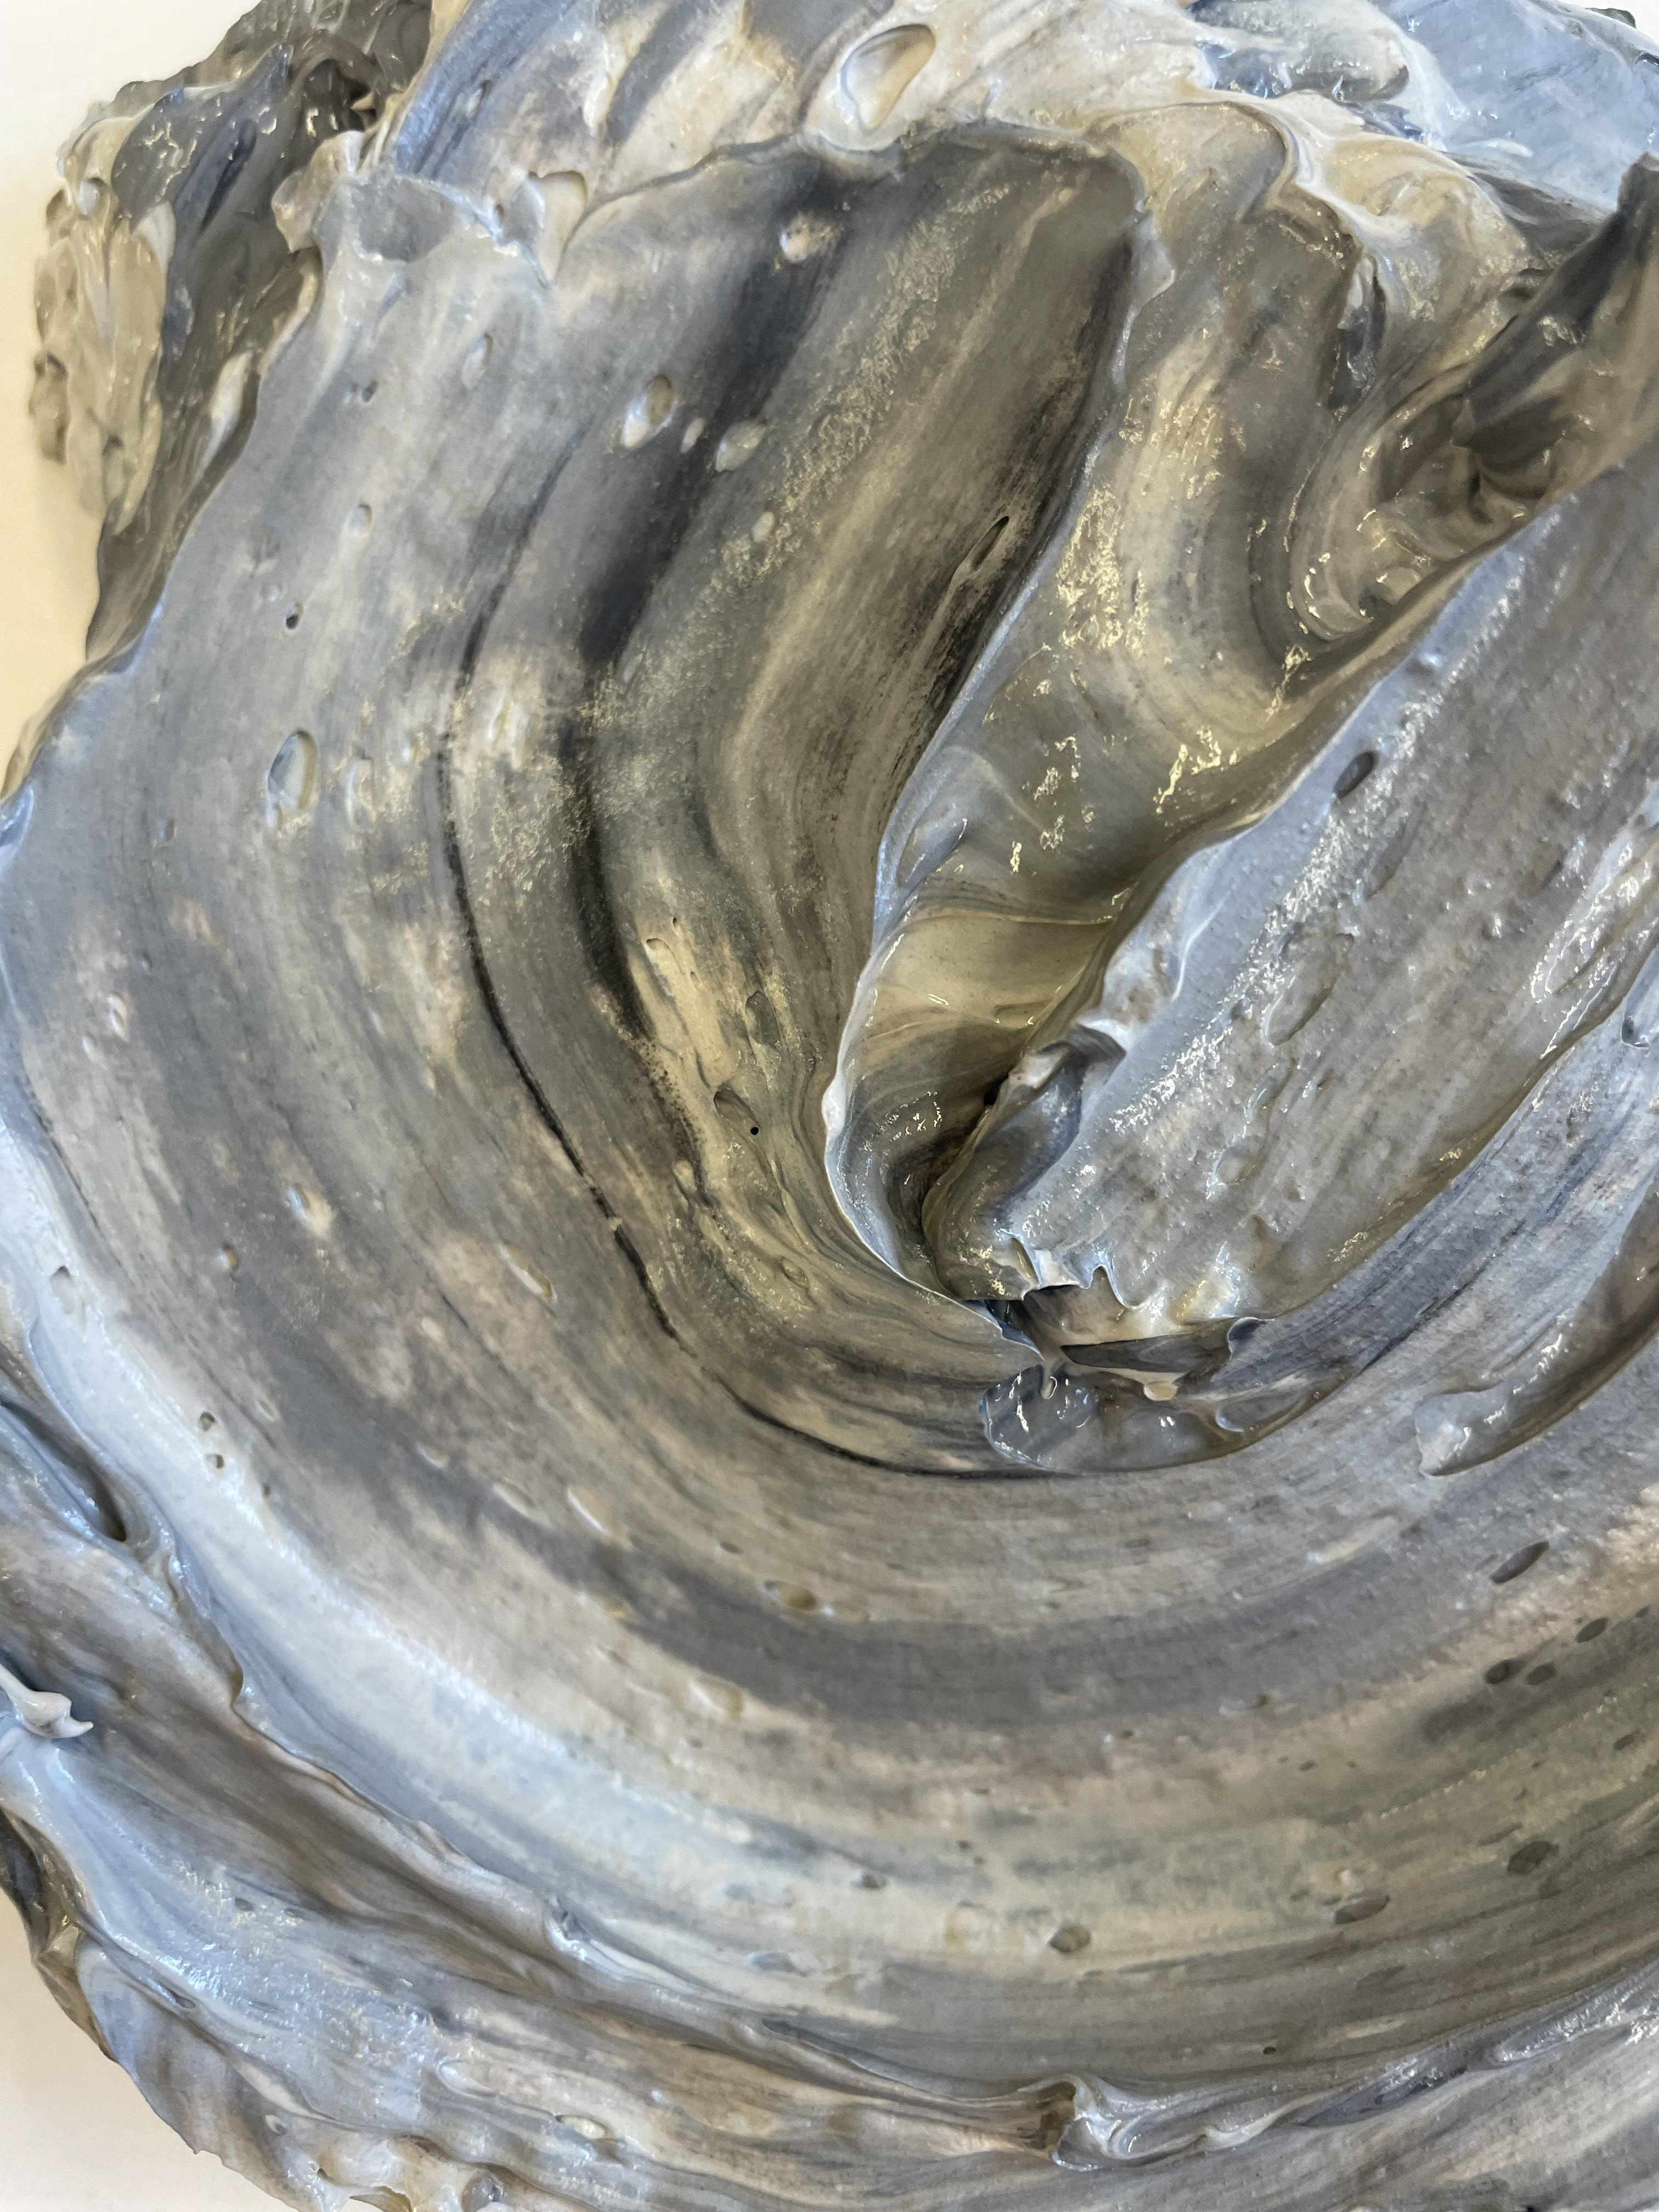
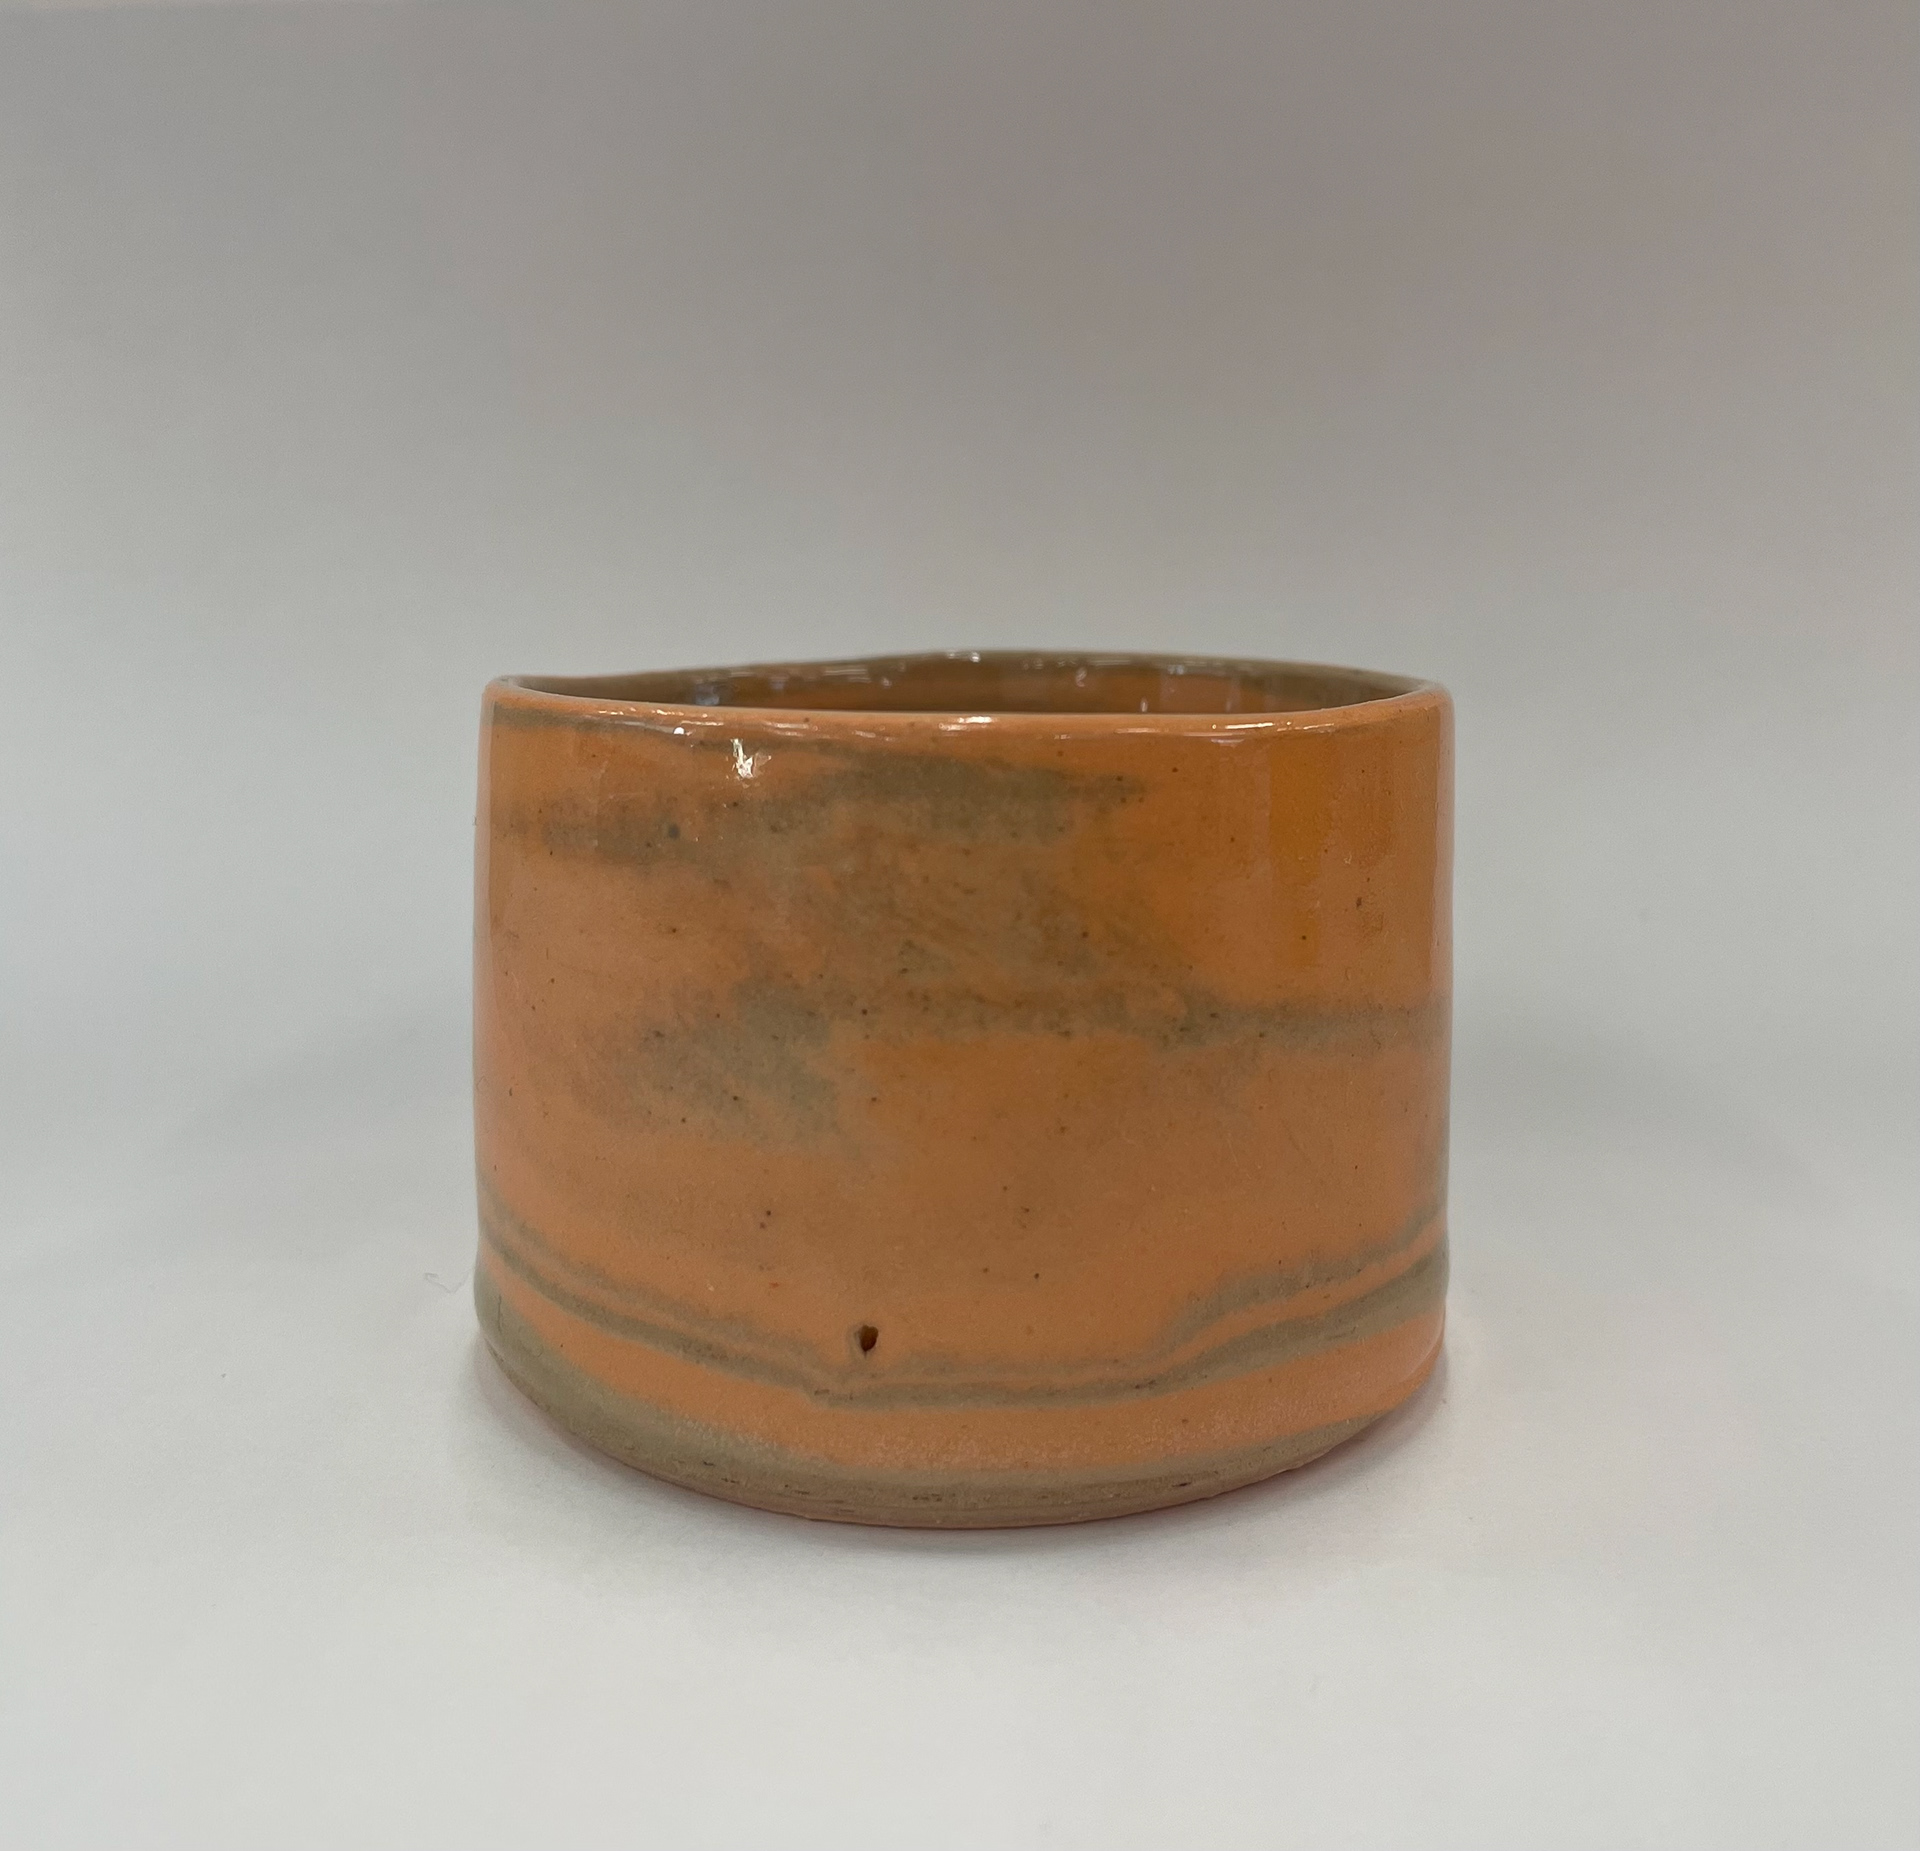
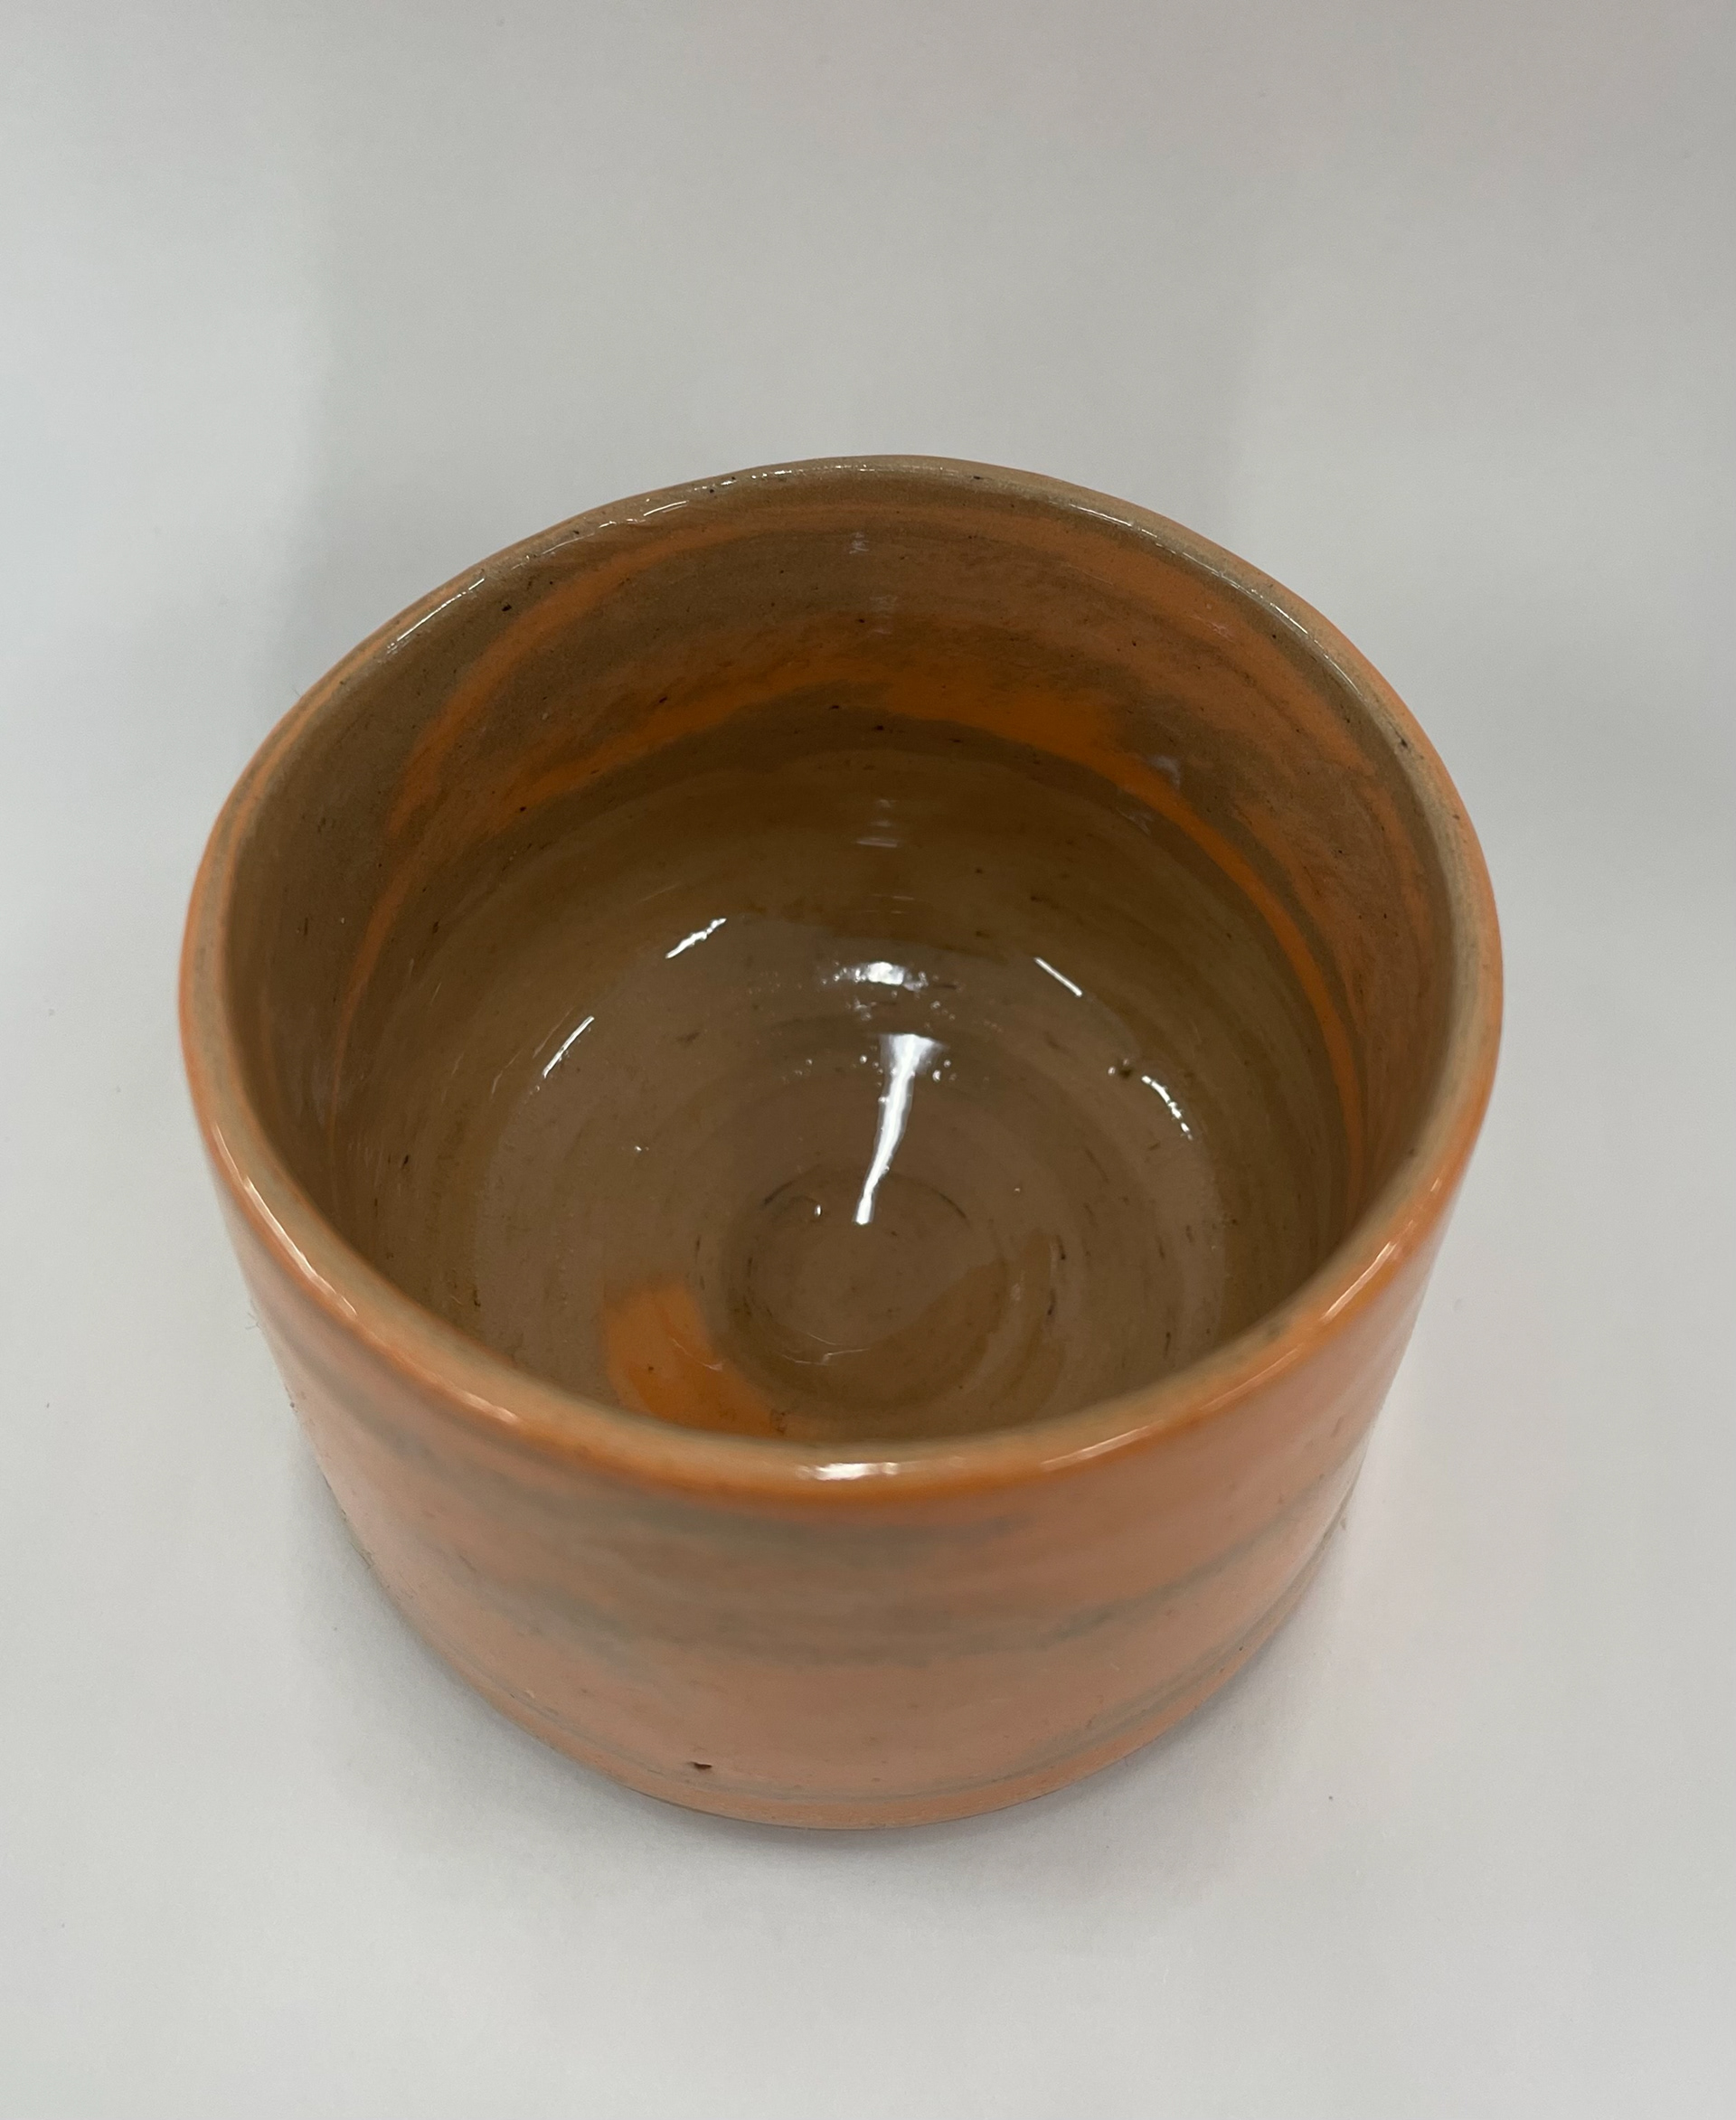
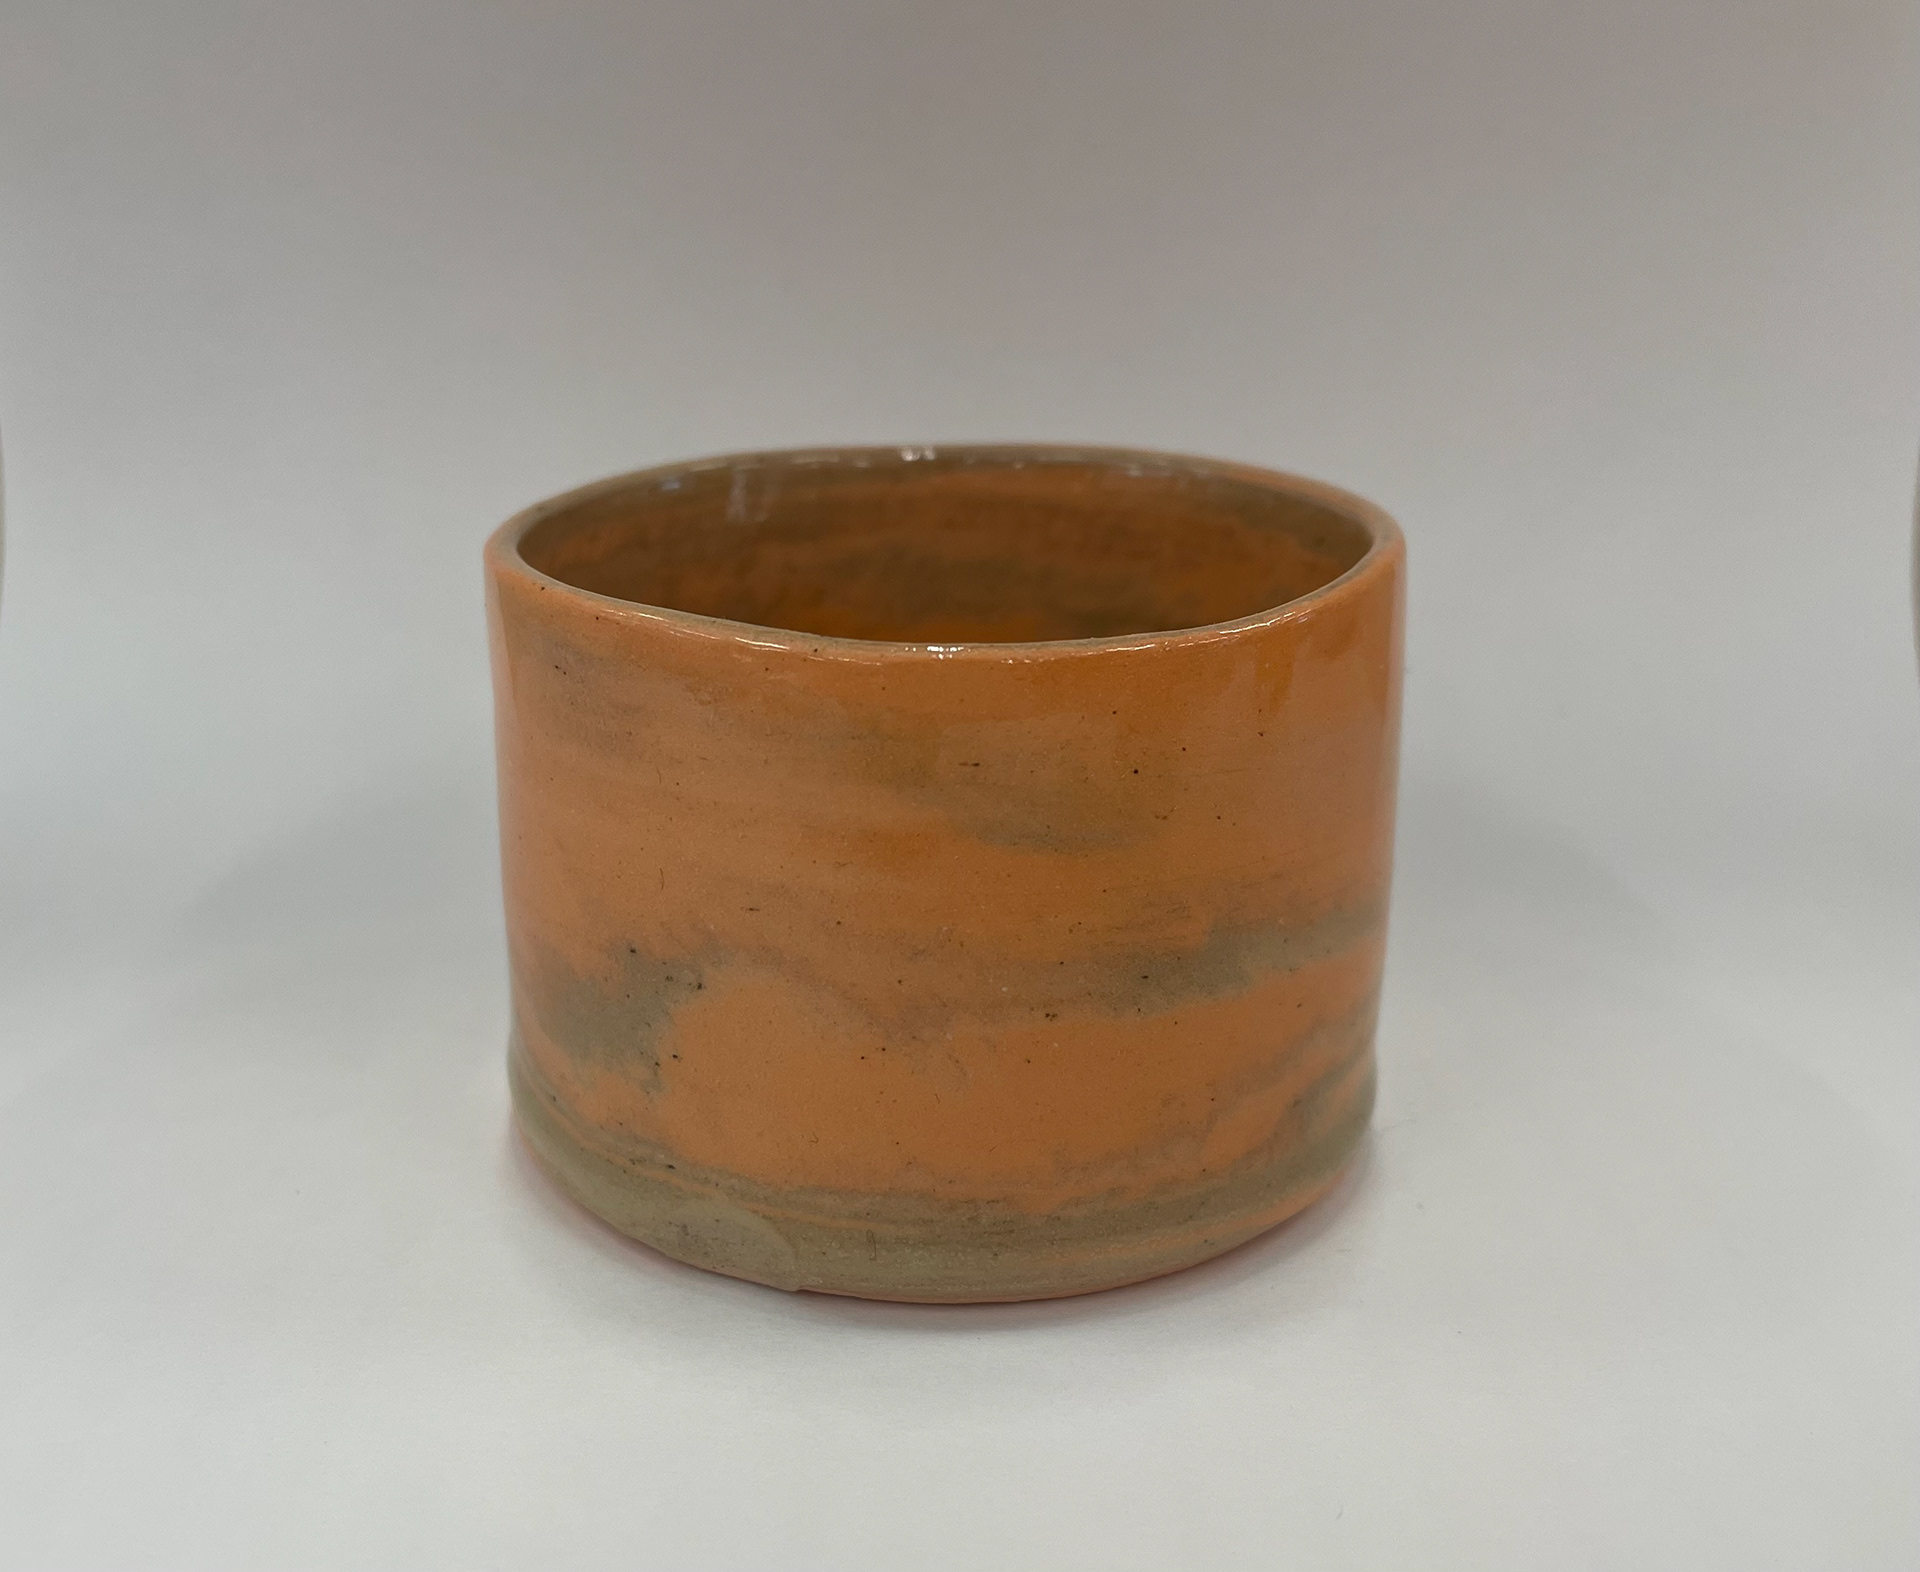
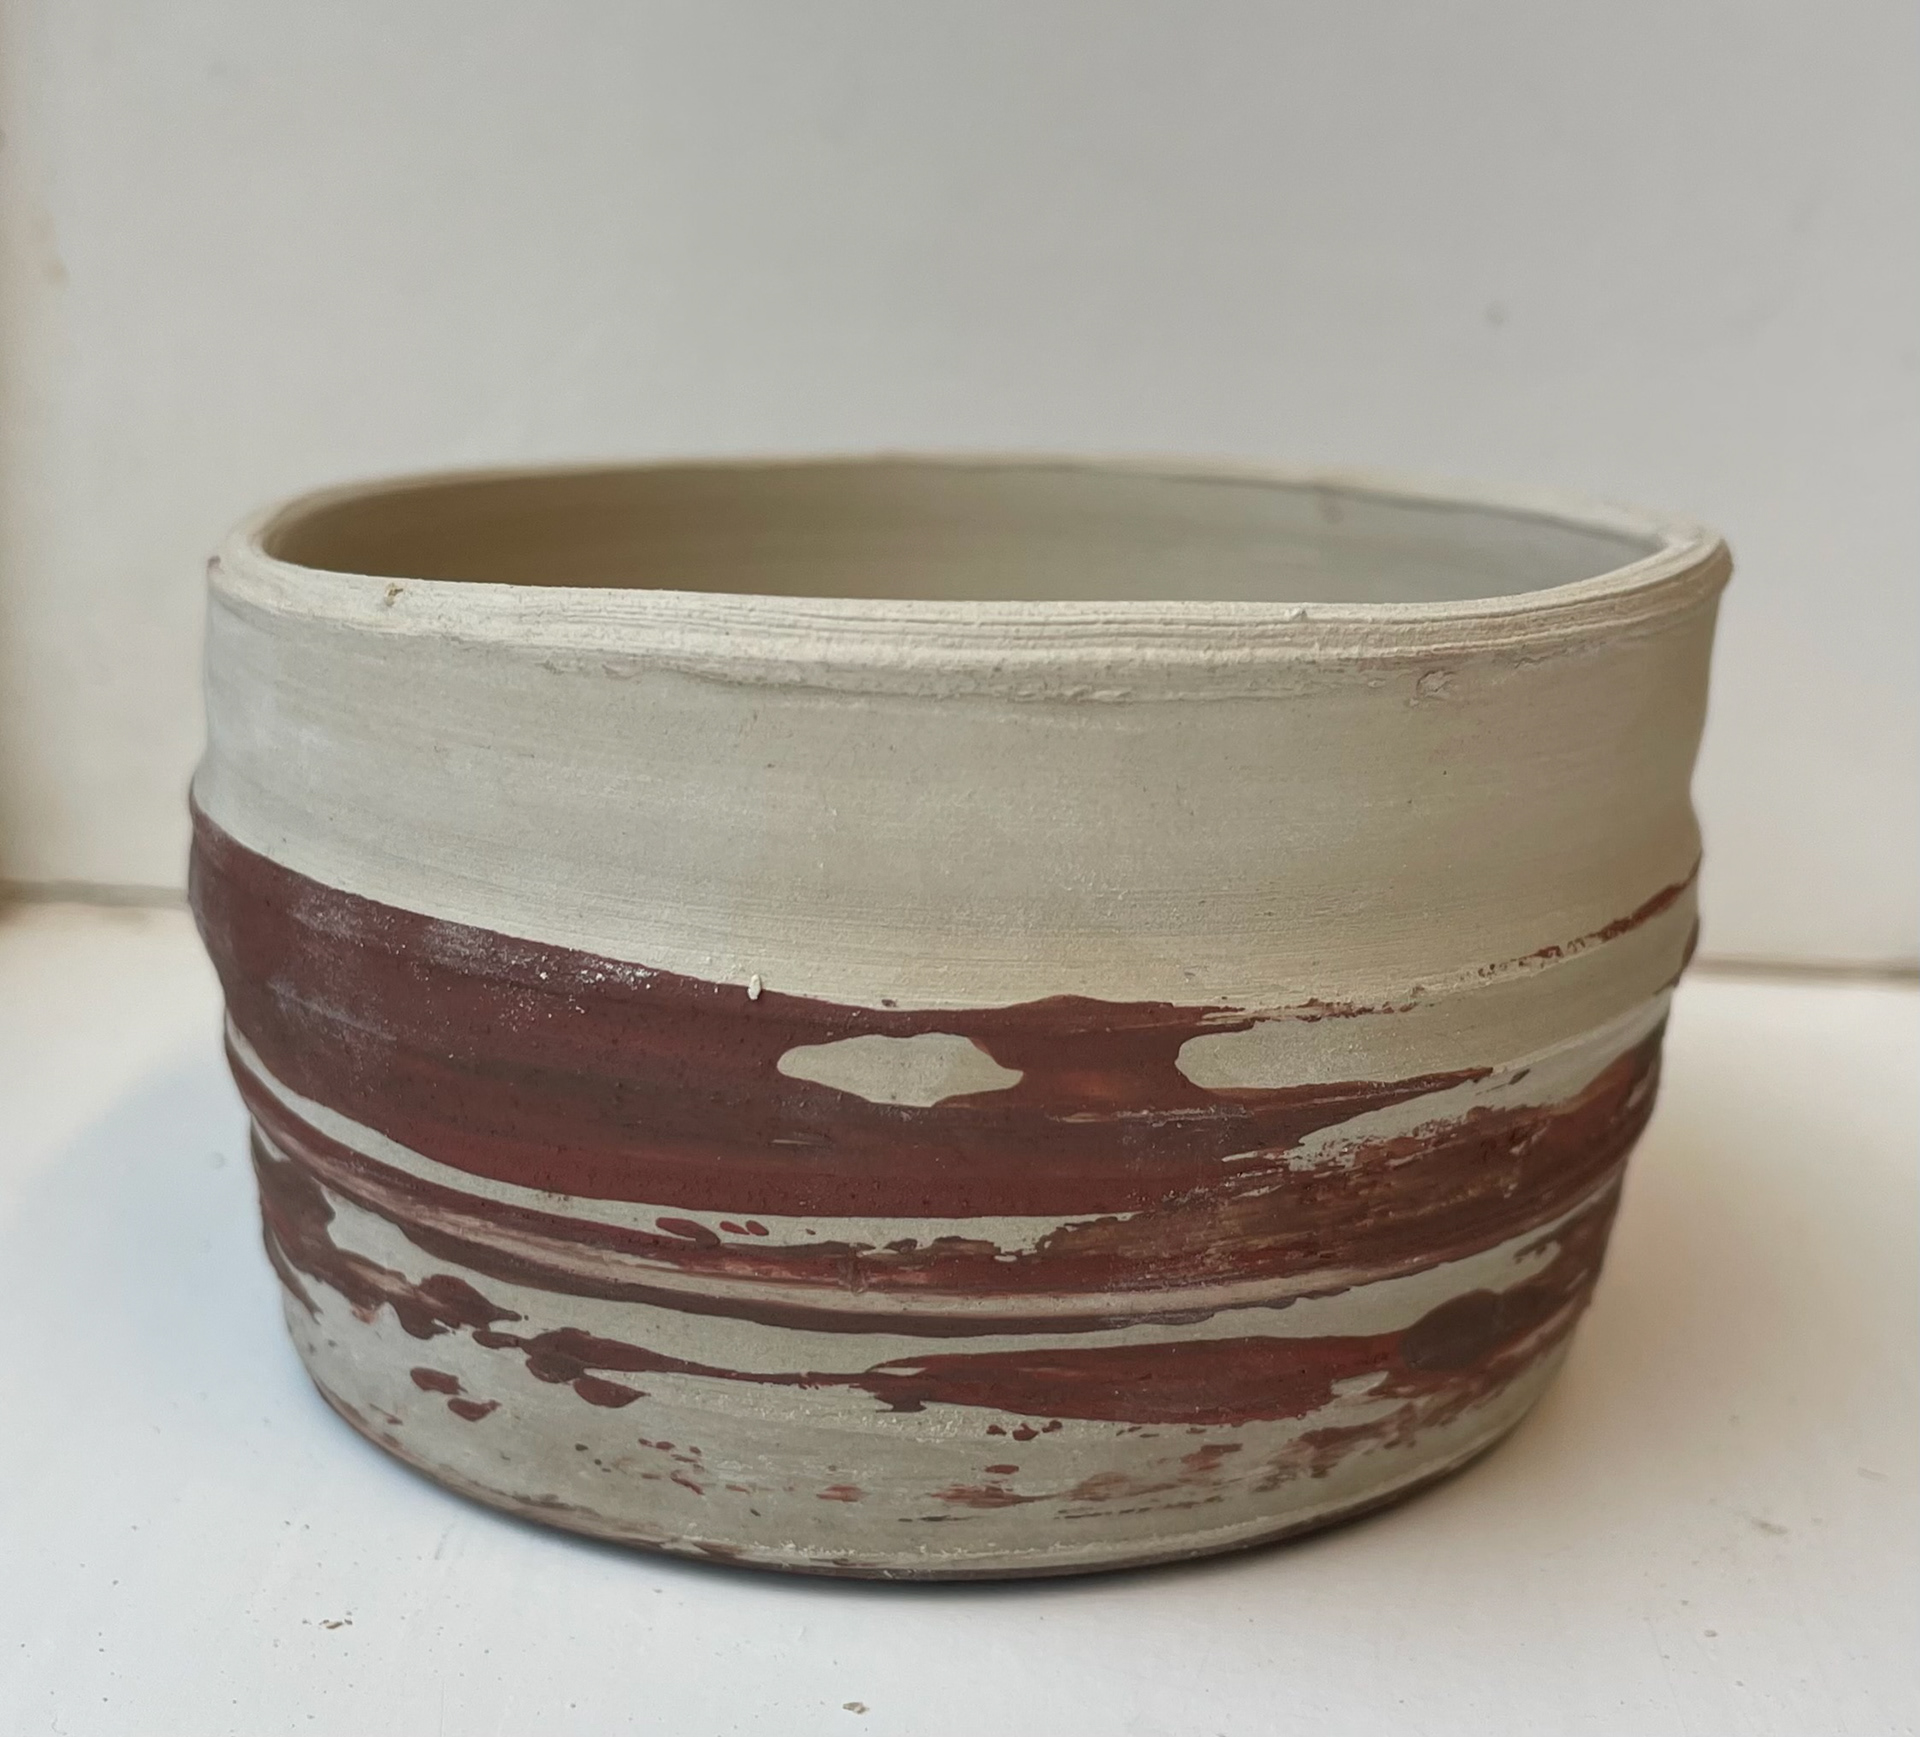
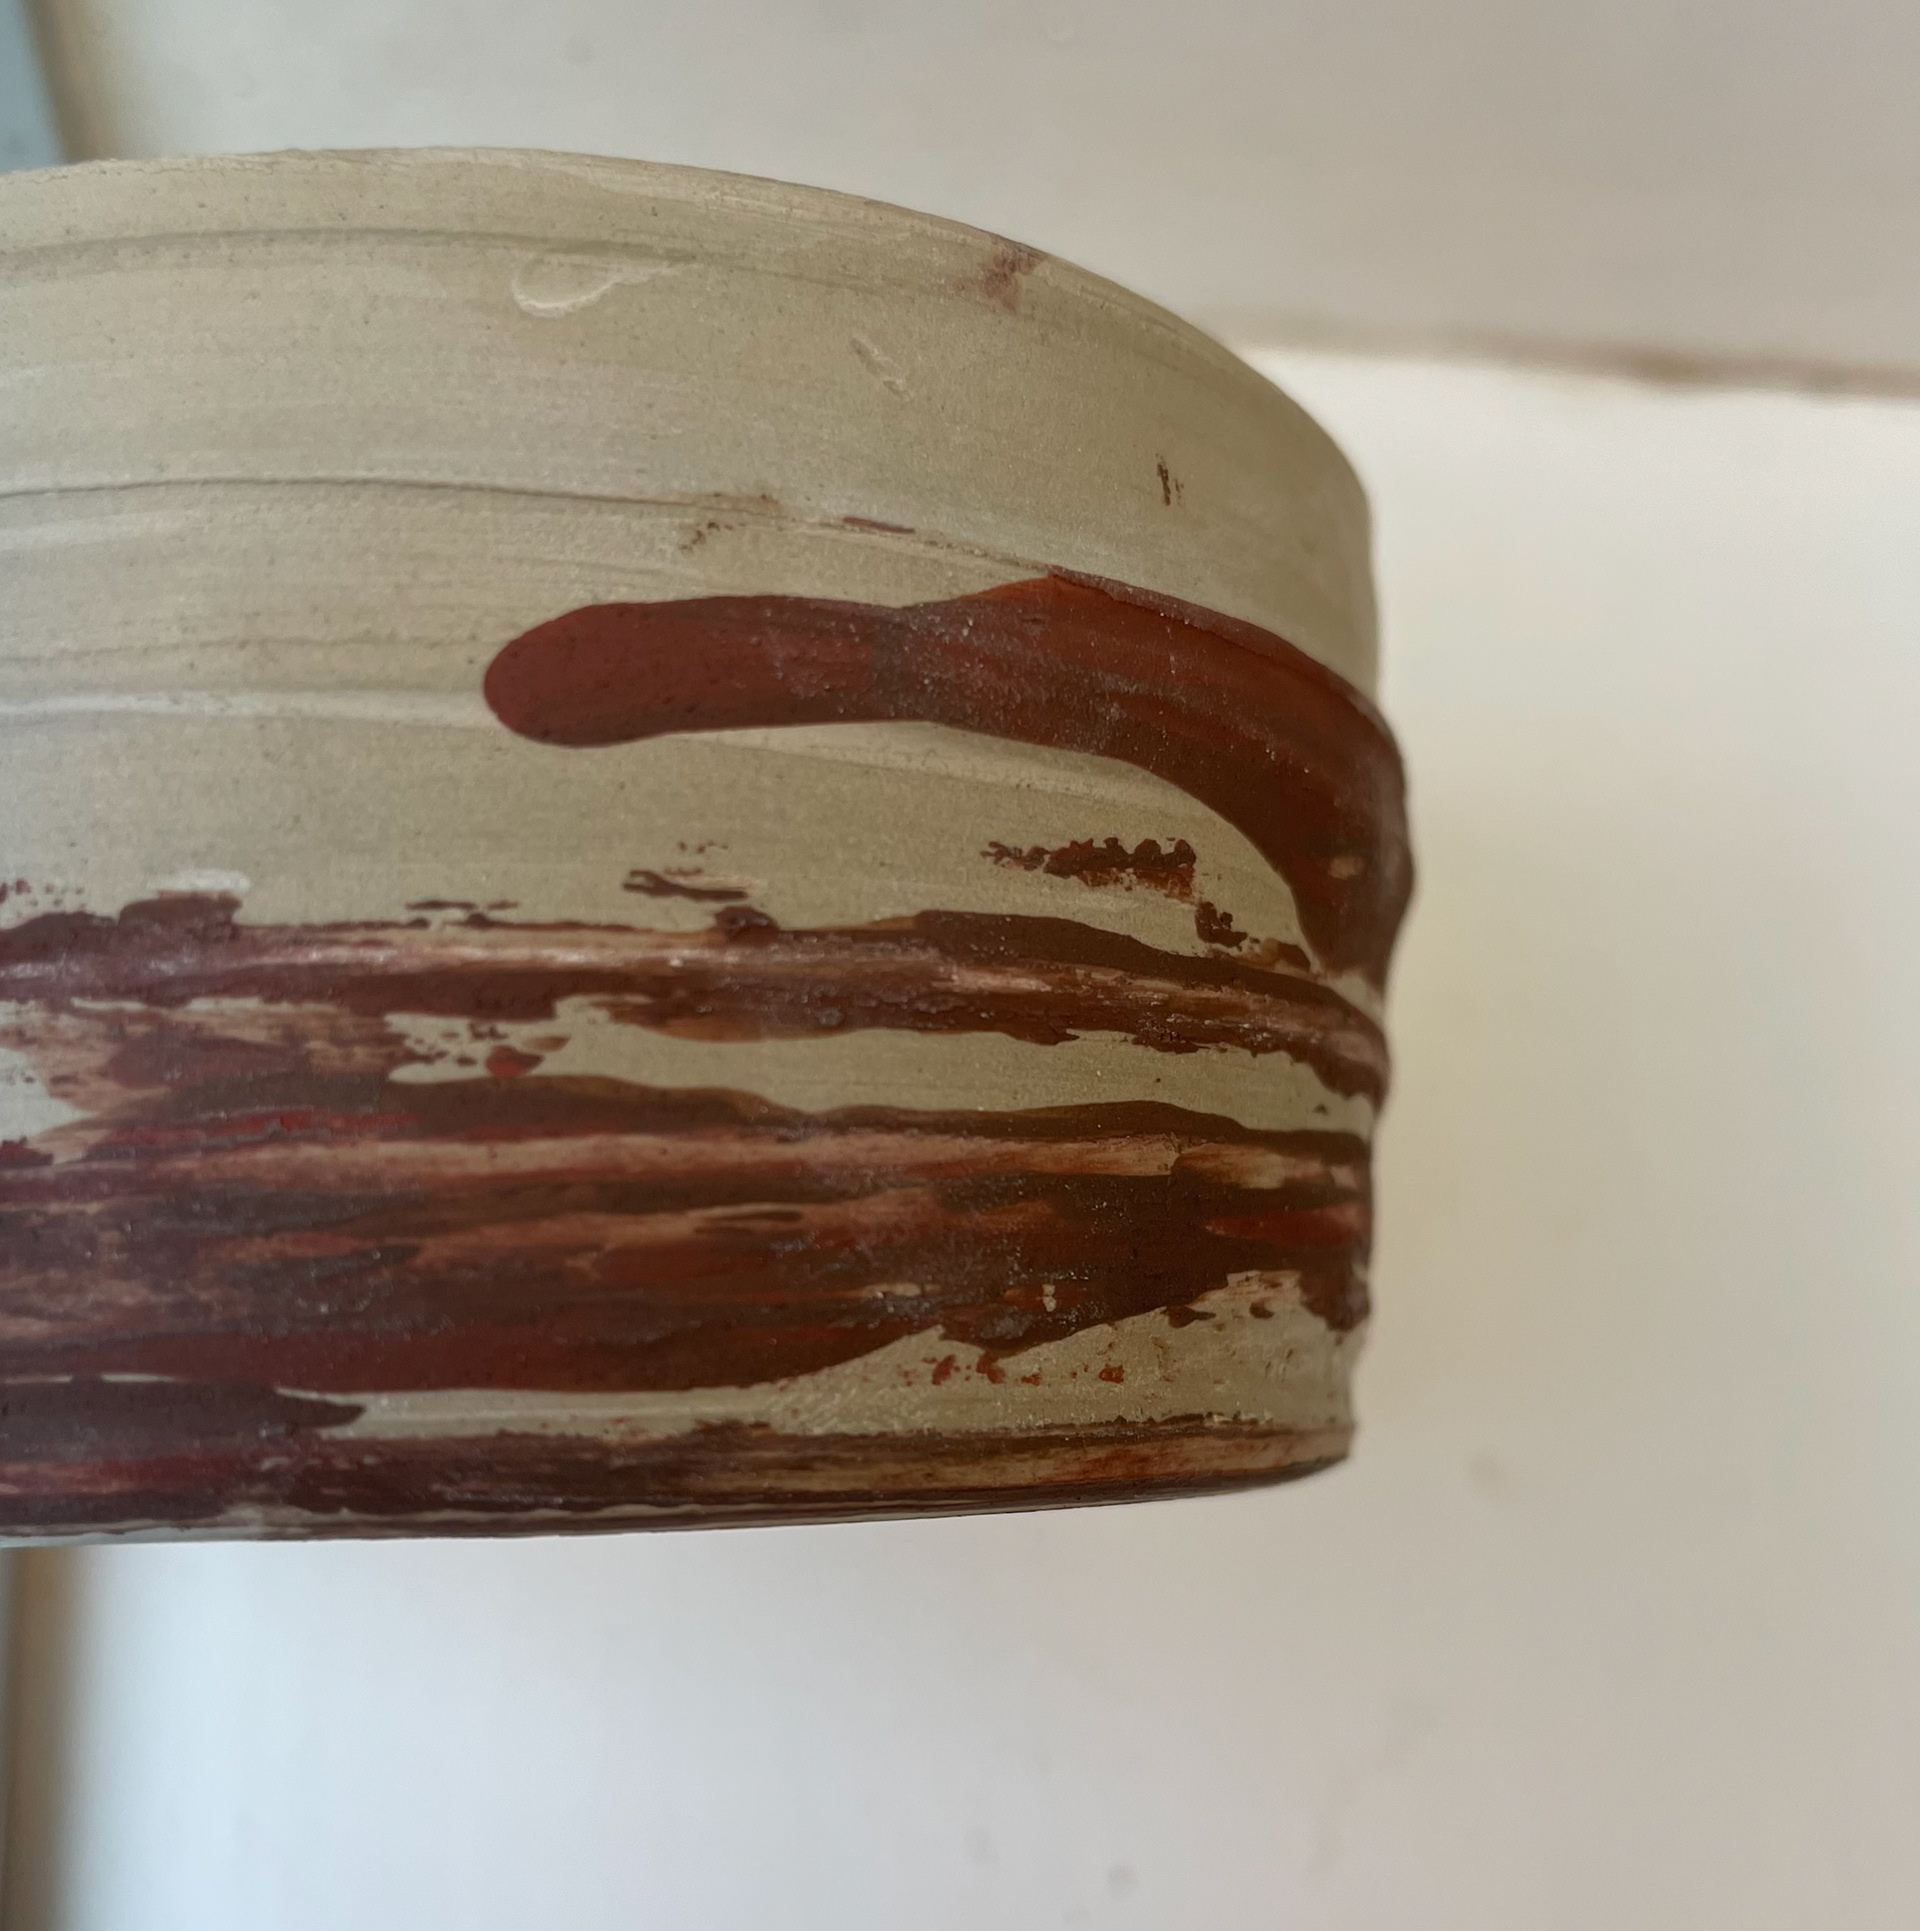
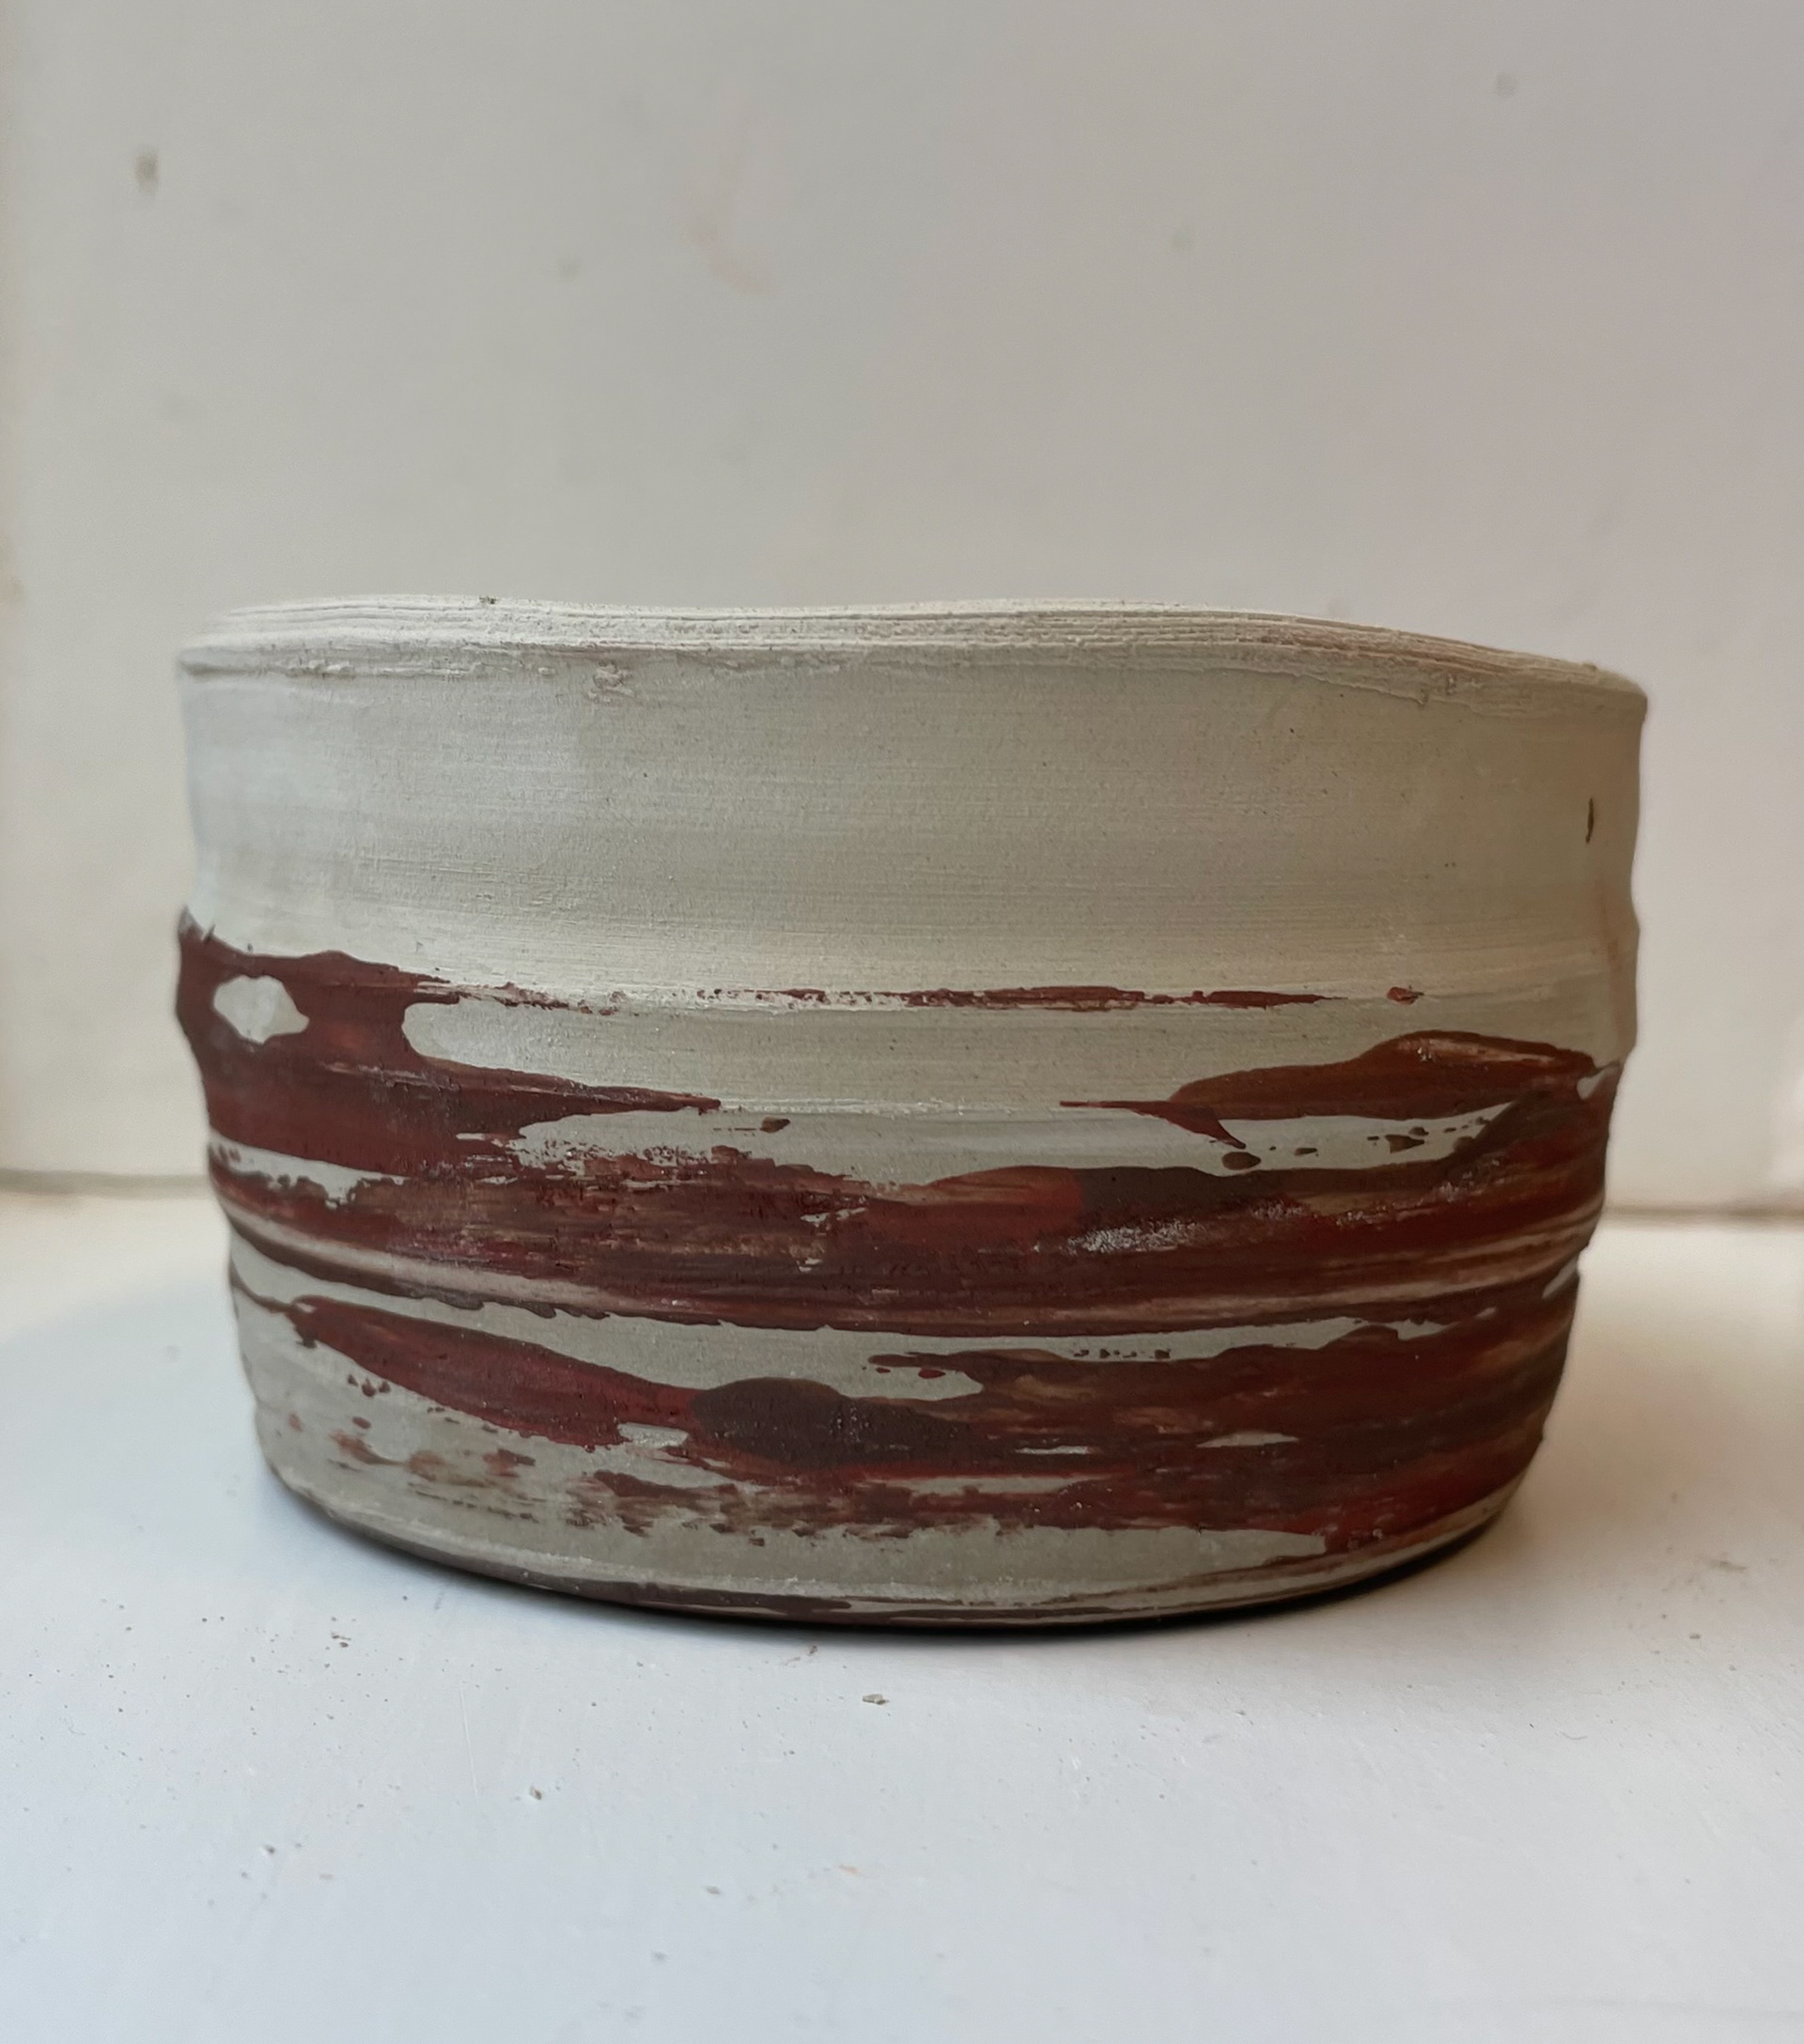
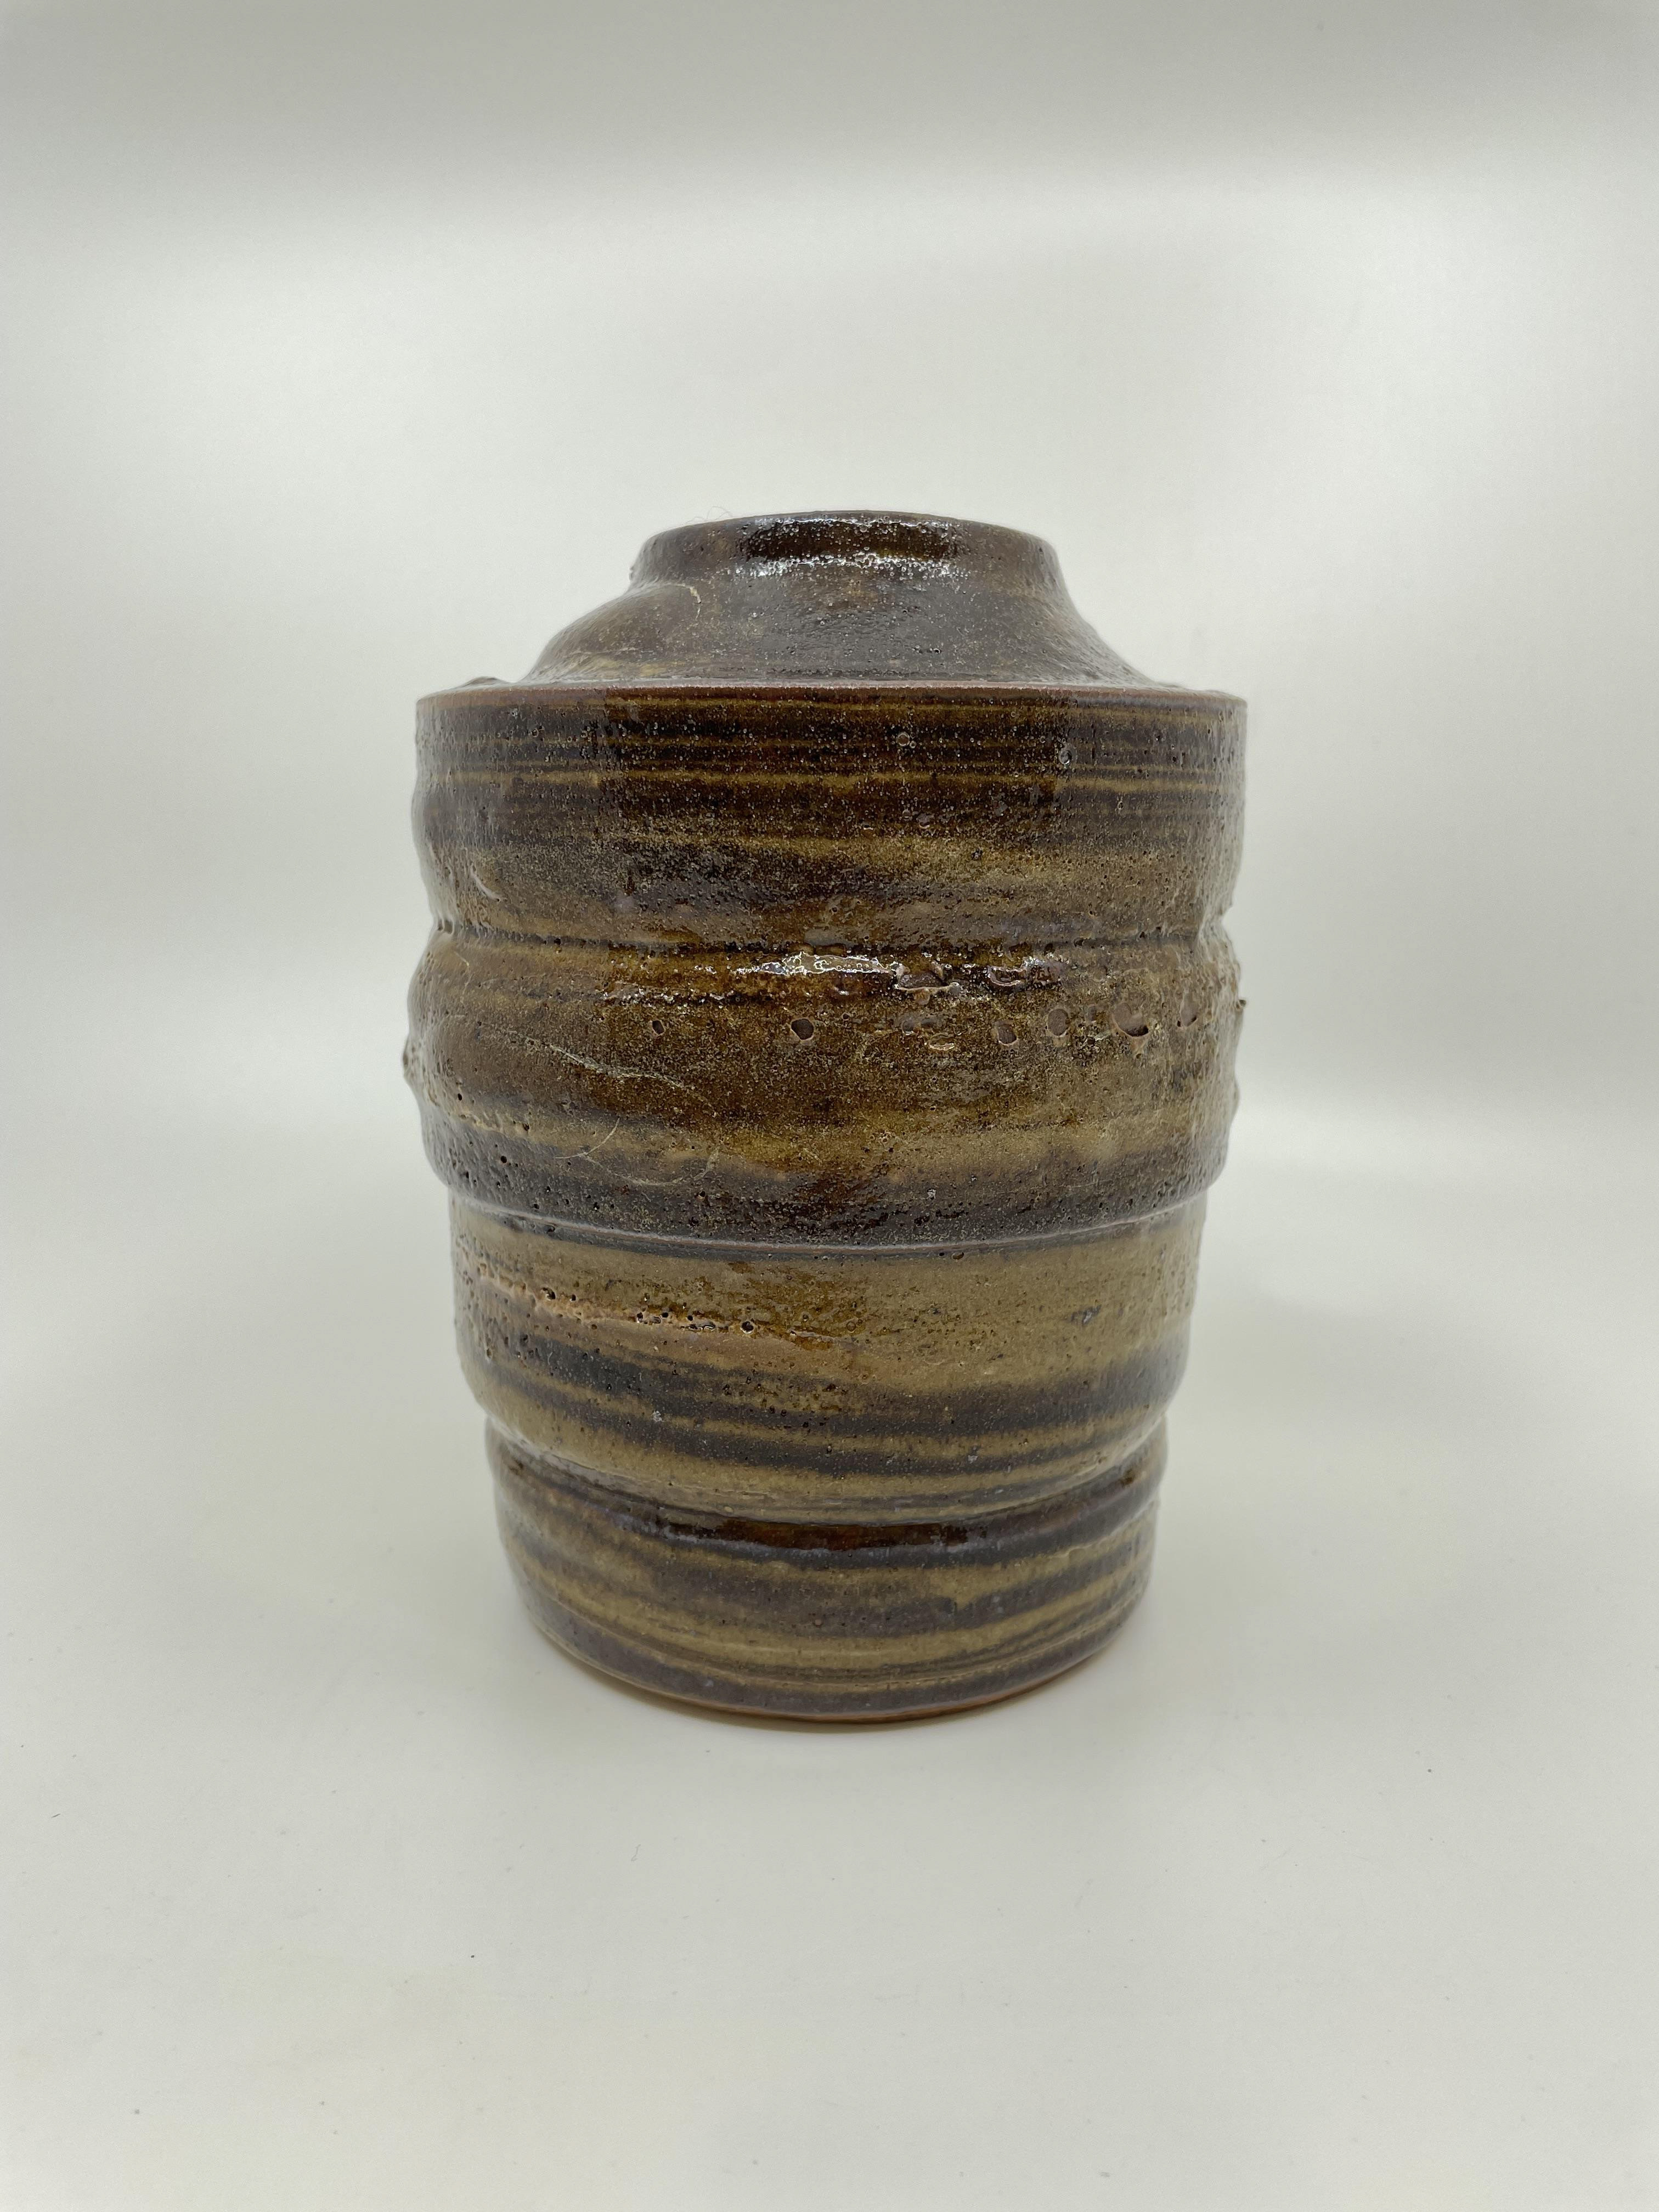
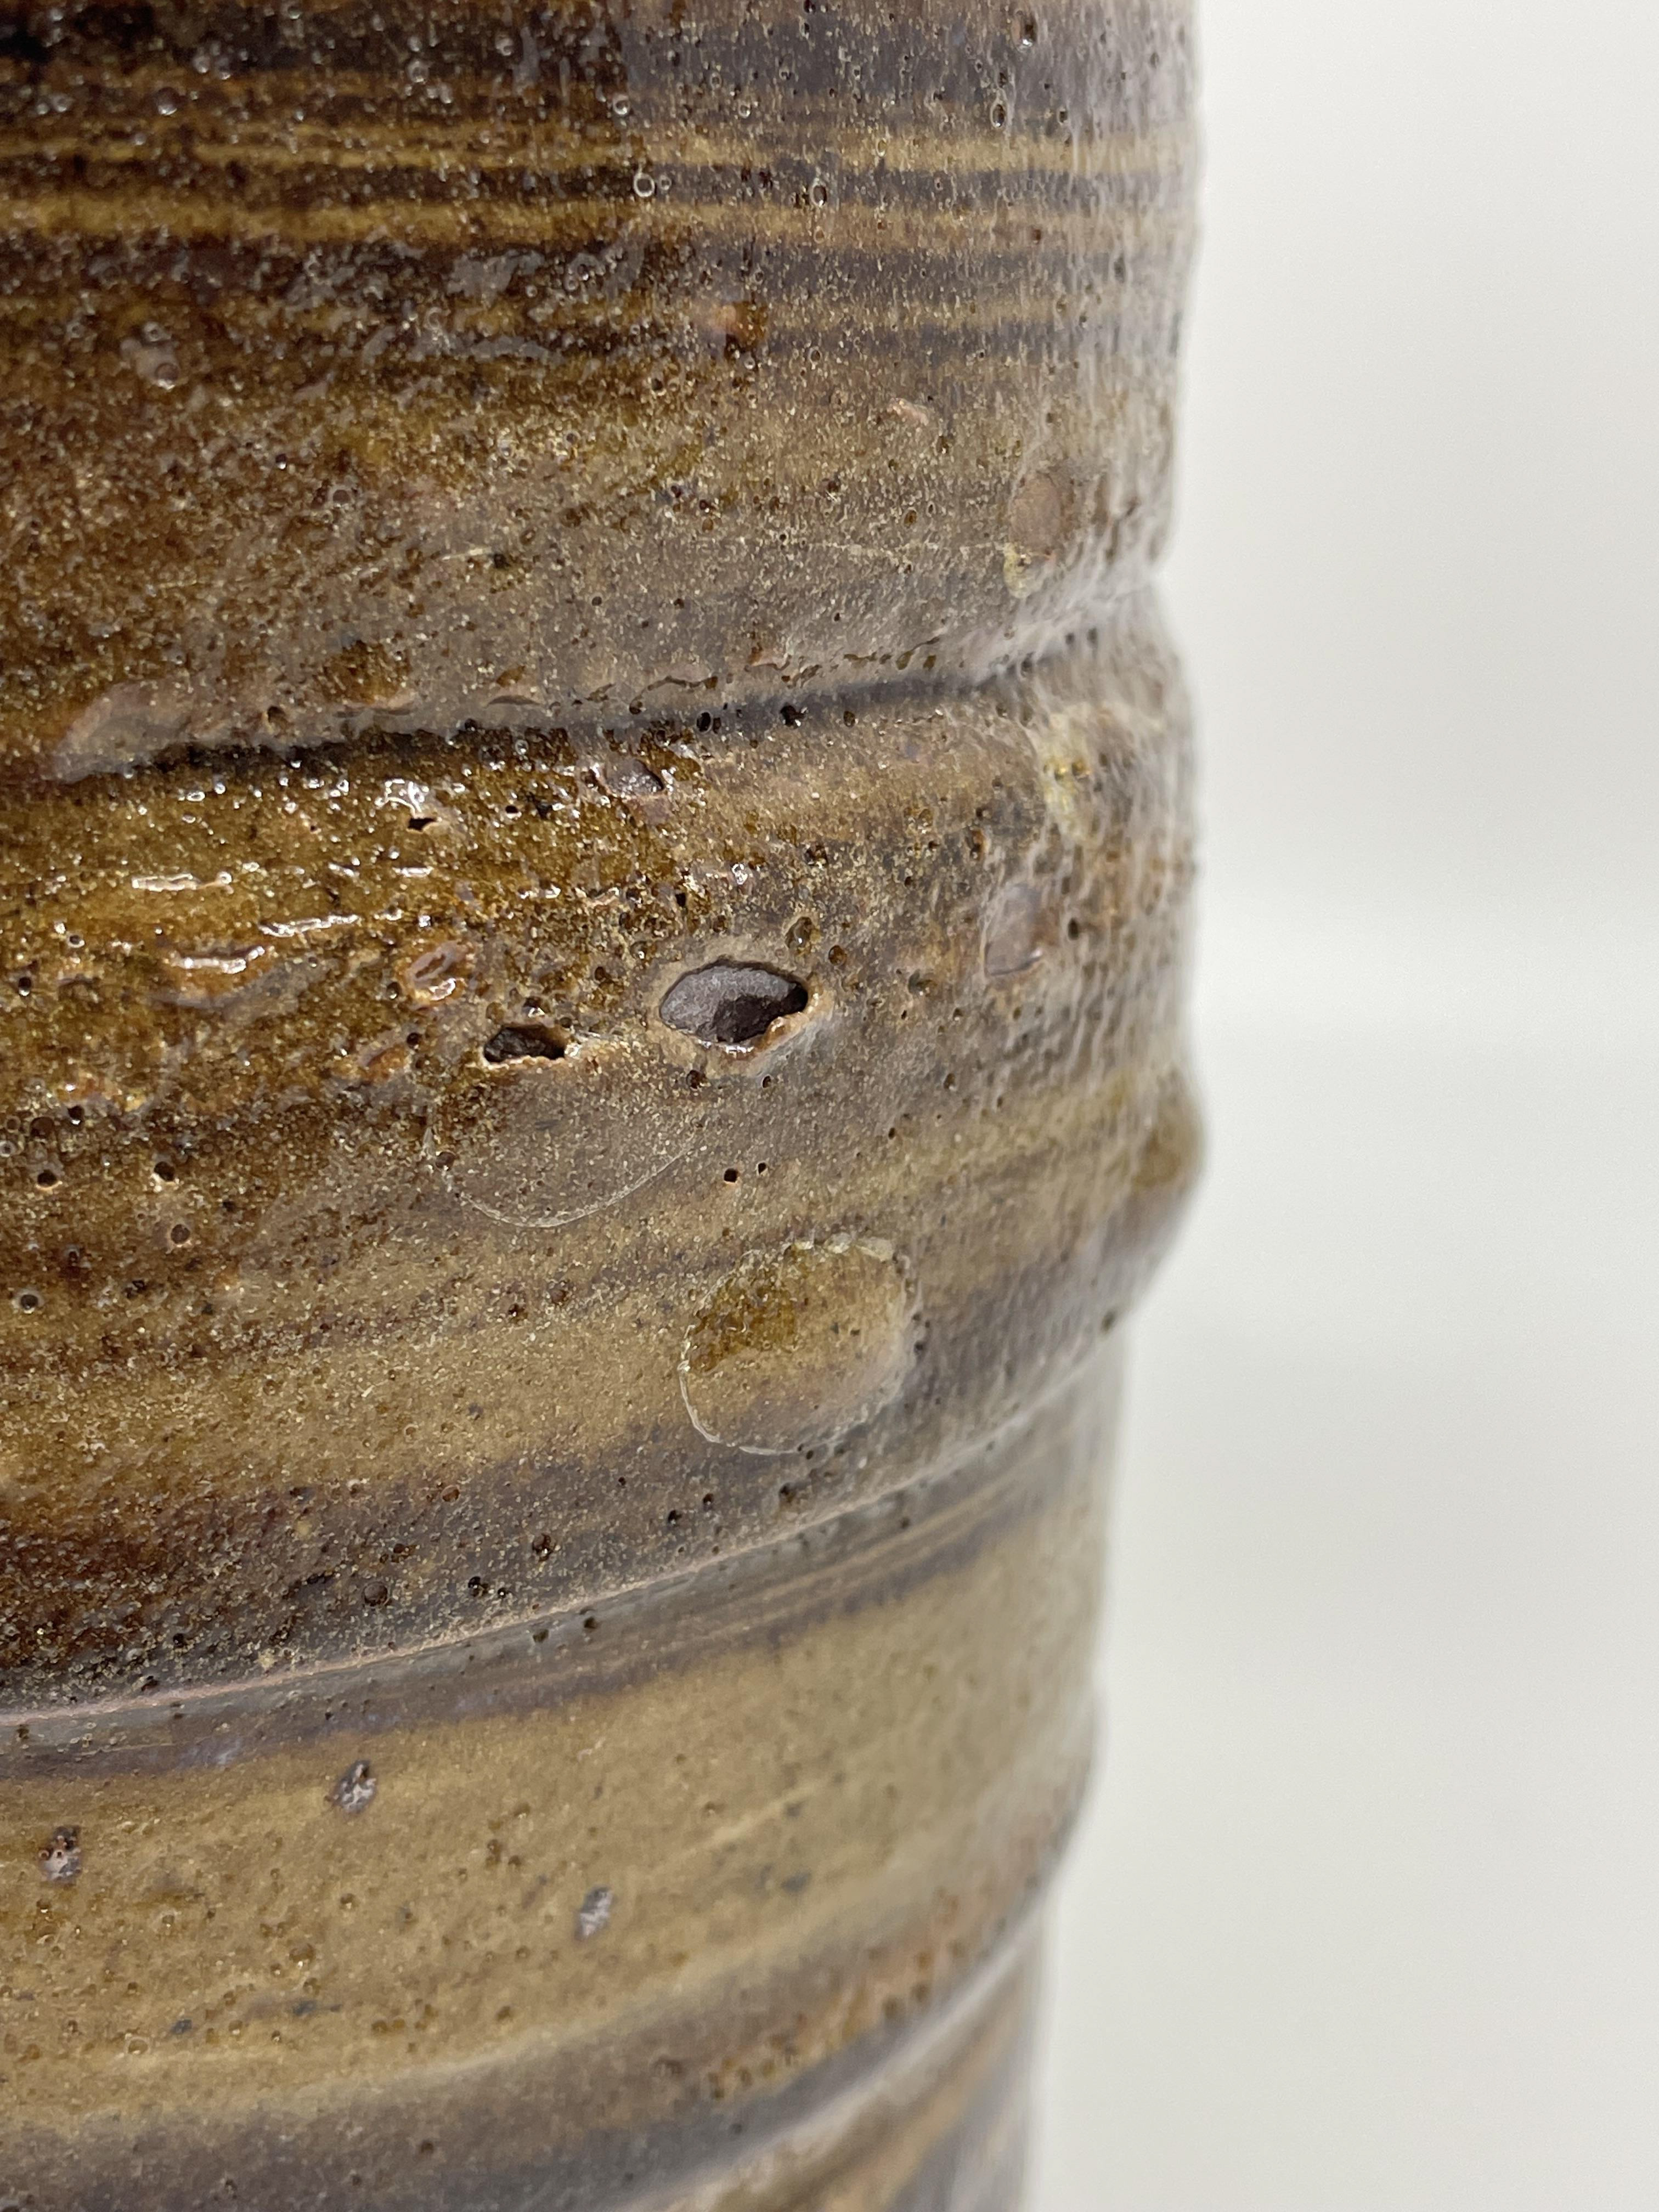
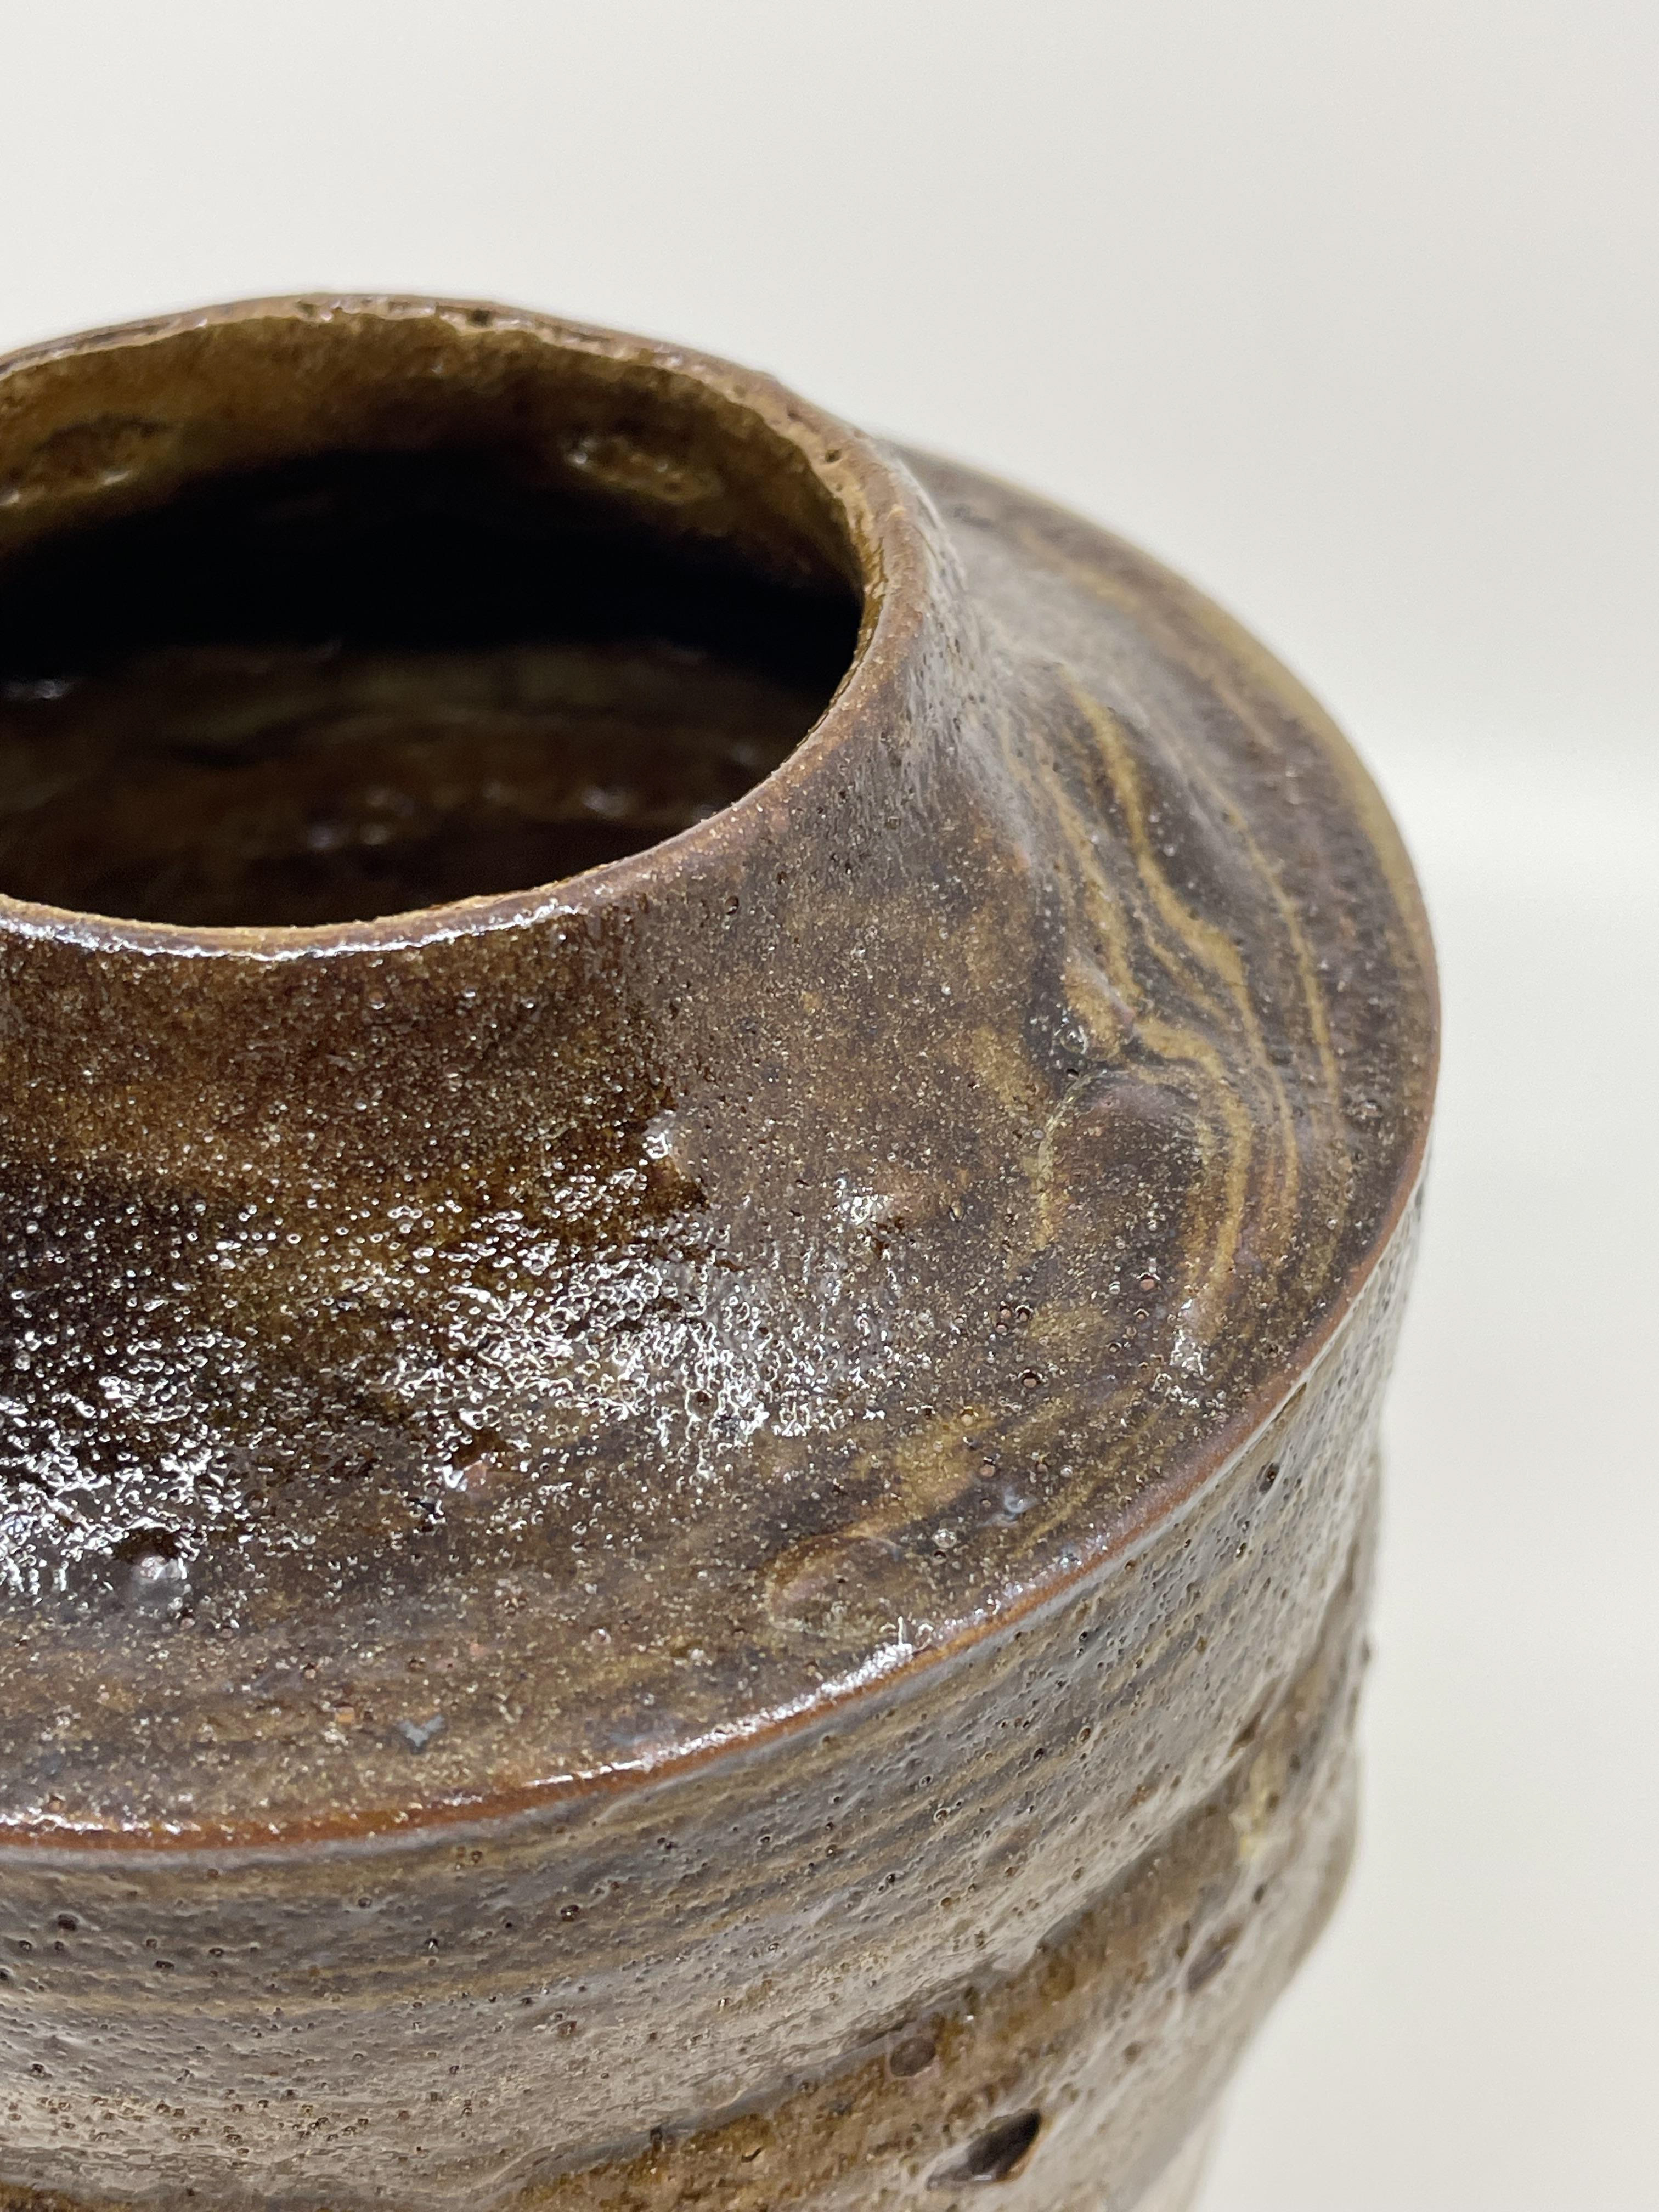
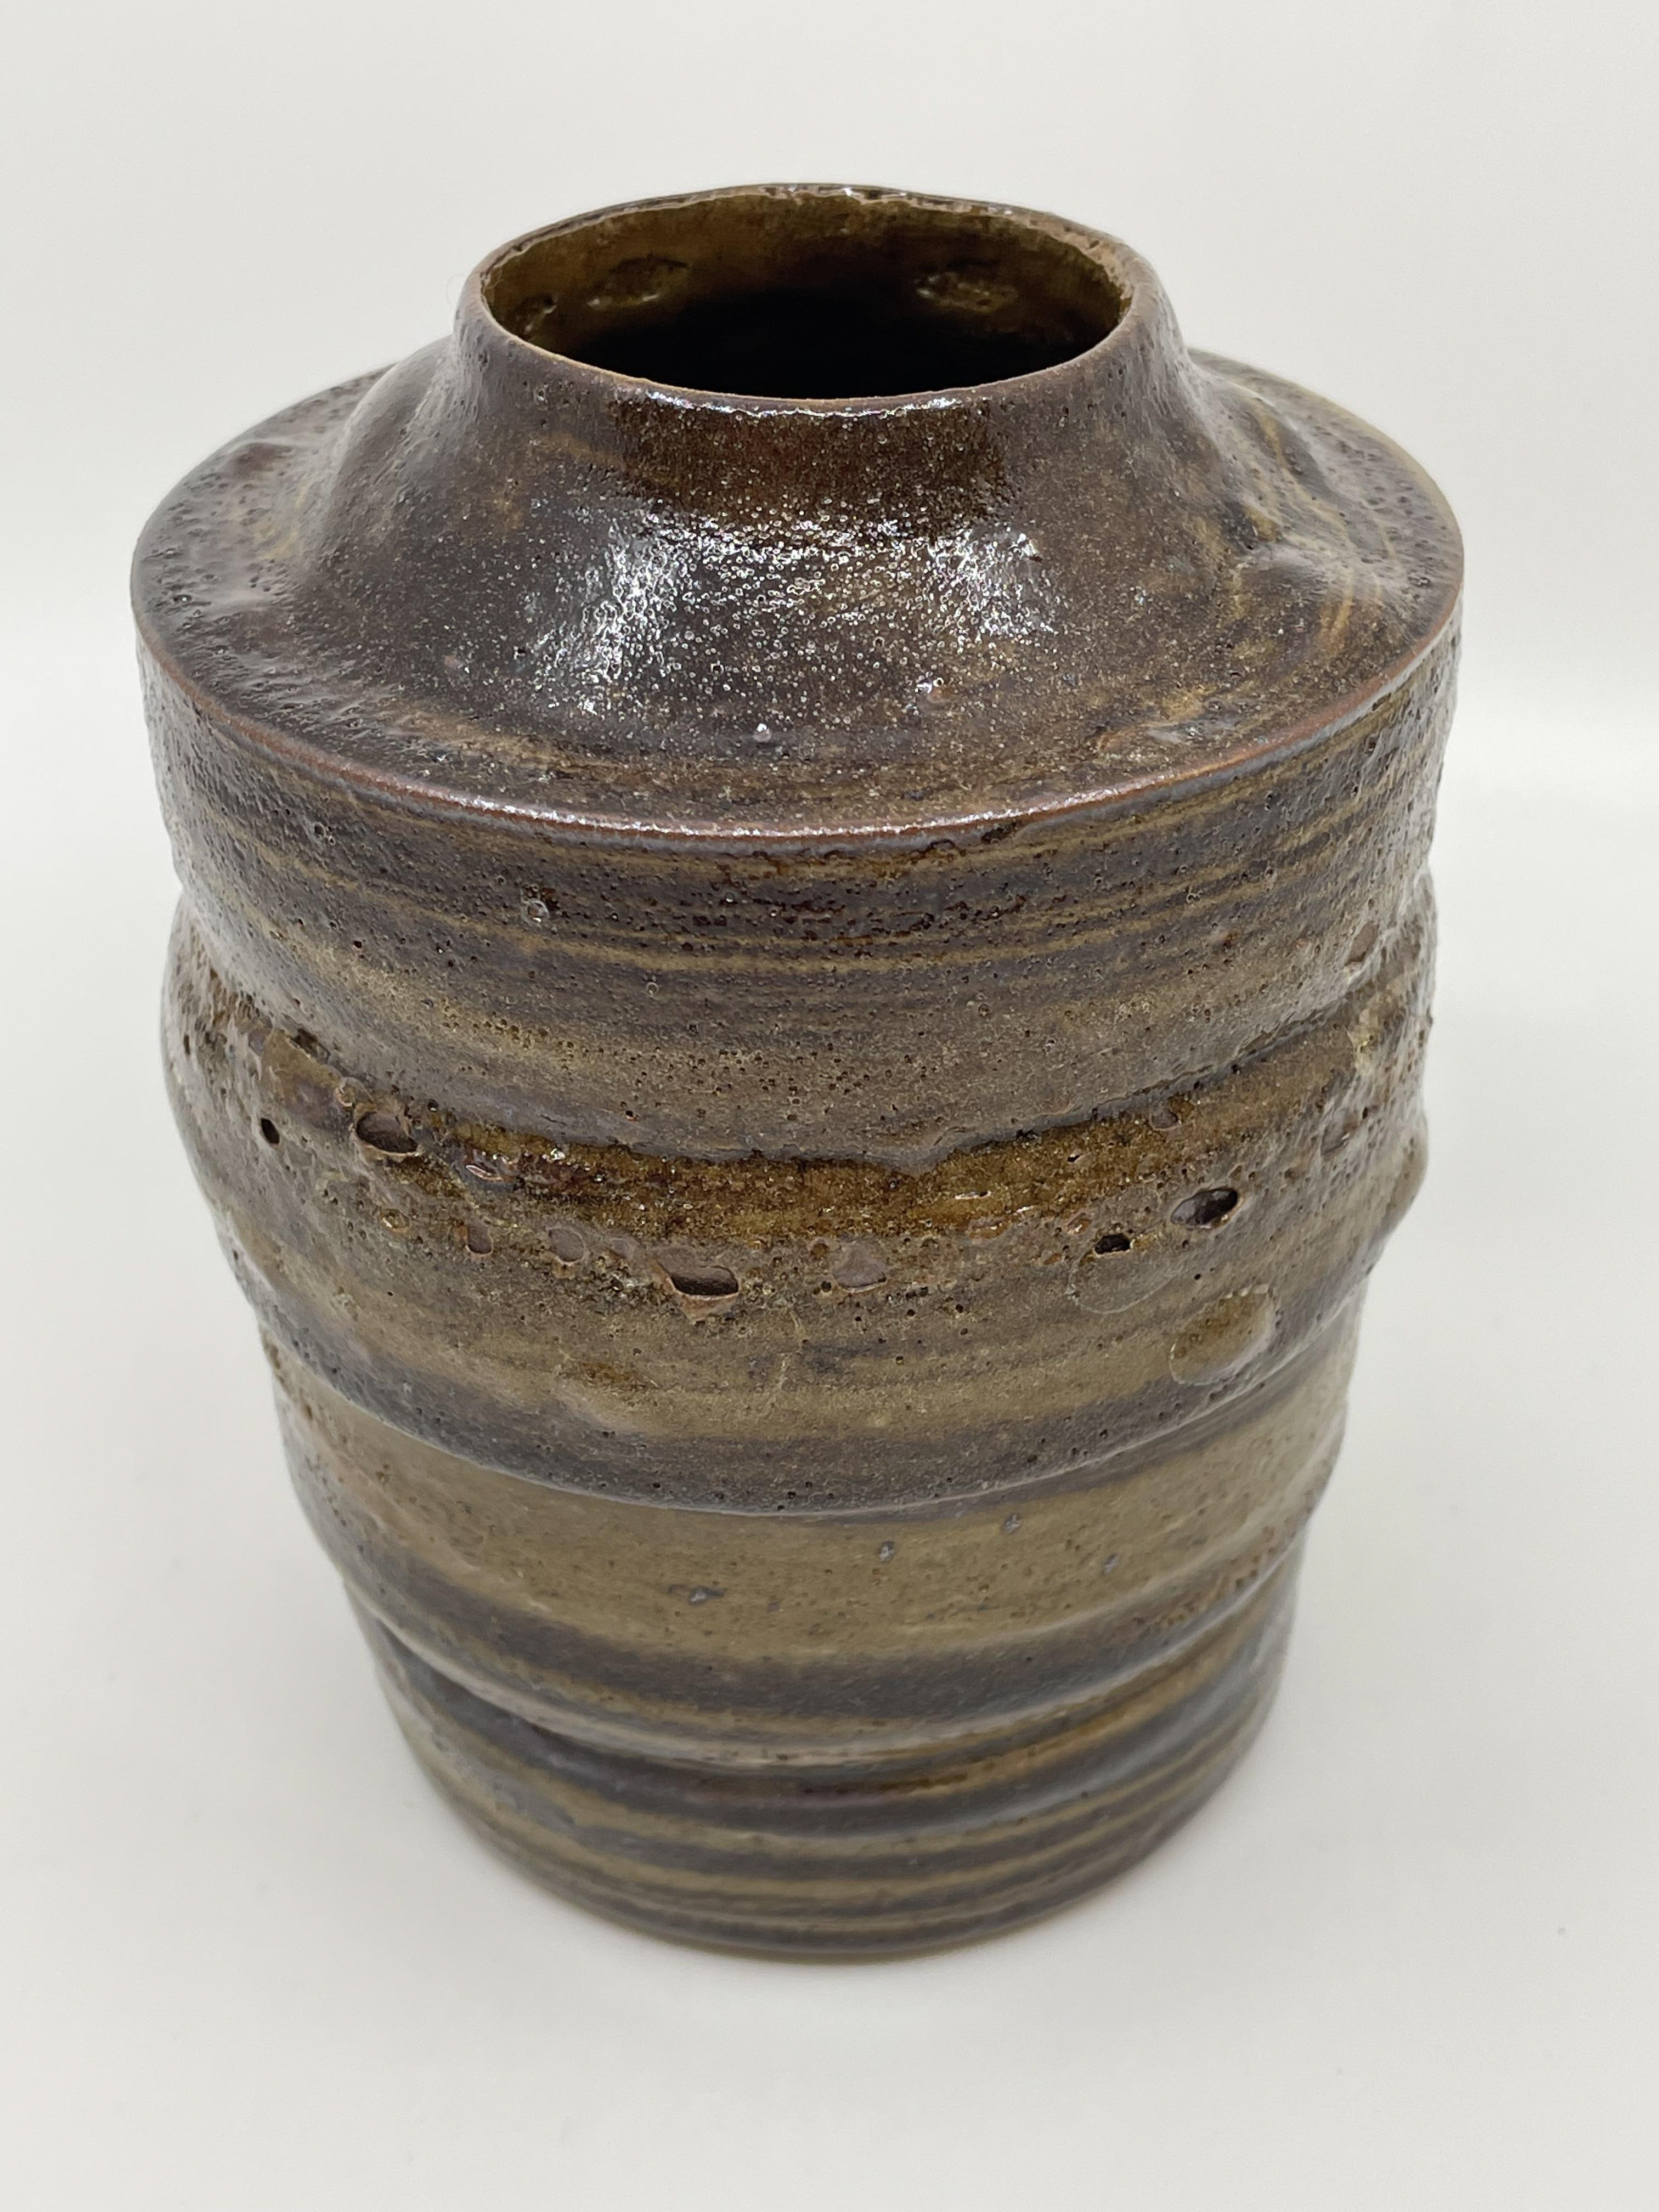
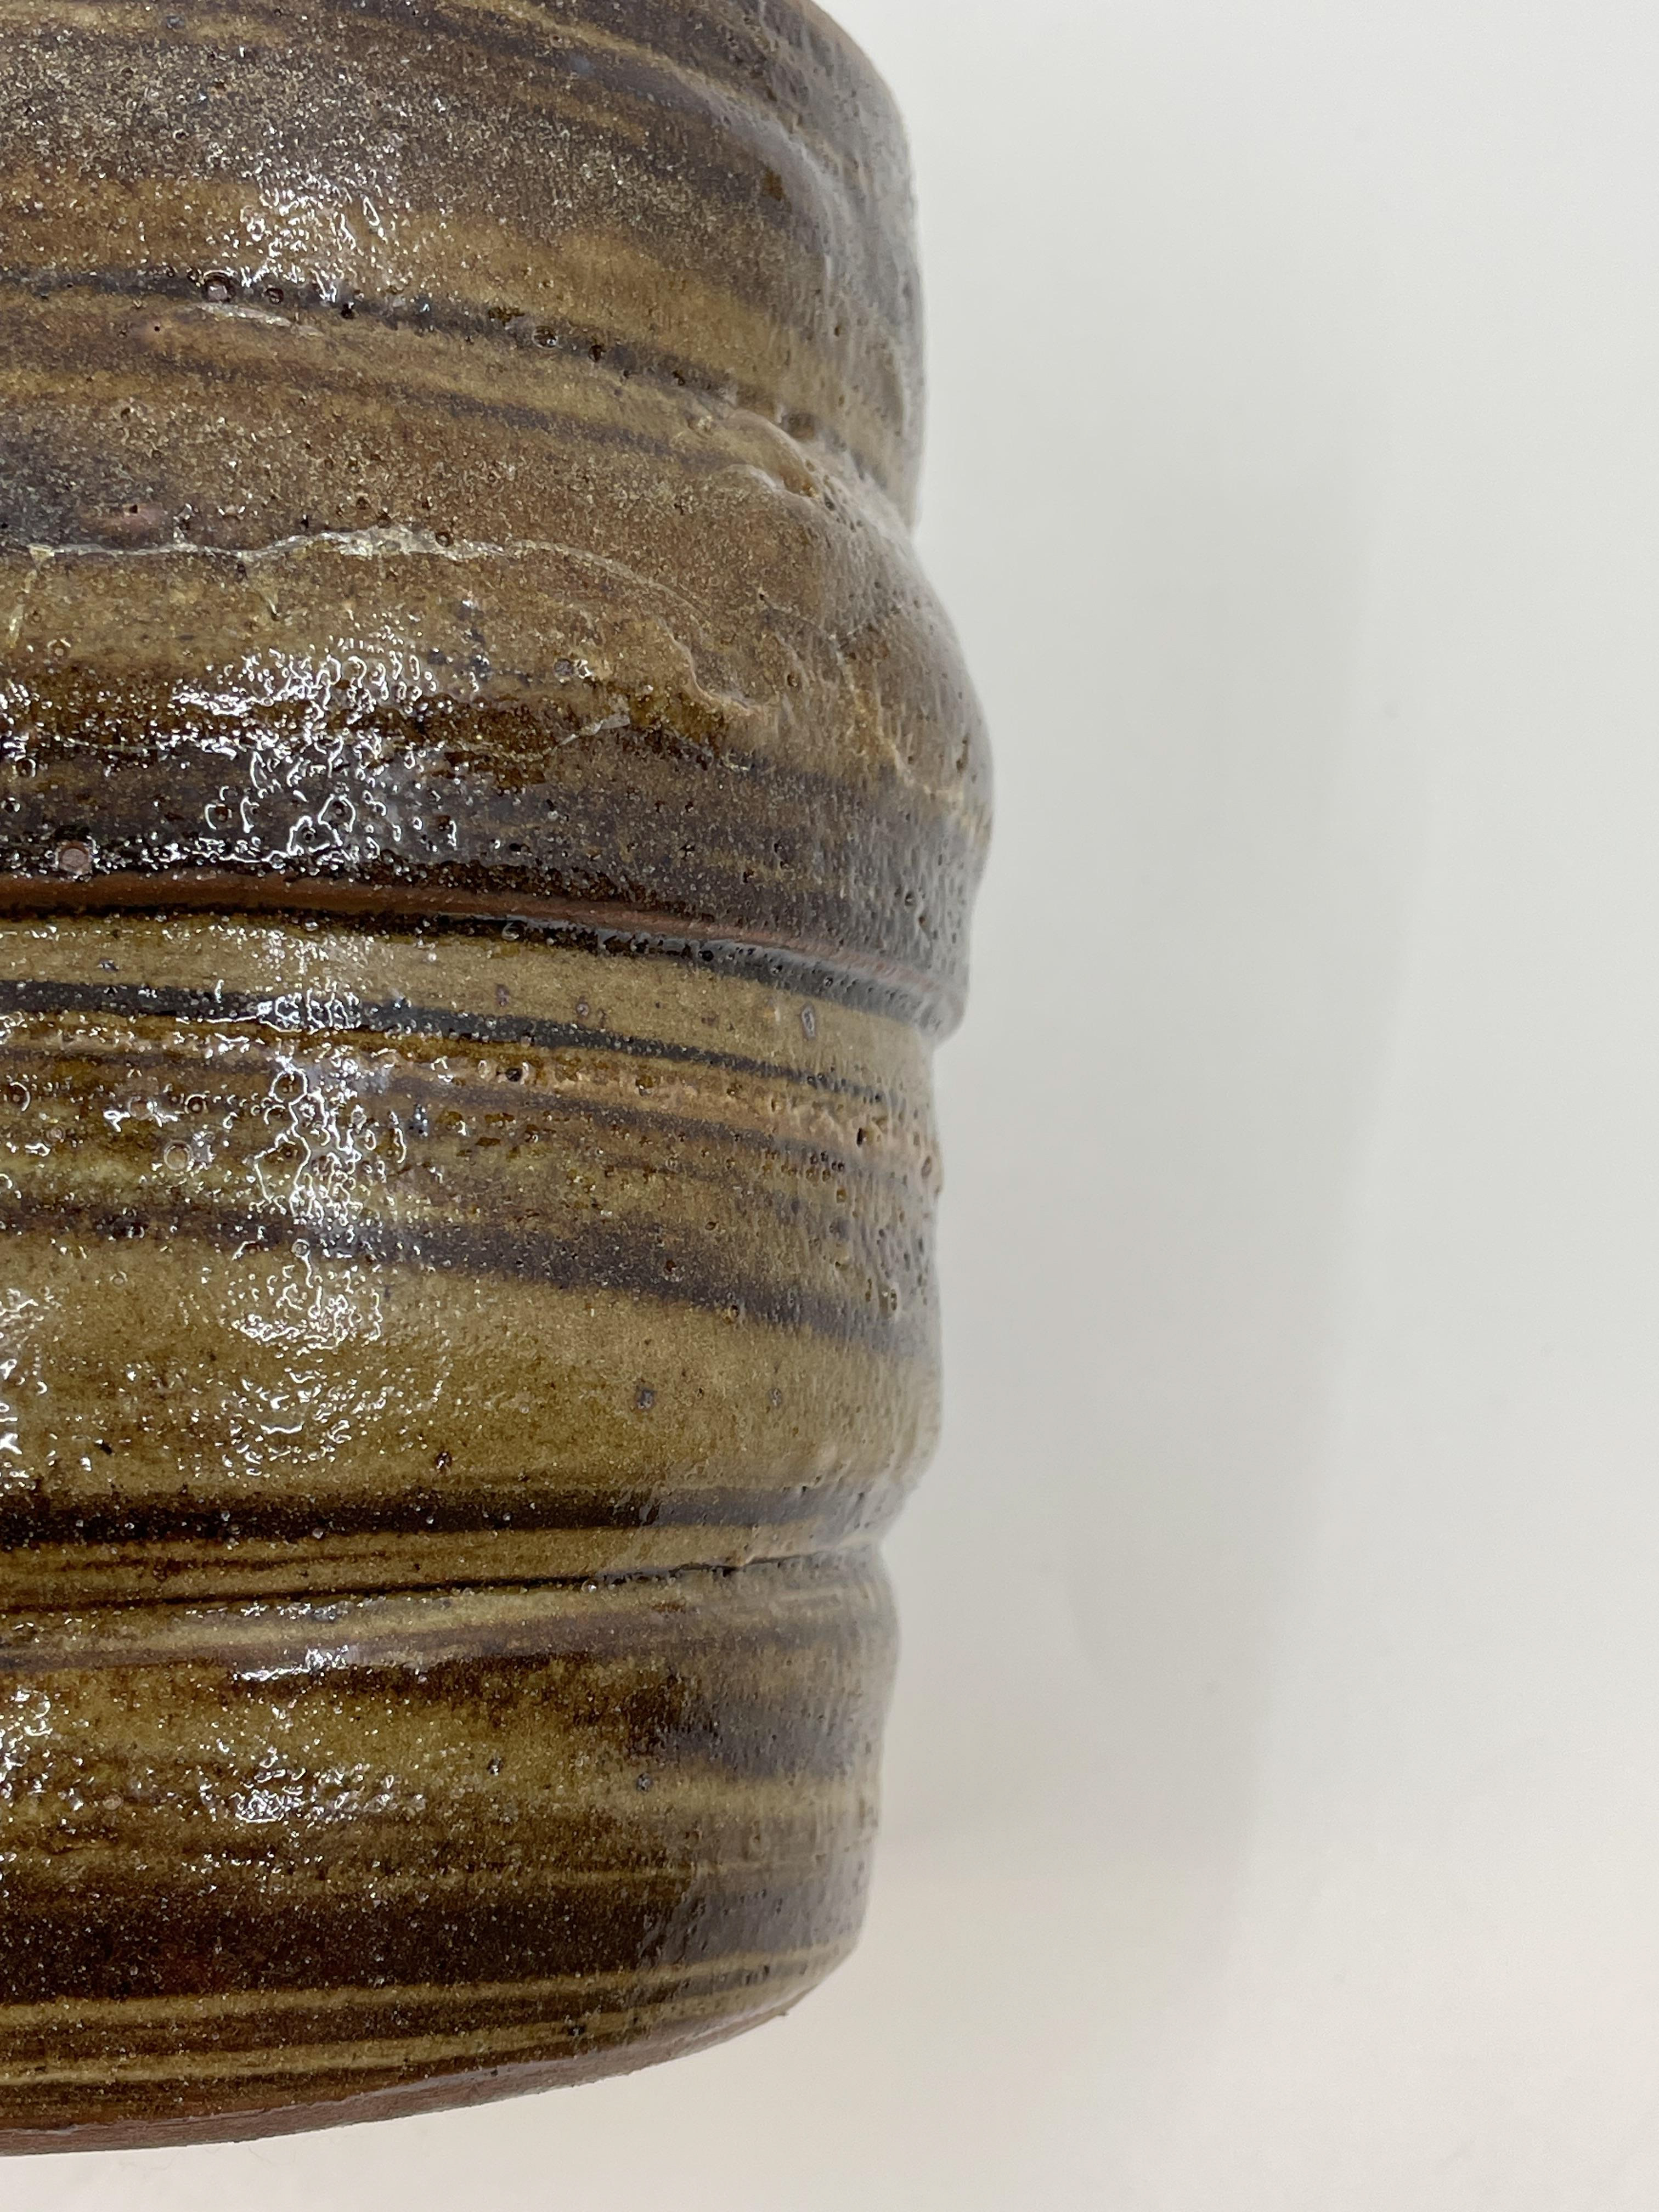
This piece was created with a mixture of 2% and 2.5% red iron oxide, along with 10% magnesium oxide. I clear-glazed it and fired it in stoneware to see how the textures would develop with these oxides. The outcome was surprising; the high-quantity oxides and high firing temperature resulted in a fascinating surface texture. The vessel is bumpy and rough throughout, with air pockets of clay, especially noticeable where the magnesium oxide reacted. The 10% magnesium didn't respond well to the heat and began to melt, contributing to the textured surface. Although the piece held its form, the texture did not align with my vision inspired by Brighton Beach, where pebbles are smooth and polished, and the water is calm and reflective. This rough texture contrasted starkly with the serene, organic qualities I associate with Brighton. From this experiment, I realised that I don't want extensive texture throughout my vessels, as it clashes with the marbled clay and their profiles. The pot appears overwhelming and lacks a professional finish, guiding me to refine my approach for future pieces.
Testing Vessels in Stoneware Fire
Oxides can be fired at high temperatures, but it's important to consider the type of oxide and the desired outcome. Generally, metal oxides like iron oxide, copper oxide, and cobalt oxide are stable at high temperatures and can produce vibrant colours when fired in an oxidation atmosphere. However, firing at excessively high temperatures can cause the oxides to over-melt, leading to lumpy textures and unexpected colour changes. I wanted to determine whether to fire my work at earthenware, stoneware, or a combination of both. From my previous project, I understood the outcomes of earthenware firing; the lower temperature allowed the coloured clay to develop well and retain its form. However, I had not yet explored the results of stoneware firing. This exploration would help me understand the relationship between different oxides and the different oxidised being fired at high temperatures and decide the best approach for my work.
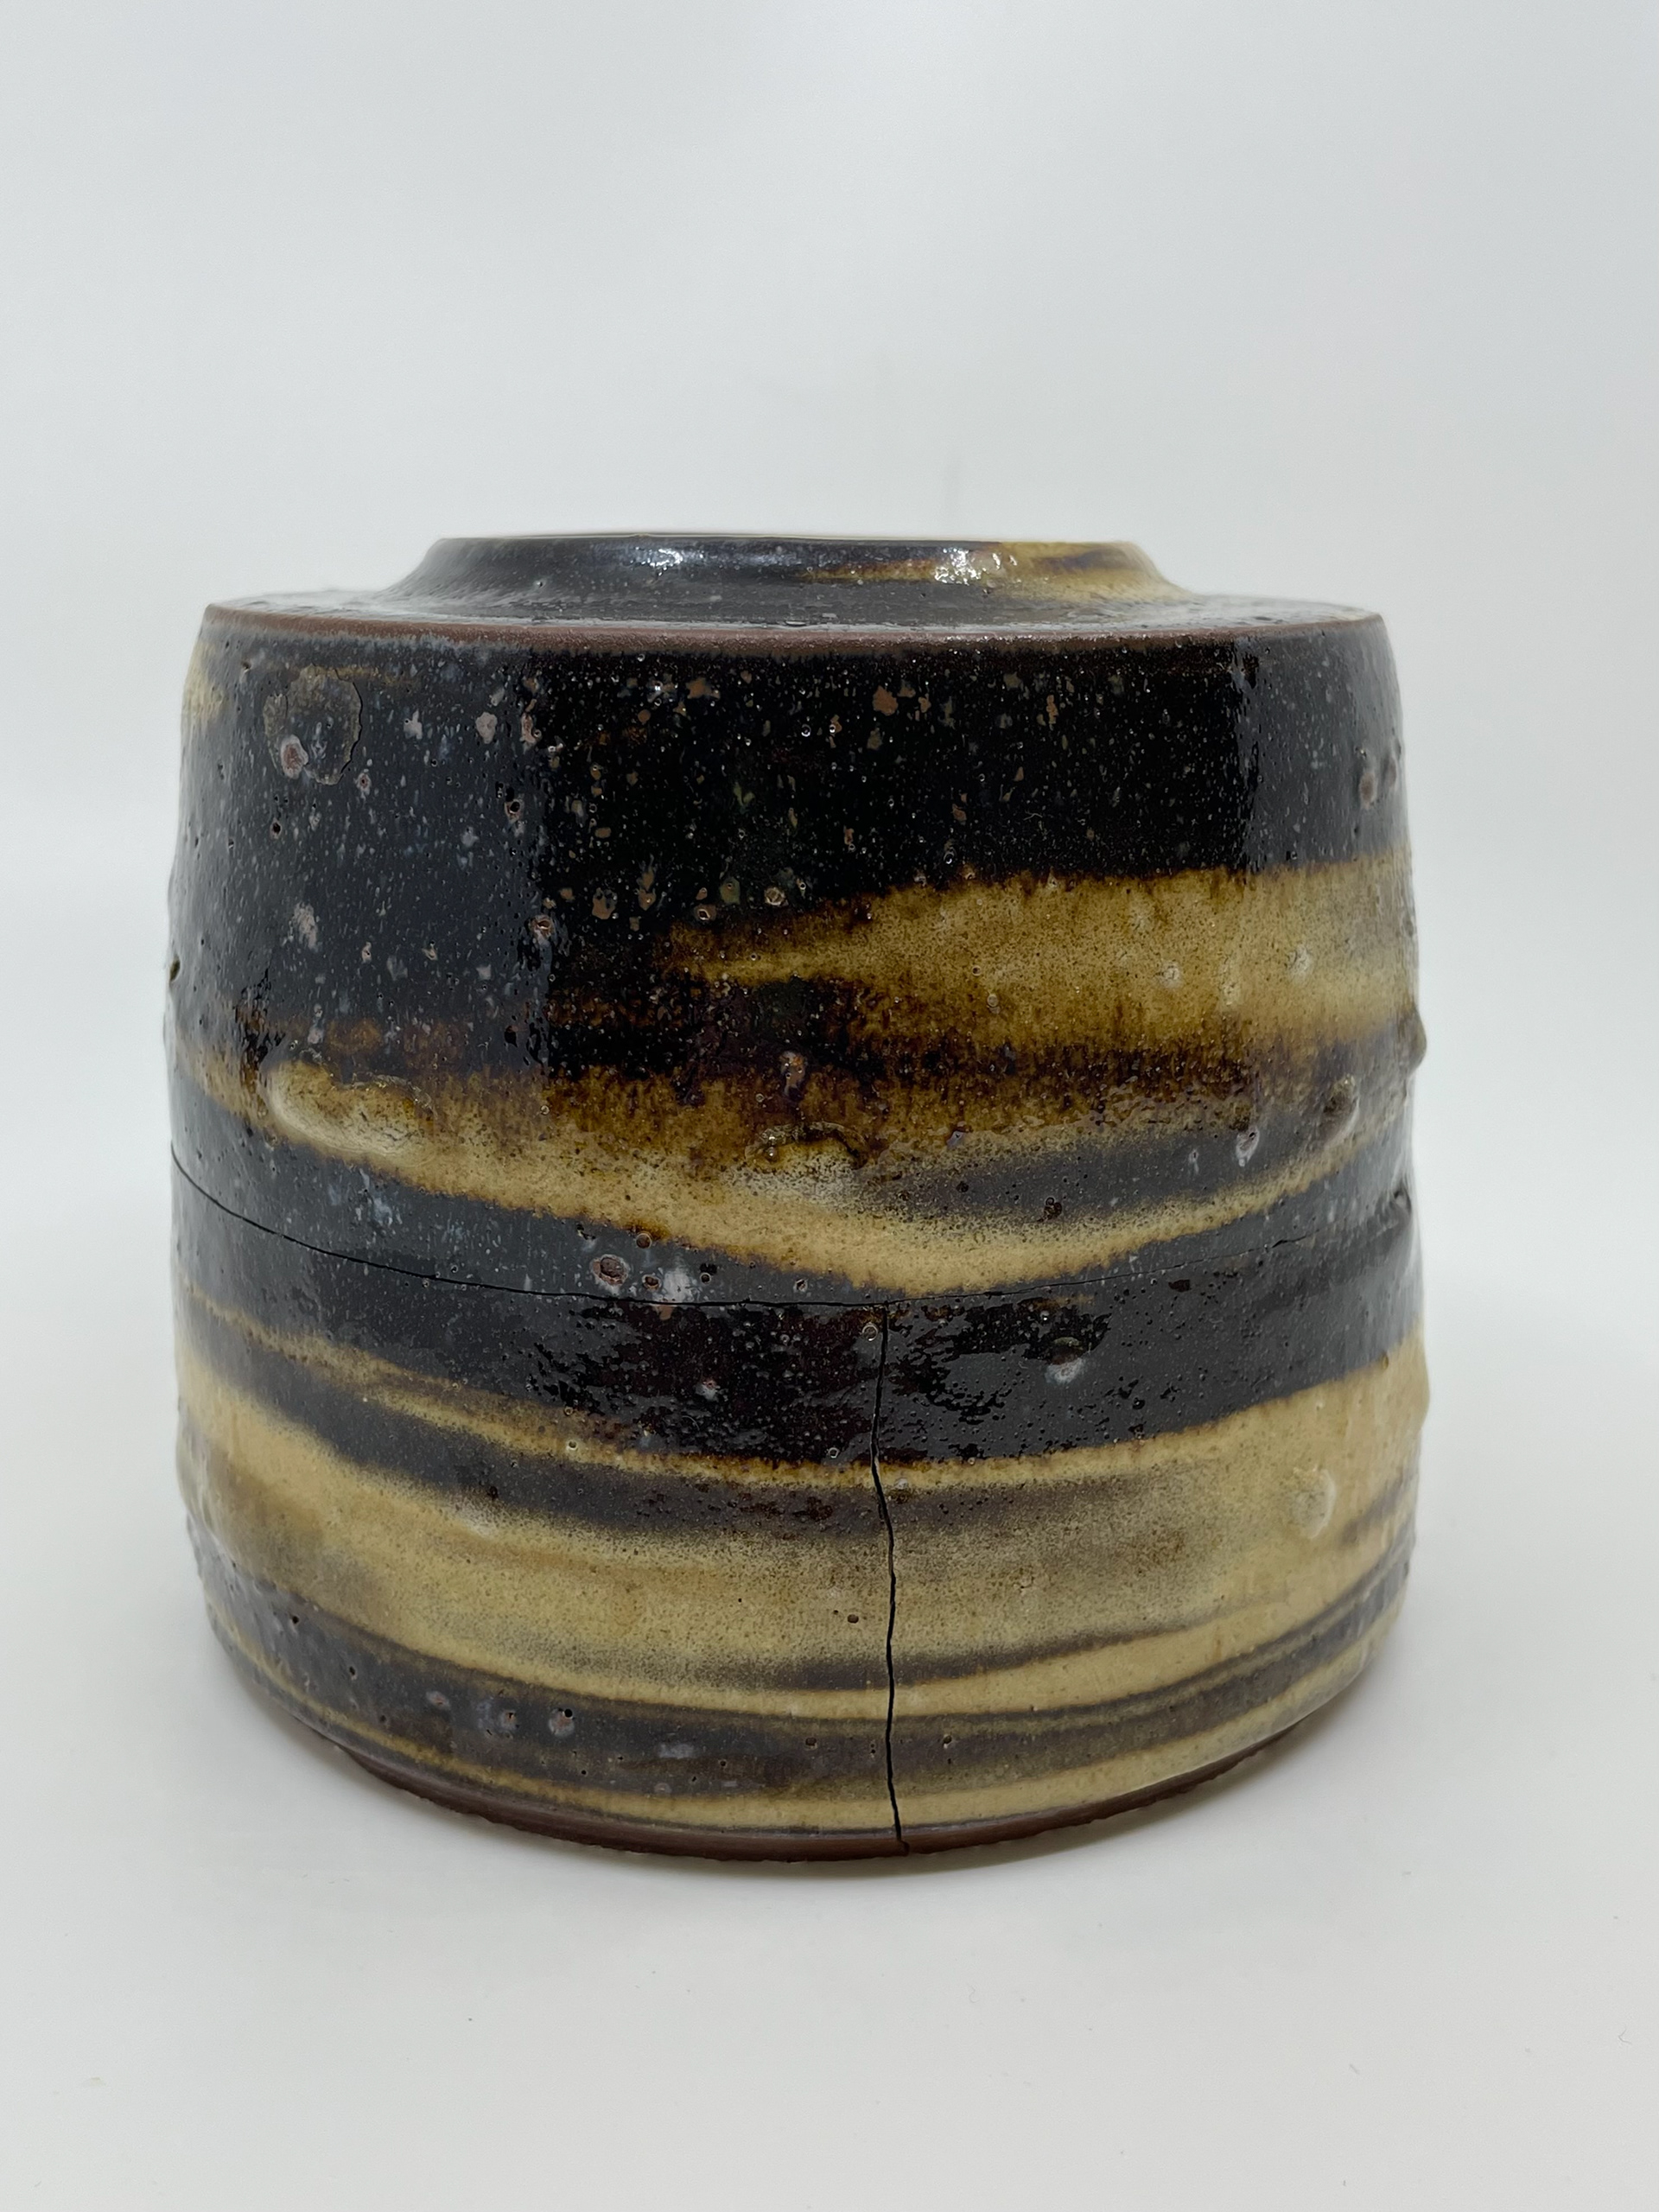
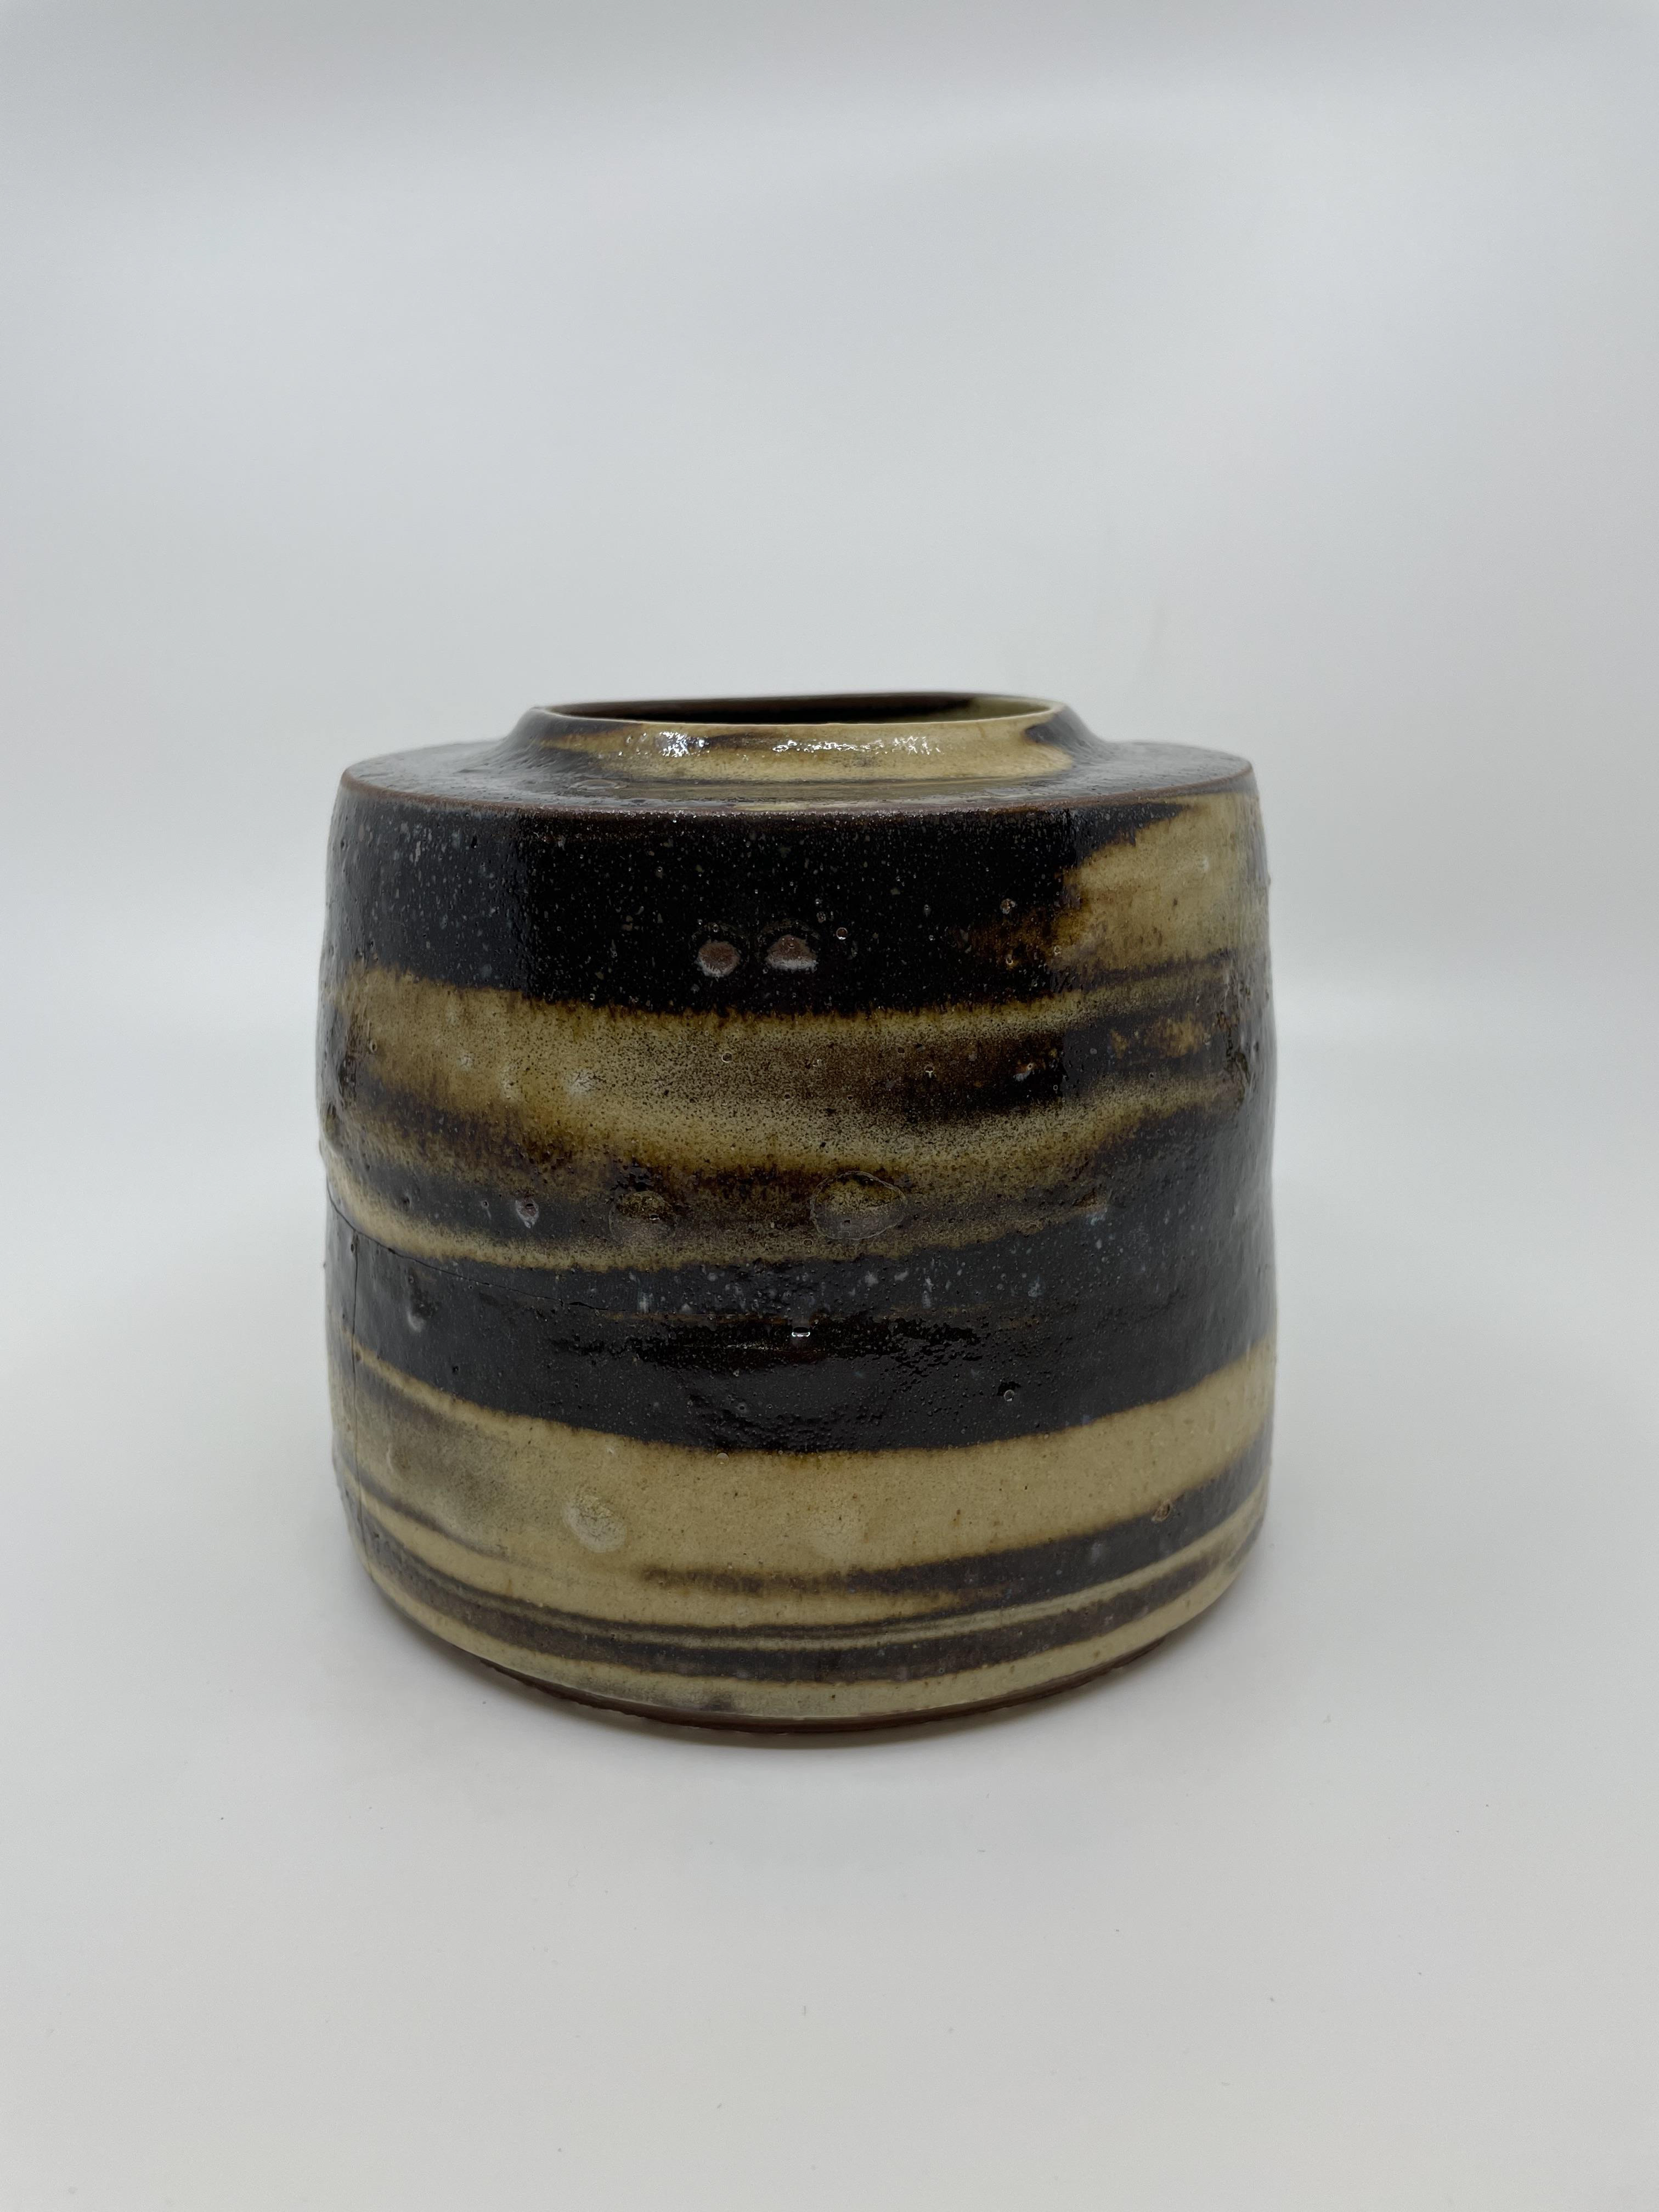
This vessel is composed of a mixture of clays and oxides that produced an interesting reaction, resulting in much deeper colours and added surface texture. However, moving forward with my final pieces, I have decided not to fire at stoneware temperatures. This decision stems from the inconsistent reactions between the firings and oxides, which create unpredictable results. Stoneware firing also led to significant issues such as large cracks, and in some cases, the clay was slowly melting, causing the base to stick to the kiln shelf. Despite my appreciation for the form and colours achieved in this vessel, the stoneware firing did not provide the finish I desired. Additionally, when giving away my work, it is crucial to consider safety; distributing pieces that are cracked poses a risk to the public and limits the functional uses of the pieces. By firing at earthenware temperatures, I gain more control over the outcome, ensuring a safer and more polished final product that aligns better with my vision for the collection.