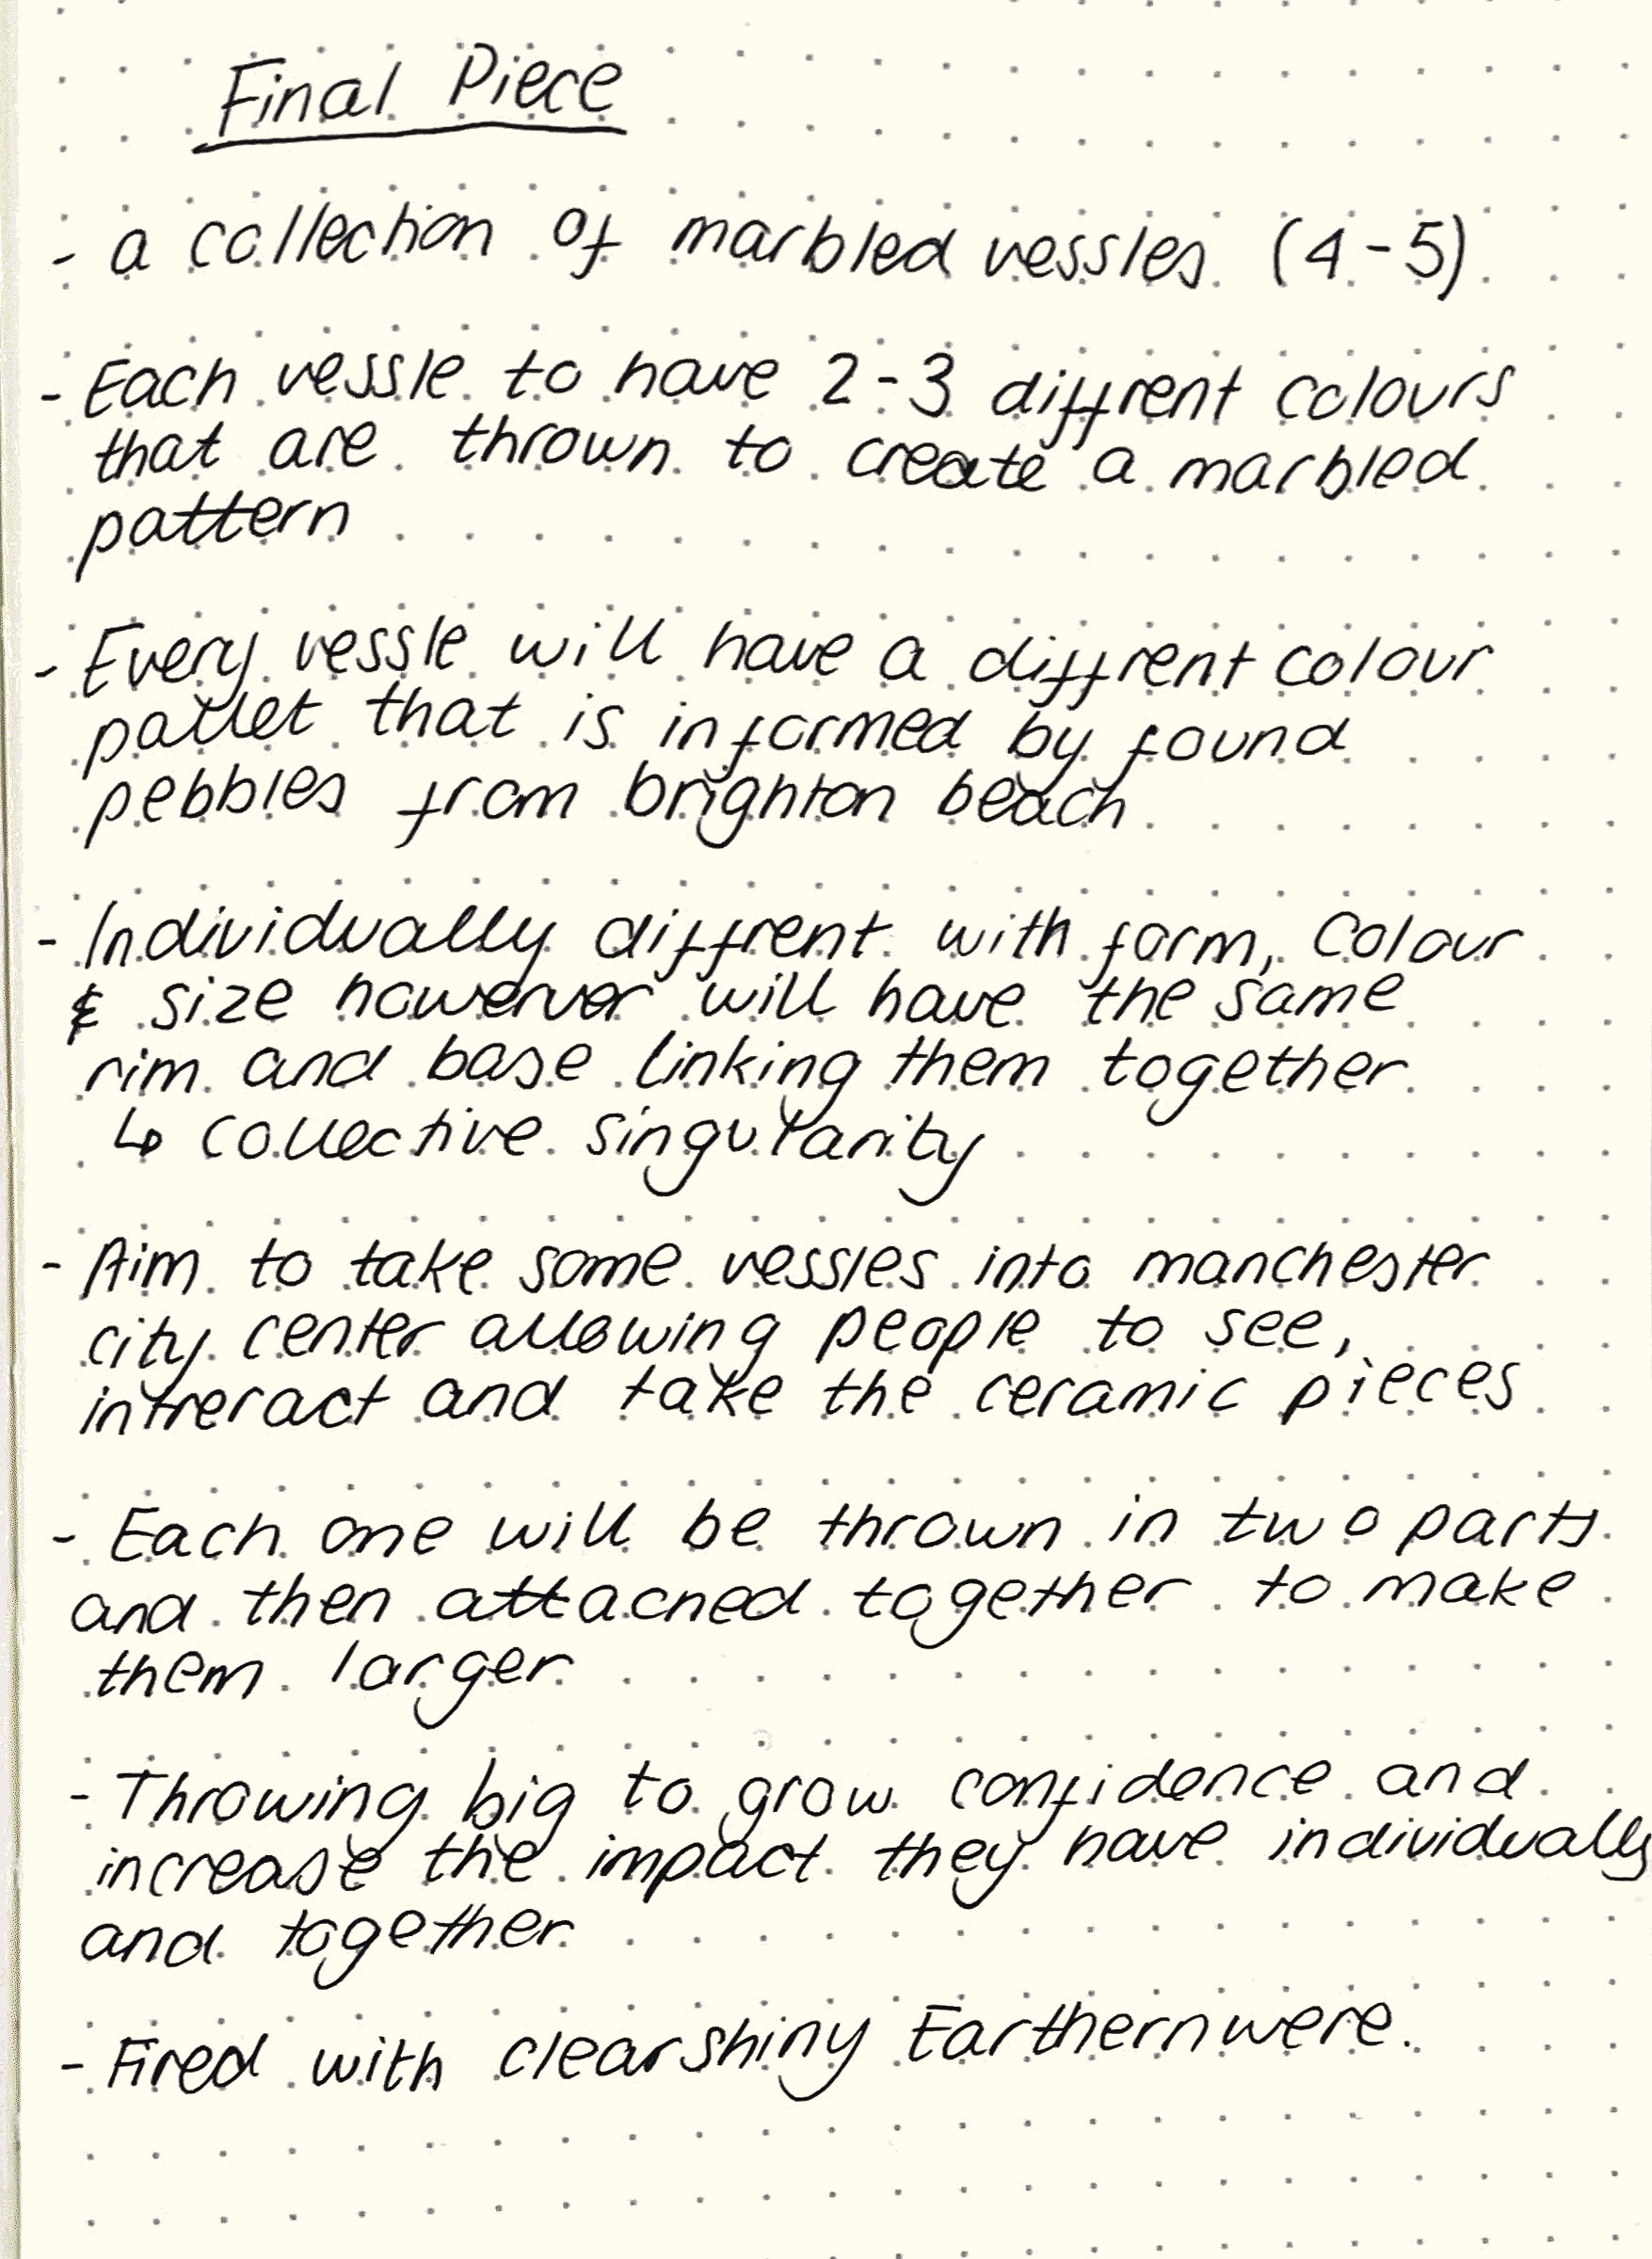
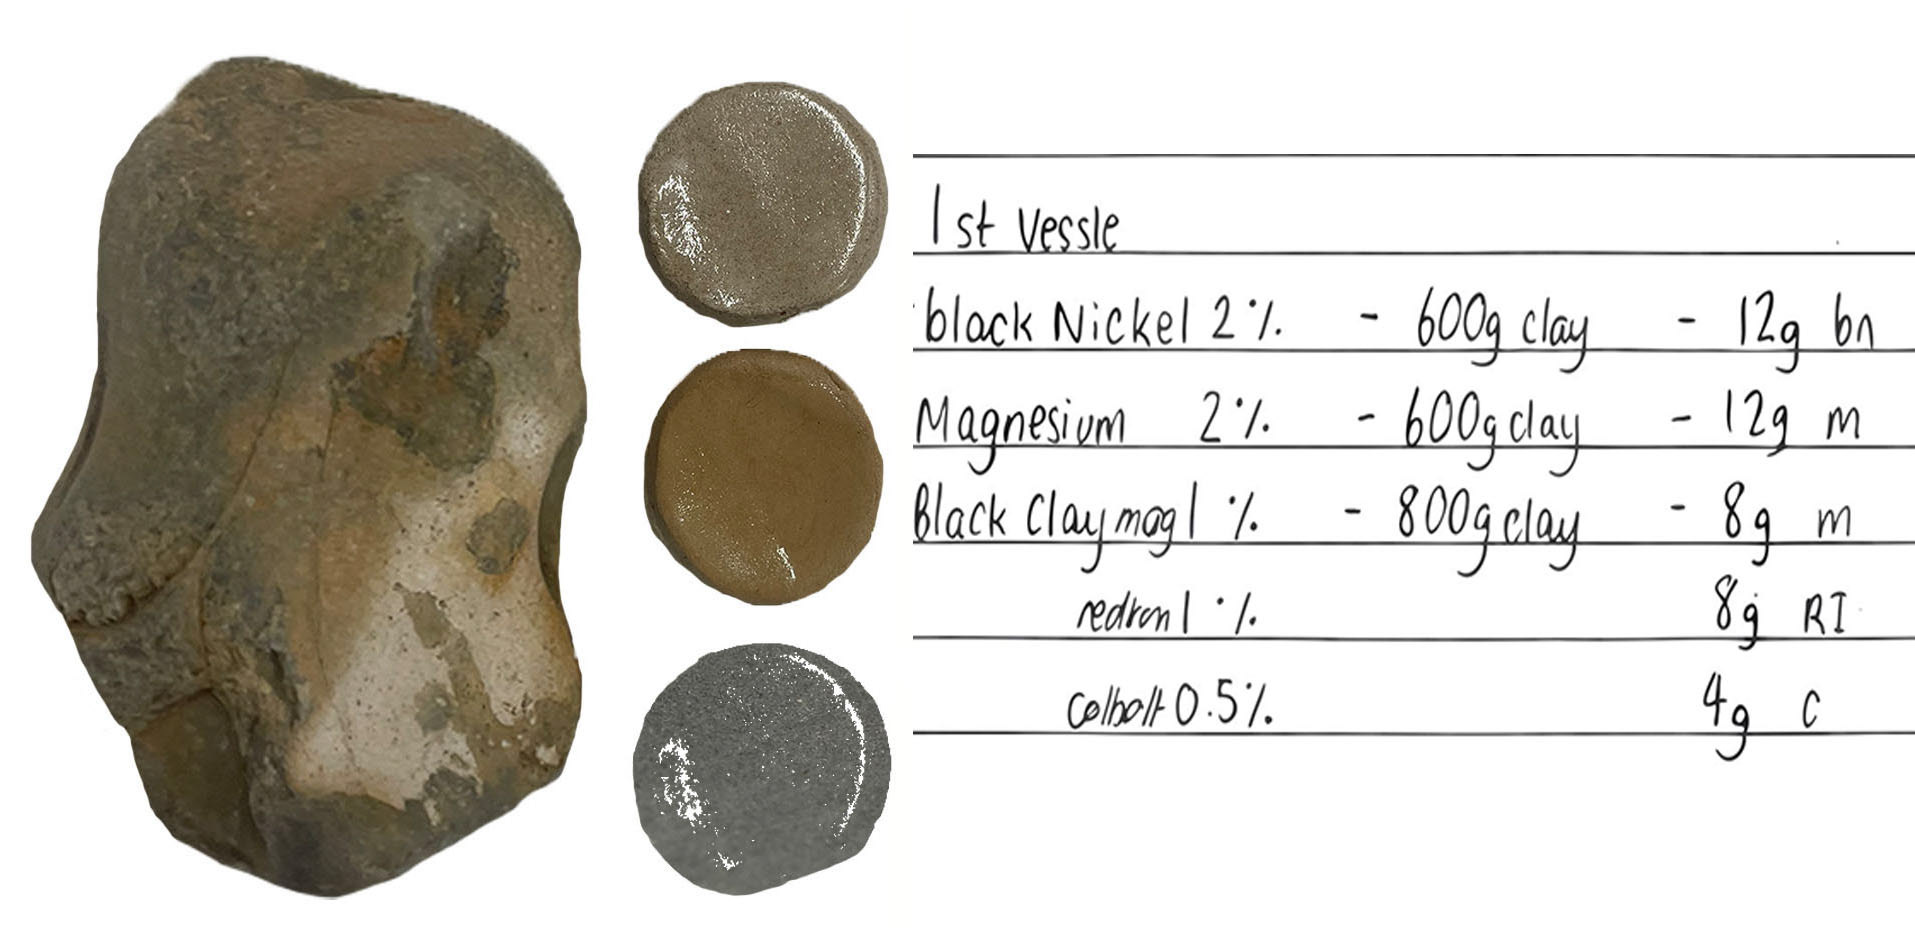
Colouring Clay

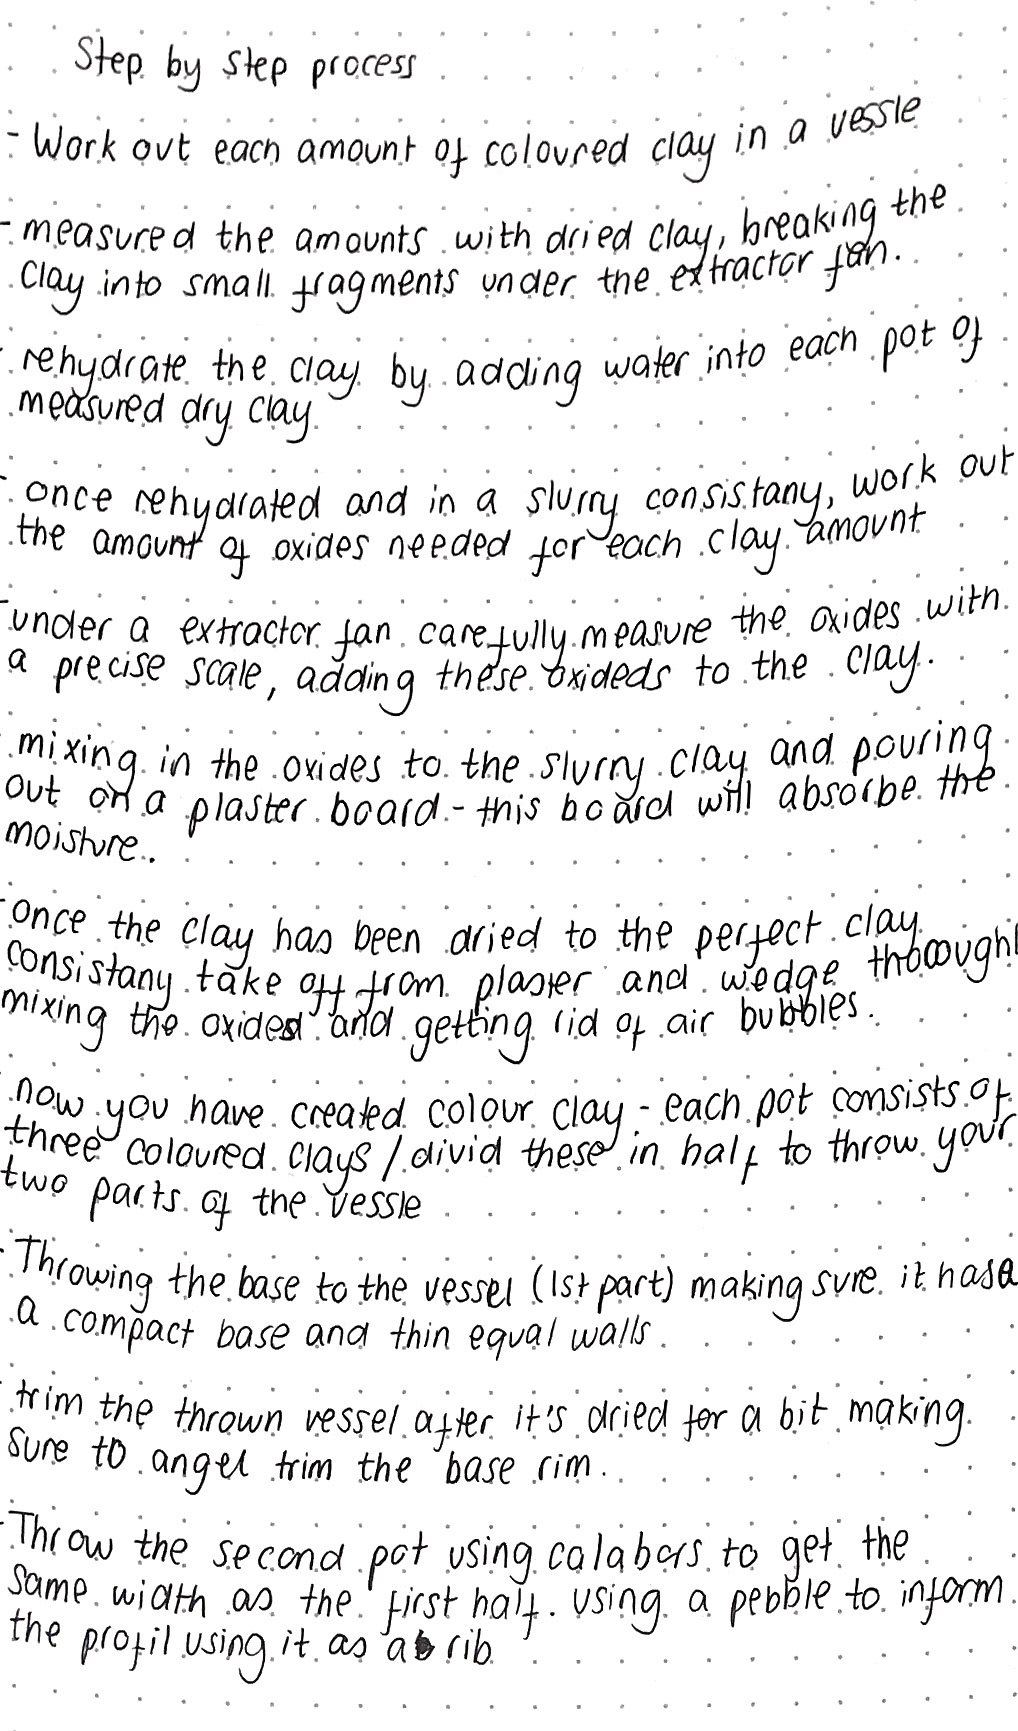
This is the process of colouring all my clay; each vessel had different amounts of clay and various amounts of oxides. Making all the clay was complicated as I had to be precise with my measurements and organised while remembering which clay was for each vessel. Therefore, I made a system of each clay in pot order and had to keep this order throughout the process. This process was also very time-consuming therefore, I had enough time to make the clay and time to remake the clay if needed.
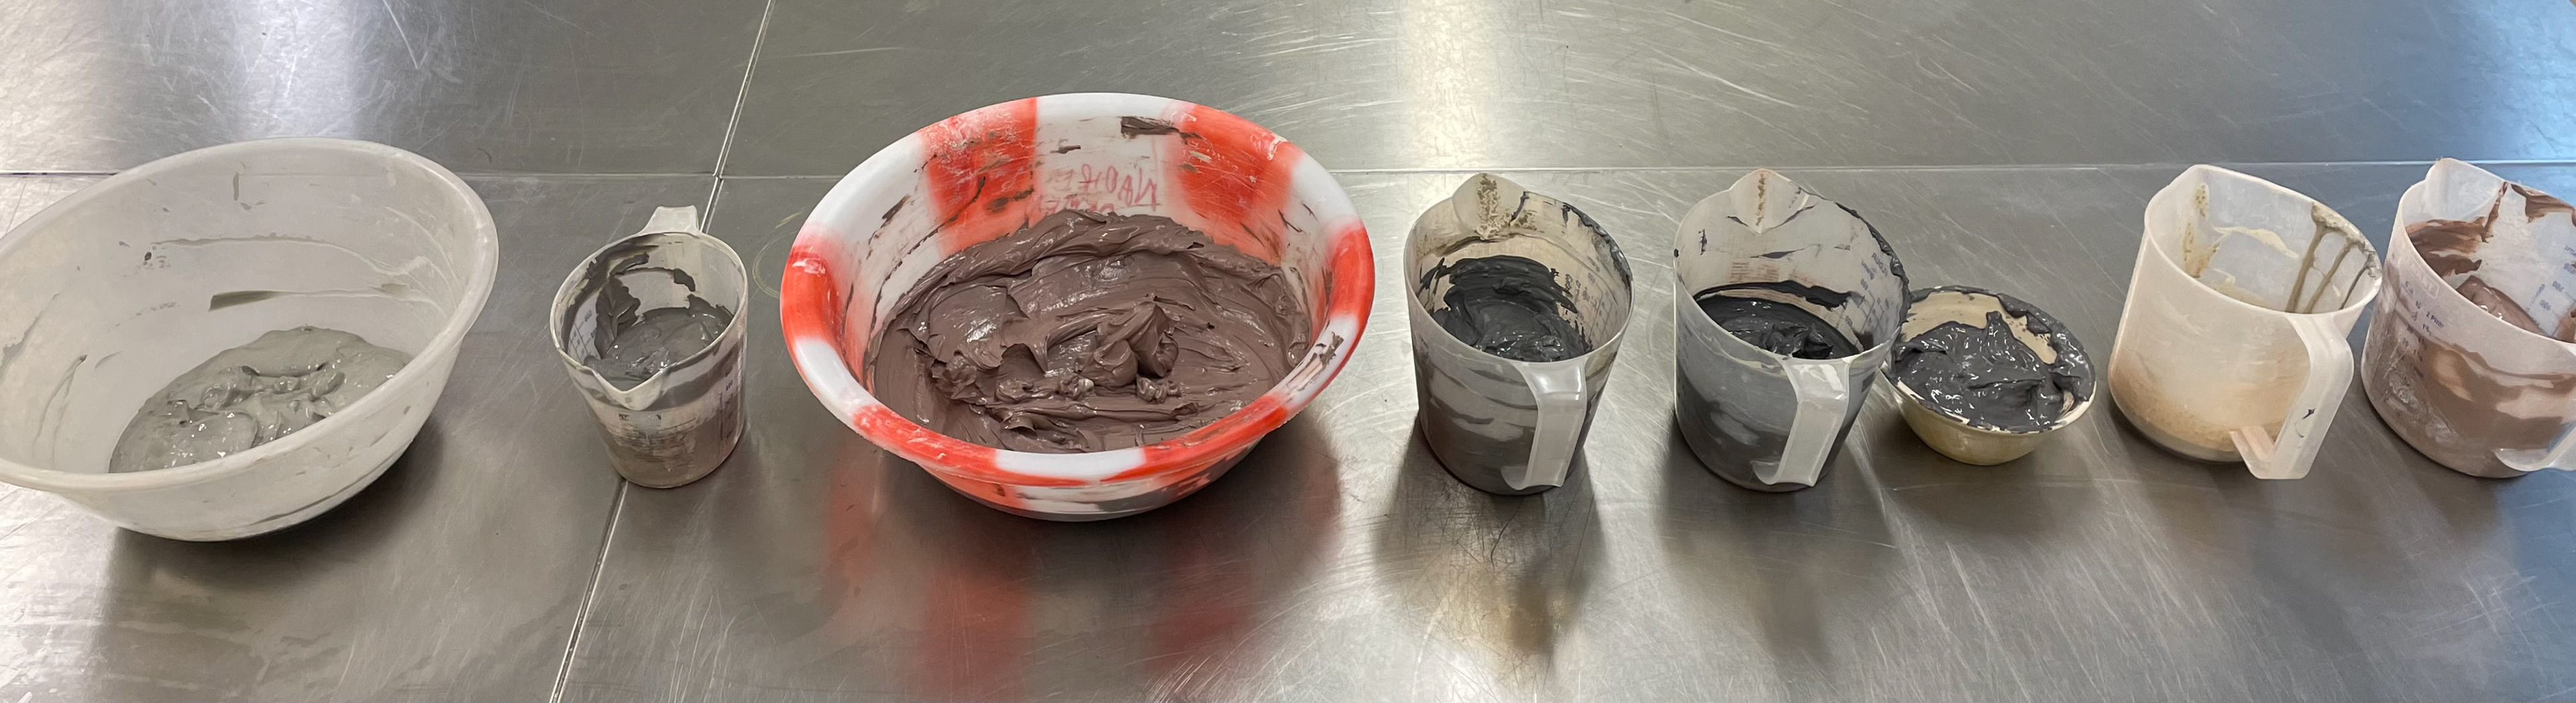
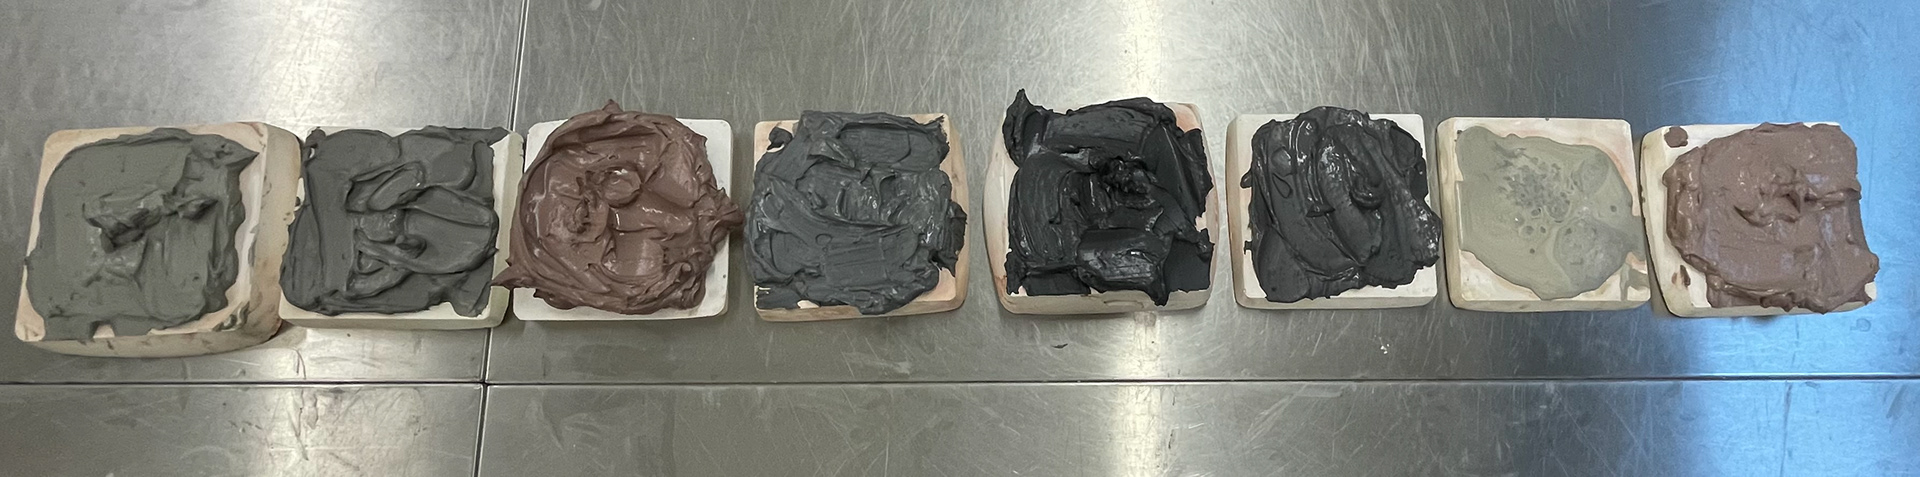
Being all different amounts of clay meant that they had different drying times. Therefore, I was constantly keeping an eye on and checking that they were not getting too dried out by the plaster bats, allowing me to have the perfect consistency for my clay.
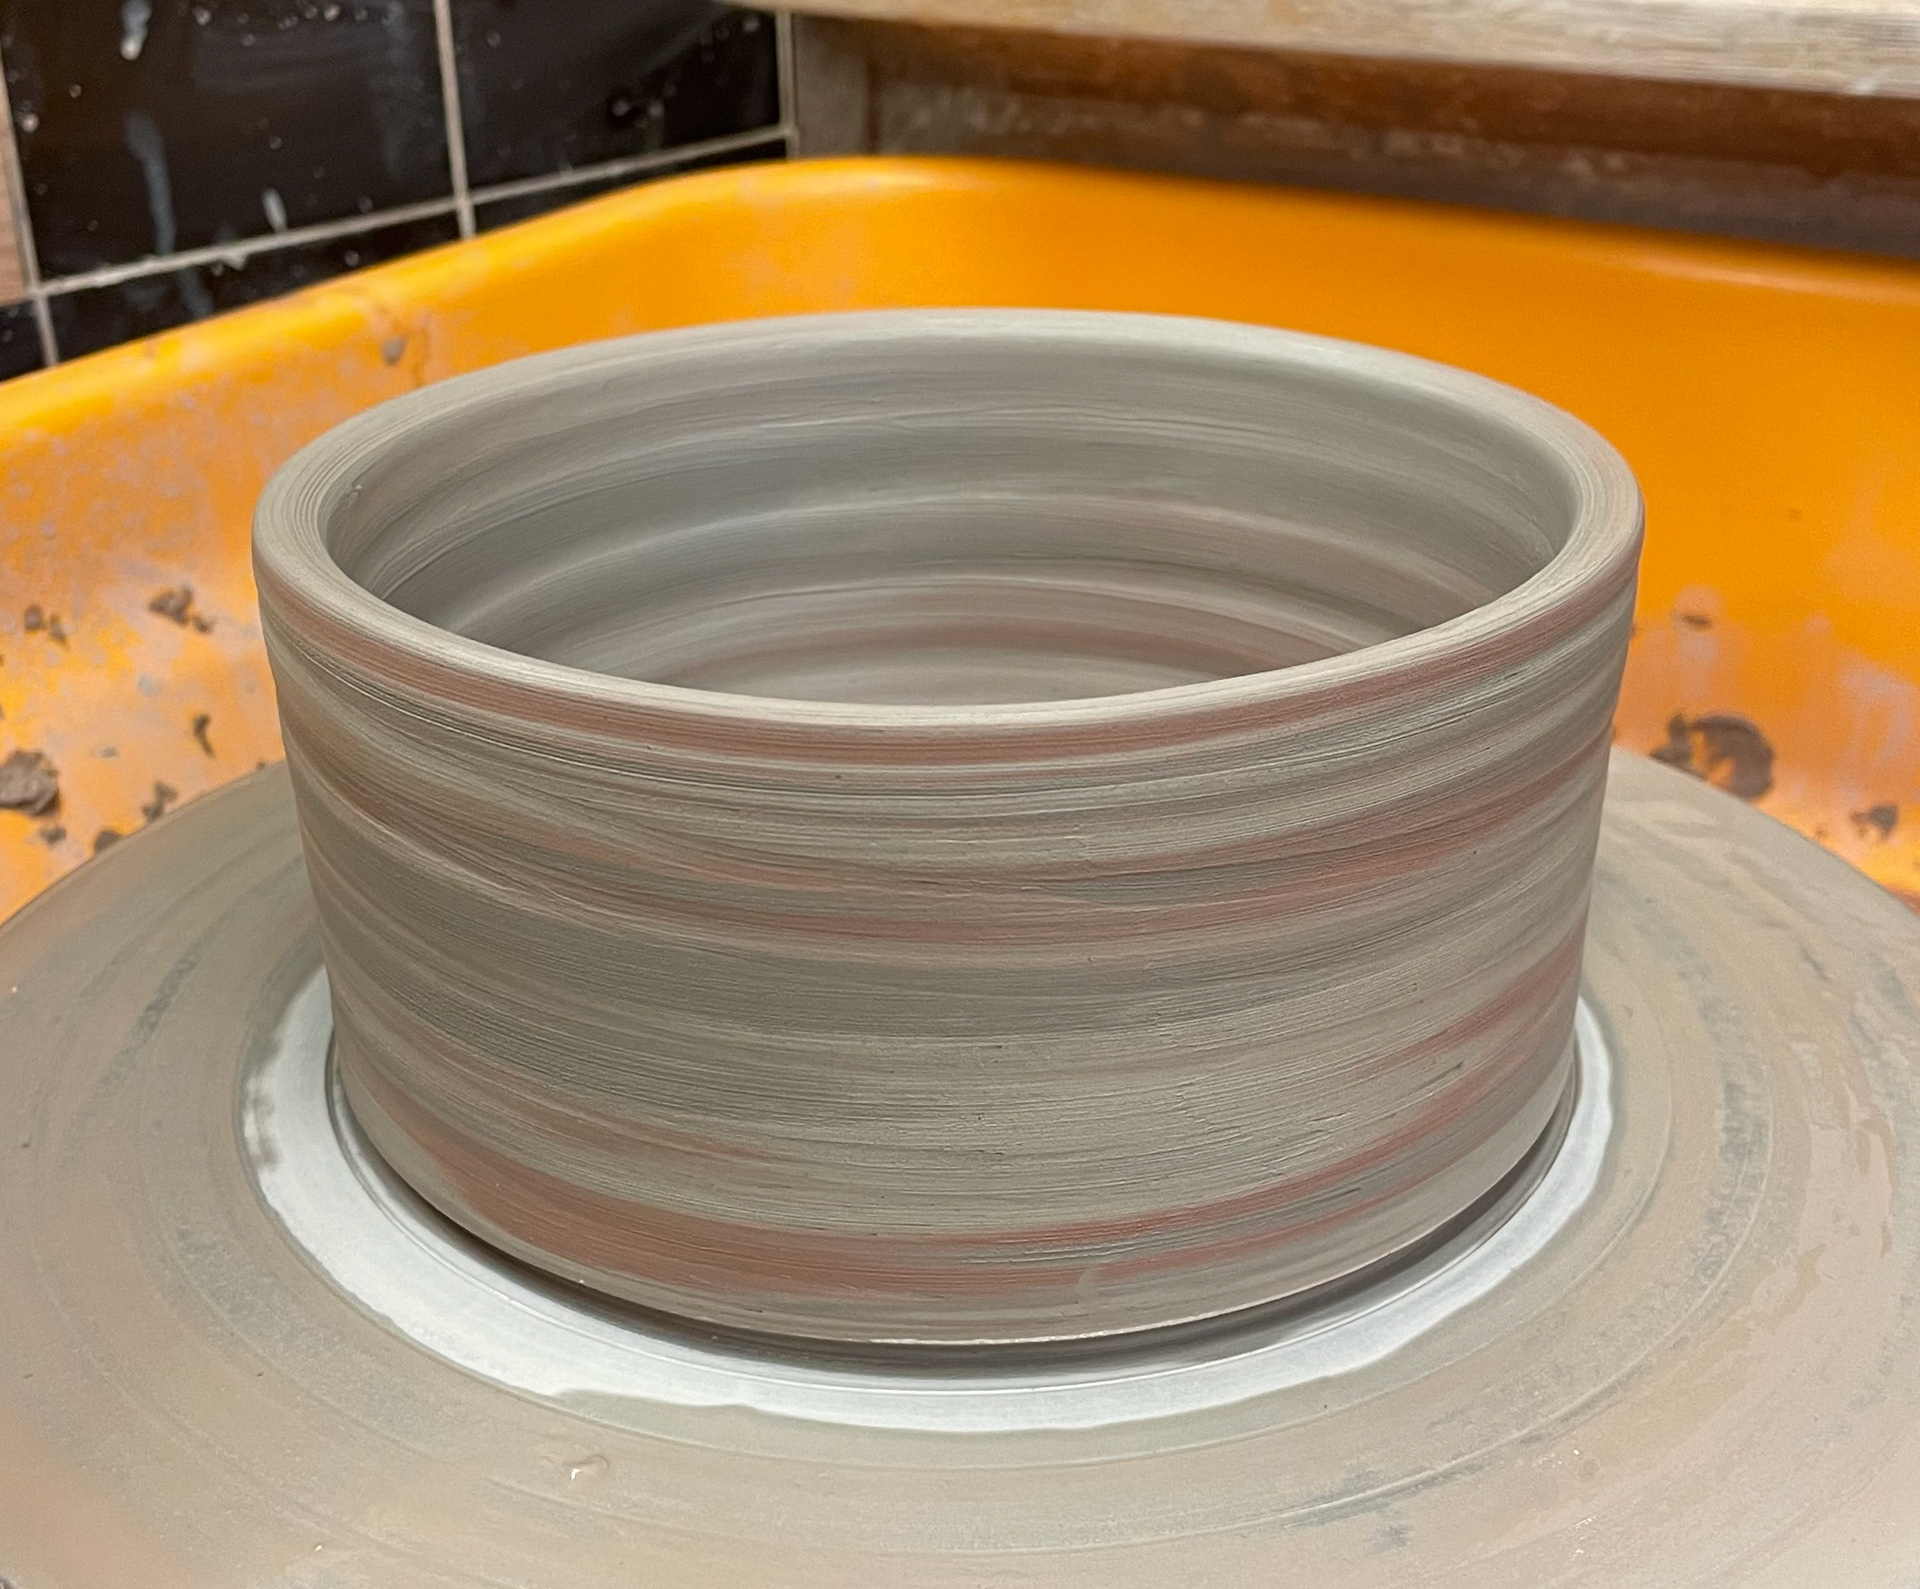
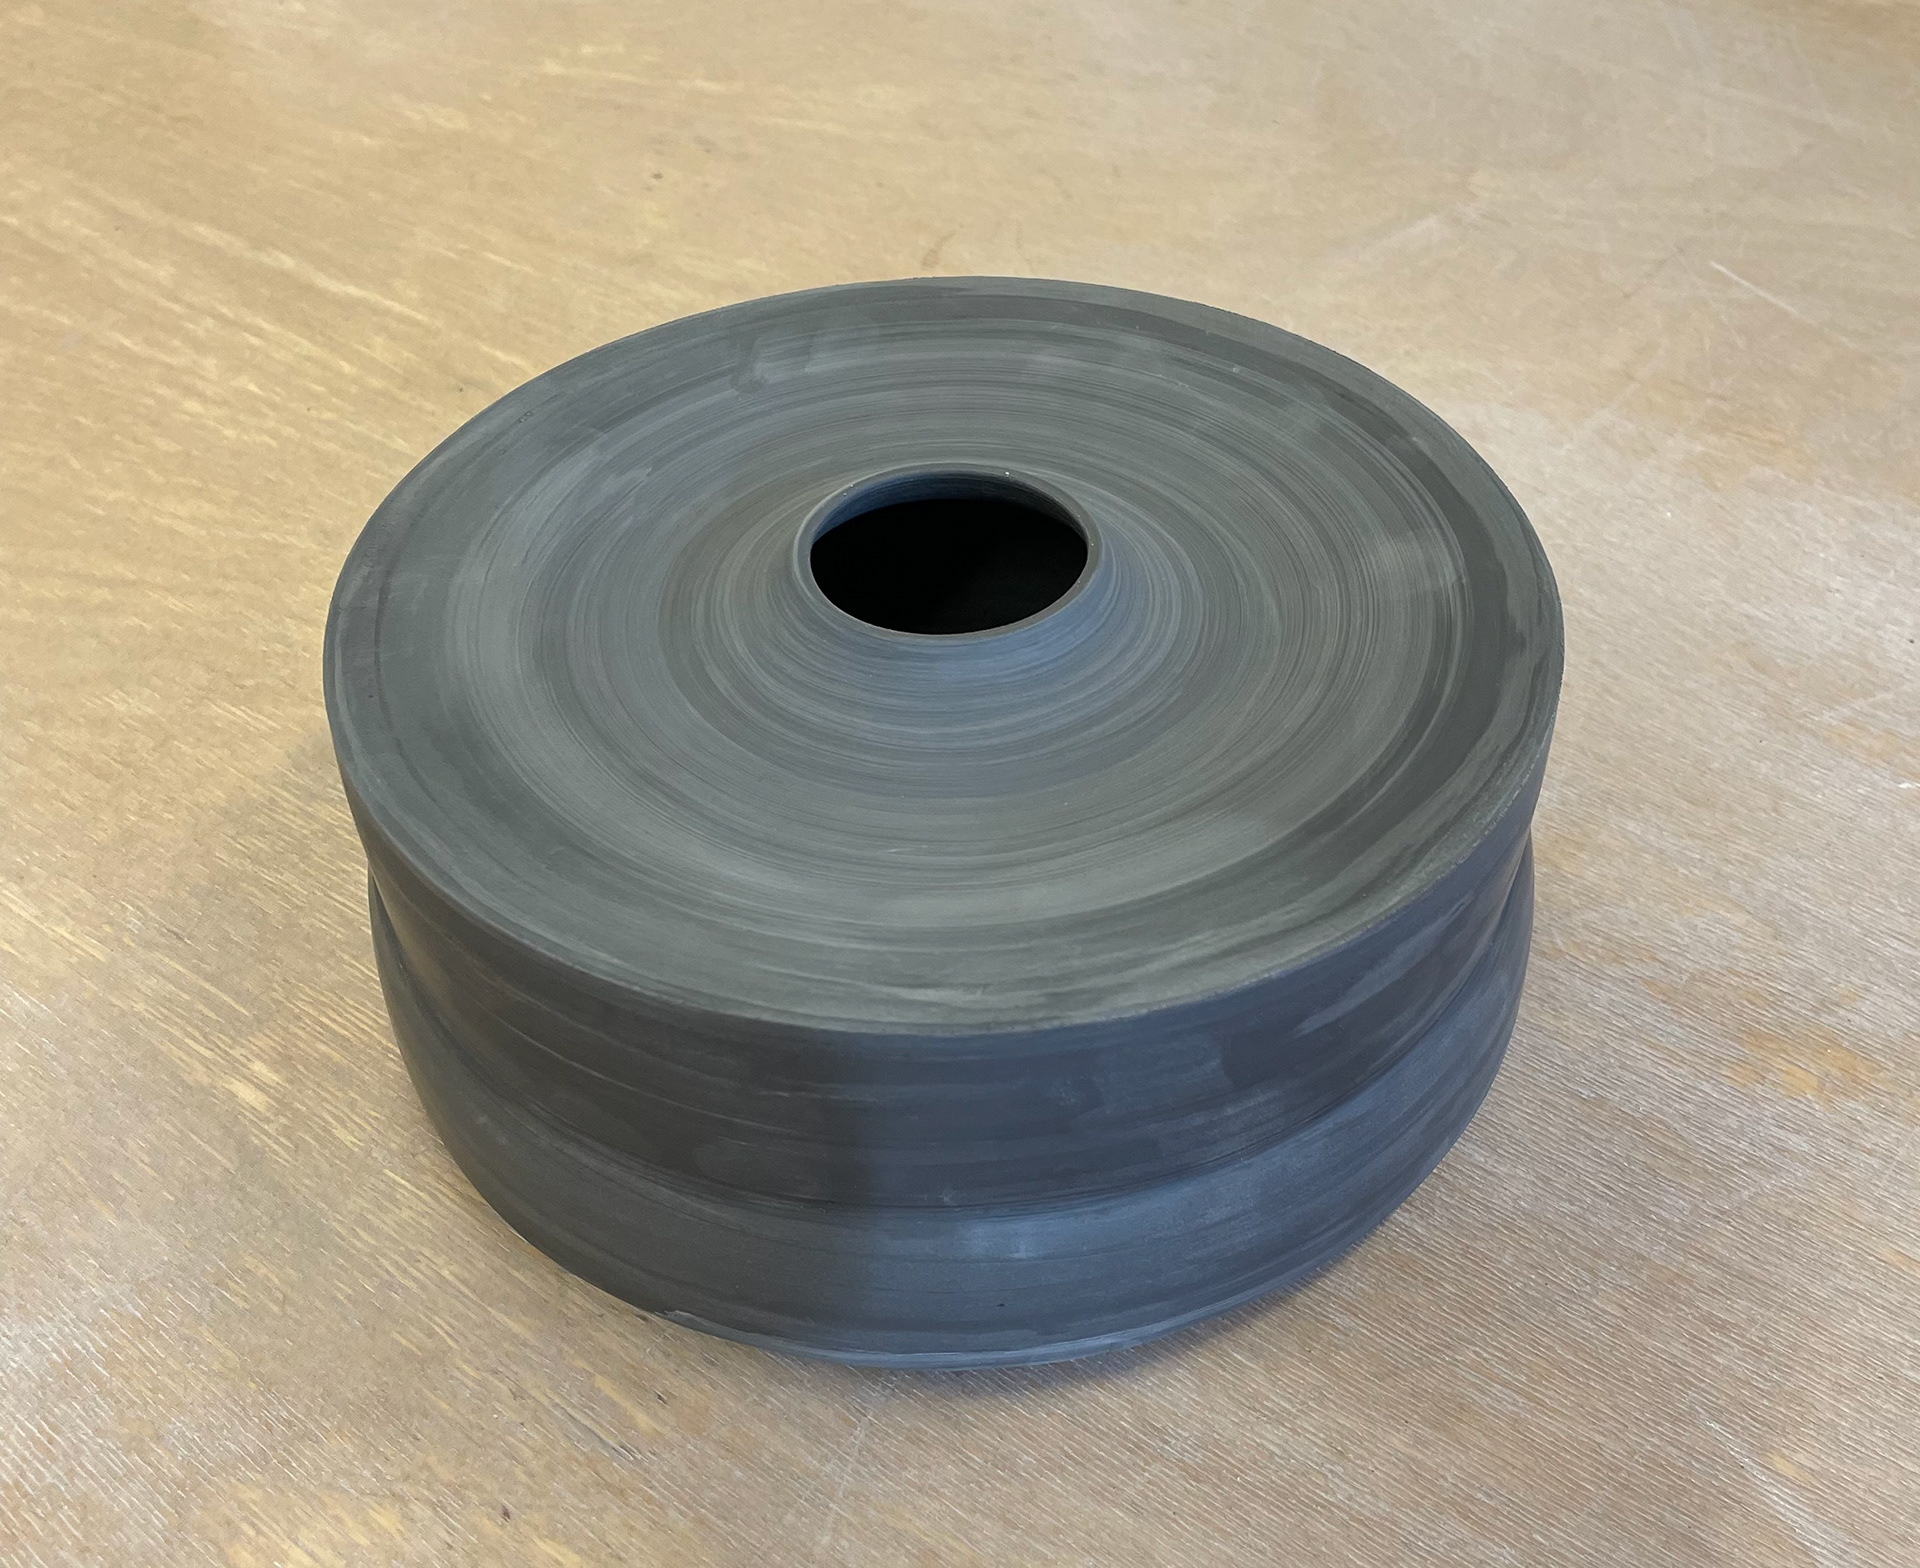
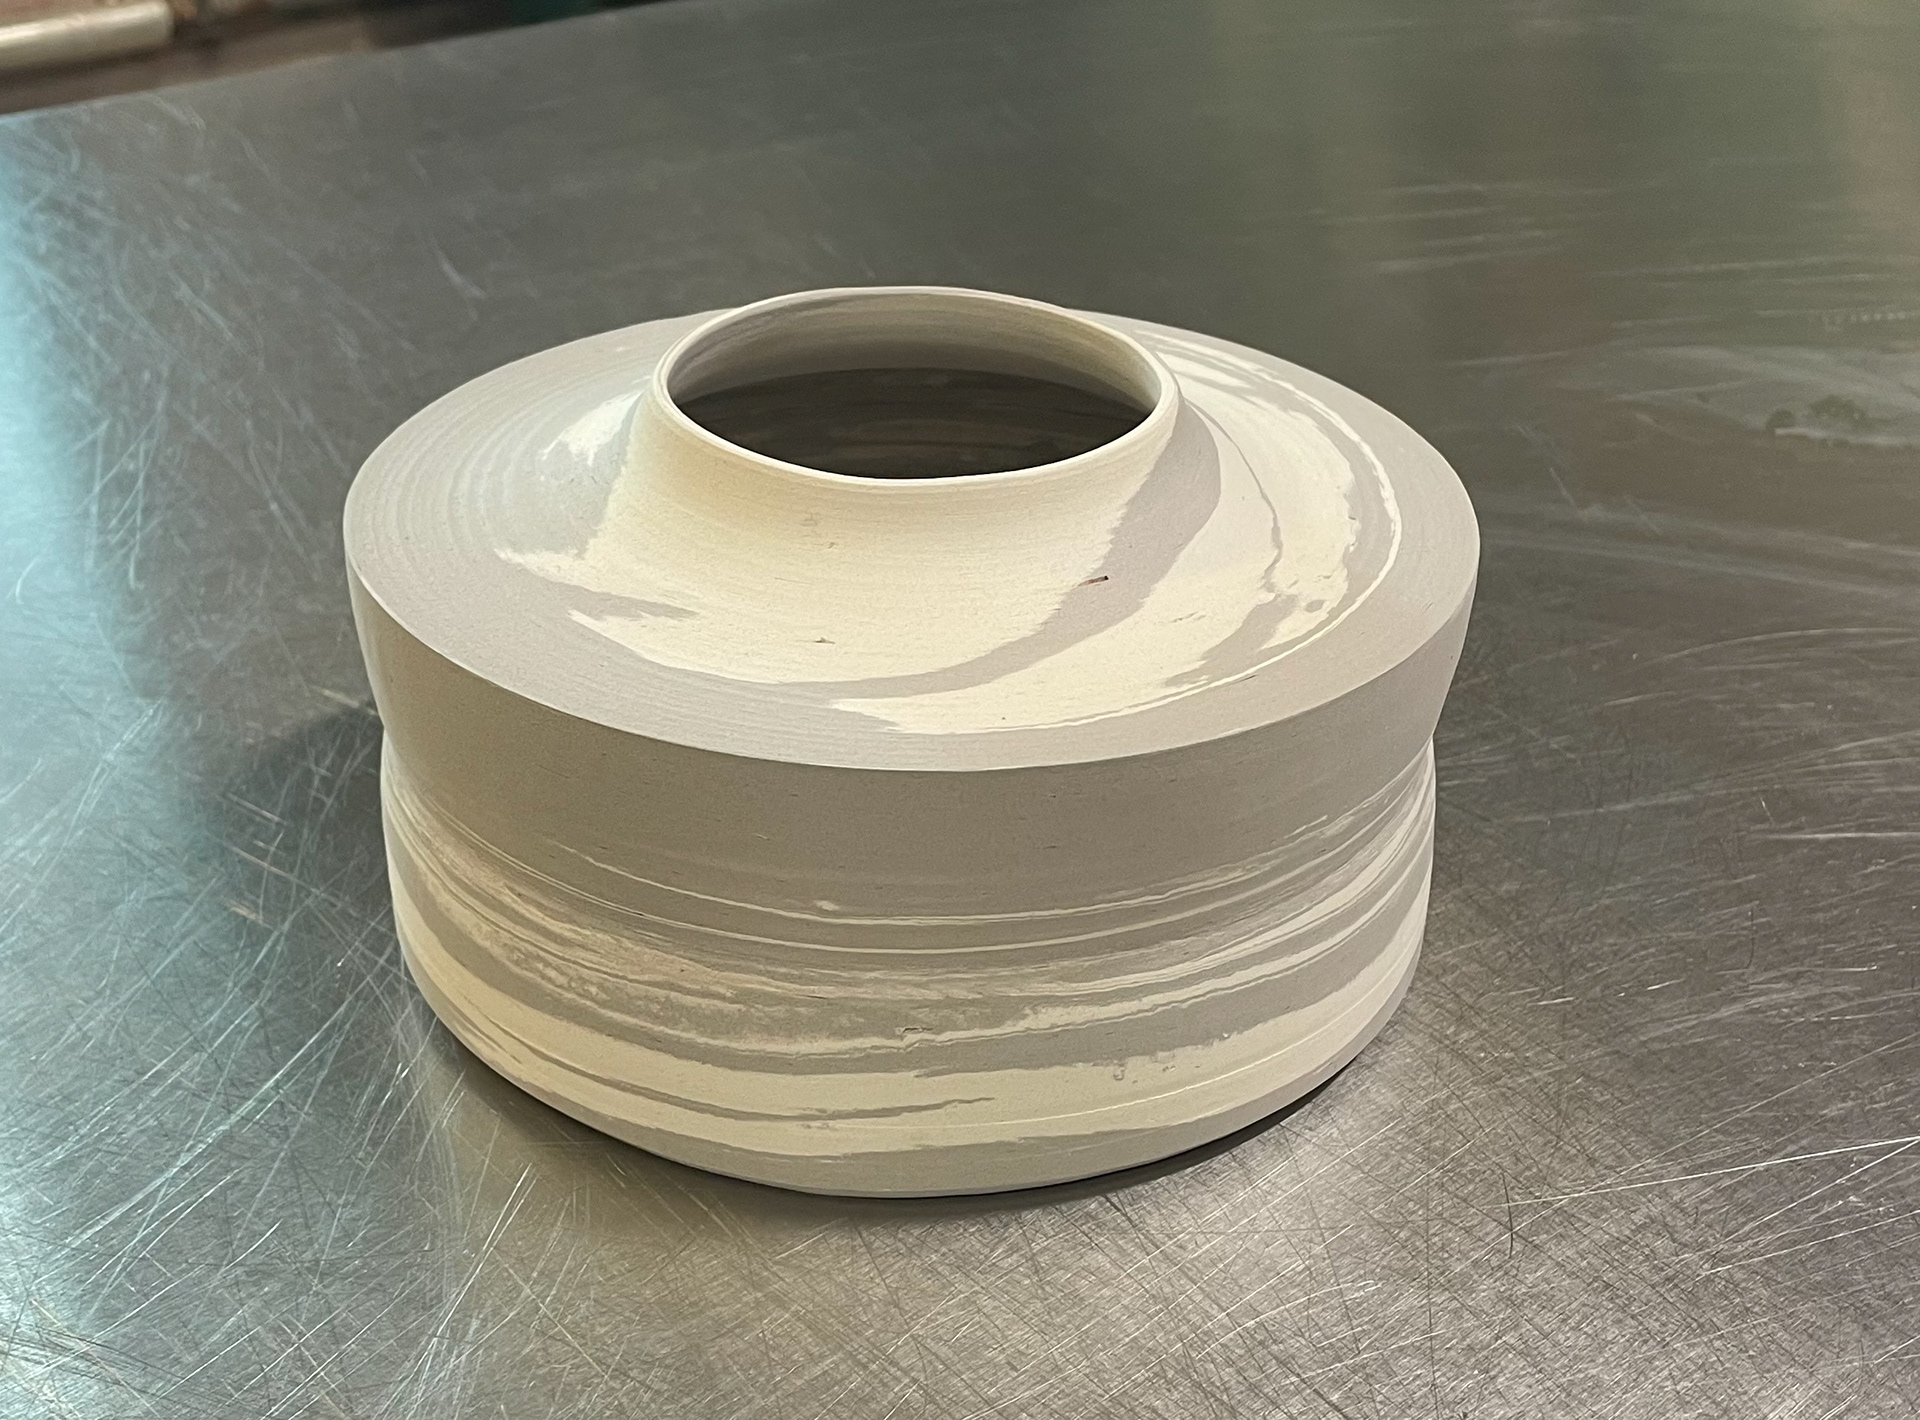
First Beach Vessel
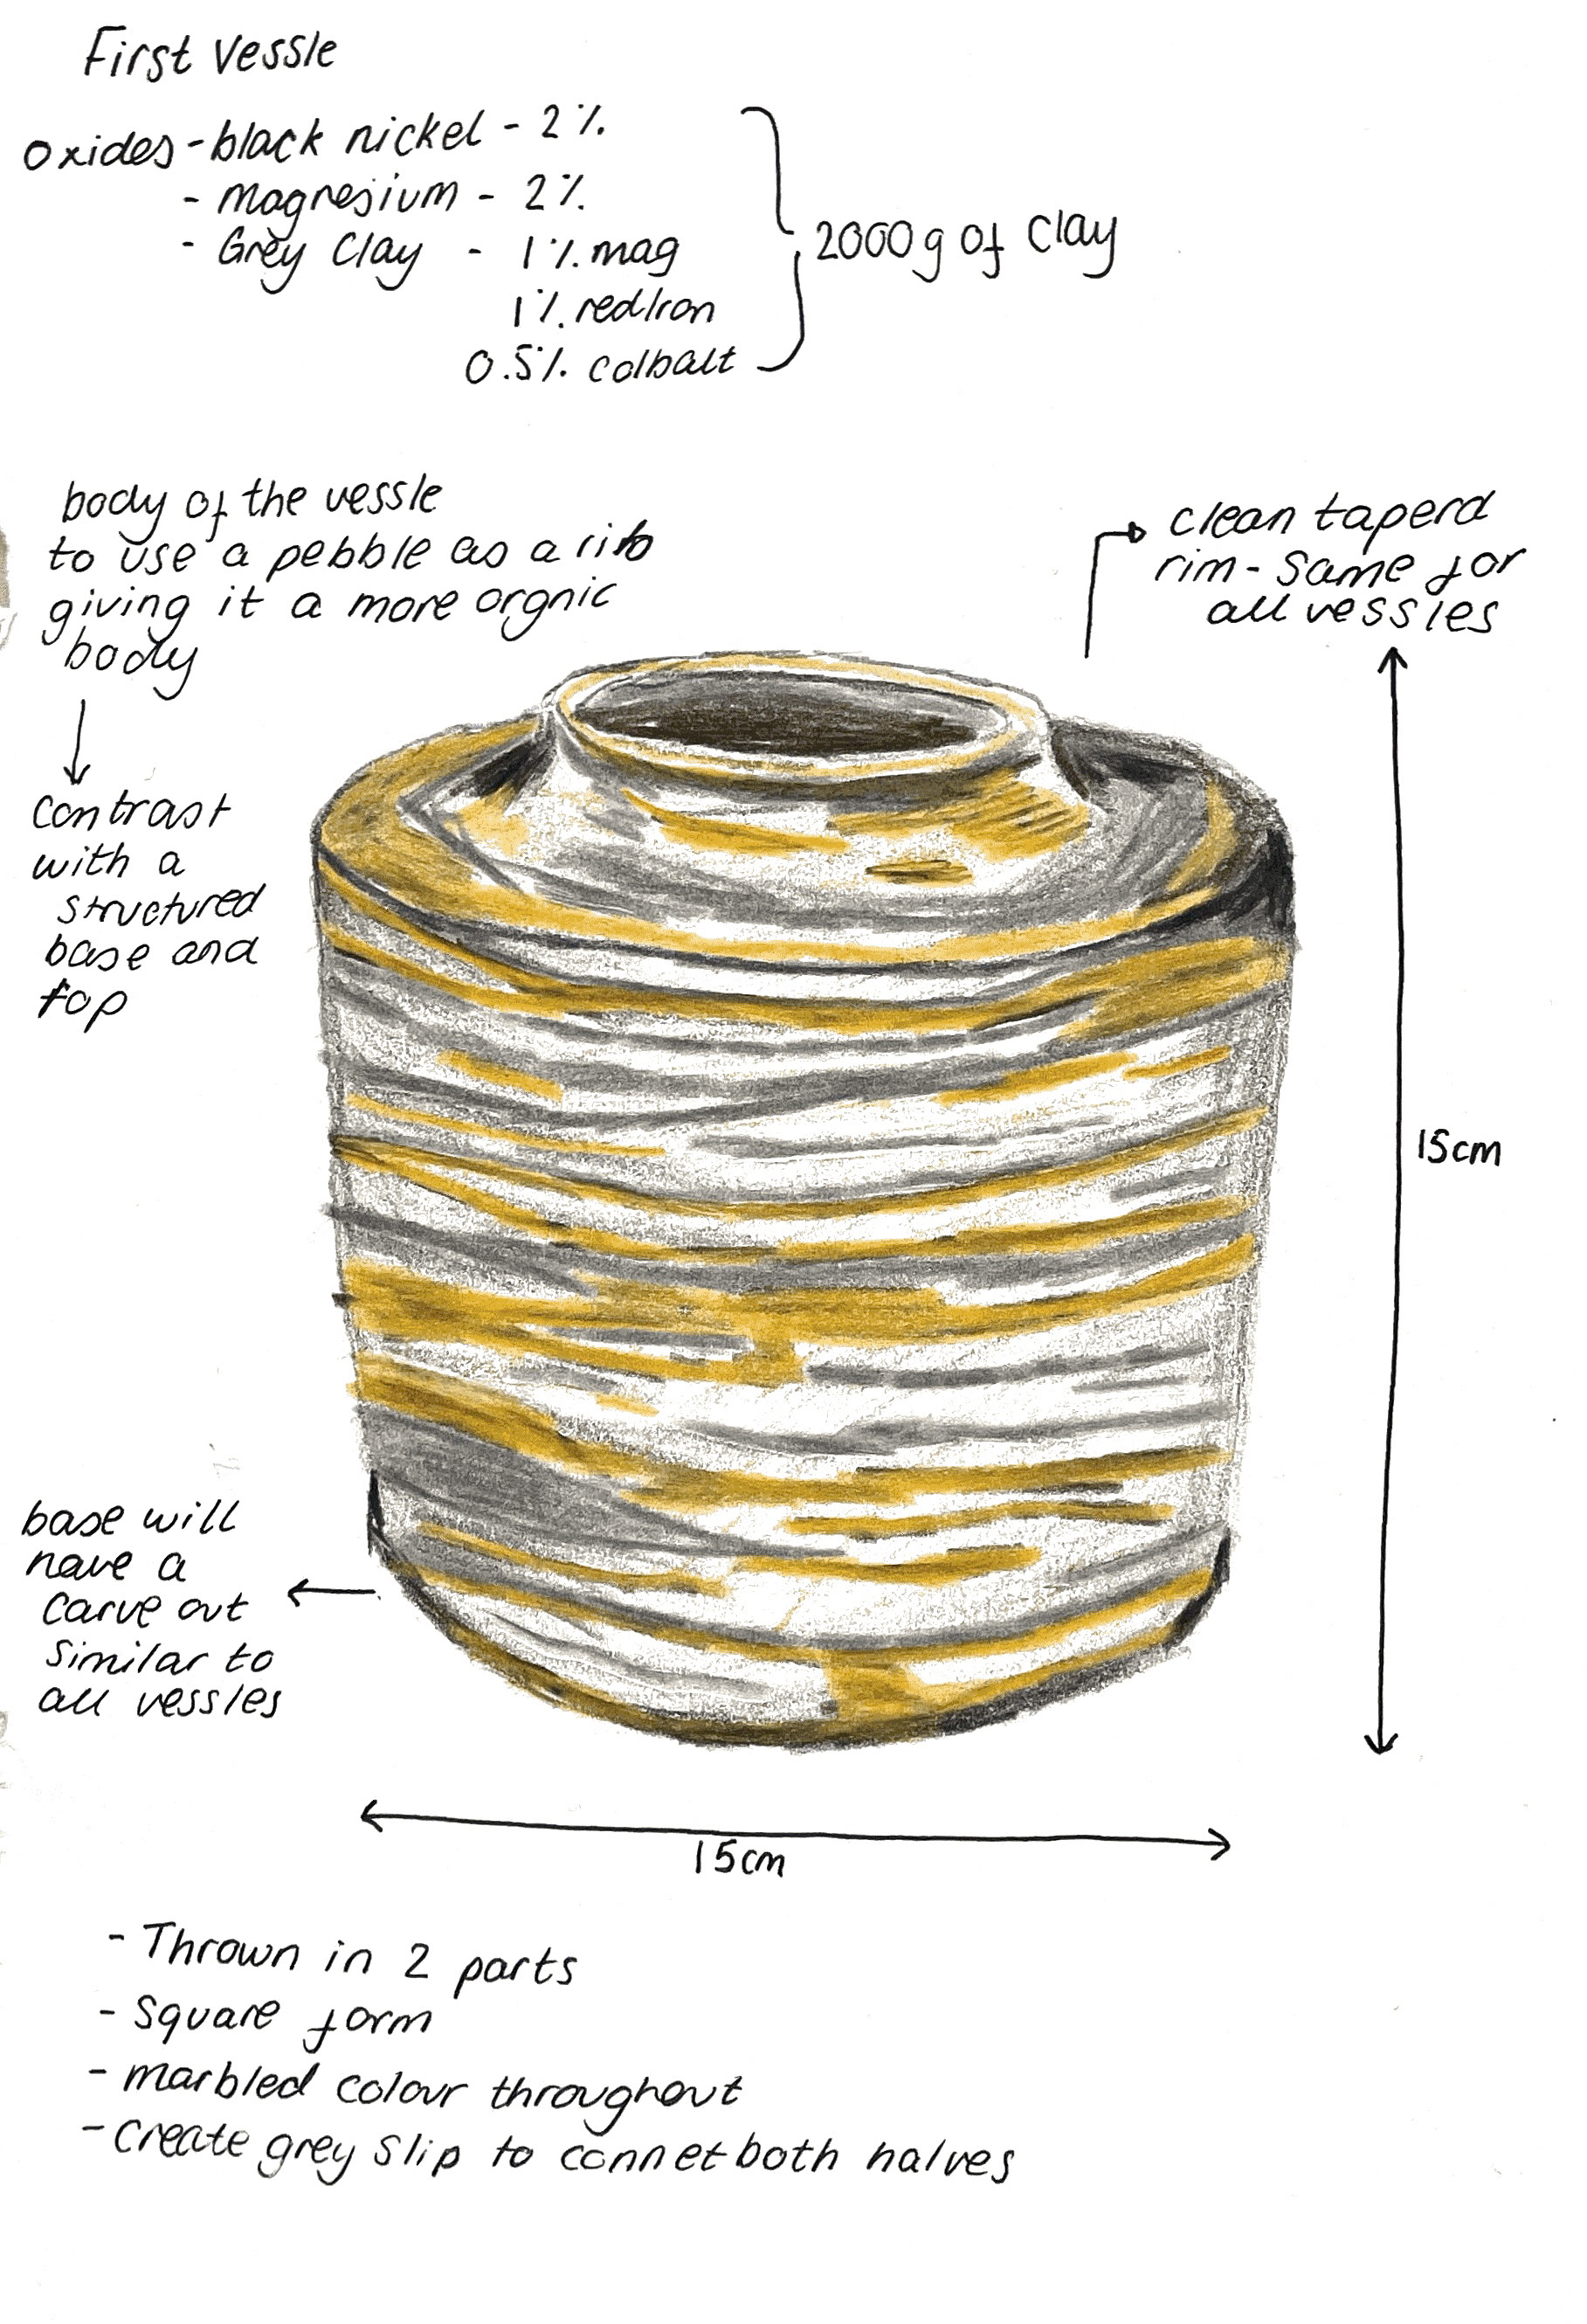
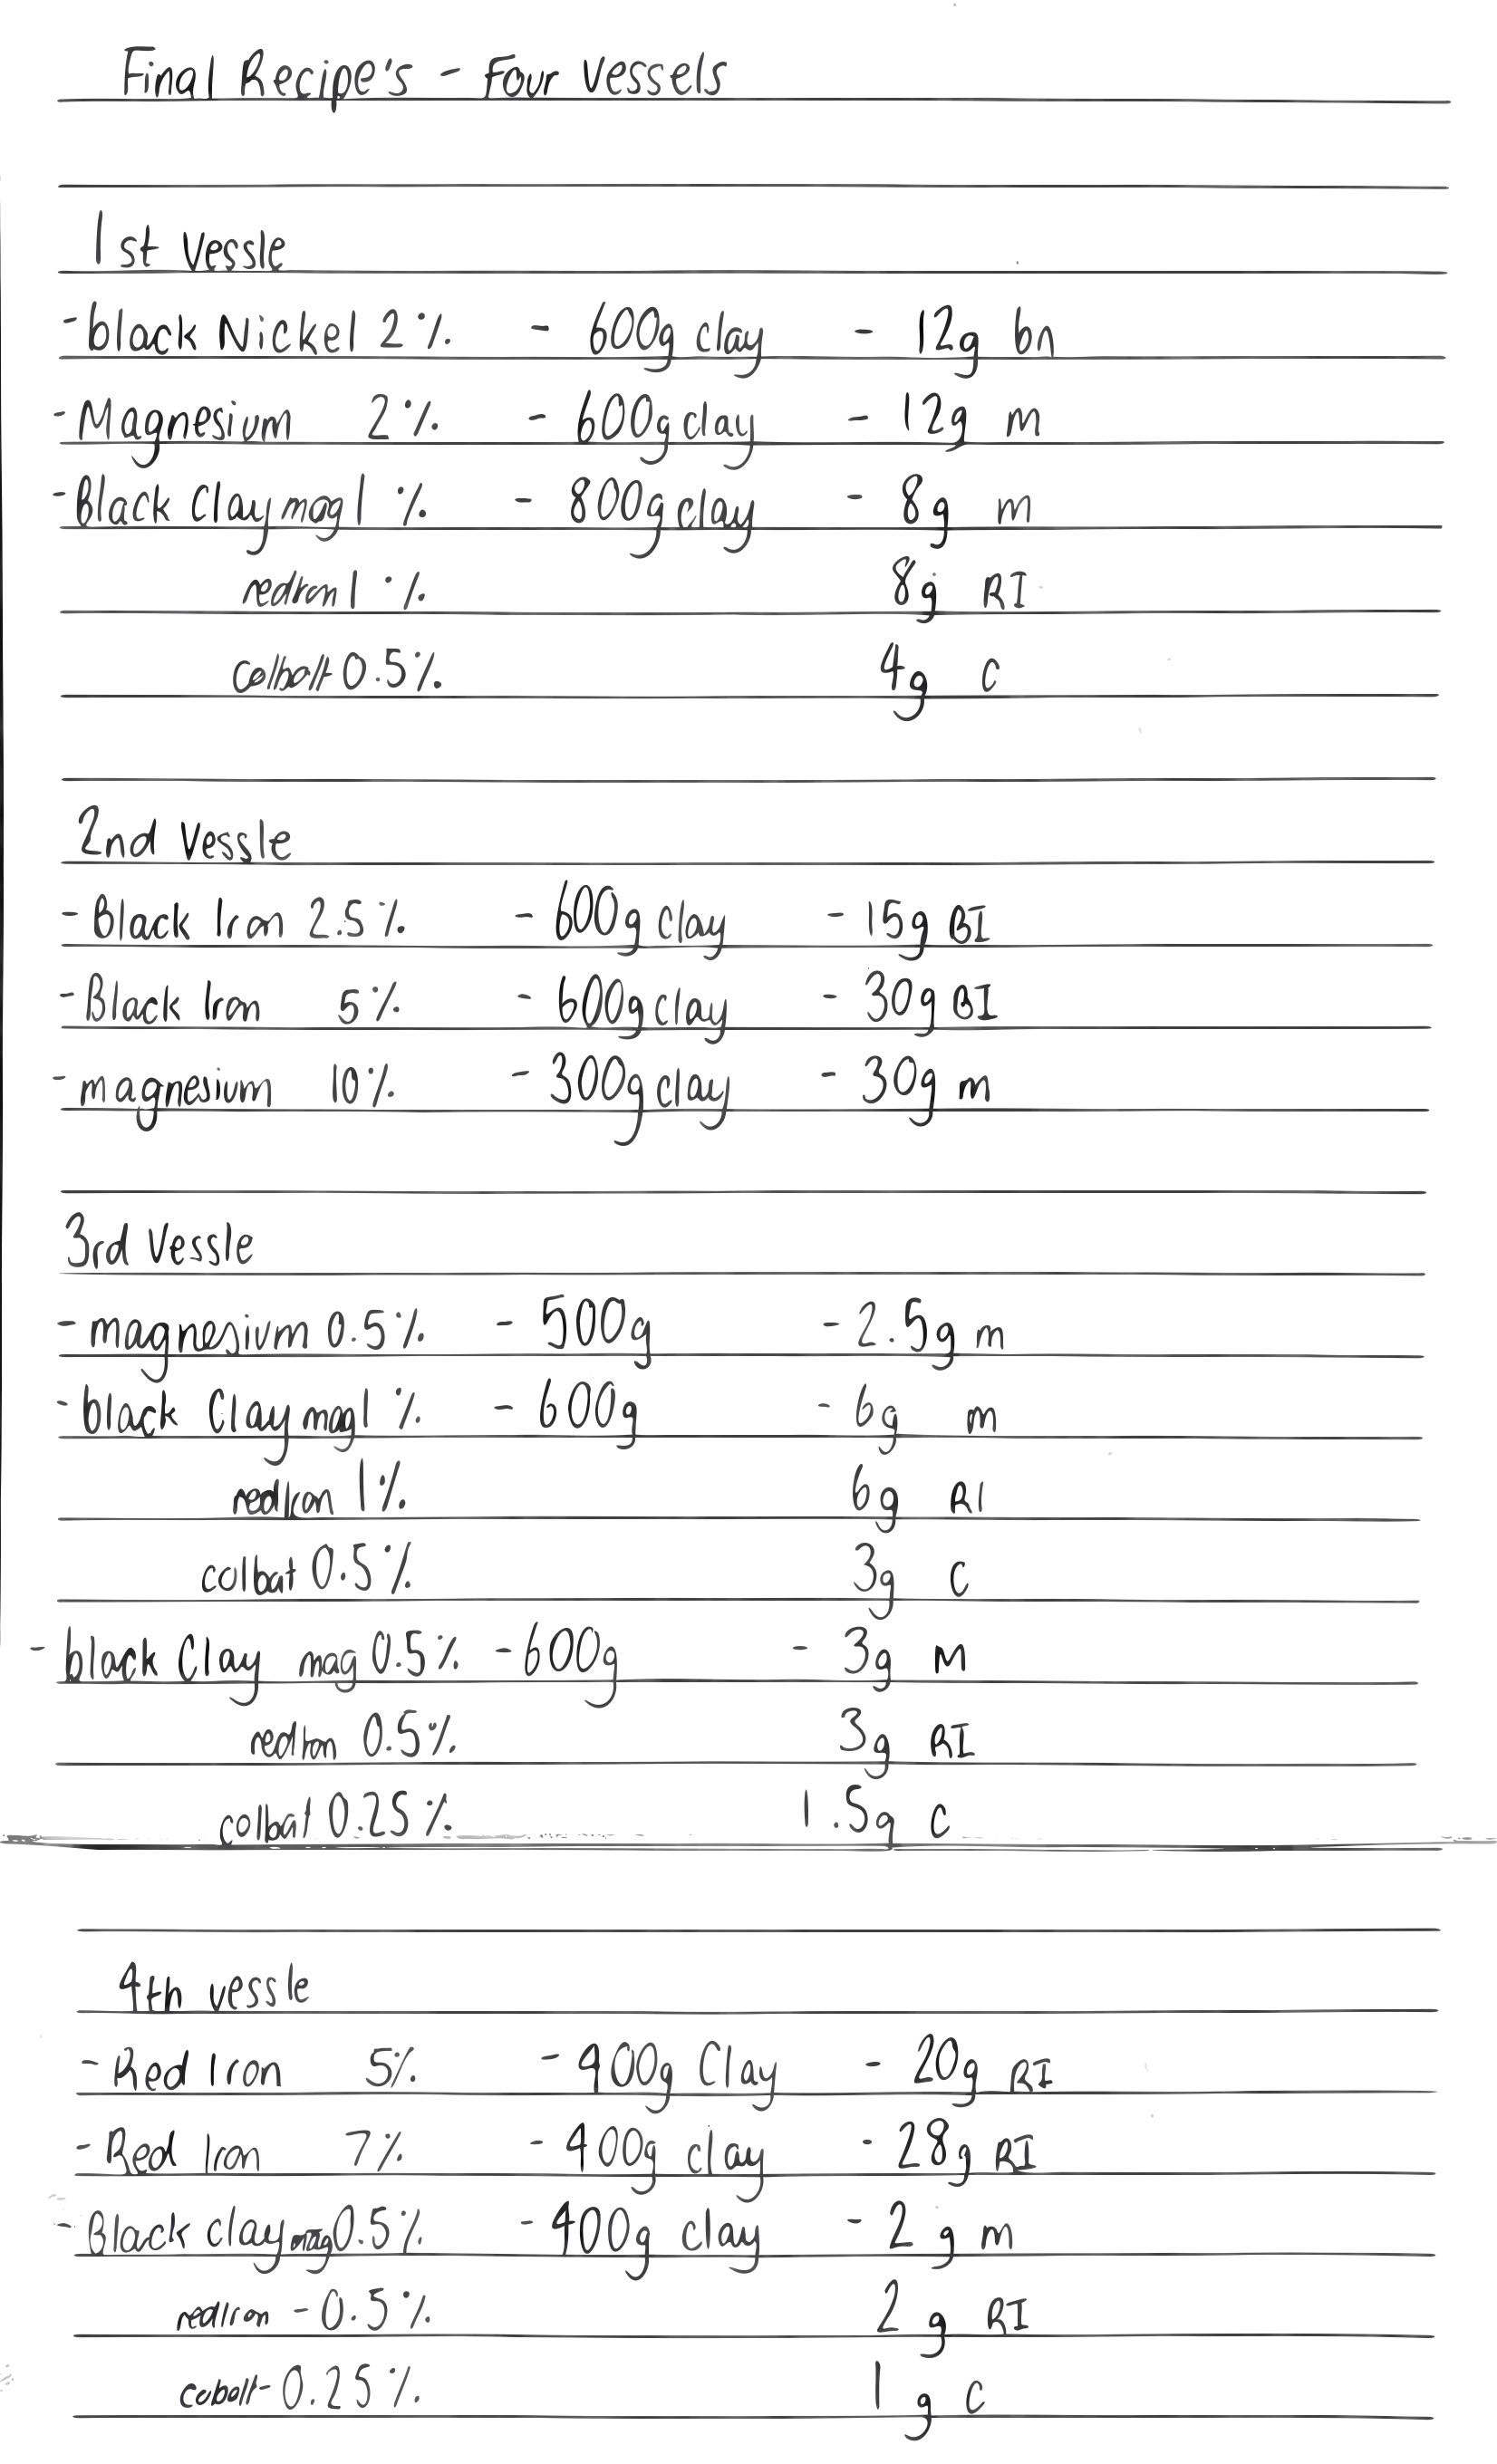
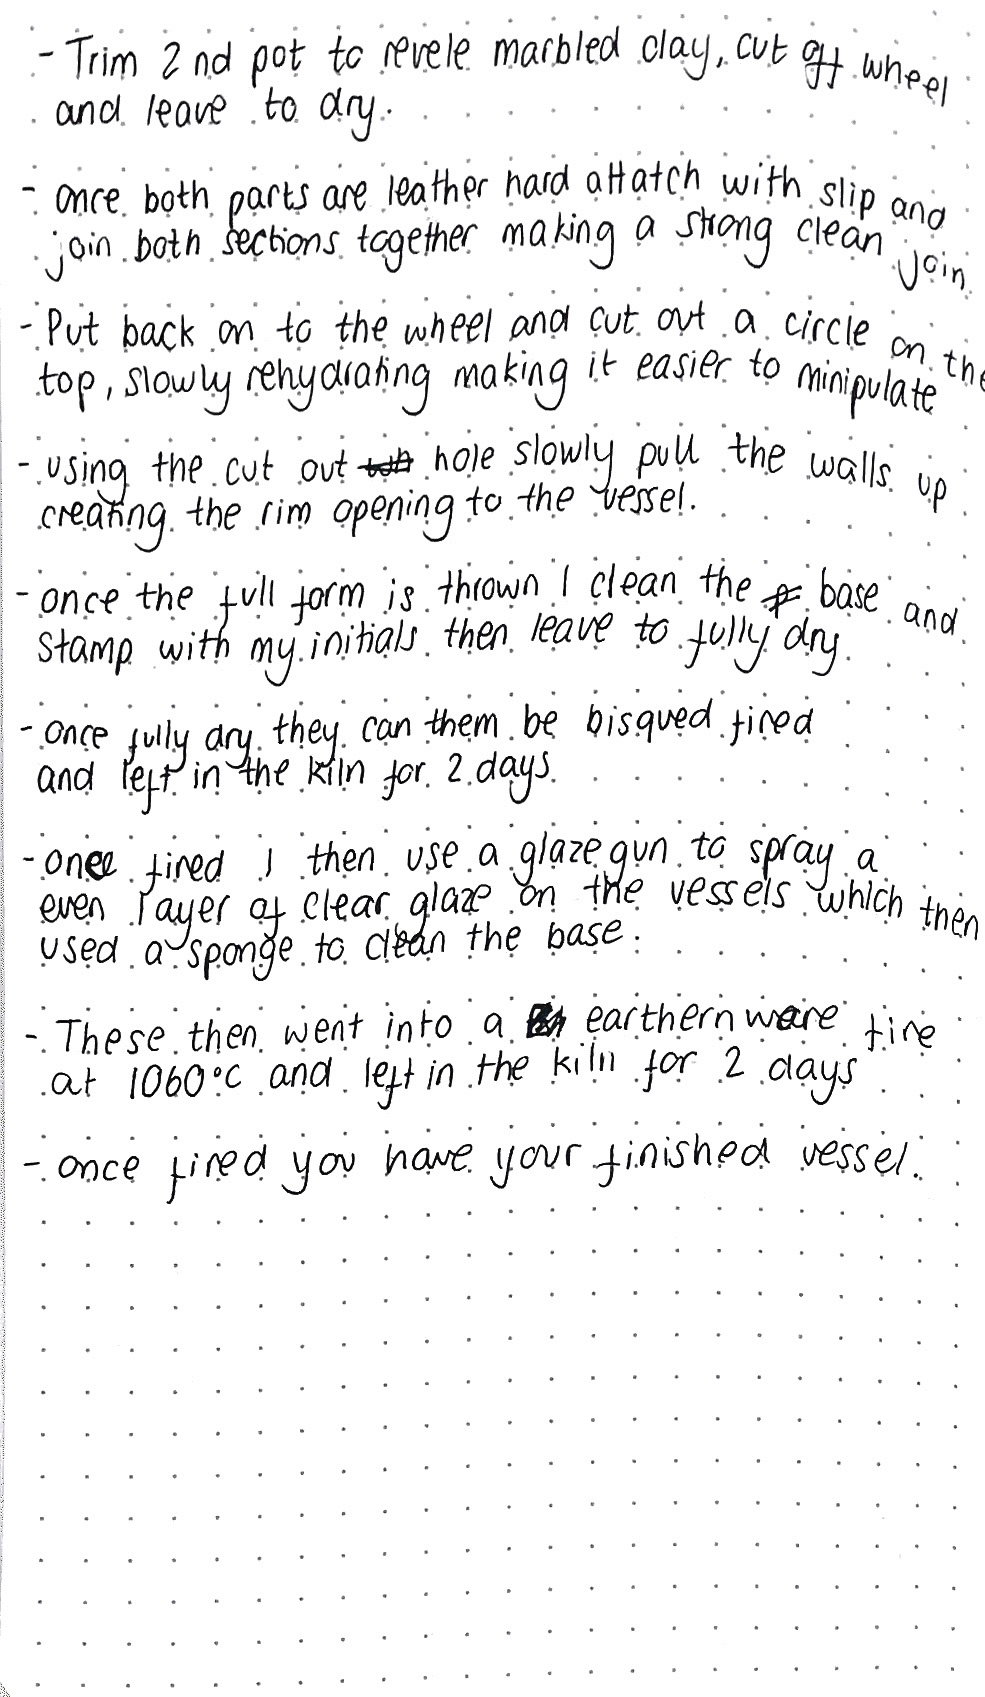
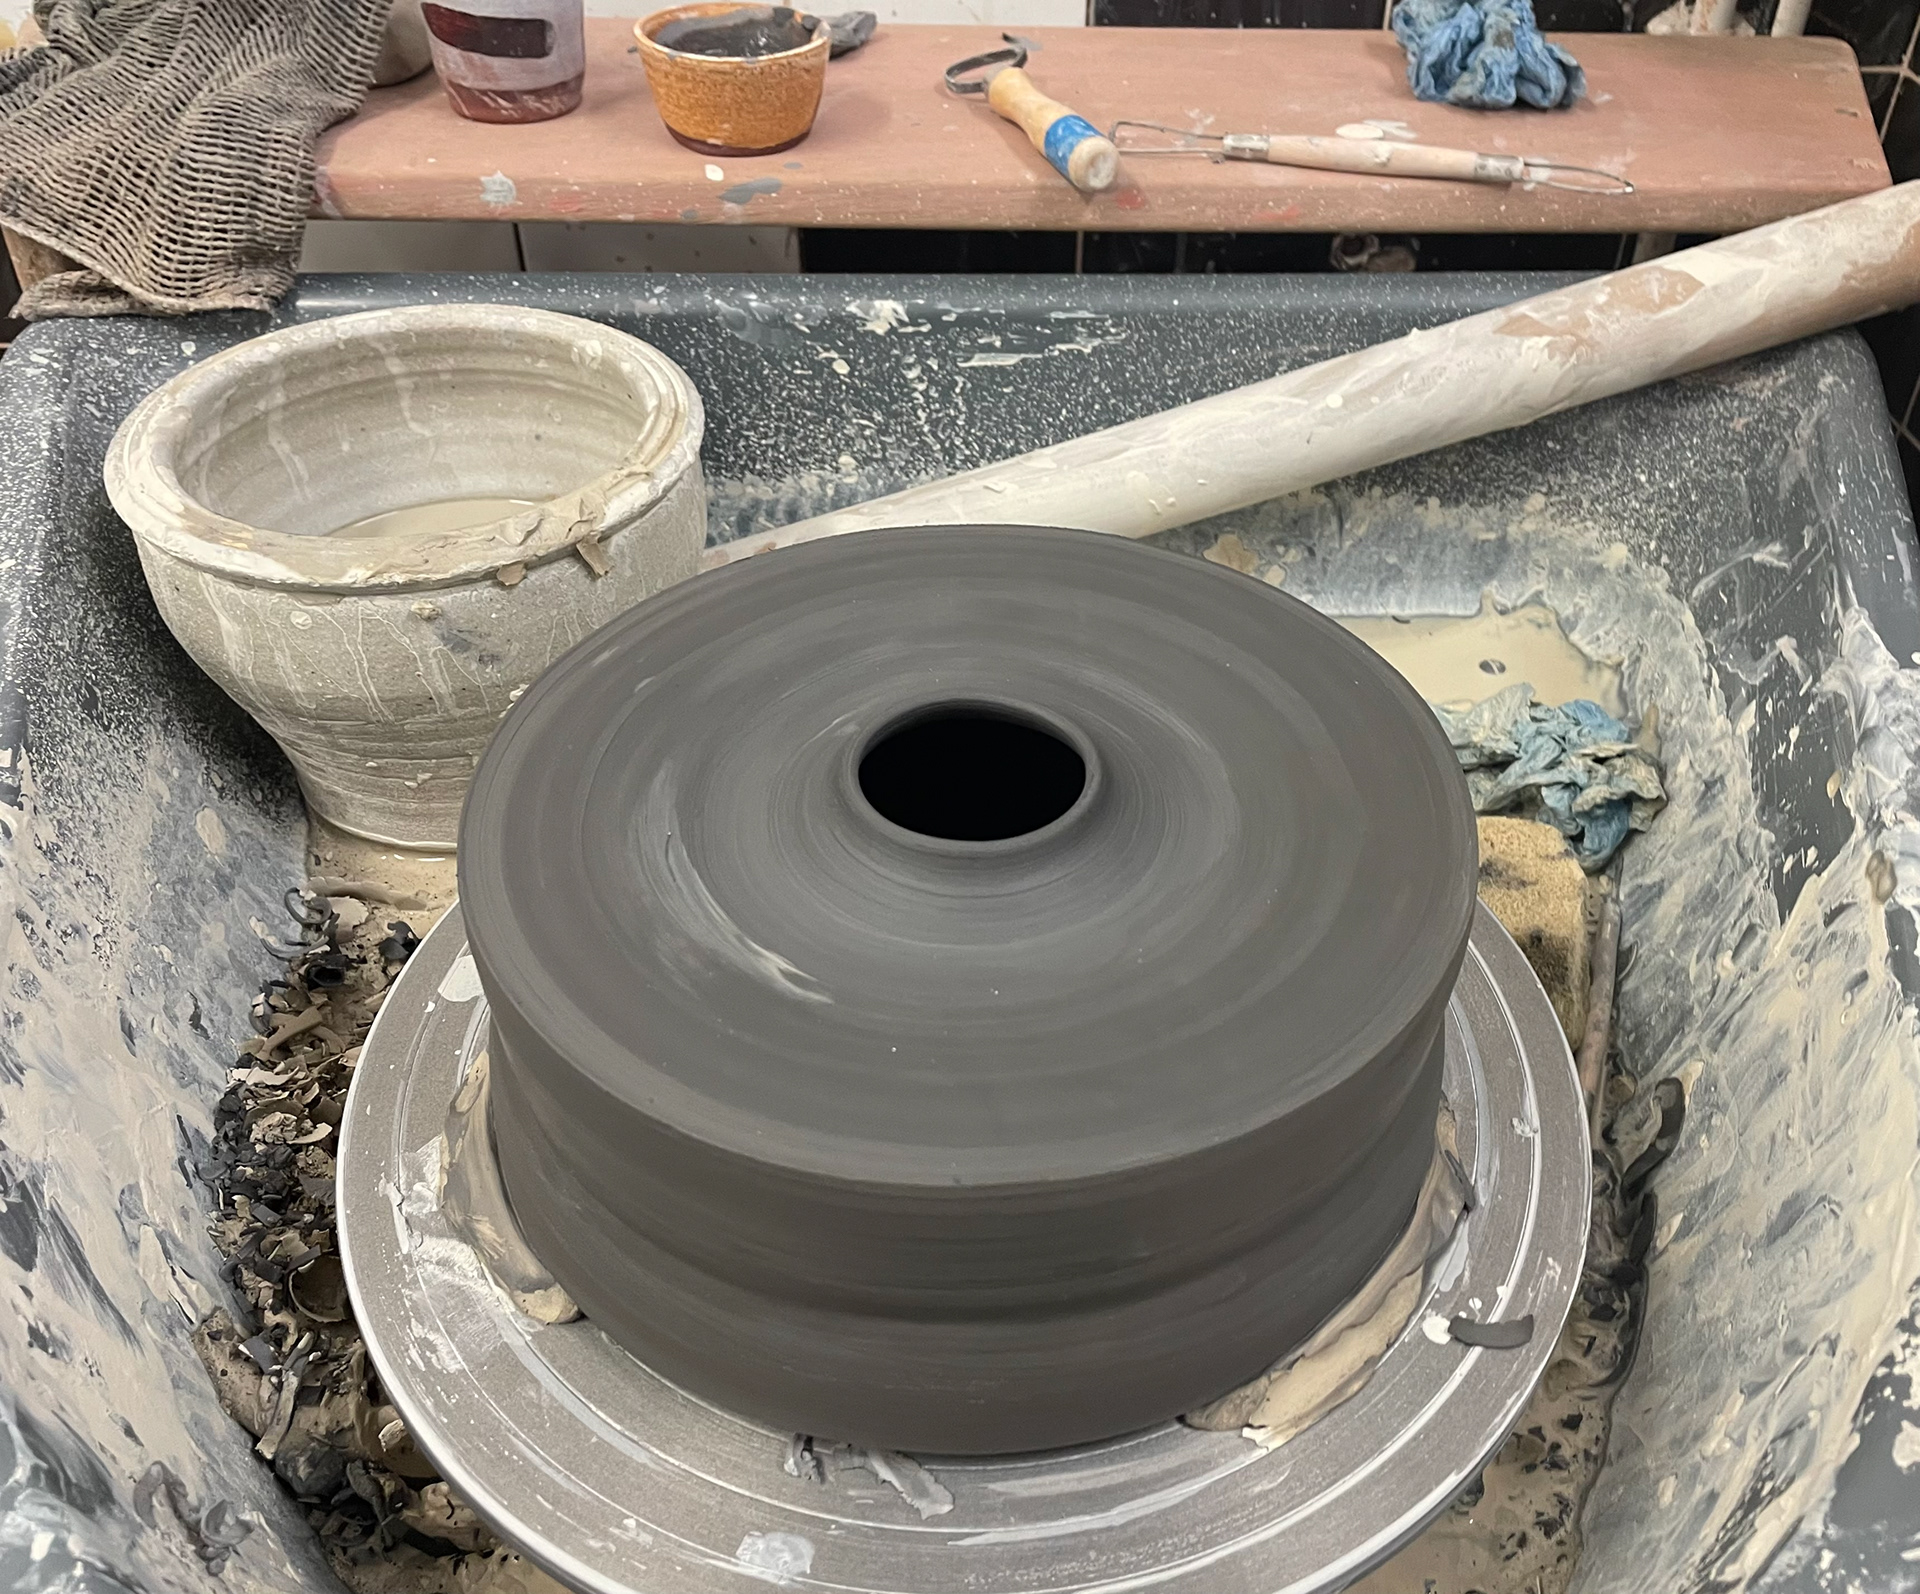
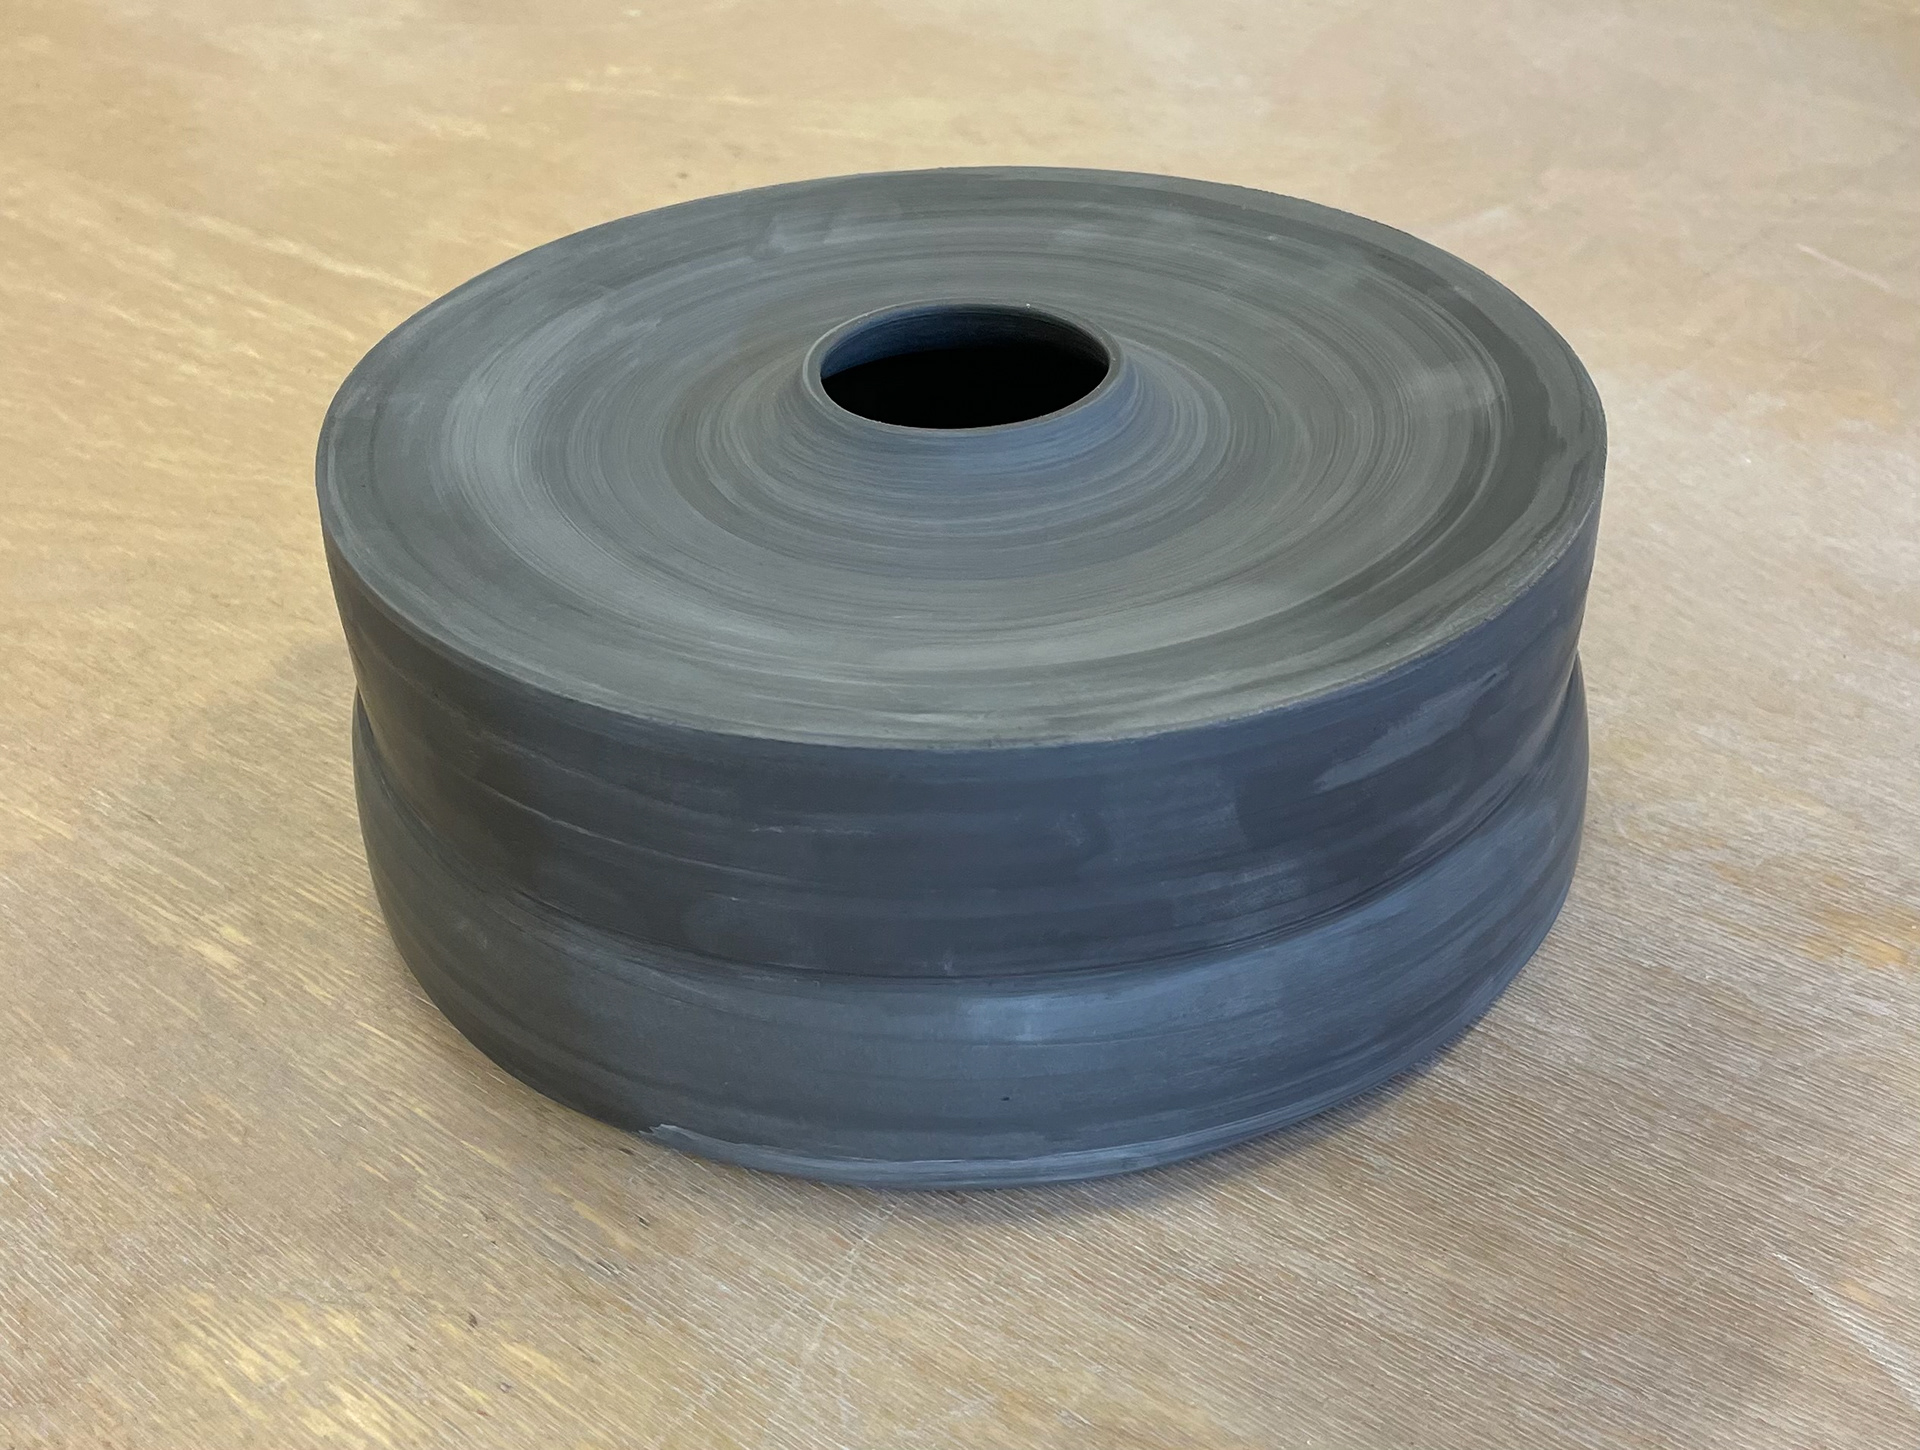
The first vessel I made is a mix of black nickel 2%, magnesium 2% and grey clay with a combined weight of 2000g dry clay. For this vessel, I wanted it to be square, with its width and height being similar. Once I created the colour clay, I halved each clay, allowing me to throw this pot in two parts. It was difficult getting the width of the vessels to be exact and throwing the walls with the same thickness. Due to not thinking that clay shrinks, I measured the top width once it dried due to this, I threw the 2nd part with the wrong measurements, leading to the two pots not lining up. Due to this, they didn't attach flushed. However, once attached with slurry from the trimmings, I was able to trim the overlay that the attachment had, leading to a clean connection between the two parts.
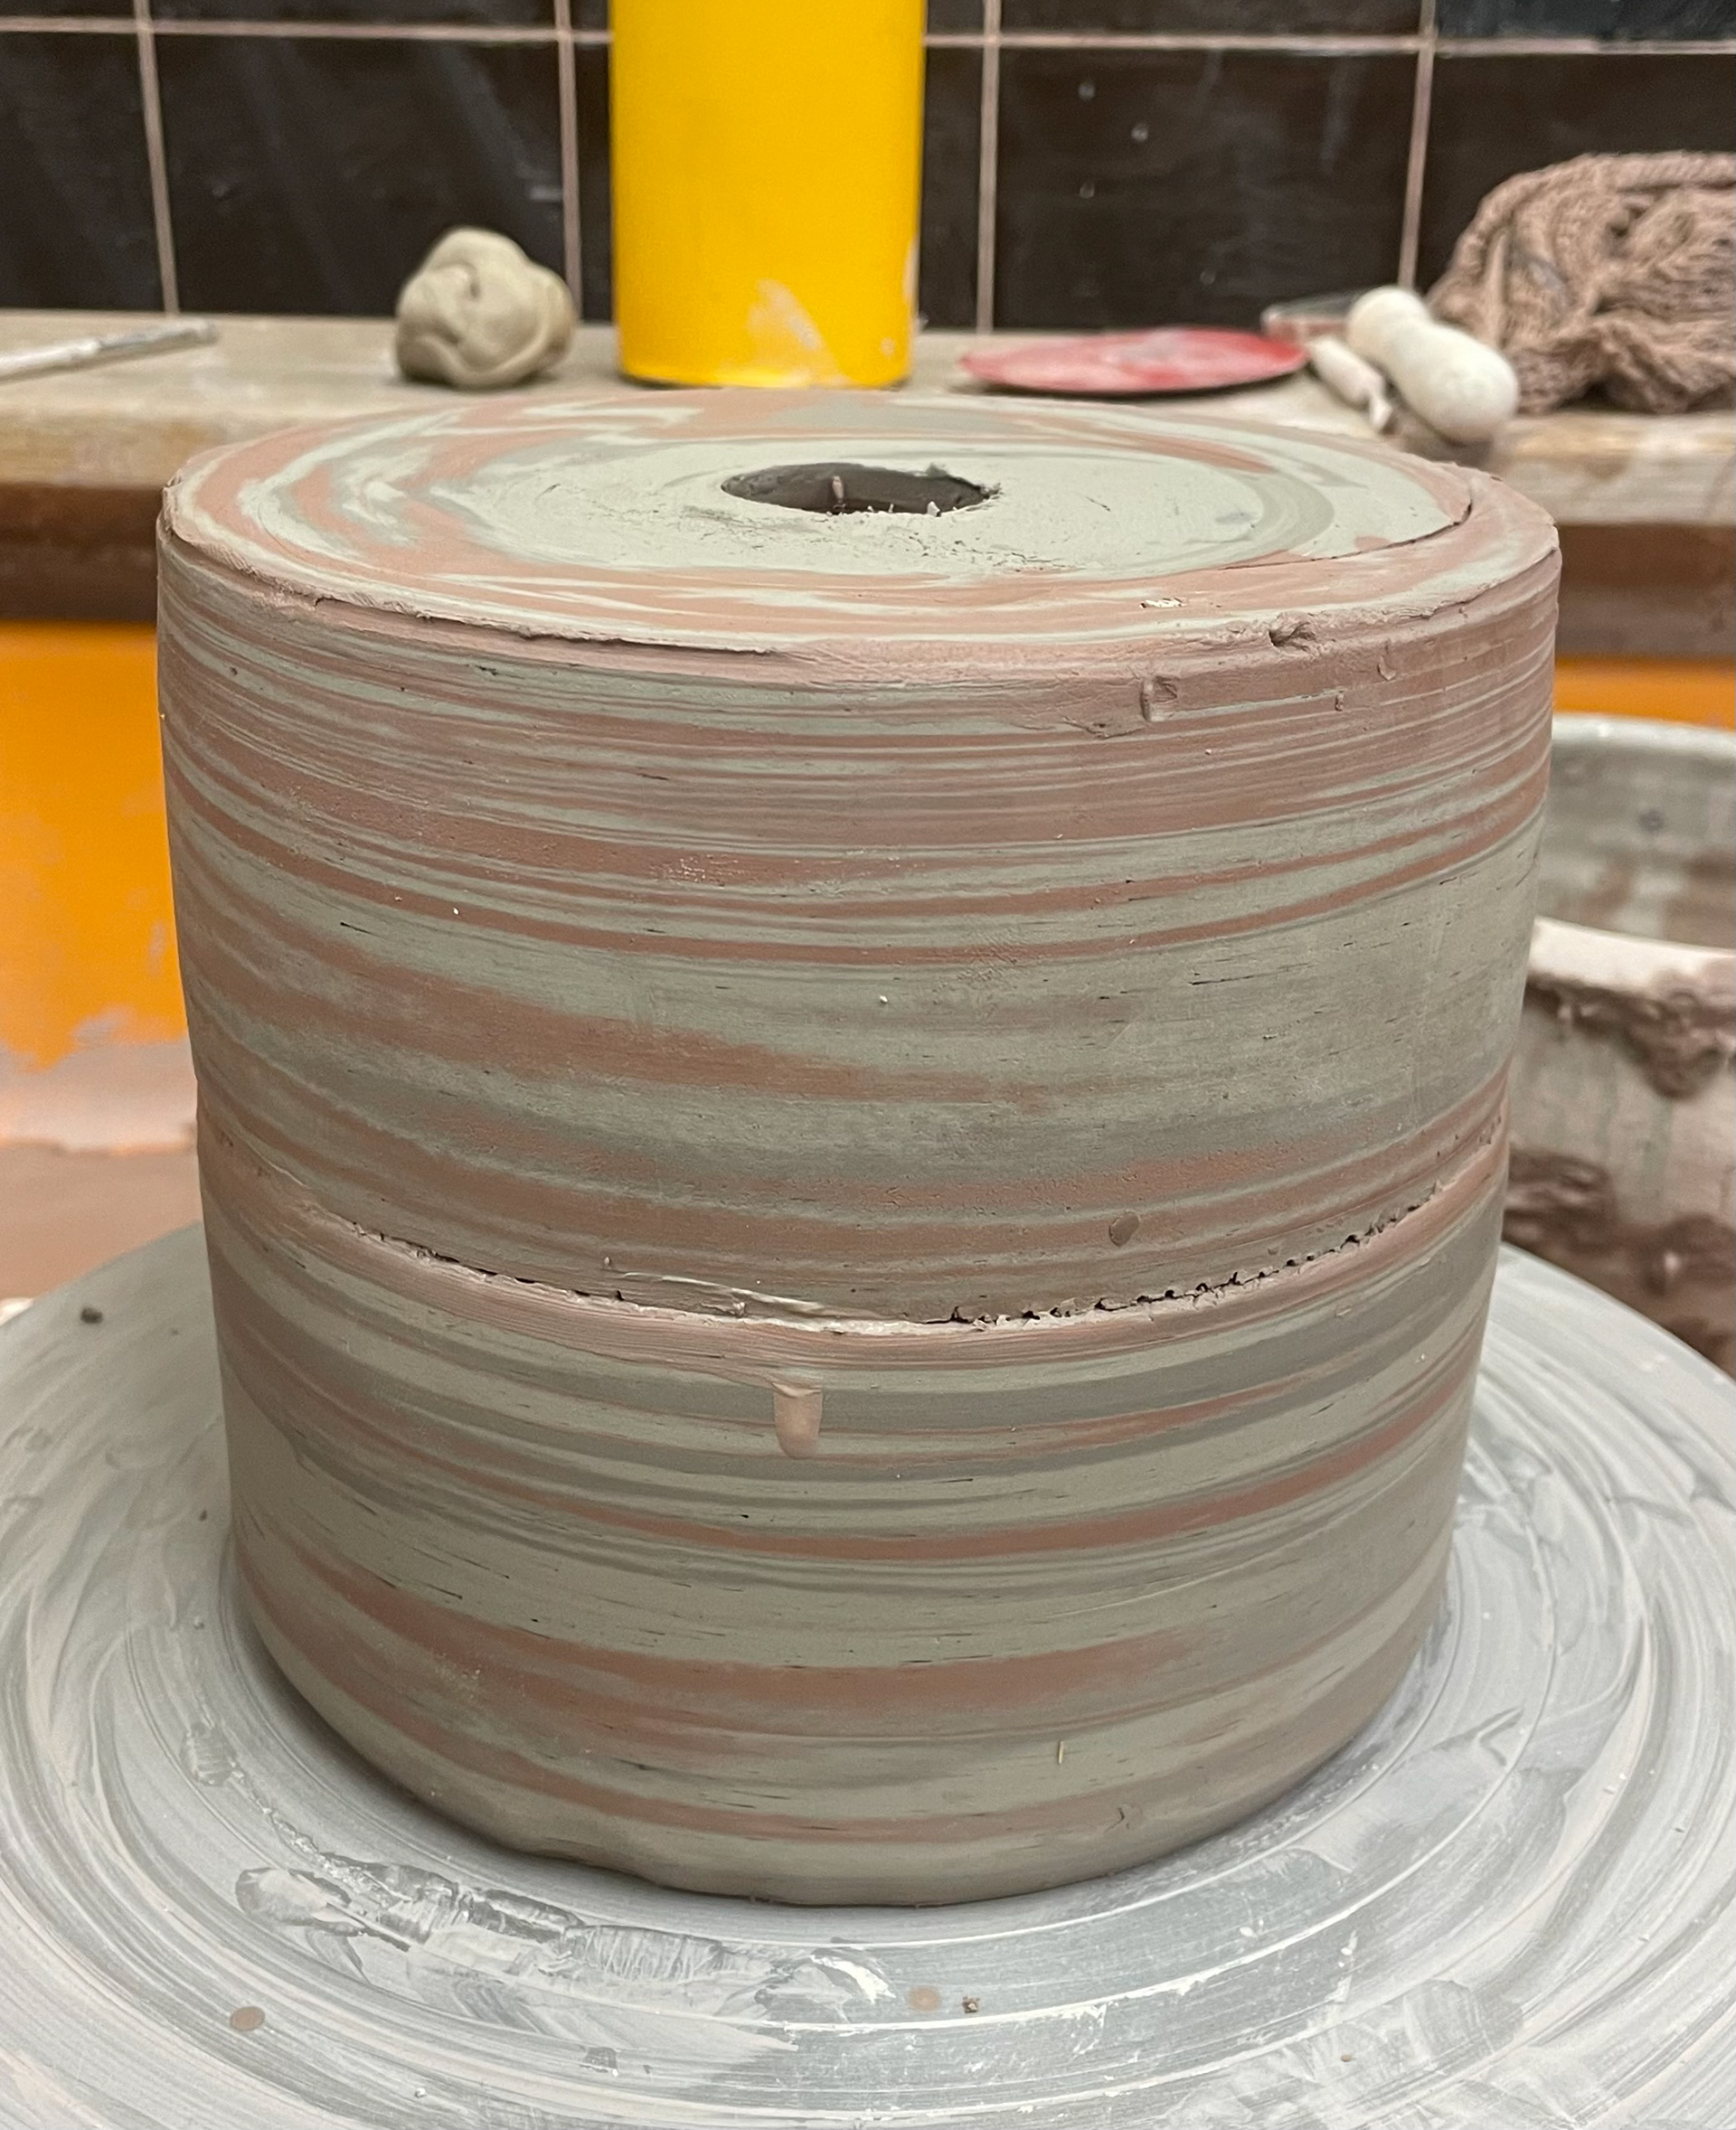
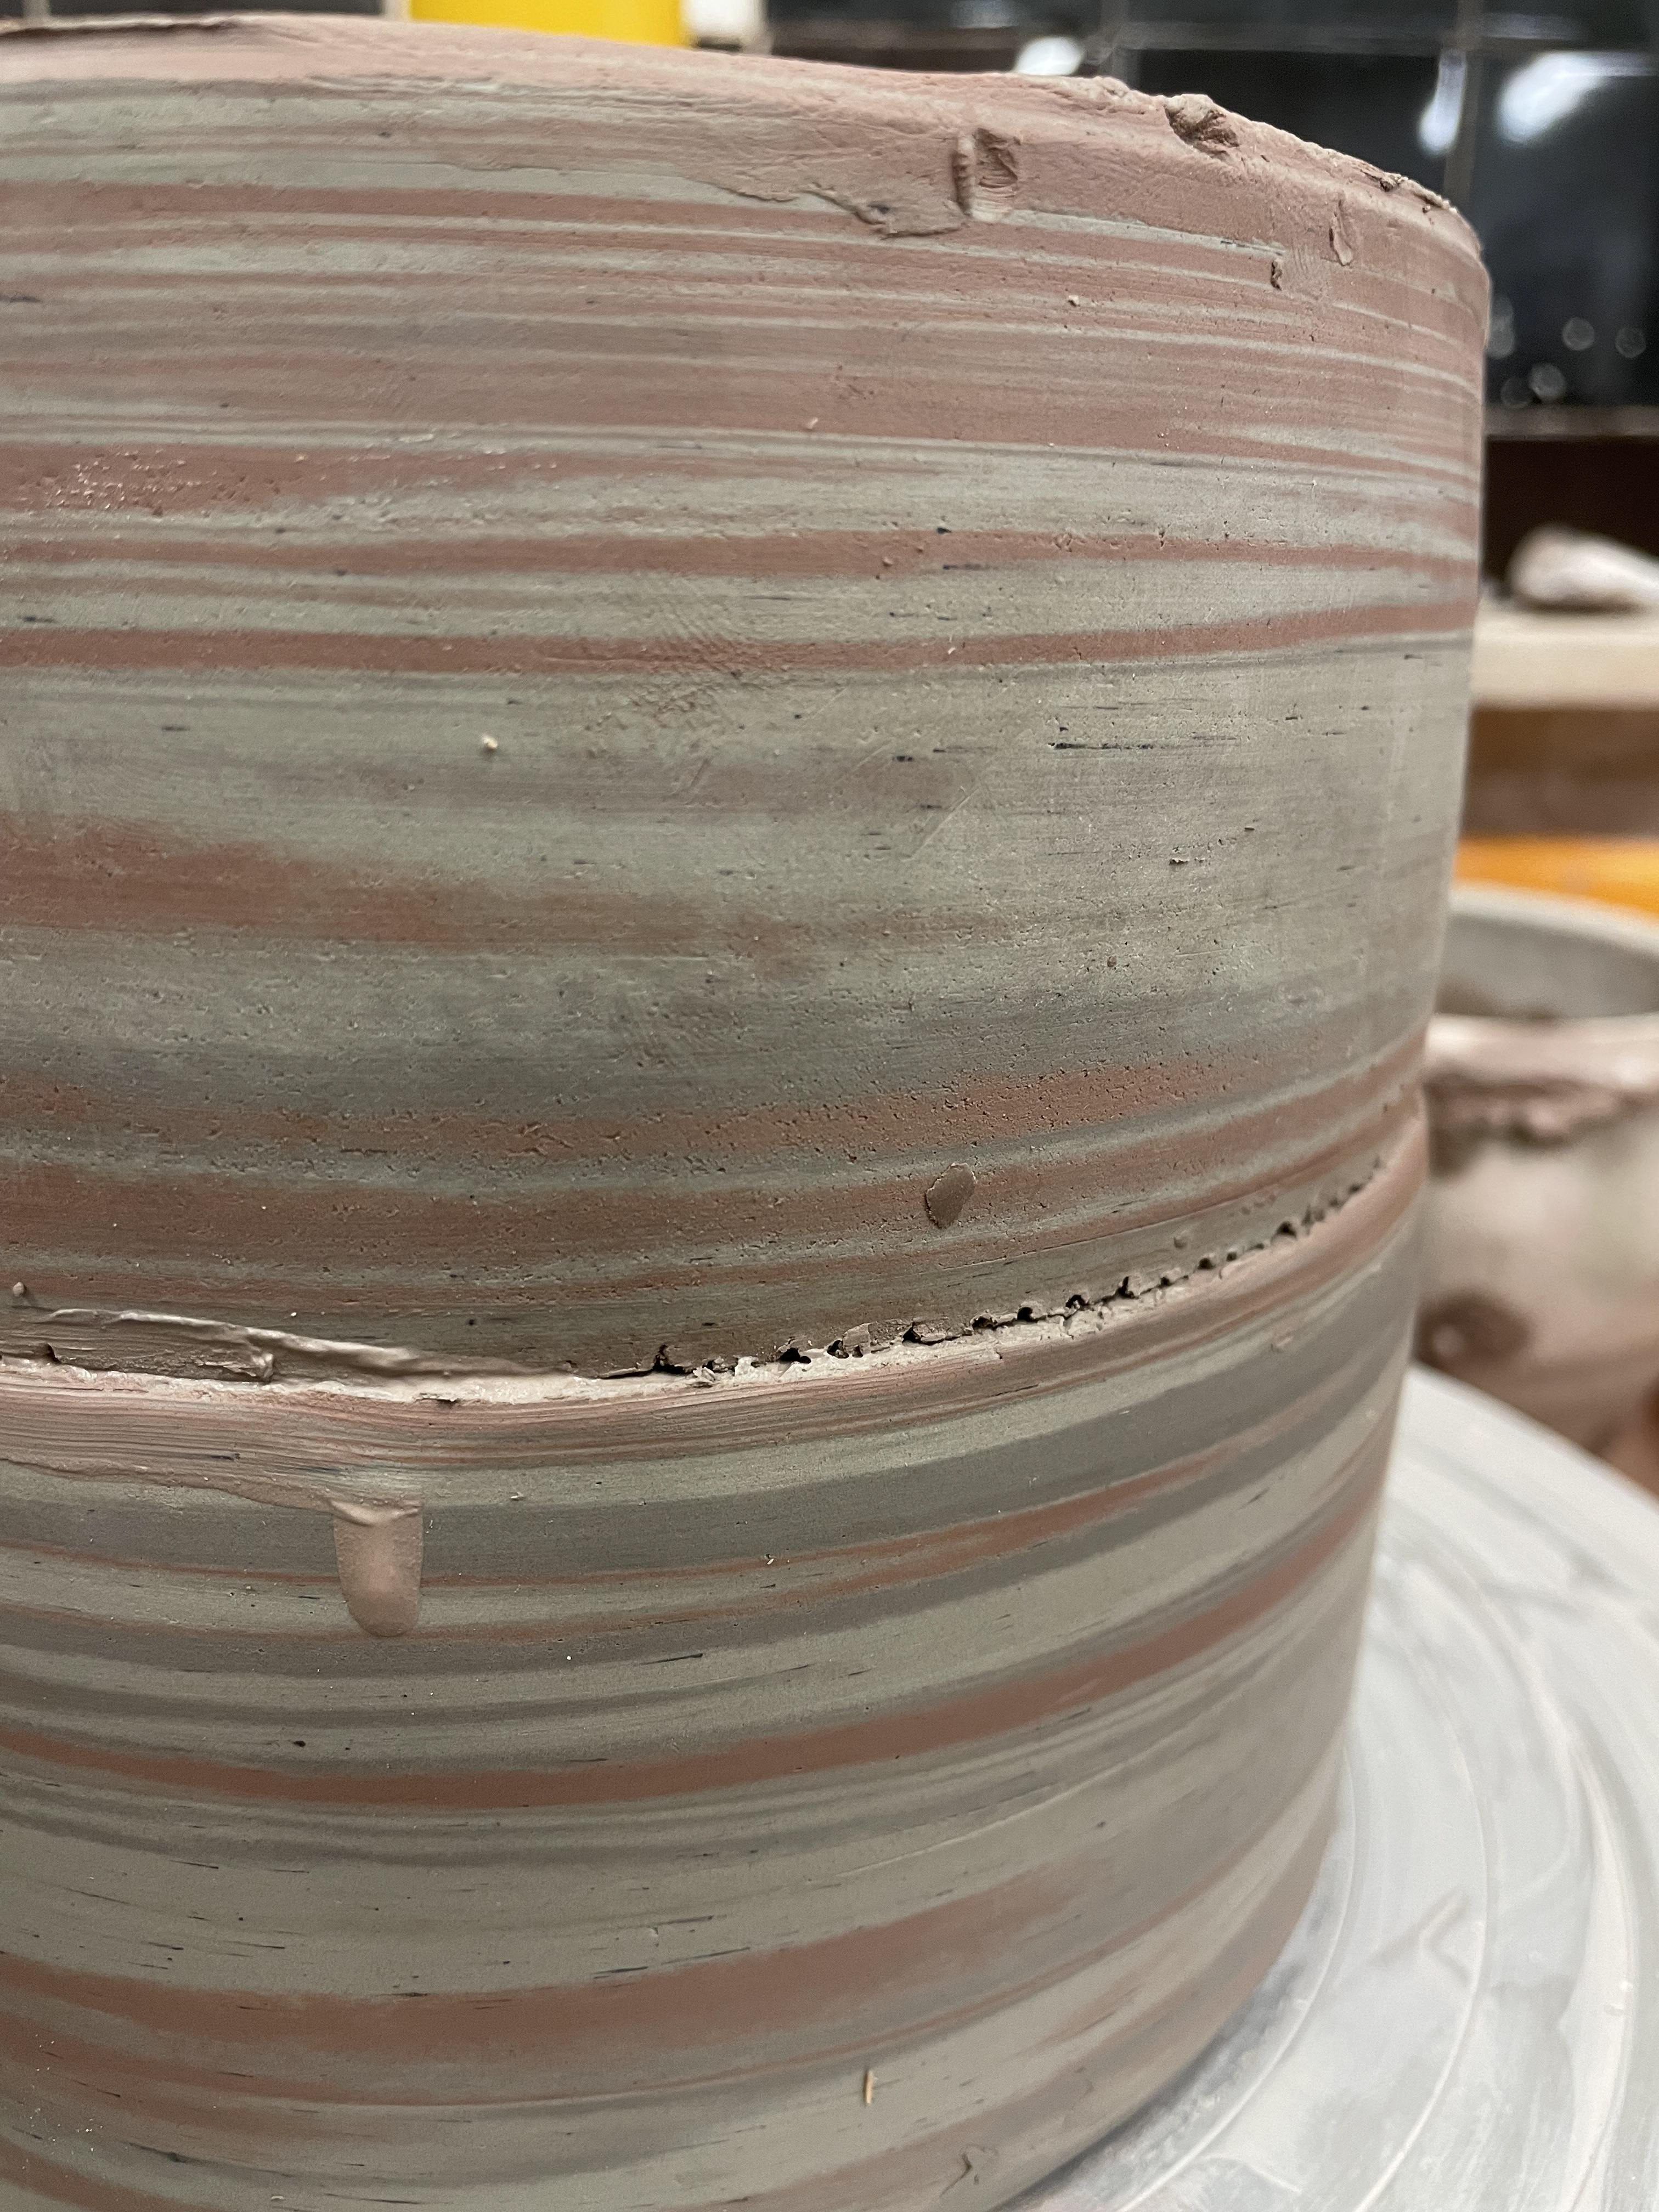
As I learned from my samples, it is crucial to throw the bottom of the second part vessel with a consistently thicker base, as you need to have enough clay when pulling up the walls on the opening I made the top thicker; however, this also meant it had more weight to it, I was worried that when adding this on top of the bottom piece it wouldn't be able to support the weight and bow into its self, especially if it's not perfectly leather hard. I think it bowed slightly due to the weight, but not drastically where it would affect the overall vessel.
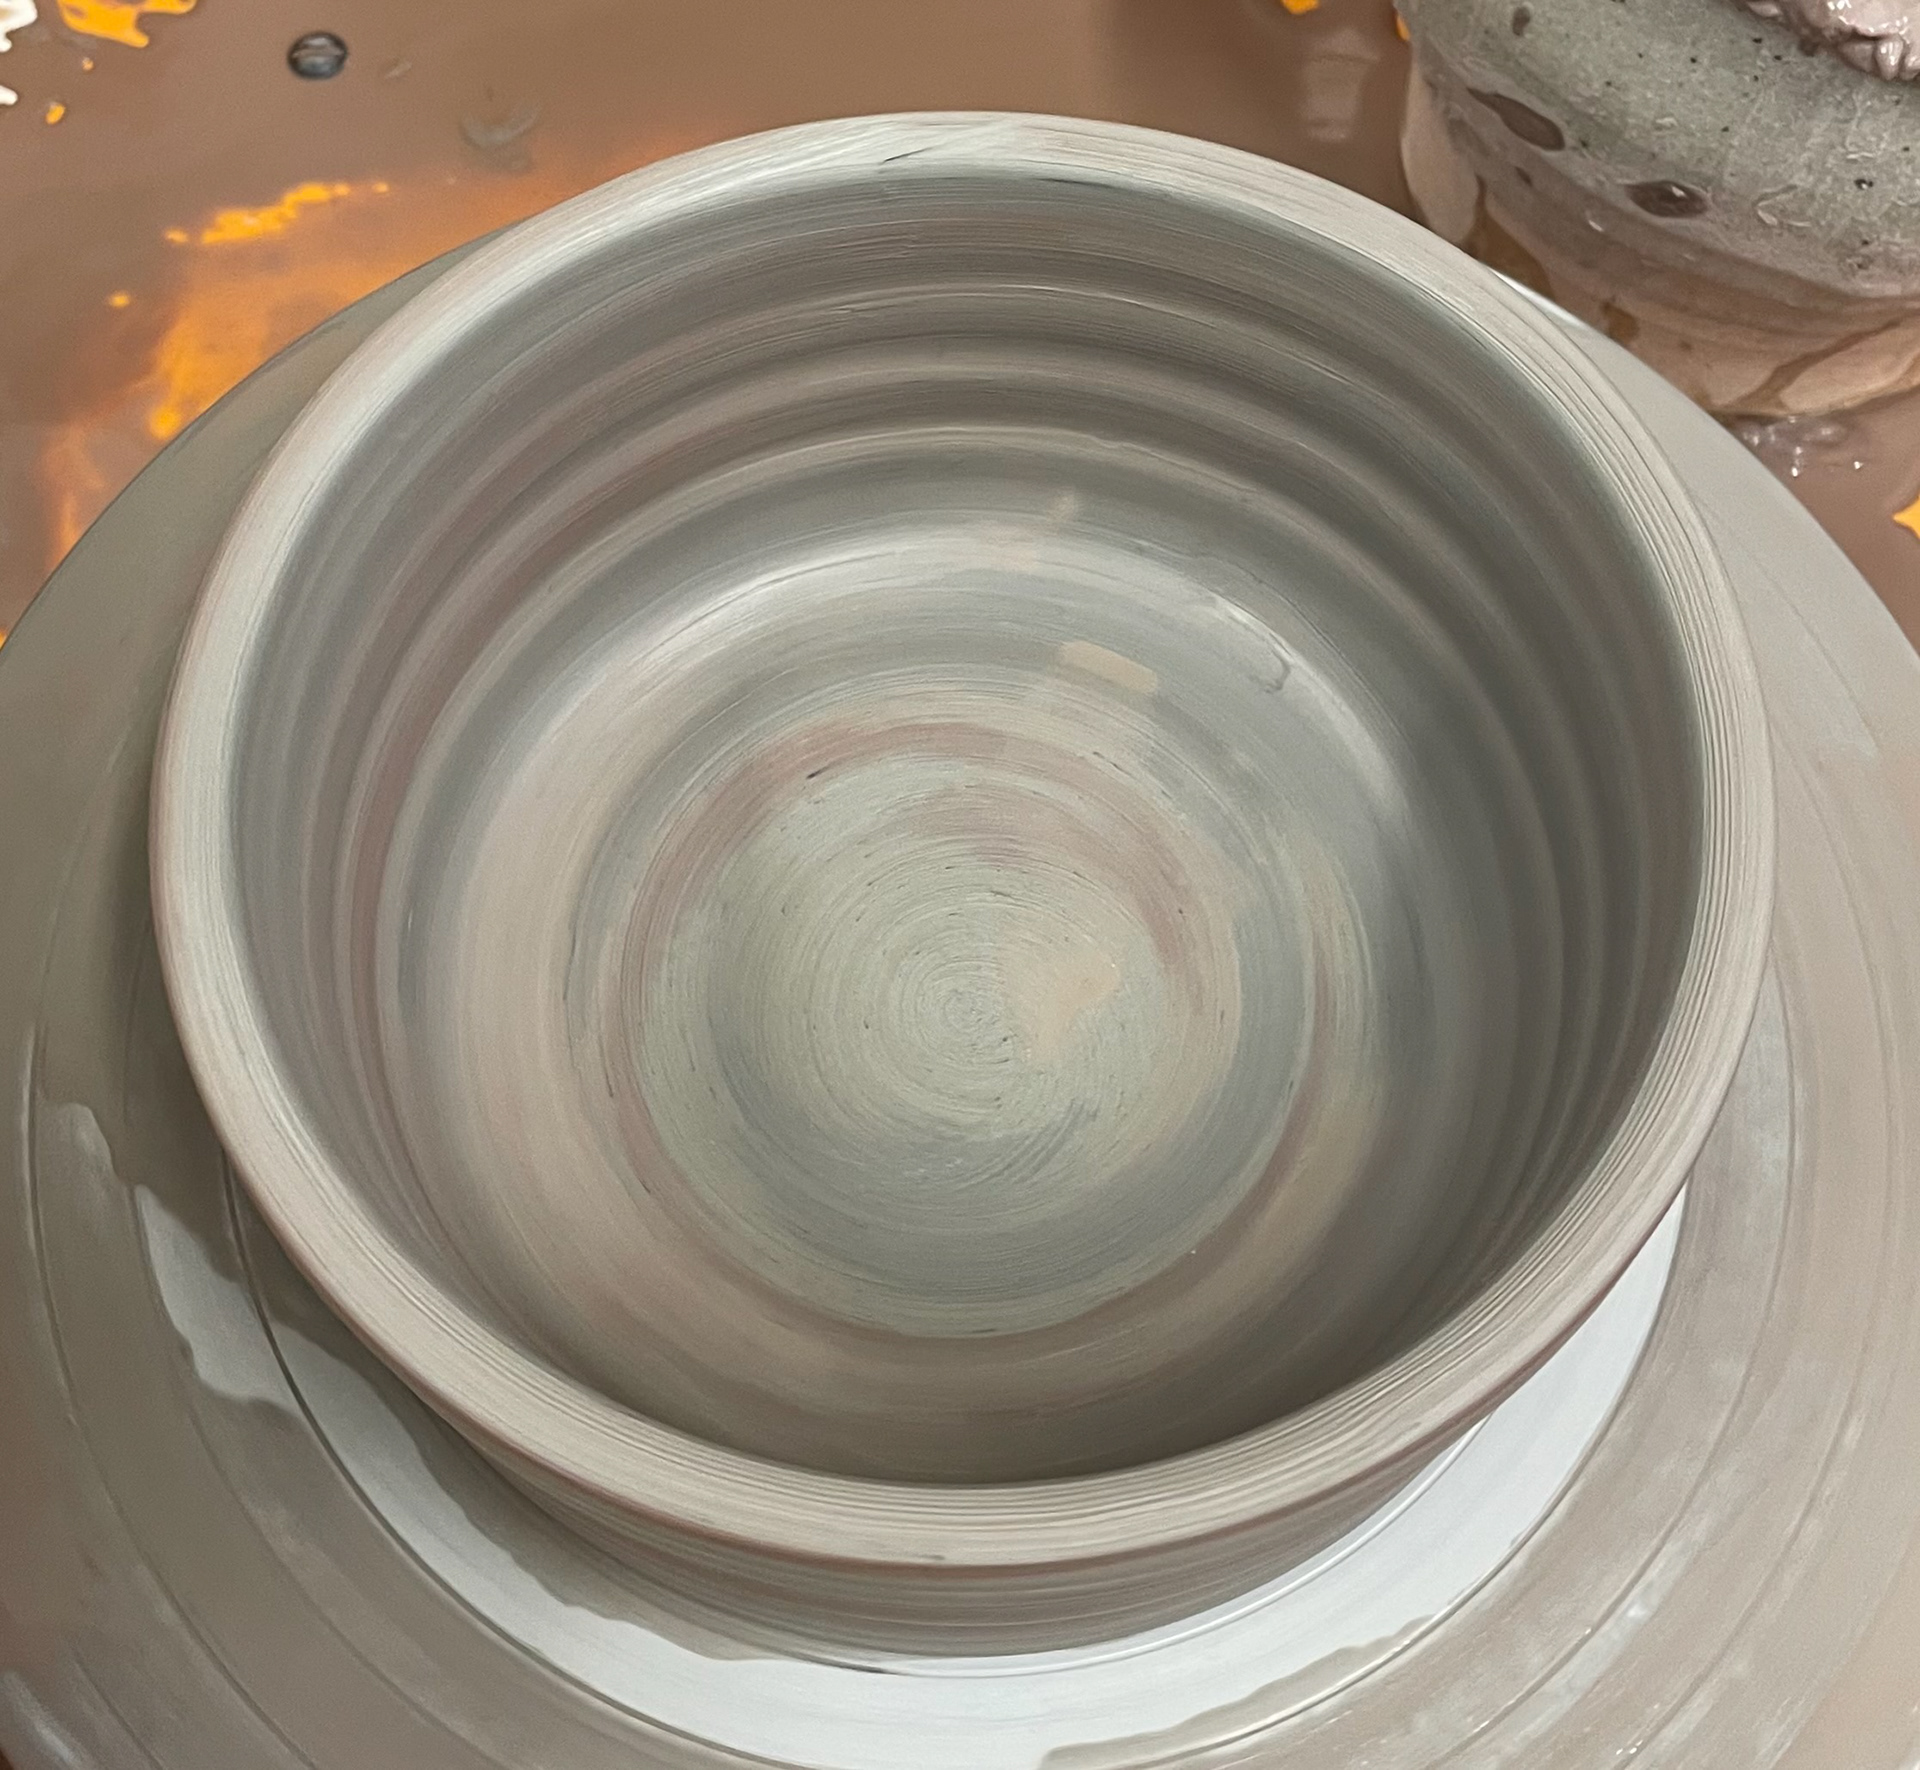
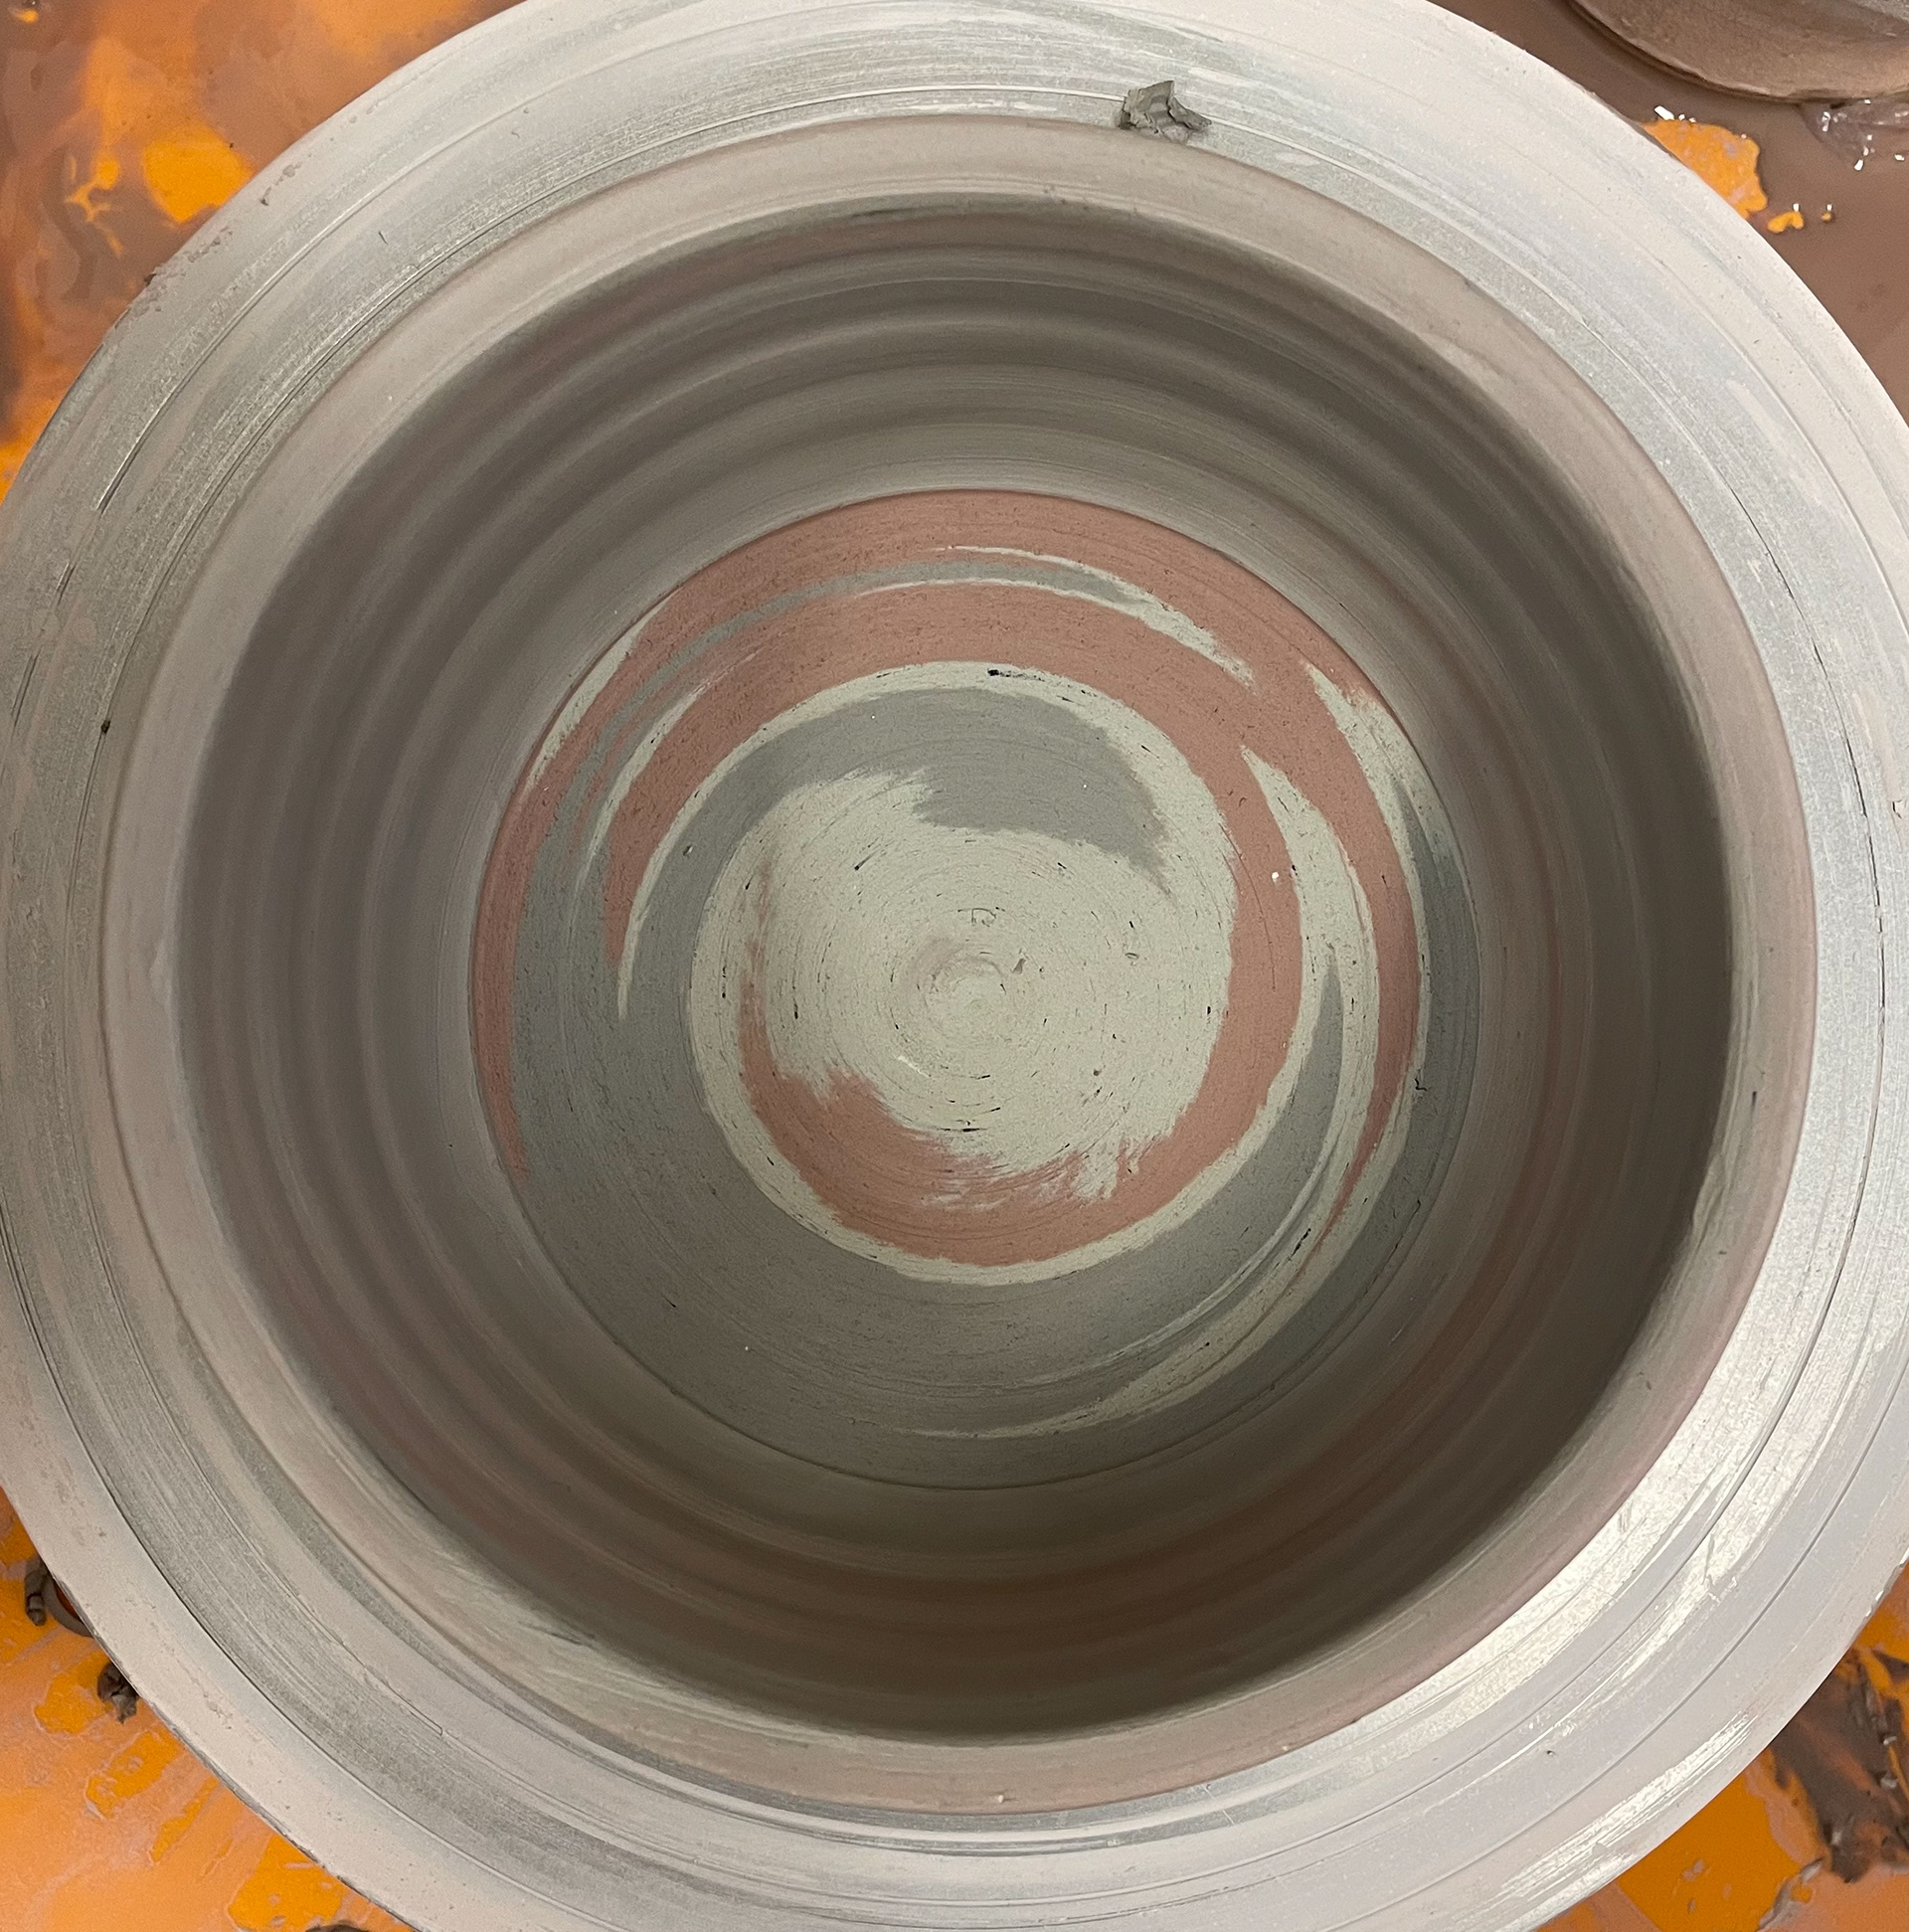
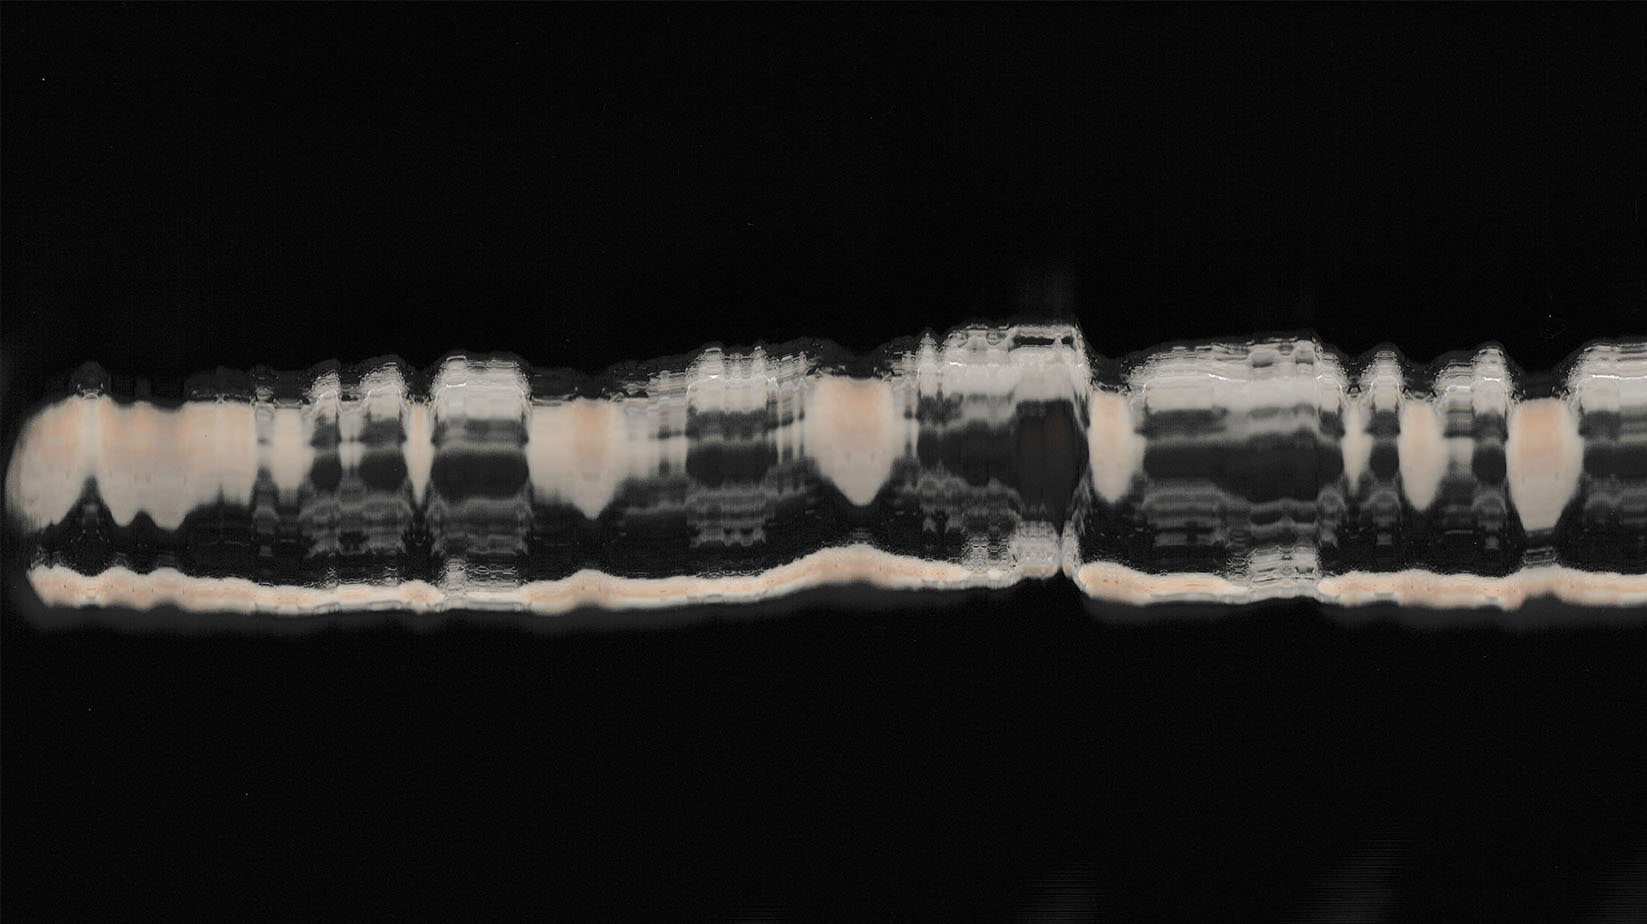
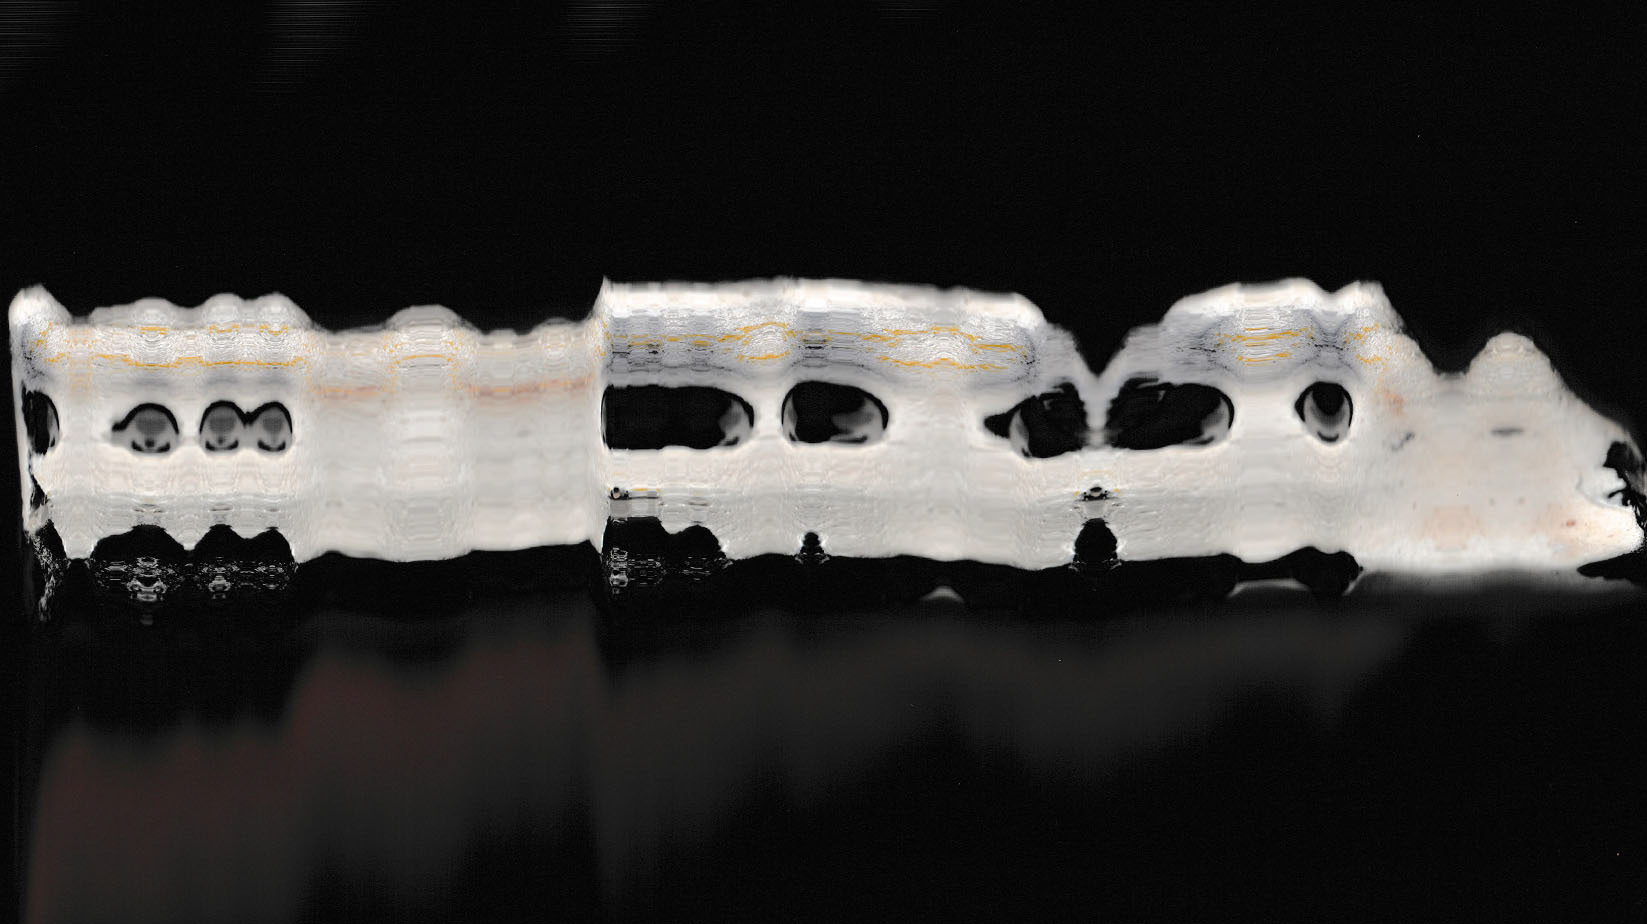
Having three types of coloured clay, you cannot predict the marbling outcome, as throwing is what creates the marbling. I was interested in how this vessel had very tight marbling with the colours mixing throughout this might have been because I took a while to centre my clay therefore, it was combining the colours more, however, it is interesting how it's present in both parts of the pot. You can also see that in the vessel, some of the colours have blended whilst being marbled, giving a more gradient effect of the colours rather than distinct marbled lines I don't mind this look as part of the fun of throwing with multiple coloured clays is not knowing the outcome of the marbled effect however having distinct solid lines is seen more in the scans of my pebbles so it contrast from them.
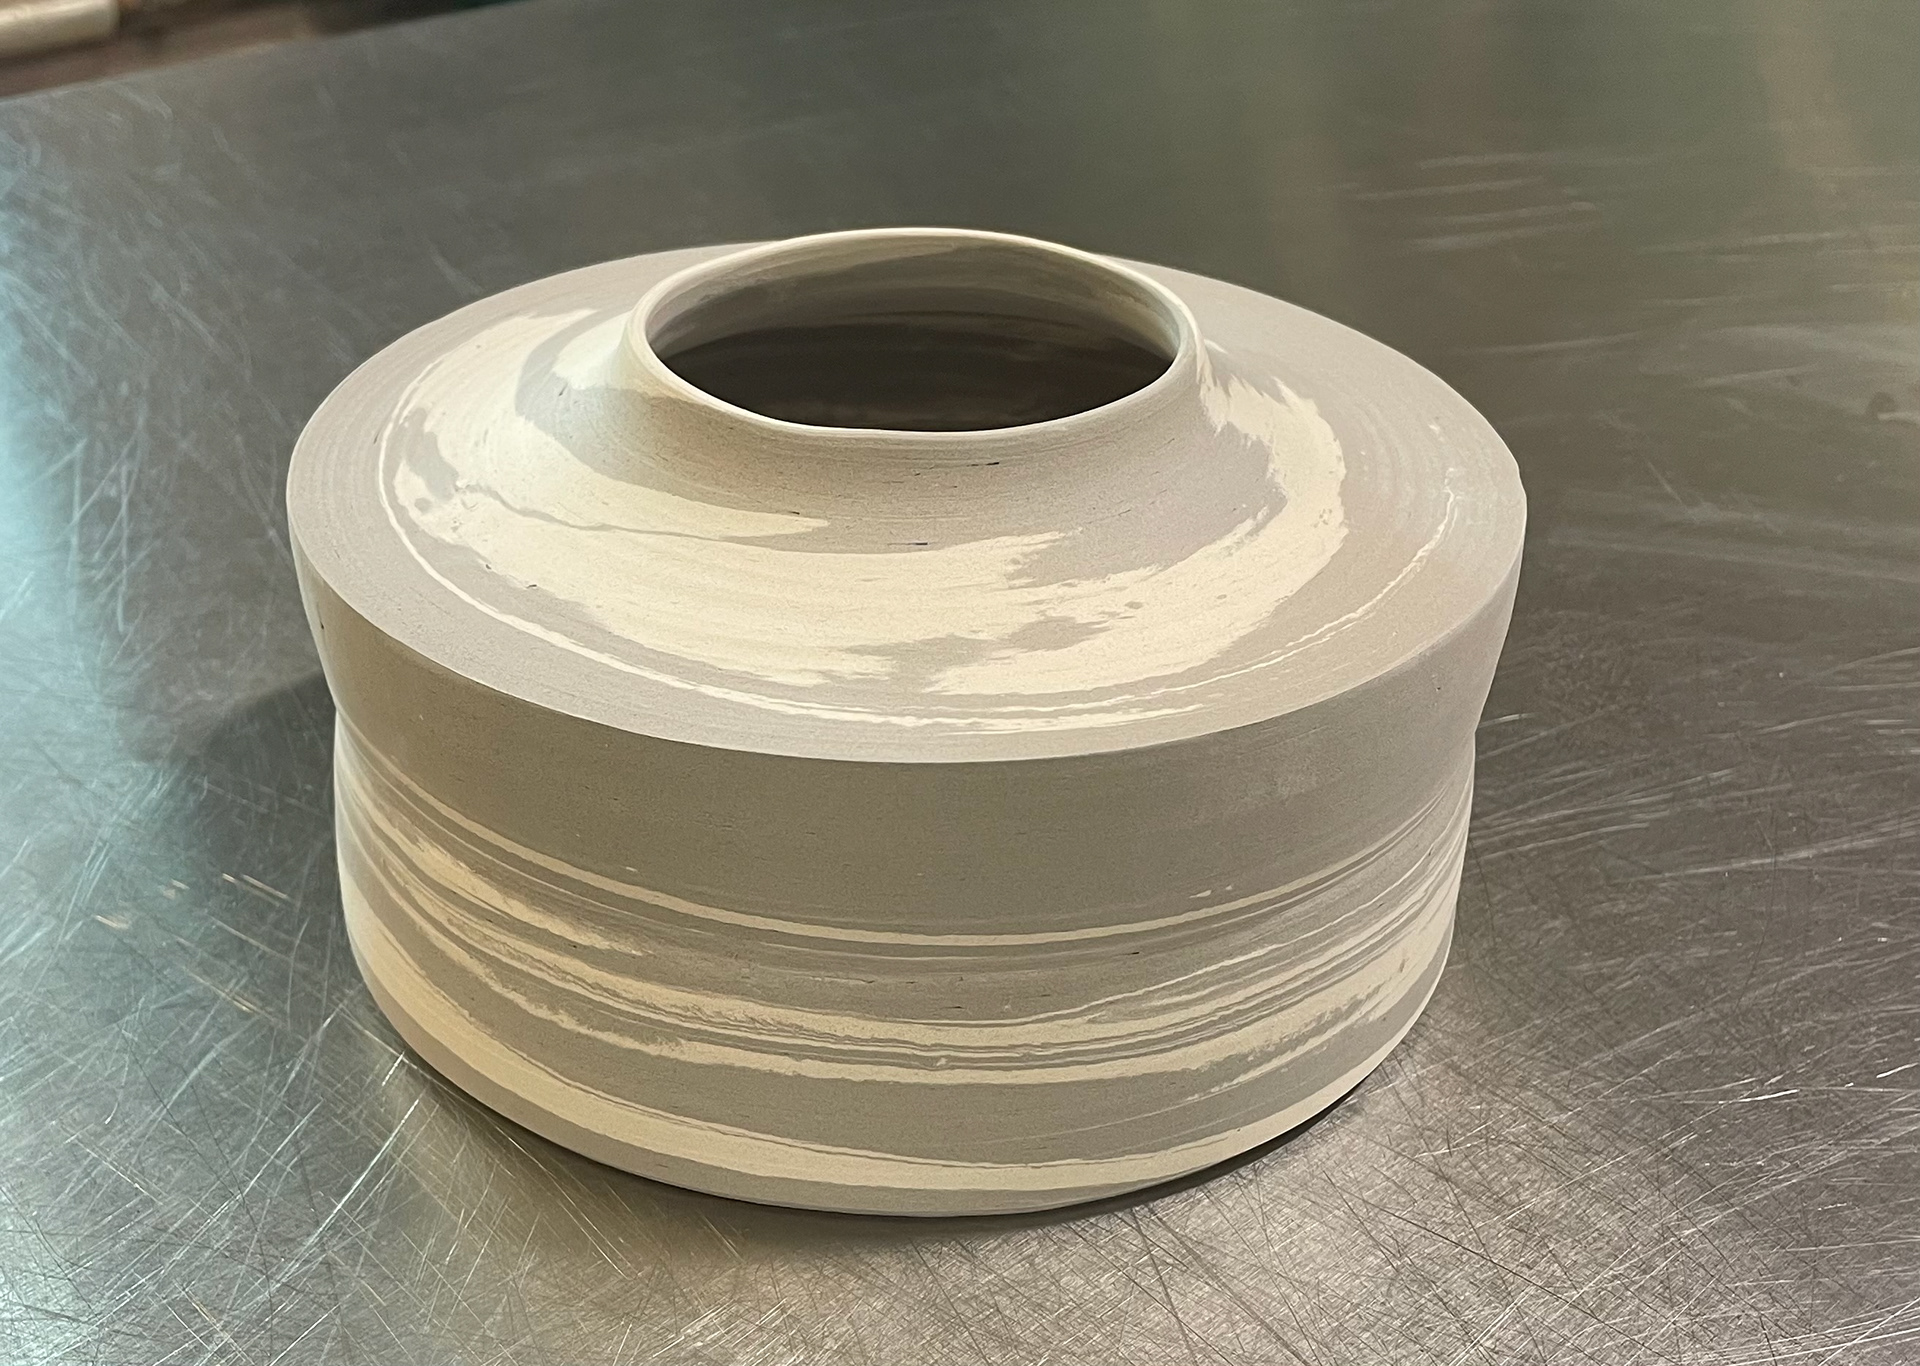
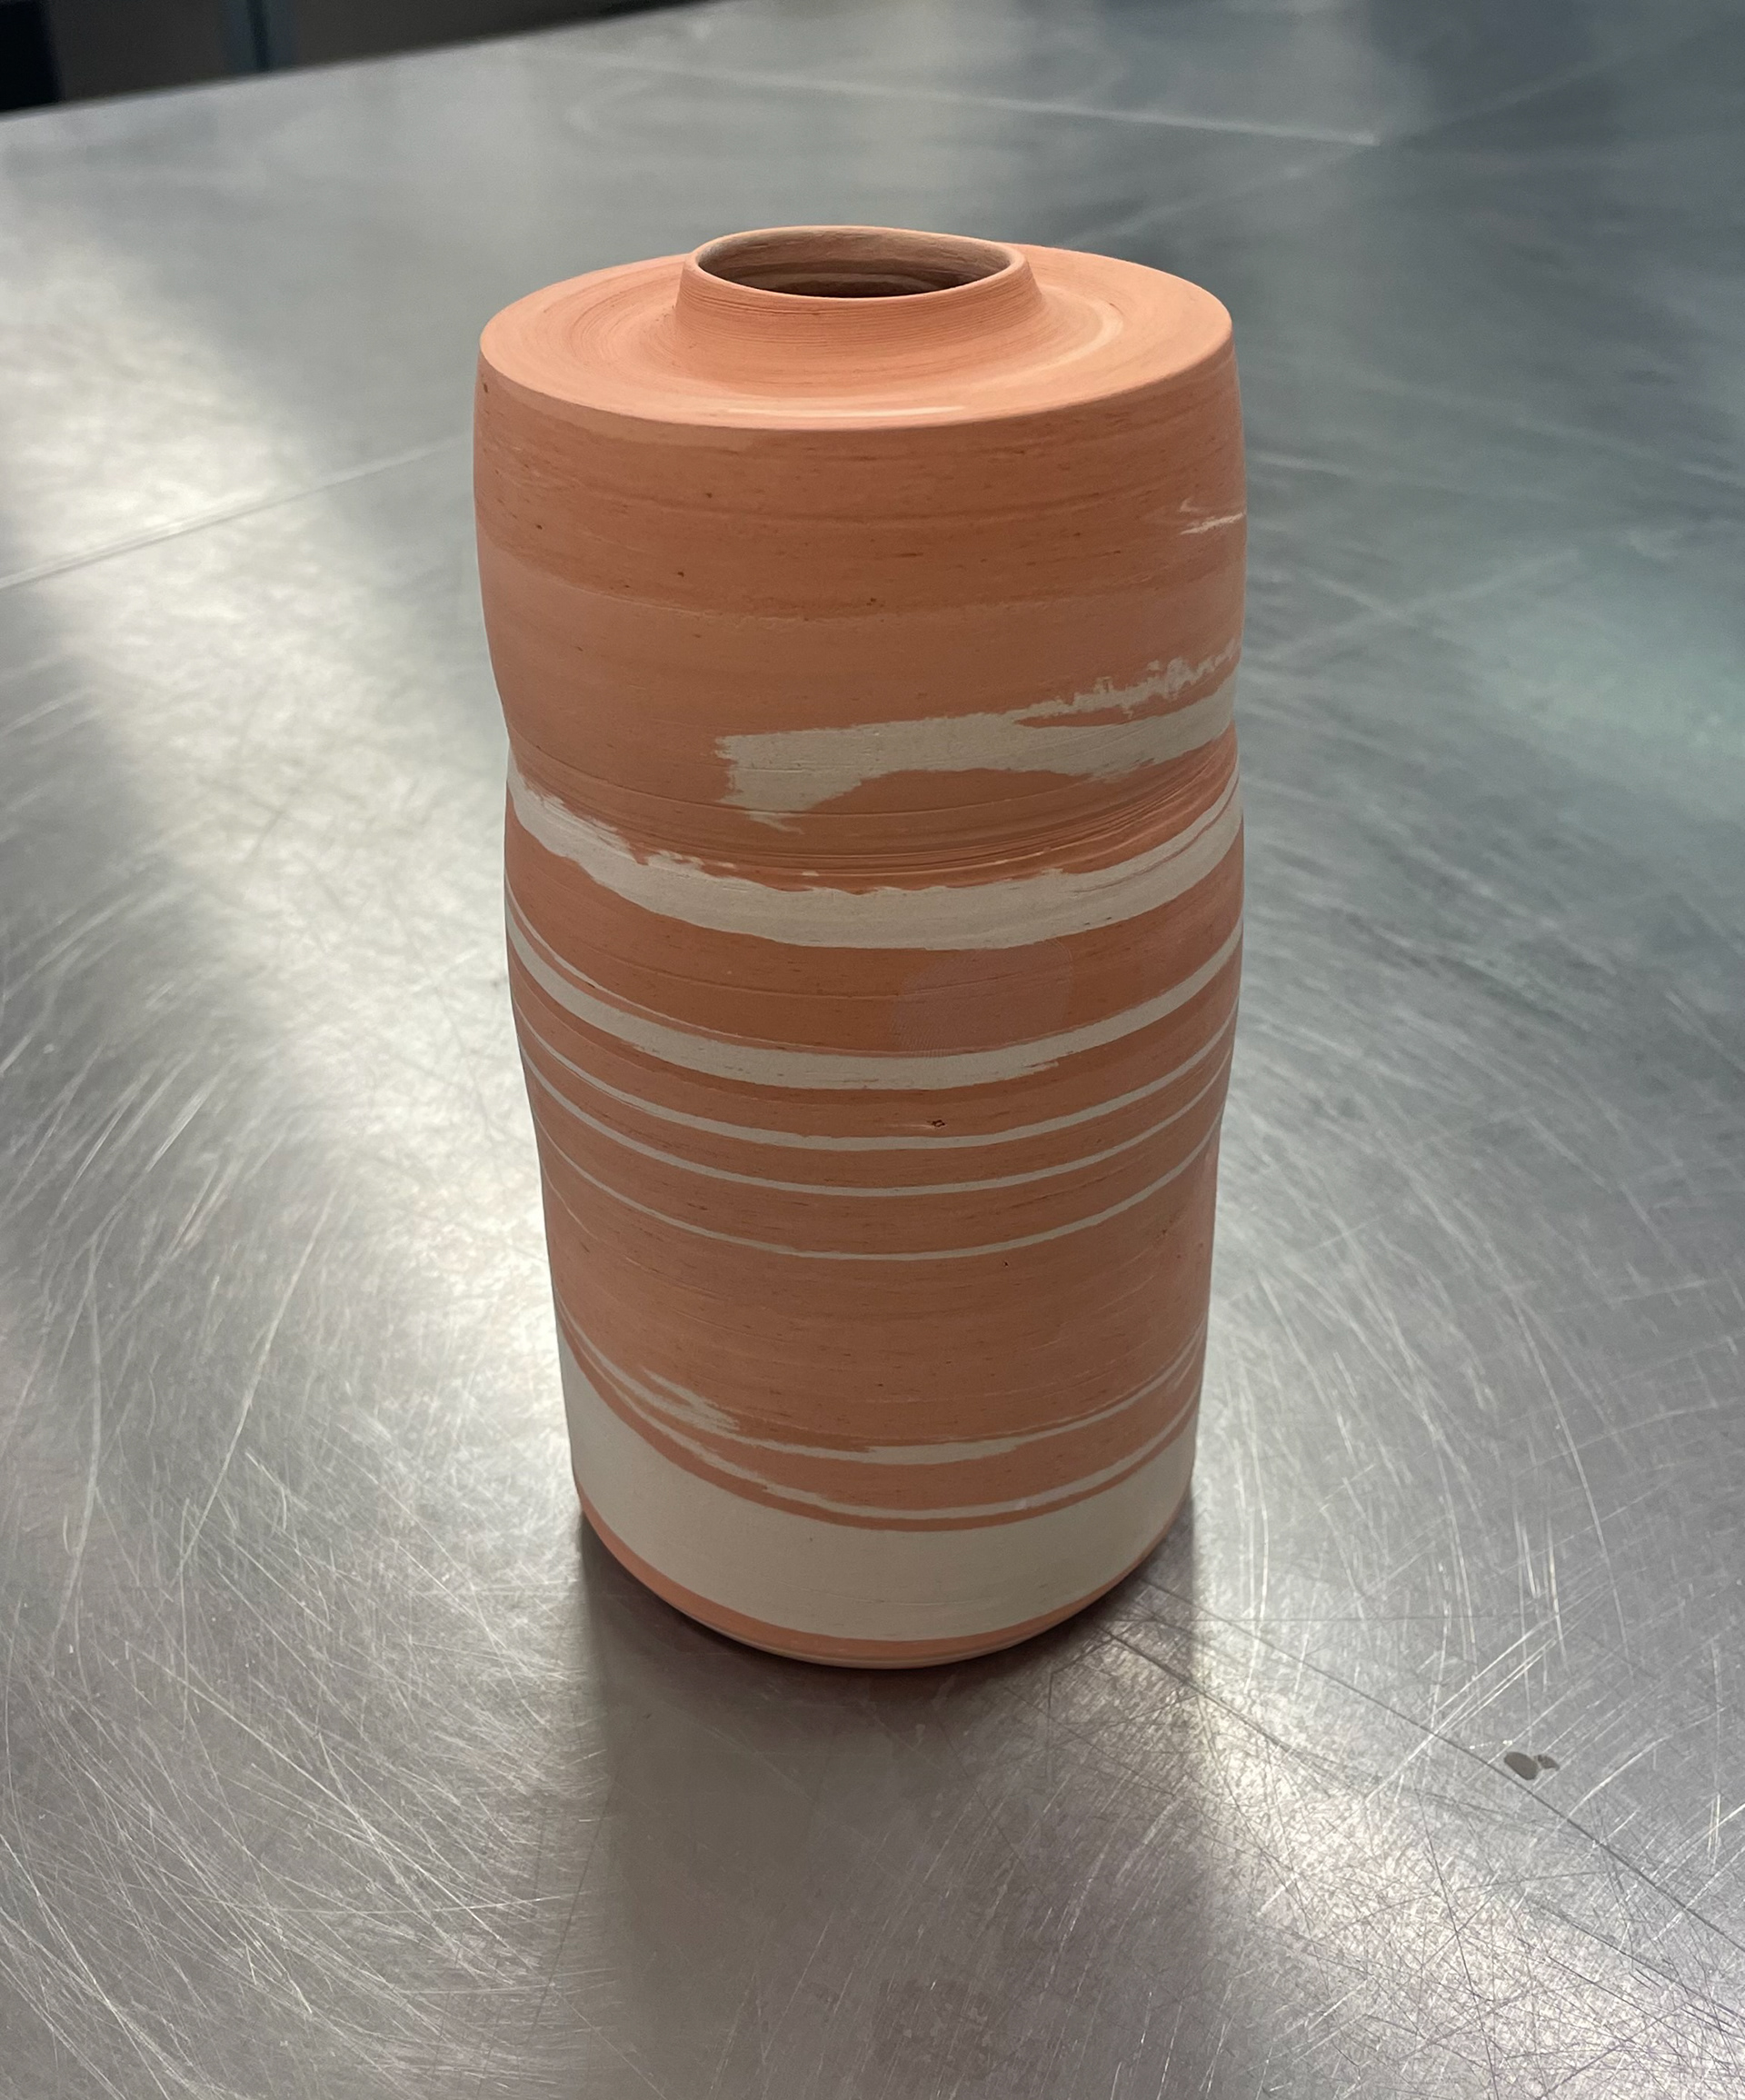
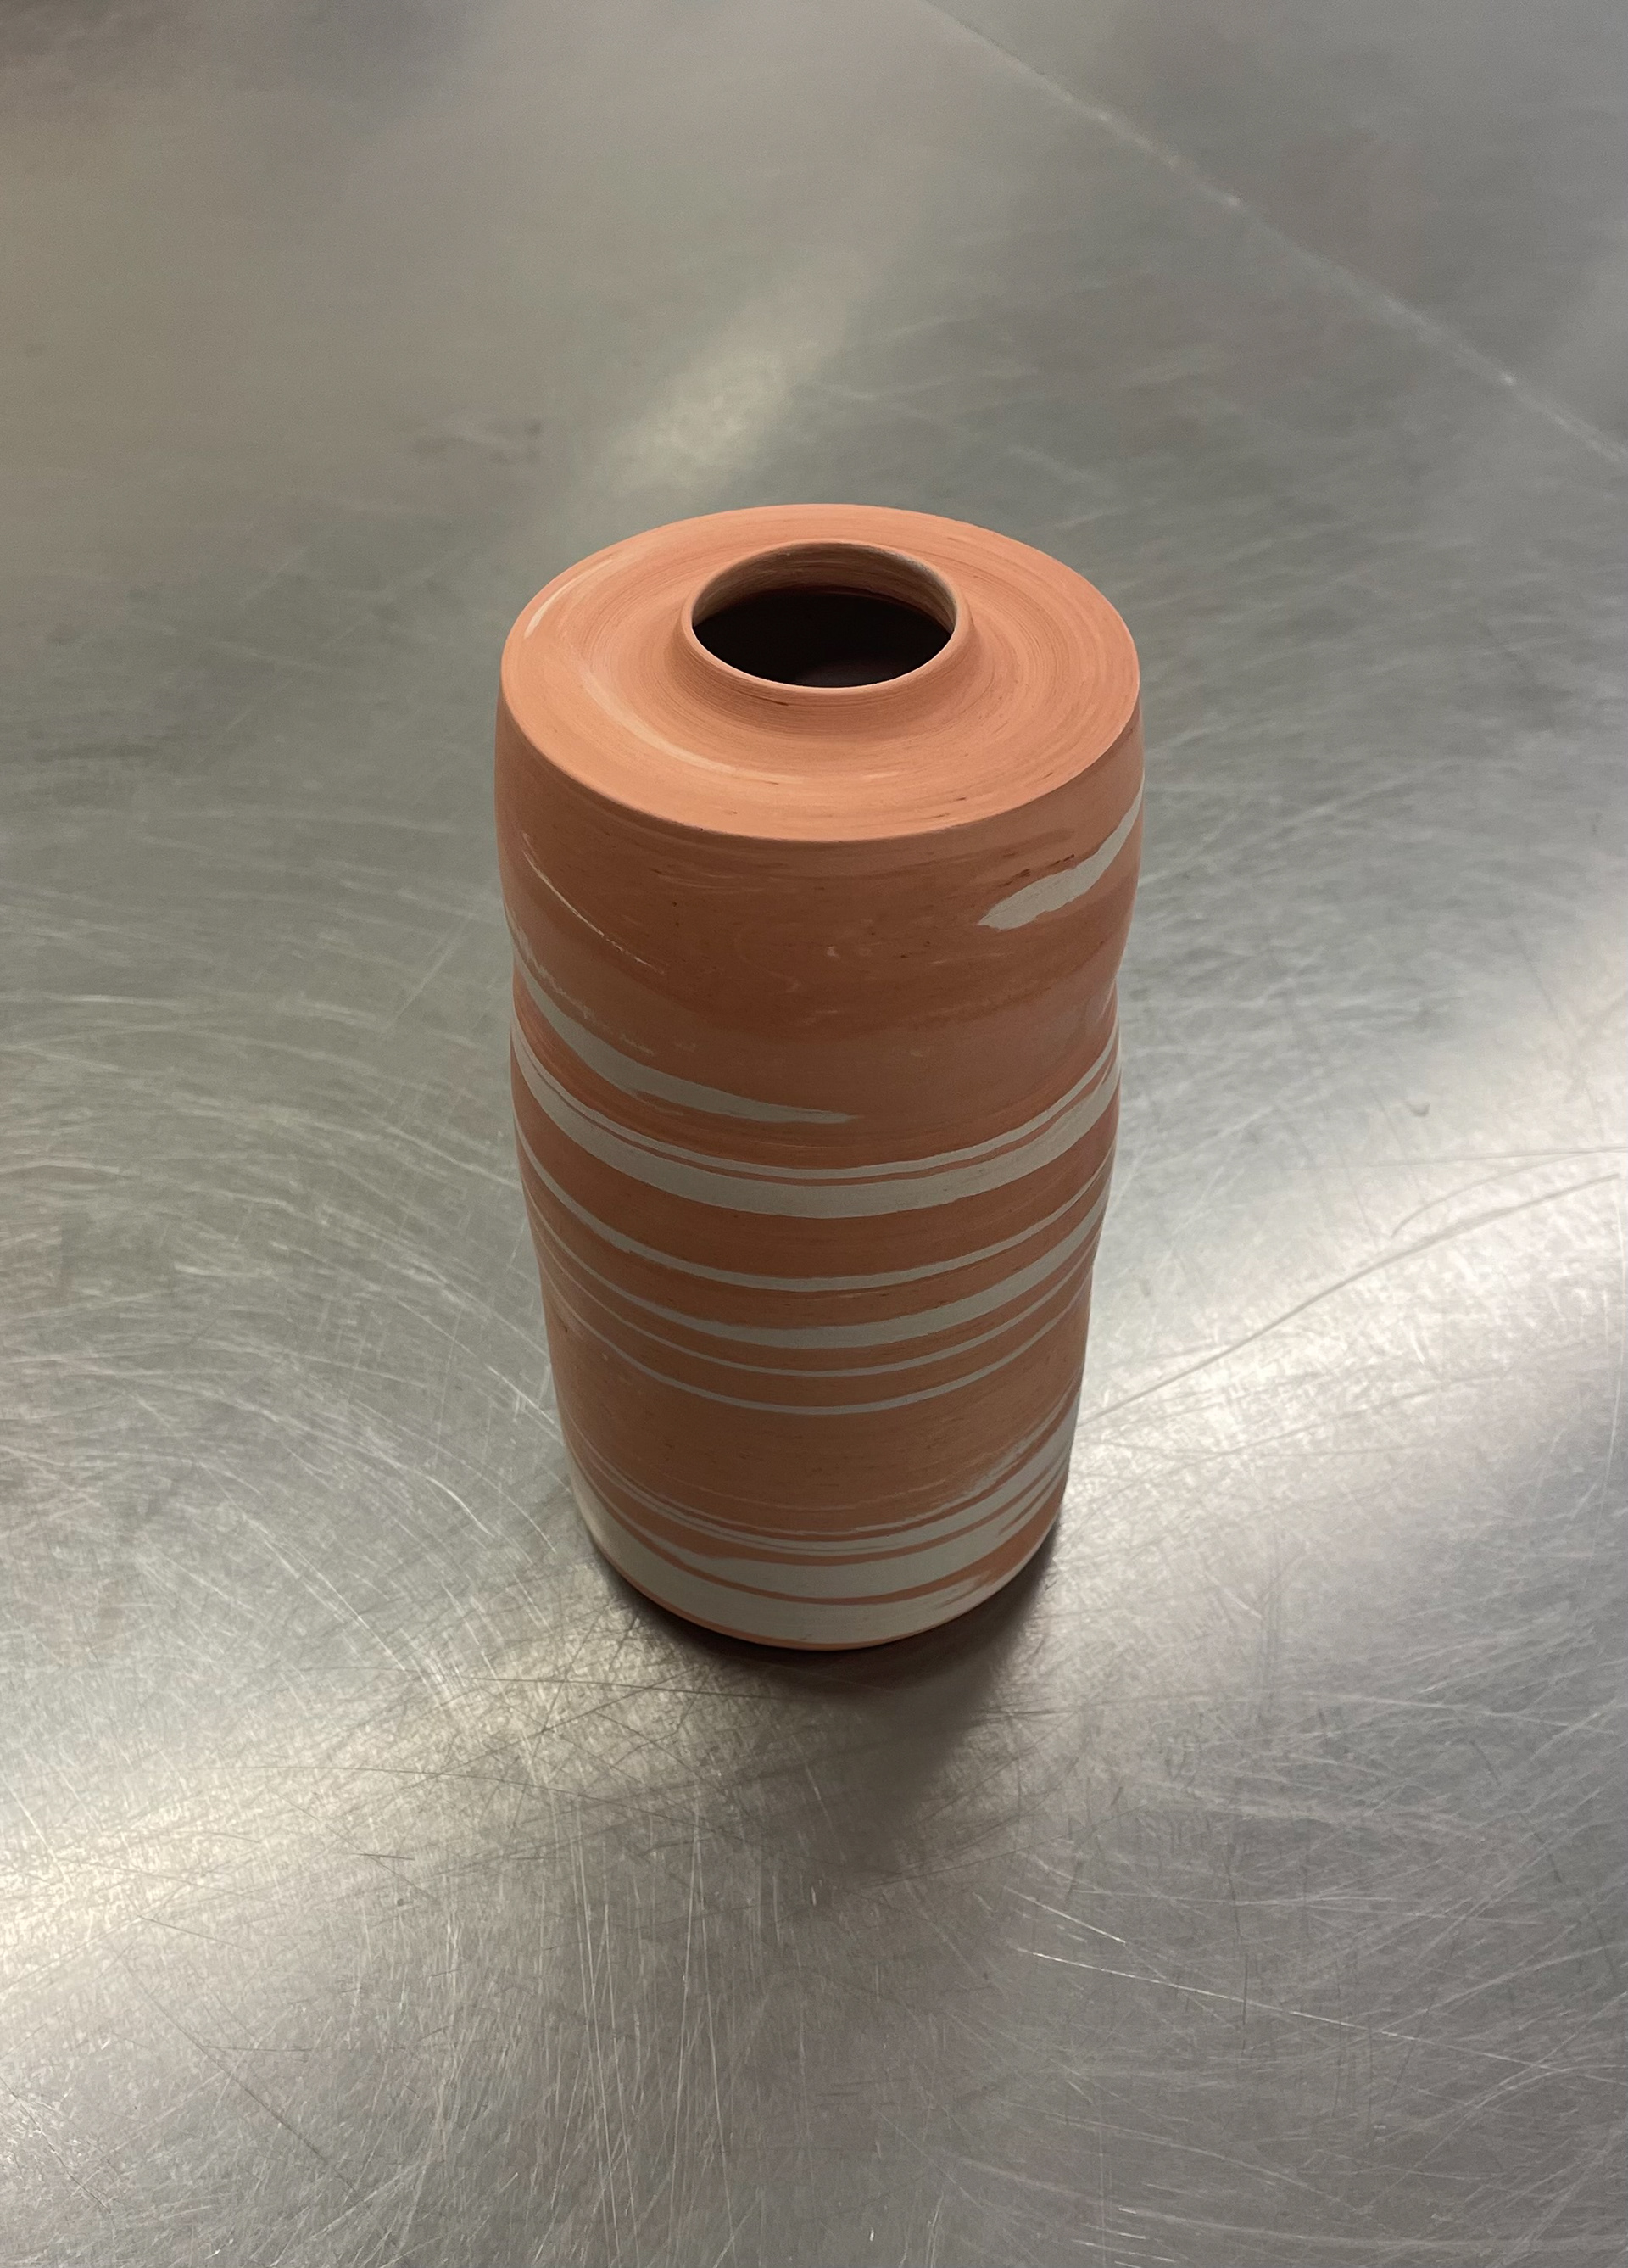
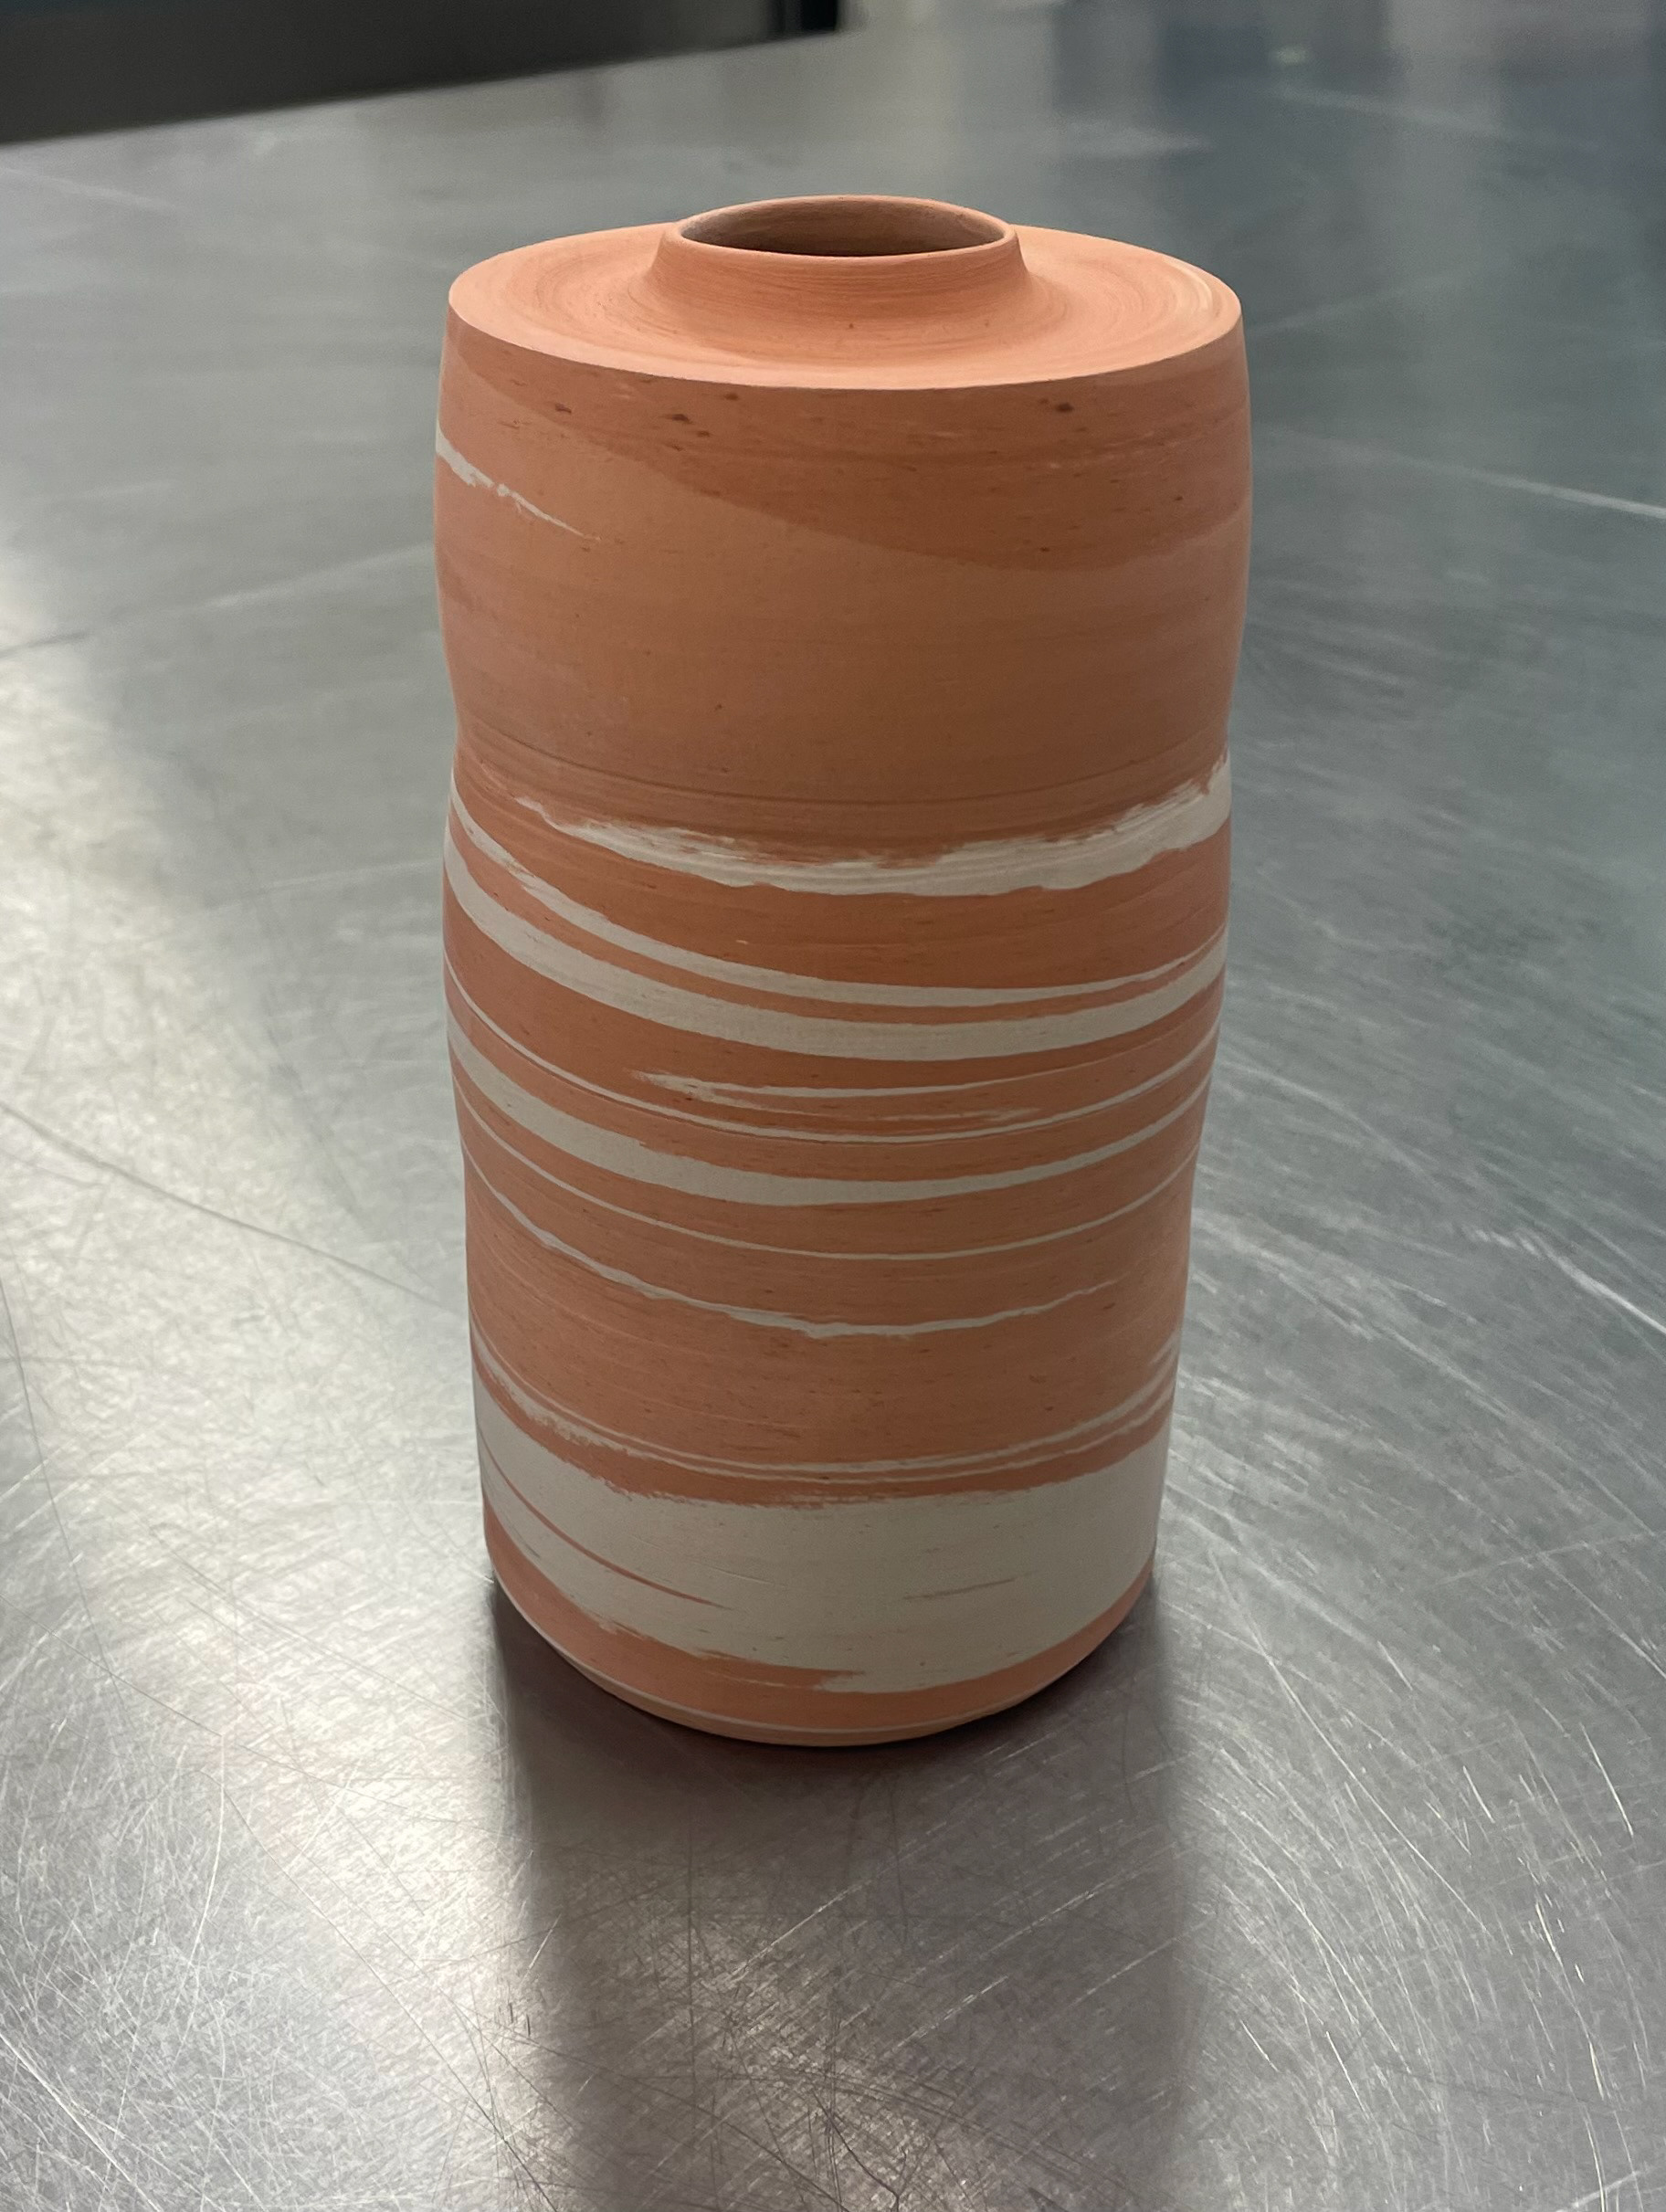
Second Beach Vessel
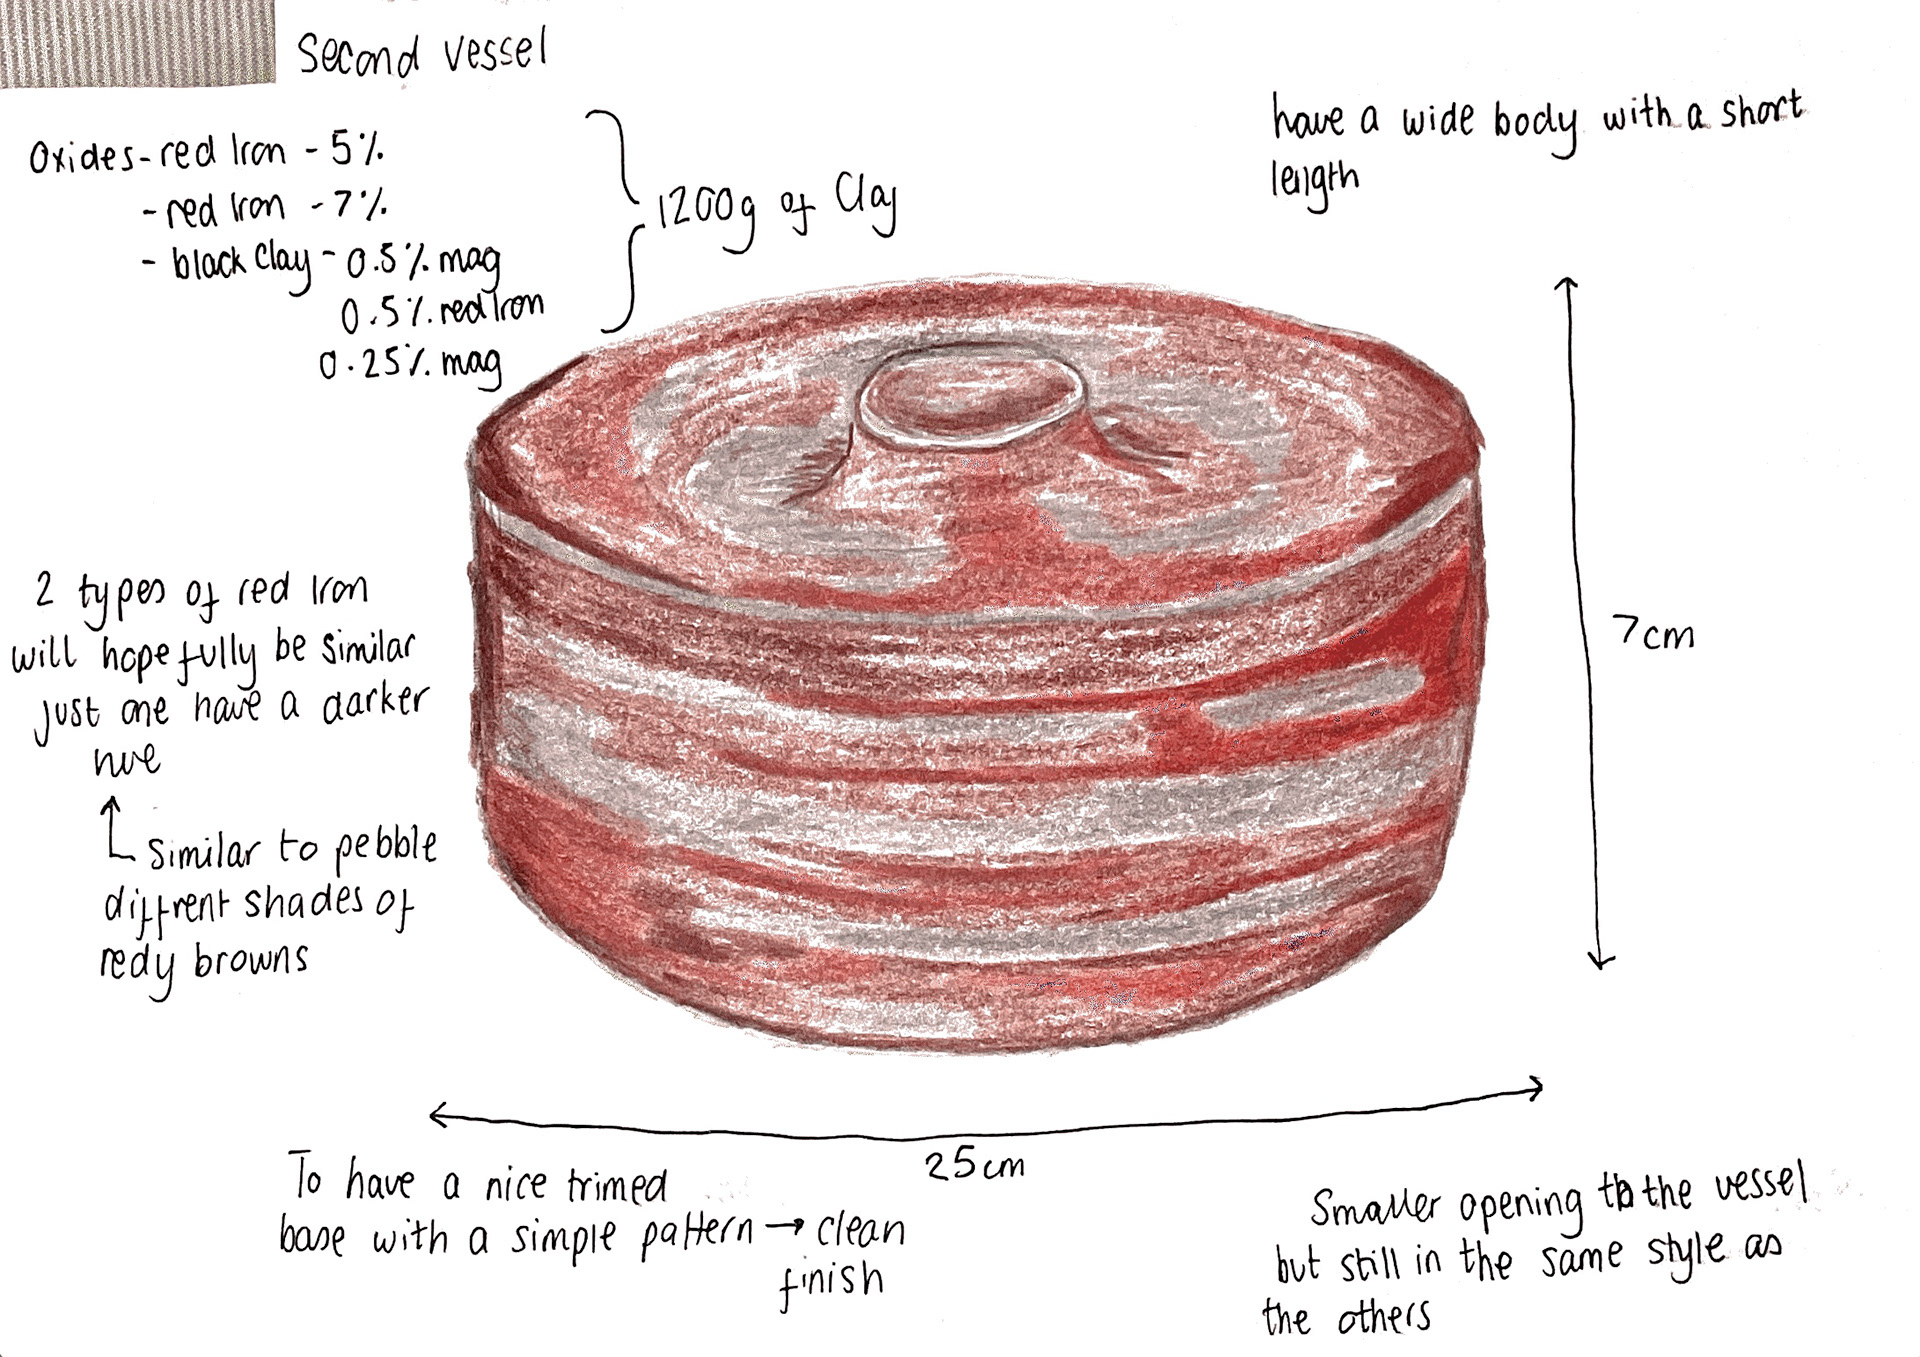
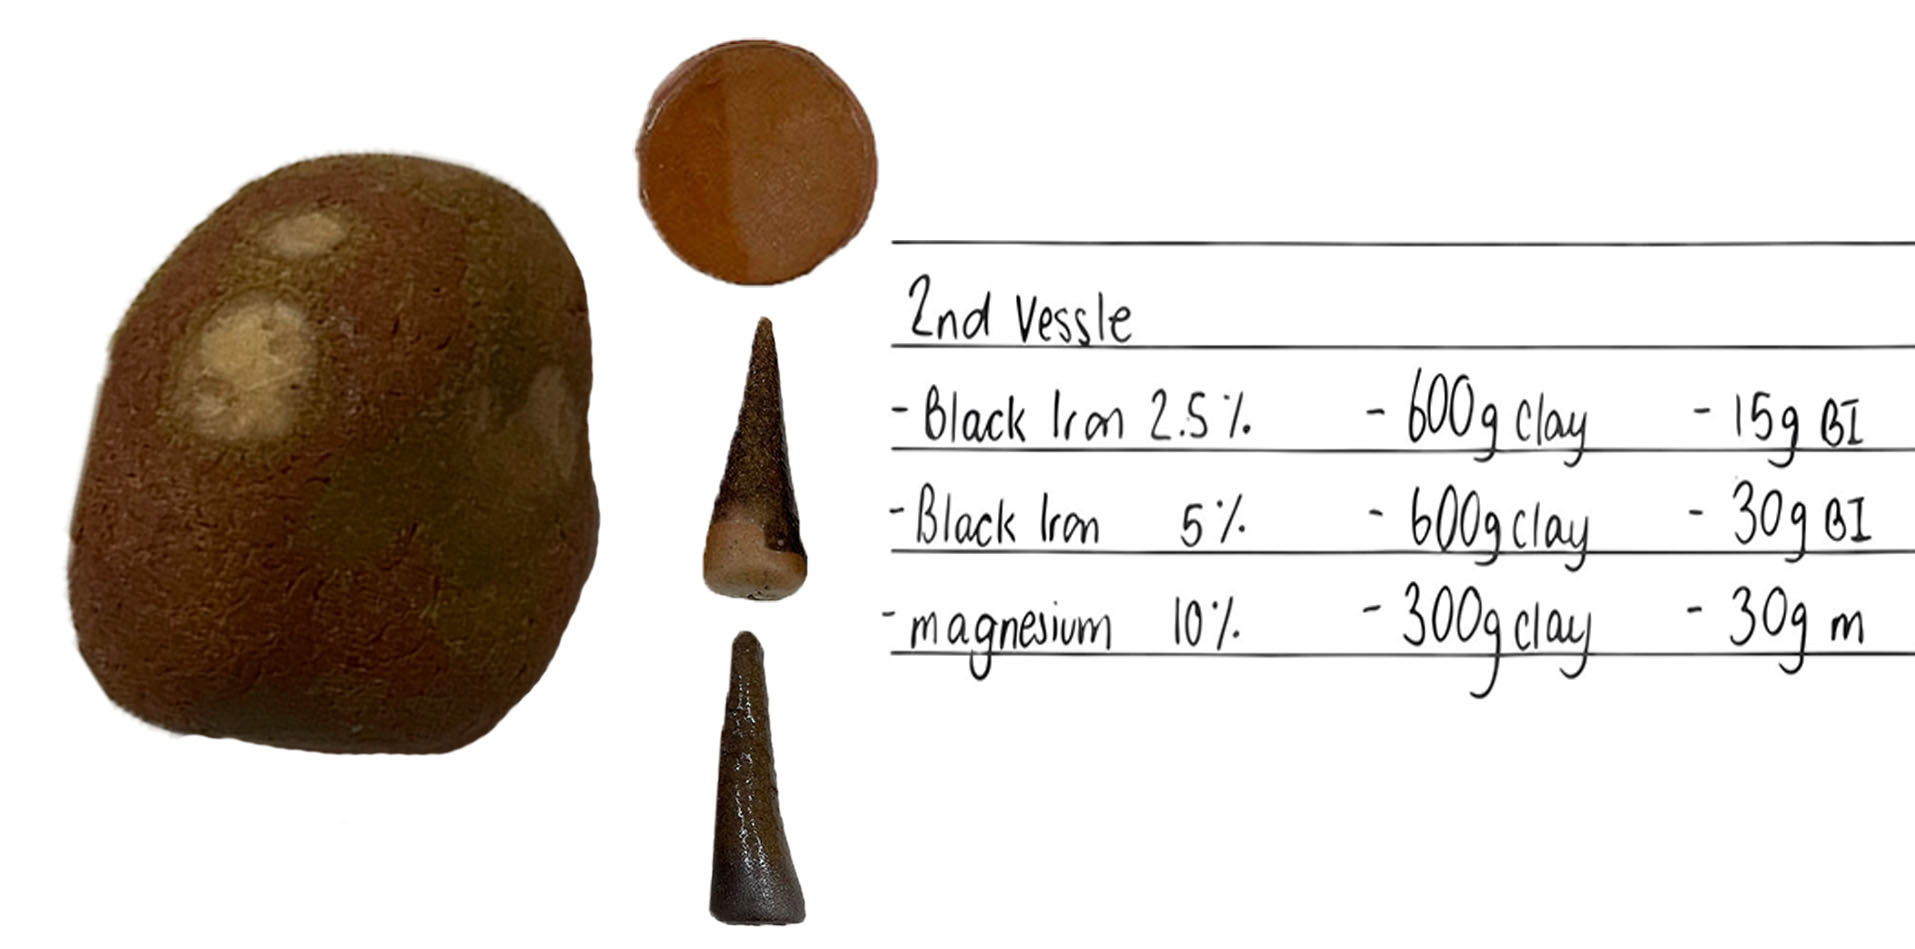
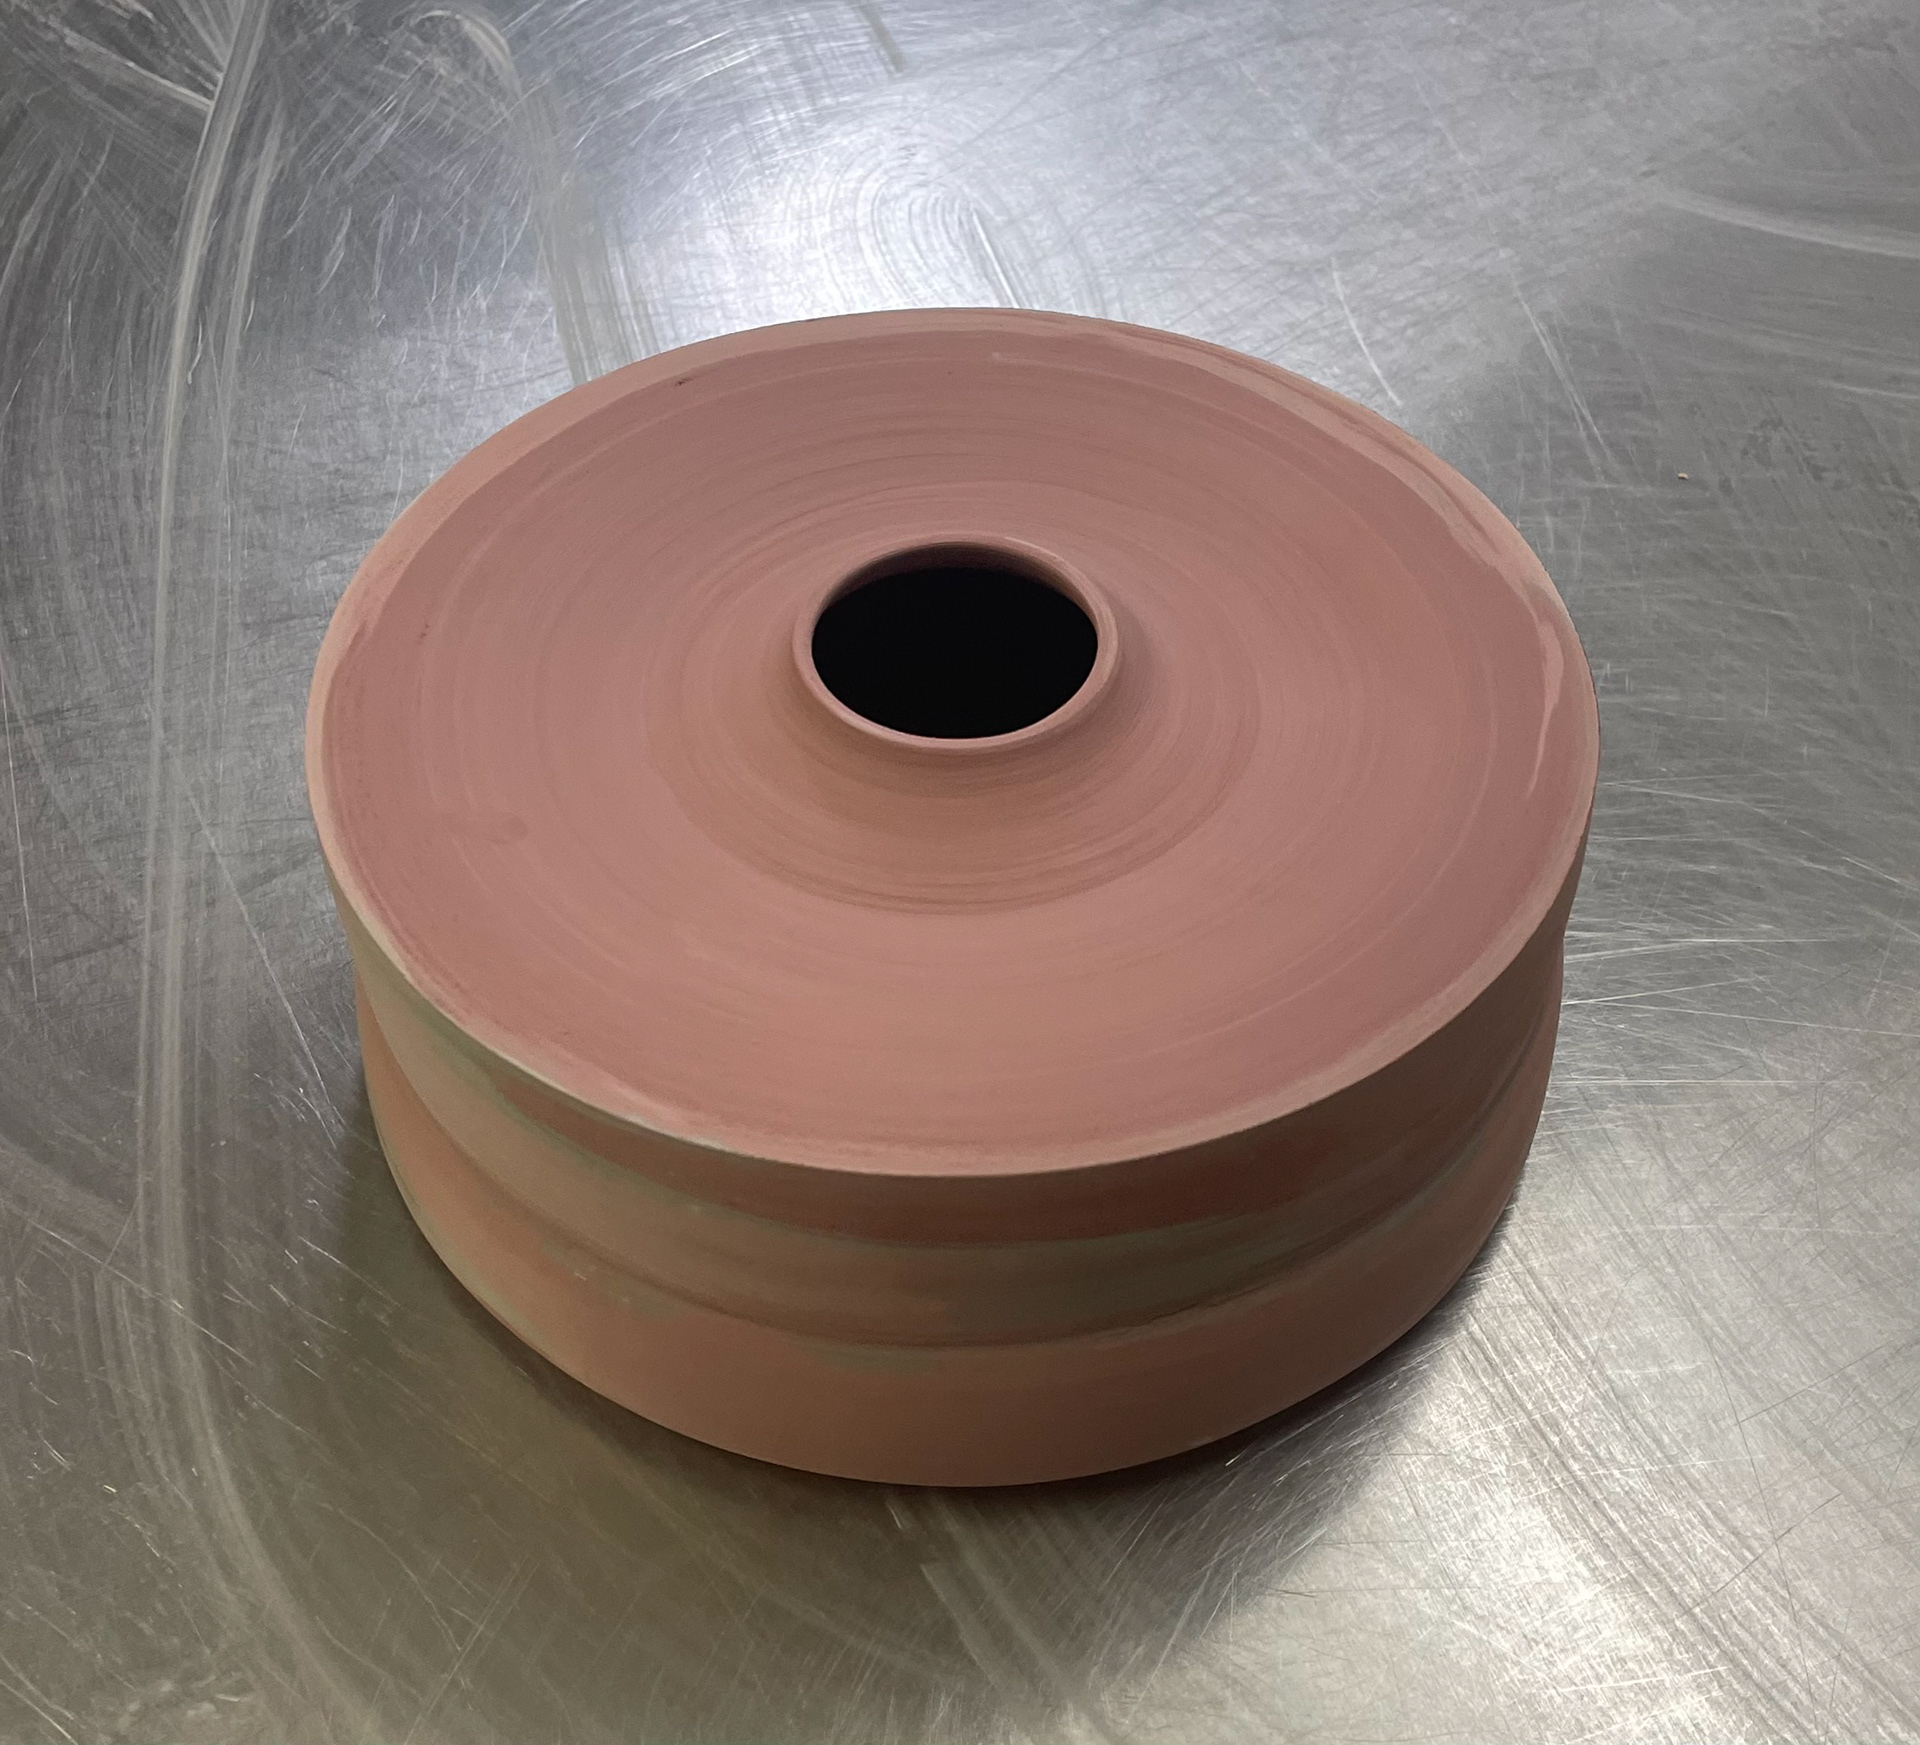
I intentionally chose three colour clays to throw in my vessels as I thought too many colours would take away from the form, making the colour too overwhelming. Keeping to a simple colour pallet allows the vessel's profile to stand out more, drawing attention to the detail of the clean price rims. I used ivory stone wear as the main body clay in my previous marbled clay project. However, I decided not to have that in this project as the big contrast would be too distracting and having three similar amounts of clay allows for larger marbling sections, which I like in my work compared to fine coloured lines running throughout bigger colour sections suit a bigger vessel more. I also decided to use similar coloured clays in my work, having two clays that are the same but changing the amount of oxide within them. I think this gradient in colour adds a subtle change and draws to detail, making my work look of a higher standard.
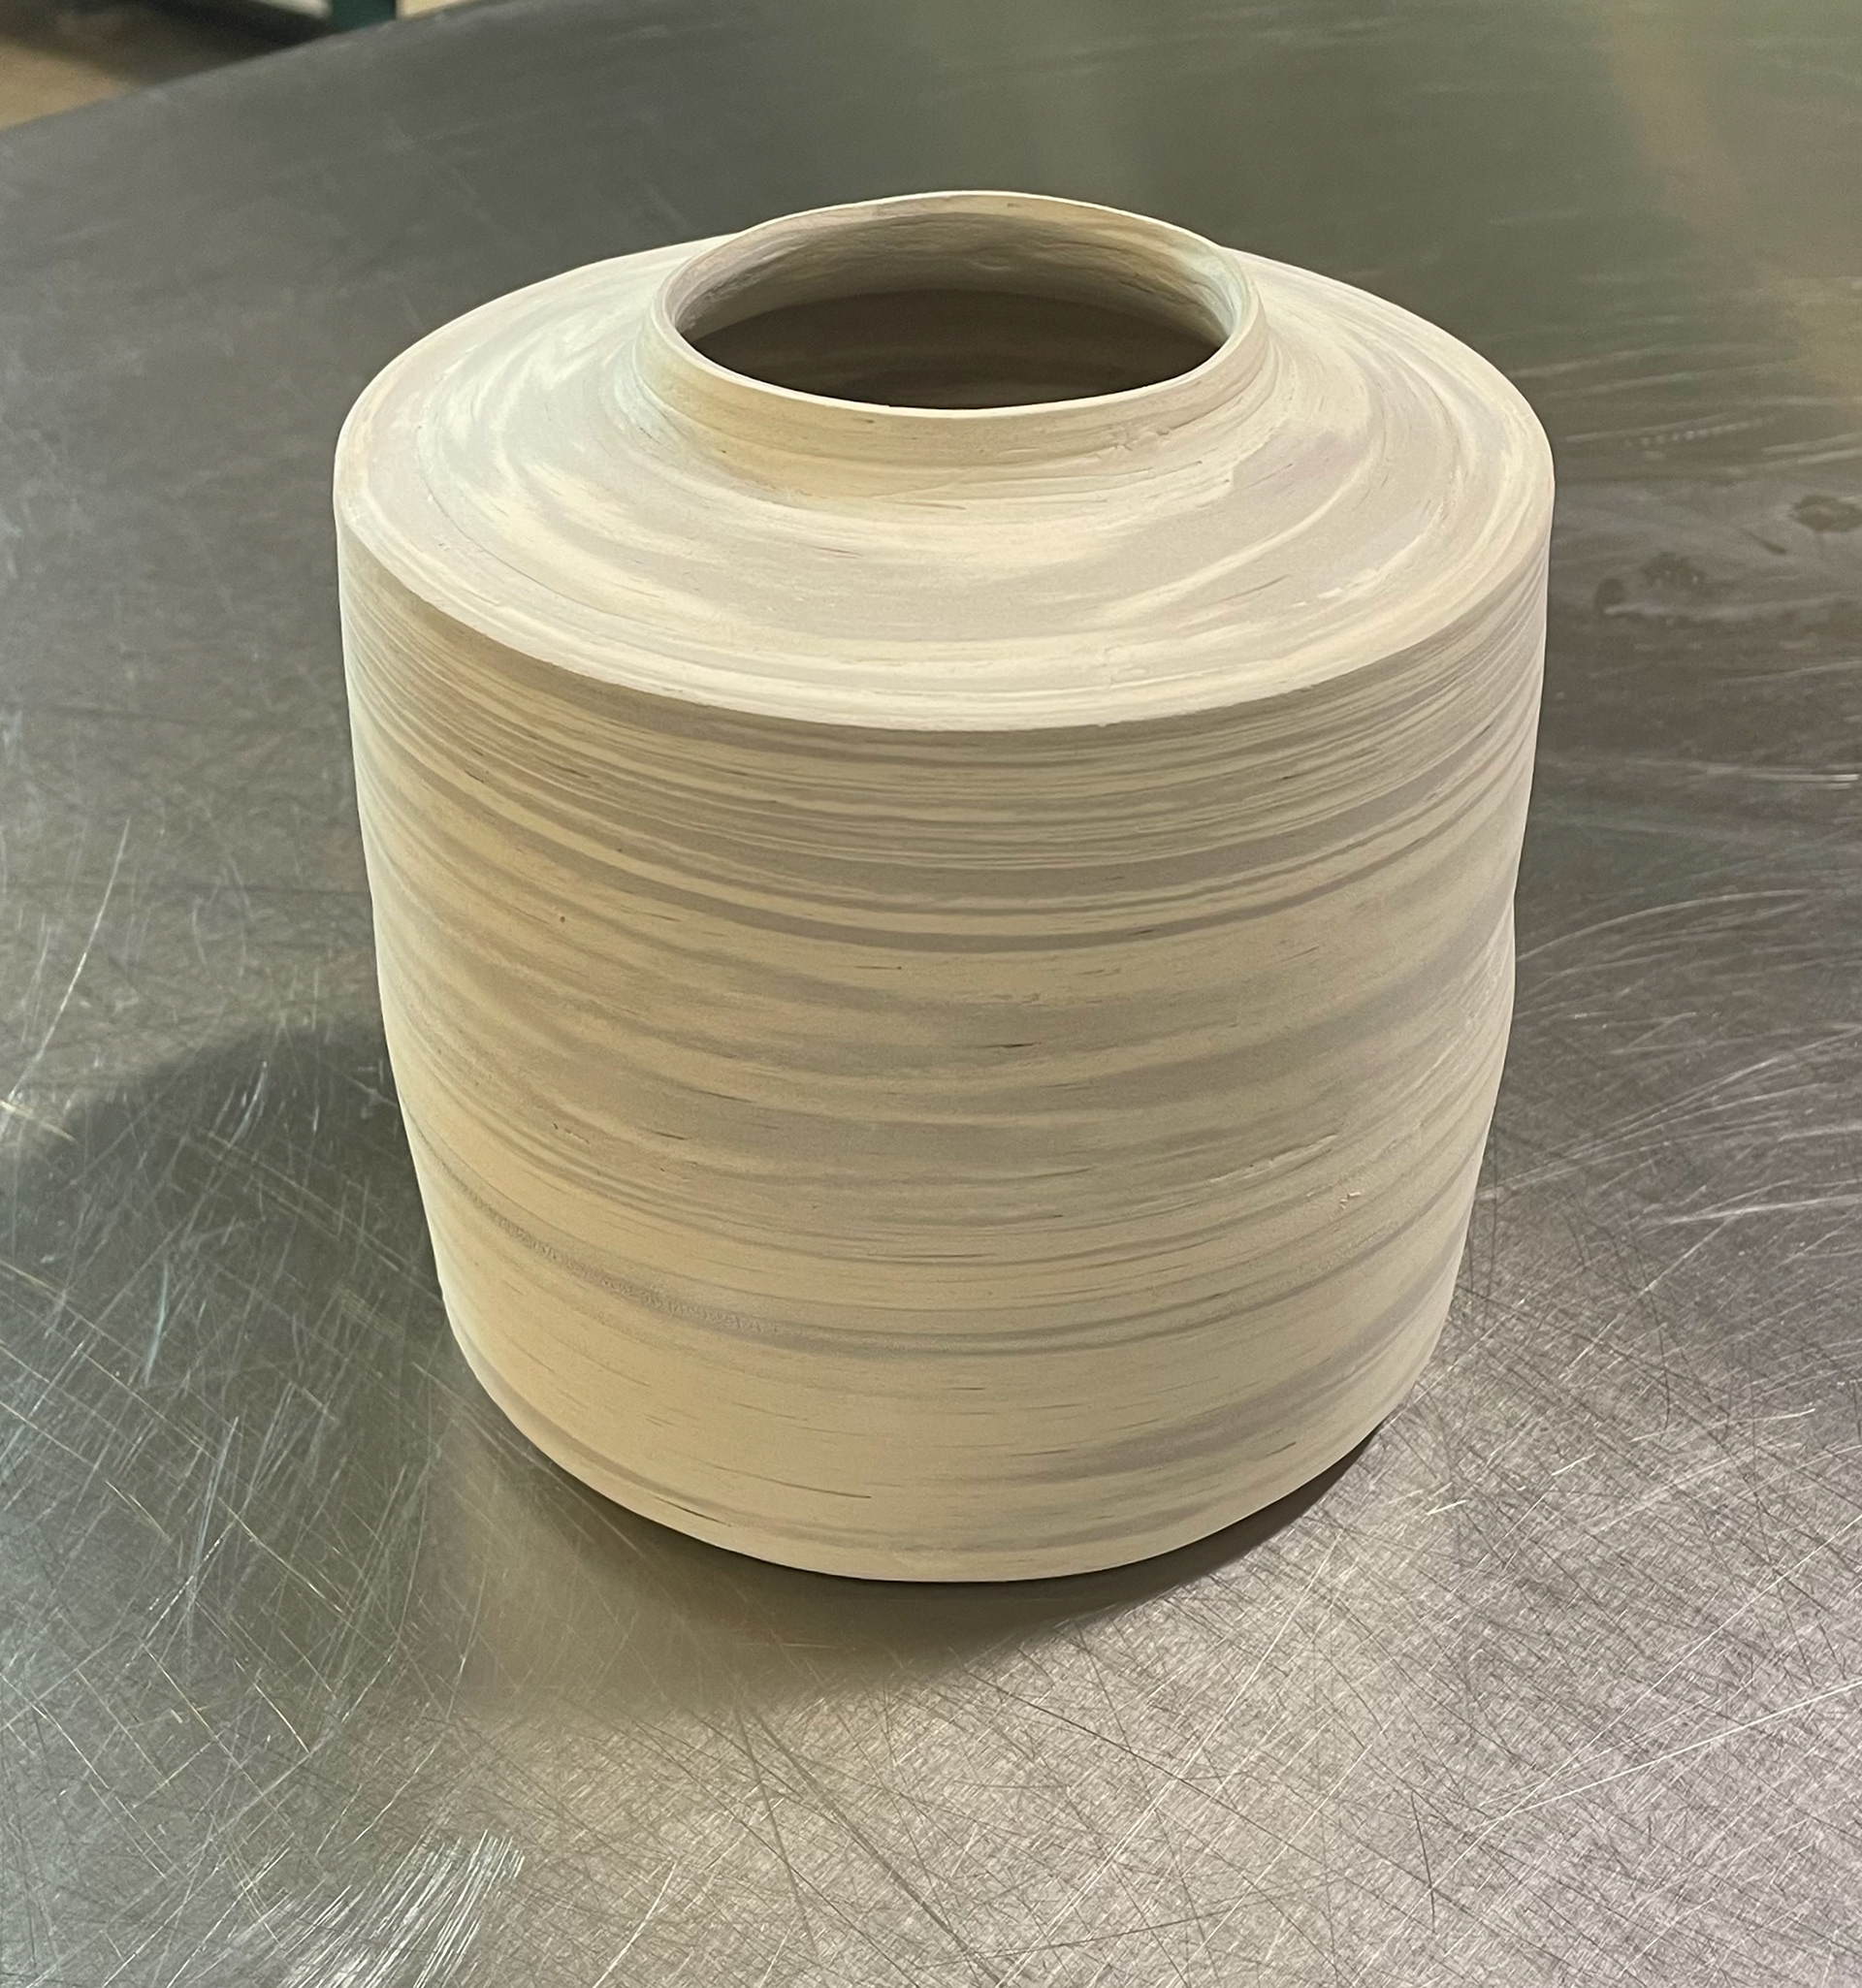
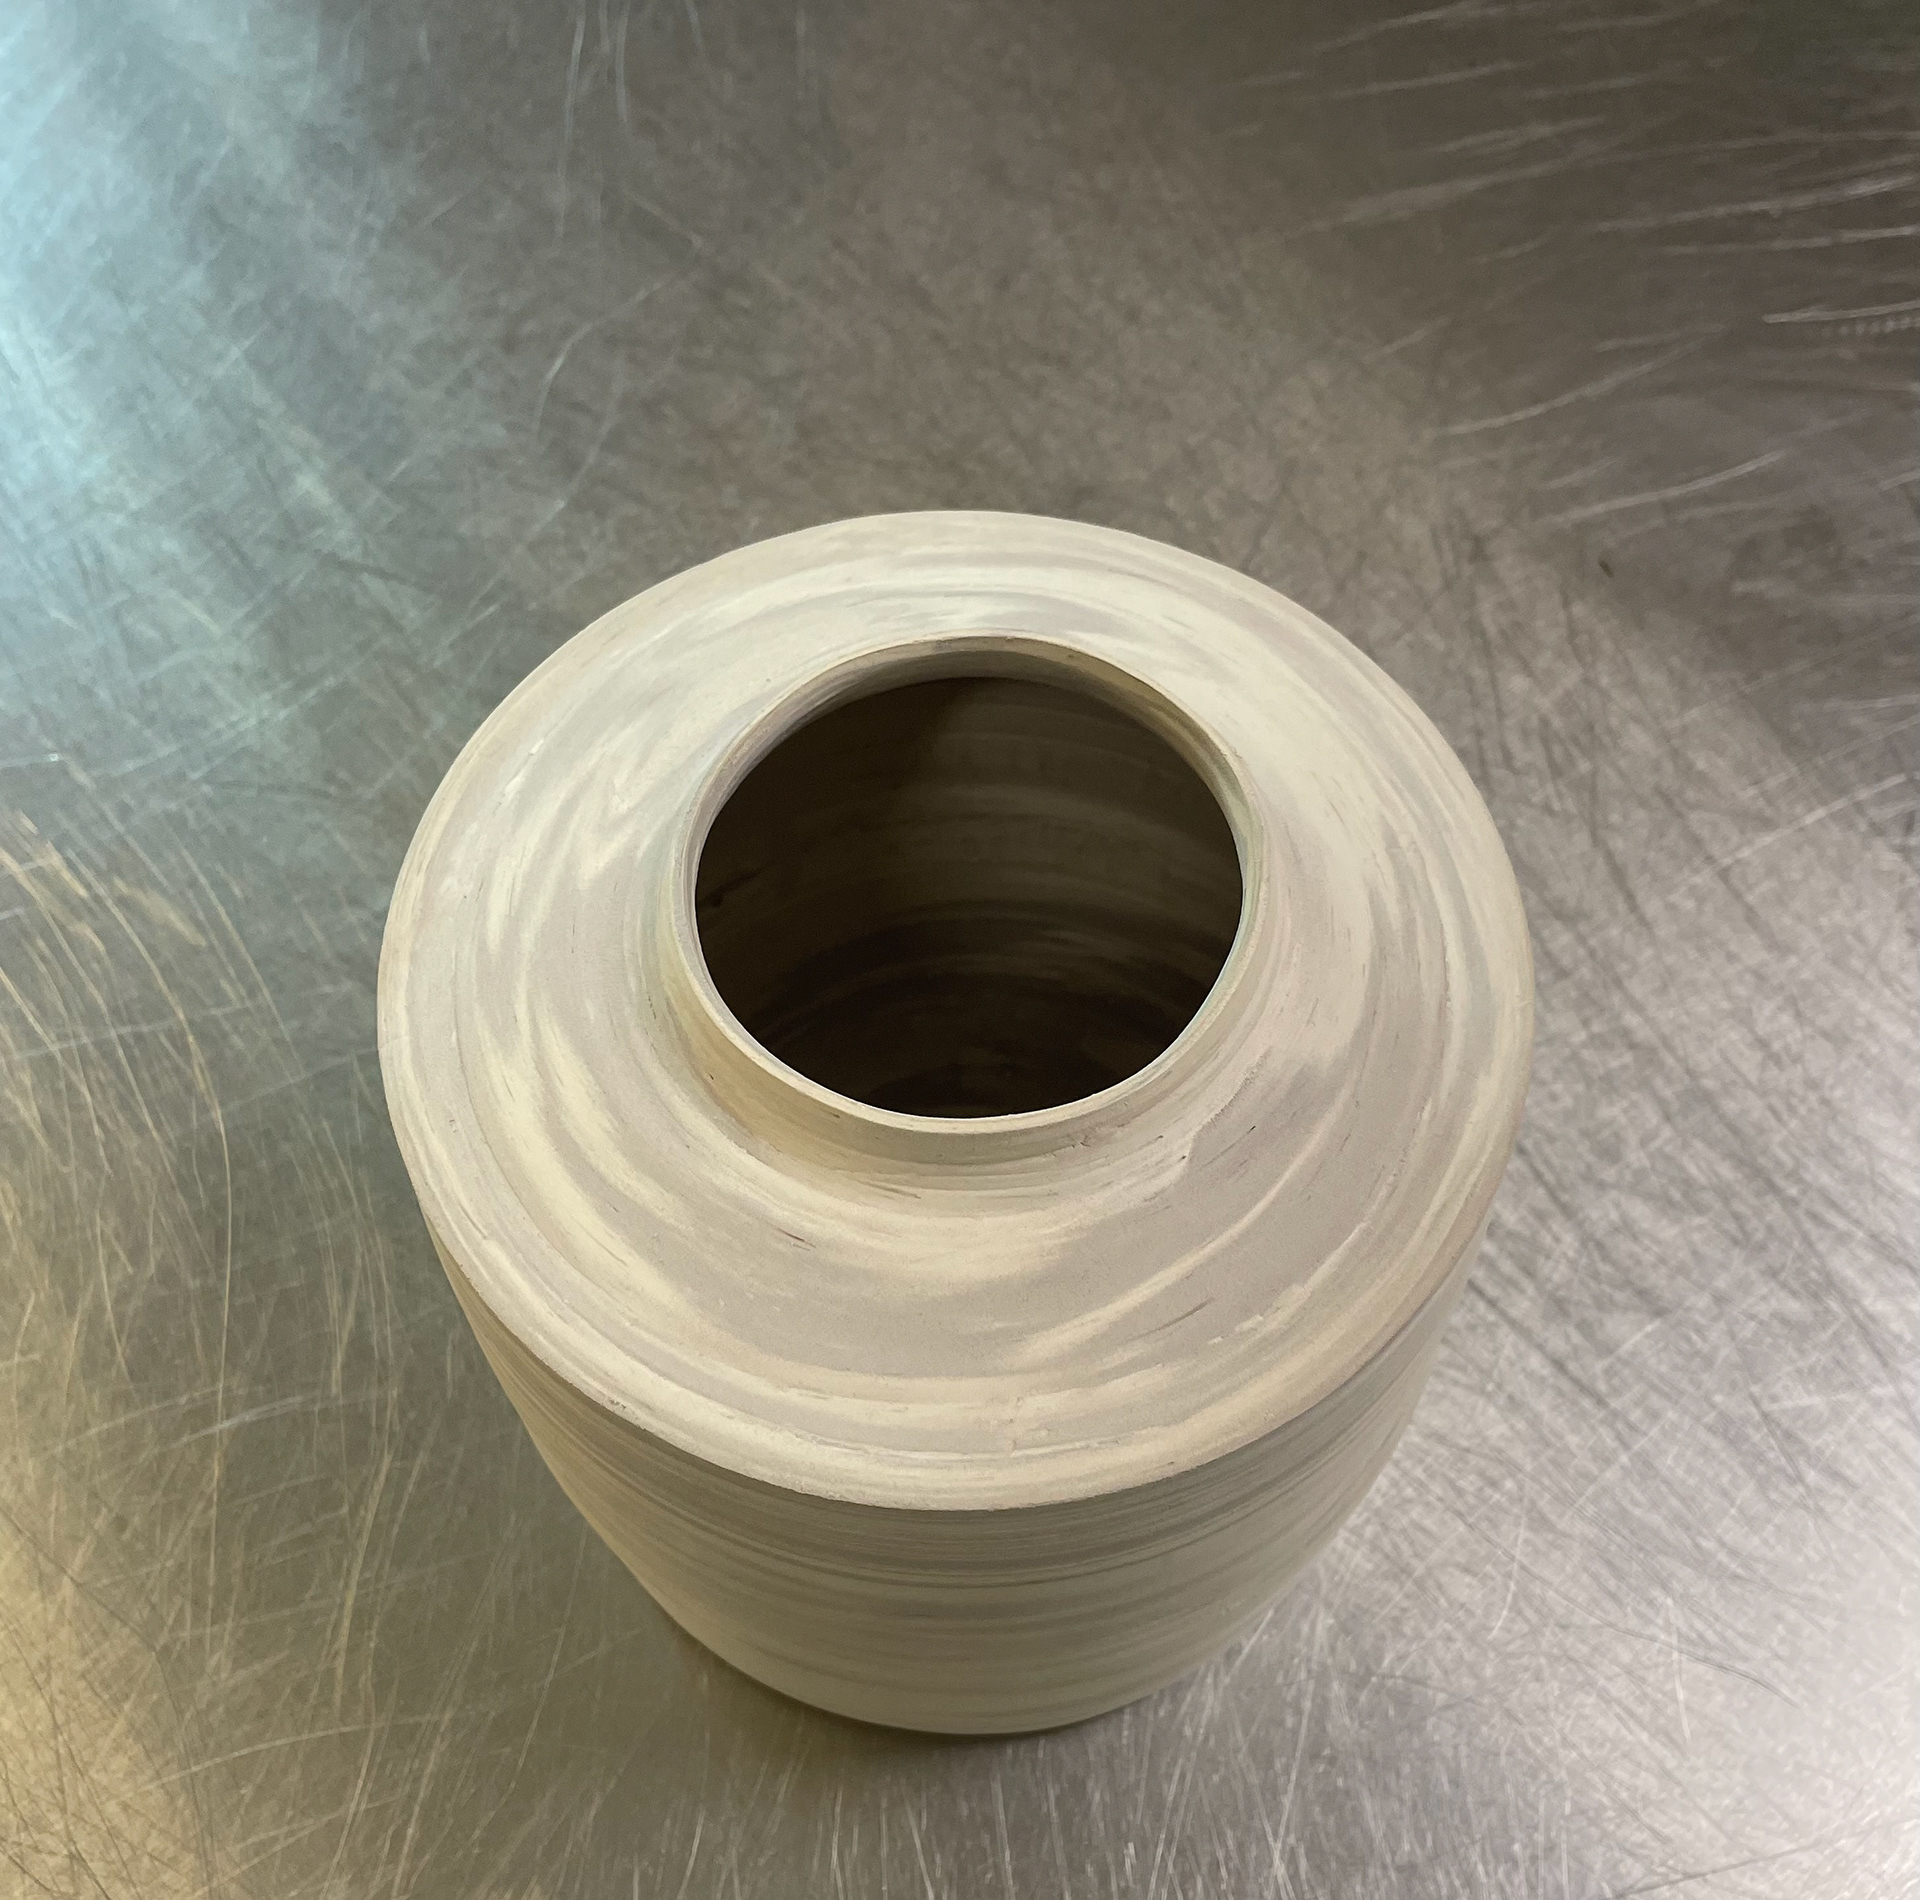
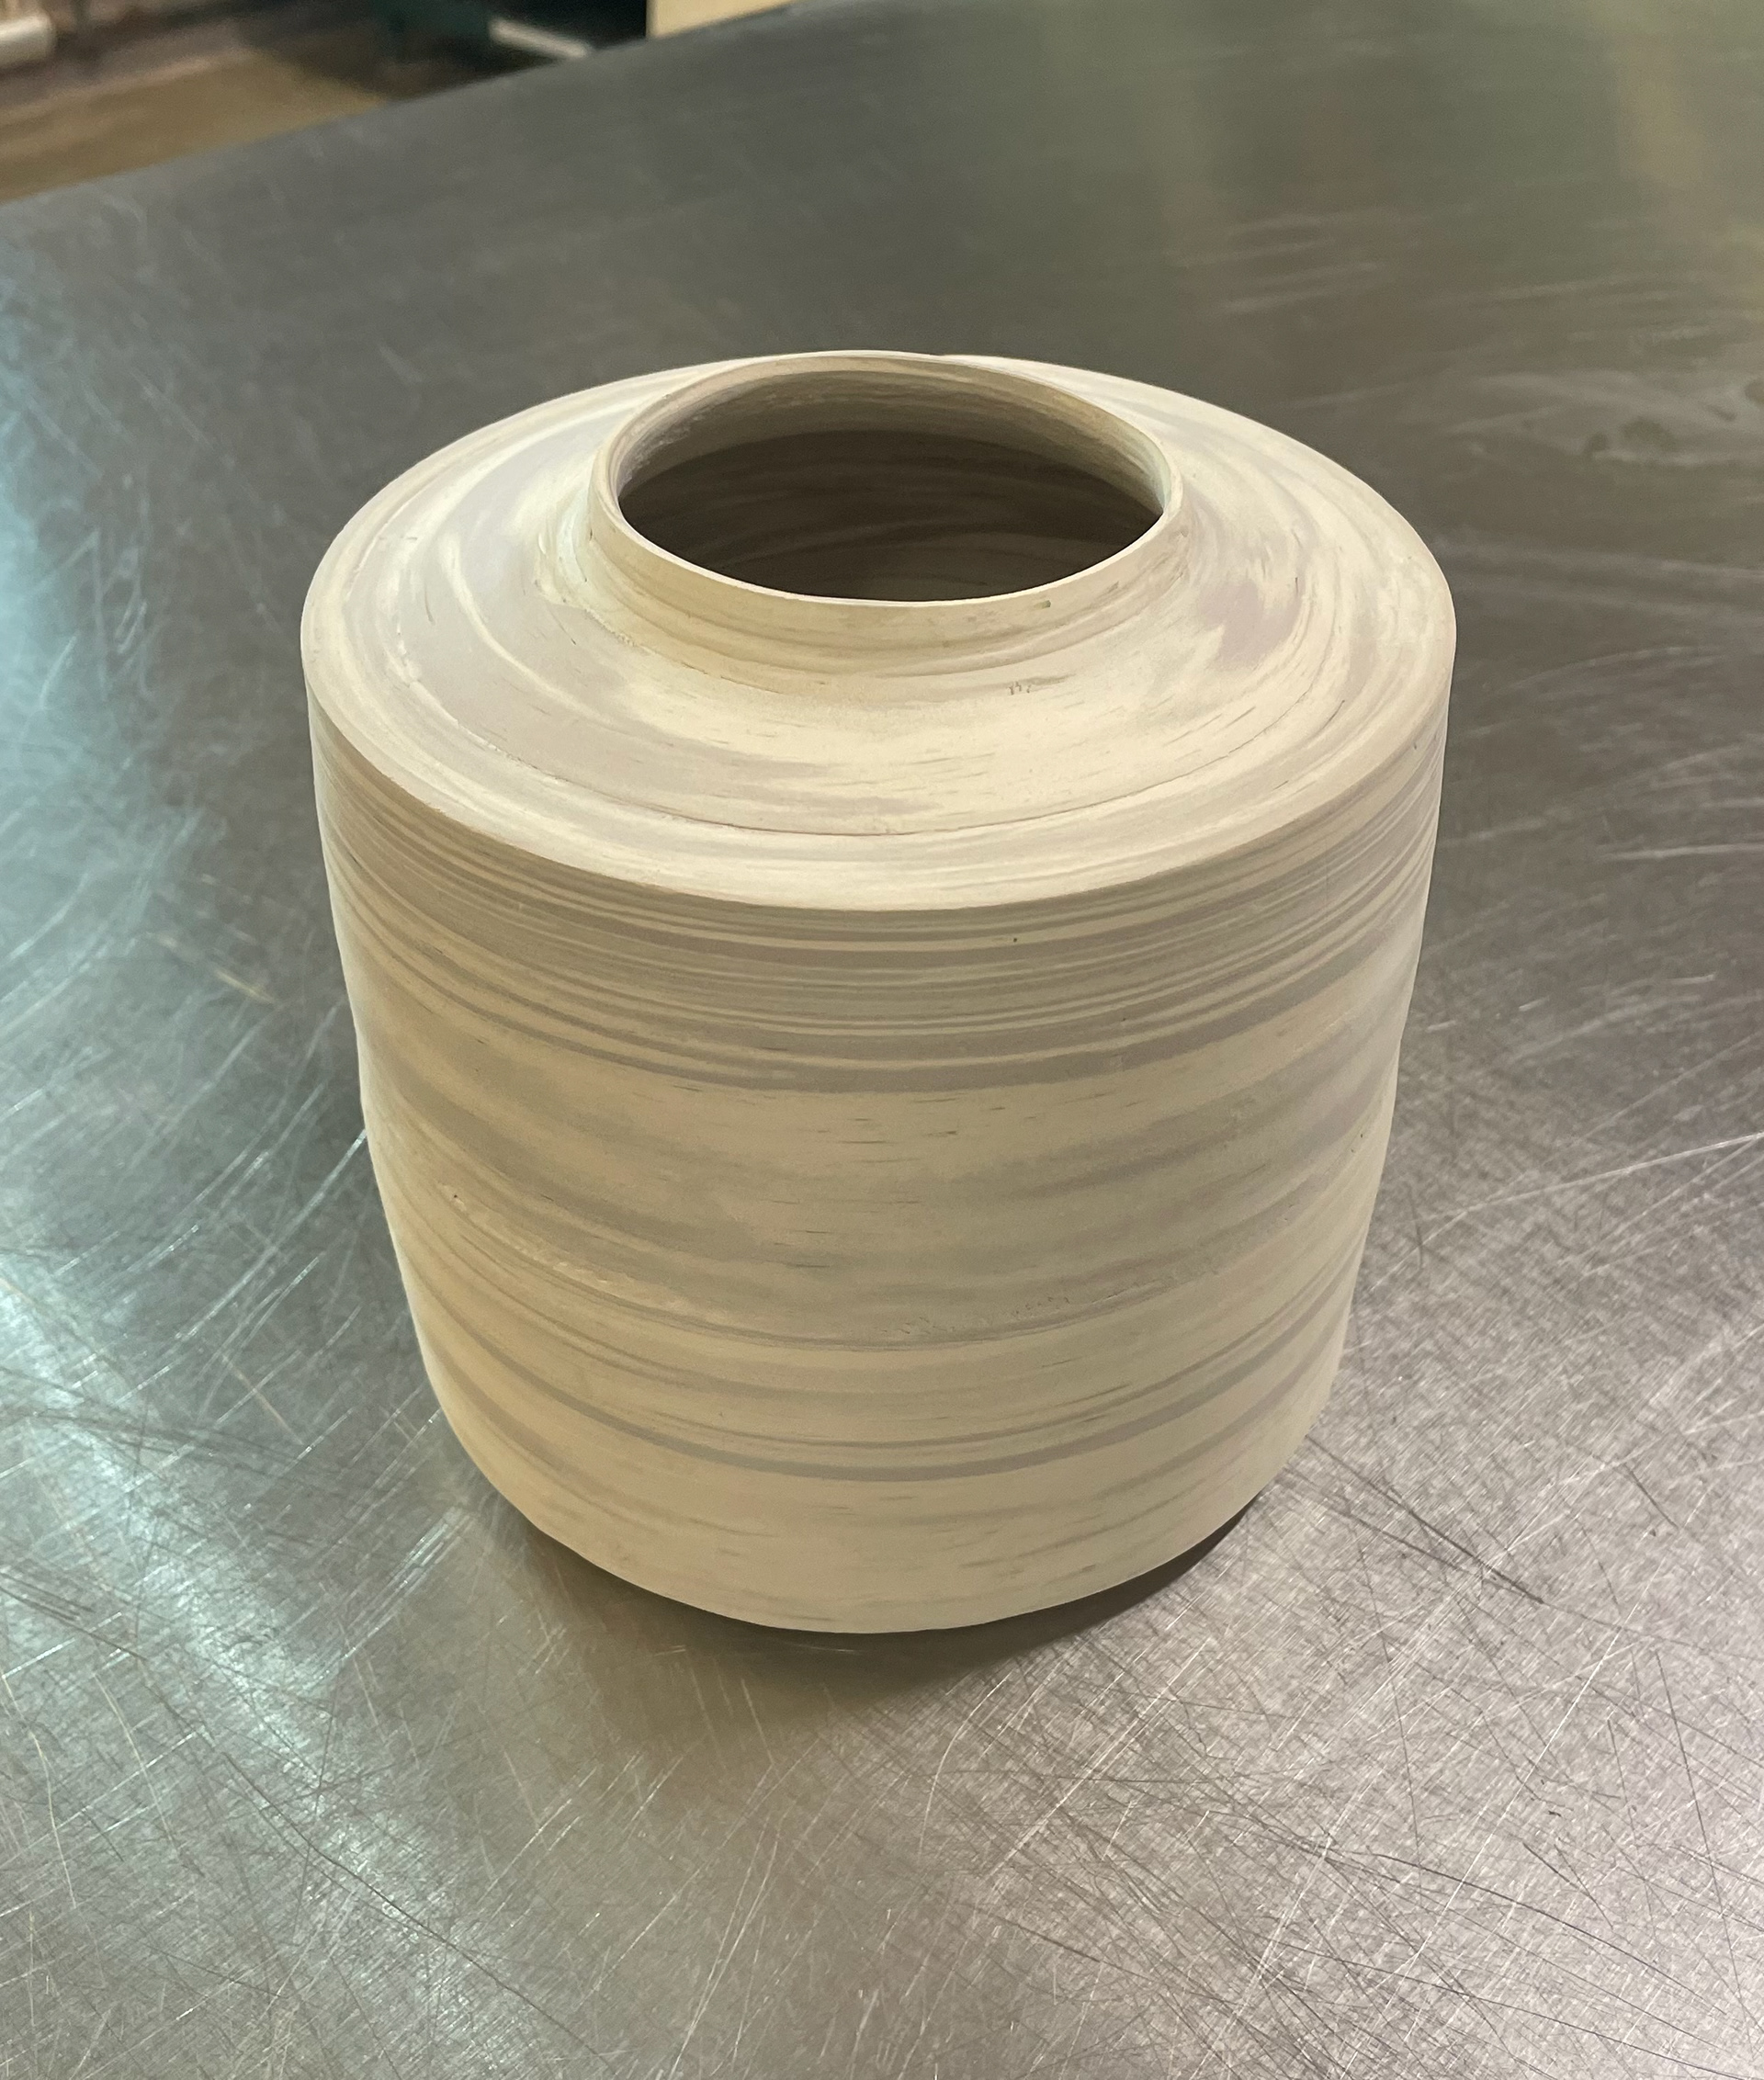
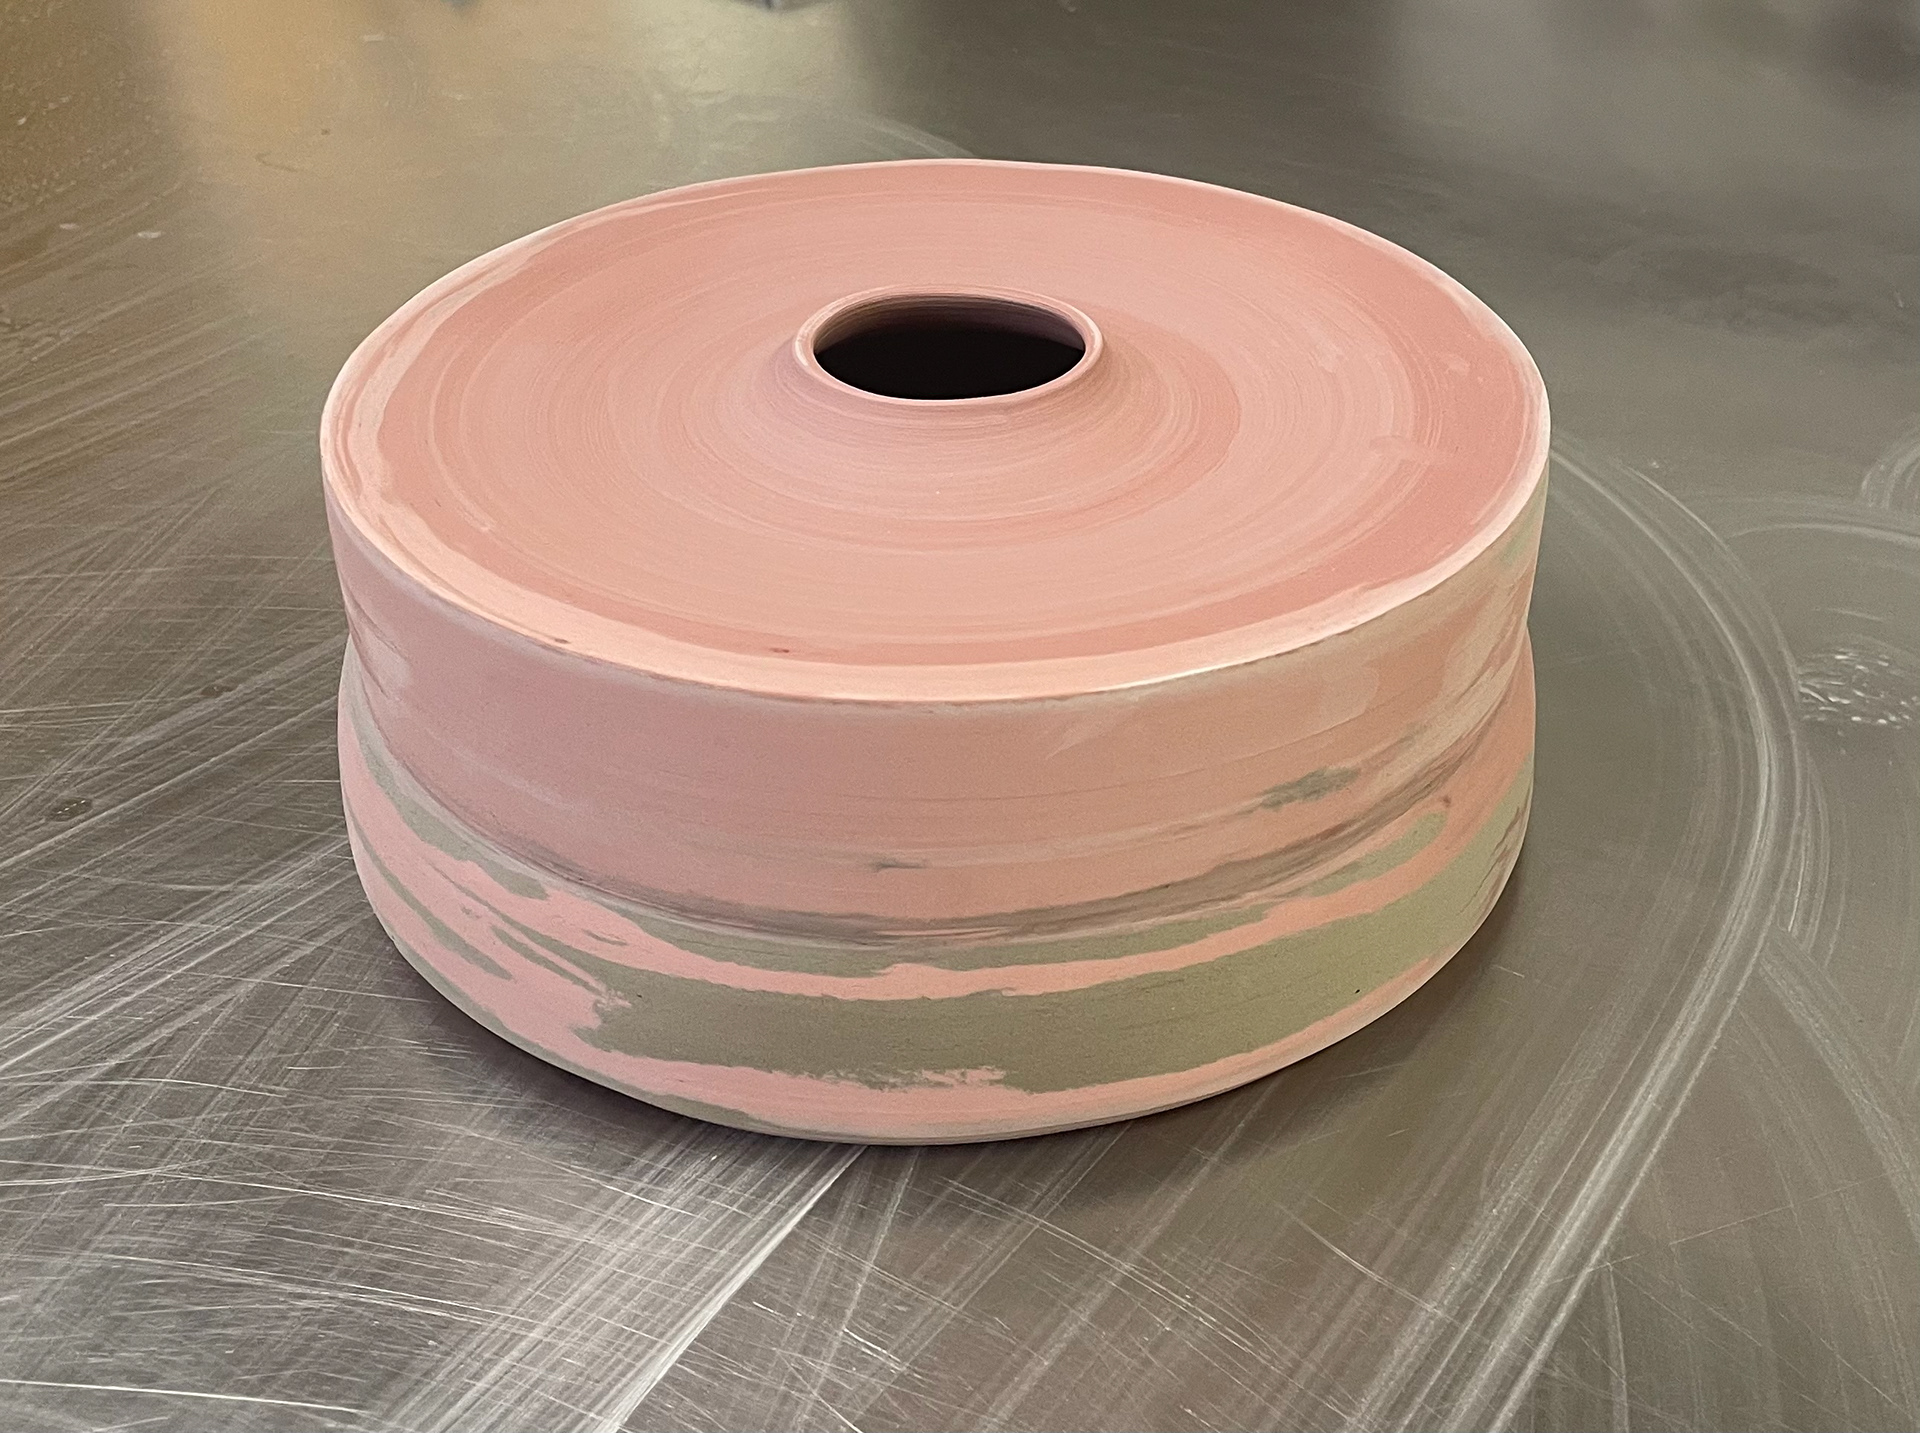
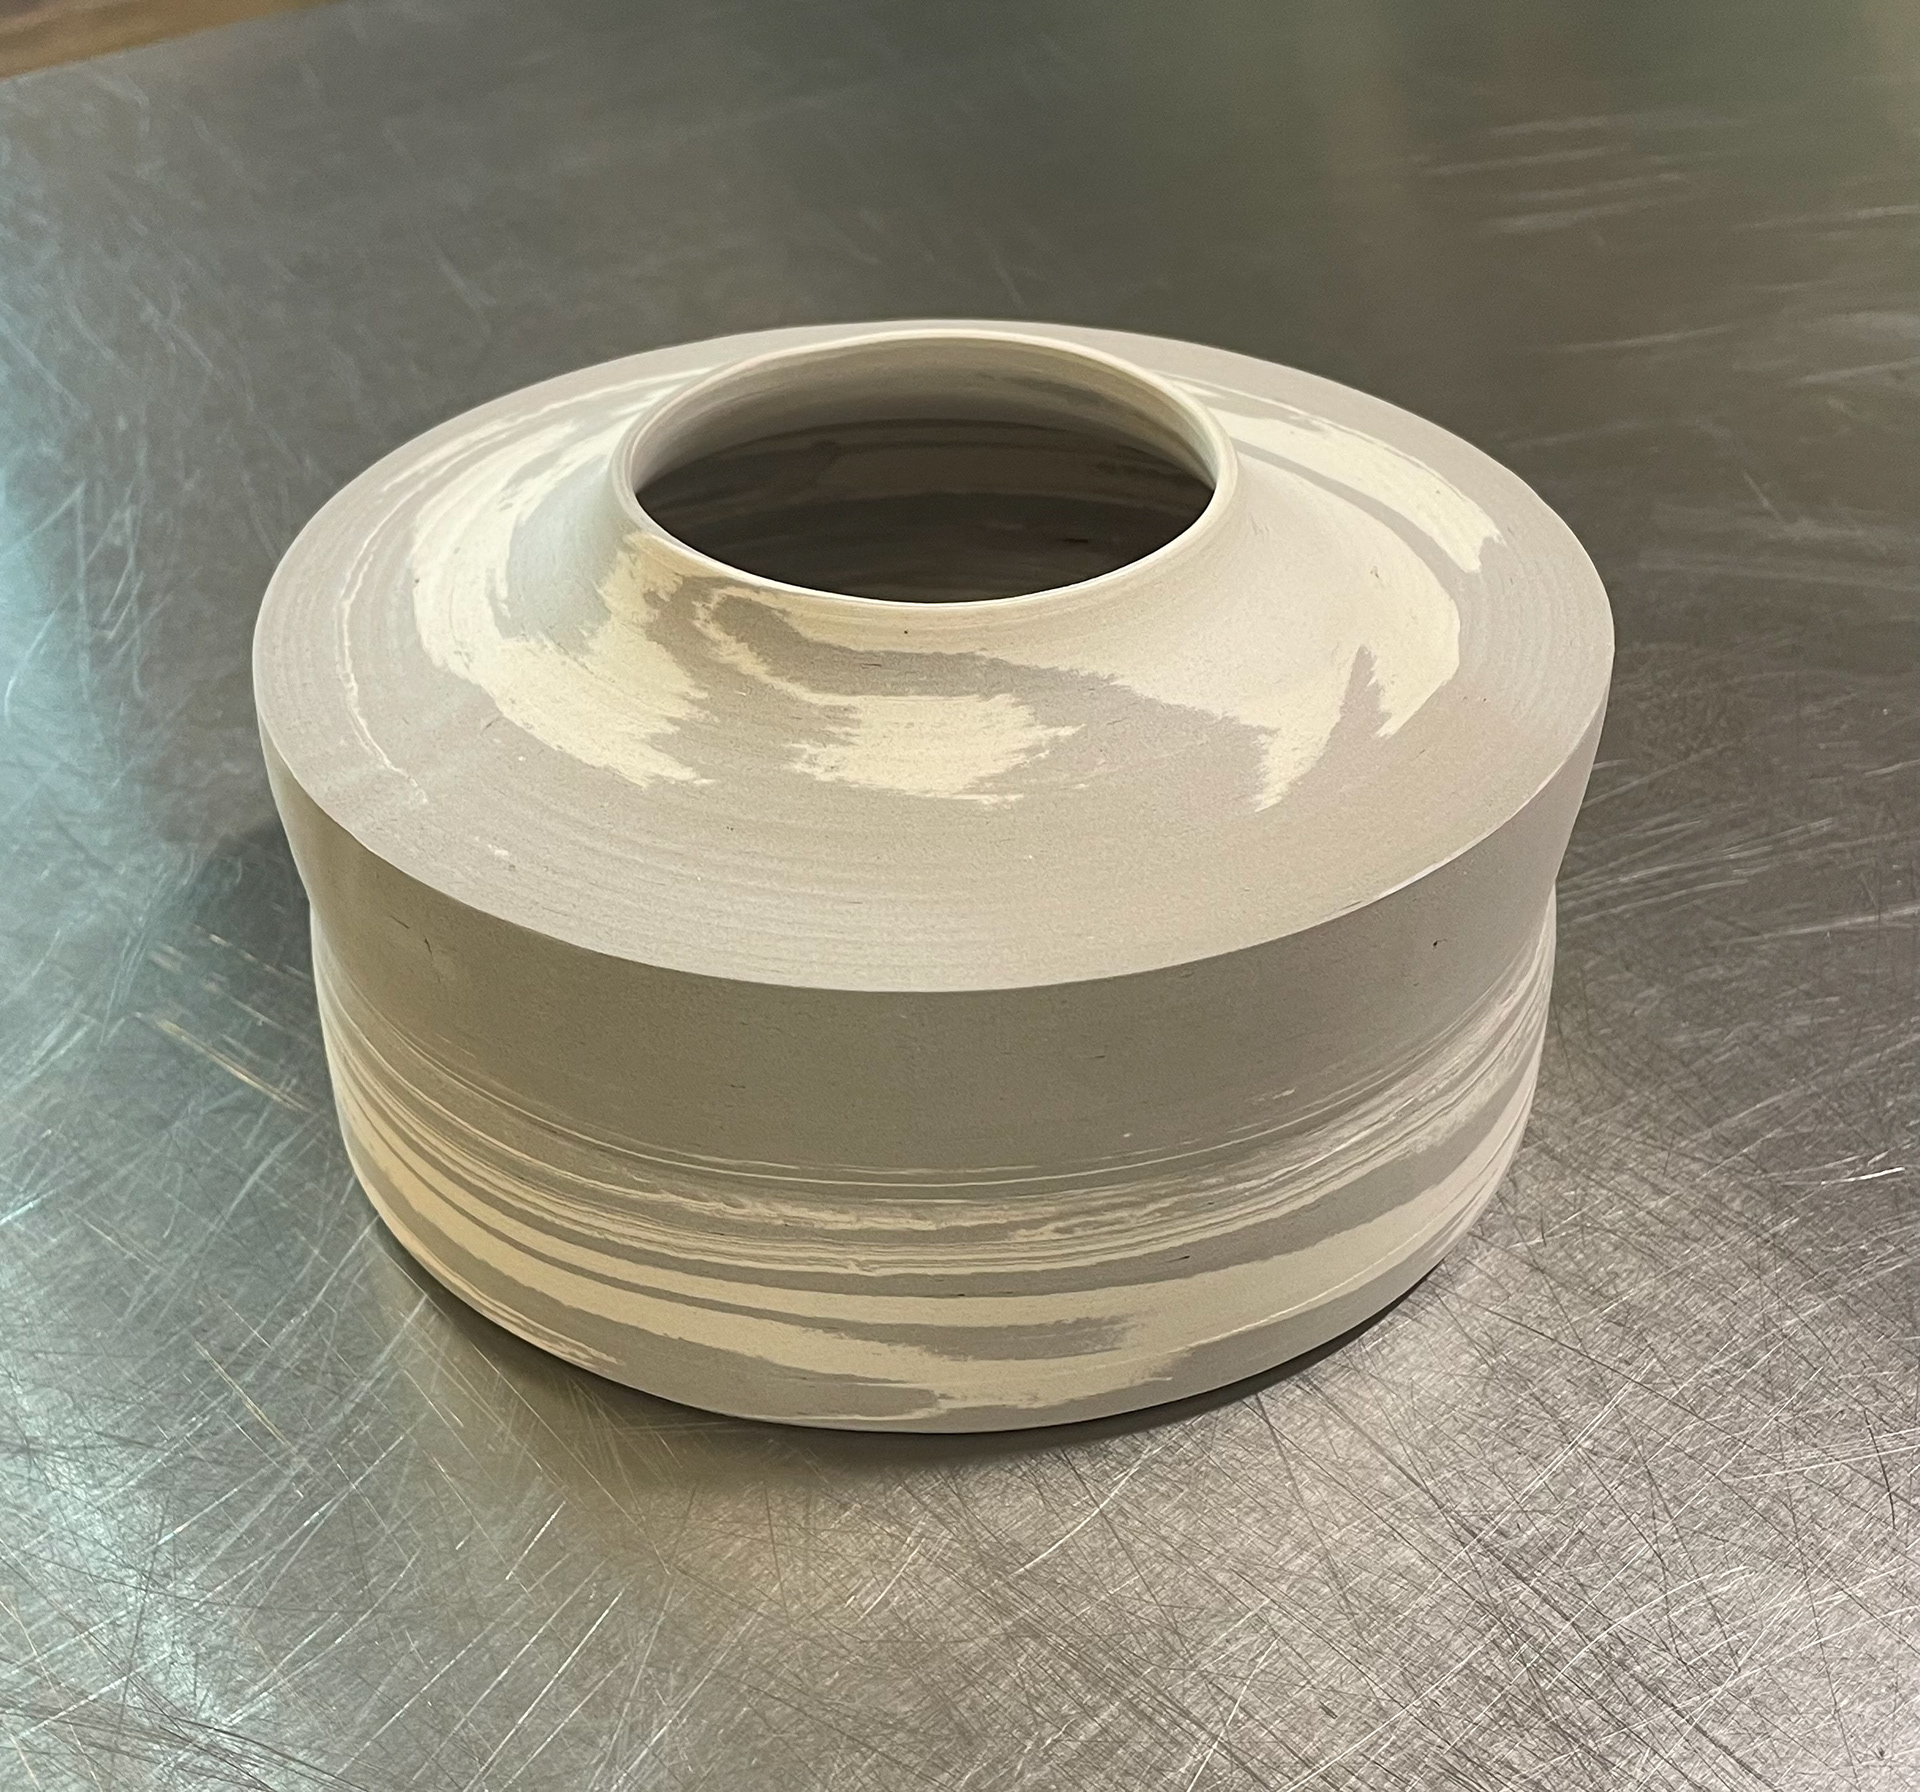
Third Beach Vessel
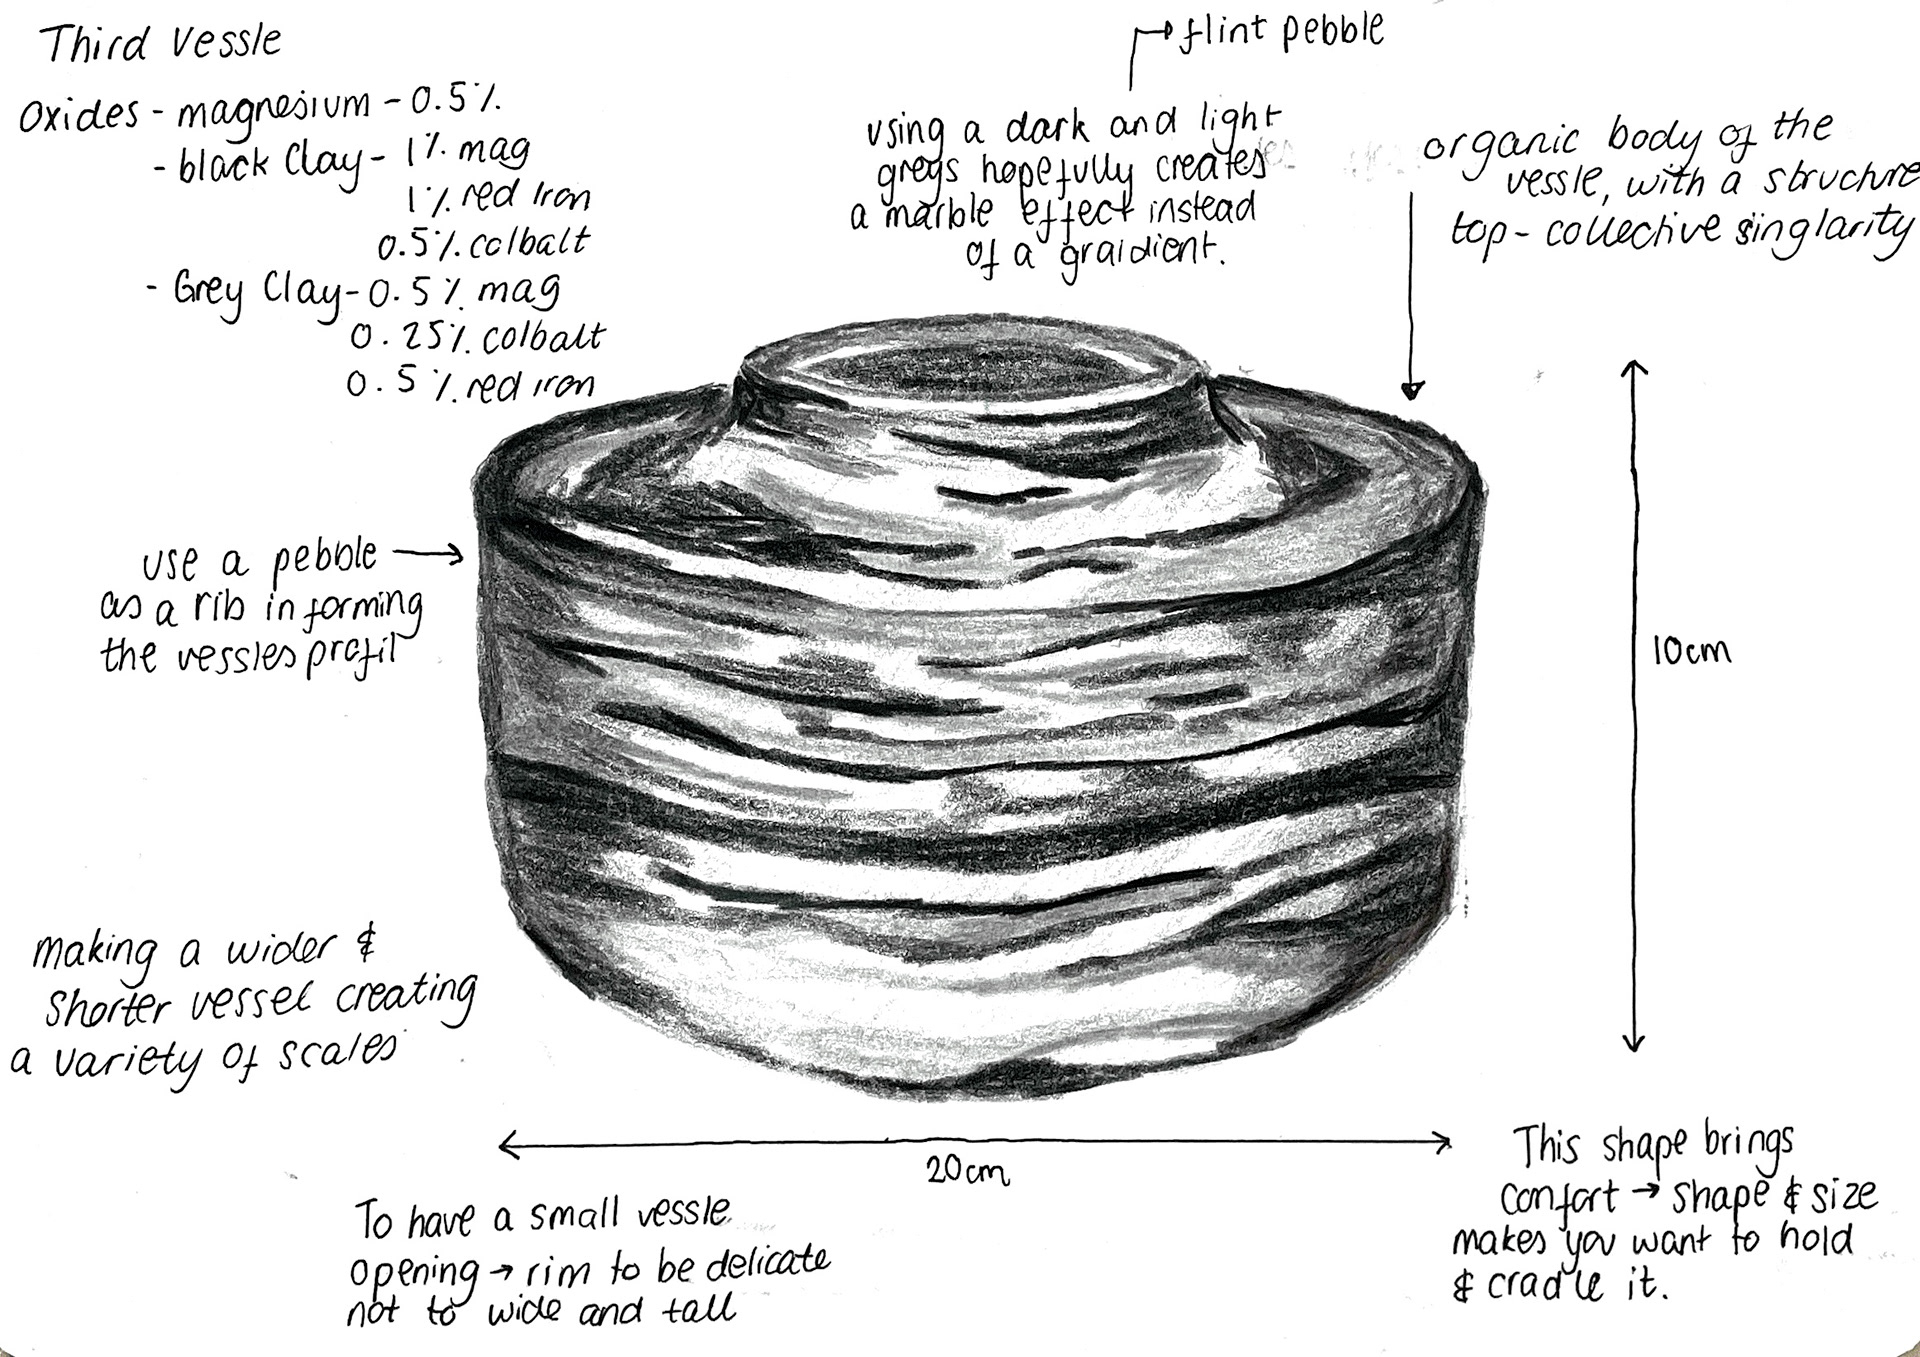
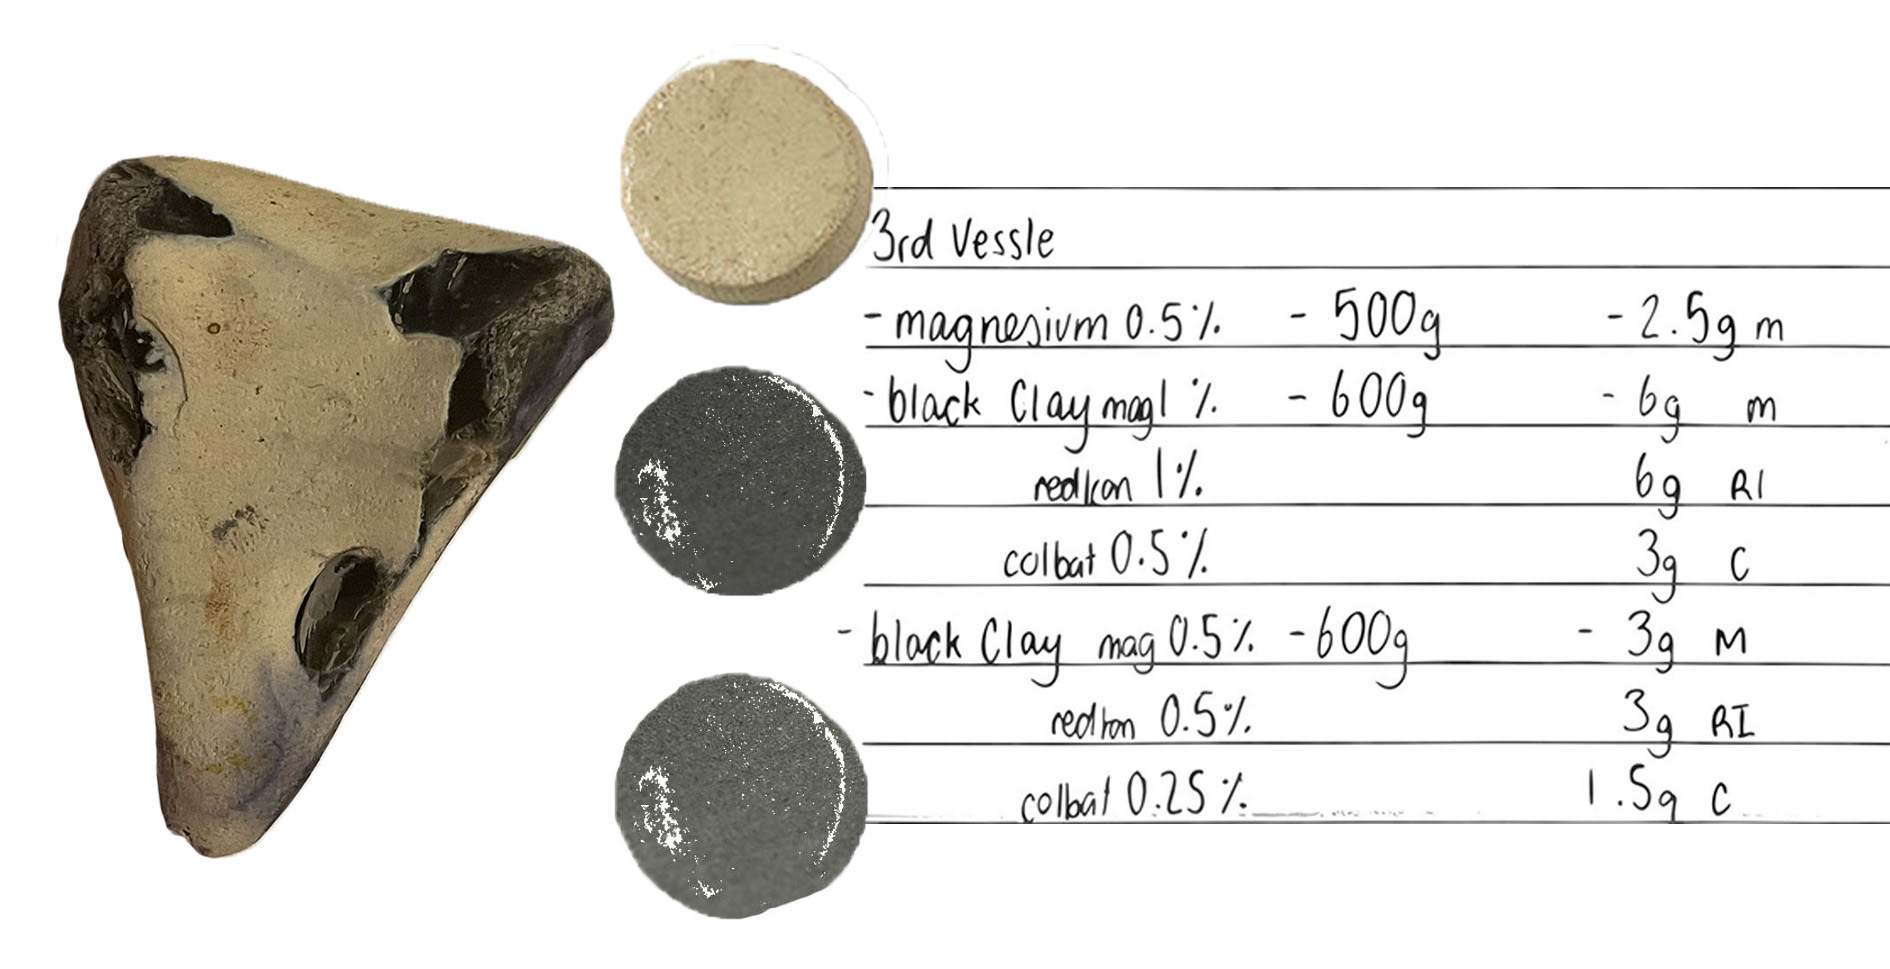

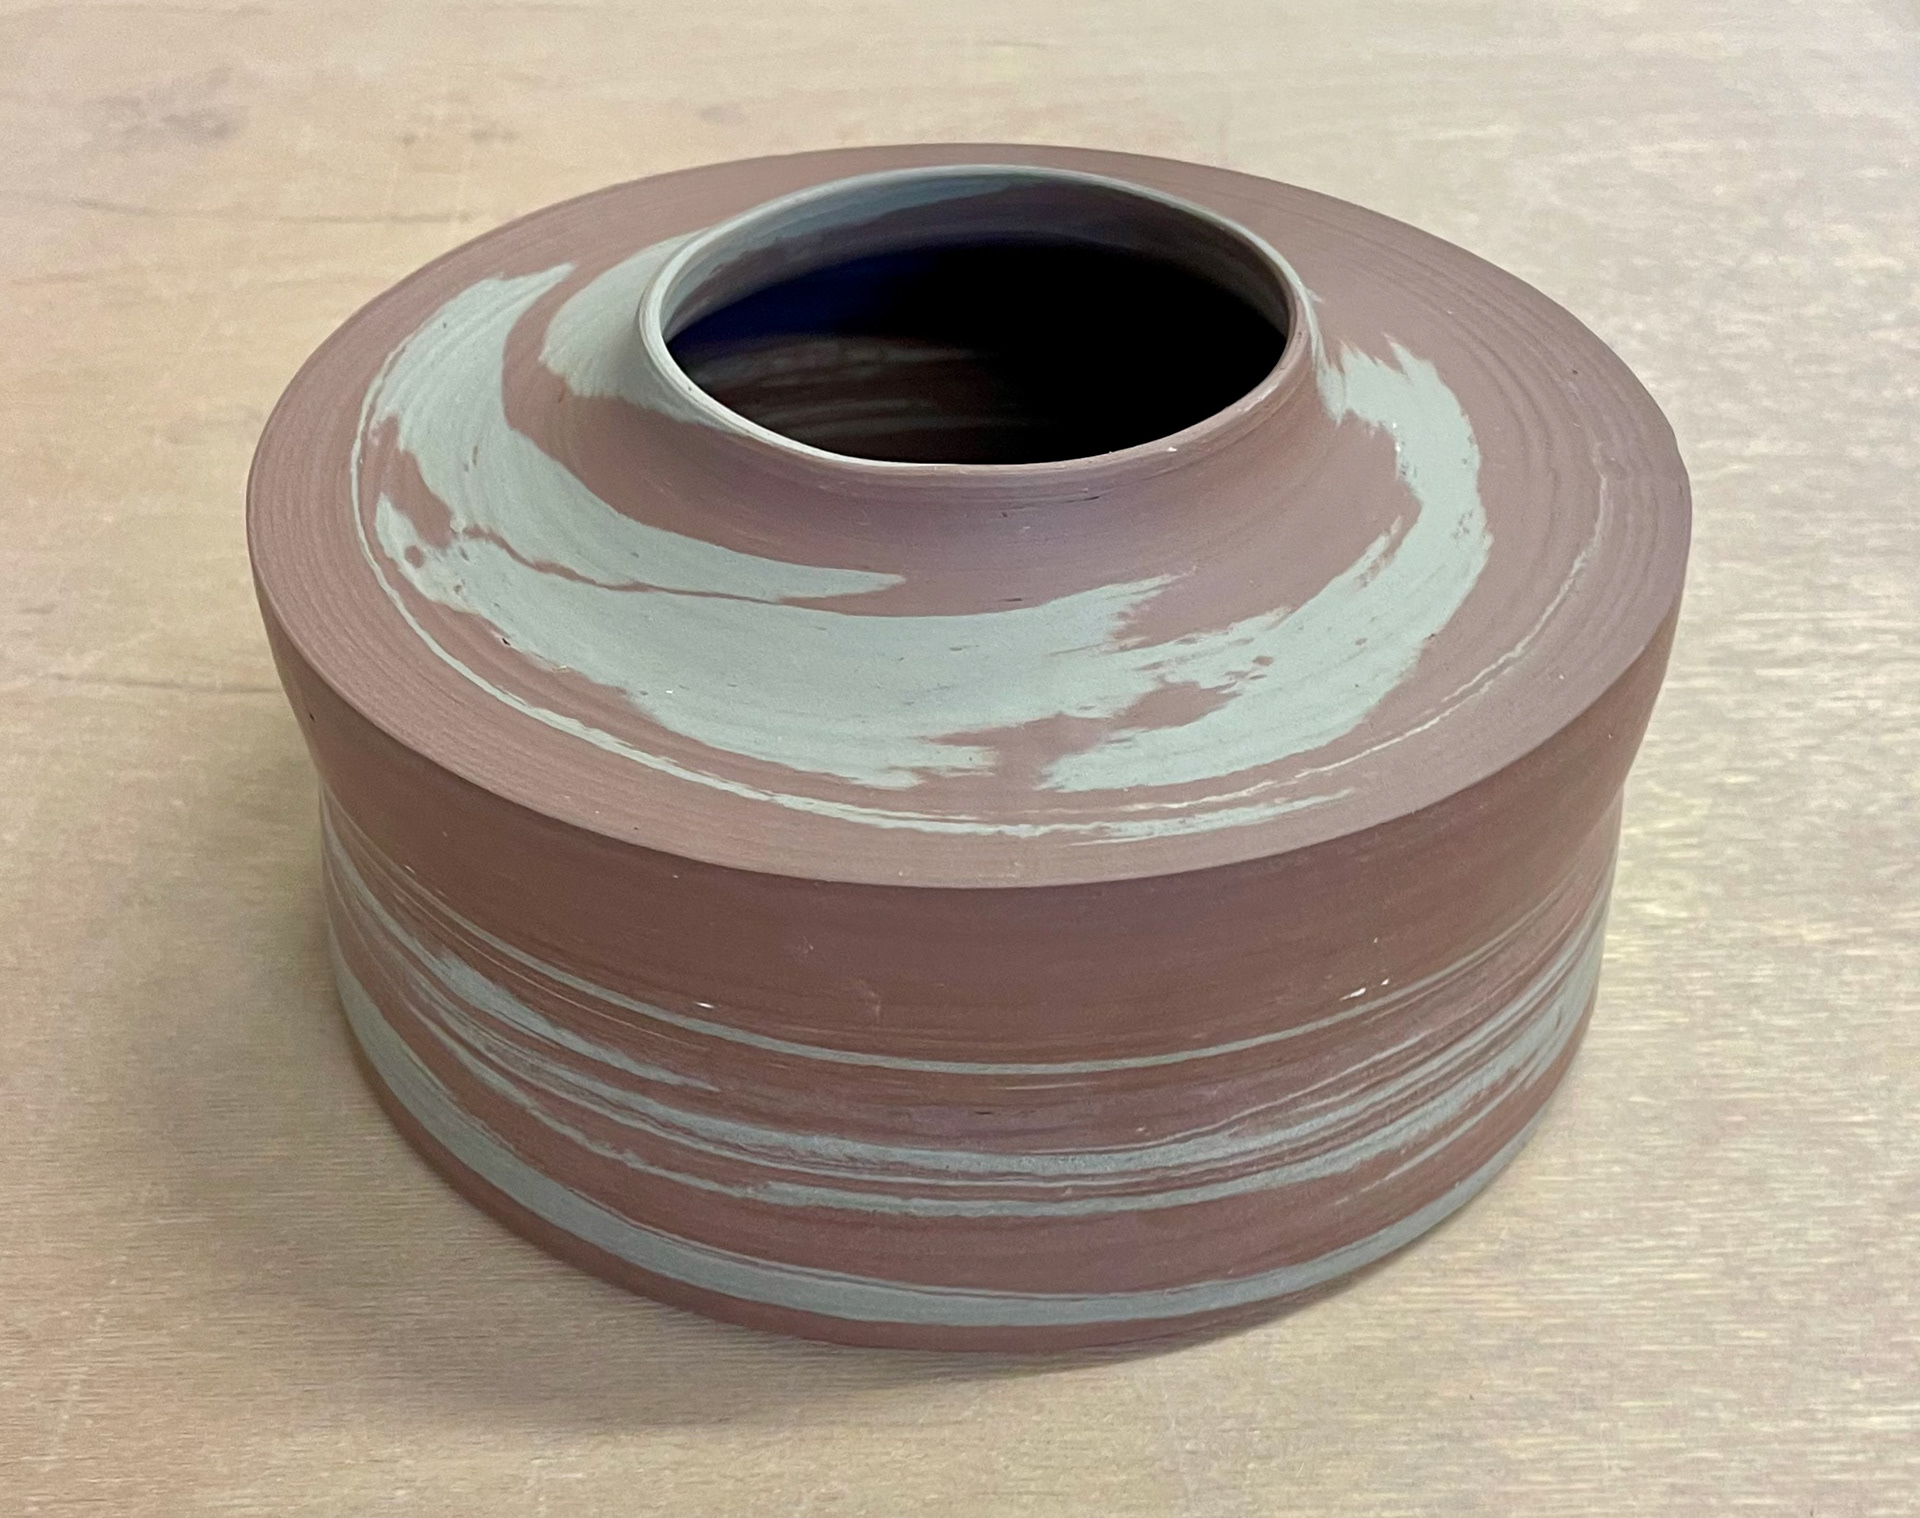
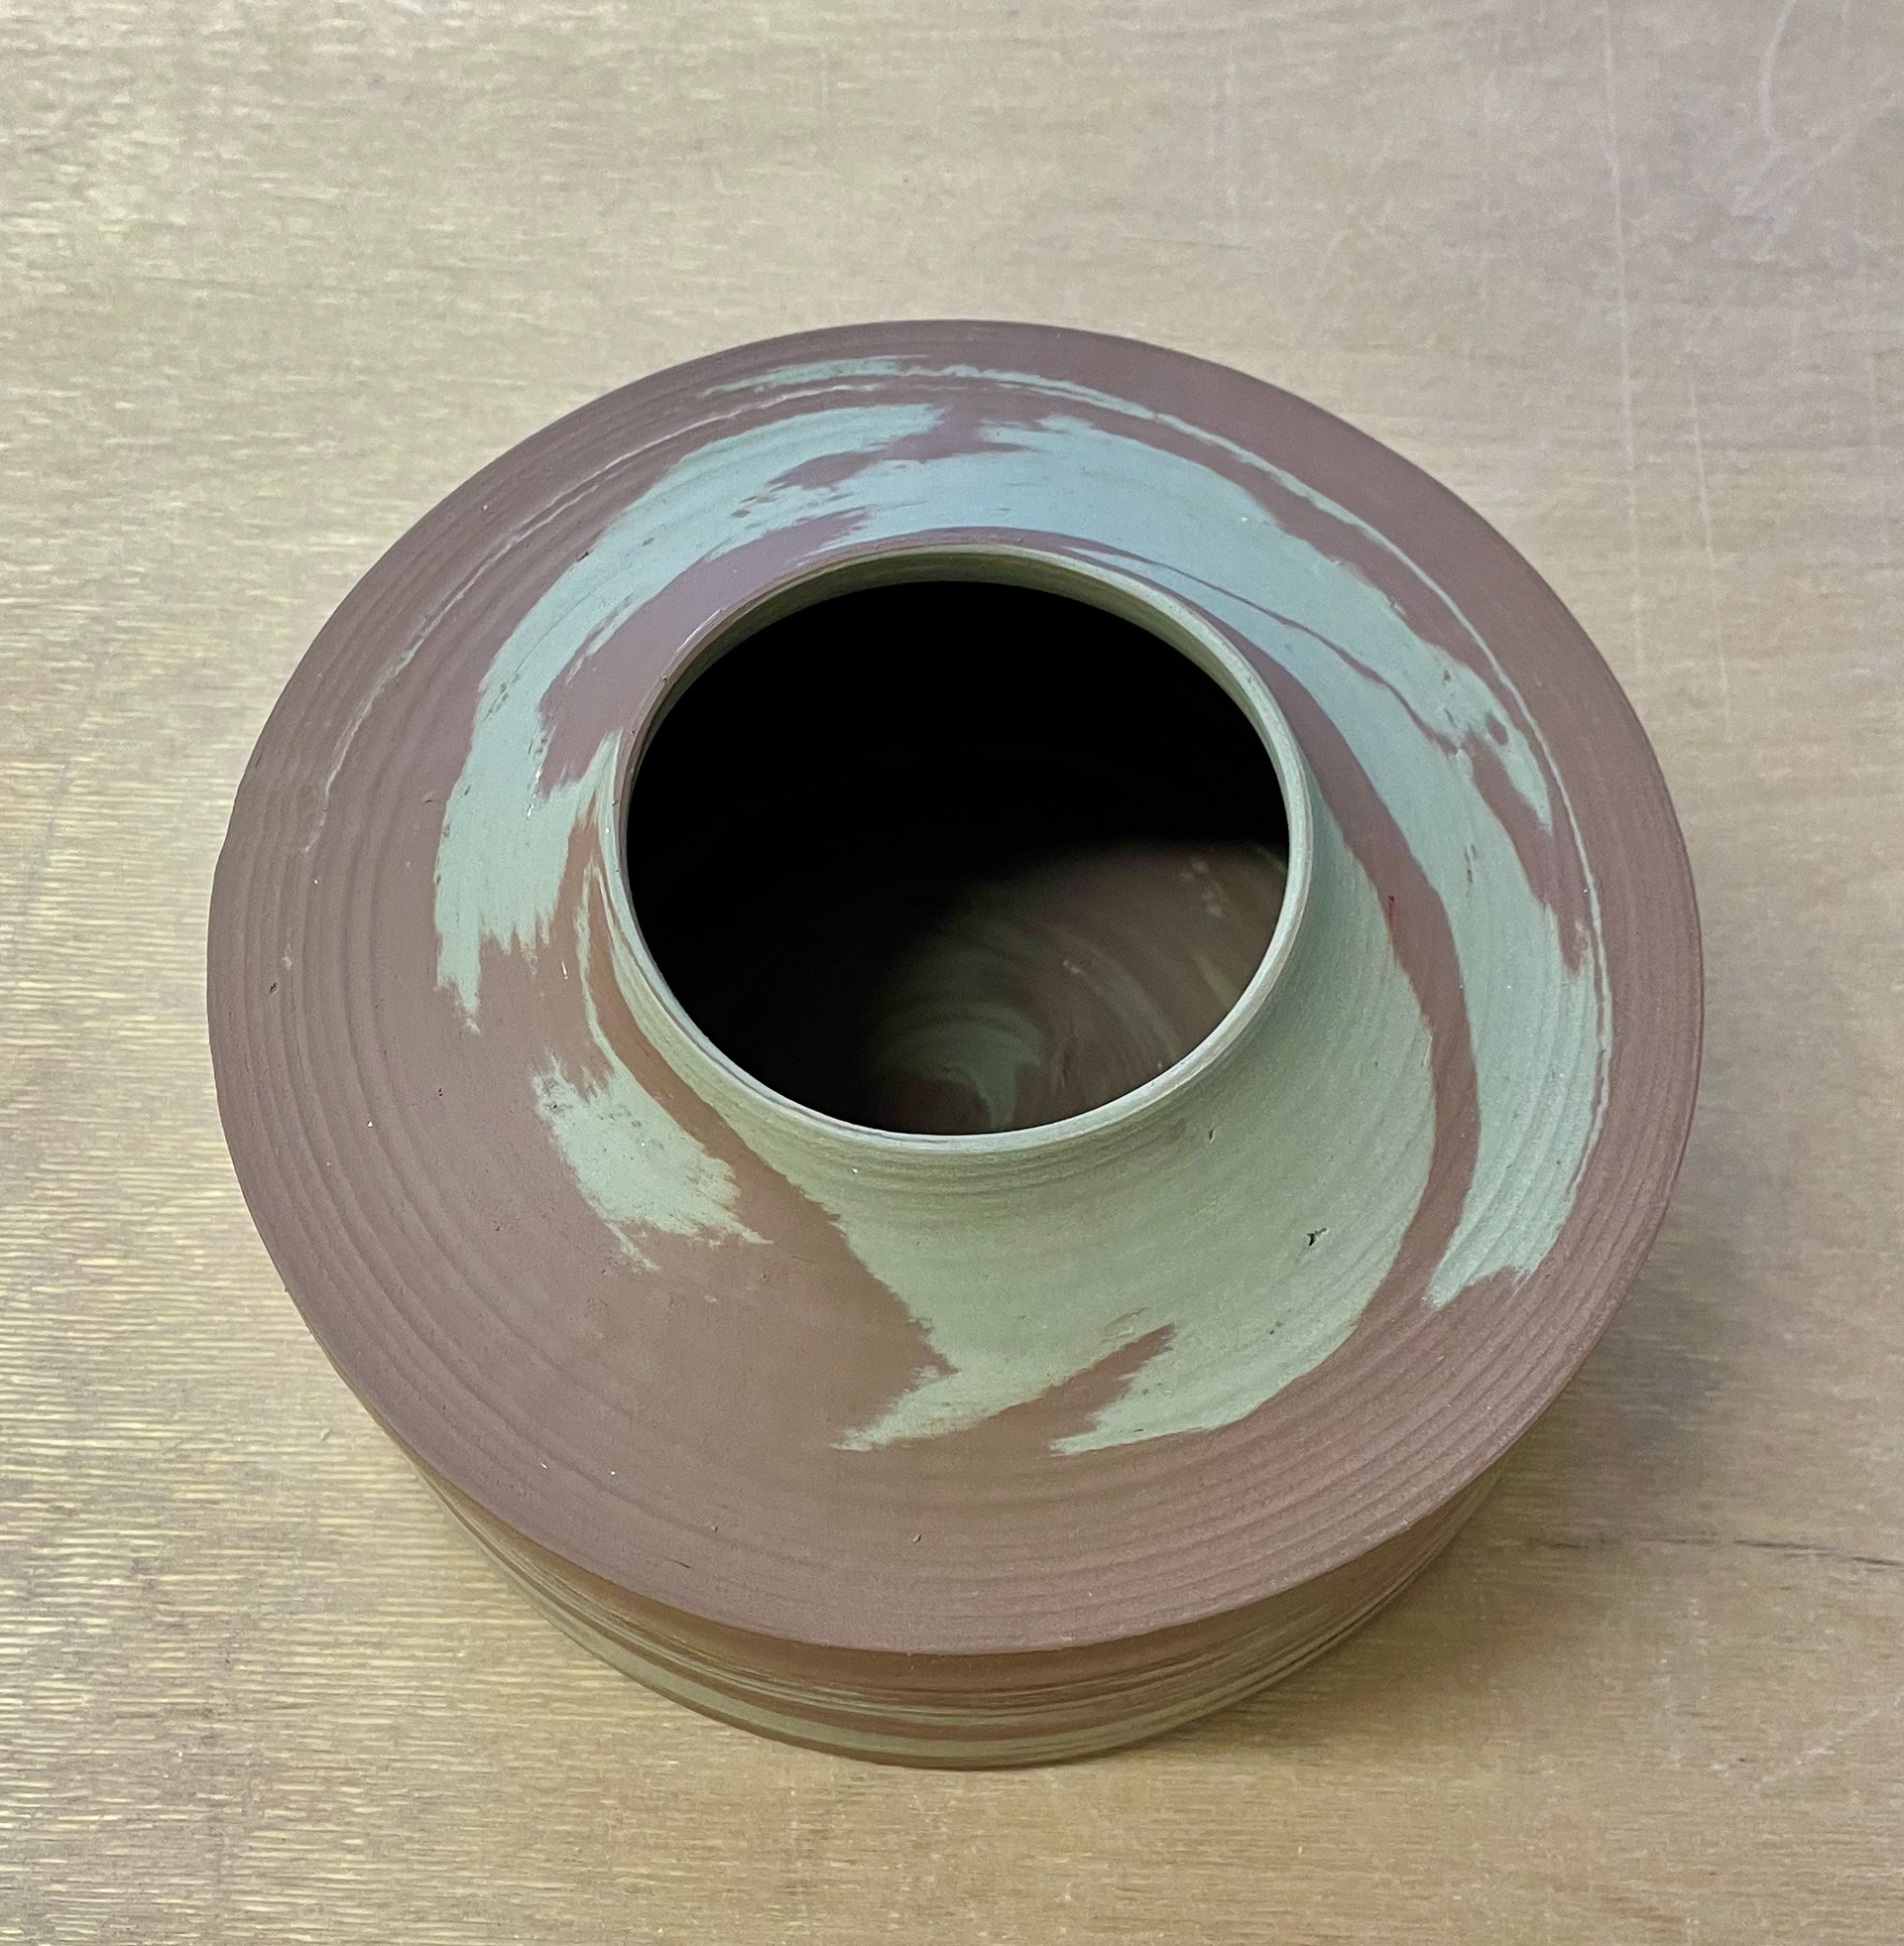
This is one of my favourite vessels, and I believe the finish is of a very high standard due to various elements. I used three different clays, including two grey clays with subtle colour variations. The comforting form created by the pebble adds to its appeal. I particularly like the sizing, as it complements the rest of my collection by adding variety in scale. Considering a laser rib of my pebbles could result in a more powerful profile. The rims of the pot are clean and precise, consistent with all my vessels. By using three similar colours, the white magnesium stands out with a bold contrast, making it eye-catching and representing the Brighton flint stones presently. When imagining this vessel in a home setting, its neutral colour palette makes it versatile and suitable for most decor styles, serving as a good accent piece. While I am interested in experimenting with different colours, I believe this vessel already exhibits a strong colour contrast.
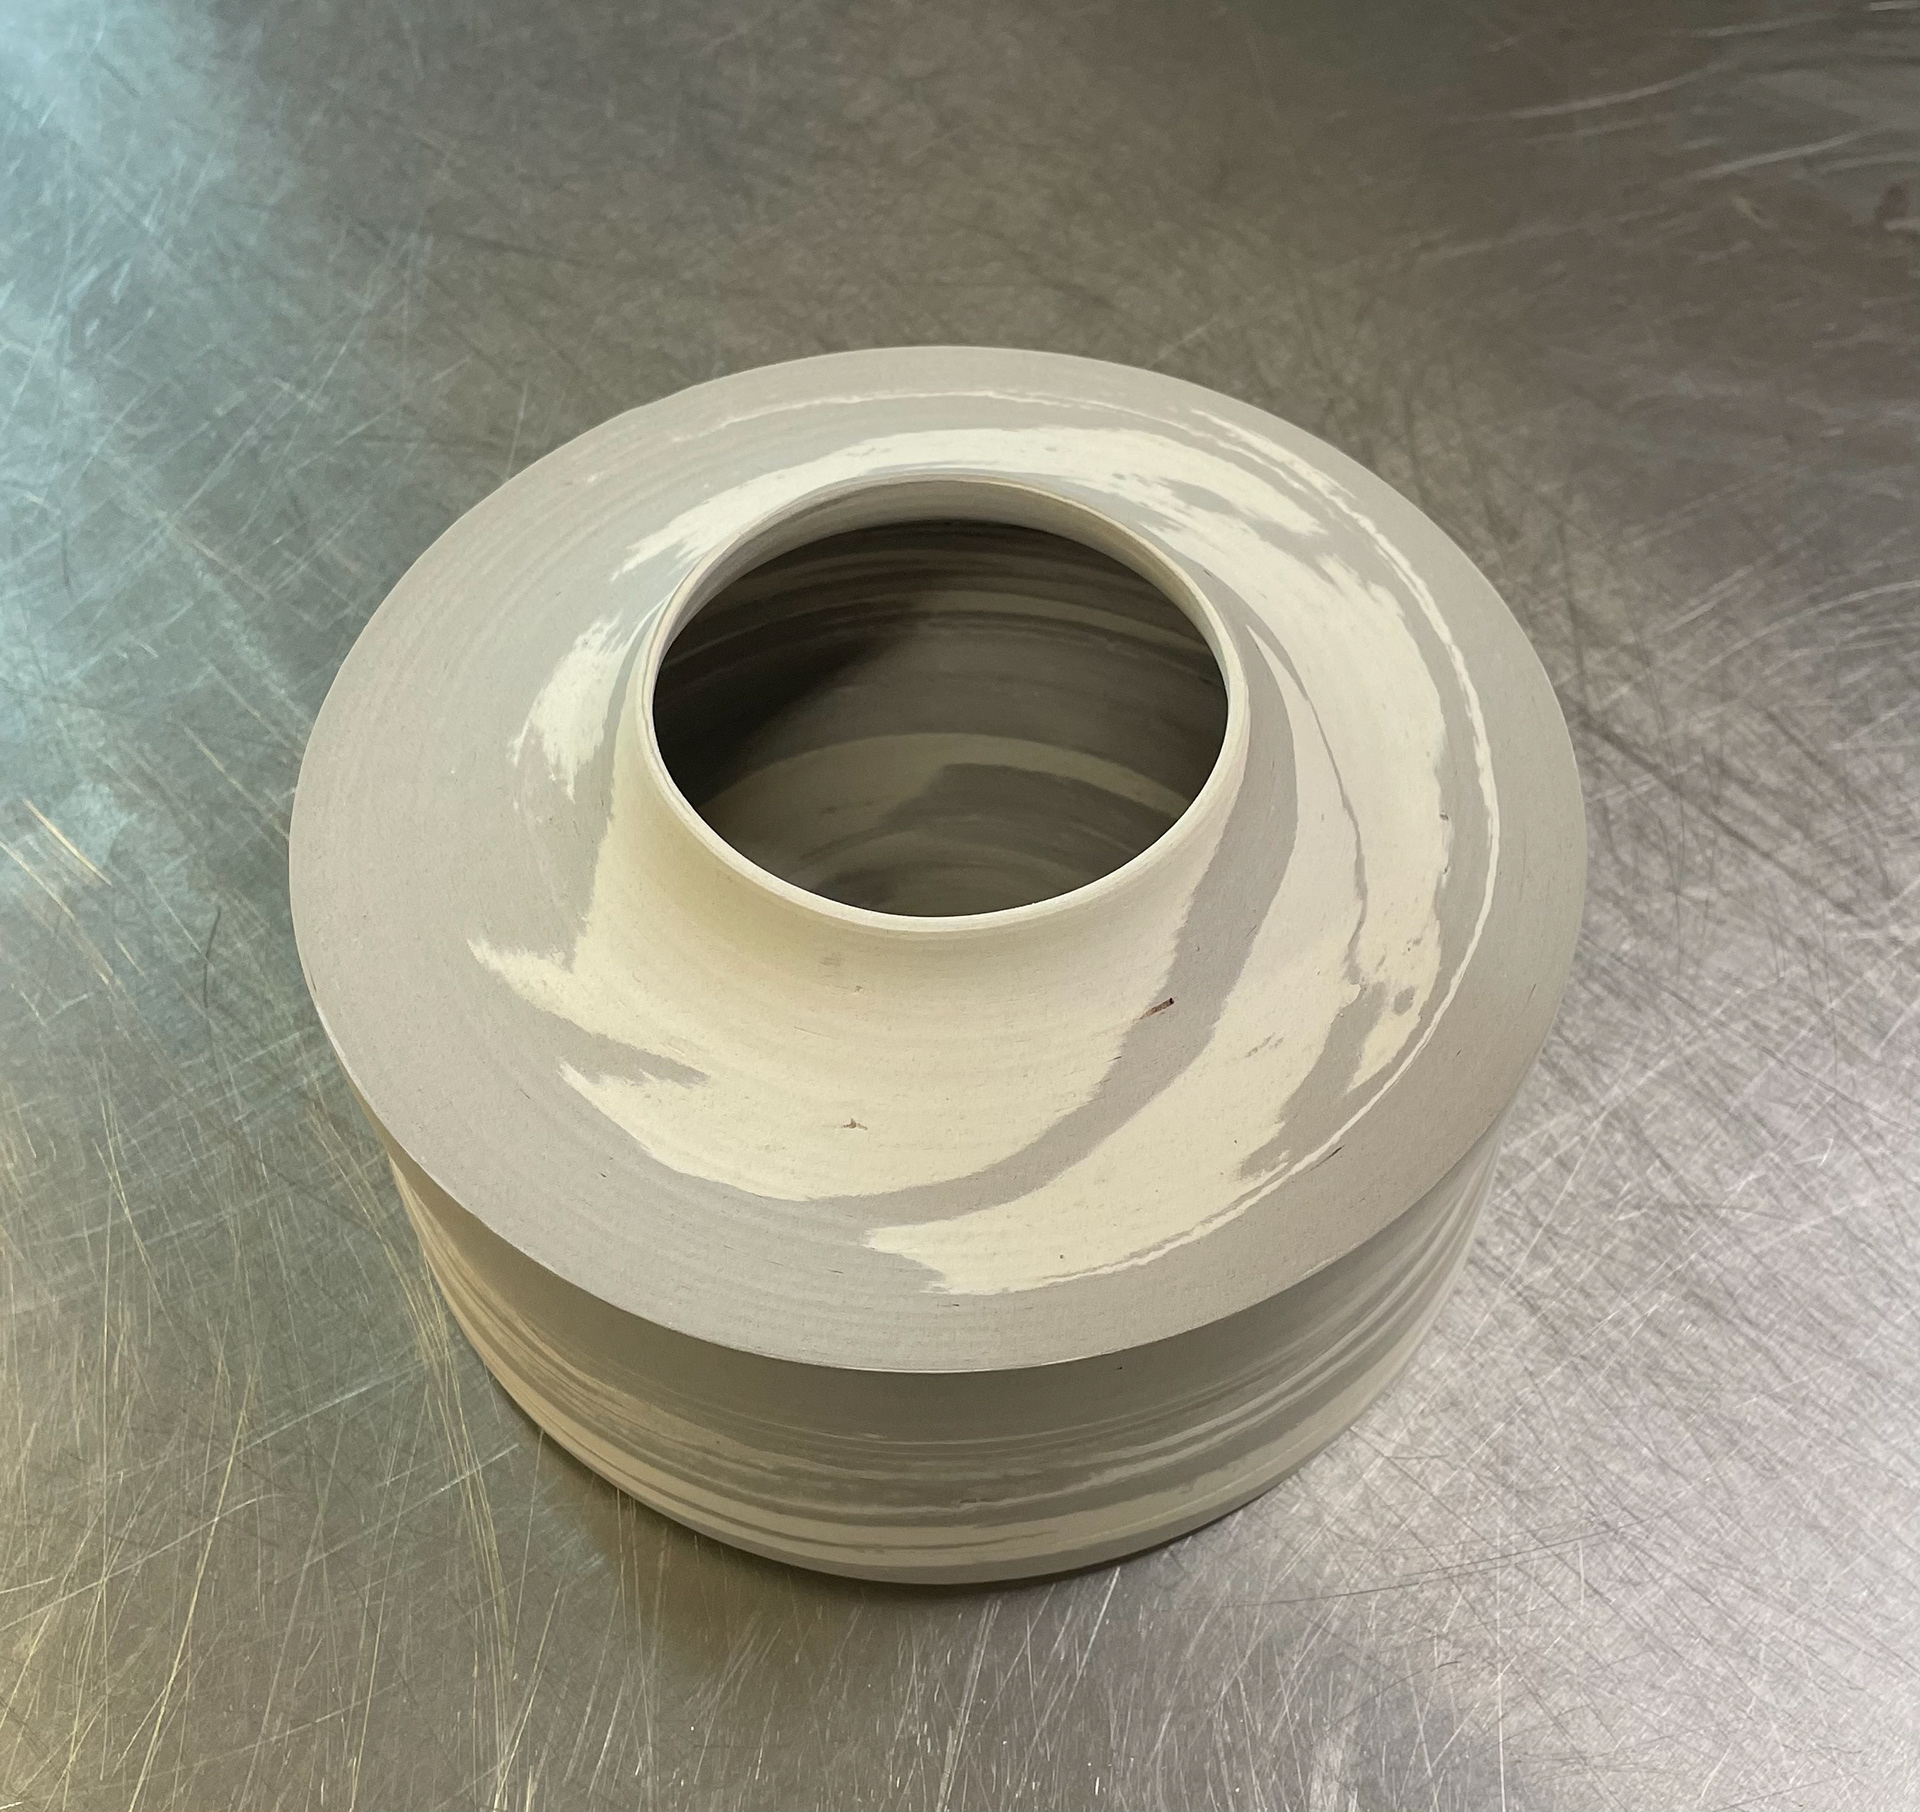
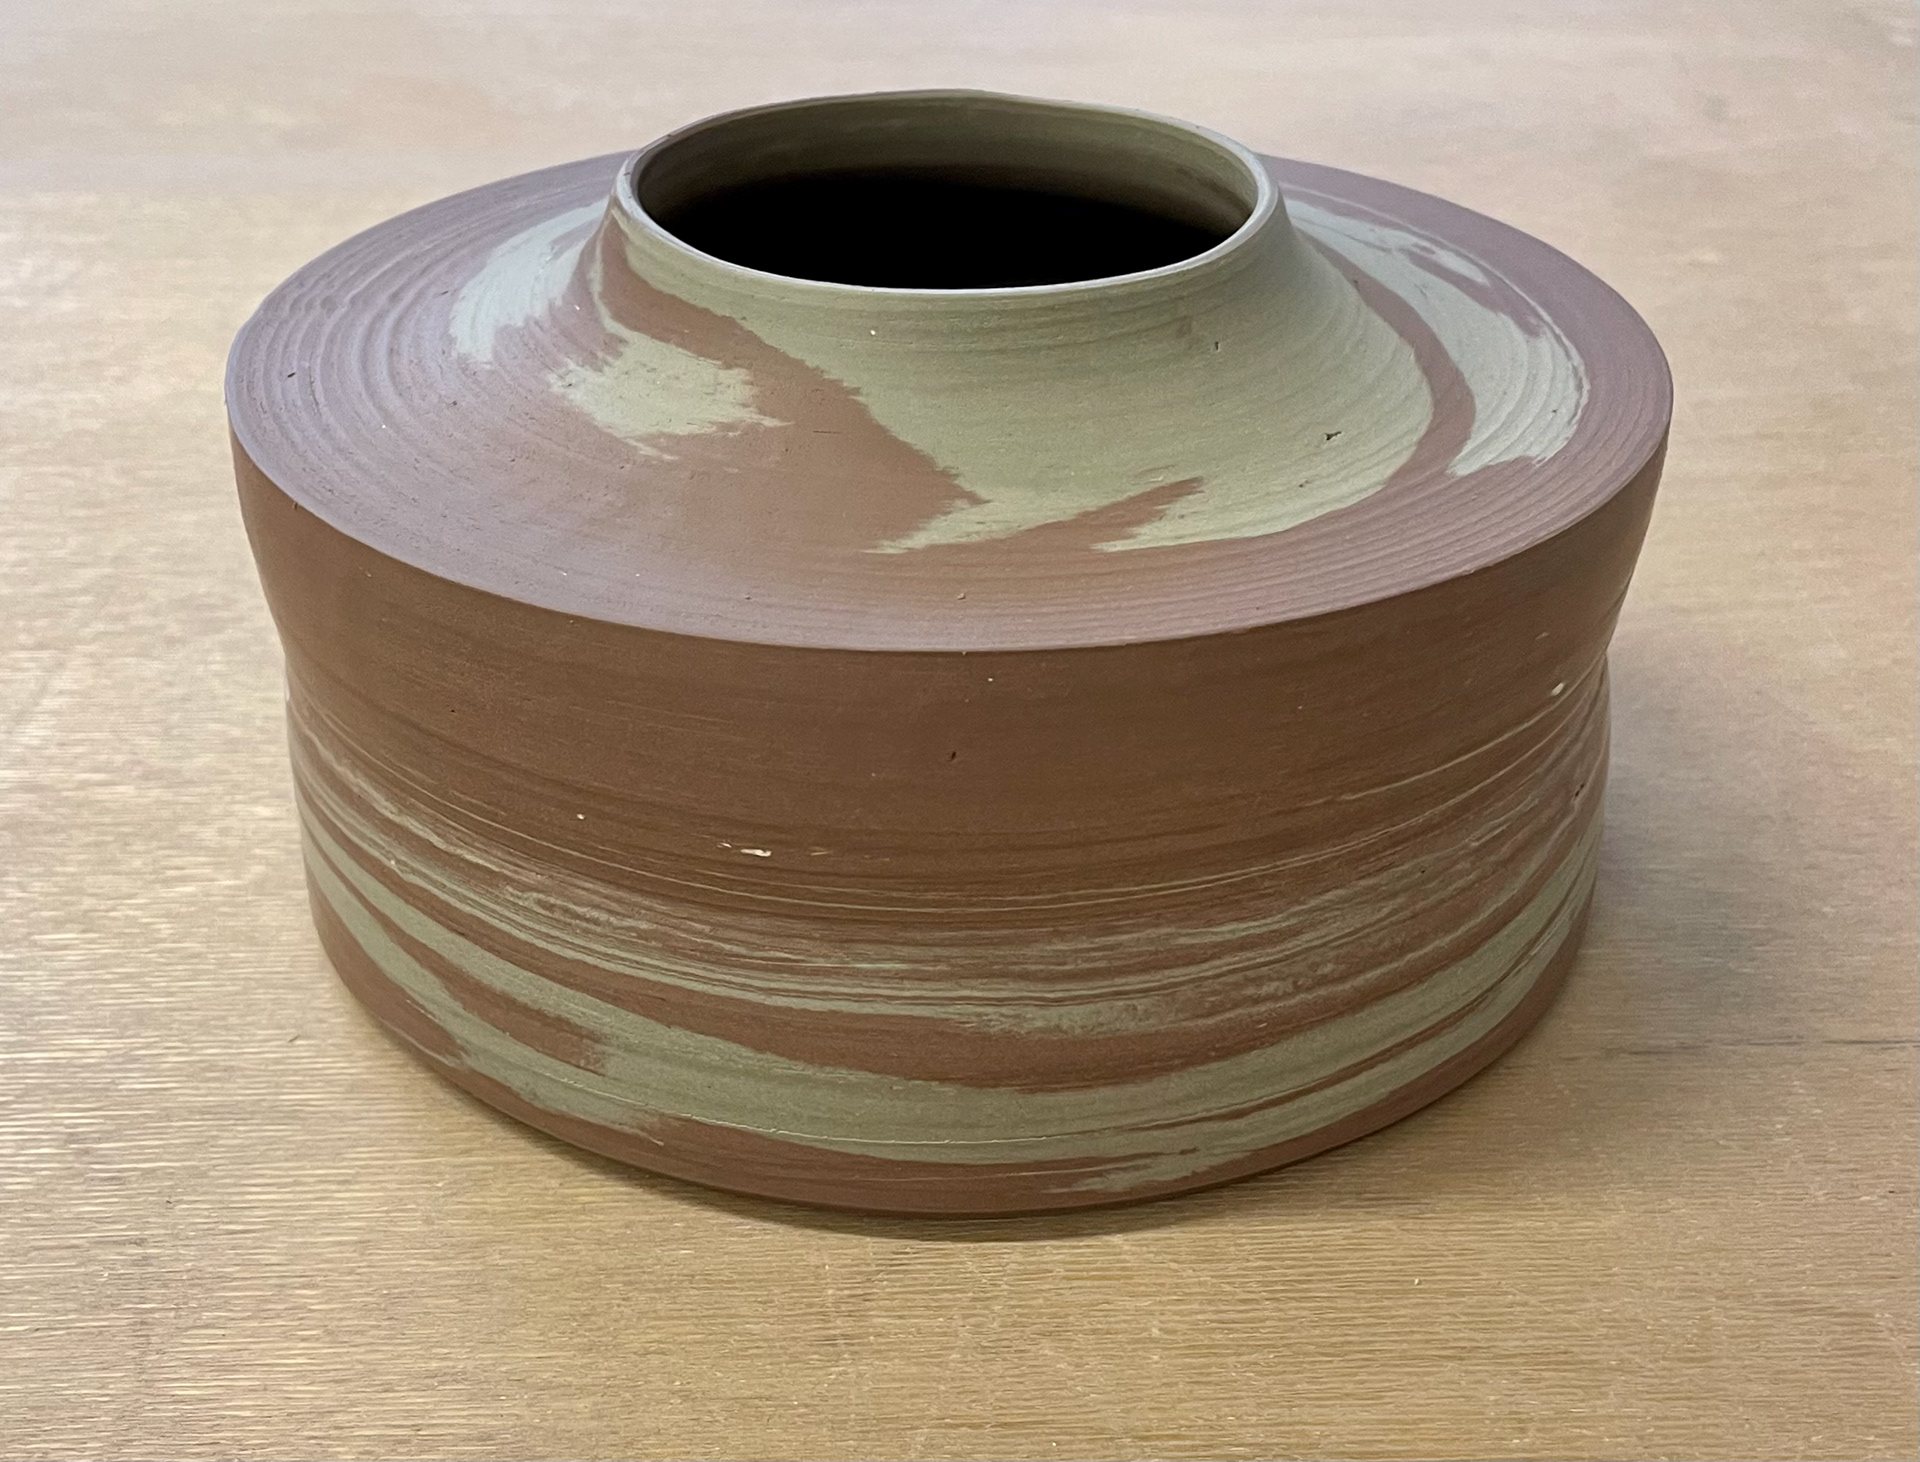
Fourth Beach Vessel
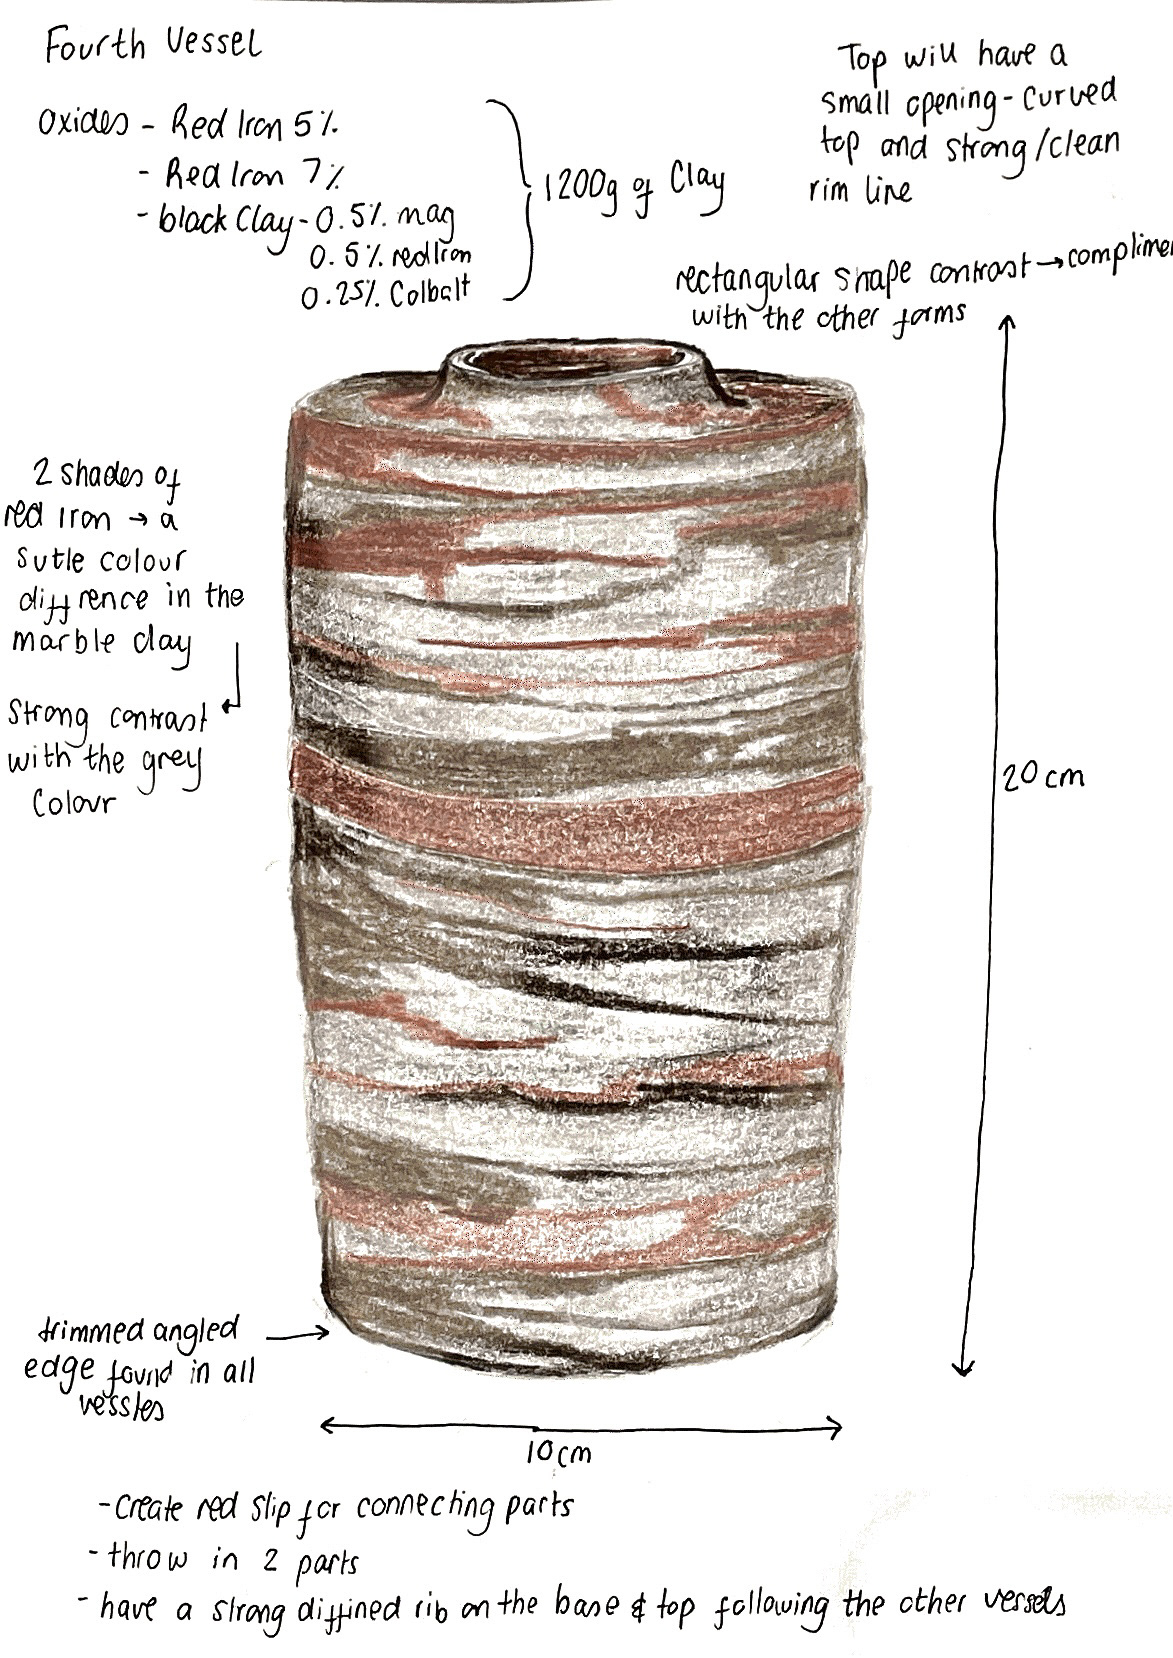
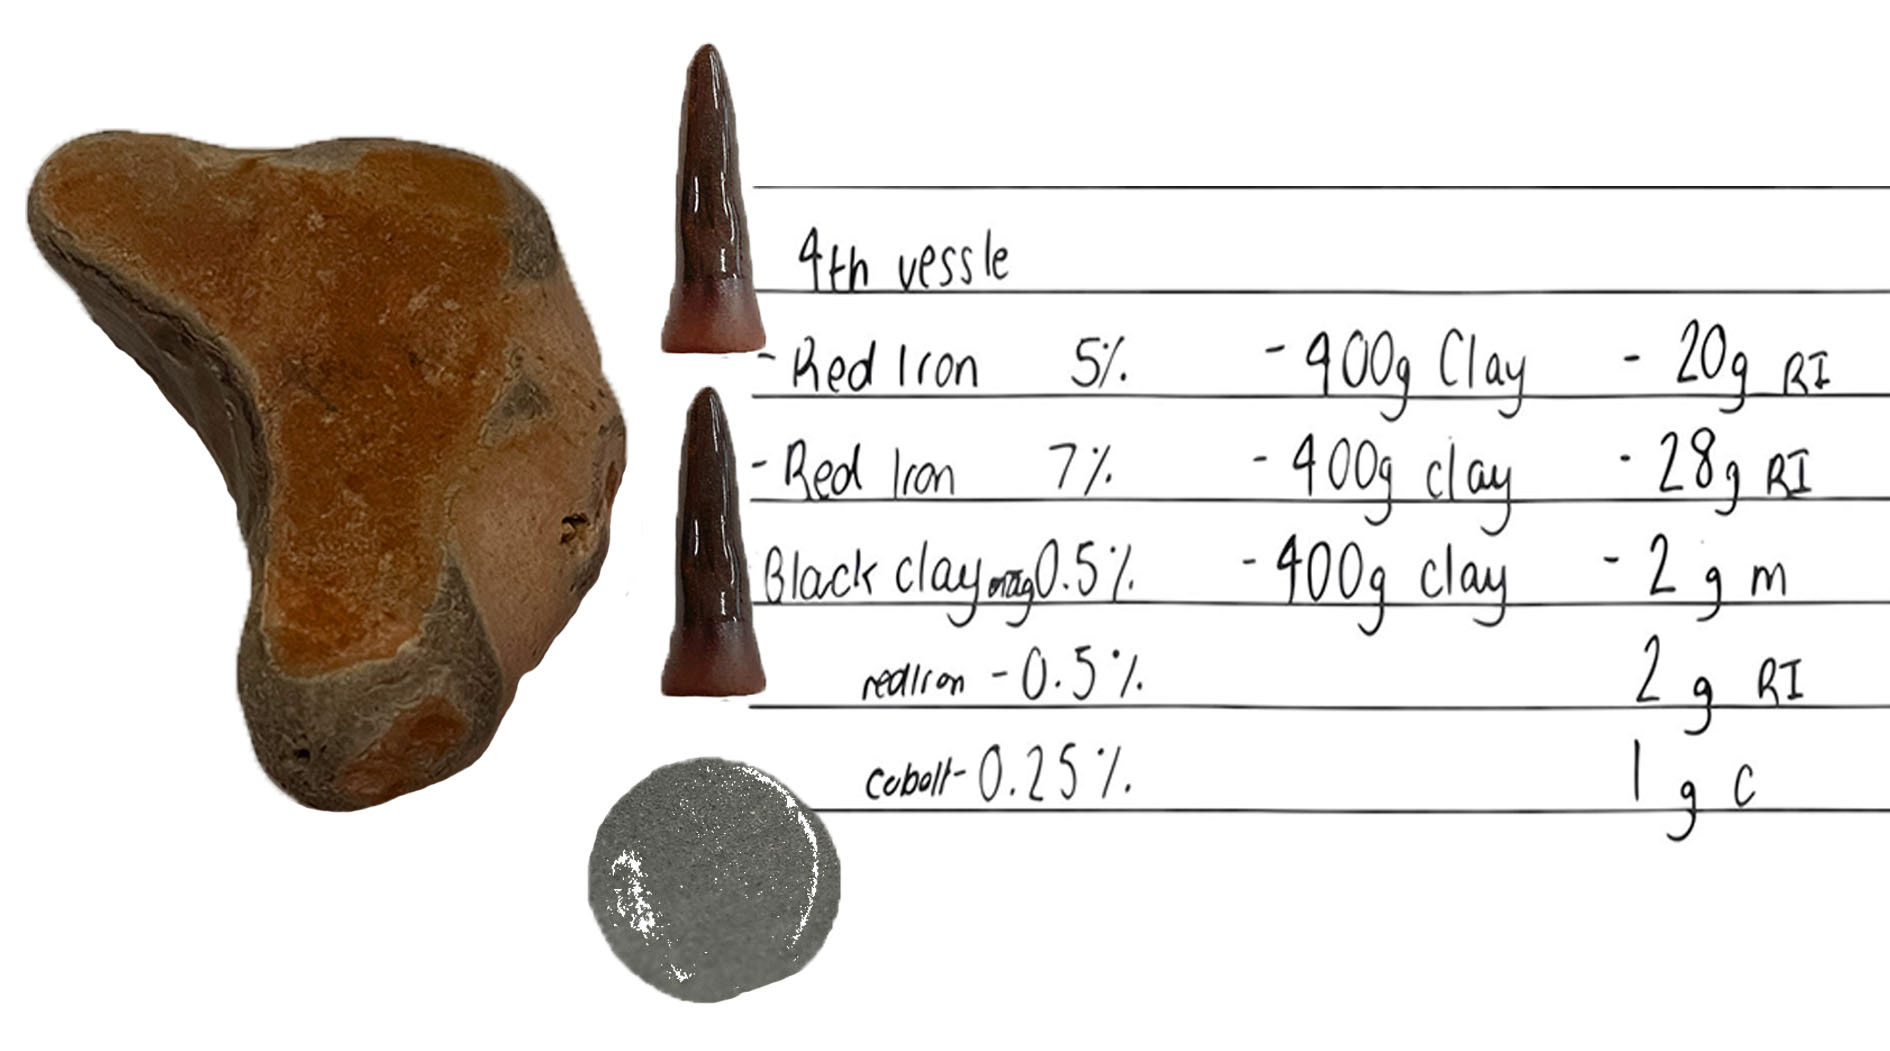
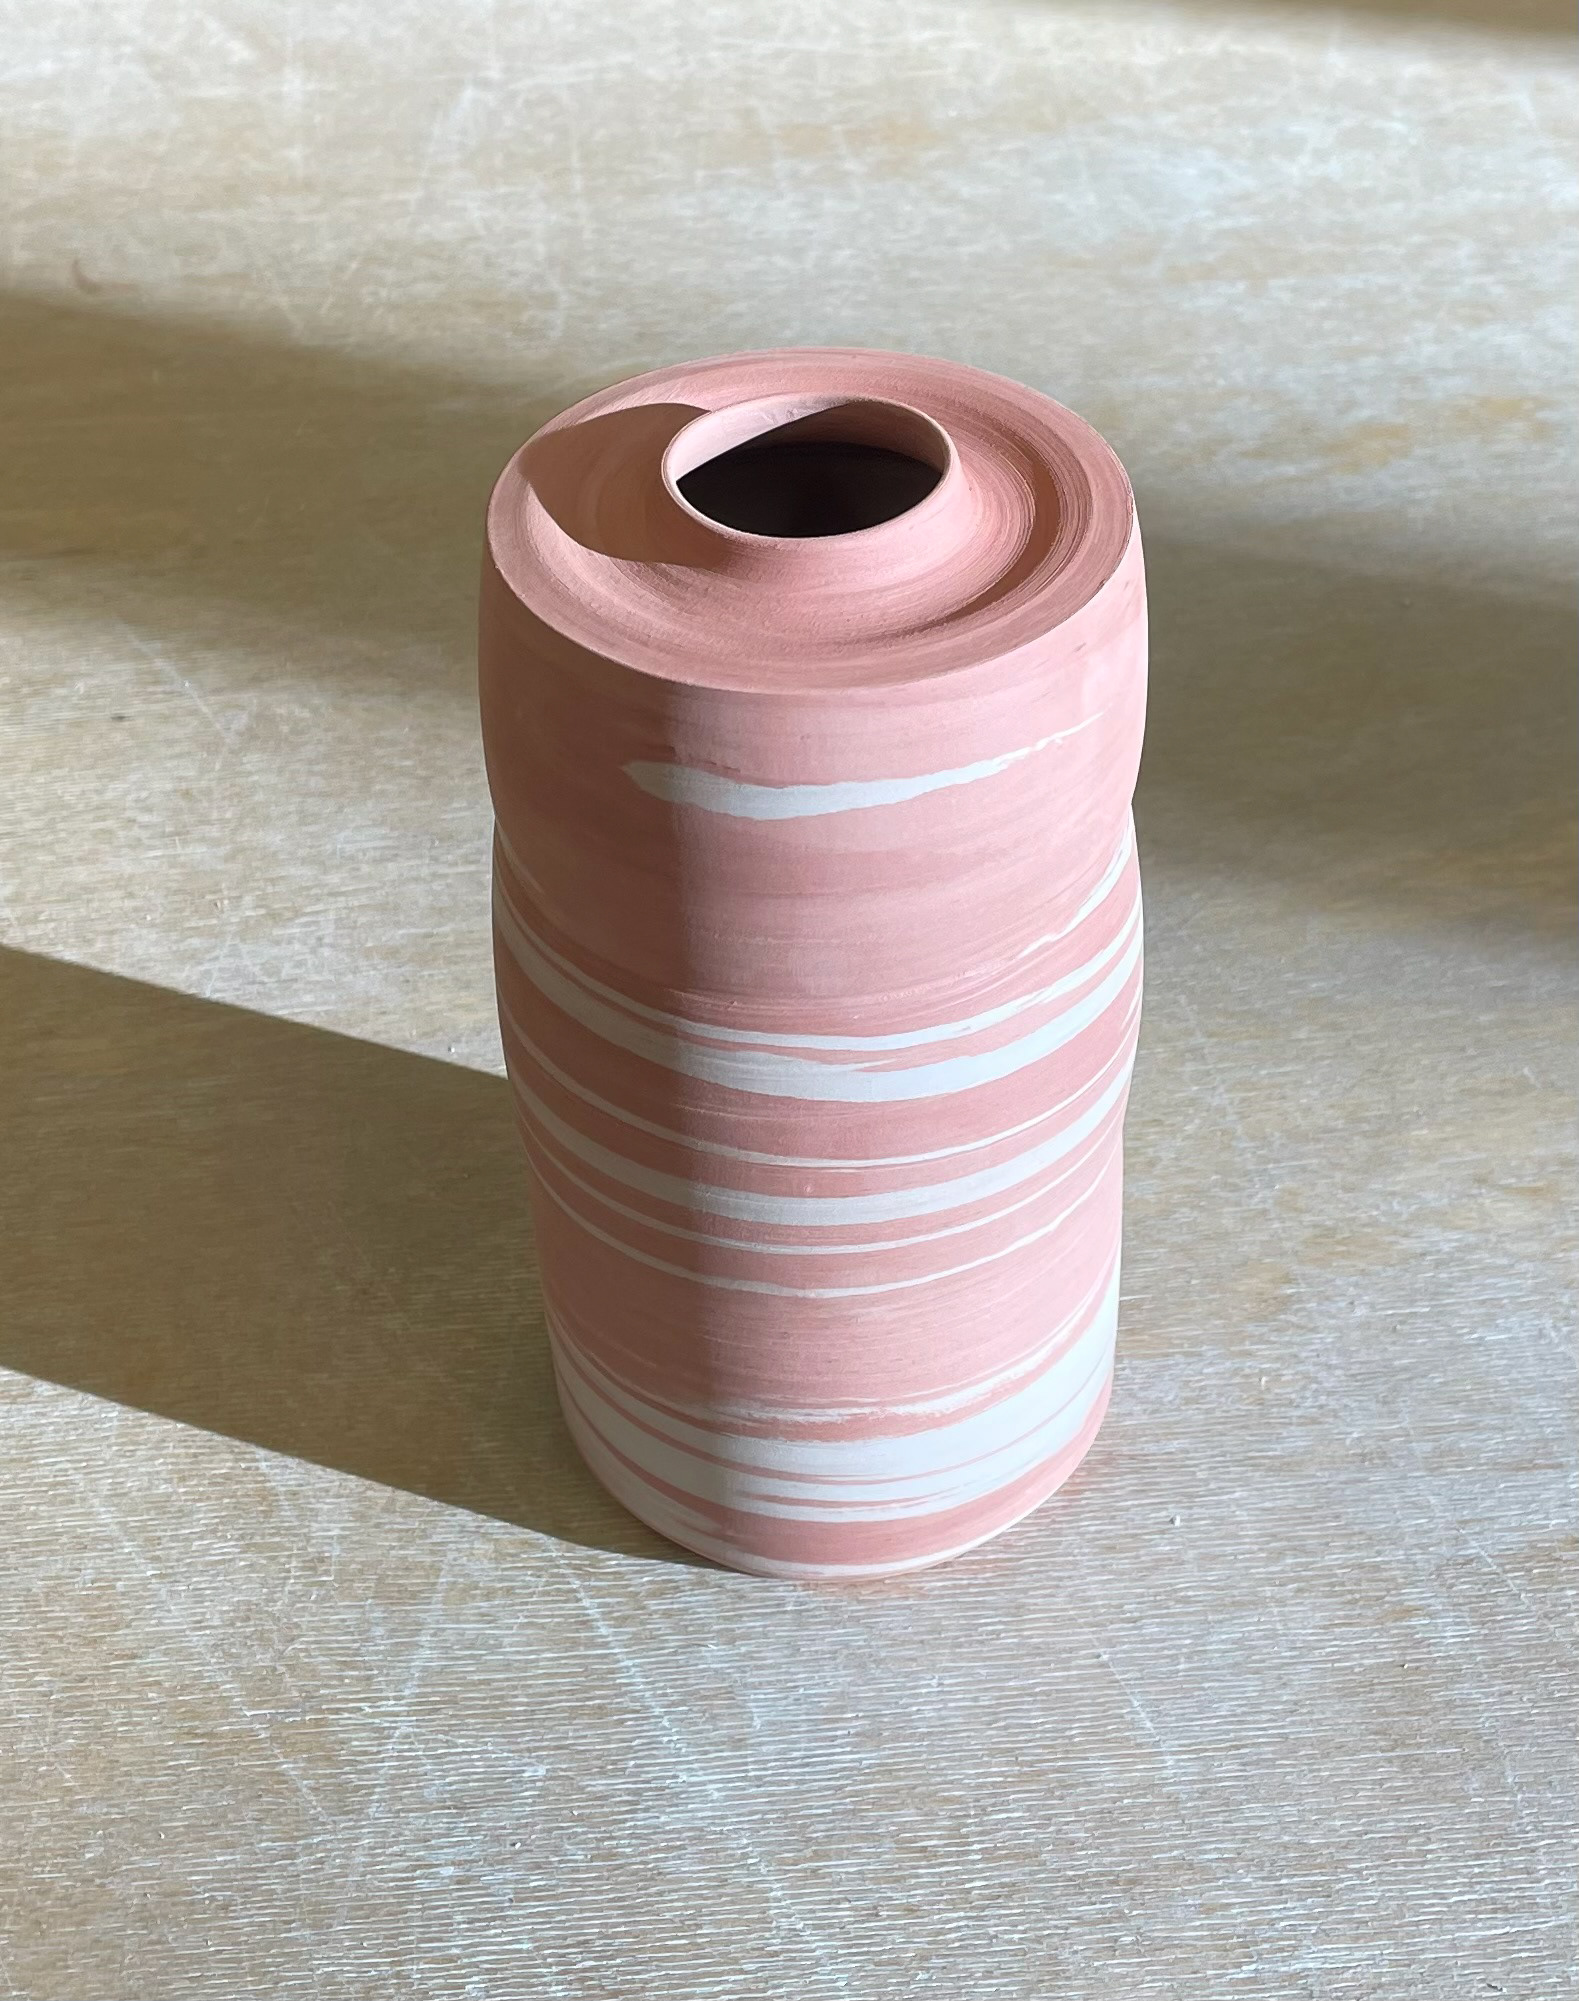
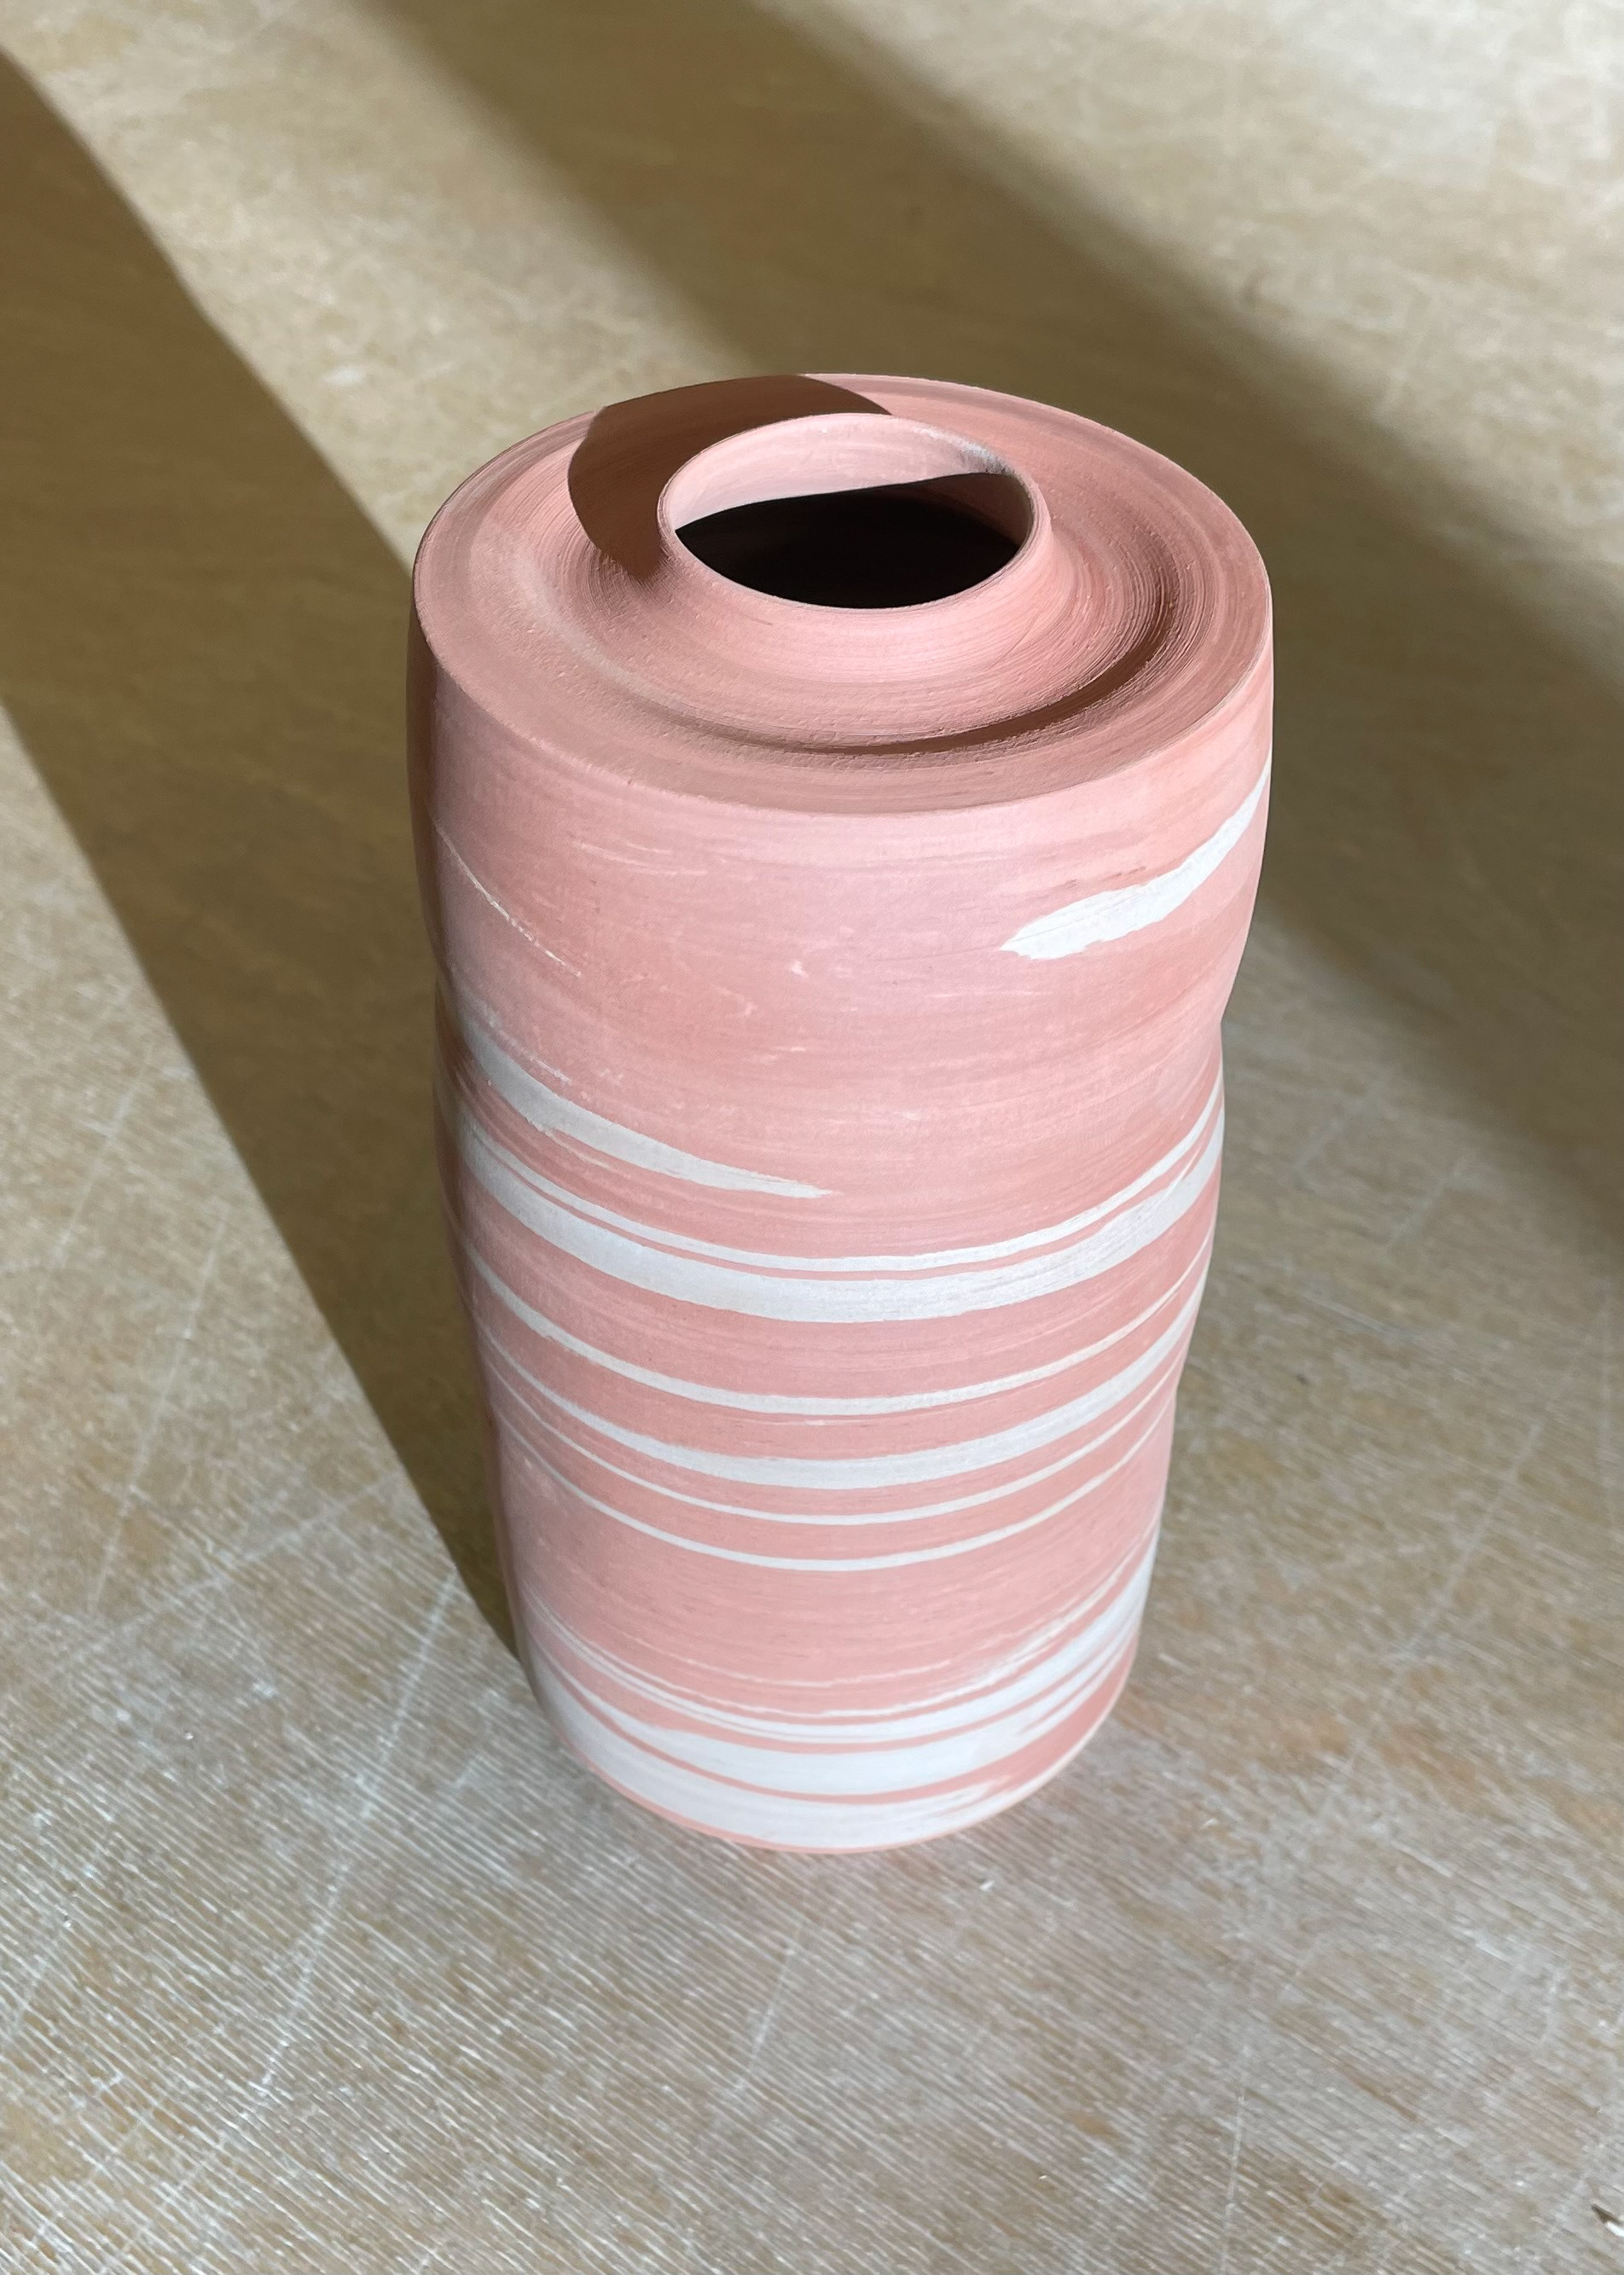

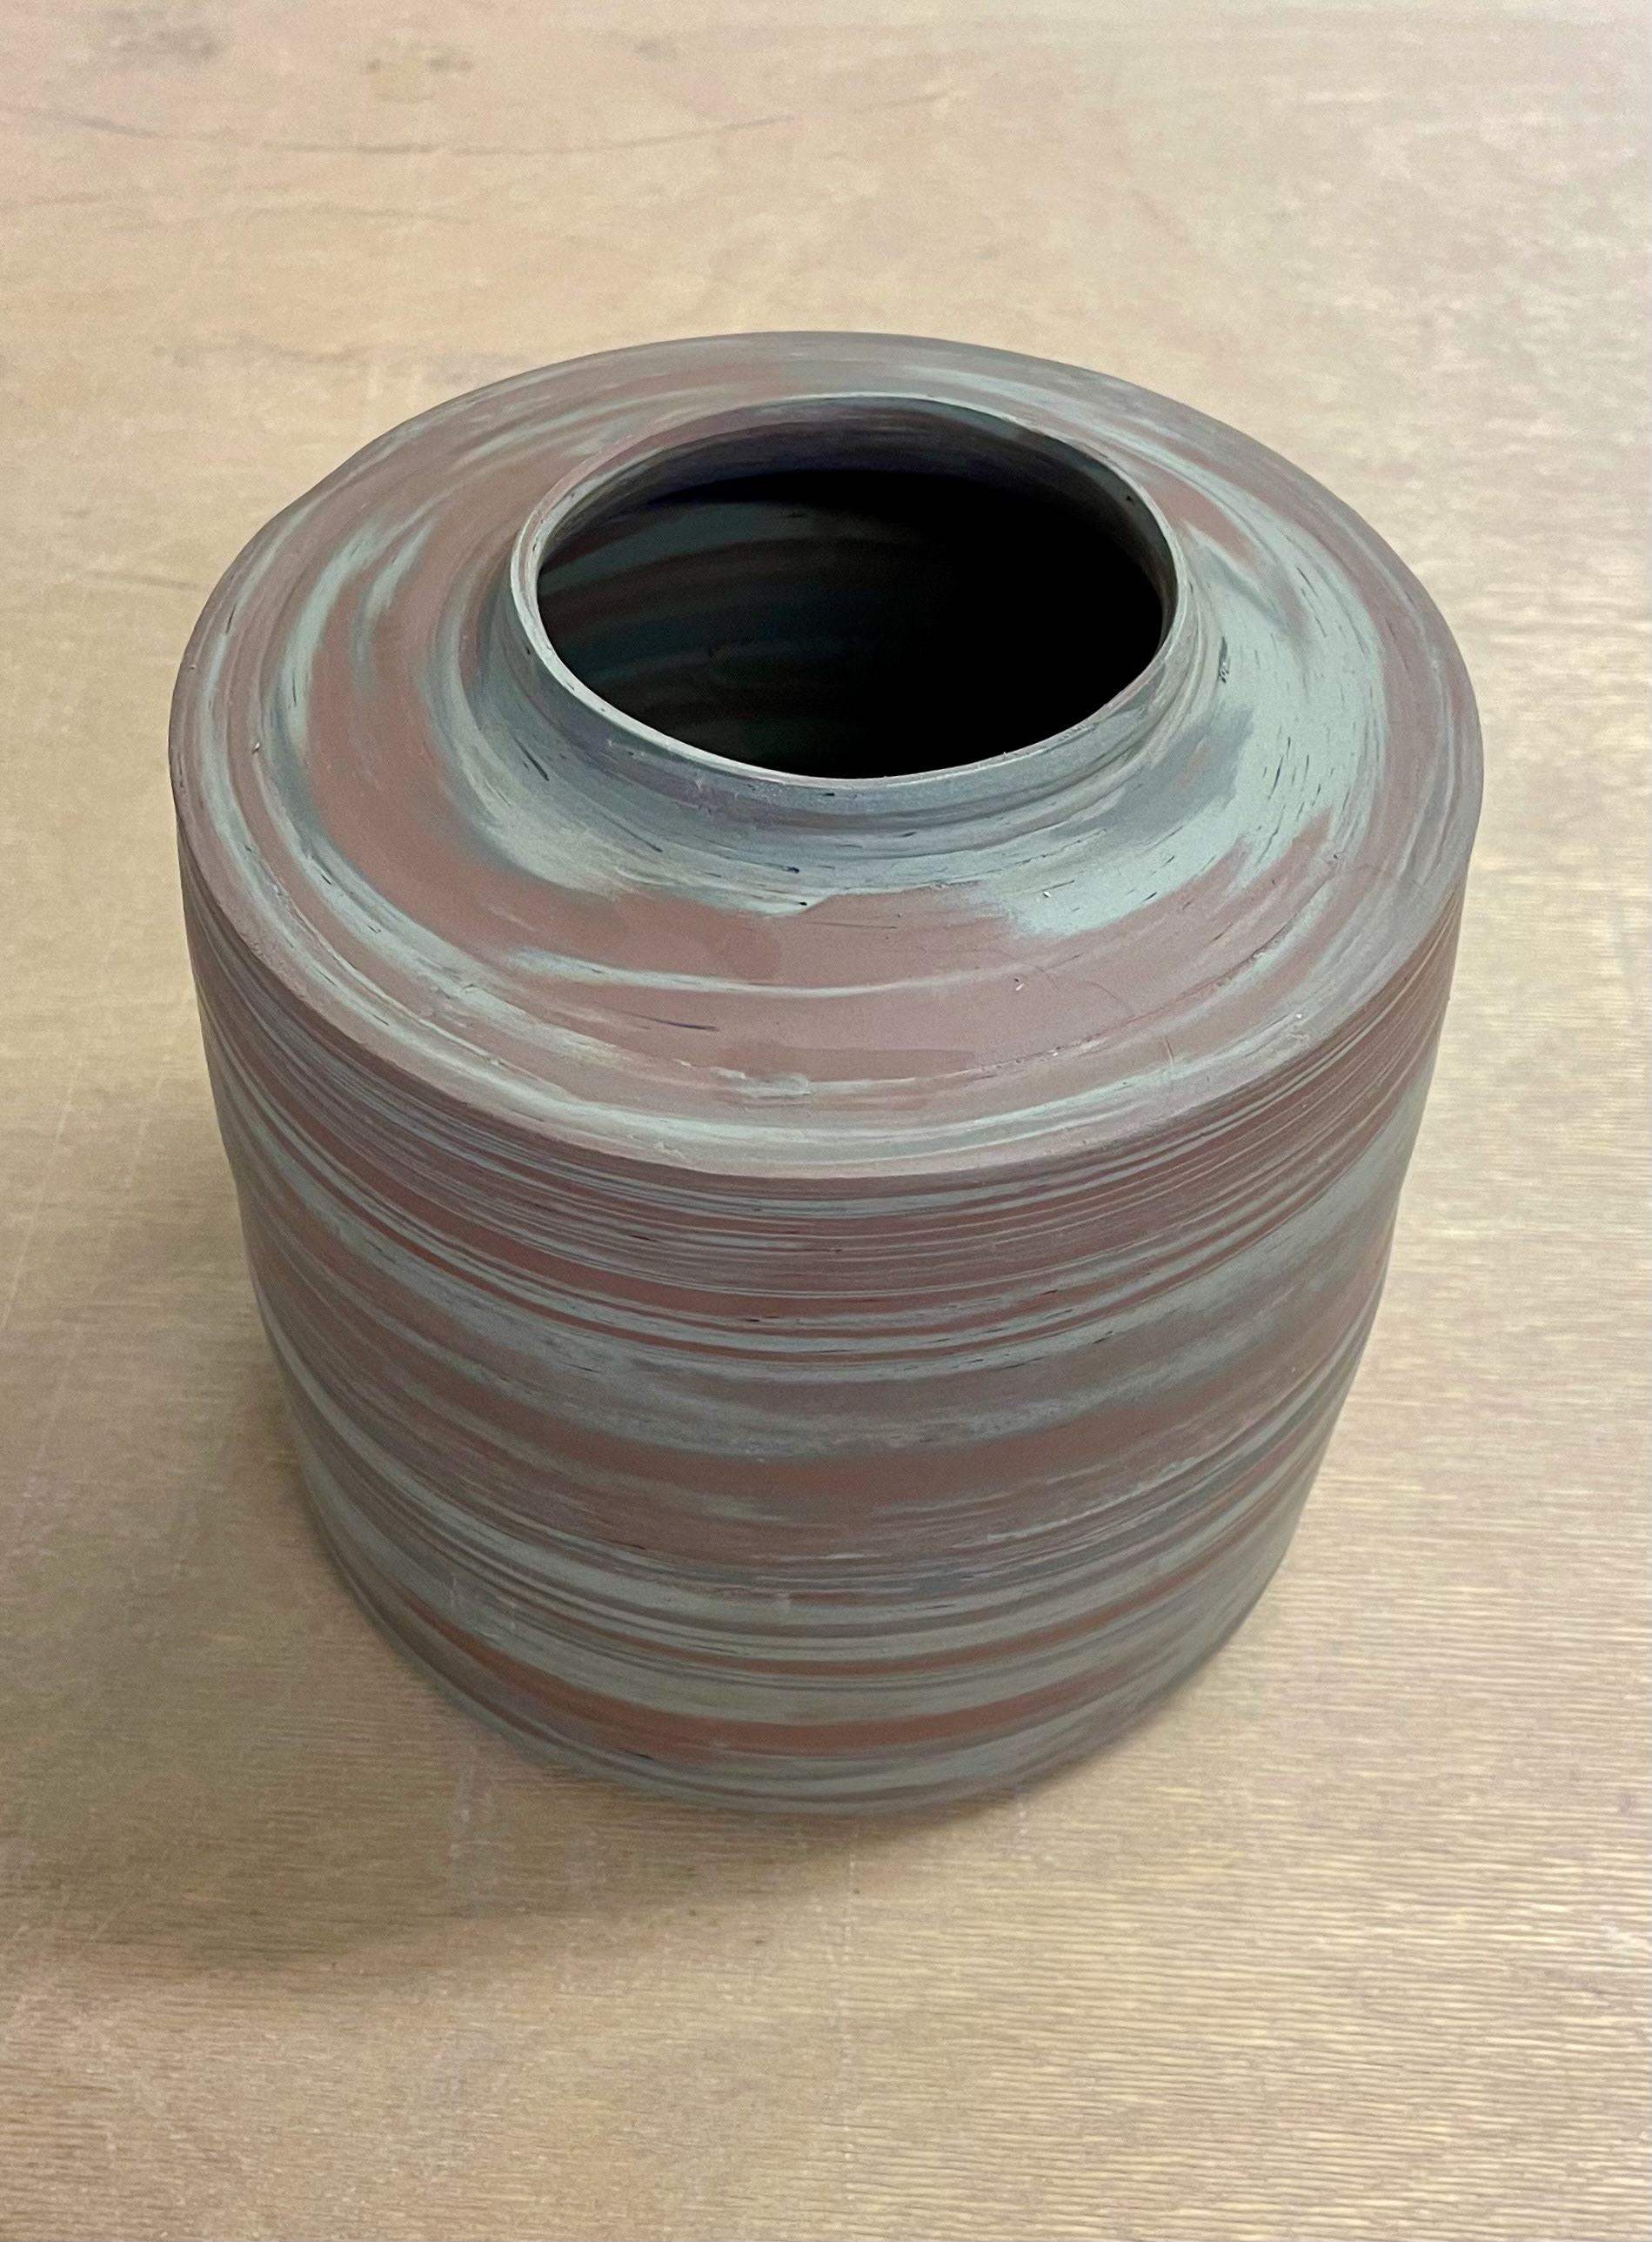
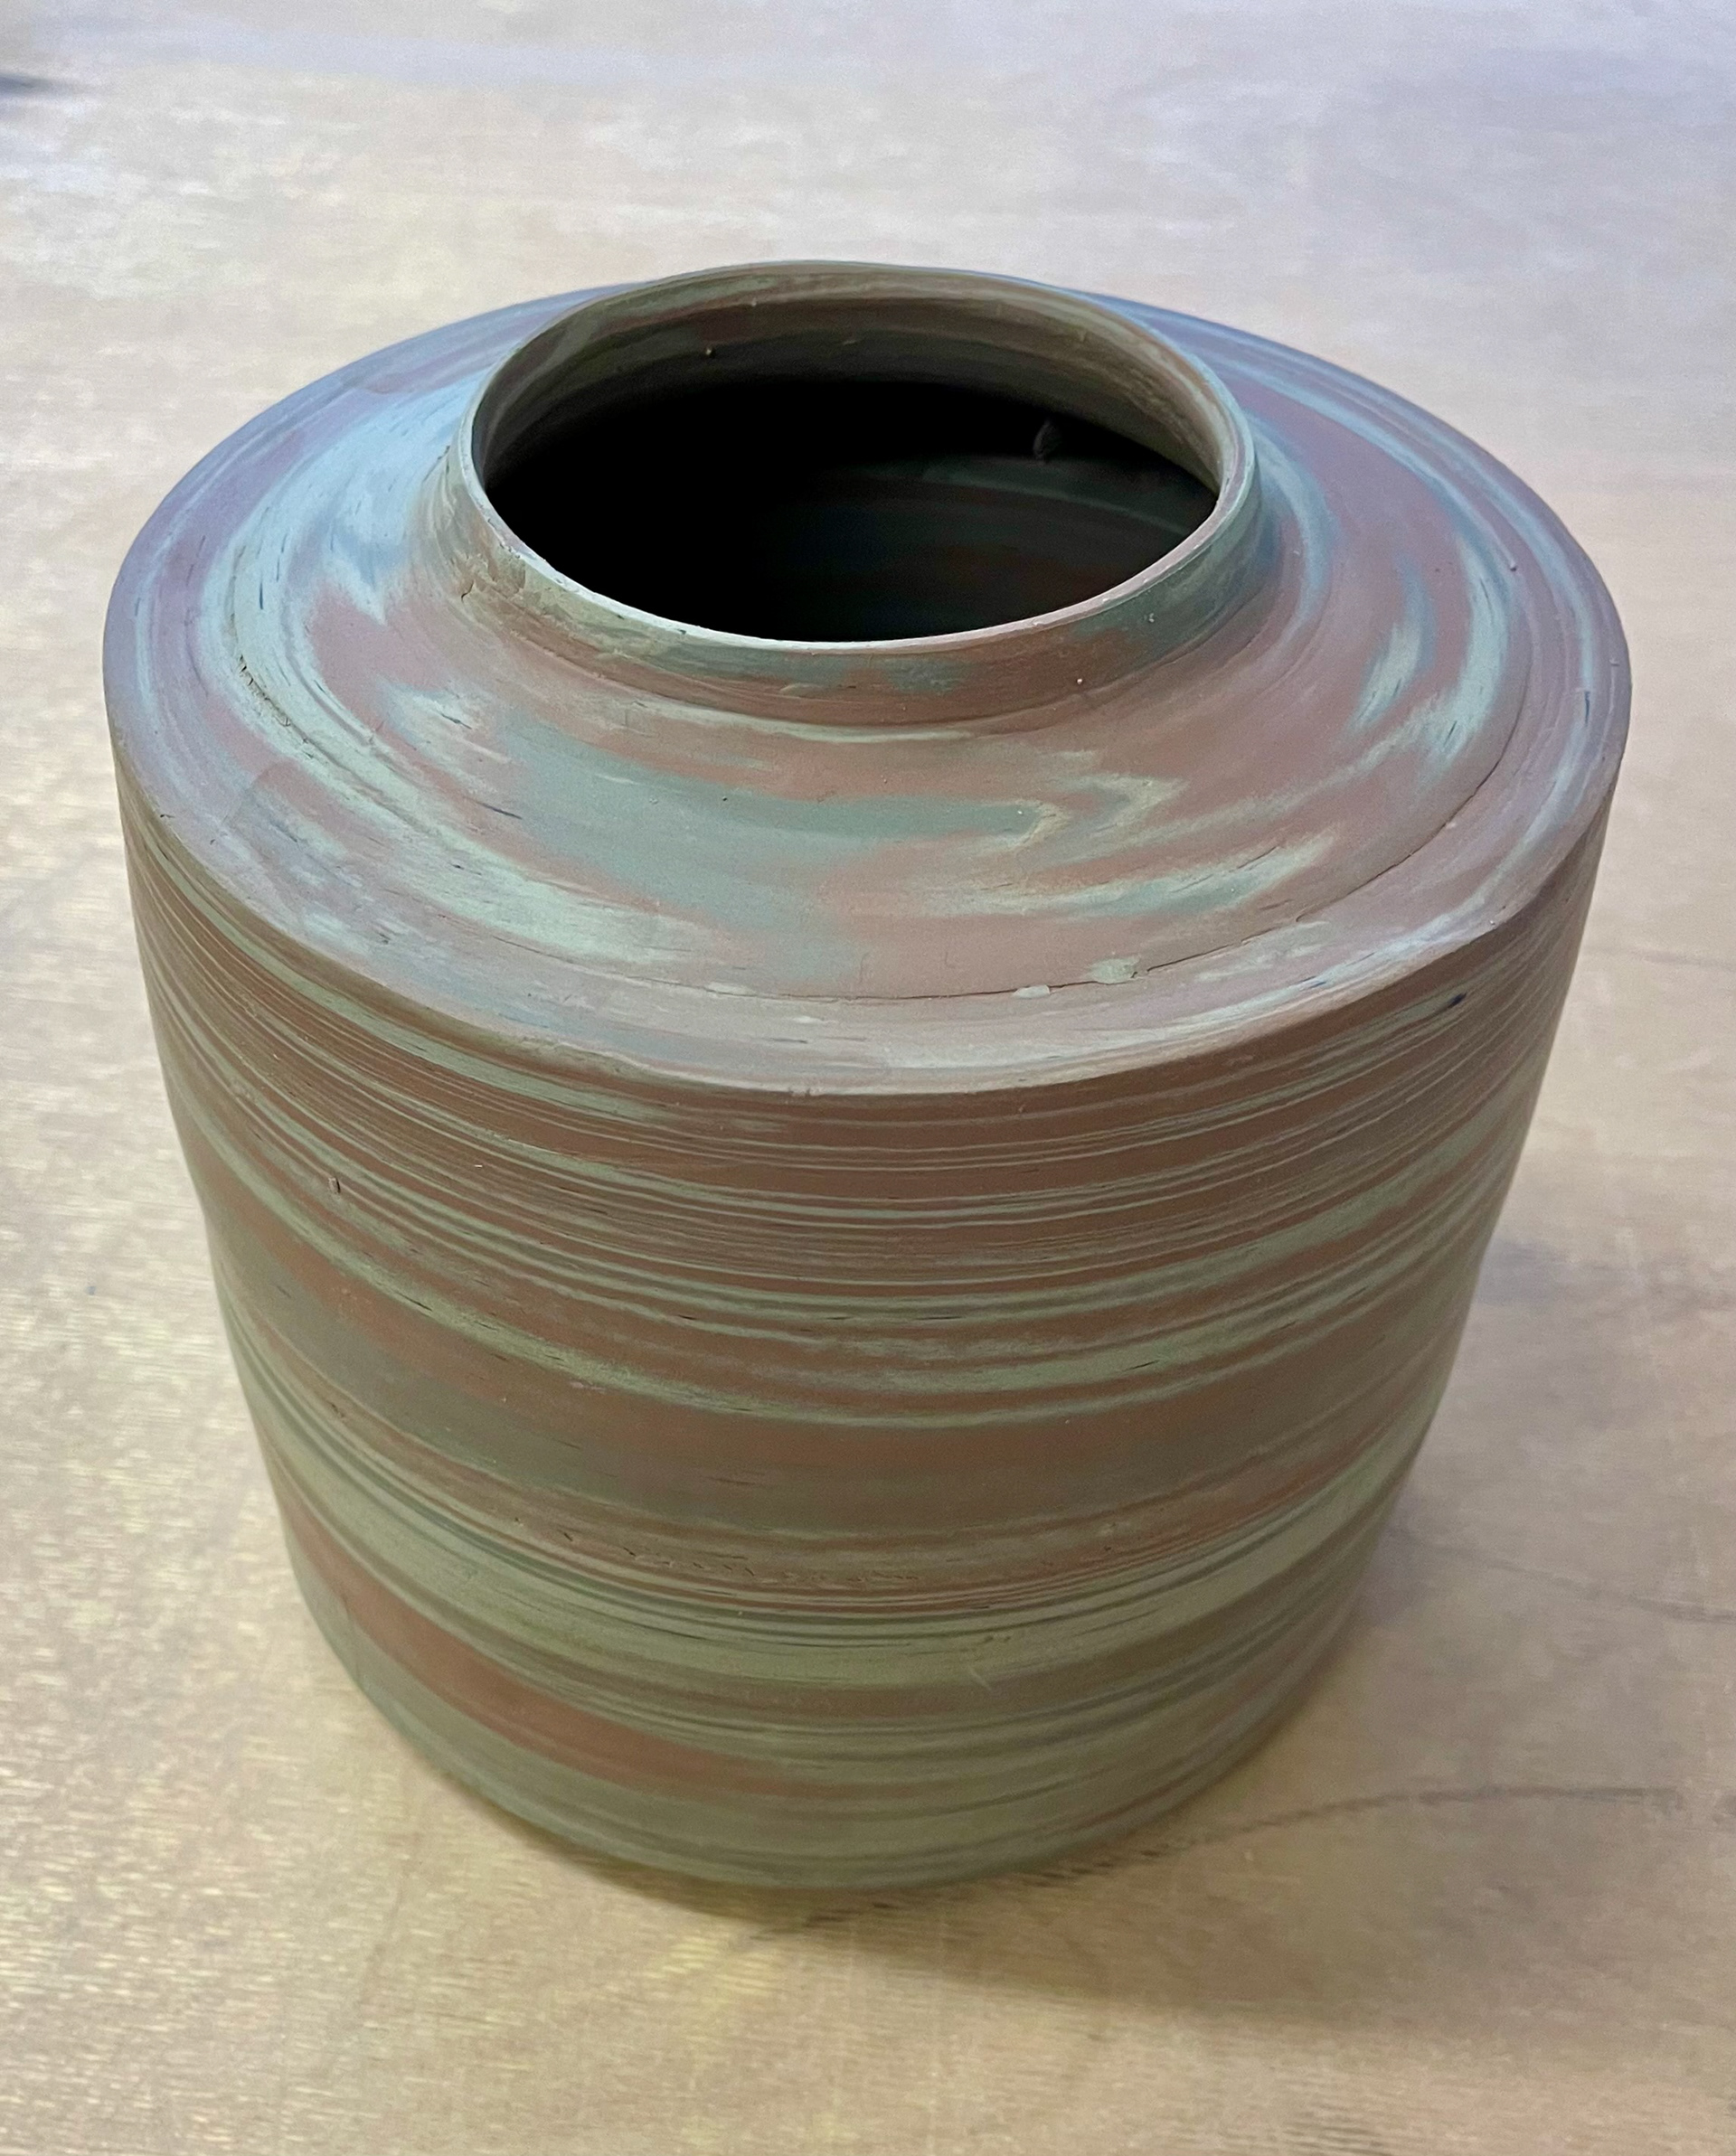
decided to change the scale again, adding variation in form and size to my collection. Although I initially considered this one of my weakest pots, I believe it would have a greater impact if it were larger. I didn't anticipate it shrinking as much as it did during the drying process. Using grey clay, which was marbled with brown, resulted in an unexpected blue hue. I find the brown somewhat overpowering, diminishing the vessel's individual strength. I created this piece by stacking three vessels. Originally, I wasn't satisfied with one of my throws and, to avoid wasting clay, decided to make smaller amounts and stack three vessels instead of two. Interestingly, you can't tell that the vessel was thrown in parts, as the marbling pattern flows seamlessly throughout. This unintentional result works well, making it look as though the vessel was thrown as a single piece.
I am most impressed by the weight of my vessels; they are surprisingly light, especially considering their larger size. Many people have commented on their unexpected lightness. I'm proud of my throwing skills, as the weight and finish of these vessels showcase my expertise and confidence in throwing. If I were to create a larger collection, I might explore using slip casting, but I wonder if this would diminish the unique qualities and craftsmanship of each vessel.
First Firing
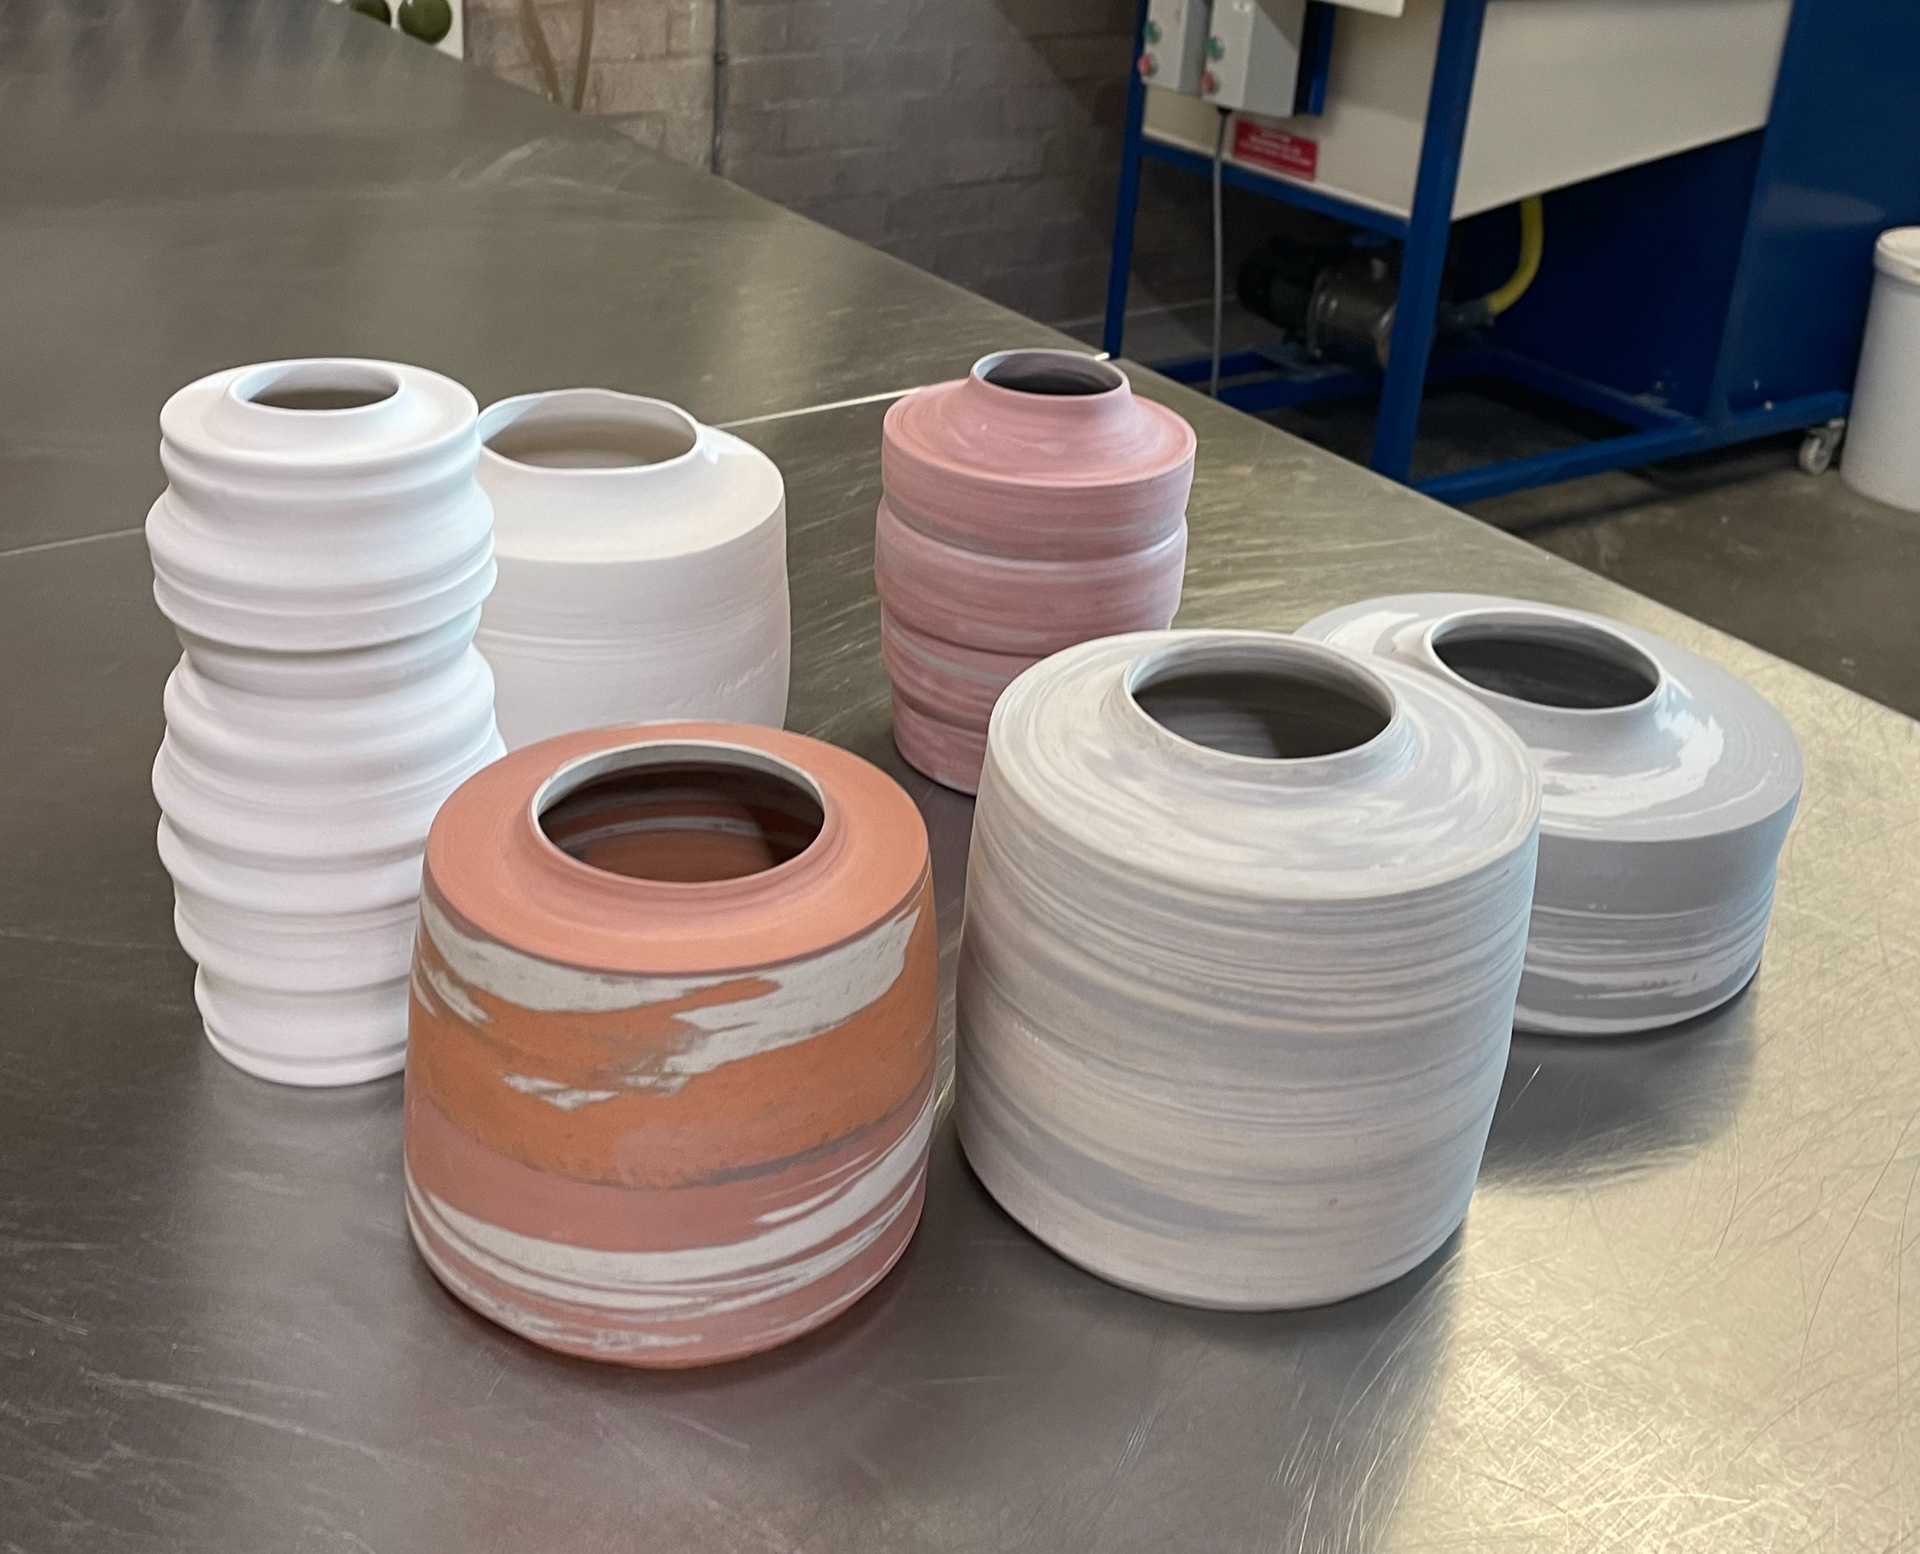
As I wanted to experiment with other glazes, all my vessels came out of bisque at the same time. Although these aren't all my final pieces, I like the look of the collection. Being able to imagine the other sample vessels following the same characteristics as my final vessels makes me want to create a bigger collection in S and R and makes me excited to continue experimenting with more vessels.
Glazed With Clear Glaze
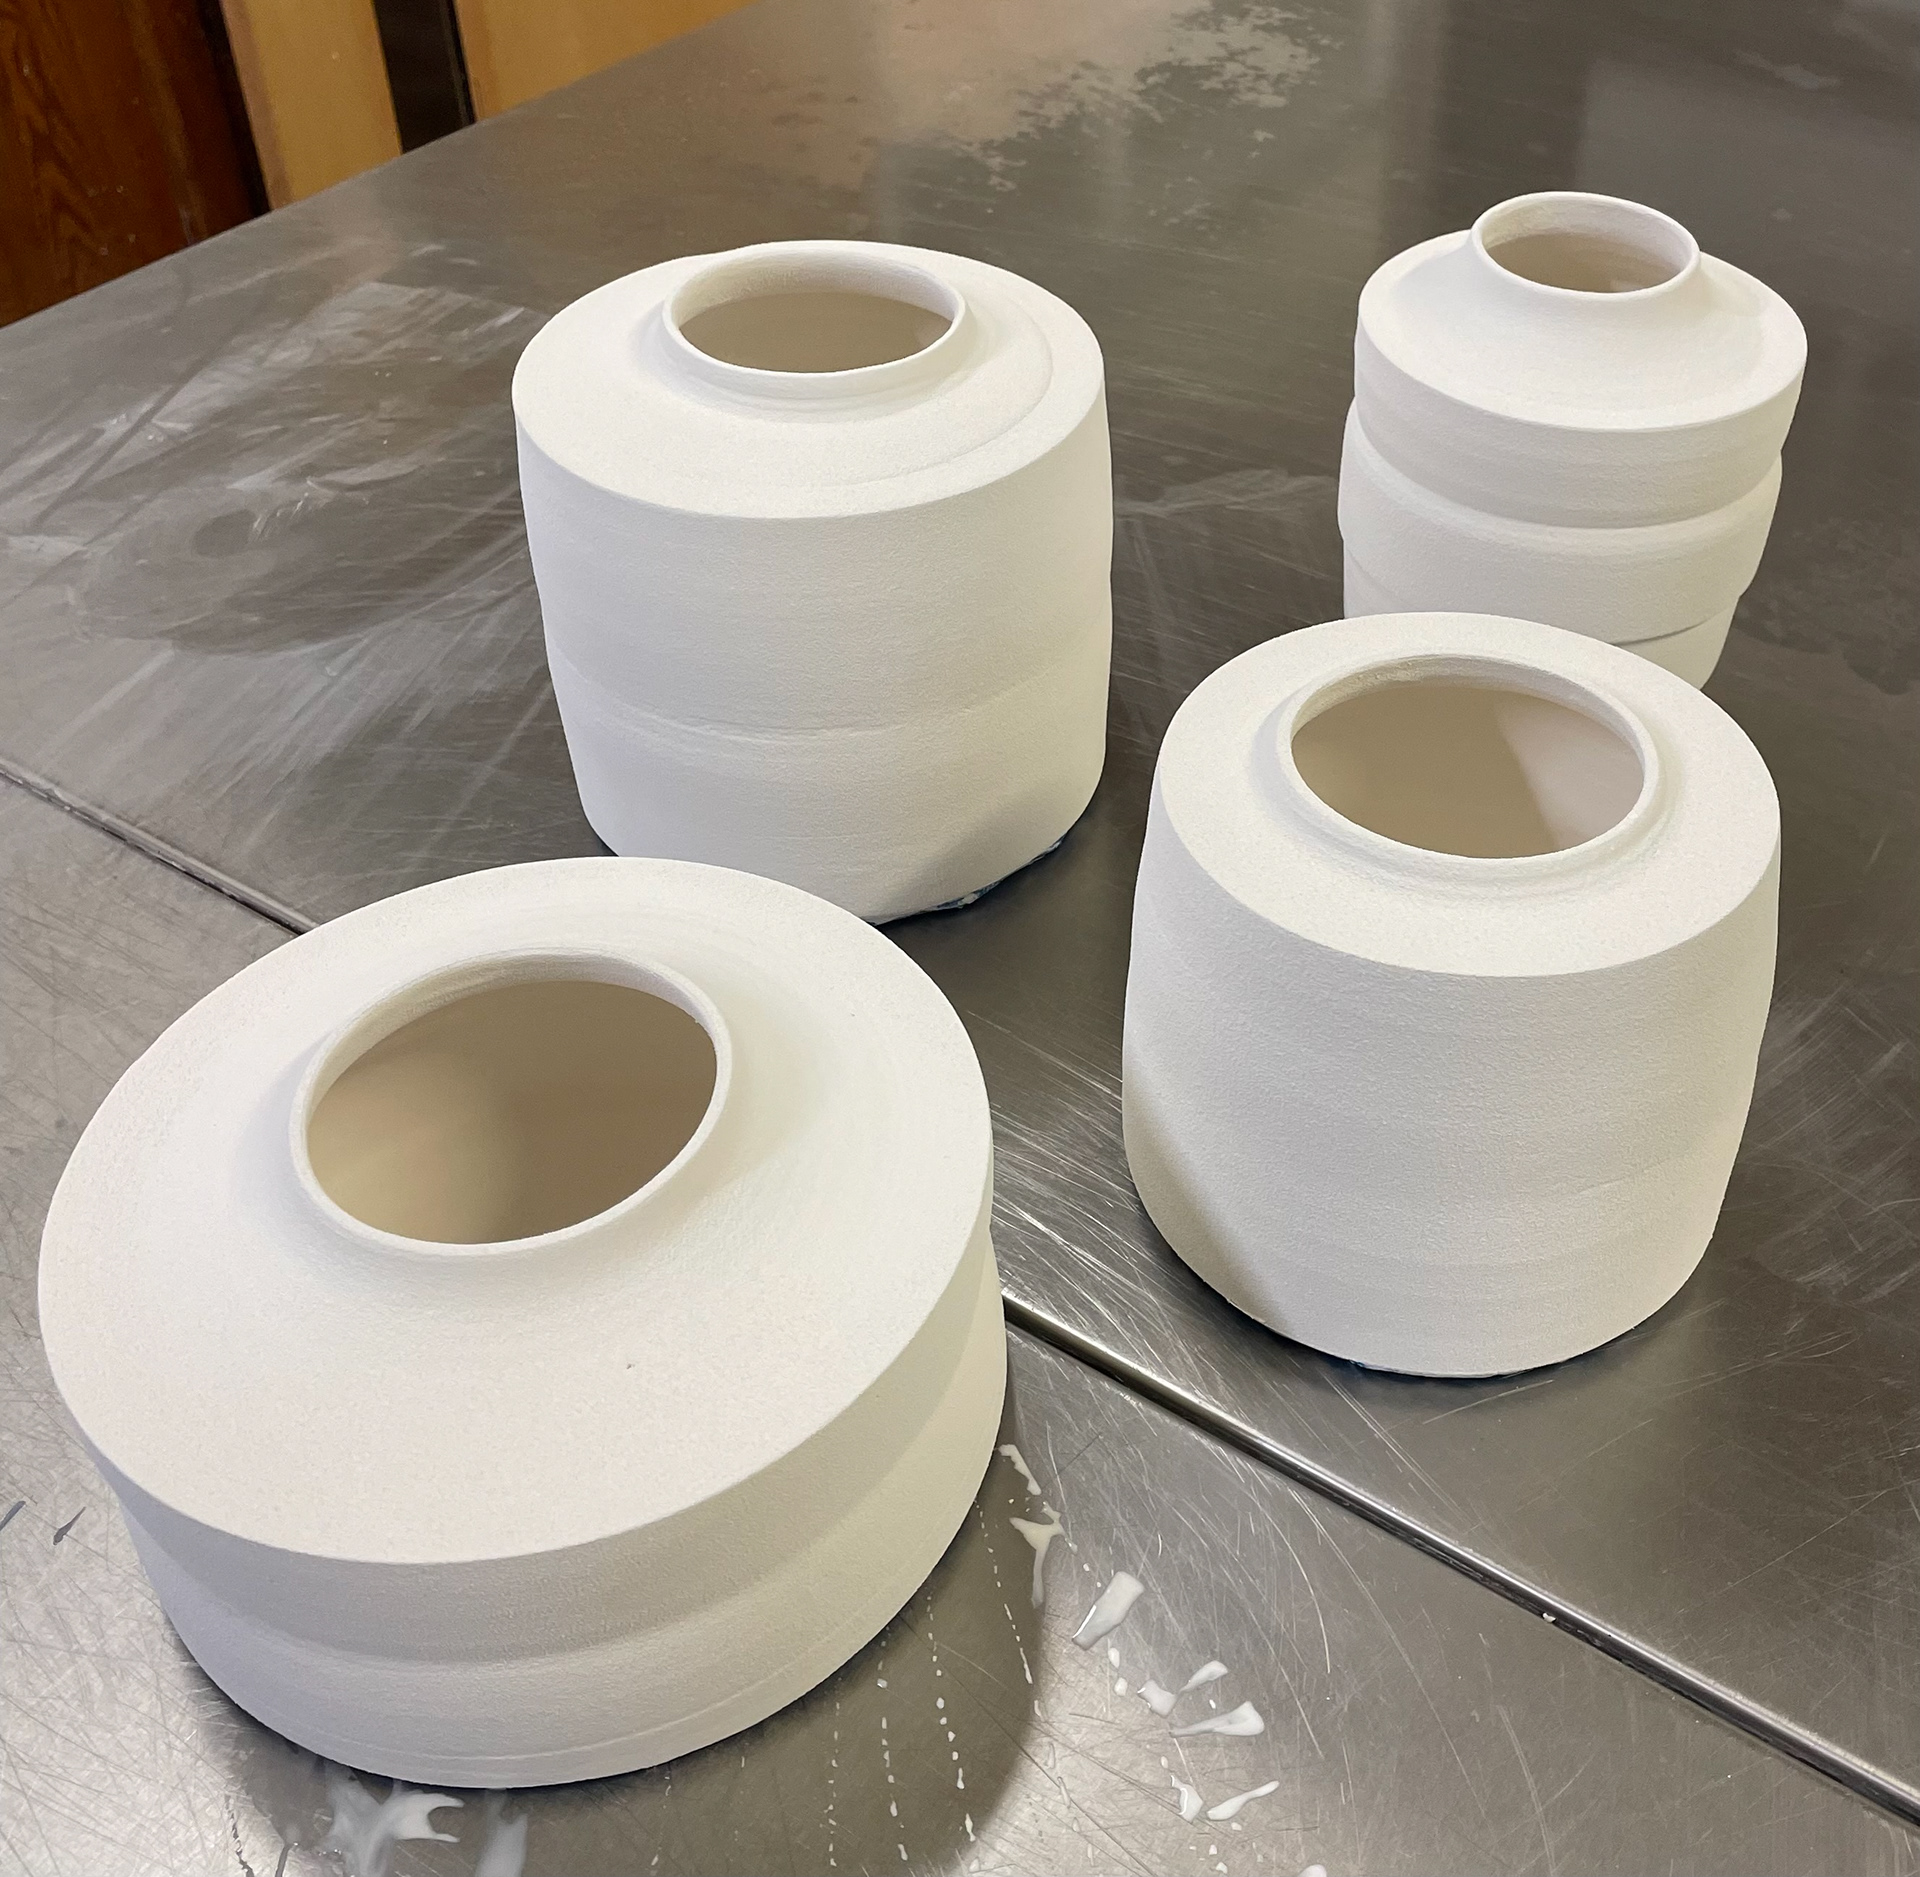
Each final vessel was fired earthenware with a clear, shiny glaze. I chose clear shiny as it enhanced the coloured oxides the best, and the shiny glaze reminded me of the water reflections you can see in the sea. For the inner glaze, I poured in the glaze, allowed it to sit for a bit, and then poured it out evenly, leaving me with a lovely, clean inner glaze. For the outside, I taped off the base, including the rim, and then used a glaze spray gun, applying the glaze in strokes. I prefer to use the glaze gun as it allows me to apply an even thin layer of glaze, which I think has the most professional standard.
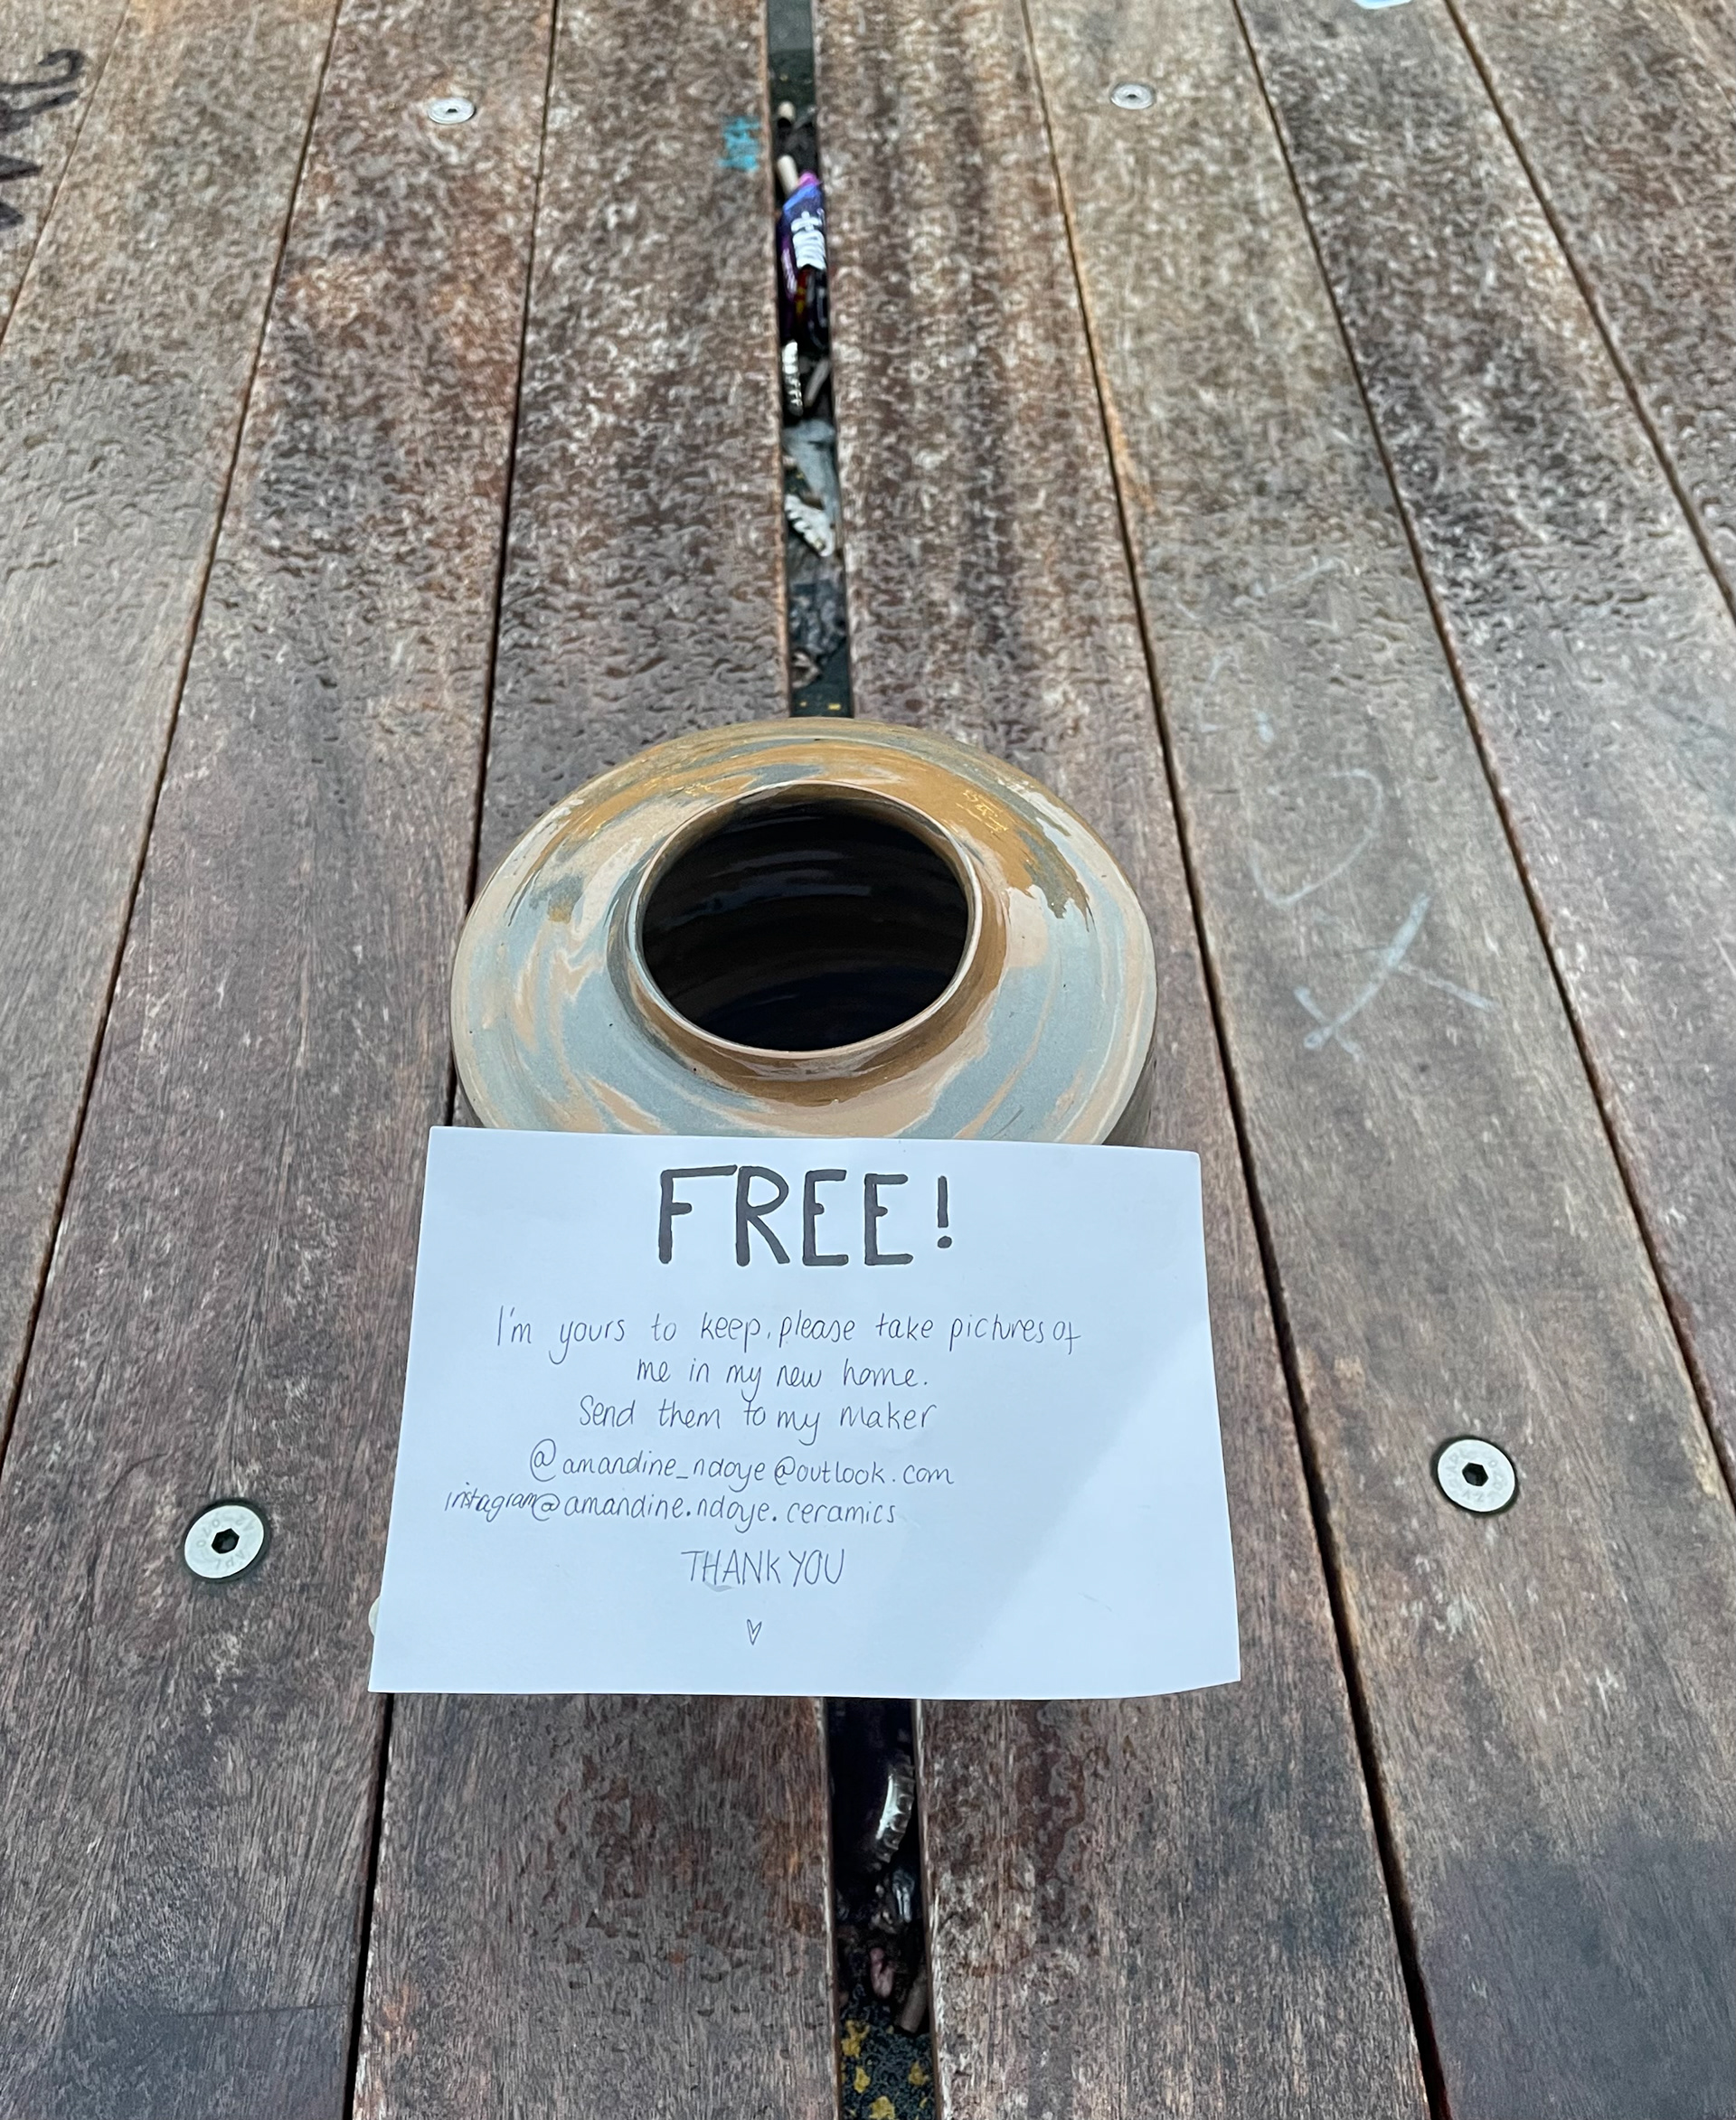
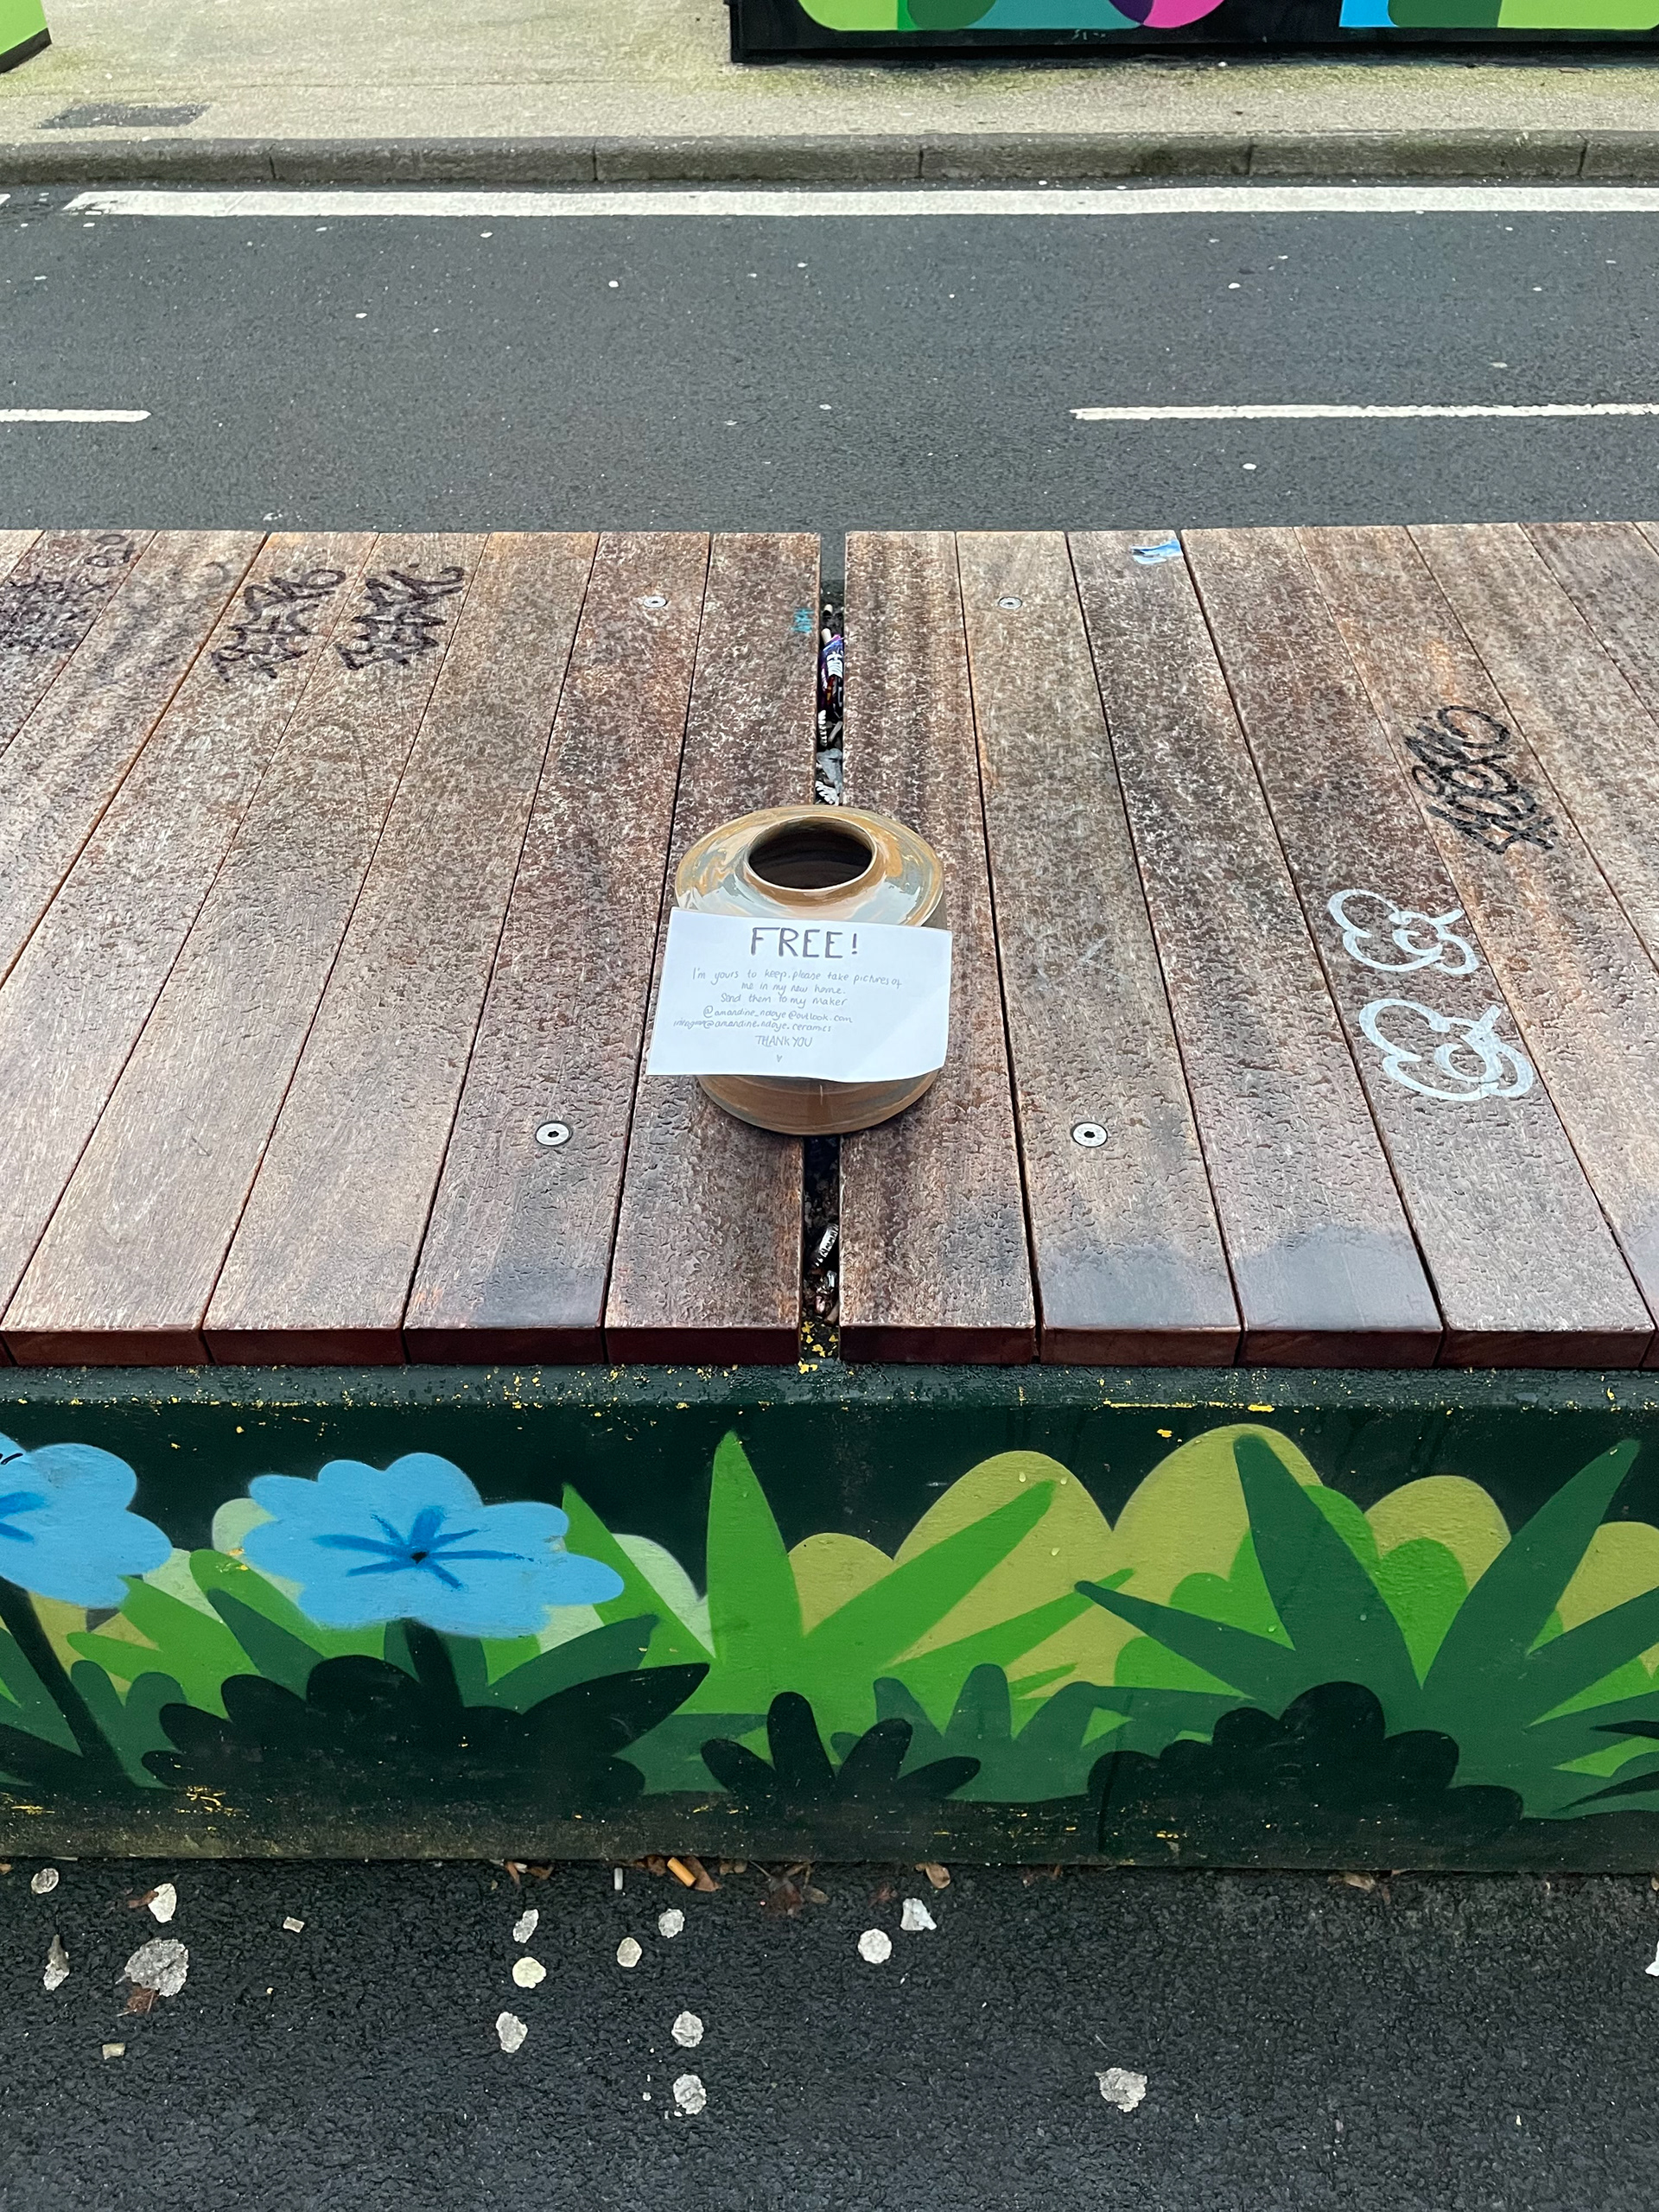
Putting A Vessle Into Manchester
Distributing free art enables me to foster community engagement and accessibility. By sharing art without financial barriers it allows more people to experience and welome art into their homes. It also allows for greater exposure and connection with a diverse audience, which can lead to increased recognition and appreciation that why on my vessles i left a note allowing the person who takes my work to get back into conntact. not only is this for me to see where my beach vessle new home is but to create a converstion to learn and know my new community. Additionally, offering free art can spark inspiration and dialogue, encouraging others to explore their own creativity. This practice not only enriches the cultural landscape but also reinforces the idea that art is for everyone, regardless of socioeconomic status.
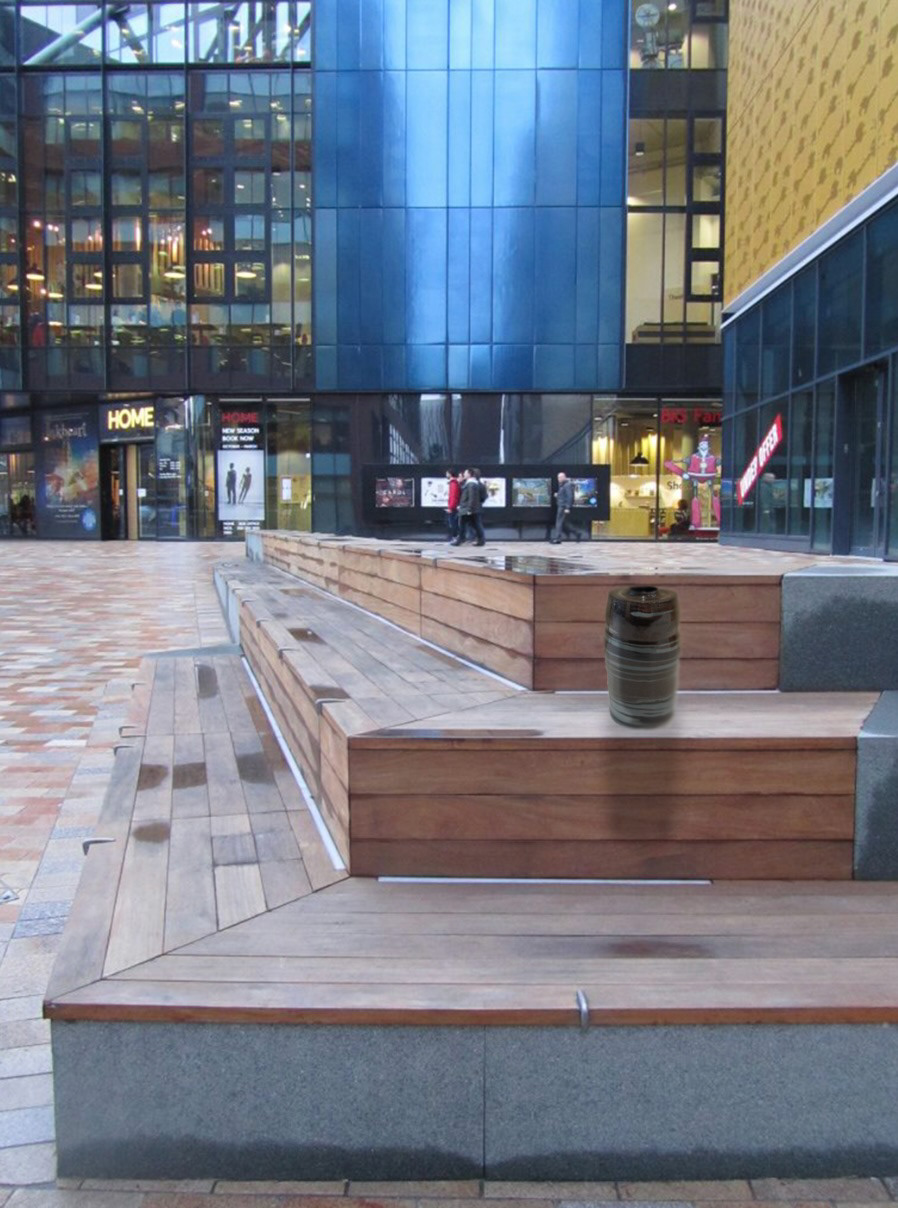
Edited Vessel in First Street Manchester
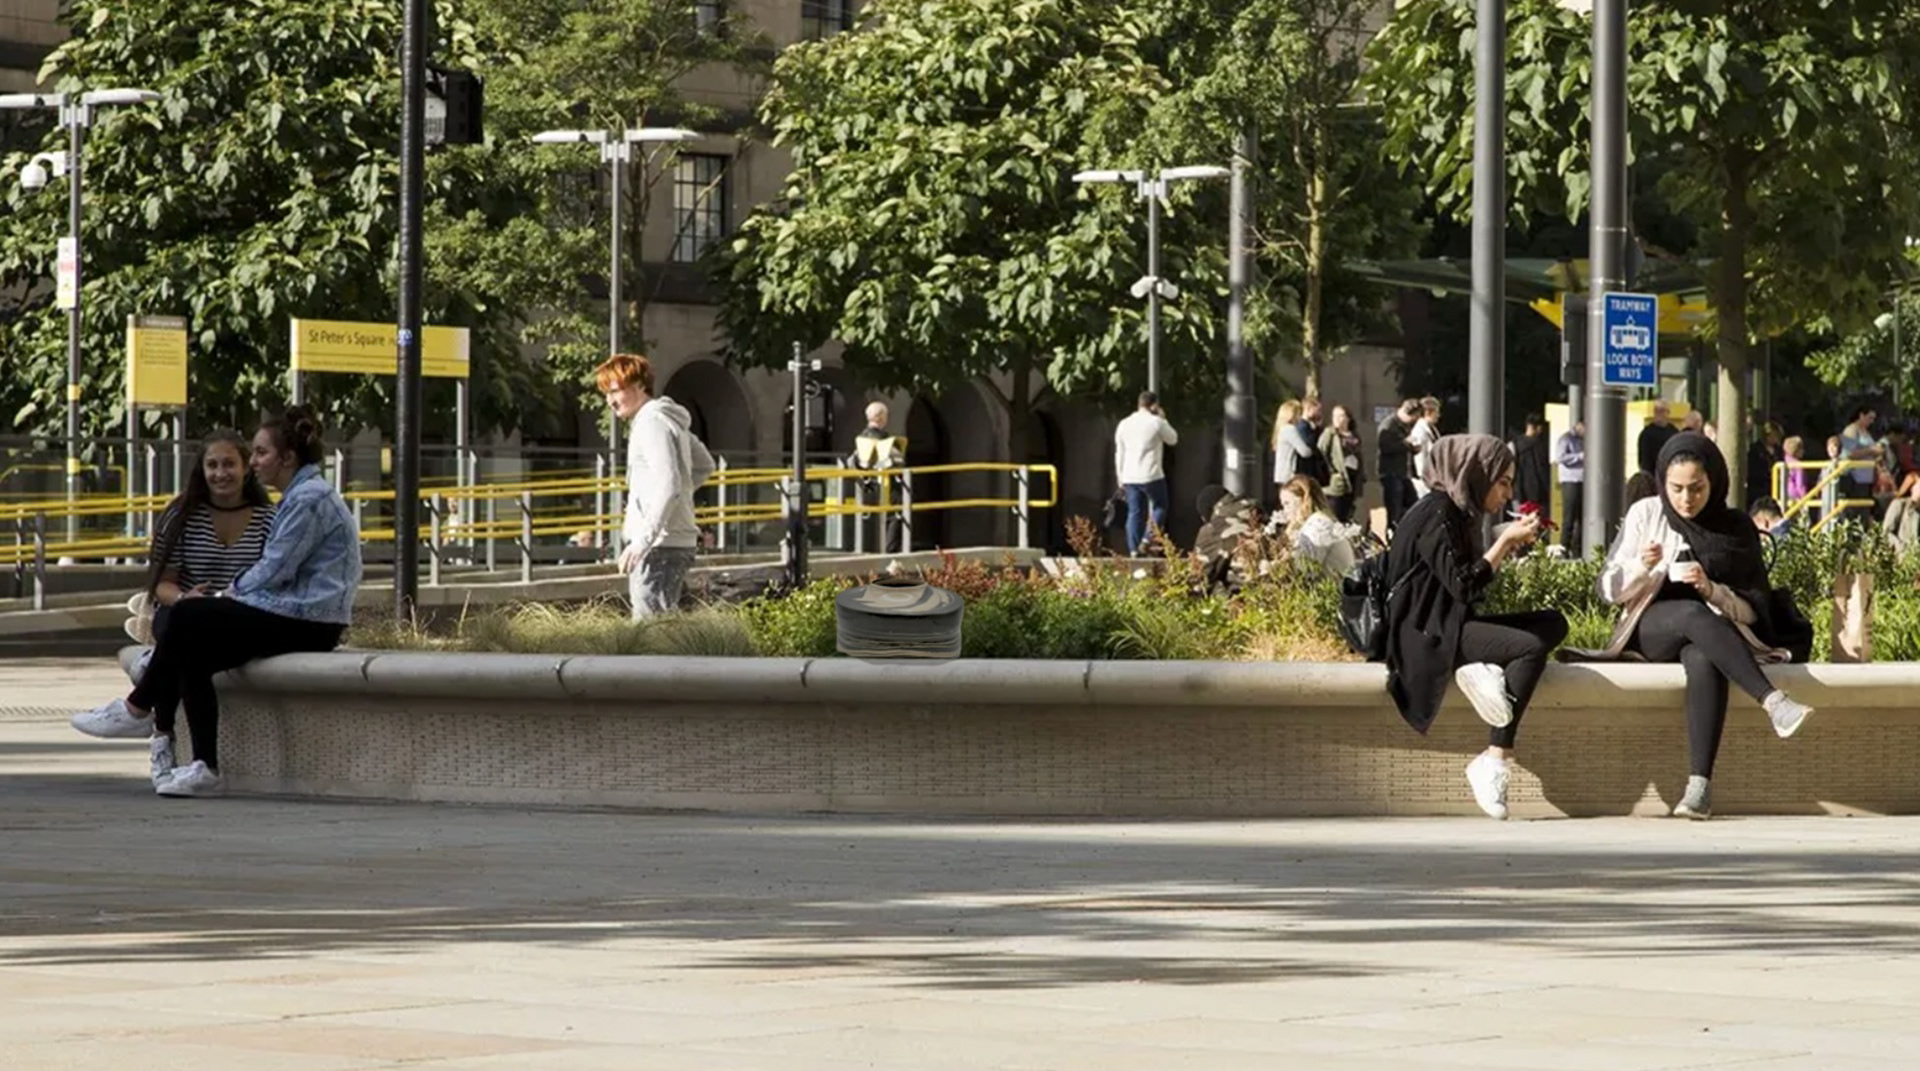
Edited Vessel in St Peters Sq Manchester
Photoshop mock-up of where I would potentially place my collection of beach vessels.

I wanted to place my vessel in the middle of Manchester. Placing work in the middle of the city for people to take for free, I was a lot more nervous than I thought. What if no one stopped to look? What if someone broke it? What if no one took it? The thought of no one taking my work was very overwhelming as then it would make me doubt myself as a maker and that no one wants a free ceramic vessel due to the look. Due to this being my first time placing art in the city, I decided to place it in a more comforting area of the northern quarter. Although I didn't intend for it to be placed here, I just thought it would be a good starting point for my confidence. As I sat in a cafe ready to film people, pass as I thought it would take a while to be picked up, to my amazement, it got taken by a member of the public in 30 seconds. I was so shocked my work was out there to engage with the public and got taken so fast. However, this was a very reassuring thing and validation of my work as an artist. This was very out of my comfort zone, but I needed to do it as a maker, as free, accessible art is something I want to always consider within my work.
In the further synthesis and resolution, I want to further explore the idea of giving free art away. I like the idea of welcoming my art into people's homes without knowing anything about them. I hoped this would inspire, delight and connect with the public. I think it would be interesting to experiment with placing my vessels in different areas of Manchester, looking at areas that don't have as much exposure to art and places that have strong community relations. I also want to enable a way to hear more from the people who take my work, seeing if they are new to the city, how they feel about the city and other questions this I think could be achieved by creating a survey or a QR code that takes them to questions and ables them to reconnect to me as a maker. I am interested in everyone's role in society, seeing if people have felt the same isolation in a big city, and seeing if having this new vessel or exposure to art can help.
Although this was a very fun experiment and pushed me as a maker, I never got a response from the new owner of my vessel. Although I'm happy that I shared free art, and it is something that I will continue to do throughout my practice, I was excited to hear back and see the new home my vessel had. This is something that is out of my control, and I believe that the more vessels I give out, the larger the response I will receive. I know that not everyone will reply to me. Maybe I need to think of a more accessible way to contact me as I put my email and Instagram, but if I had a QR code or something, it would be a lot simpler and easier to get into contact this would hopefully encourage more people. I also want to expand on my contacts and try to experiment with making connections to the public with free art; I think this is an interesting concept and something I would want to develop.