Exploring Further With Mugs
After using coloured clay in my previous project, I loved its effect. And I wanted to experiment further, looking into throwing with clay and seeing the impact this has. I threw quick samples with leftover coloured clay using 1% cobalt oxide and 2% chromium oxide. I wanted to experiment with different applications of coloured clay, throwing it with blue clay, applying it as a slip, and brushing it on.
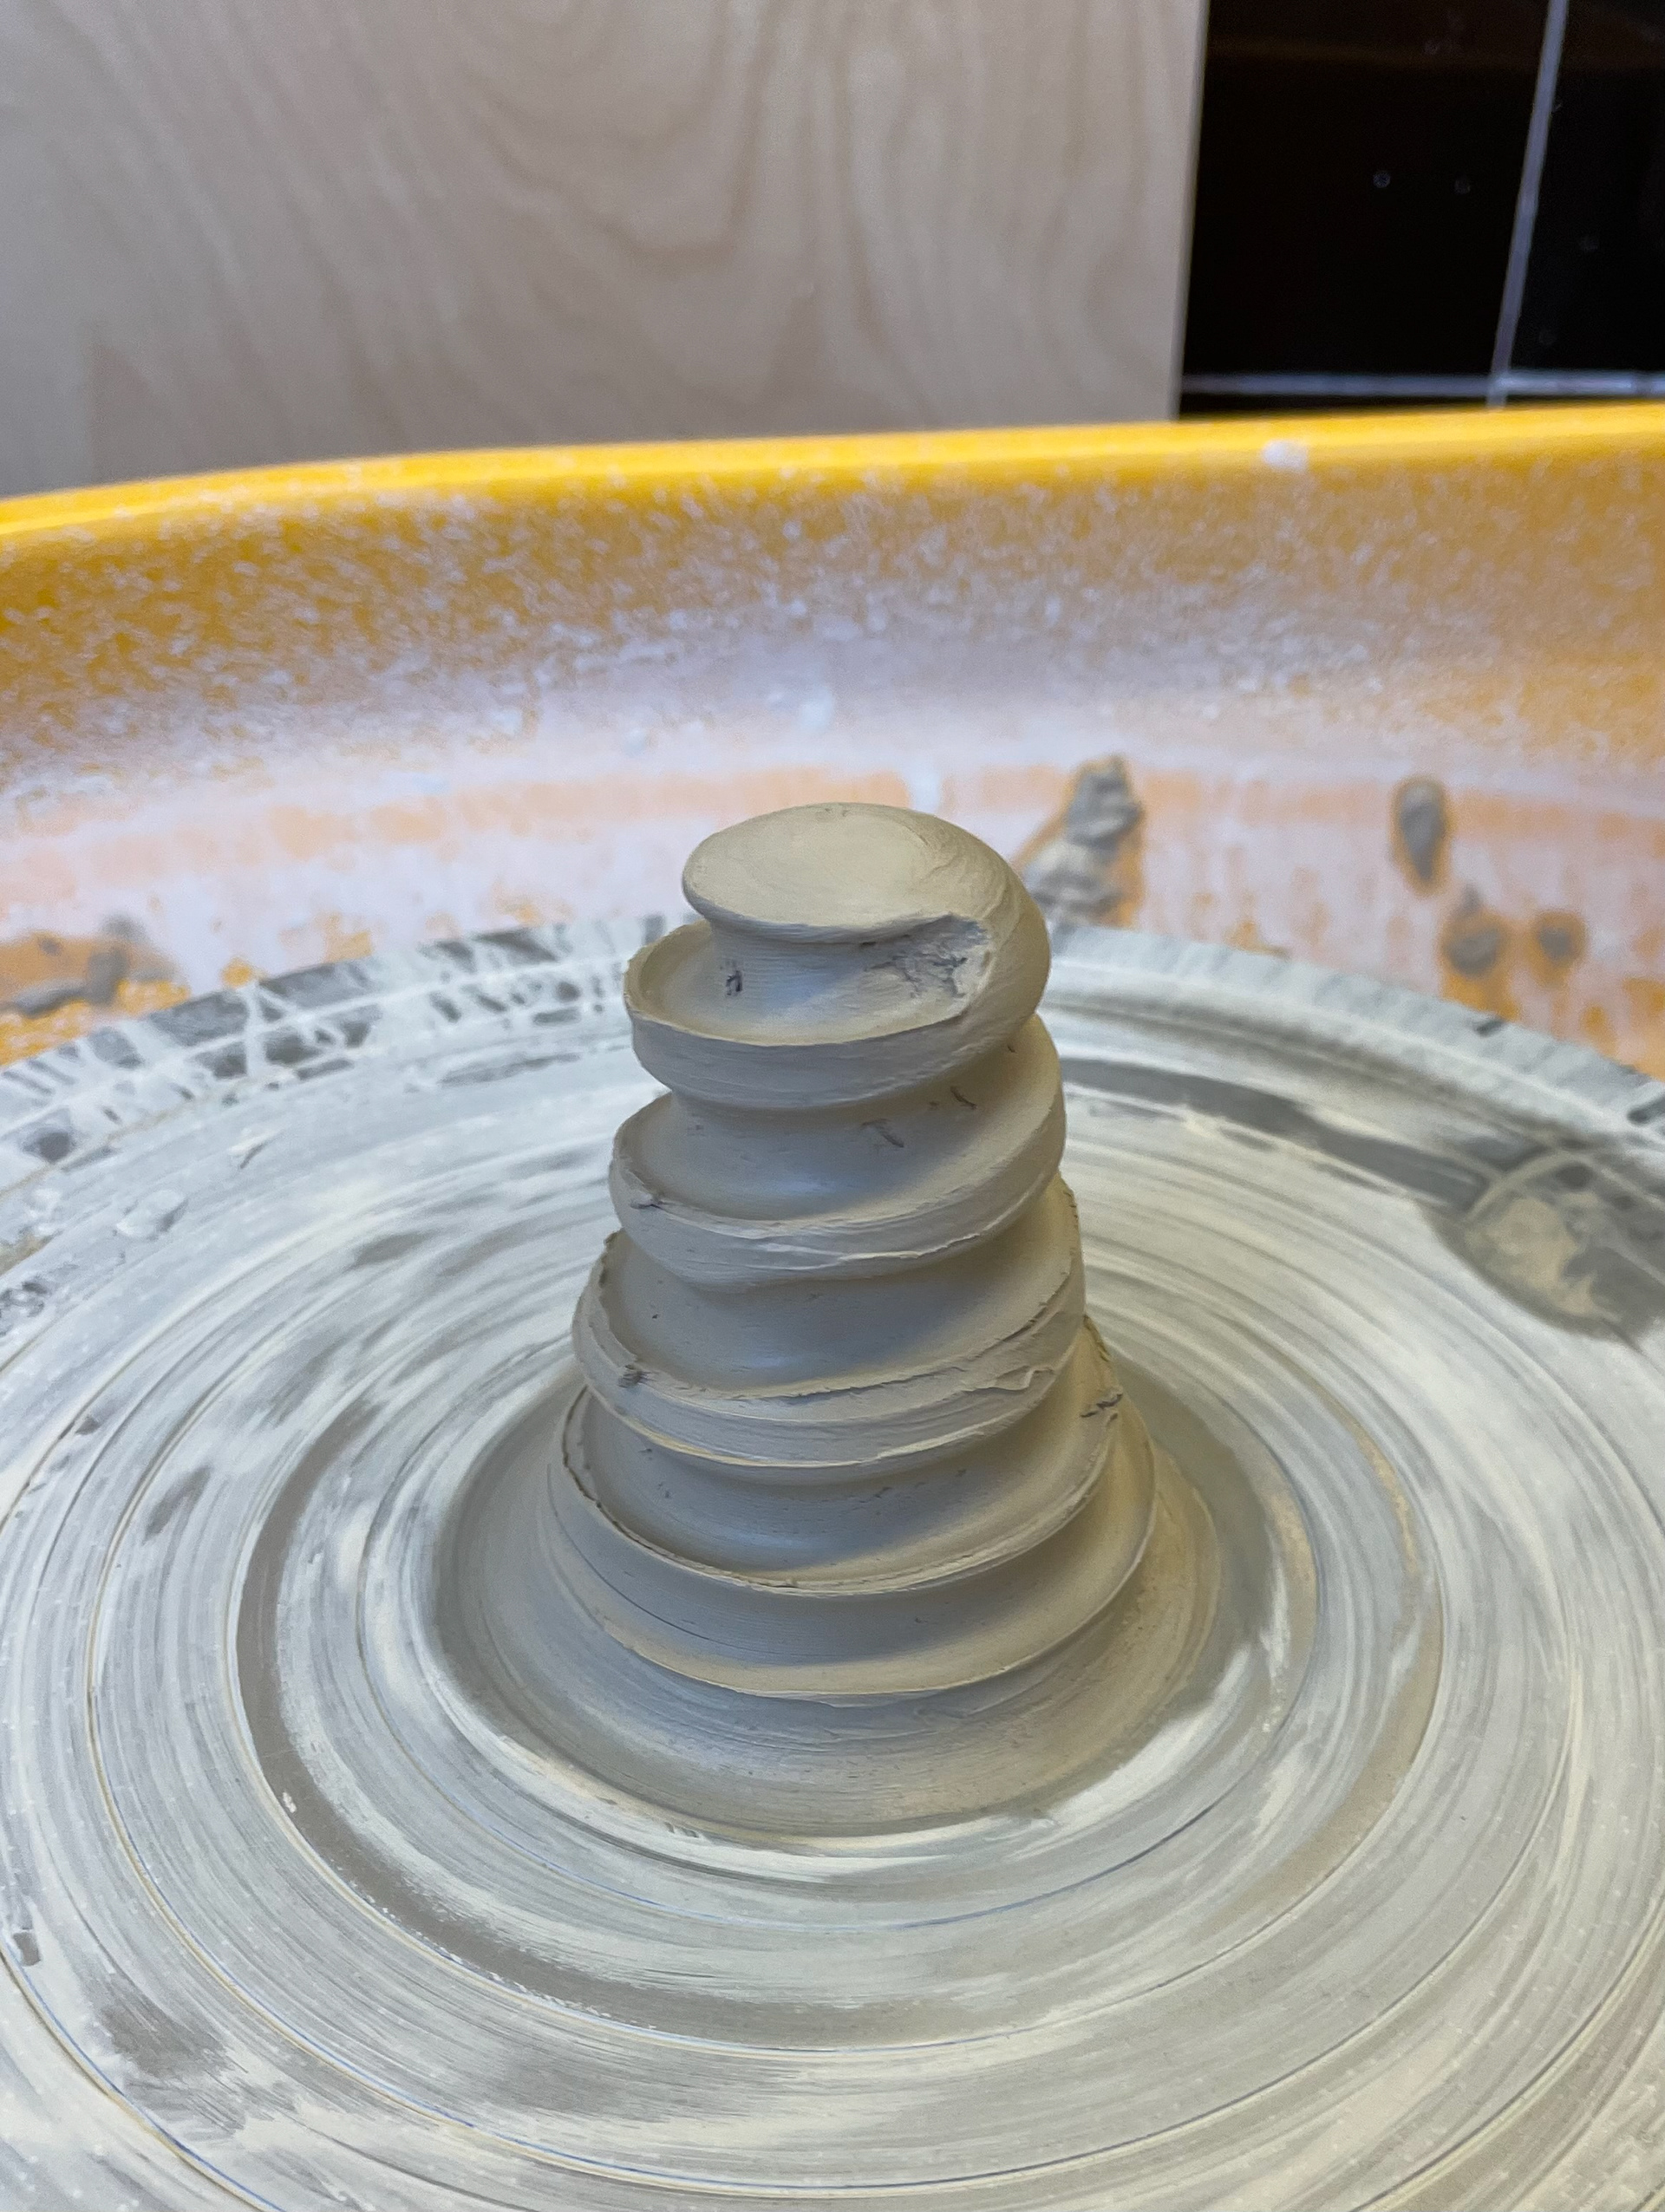
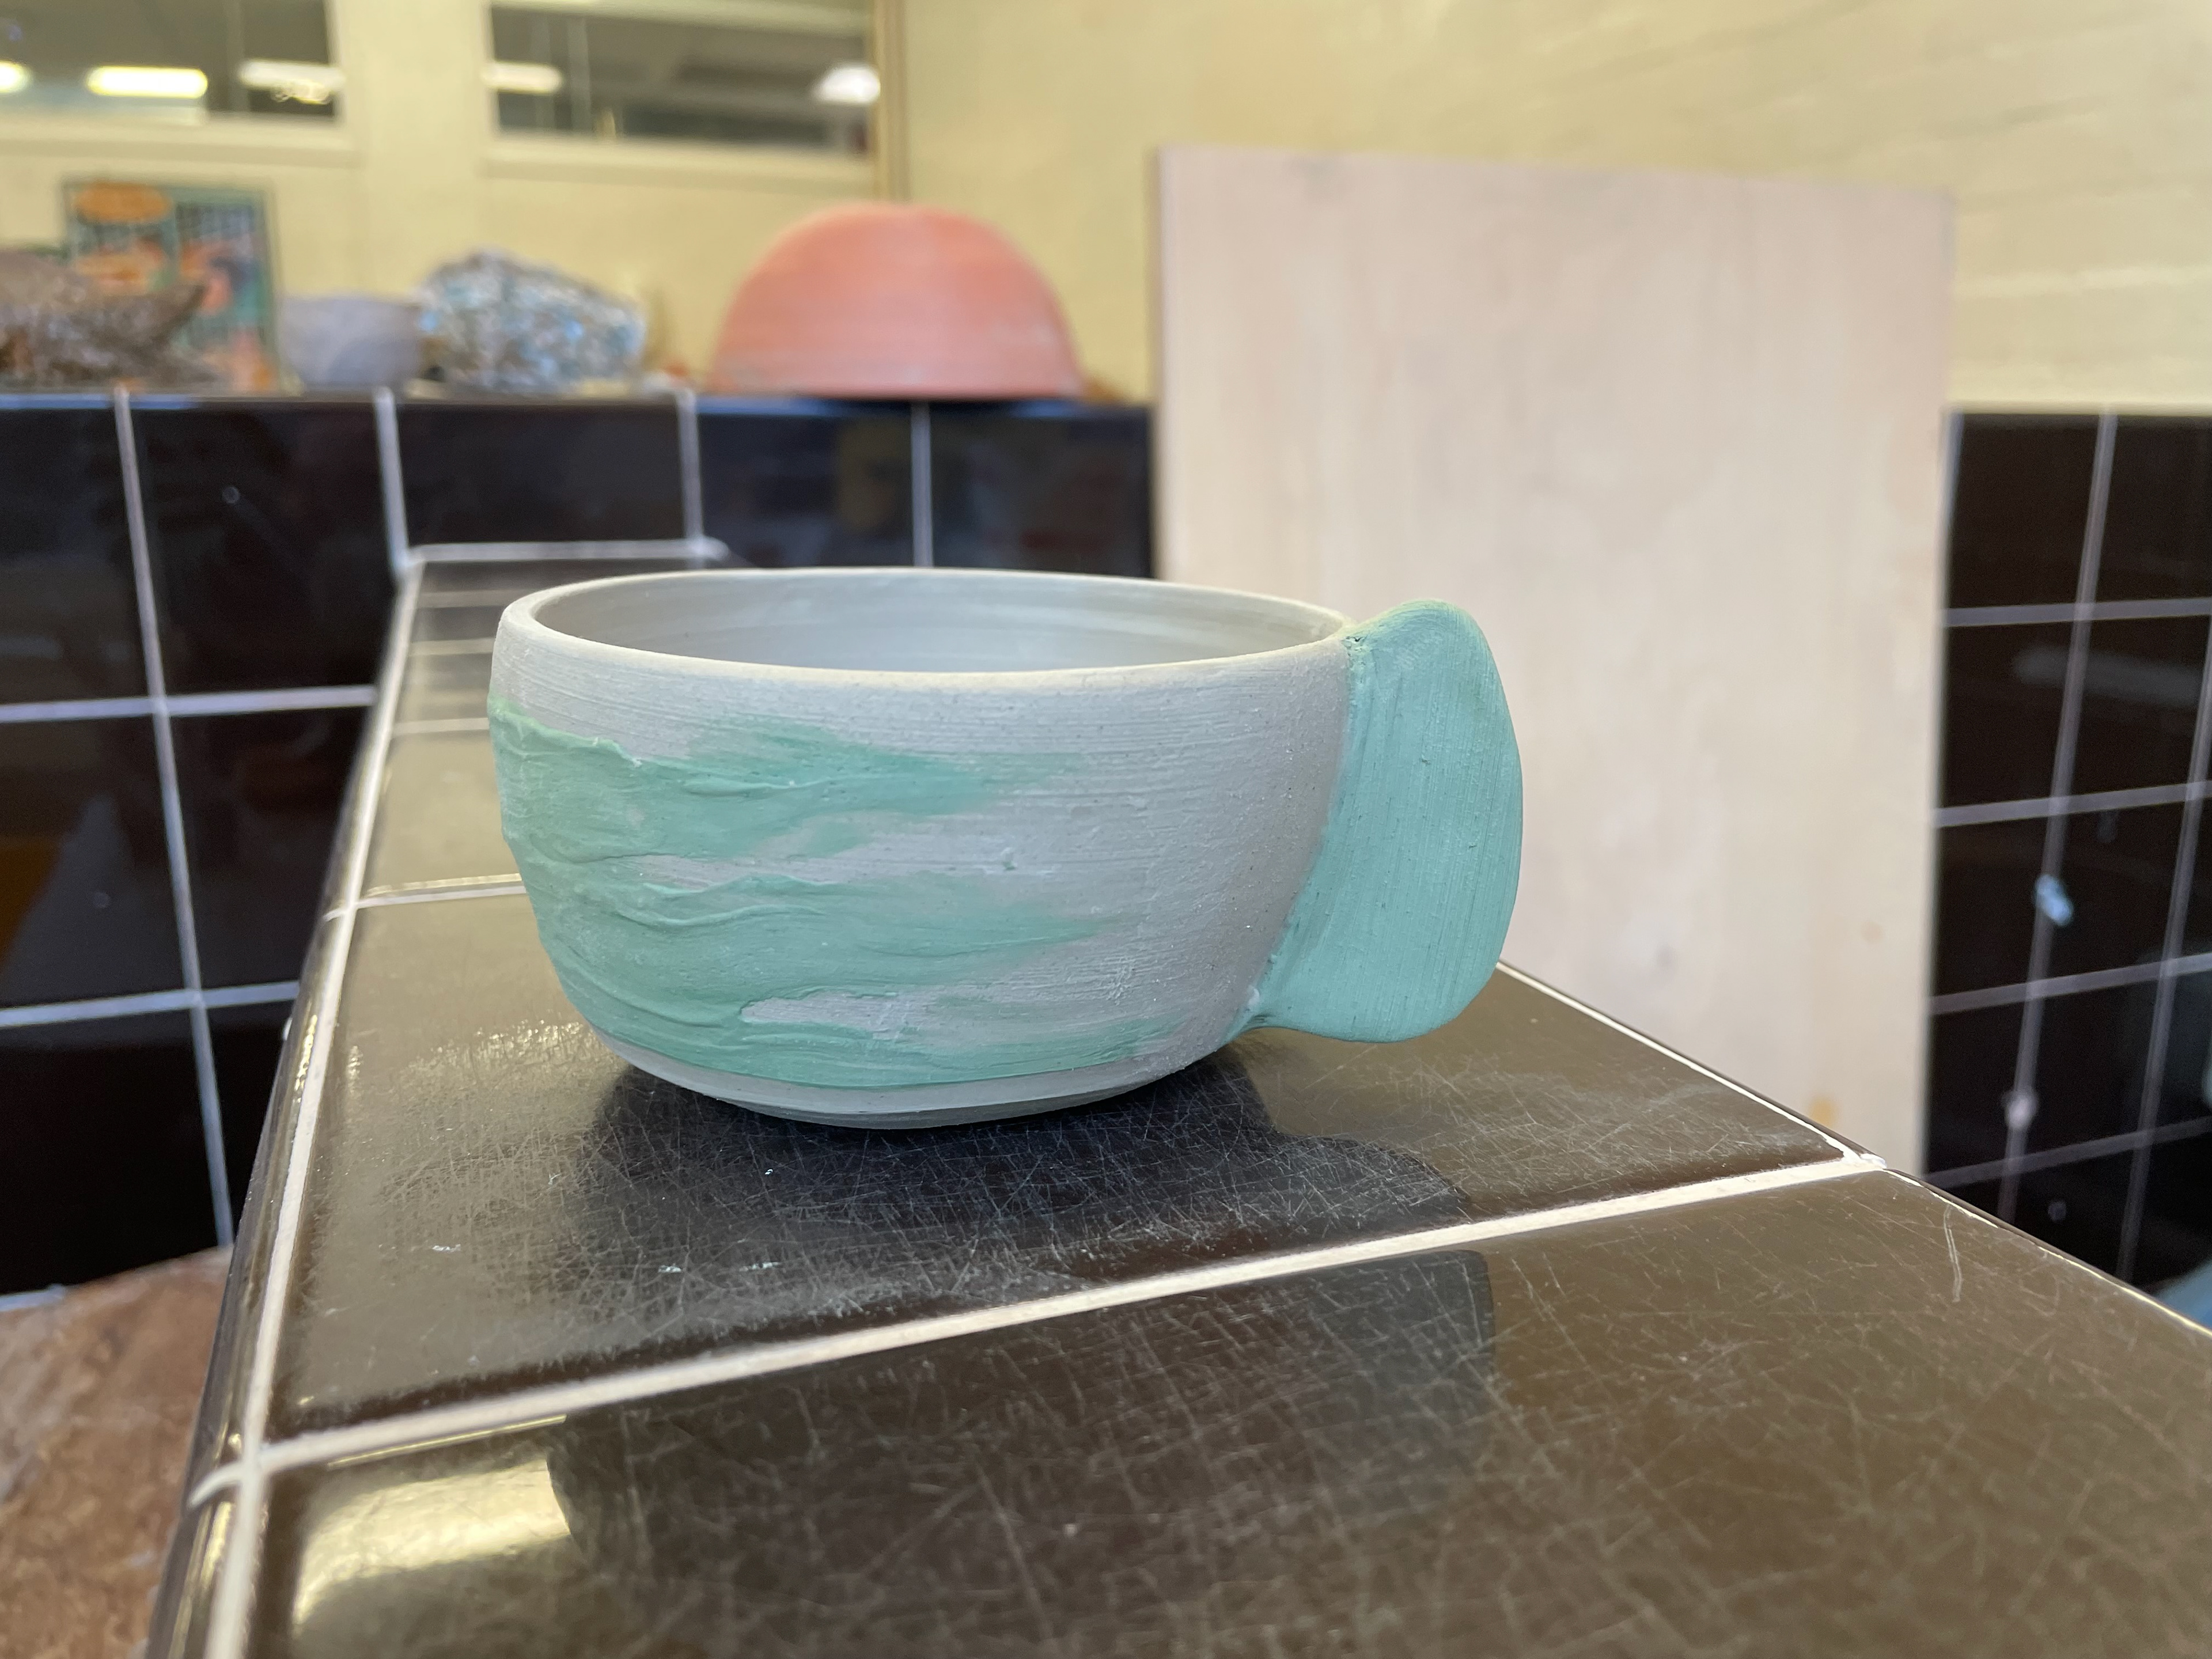

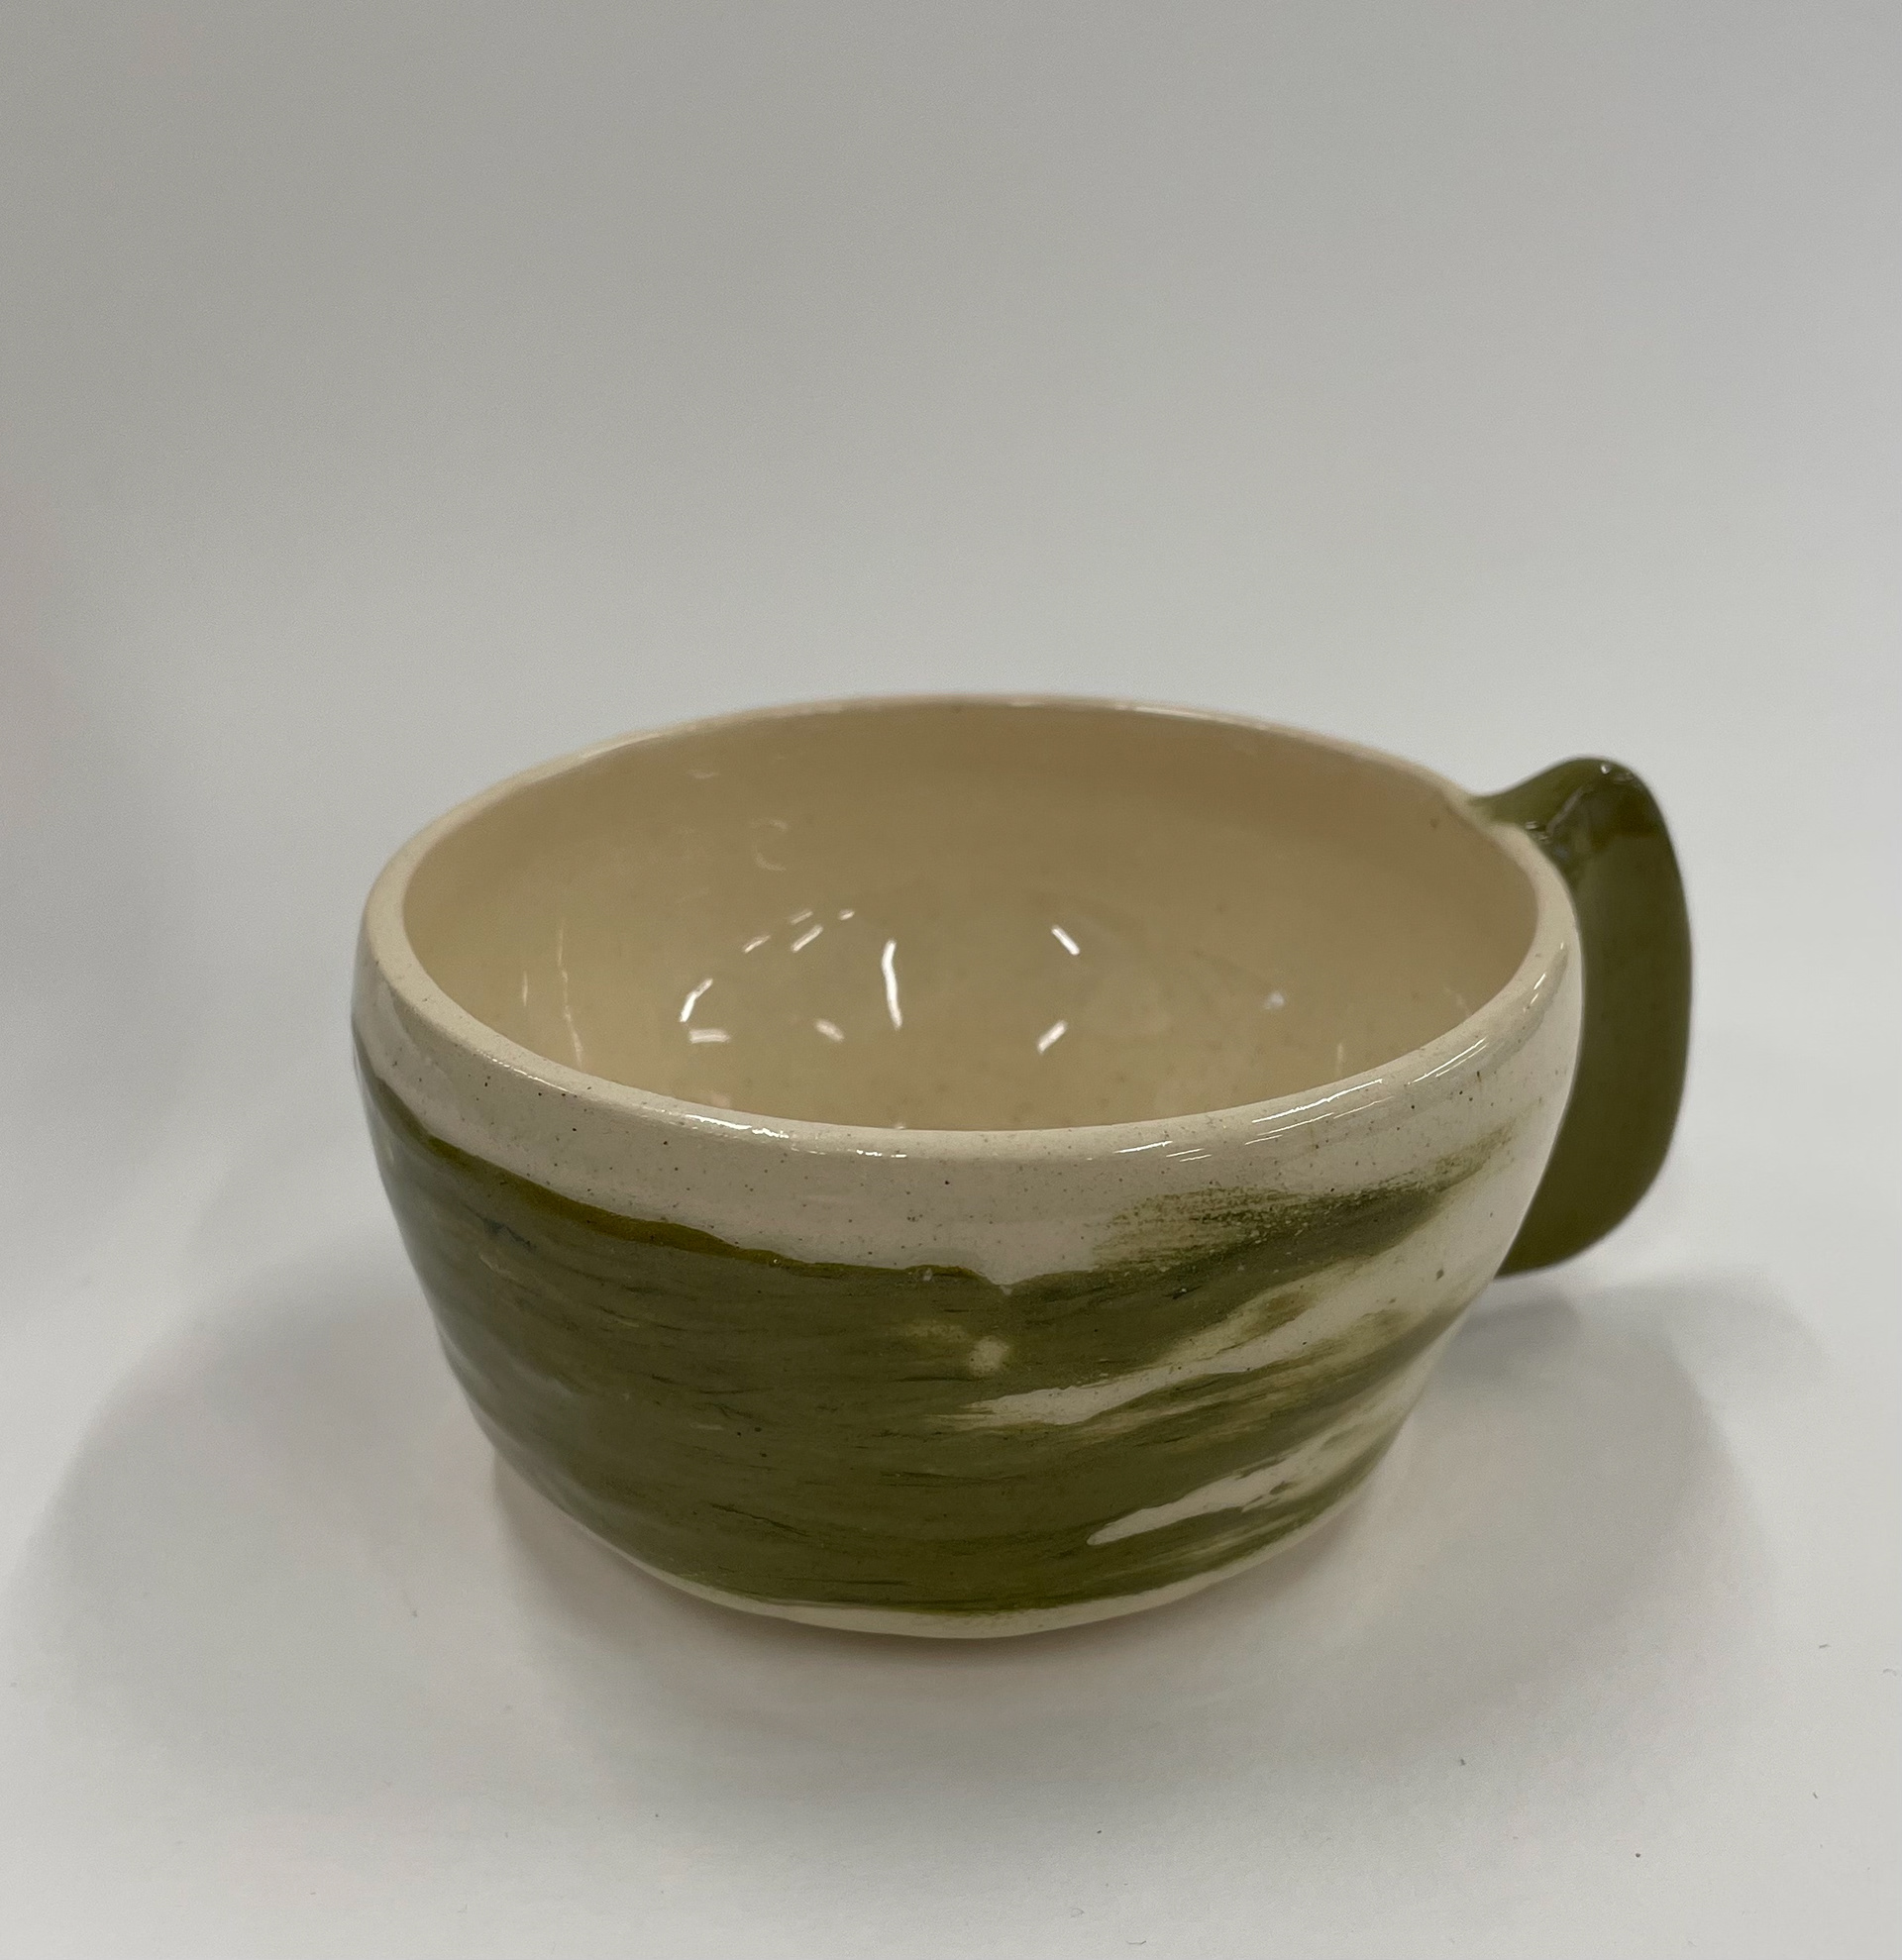
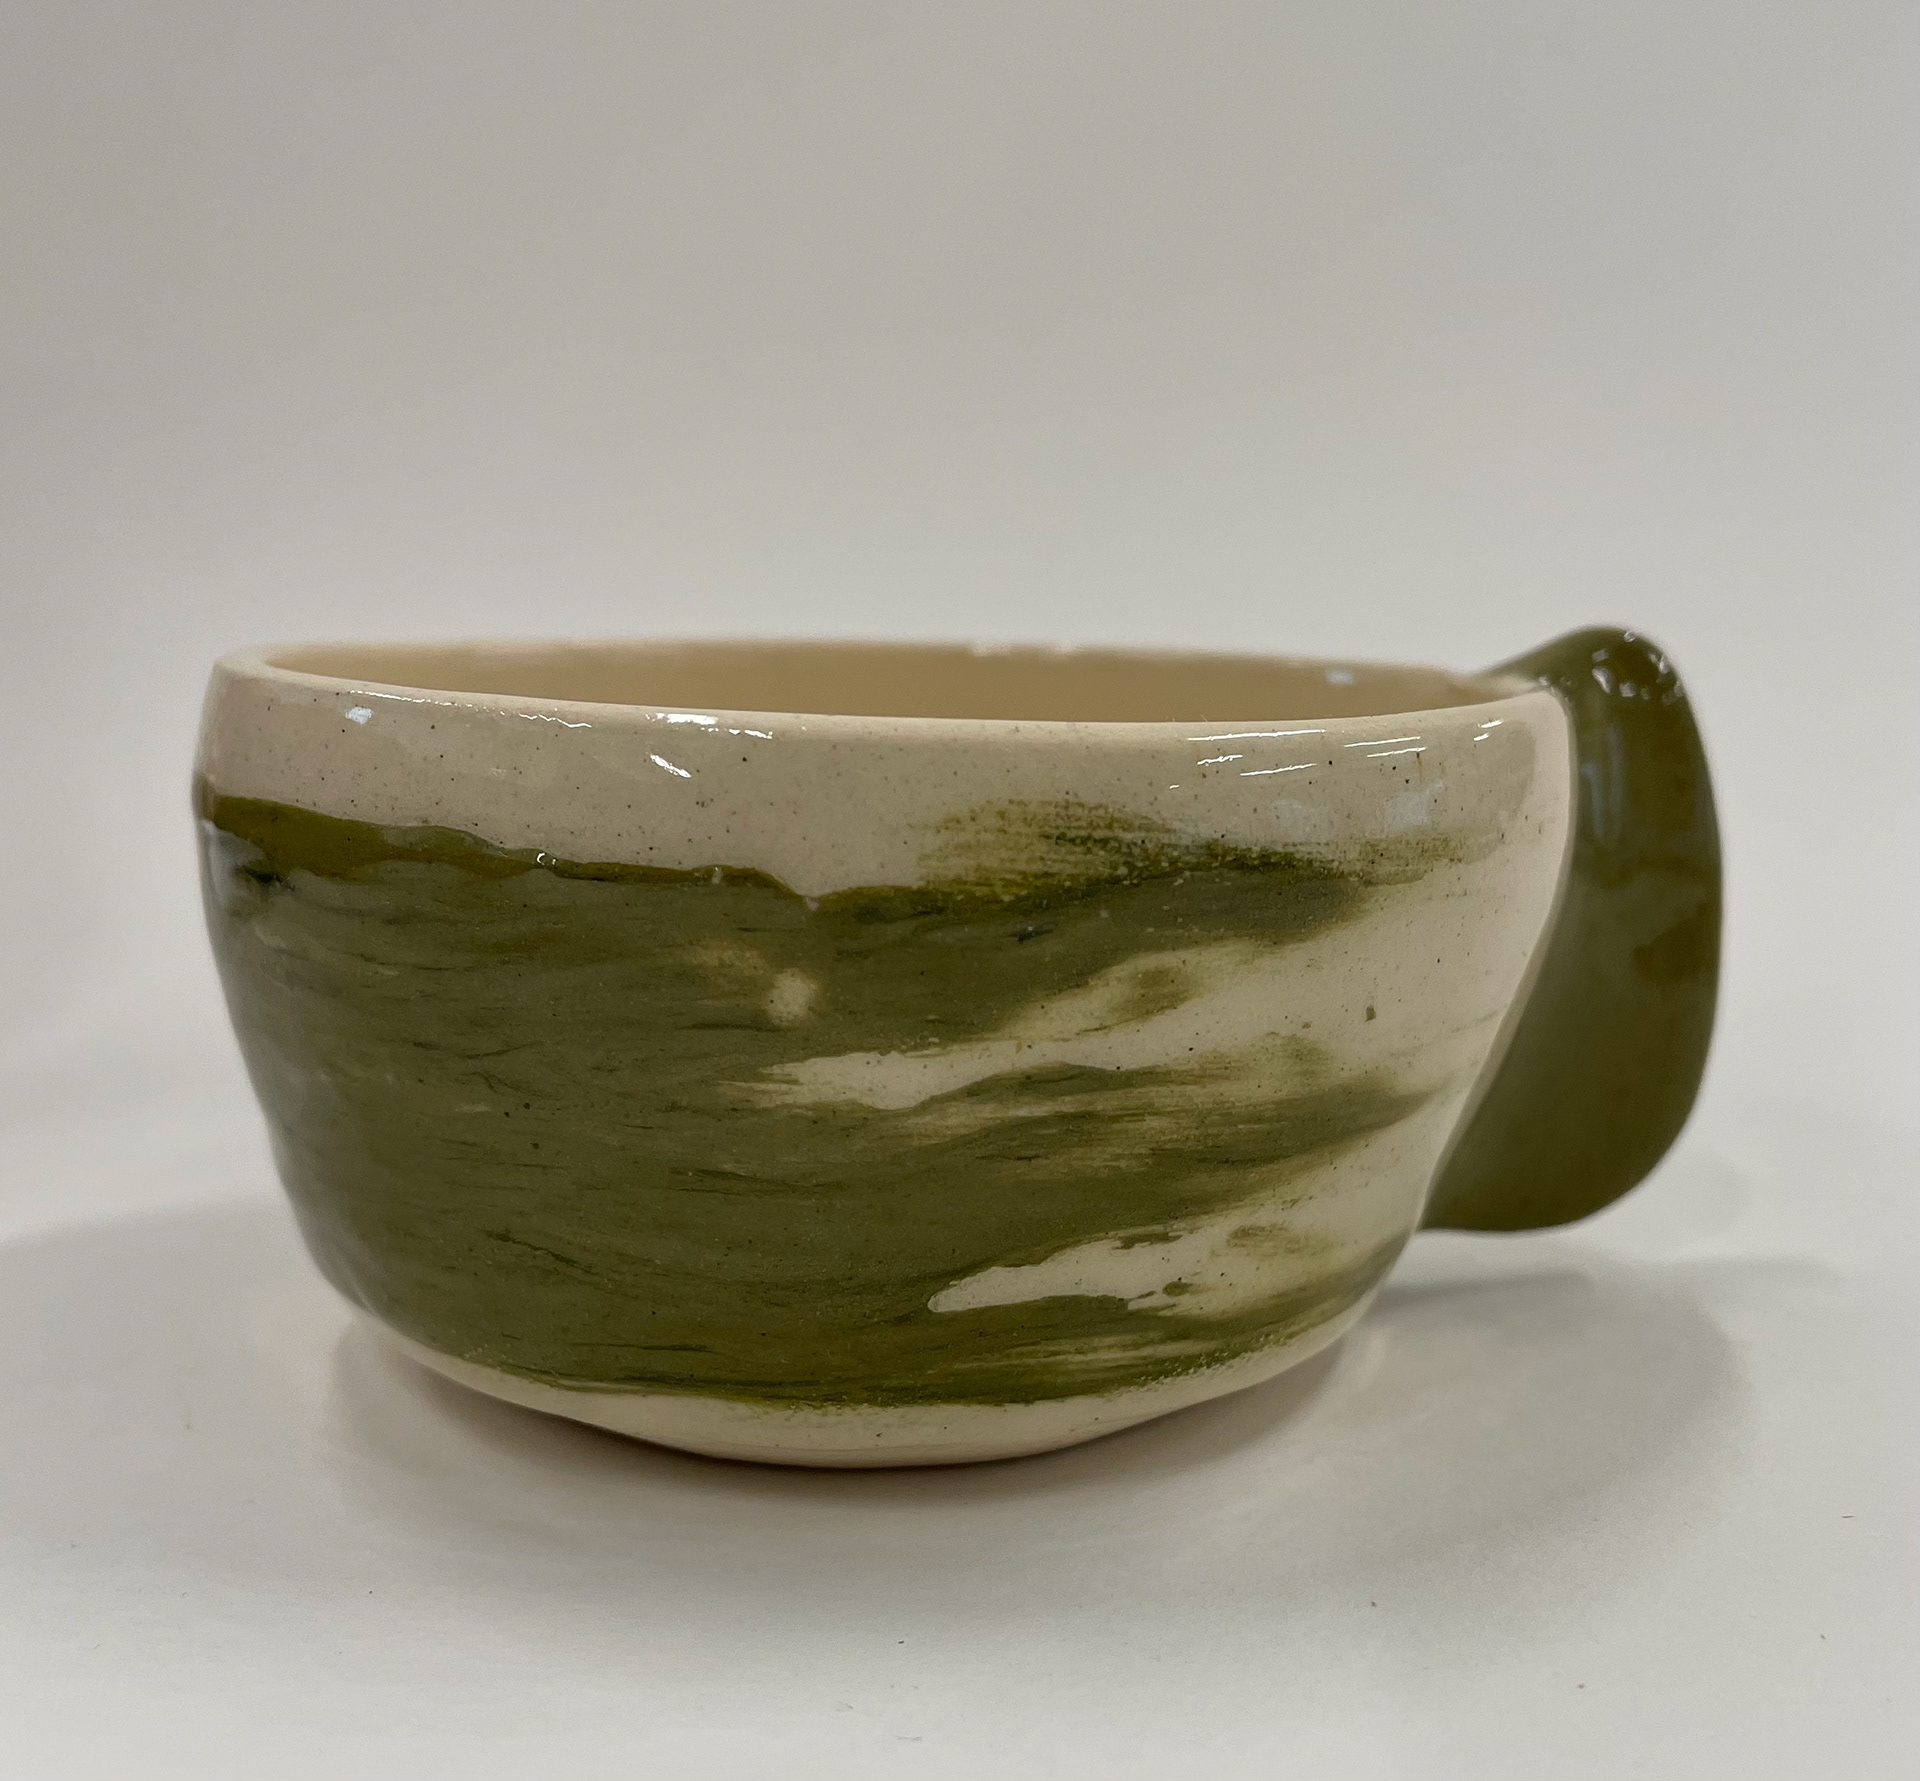
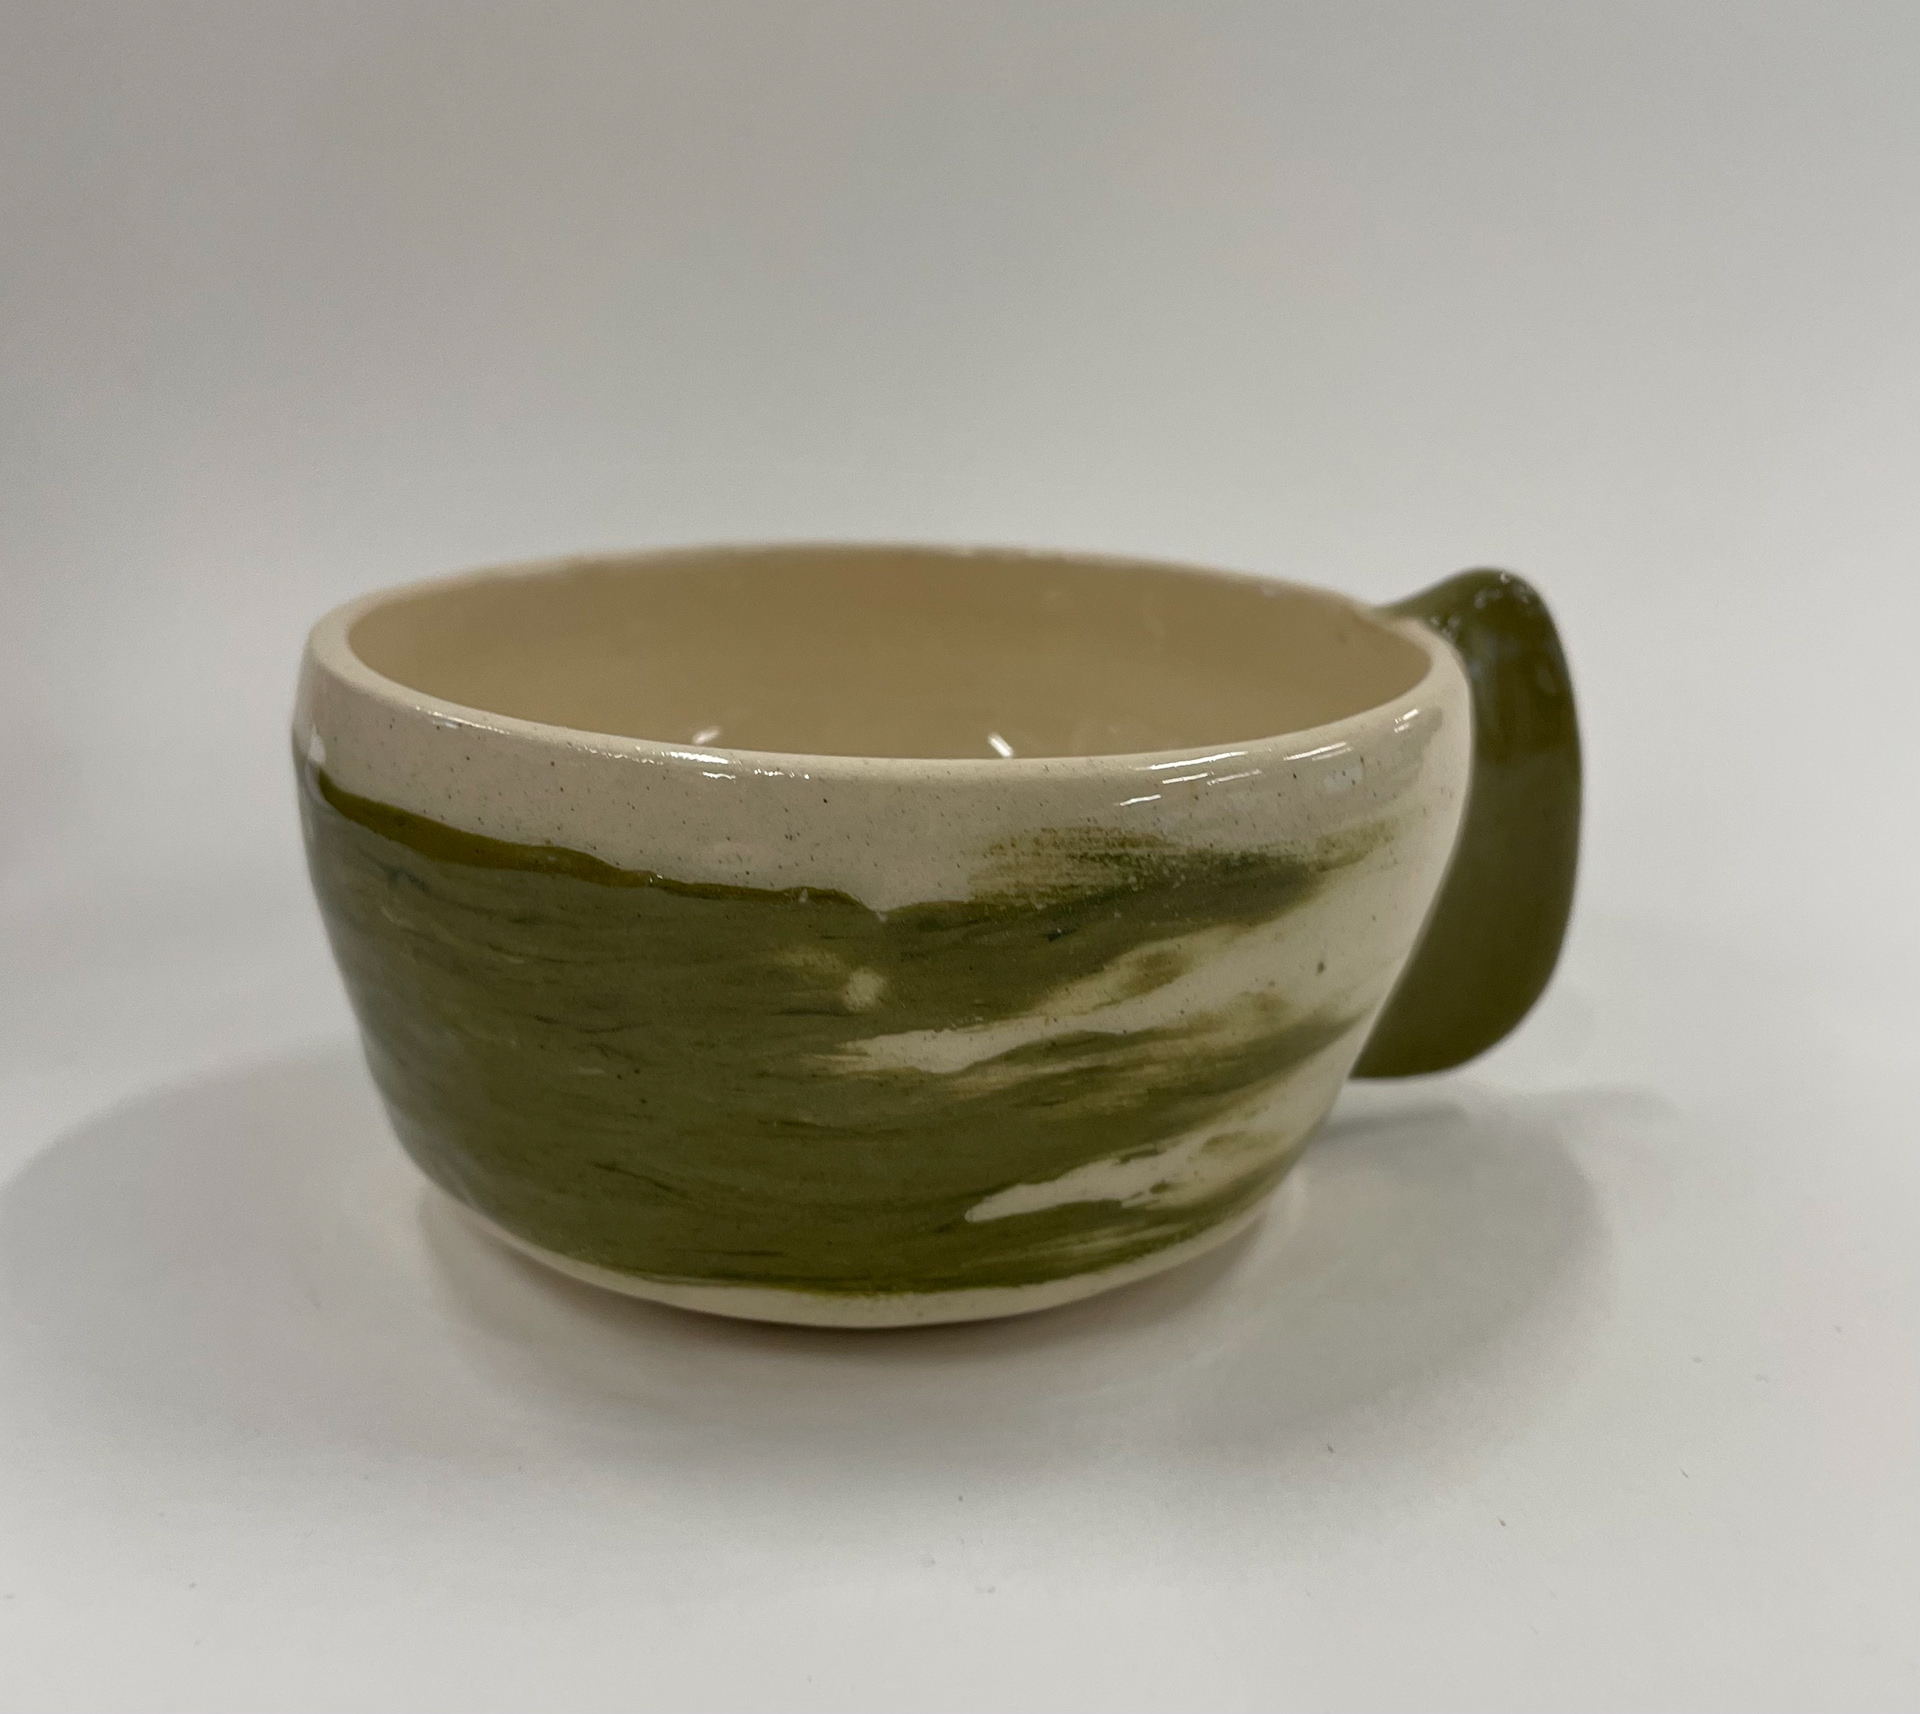
These were my outcomes: firing the clay into earthenware and then giving them a clear glaze over the top. I tried using the coloured clay as a slip and throwing it into a vessel with ivory stoneware clay. This quick sampling sparked my interest in throwing with coloured clay; I like the effect it gives the vessels, and you don't necessarily know the outcome, so it is a bit less controlled. With the sample of applying slip, I liked the look of it; however, sitting on the surface instead of being incorporated meant that it gave the vessel a bumpy texture and didn't look to the standard I was trying to achieve. From this, I decided to experiment more with throwing with coloured clay and develop my colour pallet more precisely.
Colouring Clay
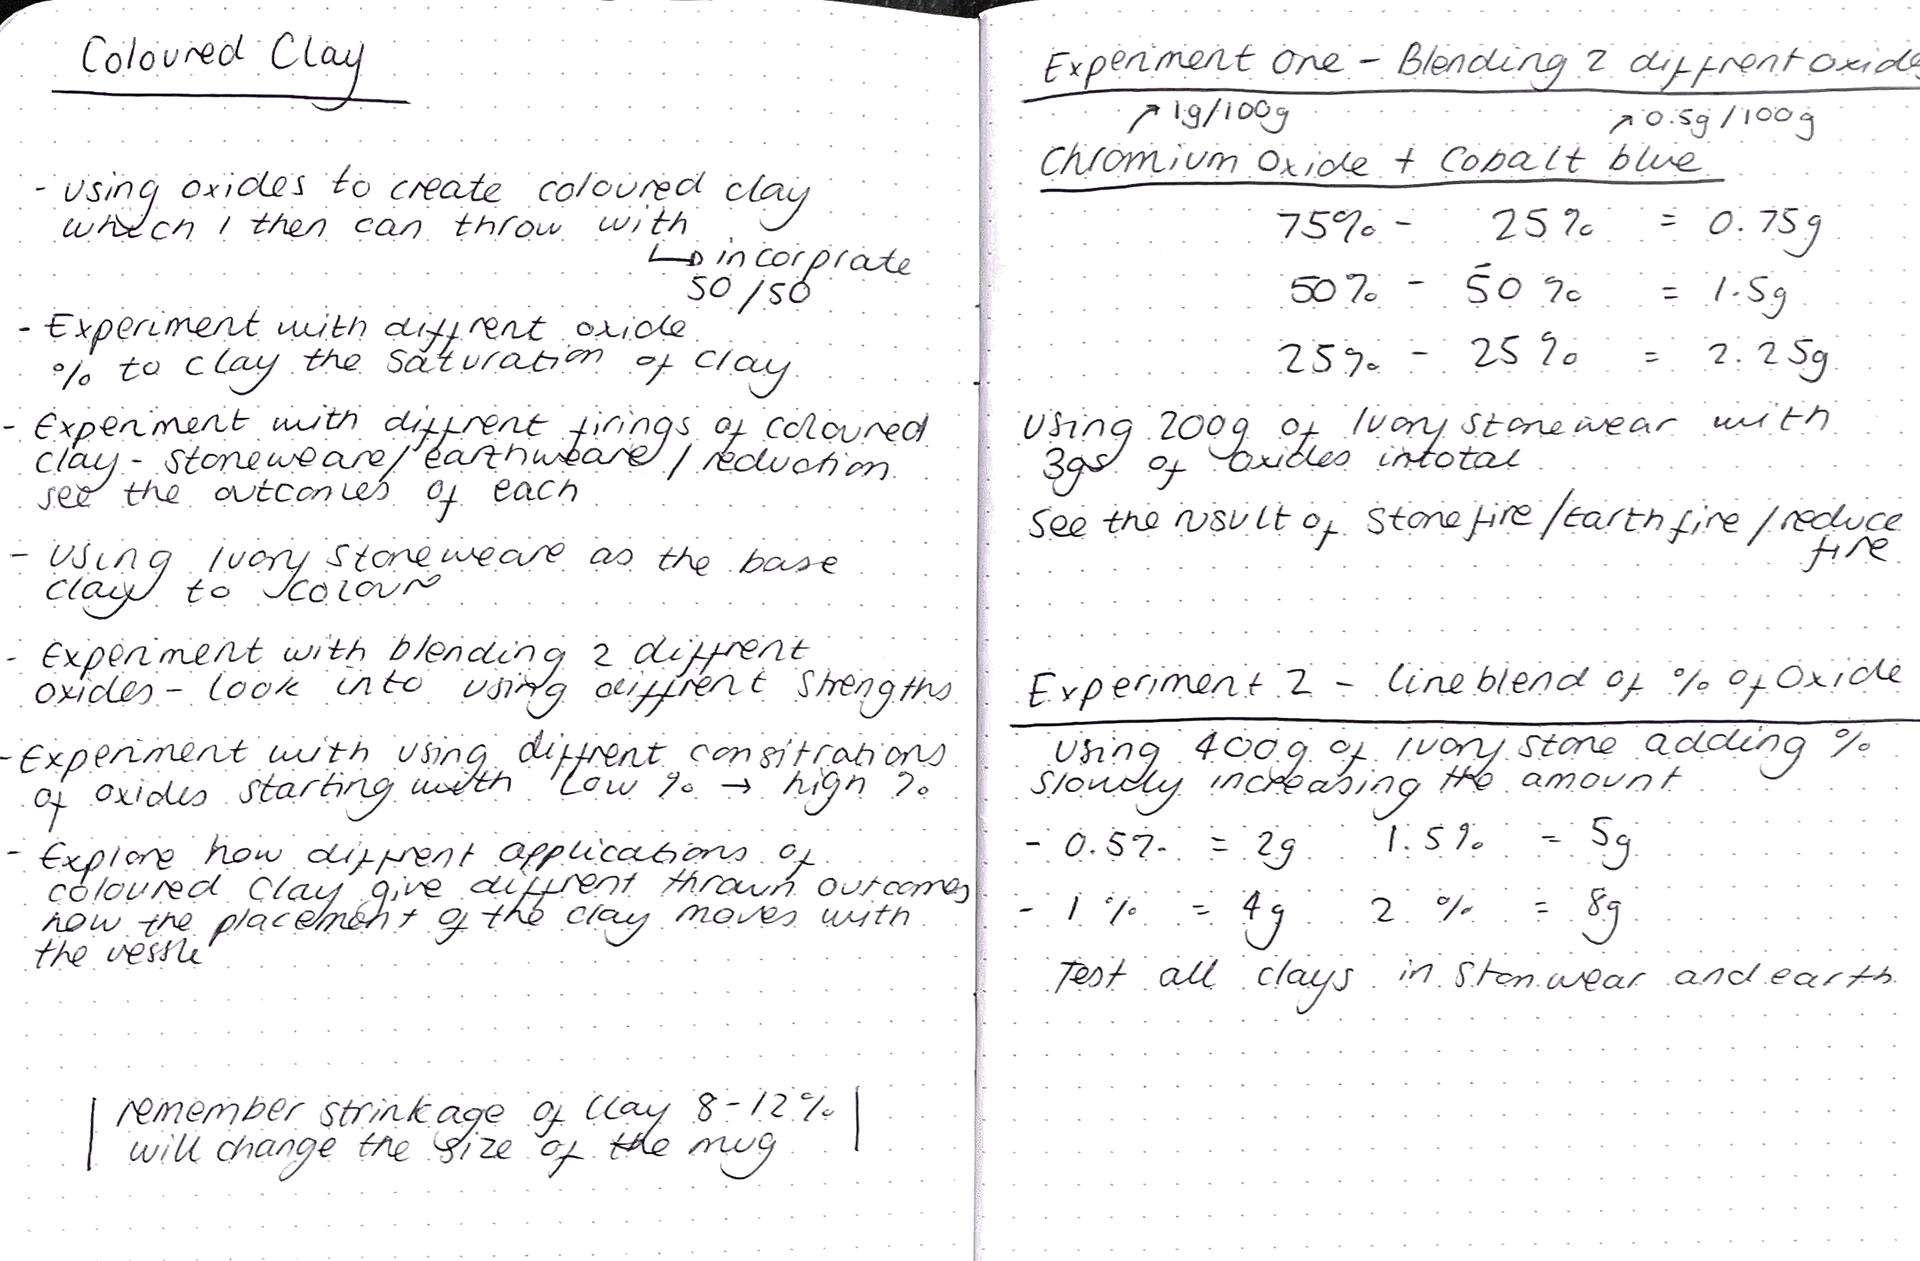
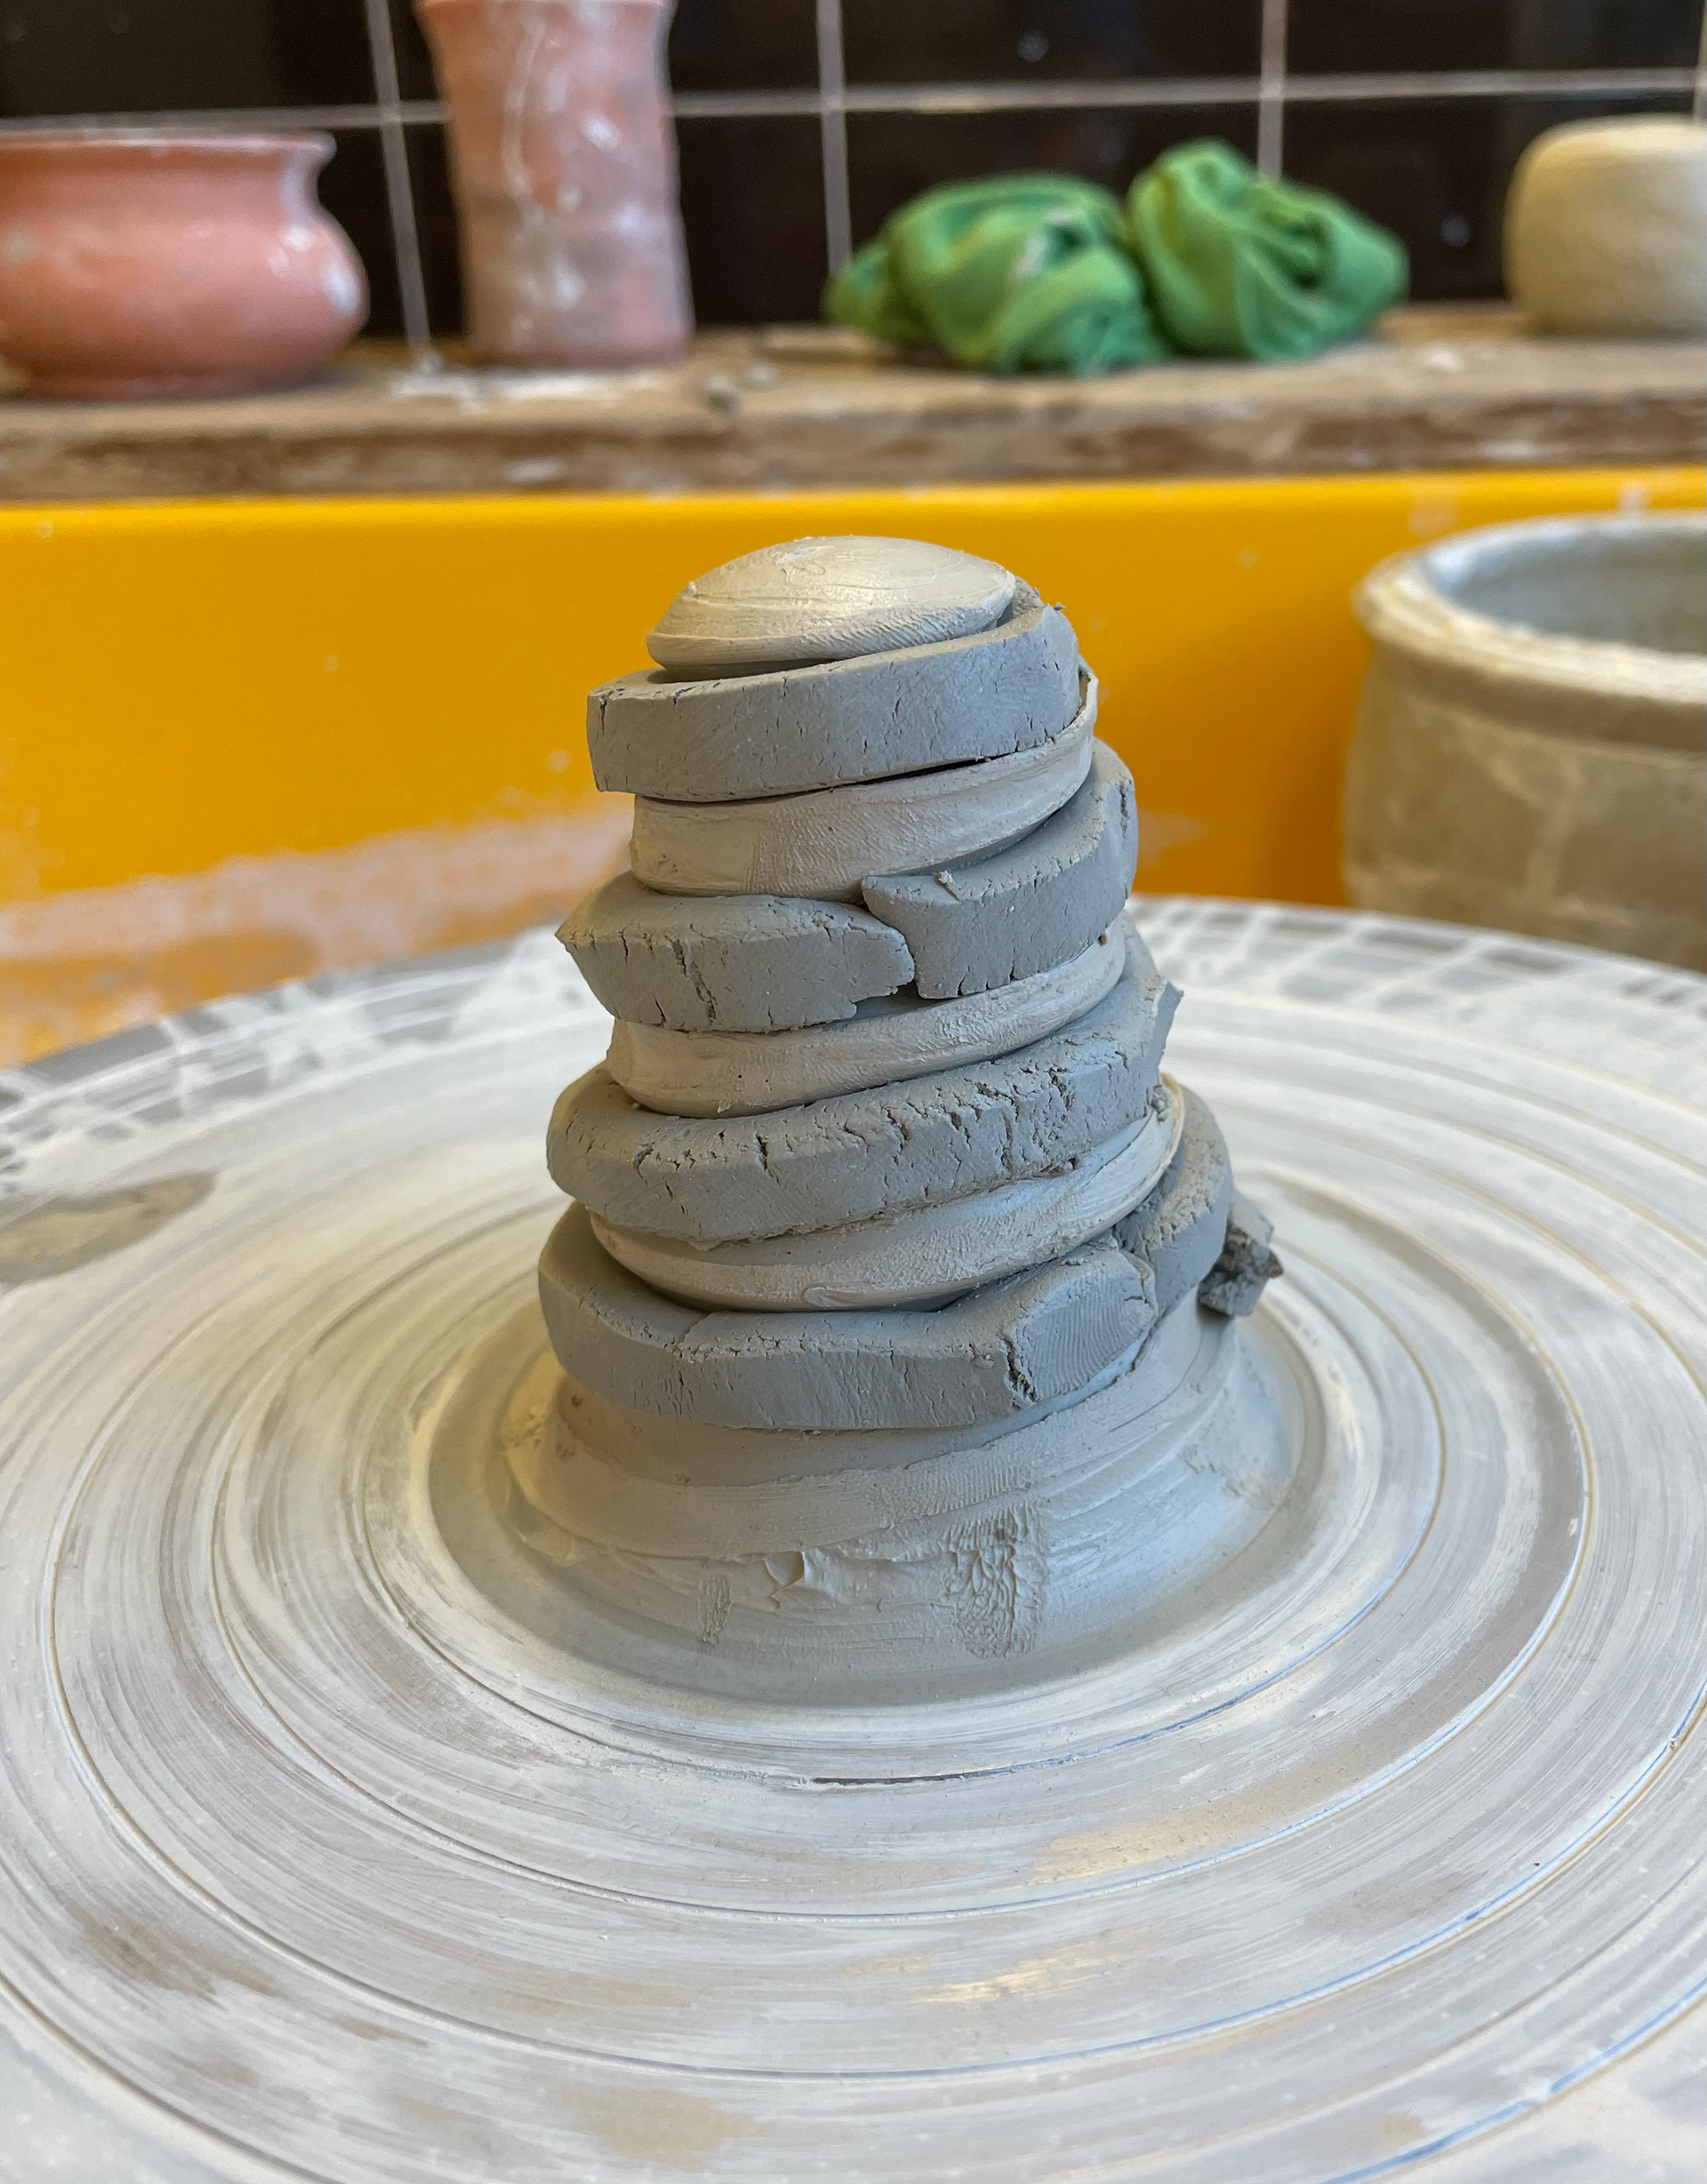
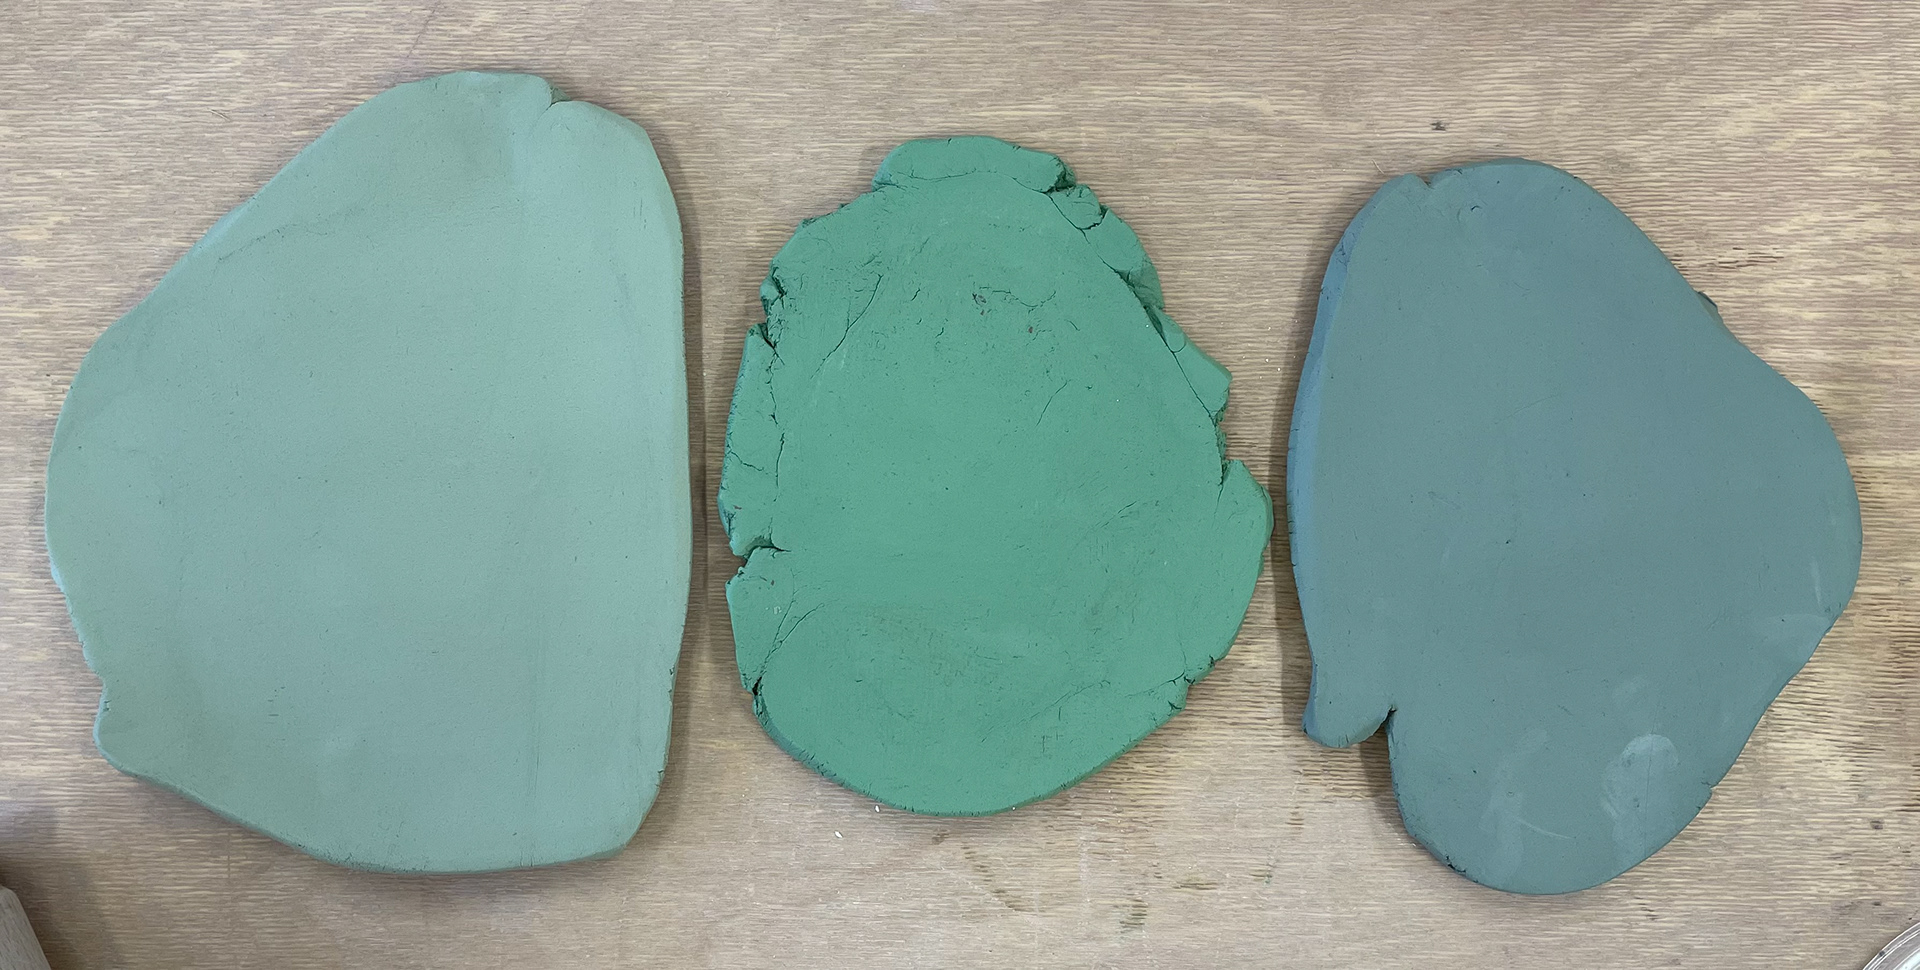
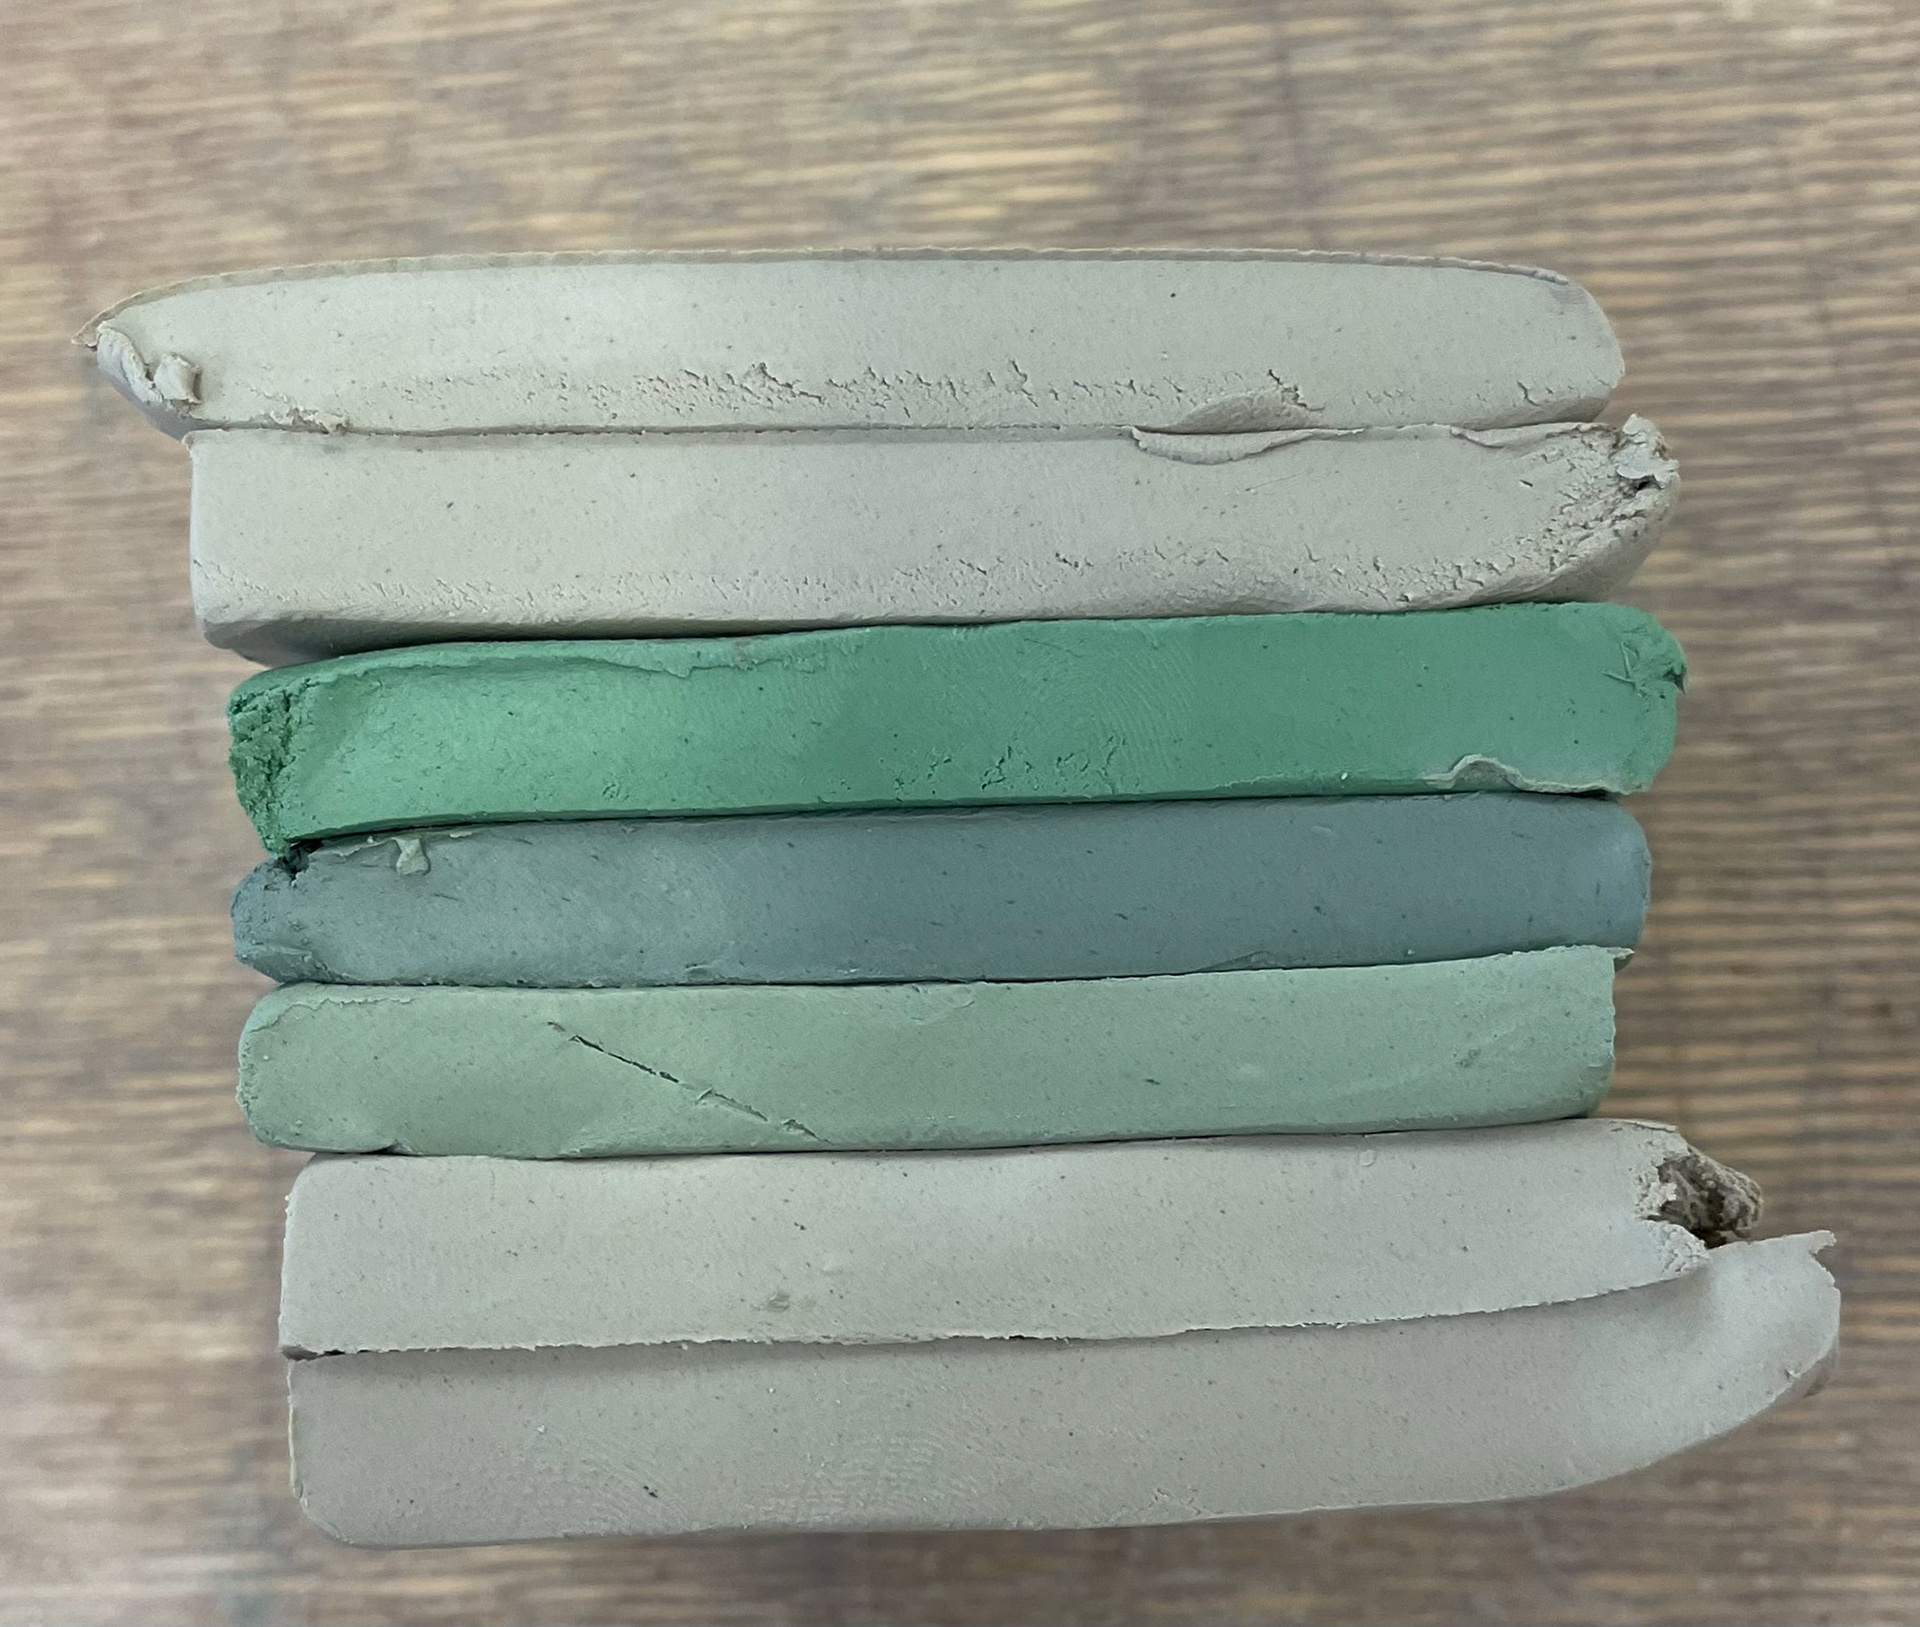
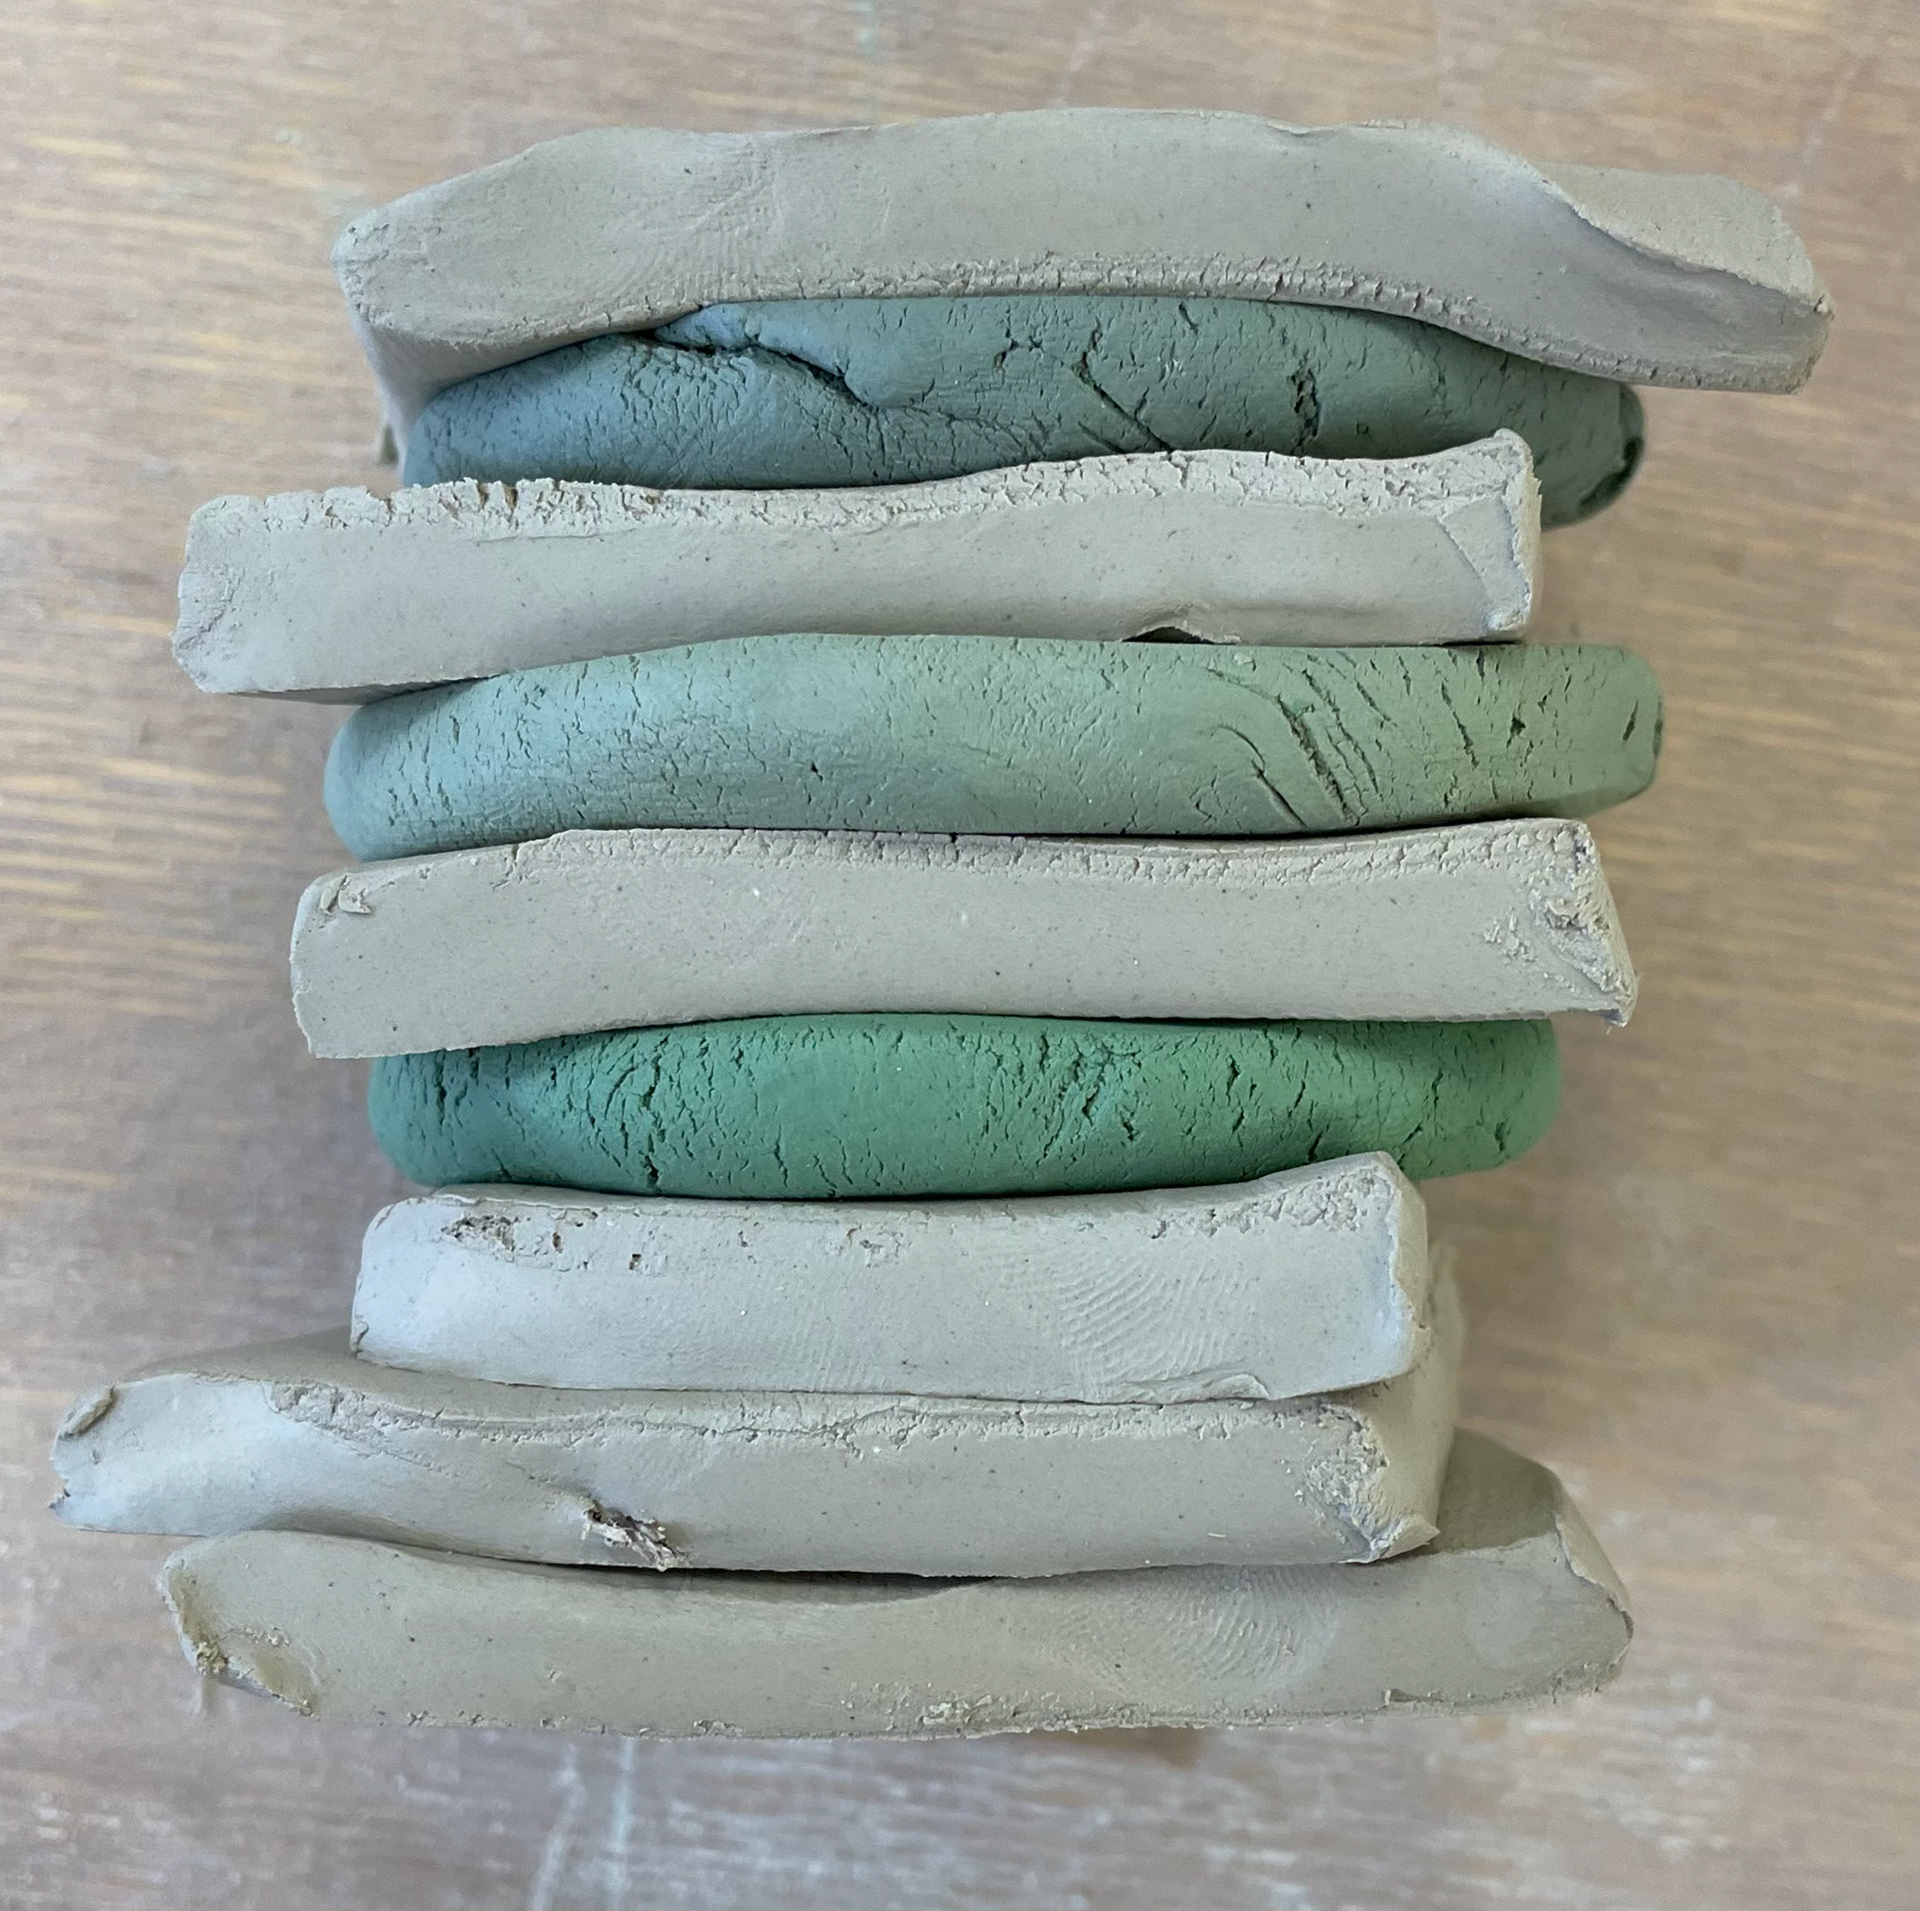
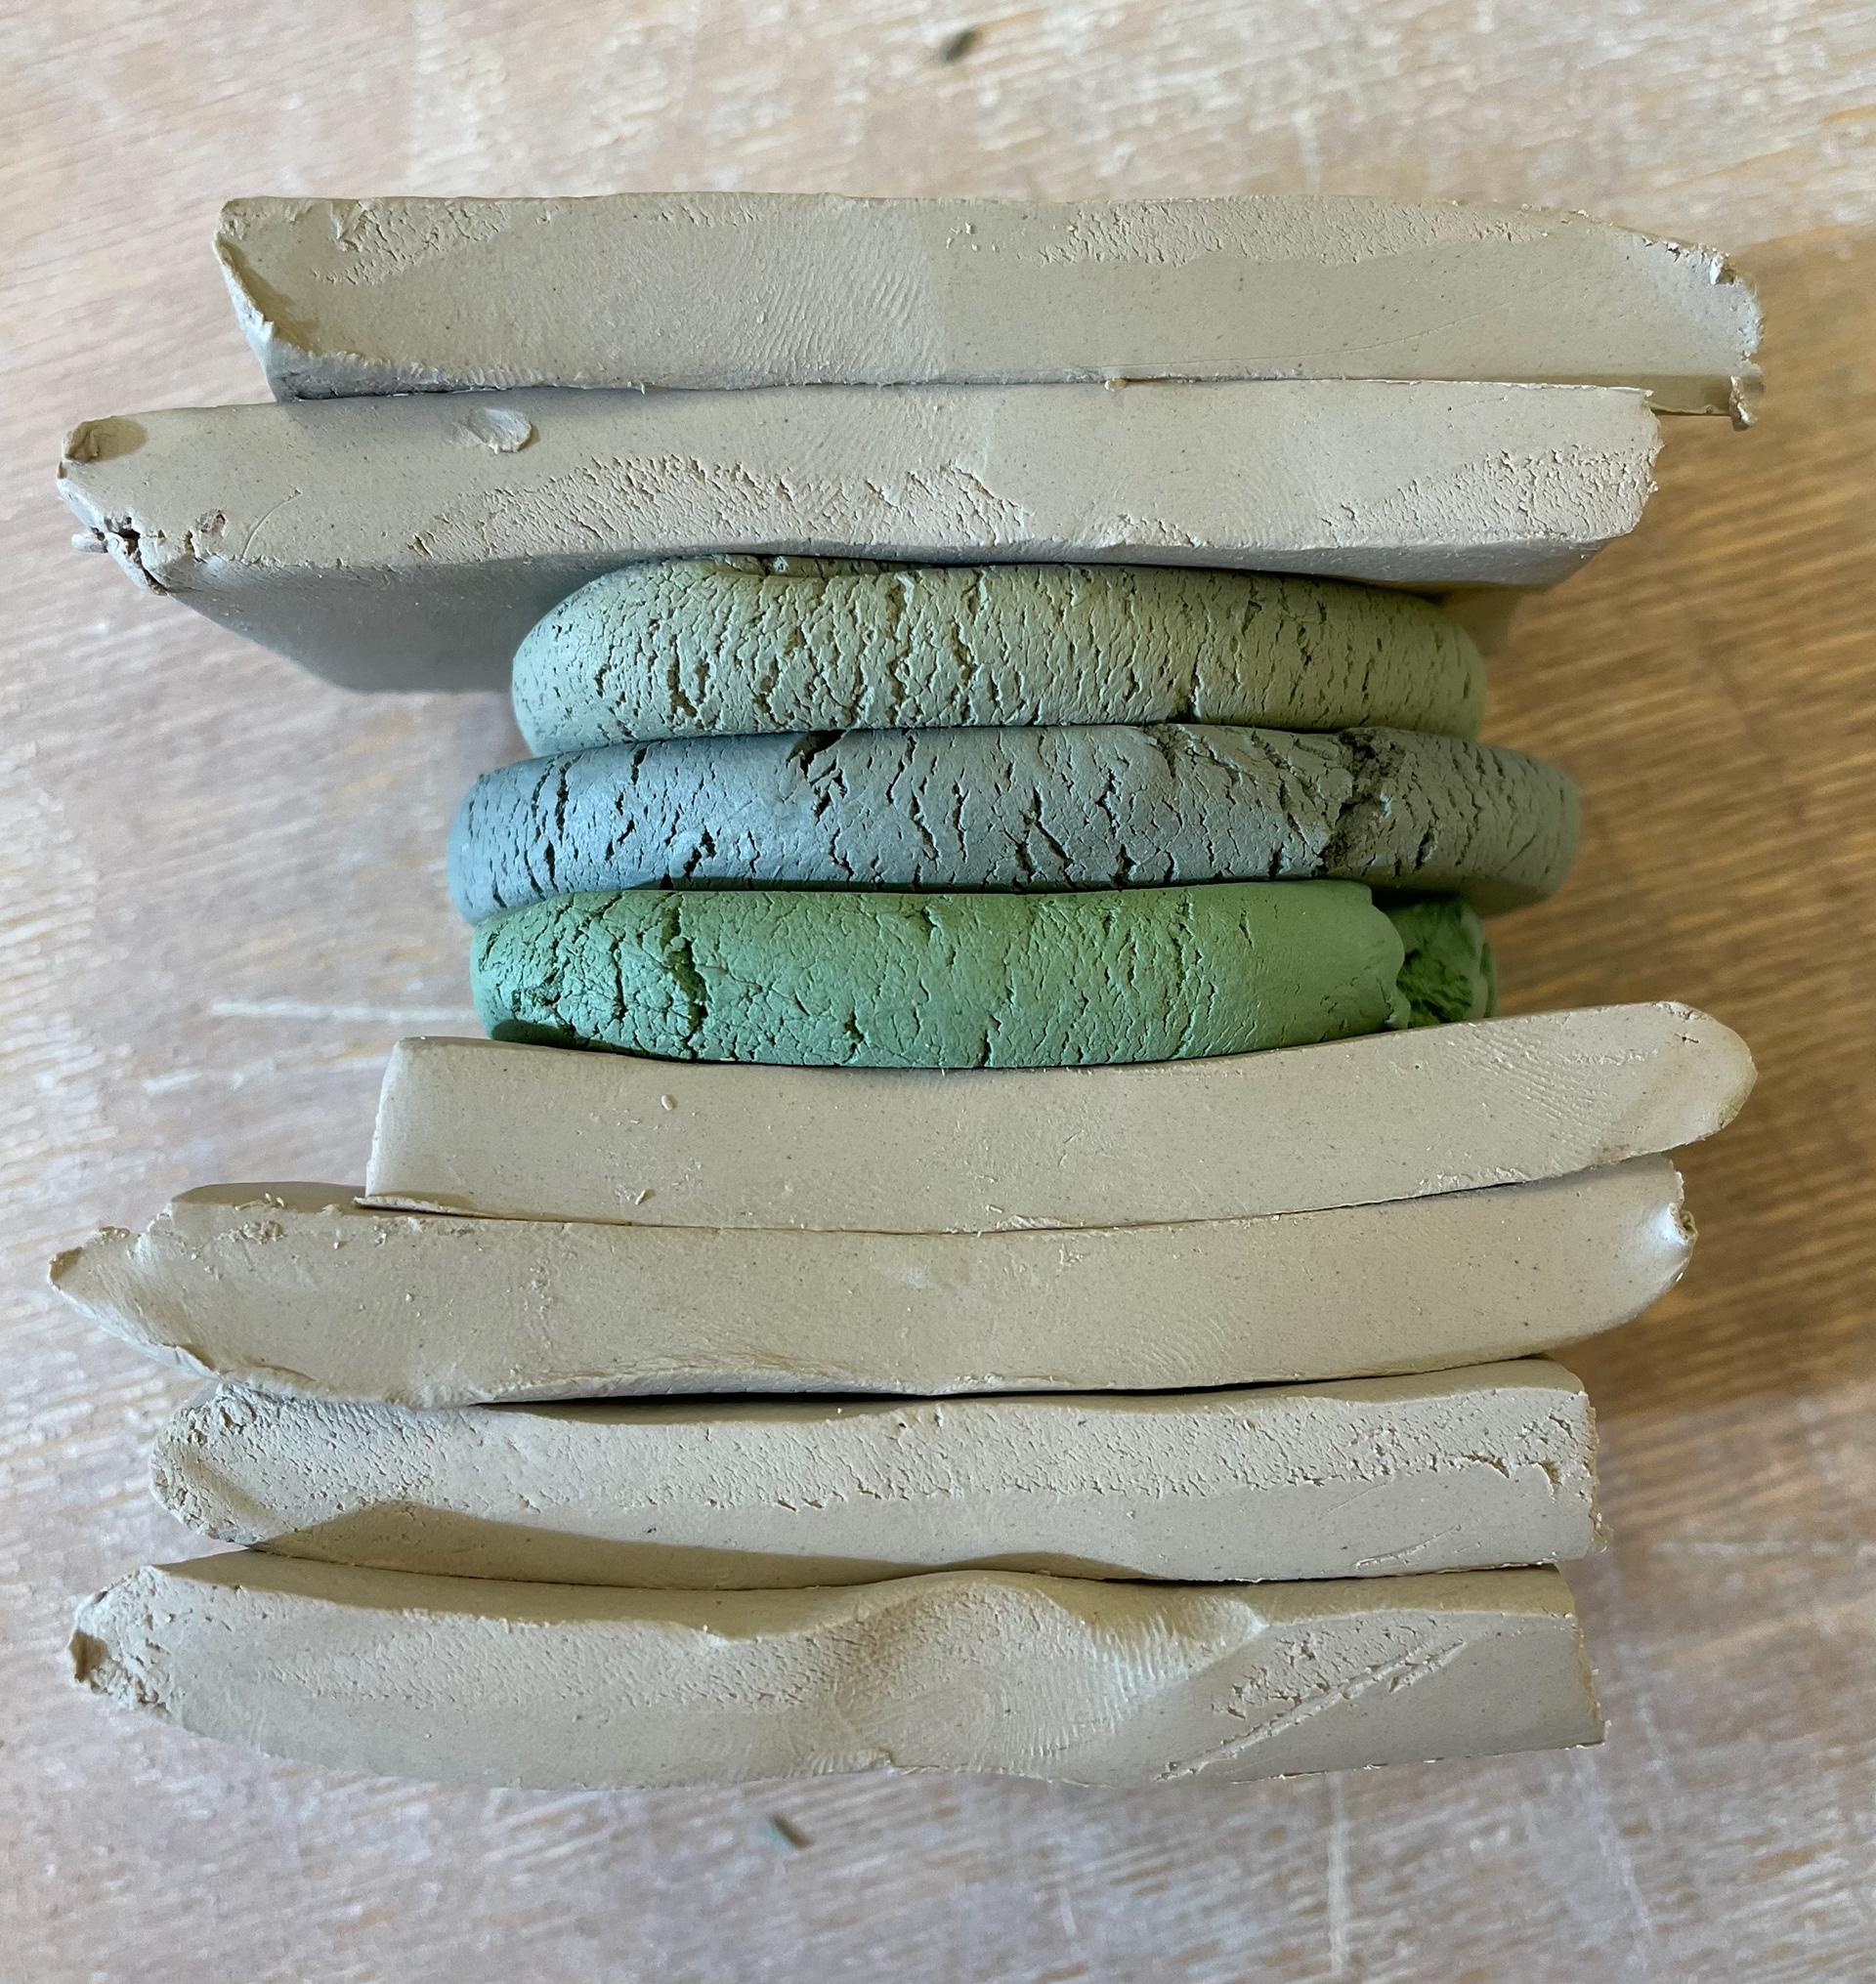
I wanted to conduct coloured clay experiments as I had already established my colour pallet; nature will inform my coloured clays. I decided to try and recreate these colours using cobalt, chromium oxide blue, and green oxidised; I wanted to see what quantities would give me the best outcome. As I had used cobalt before, I knew it was a solid, bold blue; however, that was not the colour I wanted to achieve, so I decided to mix it with chromium to get a better blend of colours. I then created different samples using increasing quantities of chromium to see which green would work best with my colour pallet. Then, firing these in stoneware and earthenware to see which best reacts with the temperature, giving me the best results
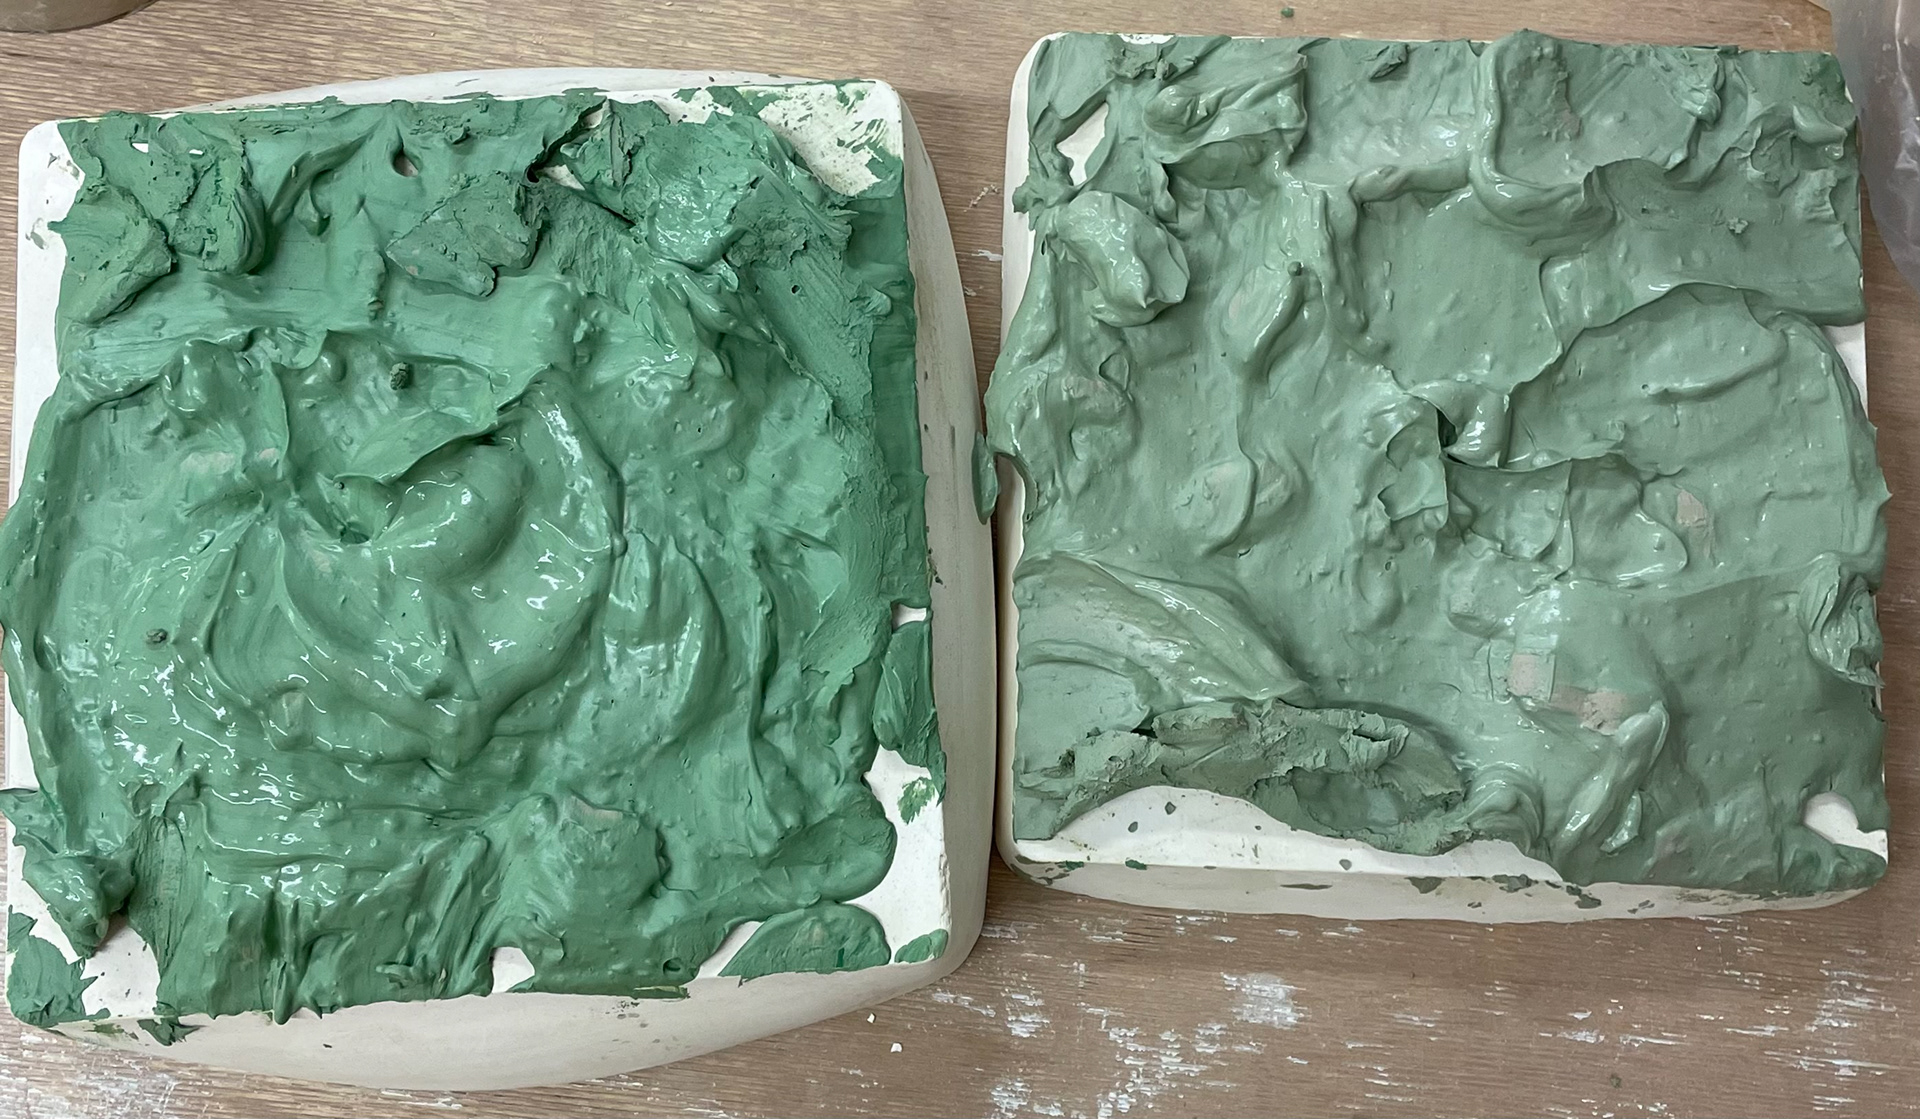
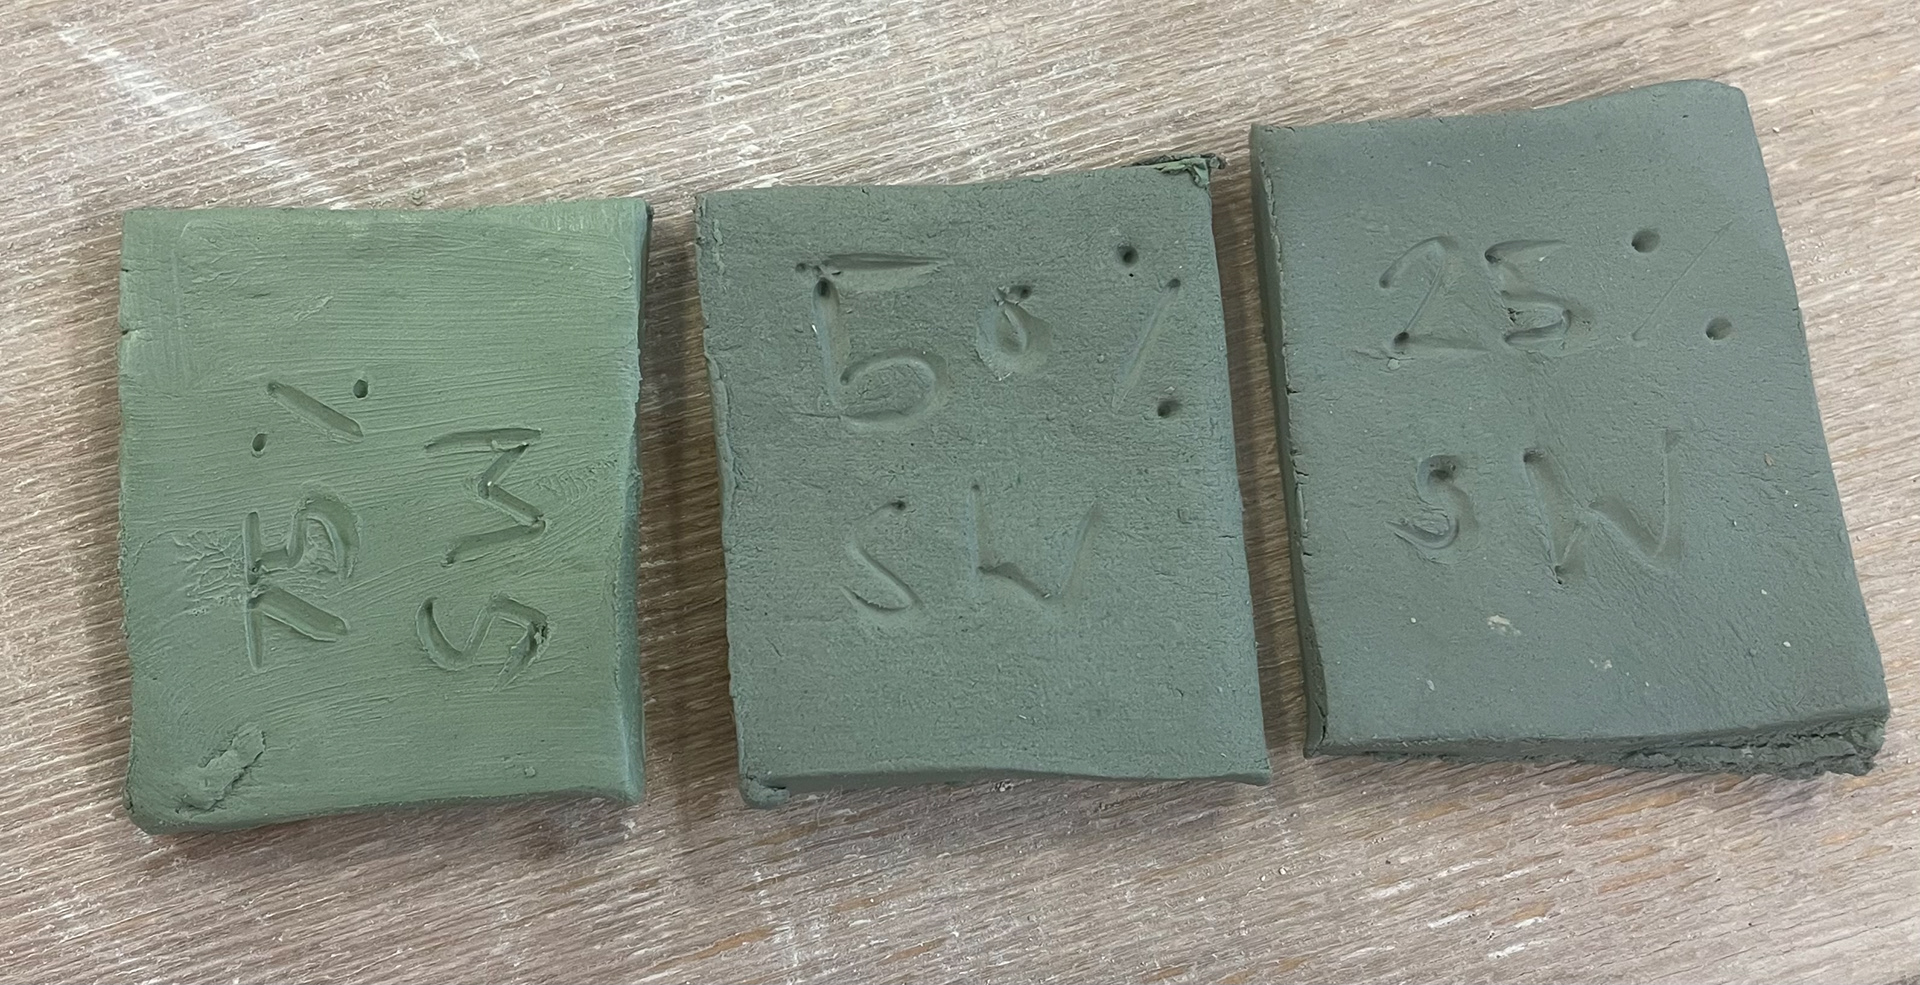

I created the coloured clay by starting with 400g of dried clay, which I rehydrated. Once rehydrated, I could mix in my oxides to the corresponding amounts. Once combined, I could place them on a plasterboard, which absorbed the moisture, making them into coloured clay.
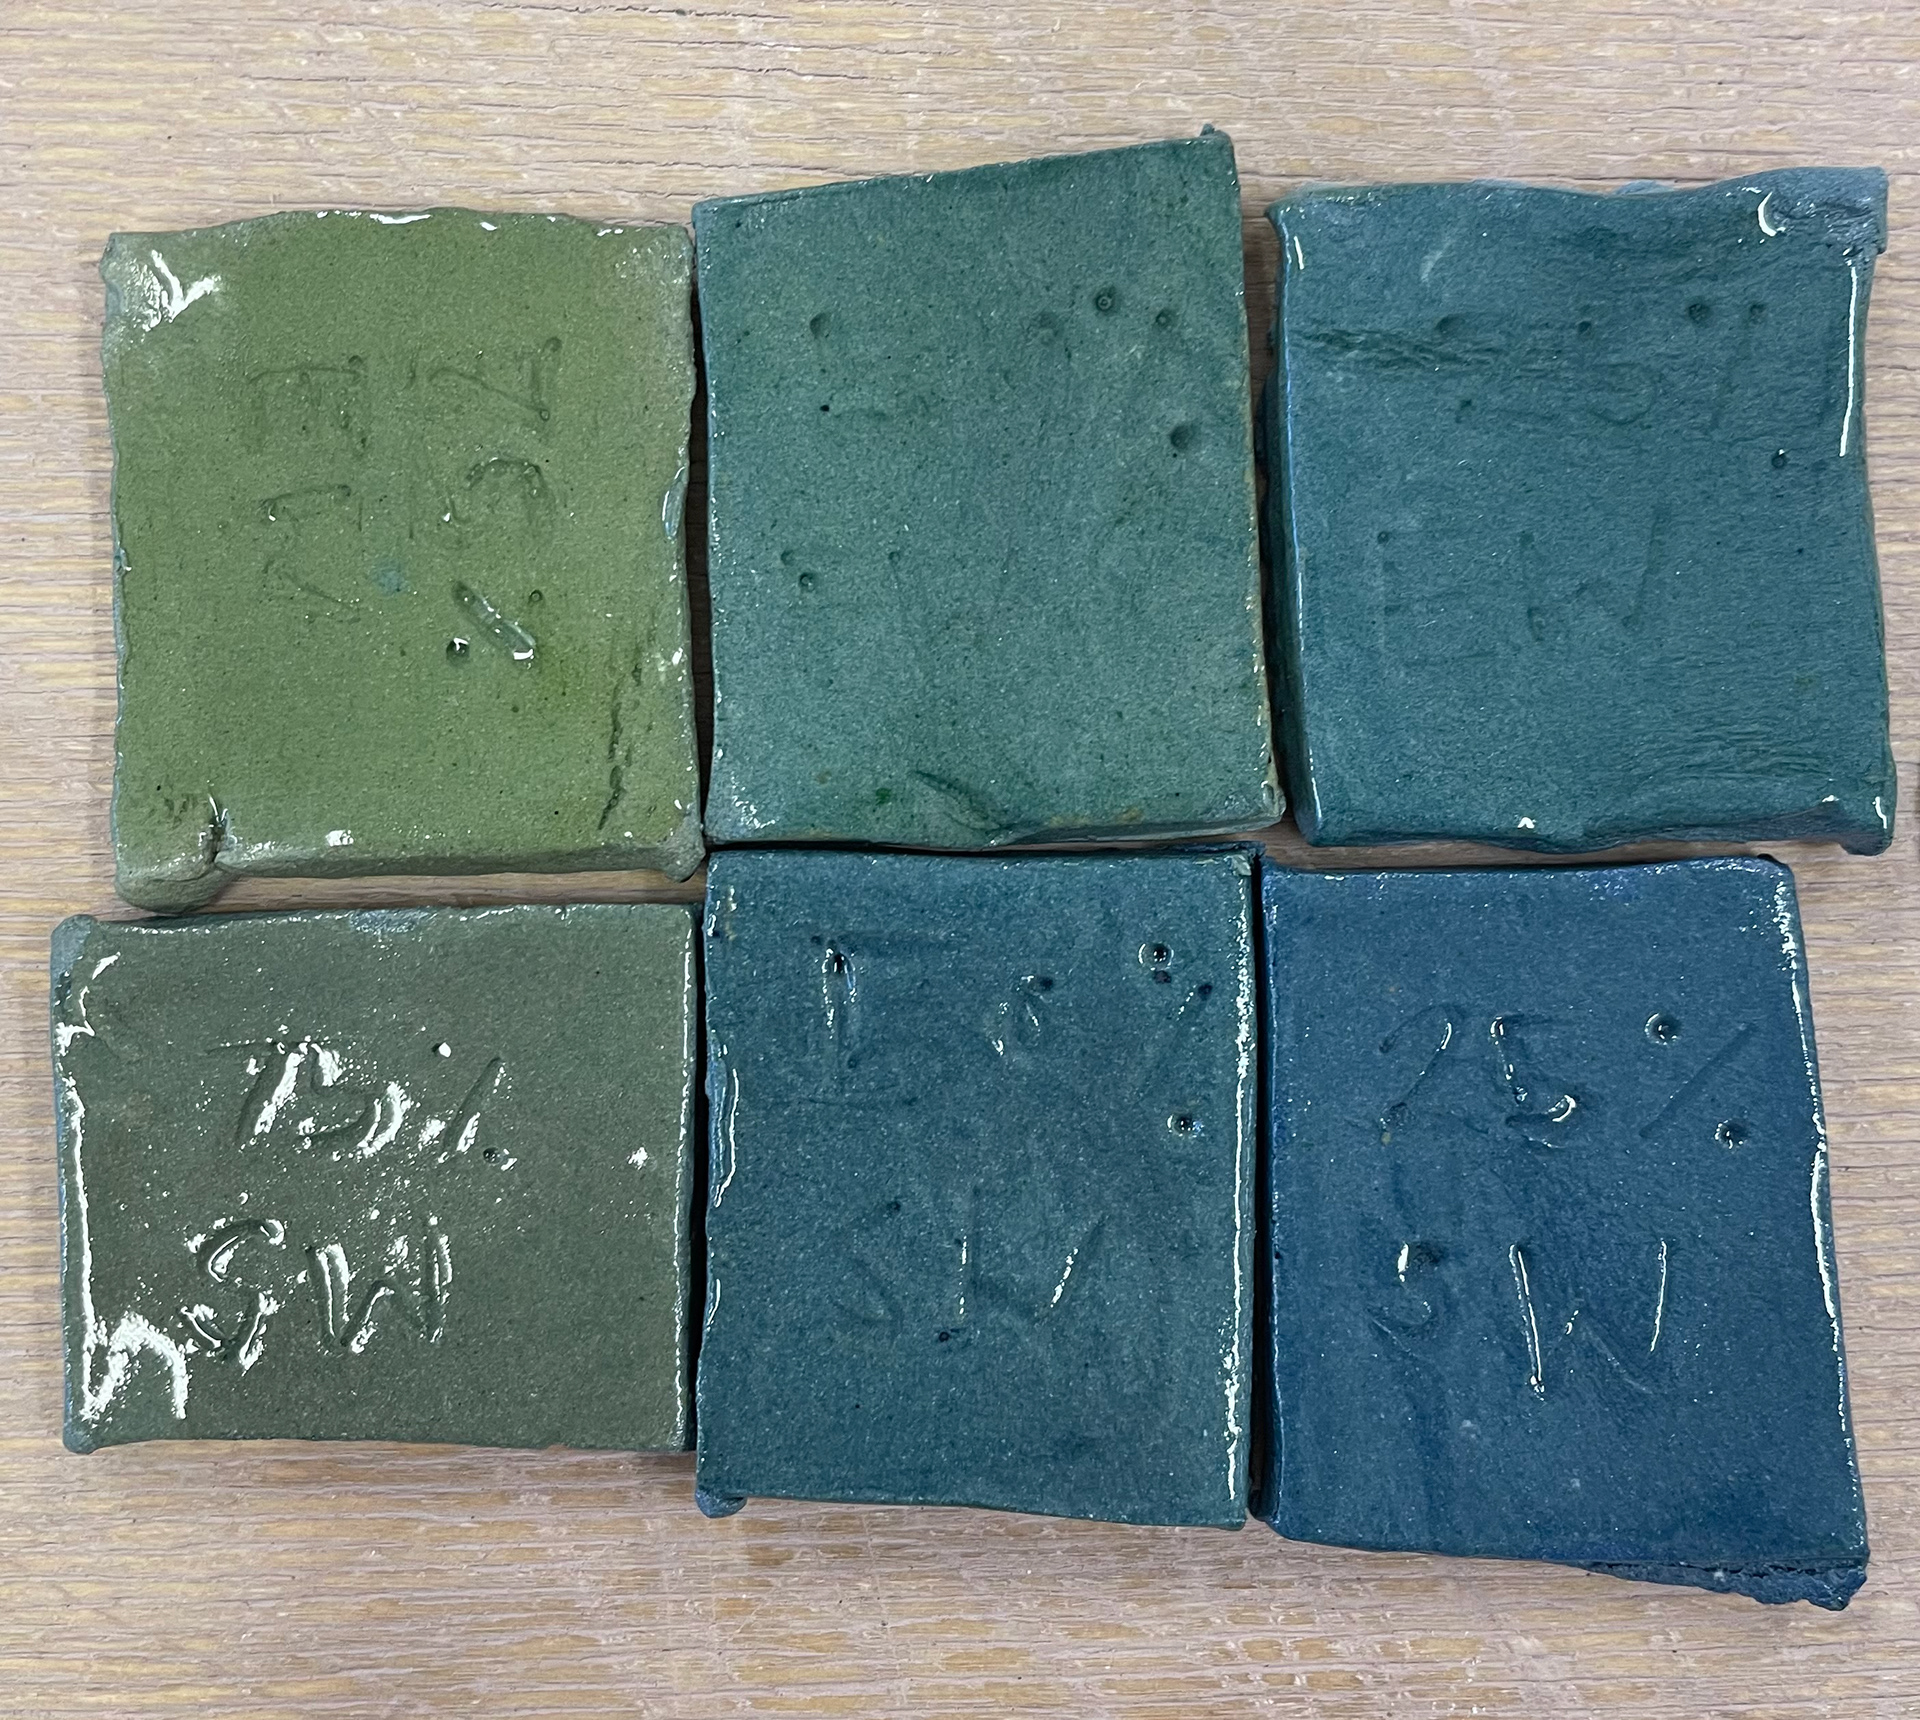
These are my outcomes: once all glazed, the stoneware of the chromium oxide became very dull and wasn't the result that I wanted to achieve, as I was throwing the clay different clays in one vessel, they all needed to be fired; therefore, with my mixed chromium oxide although I like the stoneware results I don't like the colours of the chromium as its not as bright and playful therefor i'll use earthenware for all my firings of coloured clay.
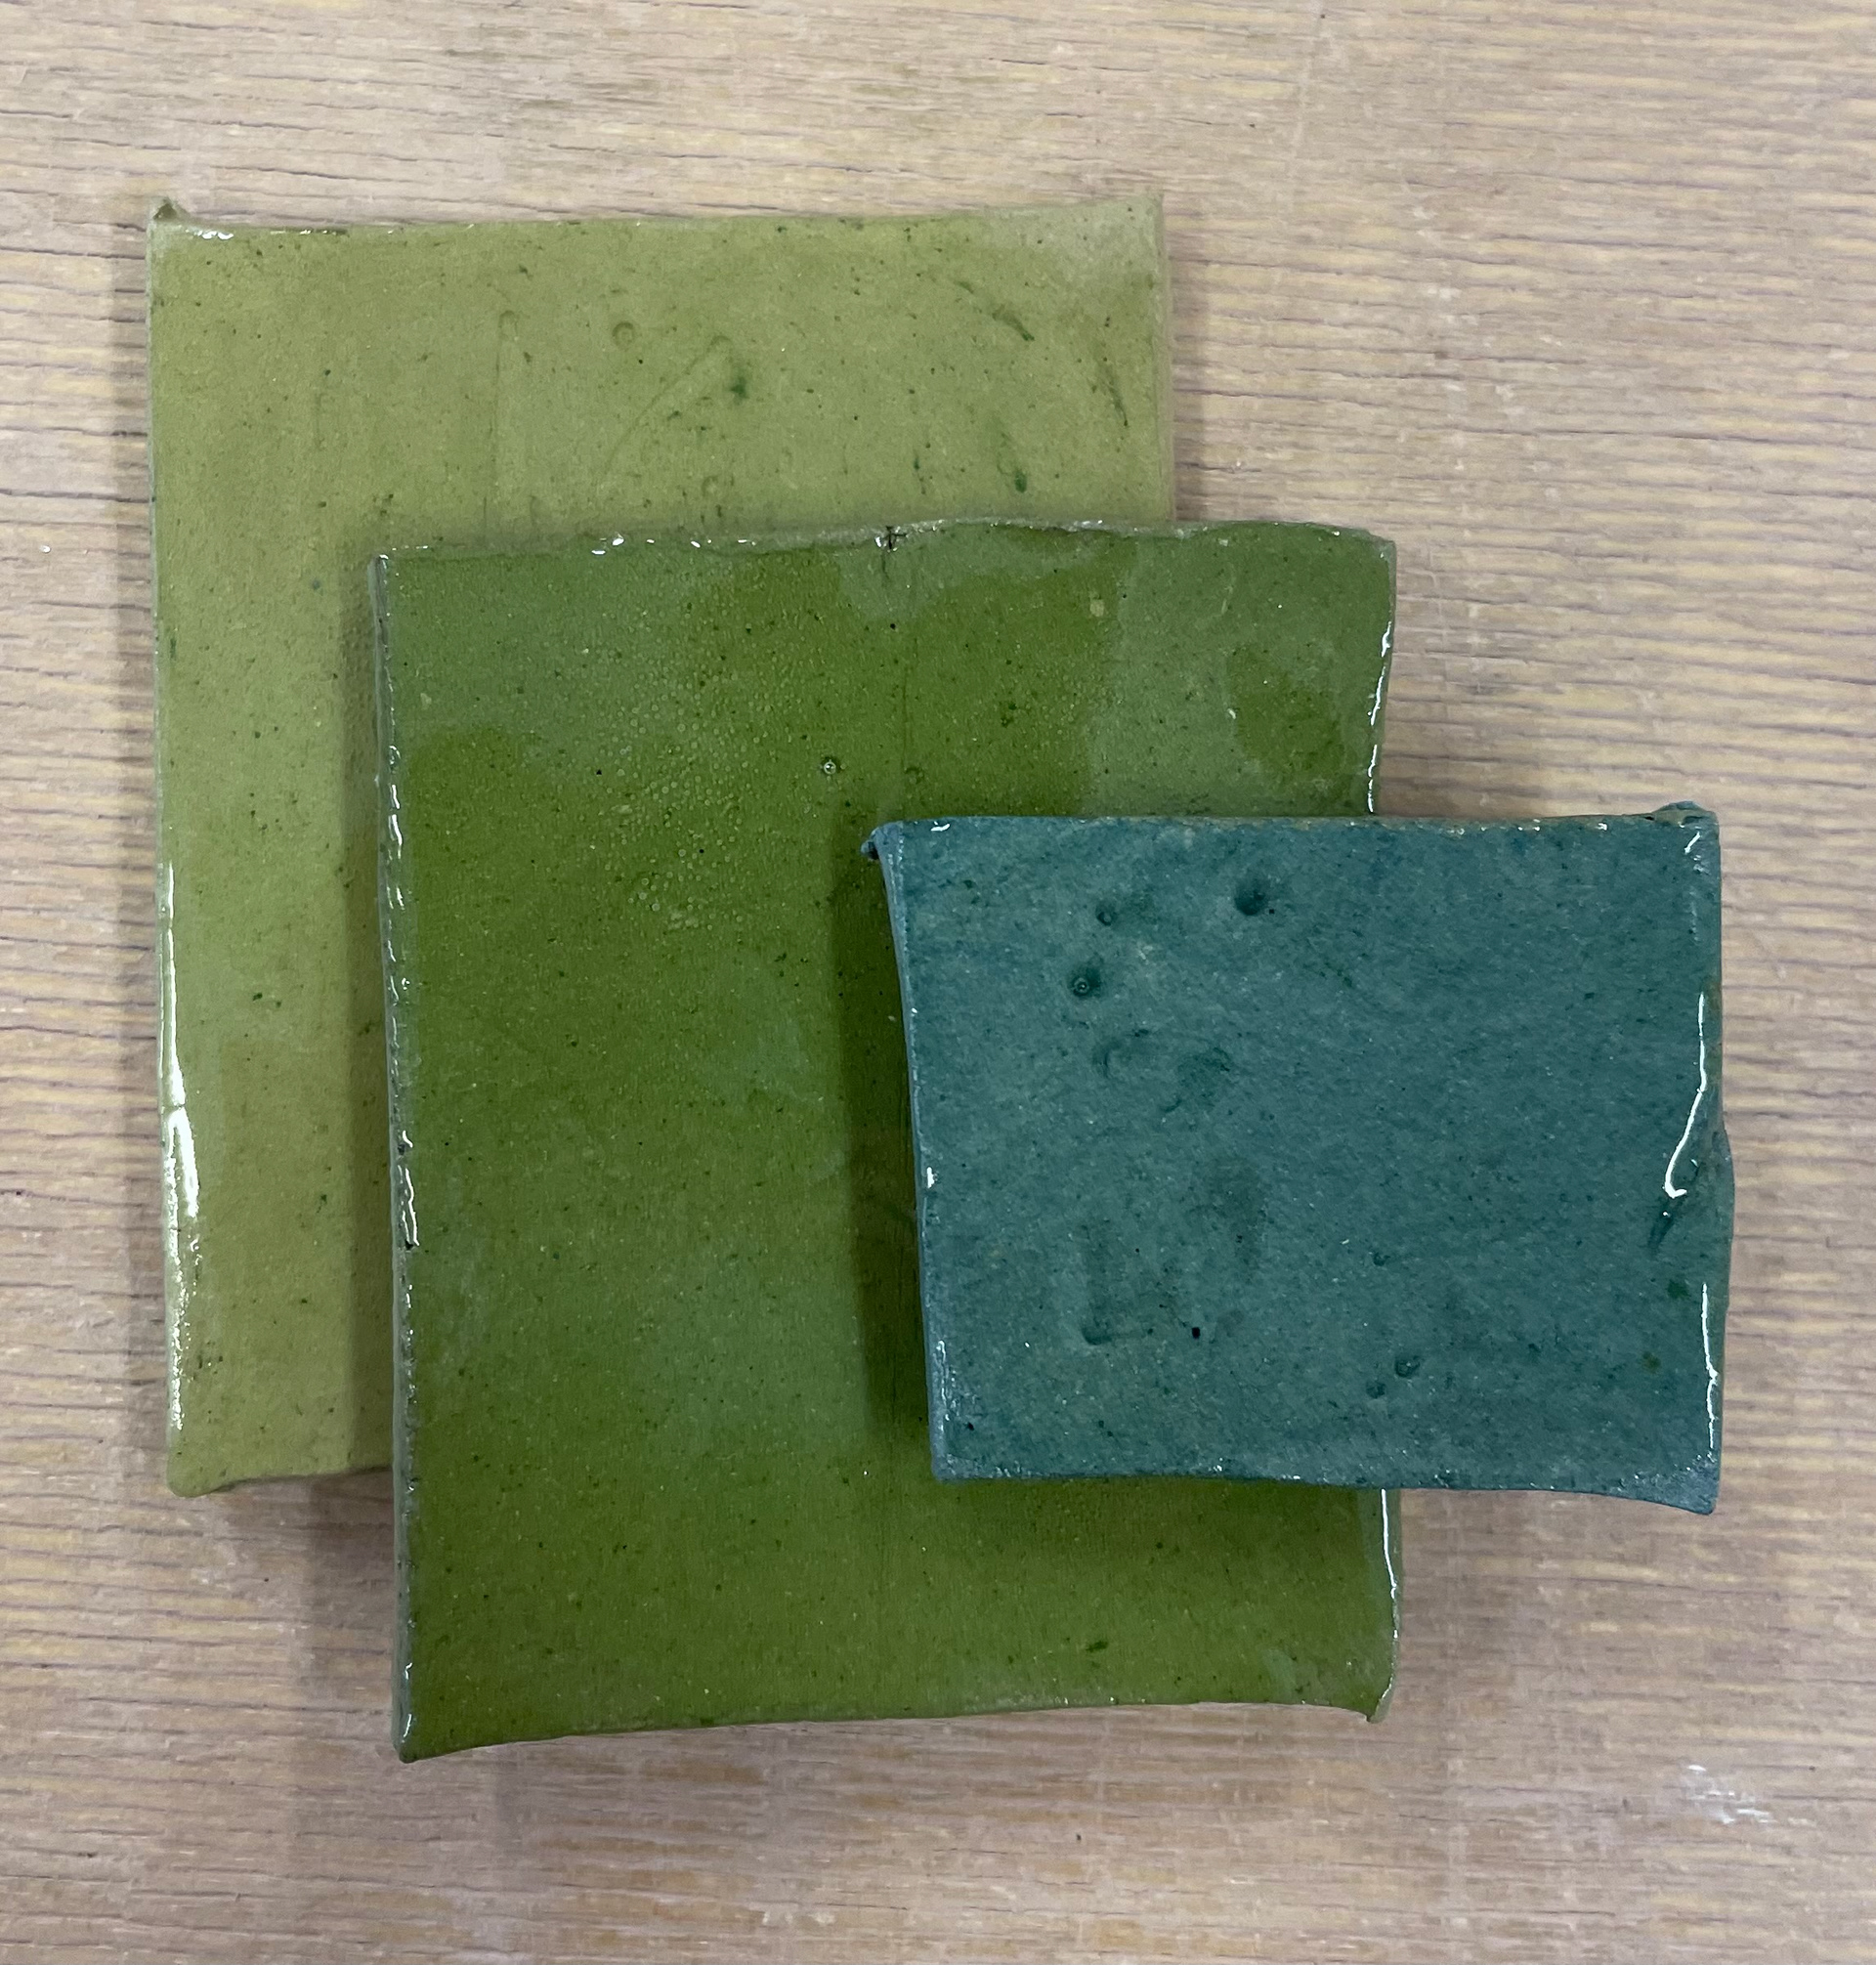
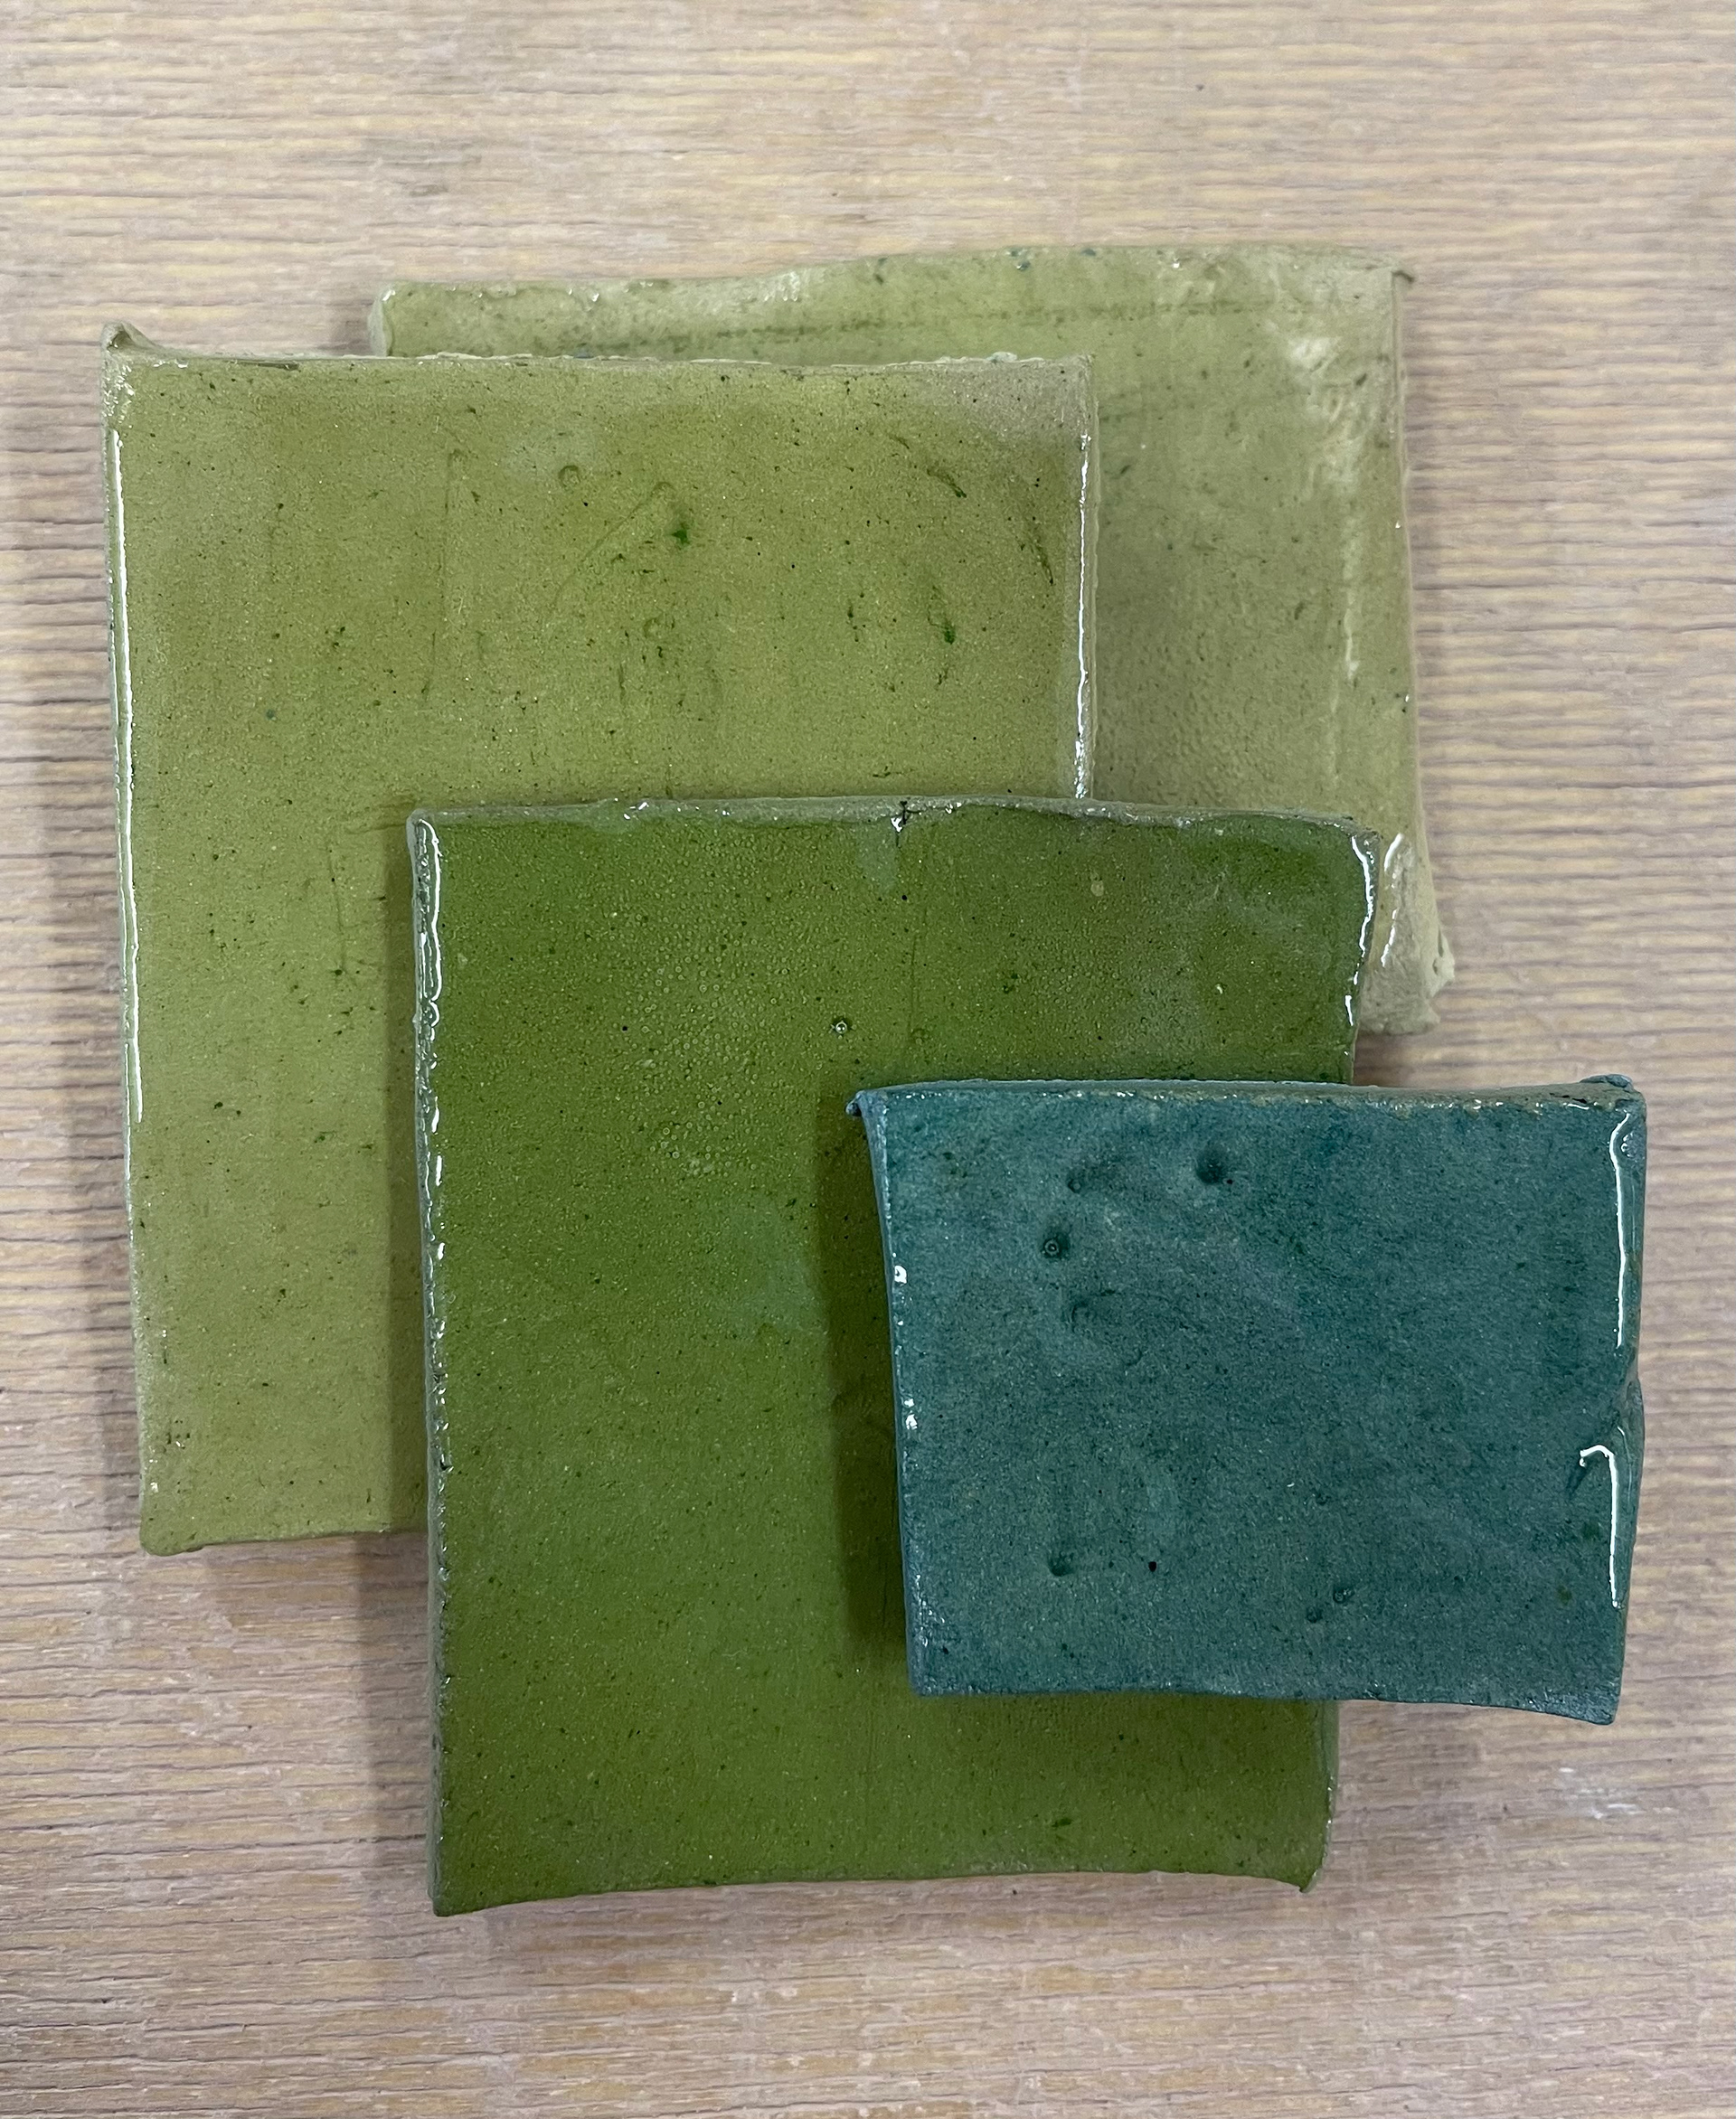
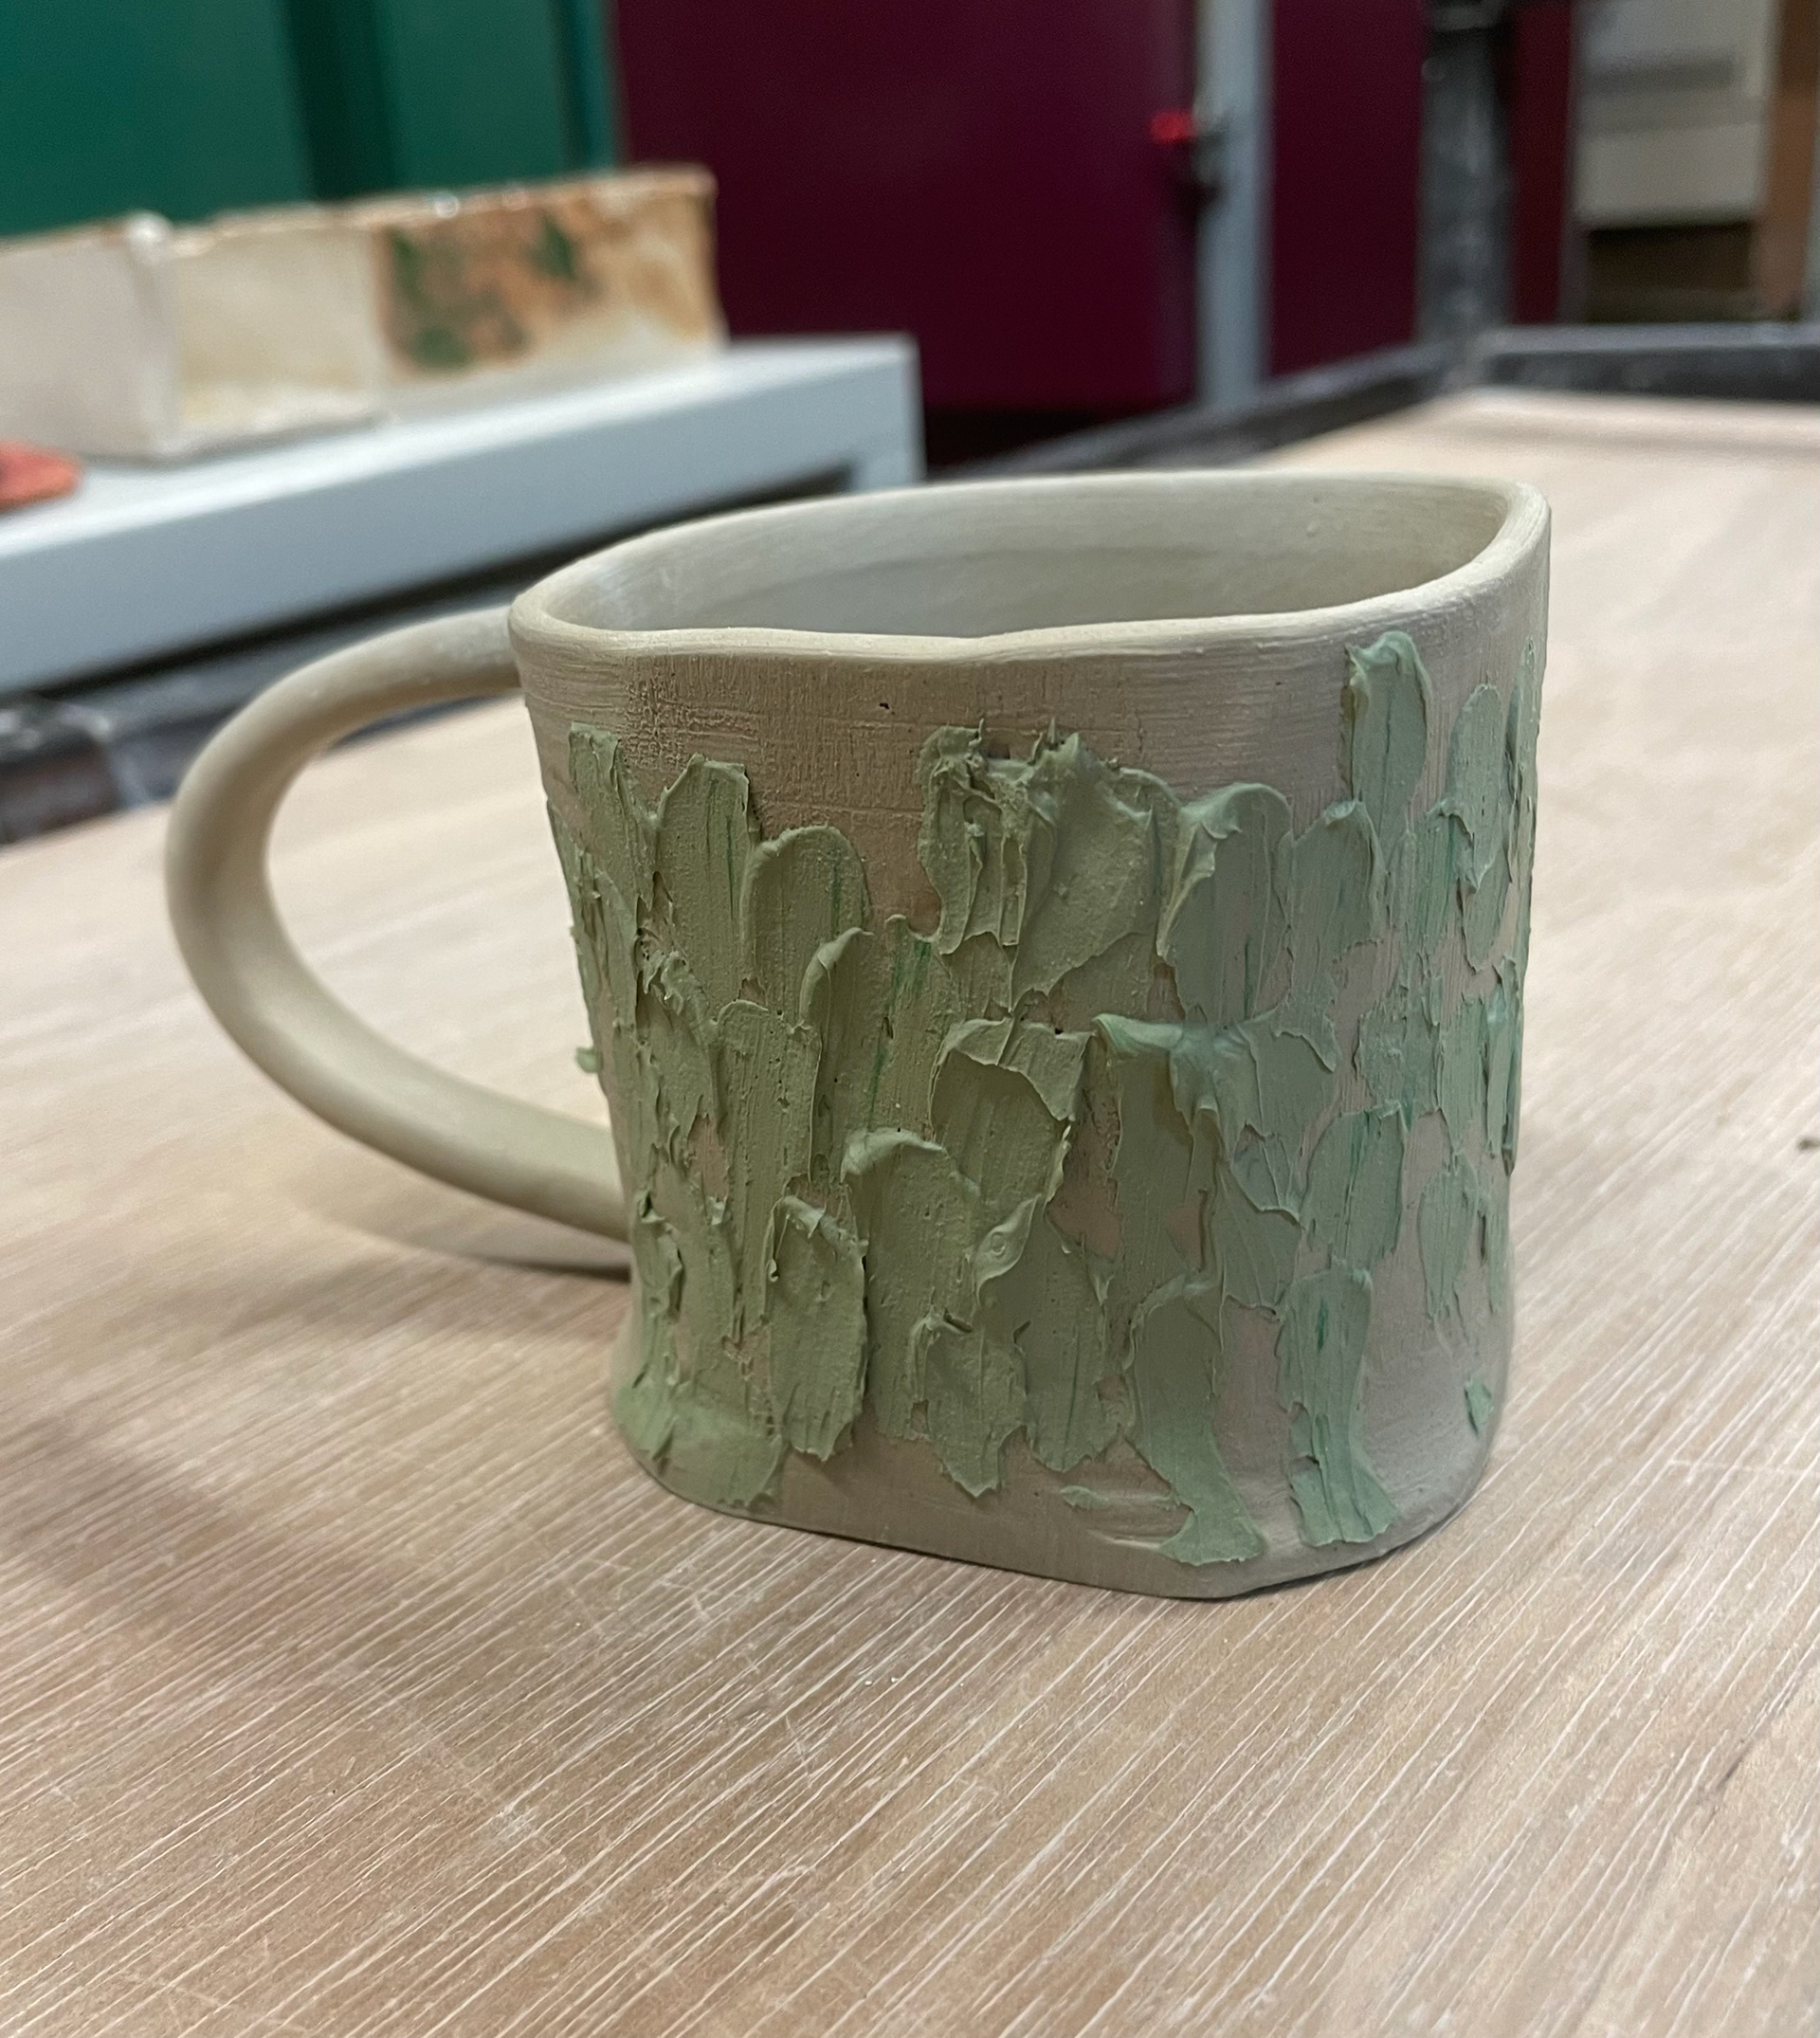
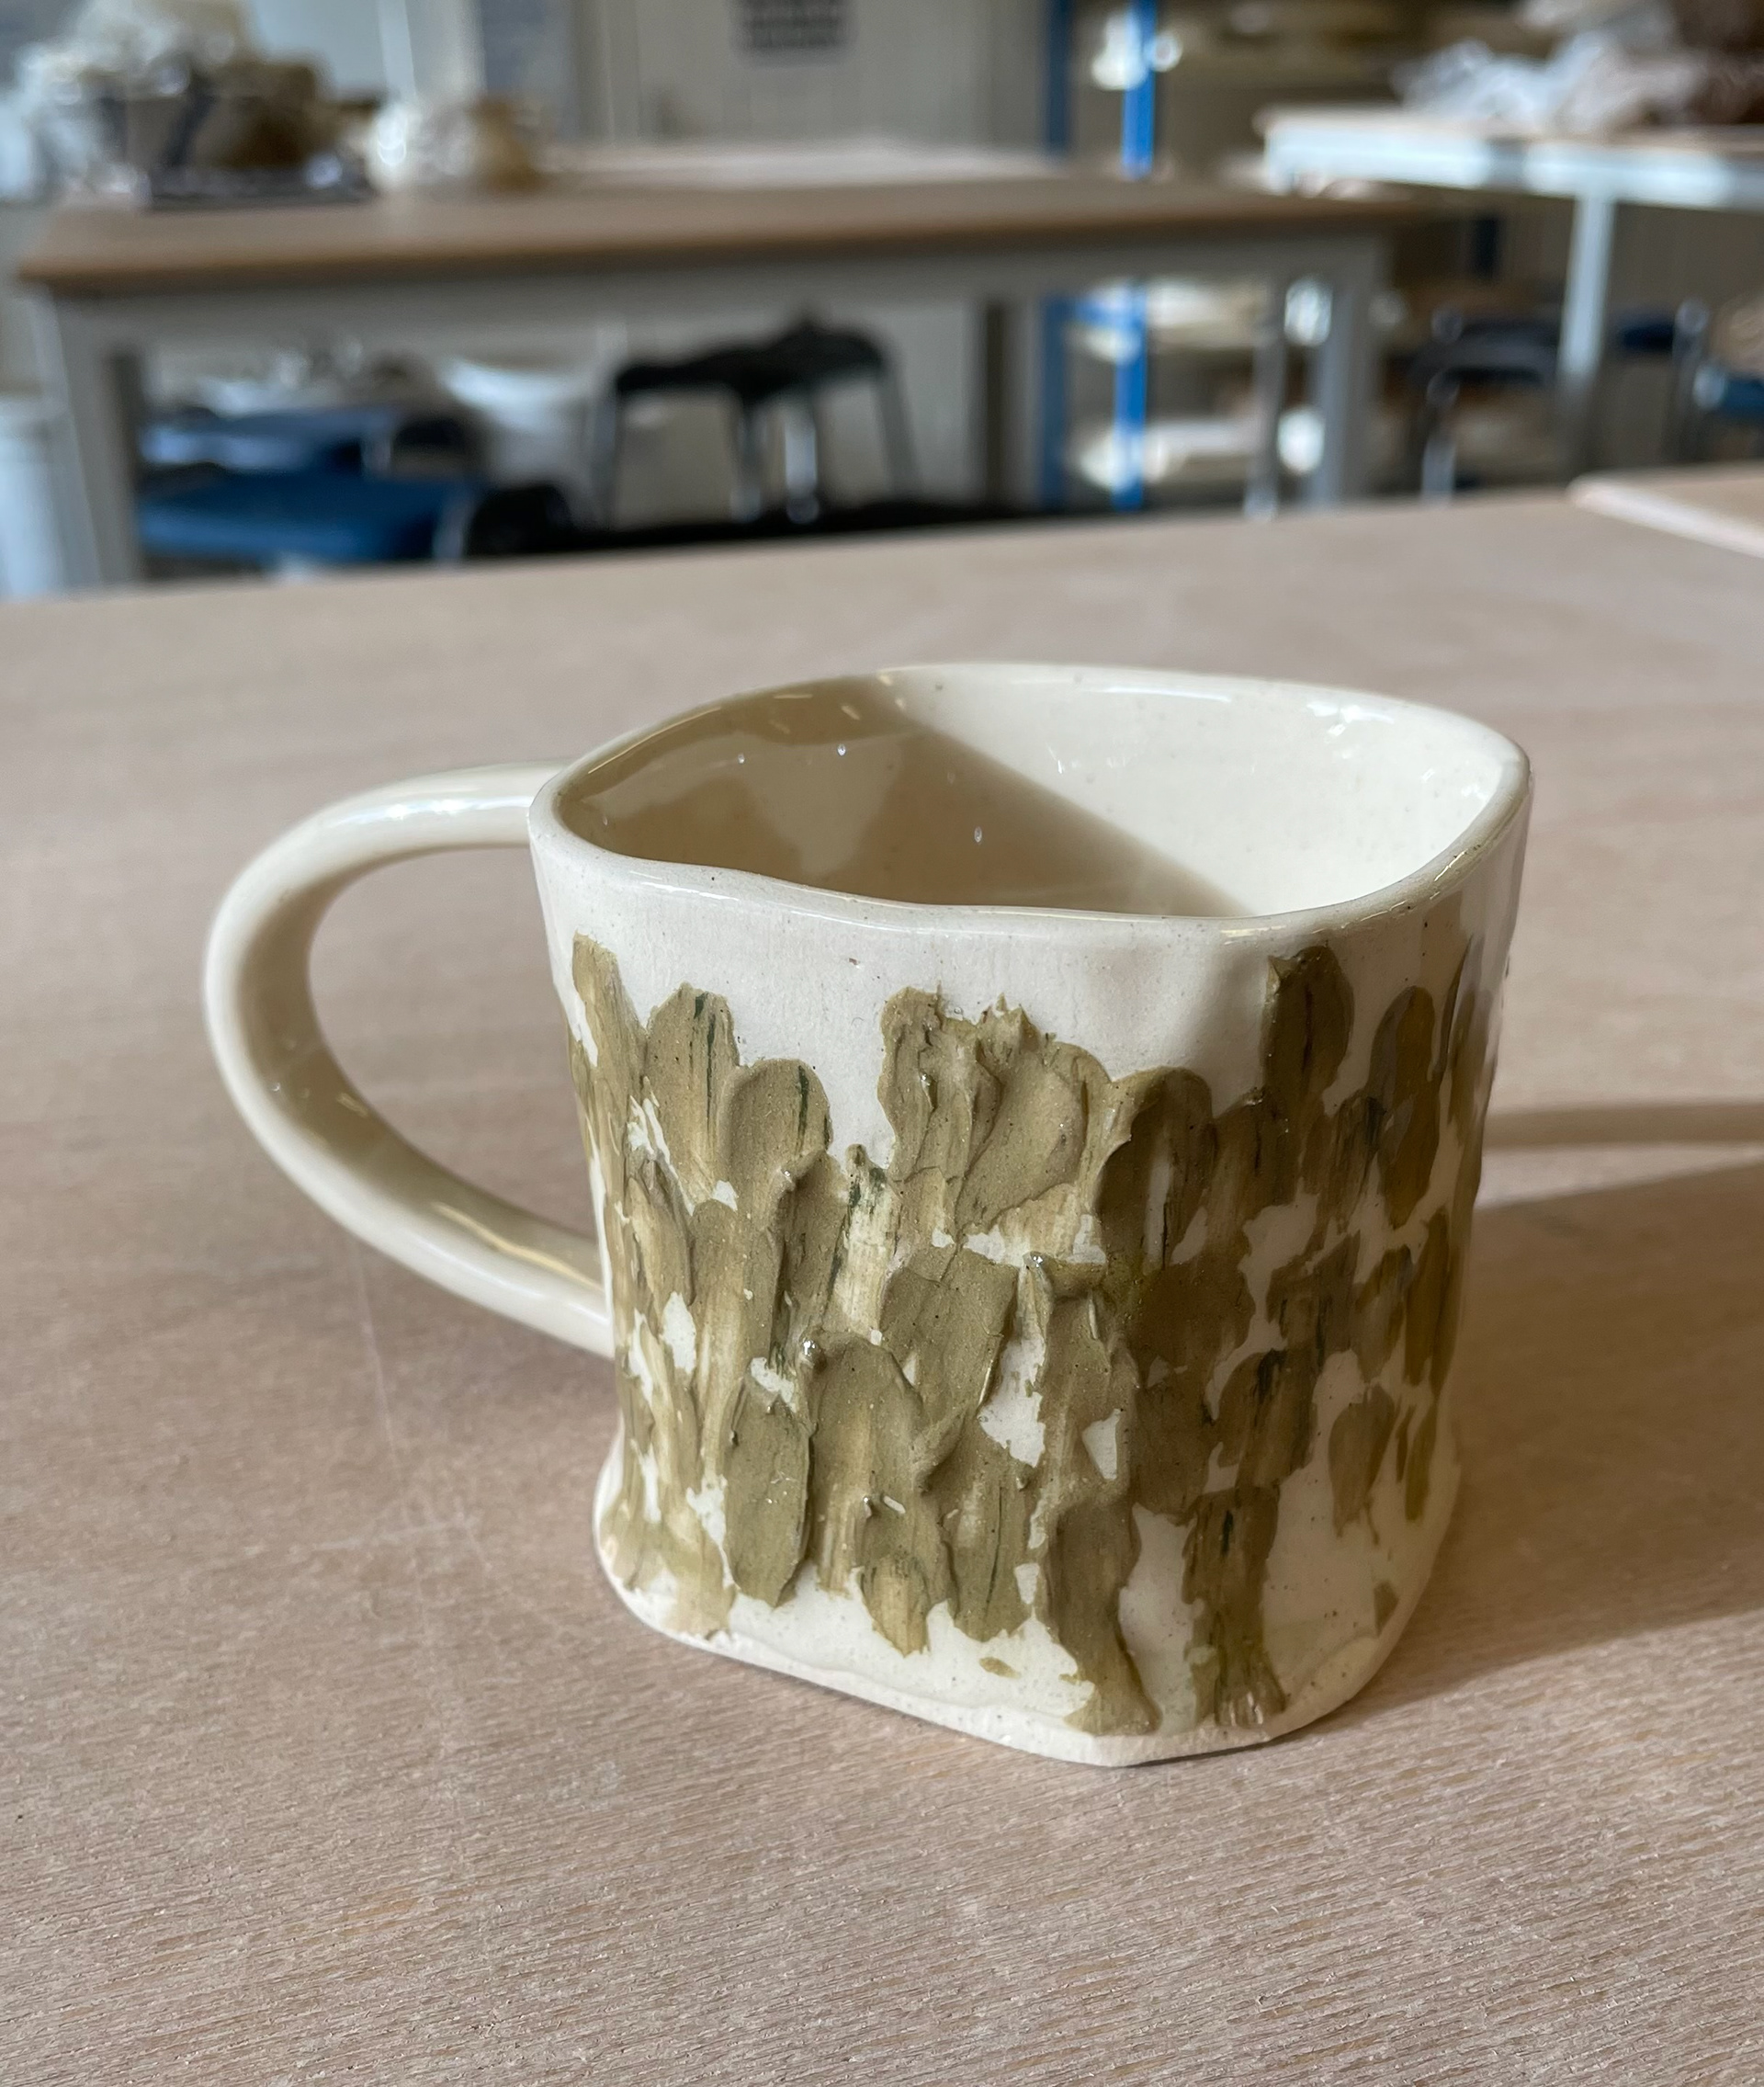
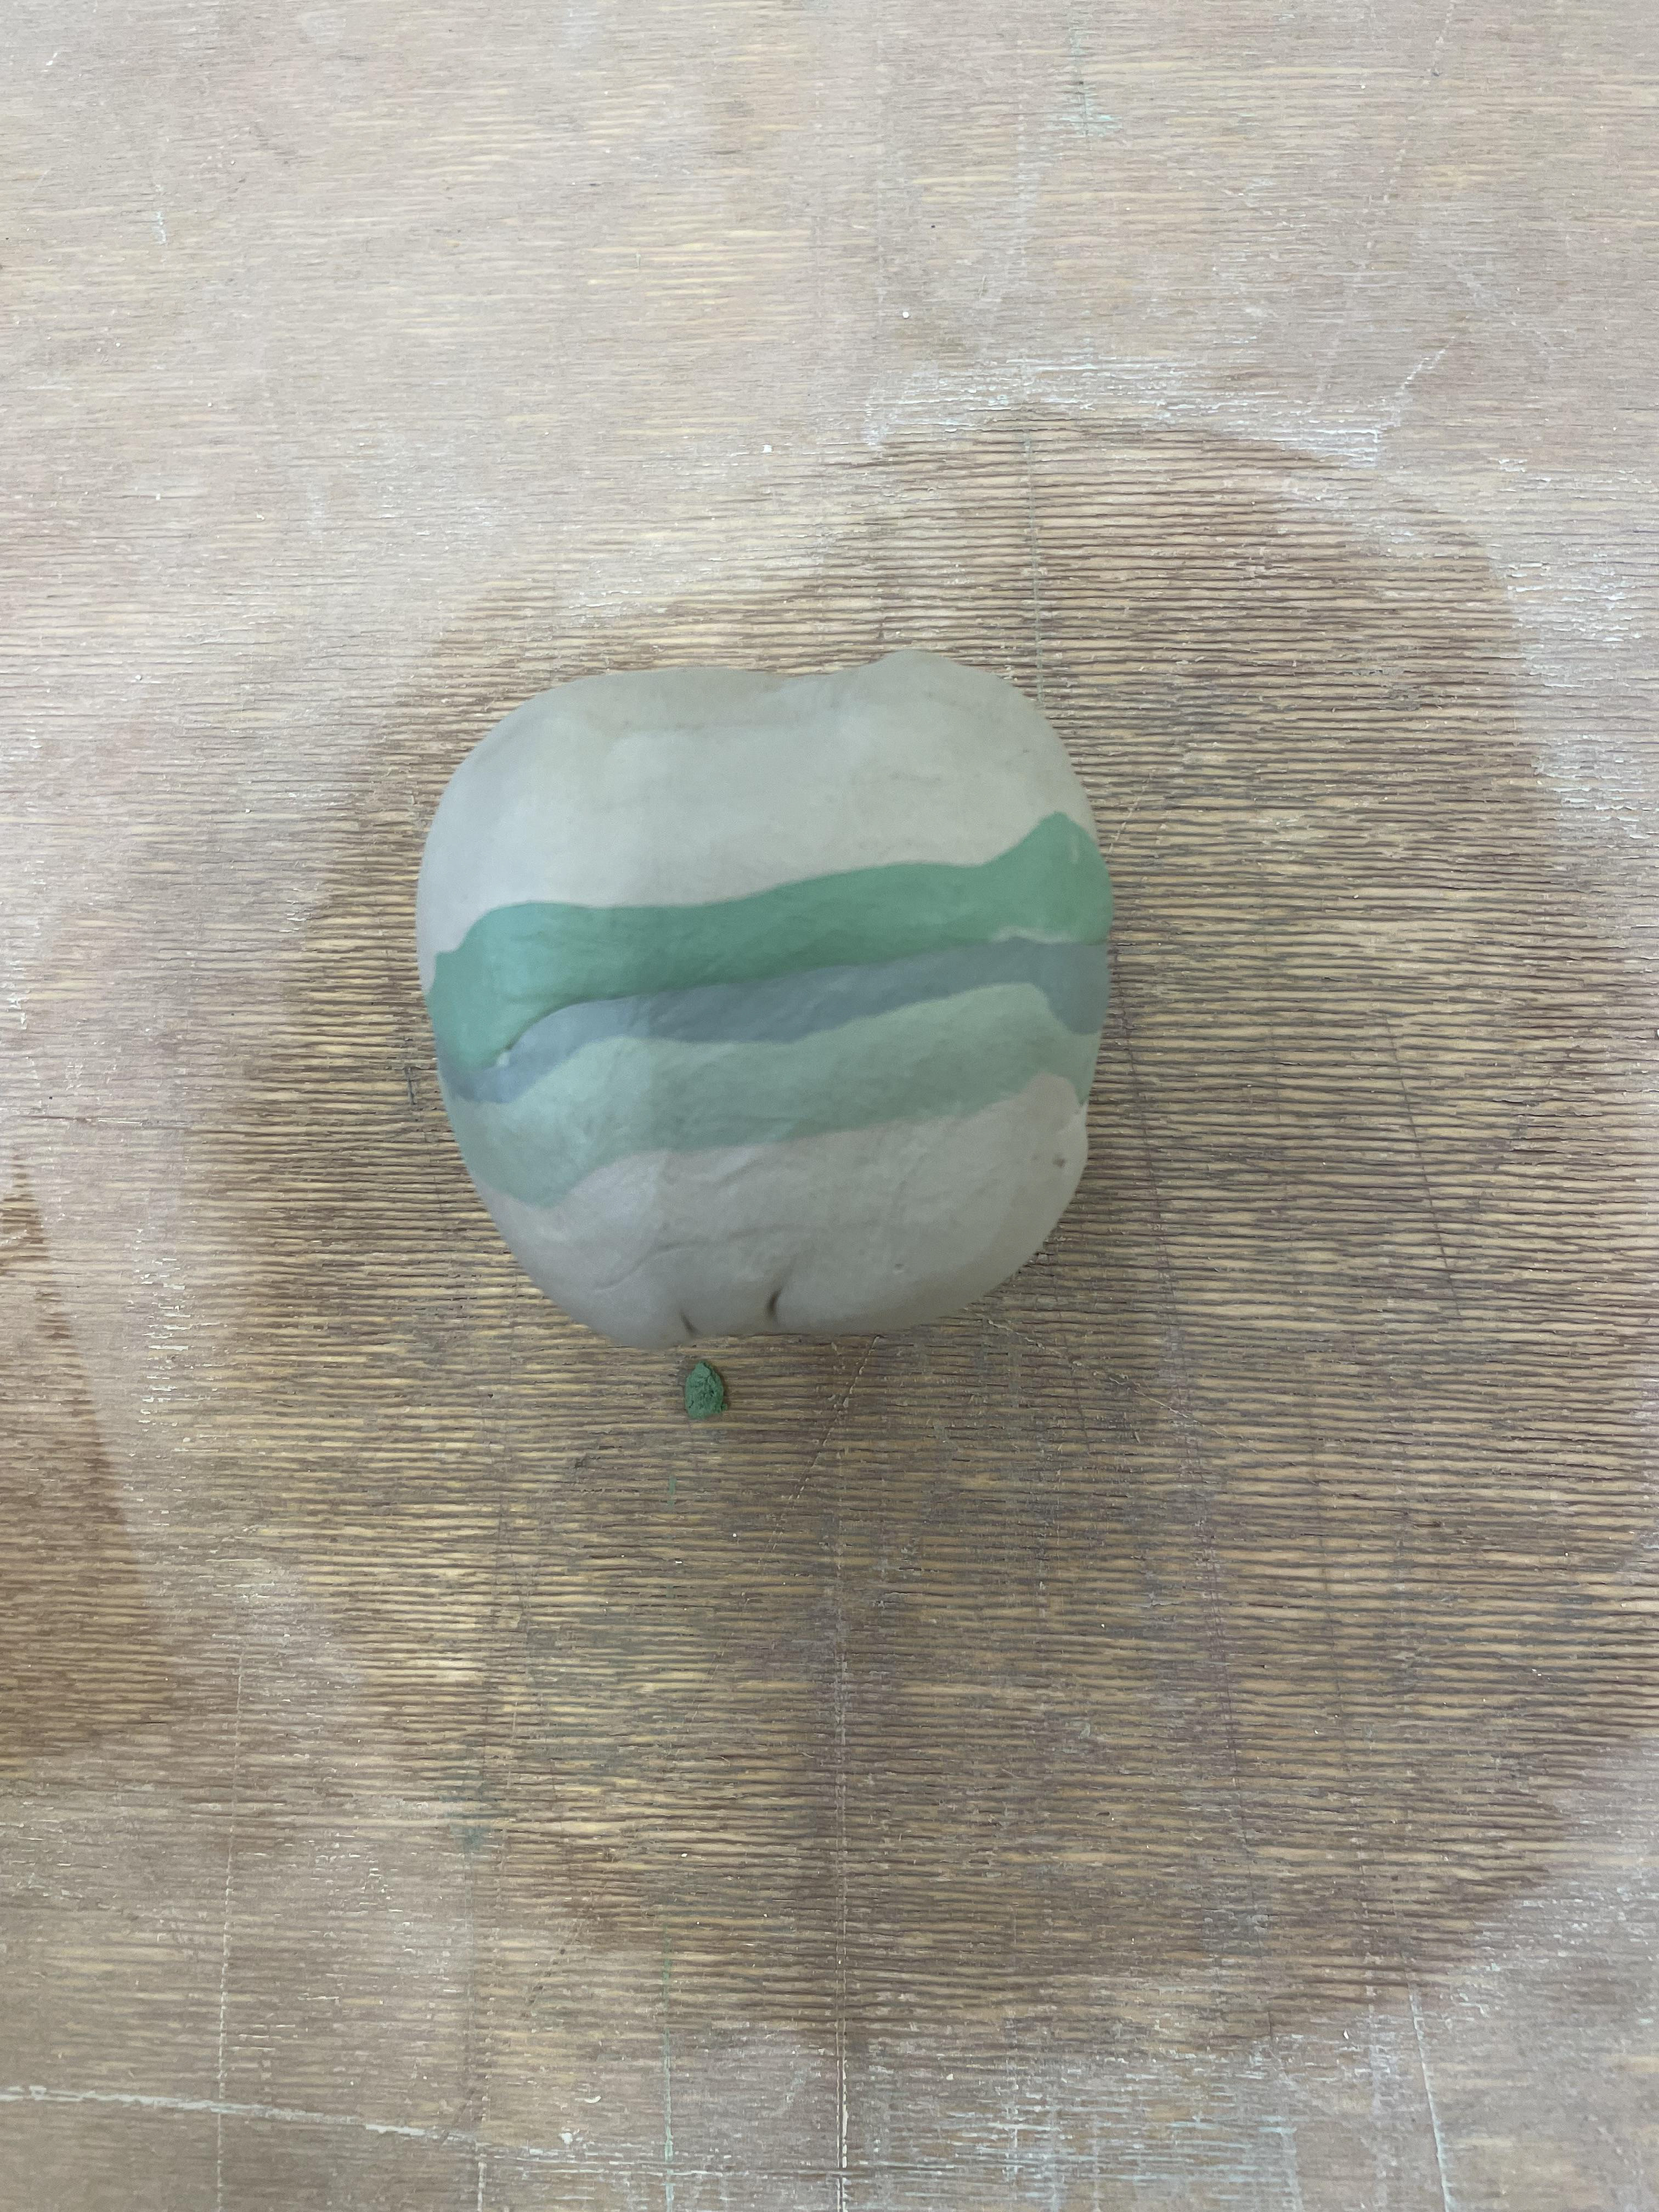
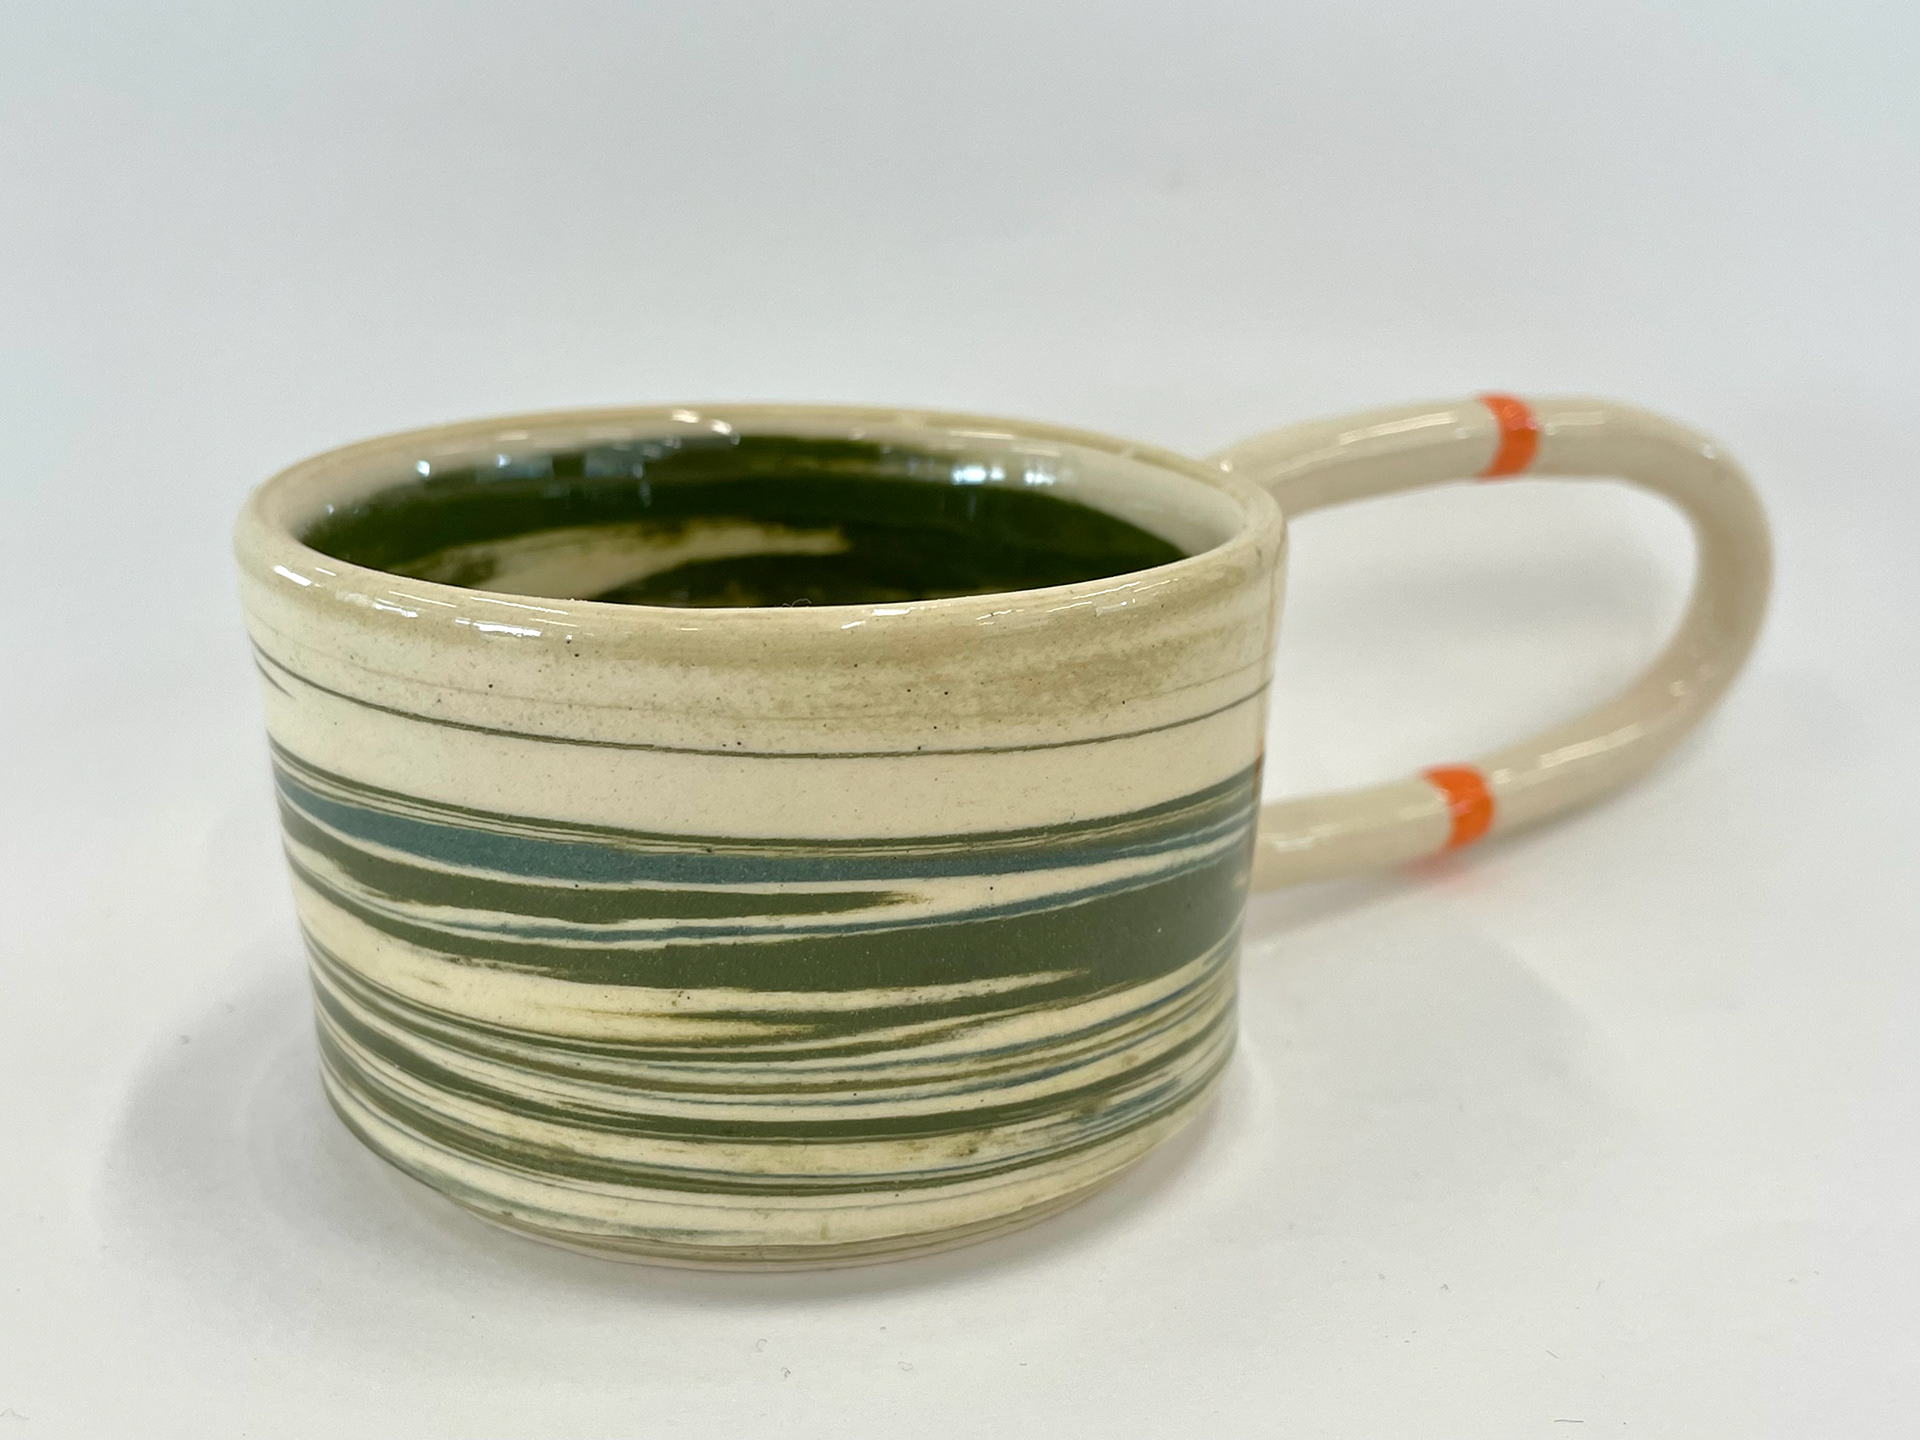
Looking at what combinations of coloured clay I enjoy, I decided to use three coloured clays as throwing these will work best, allowing the clays to blend a little. I decided to have more green. This is based on my photos of nature's changing seasons and a wide range of greens in nature. The 50/50 cobalt and chromium work best with the chromium colours not being too dark; however, having a big contrast. I am happy with my sample coloured clay. It reflects my influence on nature and is thrown with ivory stoneware clay; it will be a plain background, allowing the clouds to pop out.
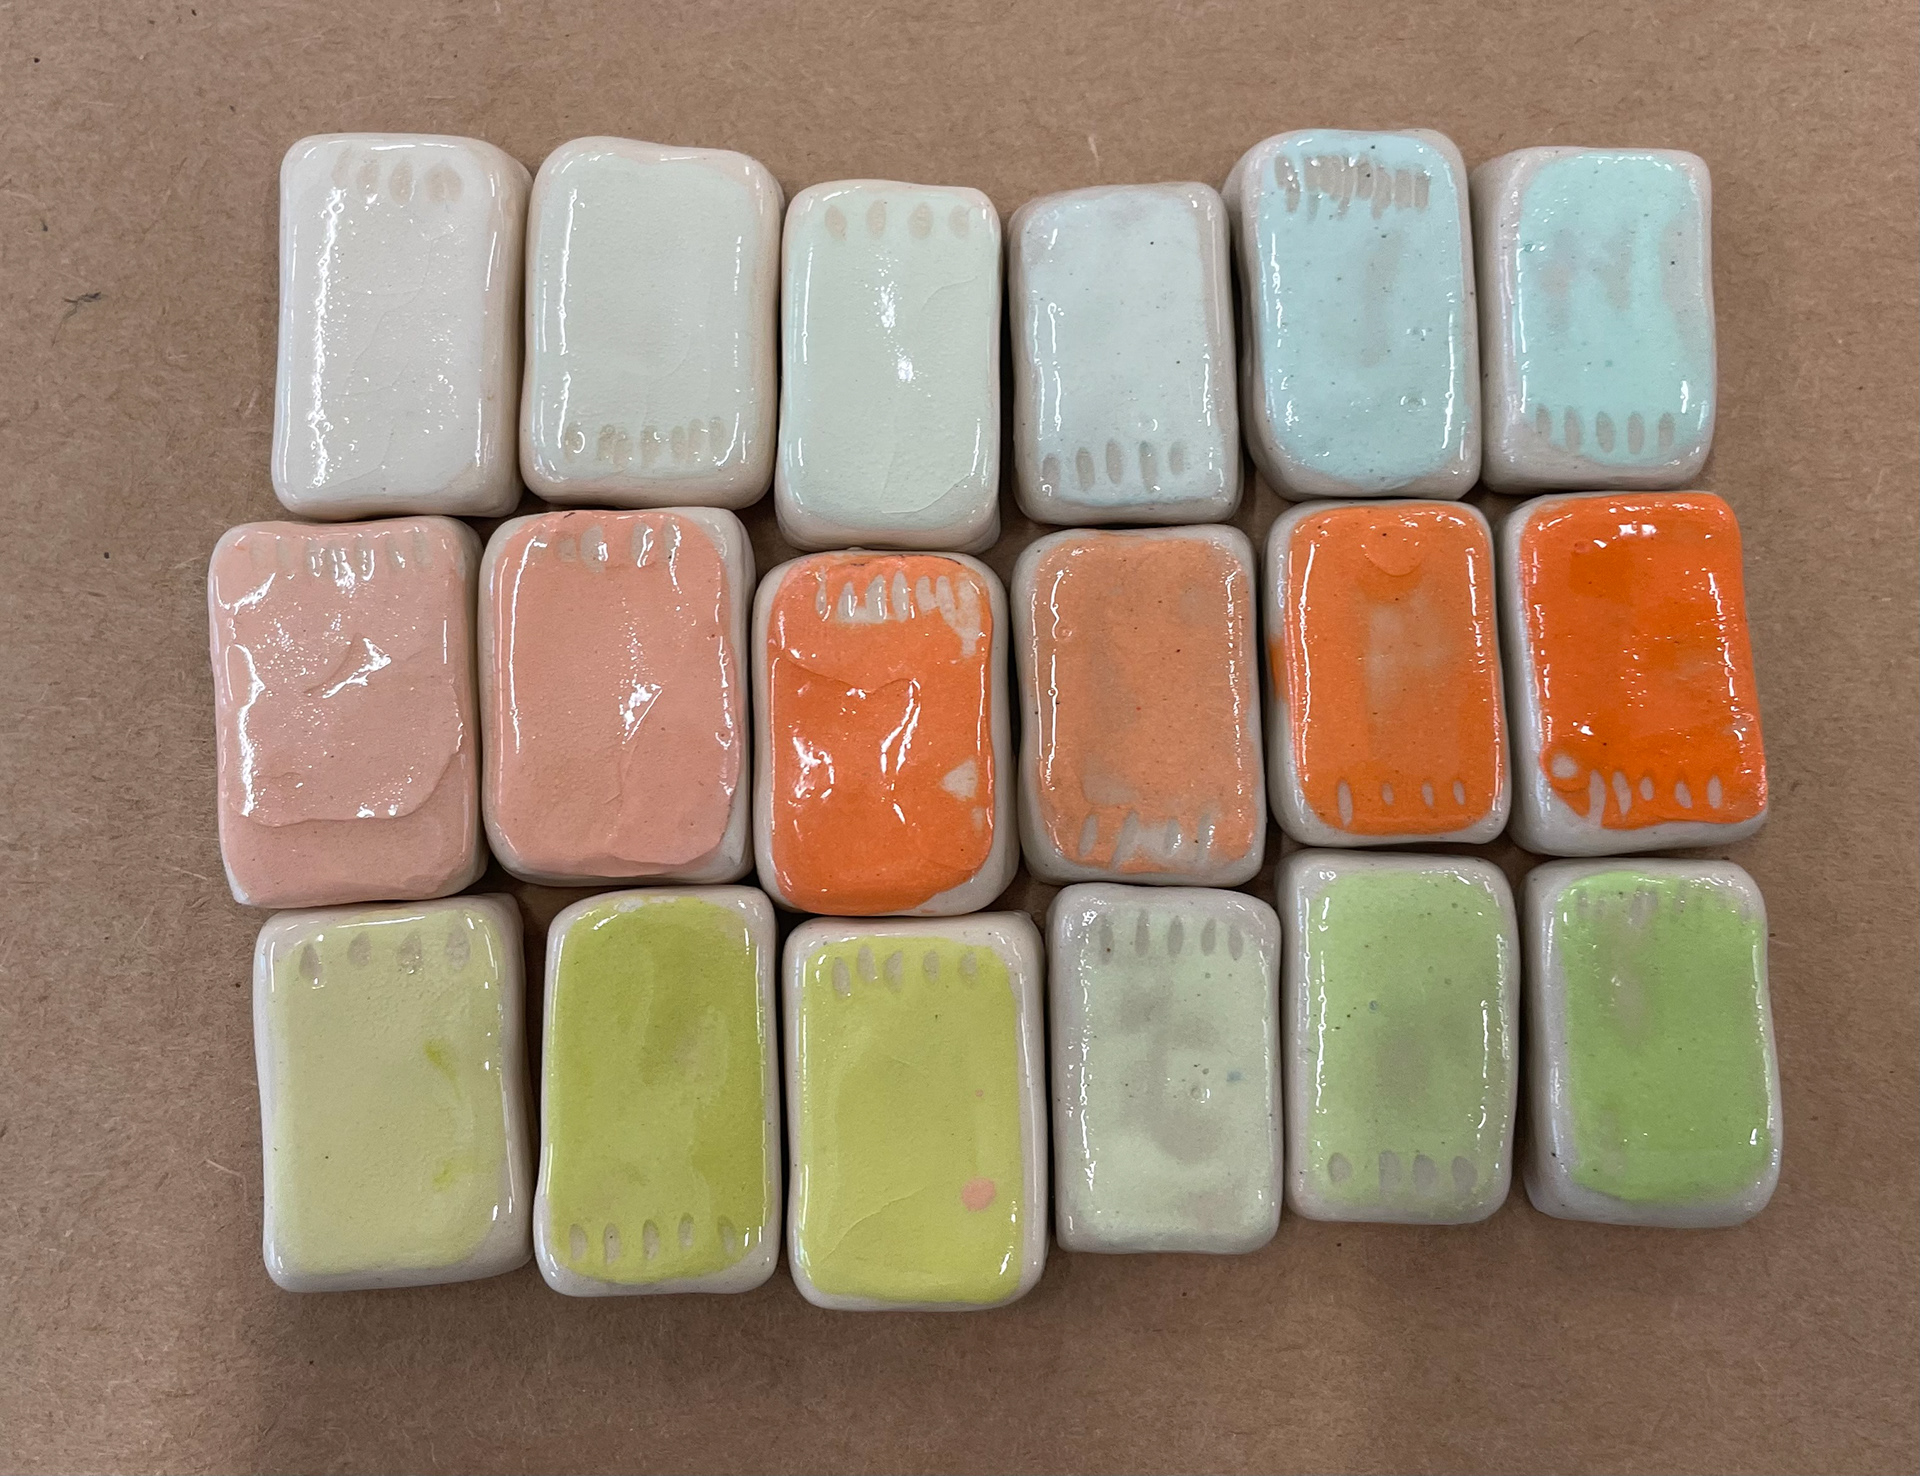
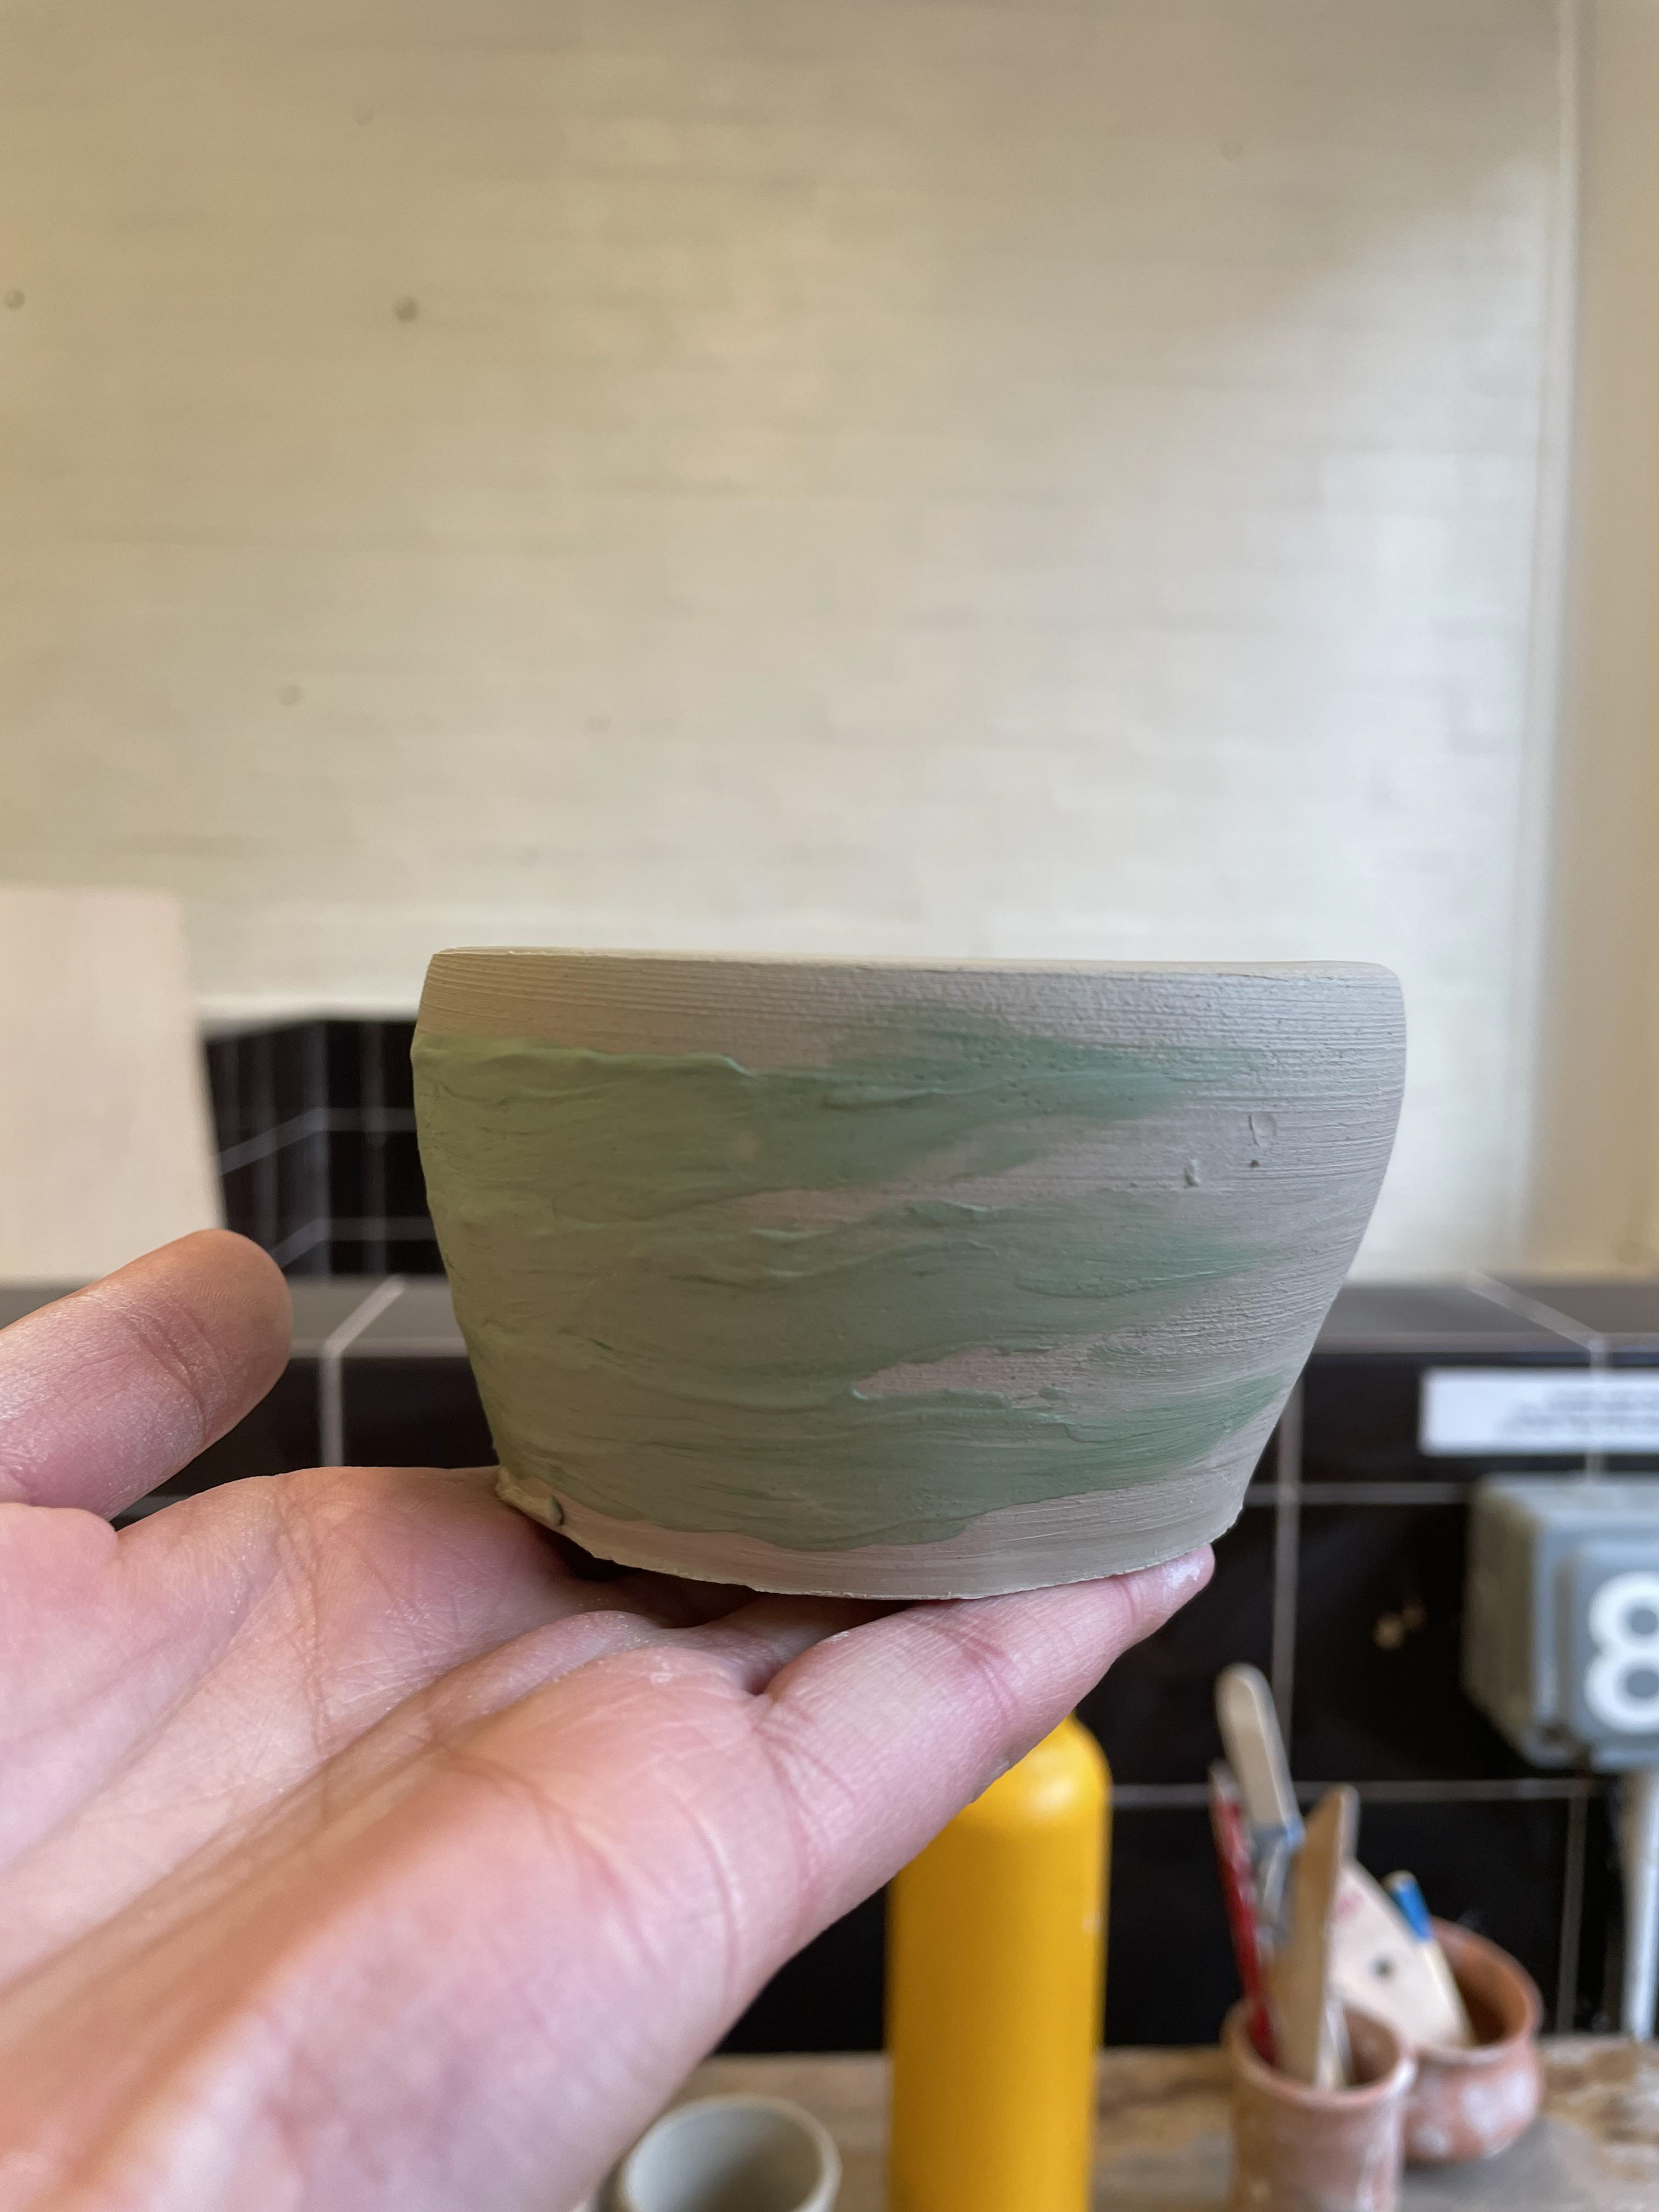
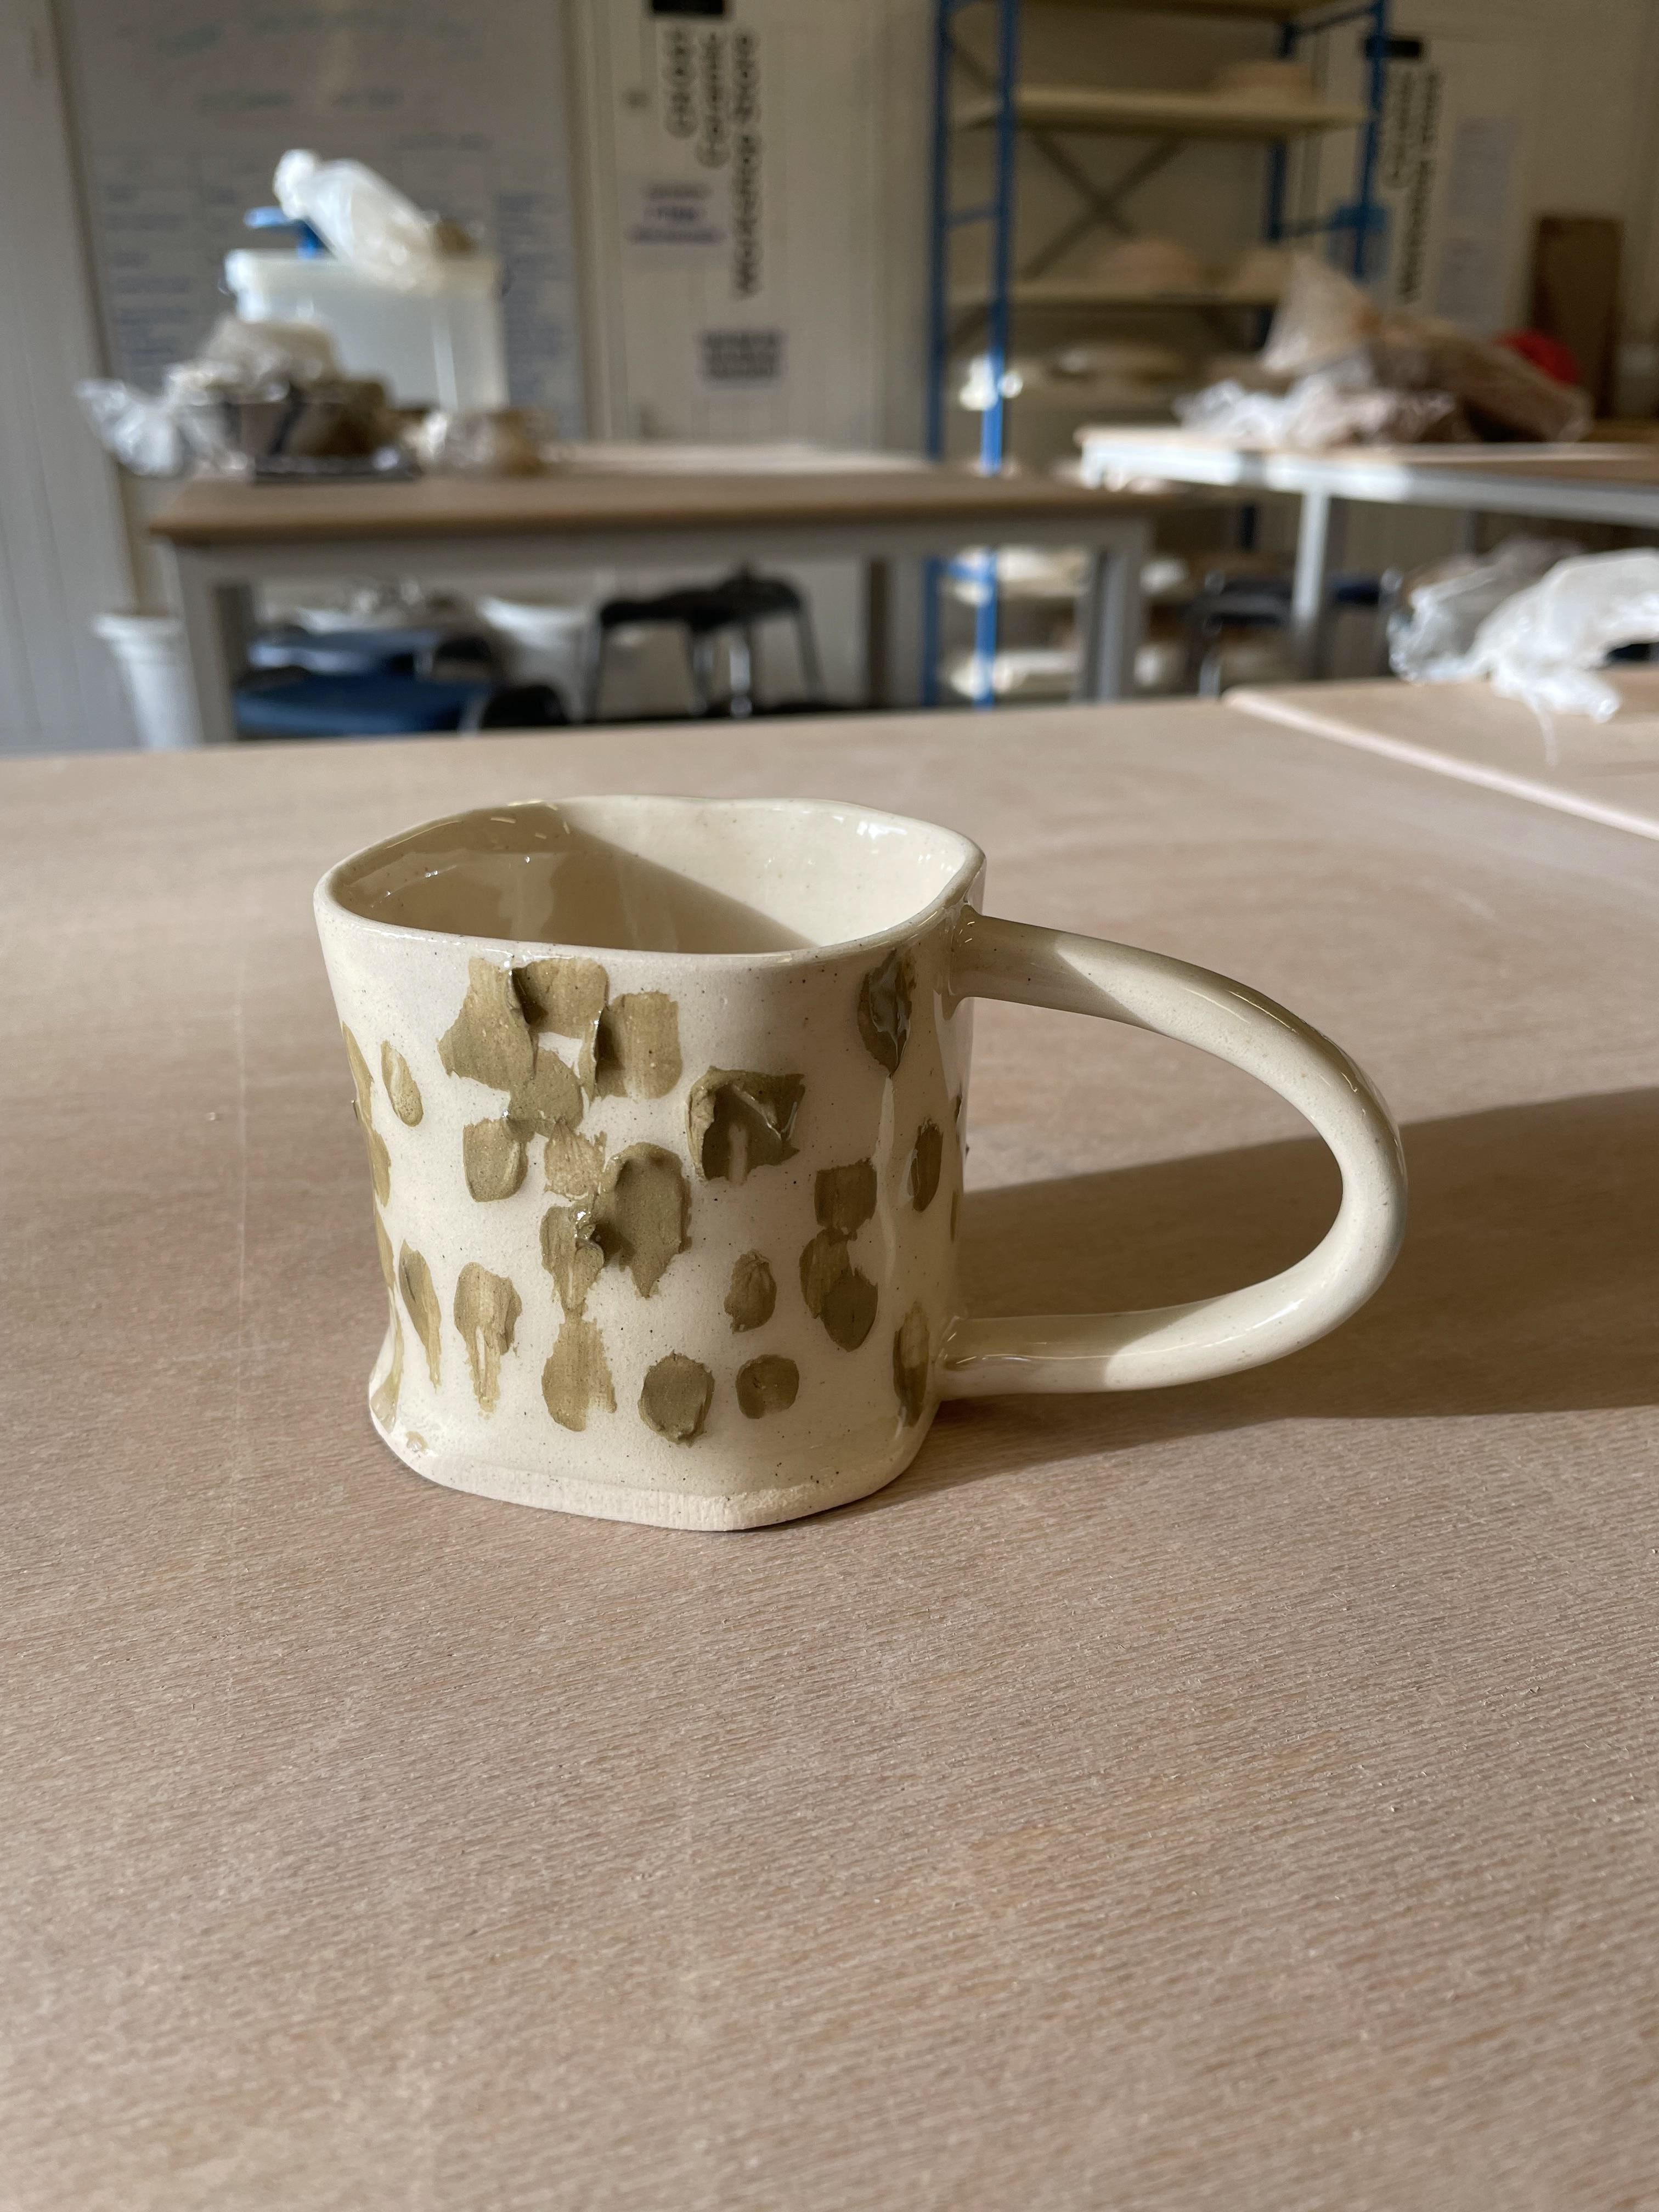
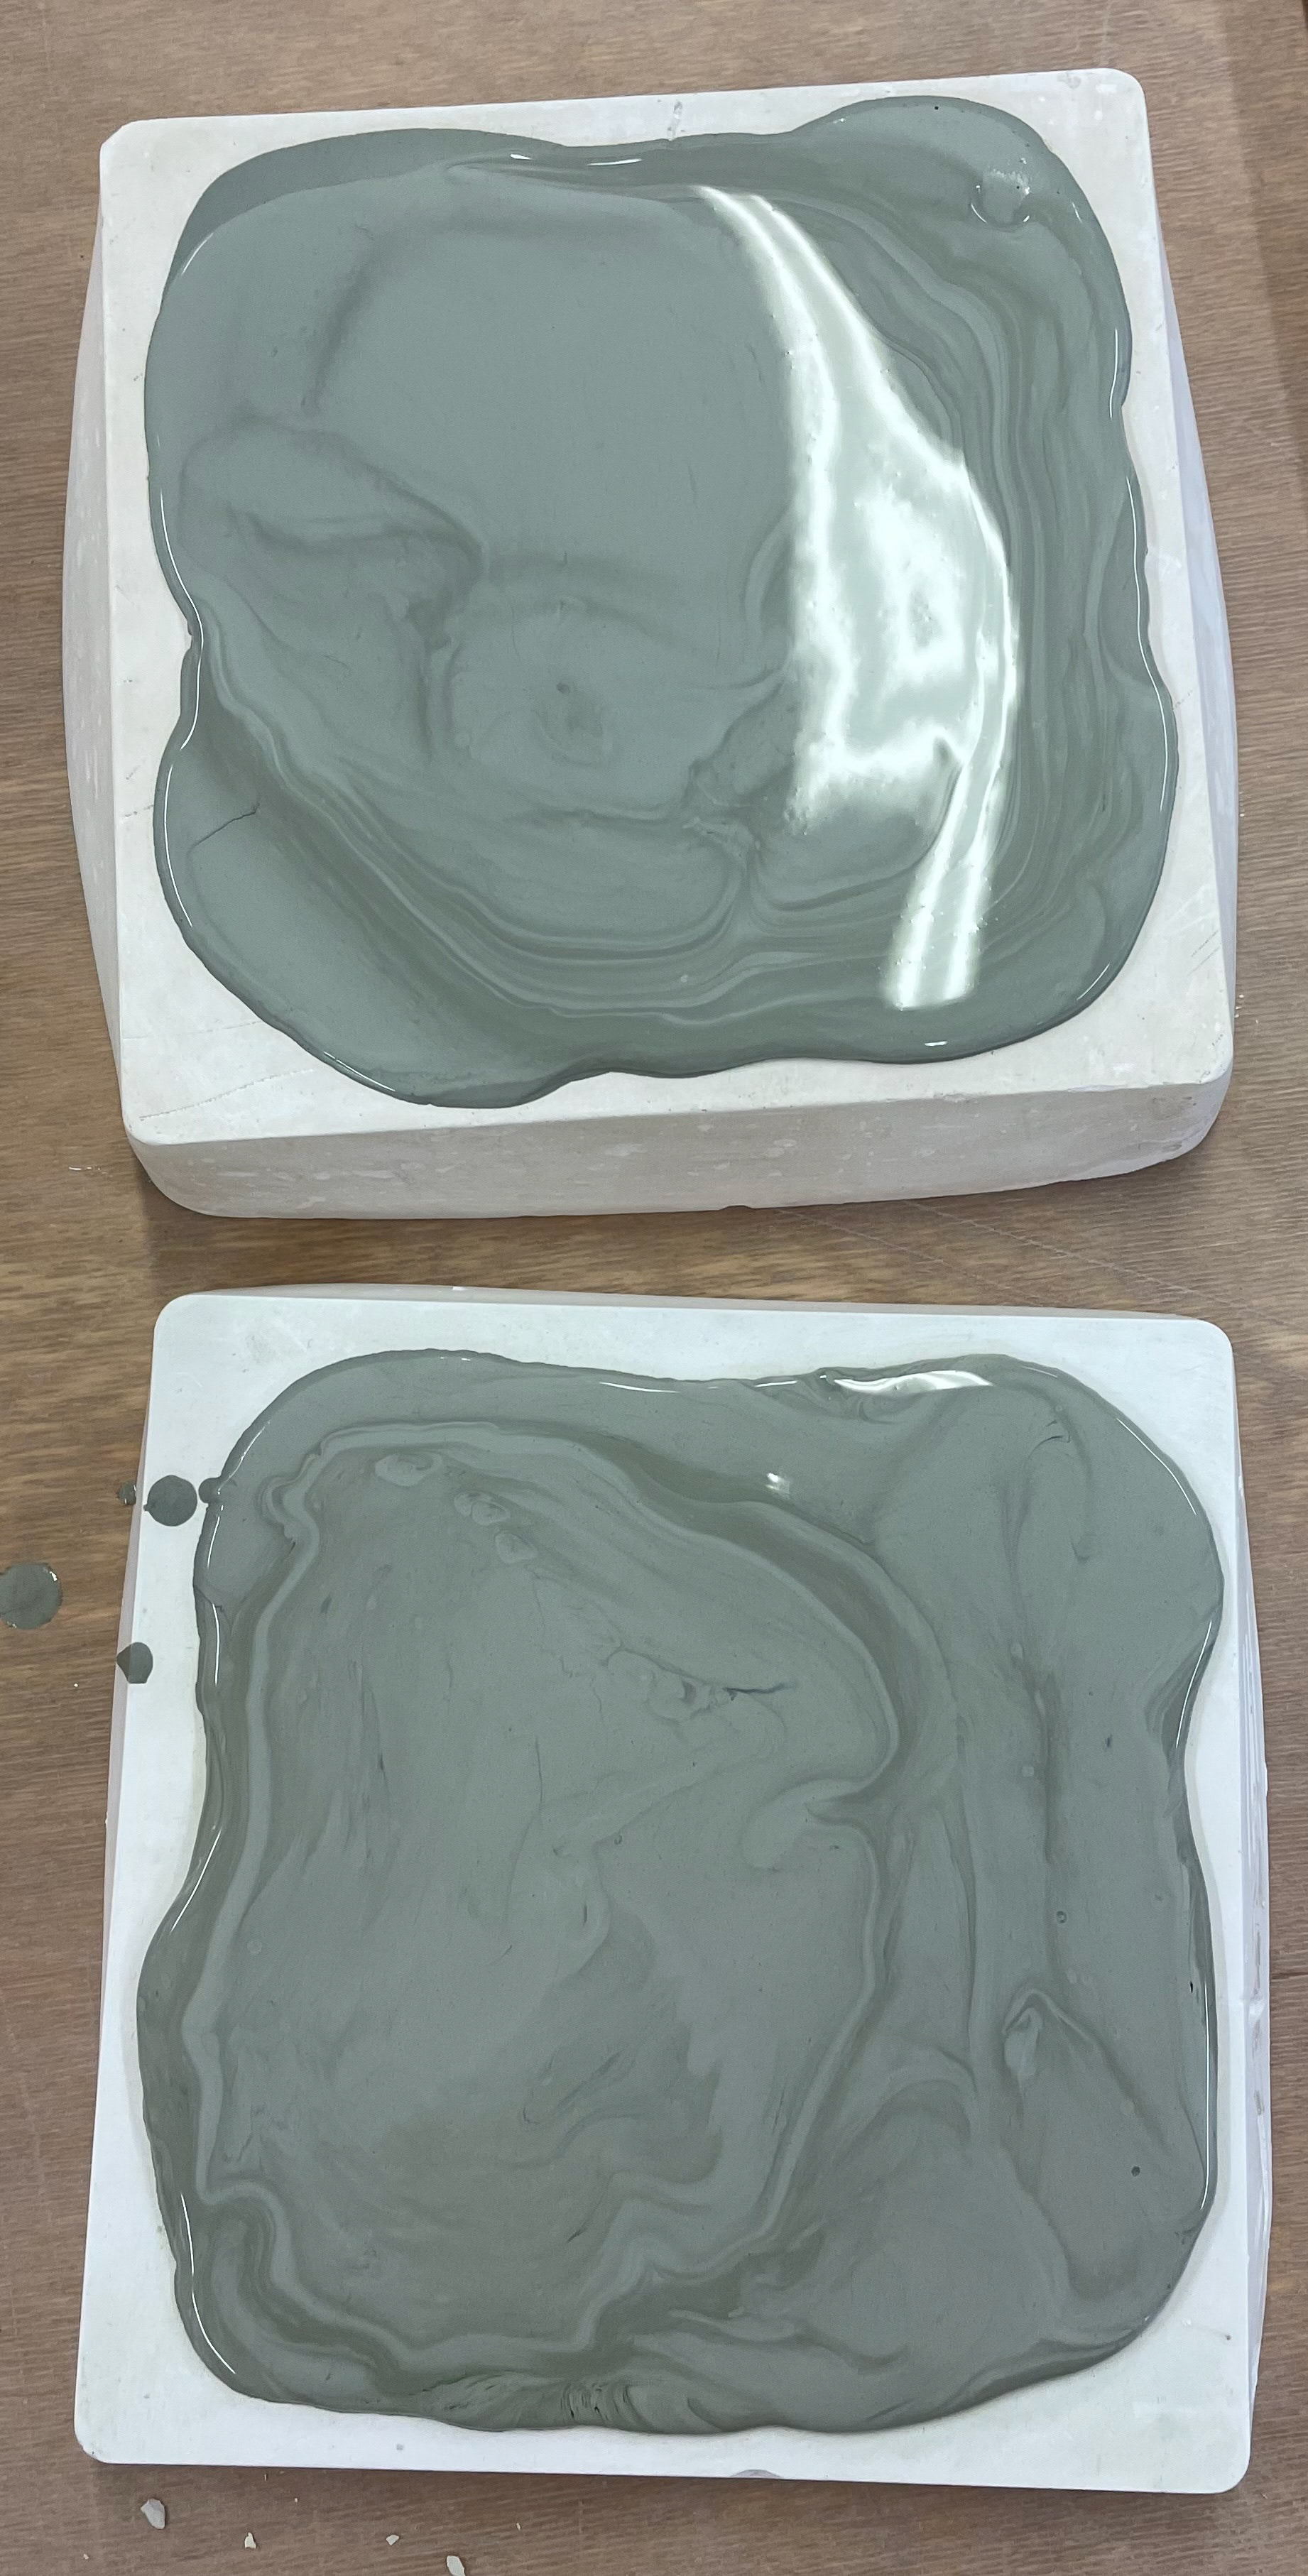
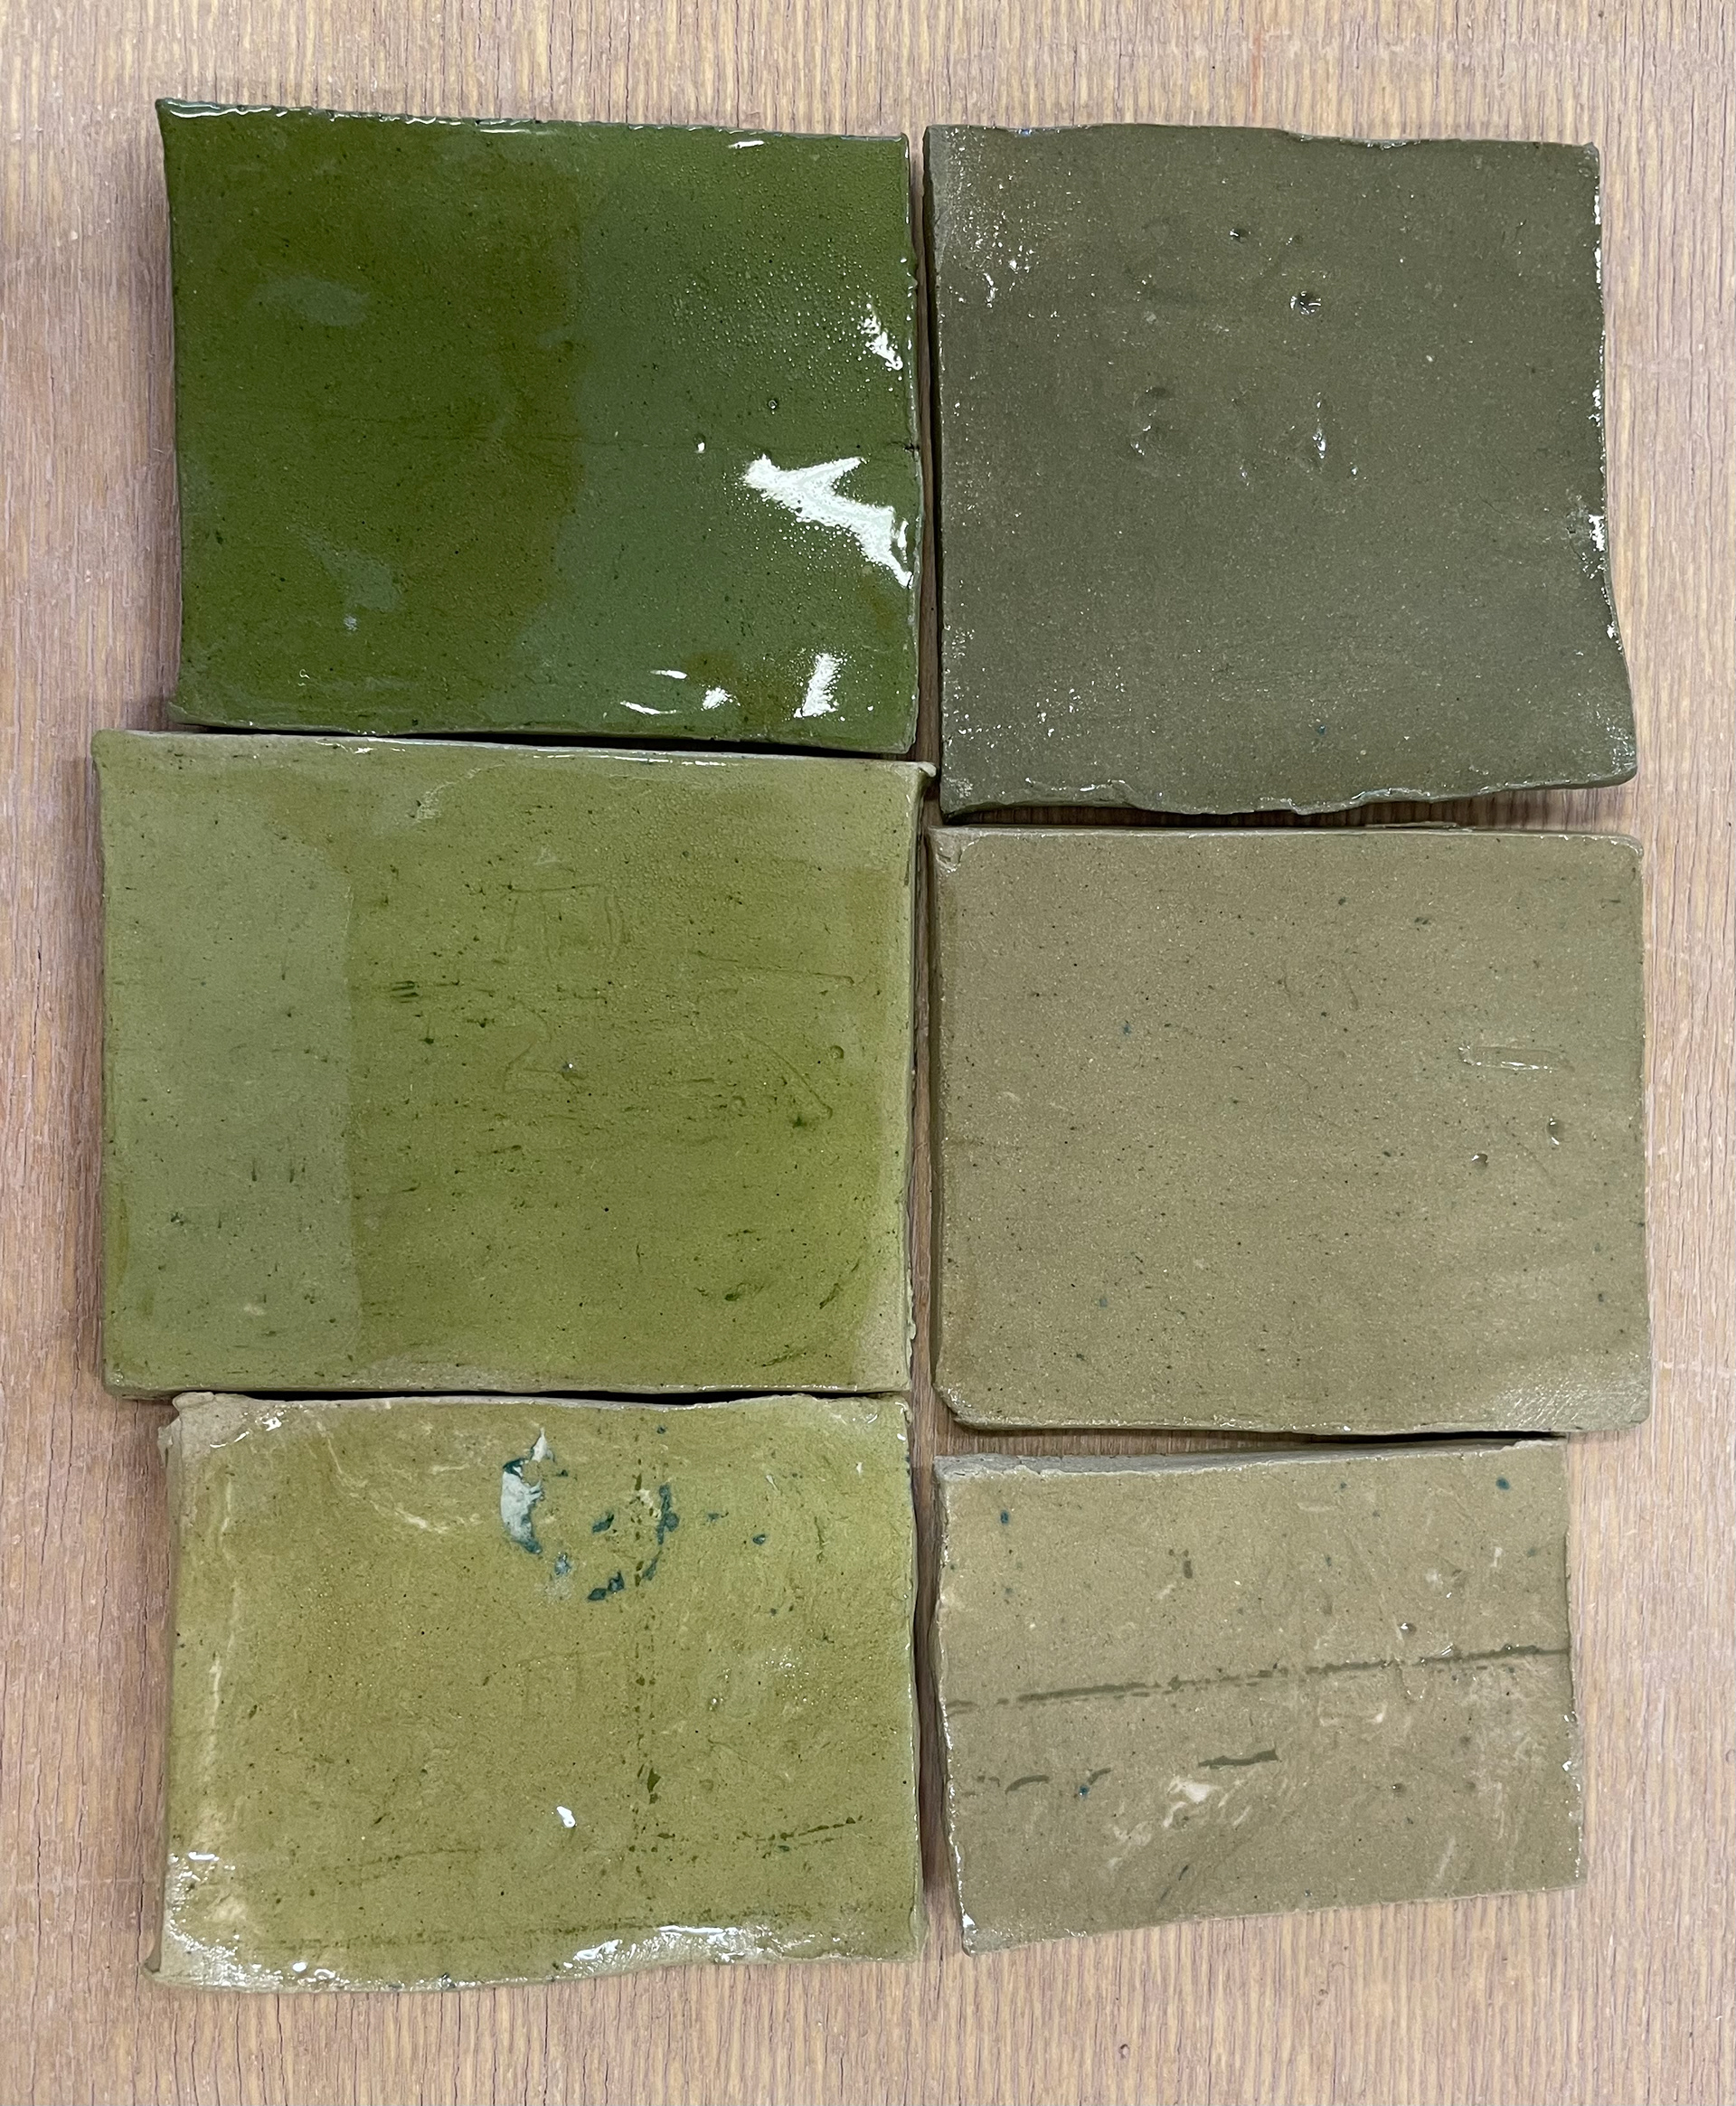
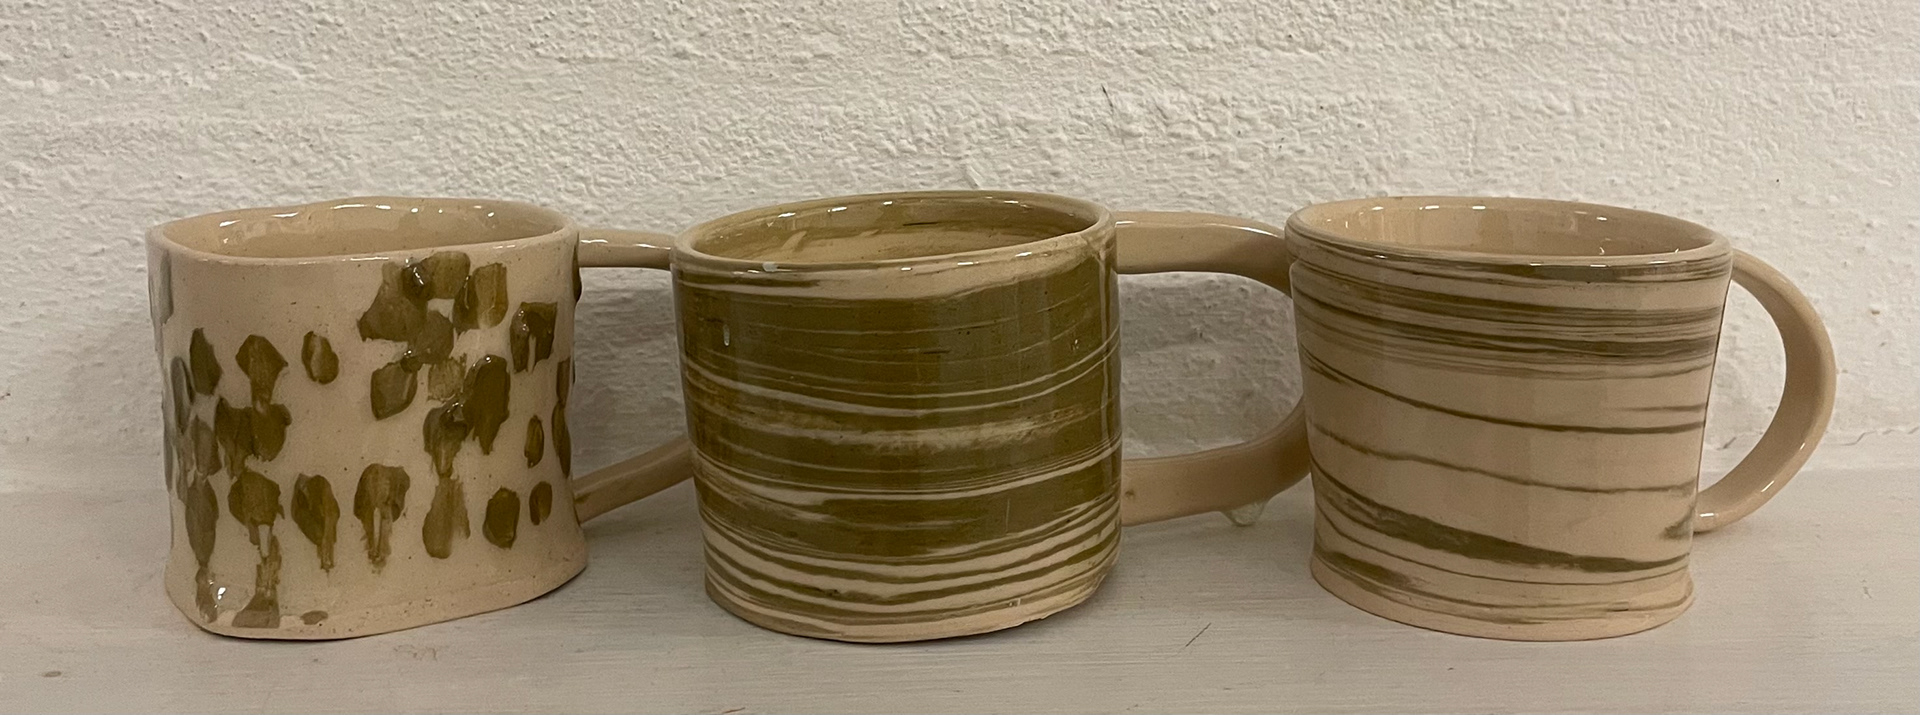
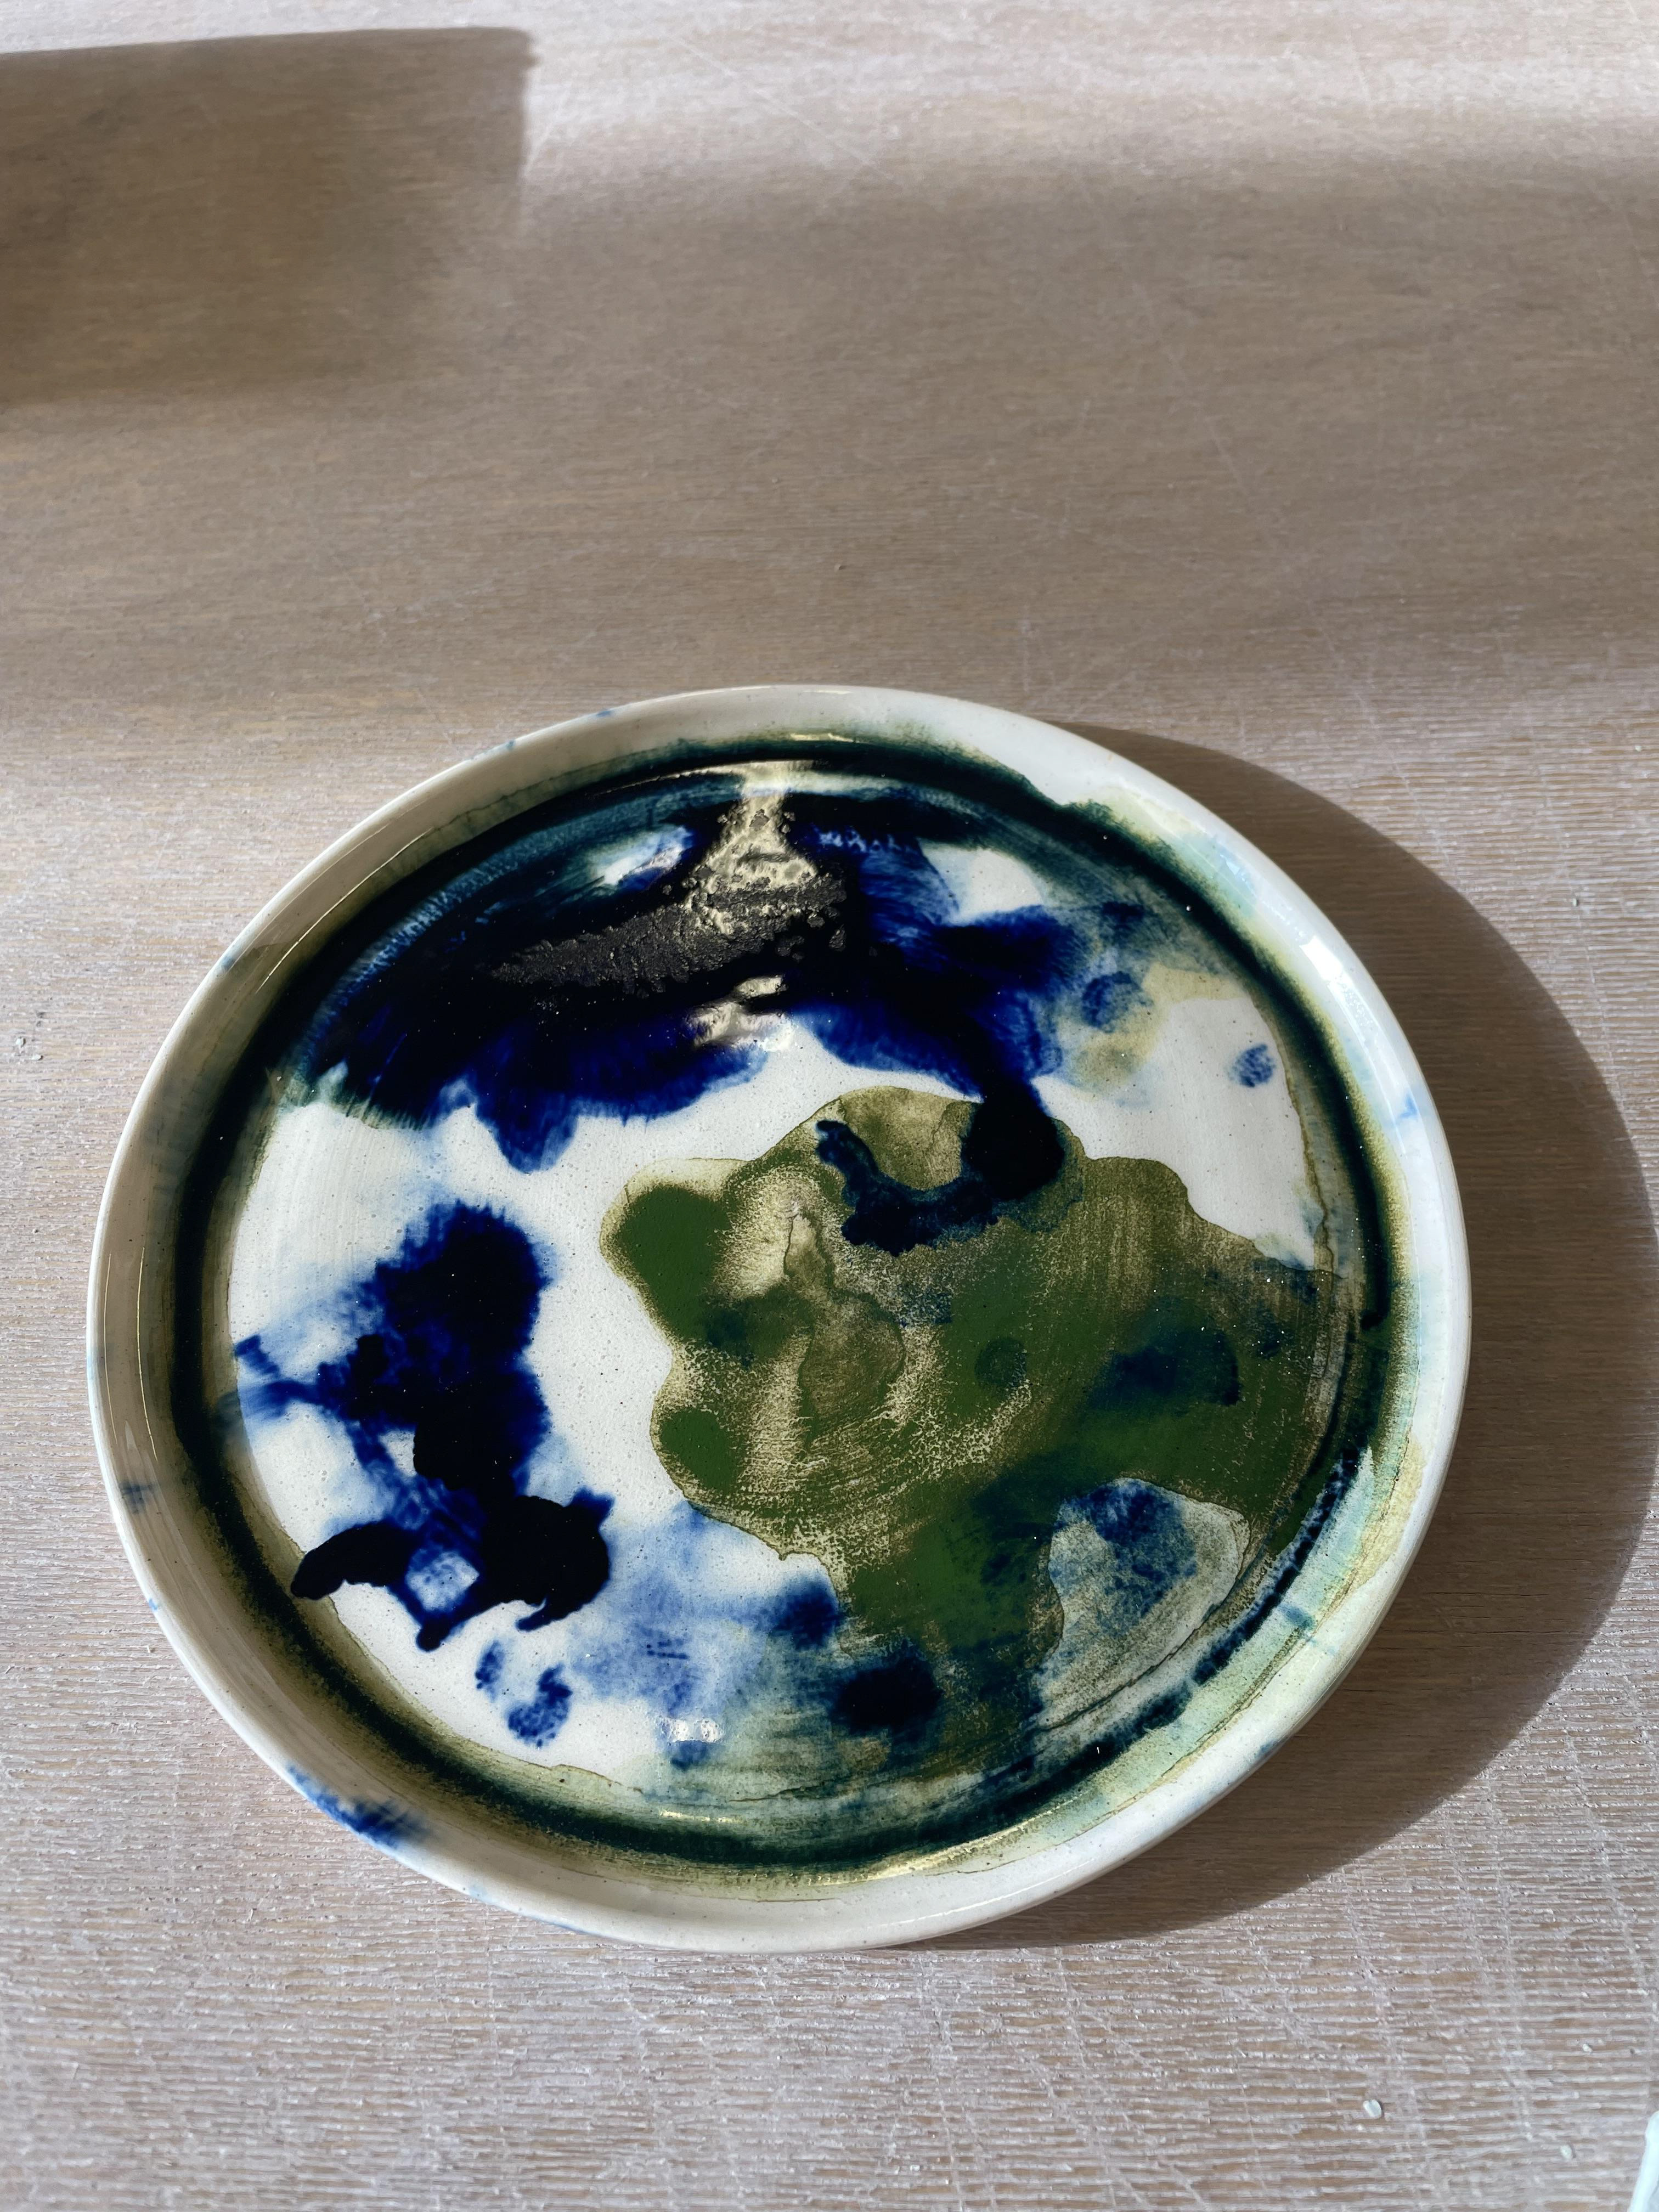
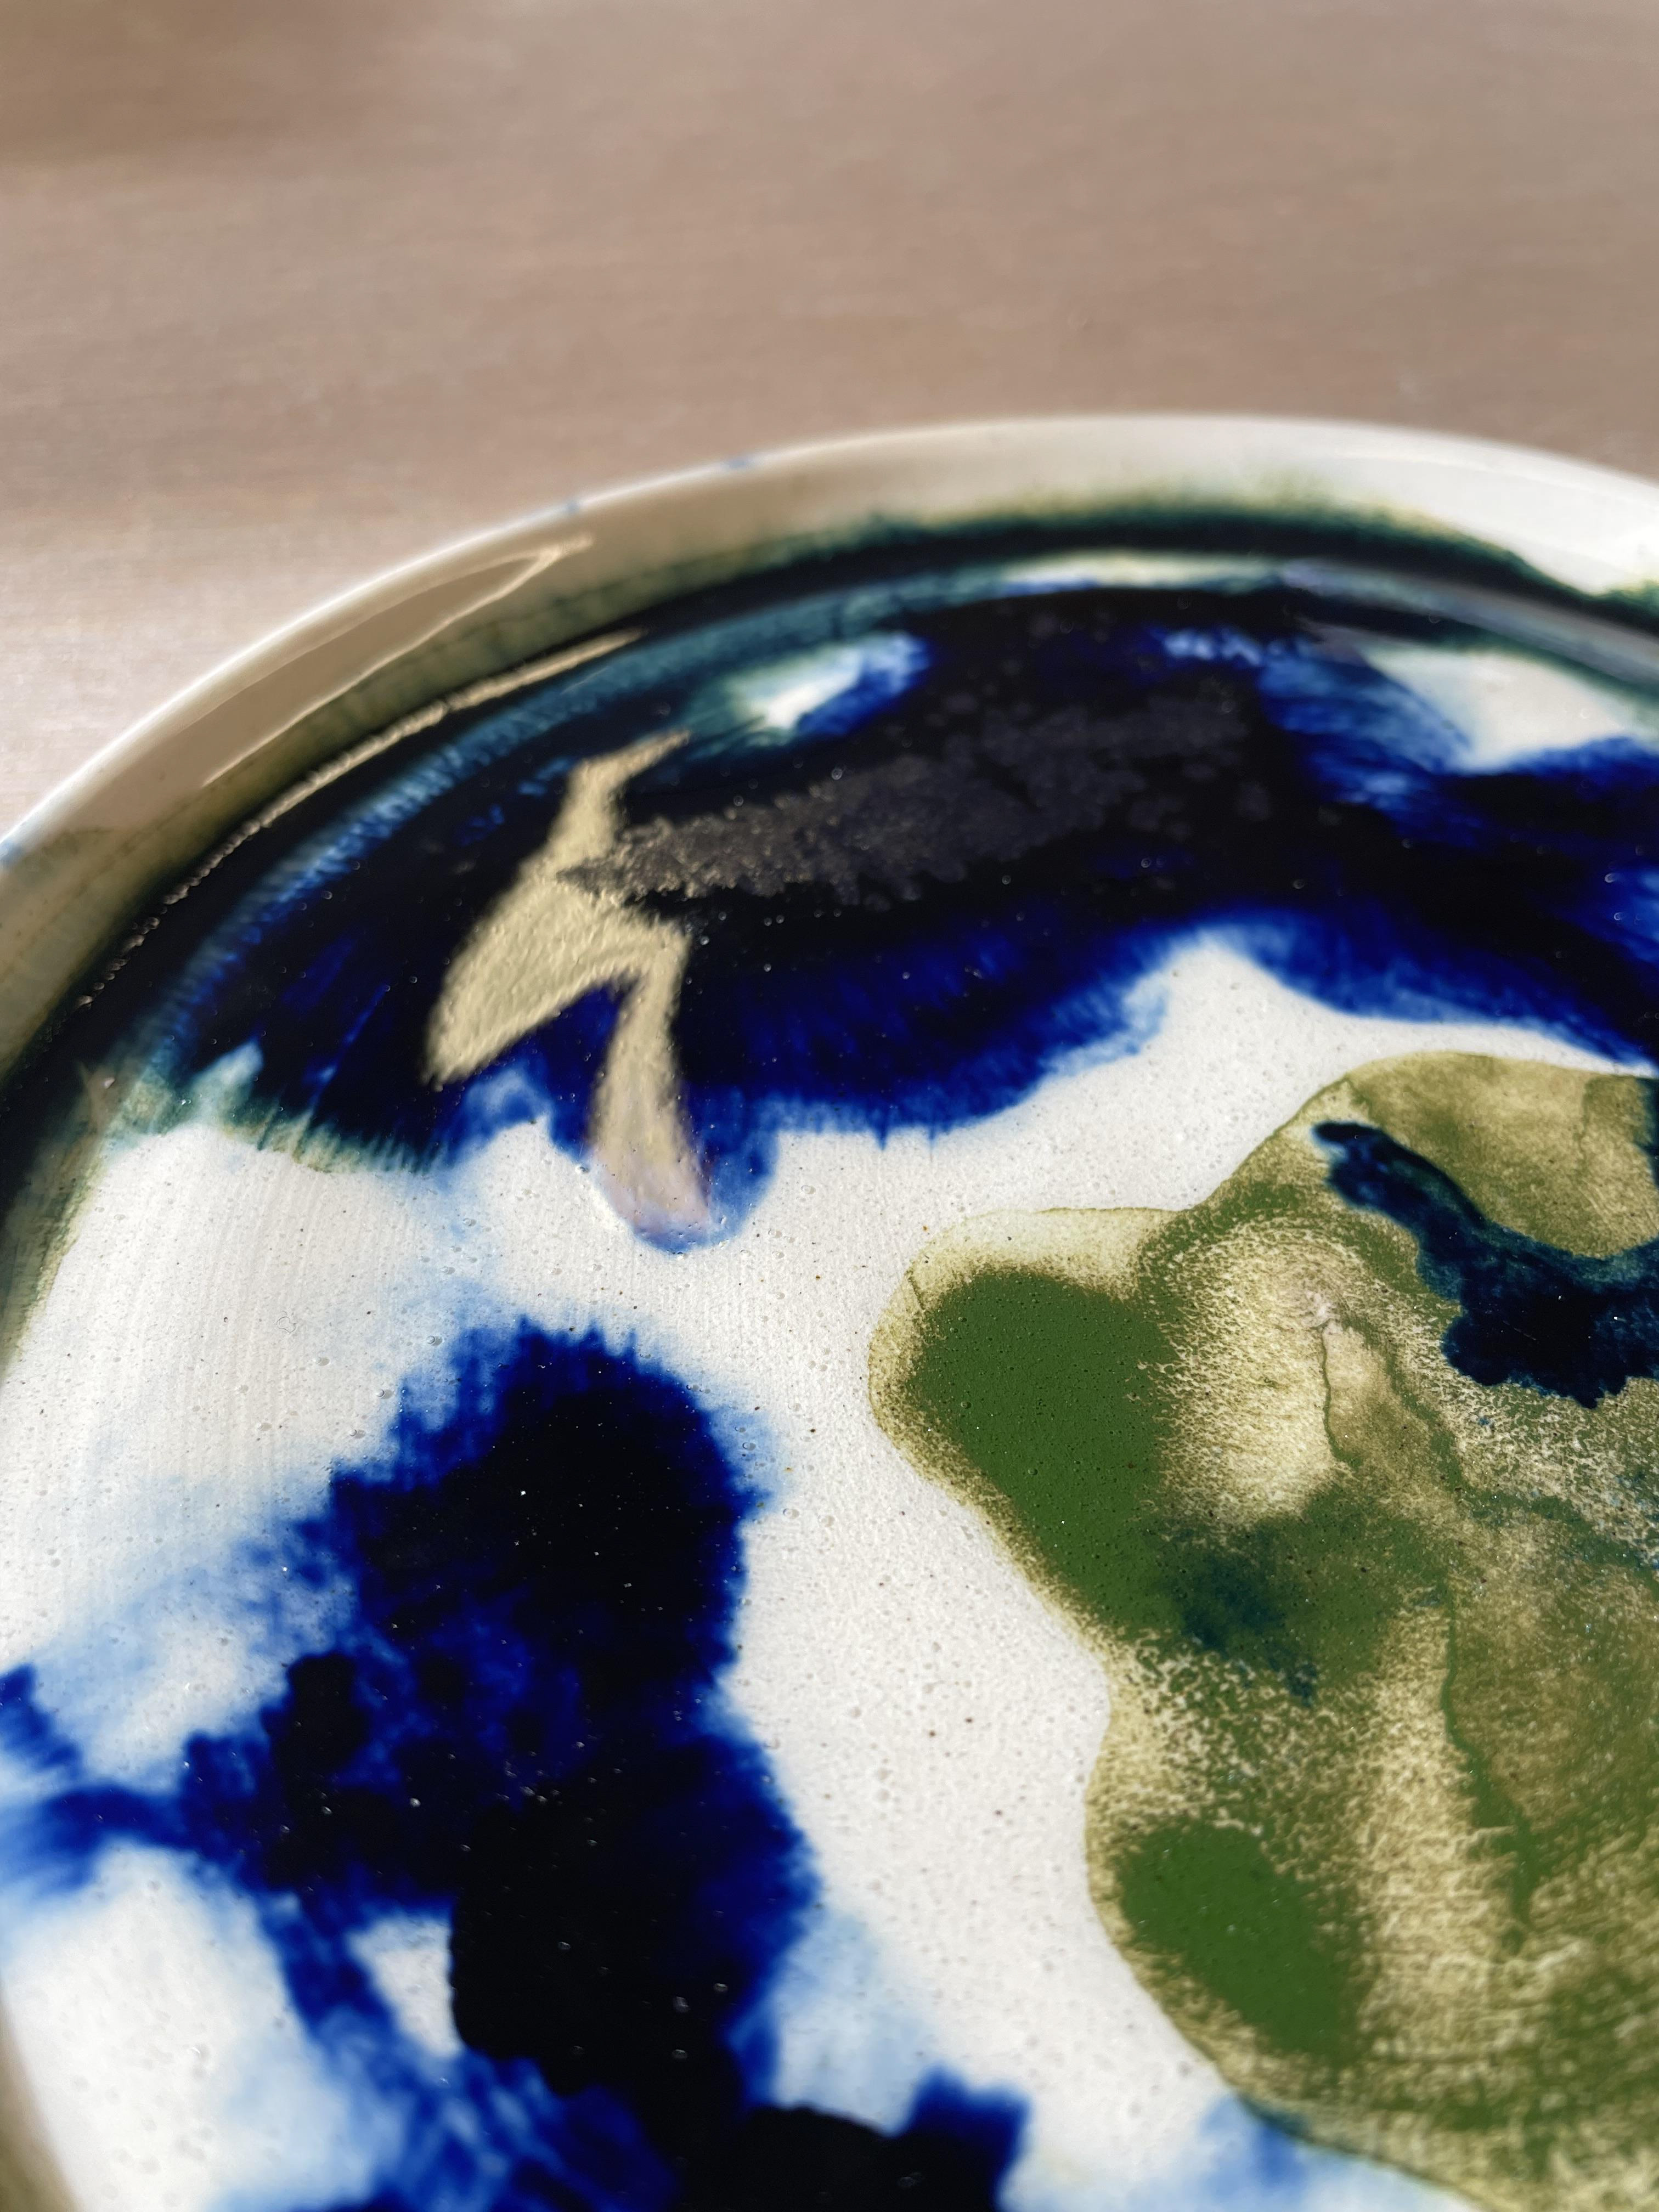
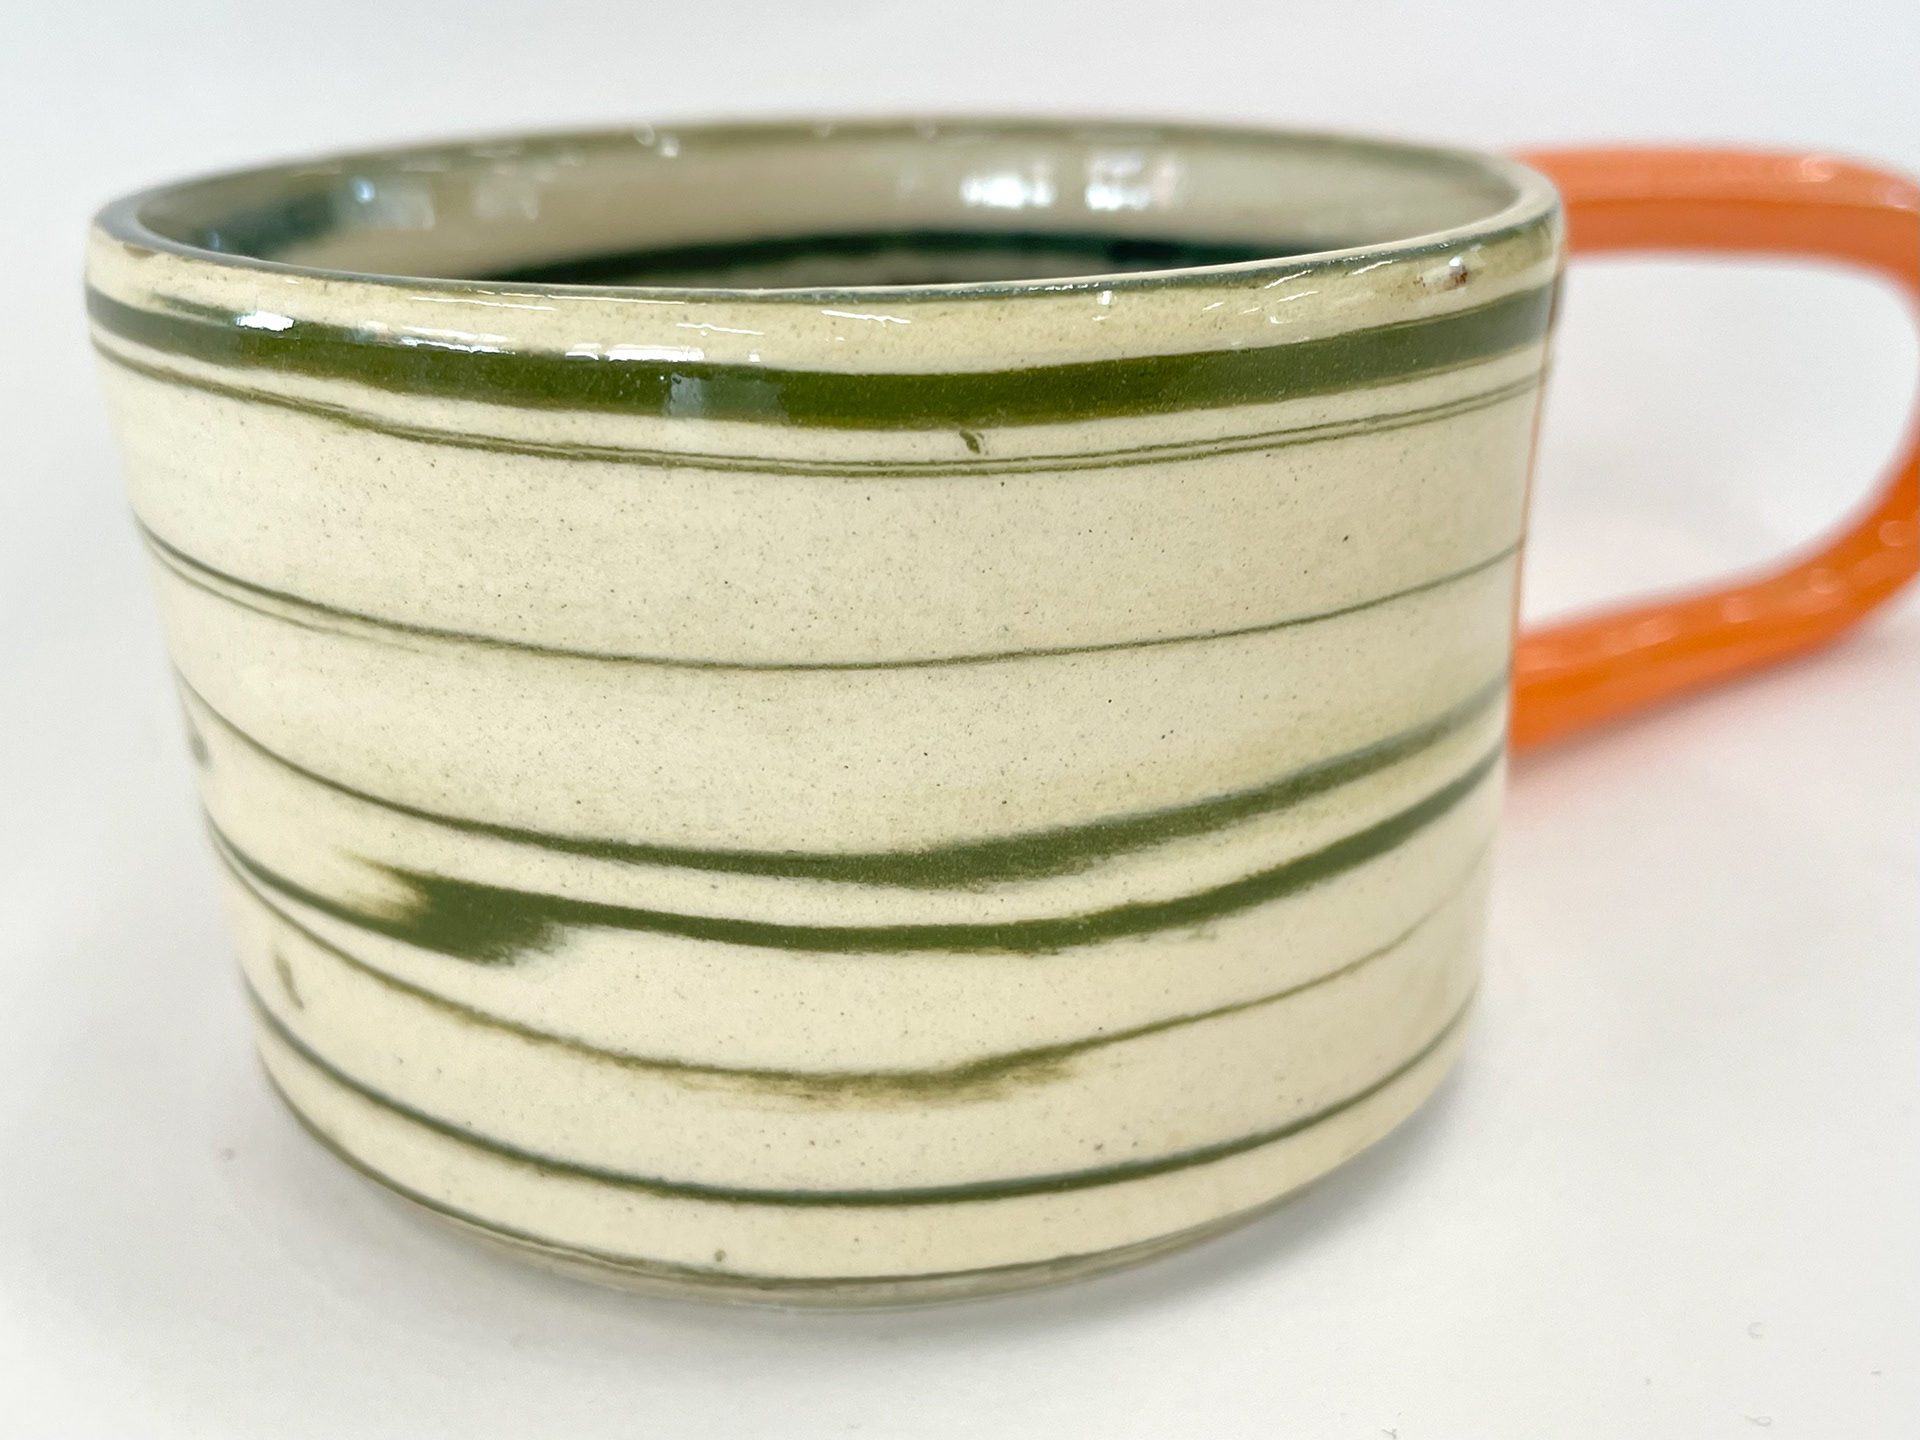
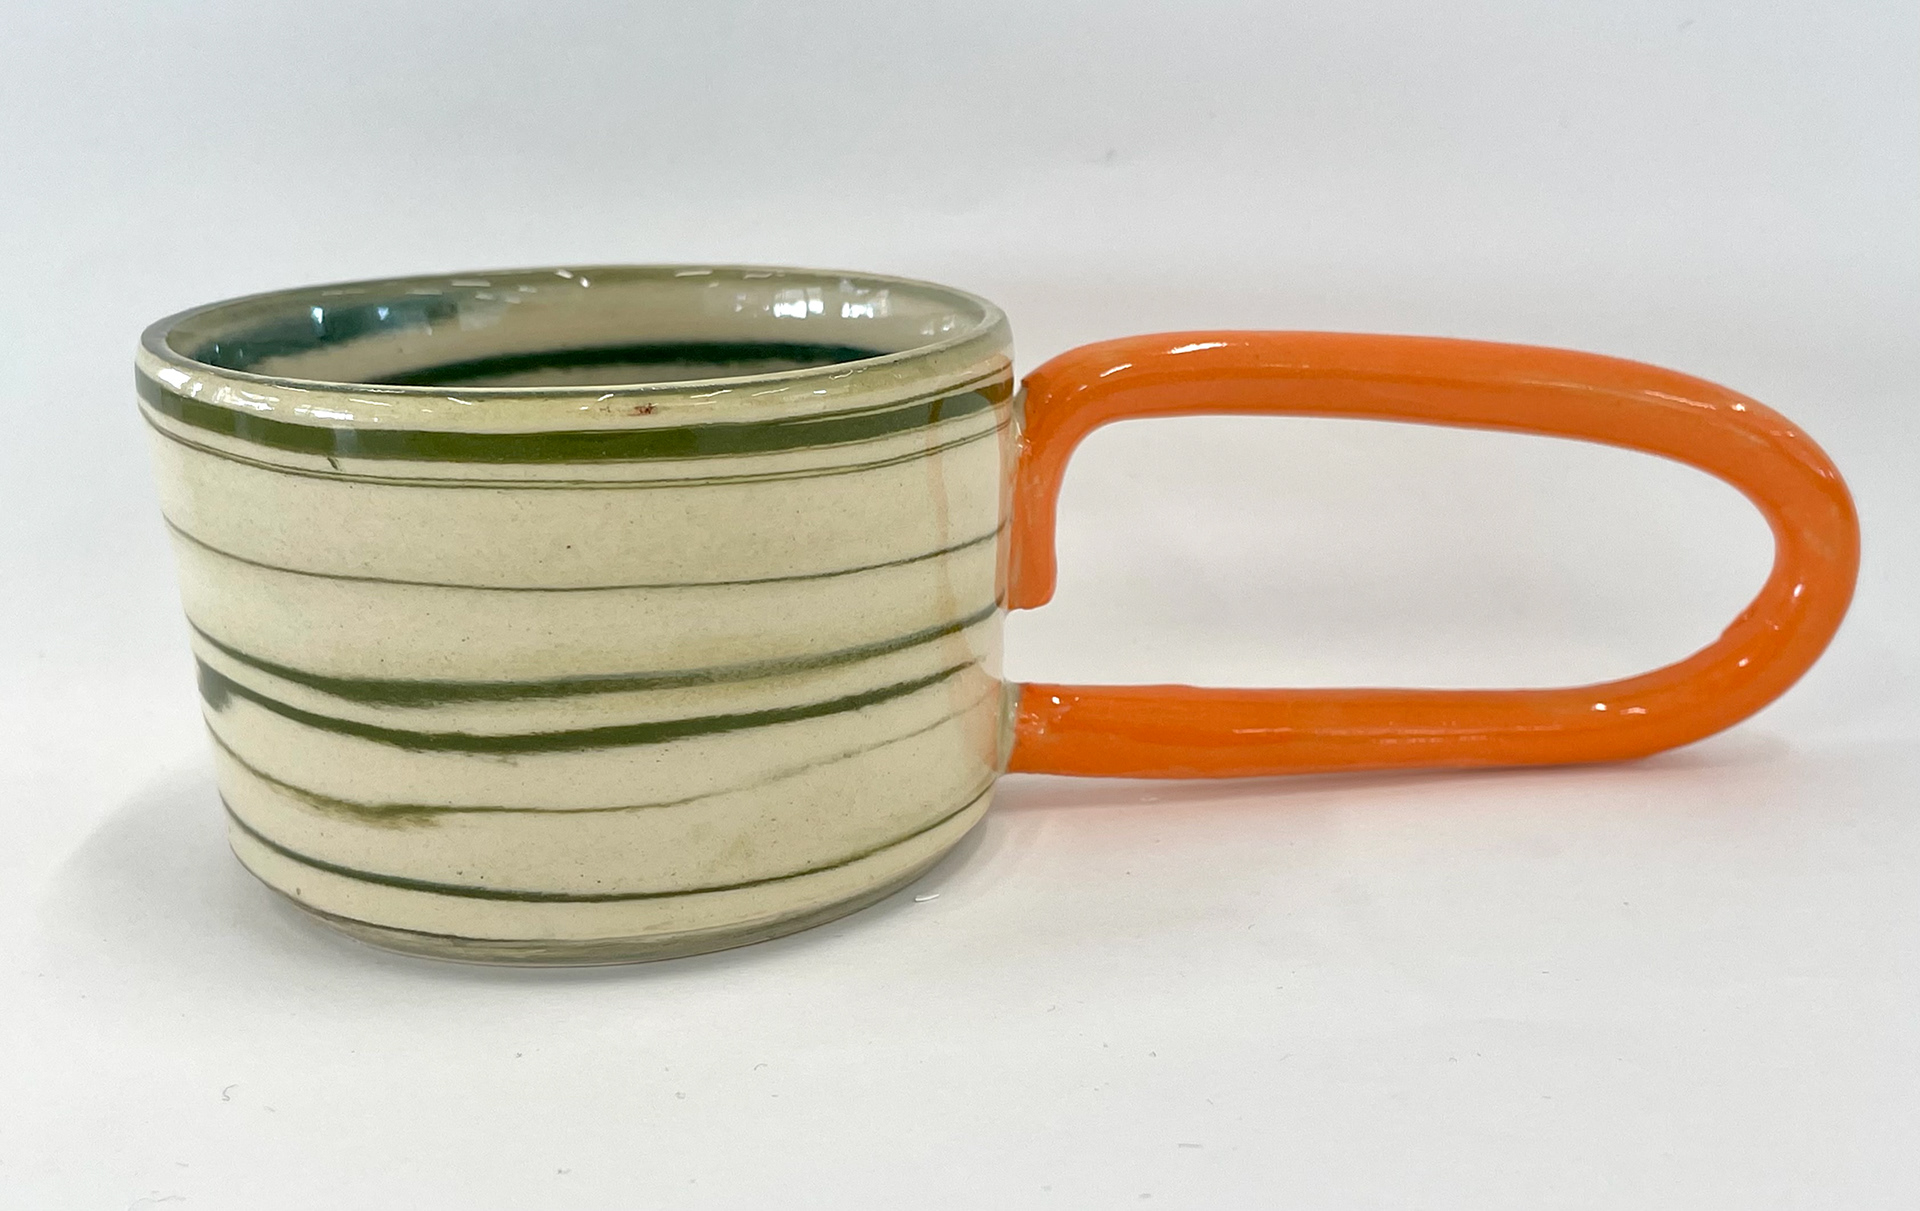
This technique of colouring clay uses stains, which I added to white slip to apply to ivory stoneware clay. Similar to oxides, experiments were performed with different quantities and firing at earthenware and stoneware. I used quantities of 2%,5% and 8% and fired in both earthen (left) and stoneware (right). Developing this further, I want to increase my measurement to 10% as I like a vivid, potent orange; however, with stains at a certain point, they become too saturated, and the increase of colour wouldn't have a difference once fully saturated. I used various colours to see which would work best with my pallet. For me, orange was the best colour that worked with my oxidised colour pallet; I like its bright, bold contrast, but I now need to think of how to incorporate it into my design without being too overpowering.
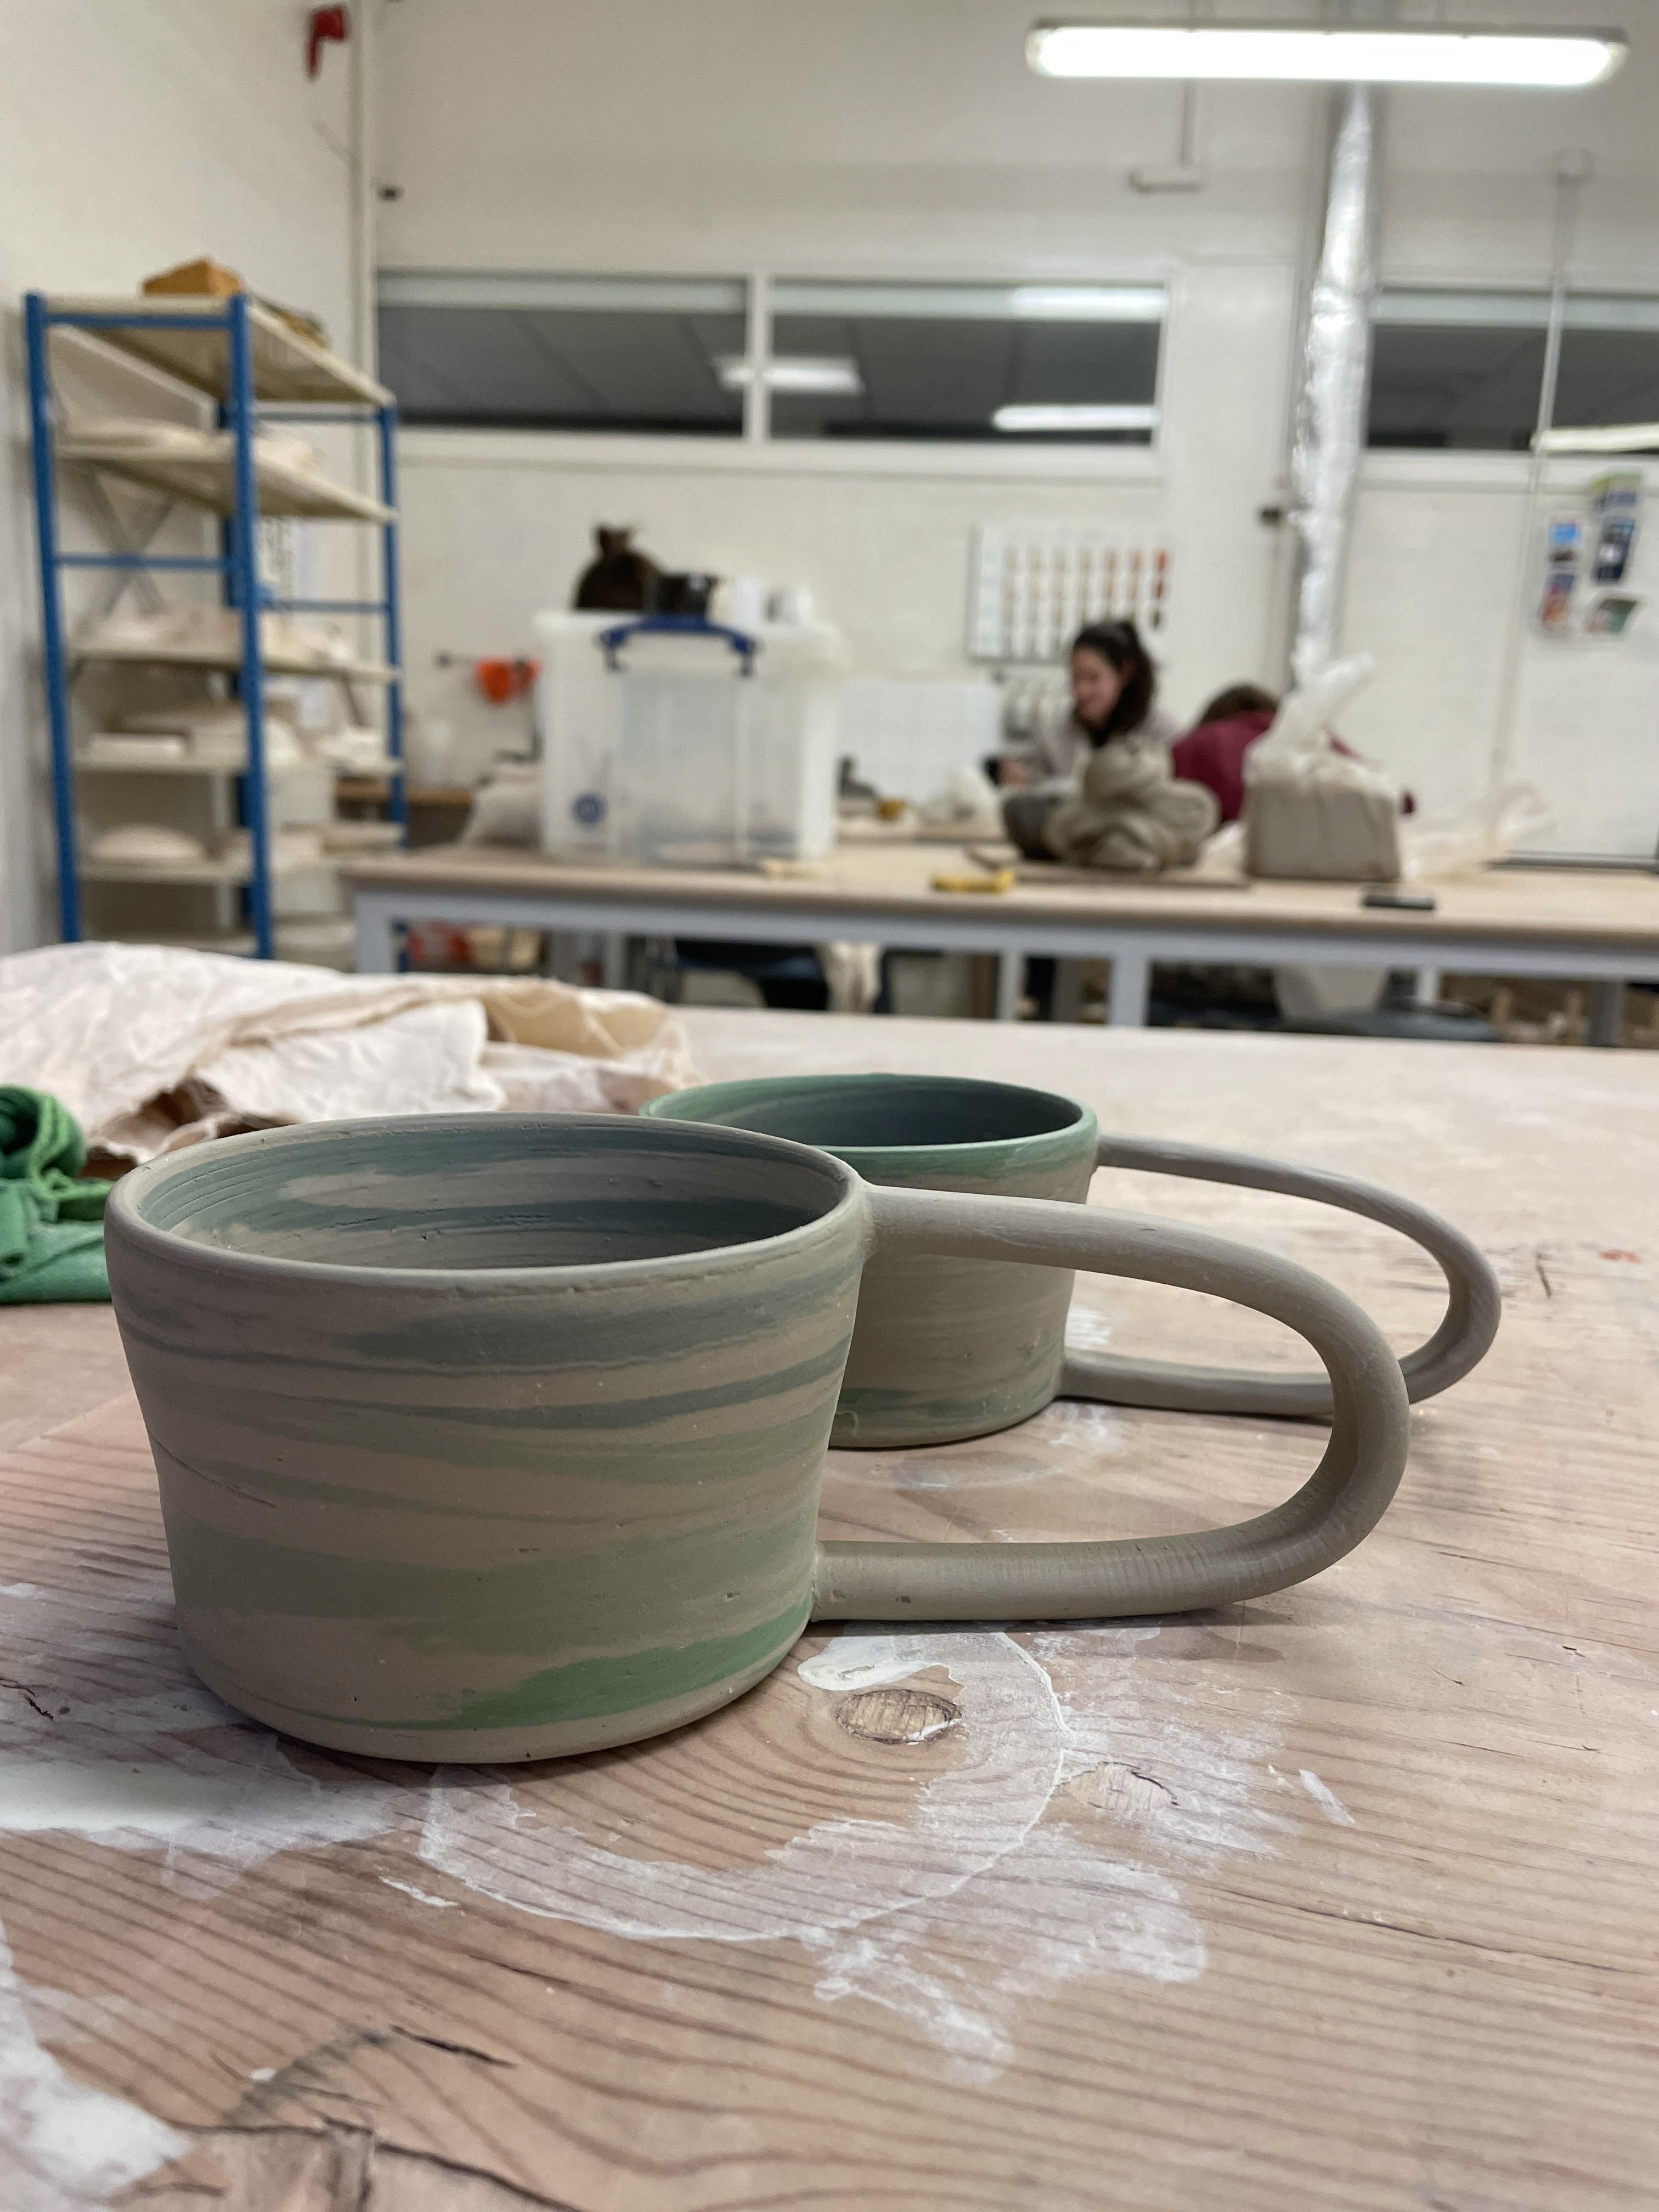
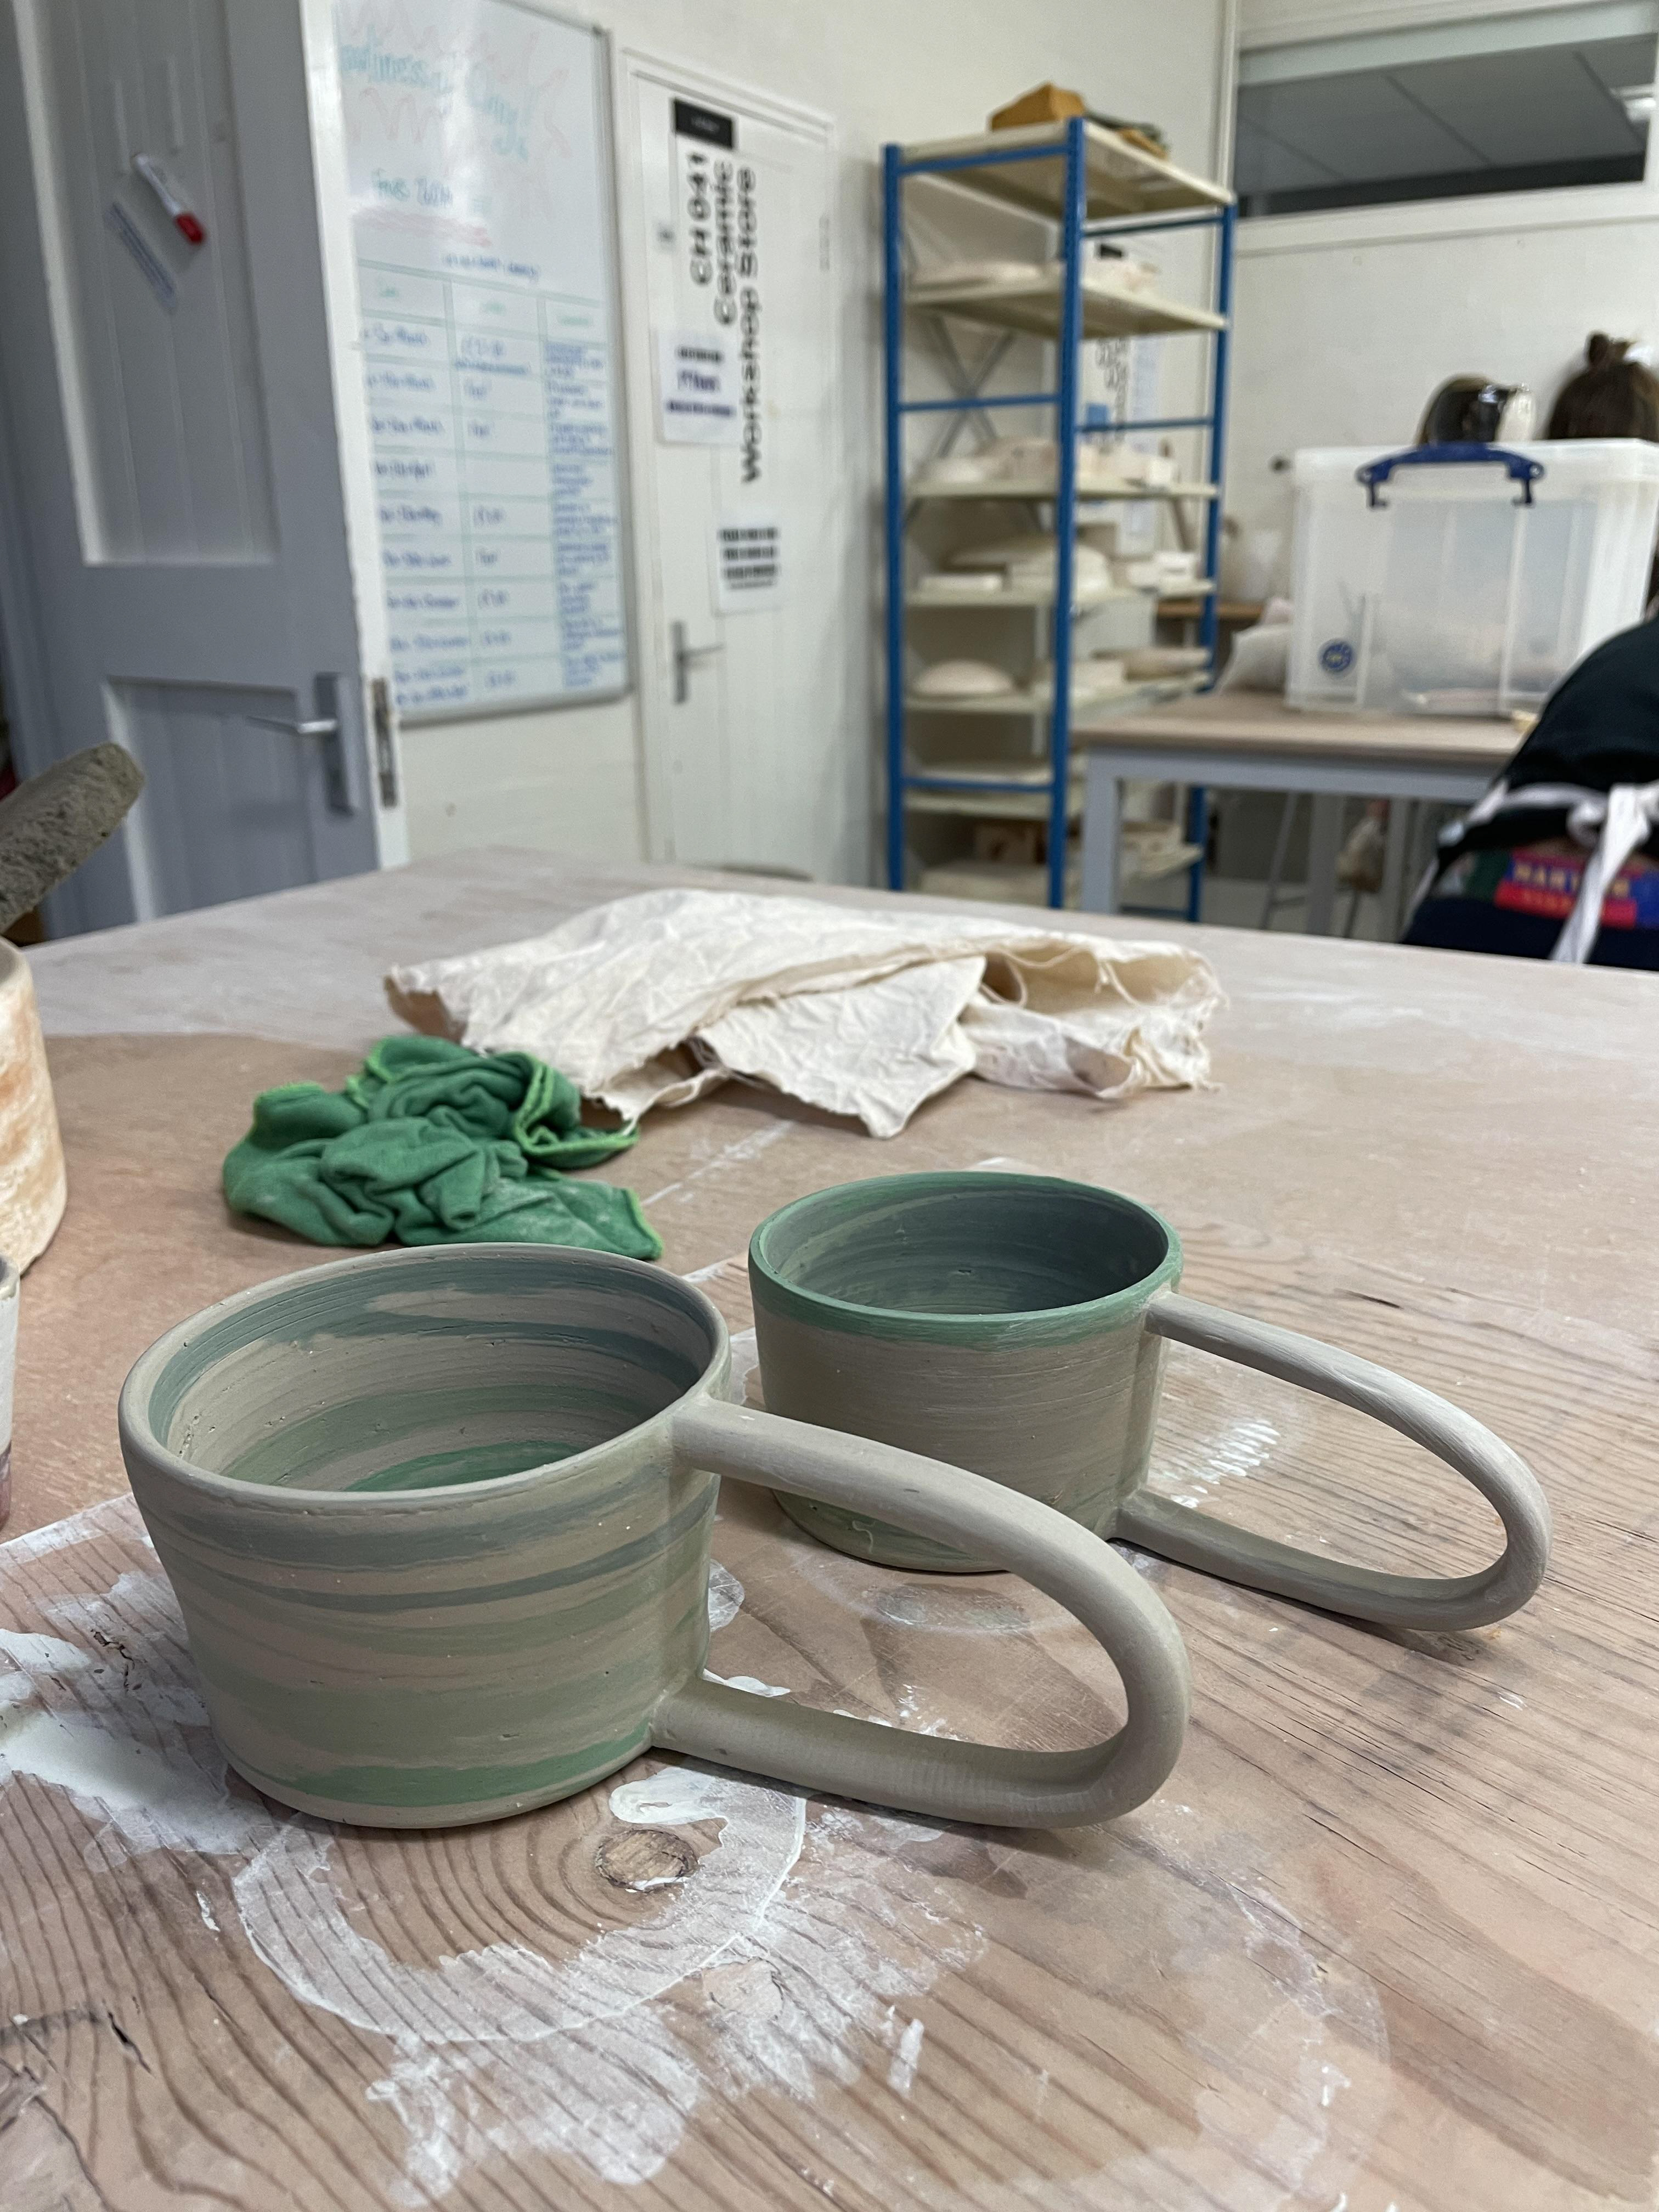
Experimenting With Throwing Coloured Clay
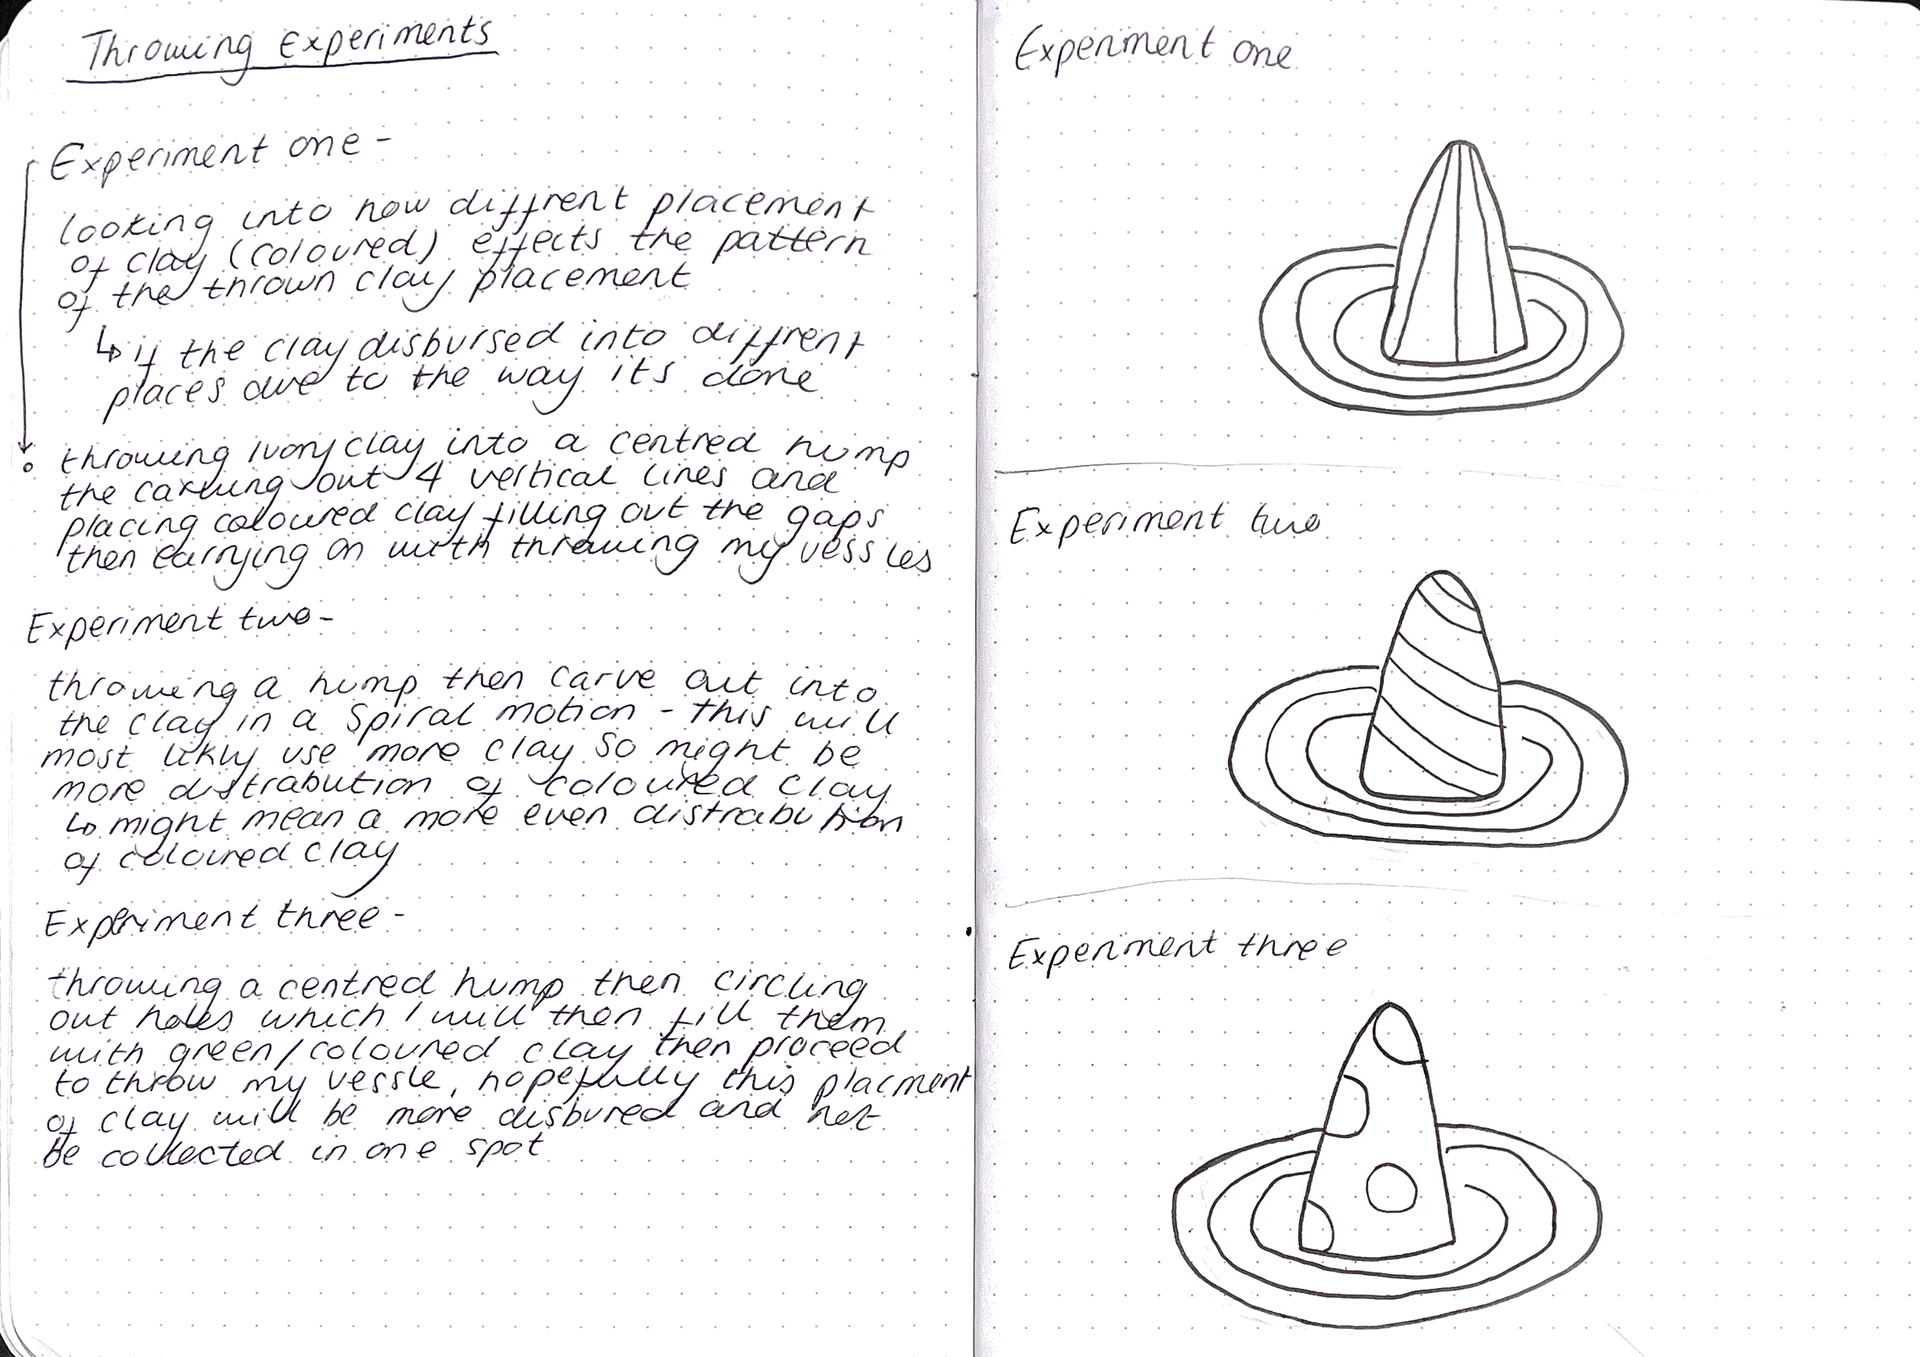
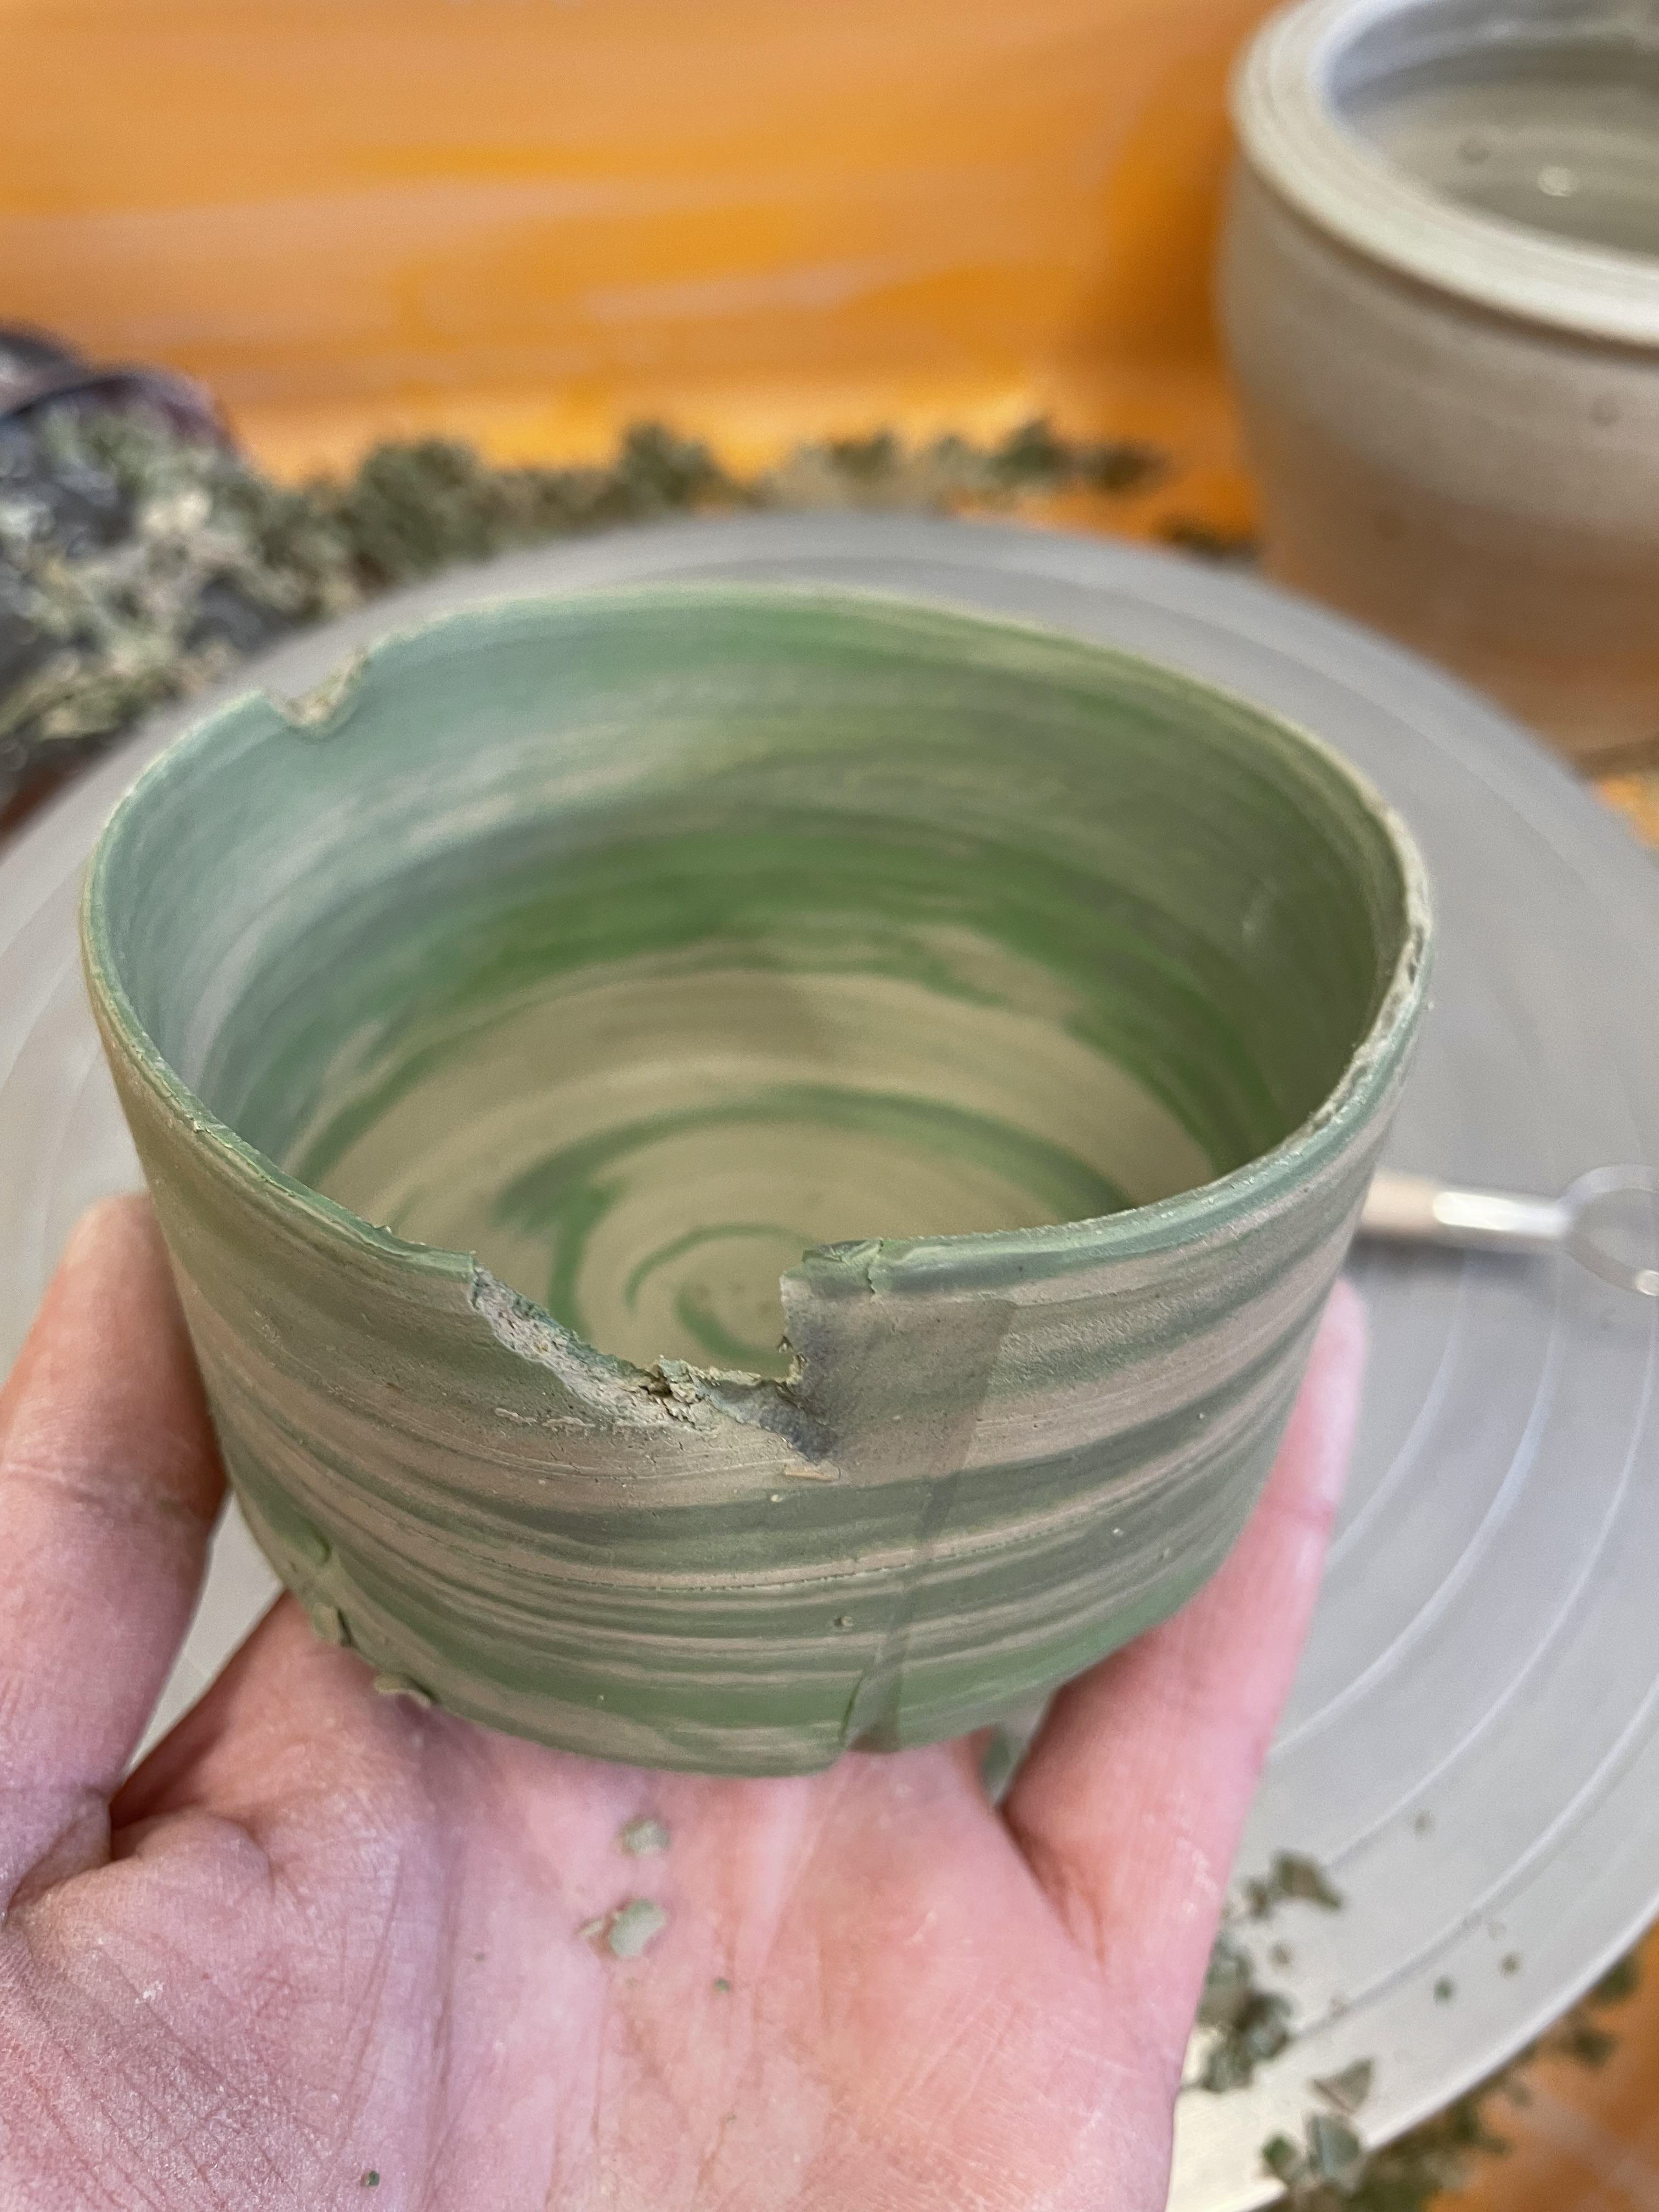
Whilst throwing this piece, i damaged it not seeing the outcome of the patterns.
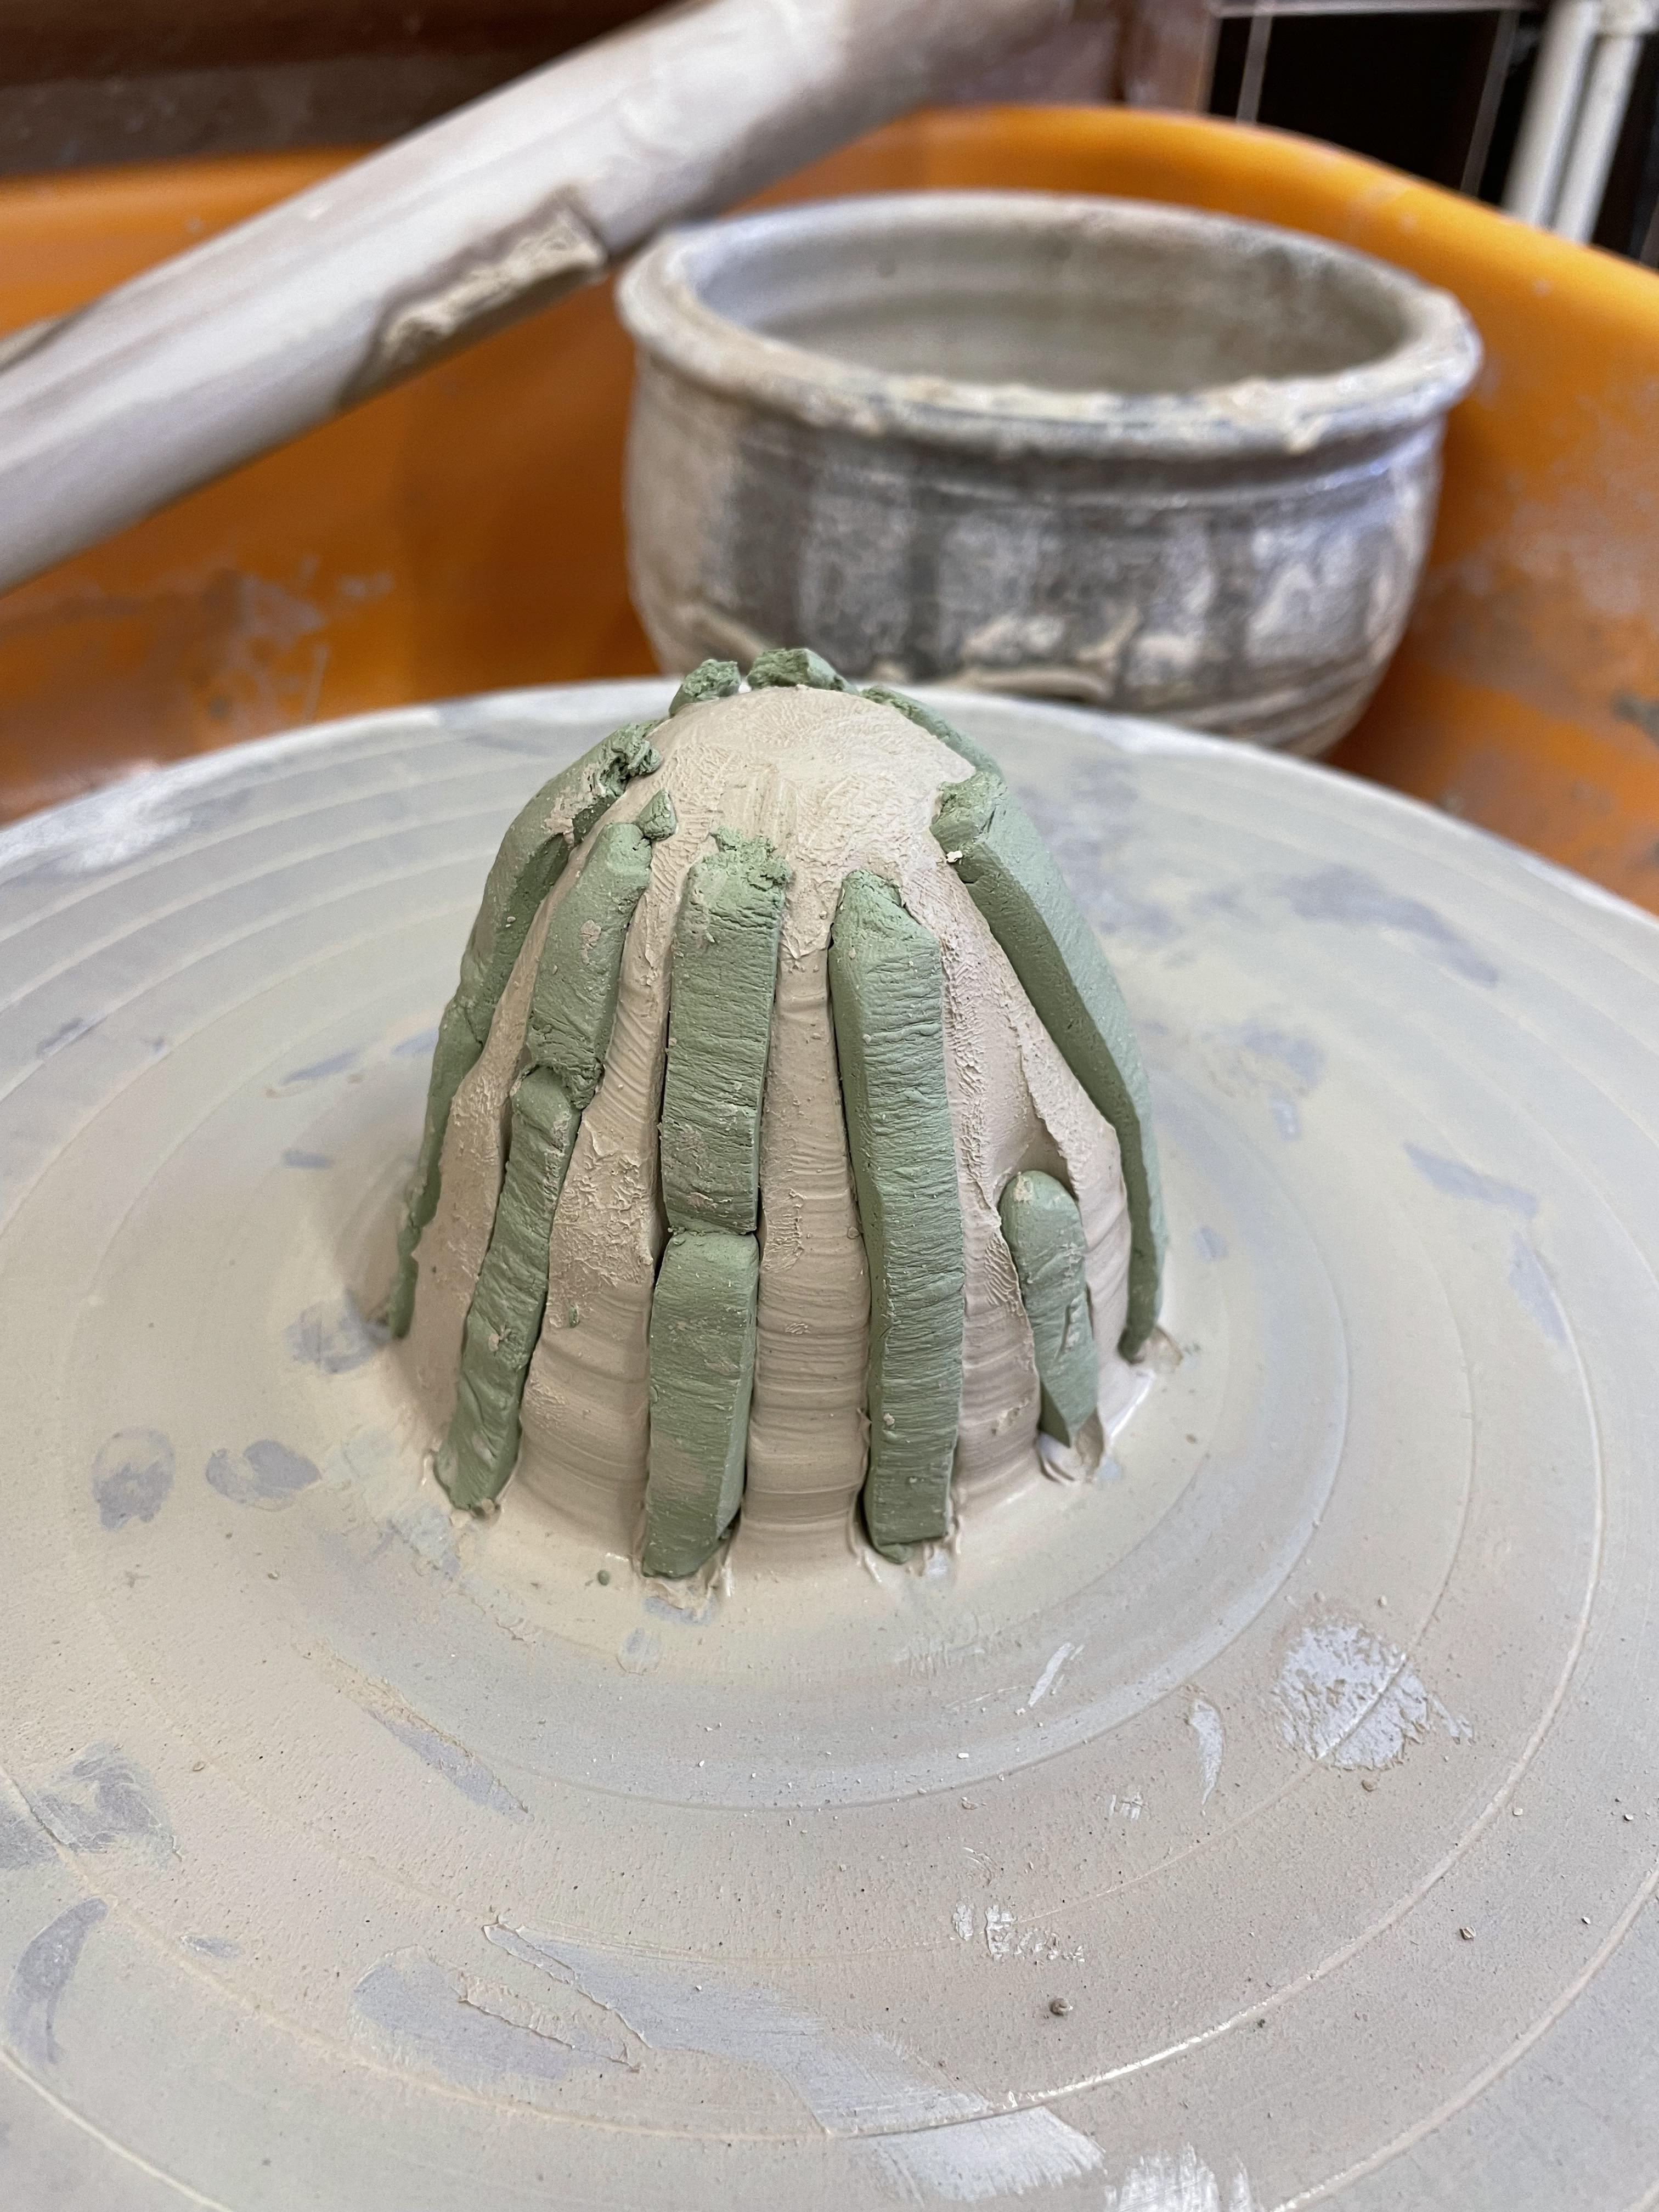

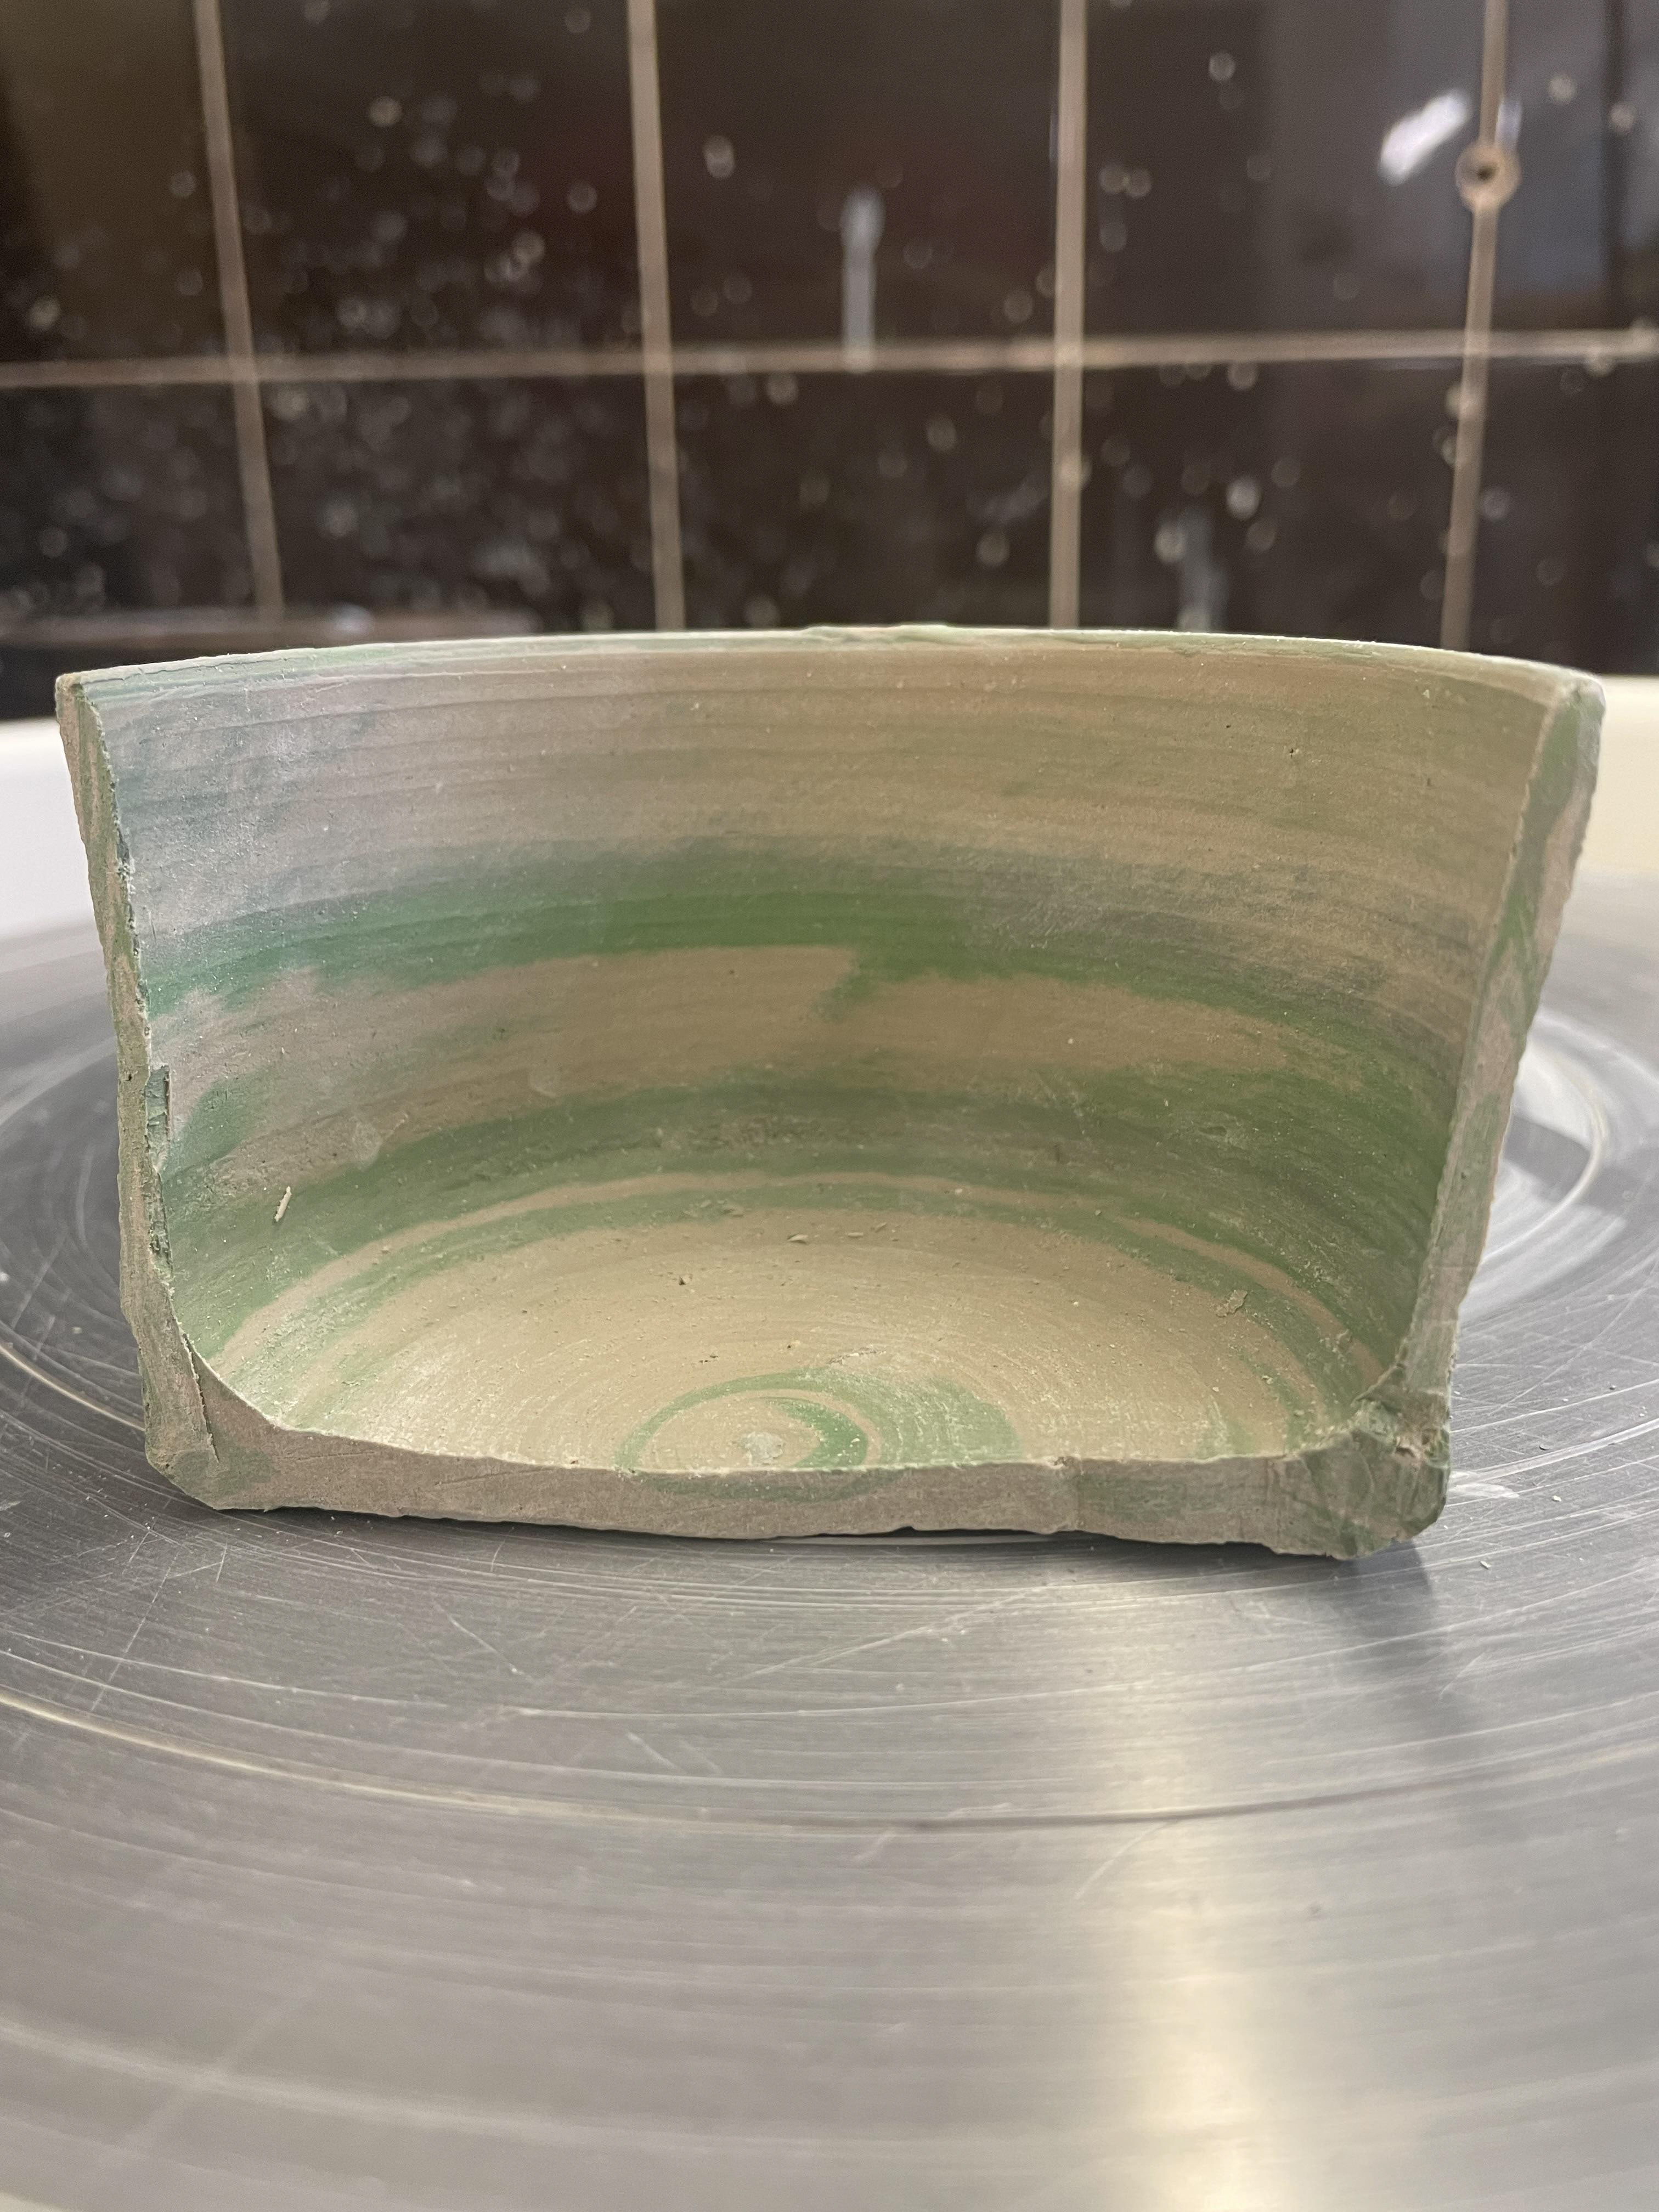
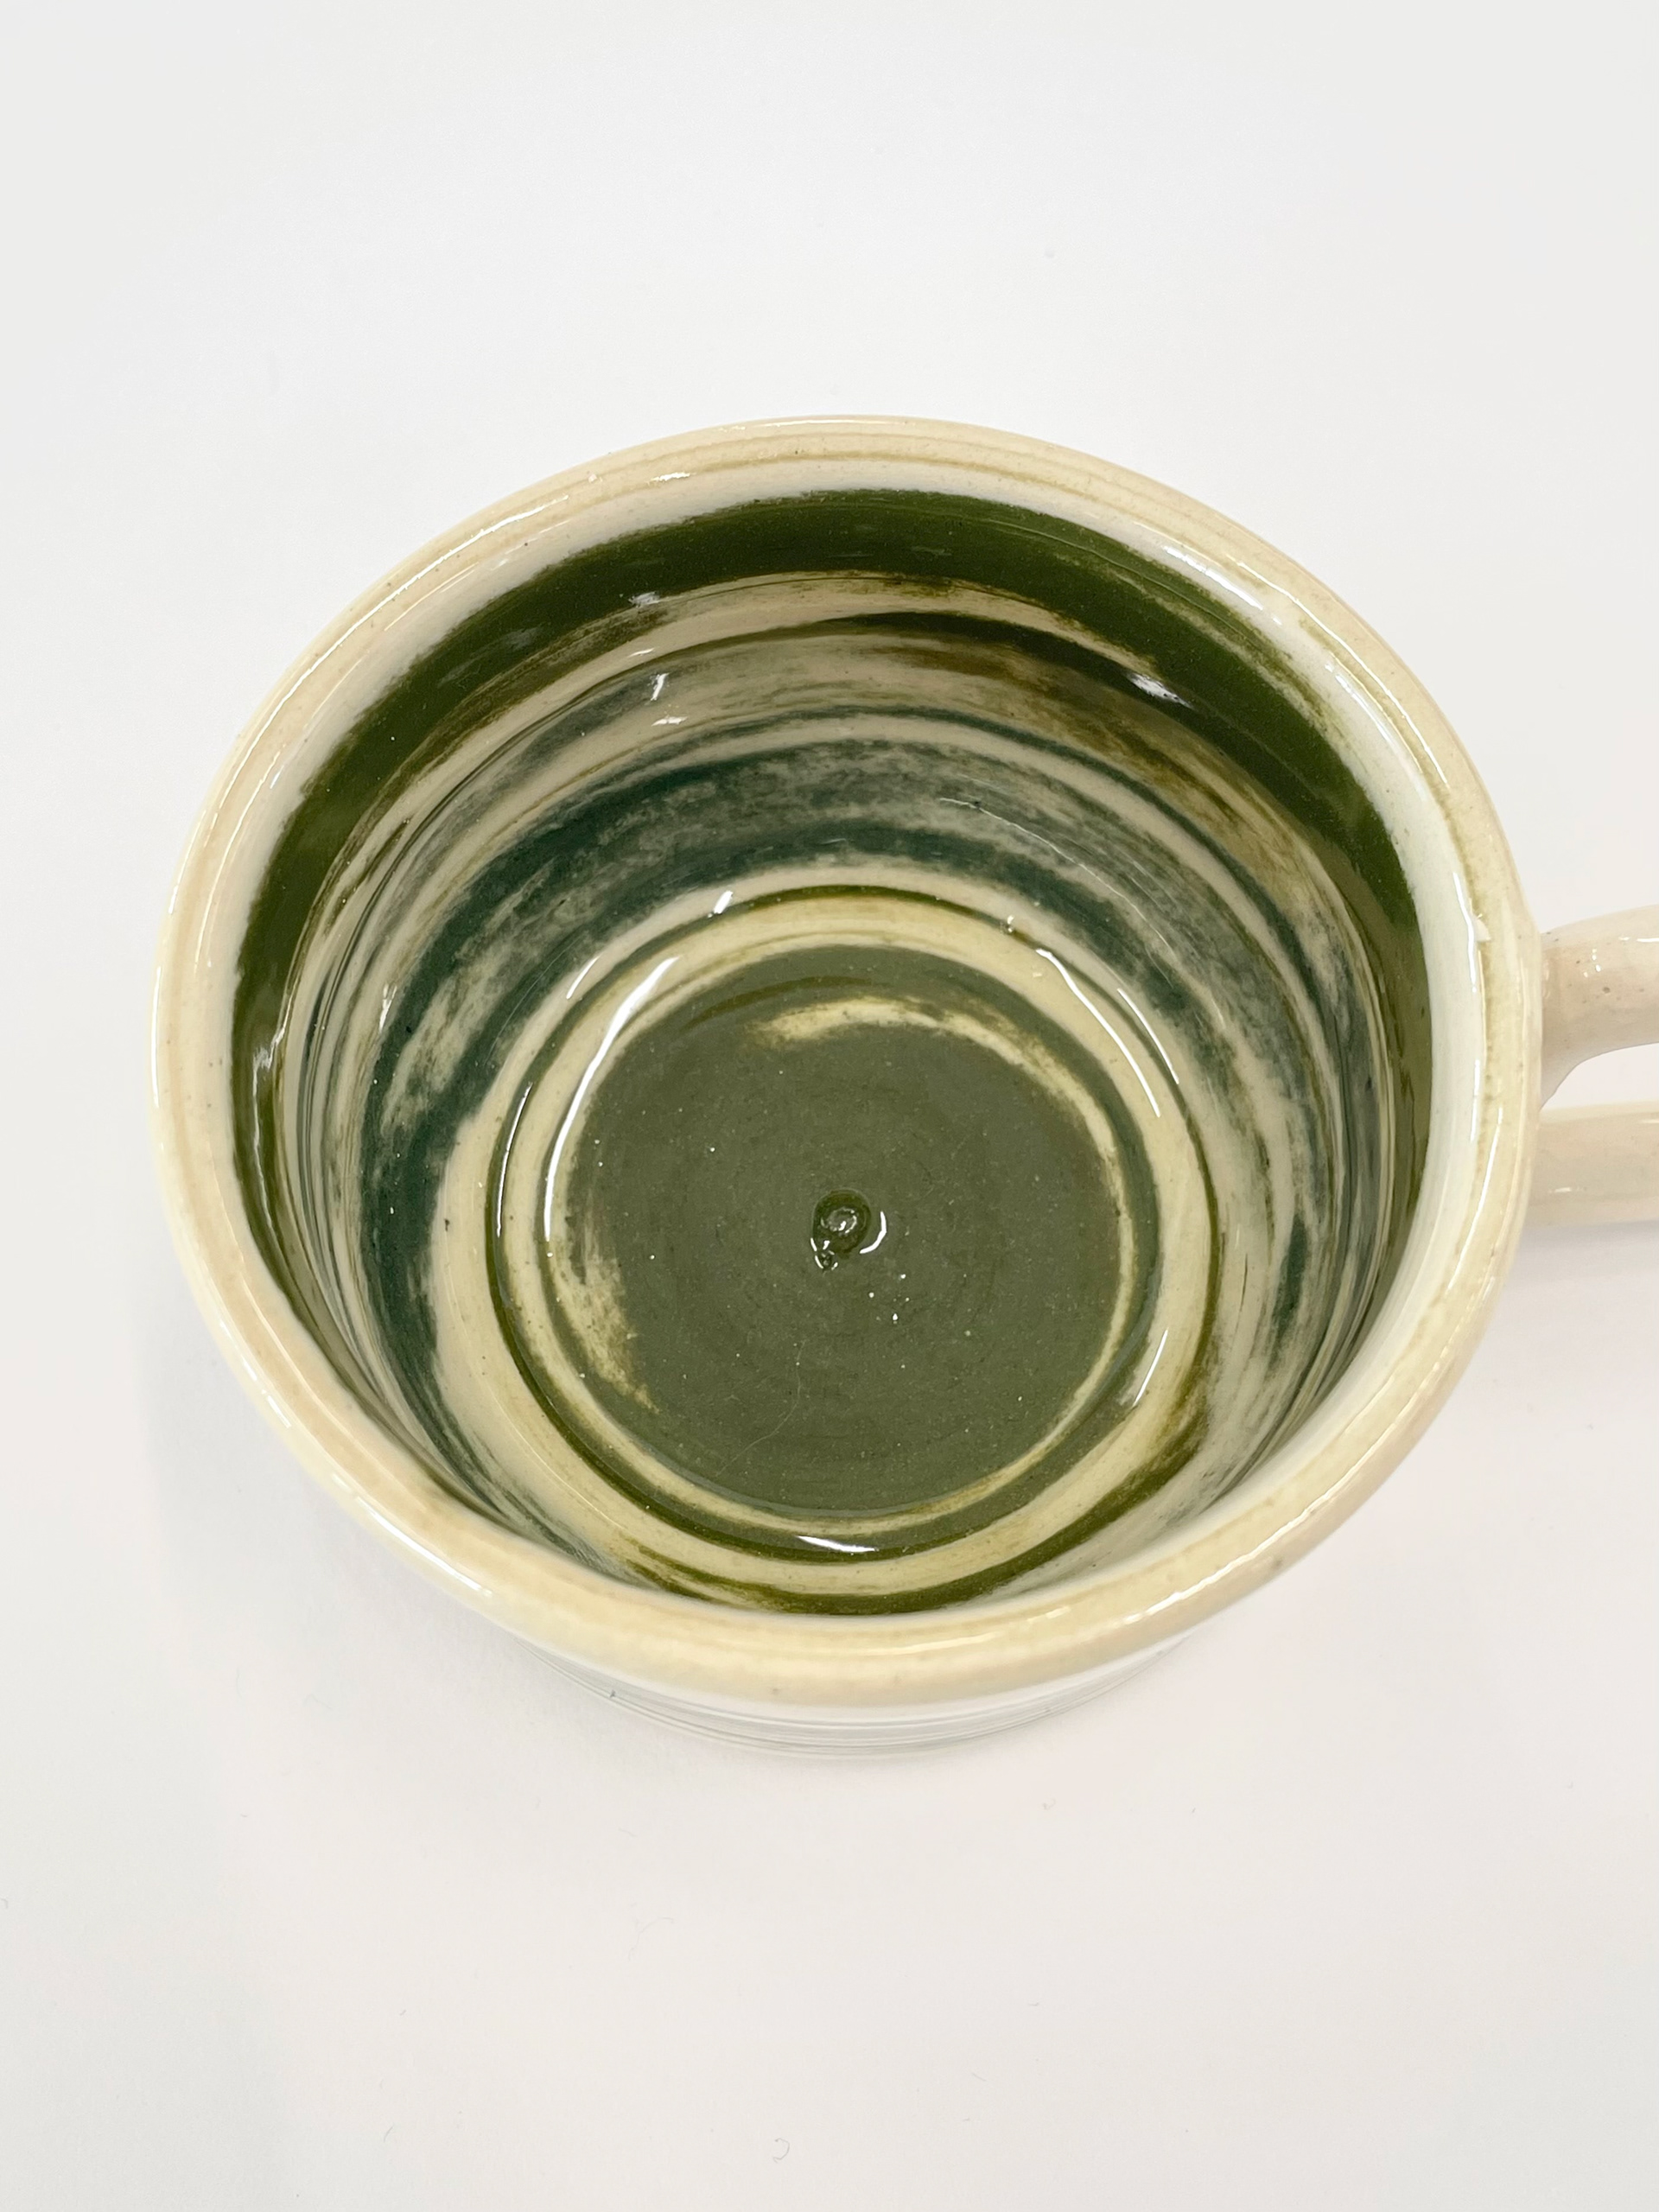
Looking closely at the patterns created when throwing with coloured clay added to the ivory stoneware hump in different ways is very interesting; I like how they have different patterns; therefore, not one thrown vessel is the same. However, I found that it was harder to throw the clay as it created lots of air bubbles where I placed the coloured clay; therefore, it had inconsistencies as I hit air pockets damaging the walls of the hump. Moving forward, I realised I needed to be more accurate with my clay and measure the amount I use; this is beneficial as I'll know the weight of my mugs, have more consistency and save clay with my amounts. It also means I won't have a vessel over powdered by coloured clay.
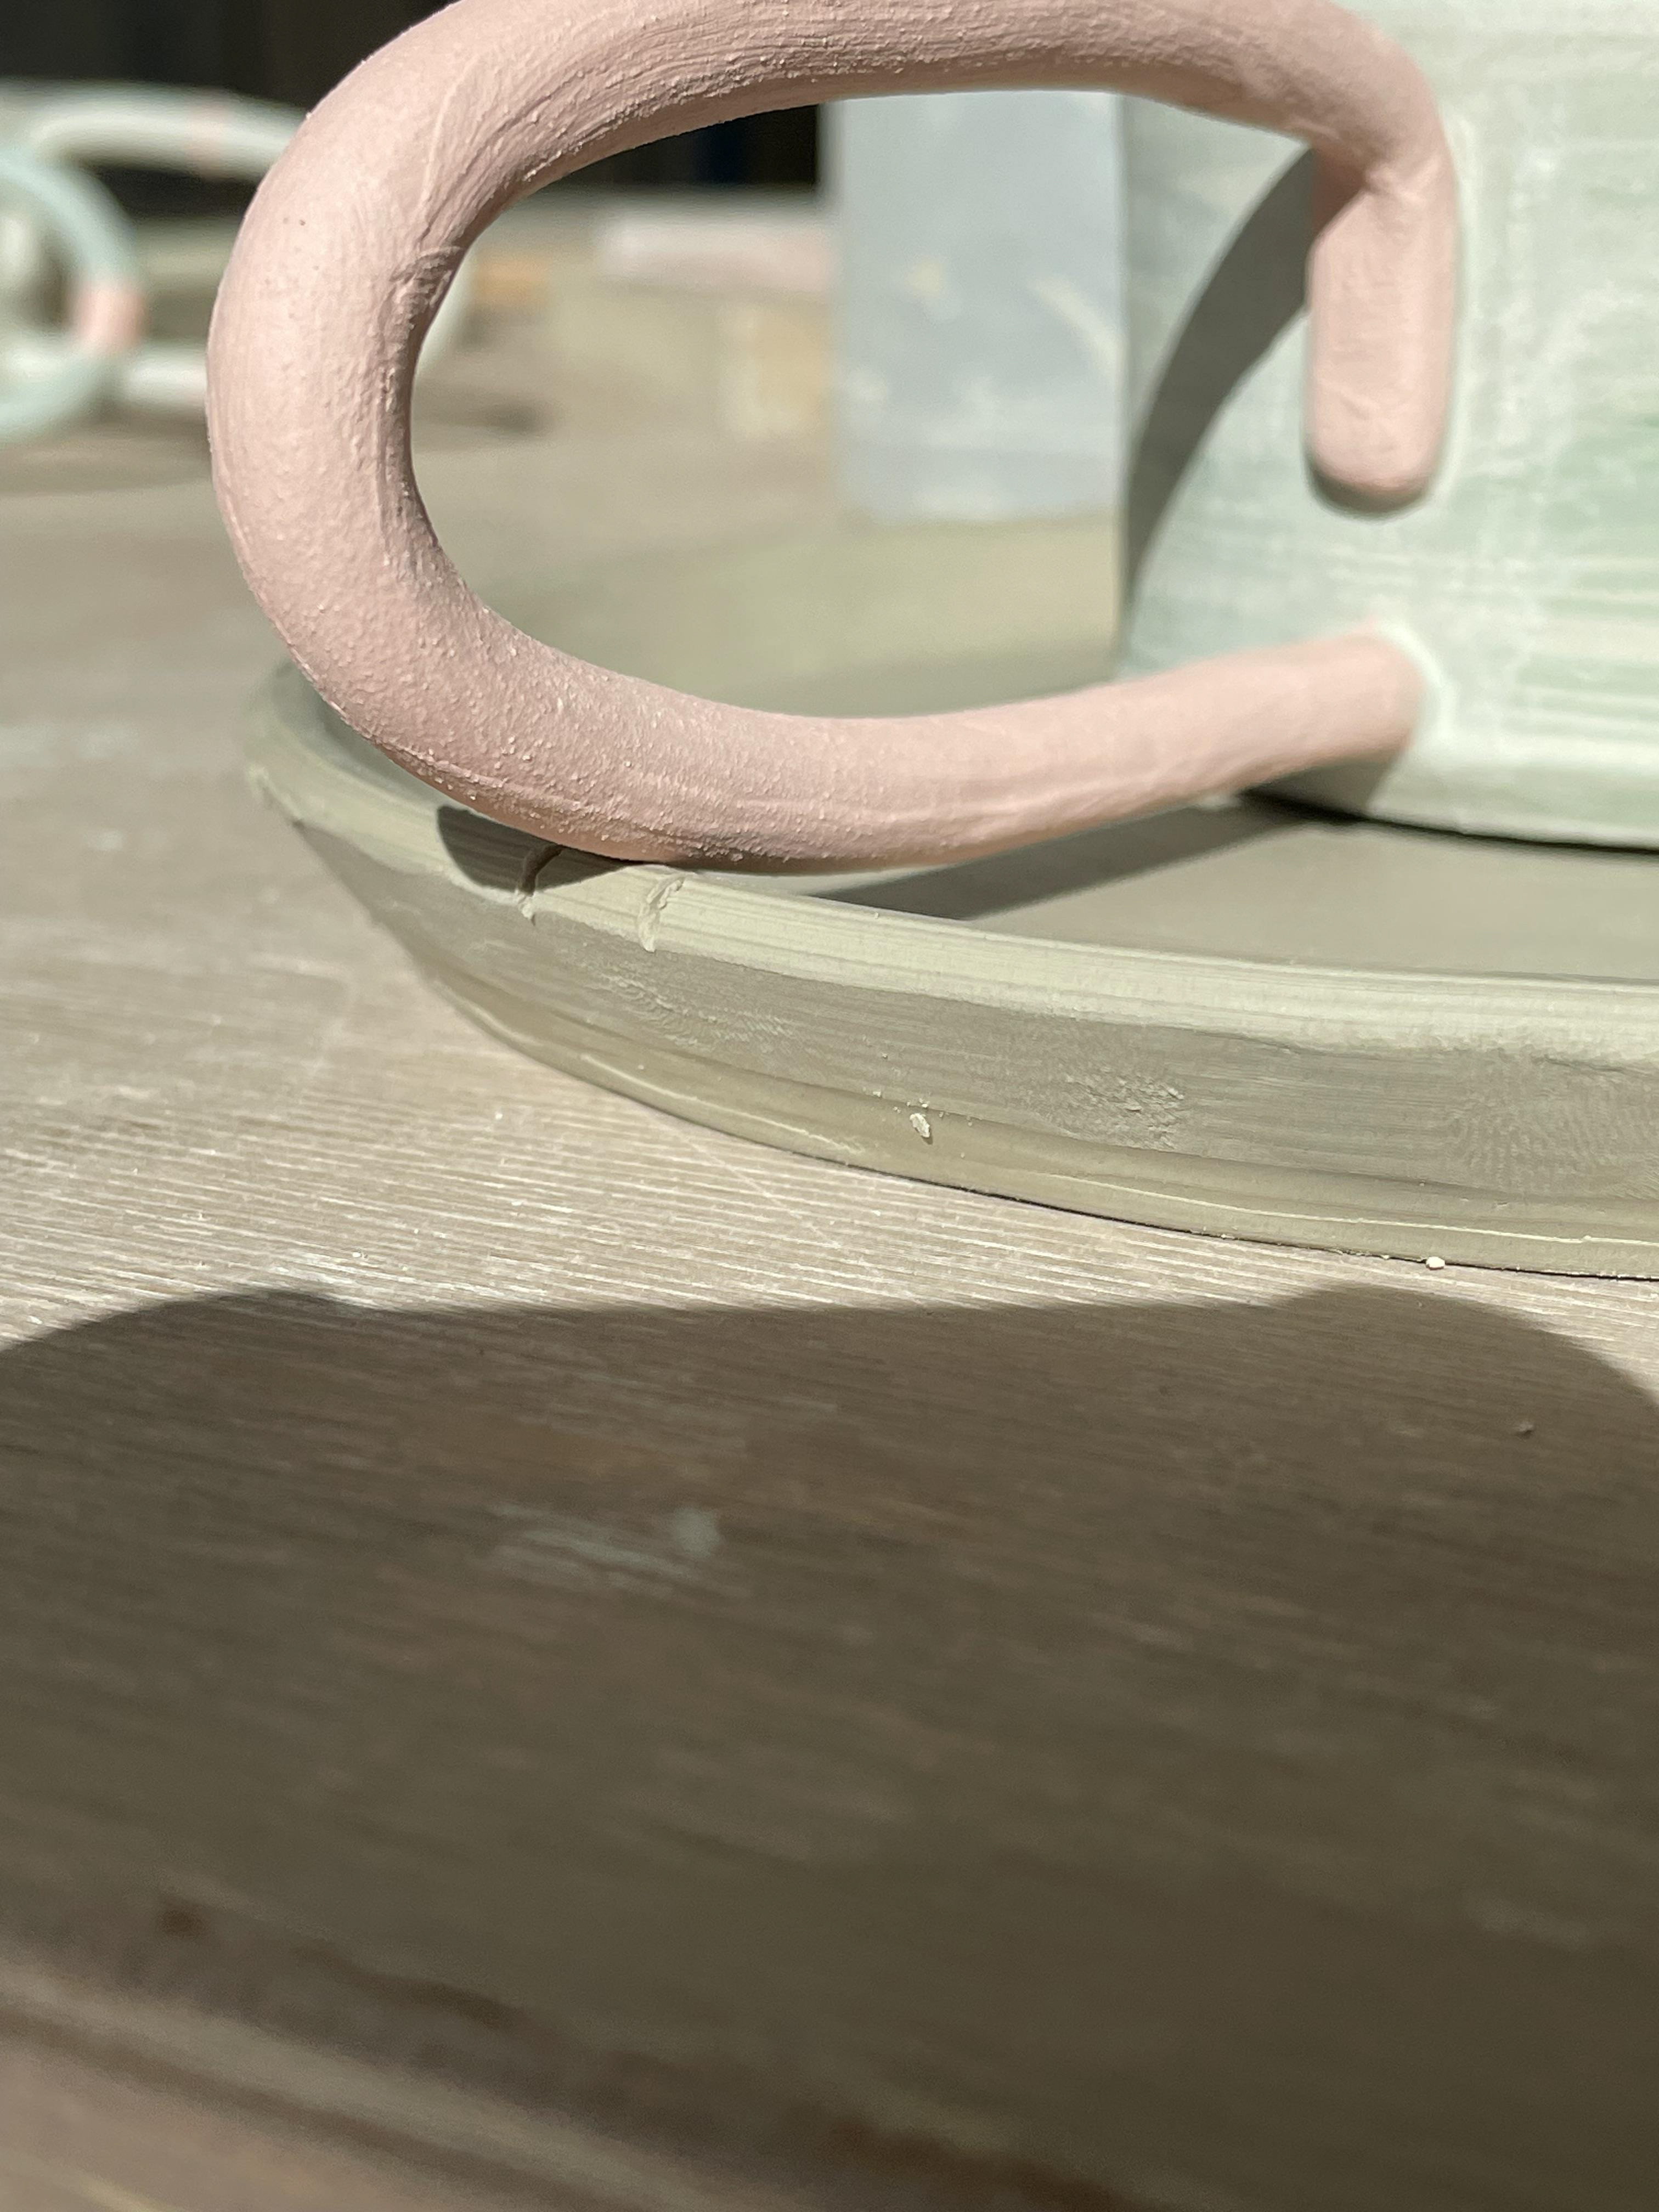
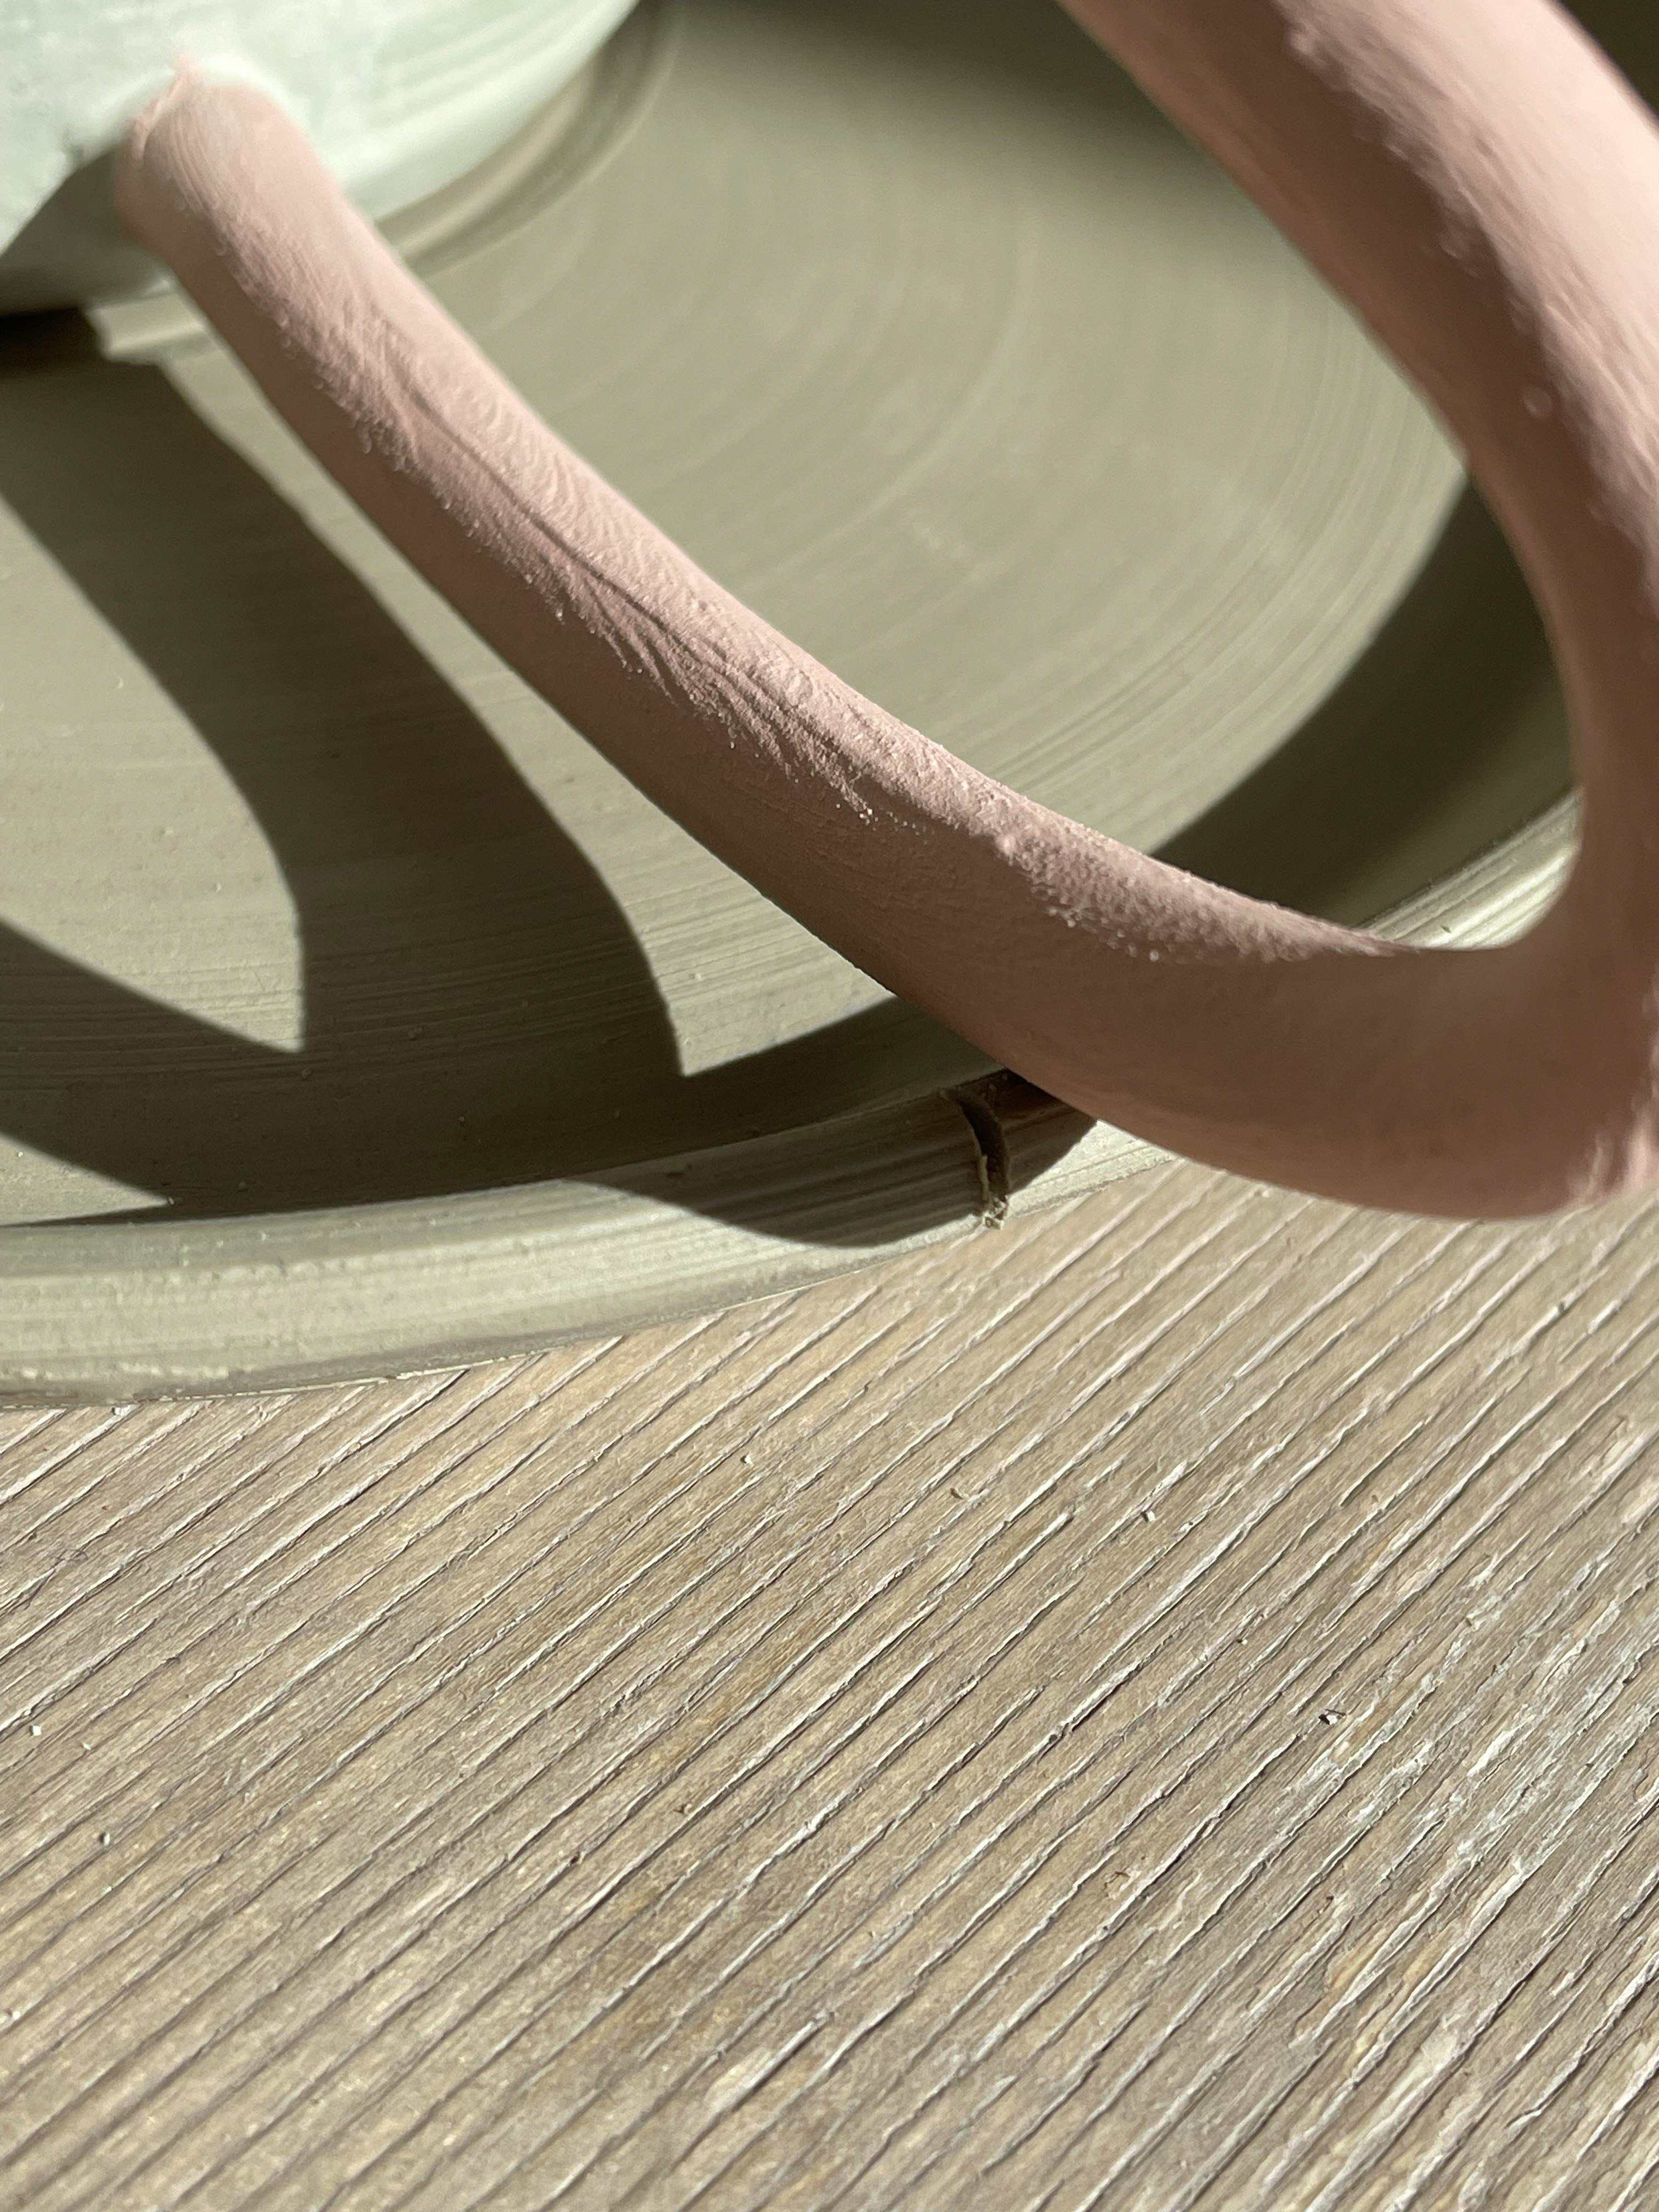
Different Handles
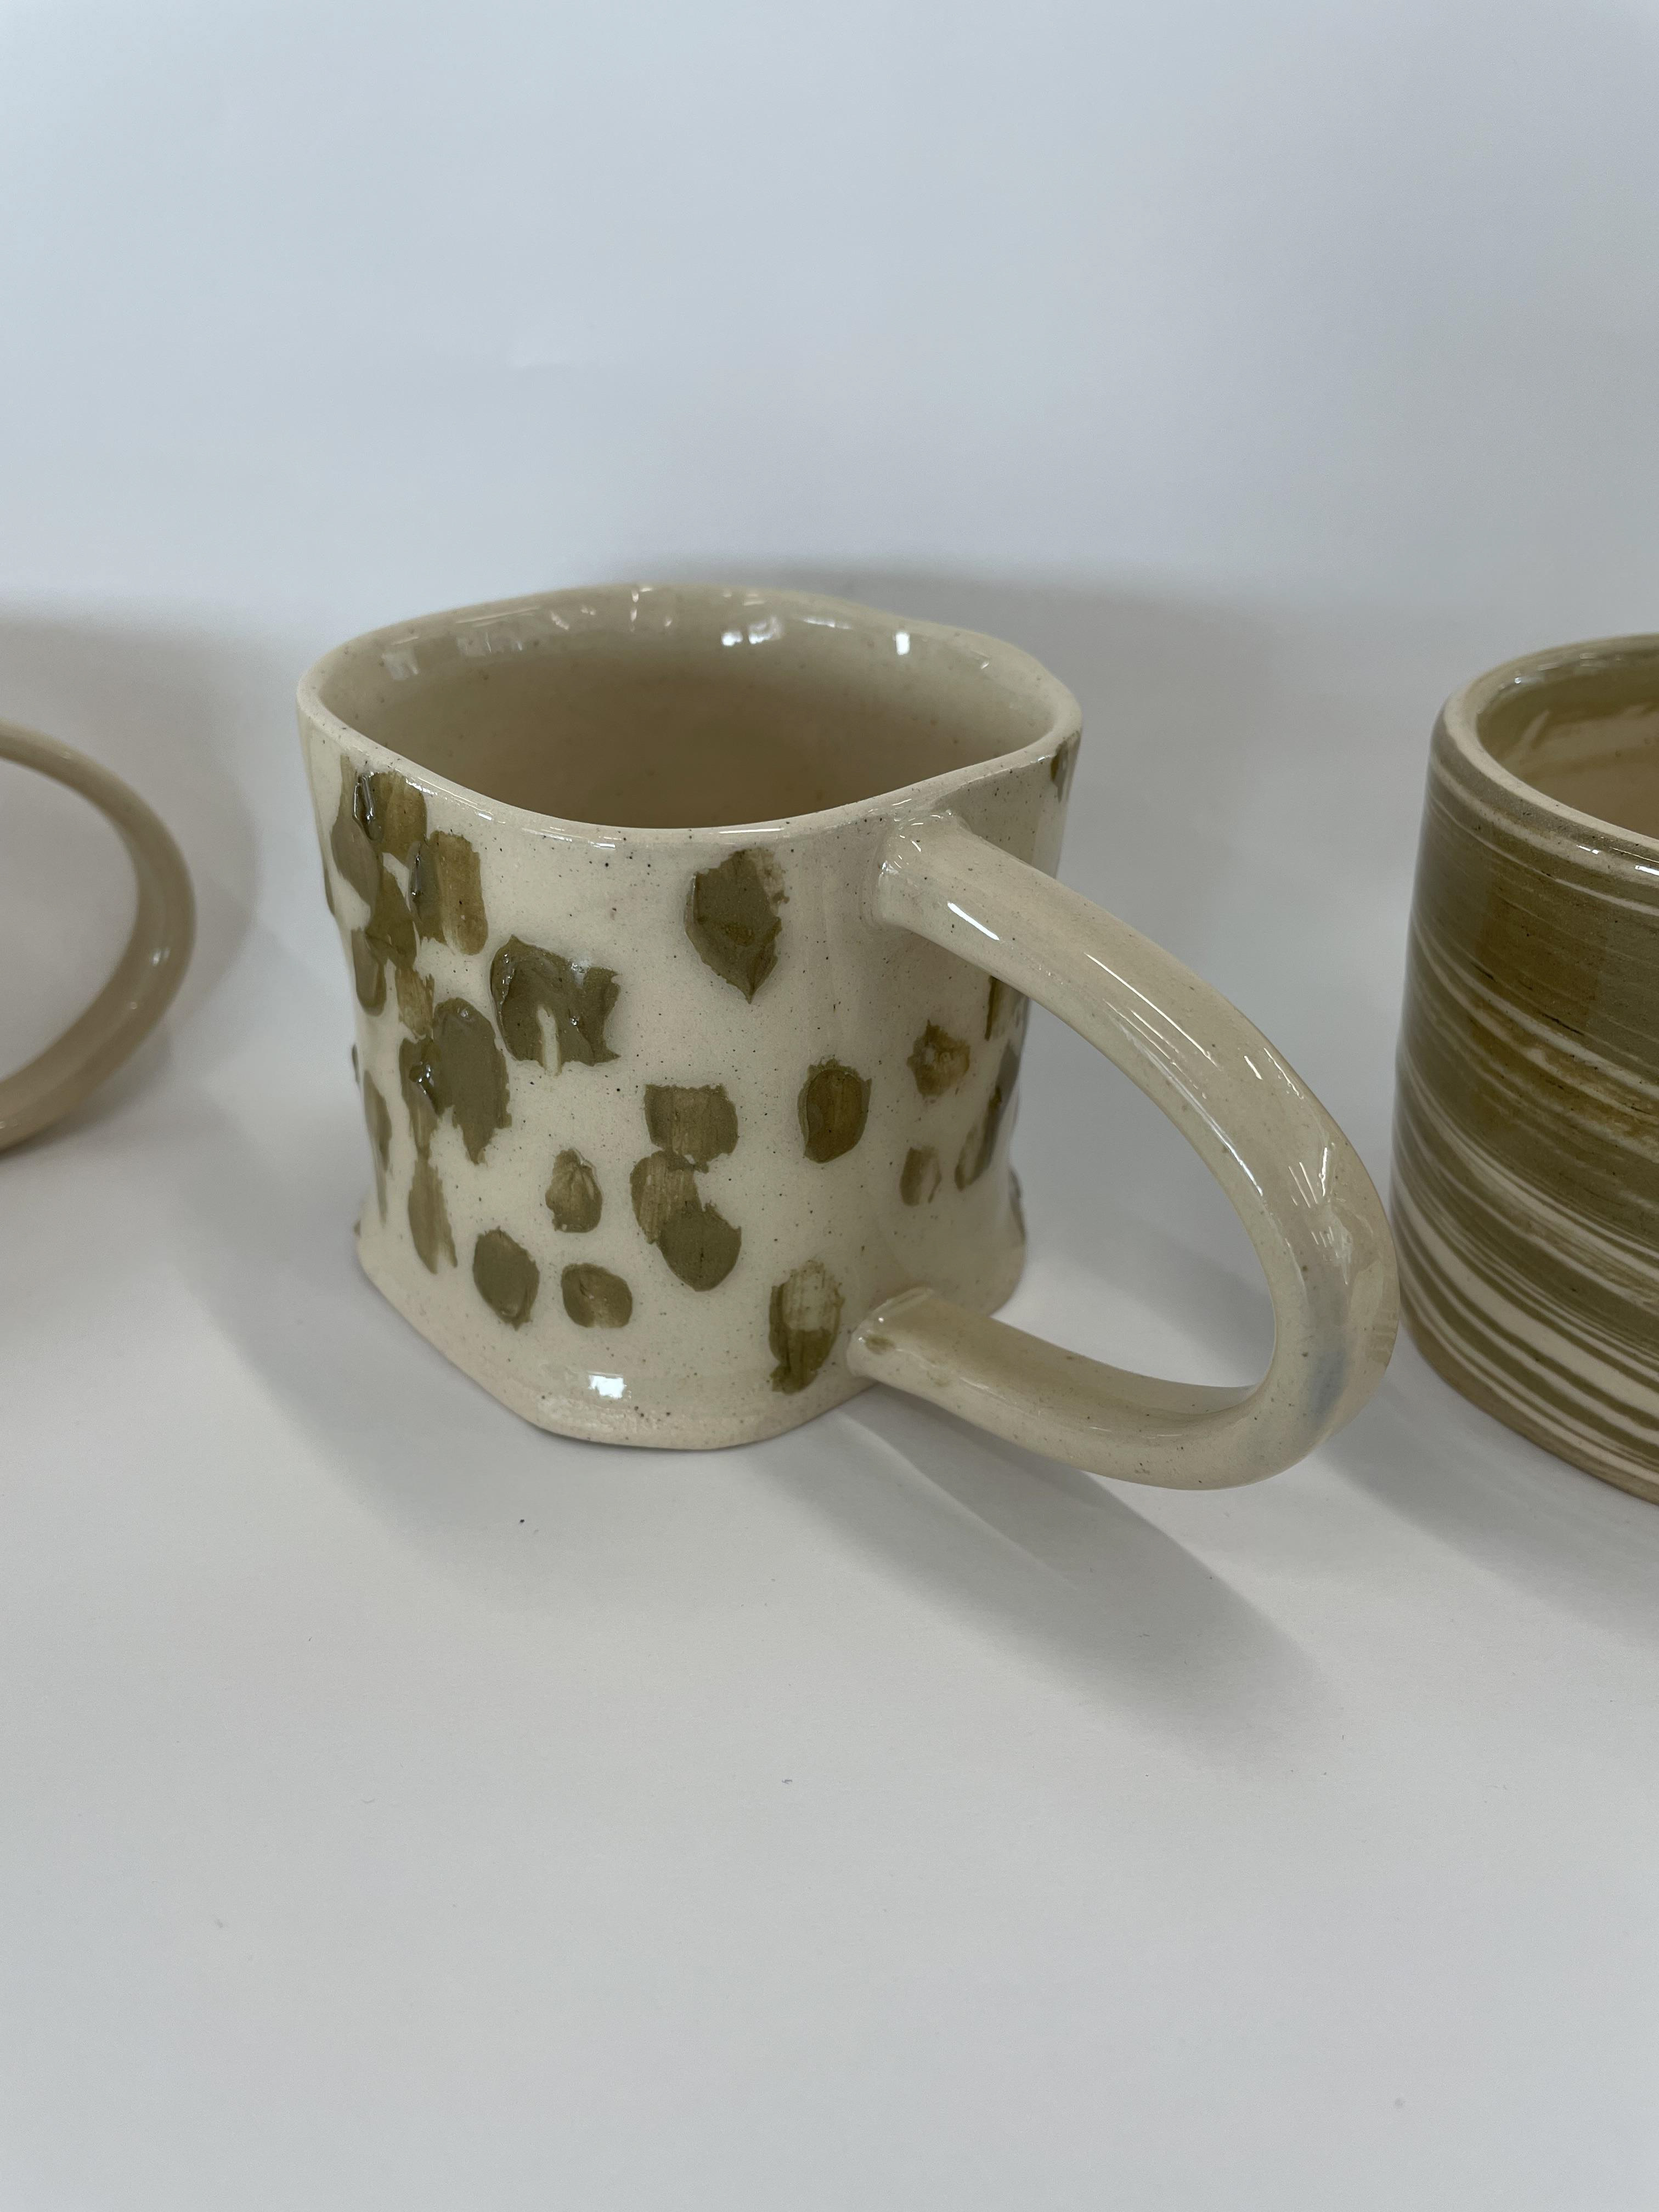
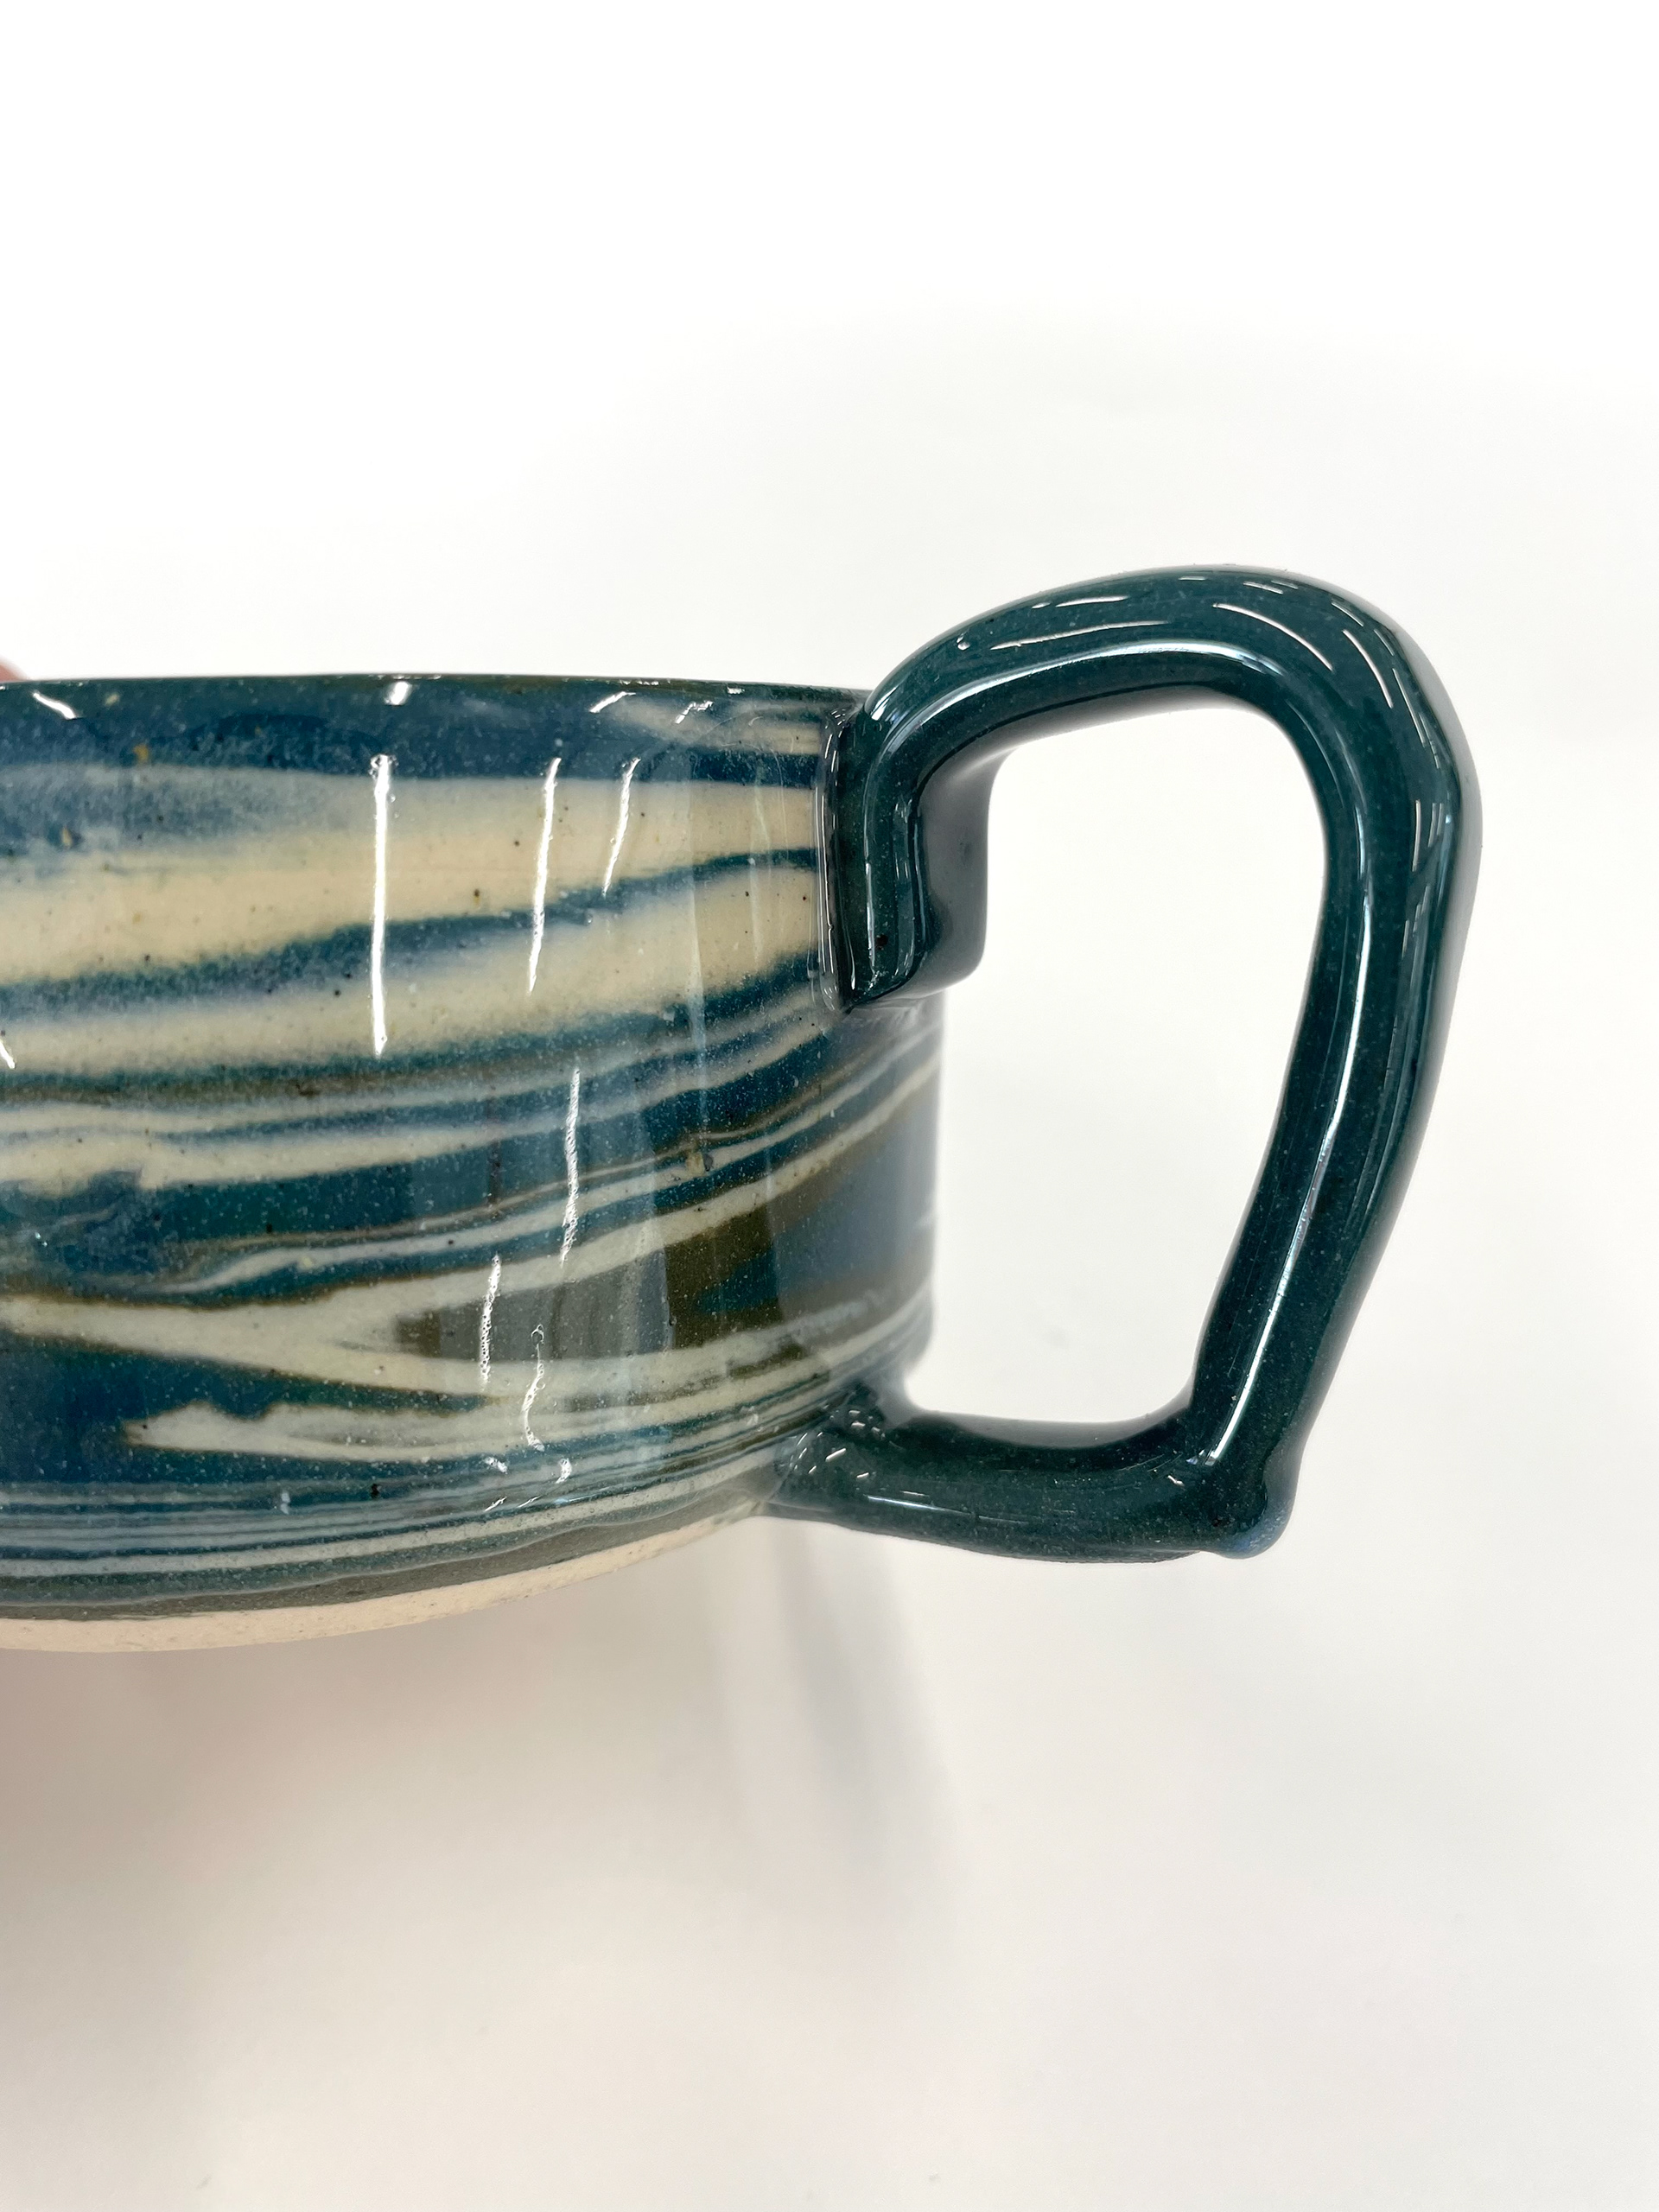
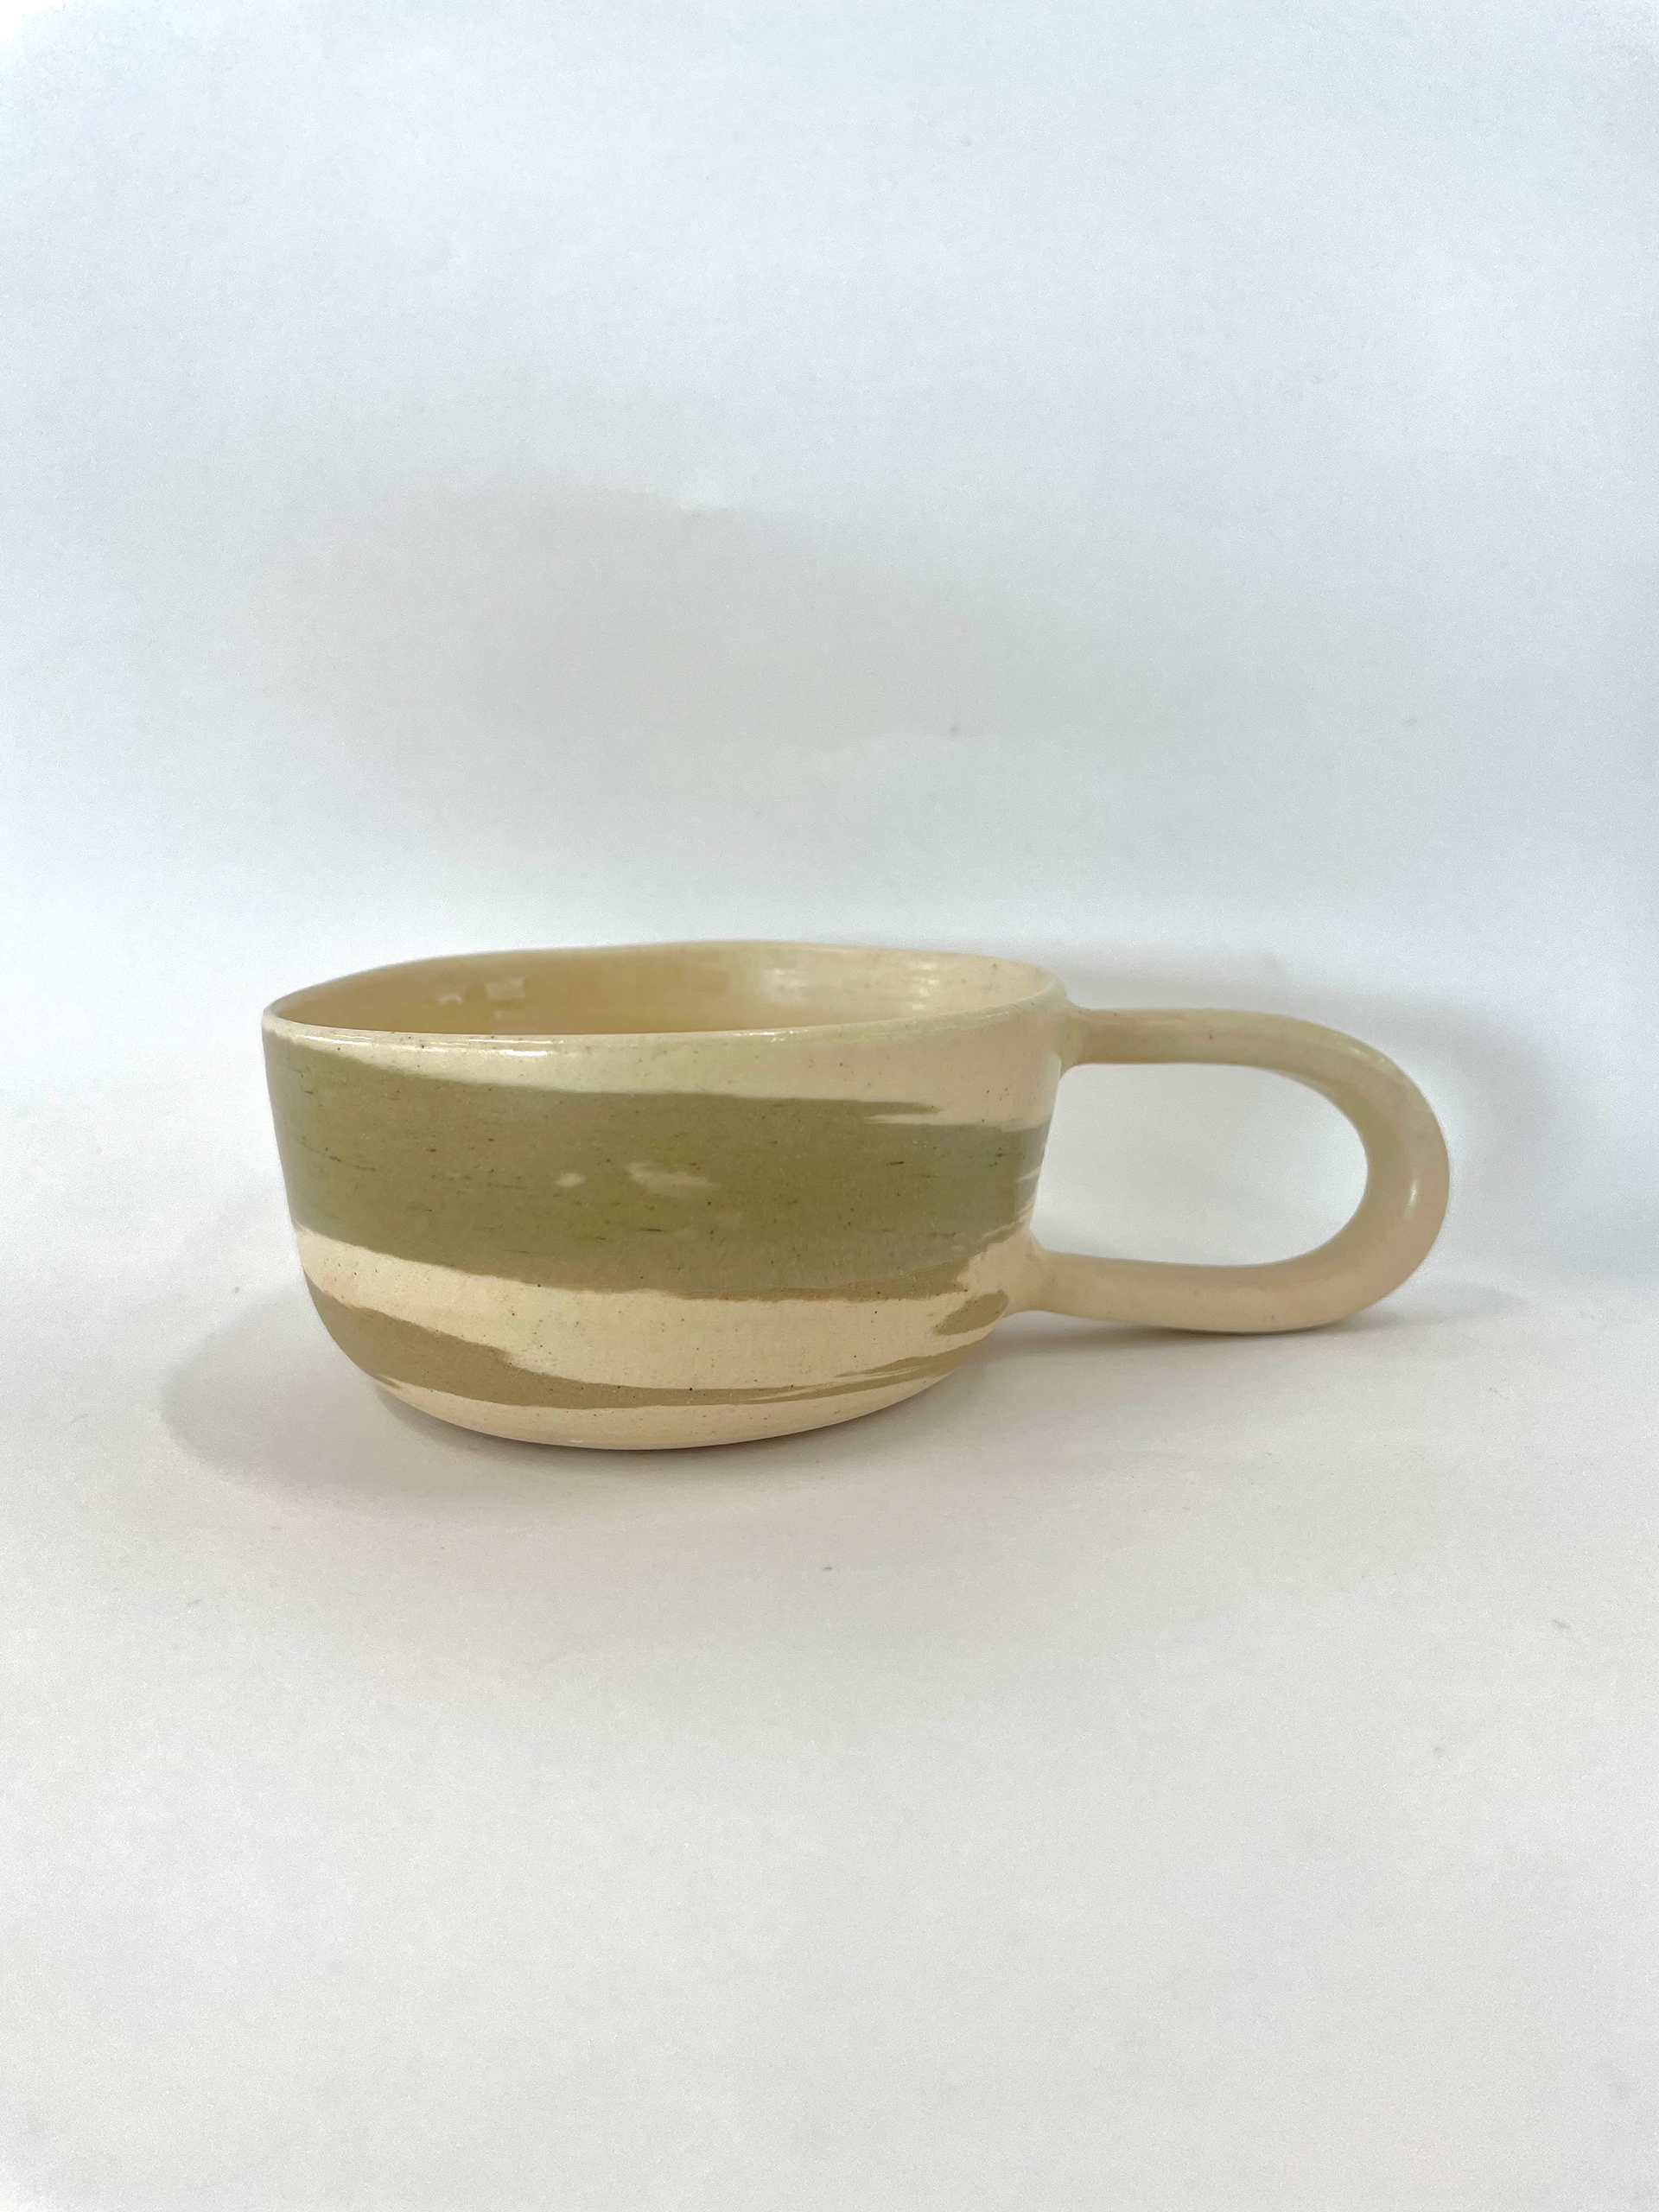
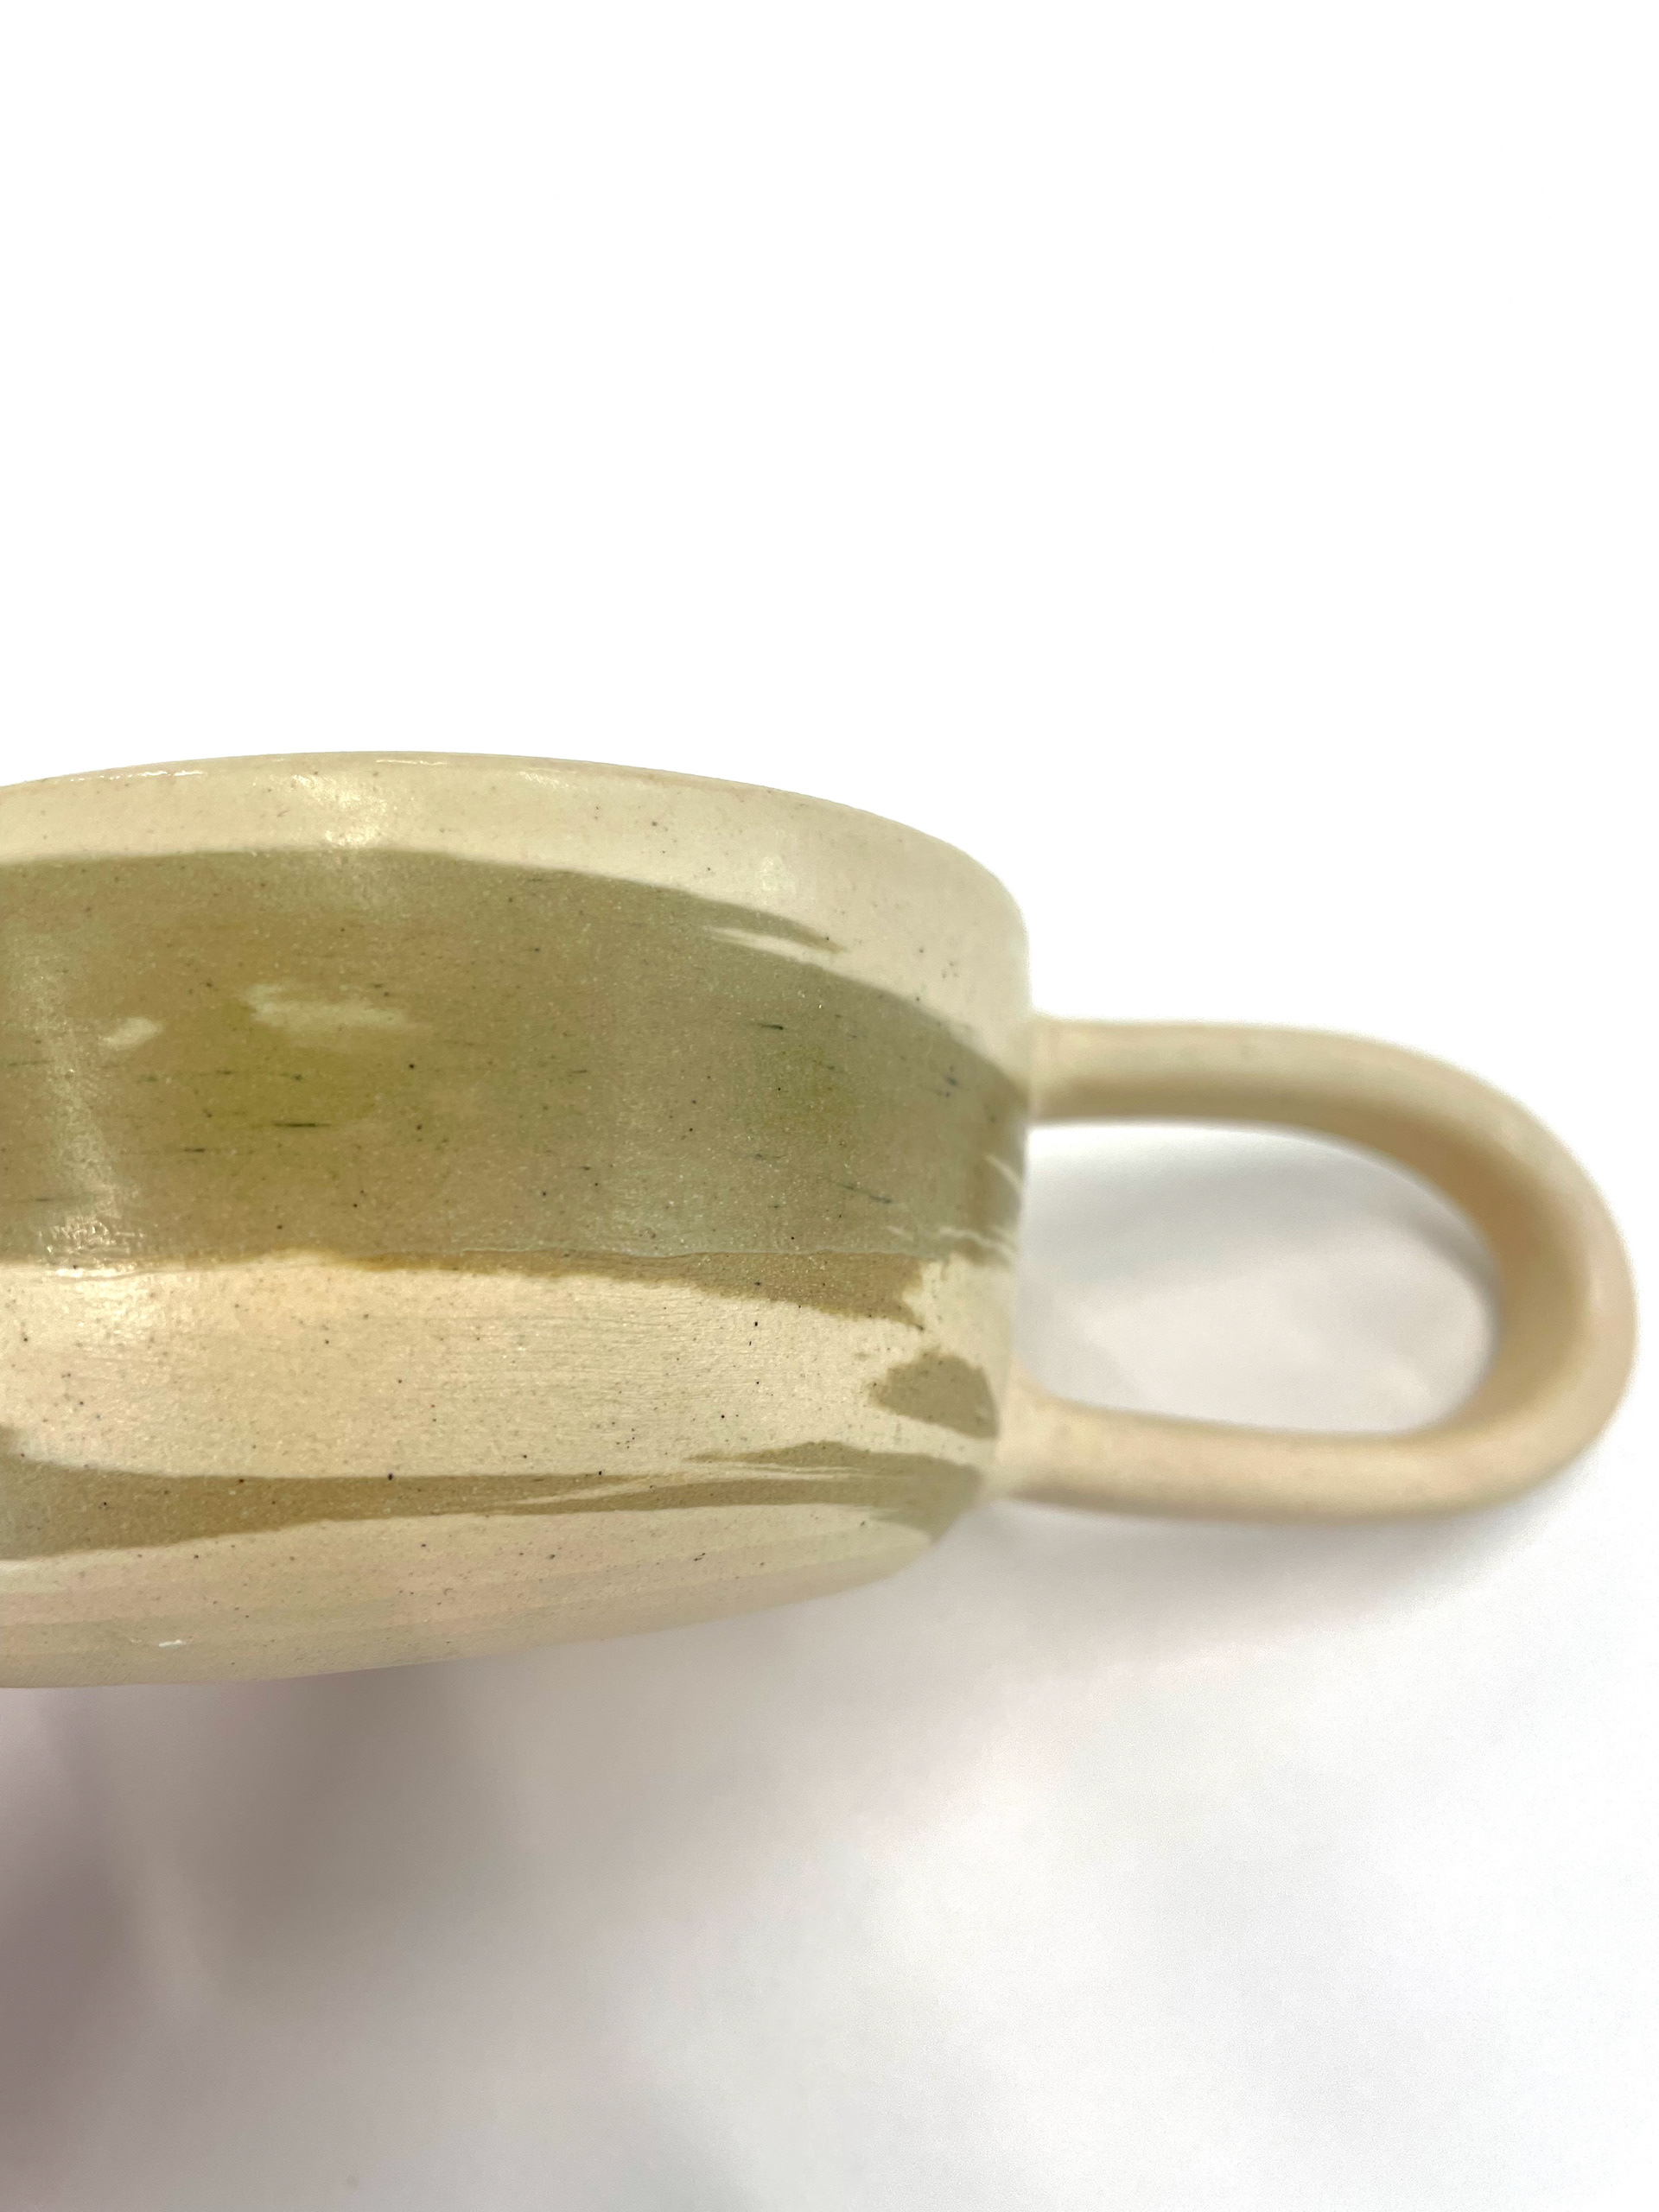
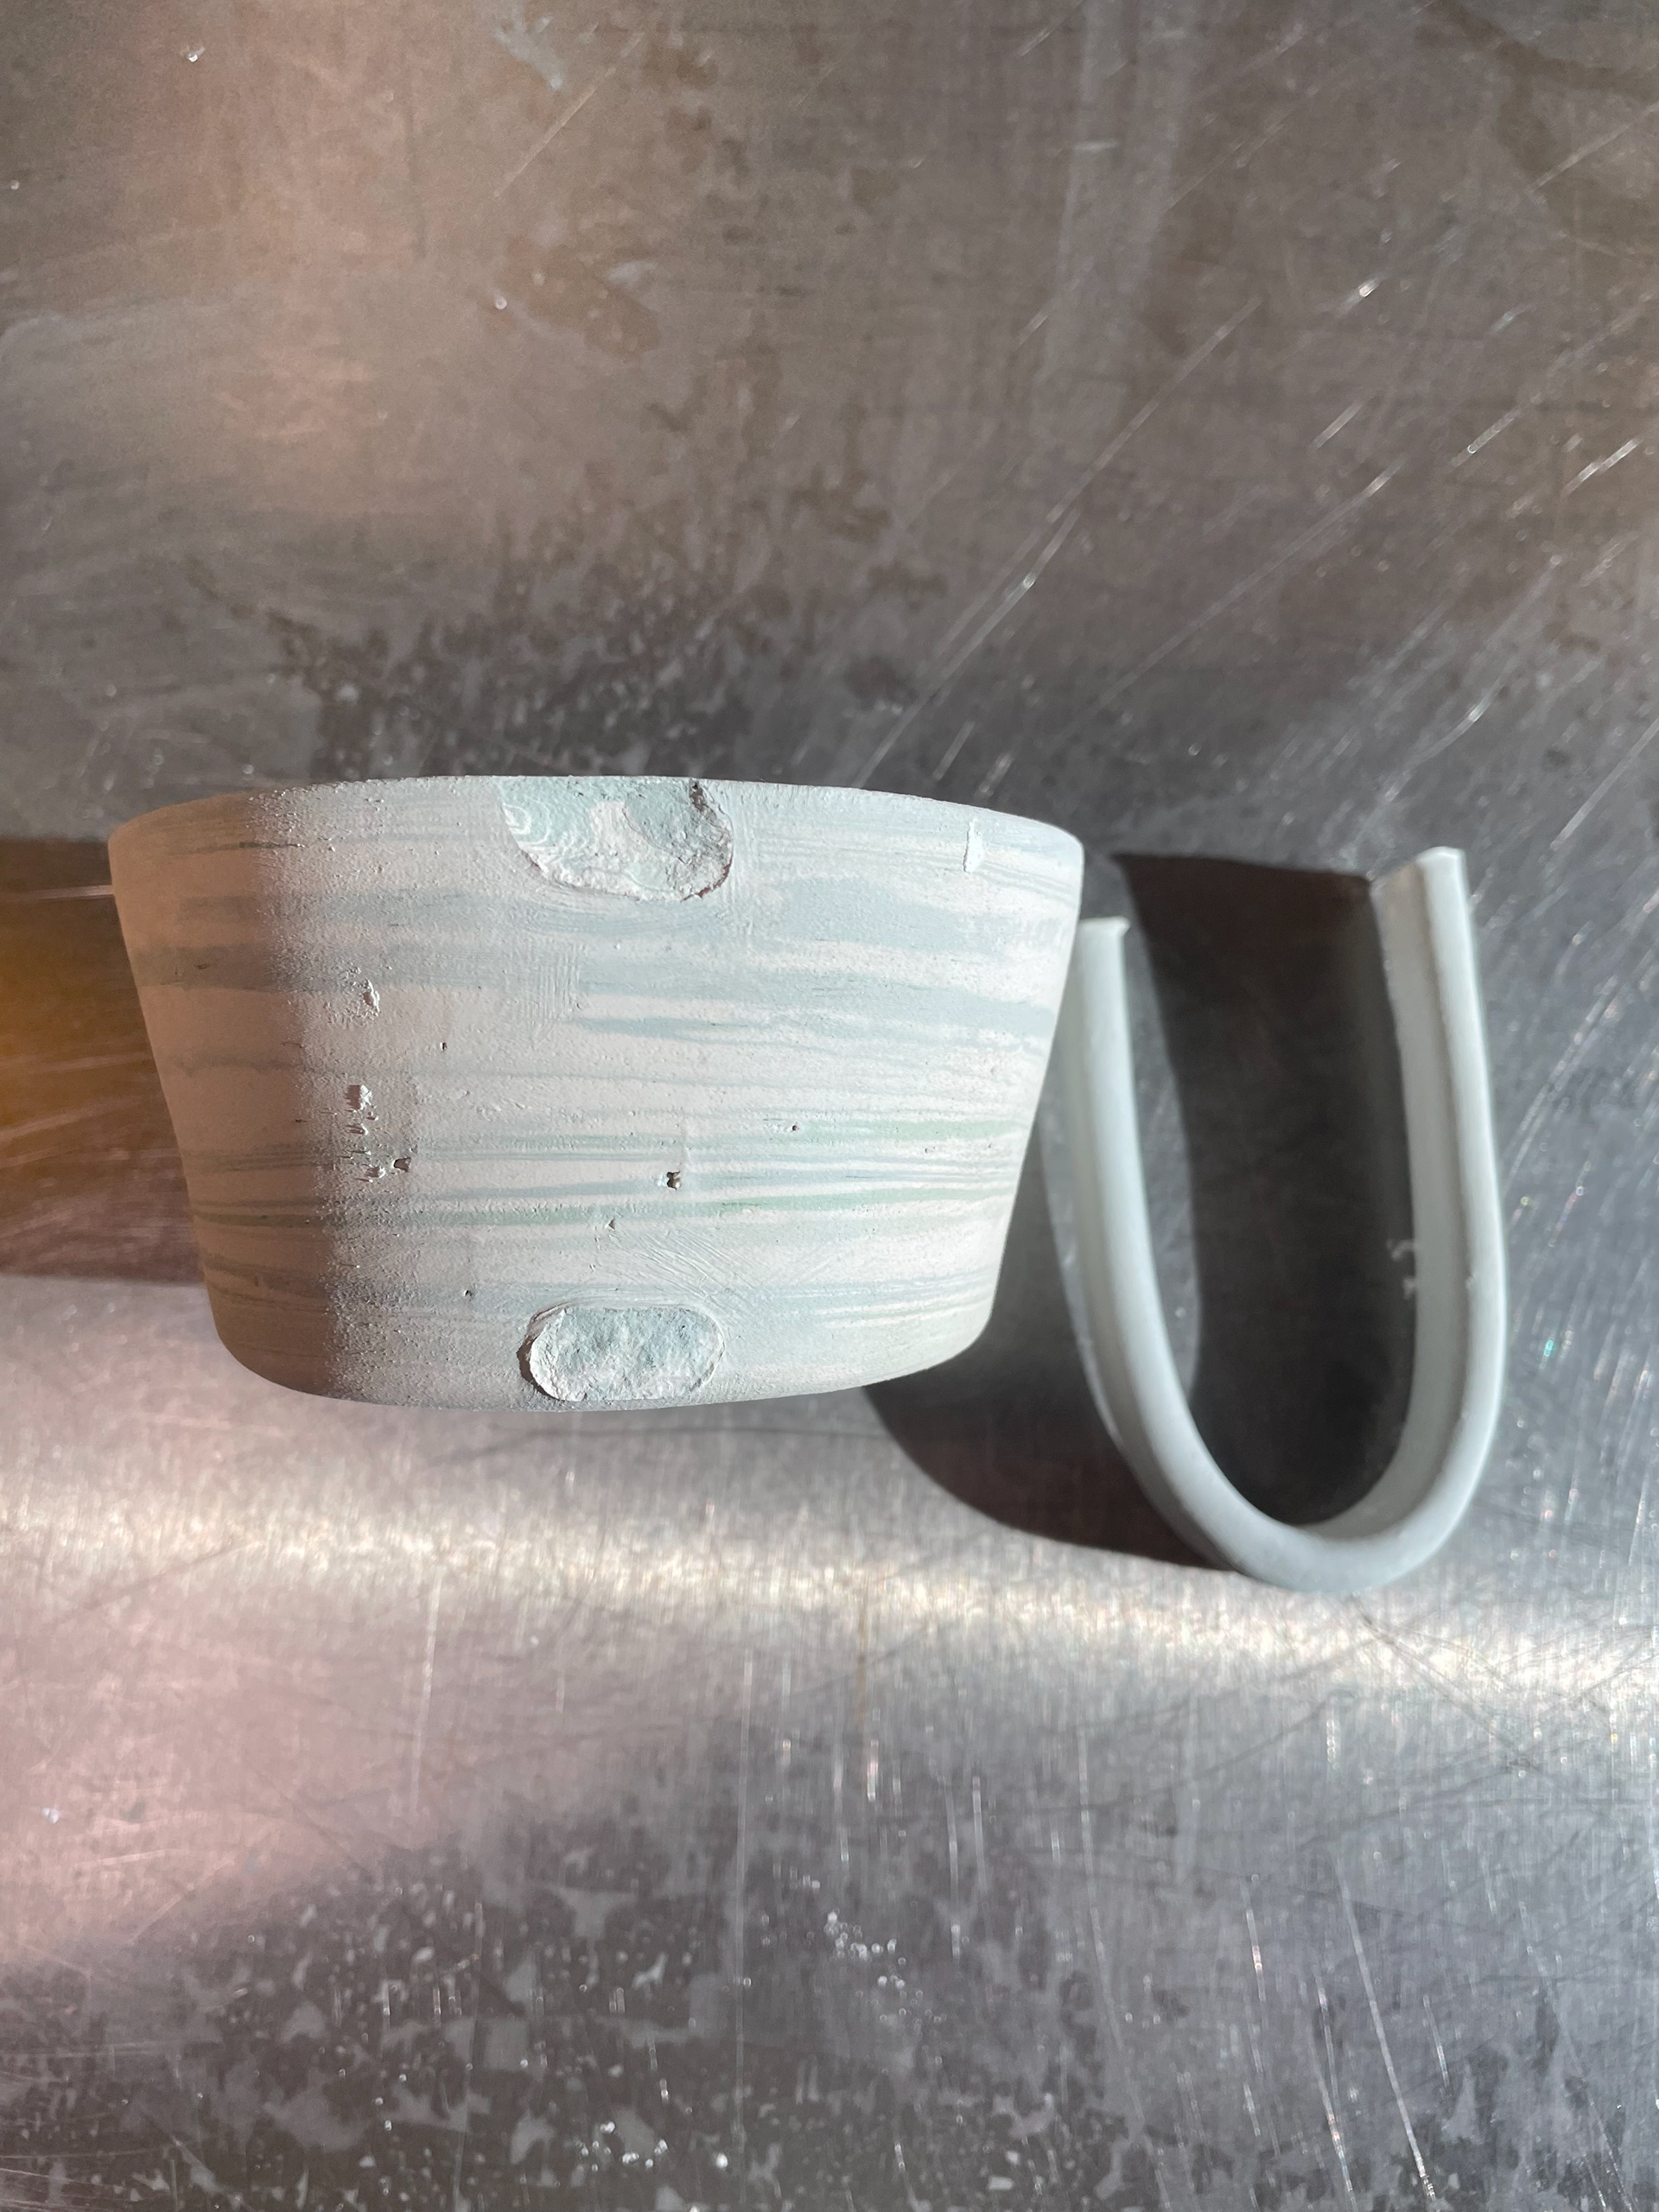
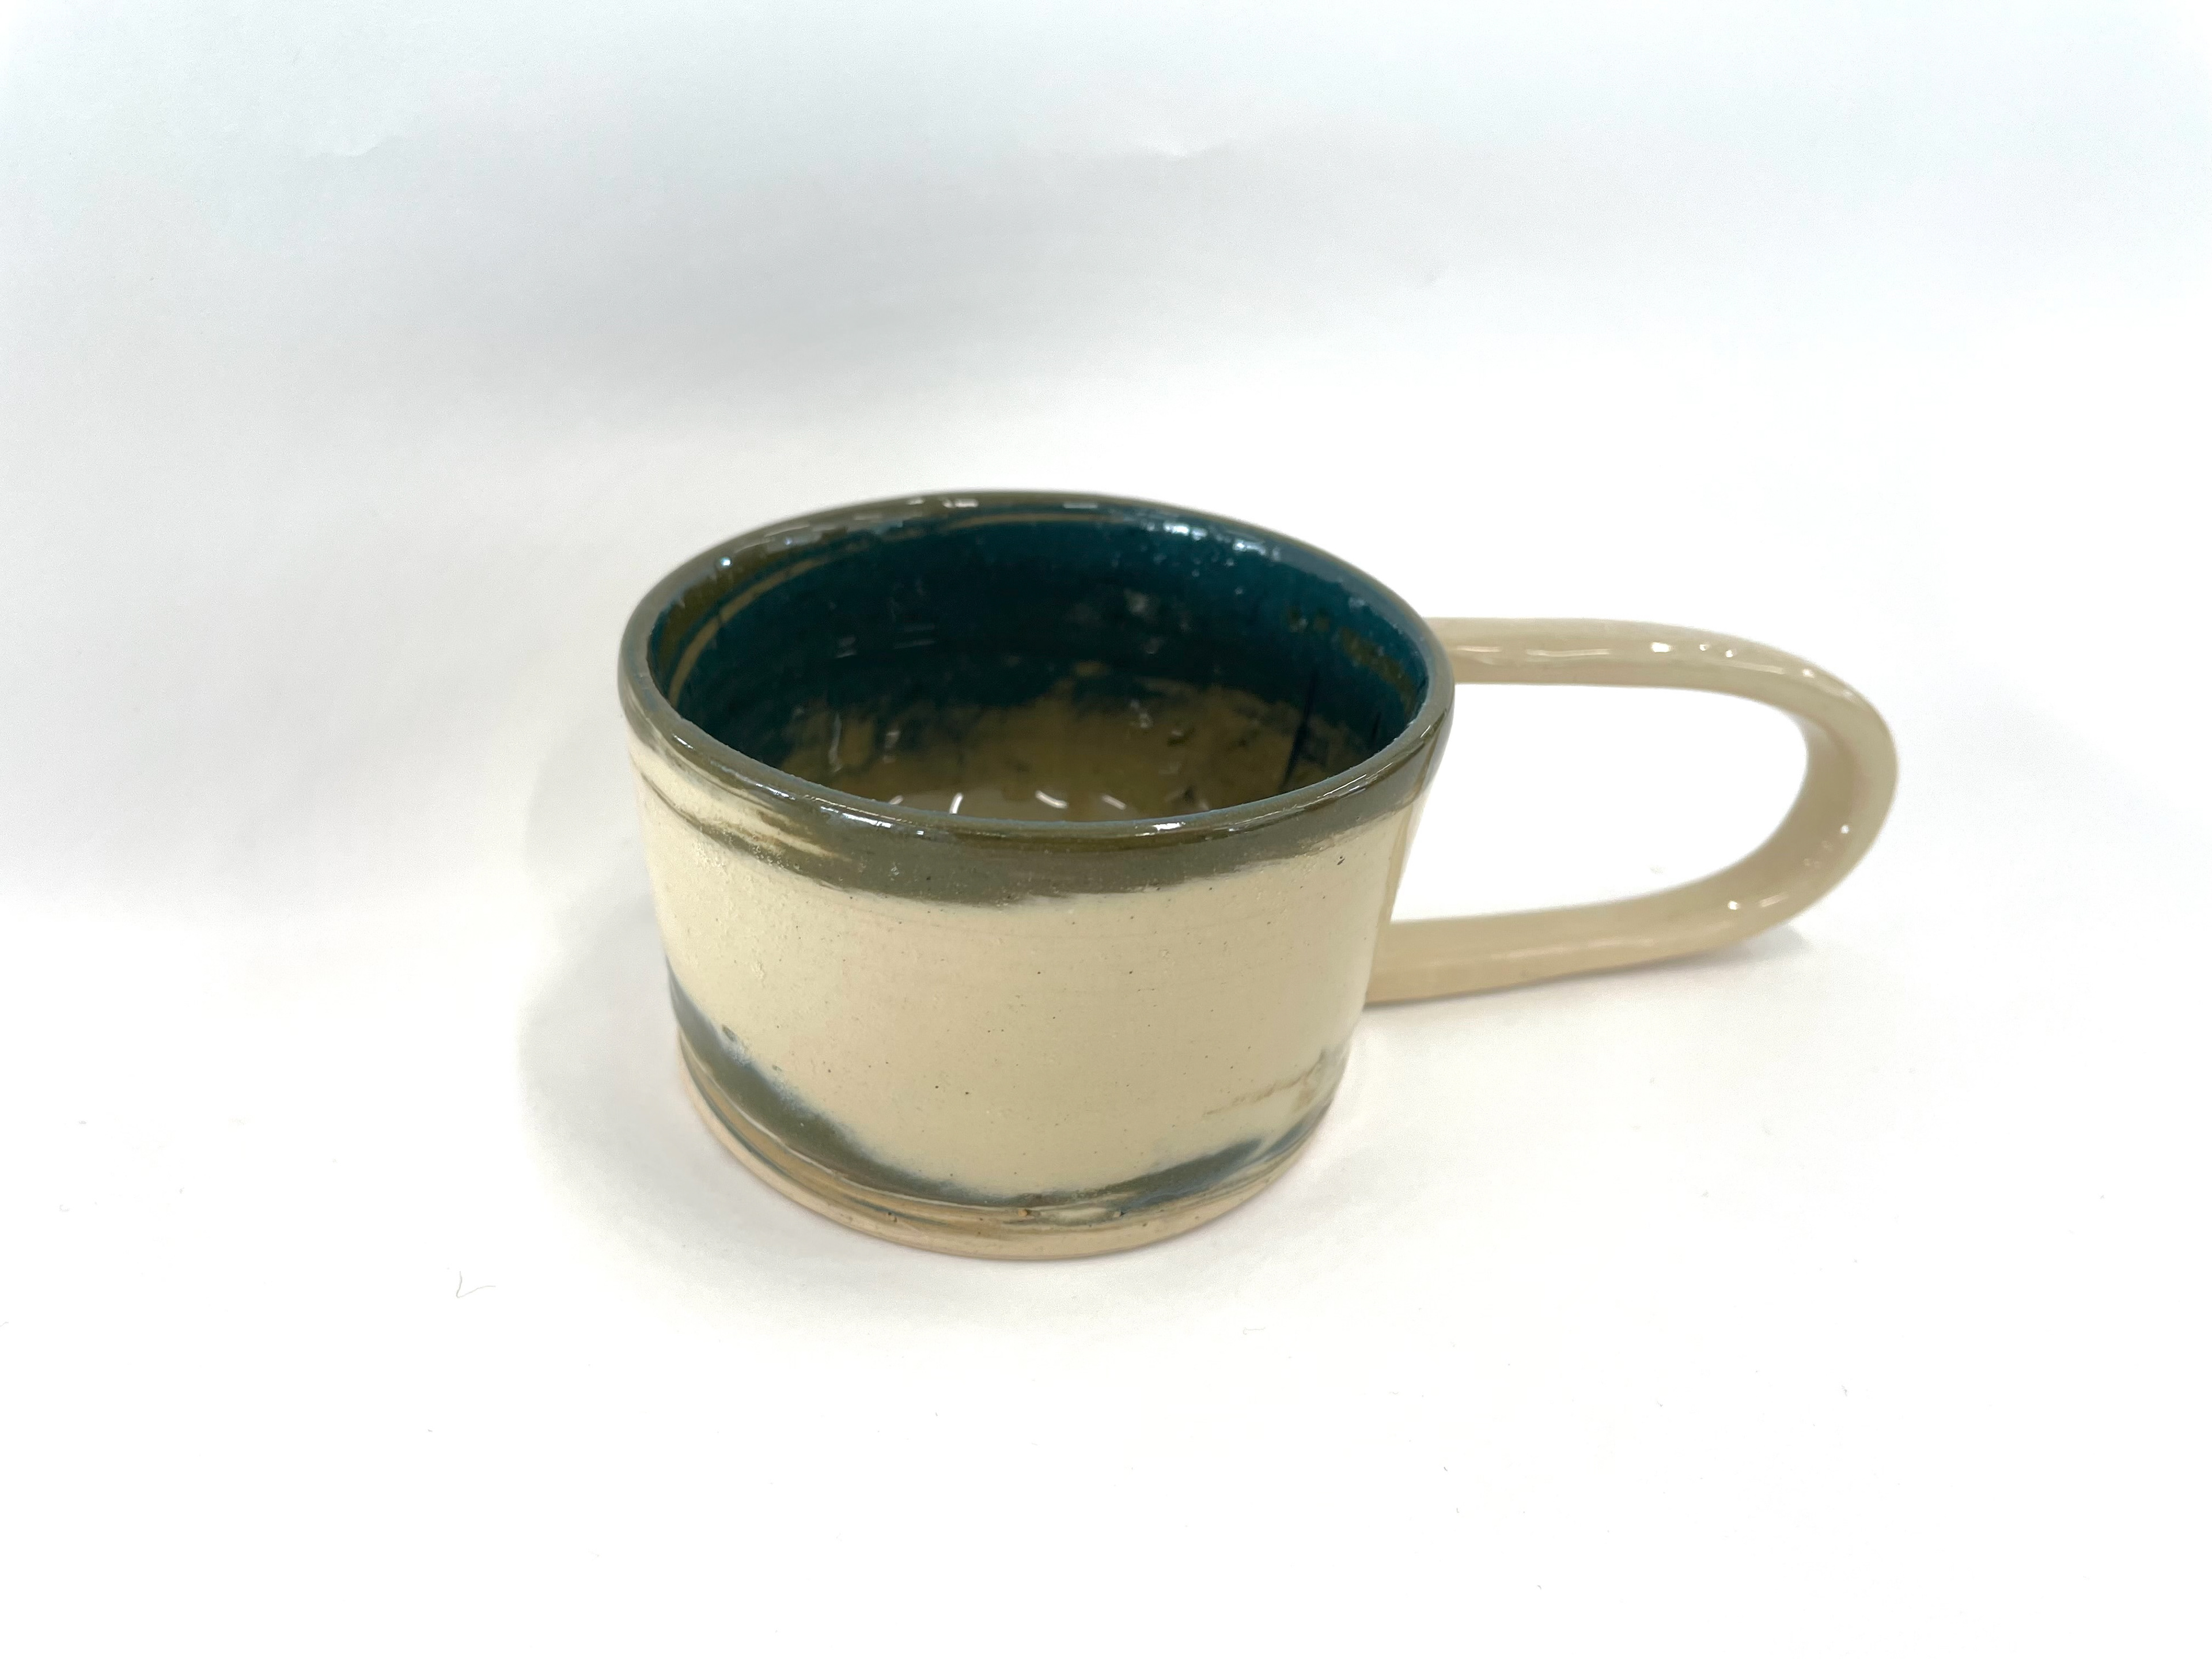
Exploring different attachment handle techniques, creating many different handles to see which I prefer and if they can support and be a comfy part of the mug. Developing this further, we decided to explore long handles, making them more rounded and comfortable for the user. I chose not to use a handle pull technique as it makes the handles too bulky for the design. I also realised I handled the mugs a lot, which I want to minimise as the more you touch the coloured clay, the more it discolours and ruins.
What Shape Mug Do I Prefer
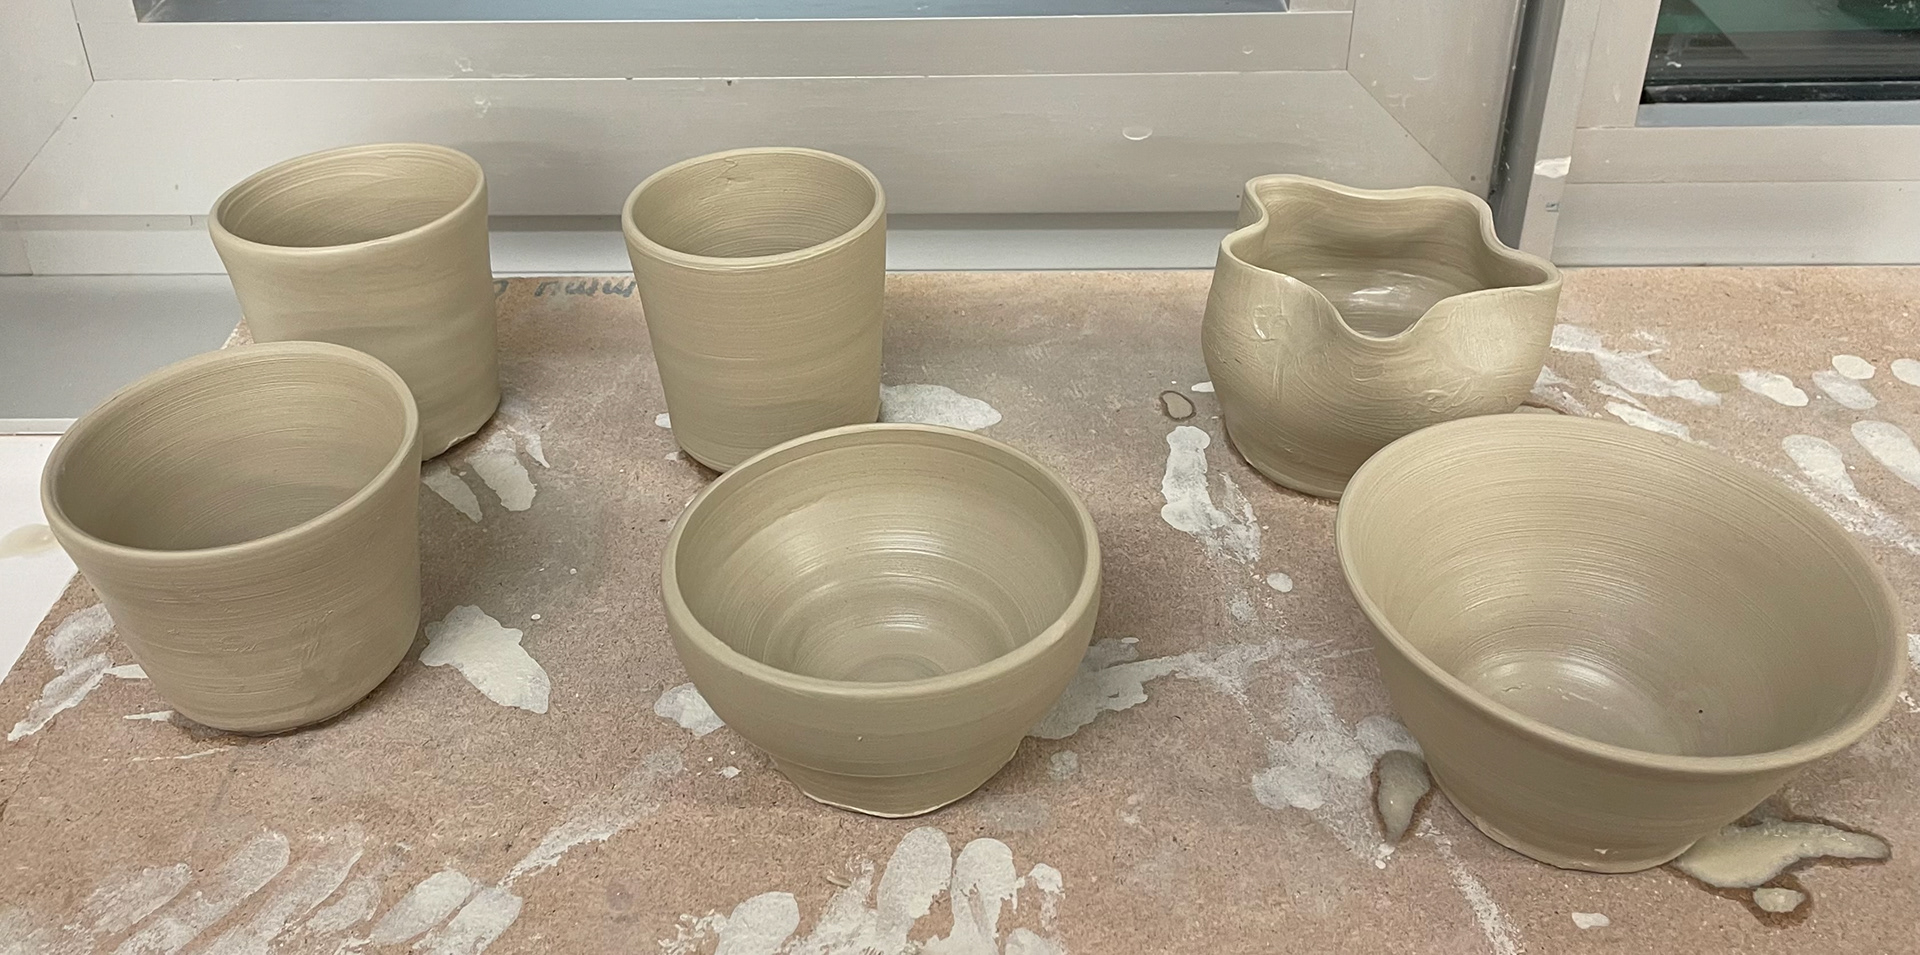
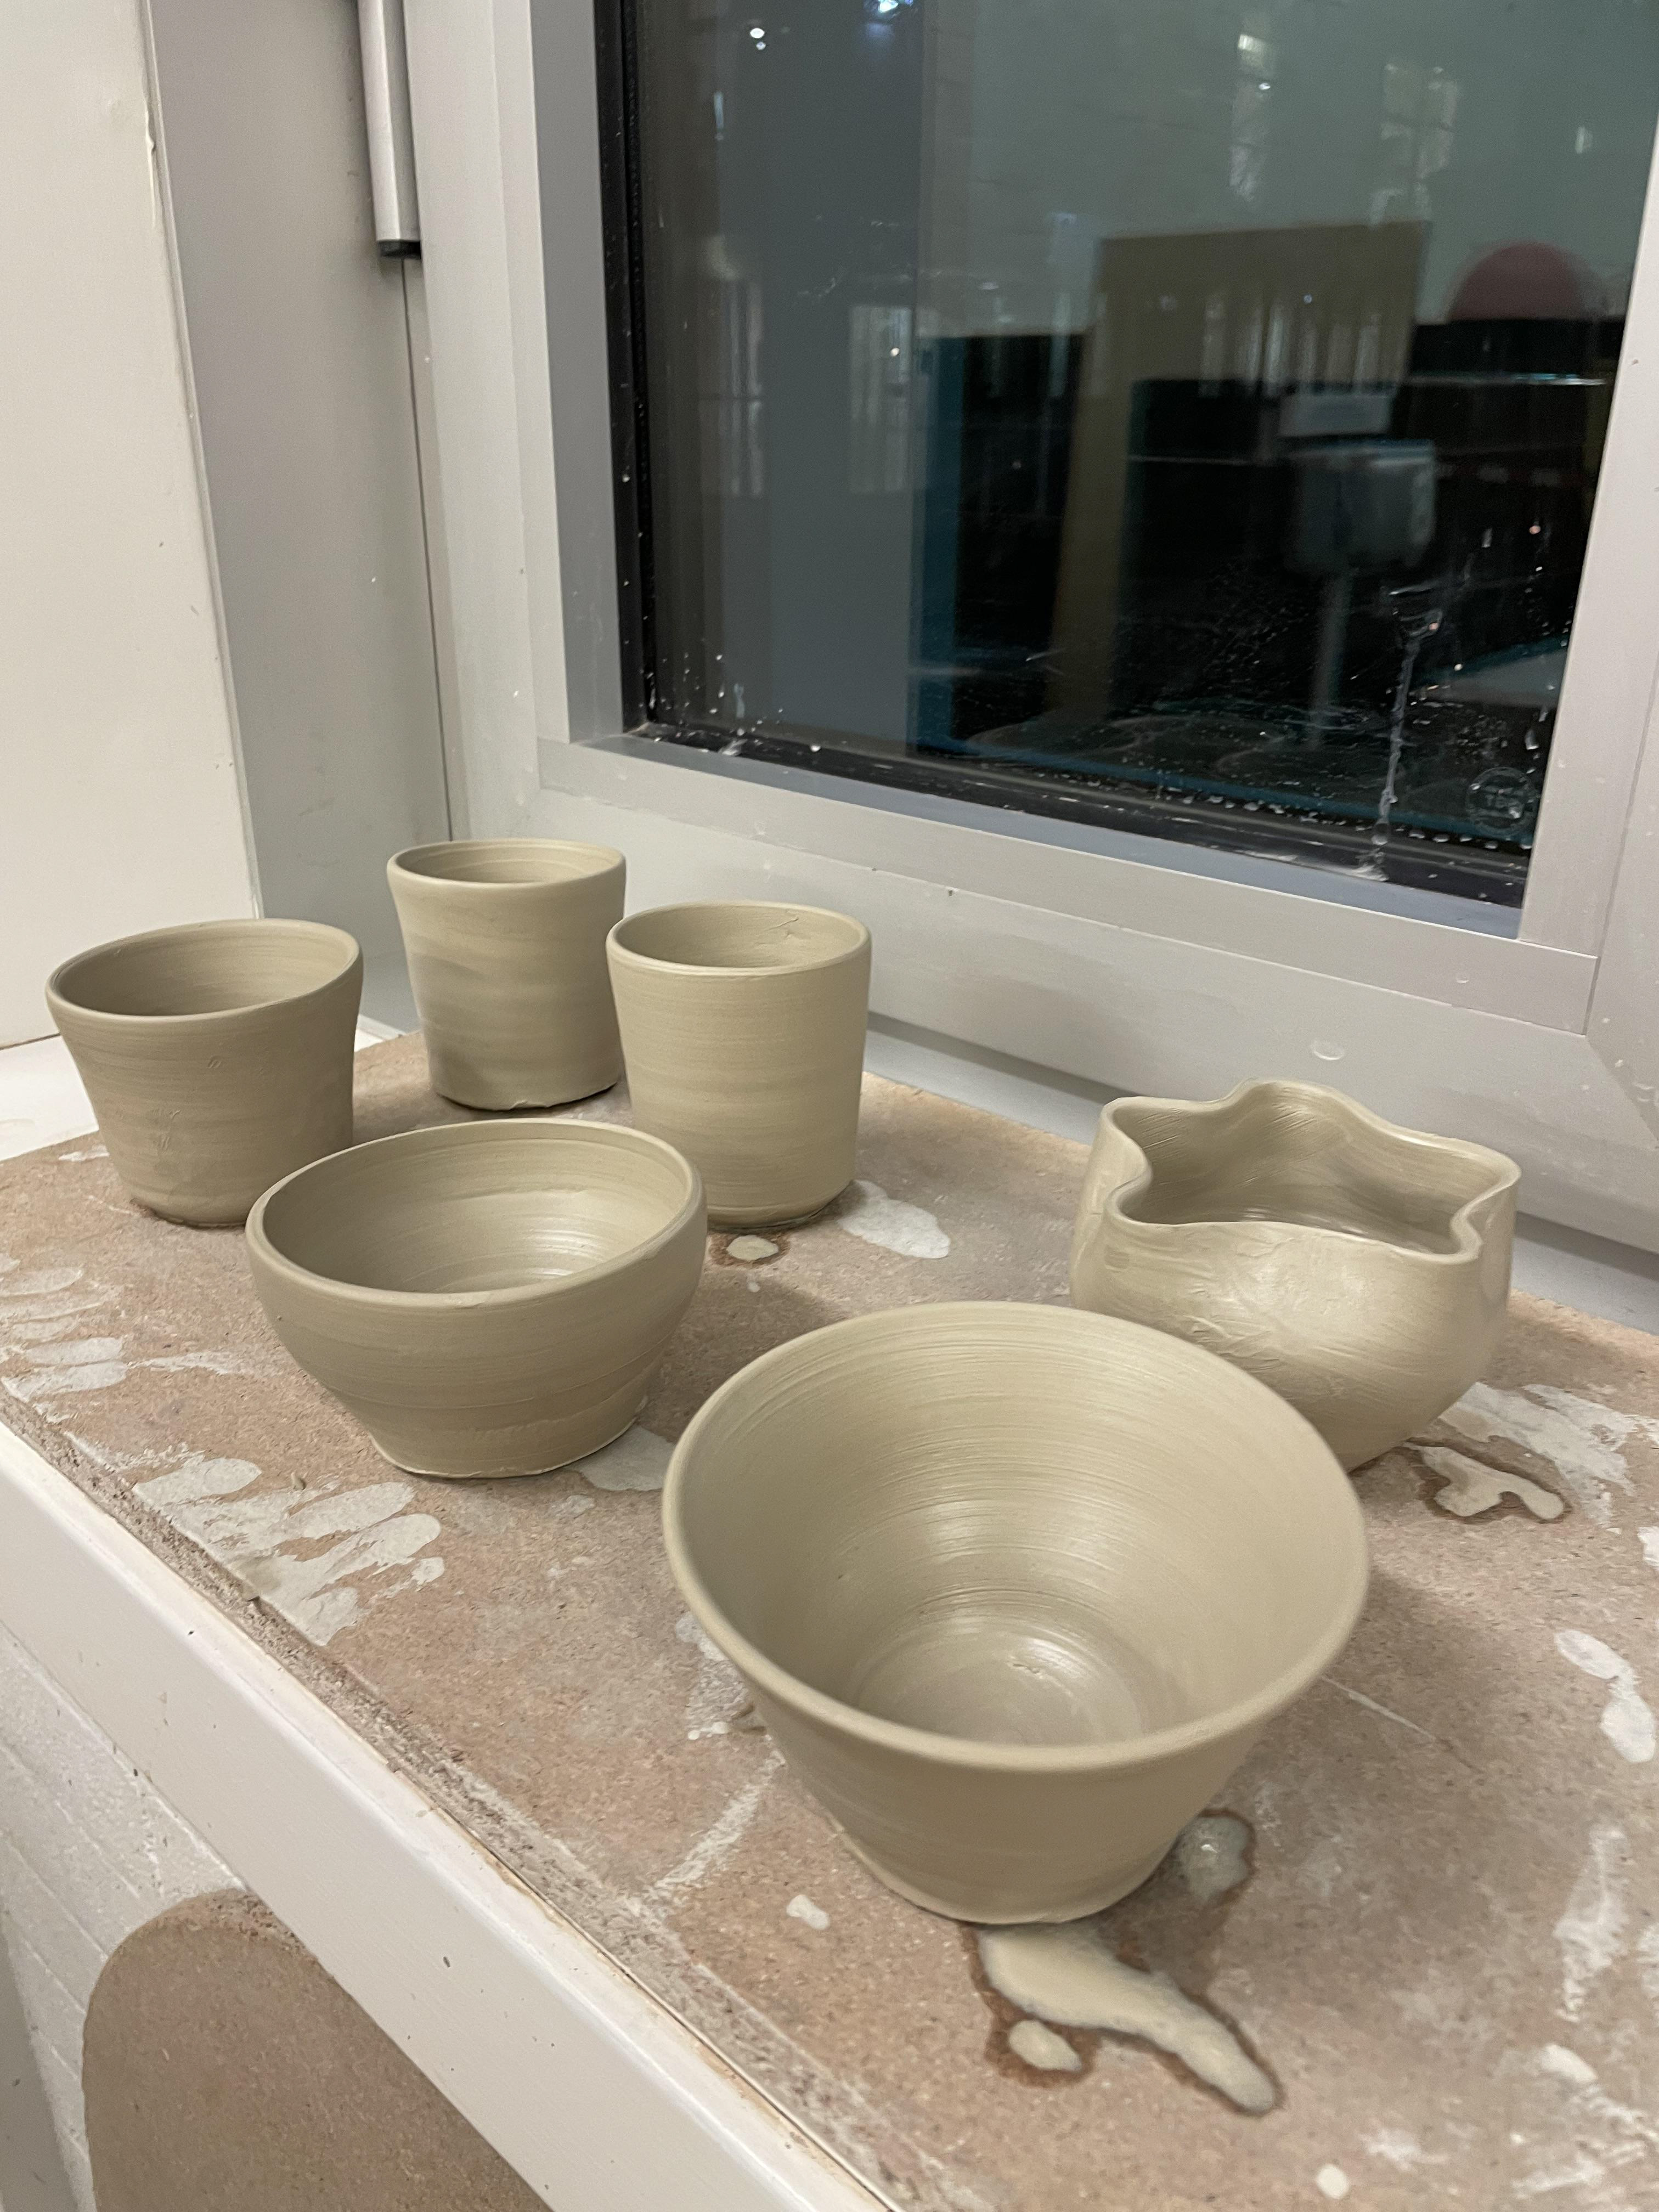
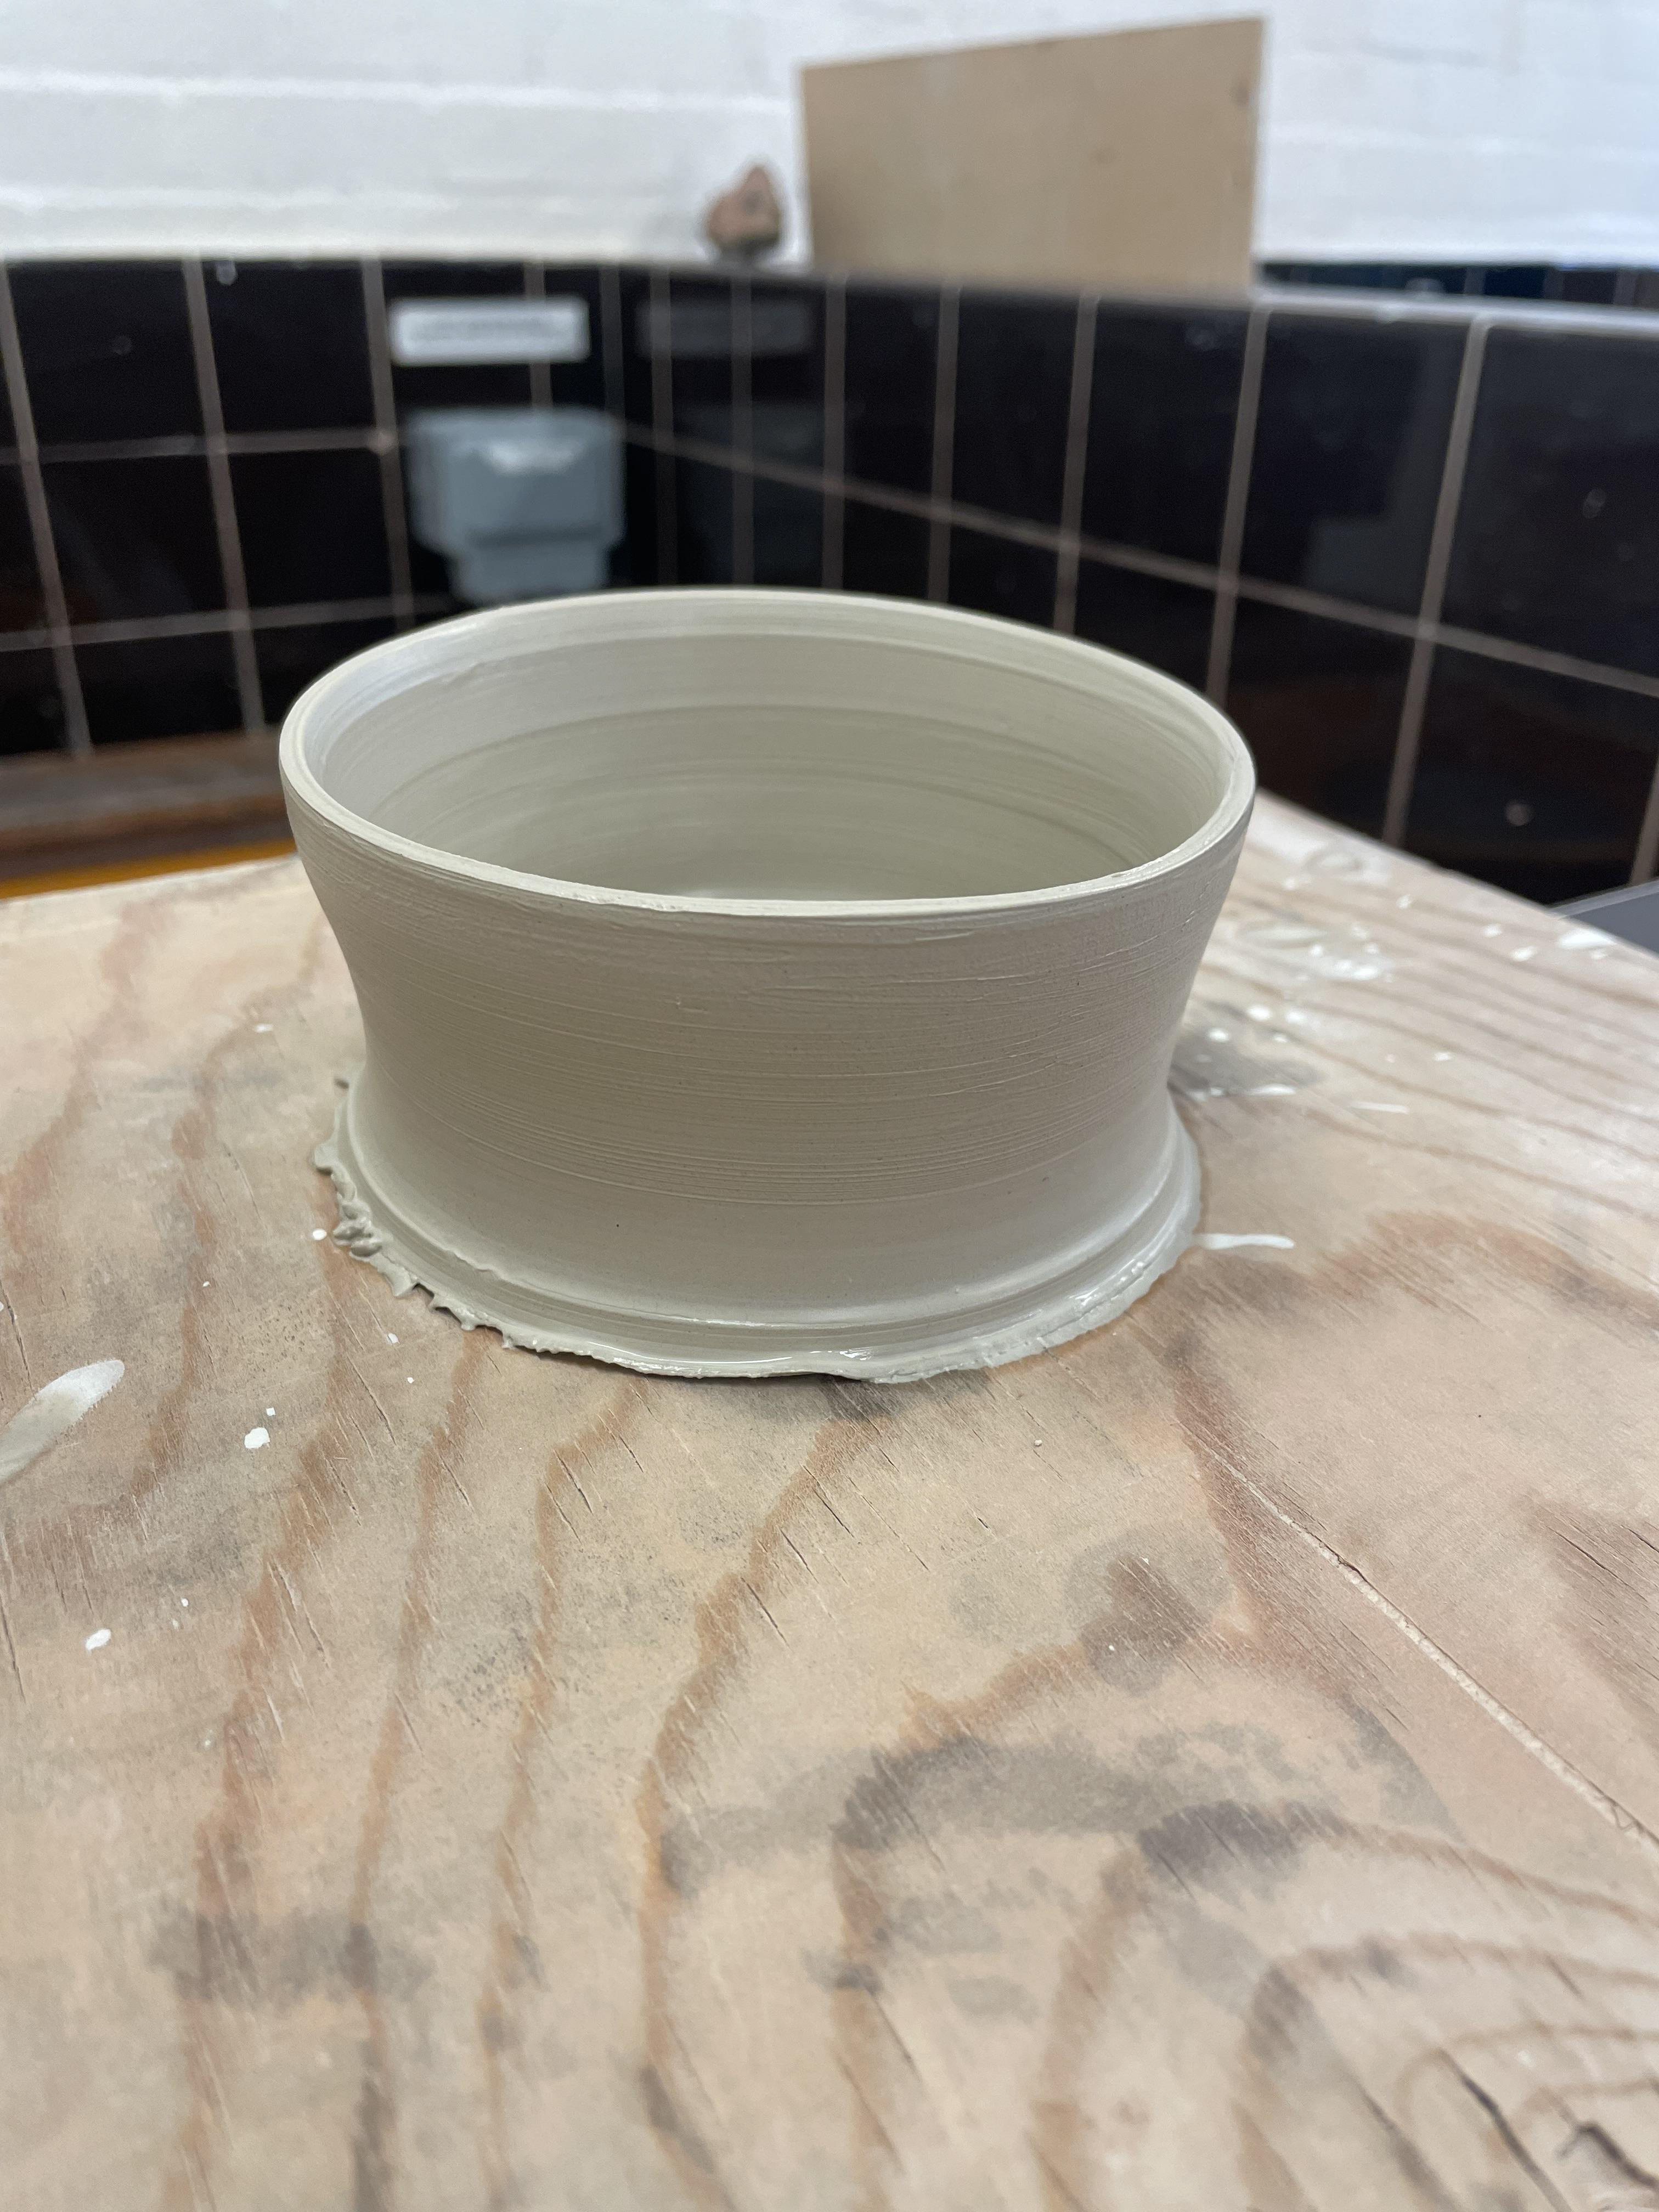
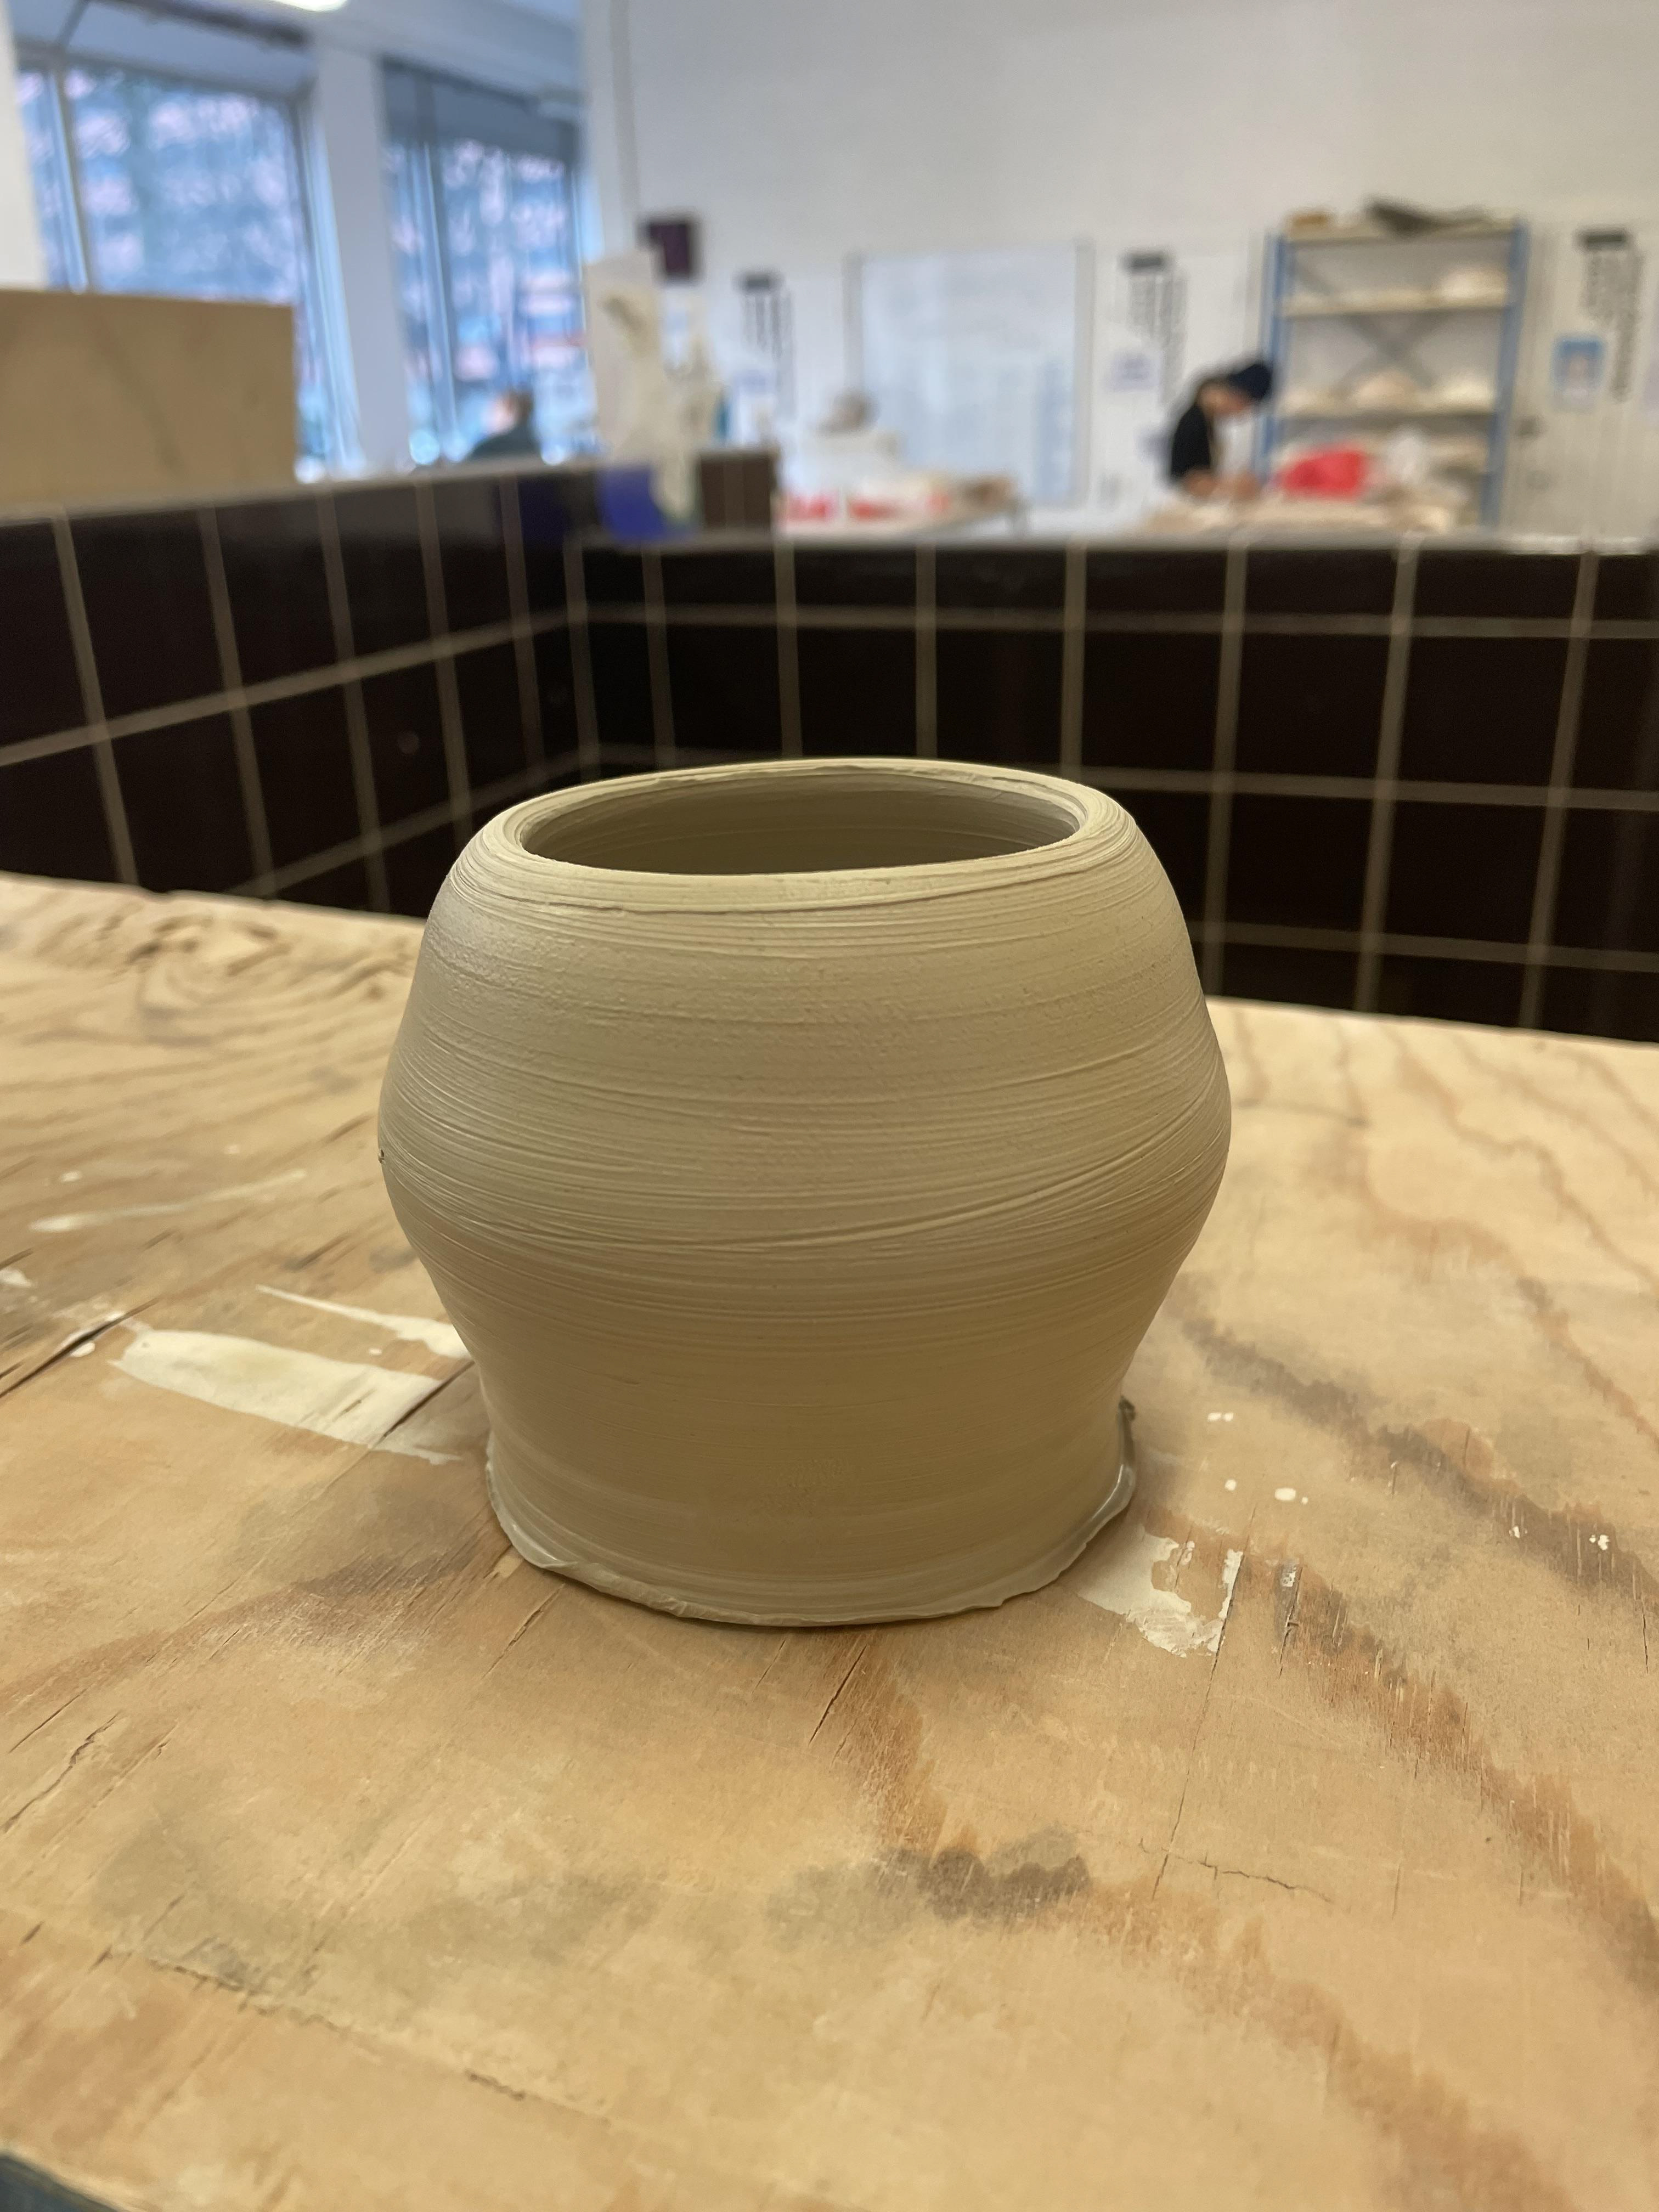
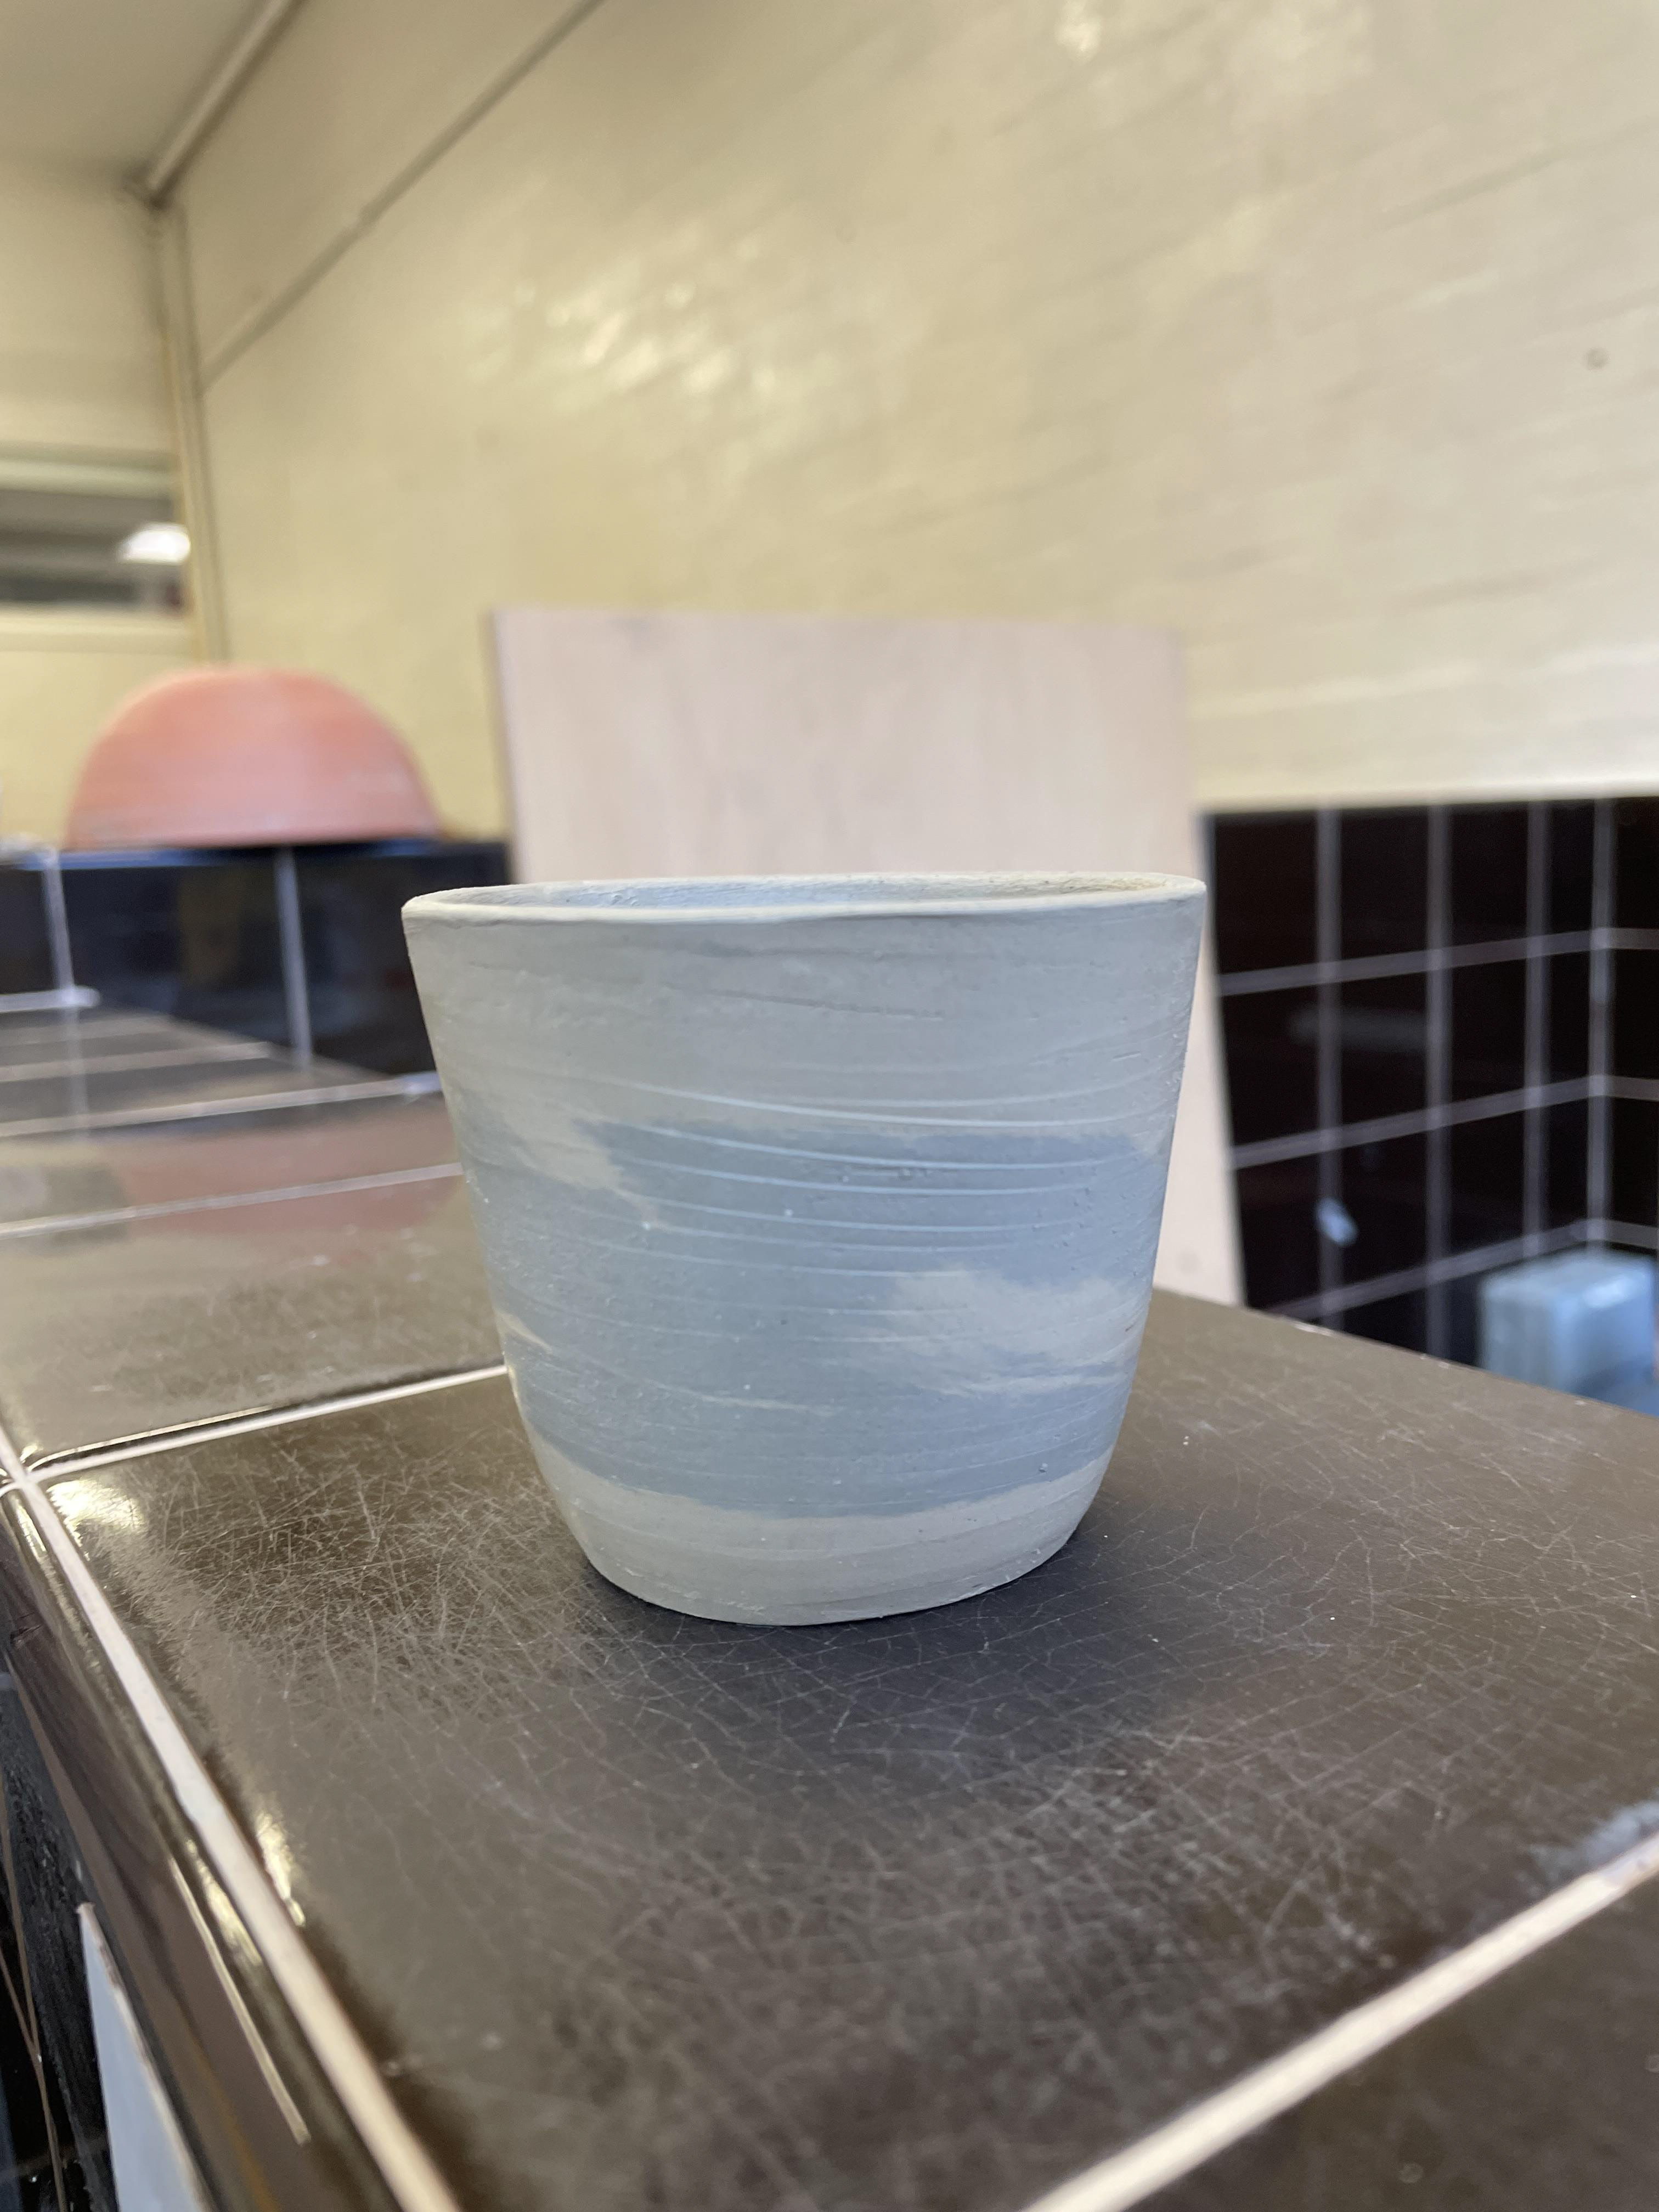
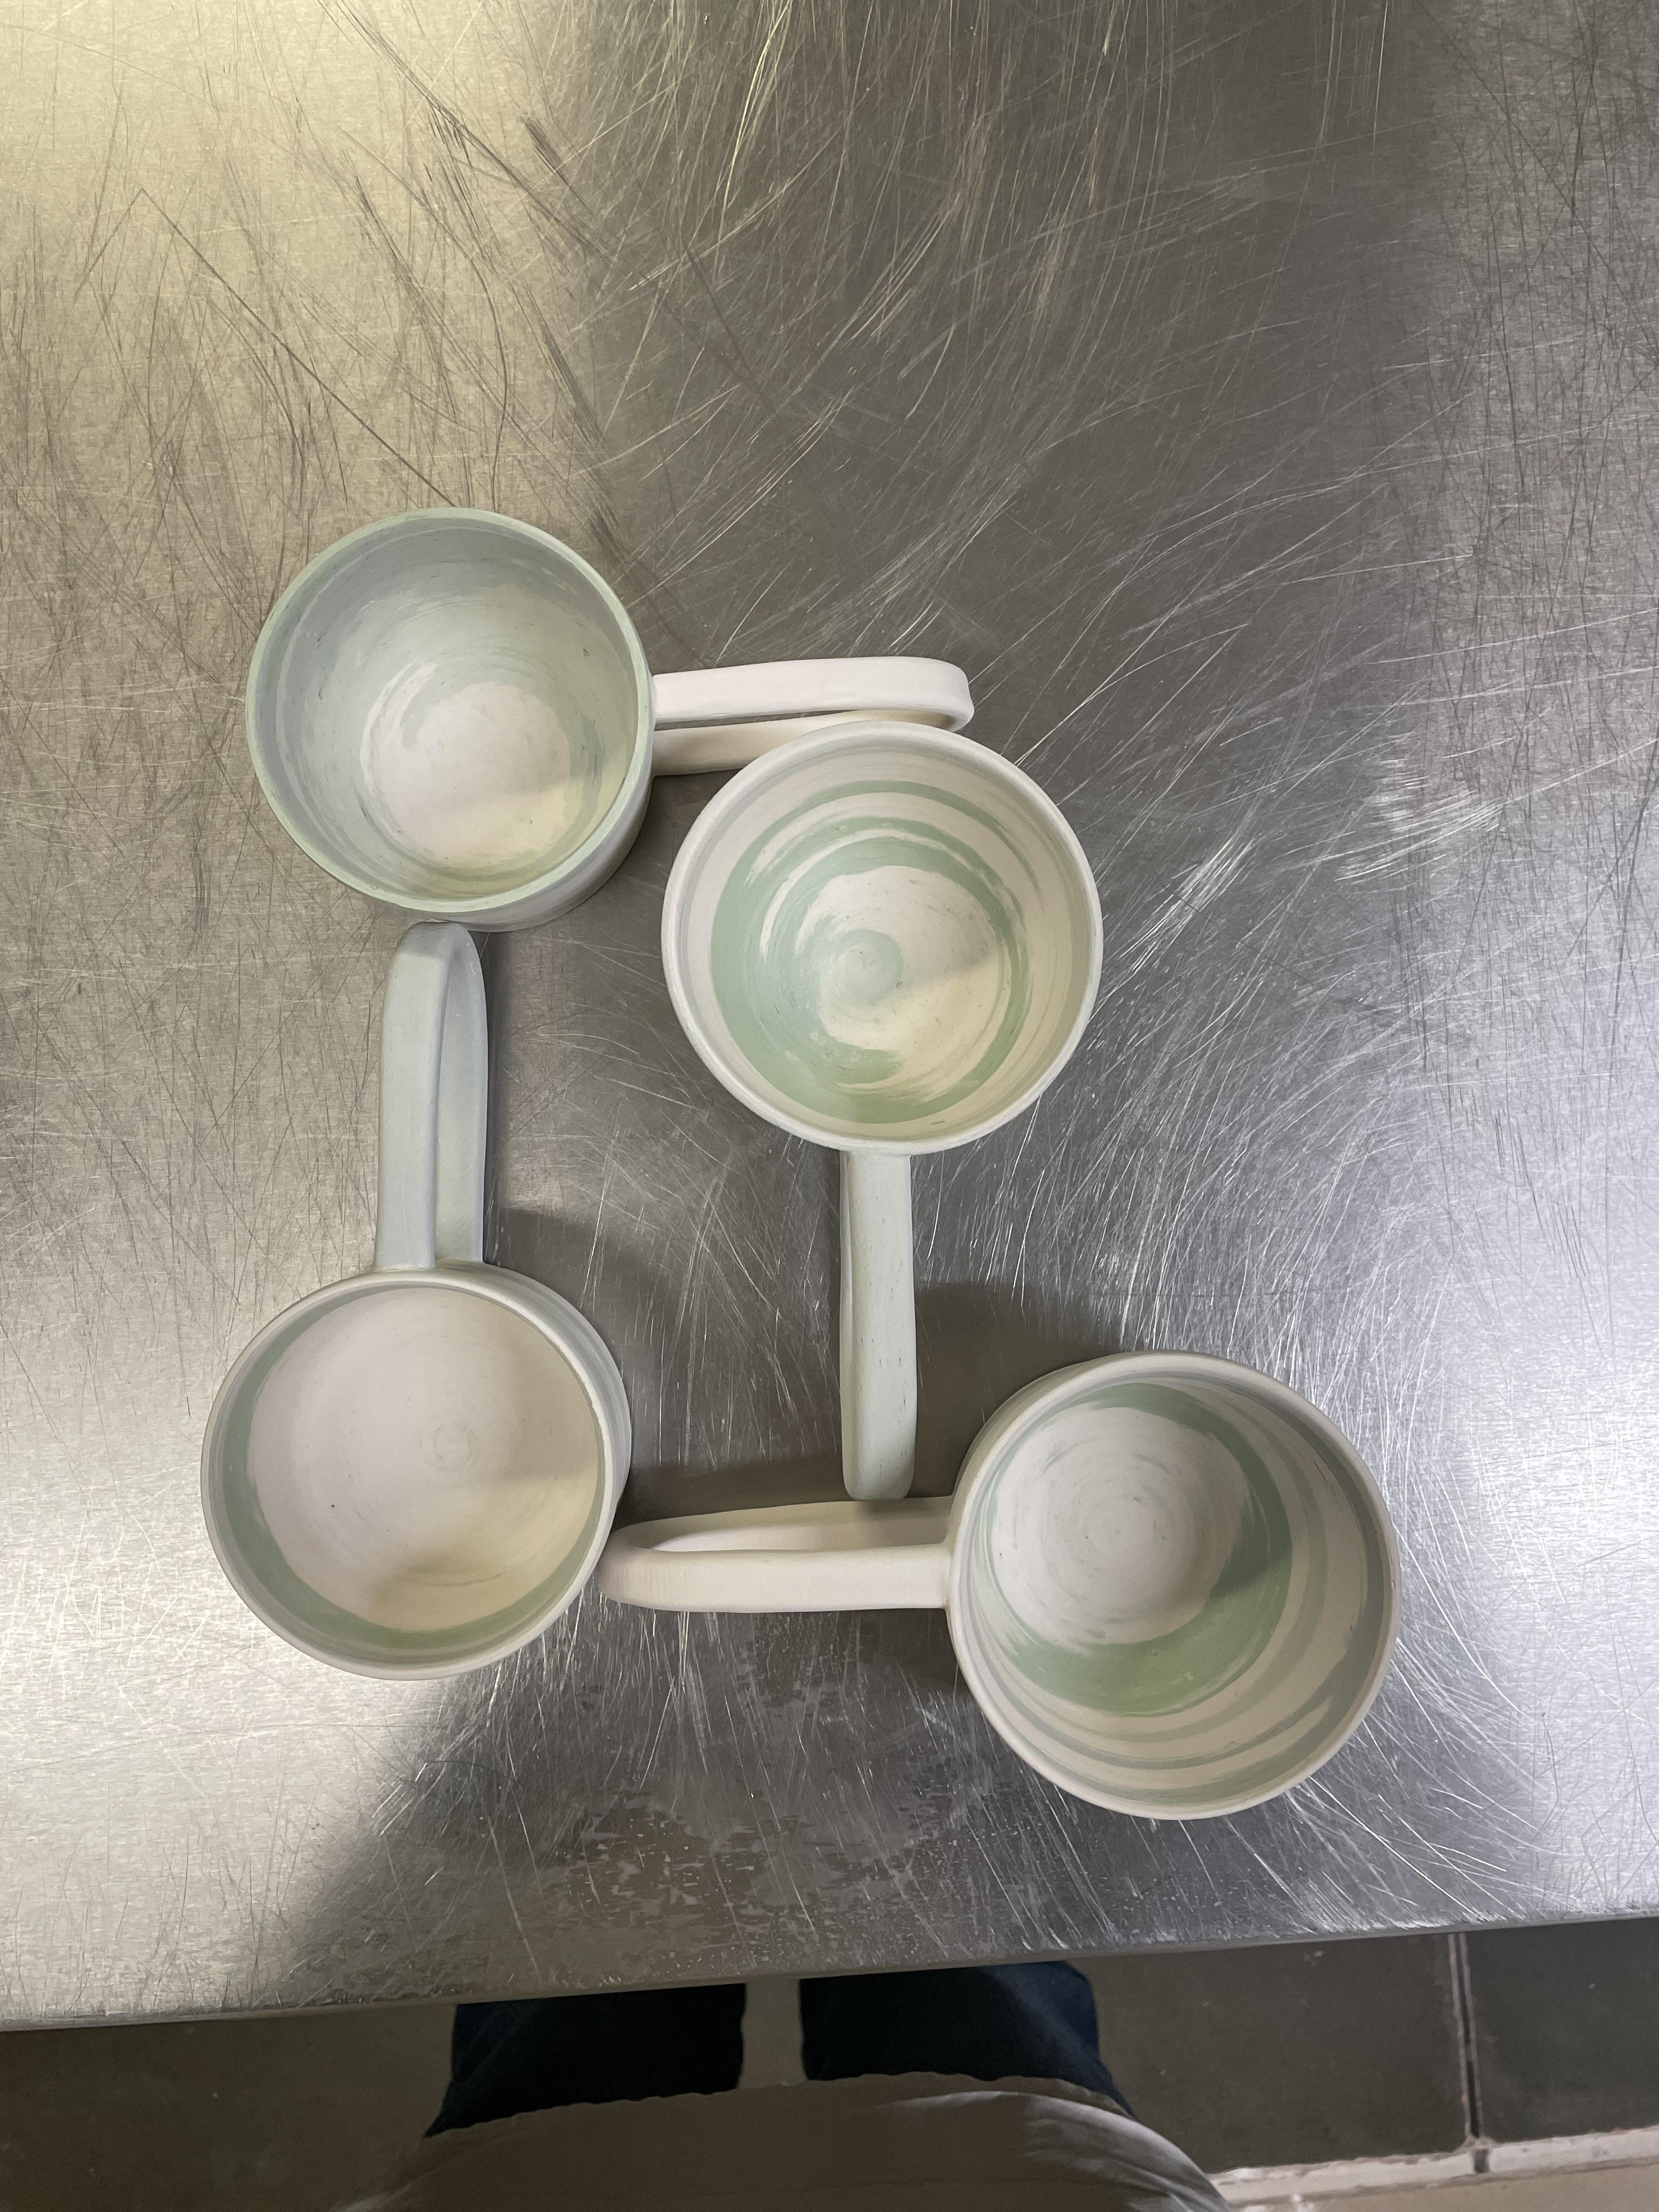
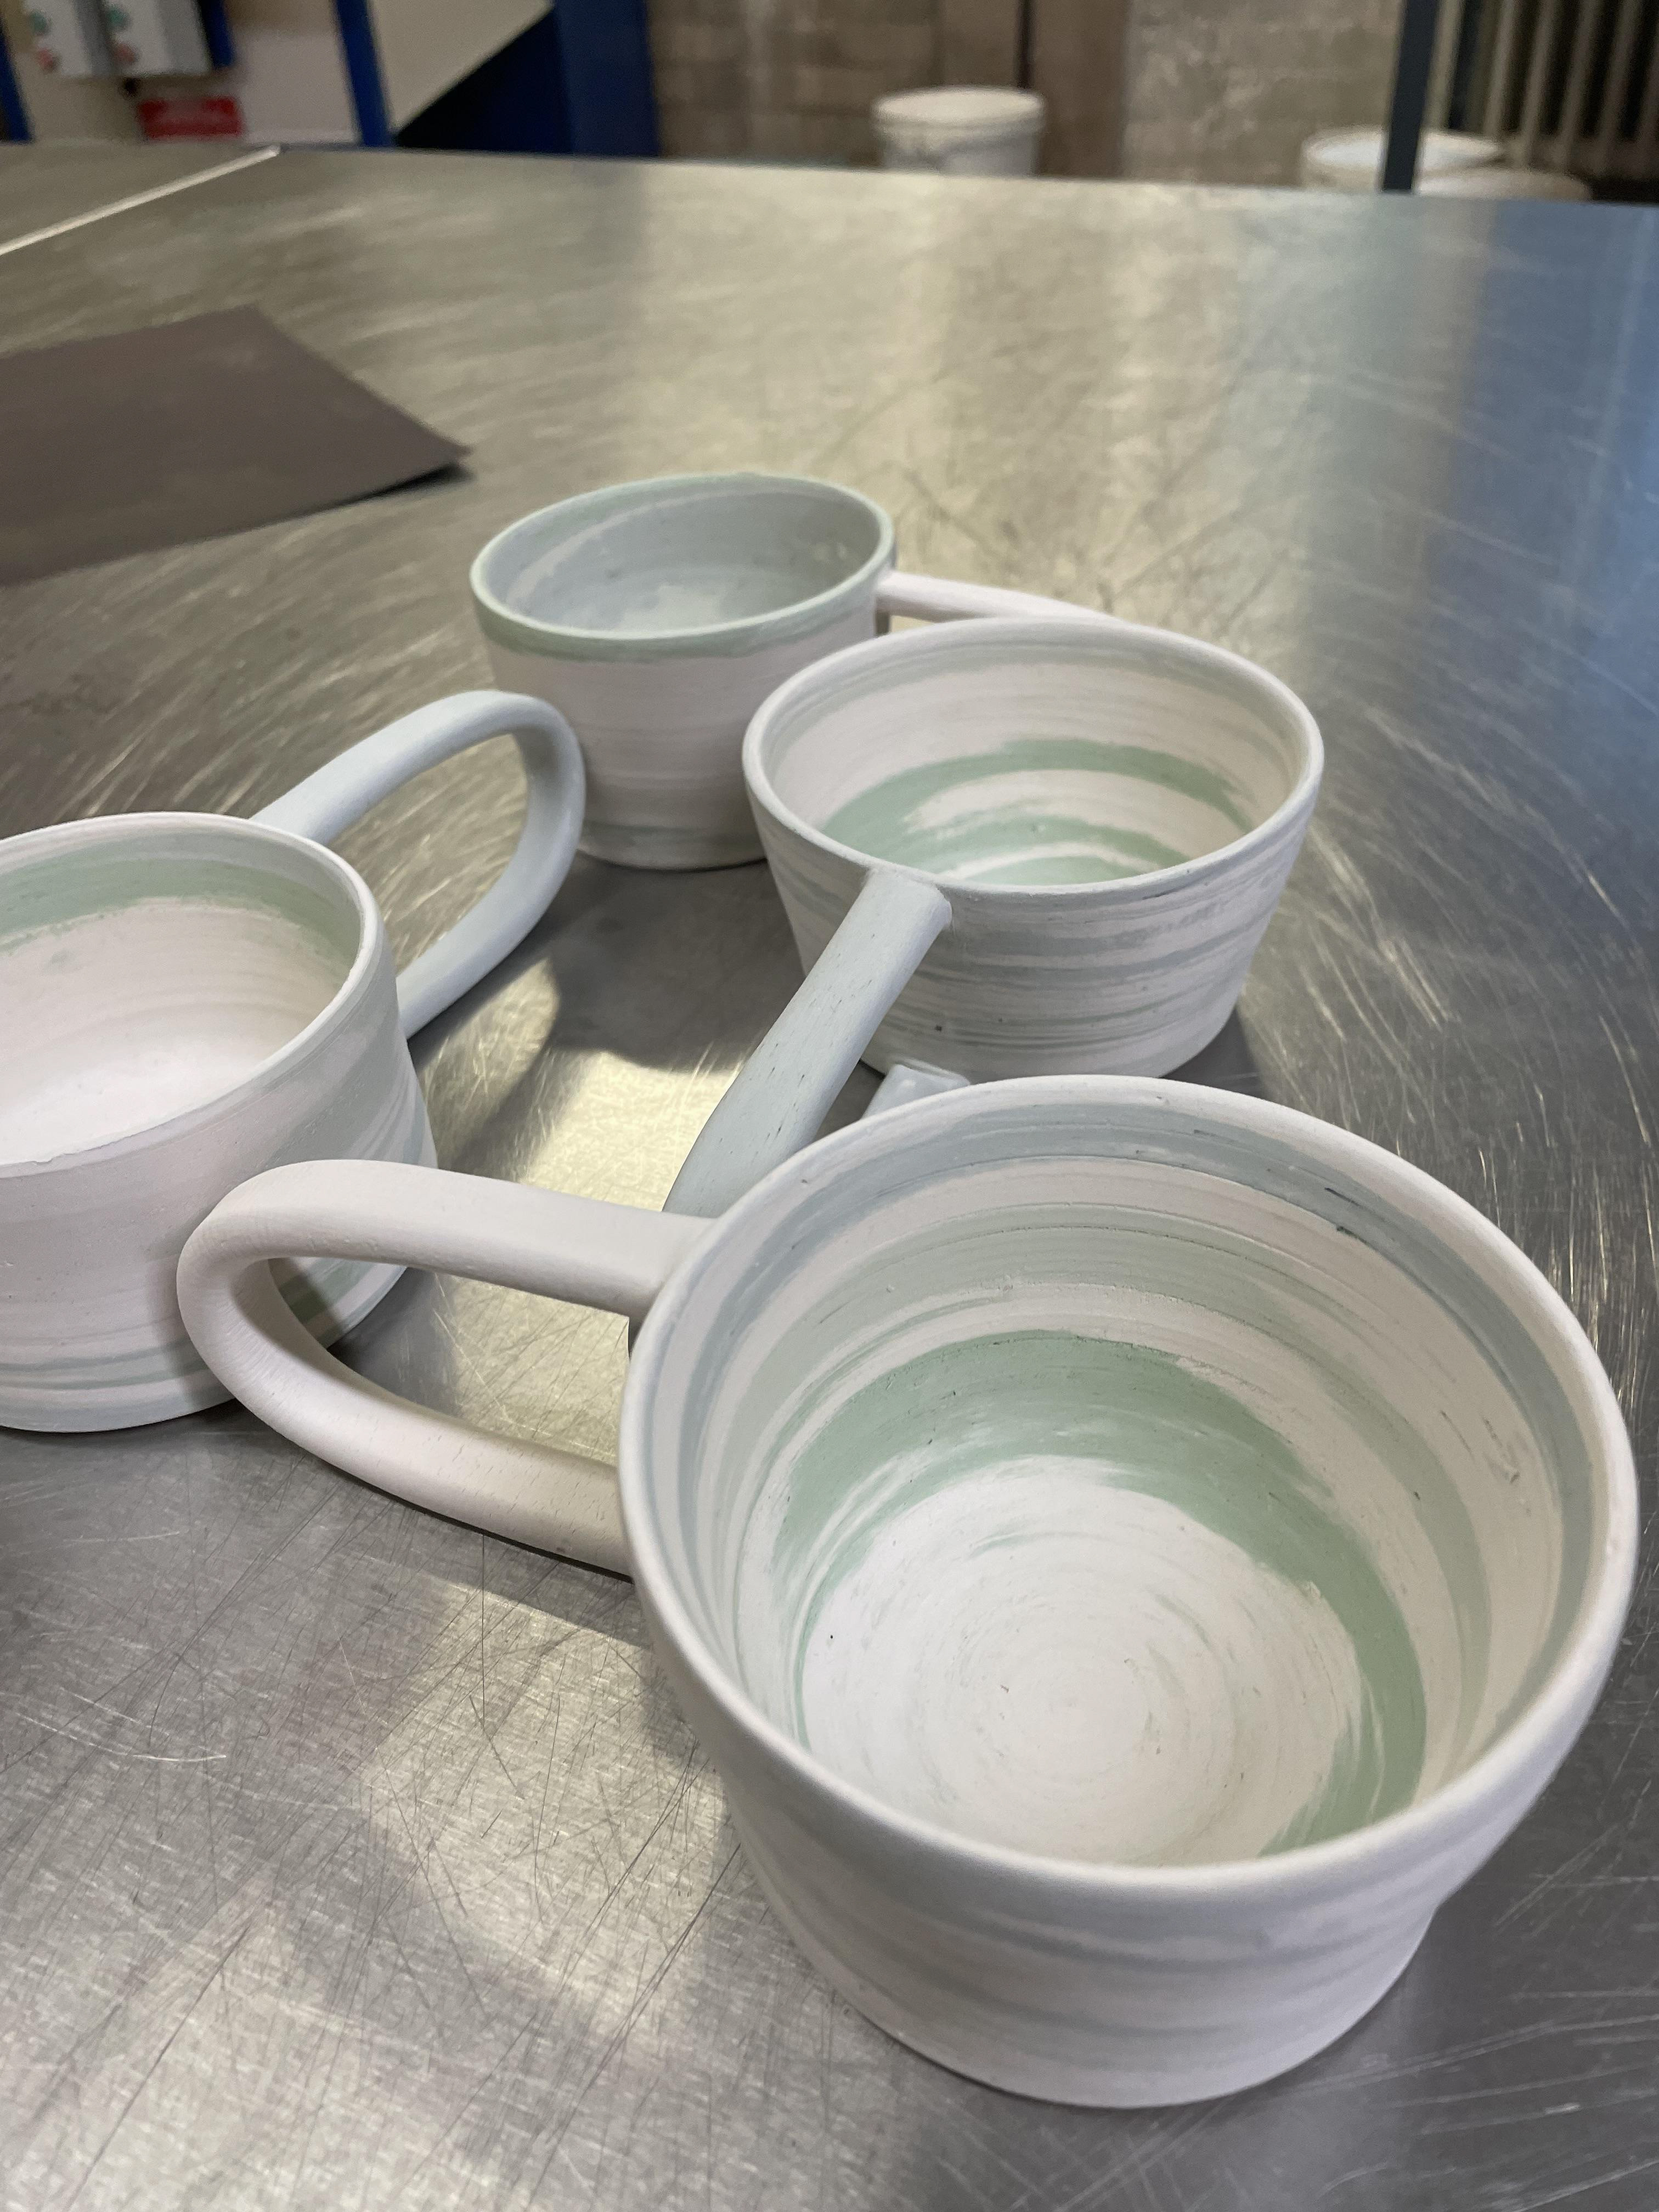
Playing around with different shapes of mugs, some taller ones and more bowled shapes. I wanted to experiment with shape; therefore, once thrown, I decided to recycle all the vessels, not wanting to waste clay. After doing this experiment and research into mugs, I decided I wanted to create more of a wide straight mug that is smaller in size; I now need to work on the consistency of my mug's throwing constantly to achieve the shape that I want and abling me to create a set all similar in size and shape.
Looking Into Matt Glazing
I wanted to look at different finishes of my mugs to see if a matt clear earthenware would give a more natural look to my mugs and still allow the colours to pop. I like the matt effect; however, it needs to be layered thin to be matt; otherwise, it goes glossy when glazed too thick. Due to this, the inside of the mugs are shiny as the glaze was applied thicker; I wouldn't say I liked the inconsistencies of the glaze. However, this is my fault, and I can prevent this by watering down the glaze or using a spray gun. I like its effect, but a shiny glaze is more fitting as it feels more comfortable for the user when drinking. Also, after further research, I realised there are better finishes for food and drink vessels than matt glazing.
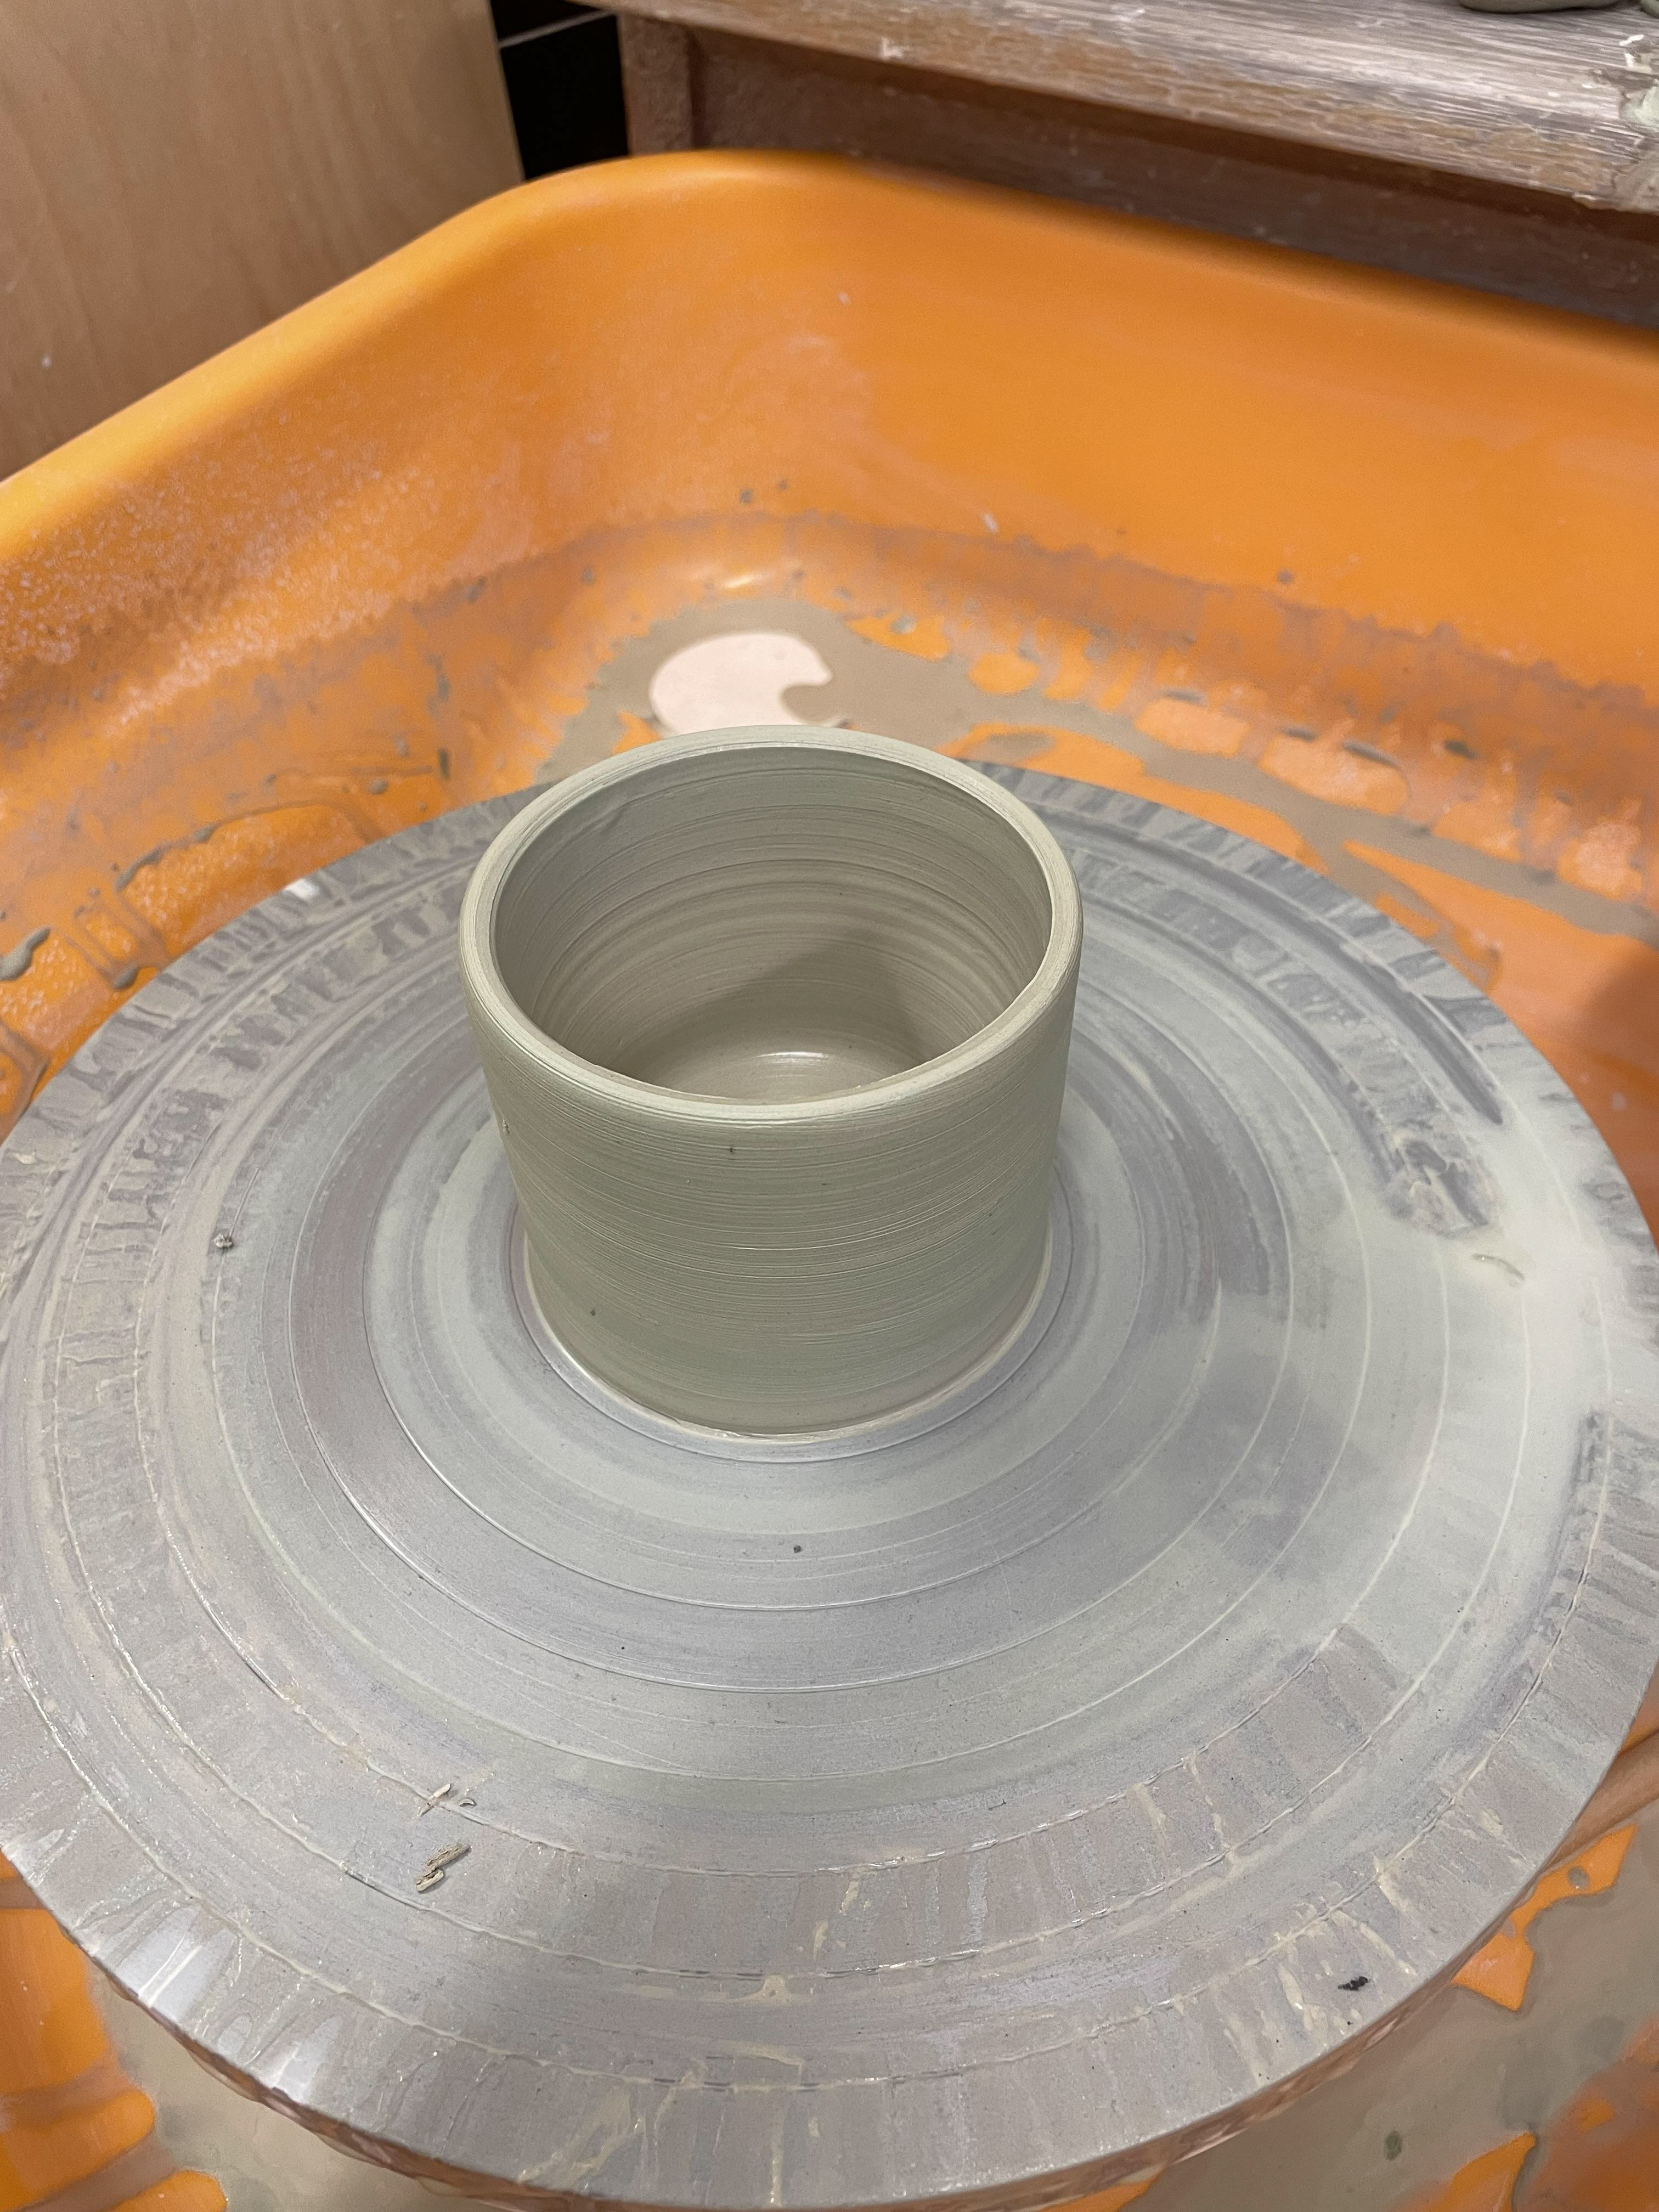
Throwing With Layering Clay

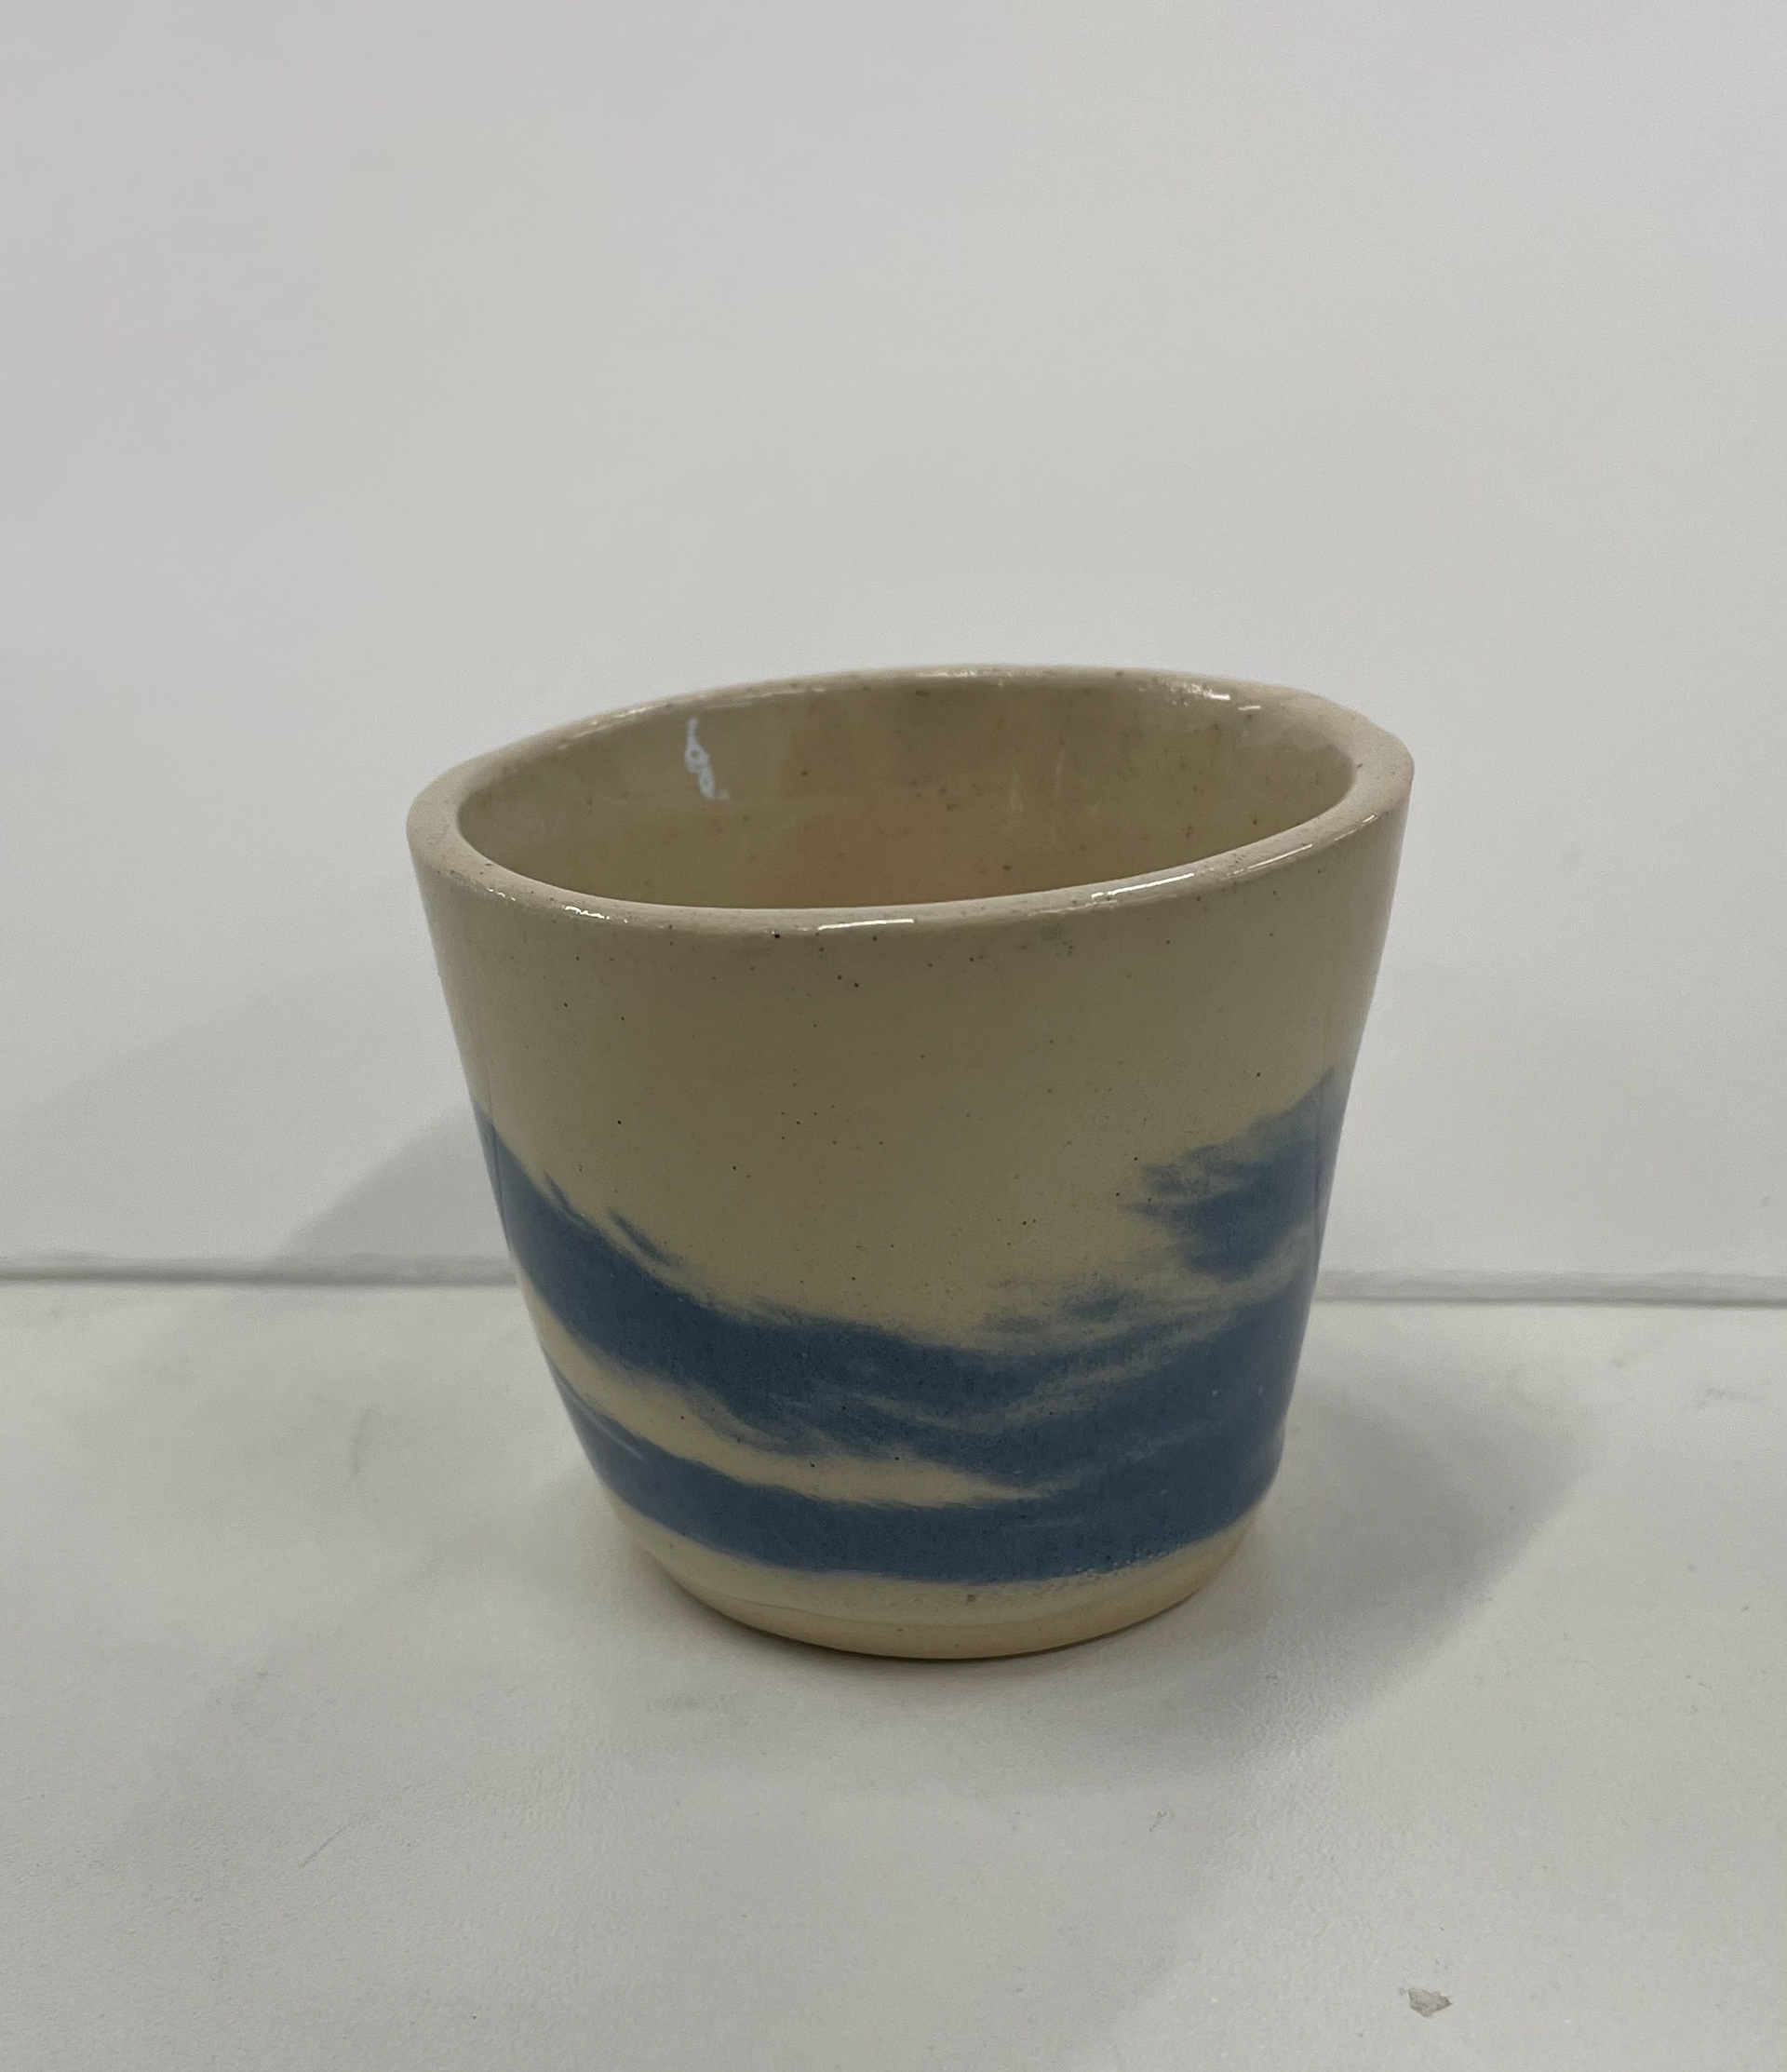
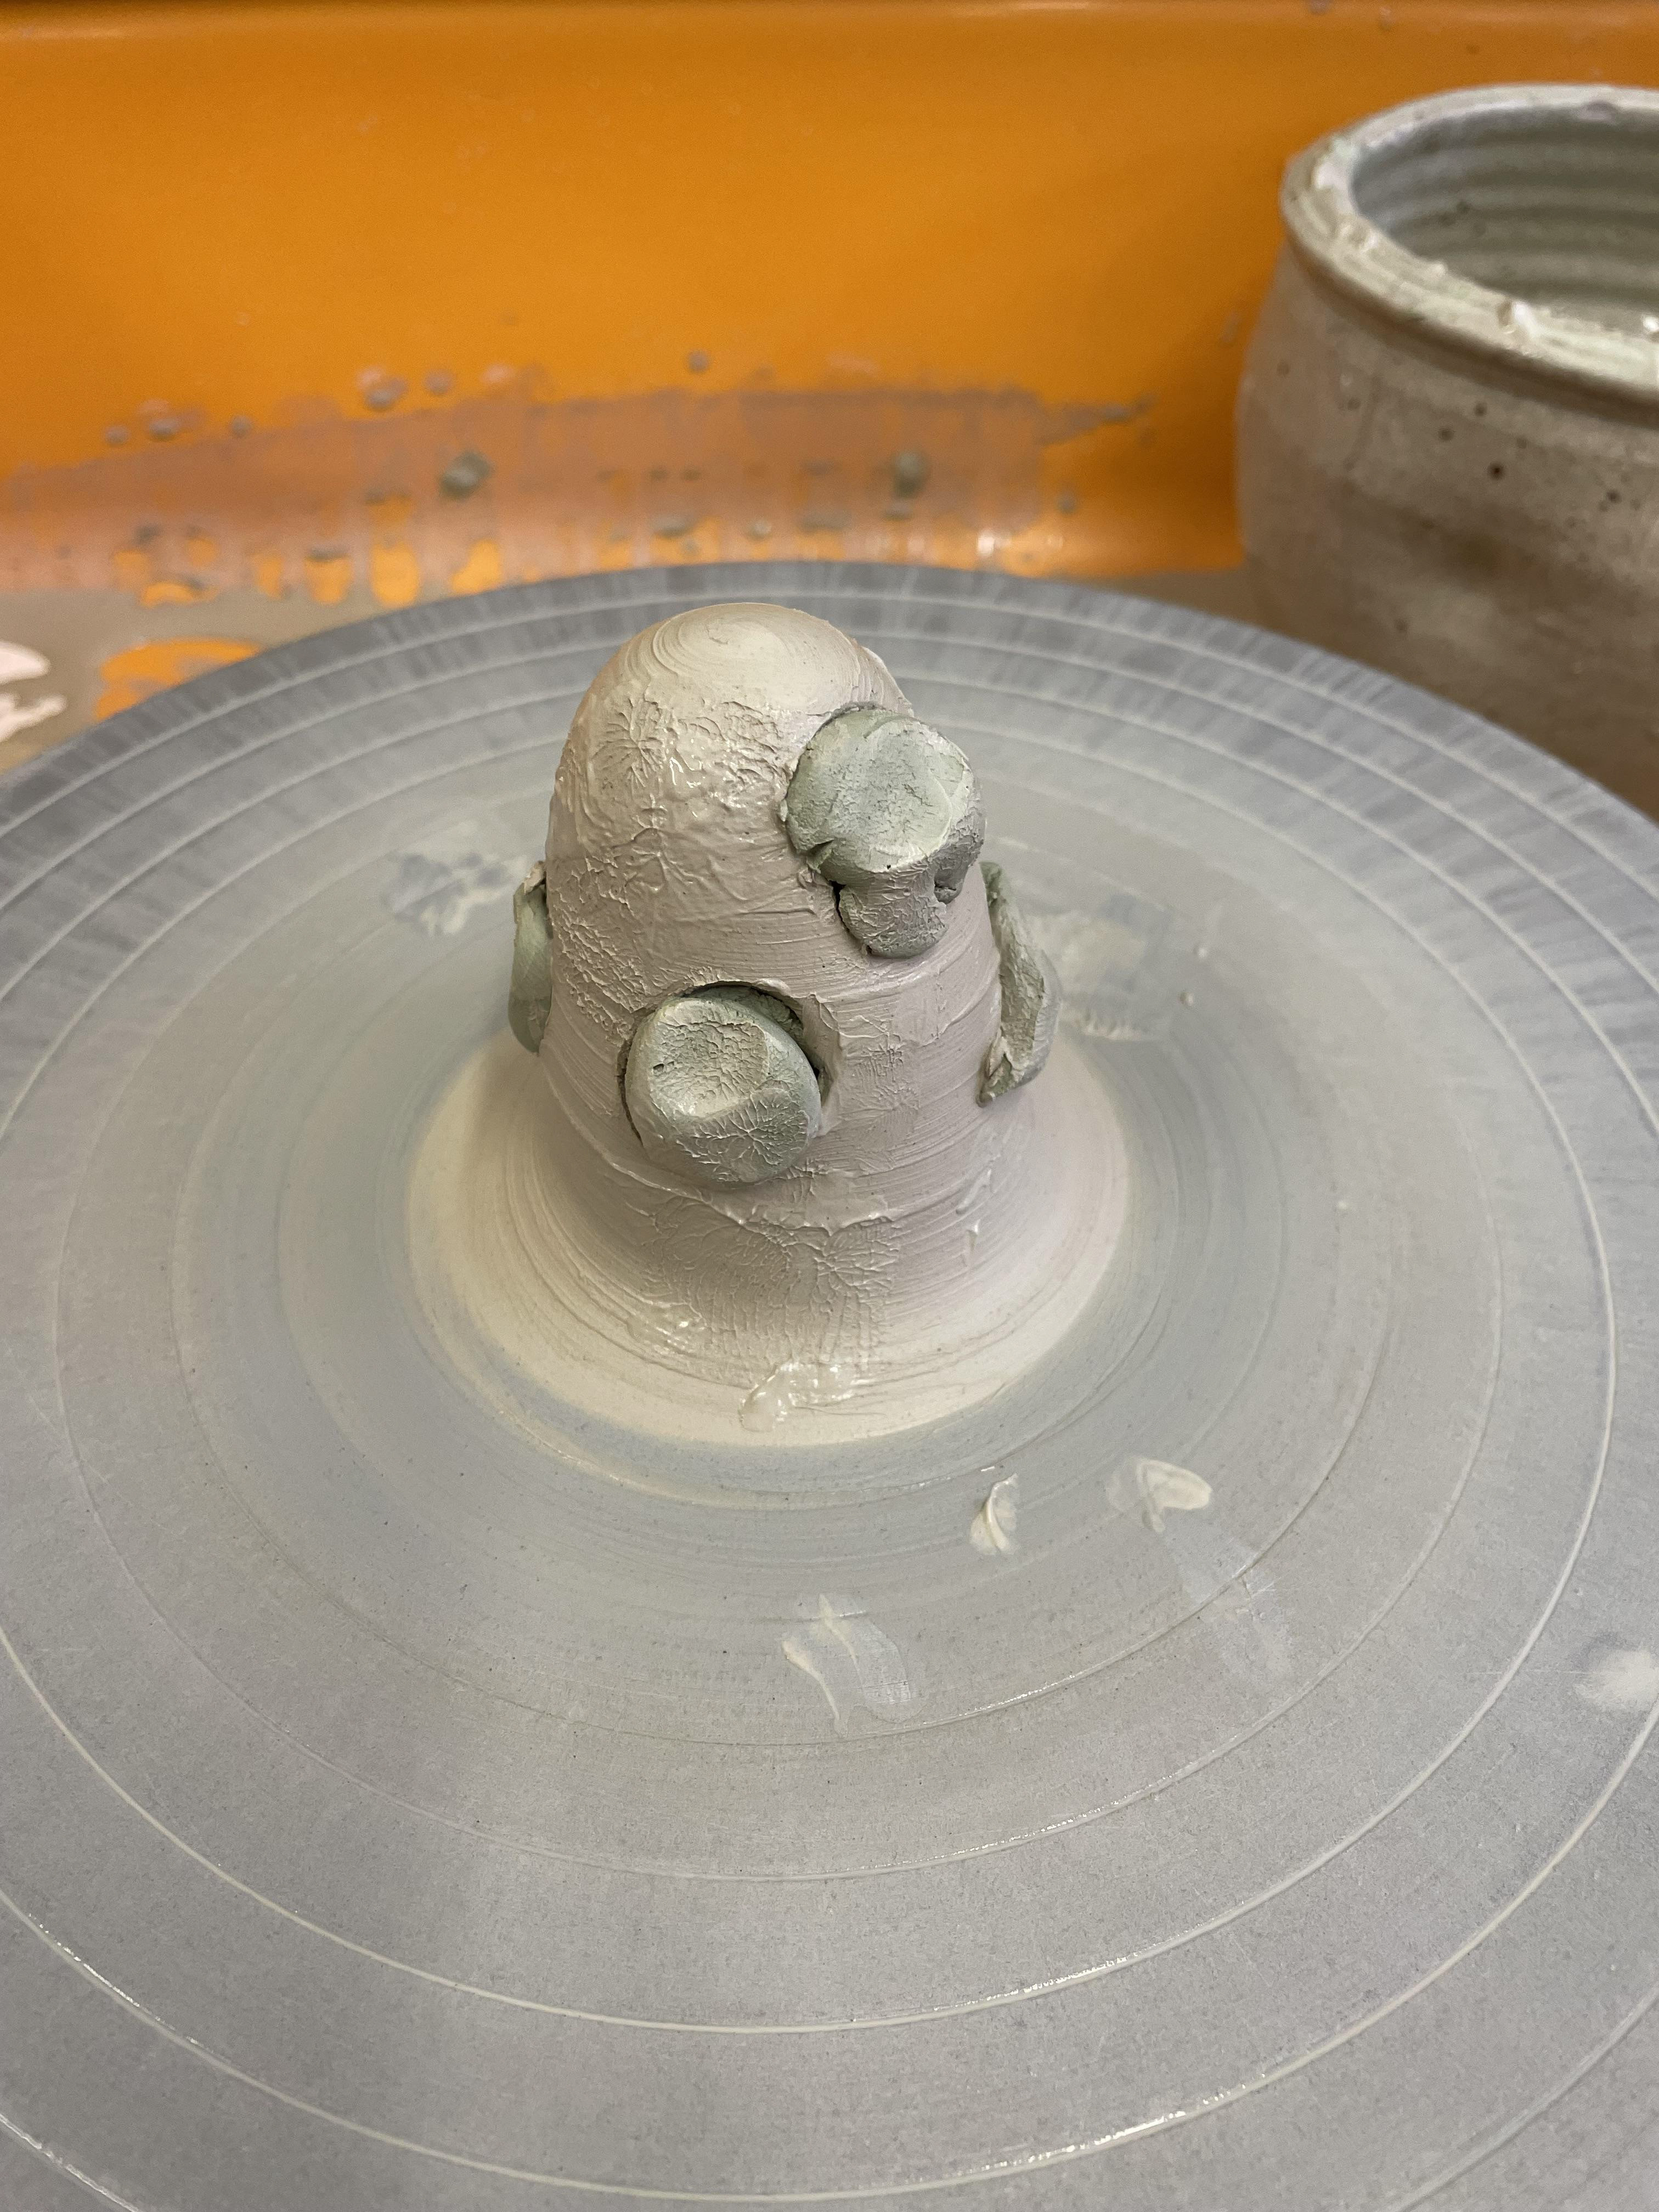
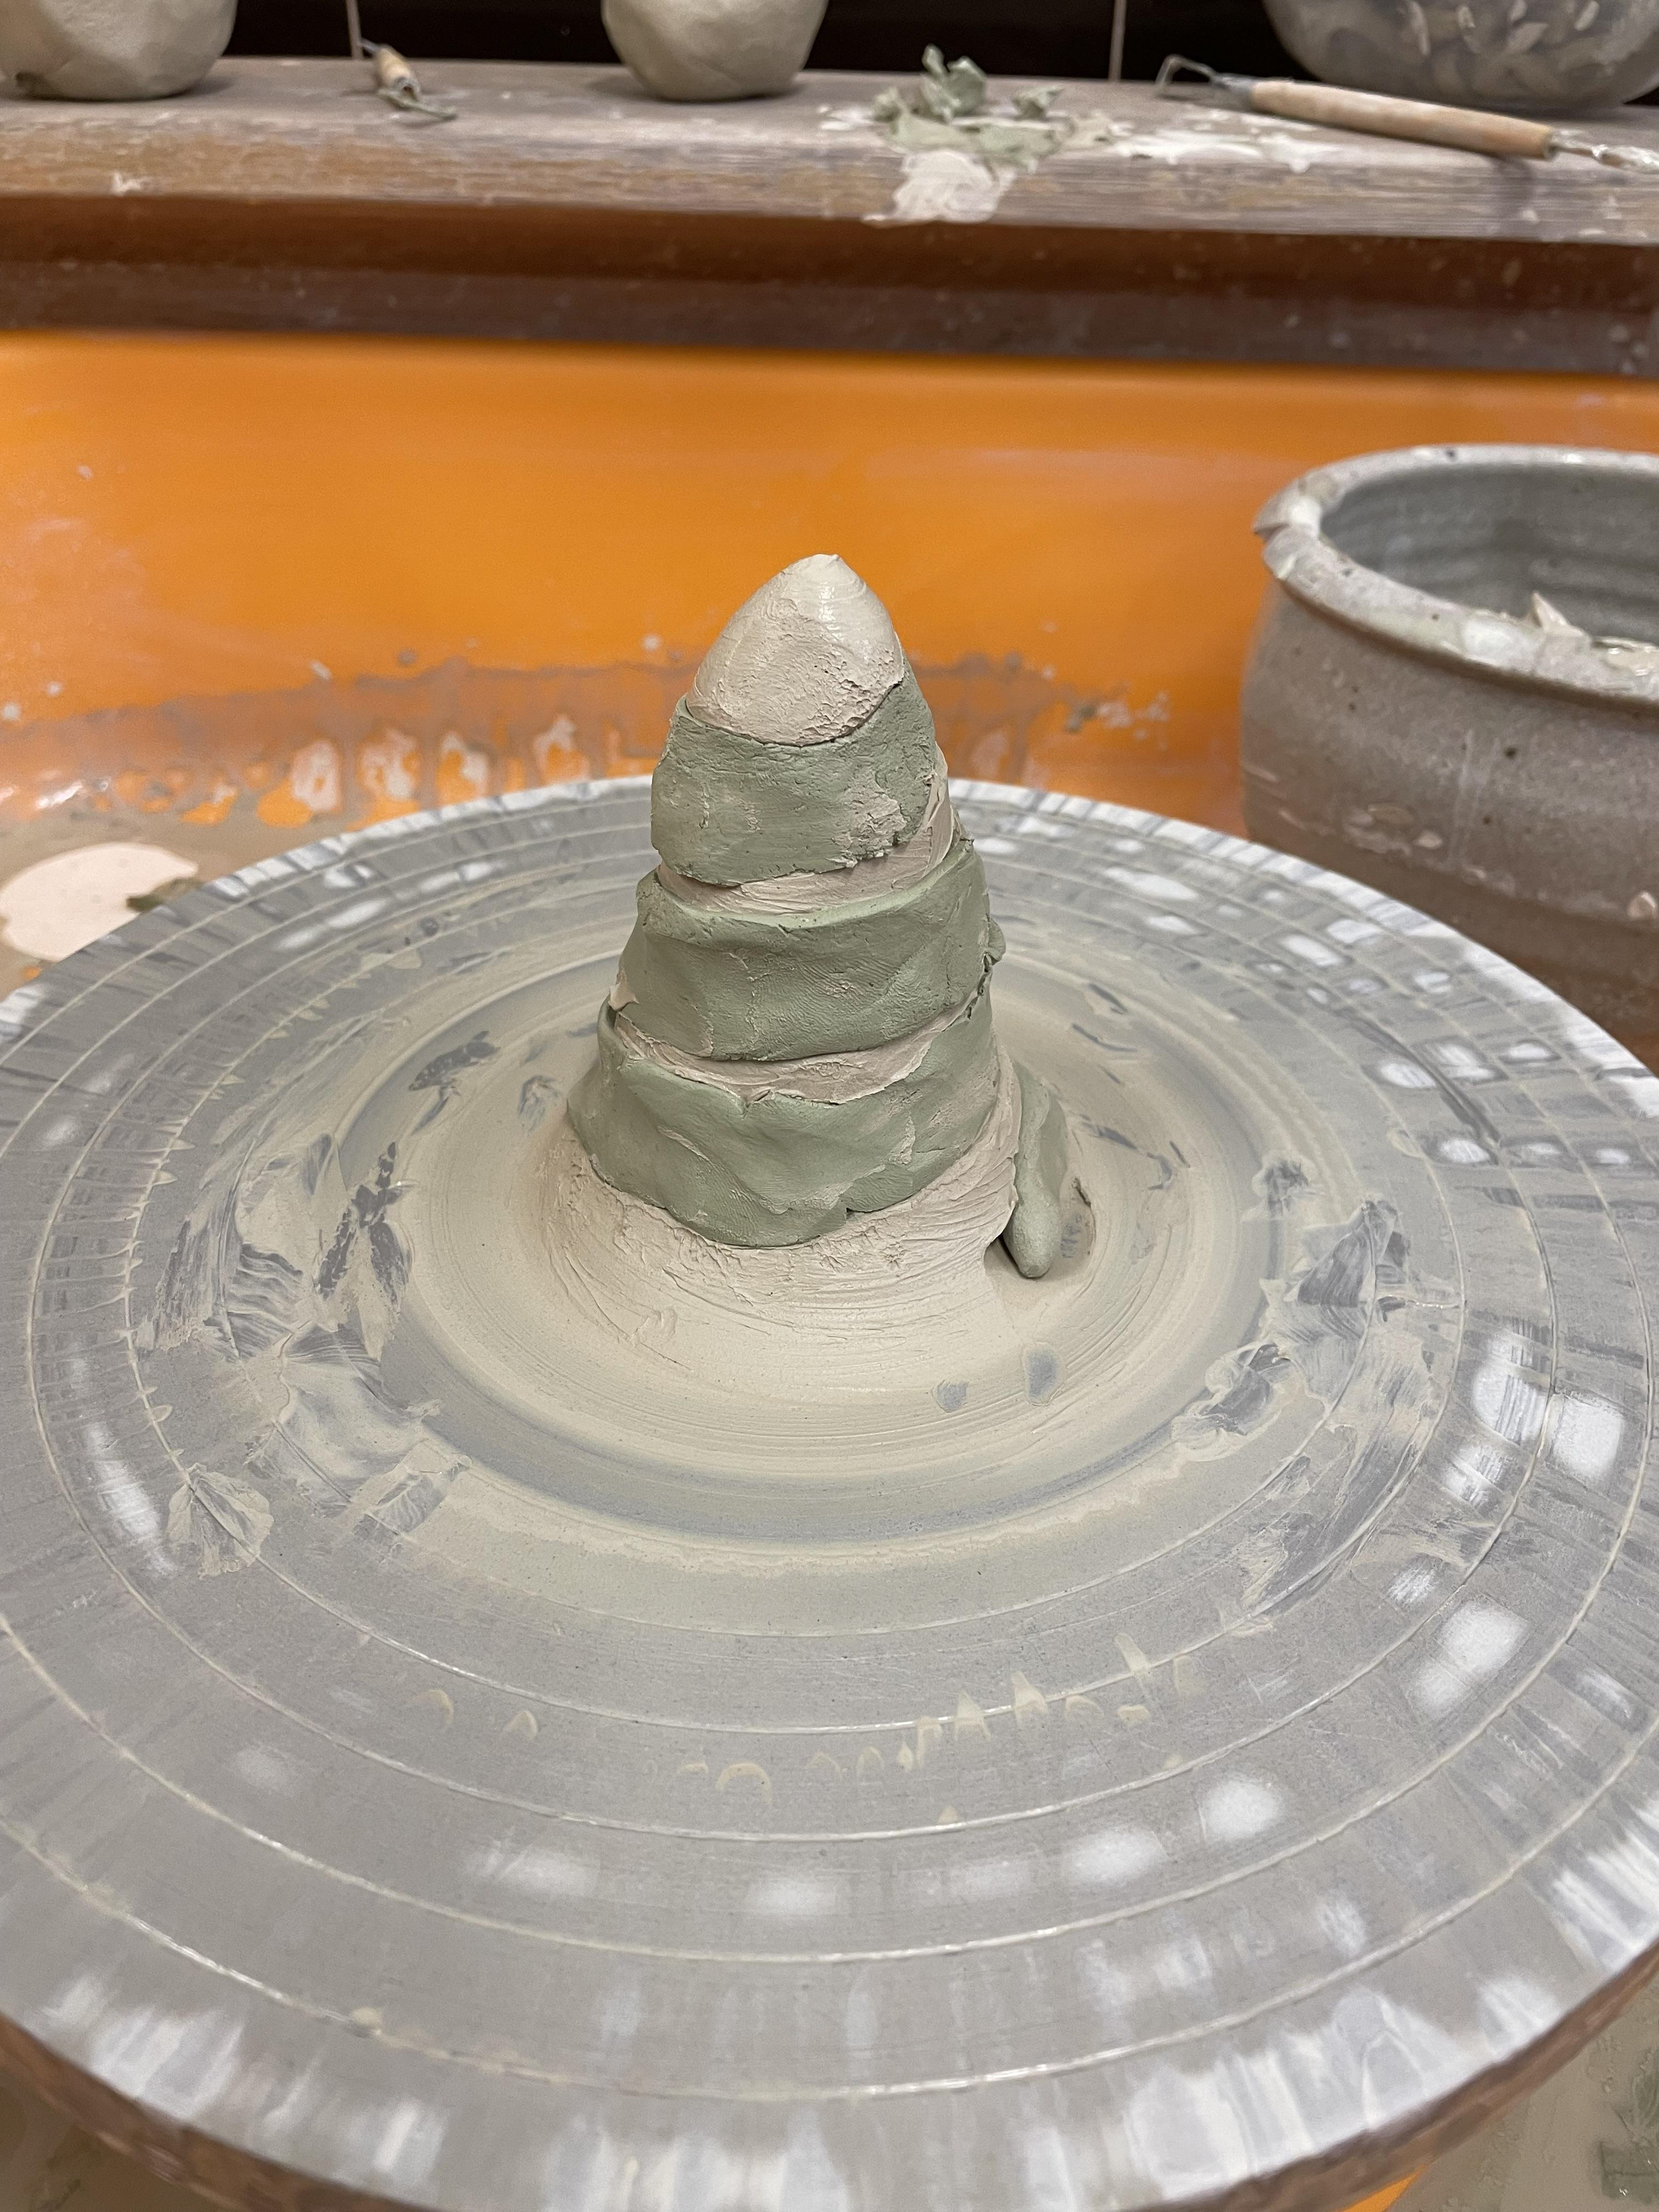
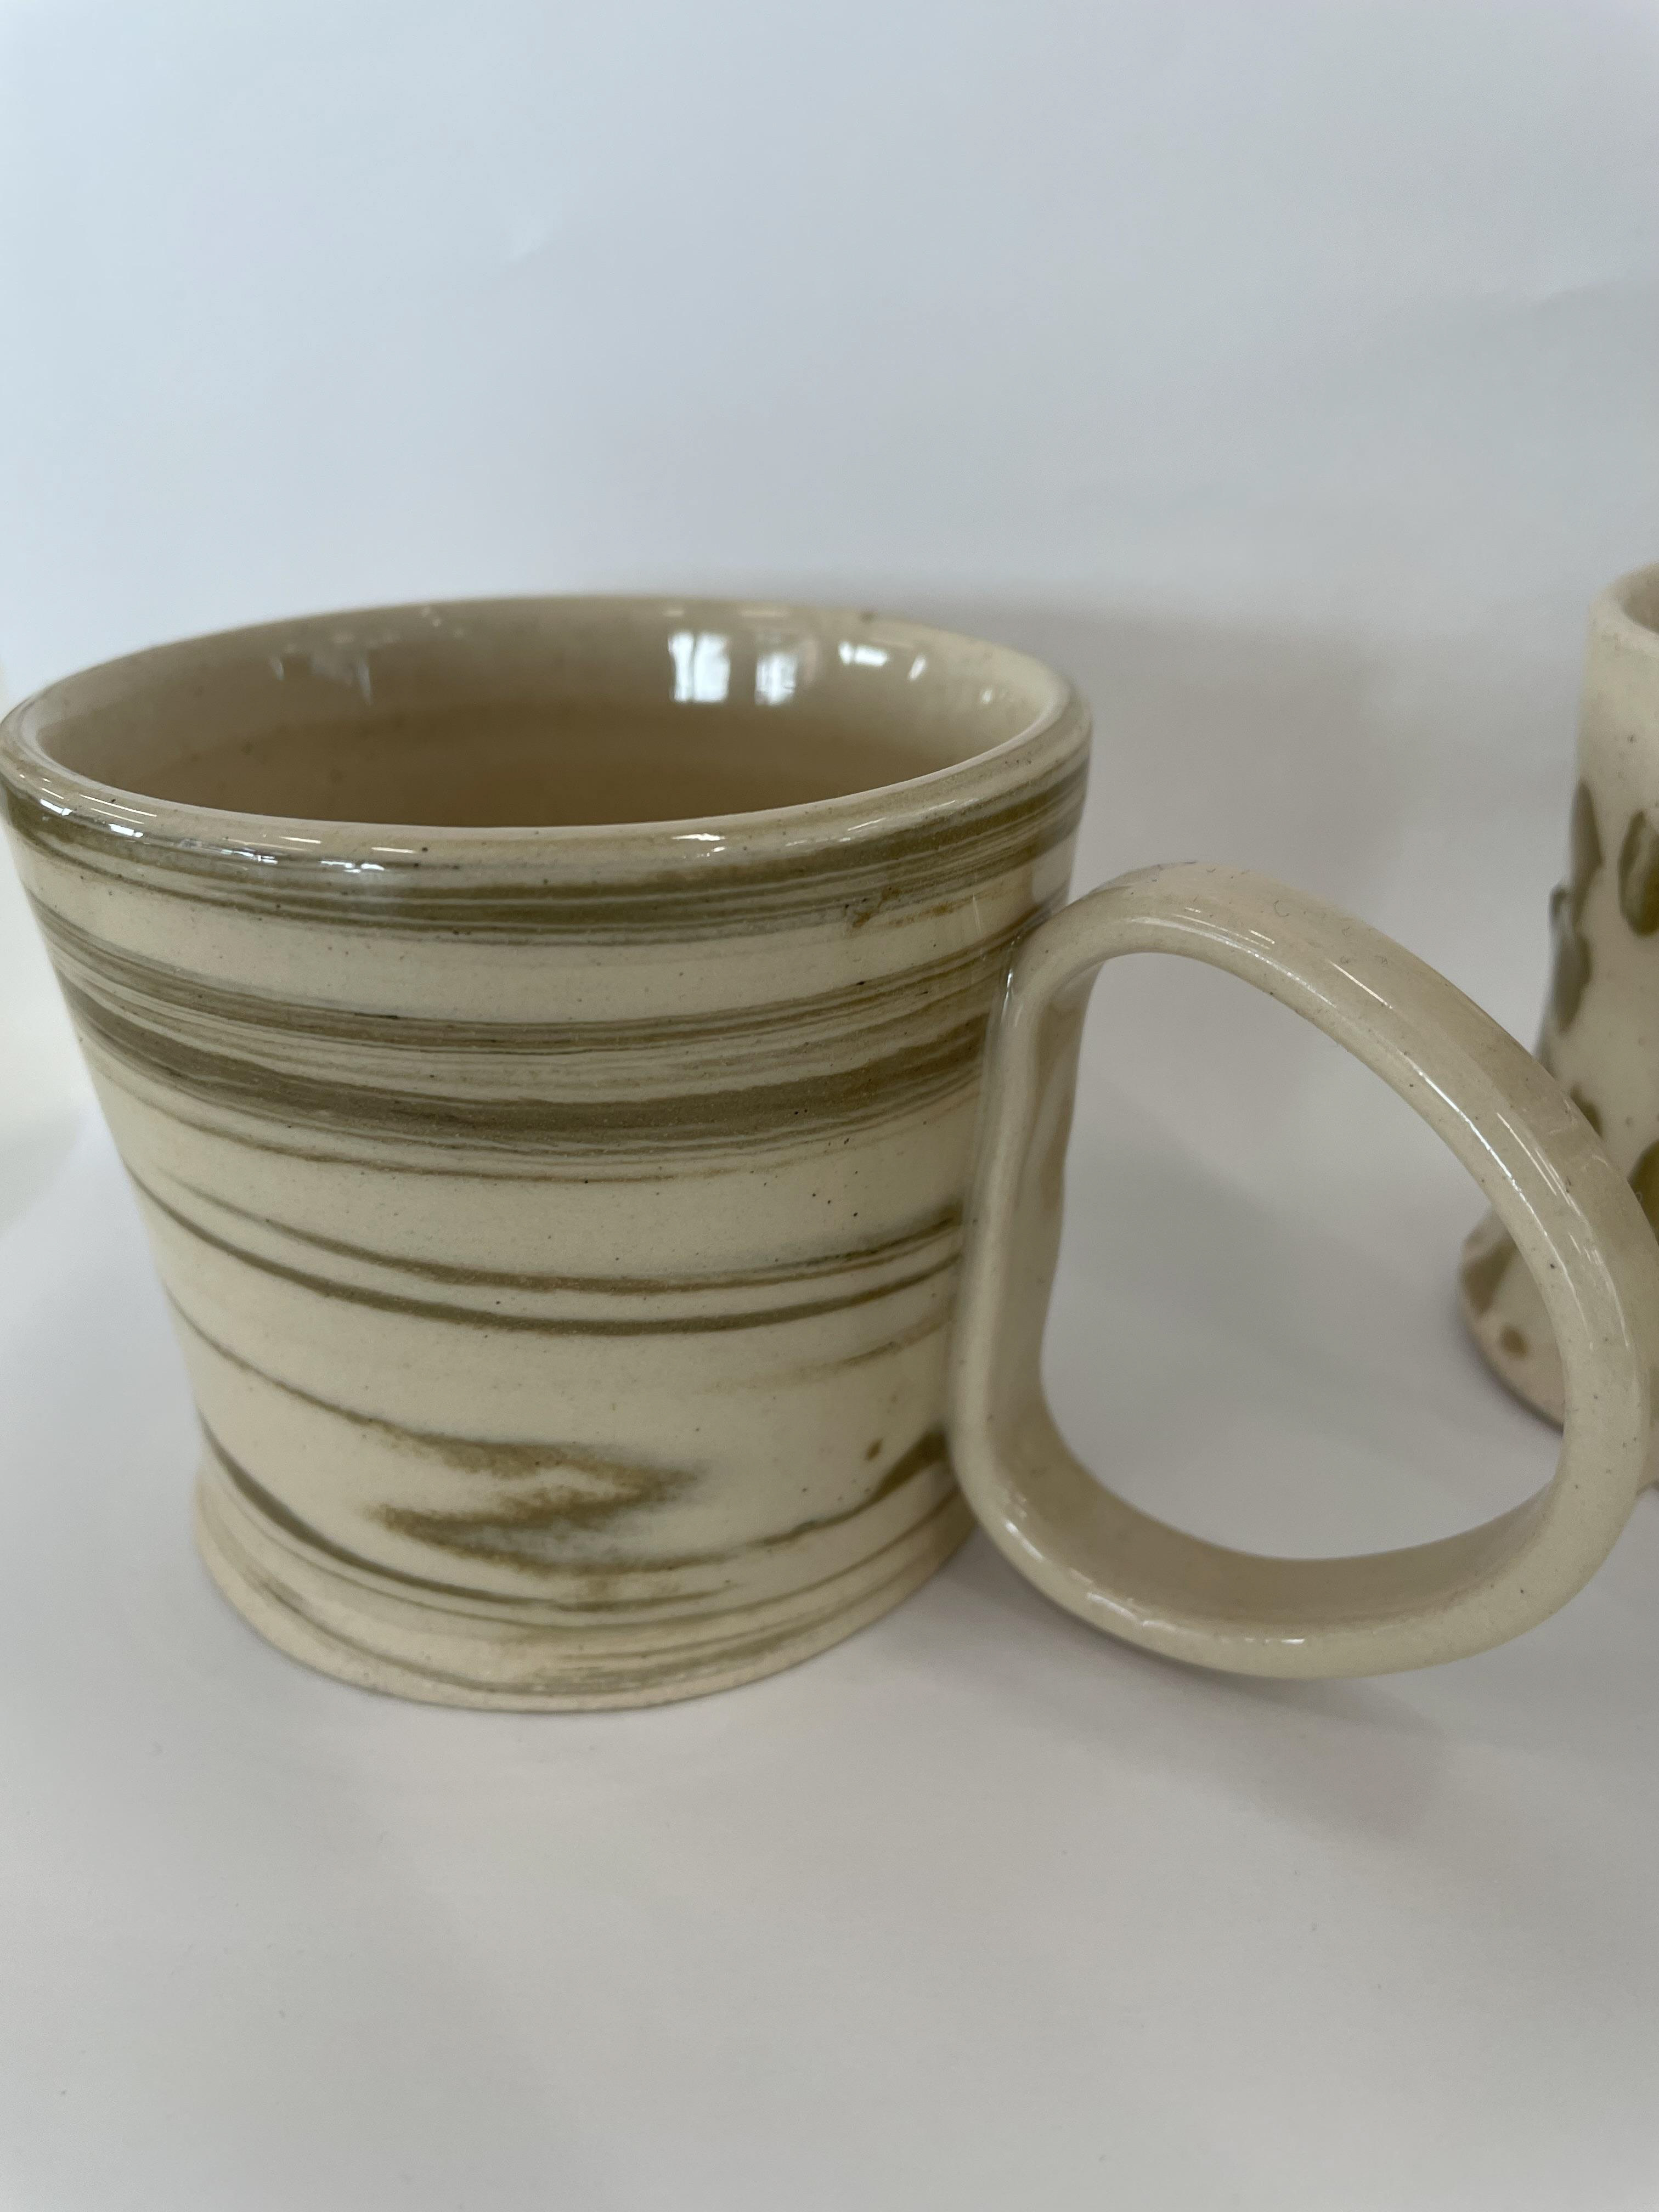
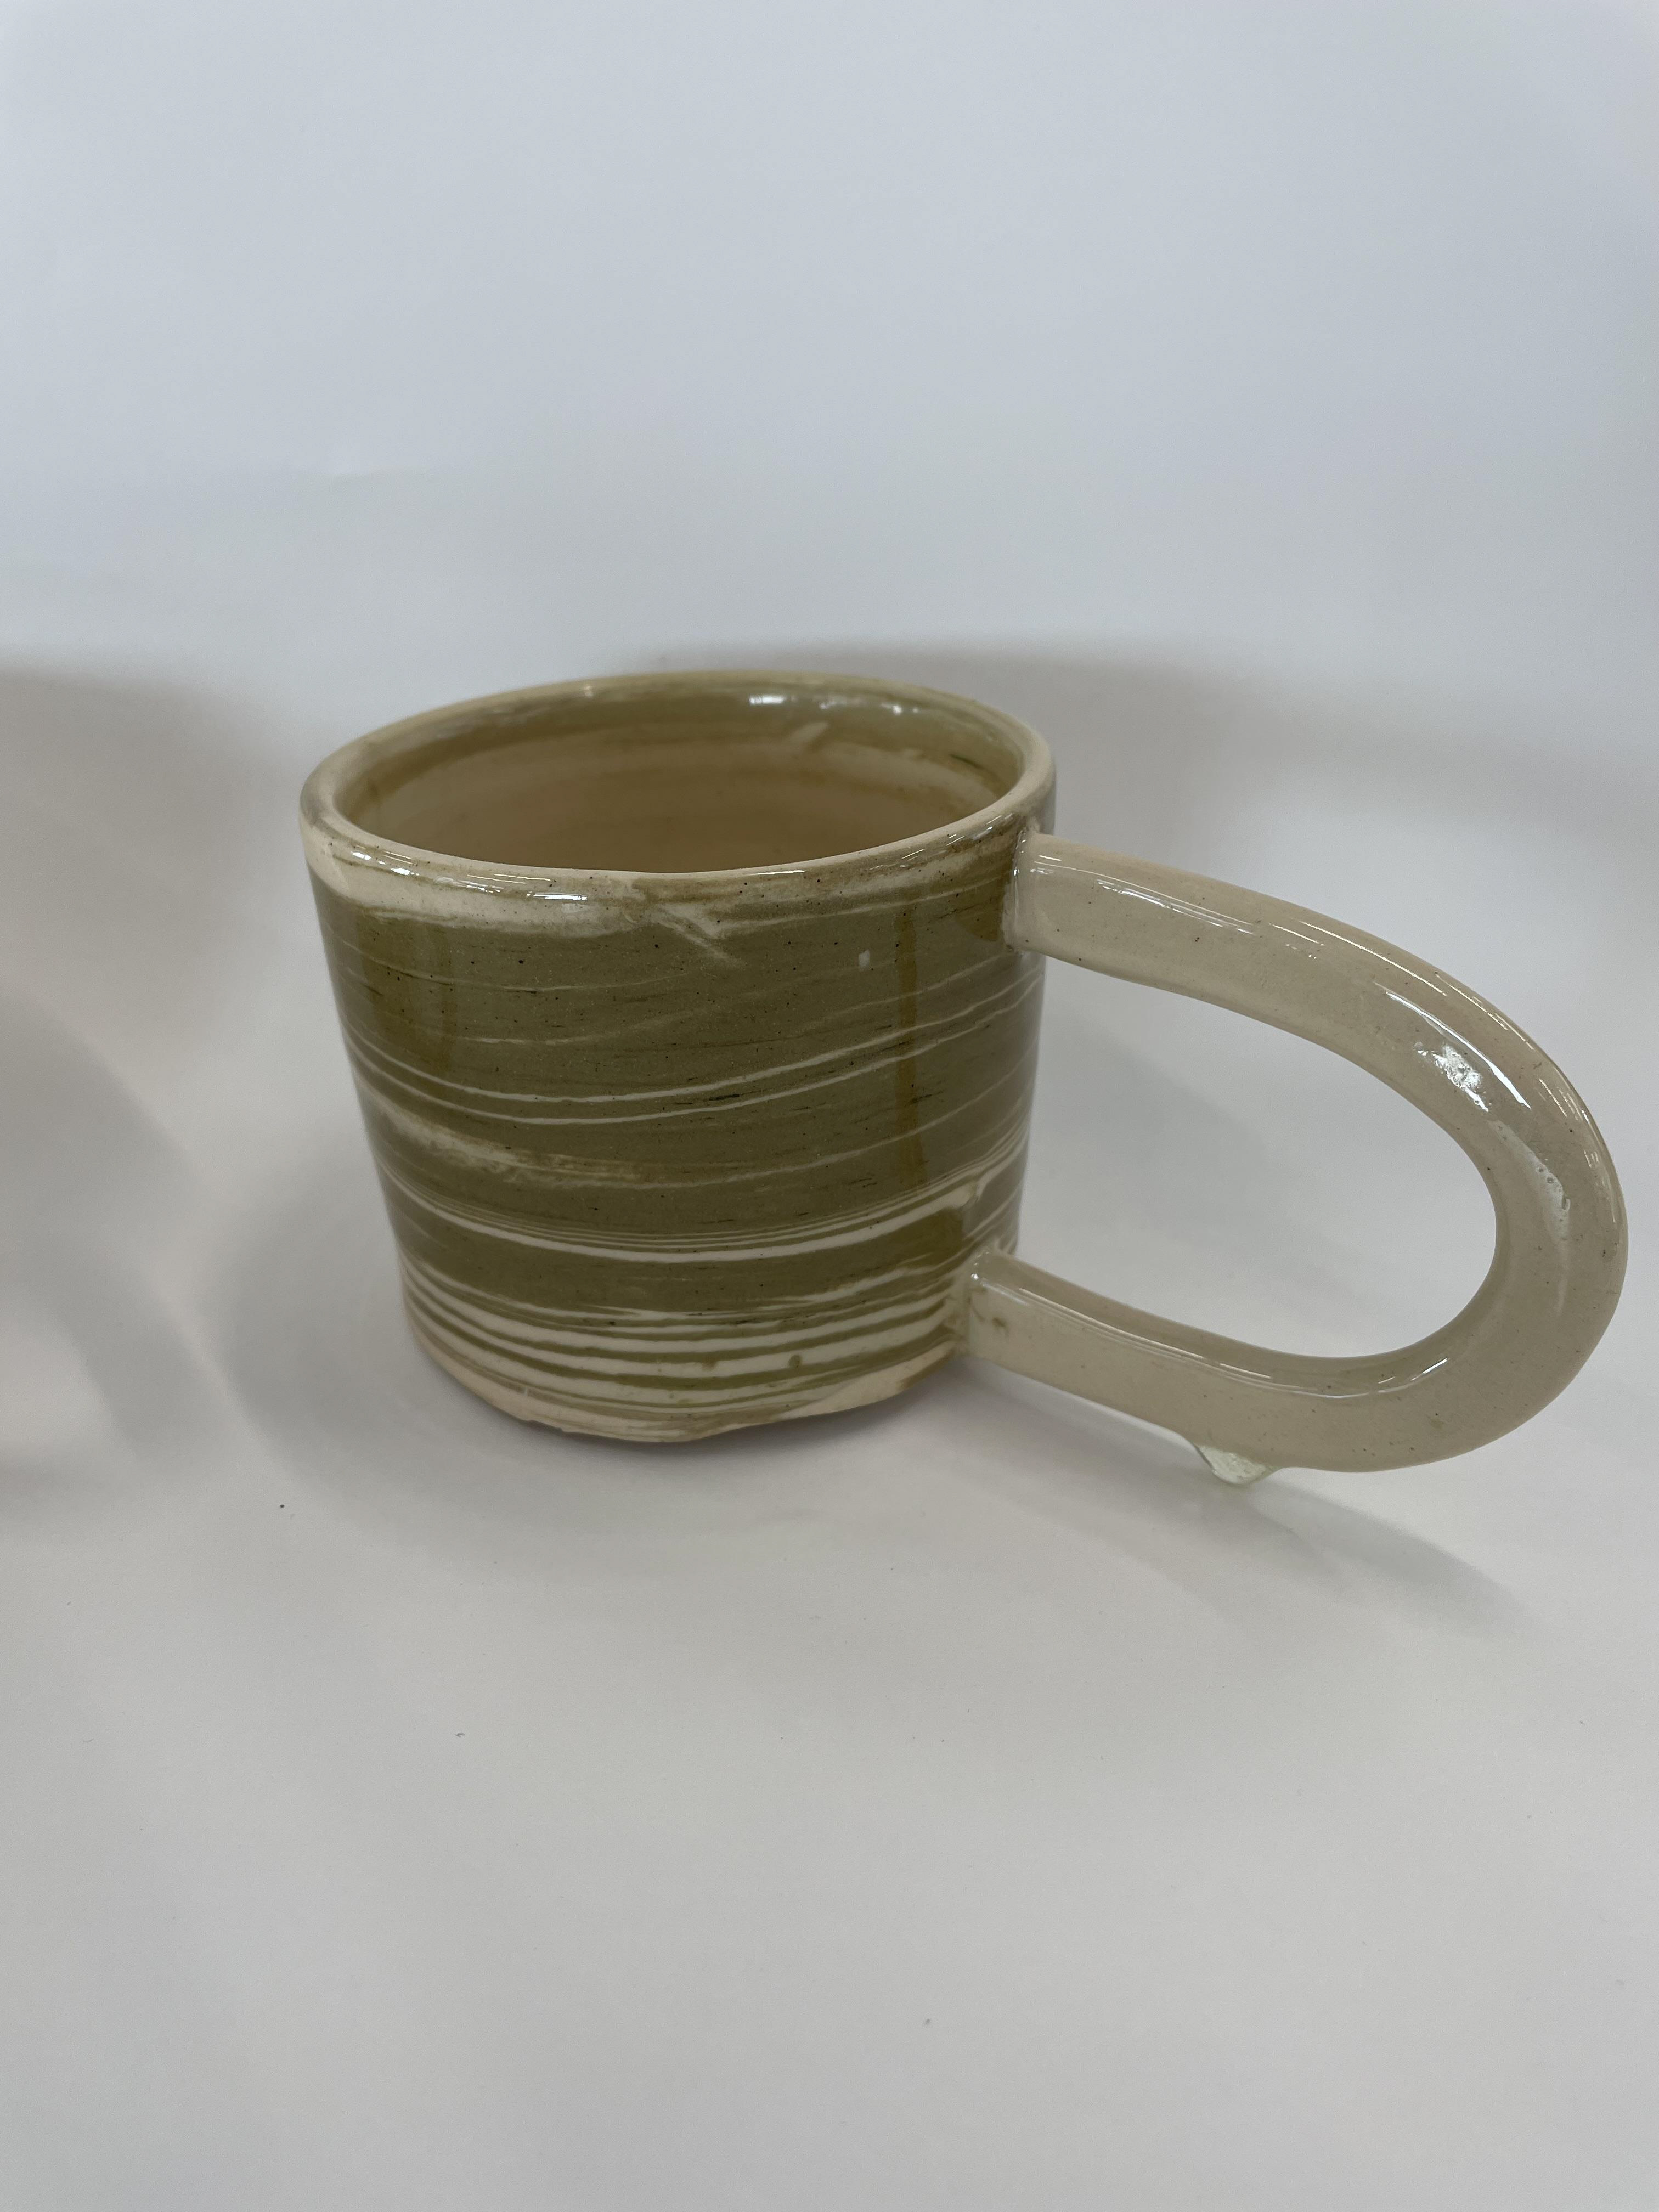
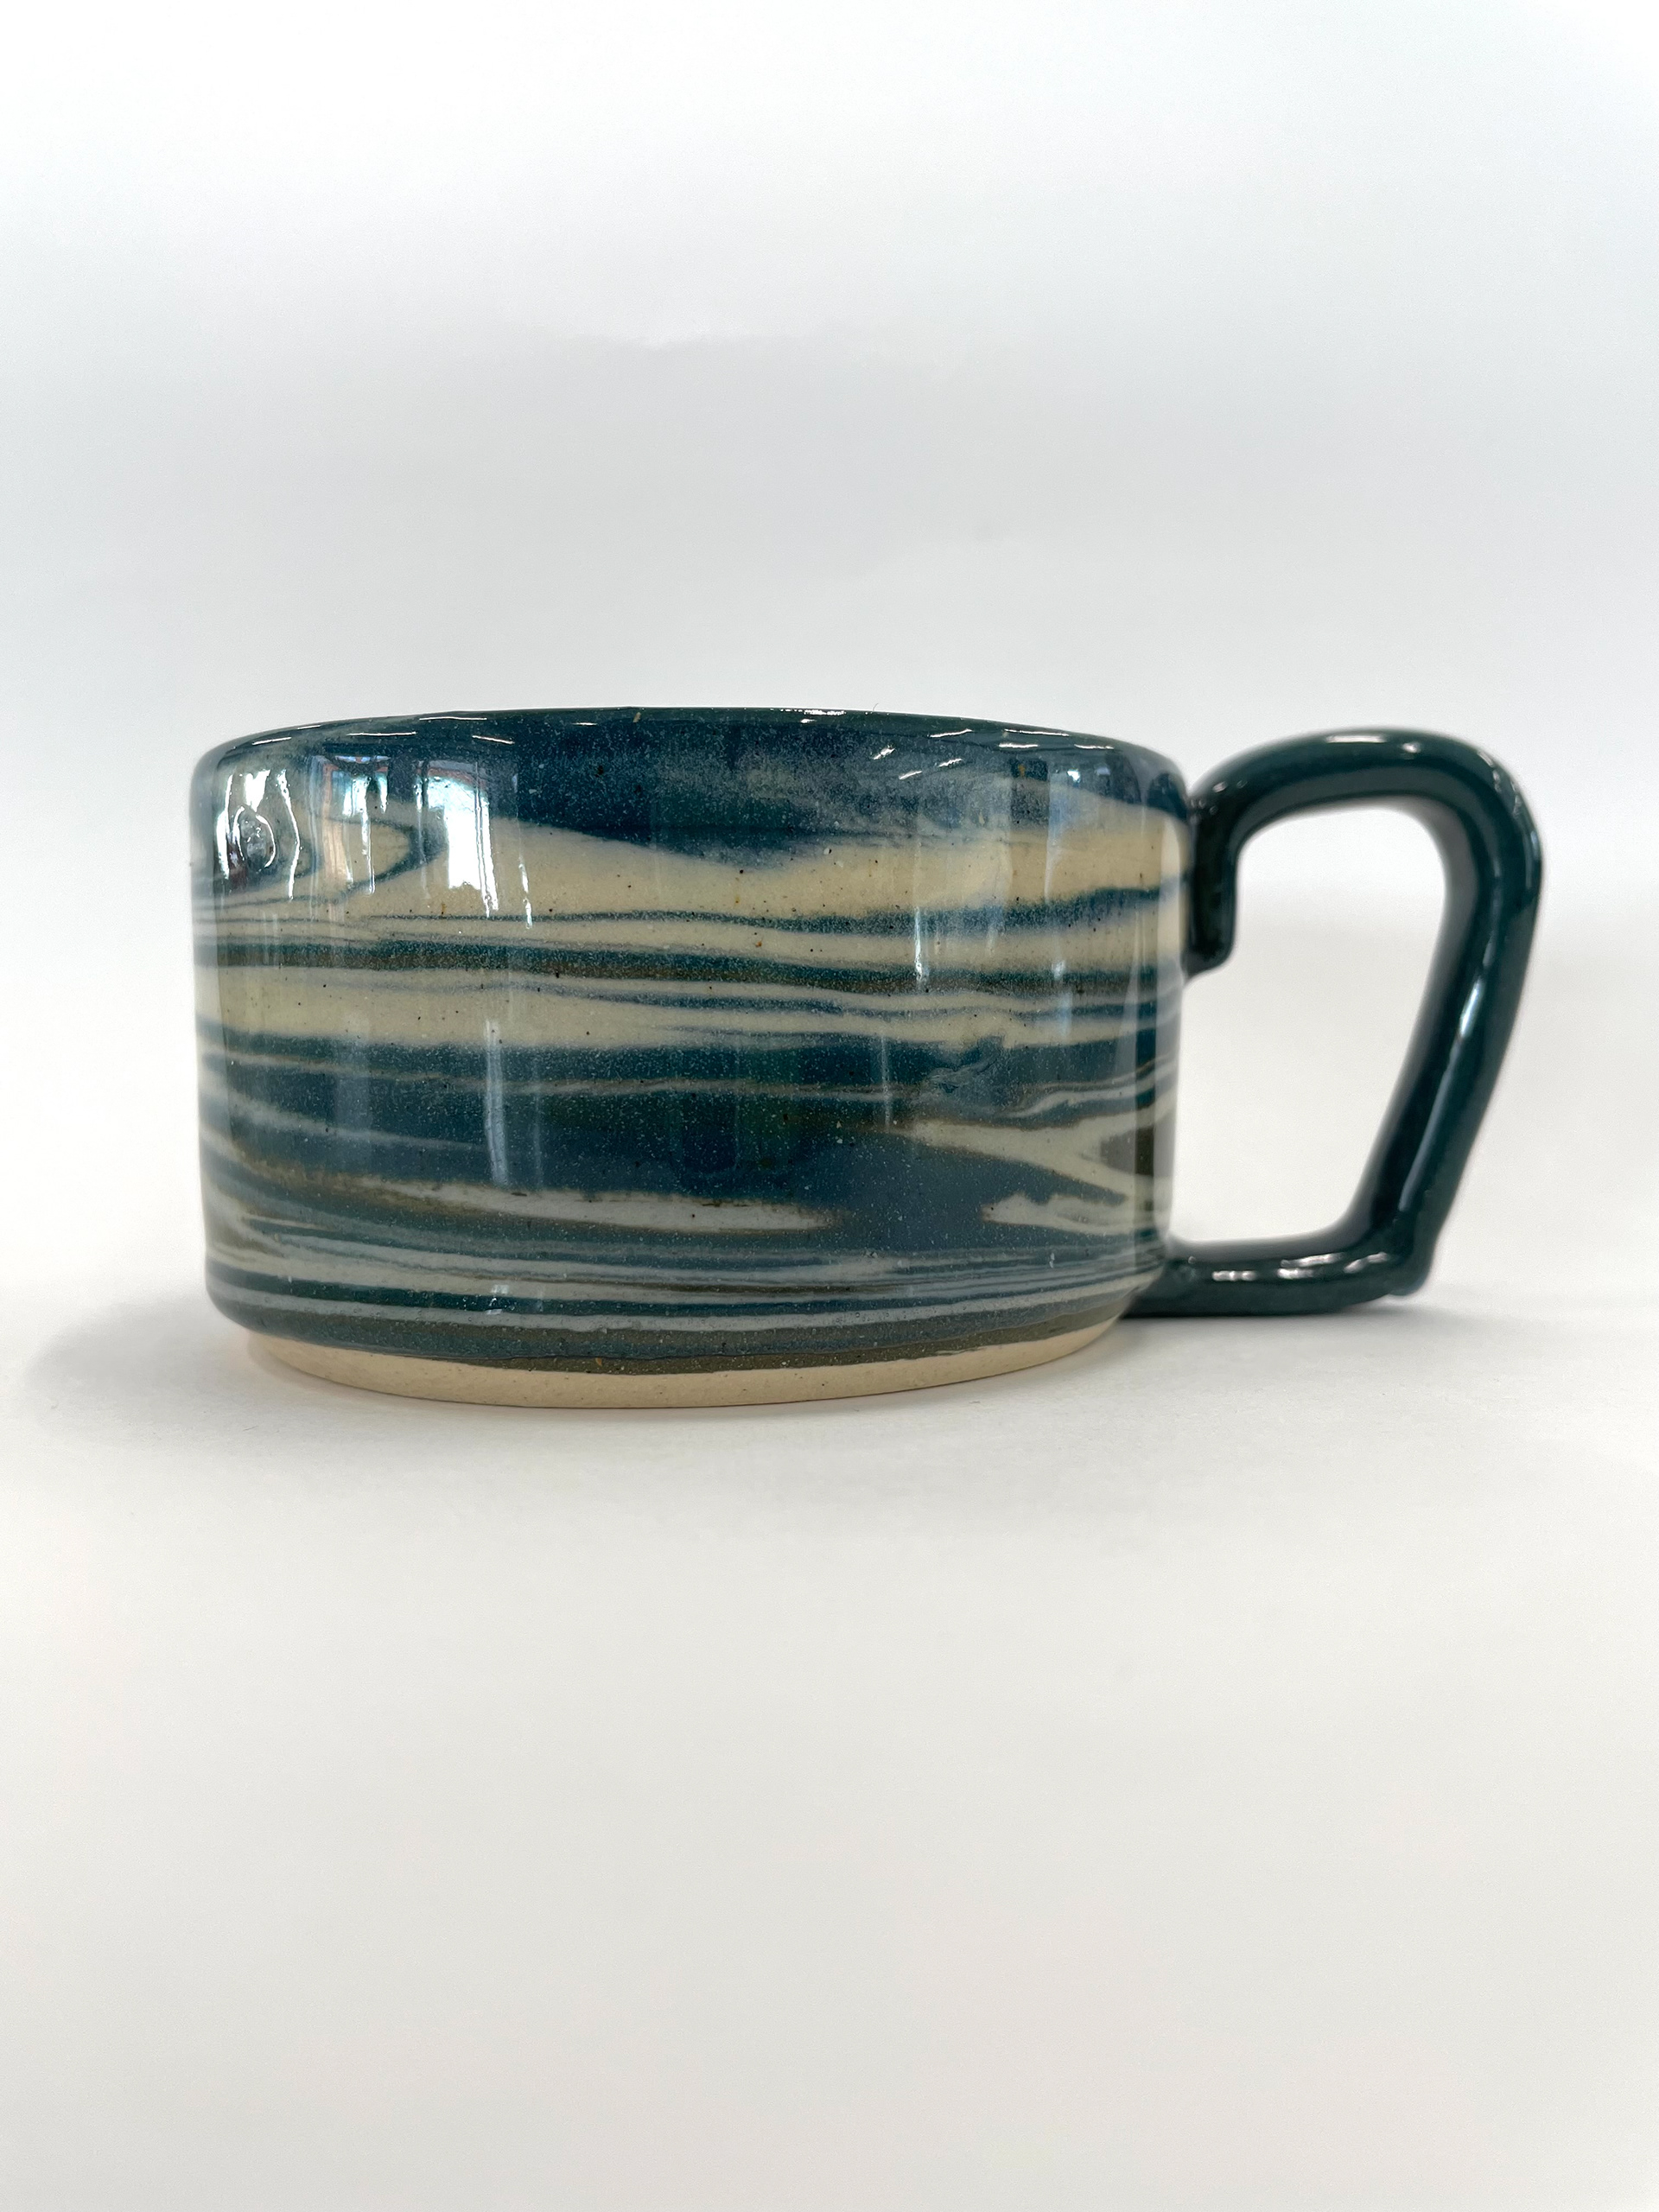
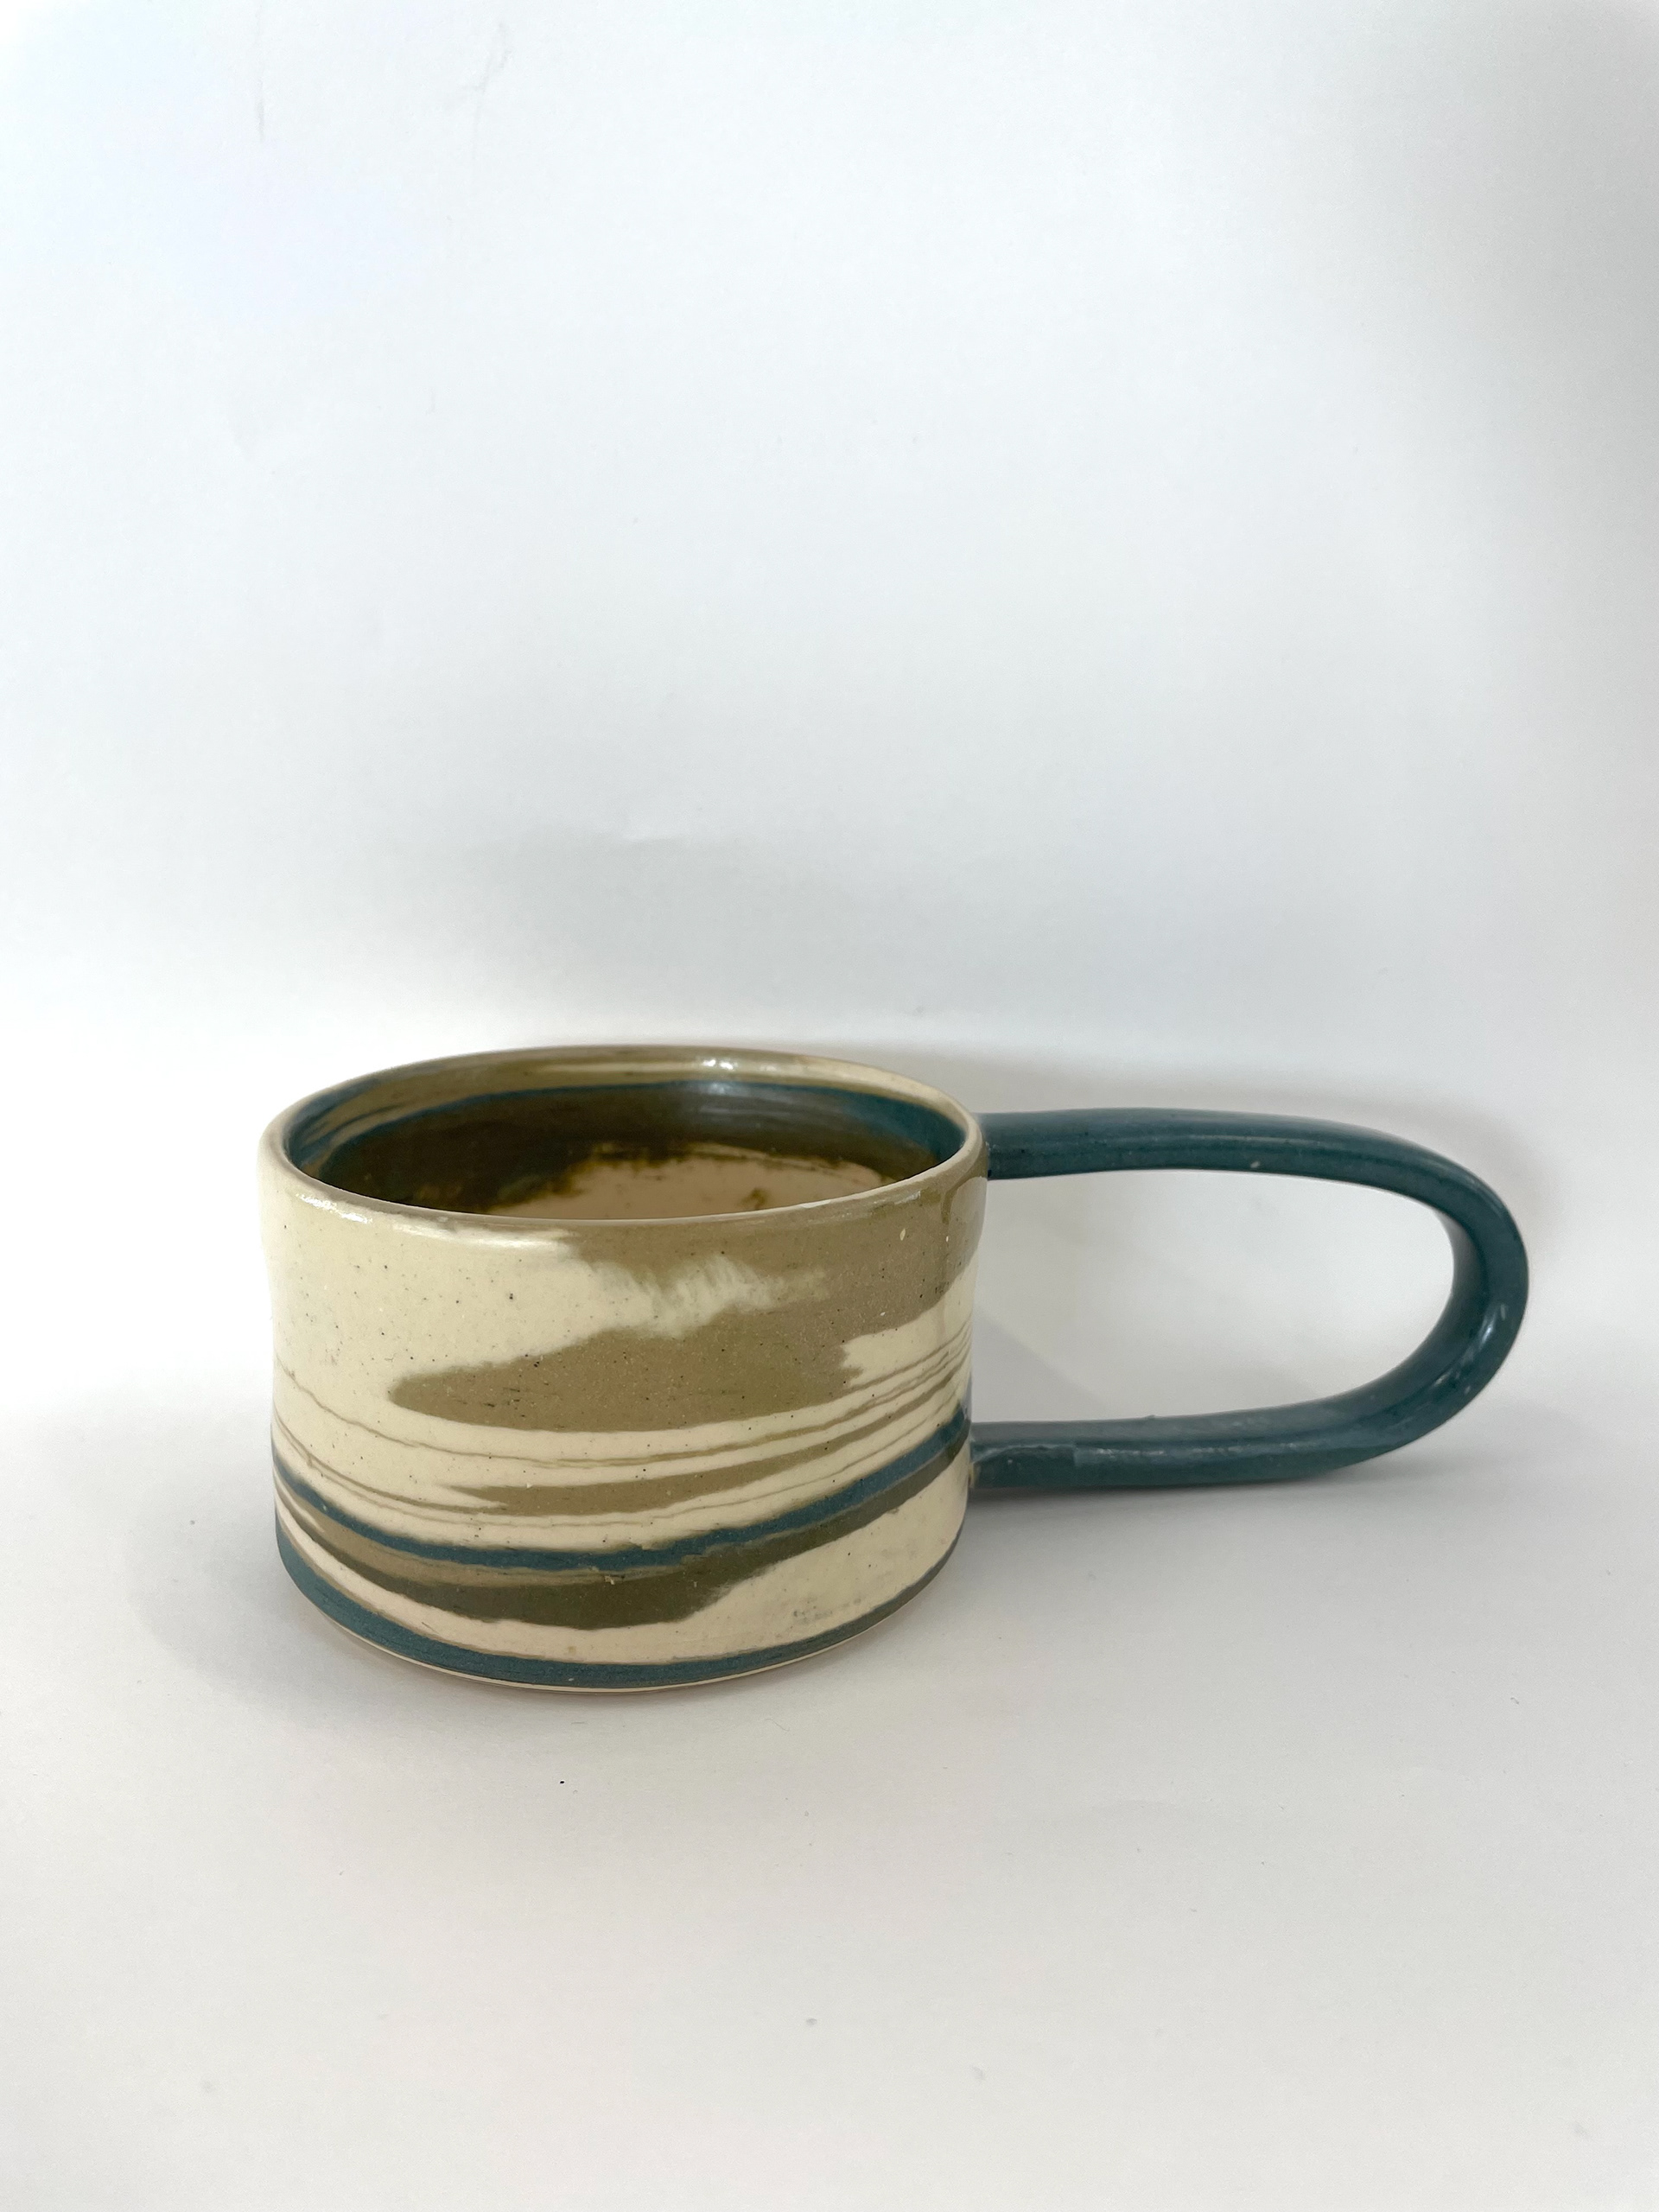
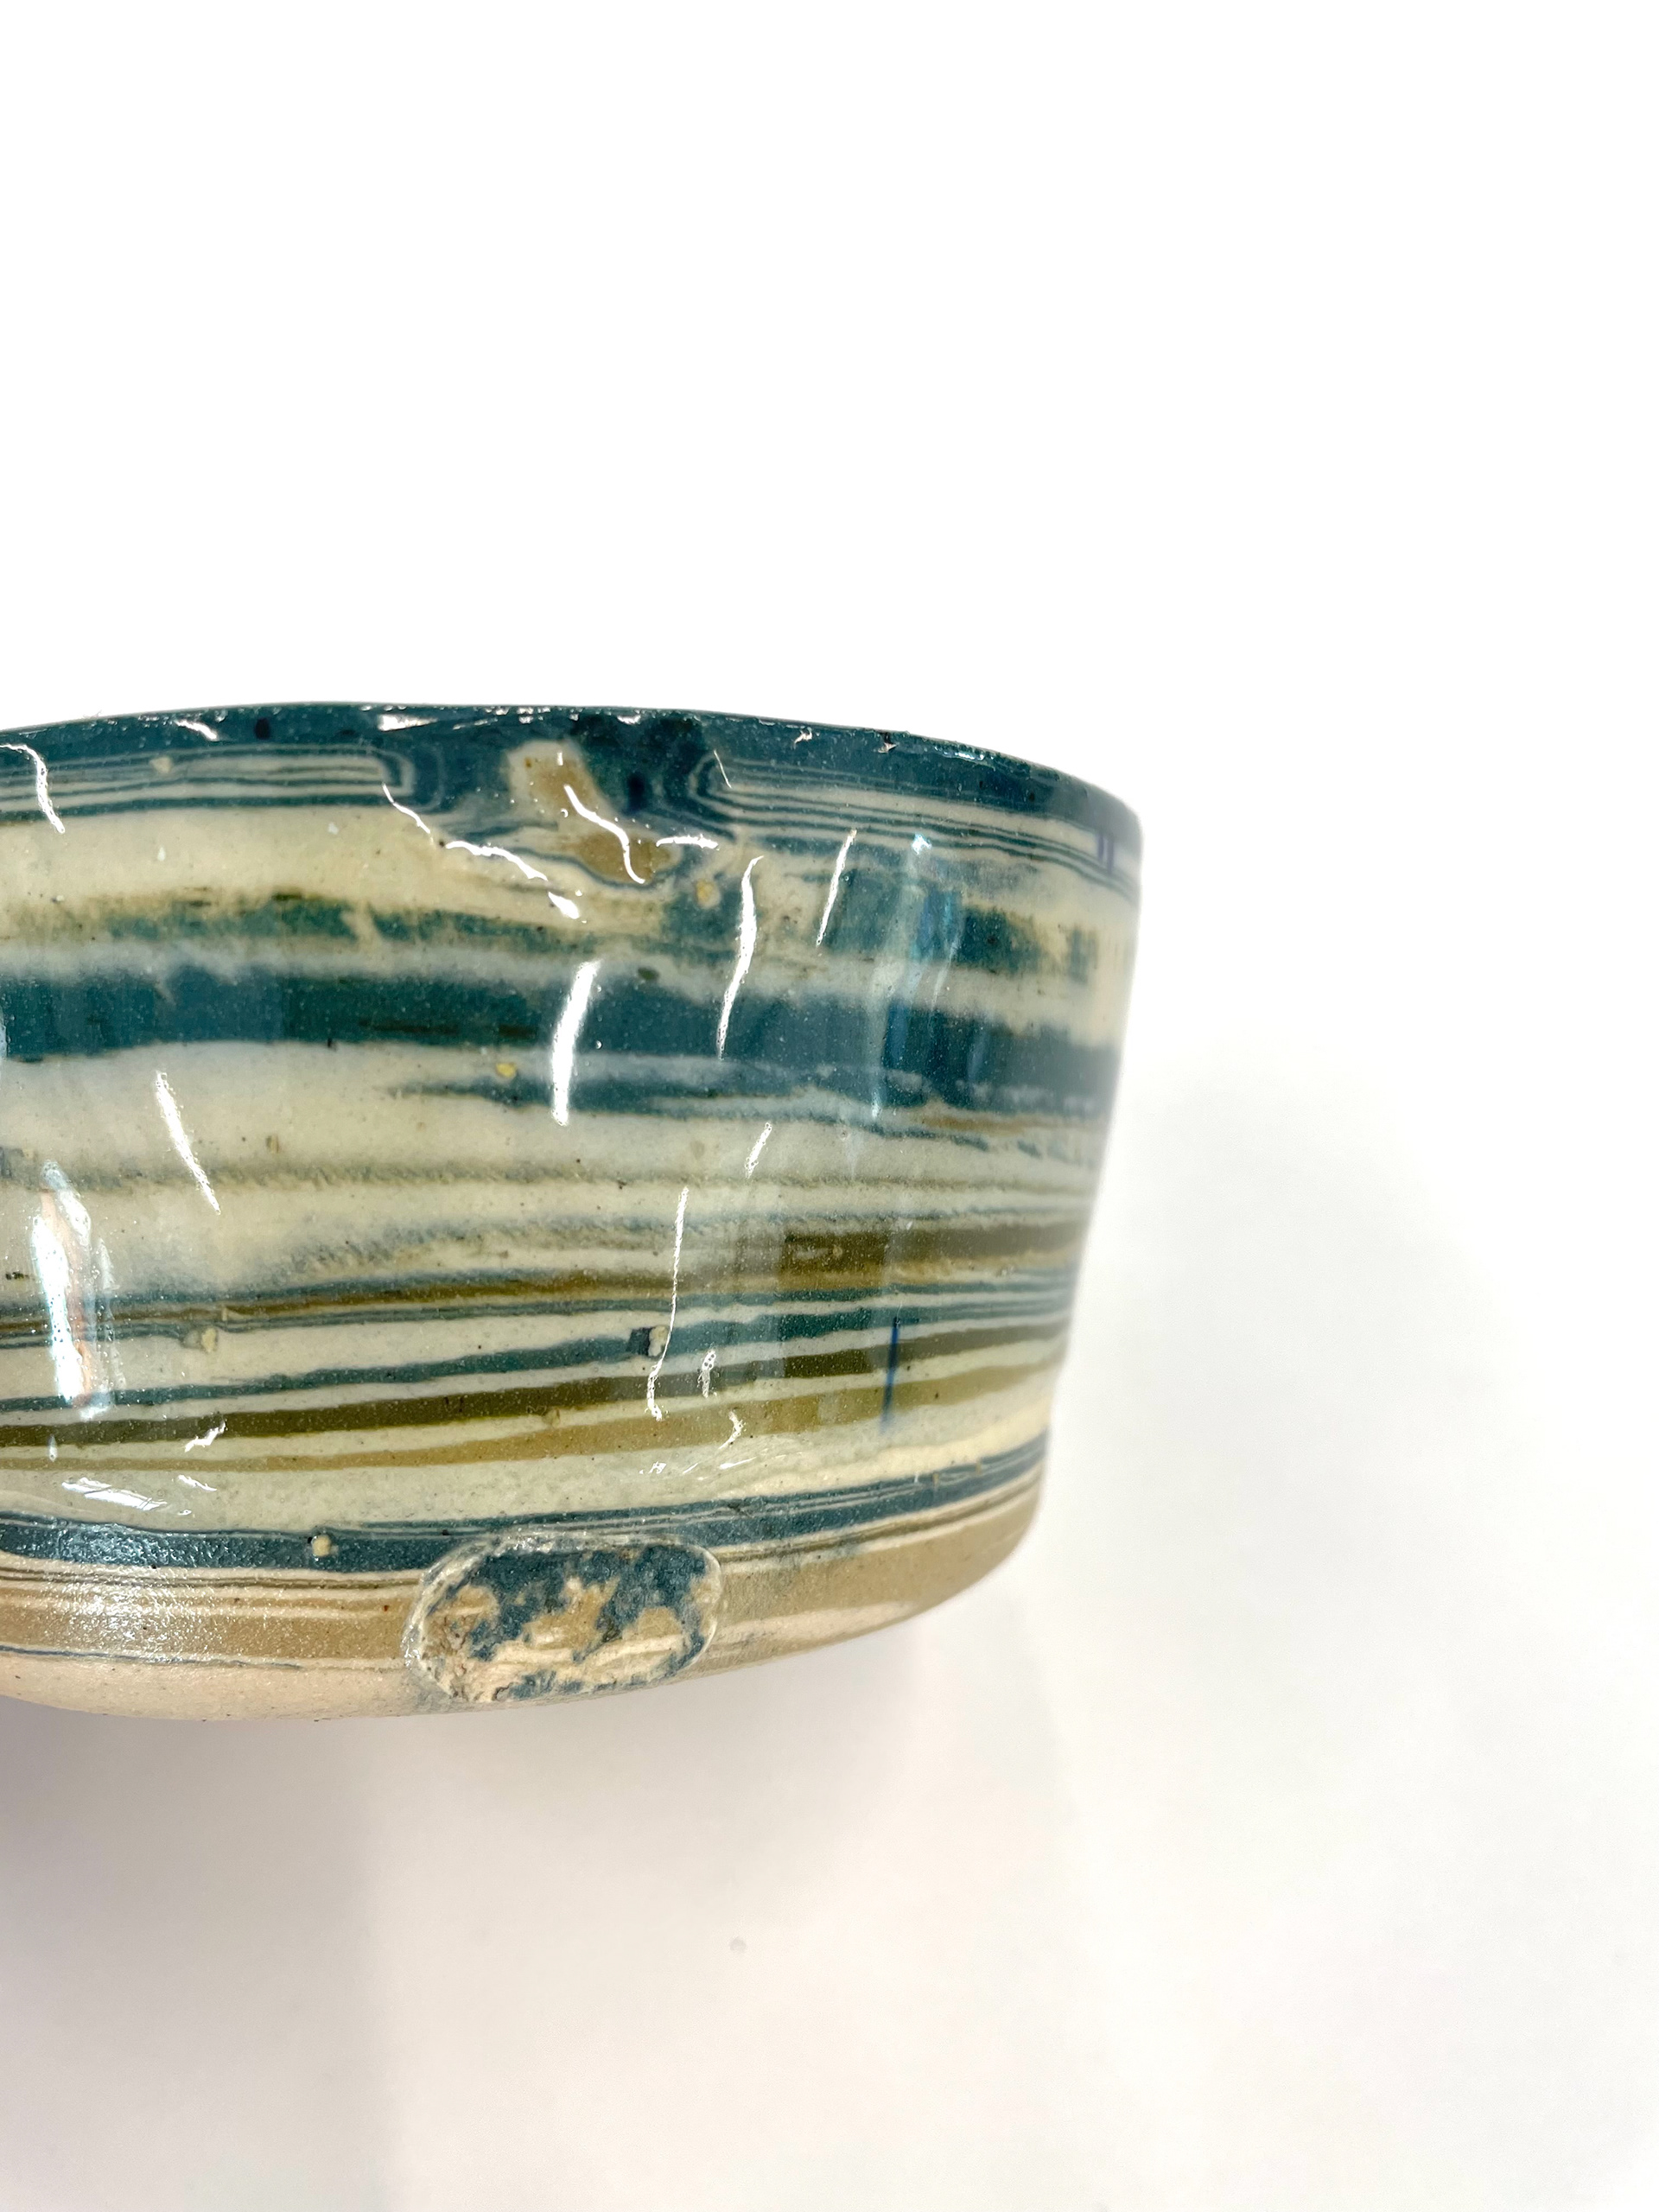
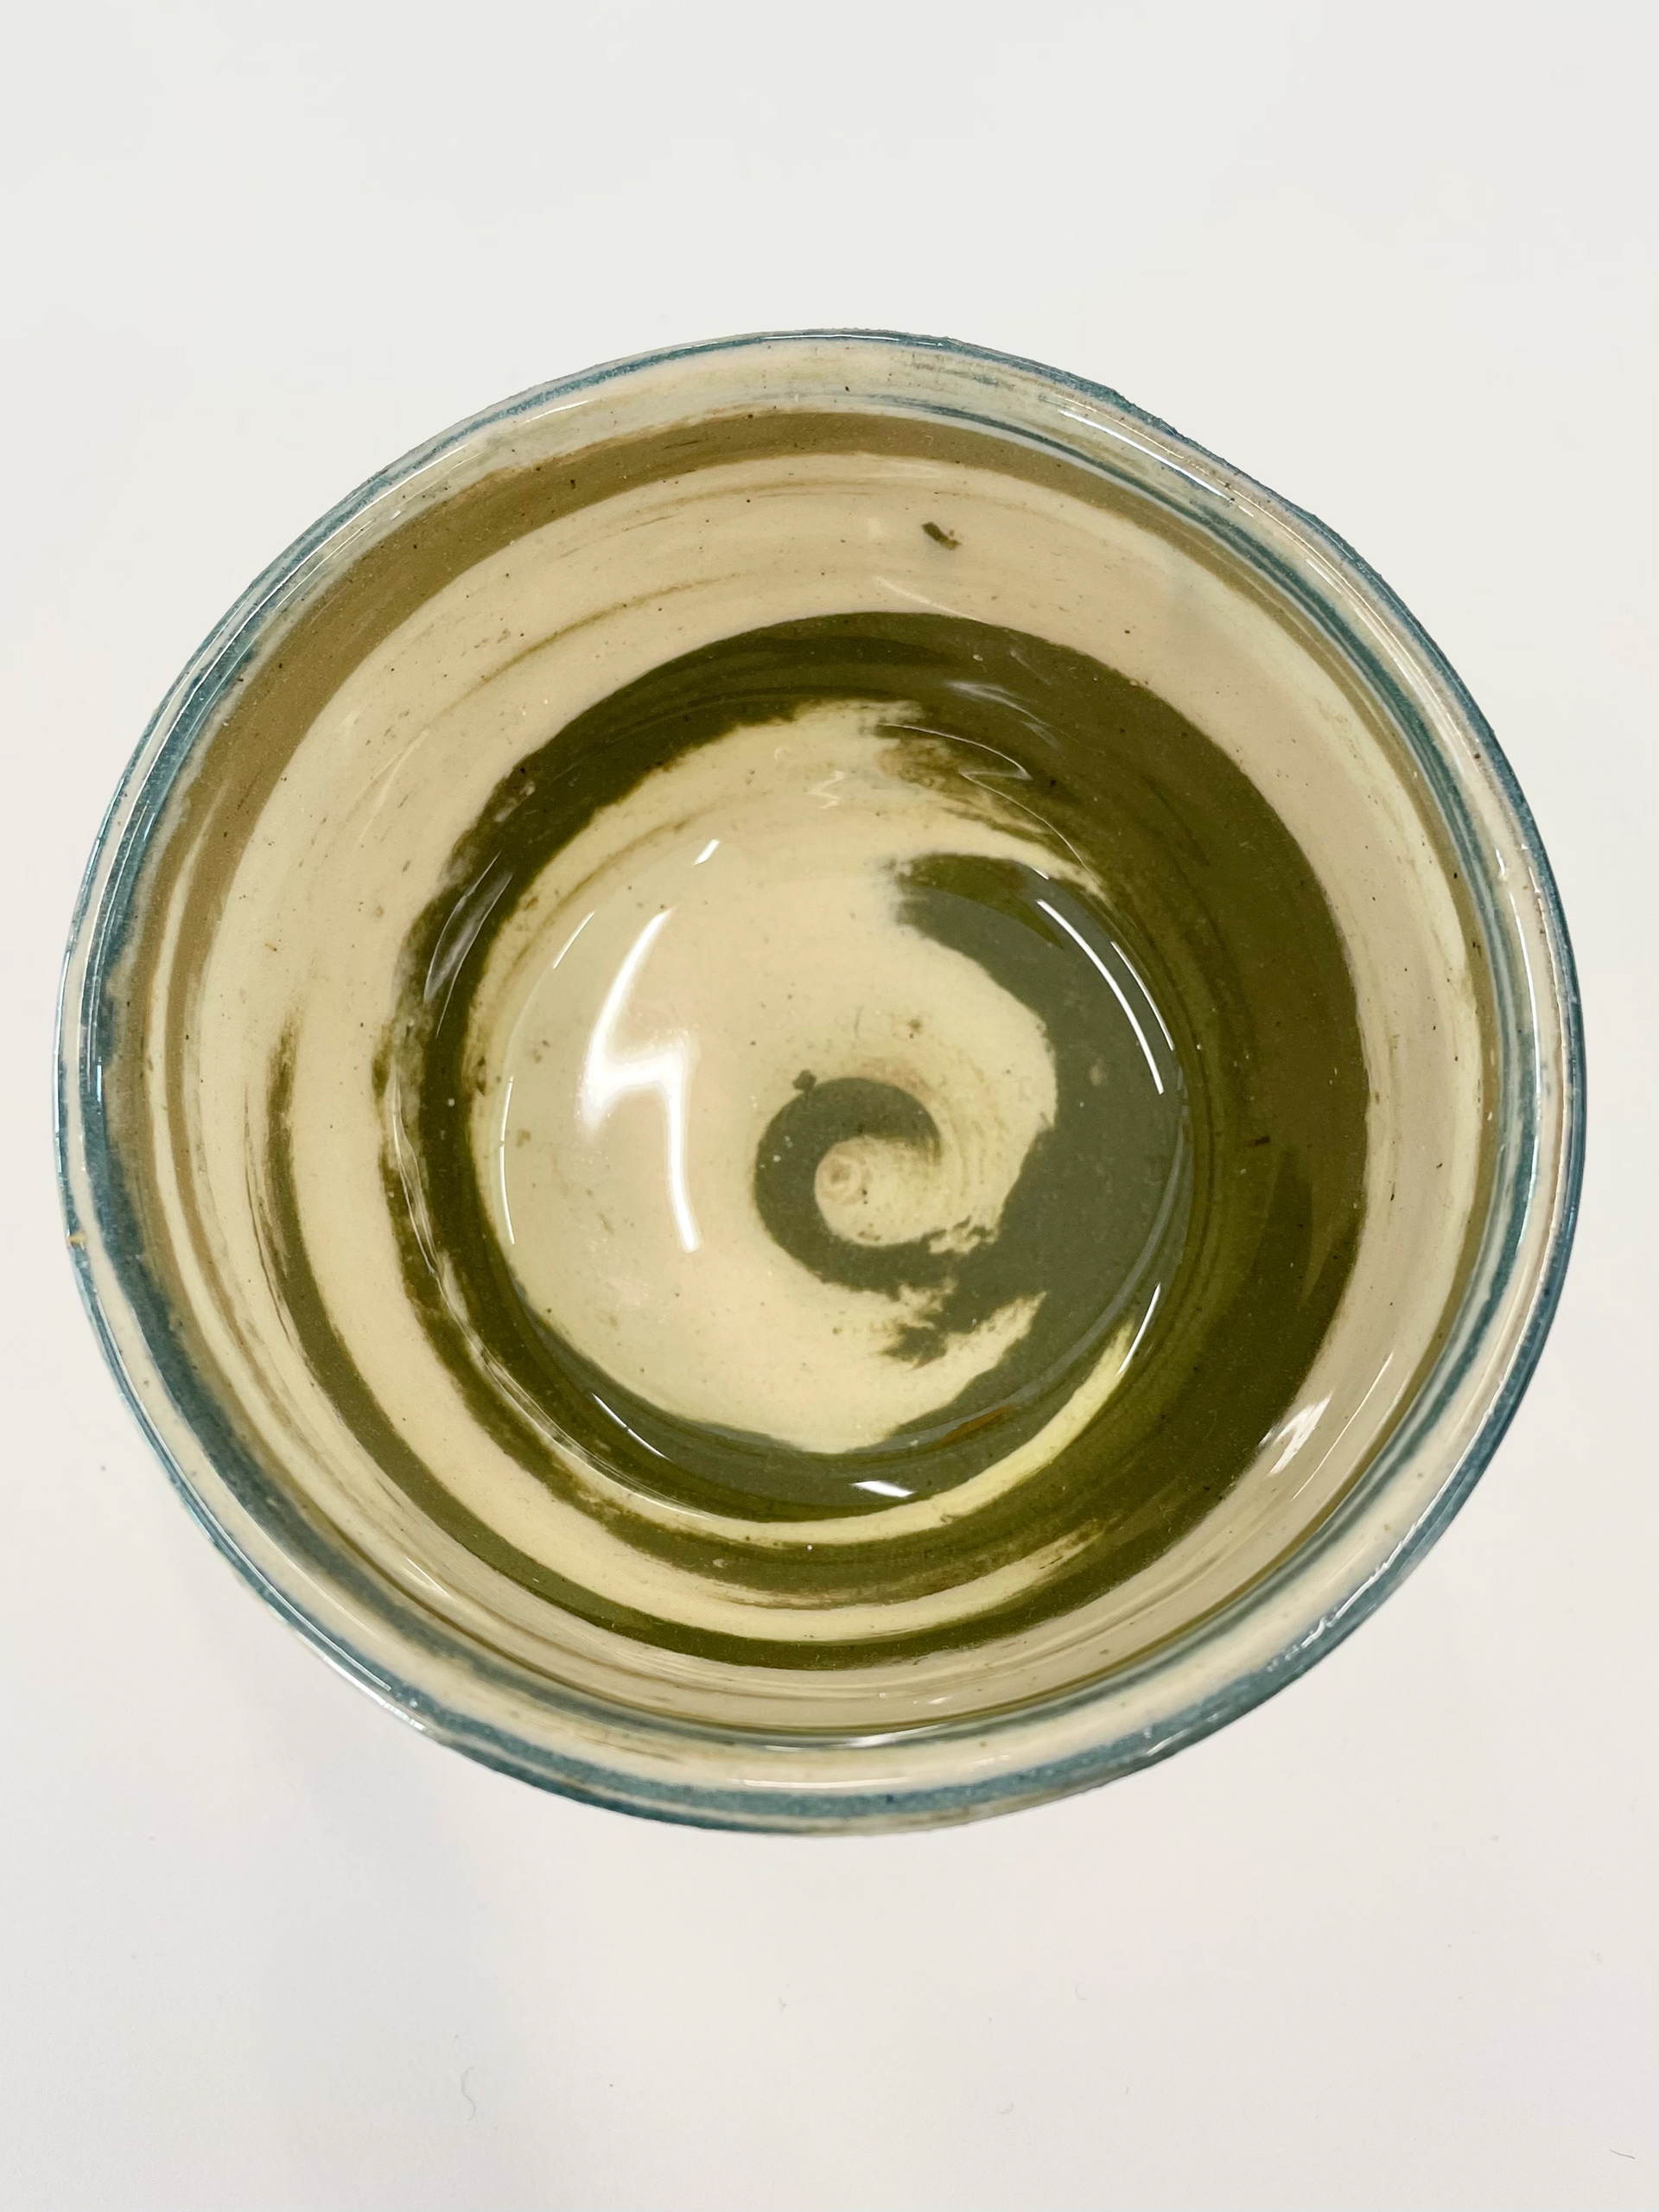
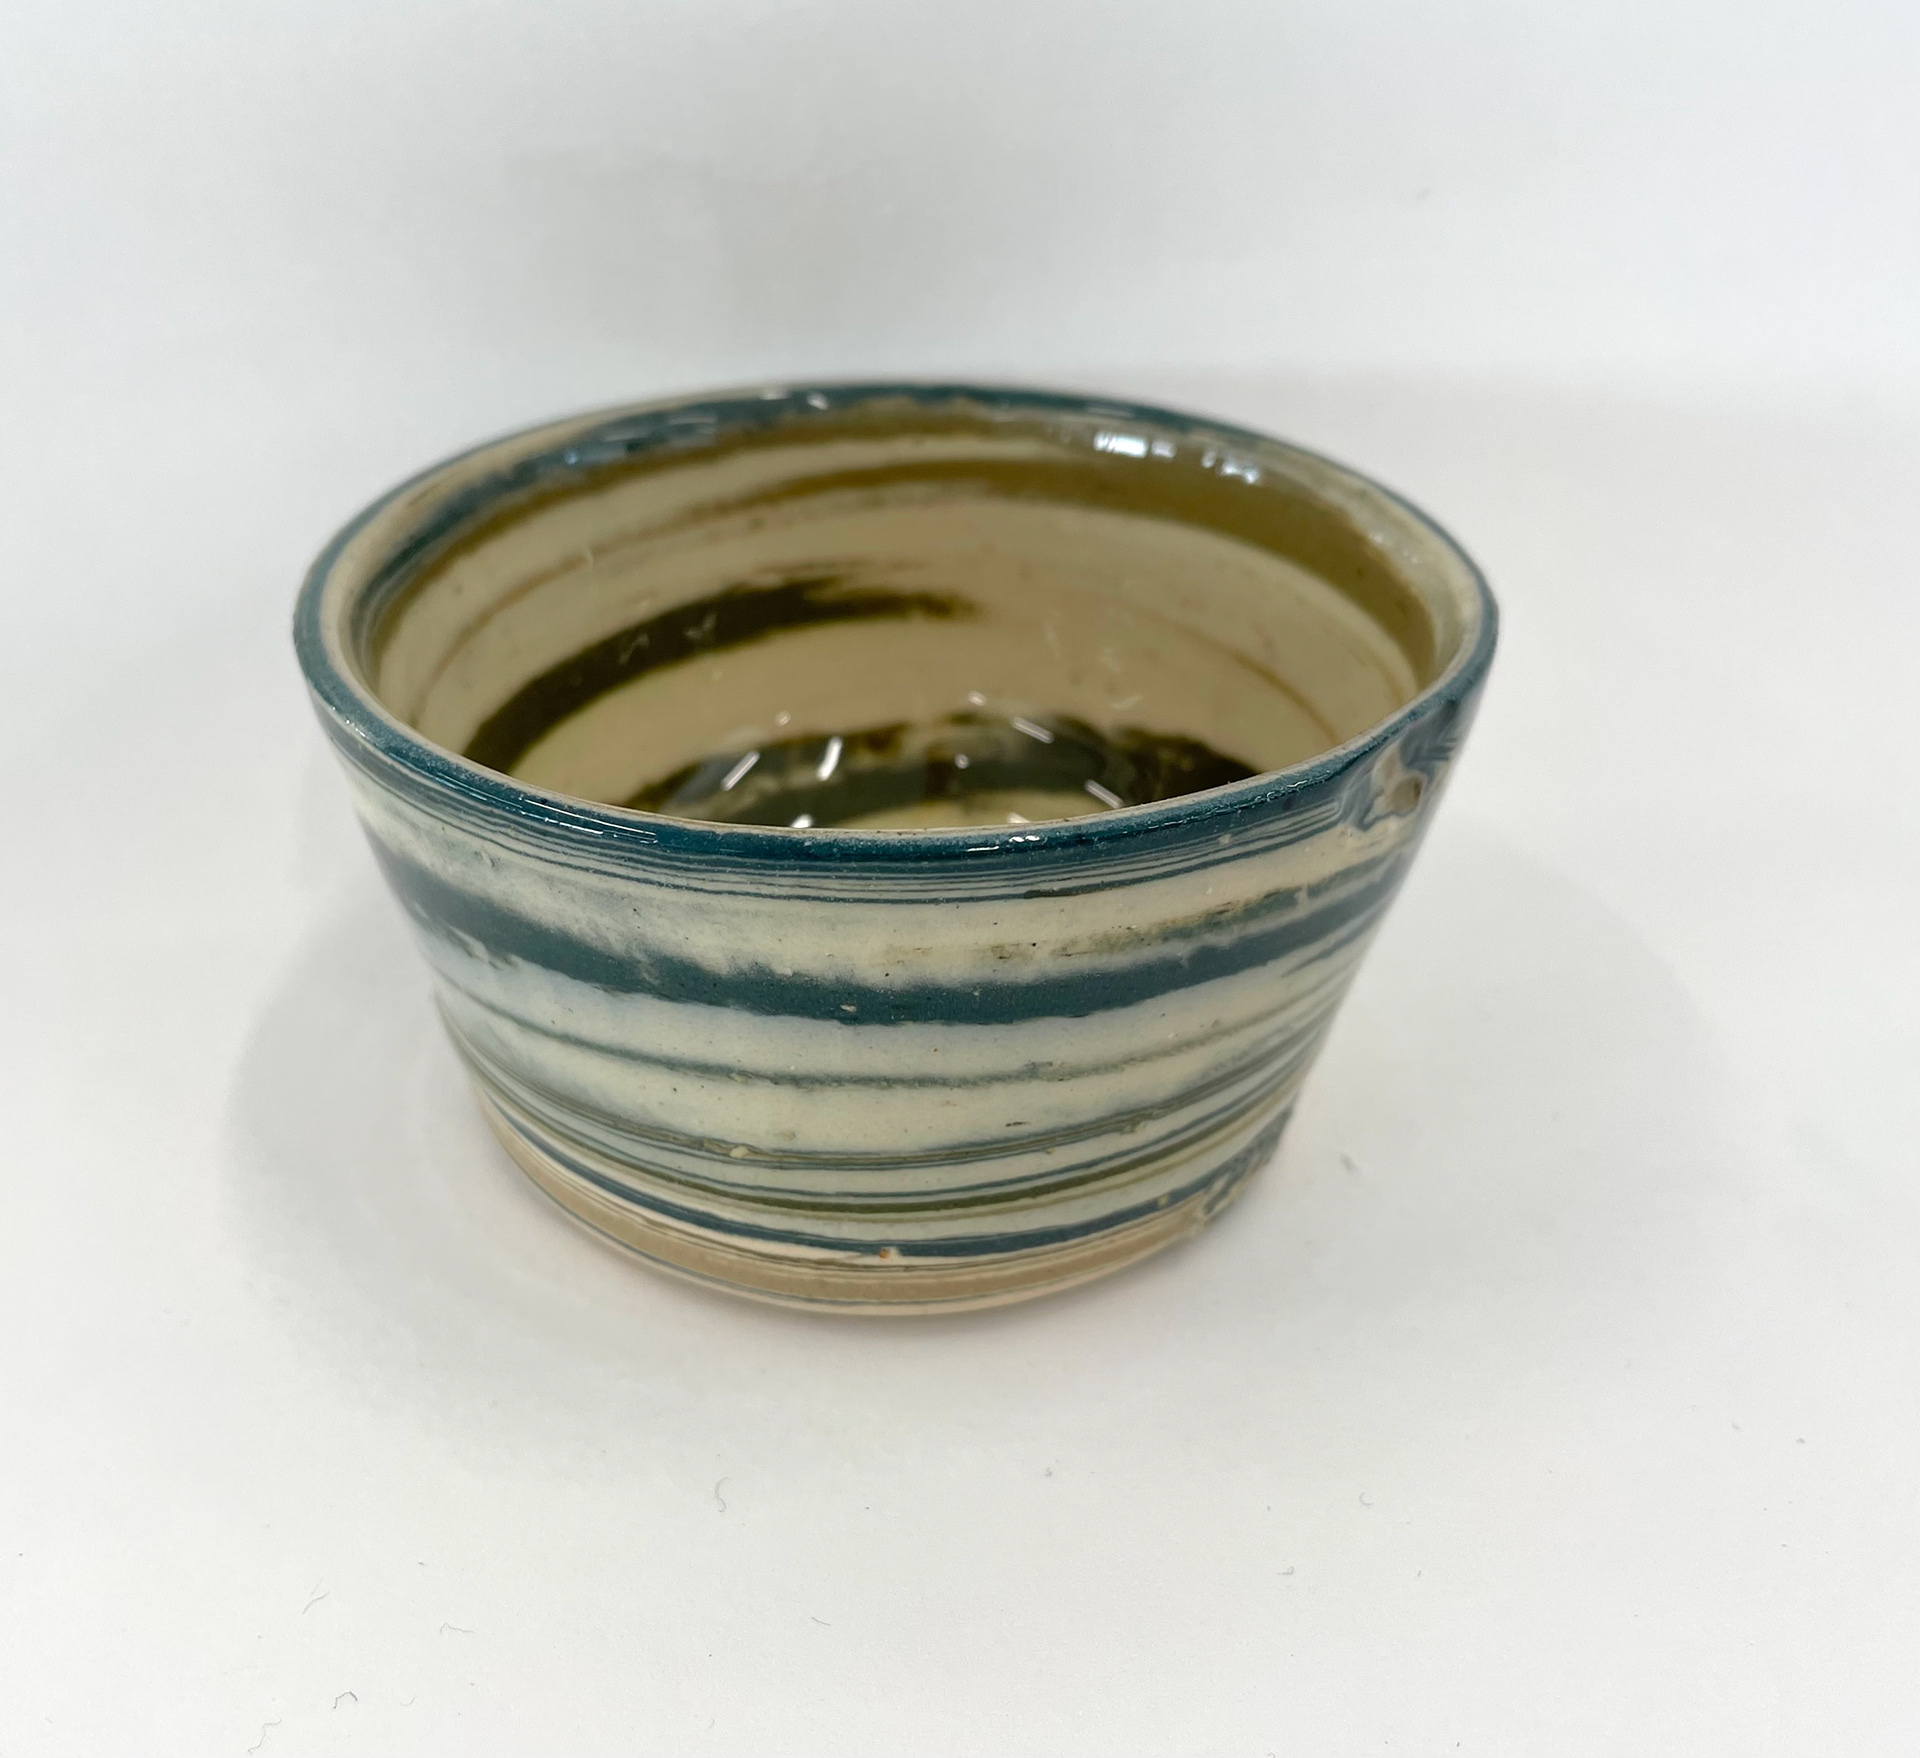
Trying to incorporate my clay into my mugs by layering the coloured clay between ivory stoneware. I hoped that this technique would be more consistent and that throwing with three colours would give me a variety of patterns when layered differently. By using this technique, I was more in control of the amount of clay I was using. I had 50g of each coloured clay with 250g of ivory stoneware, and I threw 400g of clay. I split the ivory into different amounts and arranged them differently, hoping this would give me different outcomes from the marbling on the mugs.
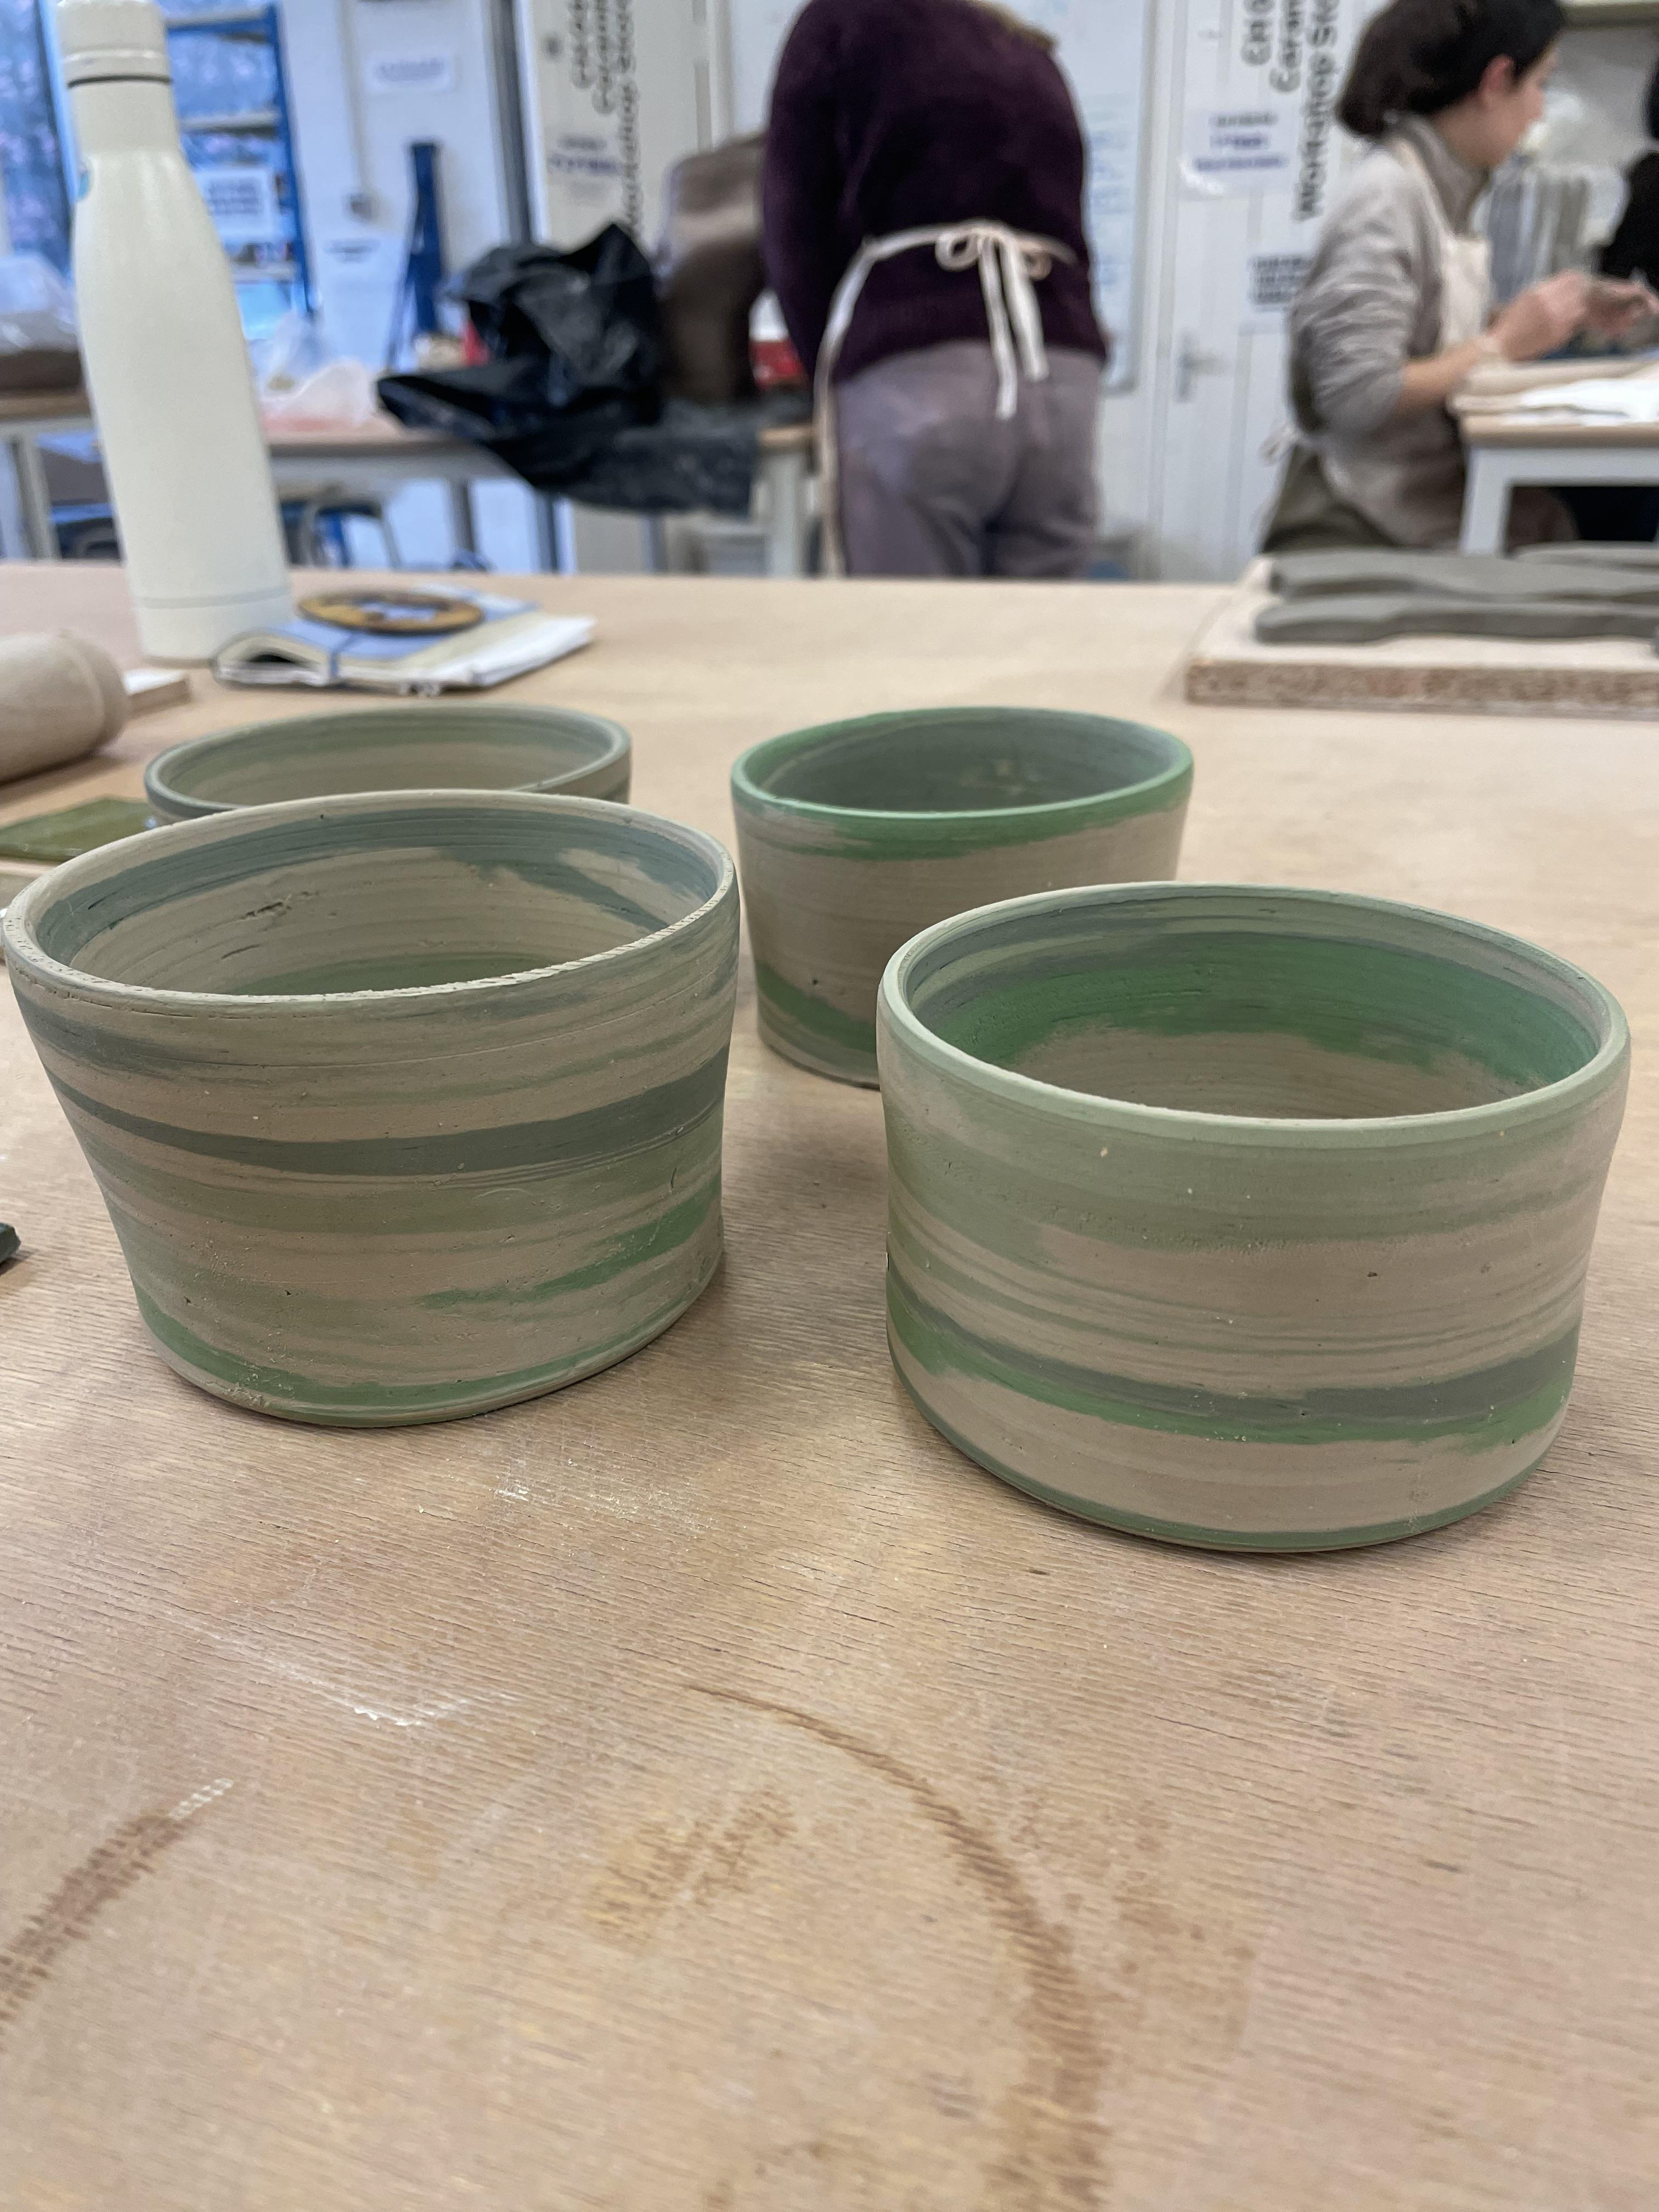
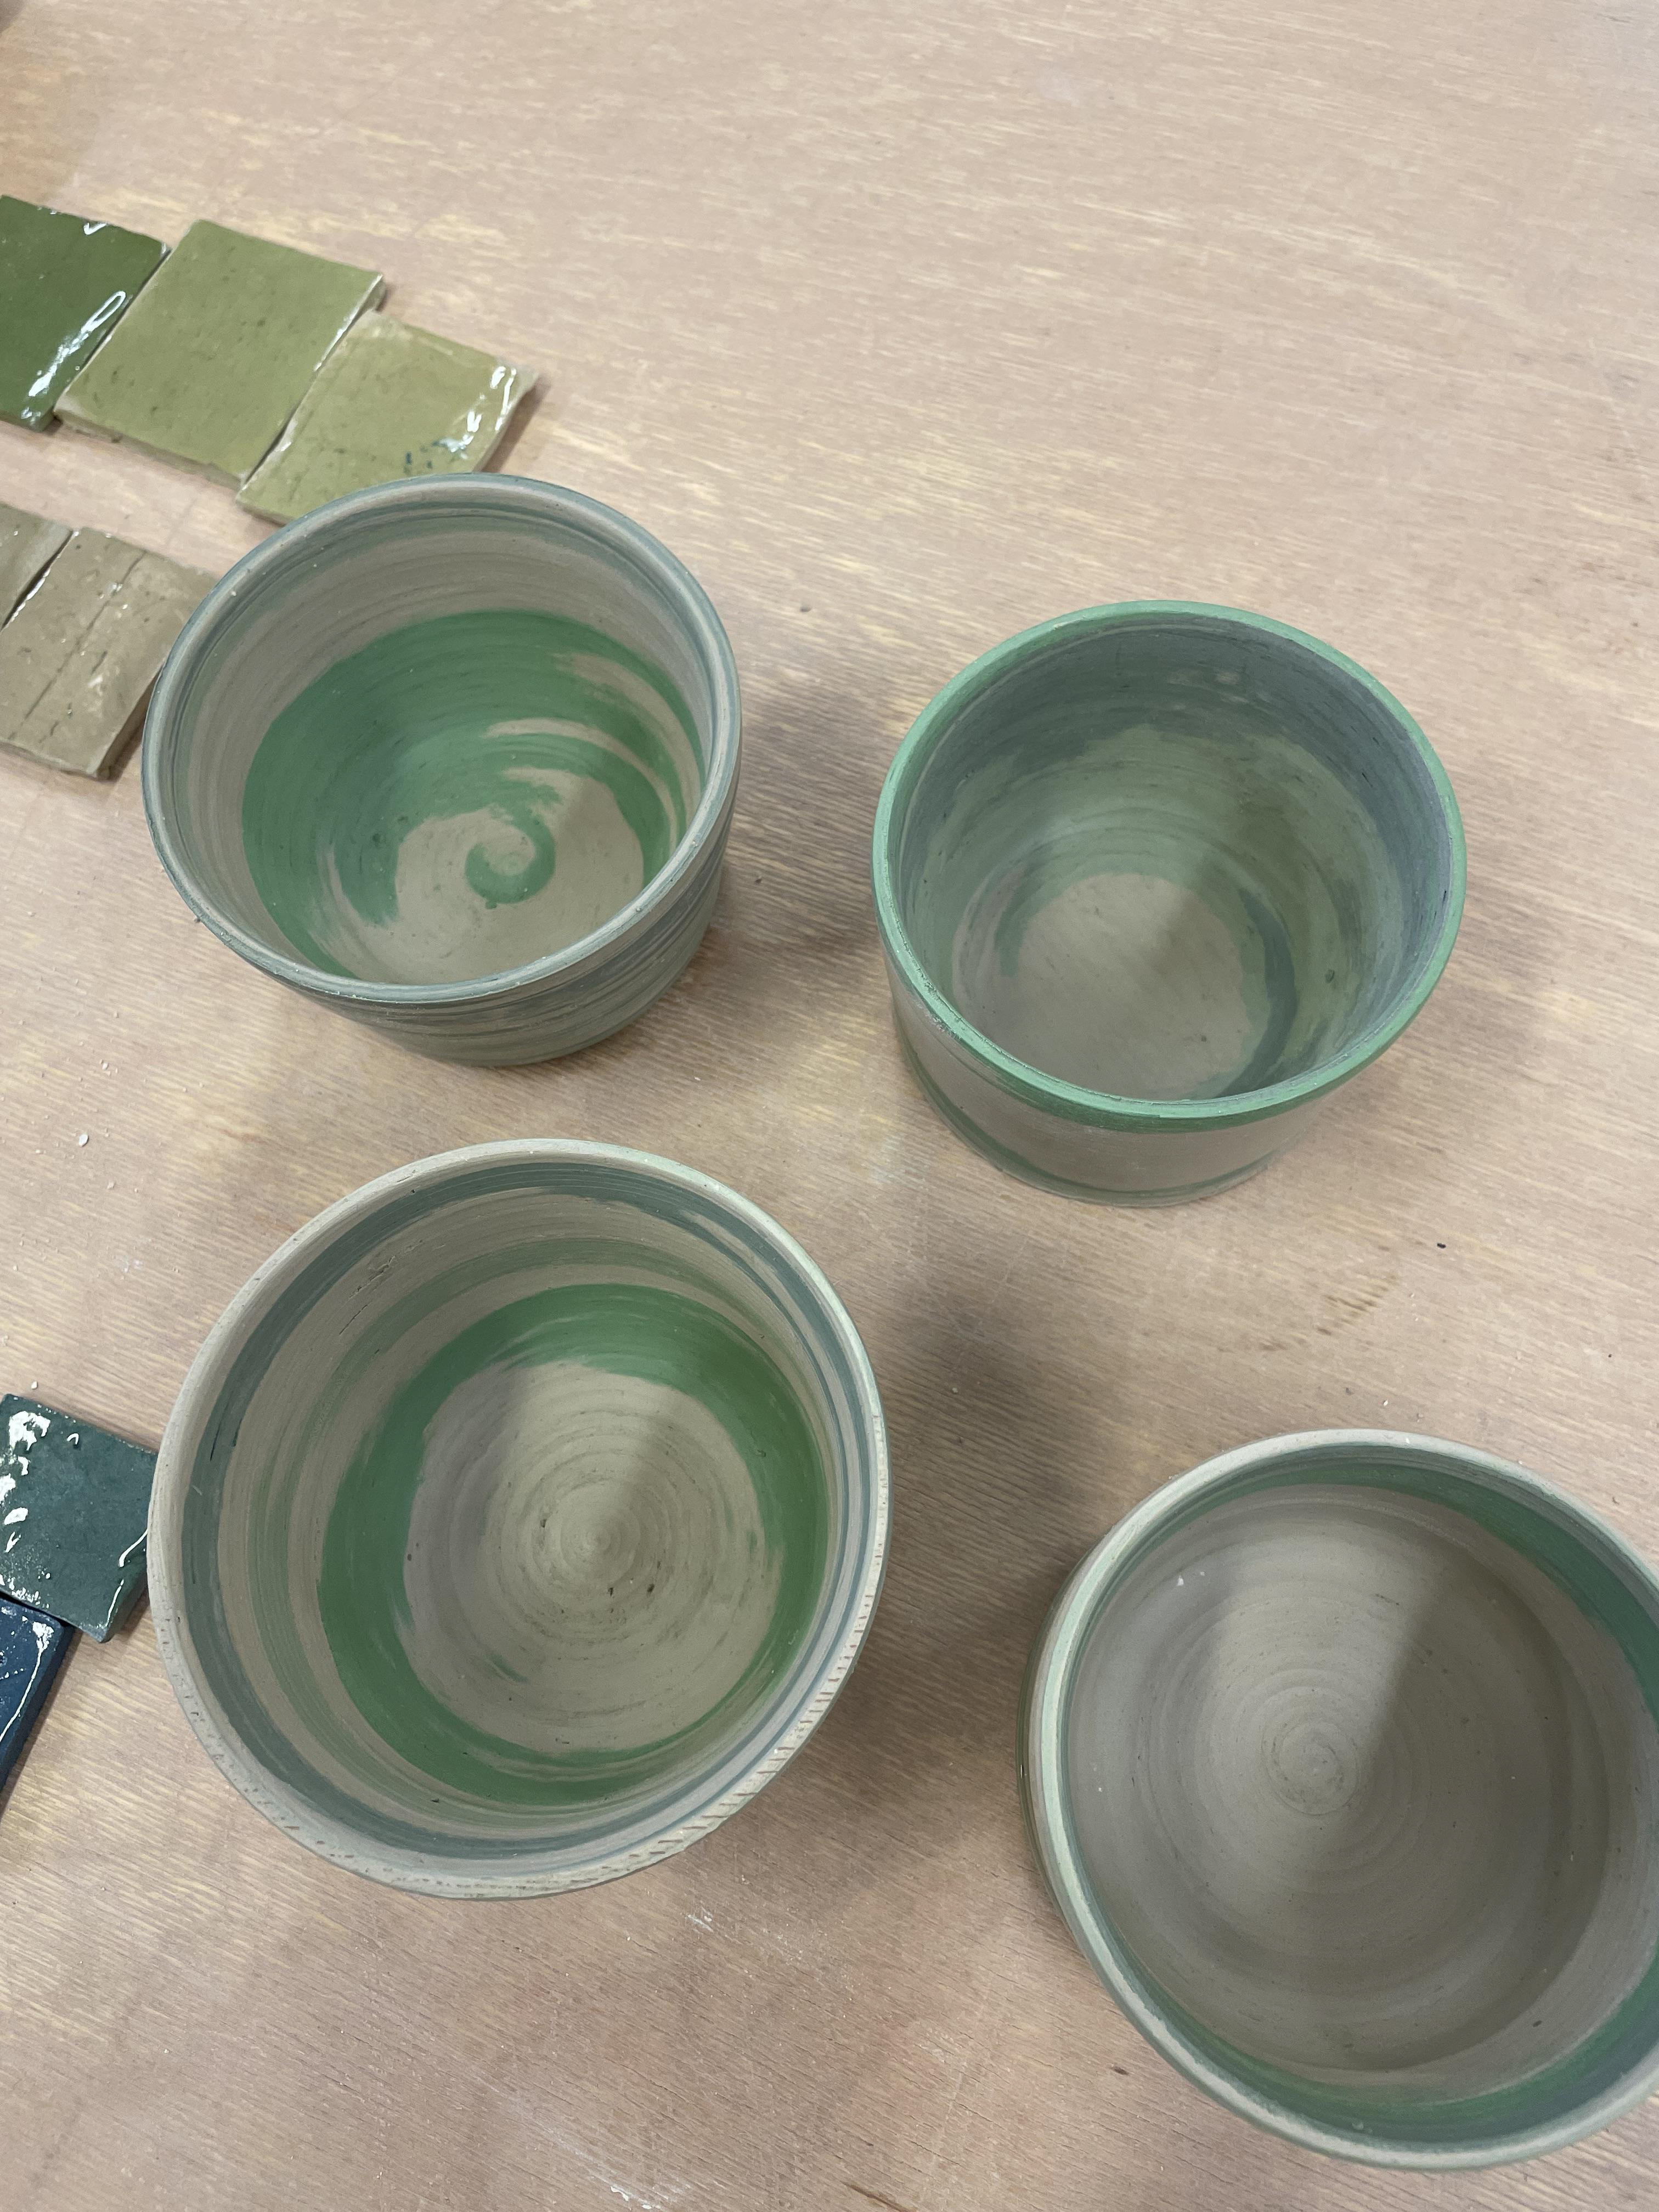
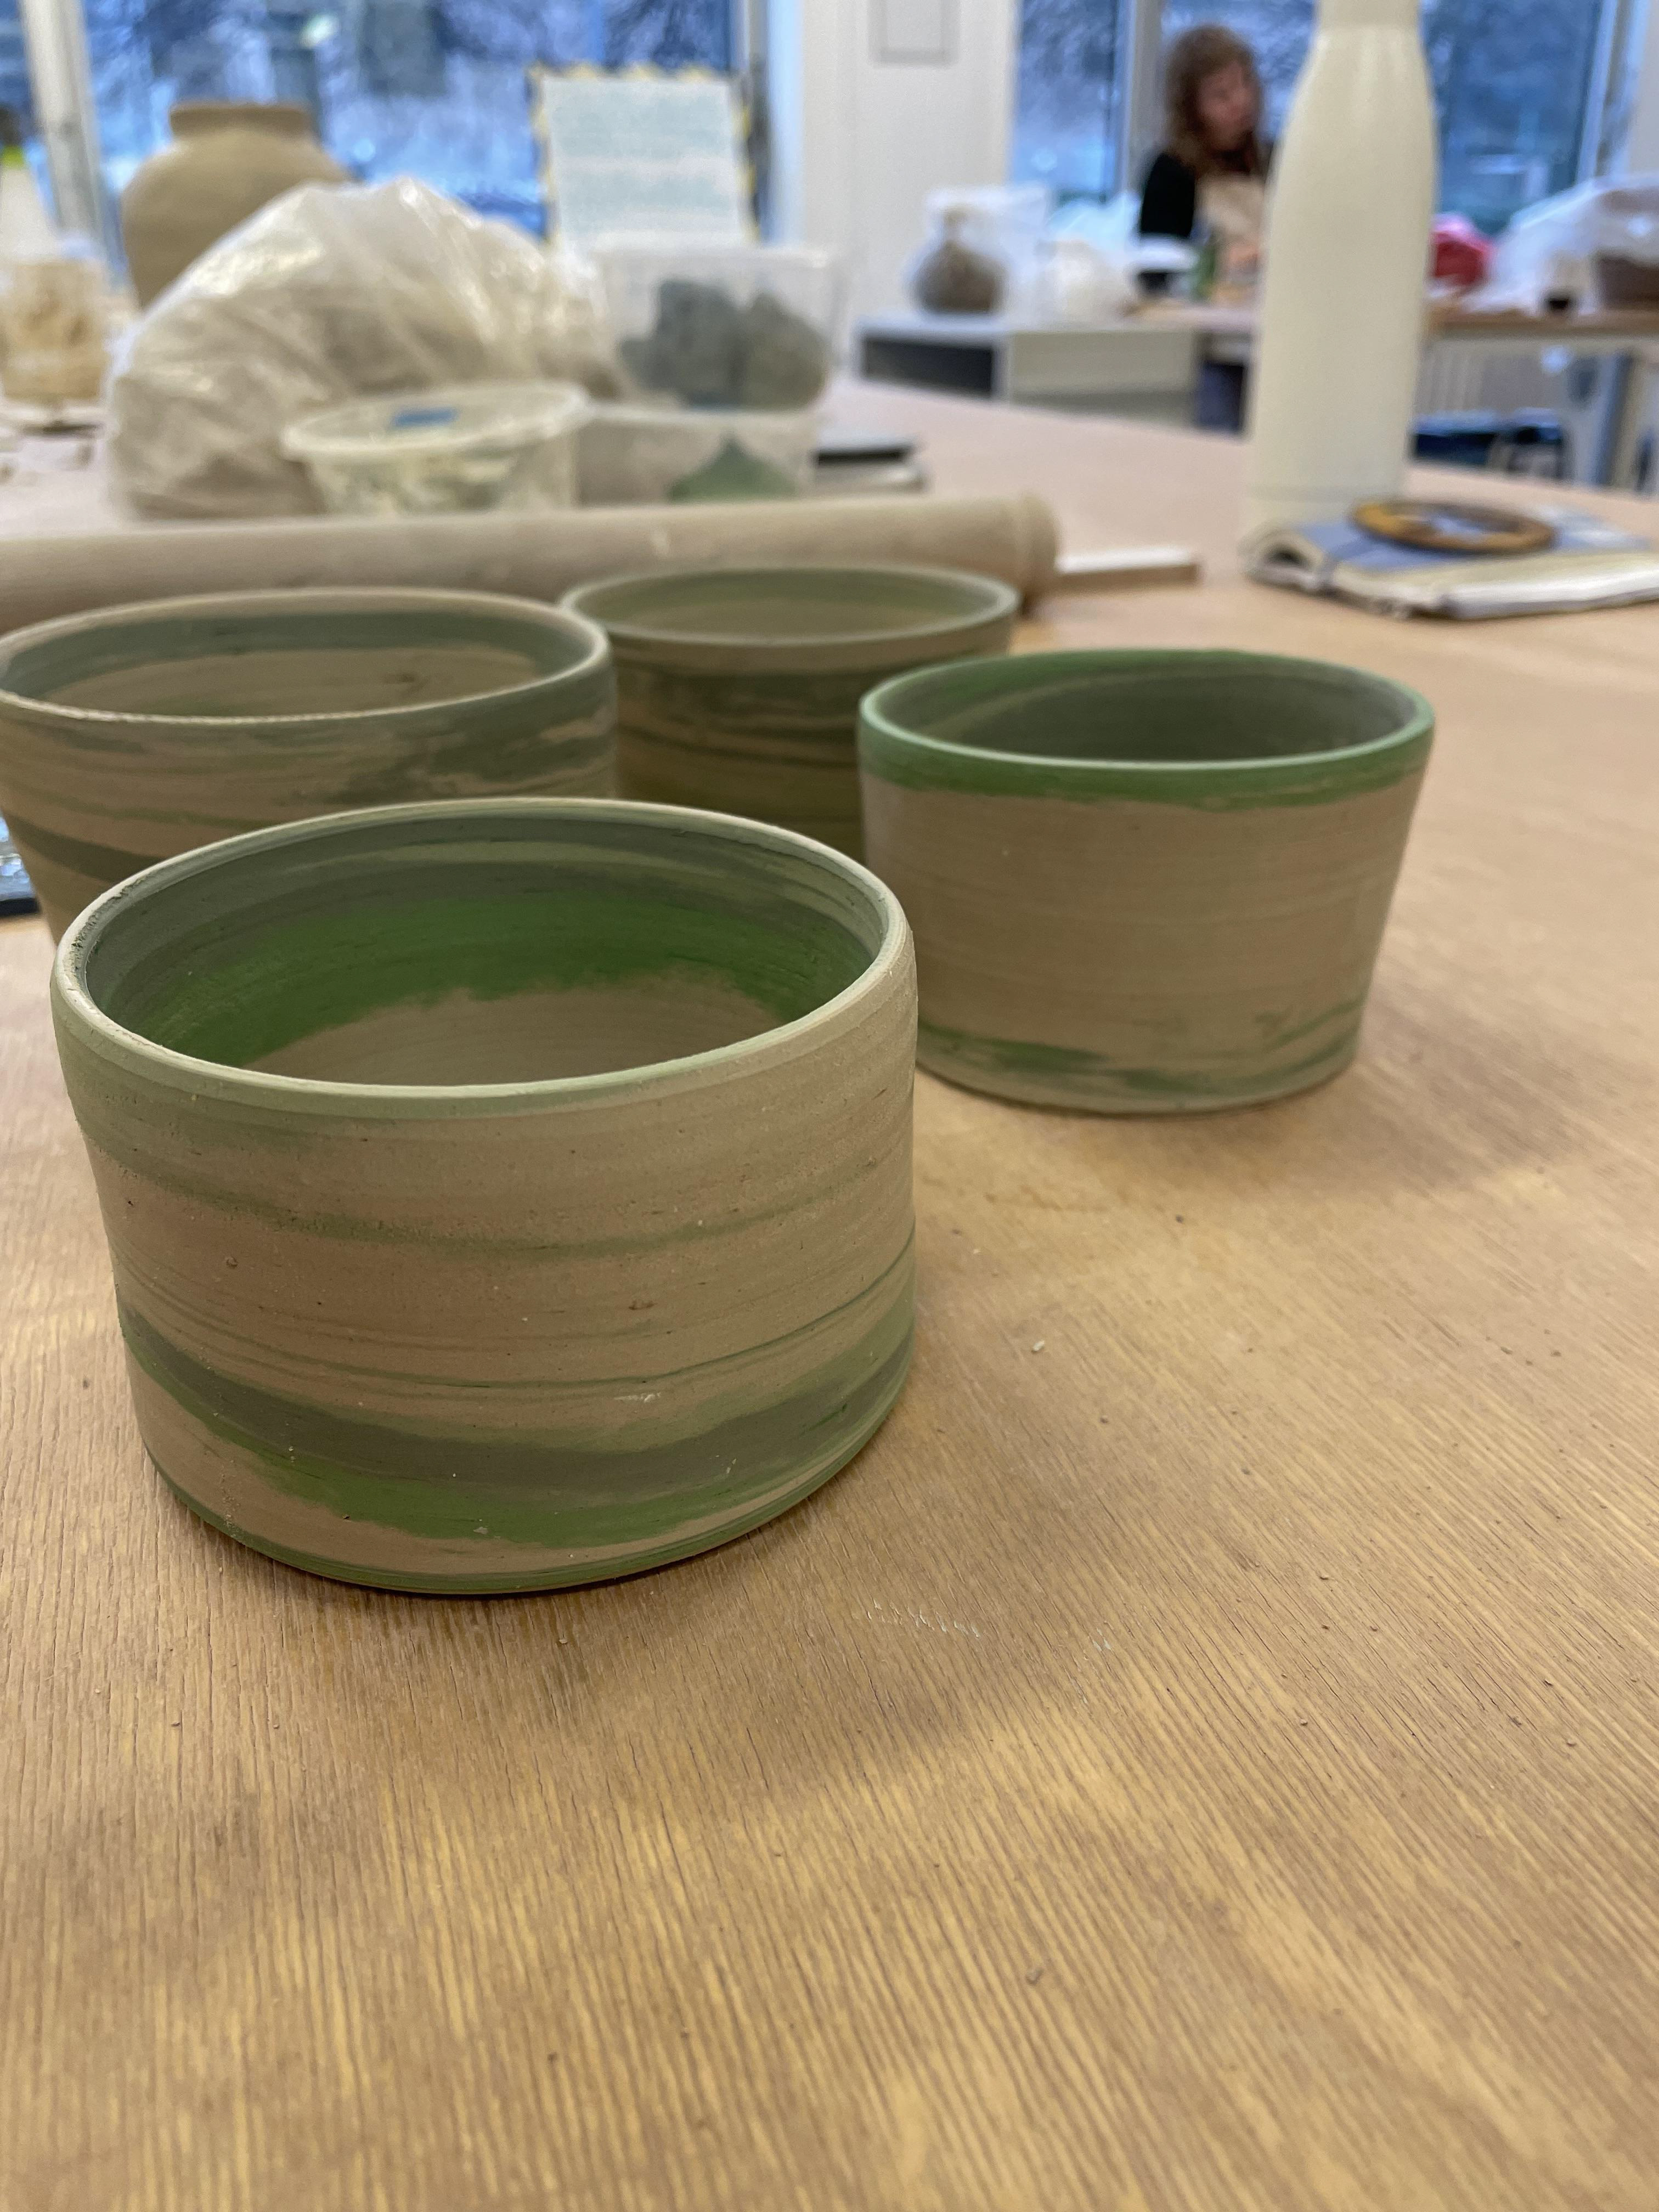
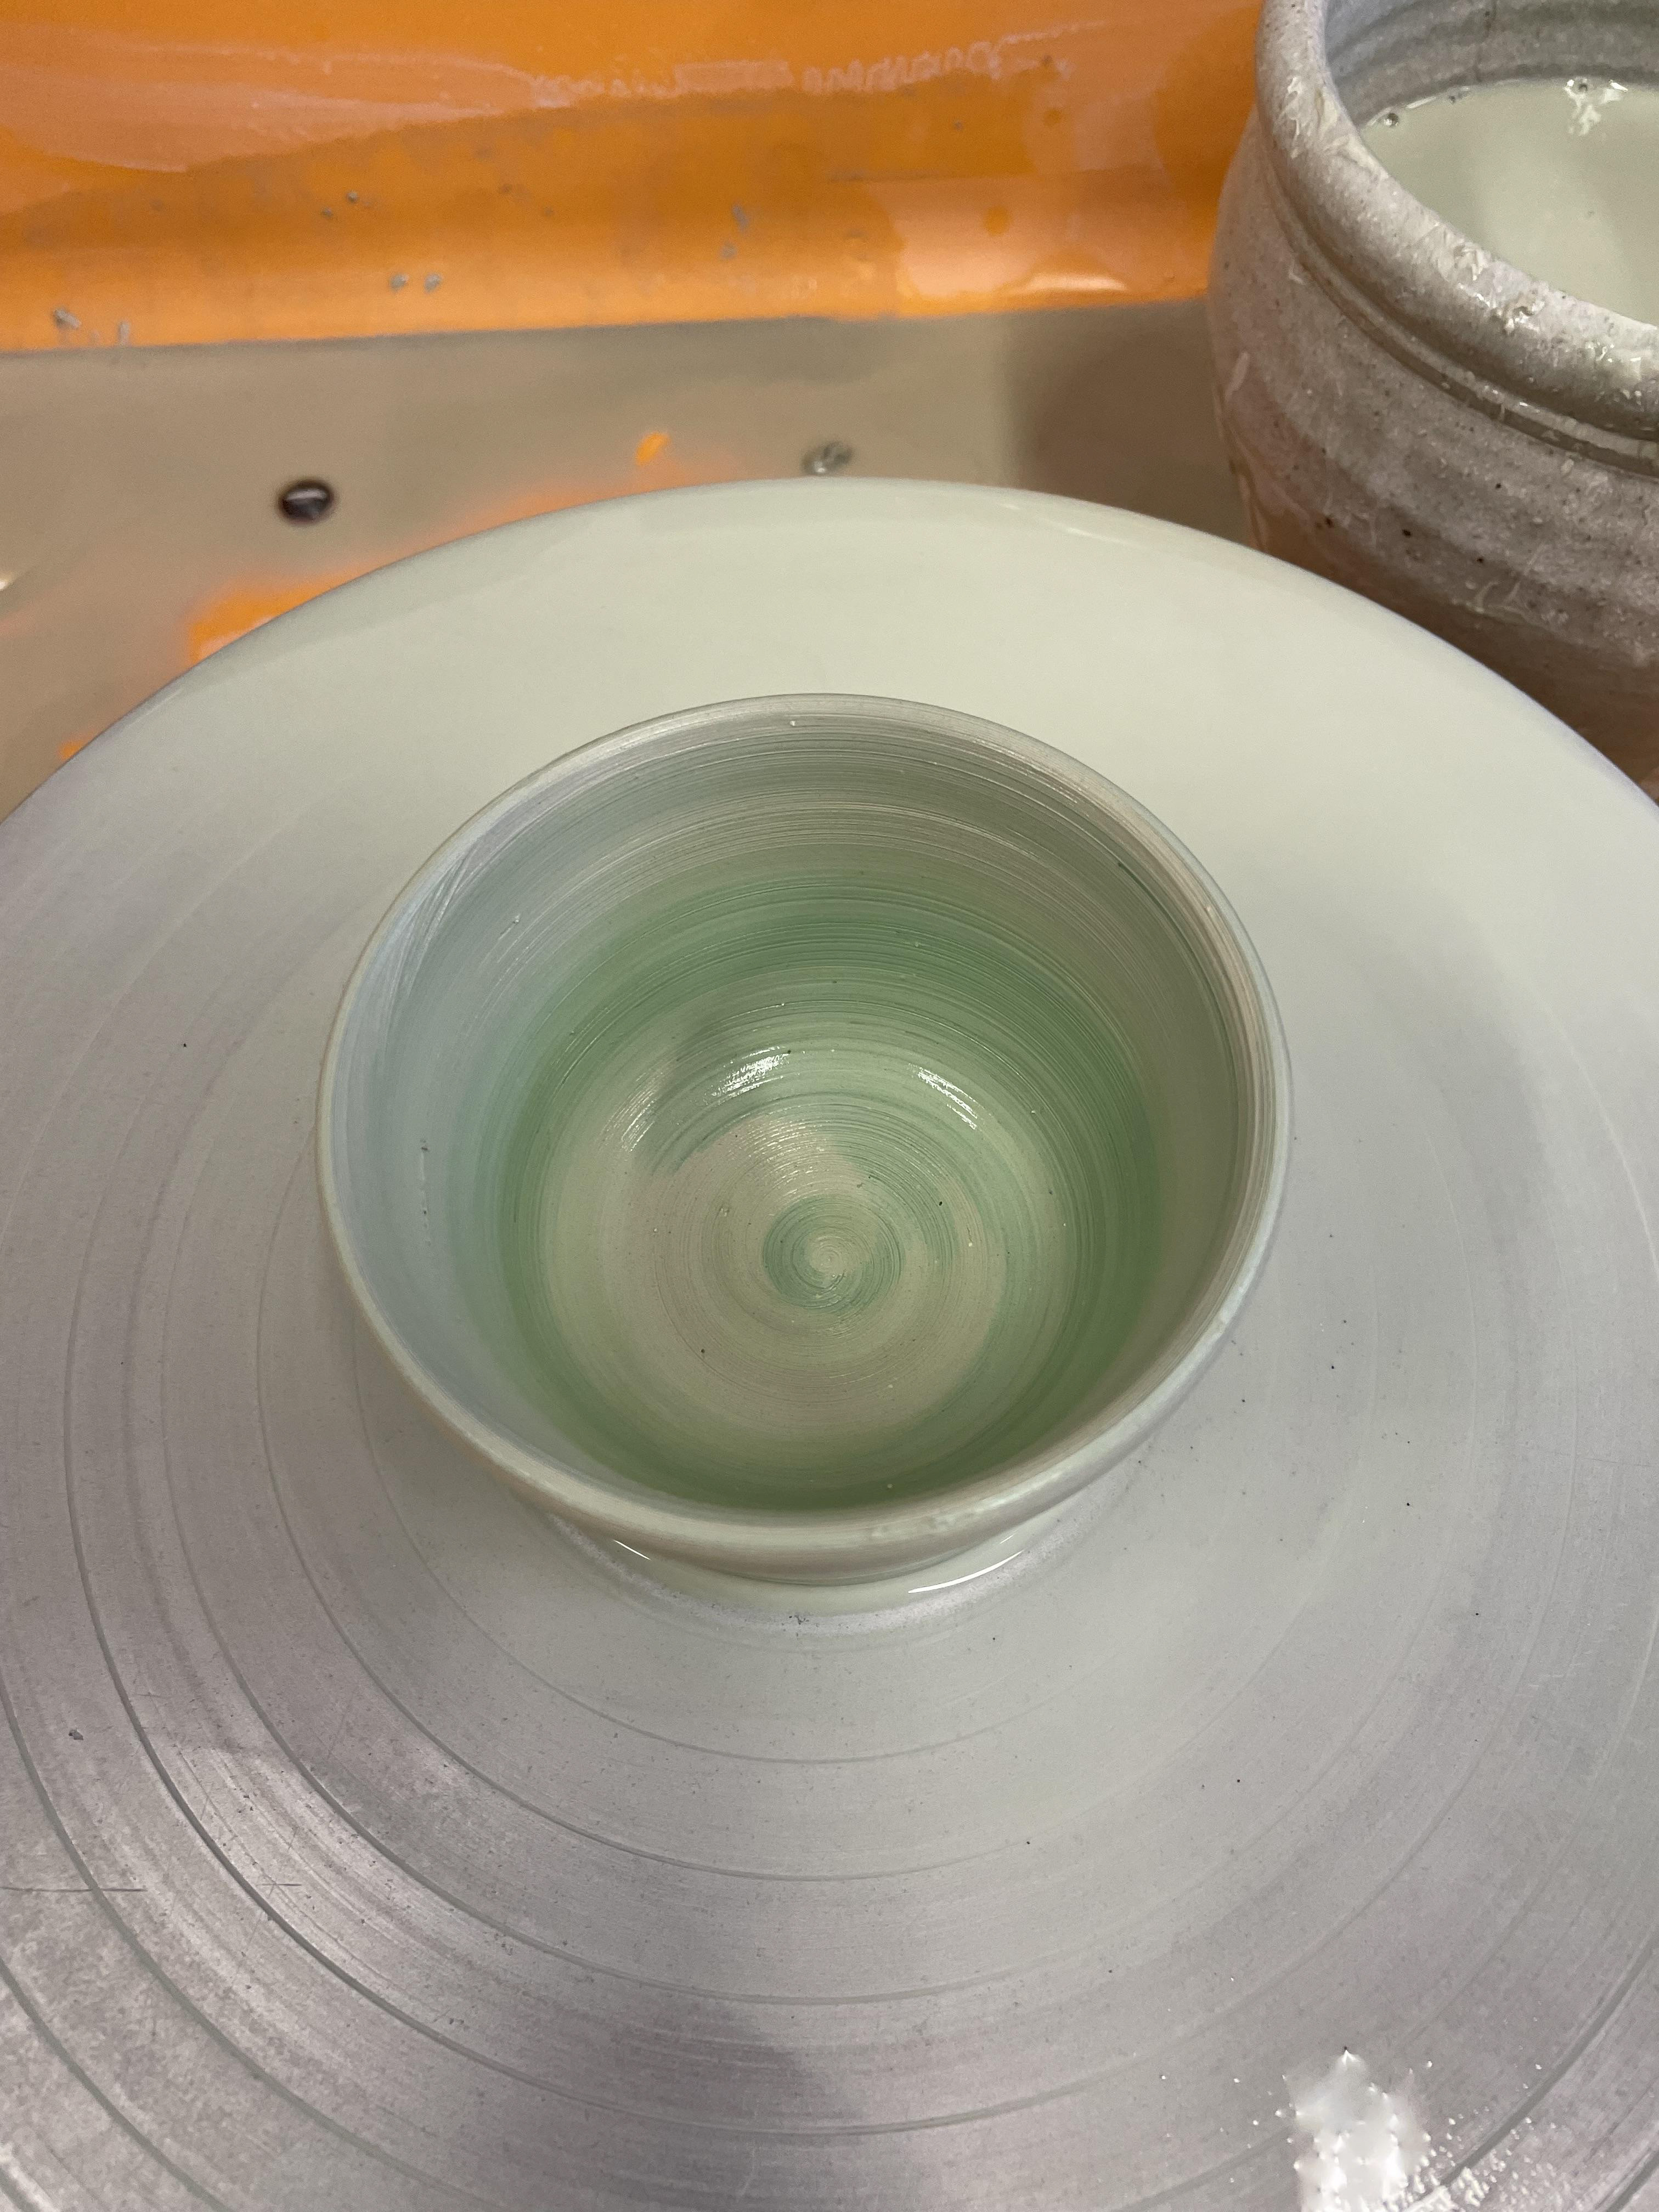
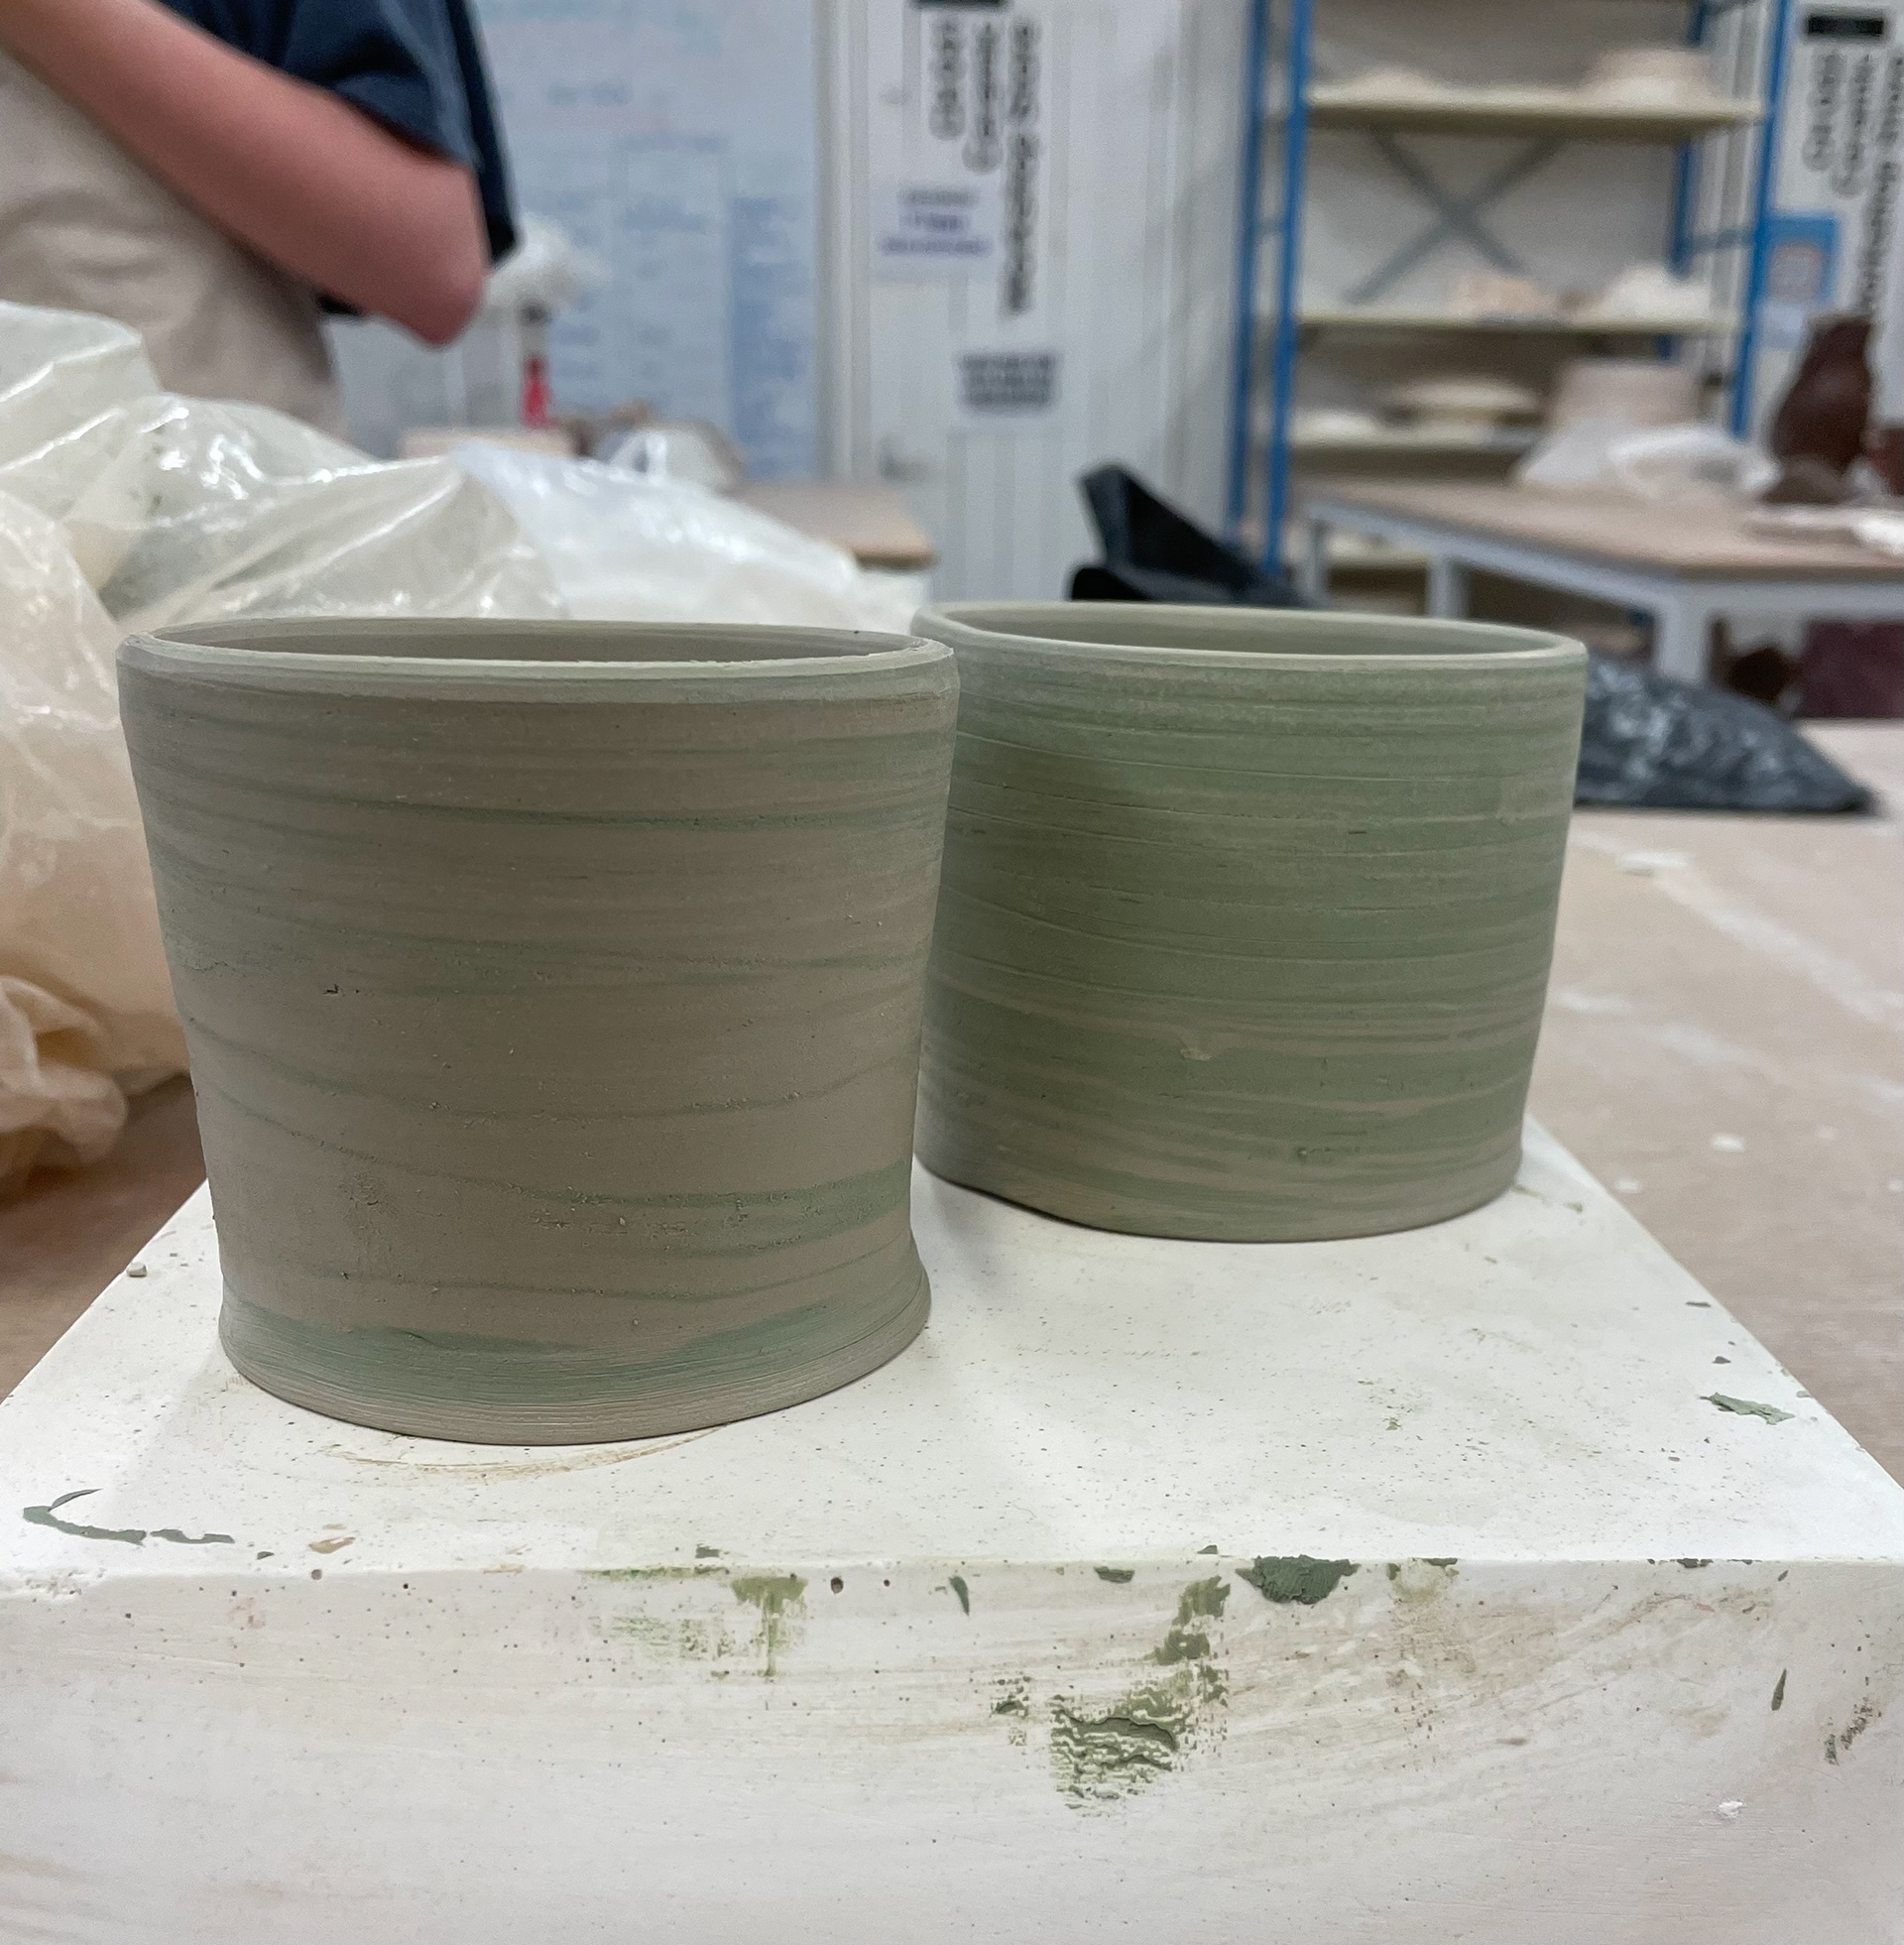
Throwing and trimming my mugs, I was impressed with the outcome of the layering technique, which allowed coloured clay to marble the inside of the mugs, which I liked the aesthetic of. I also liked the effect the layered clay gave, giving each mug a very different outcome; if I stacked all the coloured clay together, they blended more together; however, if I split them up with ivory stoneware, they would be more spread out and have distinct layers to the mugs. I also really enjoyed the shape that I was able to achieve. This is something that I want to follow in my practice. However, my sizing is too big. Having a mug that is too big and has long handles would mean there isn't enough support for them. I threw with extra clay as I knew that I would have to trim lots off to reveal the coloured clay pattern; however, I threw with too much, making them too big- I need to reduce the amount of clay to around 300g
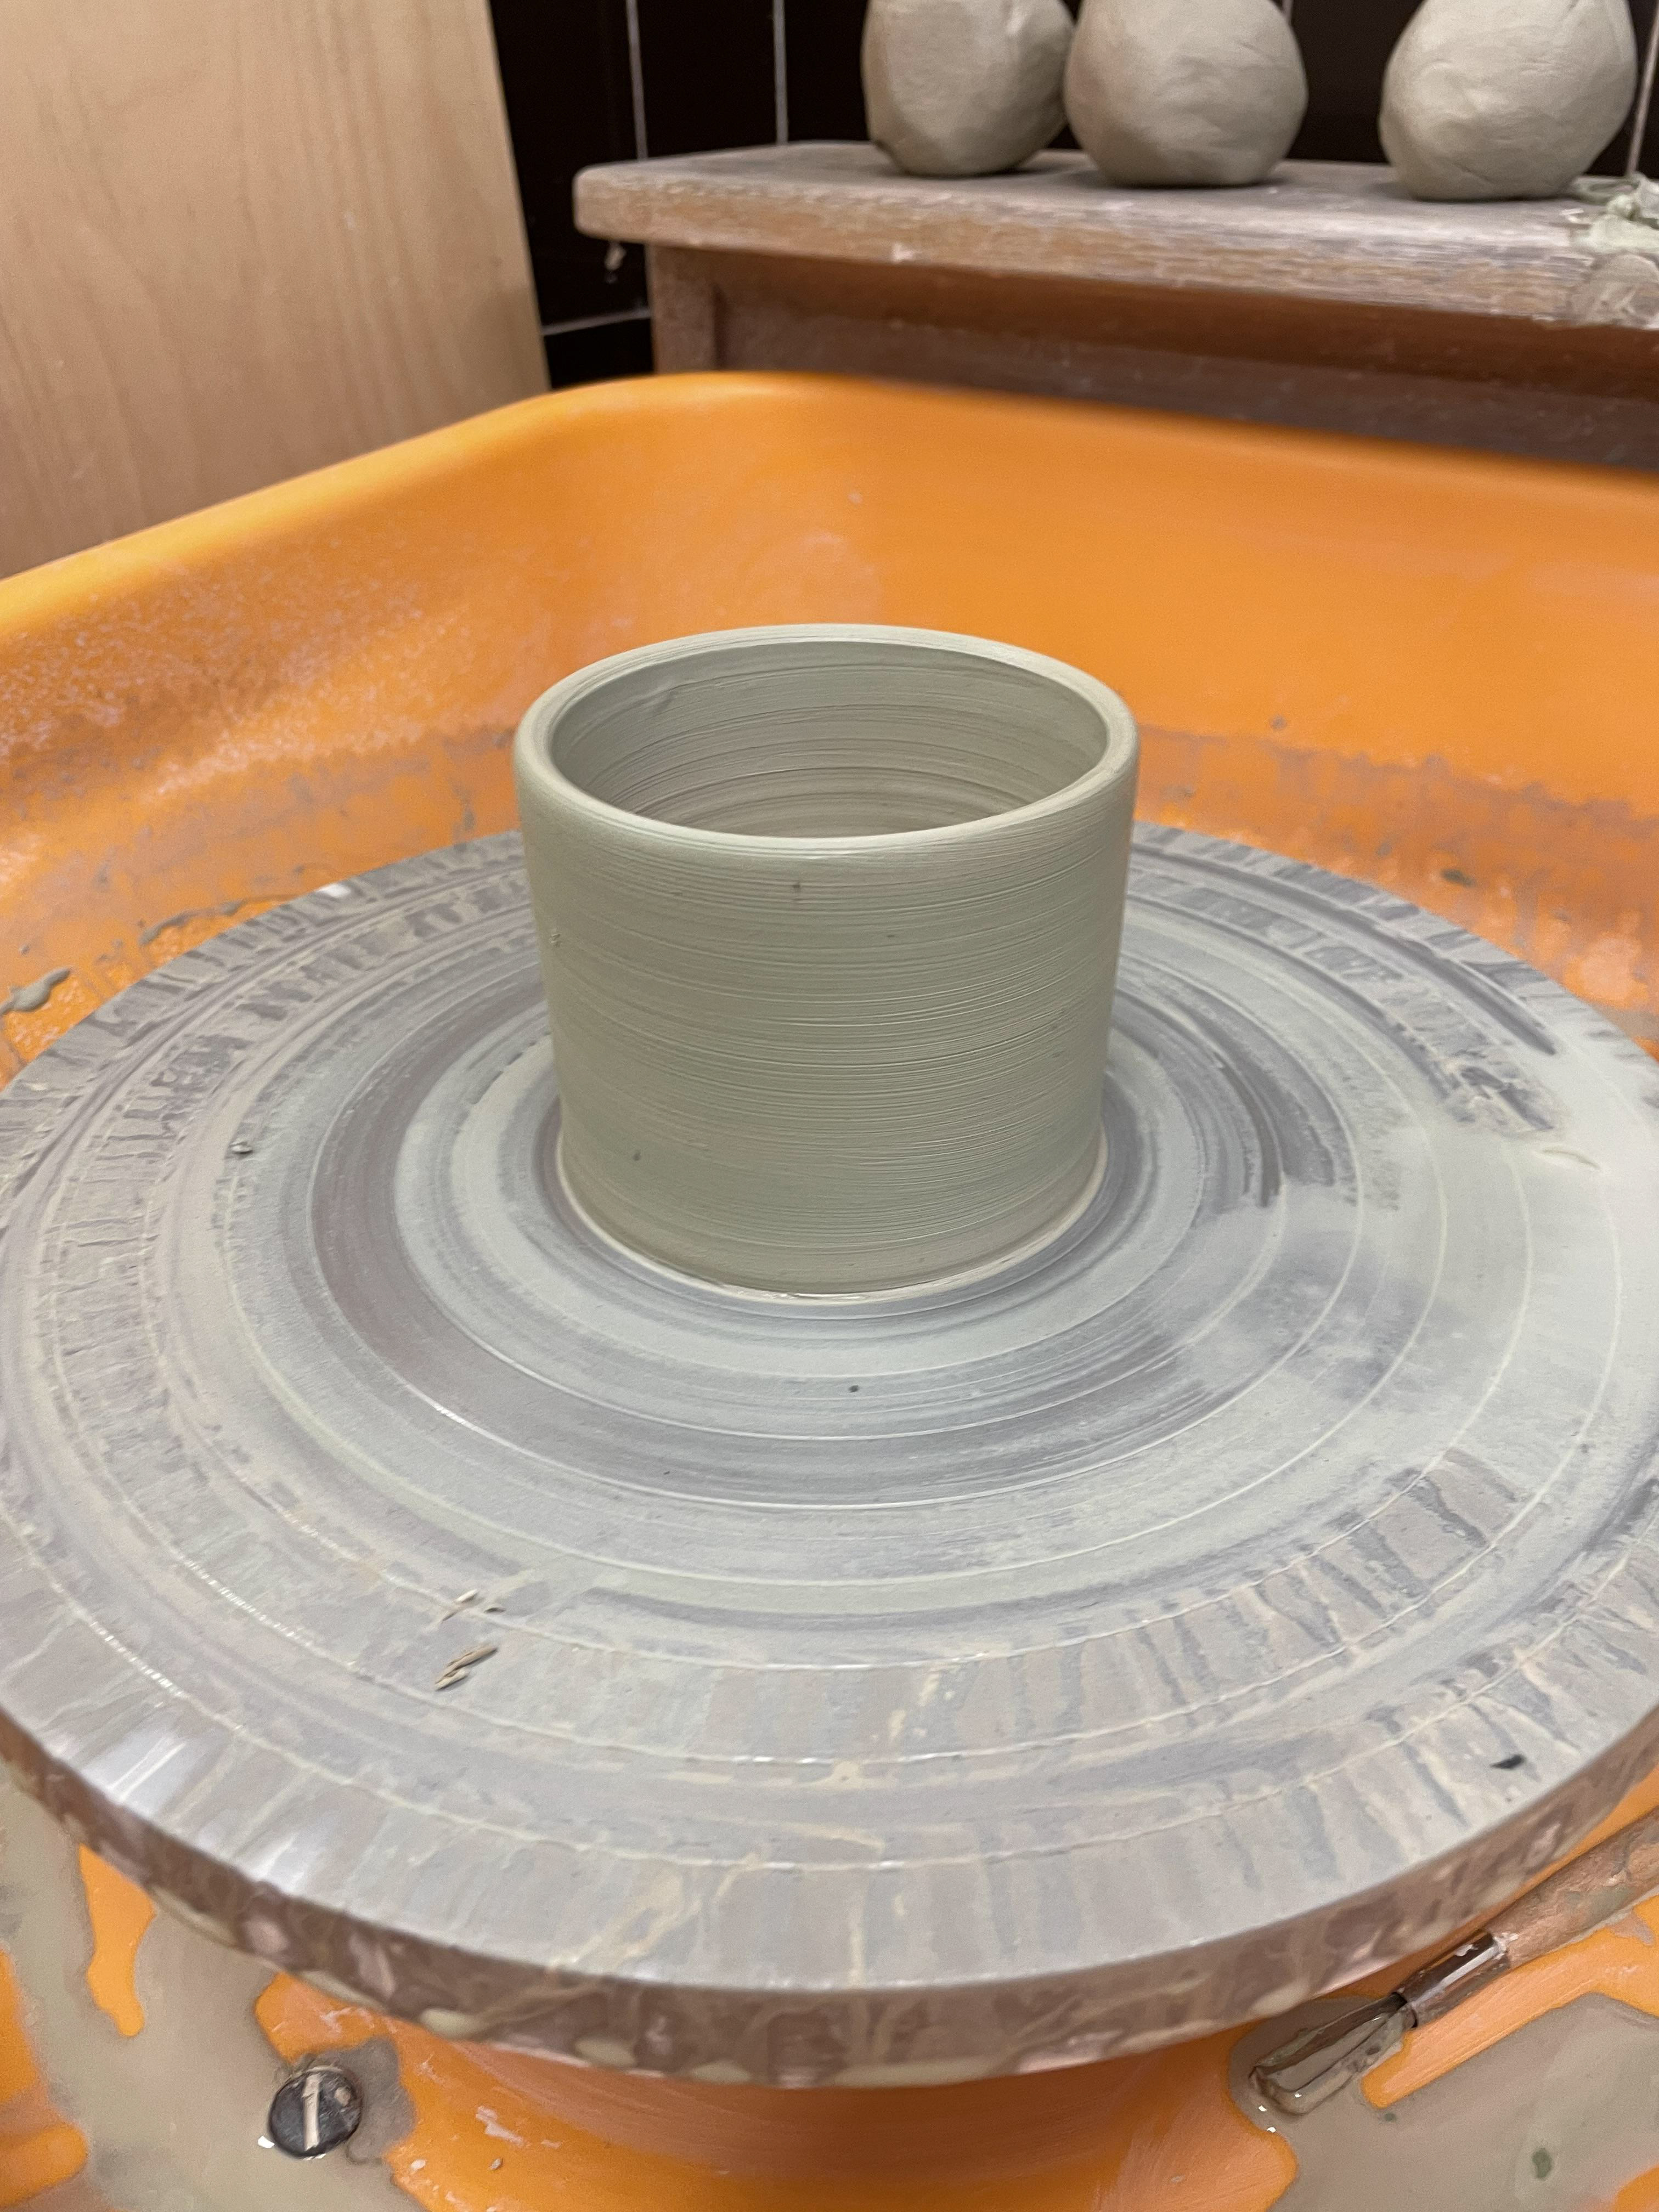
I found trimming very difficult as I wanted to trim the outside, the bottom, and the inside; stabling the base of the mug to the wheel allowed me to trim the inside and the outside; however, it was tough to remove off the wheel due to the large surface area of the bottom of the mug, it would suction onto the wheel. Therefore, the only way to release it would be to wire cut it off; this proved risky as you had to cut as close to the wheel as possible, and I didn't throw a thick base. This would remove clay from the bottom, and then I would trim it, which meant the mugs either had very thing bases or I would rip through them. I also found that I would allow them to get too leathery; therefore, I would need more pressure to trim. This usually meant I would lose my place and ruin the walls of the mugs. Also, moving the mug off the wheel and backing off meant you would ruin its surface pattern, smudging the marbled effect. To prevent this from happening, I need to test trimming on the wheel once thrown for my next set of mugs. Keeping it on the wheel allows it to be leather-hard, and adding a rim to the base would also be helpful. This lip will mean less surface area, so when wiring it off, it realises easier and doesn't allow it to go too hard.
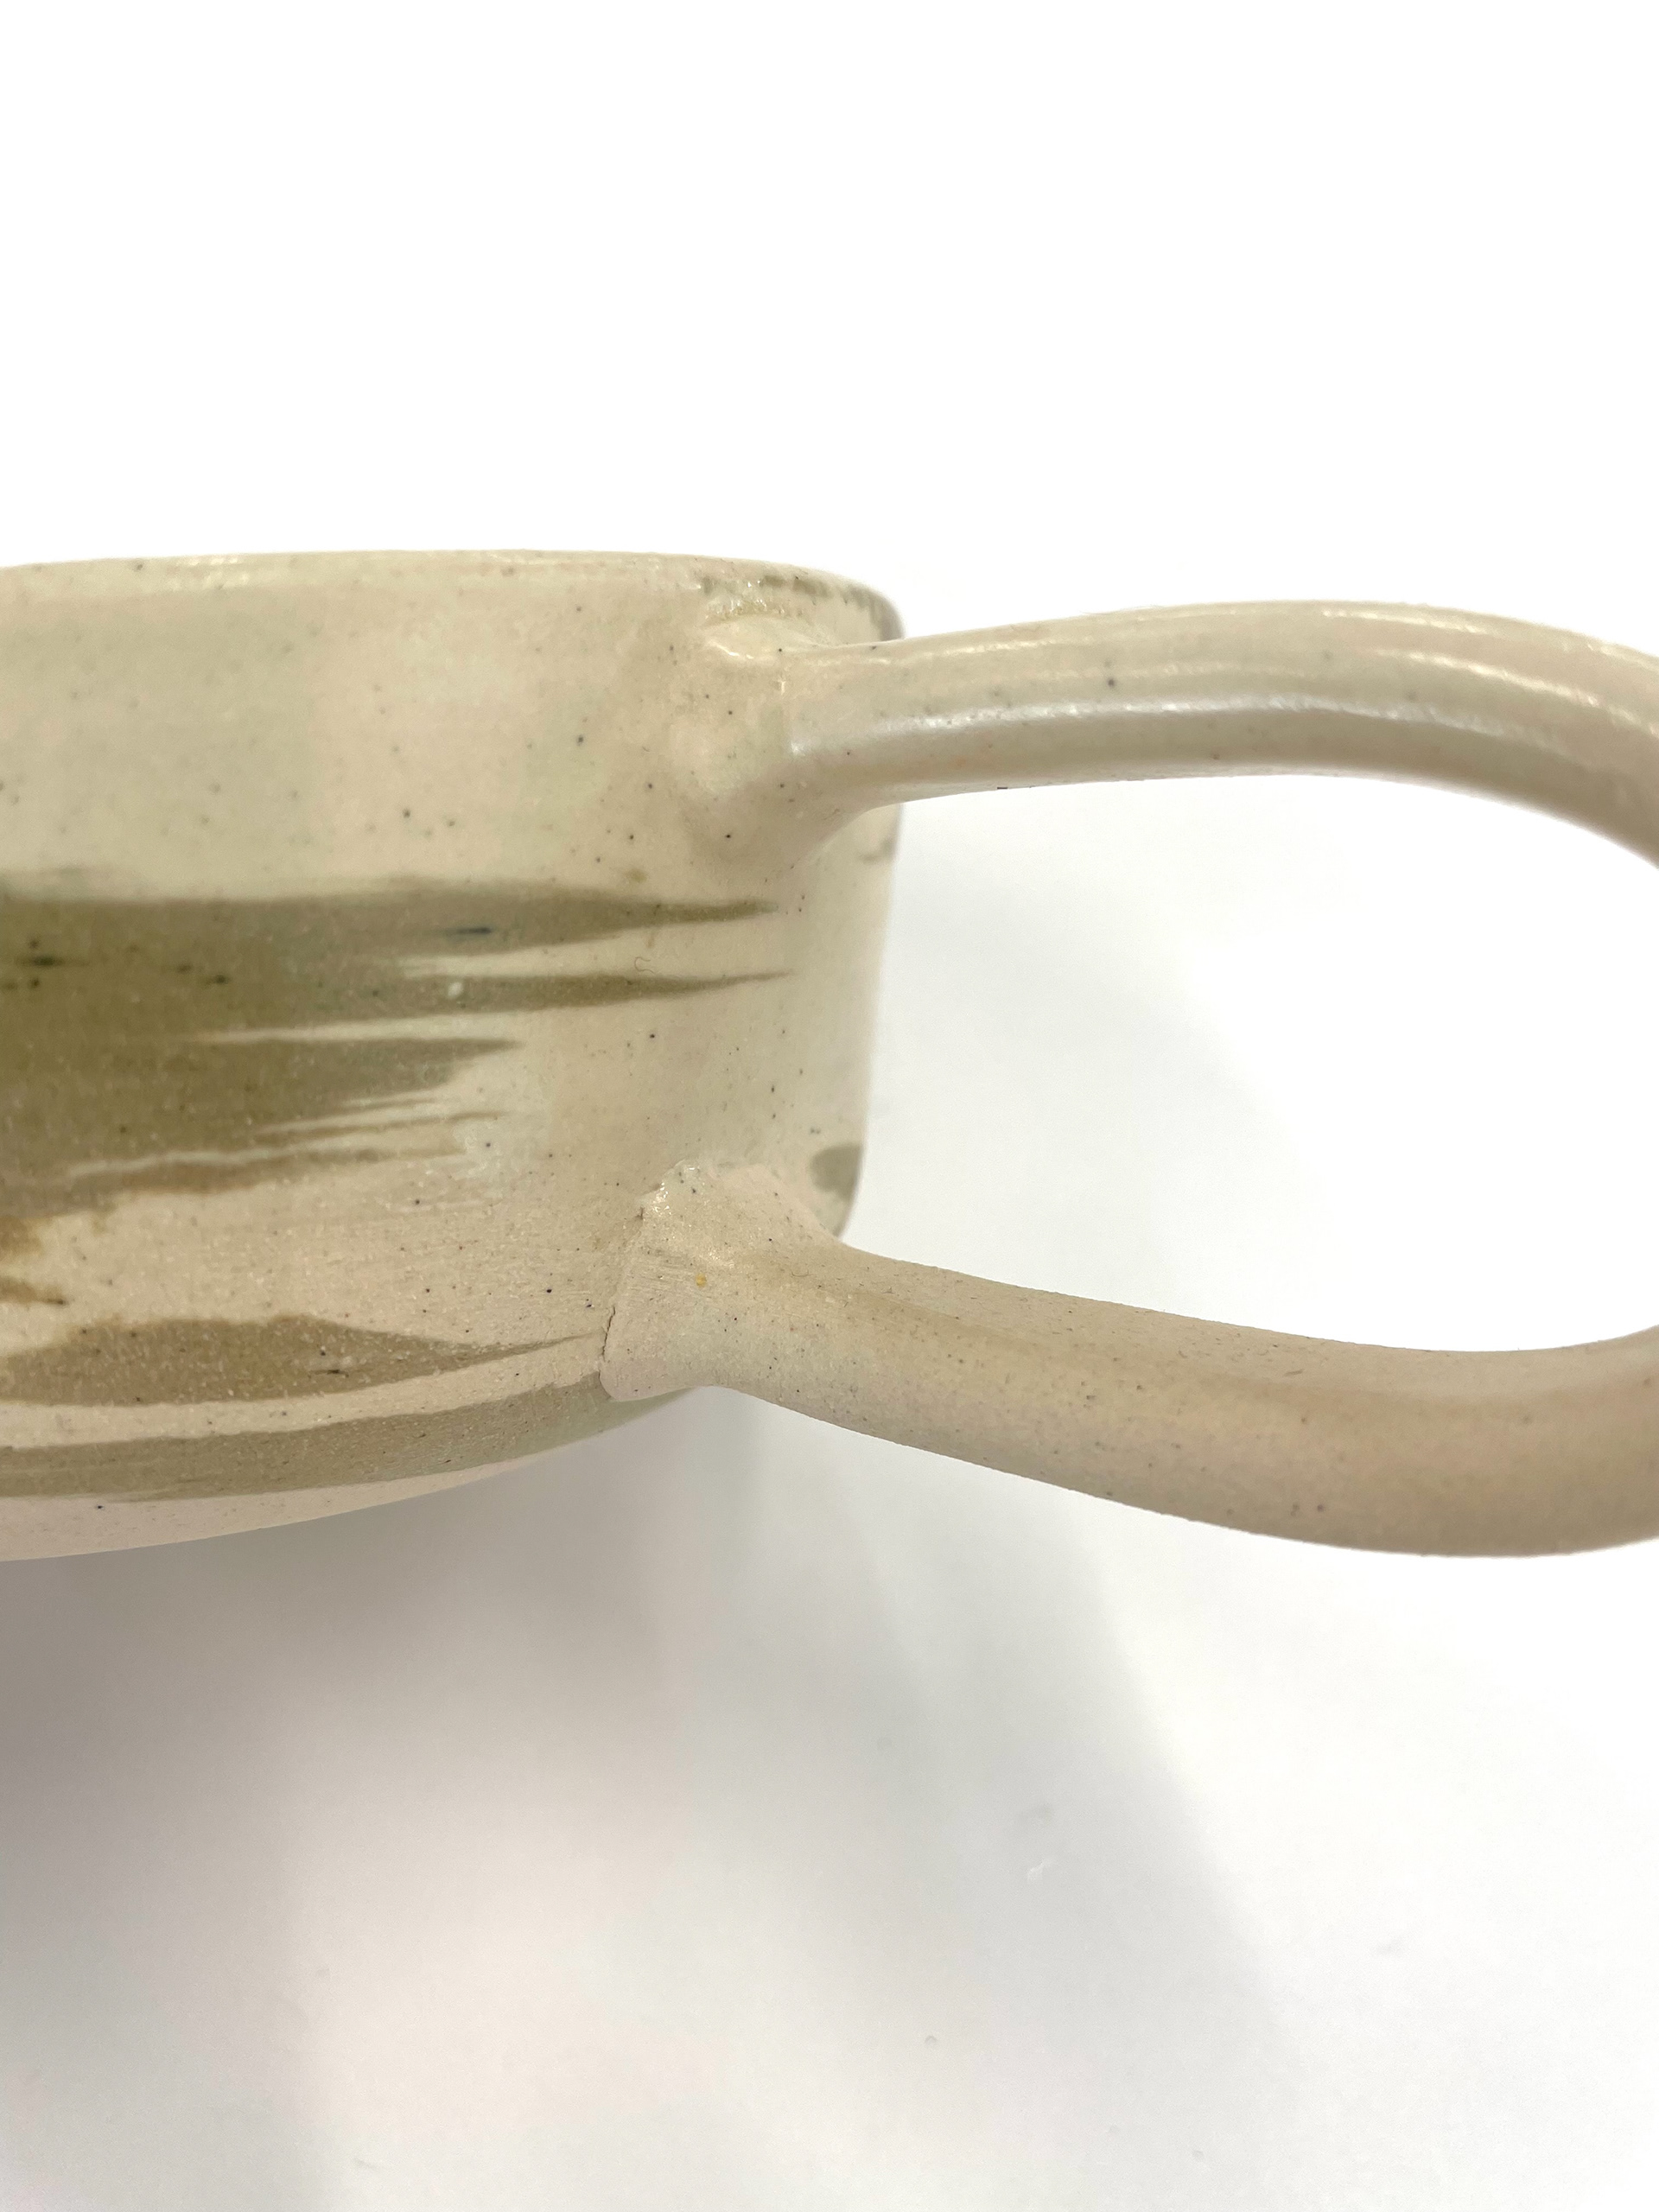
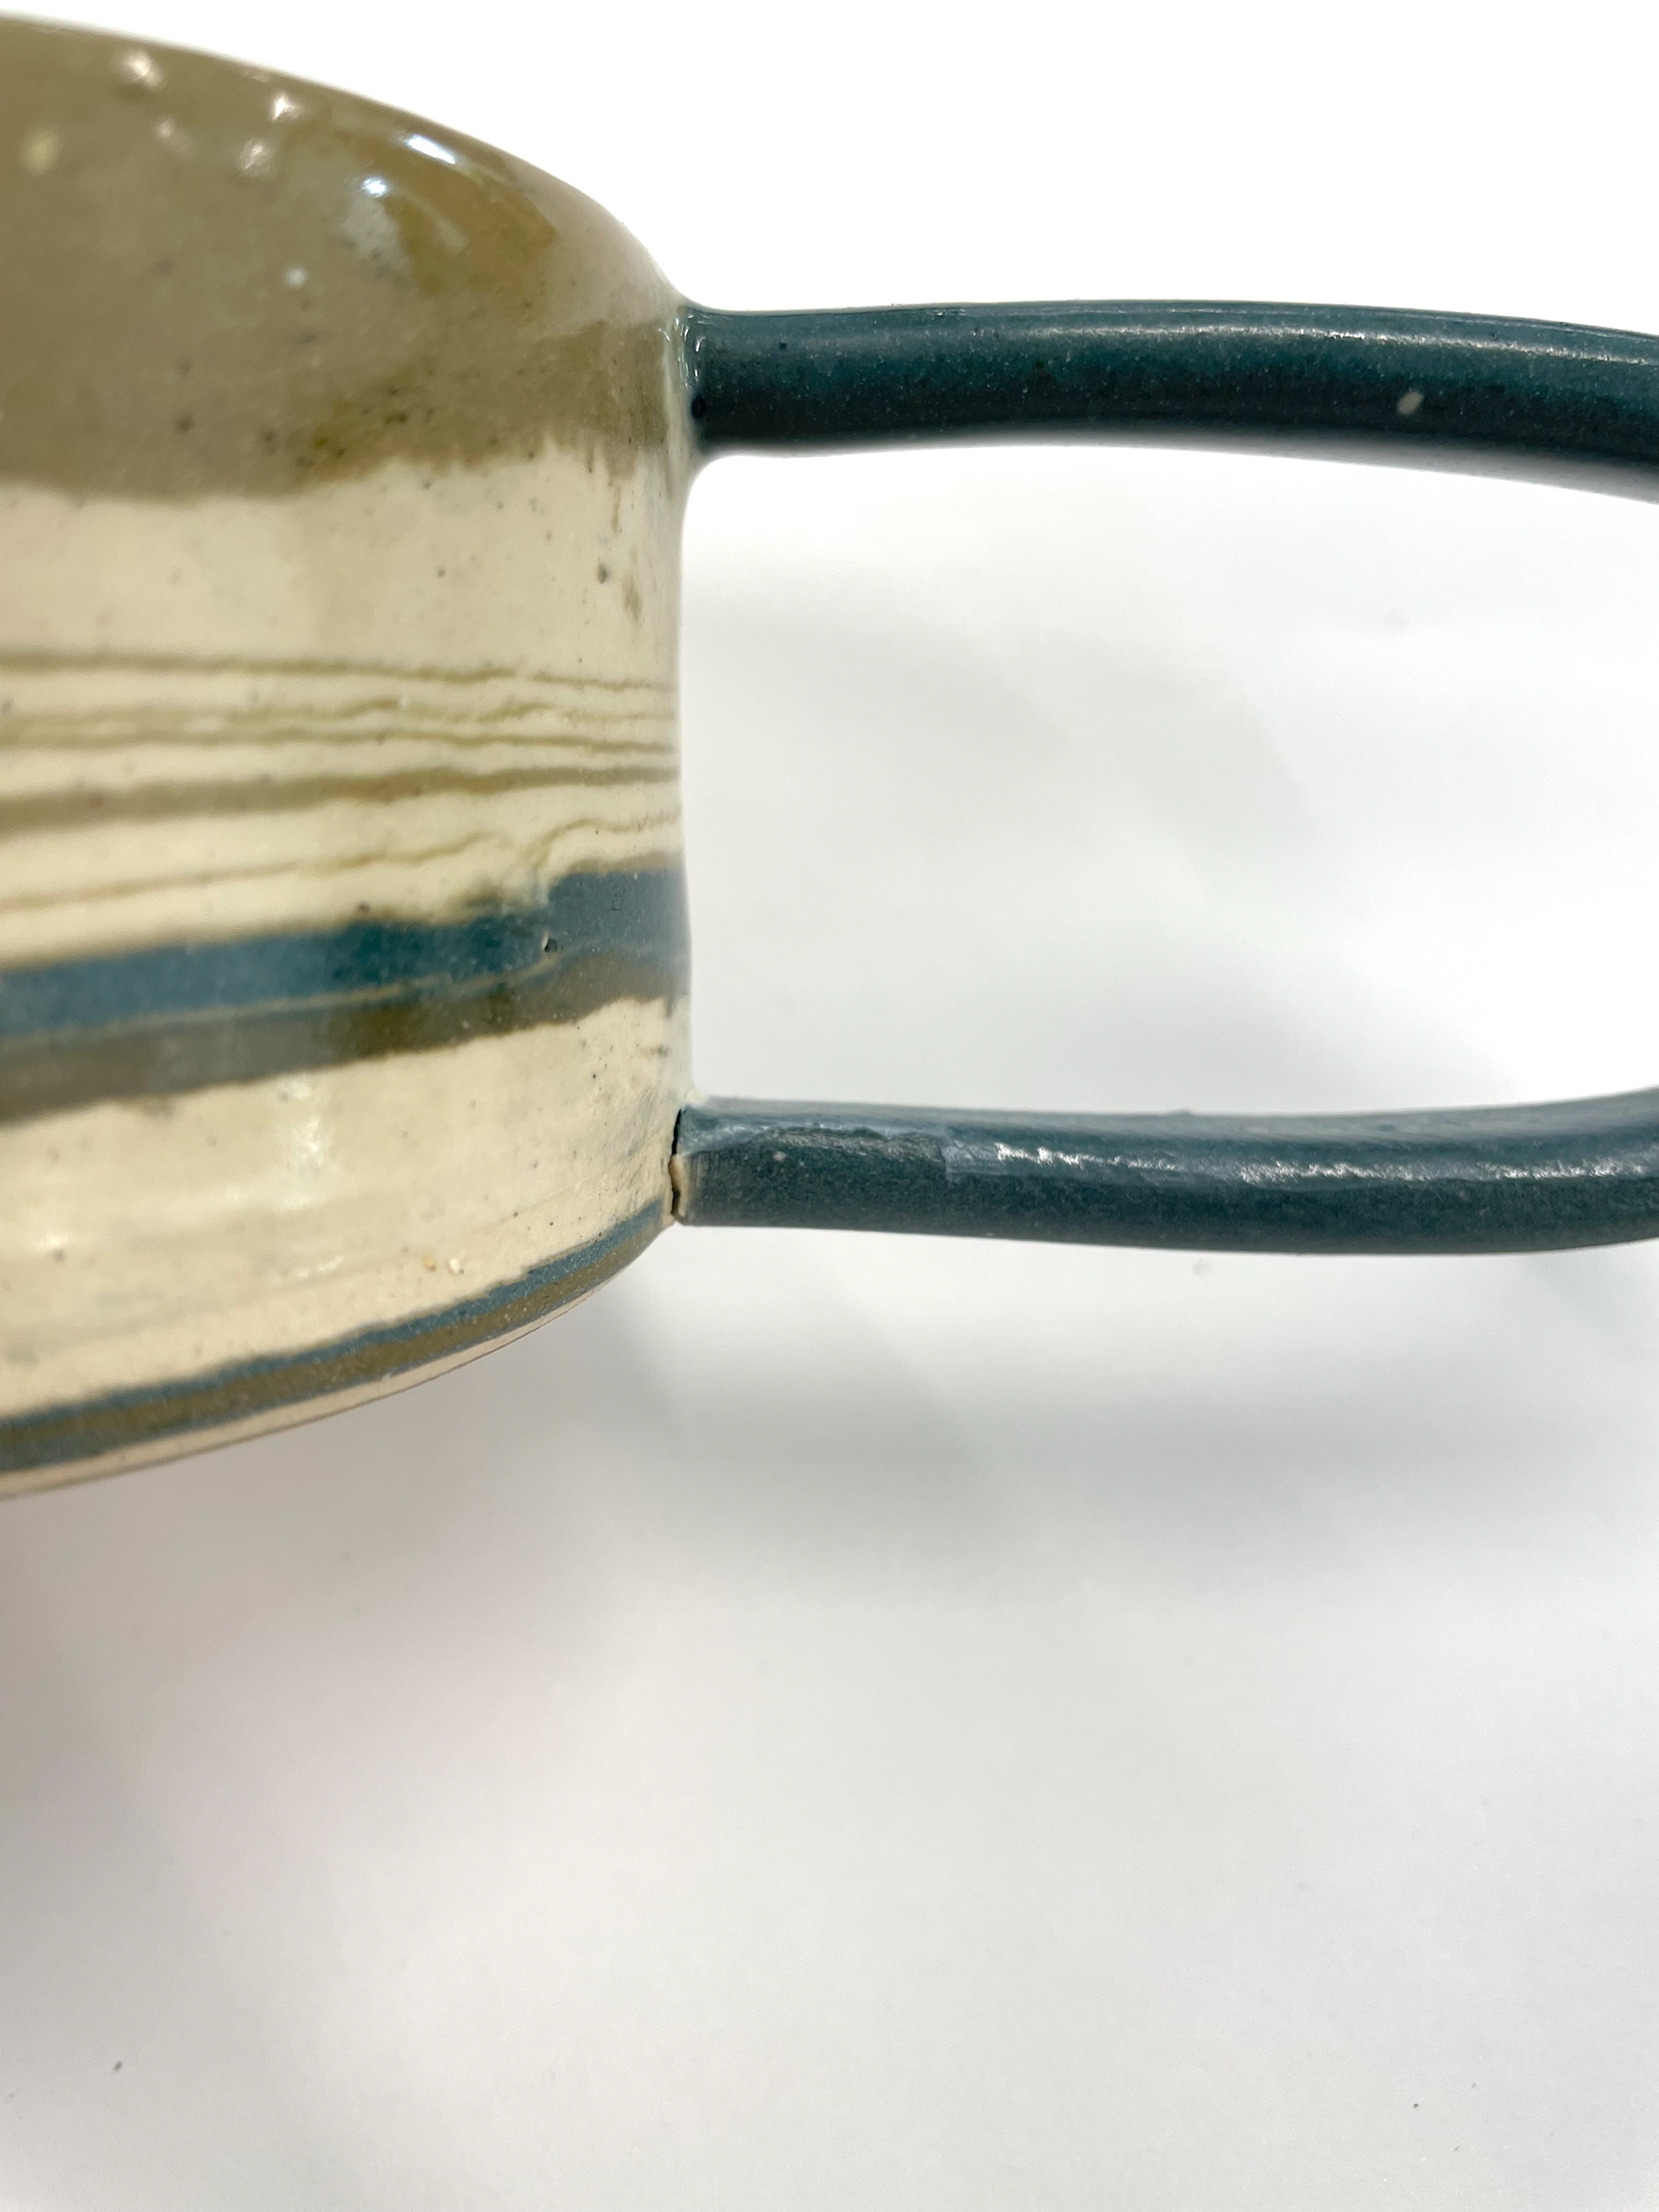
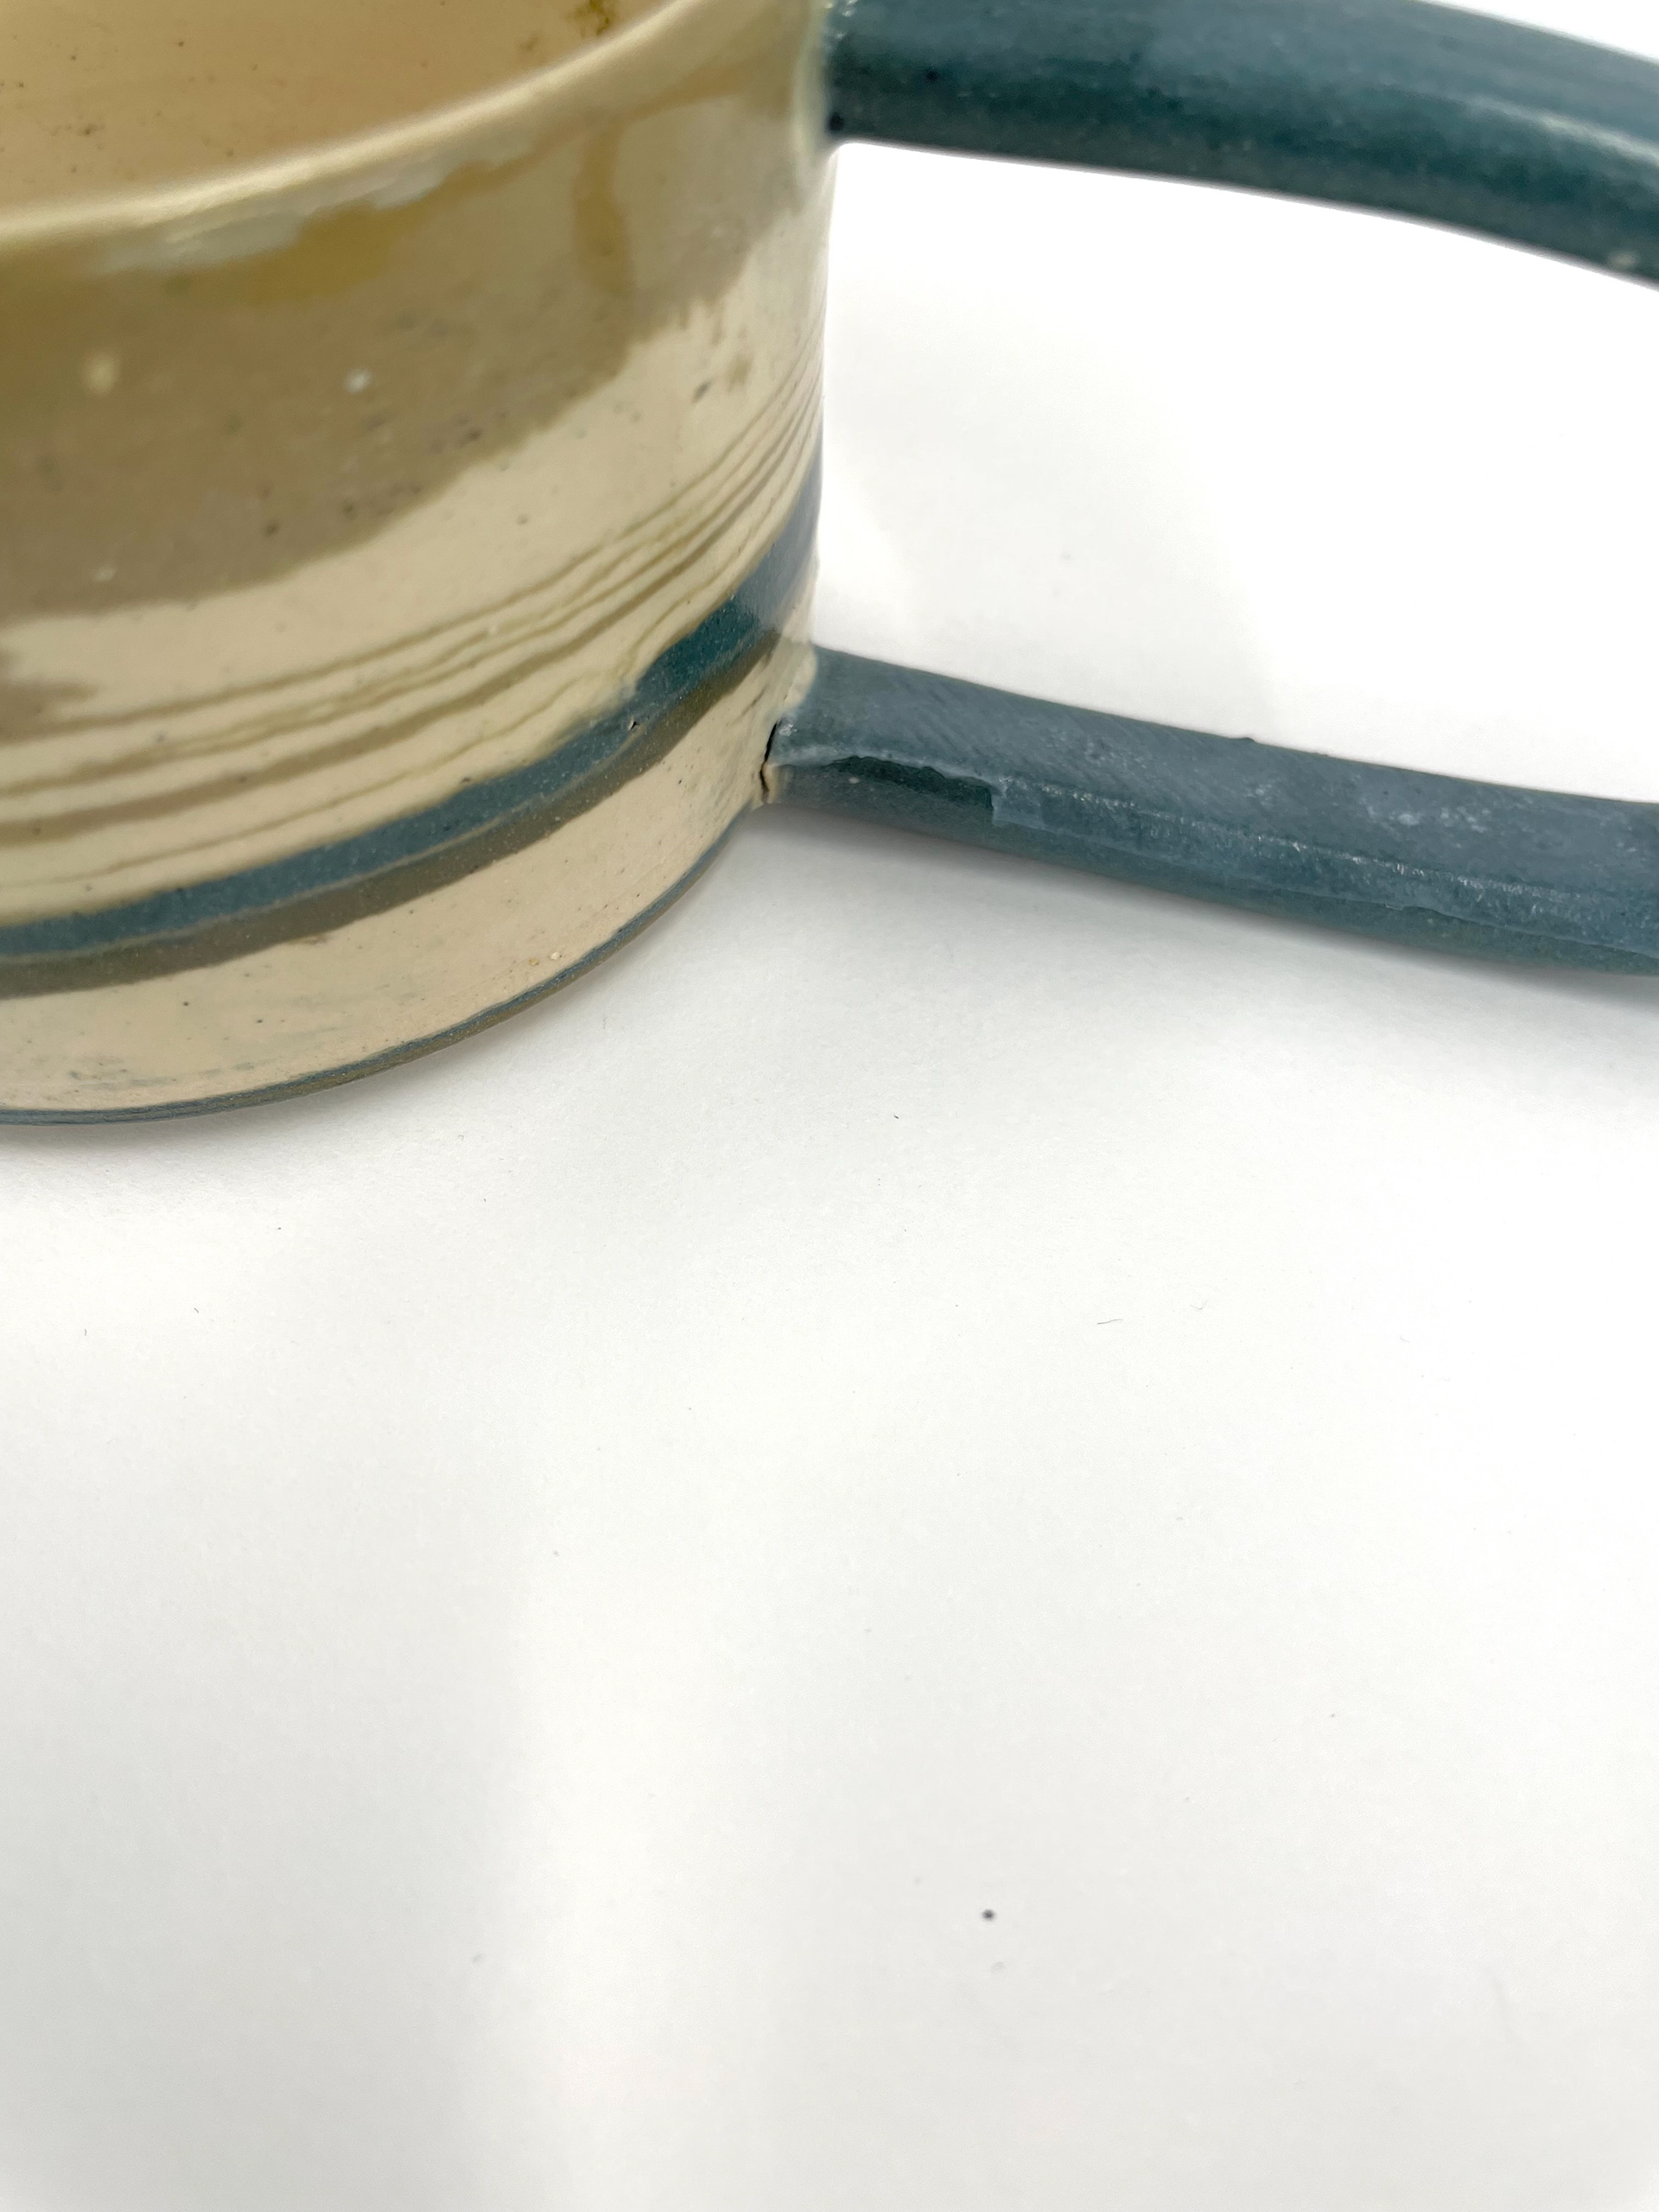
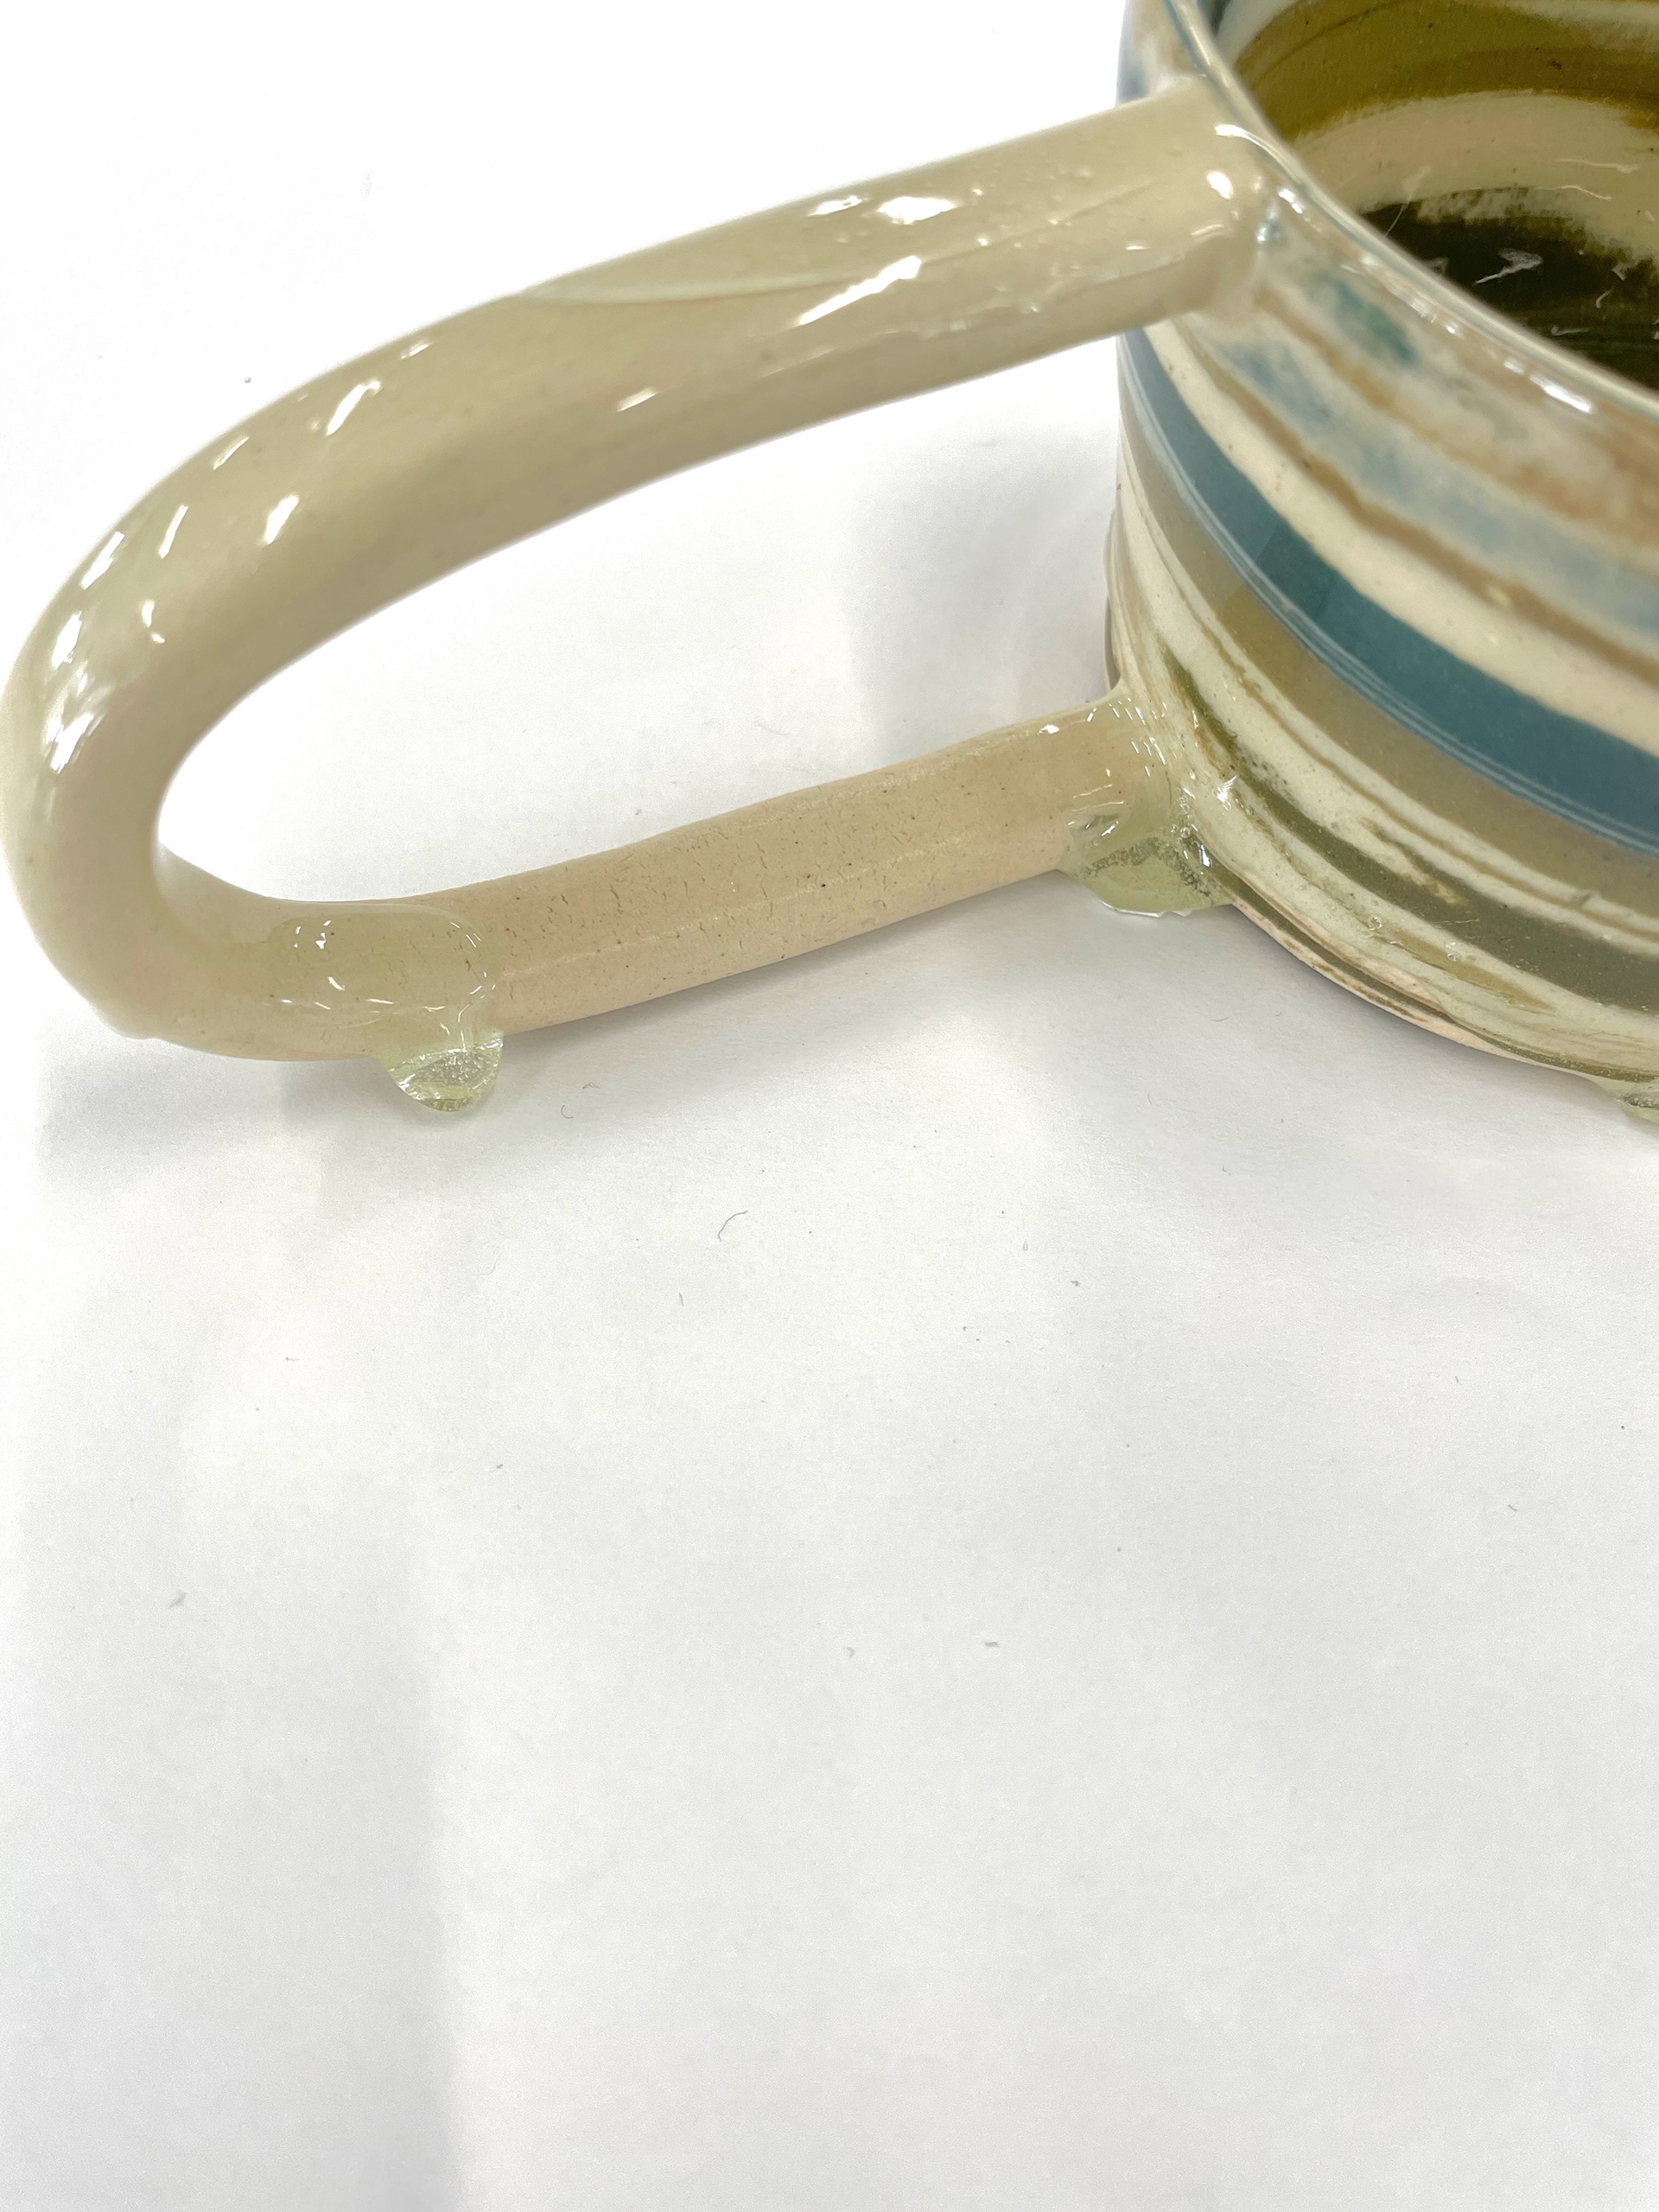
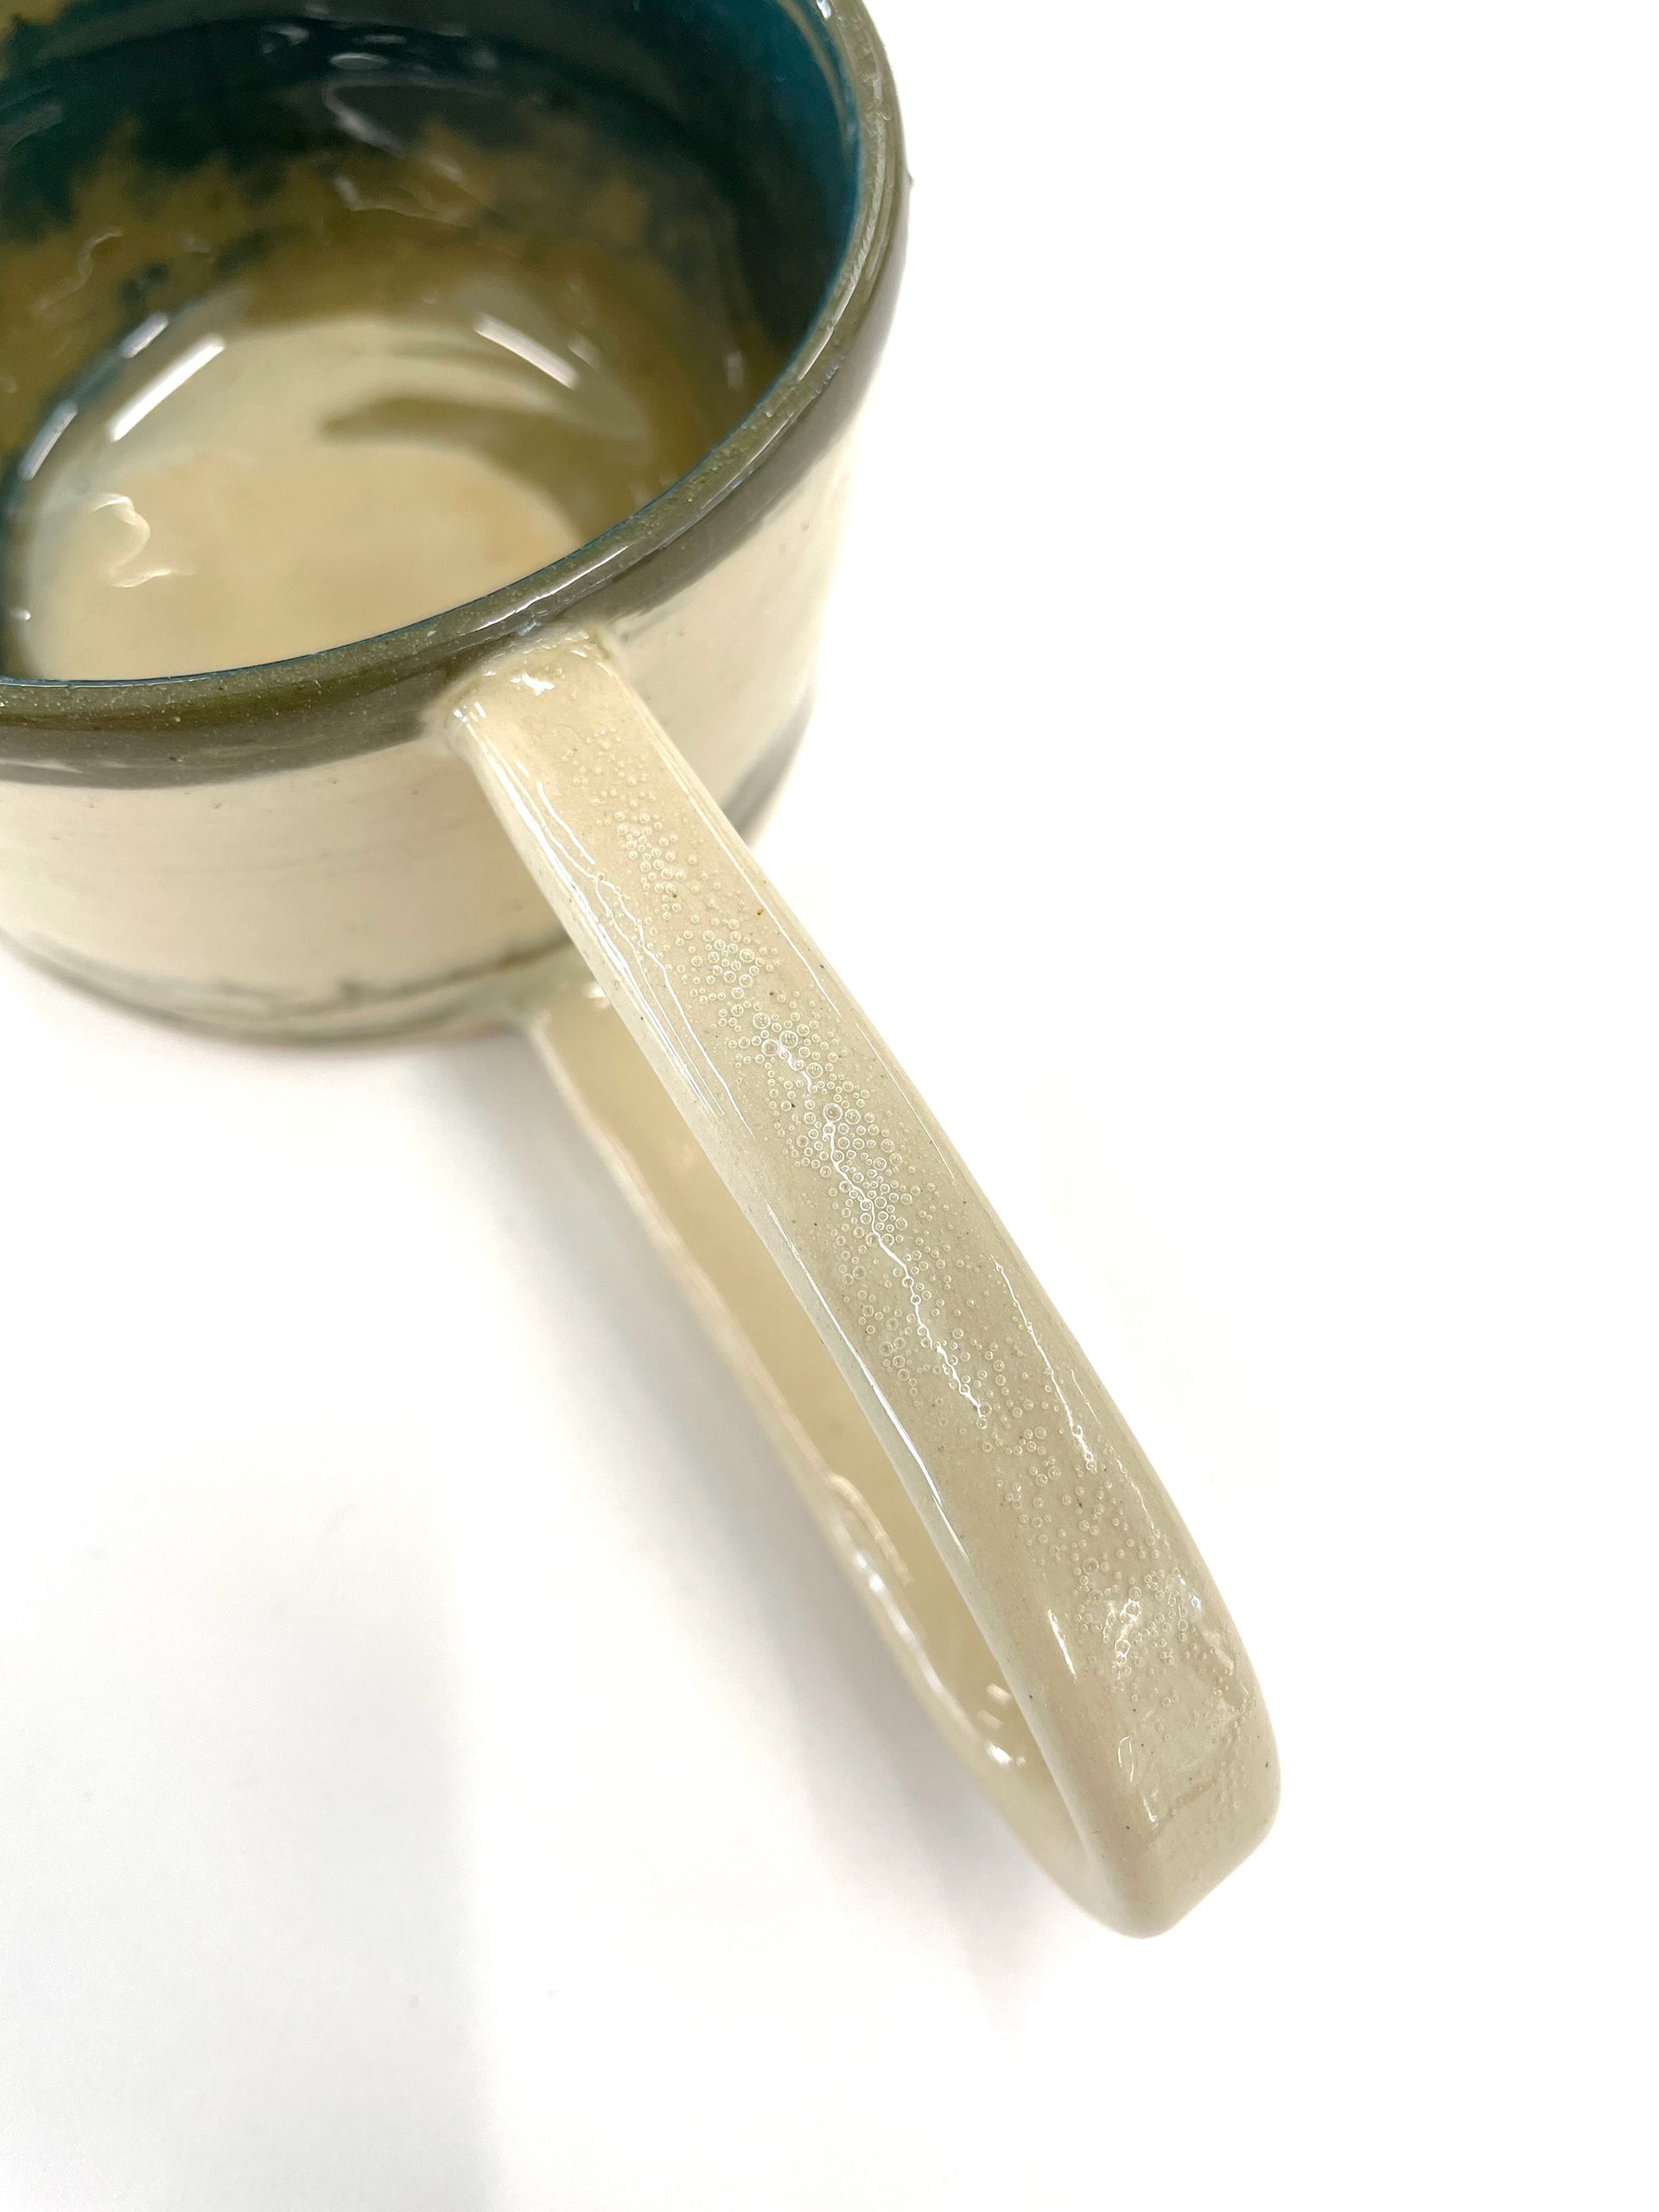
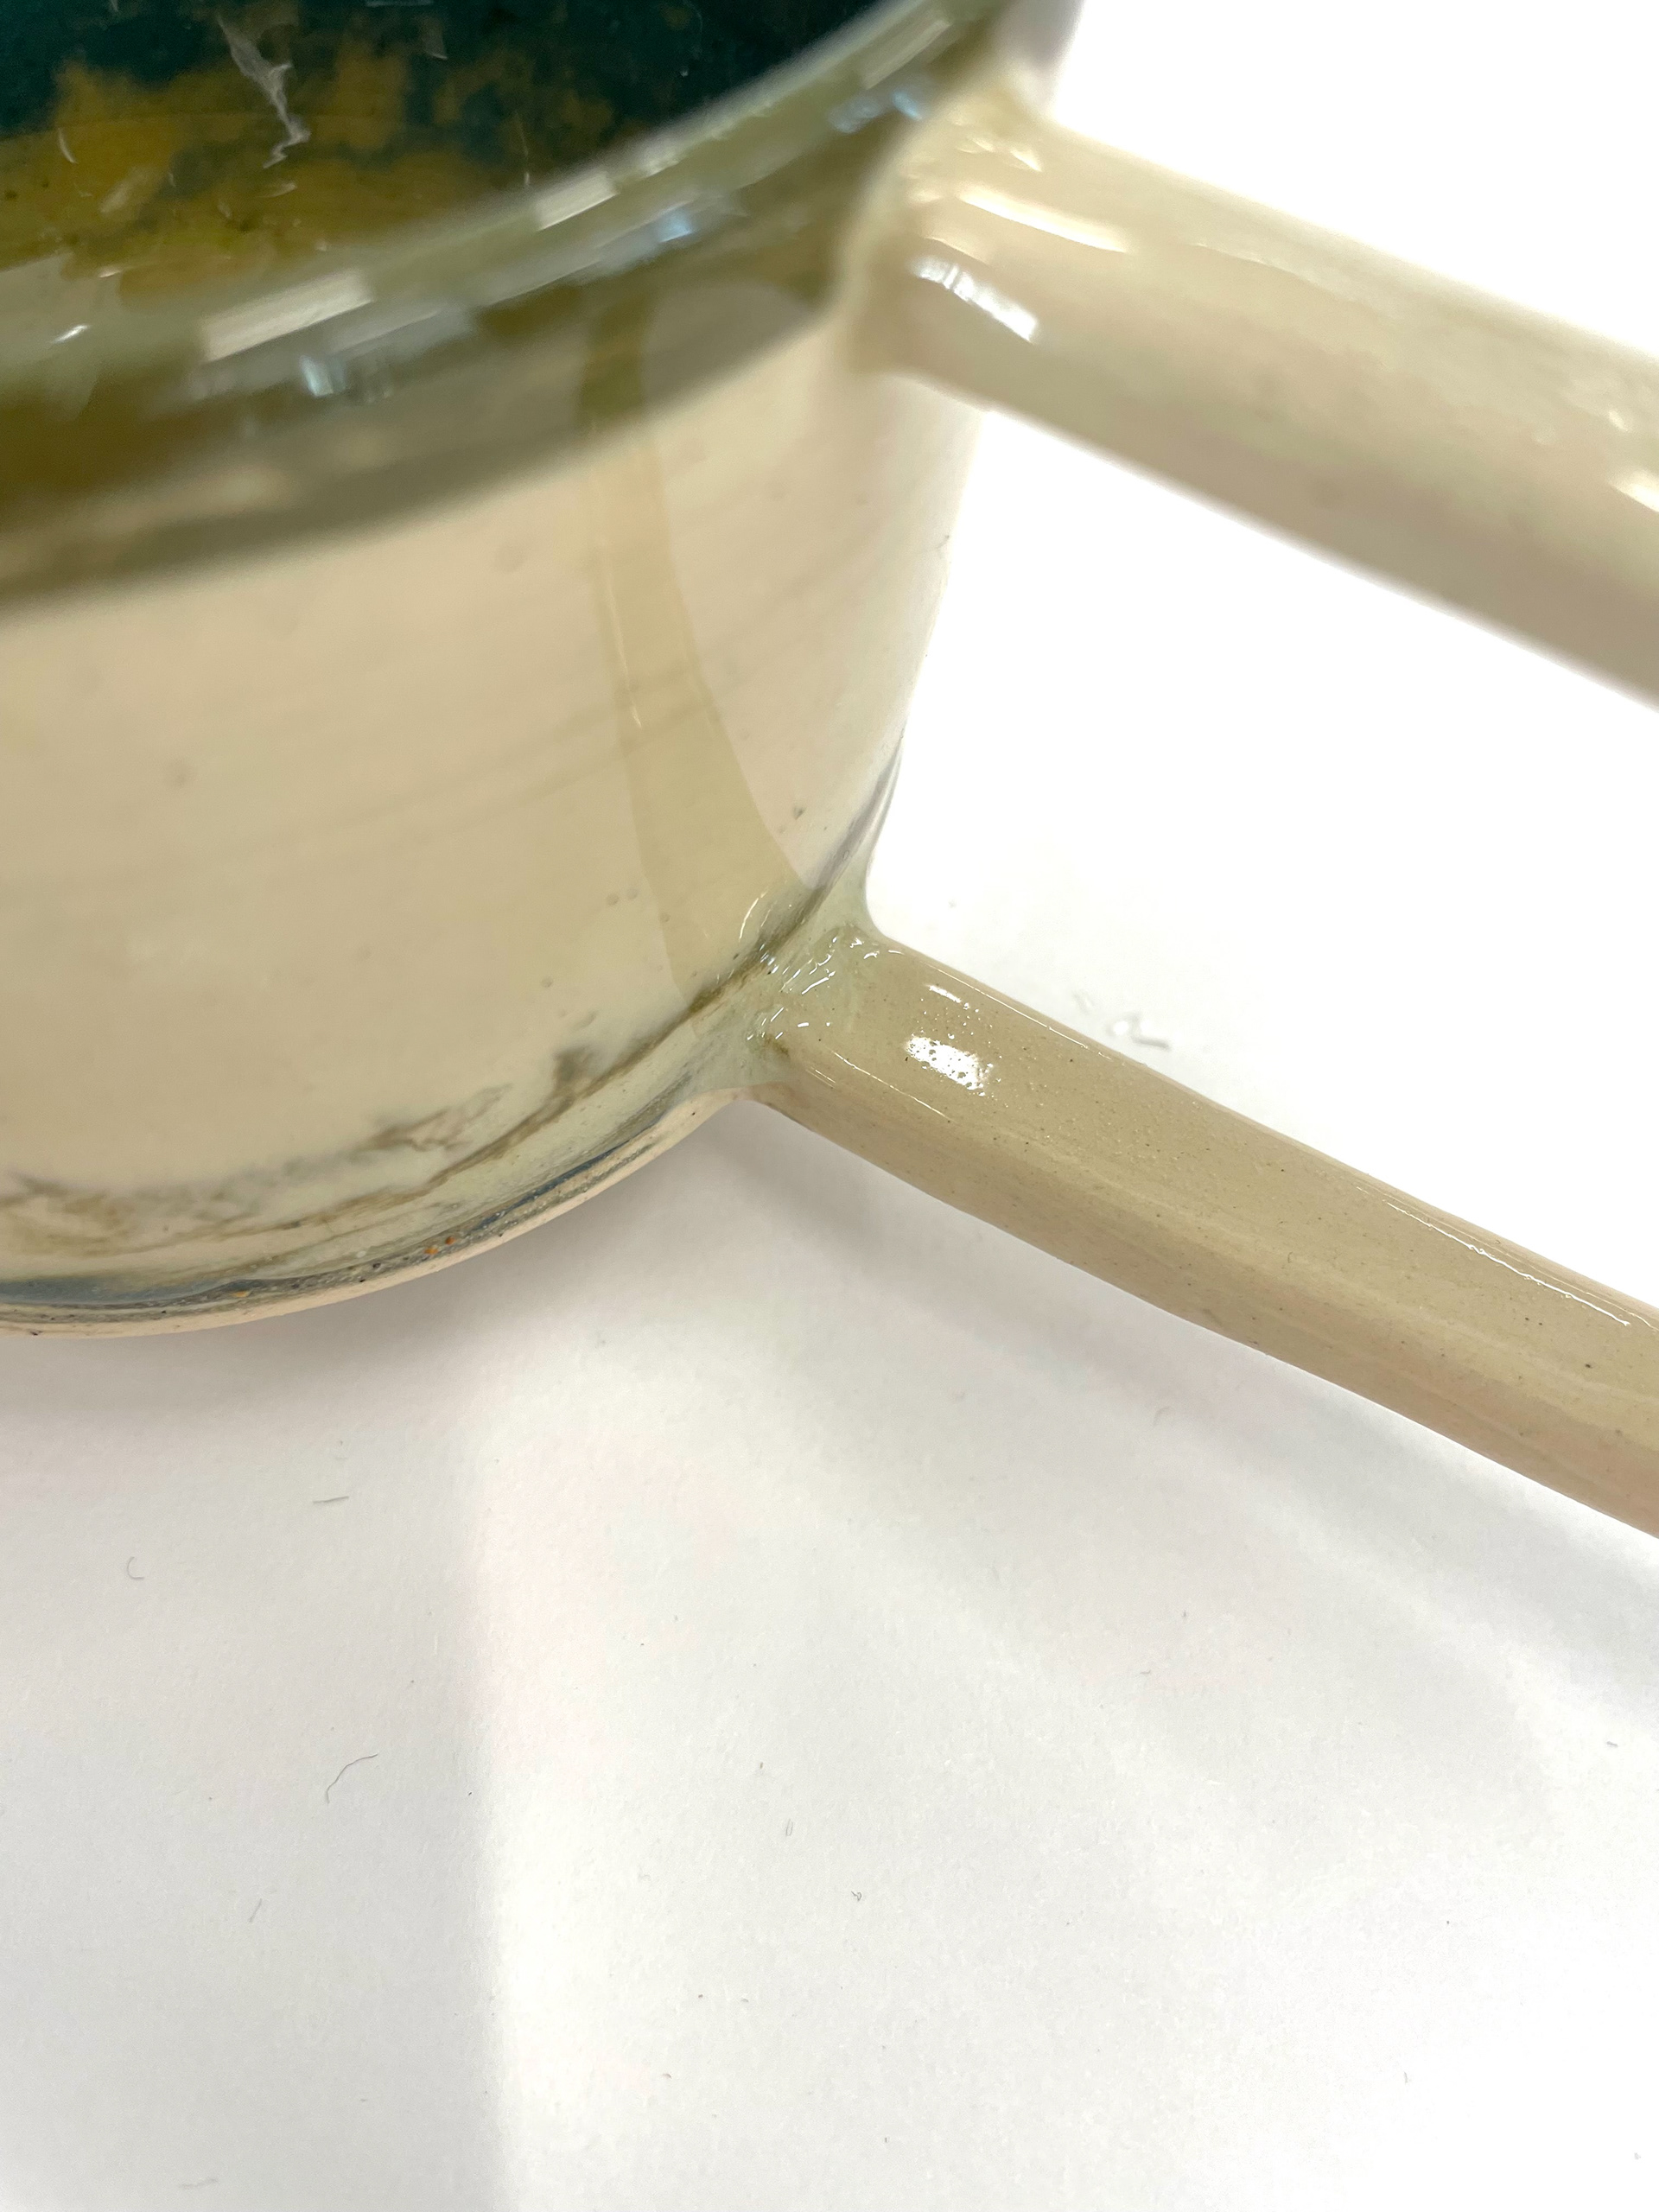
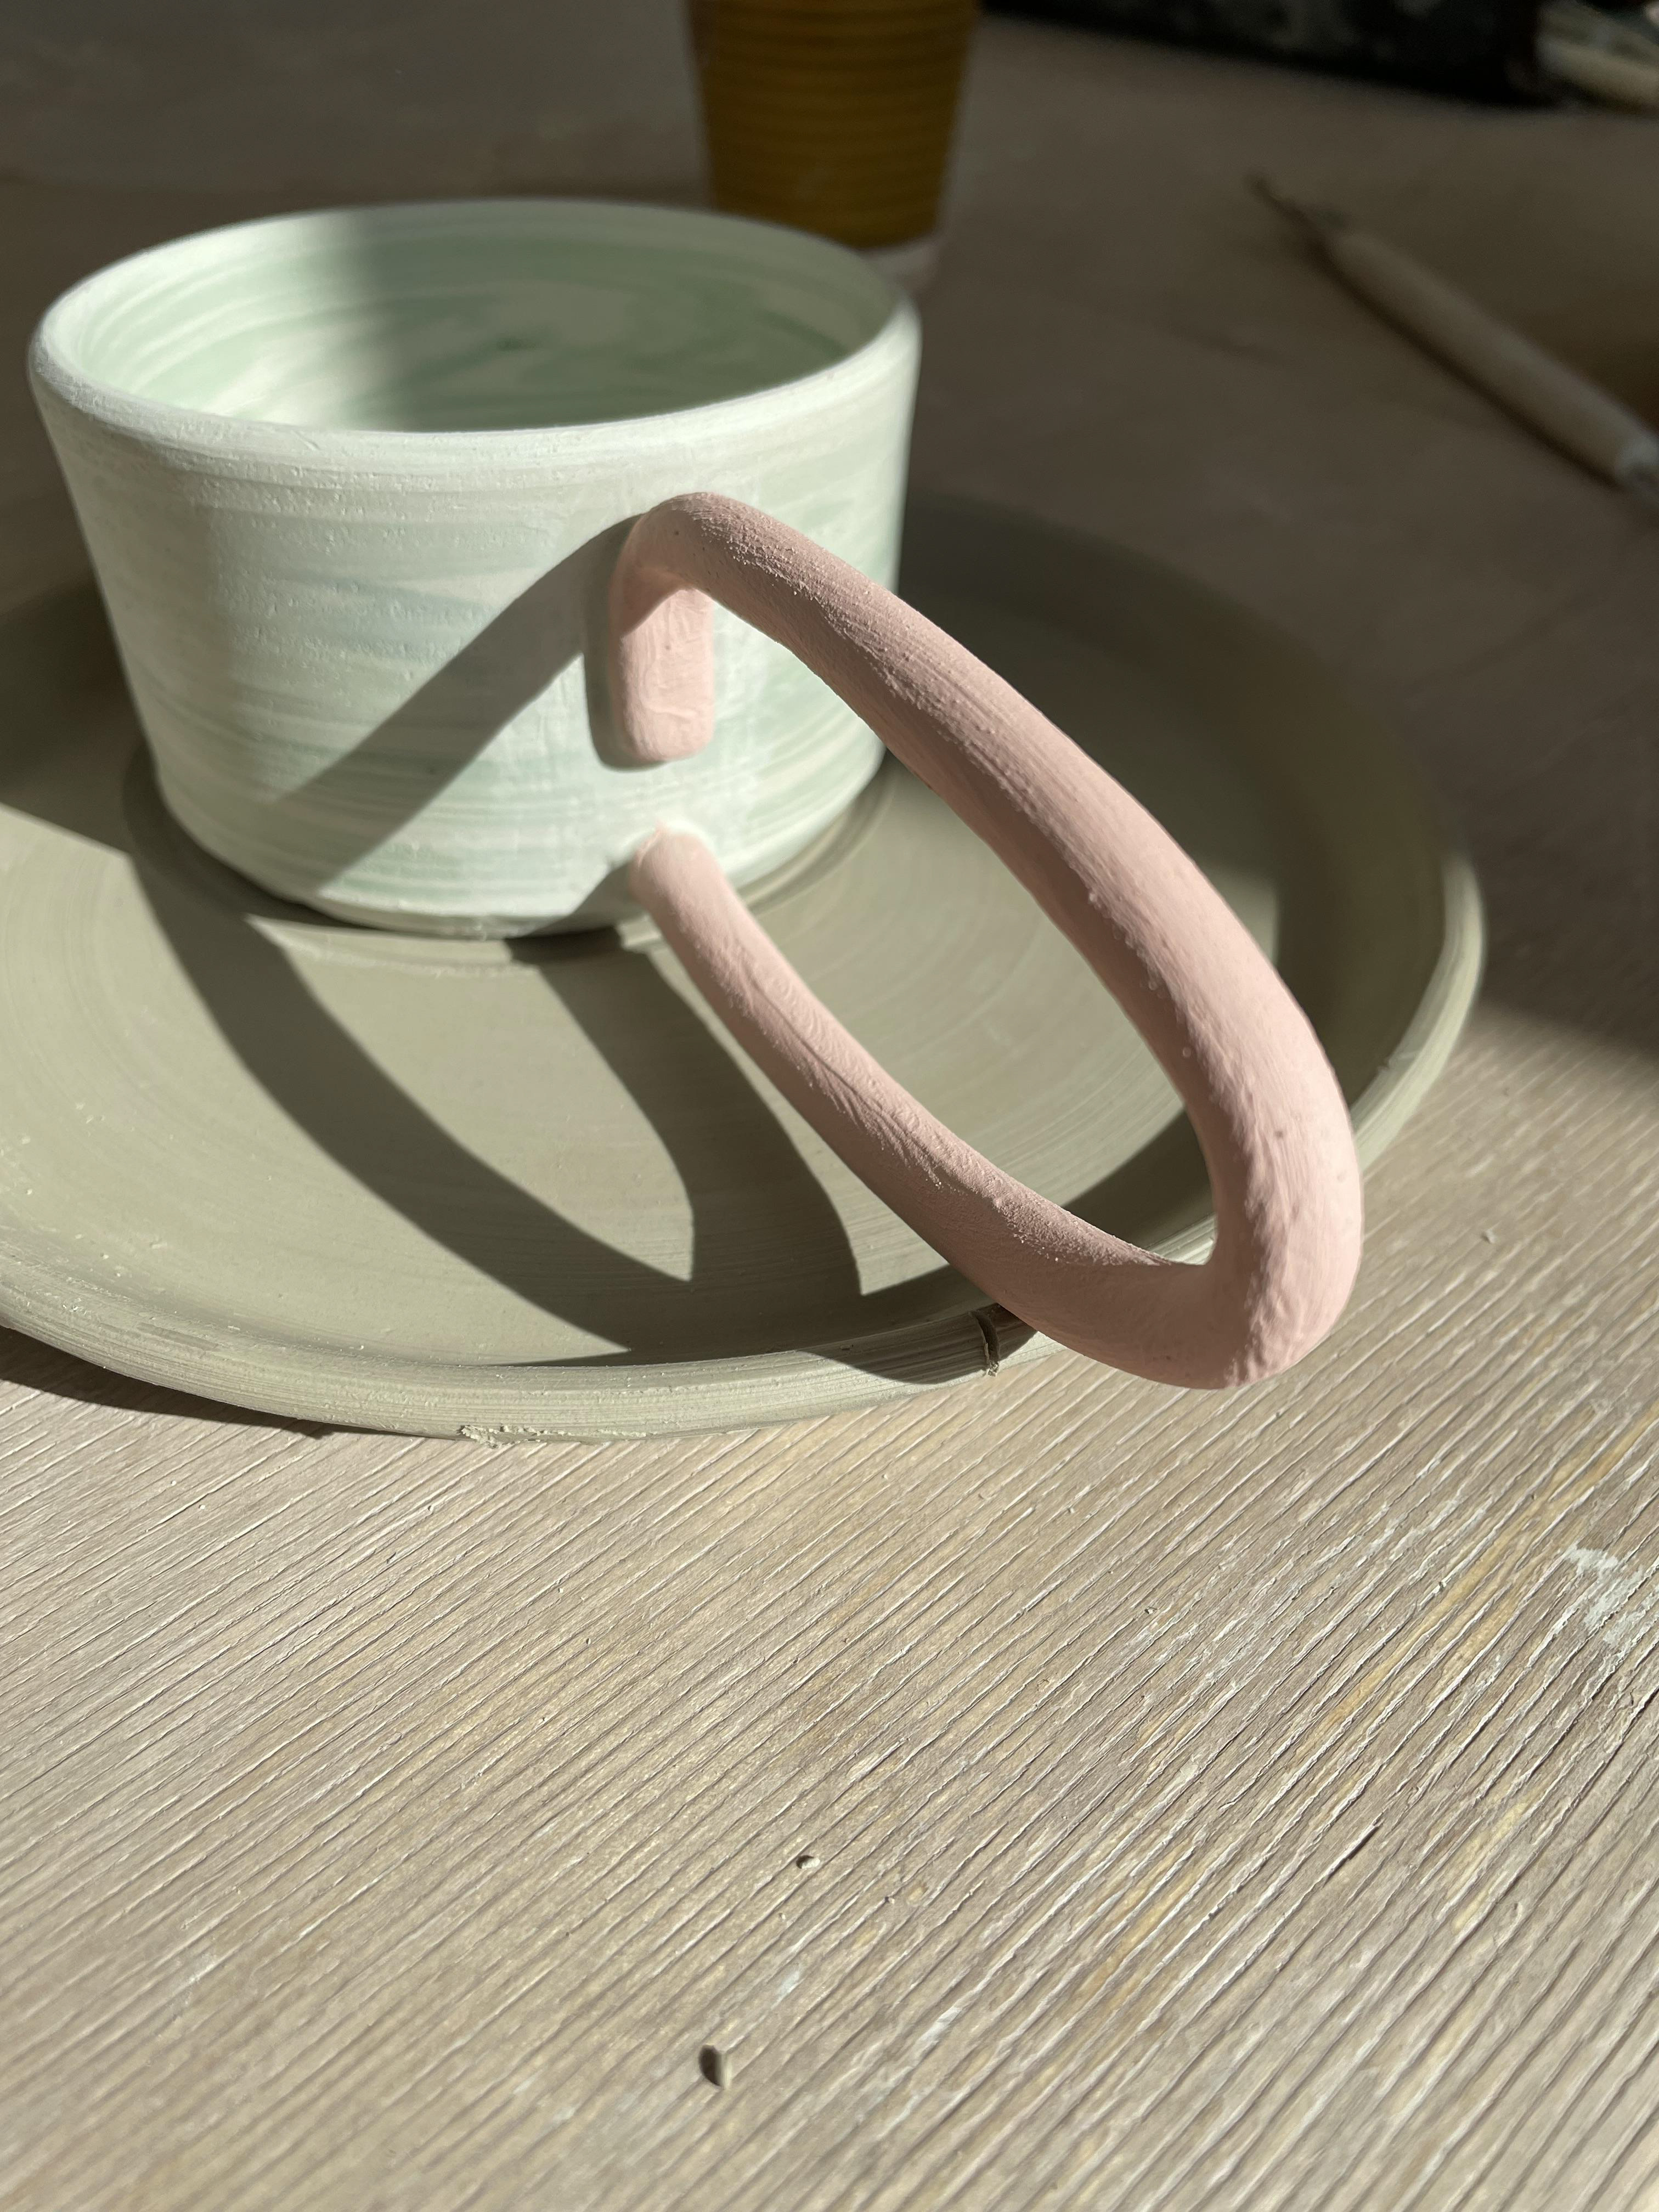
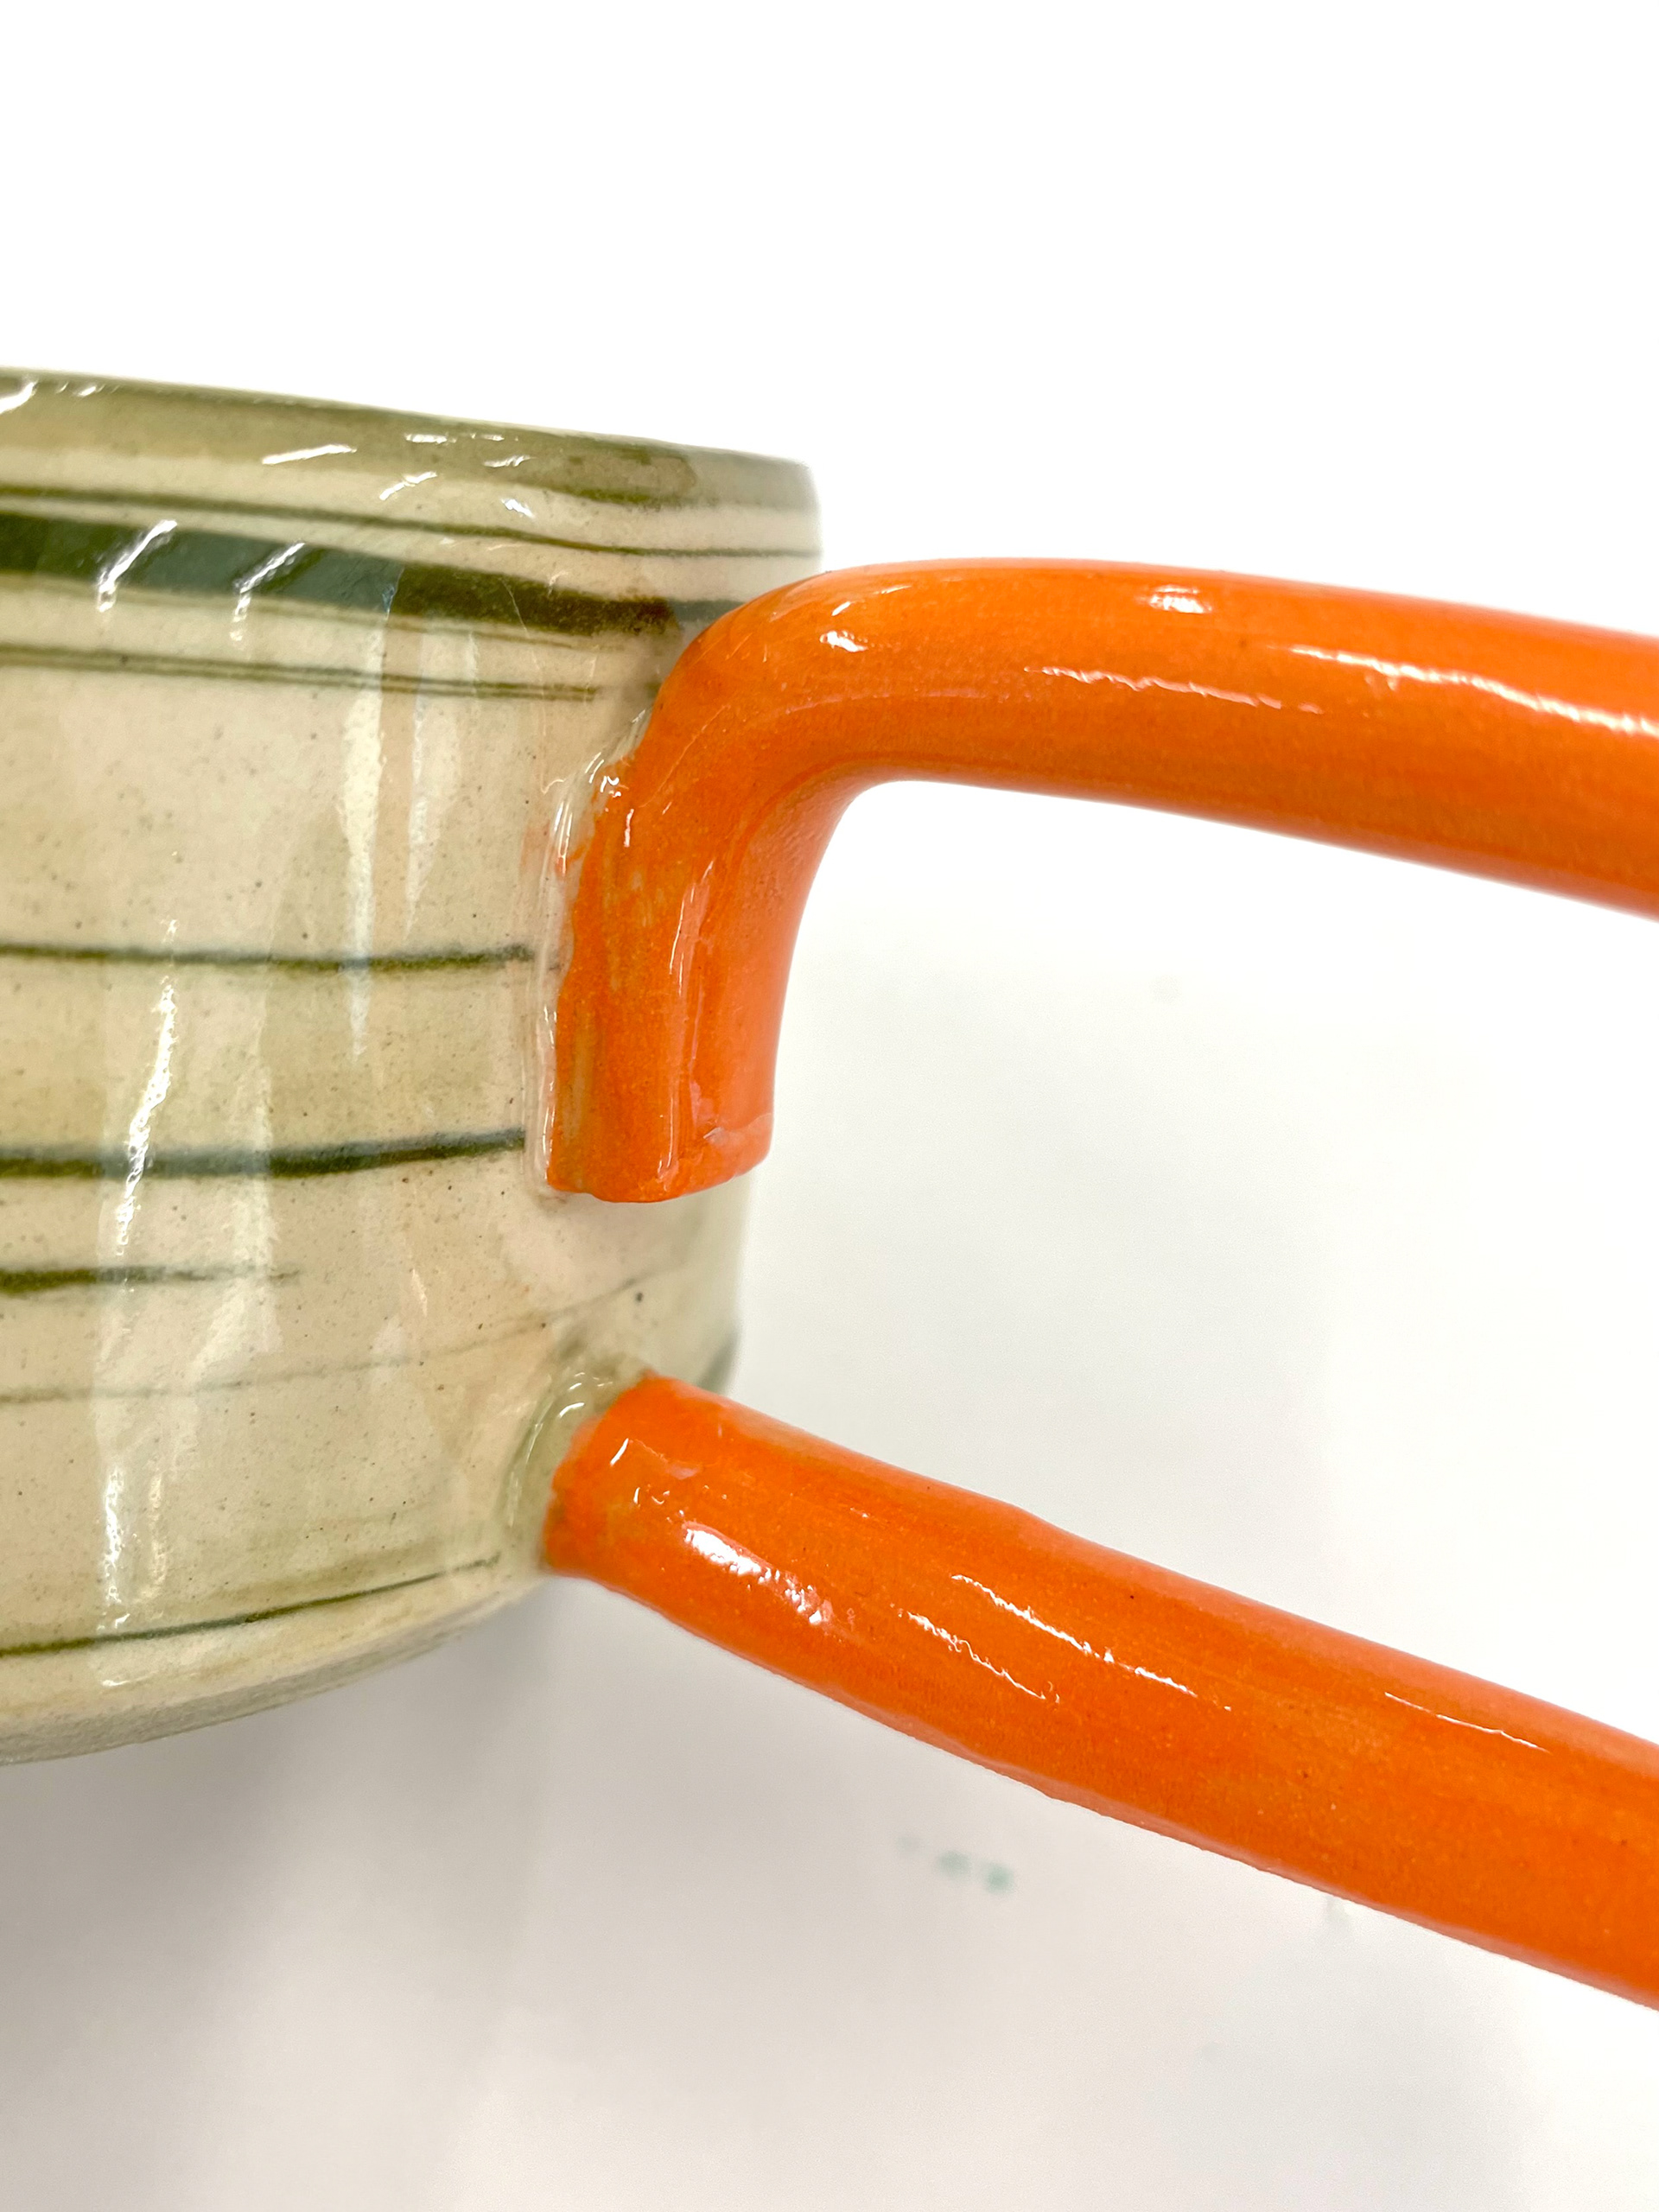
Attaching Handles

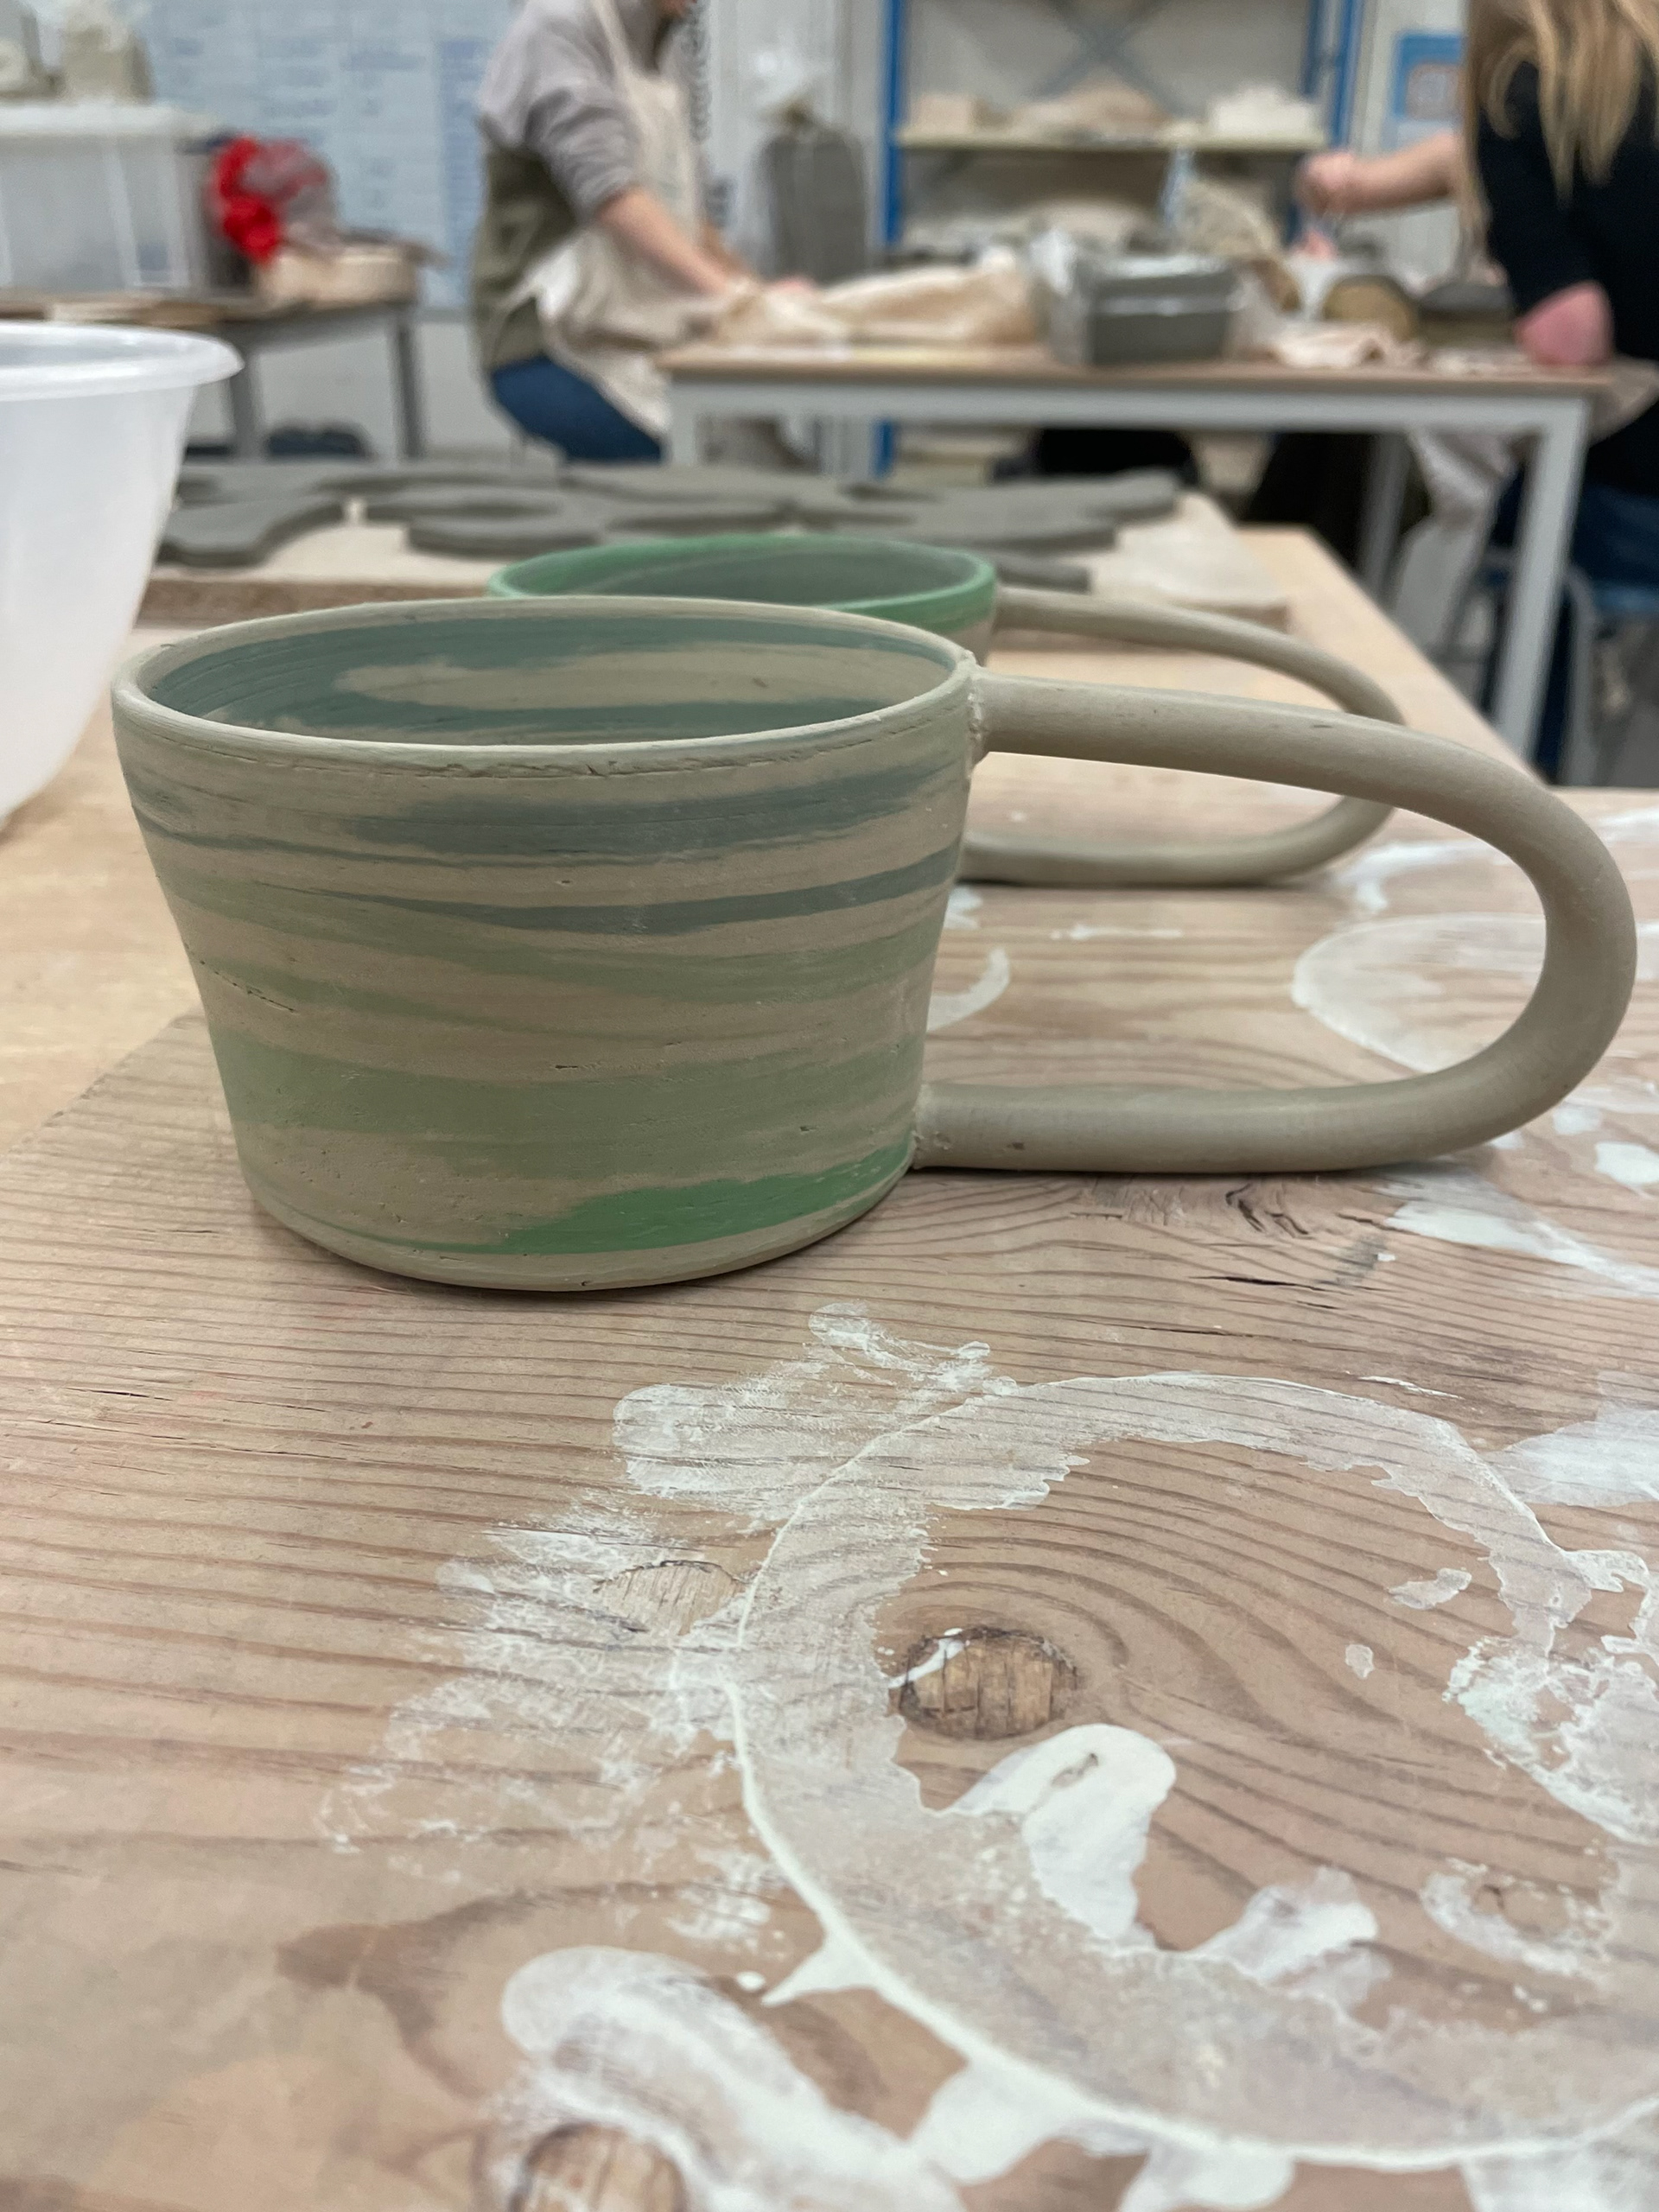

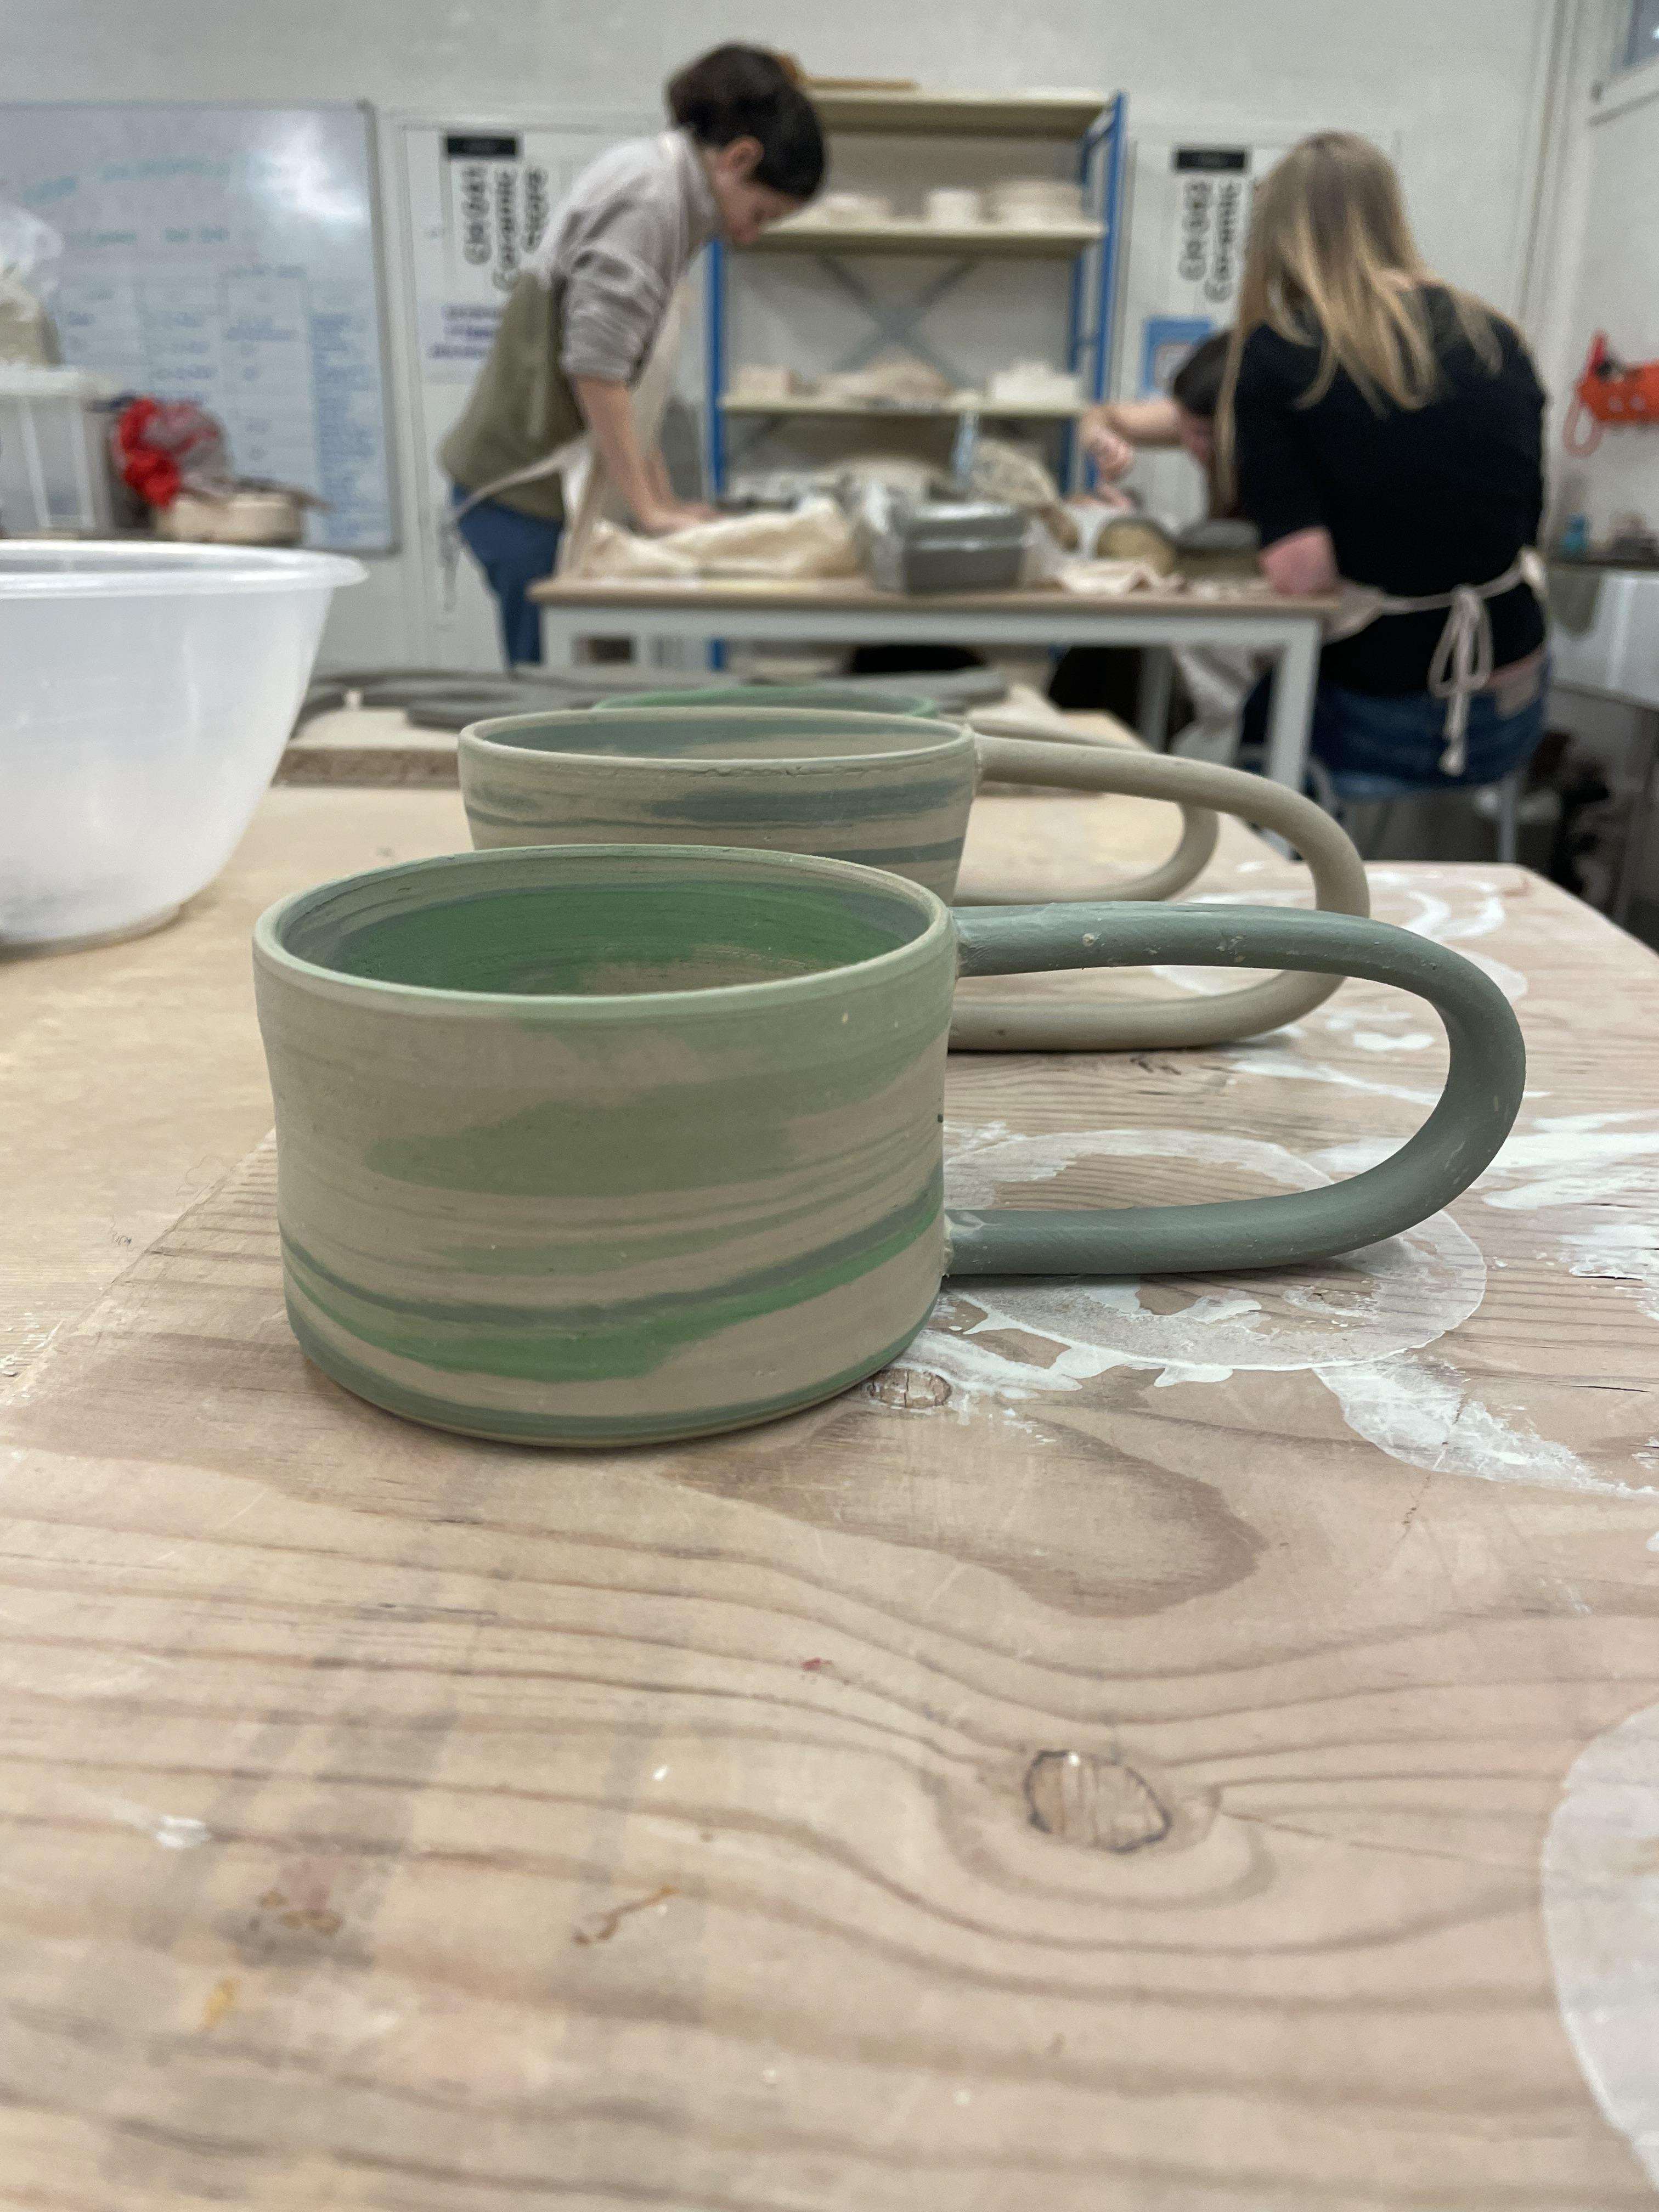
I rolled out different clay lengths for the handles to see which size I liked best. I then used the scoring and slurry technique to attach them, allowing them to get leather hard; therefore, they would dry and, at similar times, prevent cracking. These handles are not perfectly round but have a slightly curved edge. I scored the handle and mug and applied pressure to the area, allowing for solid security. I found it challenging to align the handles straight as they are delicate. They weren't very sturdy to apply. I also wanted to add a bit of clay at the base of the attachment to add additional security; however, this would mean that my marbled-coloured clay would be marked. Cleaning up the handles was also challenging due to the coloured layers, so I had to be careful not to smudge and ruin the pattern. I found using a rubber tool and a kidney was best for clean-ups.
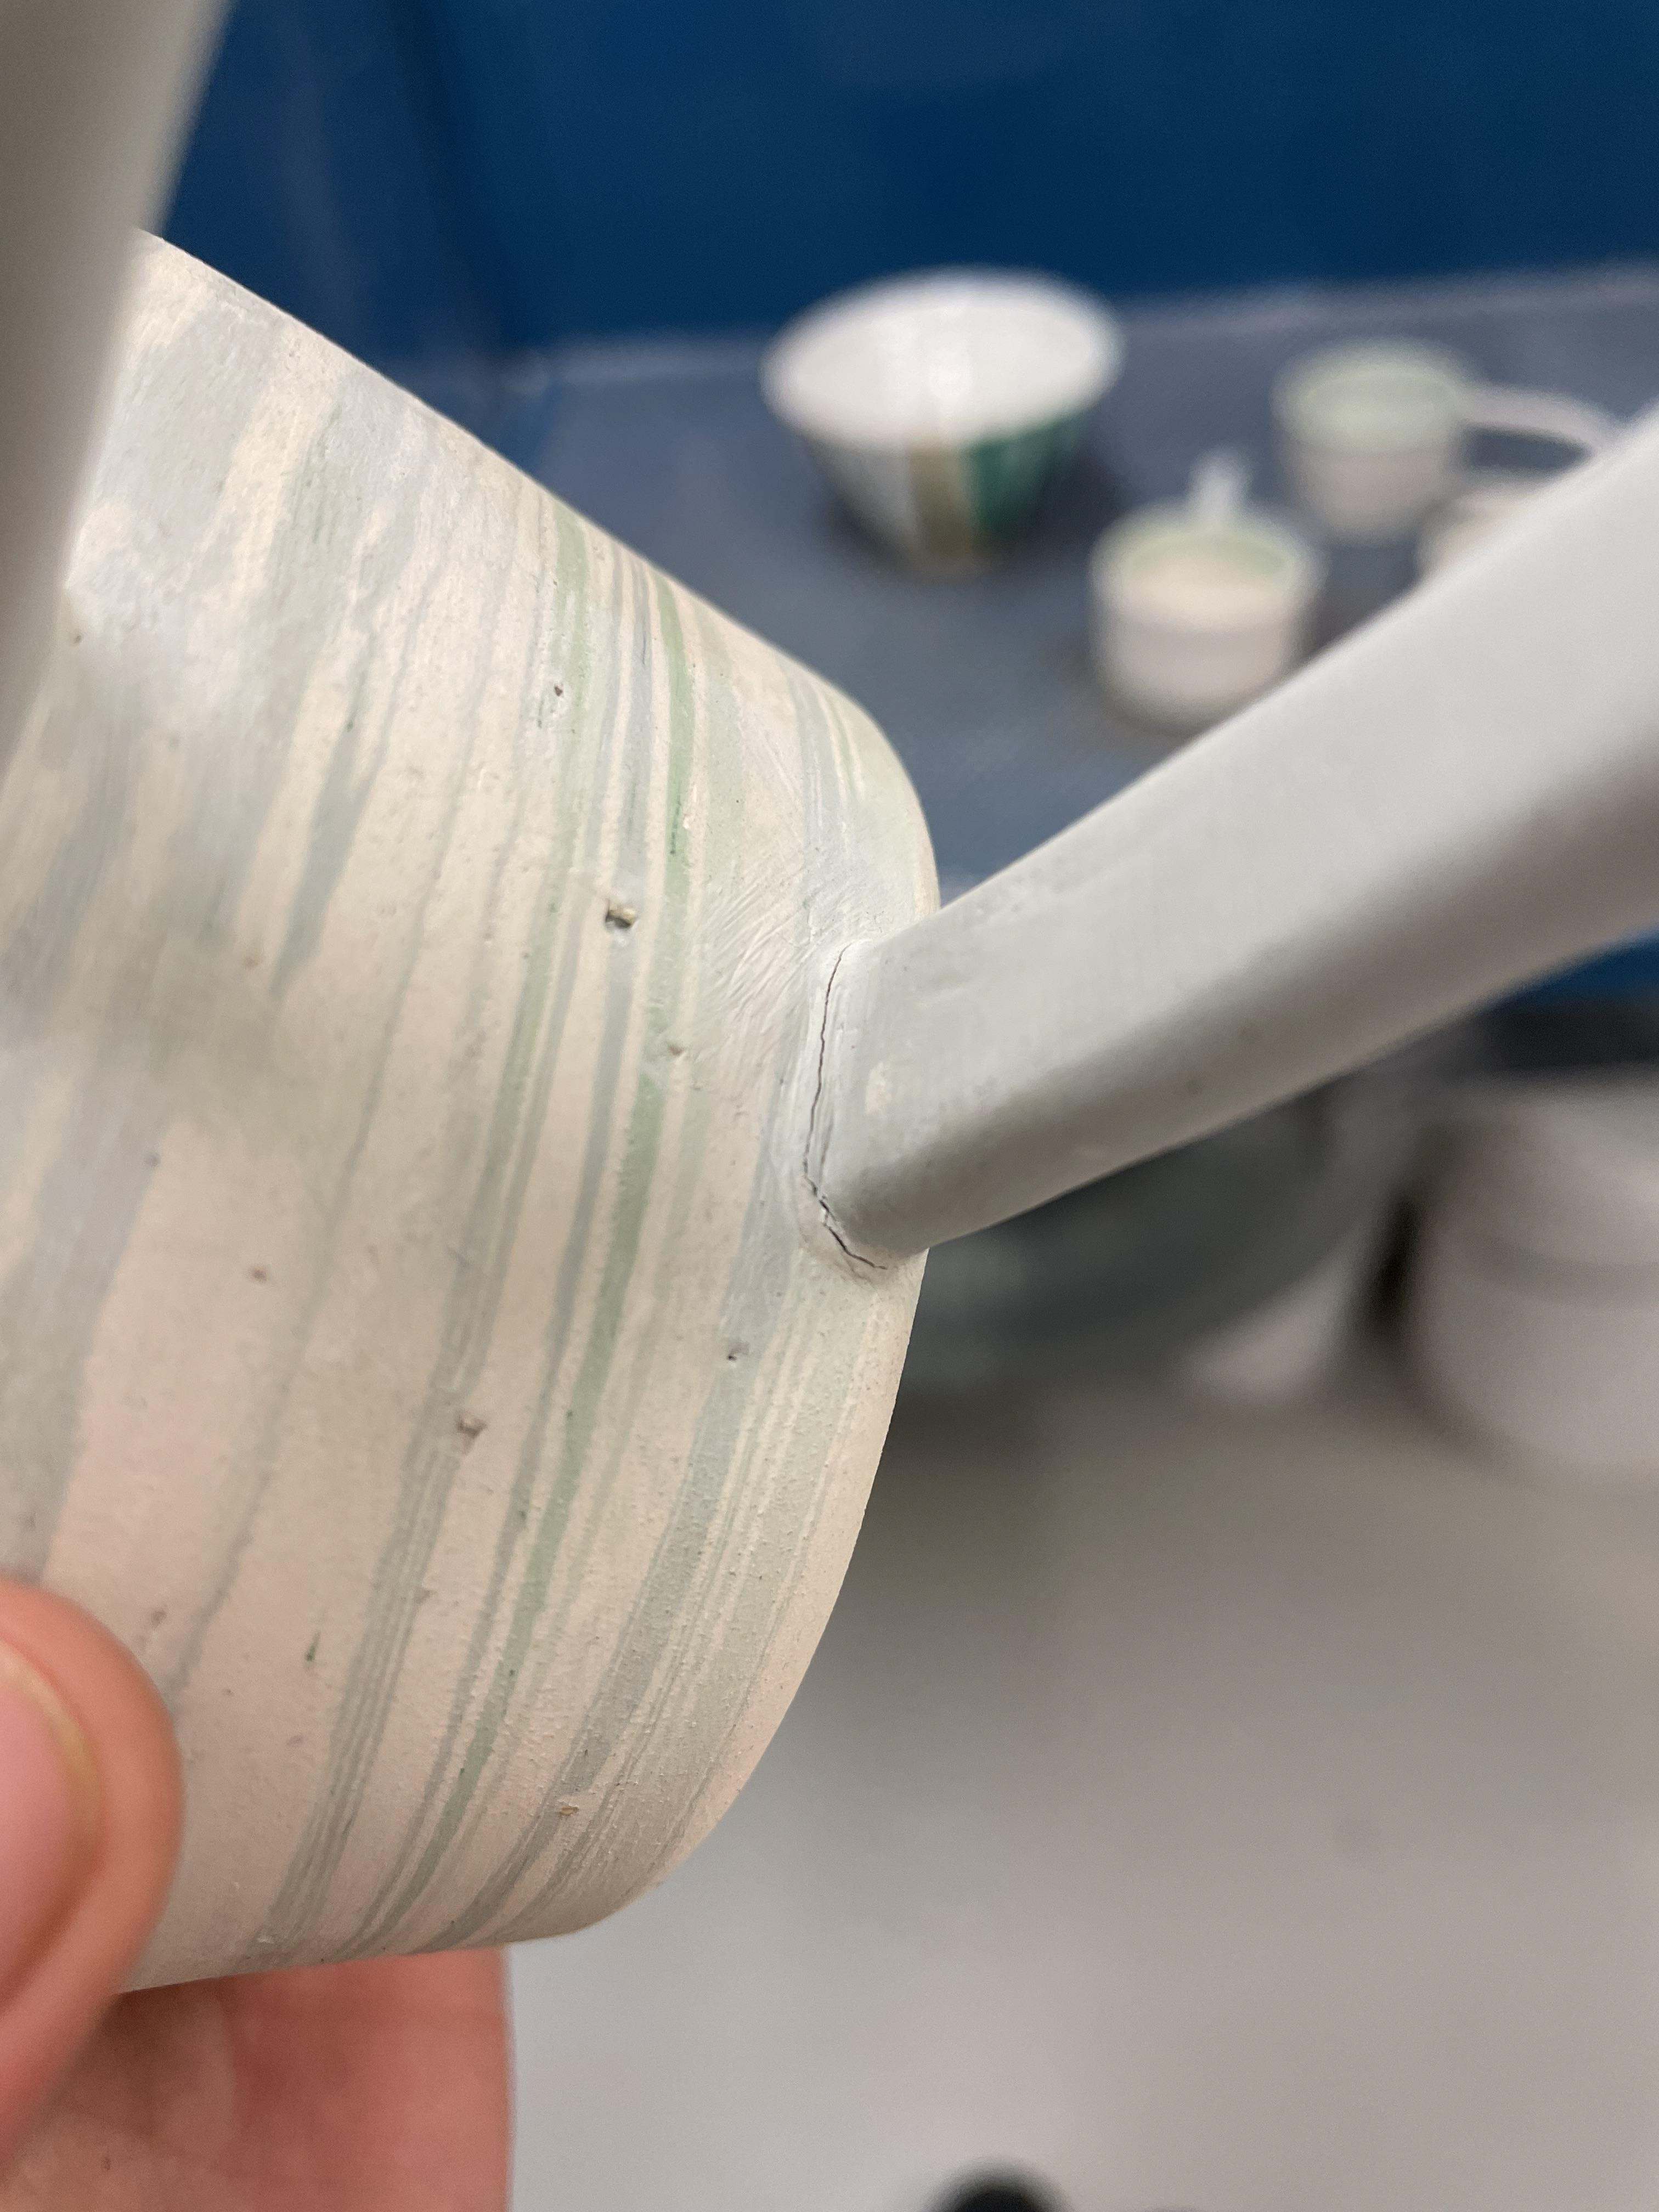


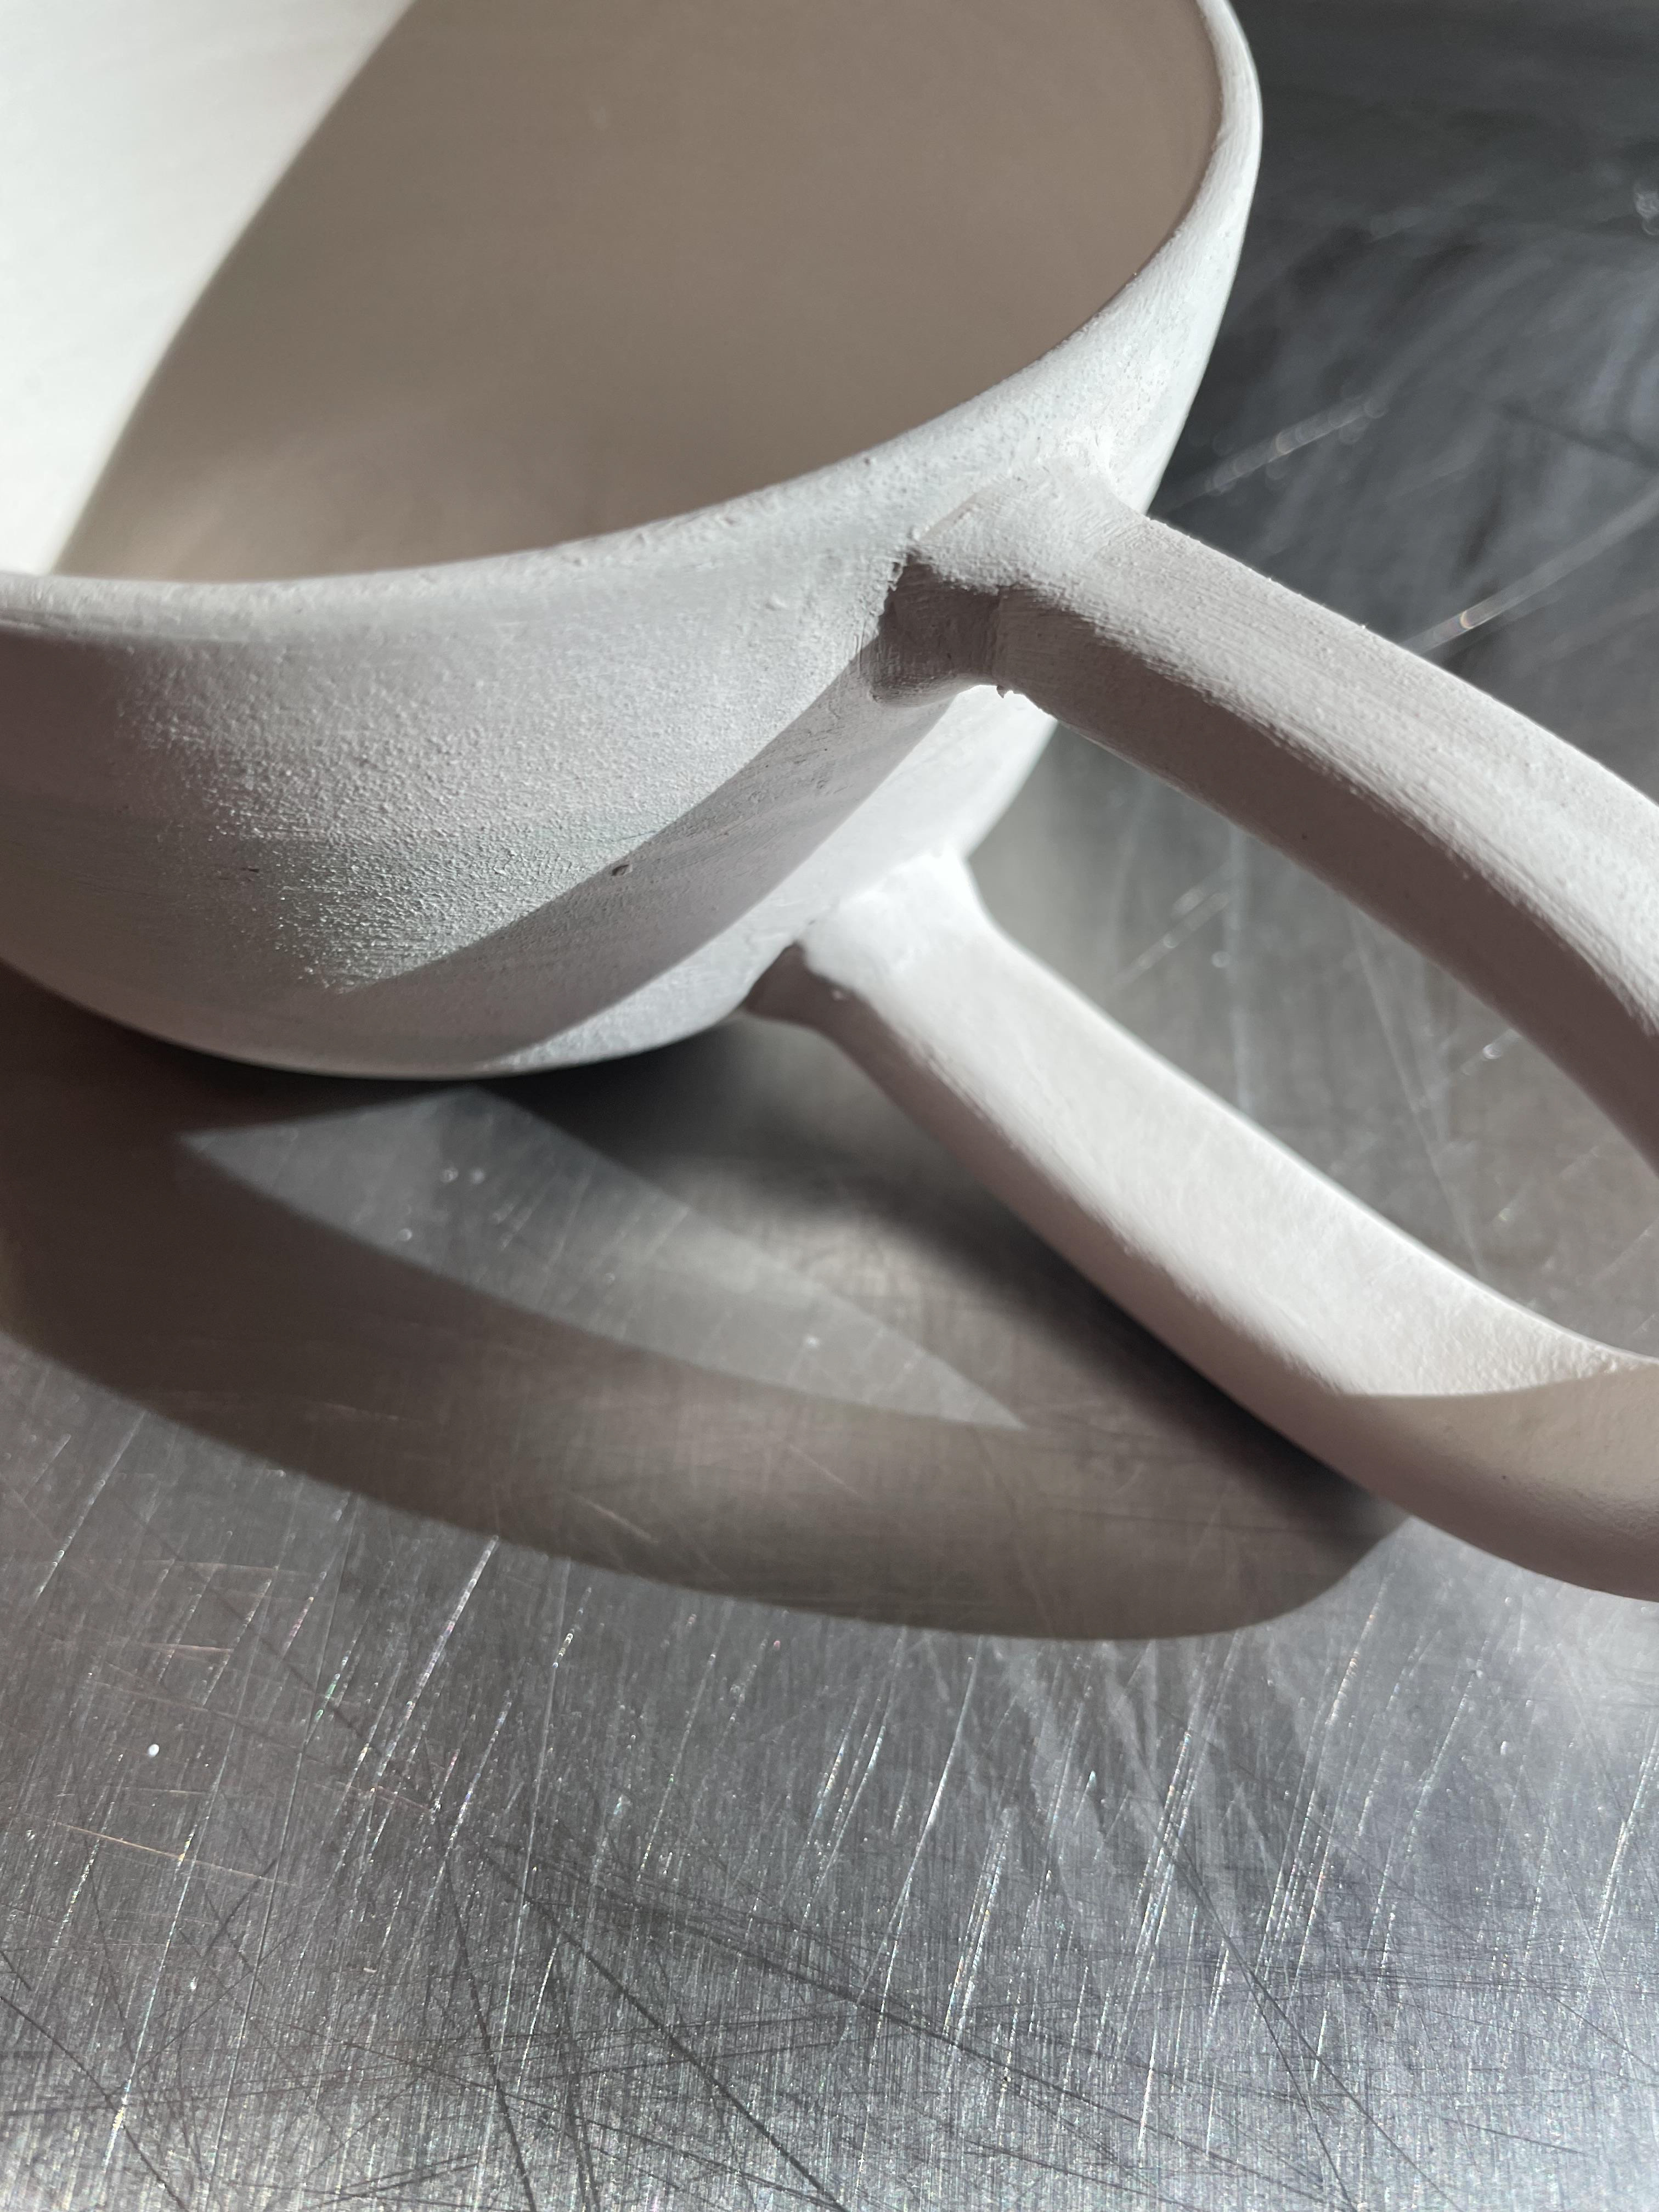
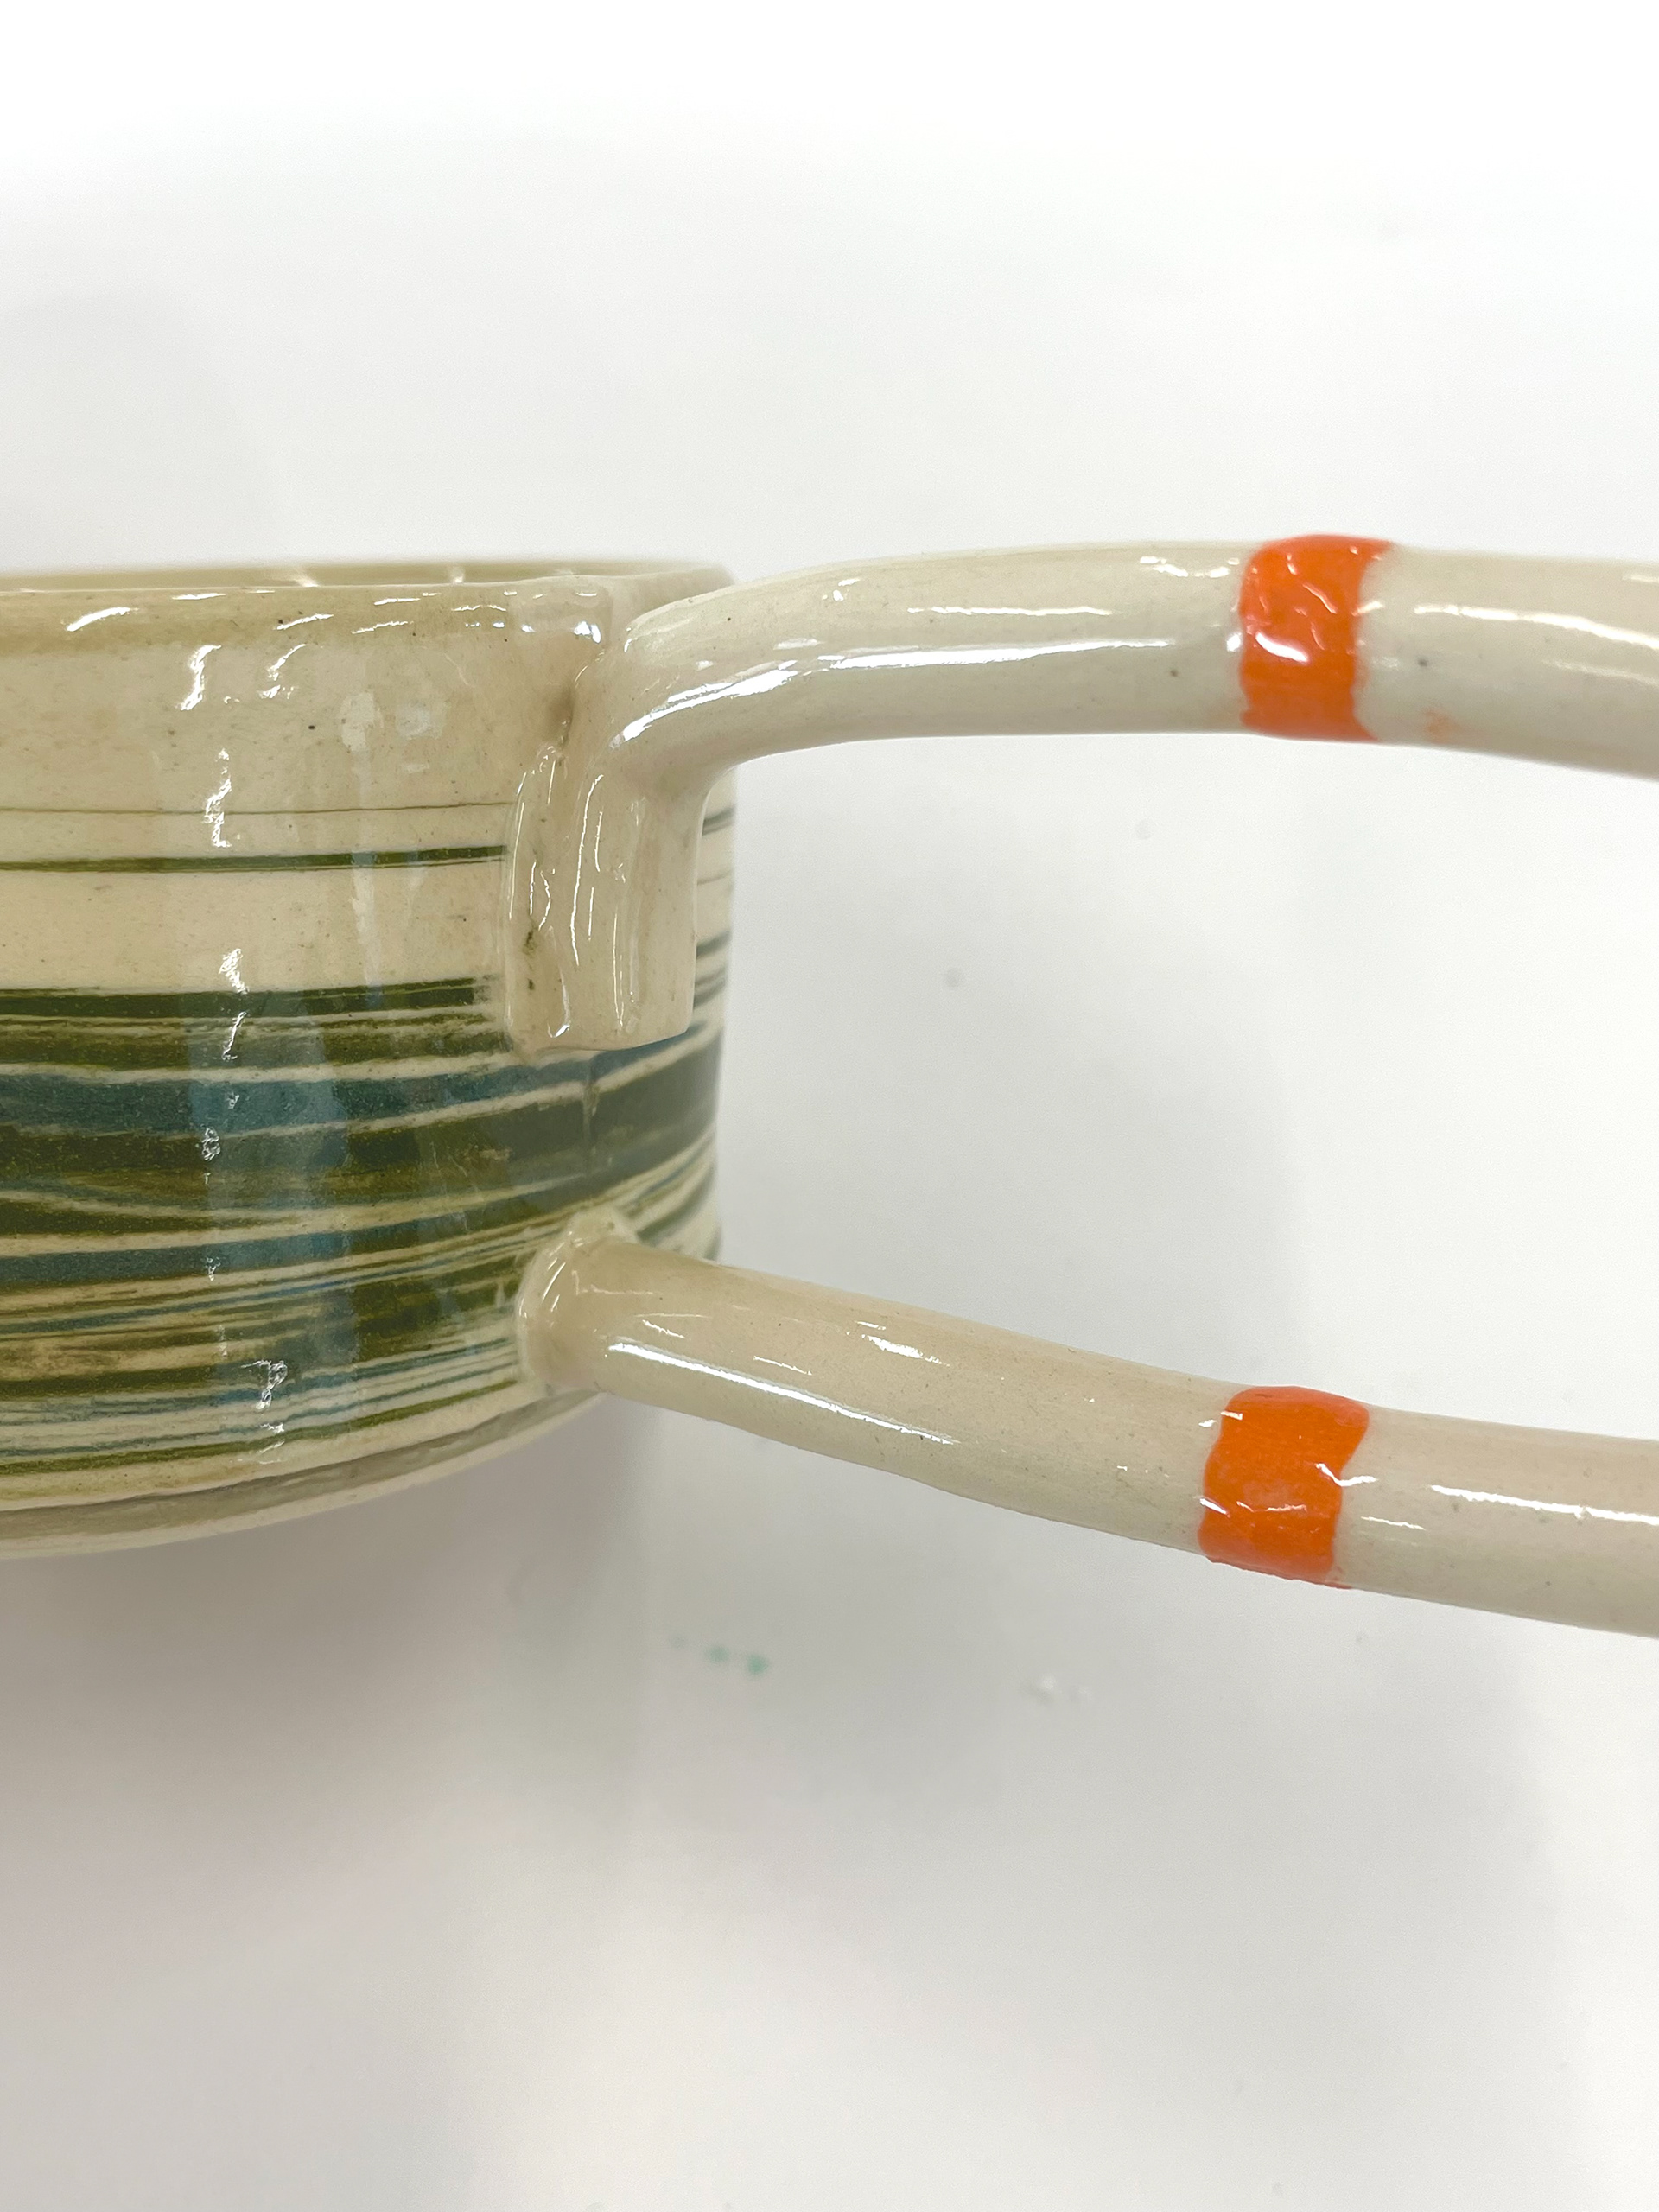
Coming out of their bisque fire, I noticed cracks and breaks in the handles. I need to find a more secure way of attaching the handles, which still have the same length. The handles were also attached to the base so that the bottom of the handles and mugs couldn't be glazed, as they would have to be on the kiln shelf. I wouldn't say I liked the look of half of a handle being glazed. It looked unfinished and uncompleted; by having a rim, the handles would be attached at the top of the rim, giving a gap between handle and base, allowing me to glaze the body of the mug and have a whole finish
Reflecting My Glazing
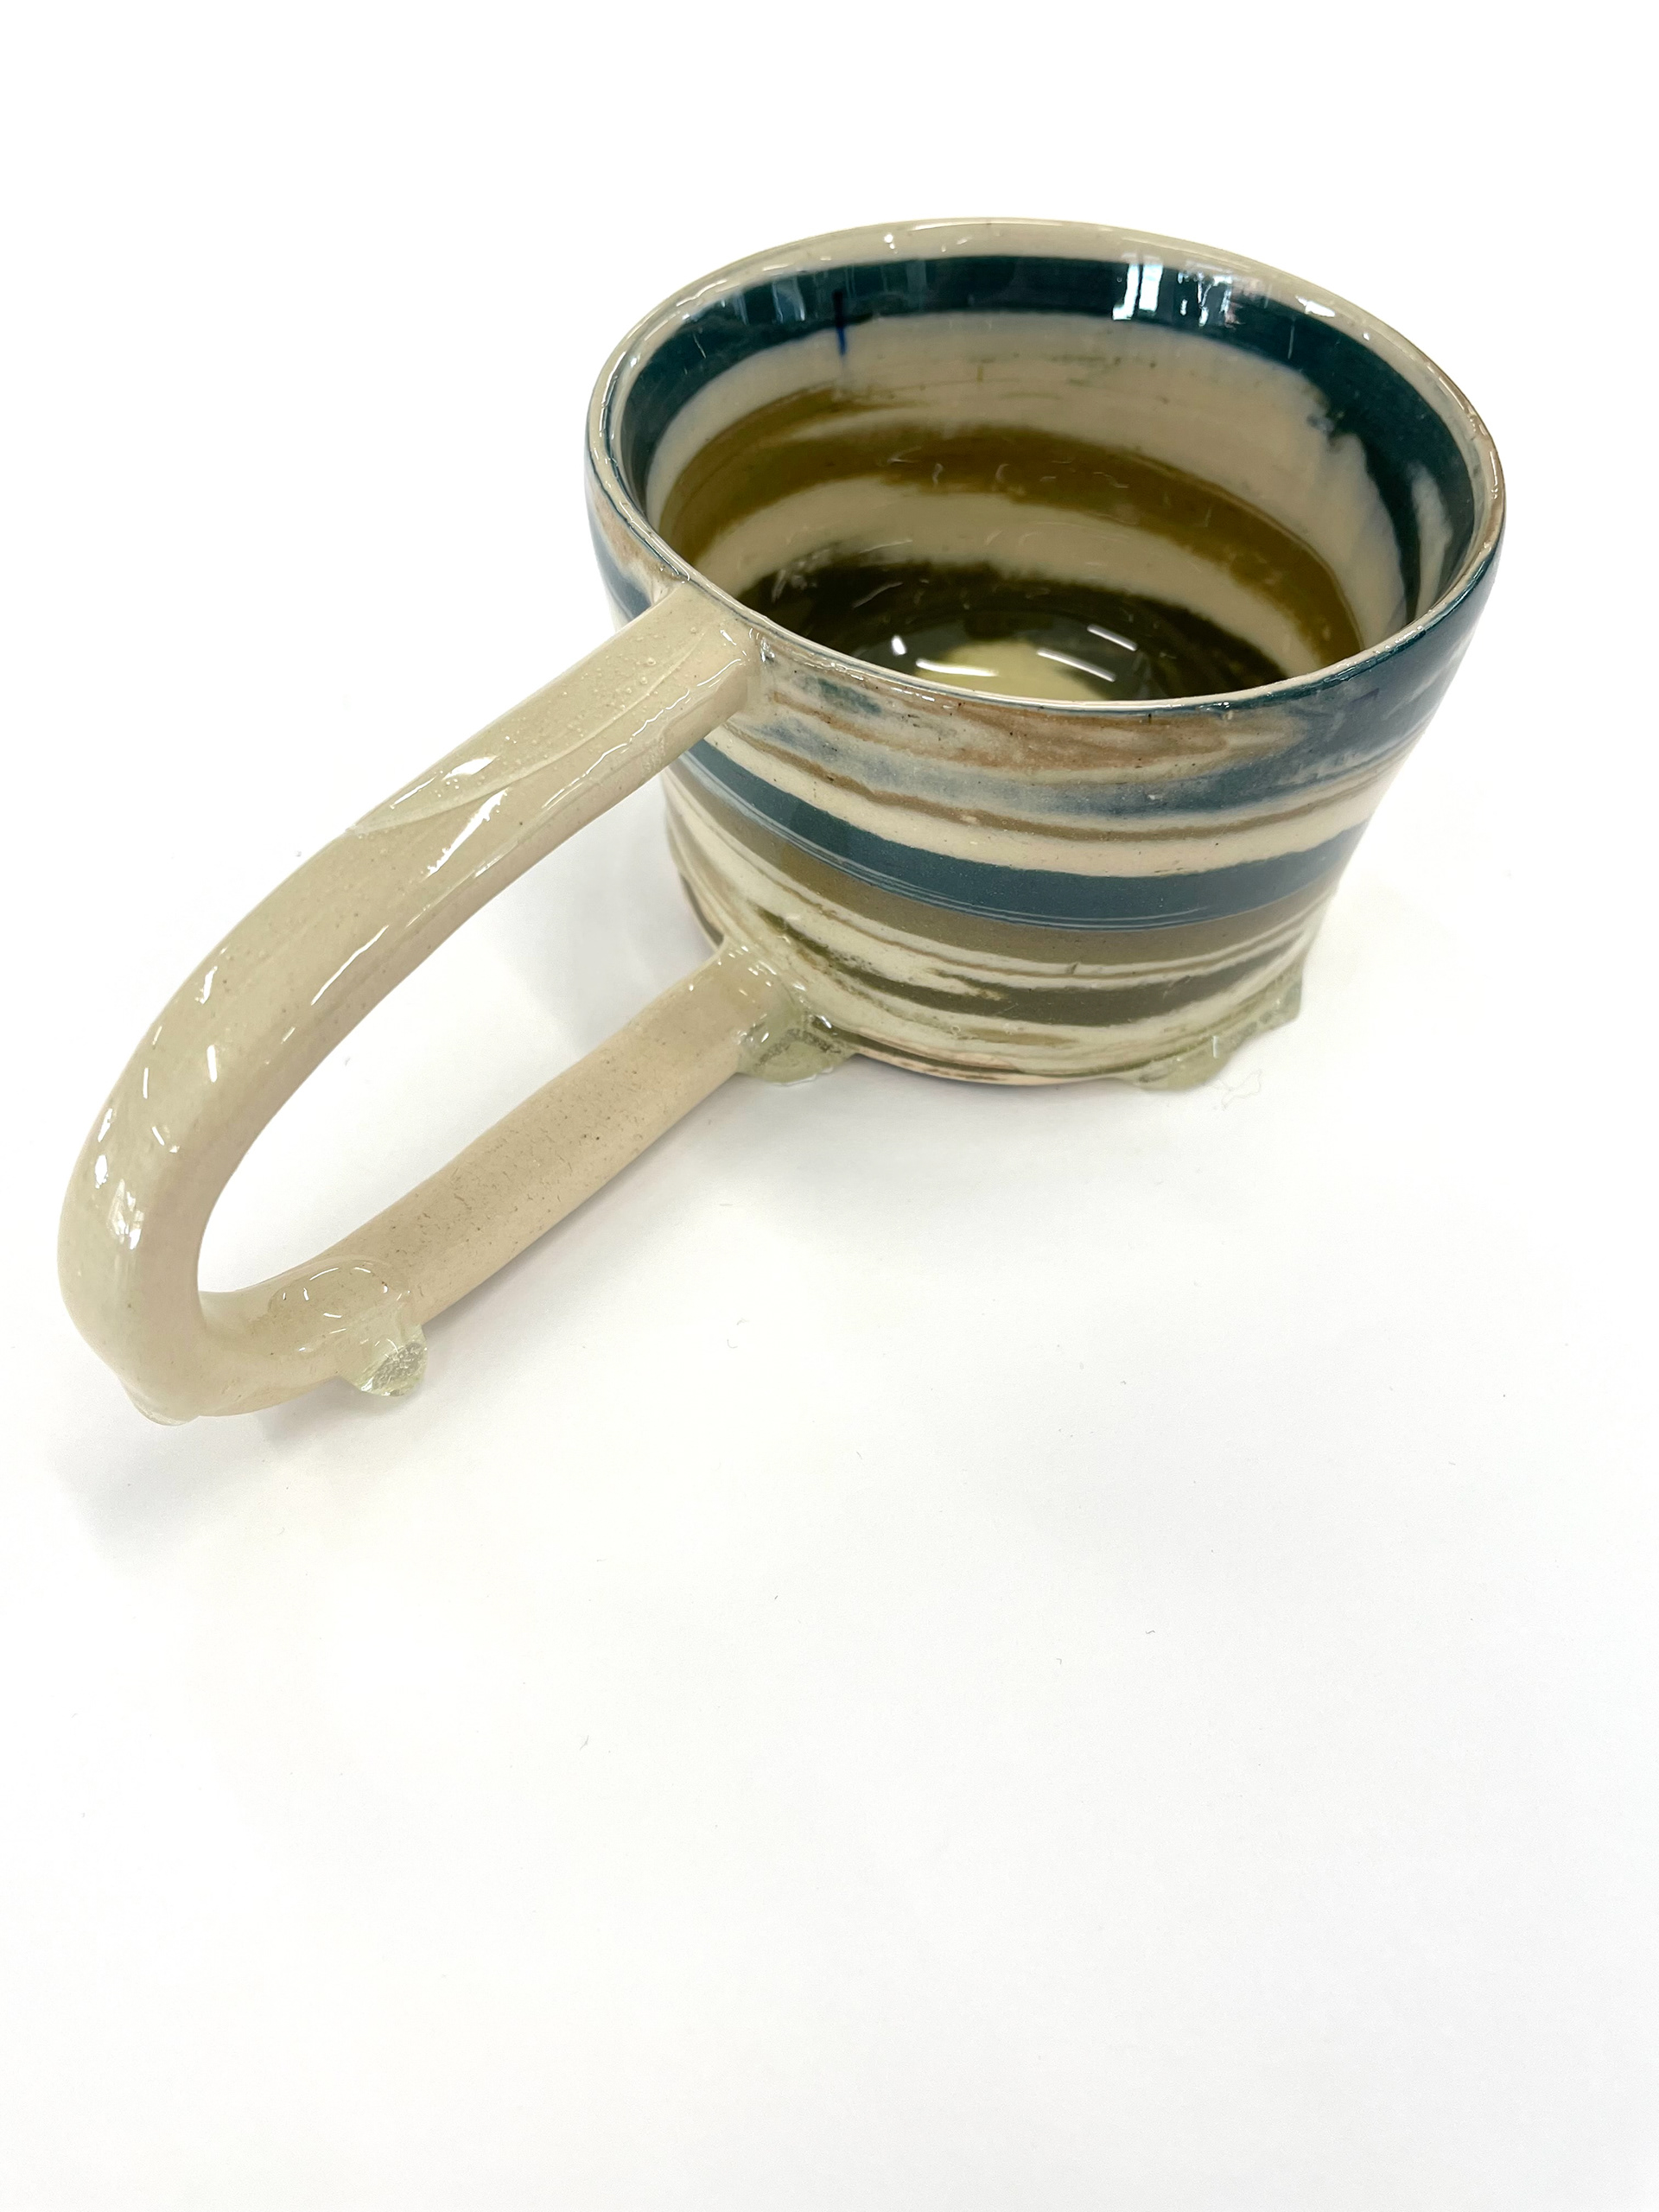

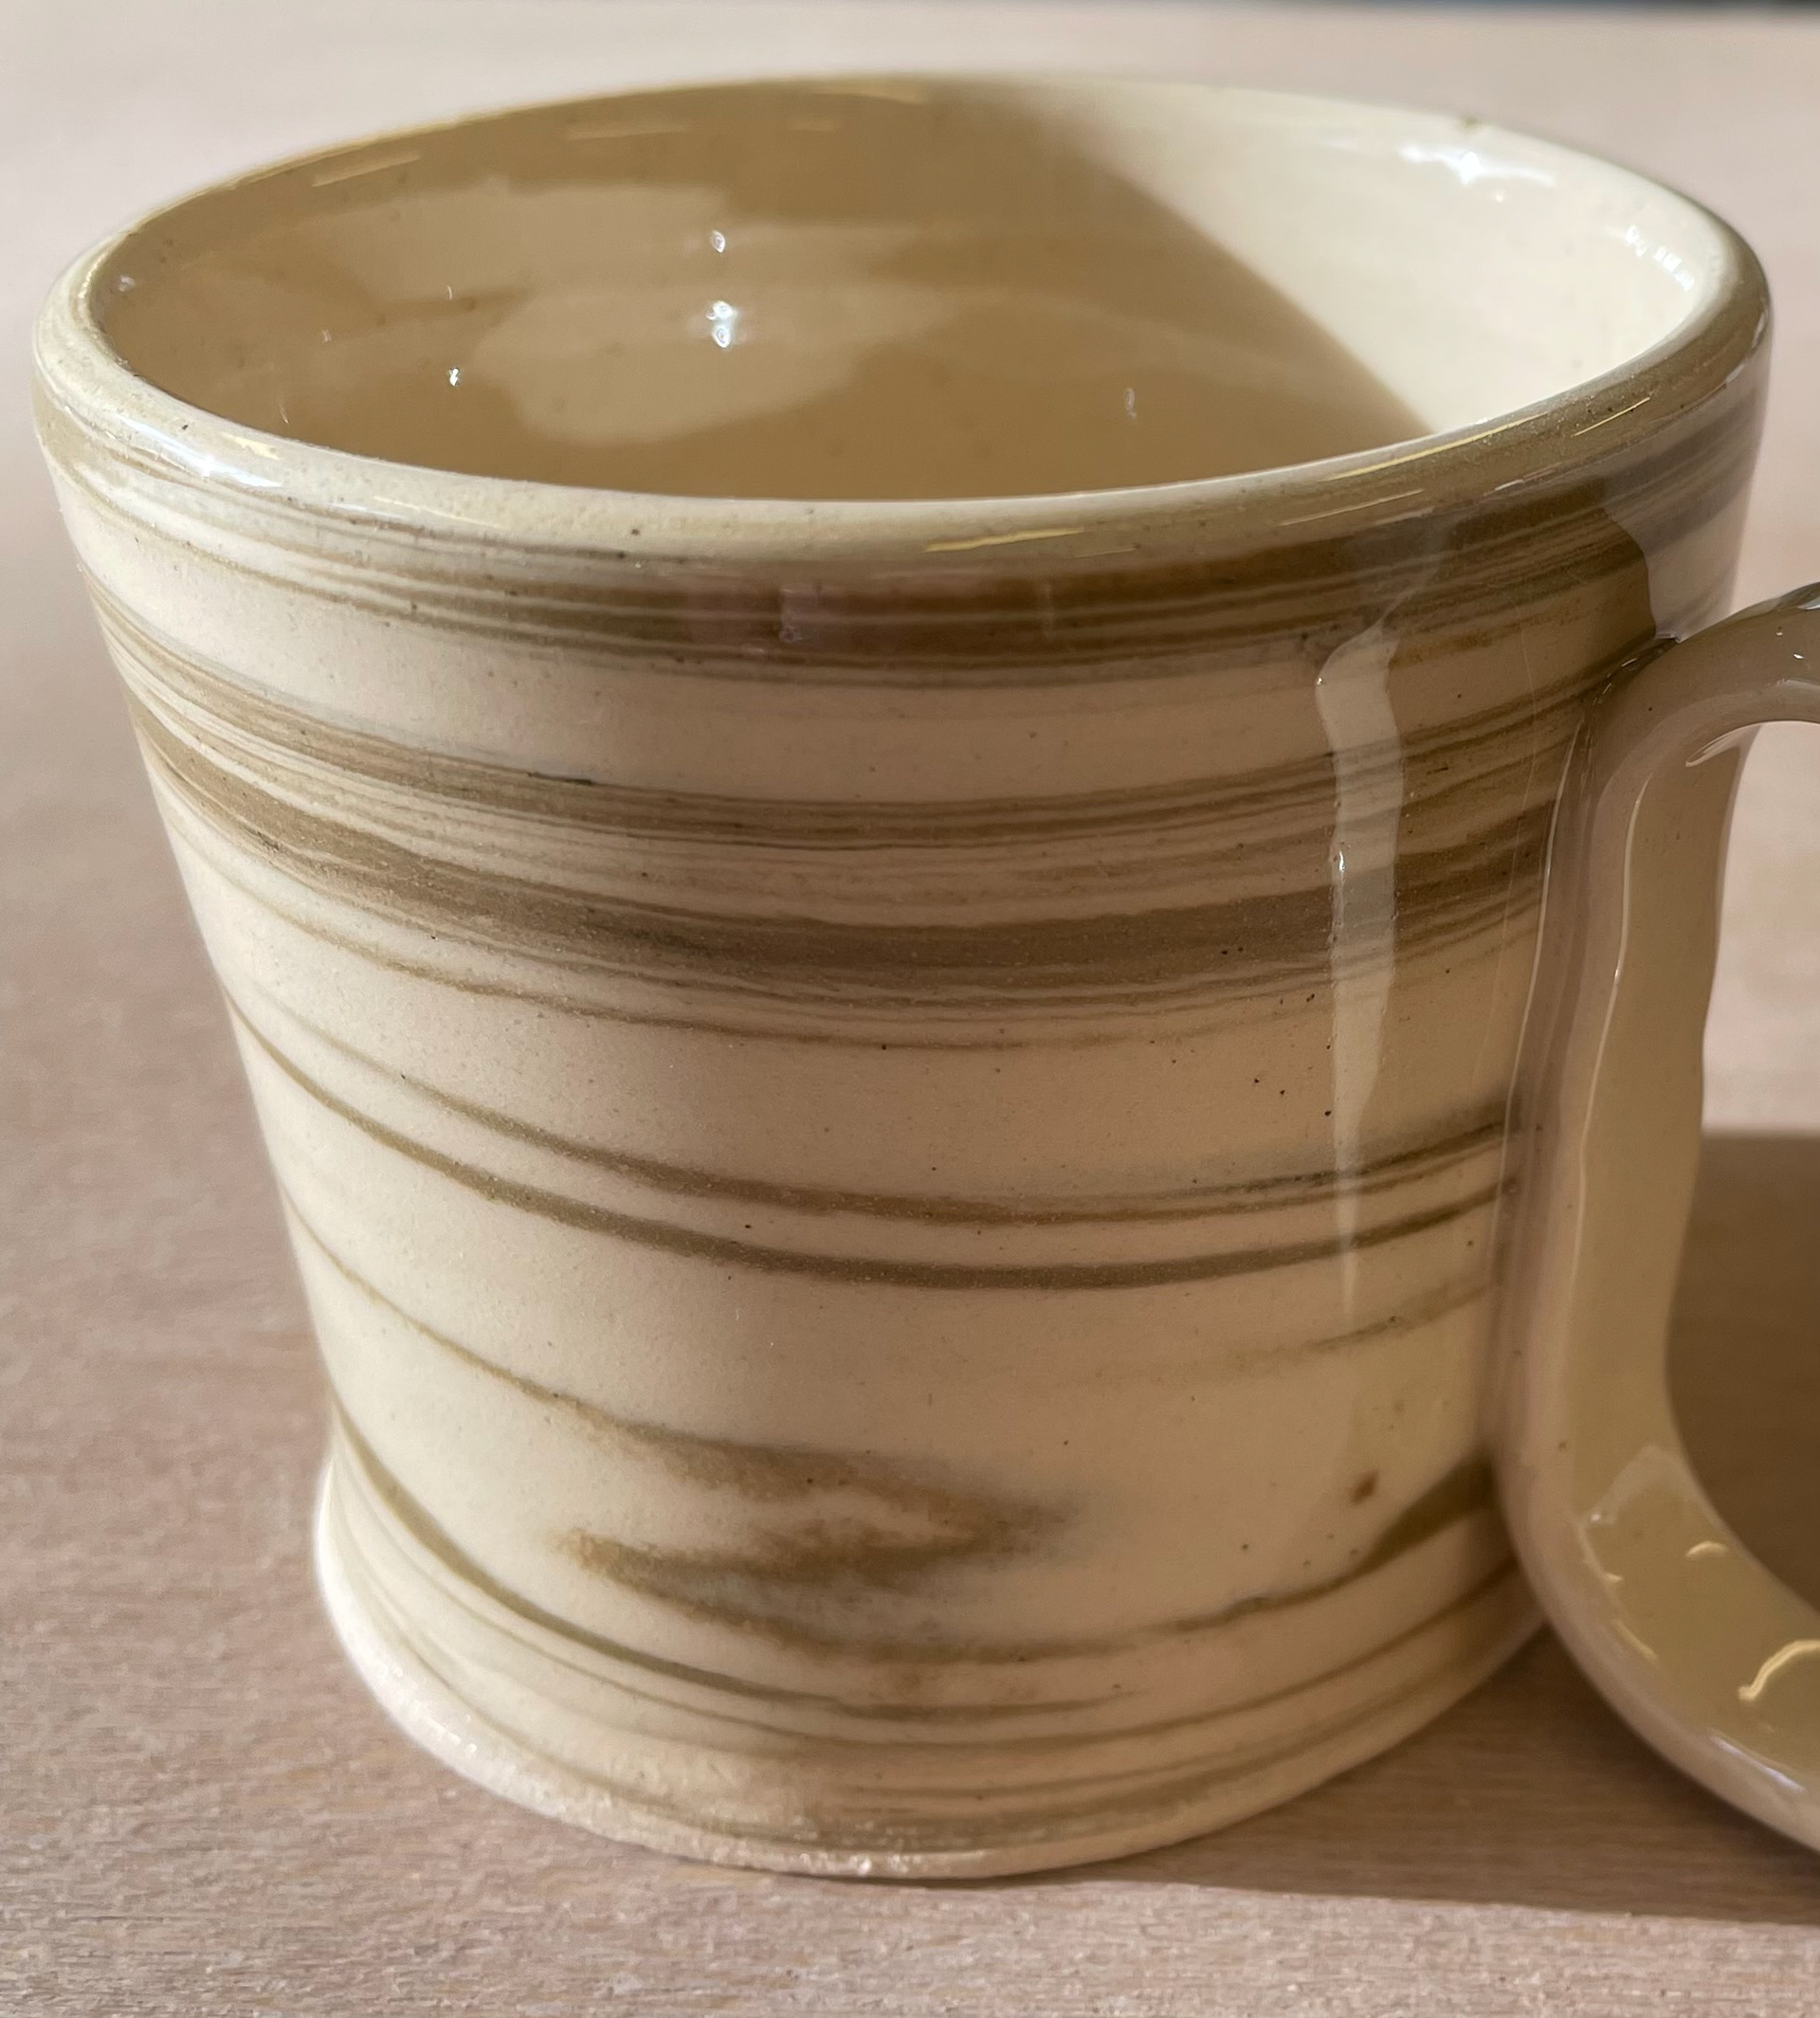
I glazed my mugs with clear, shining earthenware glaze. I want to use this glaze as it allowed the mixed colours to be shown and gave the mugs a smooth finish. However, when I glazed these mugs, I applied the glaze way too thick; the glaze needs to be thinner and more consistent. Not being the best at glazing, I usually pour glaze inside the mug, pour it out and then dip it in a bucket to cover the outside. The glaze was so thick it created bubbles on all the mugs, created glaze drops which were extremely harsh and sharp and layered the inside of the mug, taking around 10ml from the inside. This thickness of glaze is very extreme. I'm surprised it didn't crack the whole mug. I need to practise getting more consistent, smooth and thin glazing; this can be achieved two ways: either thinning out the glaze with water, which means it won't be absorbed as fast or using a glaze spray gun, which will allow me to get equal consistent glaze enabling me to be in control as its air pressure, it's more straightforward to apply.
Practising Making Saucers
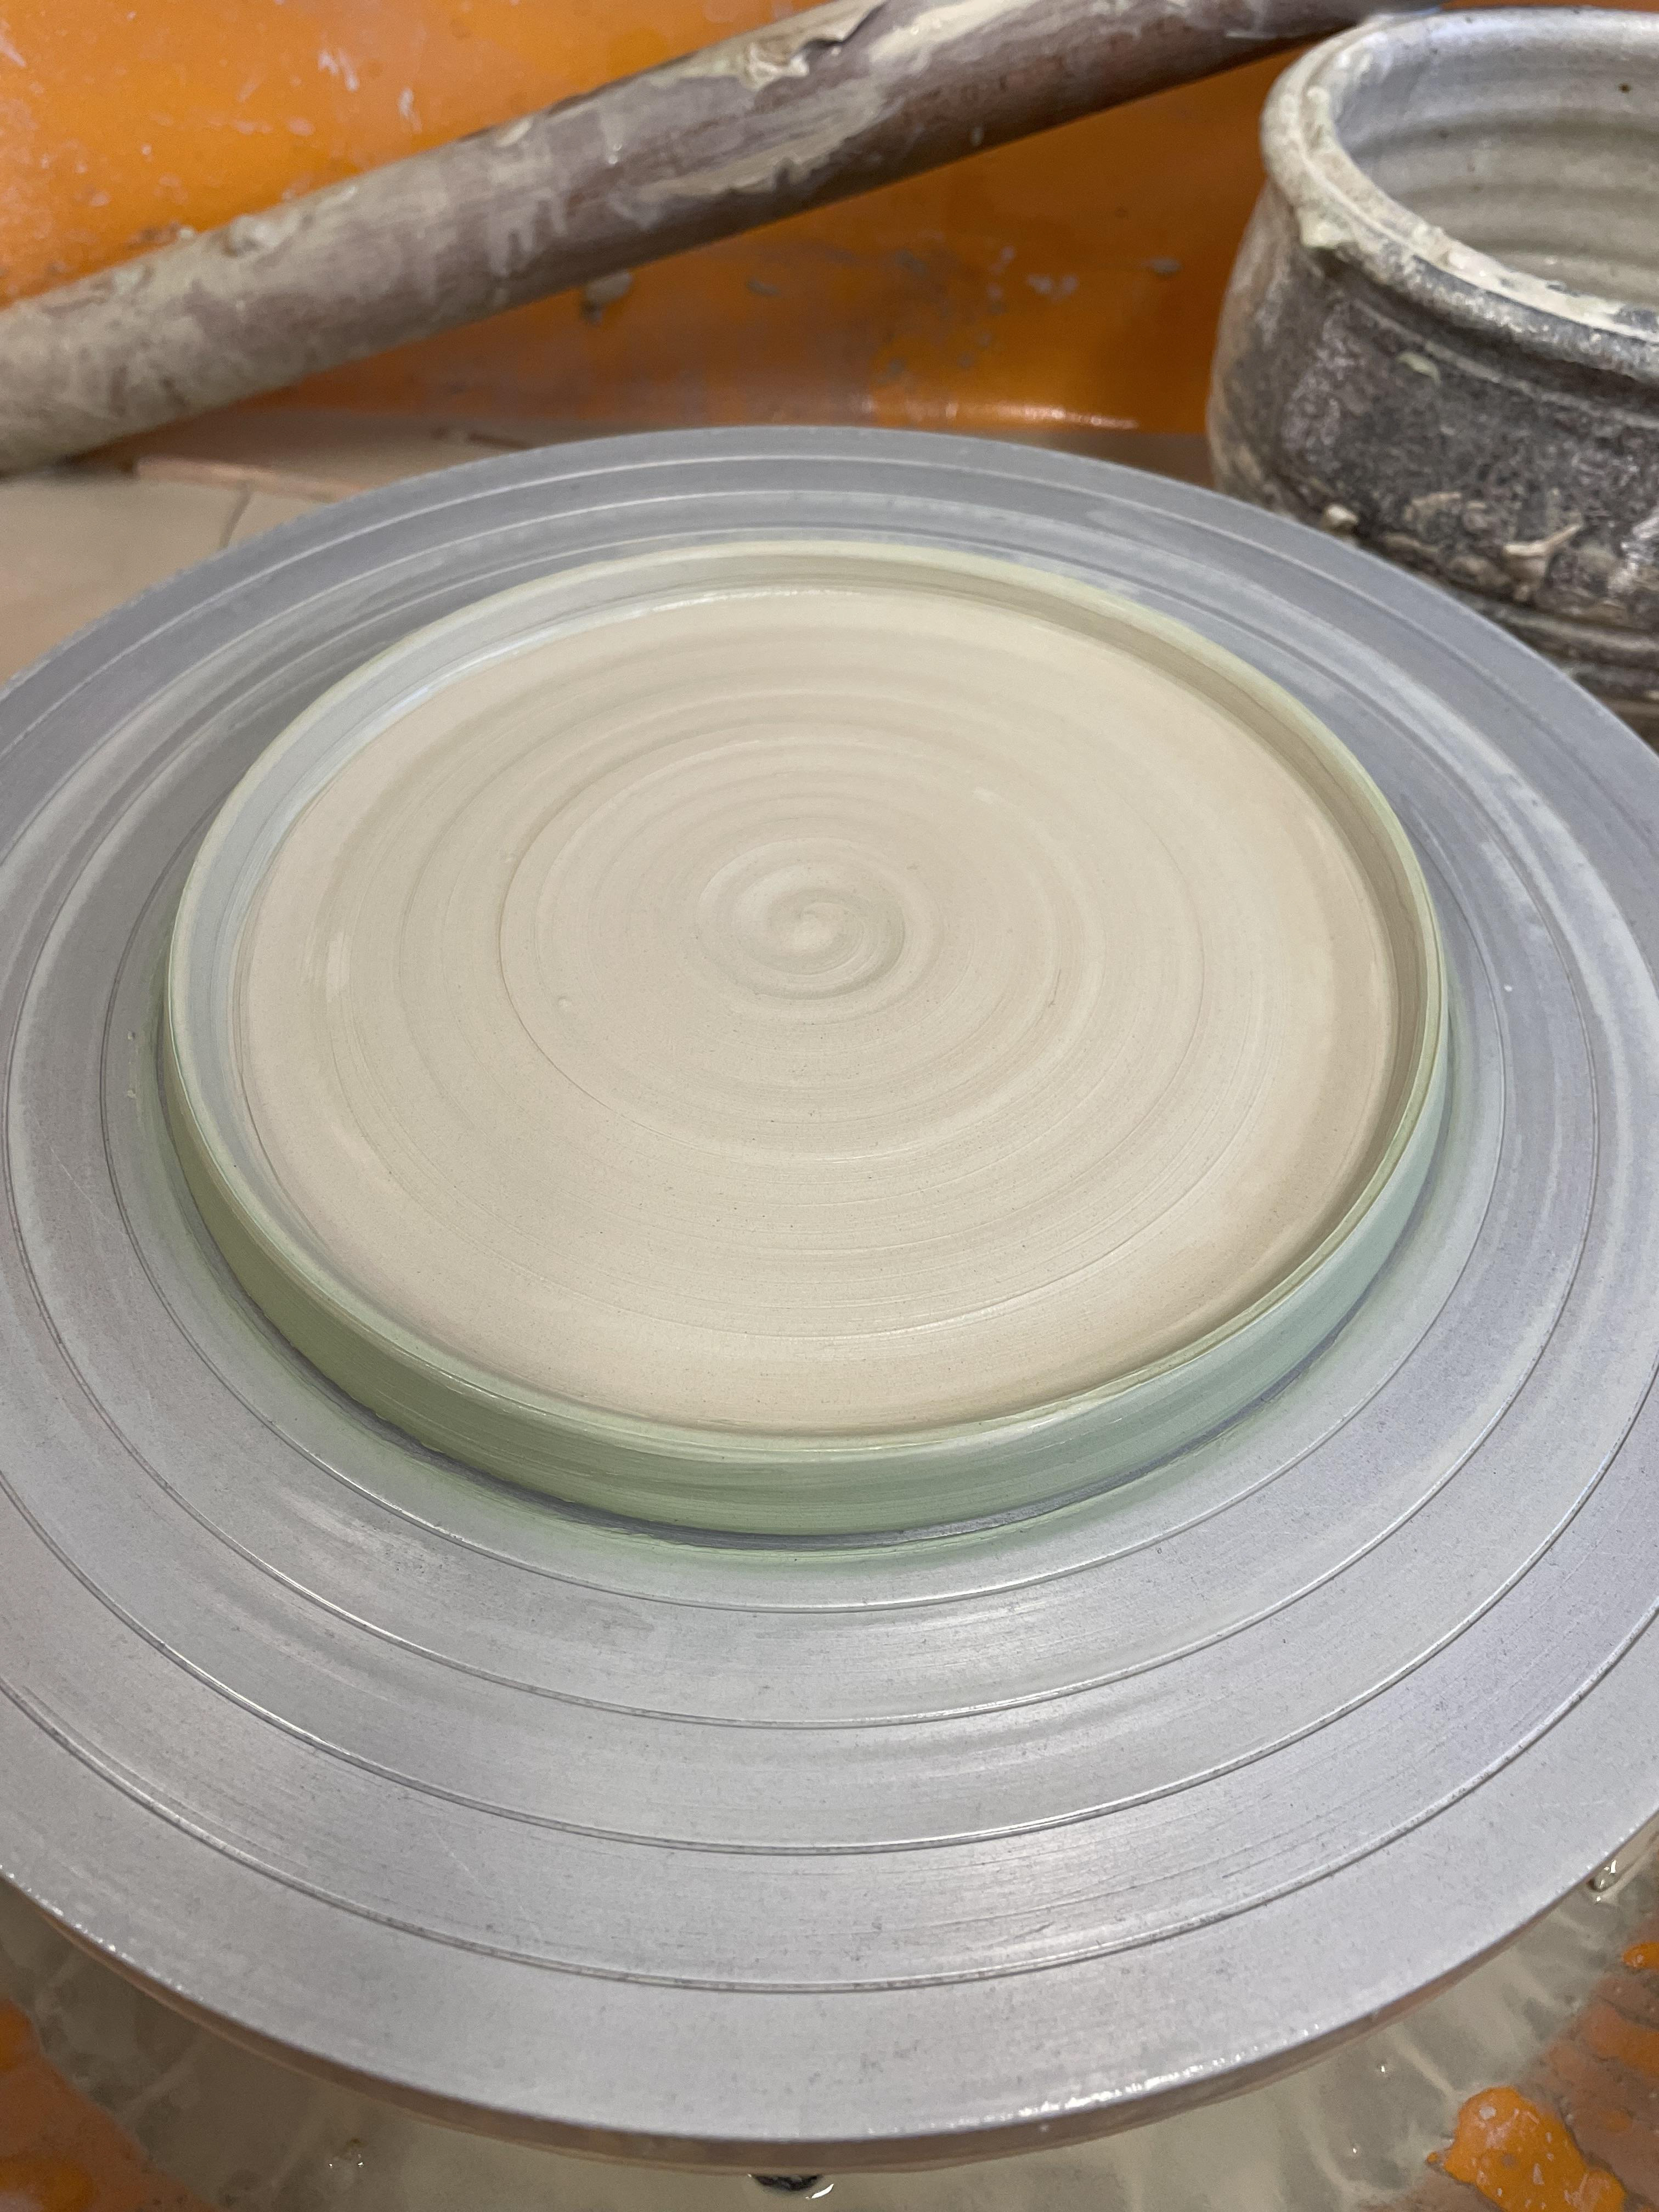
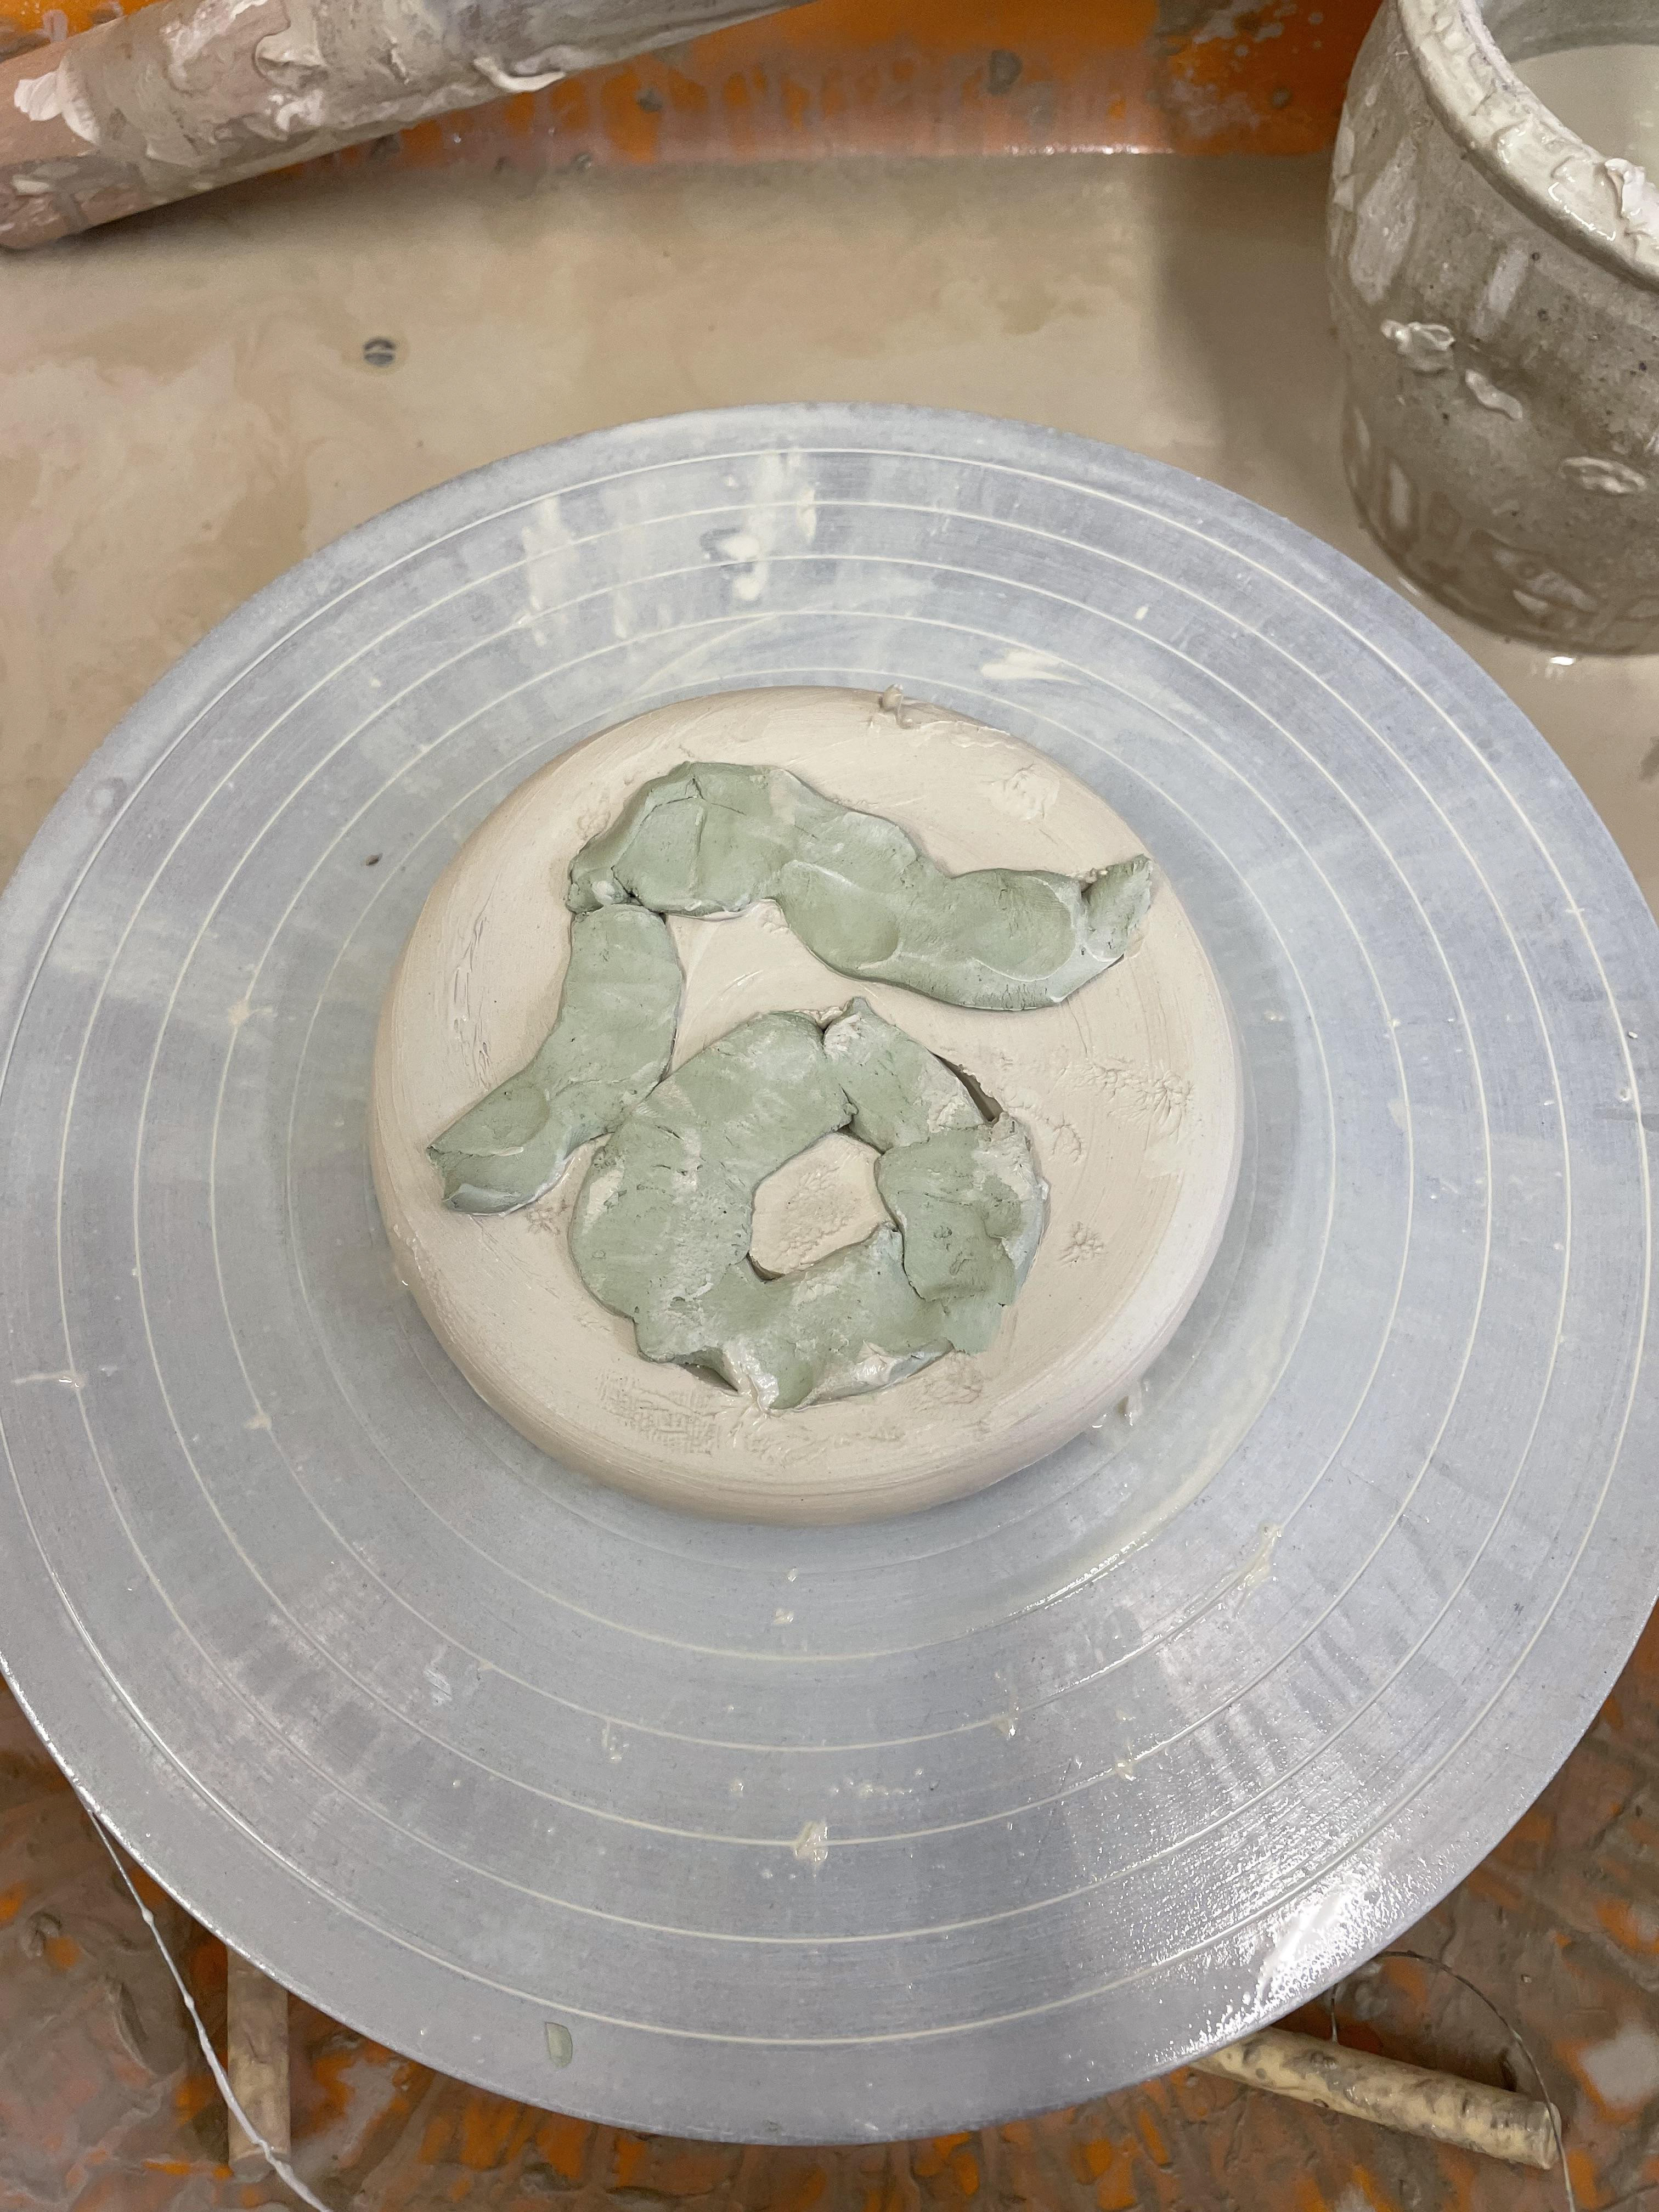
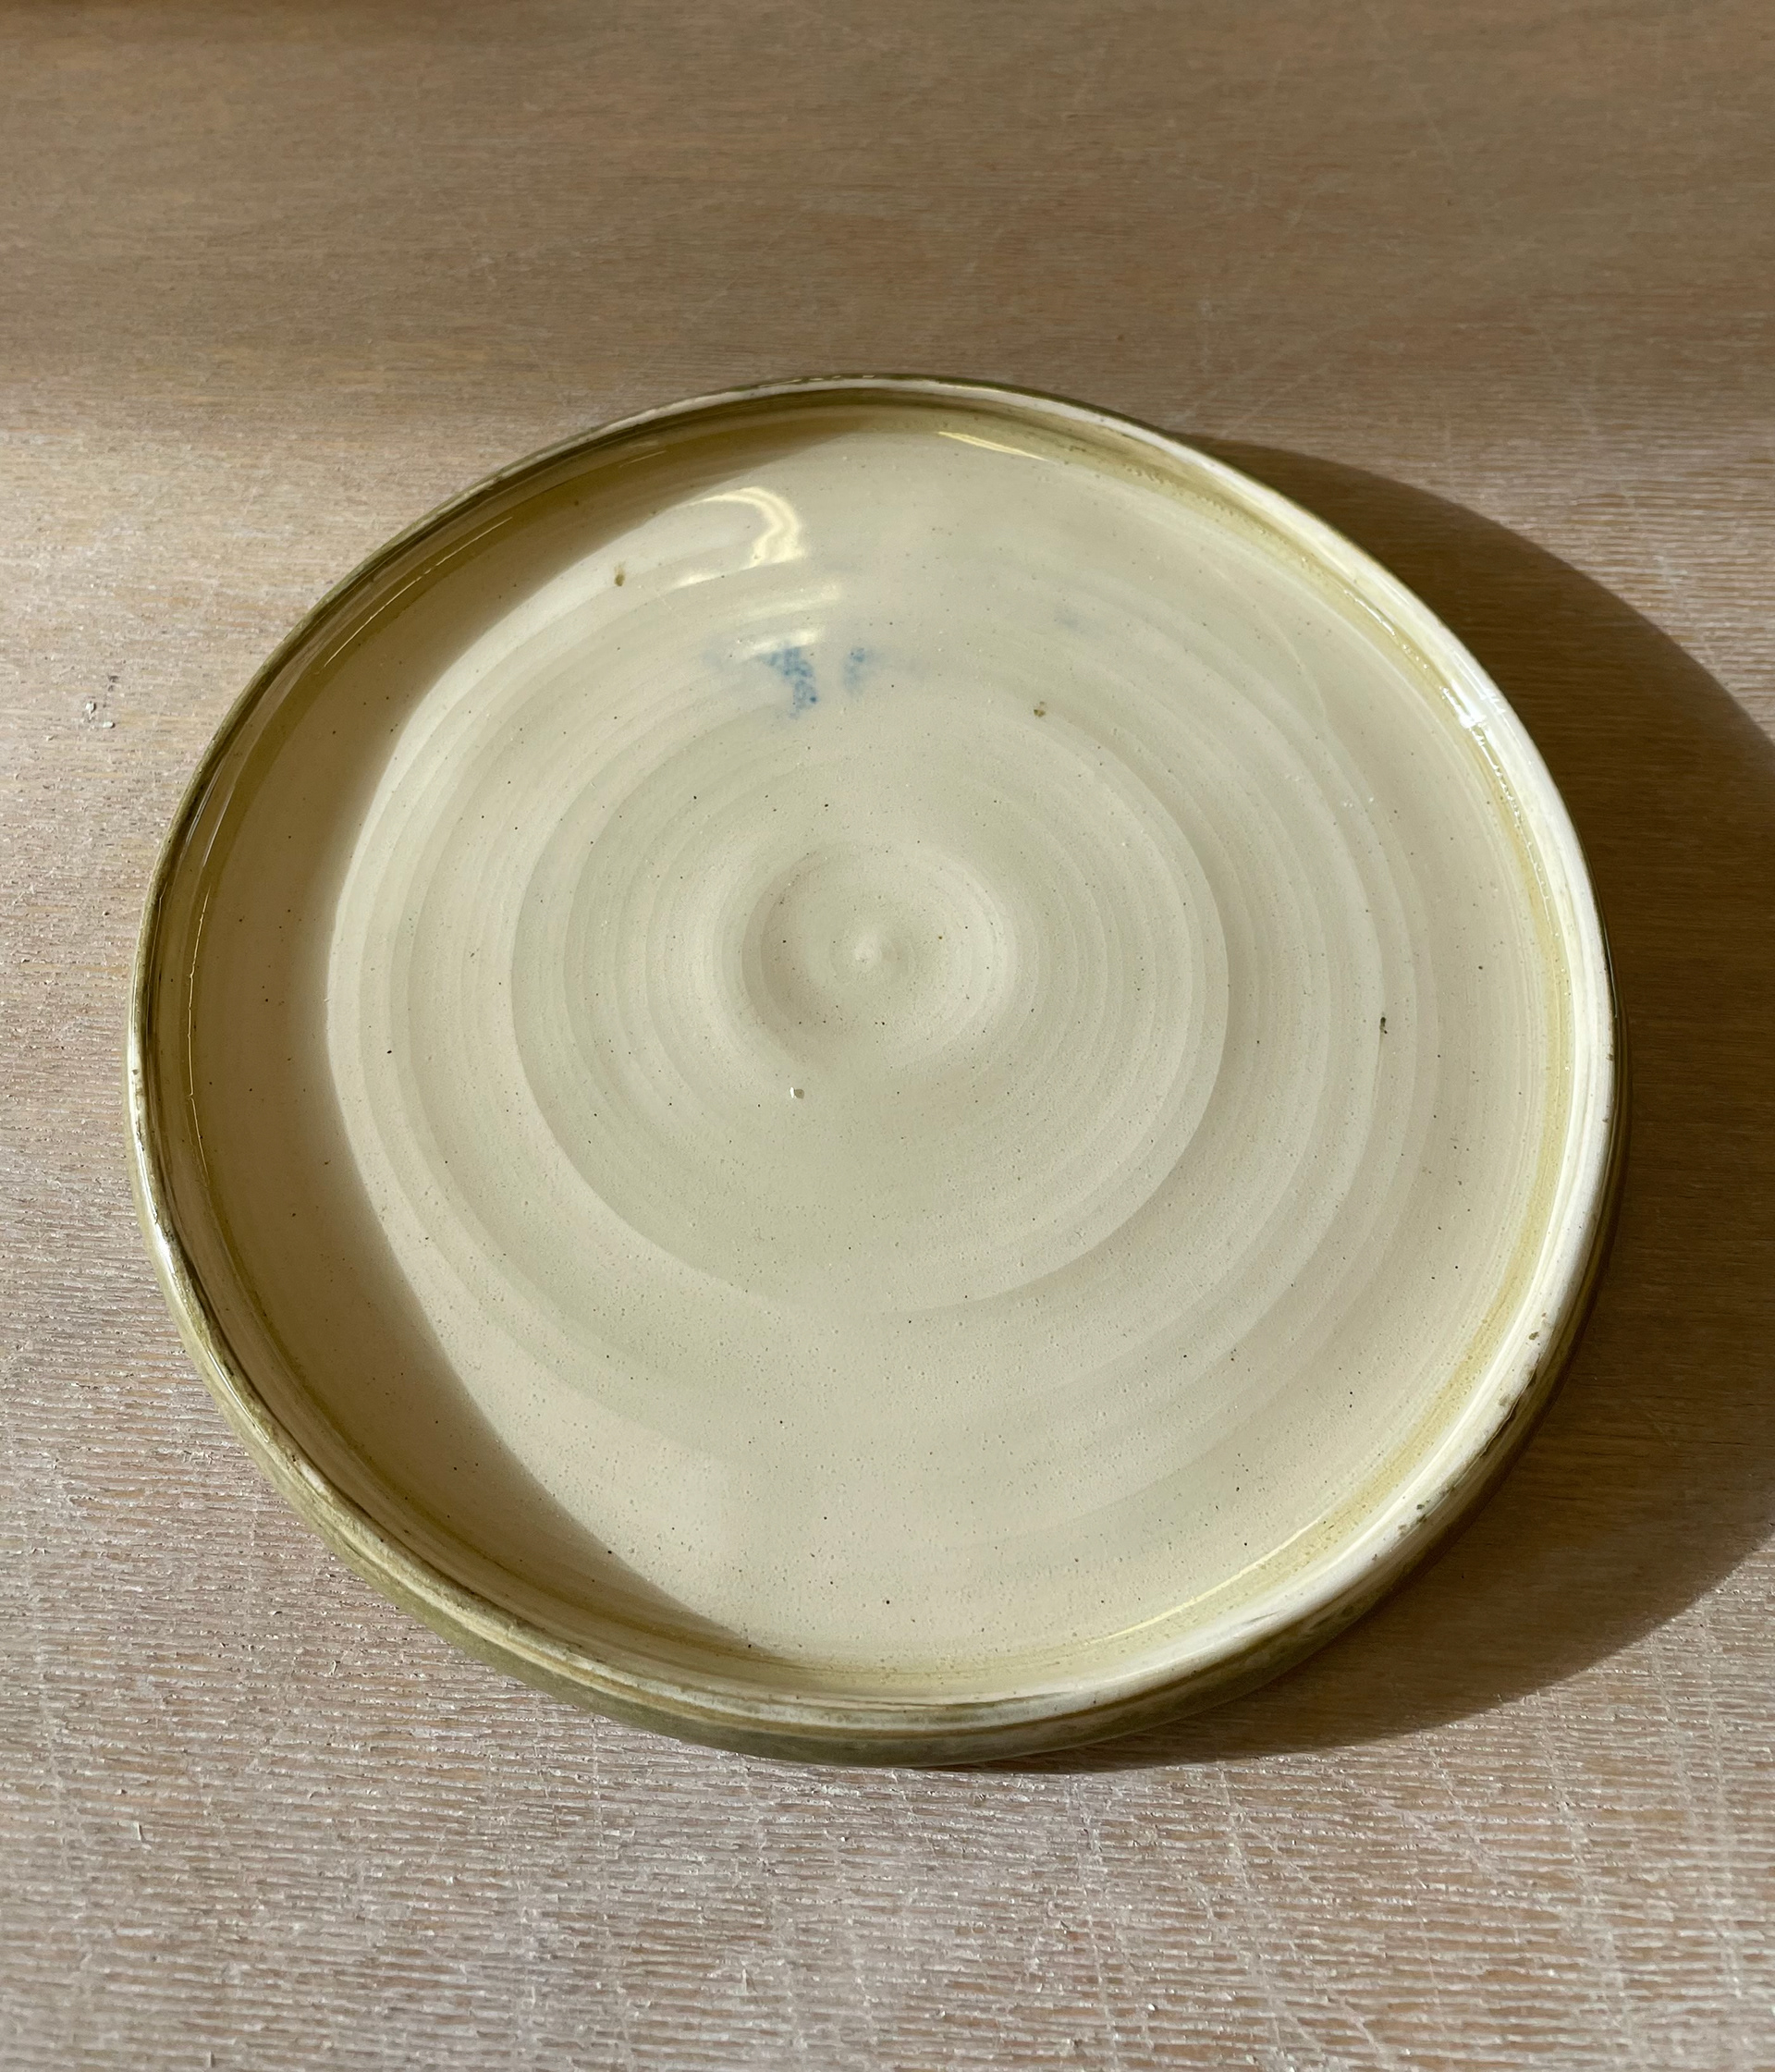
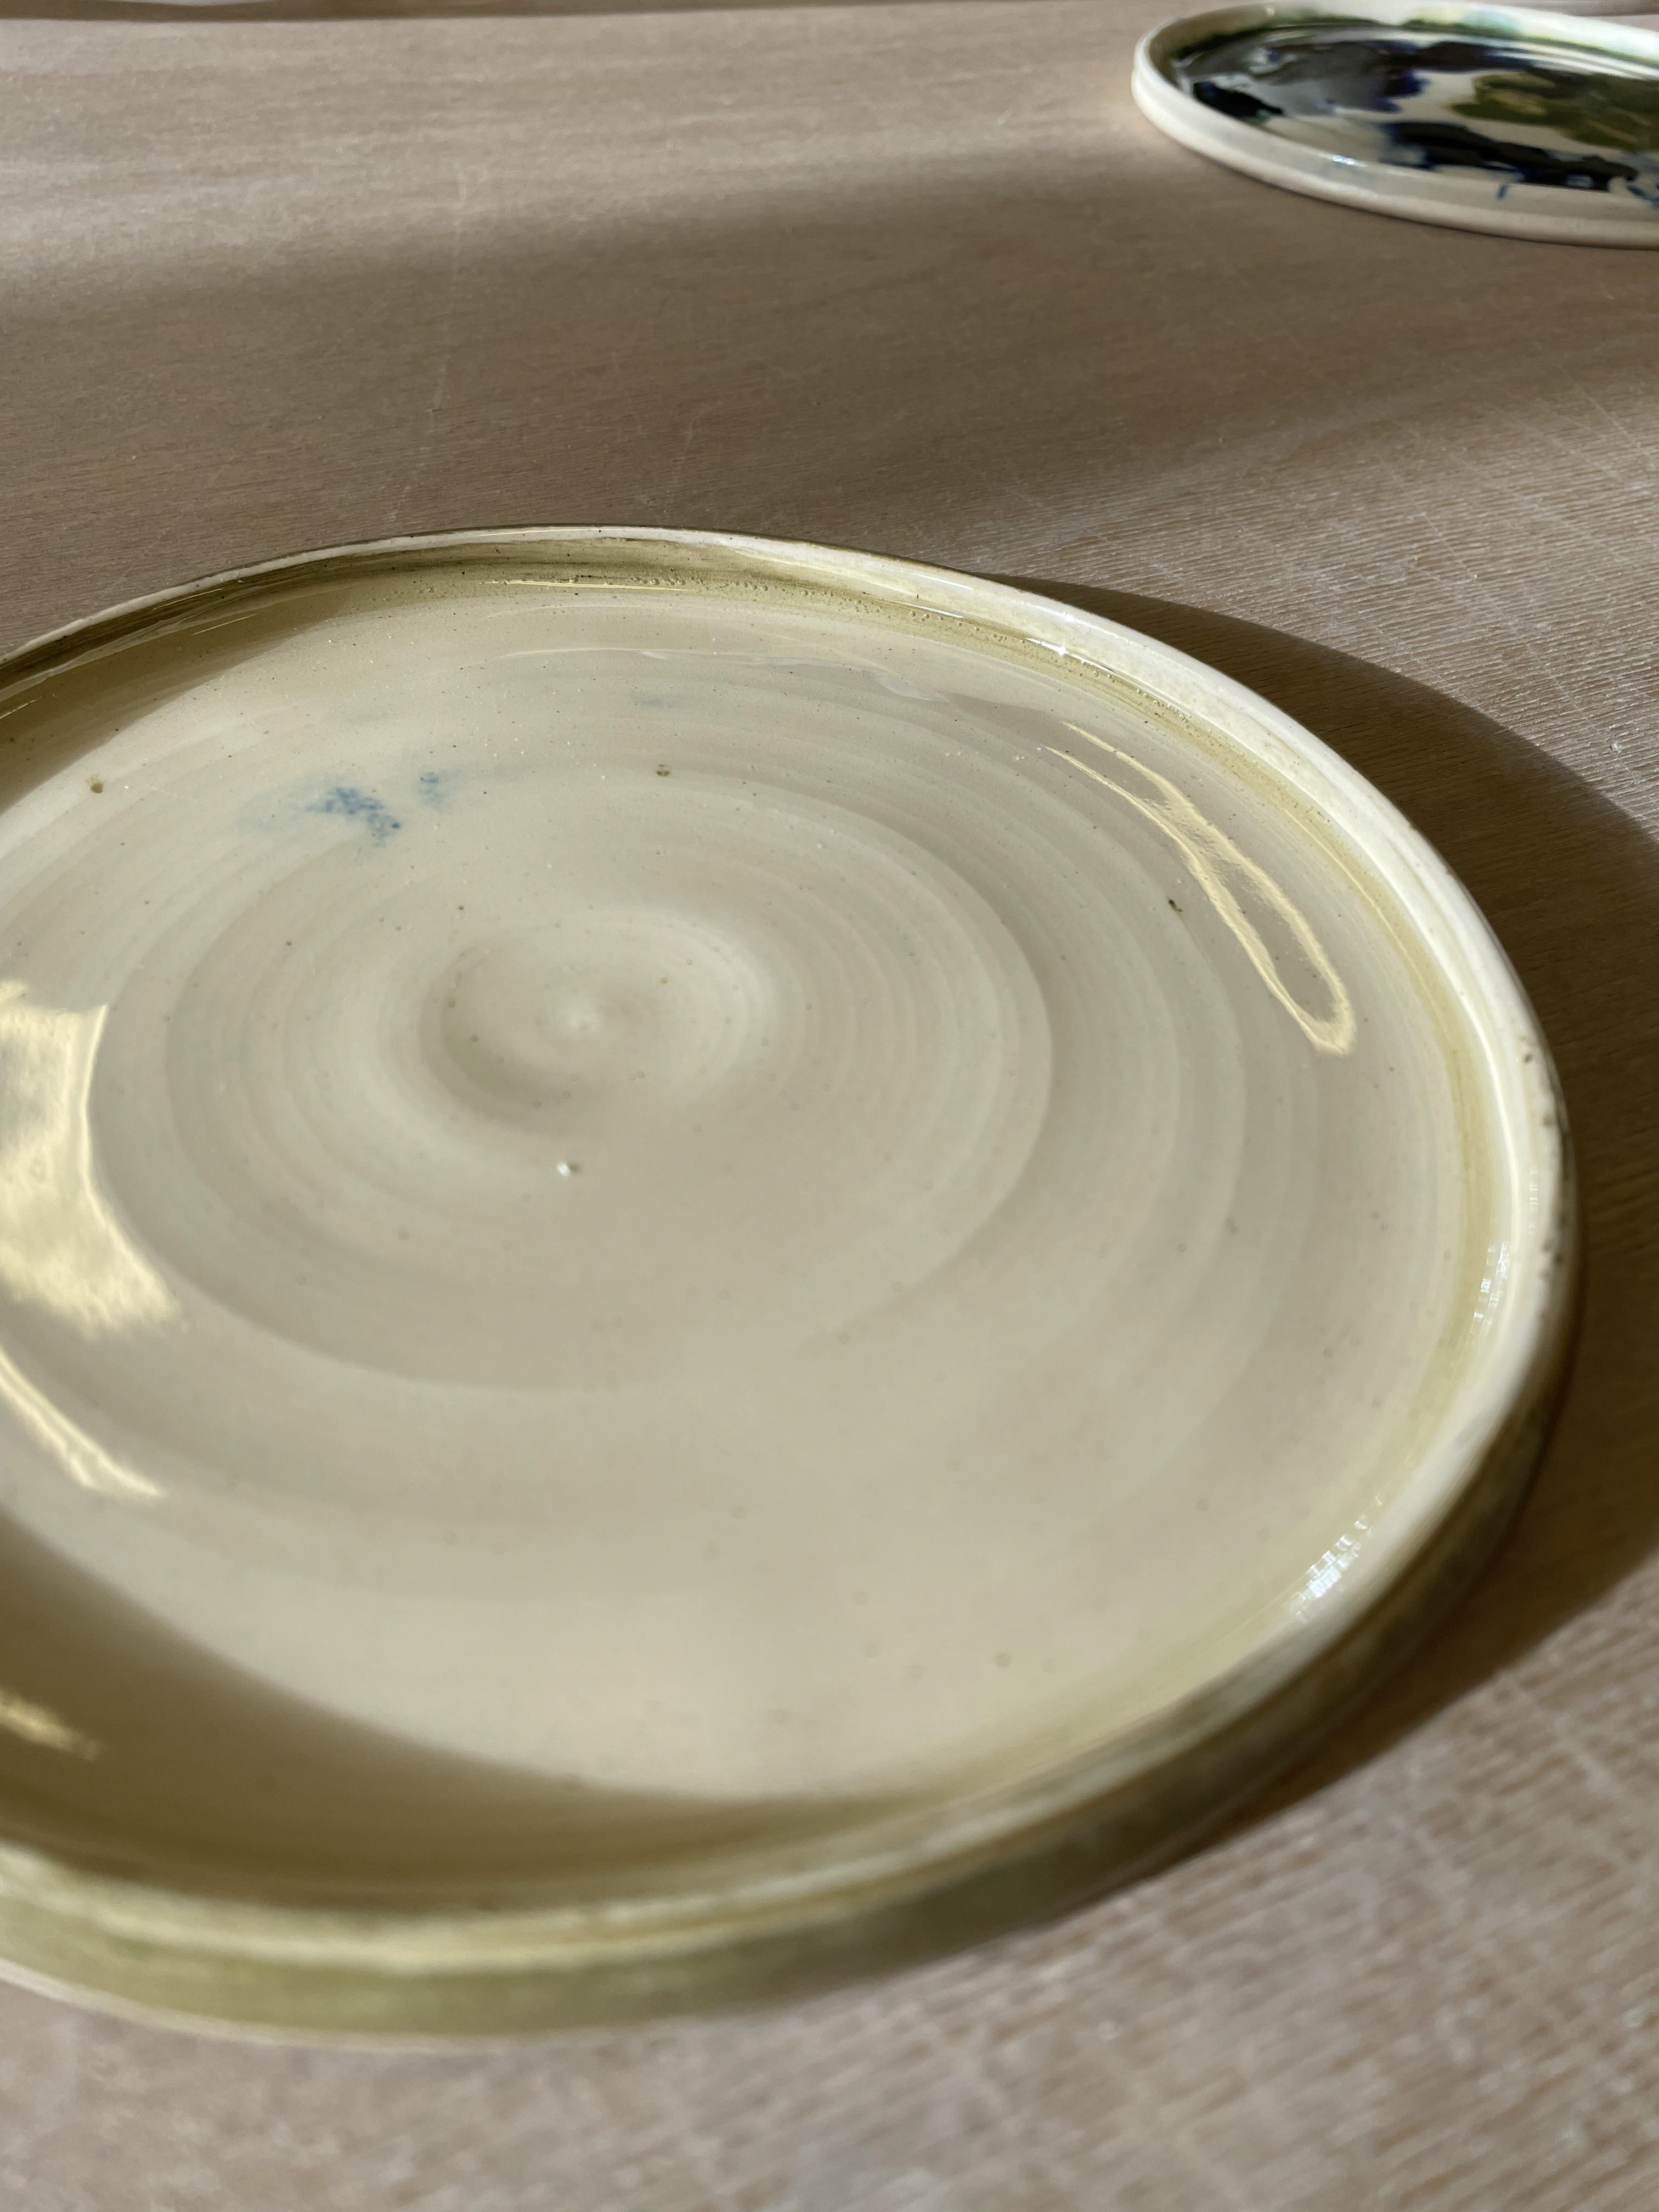
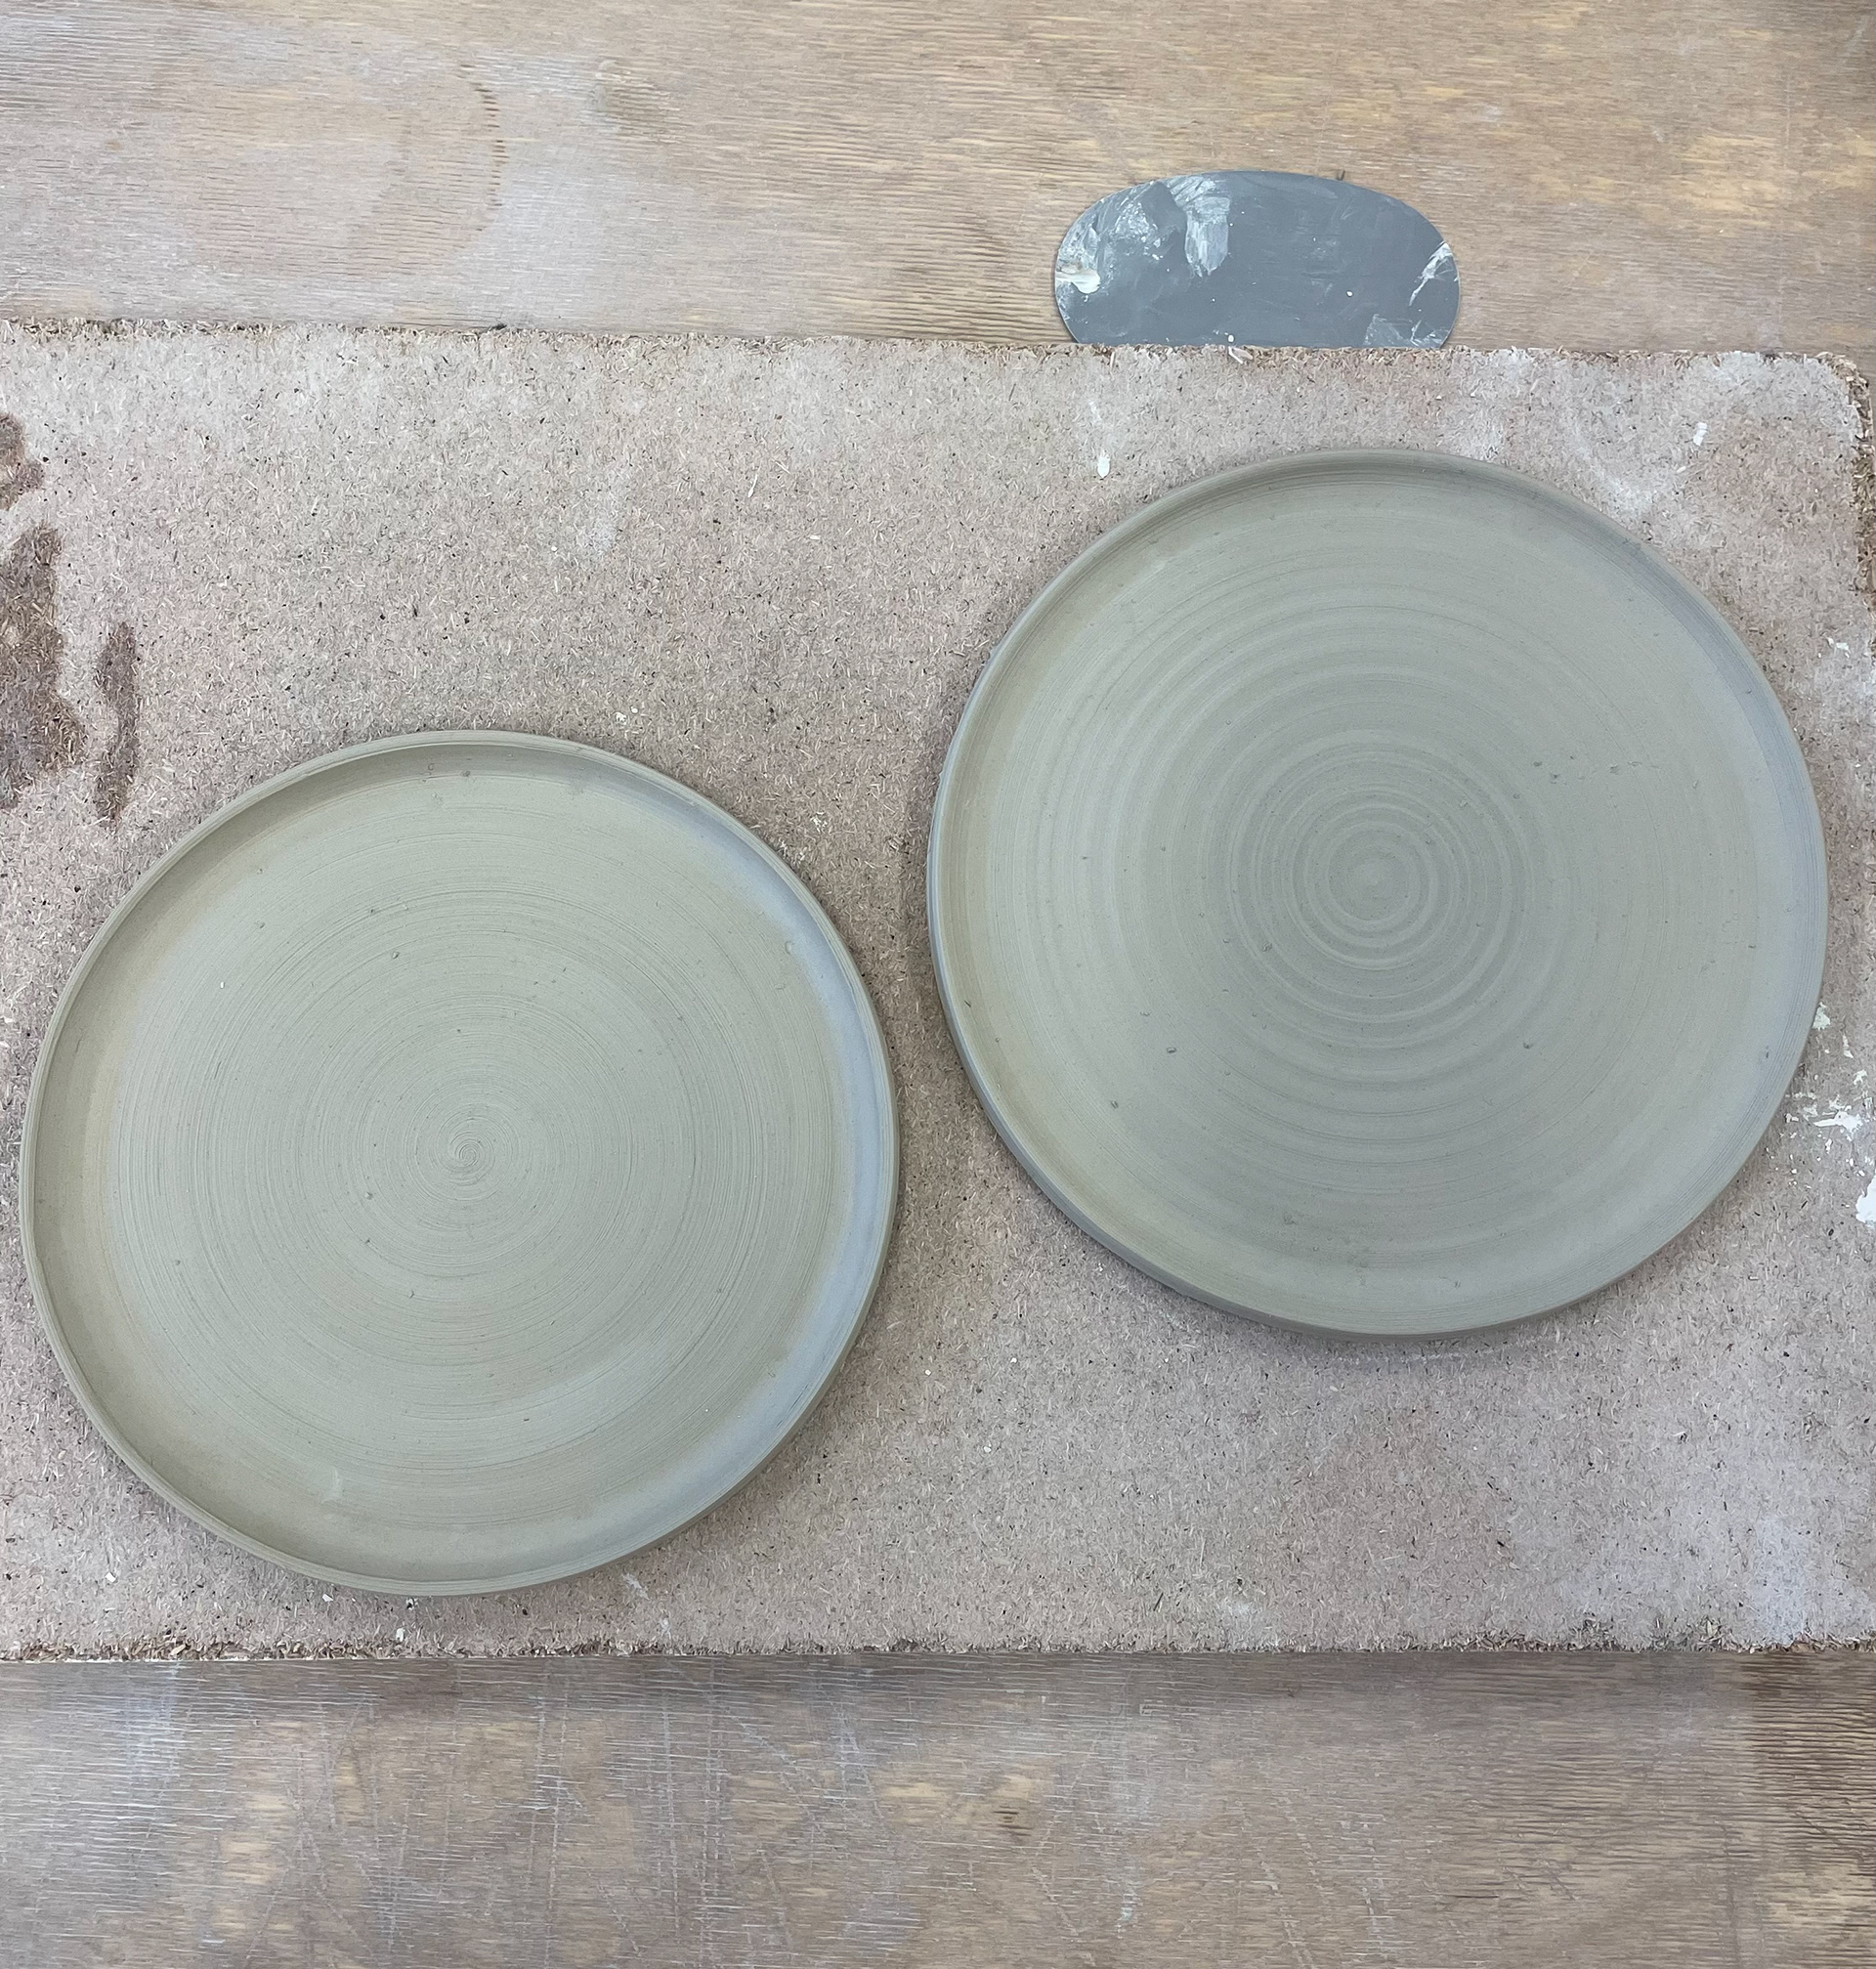
Thinking about making mug sets, I wanted to create saucers that match; making plates on the wheel is fun; however, it went differently than planned. To create these plates, I threw a hump on the wheel and then applied pressure with a rolling pin. This pressure evenly flattened the clay; then, I trimmed the plates to different sizes to see which would fit my mugs best and used an angled tool to flip the sides up to create a small rim. For my first plate, I threw ivory stoneware clay and layered chromium oxide clay to create a lovely pattern in the centre, similar to the mugs. However, when I applied the pressure, all the coloured clay spread outwards, distributing all the clay to the outer rim and hiding all the coloured clay. I then wanted to also experiment with using chromium and cobalt liquid oxides, applying this after bisque. This effect is good but does not fit with what I want to achieve with my mugs. The colours are too bold and have no structure, as liquid follows the plate form. I practised this technique many times, perfecting the correct shape I wanted to achieve, quickly learning that I needed to throw the plates a lot thicker as when you remove them off the wheel, and they are too thin, you will cut straight through the base of the plates, which happened many times. Going further and developing my technique, I need to think about the sizing for my saucers, how I will apply the coloured clay, and if I want a lip that holds the mugs.
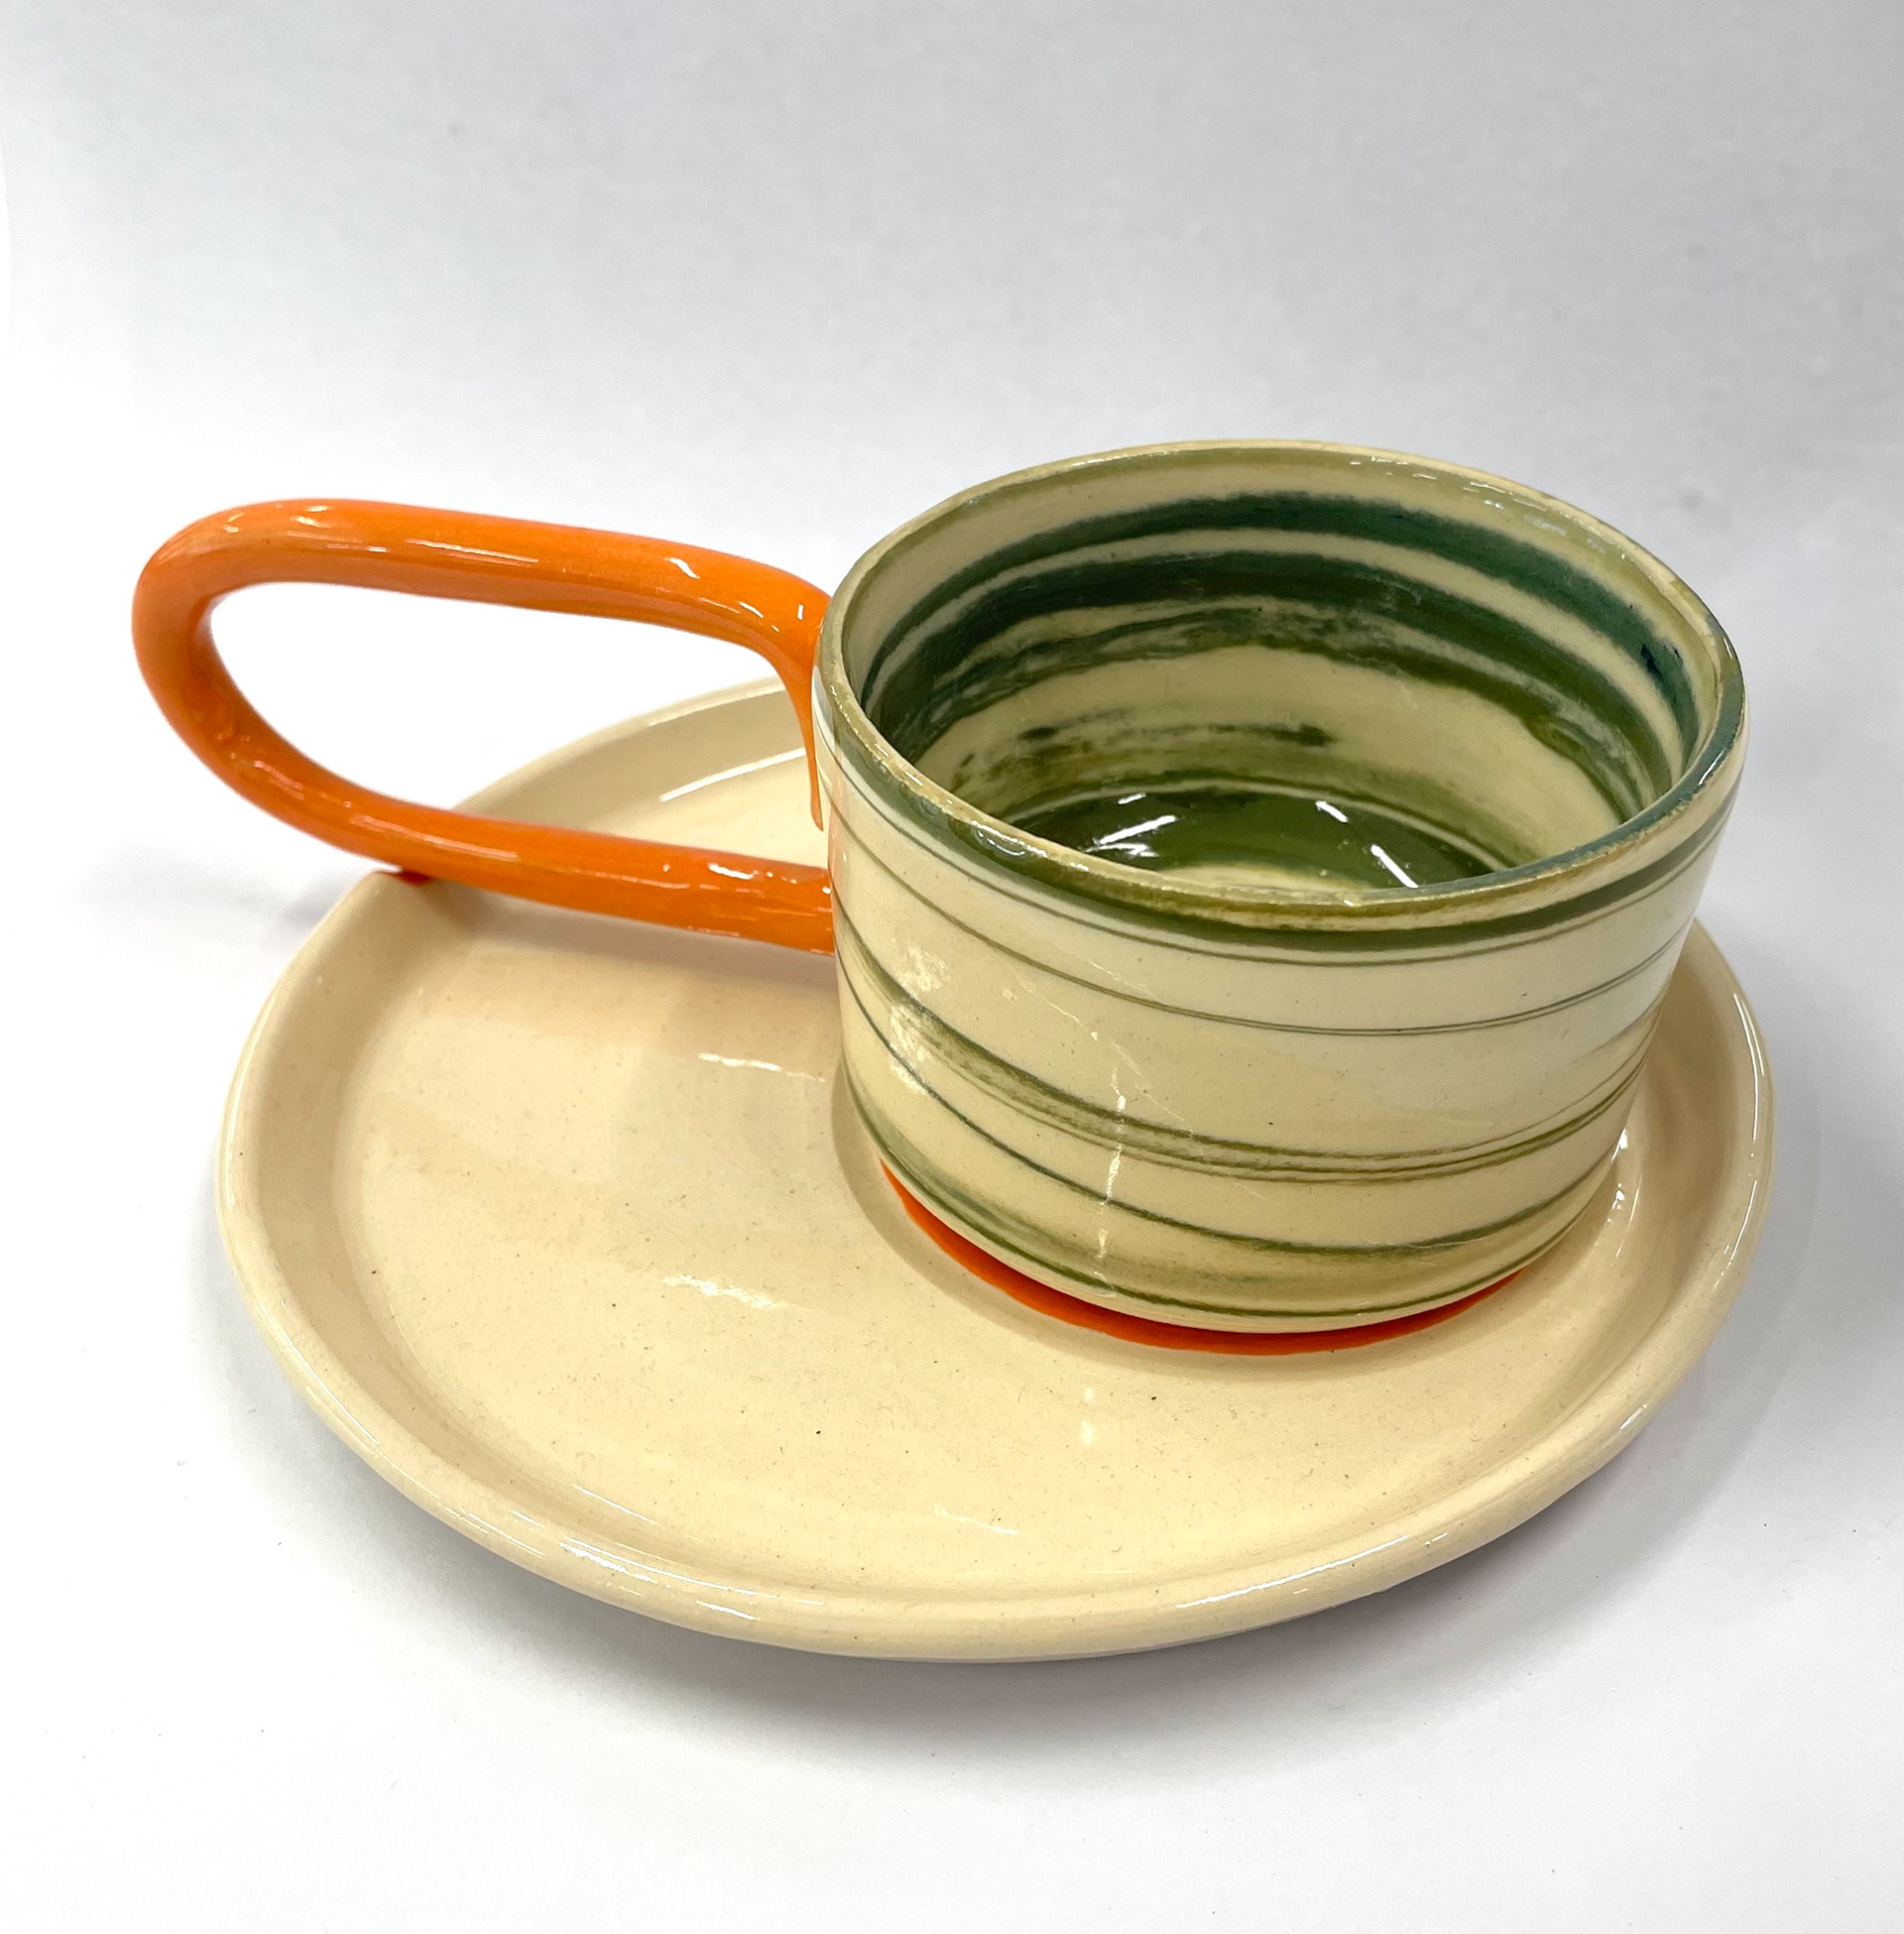
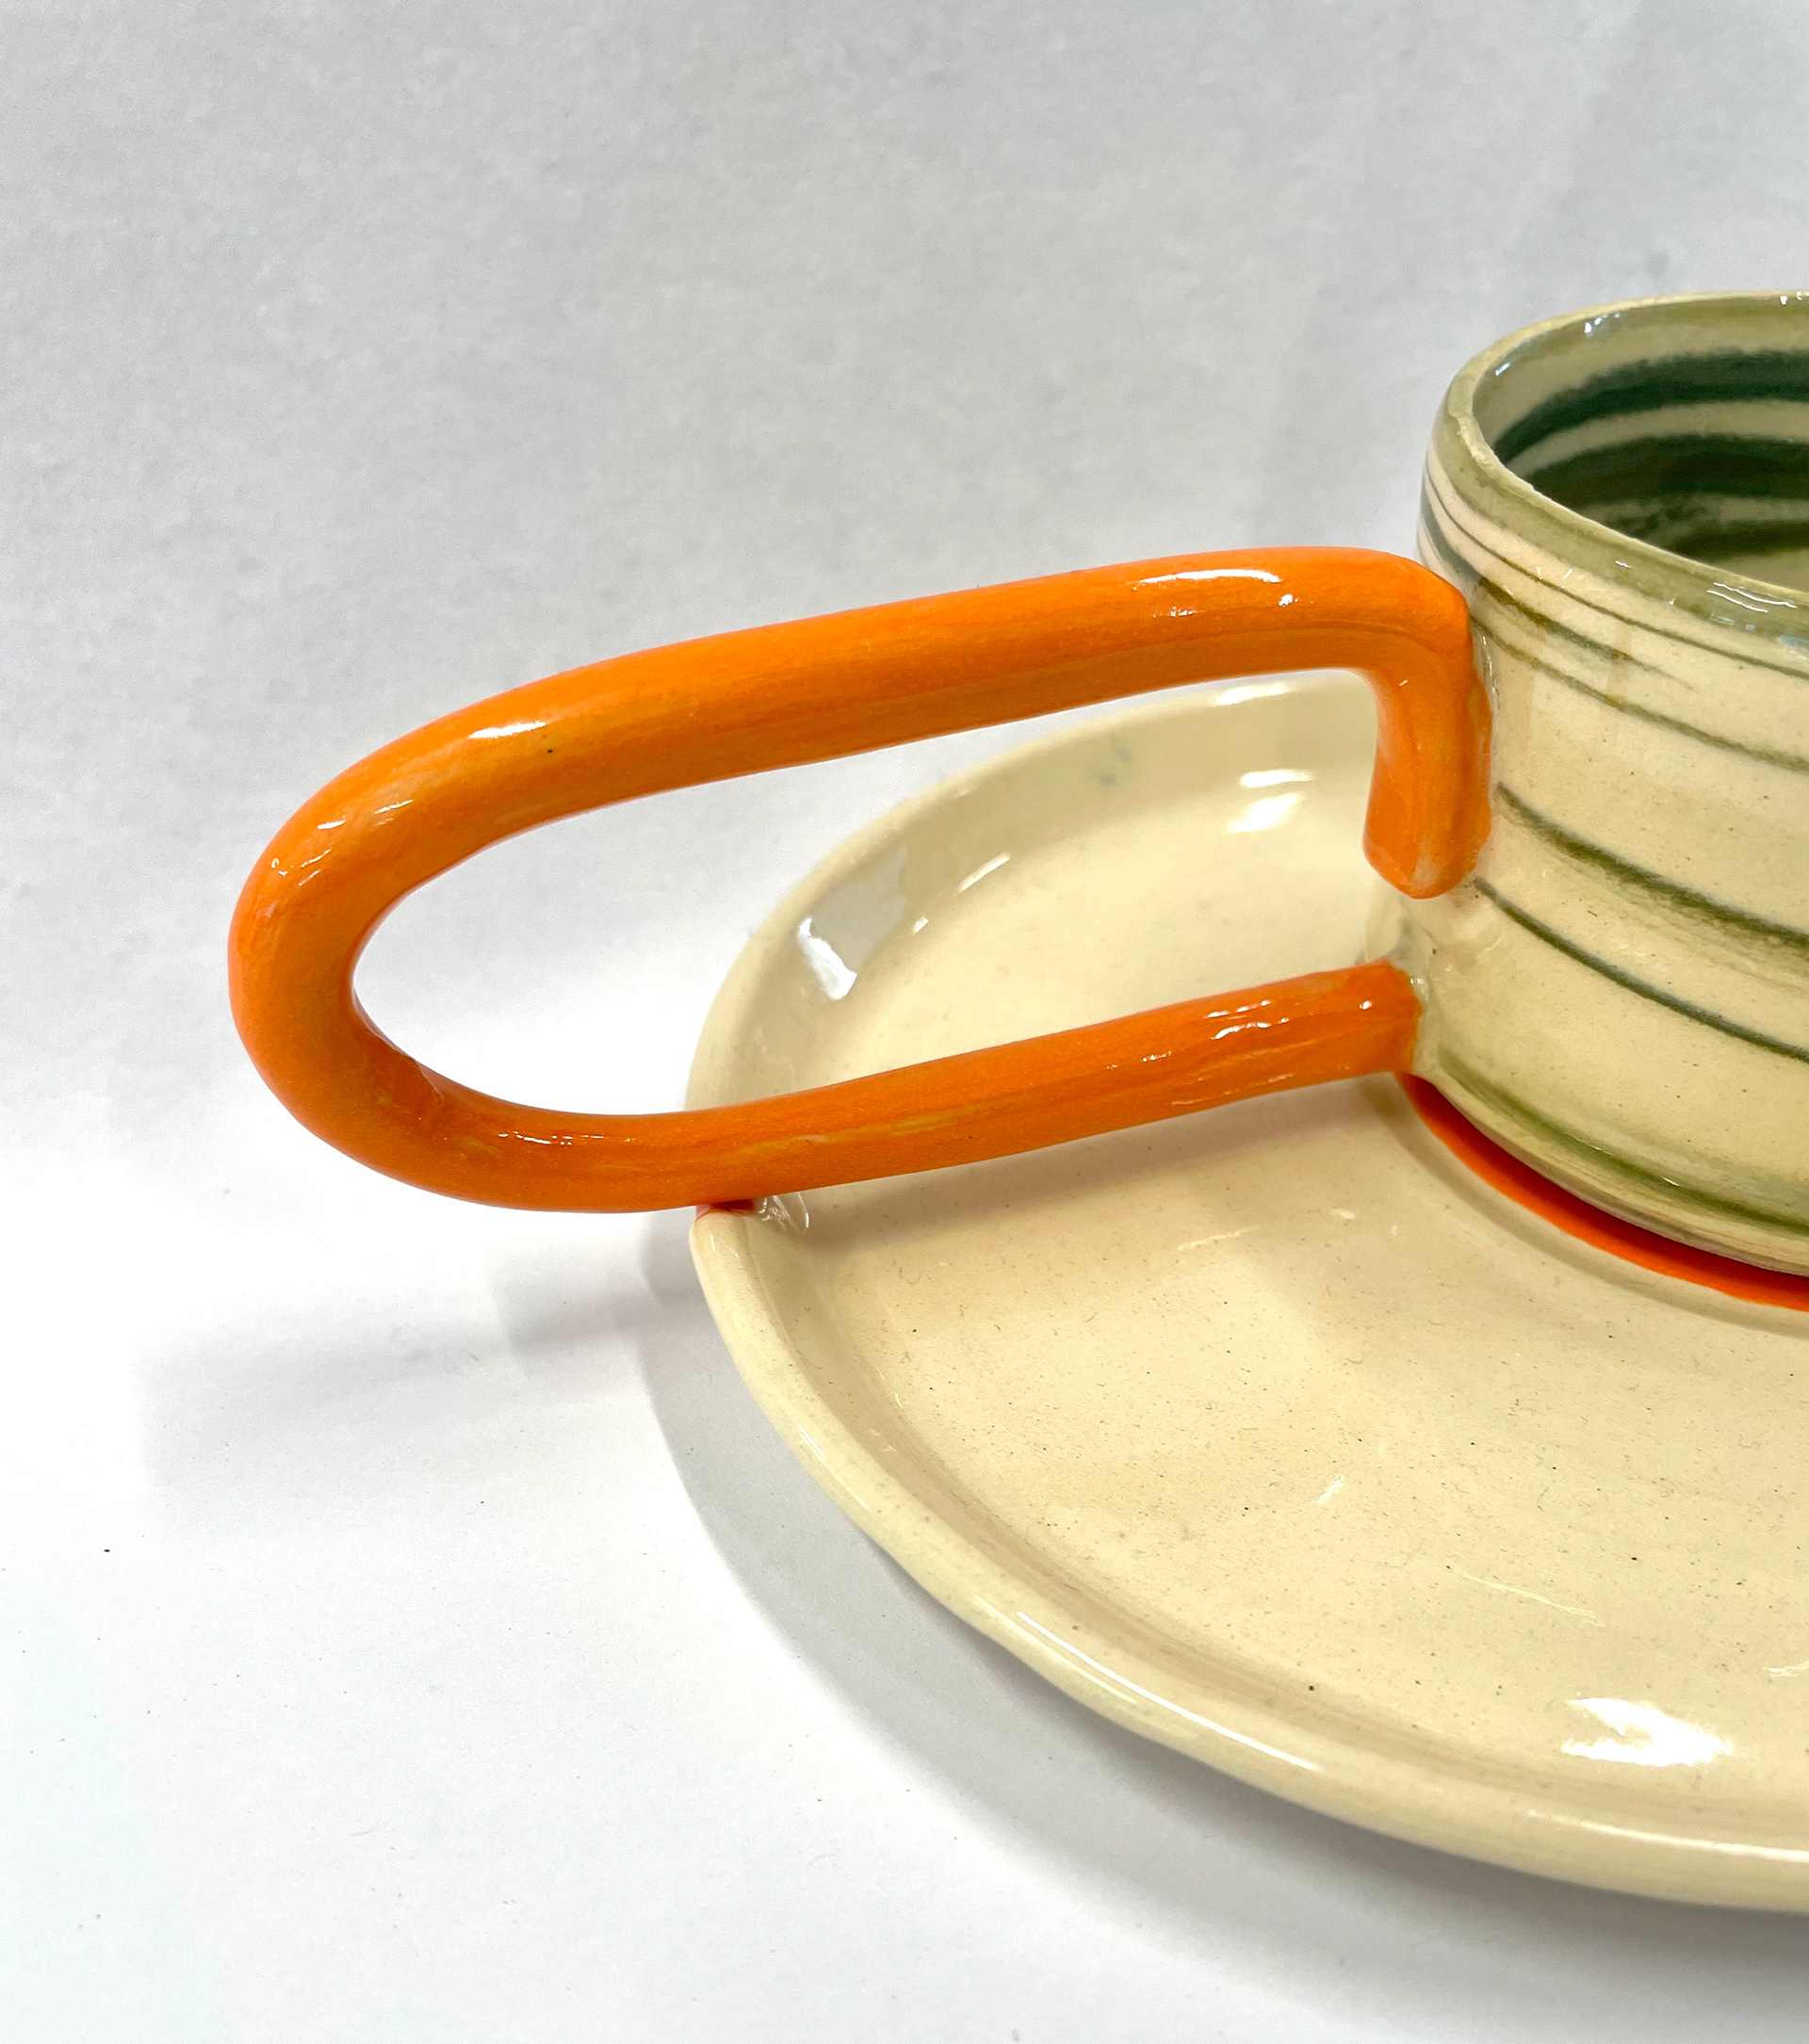
Fitting my mugs with my saucers, I quickly learned they didn't fit well. I need to rethink the design of the saucers, as the mugs have such long handles that they sit on top of the rim, which means the mug isn't sitting flat on the saucer, unbalancing the mug. I must create a design that allows the handle to sit smoothly with the saucer, creating a slick hold for the mug. I must also resize the mug so the saucer isn't overpowering and unnecessarily big.
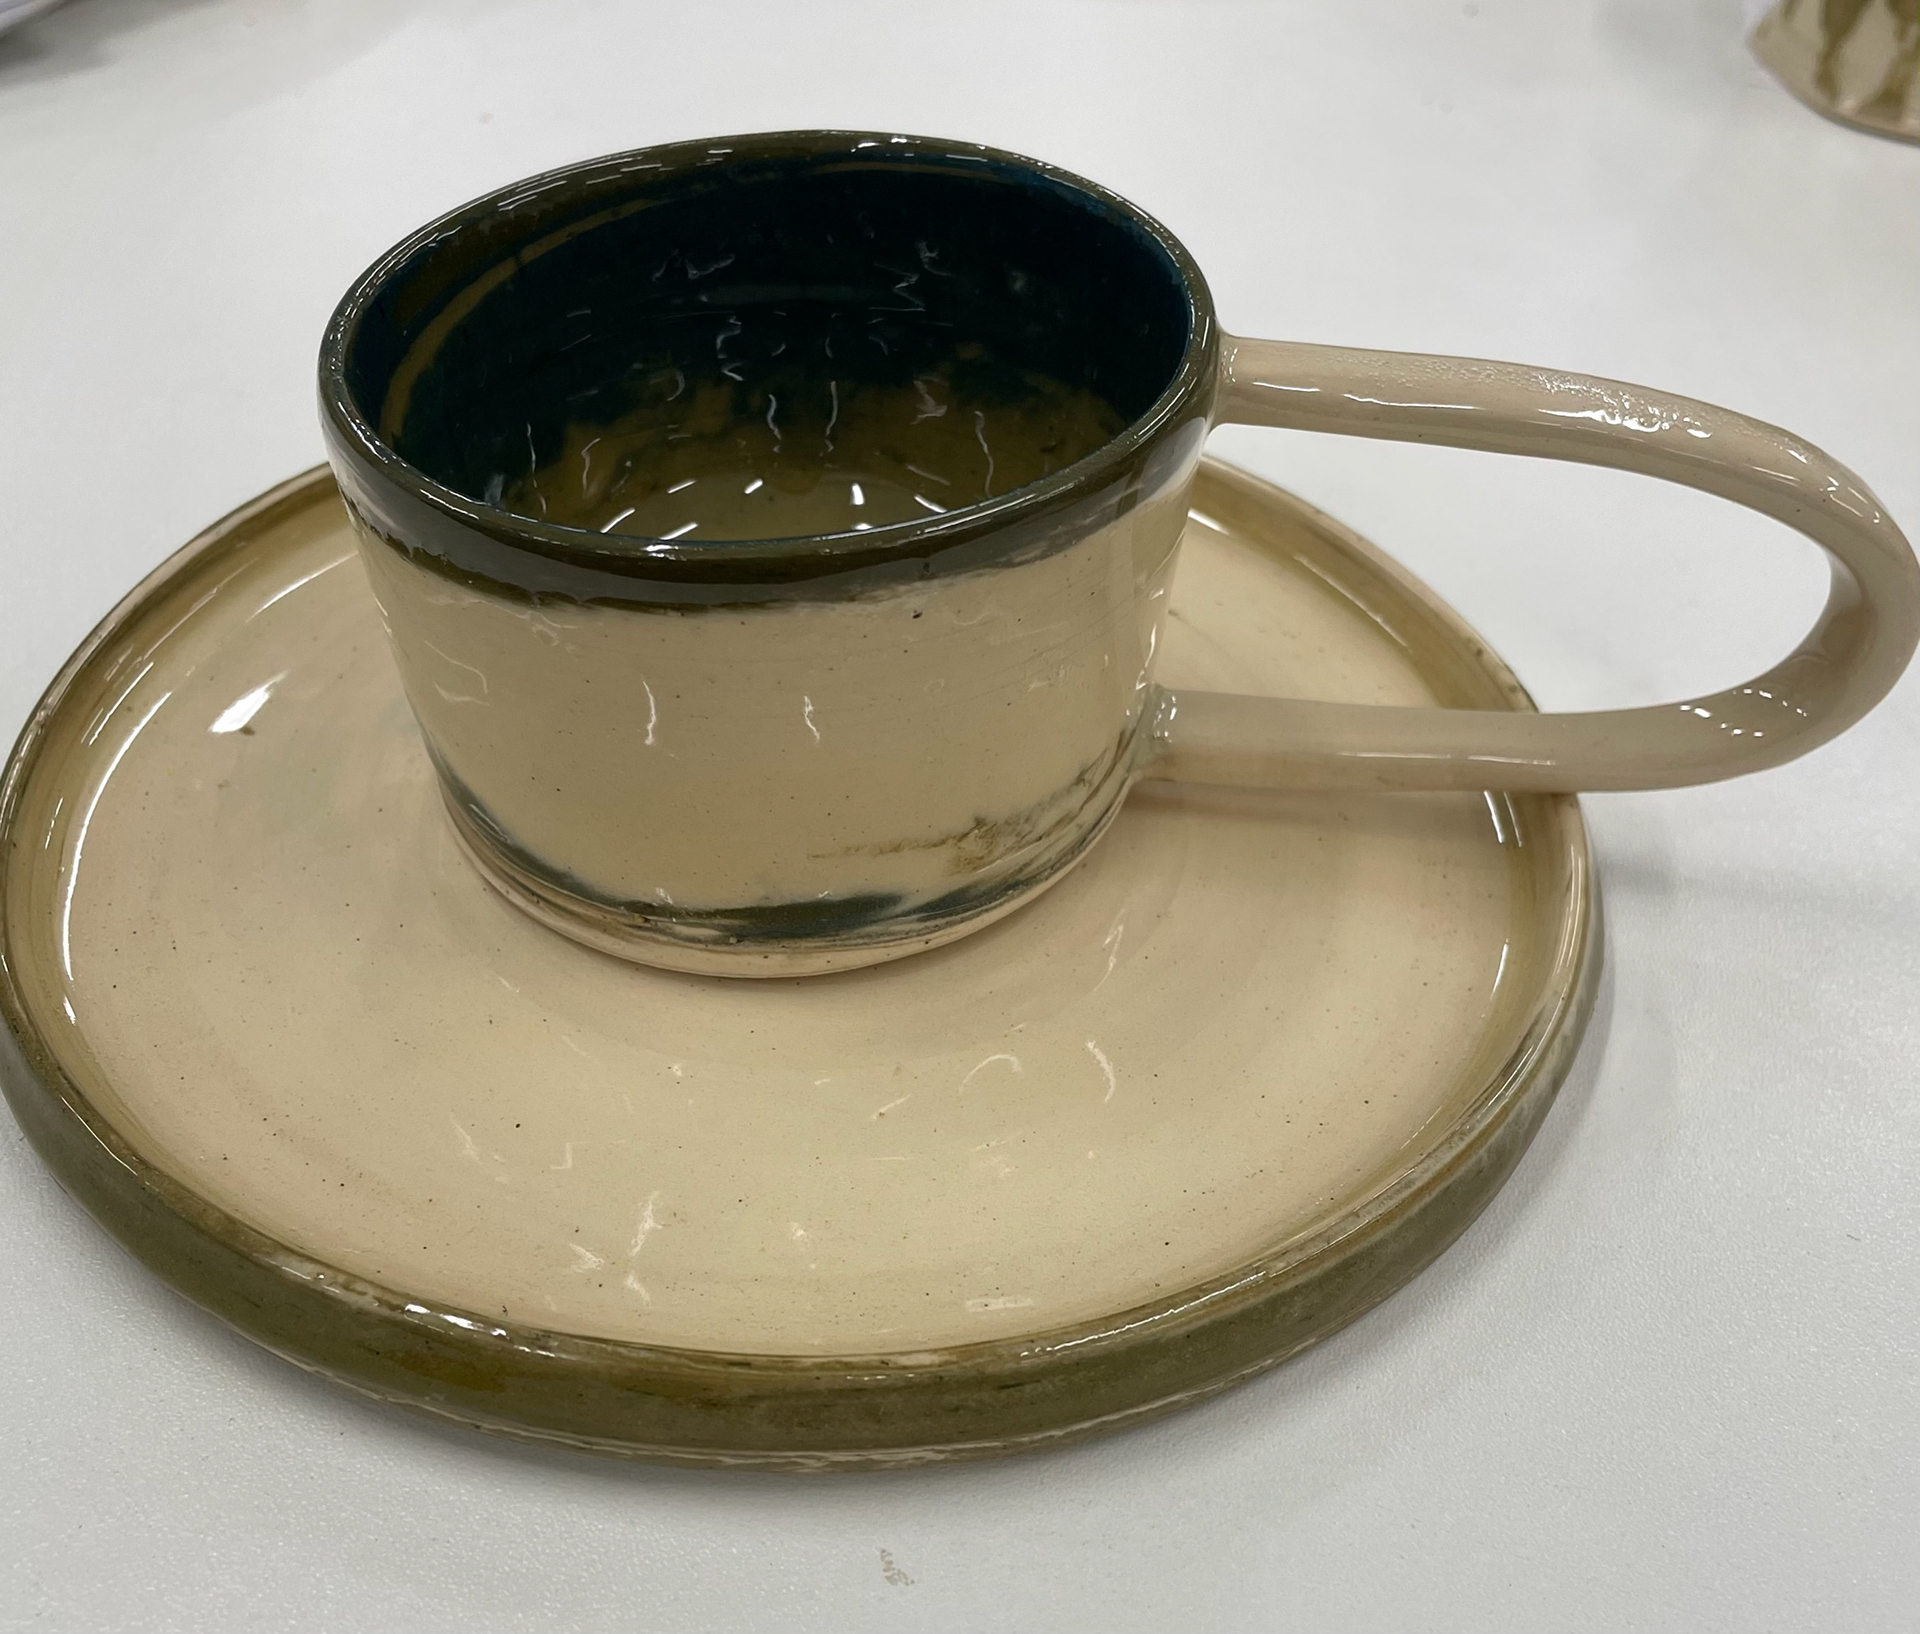
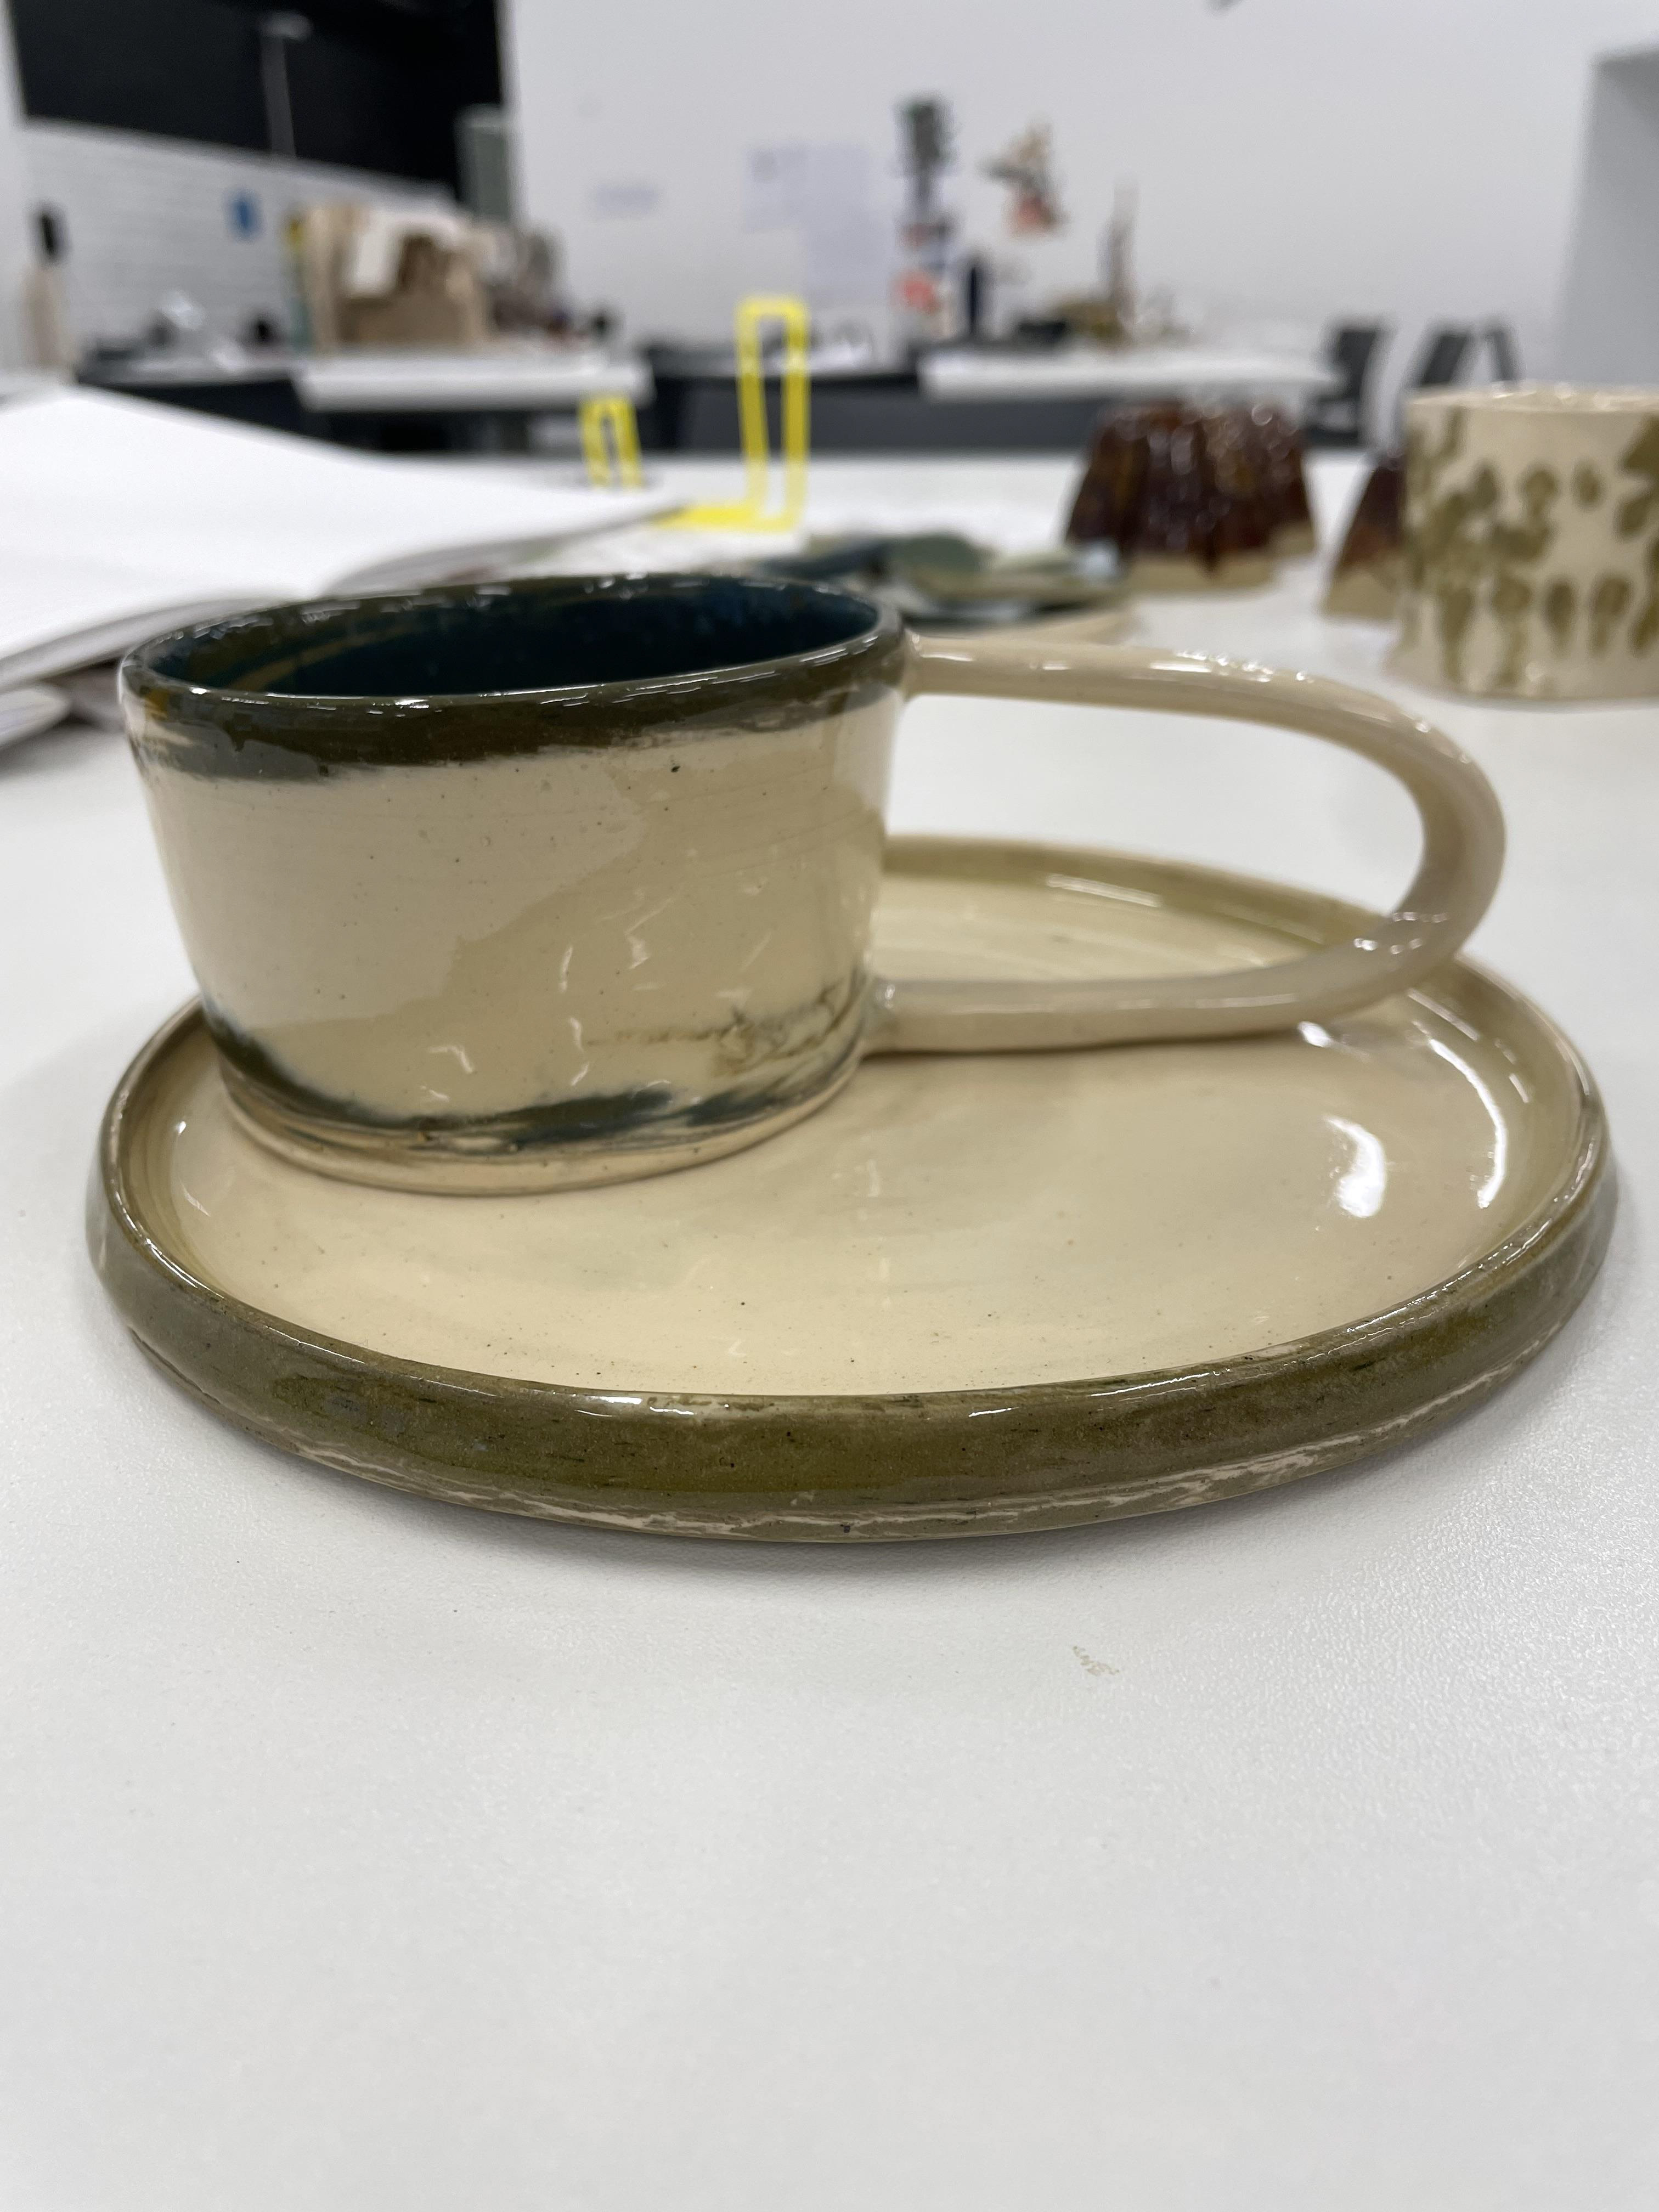
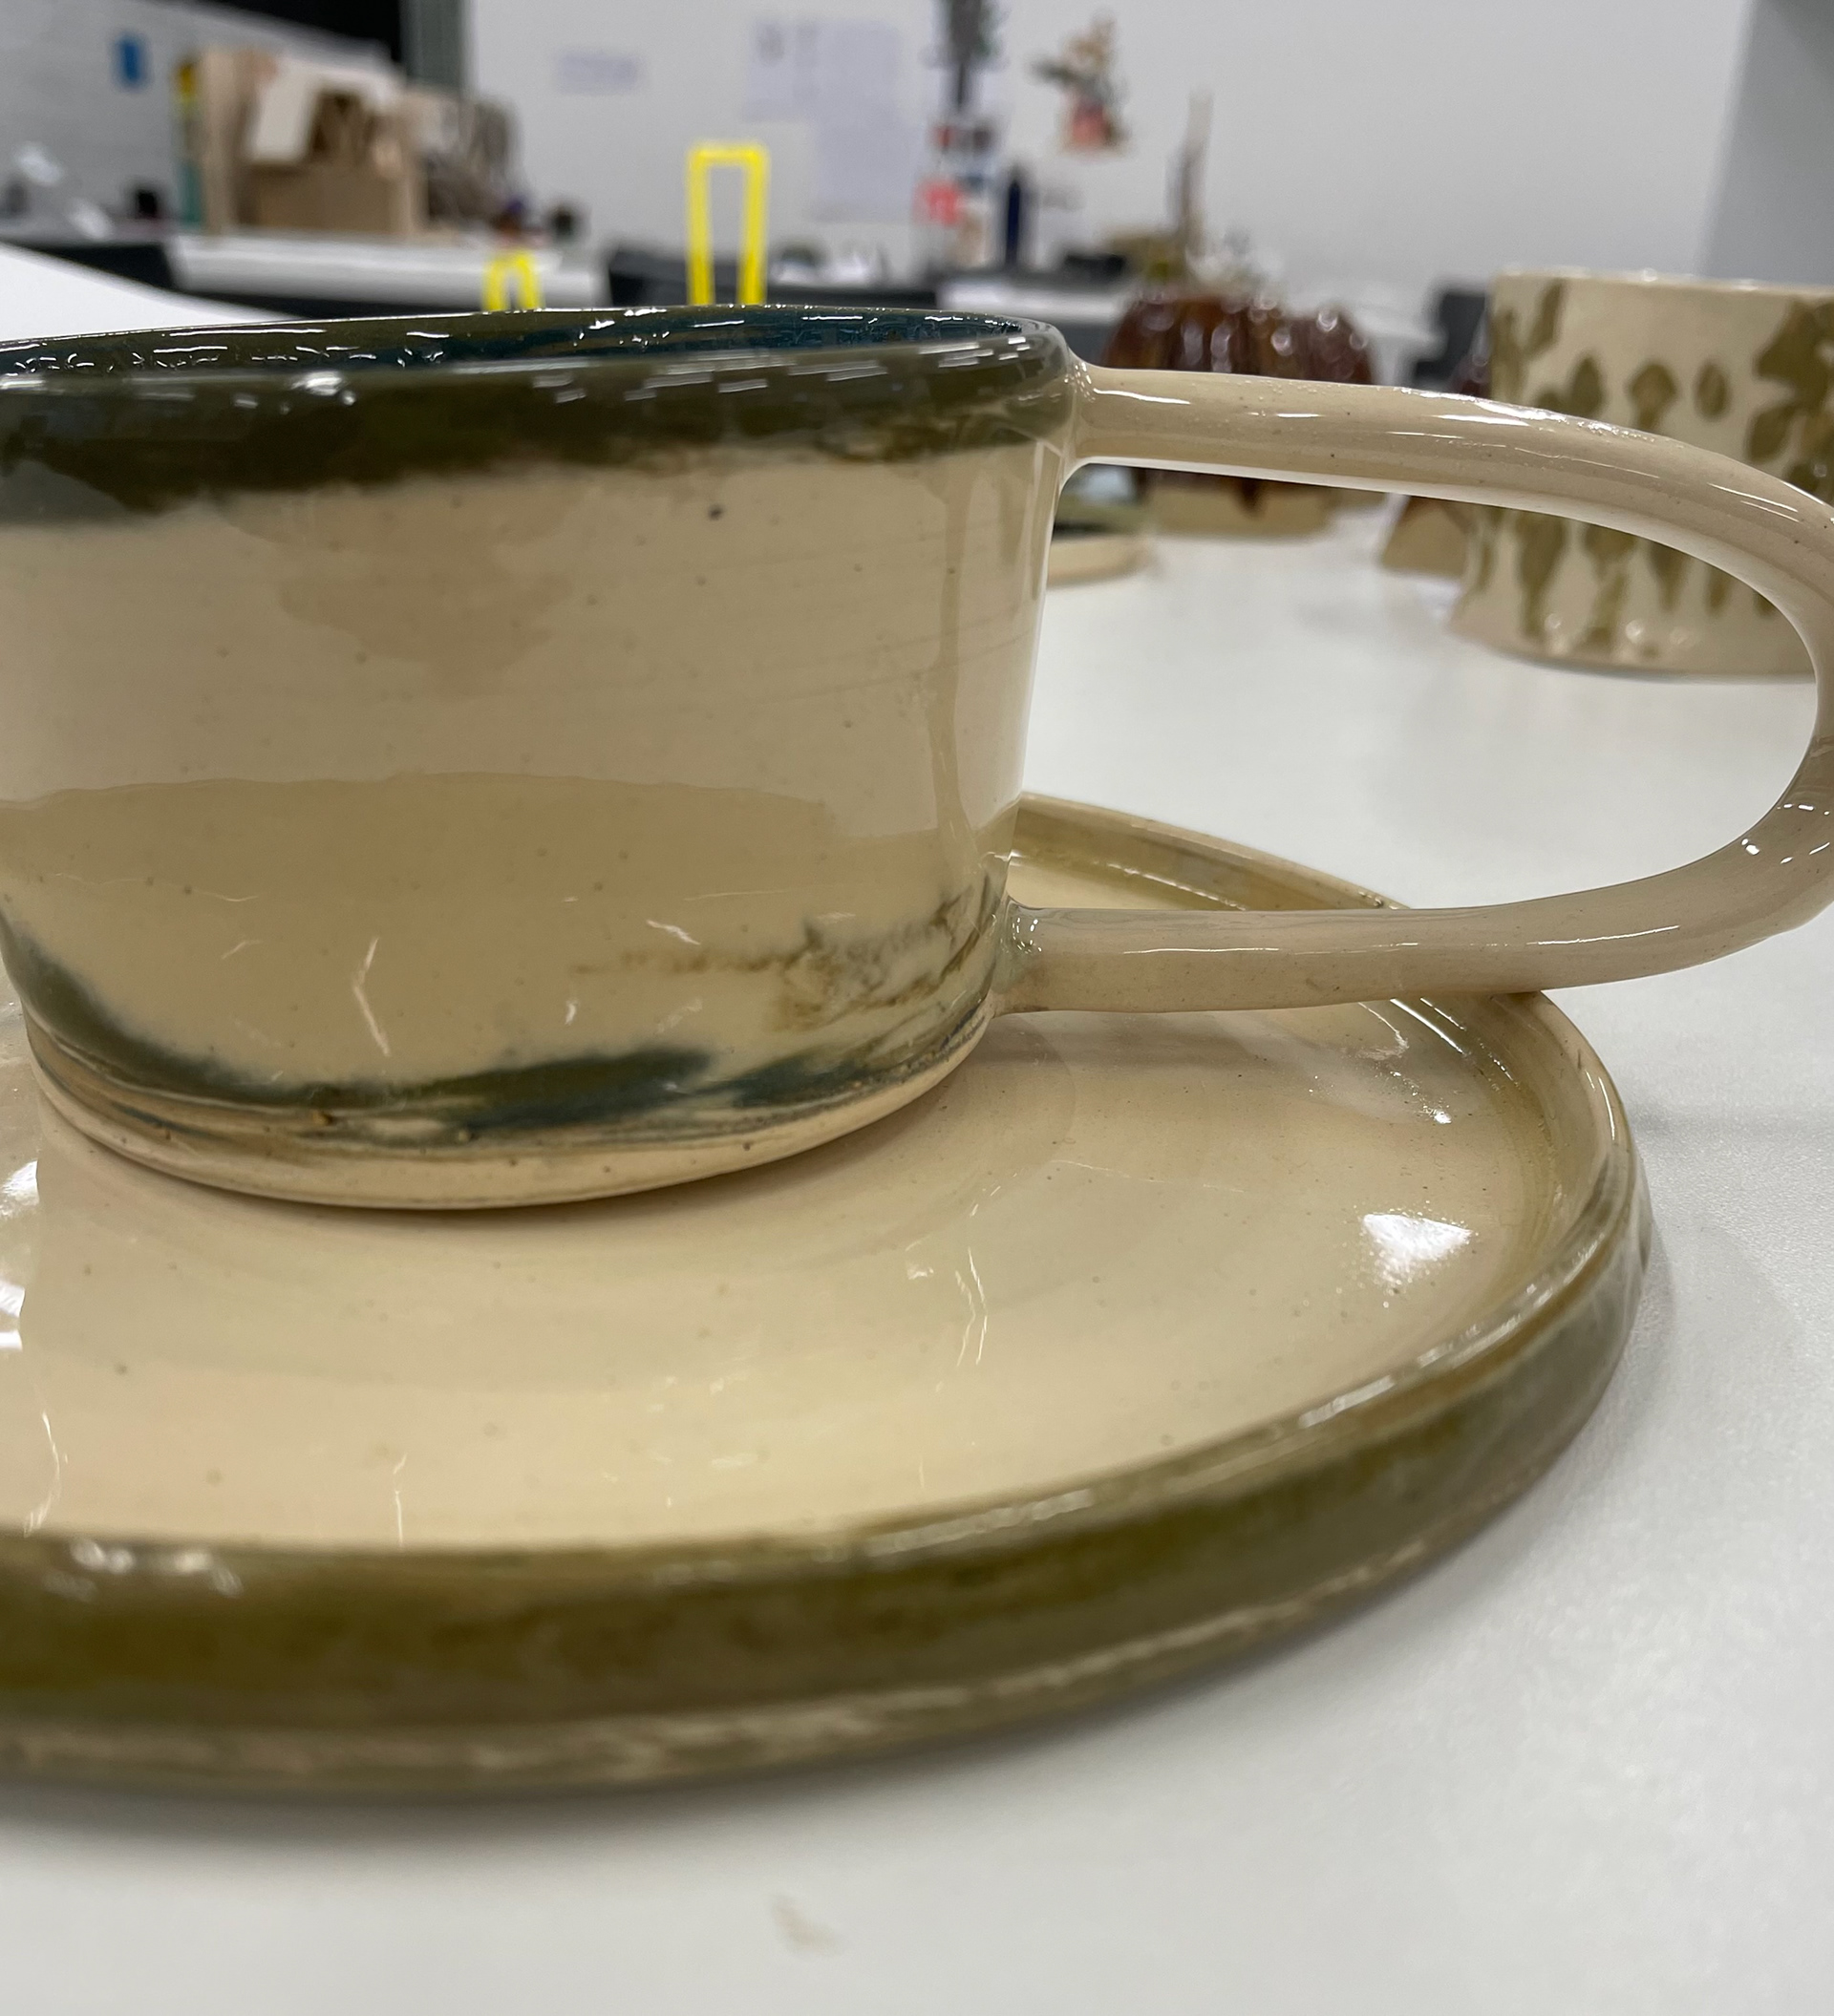
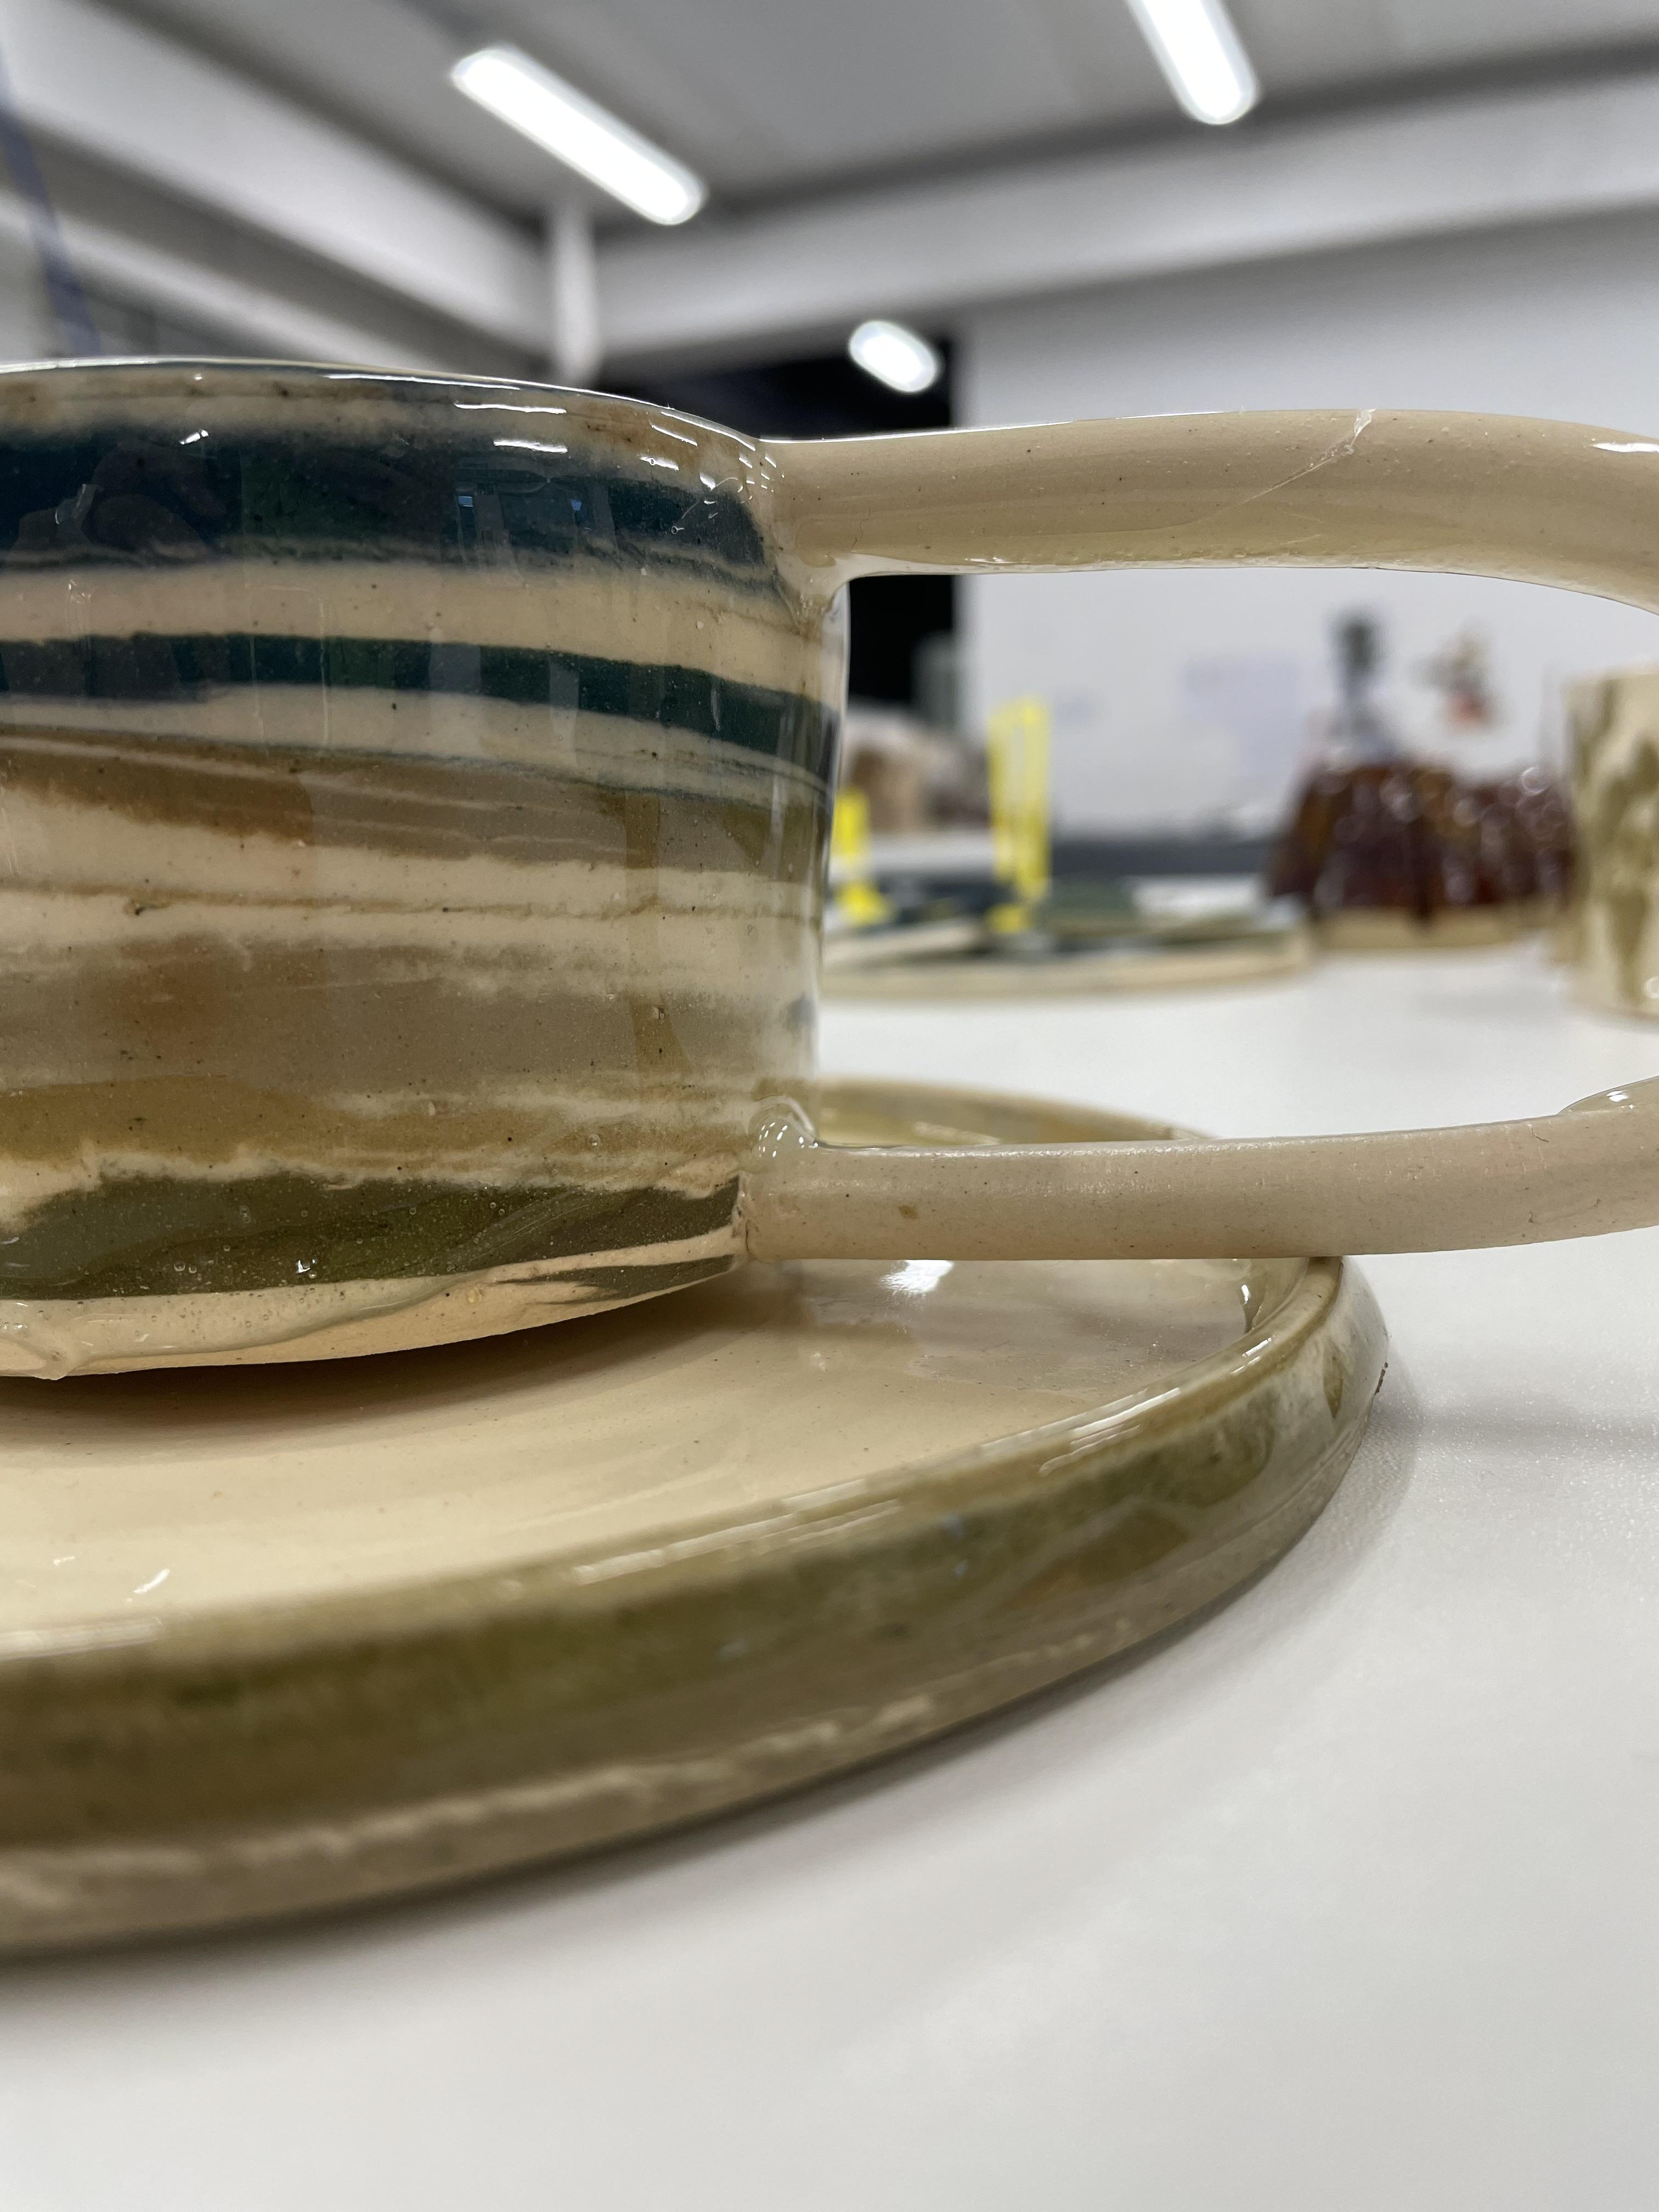
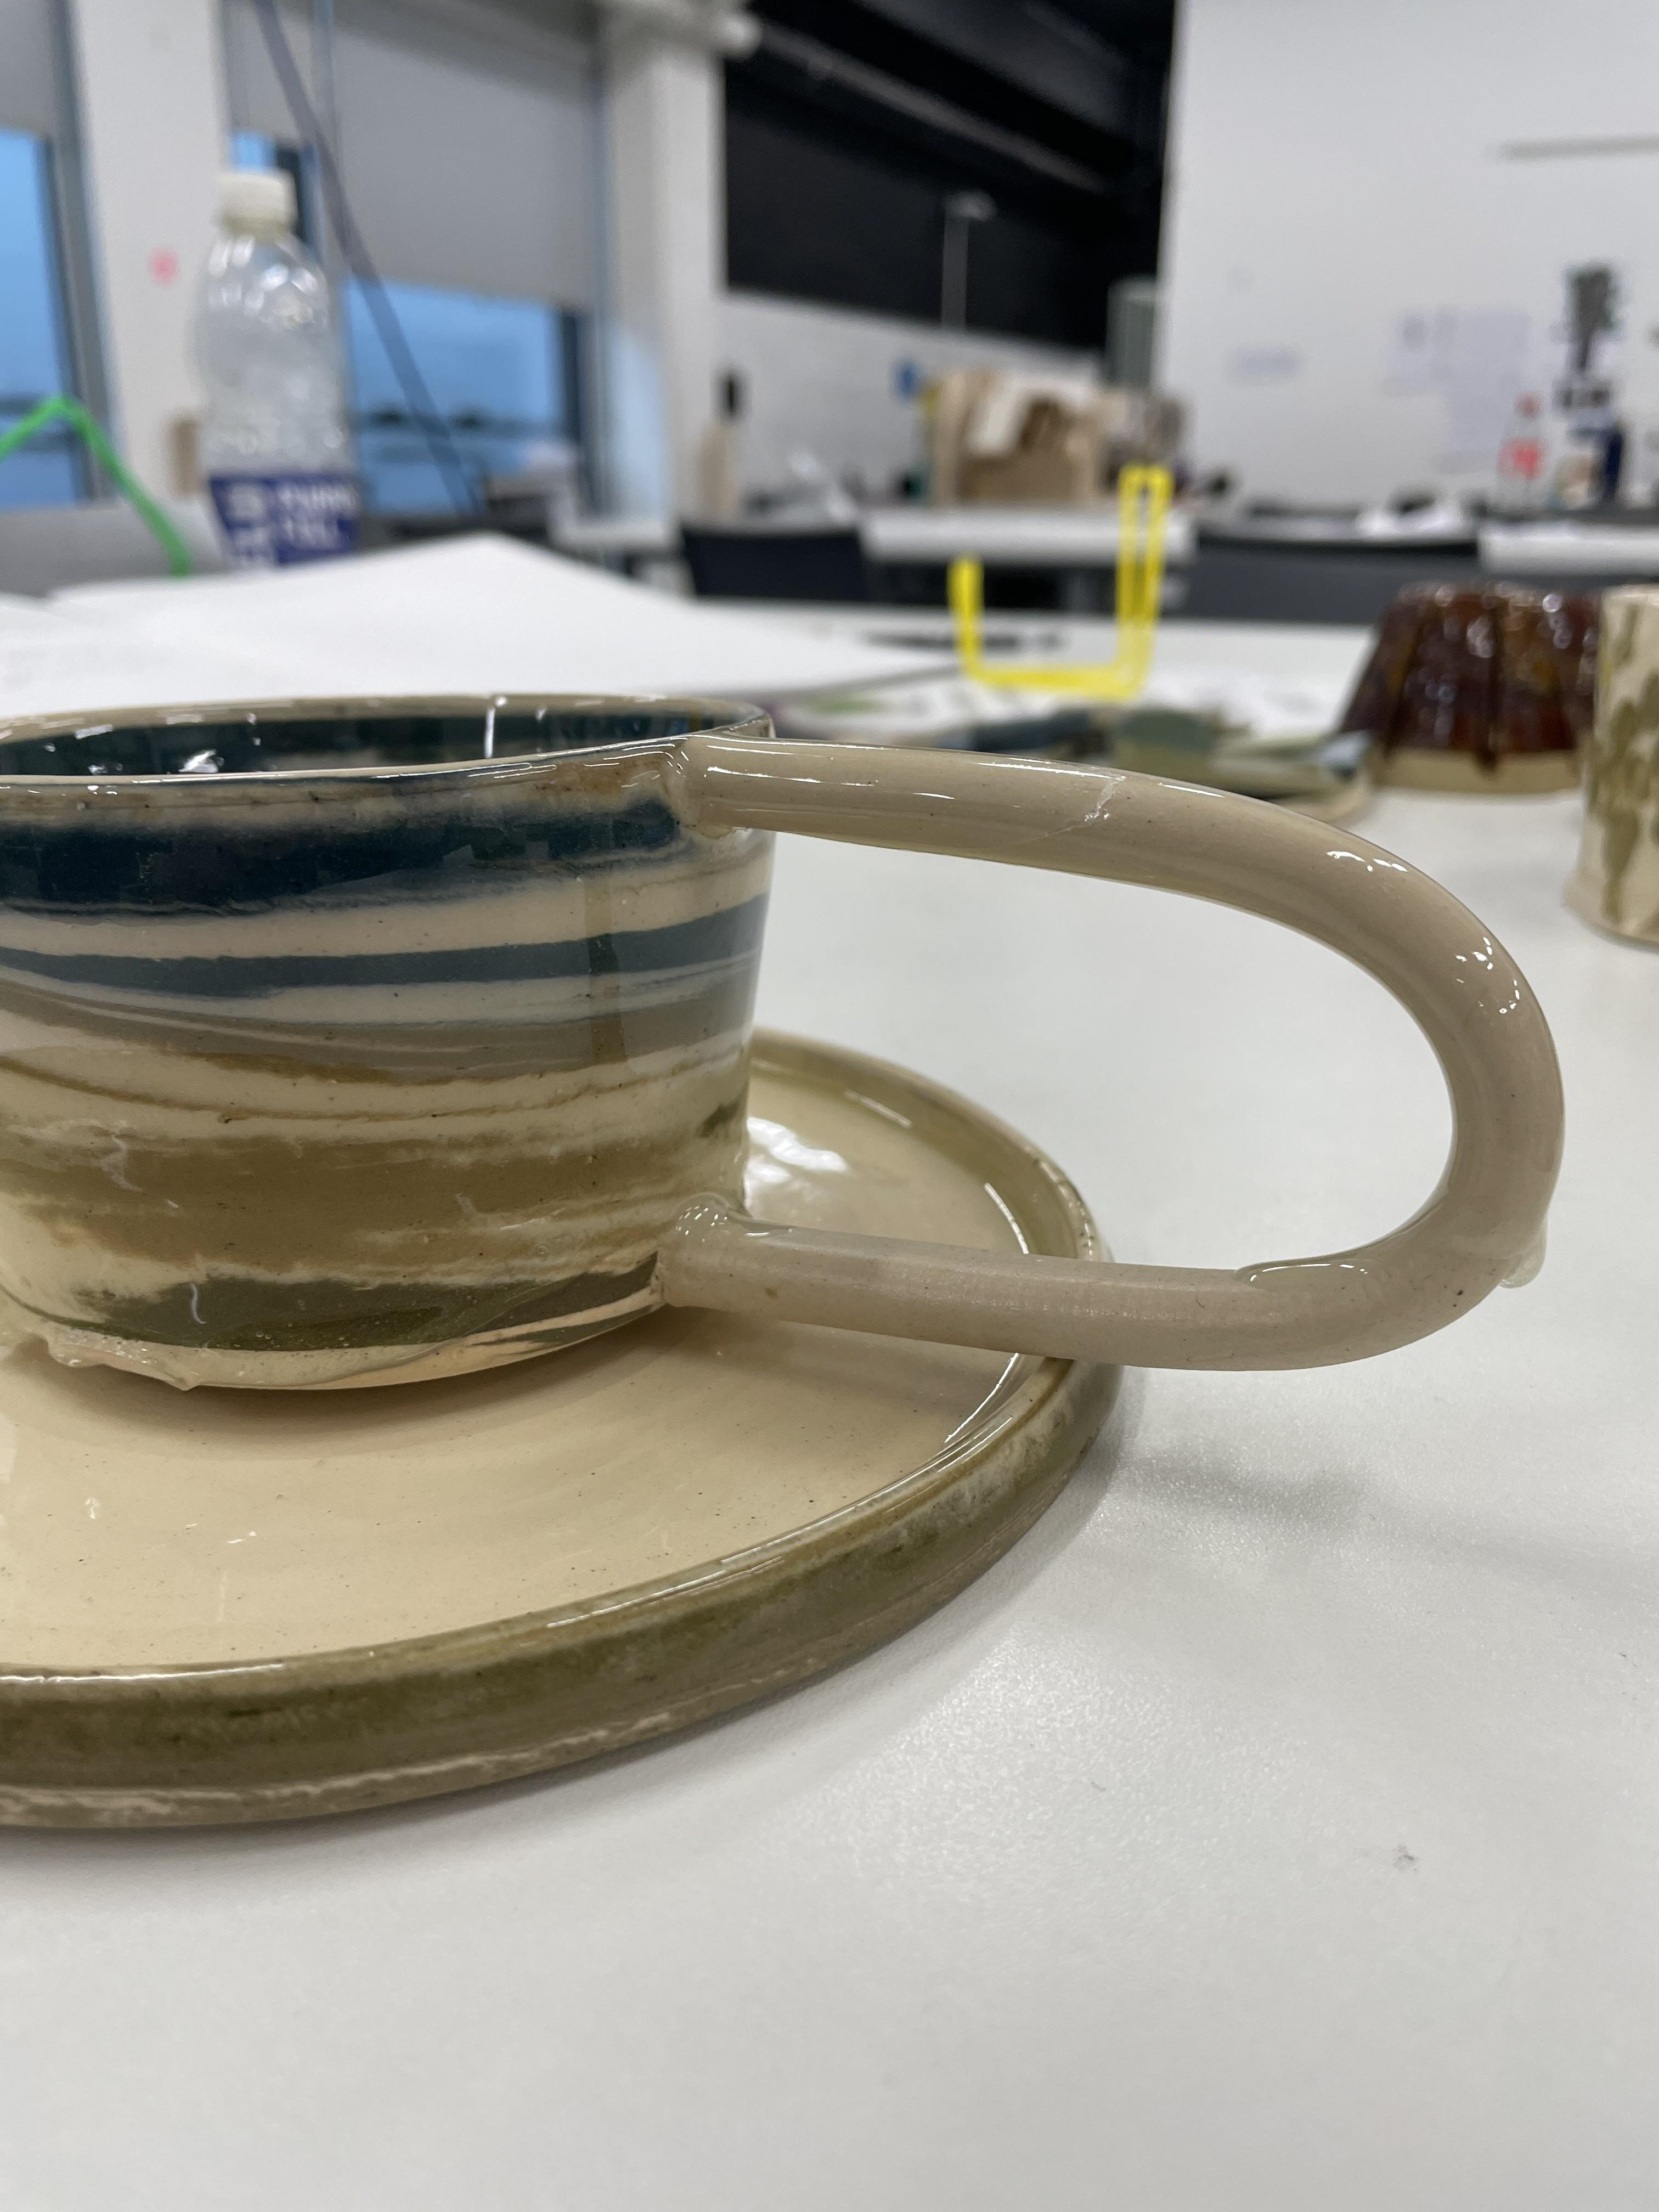
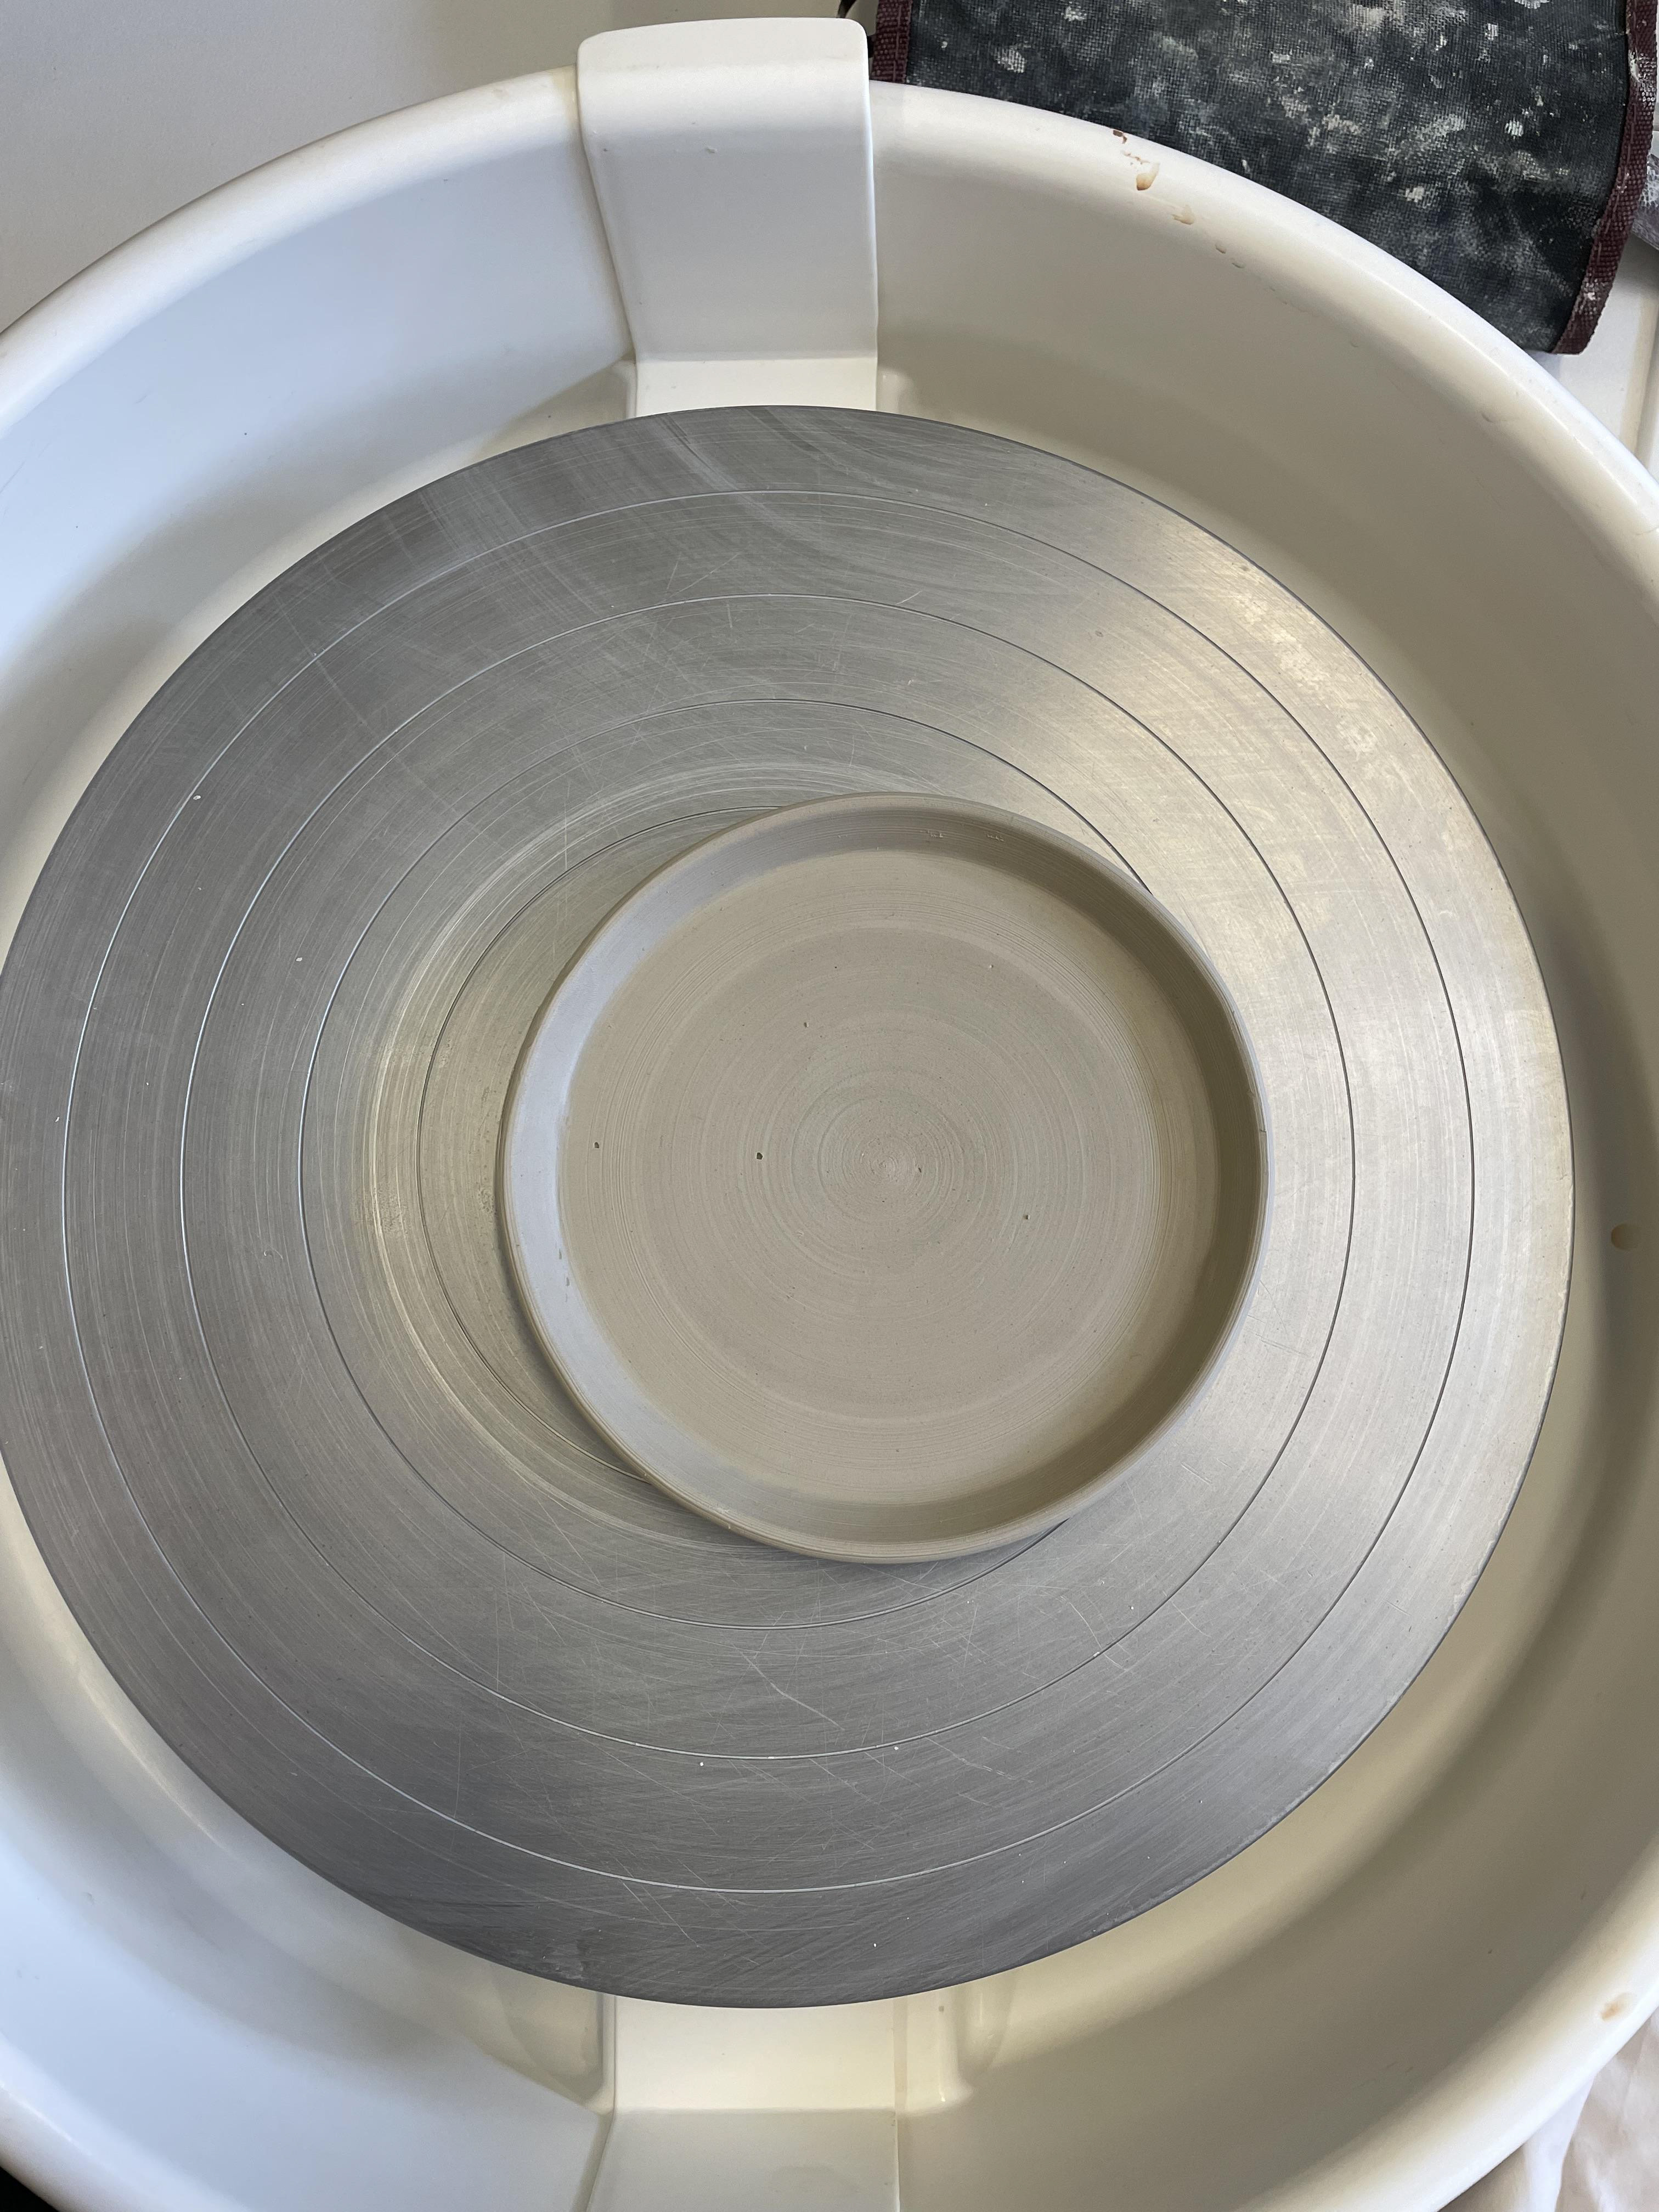
Practising my saucers to fit my mugs, I used the same technique; however, to fit the handle, I had to move the grove that supports the mug off-centre to allow space for the handle. To achieve this, I had to trim the wheel off-centre; getting it placed correctly proved difficult and was very disorienting when trimming. To find the correct size of the grove, I measure the base of my mugs and then measure them onto my saucer in the proper position.


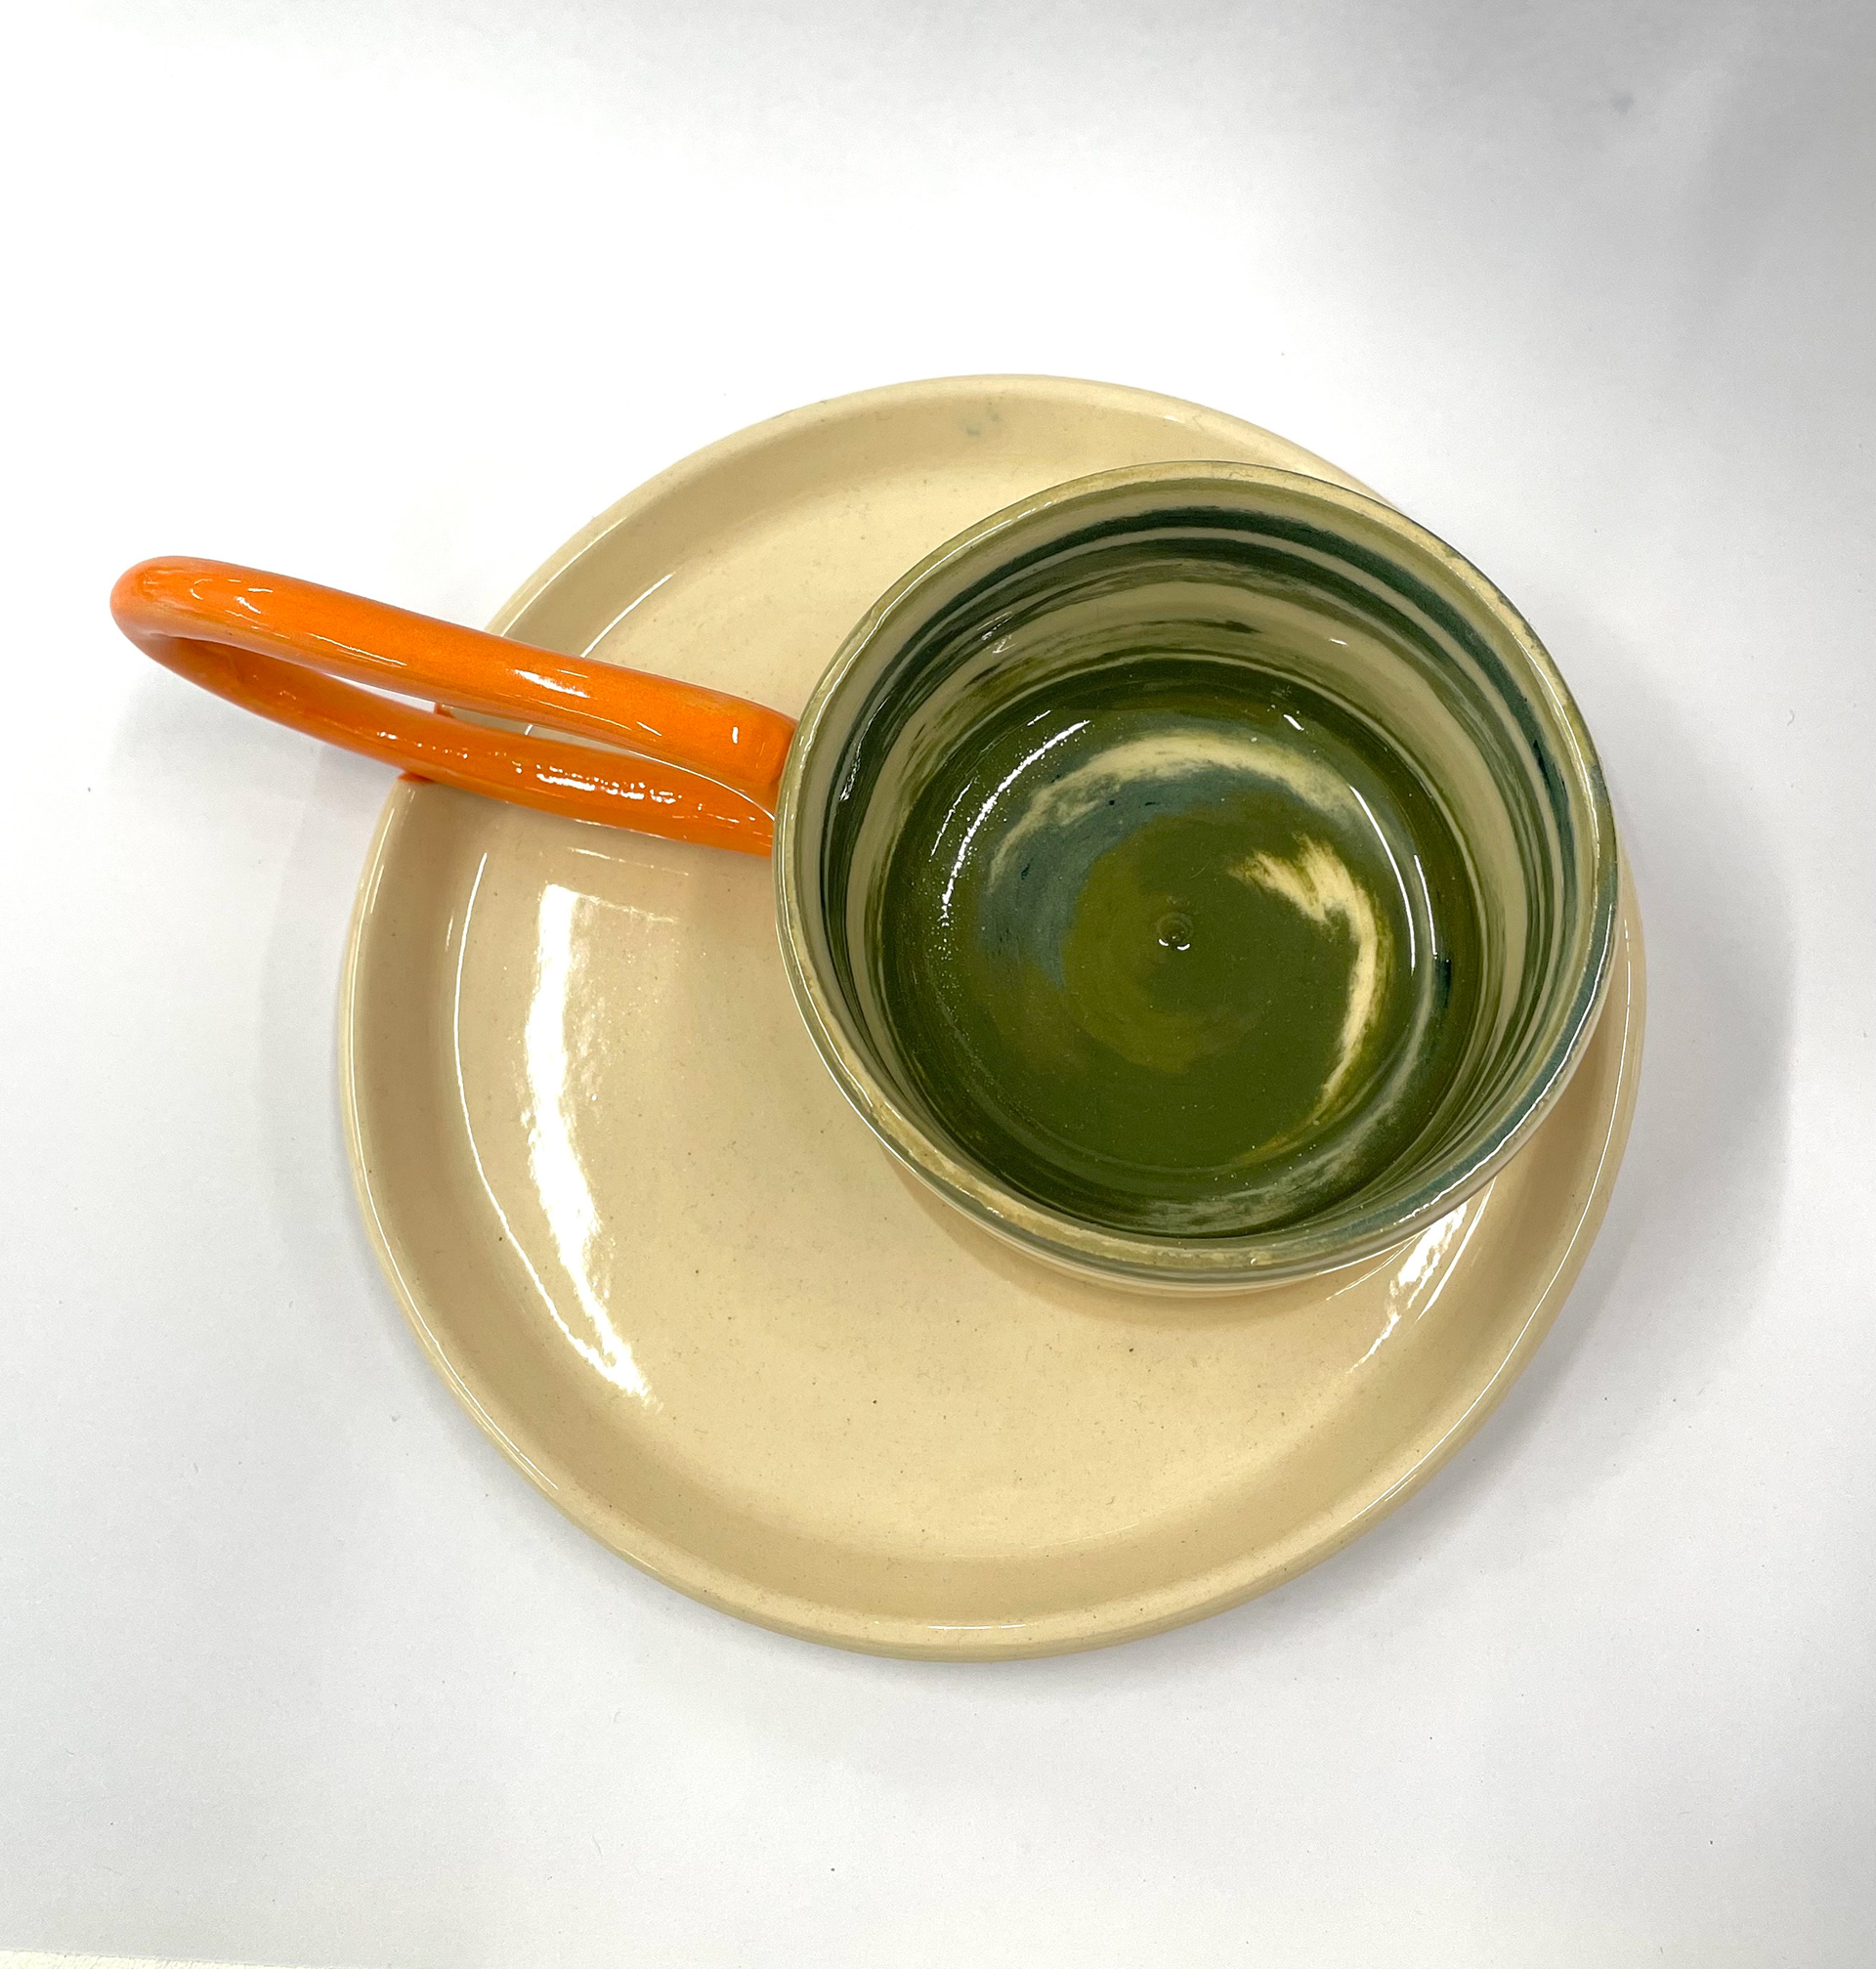
I then finished the saucer by adding a cut out on the rim, allowing the handle to sit smoothly, and painting the saucer with accents of orange slip, hoping that this would add a pop of colour linking it with the mugs. I'm thrilled with the outcome of this saucer. I think it fits well with the mug and sits comfortably. The sizing is also good; it does not overpower the mug and is not too large, so it risks swallowing the mug, taking away from the colouring and the long handle. I want to consider incorporating a little bit of coloured clay, not too much where it's conflicting, but a little and experimenting with the orange slip. Hence, each saucer is individual but a part of a set.
Reflection On Developing Work
Looking at all my processes and material testing, I was finally happy with my final samples; I learned something new with each step and developed this into my ideas, giving me a final sample. Looking into the mug and throwing with layered clay instead of replacing it on the hump was a significant change; it reduced air pockets and inconsistencies whilst throwing. I also find the right shape and practise throwing this; the shape is most effortless to throw, as I want all the shapes of my mugs to be the same. Refining all my techniques and developing my ideas allowed me to envision my final product even further and eliminate any difficulties we might have had with my final pieces. I thoroughly investigated every design point of my mugs, figuring out what worked well and what restricted the mugs, then developing further to create a sample I'm happy with.
For my final pieces, I need to ensure that I measure every mug at all stages so they are consistent in size.
I must also increase my stain percentage to 10%, giving me a bolder, vibrant orange.
I also need to reduce the amount I throw, which is 100 grams of coloured clay (33g of each colour) and 200g of ivory stoneware.
I need to find a new glazing technique, perhaps looking into spray guns, as they give a more precise application.
I also need to remember to trim on the wheel, which allows me to keep the mug body nice and clean and not smudge the pattern created.